Transcripts
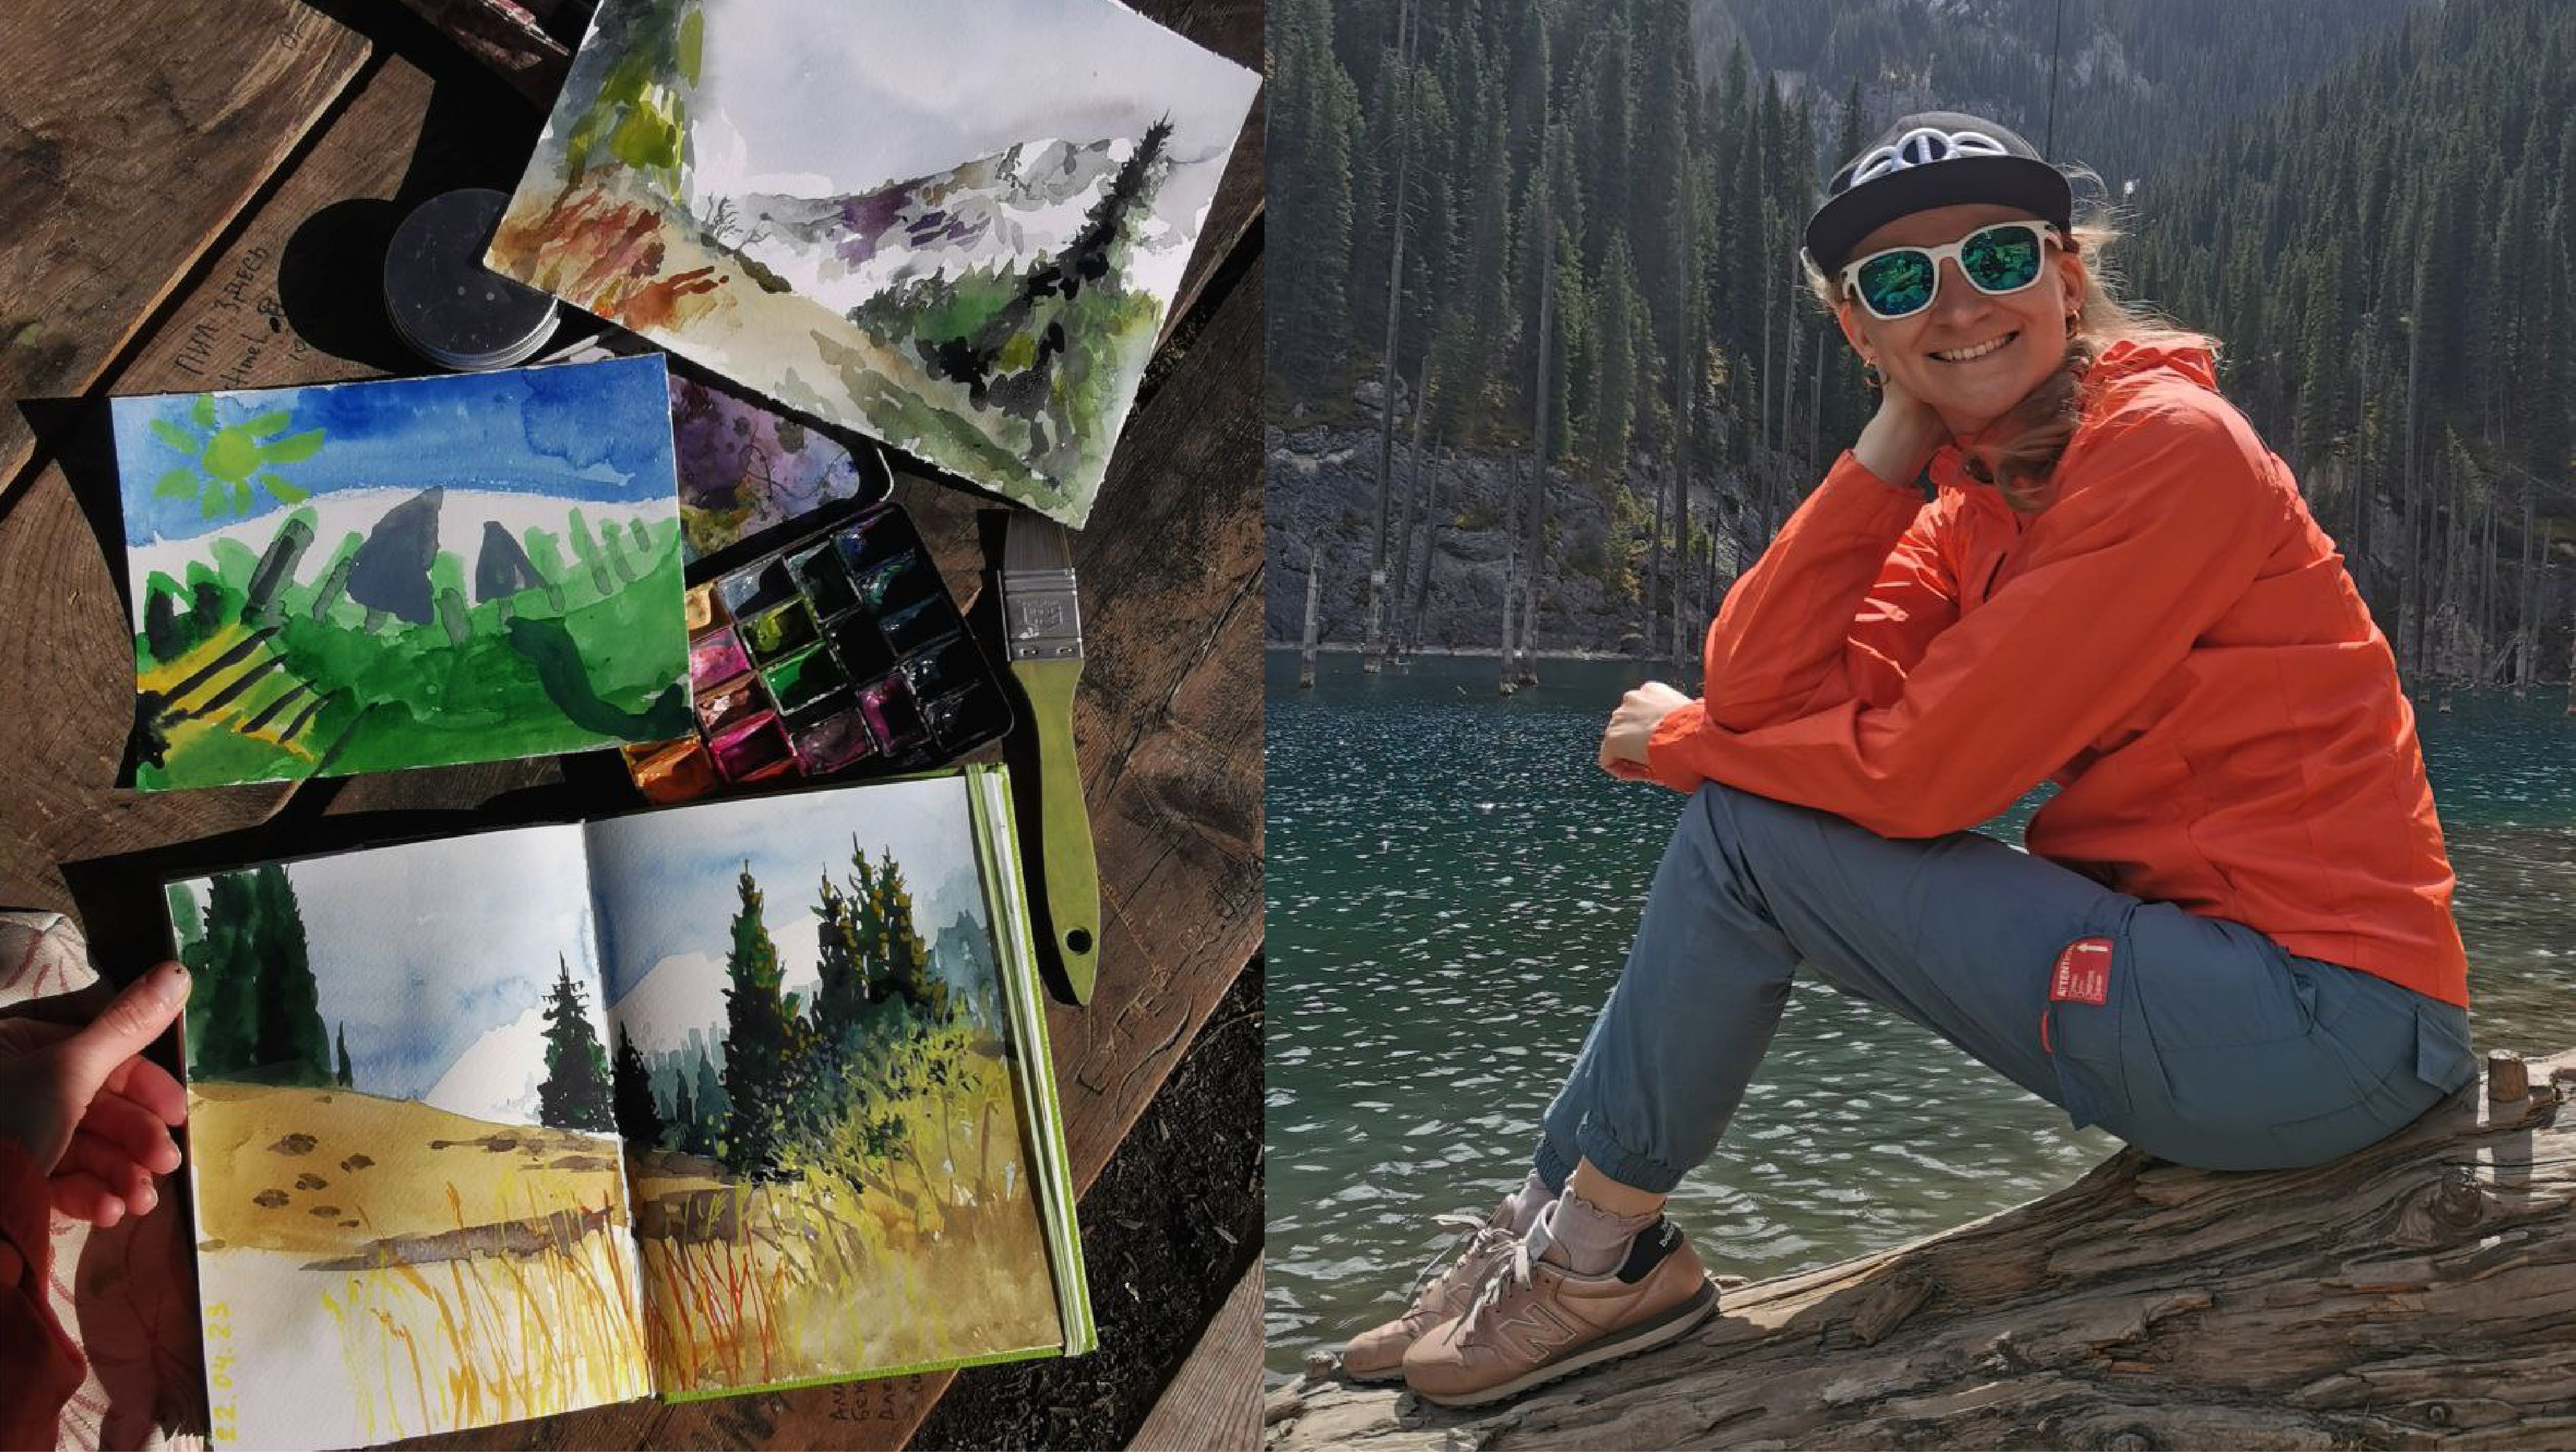
1. Intro: Hi, there. I'm [inaudible] a watercolor artist with a
degree in biotechnology. I left my engineering career in 2015 to pursue
painting full-time. I totally understand
all struggling you may meet in your way of
mastering watercolor. I know from experience, mine and my students that one of the most challenging topic
is painting white objects. In this class, we will do a deep dive into
white-related things. The main idea is to paint white. You should paint
everything but white. Basically, there are
three options how to live the white area untouched on
the watercolor painting. To begin with, we will paint the same illustration with
three different ways. Then we'll go through them a little bit level up
and learn about volume. How to paint shadows, how to paint white object
on a white background. I'll show you the way of
mixing the neutral gray color, this skill may be the game-changing one in your
watercolor practice. Moreover, you'll find two
step-by-step tutorials of beautiful illustrations and be able to apply your
newfound skills immediately. There are the winter
and the summer plots. You can pick one which appeal
to you most or paint both. Actually, to be honest, the summer one is a little
bit more challenging. I'm so grateful that you decided to spend your time mastering
watercolor with me. Let's get started.
2. Class Project: About your class project. As you could see, we will move from
basic to advanced. So whether you are a beginner
or experienced artist, you'll find lots of exercises, tutorials, and tips
in this class. Each exercise can be
your class project. Please, don't hesitate to
share your illustrations, you exercises, any
questions with me. I'm here and I'm more than happy to help you grow your skills
and watercolor practice. Basically, I give
feedback to each project. But if you need my deep
critique on your work or advice how to make it
even better, just asked me. I'm open to communication. Remember, you can update
your published project at any time to share
your progress. Let's move on and talk about
the materials we need.
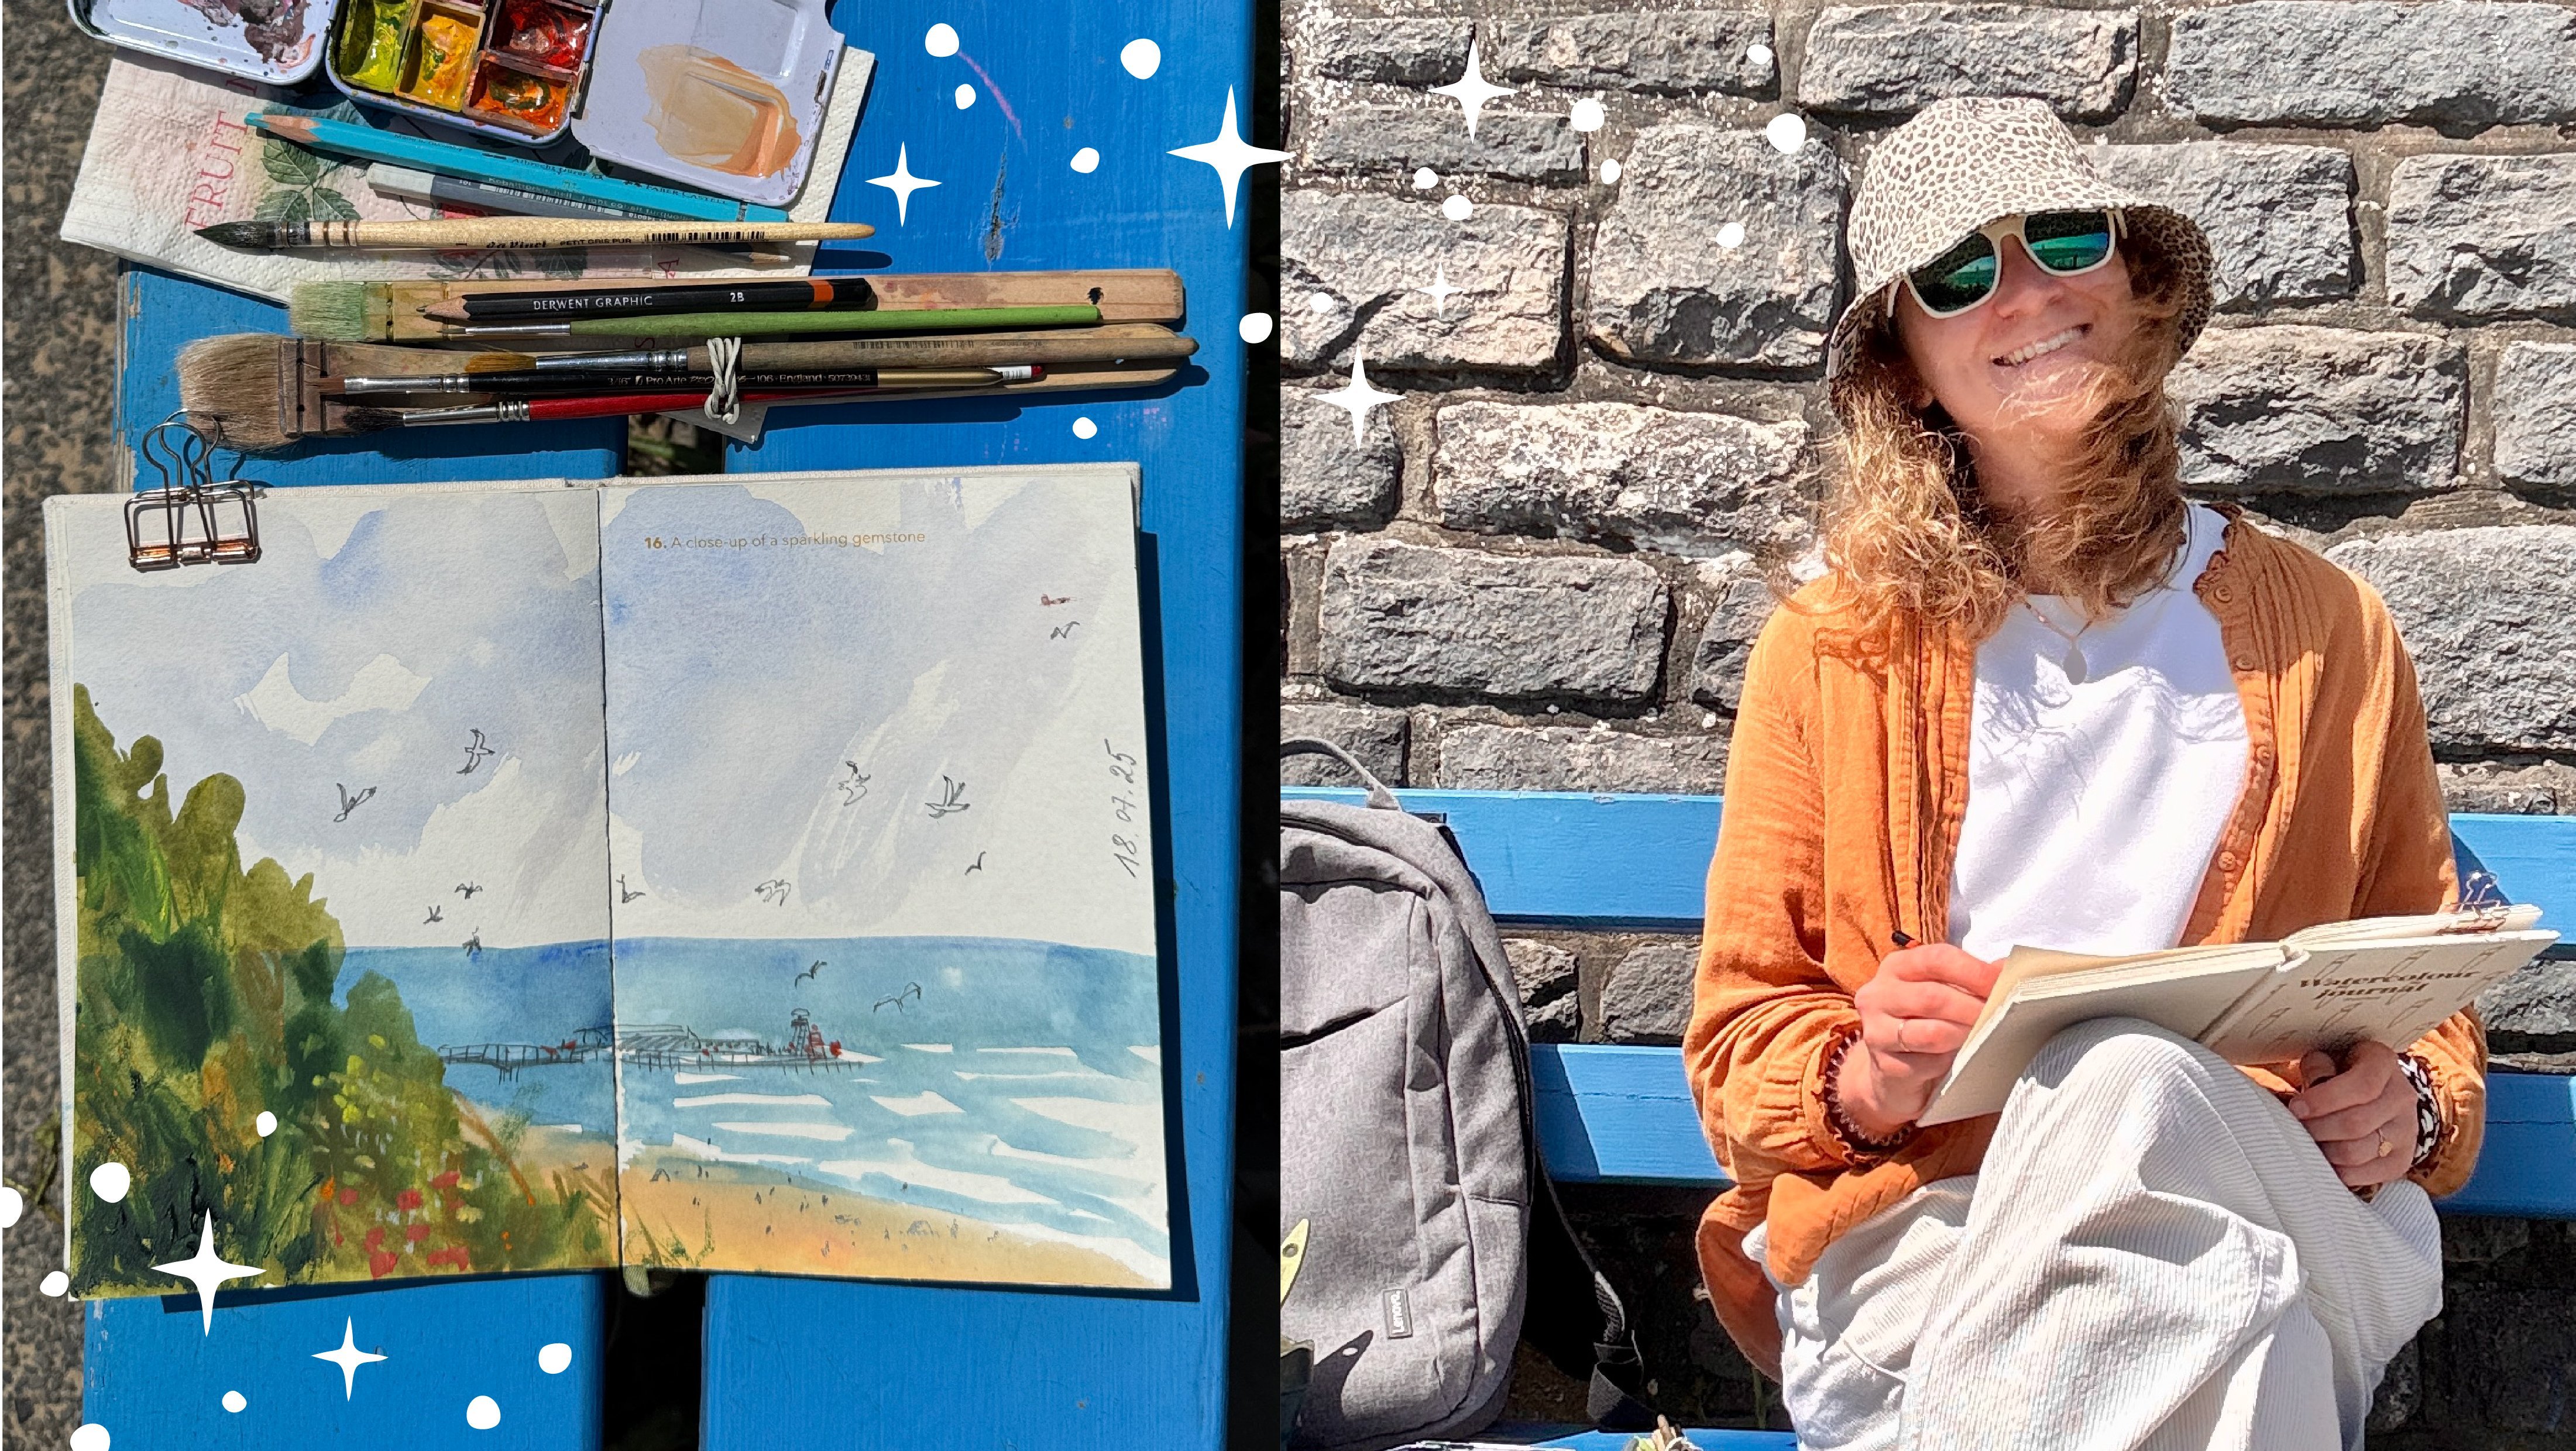
3. Materials We Need: About the materials we need, of course watercolor
your usual set, nothing special even children's paints will be okay
for begin with. I have the basic color that we will use in
this class in tubes. They are ultramarine blue, cadmium red, and yellow. Actually it is a deep yellow, but basically we need any blue, any red, and any yellow. We use what you have. Also, I love using olive green, any green color
will come in handy. About paper, these papers of small size
are four exercises like this. Usual paper not watercolor
one, just for study. You can do it in
your sketchbook. I have larger sheets for drafts, it's all plain sheet paper. Such translucent paper
can also come in handy. Clothes and shoes are
packed with such paper or you can buy trace
paper in an art shop. Don't worry if you
don't have such paper, it's not essential. But for final illustrations, we will need good watercolor
100 percent cotton paper, size a little larger than A4. Brushes, you use your favorites. I have the big flat one, any large brush, round
brush also will be okay. My main working round brush, it has a sharp tip. Two smaller ones, and this thin cheap
brush for masking fluid. It's simply the cheapest
brush in the store. Graphite and soft eraser. Masking fluid any brand, if you don't have it, that's
okay just see how it works. Scissors, glue, palette, I traditionally use
plates, sauces. White gouache for
final illustrations. Paper napkins, and a tablet, I usually place it on
top of that thing, so it has a slight slope. It's just convenient for me. That's all.
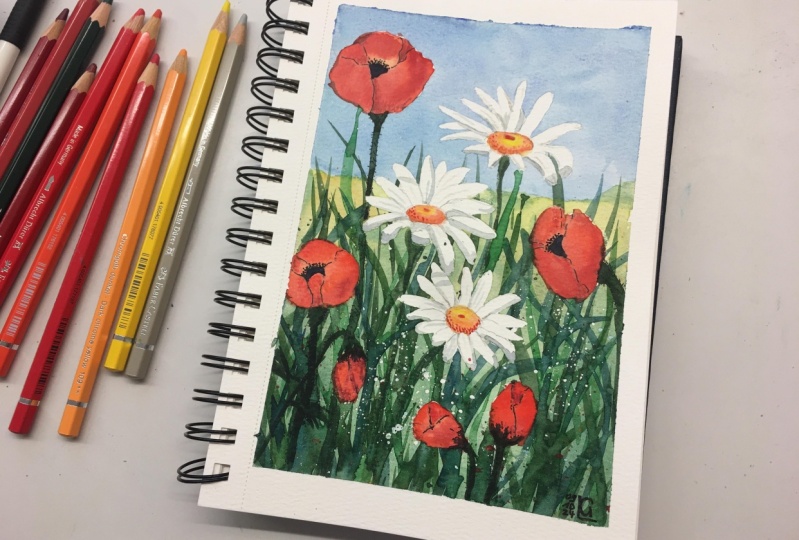
4. White Object. The First Way: To begin with, we will paint the same picture
in three different ways. It will be a small piece
of such an illustration with blooming wild strawberries. I prepared a template to make it easier for you
to draw a pencil sketch. It will be a leaf and
two strawberry flowers. You can find this template in the attached class resources. Please go to Projects
and Resources tab and make sure you
see the attached files. With the exercises, you can use plain paper
or paint in a sketchbook. There is no need for expensive
watercolor paper for now. I start by graphic drawing. One. One is ready, and another one next to it. I choose olive green as a base
color of this illustration. Use any green color you have. It doesn't matter at all. I start painting the leaf. The first way to
paint white object is to just leave it untouched. This is the most
natural way to do it and does not require any
additional materials. Just watercolor,
paper, and the brush. But it requires good brush
skills and accuracy. I add another shade
of green there to make it more picturesque. You see, as soon as paint
appears around the flower, its shape immediately
appears too. It turns out that in
order to paint white, we need to paint everything
around but white. Such a paradox. Done. Now I carefully wash off the pigment from the brush and wet the paper
in the center of the flowers to paint the heart. Add a drop of
yellow paint there. I'll wait a little while
the paint dries out completely to erase
the pencil lines. Let's remove the pencil lines. Look. Even without being
fully painted, the flowers look pretty
well recognizable. Our imagination fills in
the missing boundaries. This is how our brain works. Finishing the
illustration, let's draw the veins of leaves with
the colored pencil. It's not related to the
topic of this class but I want even this small
tutorial illustration to look nice and complete. I gently remind if
you paint with me, please feel free to share your illustrations
as a class project. Even if it's just a
small illustration, everything you do matters. I will definitely
give you a feedback. Done. Let's move on to the next video and paint the same illustration
in the second way.
5. White Object. The Second Way: I'm going to paint the same leaf and the same two wild
strawberry flowers. The graffiti drawing is exactly the same as in the
previous video. I'm making the lines
a little weaker. Now I need a masking fluid and a brush that I
don't mind ruining. Never use a good brush
for masking fluid. Never. There are masking fluids
that do not require brushes. They are better, in my opinion. I carefully covered the places that I want to leave
white and untouched. To be honest, I don't
really like this method so my masking fluid
is pretty old, I have been using it for many
years, but really seldom. But I really know artists
who use it constantly and masterfully even
in the open airs and in quick sketches
so it's up to you. There is no right or wrong way. Please make sure that the entire surface of the
flowers is protected. Otherwise, they will be stain of paint in uncovered places. Thoroughly clean the brush
from the masking fluid before it dries to
prolong its life. To continue working
be sure to wait for the masking fluid
is dry completely. A hairdryer helps
speed up this process. Since the flowers are protected, we can paint boldly and
not pay attention to those place that
should remain white. We've protected them,
they will remain white. I'll leave it to dry. I have to say that it
happens very rarely, but happens, that the masking
fluid rinse the paper. This happens for example with my favorite handmade
watercolor paper. Usually, everything is fine, but still before you paint something important to
using masking fluid, please check how it is
friendly with your paper. Very carefully. Look, the white areas
are still intact. I'm painting the hearts
over the flowers in the same way as in
the previous example. I would like to say it again, there is no right or wrong way
to leave objects unpainted. It all depends on
your preferences. Do as you want. As for me, I don't really
like a masking fluid. I have had this one
for many years, it does not tense in any way. To be honest, it seems that it has already began to
lose its properties. Look, we have two identical
illustrations painted in two different ways. There is also a third one. Let's move on to the
next video to watch it.
6. White Object. The Third Way: In my opinion, the third method is the easiest and the fastest, but a little bit cheating one. I'm drawing the leaf
without flowers. Classical watercolor
artists will tell you that this is the wrong way. Oh no, that's wrong, you shouldn't do that. But I believe that
there is no right or wrong ways in
terms of creativity and I prefer to do it
the most convenient way. I use this method very often, especially in my
sketching practice. I'm painting without thinking that there should
be flowers here. Let it to dry. I'm drawing flowers on a
separate piece of paper, exactly the same as in
the previous examples. You probably guessed
what I'm going to do. Cut them out. It looks like this. Carefully glue them on
leaf and yellow hearts. The final details with
the colored pencil. Now let's look at three
illustrations together. Please share your
opinion in discussion or in your class project. What is your favorite method? Which one seems
the easiest to you and which one is
the most difficult, and of course, if you
have any questions, I'll be more than
happy to answer them and help you master watercolor.
7. Volume and Neutral Gray: Now let's move on a
little further and talk about painting volume
on white objects. We need a neutral gray for this. To get it, I will use three colors. Ultramarine blue, put
it on the palate, cadmium red, or any other red. It's only important
that it be transparent, not opaque and yellow. I have a deep warm yellow, but cadmium yellow or any other non opaque color
will be worked too. Friends, I don't know why my
focus jumps in this video. Sorry for that. Now,
I'm mixing it all up. Please note that
there are a lot of water and a few pigments, it turned out be a neutral gray. It's good because it's
easy to change its shade by adding one of these three
colors to the palette. I add a little drop of
red for a warmer shade. If we add yellow, then the shade is
already different. If I need a cooler tone, I add ultramarine blue. [MUSIC] Only three basic colors, but so many variations and
beautiful shades of gray, semi-transparent, and great for painting
shadows on white objects. Let's go back to the illustration
from the previous video and add some volume to the
white strawberry flowers. This is a shadow from the top
flower on the bottom one. It immediately creates
the feeling that this flower is located
above of the second one. [MUSIC] In my opinion, the ability to make such
a neutral gray shade is one of the basic skill
of a watercolorist. If you manage to get it, please show it in
your class project. This is really a super
important skill. If it didn't work out, show me your attempt, your draft so I can give you advice and help you
master the skill. [MUSIC] I think that's enough.
8. White on White: Now let's paint a white
object on a white background. It doesn't happen
often in real life. Academic painting usually
has such kind of exercise. This is the last
exercise in this class and perhaps it is the most
difficult to understand one. Further, we will move on to painting full-page
final illustrations. There will be a white ball
on a white background. I'm painting a shadow. The tone of the paint is watery, unsaturated, blurring the edges. The drop shadow of an object is always darker that
its own shadow. Imagine that the ball
is on the white table and this is the wall behind it. In fact, painting
white objects on a white background is
about painting shadows. We compare surfaces. Where there is a lot of light, we leave the paper untouched. Where there is less light, we add a gentle neutral tone. We will be using neutral gray in the final illustrations
of this class. Now let's move on to painting the beautiful winter landscape.
9. Winter landscape. Sketch Thumbnail: I'm done with the
theory and exercises and we're getting to the
fun part of this class. I will paint two
final illustrations, sunny winter landscape, and summer chamomile field. Depending on your
mood or the season, choose whichever suits you best, and be sure to share your illustrations in the
class project gallery. I start the winter landscape
over the thumbnail. This is a draft. I'm drawing the boundaries
of the illustration. This is the line that
separates earth and sky. There will be magnificent
fluffy fill trees. One tree is tall, another one a little
lower next to it, and one small tree on this side. Drawing, check yourself. This little tree is located approximately in the center
of the illustration. There will be a small
house, a cabin. It's much smaller
than the [inaudible] It gives the impression that the trees are majestic and tall. Why do I prefer to draw a
detailed draft sketch first? To then draw on
watercolor paper gently, and do not use an eraser. I think it helps the illustration
look fresh and clean. There is another third
tree near the cabin. It could be the tiny
Christmas tree. I wanted the sun to shine
on my illustration. Therefore, I need
to draw shadows of the trees and of all objects. How to draw shadows? See, here is the
base of the tree. I divide it in half and find
the middle of the base, and from this point, I'm drawing the line. Then I find the midpoint of the second tree and drawing the parallel line to
the previous one. The same applies
to the small tree. The shadow of the
highest third tree will be up to this point. I'm connecting the extreme
points of the base to the top. The top of this small tree is about half of the
large one here. I'm connecting the edges to the top and the shadow
of the third tree. Let's fill in the shadows to
make the shape more clear. Look the shadow emphasize the shape of the
roof of the house. There is a shadow of the
house in the same direction. Tiny third tree. It's essential that all shadows
have the same direction. Look, I'll draw
another shadow here. This expands the space
of the illustration, creating the feeling that there are trees outside
the illustration. That to the house. Let's choose the color
scheme of our illustration. I'm intending to
use the same colors that we used for mixing
the neutral gray, ultramarine blue for the sky. Mixture of ultramarine
yellow and red for shading. Just not so dark, diluted. Ultramarine plus green
for painting fill trees. This is the tone I like. For the cabin, I choose
deep ultramarine plus deep red, such a brown. If I add more yellow
to this mixture, I will get the color for the
sunny side of the cabin. You see the combination
of these three colors in different proportions give us an infinitive number
of color options. I have figured out what and
how I will draw and paint, and I'm proceeding to
the final illustration on watercolor paper.
10. Winter Landscape. Graphite Drawing: My paper is slightly
larger than A4. This is 100 percent
cotton watercolor paper. Now I need to make
the pencil drawing, transferring the image
from the thumbnail here. How to simplify this process. I split this kitchen health, and in half again. Drawing, I always check where the object I'm drawing is
located, in which part. I draw attention to the
fact that the center of the paper is where this
small third tree is. I would even like to move it a little bit to this side. I determine where the center
of my illustration is here. Looking at these dot, and at my thumbnail, I'm drawing the line
between the earth, more precisely
snow, and the sky. I've prepared the template to make it easier for you
to draw this illustration. You will find it in the
attached class materials. There will also be the
final illustration, and all the exercises
by the way. I start with a small third tree. The top is located slightly
away from the center, here. I'm pressing the pencil lightly, so the lines are barely visible. The top of the
tallest tree is here, and there is a top
of the next one. Let there be a forest
somewhere in the distance. The cabin, the front side is located under the tallest tree, and the roof extends to the
halfway of the smallest one. Let's now drift the tiny tree. It is also a snowdrift, so there is such a curved line. Now let's move on
to the shadows. This is the middle of this tree. The center line of the shadow. Another one, and another one. I'm checking if
they're parallel. Here is the top of the shadow
of the tallest third tree, and here is of this
one, and the smallest. I'm connecting the
edges to the tops. I hope I managed to explain
the logic of drawing shadows. Please, if you have
any questions, feel free to ask. The shadow of the cabin, and of the tiny tree, and one more here. Check-in directions. The path, it's like
someone left the house, walked up to the tree, and went on about his business. Done.
11. Winter Landscape. Sky: Let's move on to
watercolor painting. But first, make sure you
fully freshen up the water. It's super important when
painting white objects. I prefer to secure the paper with paper tip before painting. First, I'm going to turn the entire illustration
with a warm color. If we observe white objects under different
lighting conditions, we will see that their color is very dependent on the lighting. For example, this
is the cup of tea in the rays of the dawn sun. Warm light paints everything
is in golden hues. Pay attention to the
color of the shadow. This is a cloudy, snowy day, and my favorite boy, by the way. Snow has a cold color. Look at the shadow here. Feel the difference. The three colors that I told you about earlier, ultramarine blue, red, and yellow allow you to
create any of these shades. I want my illustration to have
lighting like in this video. Beautiful sunny day. The sun is low in the winter
so the shadows are long and the snow has a
light golden hue. Let's go back to
our illustration and imagined that the
sun is located around here and the white snow reflects the sun's rays
getting a golden hue. Therefore, I take a warm yellow, dilute it well with the water. We need such a puddle with
a translucent yellow tone. Using this tone, I'm going
to cover all illustration. Watercolor paper
absorbs water well so you need to prepare a significant portion
of the paint solution. We need a warm yellow color. If you have any dabs, you can add a drop of orange
to the mixture, or red. Oops, too much. Watercolor brightens
when dry therefore now it may seem to you that
the tone is too yellow. Let's wait for it to dry
and see how it looks. Now I need to dilute solution of ultramarine for
painting the sky. In this place, the
color is quite bright. Then I'm diluting it
with clean water, making it completely
transparent. Let me show these from a different angle
to make it clearer. The snow area remains untouched. It's just water, no pigment. While the paper is wet, I want to slightly increase
the tone in this place. Do this only if you are sure
the paper is still wet. Speaking of watercolor, it's always better
under-do than overdo. I'm adding some yellow
here to saturate it. The sky is ready. There will be a forest
on the background. Something like that. We create a sense
of space and depth. In the next video,
we will paint trees. Let's move on.
12. Winter Landscape. Trees: Since the paper is dry here, I start working on the
trees from this tiny one. To do this, I take dark green and mix it with
ultramarine blue. With such movements, I paint the third tree
to make it look fluffy. Let its base be
pure ultramarine. Here with this
snowdrift smooth each. I'll check the paper
here, still wet. But let's try to start
painting these trees. I'm starting from the middle
to get used to and feel how wet the paper is and not
to screw up with the top. Always try to create new
traditions, variation of colors. Paper is too wet and I think
I'd better to wait a little the paper to dry completely. Let's continue. Yes, that's much better. More blue at the bottom. Look the sun is
shining from this side so I'm adding less
ultramarine and more green, making the tone lighter. A dash of yellow here. The top of the tree is
lighter and more transparent. It becomes darker and
denser towards the bottom. In some places, I
have uncovered areas. The tree is not flat, somewhere the light shines
through the branches. The next tree. The top has a less
saturated tone and the drop of yellow
here and the small one. Ultramarine. Trees are ready. In the next video, we will
start painting shadows.
13. Winter Landscape. Shadows and Cabin: To paint shadows, I need to get the neutral gray in the way we already know. Ultramarine blue plus red
plus a touch of yellow. Keep in mind that on a sunny day the shadows are contrasting
and quite intense. I'm making the edges rough. Not as flashy as the trees, but not smooth either. In this place, we need to carefully go around
the roof of the house. The etch here is
even and smooth. The shadow helps show
the shape of the roof. I am leaving unpainted areas in the shadows too, it
looks realistic. The shadow of the cabin. Mixing color for the cabin. I'm adding red directly
to the same pellet. Check if the shadow is dry. If not, then it's
better to either wait or leave a thin strip between
the shadow and the cabin. They shouldn't merge. Mix some yellow, diluting with water. This is the color for the
sunlight side of the house. Whatever I've paint,
I always strive to create calibration.
It looks great. I'll leave the cabin
to dry and move on to painting the path in
the same tone as the shadows. If you're afraid to
paint it with a brush, draw it with a colored pencil or with a marker, for example. Let me take a look at the
illustration from a distance. It's almost done. It remains only to add
the final details.
14. Winter Landscape. Final Touches: Well, let's add some small but spectacular
finishing touches. I need a white gouache. I want to paint white dots on the tiny fir tree turning
it into the Christmas tree. I'll leave it to dry. Now I will add details
to the cabin with a thin brush and the dark
tone; ultramarine or green. Any coal dull color. There is shadow under the roof. You know such small details that are even difficult
to distinguish, it is easy to forget
about them but they are important for creating the
right mood and atmosphere. There will also
be a chimney pipe and a shadow. Now I need red, bright, and saturated for painting decorations on the
Christmas tree. We have already prepared
places for them. While there is red in my brush, I will make one small detail; paint a red spot on a
small piece of paper. Now I'll make smoke
from the pipe. Let's keep the
cabin warm inside. Translucent paper will
come in handy for this. I put it on top of the illustration and I'm drawing the shape of the smoke. Let's imagine that the weather is calm so the smoke goes up. Let's cut it out. Let's take a look how it turned out. I like the way it looks. We need to carefully glue it on. I like the translucent
effect, looks pretty good. It remains to add only one
tiny and lovely detail. A small present under the Christmas tree. A little bit of golden lights and snow on the windows. You can print postcards
with this landscape. This is such a life hack, painting illustration and then reduce it and print
in a small size. The print quality
will be perfect. The larger the paper size the easier it to work
on small details. One more idea that I
want to share with you, you can change the color scheme of the illustration up to you. For example, here is
some incredible sunset. By simply changing
the background color you can change the mood of
the entire illustration. I'm looking forward to your
class projects or questions. In the next video we will paint the summary illustration; a chamomile field.
Let's move on.
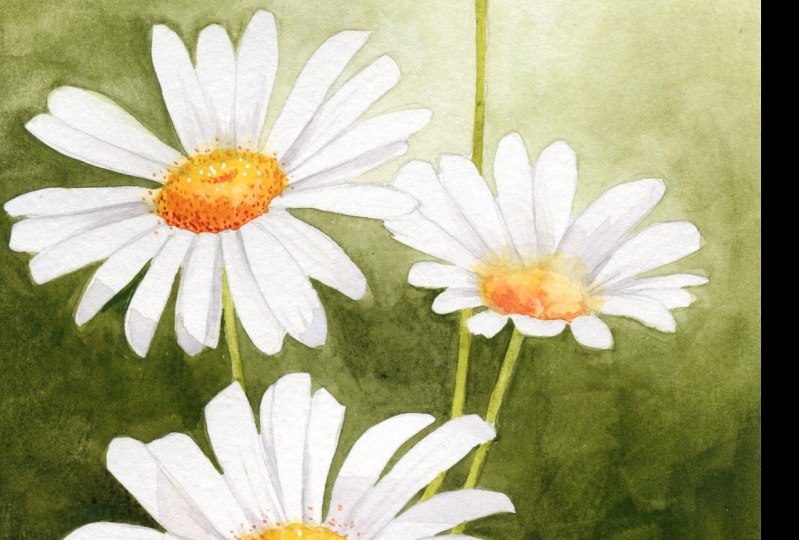
15. Chamomiles. Thumbnail: Friends, let's draw
something summary. Chamomile filled in warm colors. As the step, I sketch out the main idea and composition
of the illustration. One large flower in the center just moved
a little to the left. It will be the
focus of attention. [MUSIC] There is another one
in the background. It will be less noticeable. [MUSIC] The third one, a few petals remain
outside the frame. Here, another one pops out
a bit given the impression that this is a field and there are a lot
of flowers on it. This flower is the
main one we'll paint it in the
most detailed way. The background color
will vary from the dark at the bottom to almost
transparent at the top. Well, what's with
the color scheme? Rich, dark yellow for the
parts of the flowers. For the background, I'll take olive
green as the base, the very warm green. In dark places, it
will go to brown. To do this, I mix it
with cadmium red. Perhaps I add dark green
to make the tone darker. This color will be at the
bottom of the illustration and then it will fade a very
transparent light tone. The shadows on the
flowers will be, I think you guessed
it, neutral gray. I'm just using the palette from the previous illustration. Here is the color scheme
of this illustration. [MUSIC]
16. Chamomiles. Graphite Drawing: As for the previous
illustration, I've prepared the template where the quantum of the
flowers are clearly visible. It would be easier for you to make a pencil drawing I hope. You will find it in
their touched materials. I will be painting on 100 percent cotton
watercolor paper. As in the previous example, I mark the center of
the paper and drawing chamomiles constantly
checking their location relative to the center
of the composition. The heart of the main flower just touches the center point. Petals are located
at different angles, so you don't have to worry about exactly redrawing the template because the petals
so filled chamomiles arrange in the most
preserved way. The thing you
definitely shouldn't do is draw them all the same. Nature creates chamomiles
of all shapes and sizes. One flower is
finished, another one. One more chamomile here. Done.
17. Chamomiles. Shadows: Well, let's move on to painting. I start with the
shadows on the petals. I need the neutral
gray for this, a very diluted tone. [MUSIC] Let's test first. Too dark. I'll add more water. It's very important
not to overdo it here. Better under, and
then over, gold rule. [MUSIC] Do not trace each
petals, only in places. [MUSIC] For example, where one petal is located
above the other one. [MUSIC] Look here, the direction
of the petal changes. If the light is from above, then this part will
be less eliminated. The same situation here. The shadow can be
almost anywhere because we are painting
the field of flowers, and for example, the shadow from this
one can be here. Clear edges of the shadows help define the shape of the petals. I want to draw your attention to the fact that I'm painting shadows on the main flower
in detail, lots of shadows. Other flowers will
also have shadows, but not as carefully painted. [MUSIC] Let's move on to
the next flower. You see here, I'm working with larger movements, less details. I think that's enough. [MUSIC] The top flower has
several touches only. Wait until the paint
is completely dry before moving on
to the next step. This process can be
accelerated with a hairdryer.
18. Chamomiles. Hearts: In order for the hearts to be
tender and look realistic, I'm gently moistening the
paper with clean water. [MUSIC] In the lower part, I'm following the
shape of the petals, and on top, I am
moistening the paper outside the counter of the part. I'm wetting the heart of
the upper flower more intensively because I want
the paint to flow more here. For this flower, I'm squeezing the brush a little so that the paper is
wet but not too much. [MUSIC] I take the diluted yellow tone for the heart of
the distant flower. The color should not
be saturated here. Look, the paint does not go beyond the border
of the wet area. There is the sharp edge
there and fluffy on top. [MUSIC] For the main flower, I need the rich yellow. My brush has little water, but the paper is damp, so the top edge is soft. Compare with the top flower.
Feel the difference. I'll add a drop of
cadmium red here. Gentle and warm green to
paint stems. Not dark. Look, everything that is around the white petals helps
define their shapes. Make sure that the
stem line is smooth. Remember, in order
to paint white, you need to draw everything
around, but white. It's done. In the next video, we will paint the background. Let's move on. [MUSIC]
19. Chamomiles. Background: Well, let's prepare the color to start painting
the background. I take olive green, cadmium red and dark green. I want to get the dark color. Good. Now is the stage of work when we need to paint quickly and be careful not to
paint over the area that should remain white. Repair a large puddle of paint, make sure everything
you need is at hand. Water is clean, paper napkins are
at hand and no one and nothing will distract
you in the near future. I guess you should give yourself about 30 minutes to
work on the background. This video is the longest
one in this class and is about 20 minutes long. I decided not to
cut it into pieces, although I know that such long videos are
difficult to digest. The thing is, the background
needs to be done in one go. This exercise will give
you the super useful skill that you will apply very often in your personal
watercolor practice. You need to make sure that the edges of the paint
not to have time to dry. Moisten them regularly
to keep them wet, then the background
will be beautiful with a smooth transition of colors. The good 100 percent
cotton watercolor paper takes a long time to dry and helps a lot to make beautiful
washes and backgrounds. An interesting thing is, the larger the illustration, the easier it is to
go around the petals. People are often afraid of
large watercolor paper size. But in my opinion, it's just the opposite. In this place, I make it
even darker adding sepia. This works as long
as the paper is wet. If it has already begun to
dry out, don't touch it. According to my idea, the tone of the paint become lighter towards the top
of the illustration. Therefore, here I'm no longer adding dark but
adding more water. Here it is darker. Here, I will do such a trick. Because this is the narrowest
place on this side, I'm painting this straight
line and stop here. I'm finishing this piece, I will move on to the next one
where I need the rich tone because I have it
already prepare it and I'll come back this way. Done. Let's move on to the next area. We need to get the color here as much as possible
the same as the color from the other side of the stem. It seems to be too dark here. I'm wearing the brush and removing some of the pigment and mix a dark tone again. Now, I'm in hurry to paint this lower part of
this area because there is the top edge
and I need to have time to continue working with
it before the paint dries. I waited to give myself time
to work on the lower part. Although, I am stopping here
at the narrowest point, and I'll be back here later. I start adding a lot of water, diluting the color tone. You see the stem of
the distant chamomile has almost the same
tone as the background. That's exactly what I wanted. There are no sharp contrasts
and rich color here. This helps to create
a sense of depth. This flower is
further away from us. Here you can work
less accurately with more sweeping
bold movements. Here I start adding
the pigment again. Keep an eye on the
edges all the time, waiting is needed
to keep them soft. I will return to this
area a little later, but for now, I will
continue here. Remember that watercolor will become lighter
when it dries and here mixing the dark color. Well, friends, it looks like the background work is
coming to the end finally. I did not speed up the process, and judging by the video, it took me about 20 minutes
to cope with the background. This skill, I mean, the skill
of painting a background is very useful in a
watercolor practice. Hope this video was
helpful for you. In the next video, we will add the
finishing touches. This is my favorite
step to be honest.
20. Chamomiles. Final Touches: Well, I want to add
details to the heart. It is the mixture
of yellow and red, and white gouache. A few tiny details and splashes. I would like to work a little with the heart of this flower, but it must be different
from the main one. We can also do the same
trick as we did in the previous illustration,
add another chamomile. Something like that. It seems to be there but only a hint. Painting the petals
of the flowers on paper of this
size is challenging. That's true, but quite
capable to everyone. If we were painting the same illustration
in a small size, it would be much more difficult
to deal with the petals. Such a life hack. If you want to paint a postcard, paint it on a large
size and then scan it, reduce and print as a card. I want to share with
you how changing only one background
color effects to the mood and atmosphere
of the illustration. Experiment with your
favorite color combinations and enjoy your
watercolor journey. Please share your
illustrations as a class project in the
Projects and Resources tab.
21. Final Thoughts: We've reached the
end of this class. I hope I've inspired you to
practice watercolor with me. We've painted white objects
in three different ways. Learned how to paint
white on white, mixed neutral gray, and
practiced it a lot. Finally, we've painted two beautiful full-page
illustrations. I think we've observed lots of fundamental things
that will allow you to level up your
watercolor skills. I would love to see your work. Please don't hesitate
to share any exercise you did and ask
me any questions. I'm here to help you grow. Goodbye and see you again.
 Olga Bonitas, Watercolour girl