Transcripts
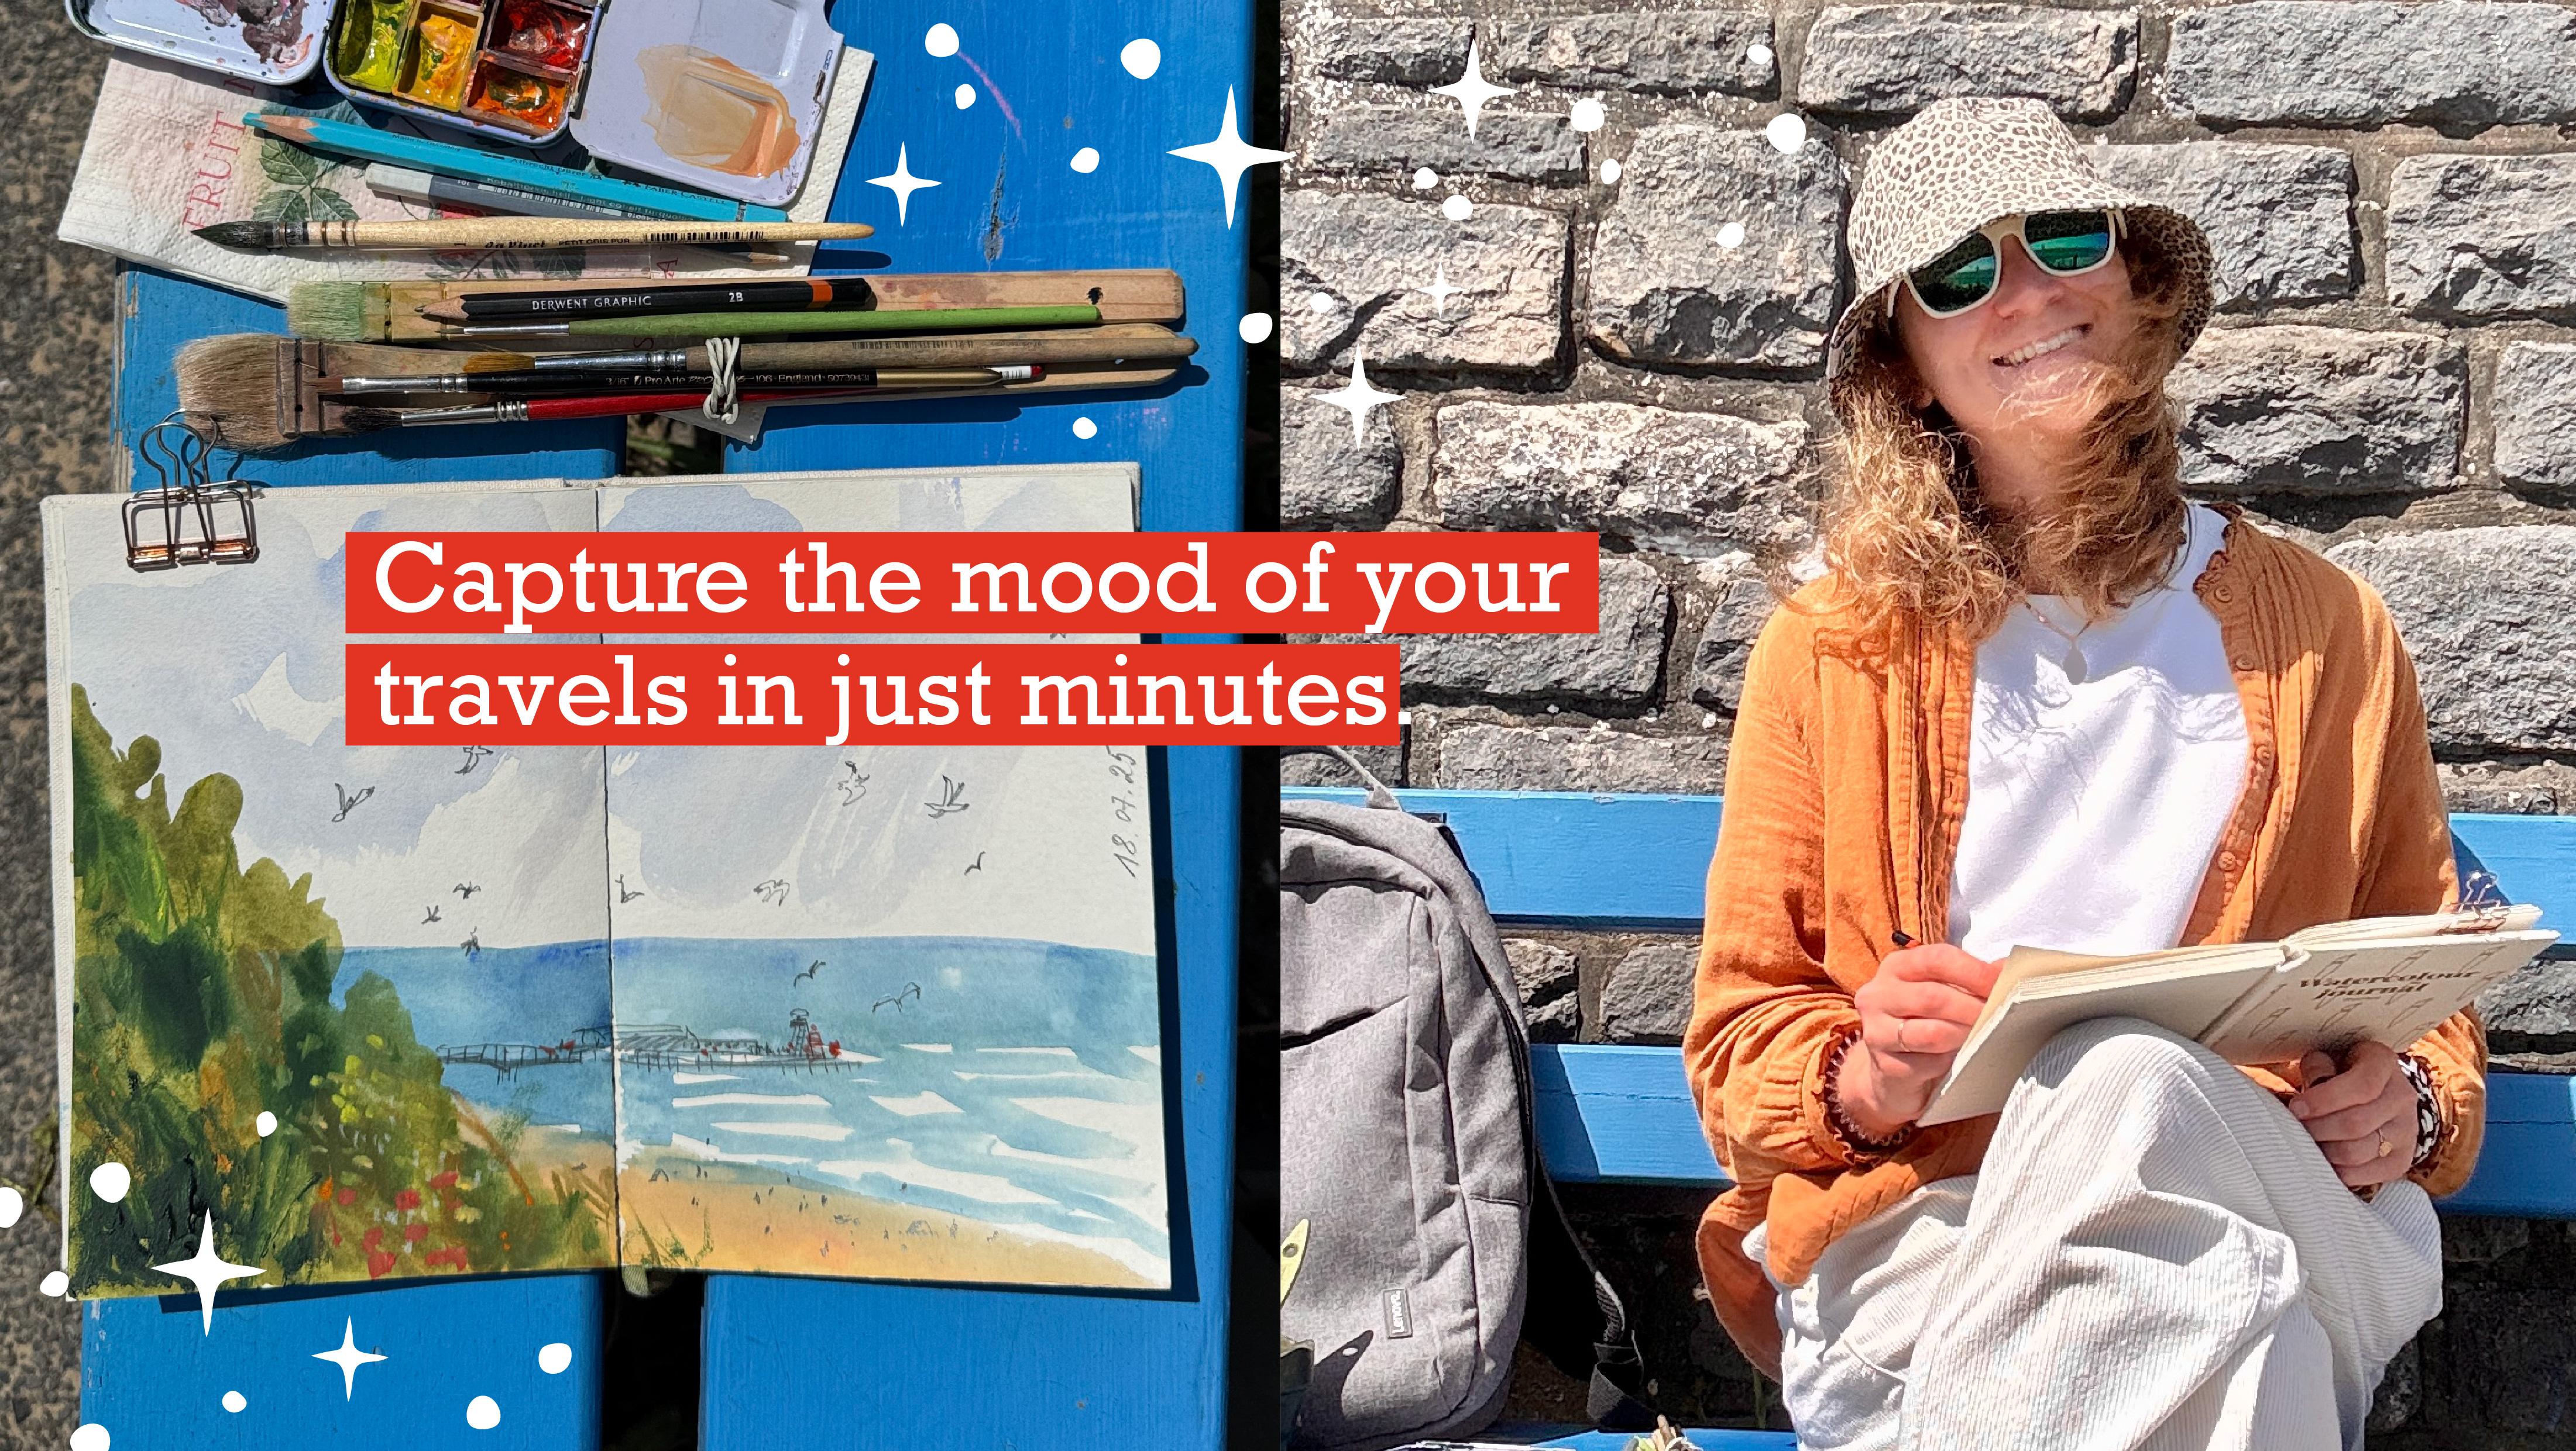
1. Intro: Do you ever wish you
could sketch while traveling but feel like there
is just never enough time? This summer, I decided
to challenge myself. On a short trip, I had only one evening and
one morning three, so I set a goal to create
as many sketches as I could in real life conditions in just ten, 30 minutes each. Hey, I'm Olo Bonitas, and in this class, I'll take you with me to bogs, lively streets, cozy cafes, the seaside beach
and sunset skies. You'll see my real process
messy and imperfect. This class is special. It's the clothing chapter of my dedicated Skillshare series on art journaling and sketching. So join me, and let's discover how much
beauty I can capture, even when time is short. This class is for
anyone who dreams of sketching but struggles to
find the time. Let's start.
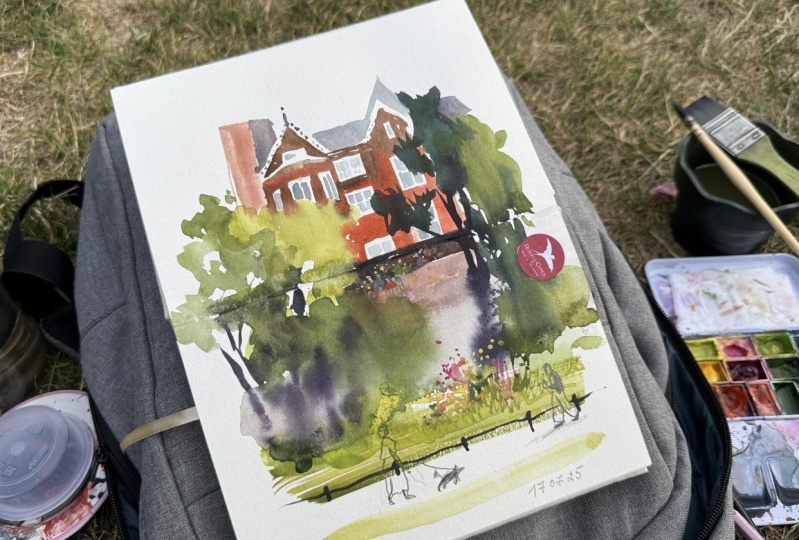
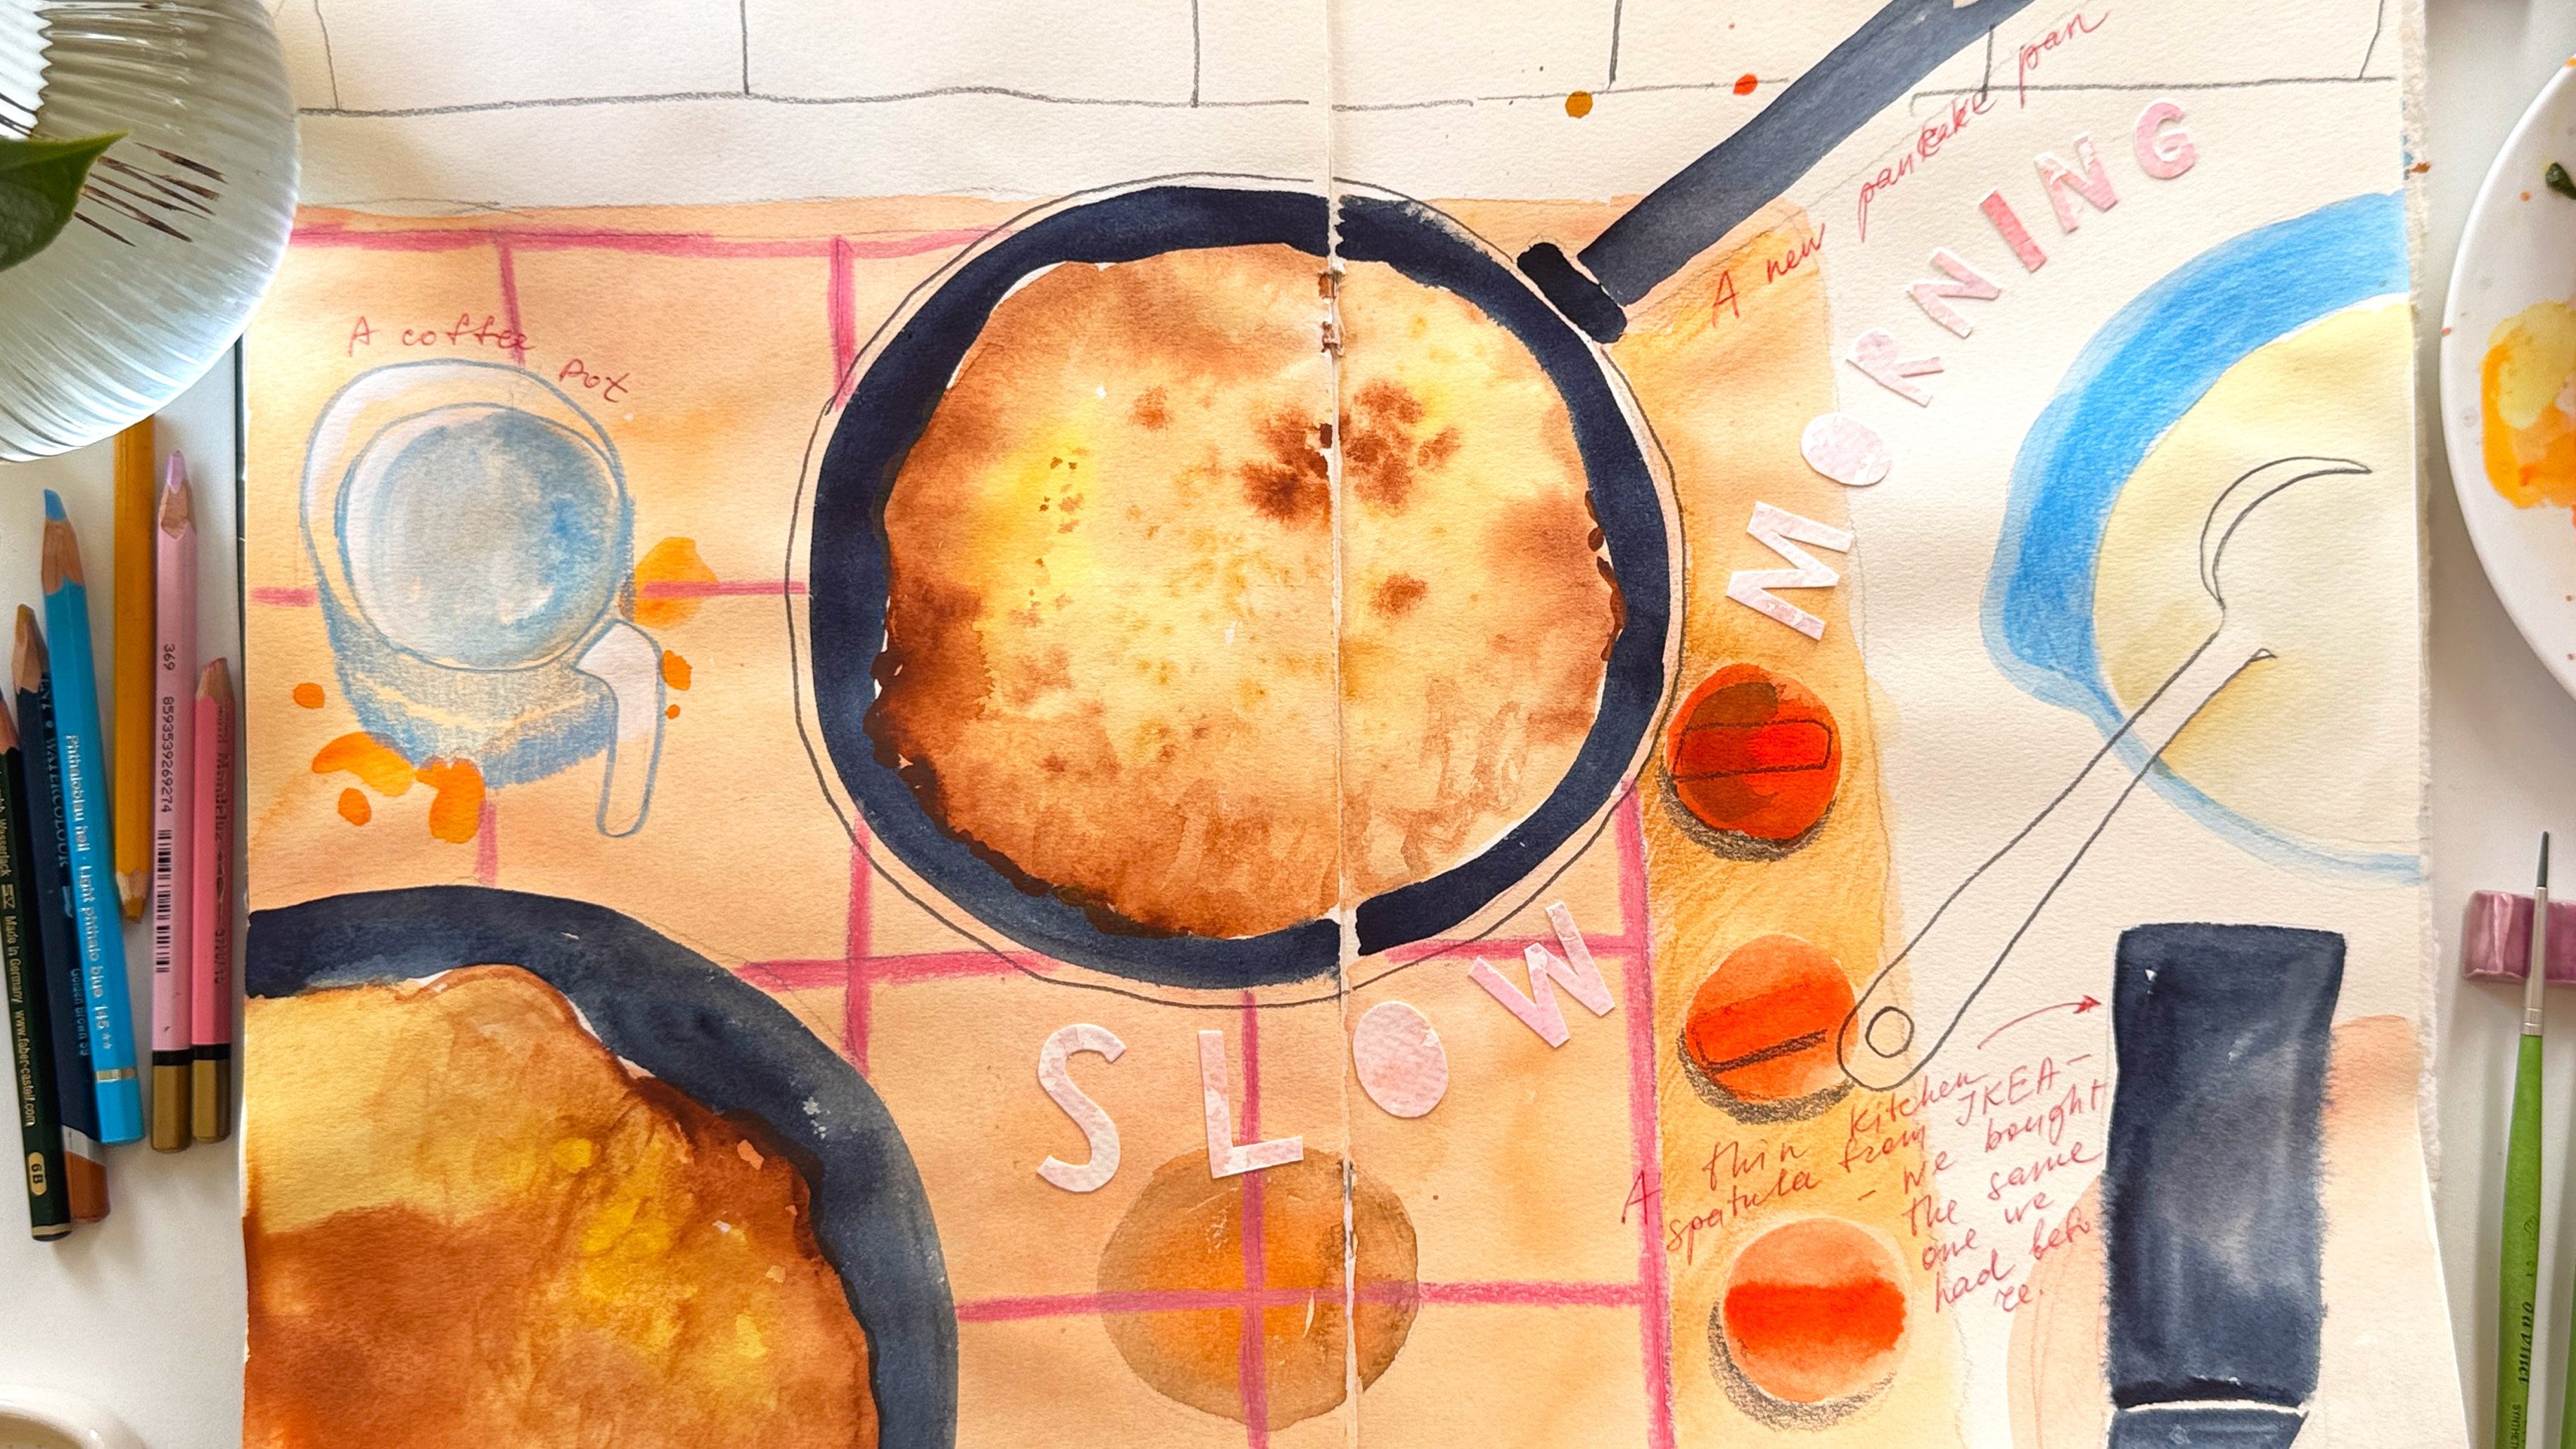
2. House in the Park: My first stop was near this charming house with a cozy cafe full
of glowing lights. I opened my sketchbook like this and just started by
laying down color shapes. When it comes to quick sketches, I almost never begin with
the pencil drawings. It's too time consuming. I go straight in with colors. The key here is to step back from thinking about
what you are drawing and instead see the
scene as a collection of colored stains that come in
different sizes and shapes. Of course, the paint will
sometimes spread too much. The colors might be a bit off, many details get lost,
but that's all right. That's fine. What matters
here is the mood, the atmosphere, and that's all. You know quick sketches is a bit like tiding your home
before guests arrive. Imagine a friend
calls you and says, I'll be there in 15 minutes, and you look around and see
cows everywhere, a mess. And of course, you don't
have time for a deep clean, but you can put
away the clothes, clean the toys from the floor, wipe the table, and make the
living room feel welcoming. That's very different from
hours of proper cleaning. Quick sketching
works the same way. I just ask myself, Within 15 minutes, what can
I capture and go for that? Oops. Now I'm moving
on to the details. The roof, for example, has
lots of tiny elements, and I'm thinking about how to suggest them
quickly and simply. Sometimes it feels scary because you don't want
to ruin this sketch. During group sketching session, I often see that fear stopping
people to draw or paint. And then sometimes I tell them, if you are afraid
it will turn out bad then do it badly on purpose. Make it bold, make it messy, treat it like an exercise
to overcome the fear. It's only paper in the end. Sometimes you need
to give yourself permission to draw
something ugly, amateurish, even
childlike, but it's still much better than
being paralyzed by fear. Here, I've reached
the flower bed. It looks gorgeous in real life, but since my sketch
is quite small, I only have a tiny space for it. So I can't draw every plant. I simply suggest the flowers
with quick patches of color. Note these light green dots
on a darker background. That's watercolor as well. And yes, it's possible
light and dark with watercol you just need to use the paint with
very little water, so it becomes opaque. With less water, watercolor can be surprisingly
bold and graphic. Next, I want to add a
few people passing by. If you've got time, it's always nice to include another
layer like this. It adds depth and makes the sketch more
interesting to look at. If you don't have
time, no problem, just snap some photos and
use them later at home as reference to add people or
not, that's also right. Love mixing graphite
pencil with watercolor. I use this combination
quite often, and if this were a
proper illustration, I develop characters
more carefully, maybe at another dog or children playing to create an
interaction, a little story. But since this is
a quick sketch, my goal is simply to capture
the moment the feeling, so I keep it simple. I could stop here, but I can't resist adding the cafe lights
because they make the whole place look so cozy
and a few extra touches. These patches here are meant to be people
inside the cafe, and I'm not sure anyone
else will recognize them. I mean, as people, but at least I'll know
what they are for sure. And here is the result. I'm thinking to add one last green line representing the lawn
where I'm sitting. And honestly, I'm scared scared to spoil the
sketch because I like it. If you think I don't
have those moments, I do and very often. But I've learned how
to overcome them. So I take a deep breath, add a line, and stop. That's it. The sketch is done, and here is the view
I had in front of me. Now I'm going to find a nice
place to have a dinner. And after this, I hope to make another sketch
before it gets dark. See you in the next video.
3. Evening Sky: Well, the sun has already set, so I need to act quickly
if I want to make one mosketch today.
Look at this sky. Marvelous. Seagulls everywhere. Now I need to decide what do
I actually want to sketch? What's the main thing
for me right now? It is the sky because
it's absolutely amazing. So the sky will take
up most of the page. I wet the paper
thoroughly and try to capture that feeling of
space and the evening light. I start with blue fading
into ultramarine. My brush follows the
direction of the clouds. At the bottom, I add a touch of cadmium orange
because the skyhir is colored by the setting sun, not too strong, very gentle. The whole mood feels calm, soft, peaceful, no sharp
contrasts very gentle. Now I move on to the clouds. They are darker than the sky itself look a little
like bird feathers. The main thing is
not to overdo it, neither the tone nor
the number of them. I mixed ultramarine
with cadmium red, one of my favorite
combinations for painting sky. I've spoken about these
color combinations a lot in several of my
watercolor classes. Altramarine together with cadmium yellow or cadmium
red or calmiumOange, creates endless
beautiful shades, perfect for painting skies
and many other things. And you know using a limited
palette and really knowing how your colors behave makes
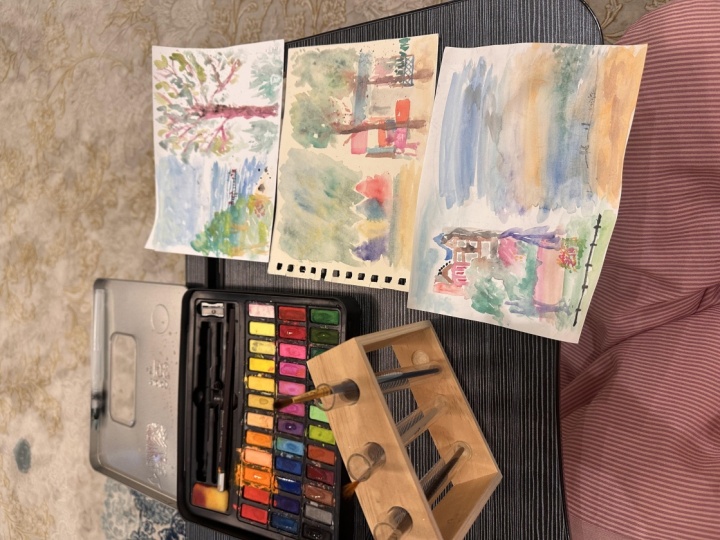
sketching so much quicker. You don't waste time choosing. A bit later, I'll show you my own watercolor
palette the one I always take with me outdoors and use for
any quick sketch. And all the time,
I remind myself, this is just a sketch. My goal is to catch the
emotion, not every detail. That's the island or
something I don't know, on the horizon and the
water reflecting the sky. And here on the foreground, the sand, the beach. Now it's time for the greenery, trees, bushes, grass
in the distance. I start with cold gray and as it comes closer, add more green. But it is important to keep all colors cool because
it's evening light. I think I've caught the essence, the evening light, and the mood. Now let's sketch the people
on the beach very simply. The further away, the
smaller they are, just a few lines and dots. These tiny details give a
sense of scale of space, and here are the segals
these ones are a bit larger. Honestly, they don't
really look like Sigels, and maybe no one else would
guess, but that's okay. This is my sketch, and what matters is my connection to it. So this is what I ended up
with. And you know what? Even though it's already dusk, I still want to try
one more sketch, just a really quick one. So let's go straight
to the next video.
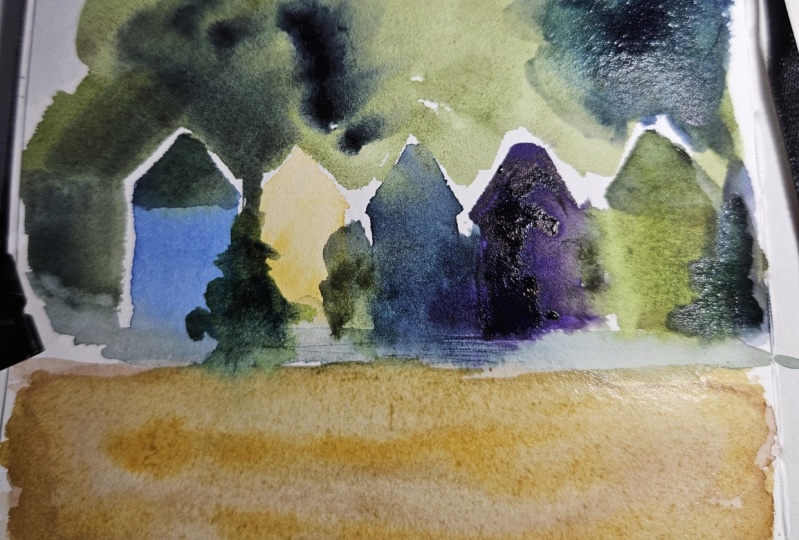
4. Beach Huts at Dusk: Okay. Look, behind me, there are those lovely
little beach huts. I really like how they
look, and I'm not sure. I'll have time to come
back here tomorrow, and it will probably be crowded. So let's make a sketch now, a really quick one. The previous page is still wet. Paper by the water
takes ages to dry, so I carefully flip the page and will only
work on this side. To be sure I don't
ruin my prayer sketch. It's getting dark quickly, and my phone battery
is almost gone. So this will be a superfast
sketch, maybe 5 minutes. All this makes it really fun. I read the paper holding another page to protect
the previous sketch. Well, what I actually
love about these hearts, their shapes and the way
the colors work together. Oops. Oh, it's too
much too much water. And I'm starting to think
this sketch is a fail. But let's add more color
next to it and see. Well, my next step supposed to be painting
the greenery around, but I'd need to wait
until this layer dries, but I can't don't have time. So I leave this fail
atompt and start again this time without
wetting the paper first. Mmm. Here we go. Just a
simple house shape. Next to it, a pale blue one
and another in dark navy. A muted yellow and a light gray. Now the greenery around them. A flat brush really helps
when you need to paint clear architectural
shapes like this. Mm hmm. The roofs are done. Now I quickly paint the green areas with
bold fast movements. Since it's already dusk, the green is dark
and cold almost shifting into deep
blue in places. At the bottom, the sandy
beach appears to pink needs a colaton and that's it. Once the sketch dries, I could add more
details, but honestly, I'm not sure I
will, my feelings, my impression of this place, there already here,
and that's enough. I checked the time
12 minutes in total. That includes the
first failed sketch plus filming all the time. So here is the sketch, and here is the view. Look, the street
lights are already on. It's time to rest. See you in the next video. For me, it will be tomorrow.
5. Busy Street: Good morning, my dear friends. New Day, New Sketch. I've stopped at
this lively street. Beautiful, isn't it? So much is happening here, and I'm thinking, how do I
capture all that quickly? And the truth is I can't I
can't depict everything. The trick is to
choose the part that catches your eye the
most and focus on that. For me, it's this little corner. No, it is a really busy place and not the easiest for
filming, to be honest. It is simply uncomfortable. So I'll just show
you the main steps. I start with color patches, looking at the shapes and the brightest spots and
putting those on paper. I love these colors. They feel so bright
and summerlyO there are people at cafe tables
and a glass store front. I put down different
color stains here, maybe their reflections, maybe people's silhouettes,
and now I move to the shadows and just so you know what it looks
like around me. It is crowded and I've
got very little space, and all my stuff is
squeezed onto a tiny area. But, you know, when
you are in the flow, you find the courage, manage it, and even enjoy it. I've added the shadows. Now it's time for a big
trees in the foreground. This is how it looks. And I think I've
reached my goal, a quick sketch of
a lively place, a relaxed summer day. People at the cafe,
lots of greenery. I'll add a few more little
touches, and that's it. It turned out fresh
and summerly. Now let's find something
else to depict. See you in the next video.
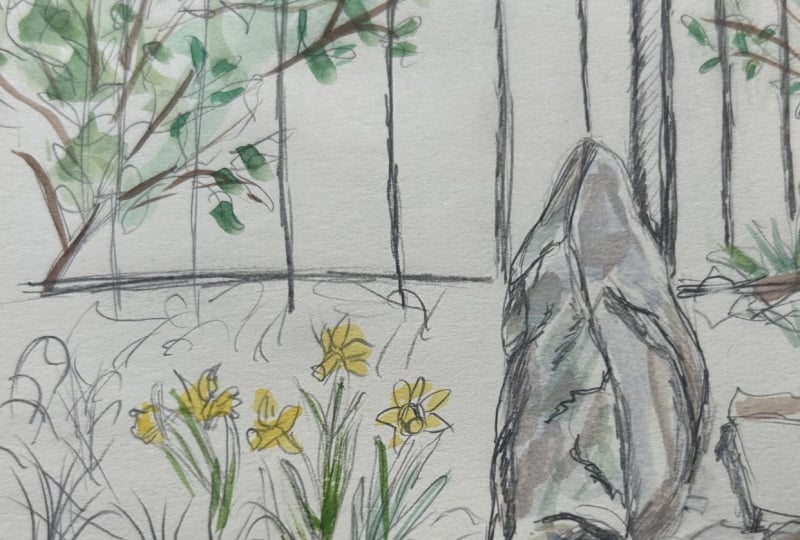
6. Pine Tree: Well, let's continue. This time, I found a comfortable spot on the grass in front of
me this huge pine tree, and that's what I
want to sketch. I'm waiting for the
previous page to dry. So meanwhile, let's
pour some water. Now, how should I place my sketchbook like
this or this way? I think like this. What particularly interests
me here is the structure, the shape of this majestic tree. I'm mixing a deep brown by combining bright pink
with dark green. In the other video, I promised to show you my
watercolor palette. I don't have many
colors with me, but I know all of
them very well. I can mix all sorts of shades. I know exactly how
they behave together. Well, I'm looking
at the pine tree and trying to catch its
character, its shape. It helps to relax the hand, not to control the
brush too much, maybe even hold it
a bit further back, so the line feels more
natural, more free. Mmm. Well, I think I'm
getting lost in details, trying to depict too
many tiny branches. It's definitely time to stop doing that now for the greenery. It has its own rhythm, and I'm trying to feel
it and follow it. All right, the pine tree
is more or less done. To show how giant it is, I'll sketch a palm tree next to it that will give
a sense of scale. A bit more volume on
the trunk. Mm hmm. And, look, the trees seem
to be hanging in there. I don't like it. Let's bring them down to the
edge of the page. A few splatters to make the greenery more
lively and textured. Oh I think I could finish here, but, you know, I'm sitting
comfortably on the grass, not in rush, so I'll
add a few more details. There is a bus stop
under the pine, so I'll add a bus
to give context and emphasize just how big
this tree is. Very simple. Just a quick sketchy bus. Some plants in the foreground. A bit more green here. That's what happens. When I get too comfortable, I just can't stop. But now, yes, yes. It's done. Here is my pine. There is a lot in this view, but I only chose what
felt interesting to me. I have a little time left, but hope to manage one
more sketch. Let's see.
7. Summer Vibes: I'm already on my way to the train station
to go back home, but I still want to fit in
one more little sketch. Look at this. So beautiful. I found the bench, and this
is the view I have from here, and I'd like to put
it in my sketchbook. But first, what should I do? Put my hat on because the sun is really strong and Osa a shot. So I don't get burnt. Well, now I'm
prepared. Let's start. I fix the page because it's rather windy and
begin with the sky. It's pure summer blue color with a few fluffy white clouds. It feels a bit awkward
sketching and filming myself at the same time while other people
are walking by, if you know what I mean. But this is already
my sixth sketch like this in this
experiment, this challenge. So I'm kind of starting
to feel pretty confident. Well, now for the sea, it's a beautiful bluish color. It gives me that holiday
feeling relaxed and happy. Closer to us, I leave some
untouched white spots. That's where the waves are. I'm using this flat brush
again because it is so handy. I've had it for years, and it still works perfectly. I leave the name in the class project tab along with all the
materials I like. This is the sandy beach, just a few strokes to show
it goes into the distance. And here is the
steep green slope. That's where I am
actually sitting looking at this amazing view. I'll add different hues
of green for variety, and here some reddish
warm tones because it's the very middle of summer and some of the grass
has already dried. A few more colorful details because there are a lot of small details in this greenery, while the sea is flat colour, it helps visually make this
pot feel closer to us. And leave the sea
in the background. It creates depth. Our brain usually reads
the detailed area as closer to us and the smooth
one as further away. The base of the sketch is done now just small but
important touches. There is a peer in the distance. It has a very complicated
construction, and I'm simplifying a lot. I can hardly see the details due to the distance and
the bright sunlight, so I draw heavily
relying on my intuition. This is a very interesting
experience, I would say. People are walking by, going to the beach in swimwear, carrying picnic baskets, toys, food, and I'm here, sketching and filming myself. Well, definitely outside
of my comfort zone. Well, if you read touches, I'm not even sure what they are. Spots of color. I see. I'd love to add some
white highlights, too, but I didn't bring
white gauge with me. I only have a white pencil. Let's try it. Nope.
It doesn't work well. Unfortunately, never mind. Now I want to add tiny people. They are just dots, so small, their size determines how we perceive the
distance, the space. Somebody is in the water. One is sunbathing. Another one put up a tent. I could fill the whole
beach with people like this and sills. There are lots of
them flying around. Let's put some on my sketch. They turned out a
bit cartoonish, I guess, but that's right. And another one here And here. And another one here. And here, I can't stop. There will be a lot of them. All right, let's wrap it up. I'll sign today's date. I'm filming this on July 18 right in the
middle of summer. So if you are watching this on a cold autumn or winter day, I hope it brings you the feeling of summer warmth and sunshine. And if you watched this fun, let me show you how I
actually filming all of this. I have this tripod. It did a really
great job helping me record all
processes on my own. And here on the bench
is all my stuff. All right, in the next video, I'll show you all the sketches I managed to do
during my experiment, and I'll also ask you to leave a review for this class because
it really matters to me, and it helps make this
class visible to others. So please
8. All Sketches and Class Project: Well, let's take a look at what I've done.
The first sketch. So more characters really
want to appear here, and I might add
them later or not. This is an unfinished sketch
of an open air performance. I didn't show it you before because it ended
up very quickly. I arrived at the end and people left and I
didn't finish it. Next, the evening beach
and the beautiful sky. The failed beach huts, the successful beach huts, it definitely still lacks
details to feel complete. This is the lovely busy street
with people in the cafe. You see here, the
pages tucked together, and the sketch got a
bit damaged because I didn't wait for it to dry properly before
starting the next one. So don't do that. This is the gorgeous
pine and other trees. And the last sketch
with the sea view, the paint is still wet, so I'd better not close
the sketchbook yet. Thank you for having me. I definitely had a lot of fun, and I hope you
enjoyed it as well. Please leave a review. It is really important, and I strongly
encourage you to share your own quick sketches and upload them in the project app. I'm really looking forward
to see it and also to know which of my sketches
is your favorite and why. Love you. Take care. Bye.