Transcripts
1. Intro: What is your favorite
part of the day? Mine is the golden
hour and Sunset time. Sometimes, I find myself
admiring surroundings, wishing that moment could
stretch out longer. It feels so good. I'm lucky, as an artist, I know how to stop a moment and reliver it through my
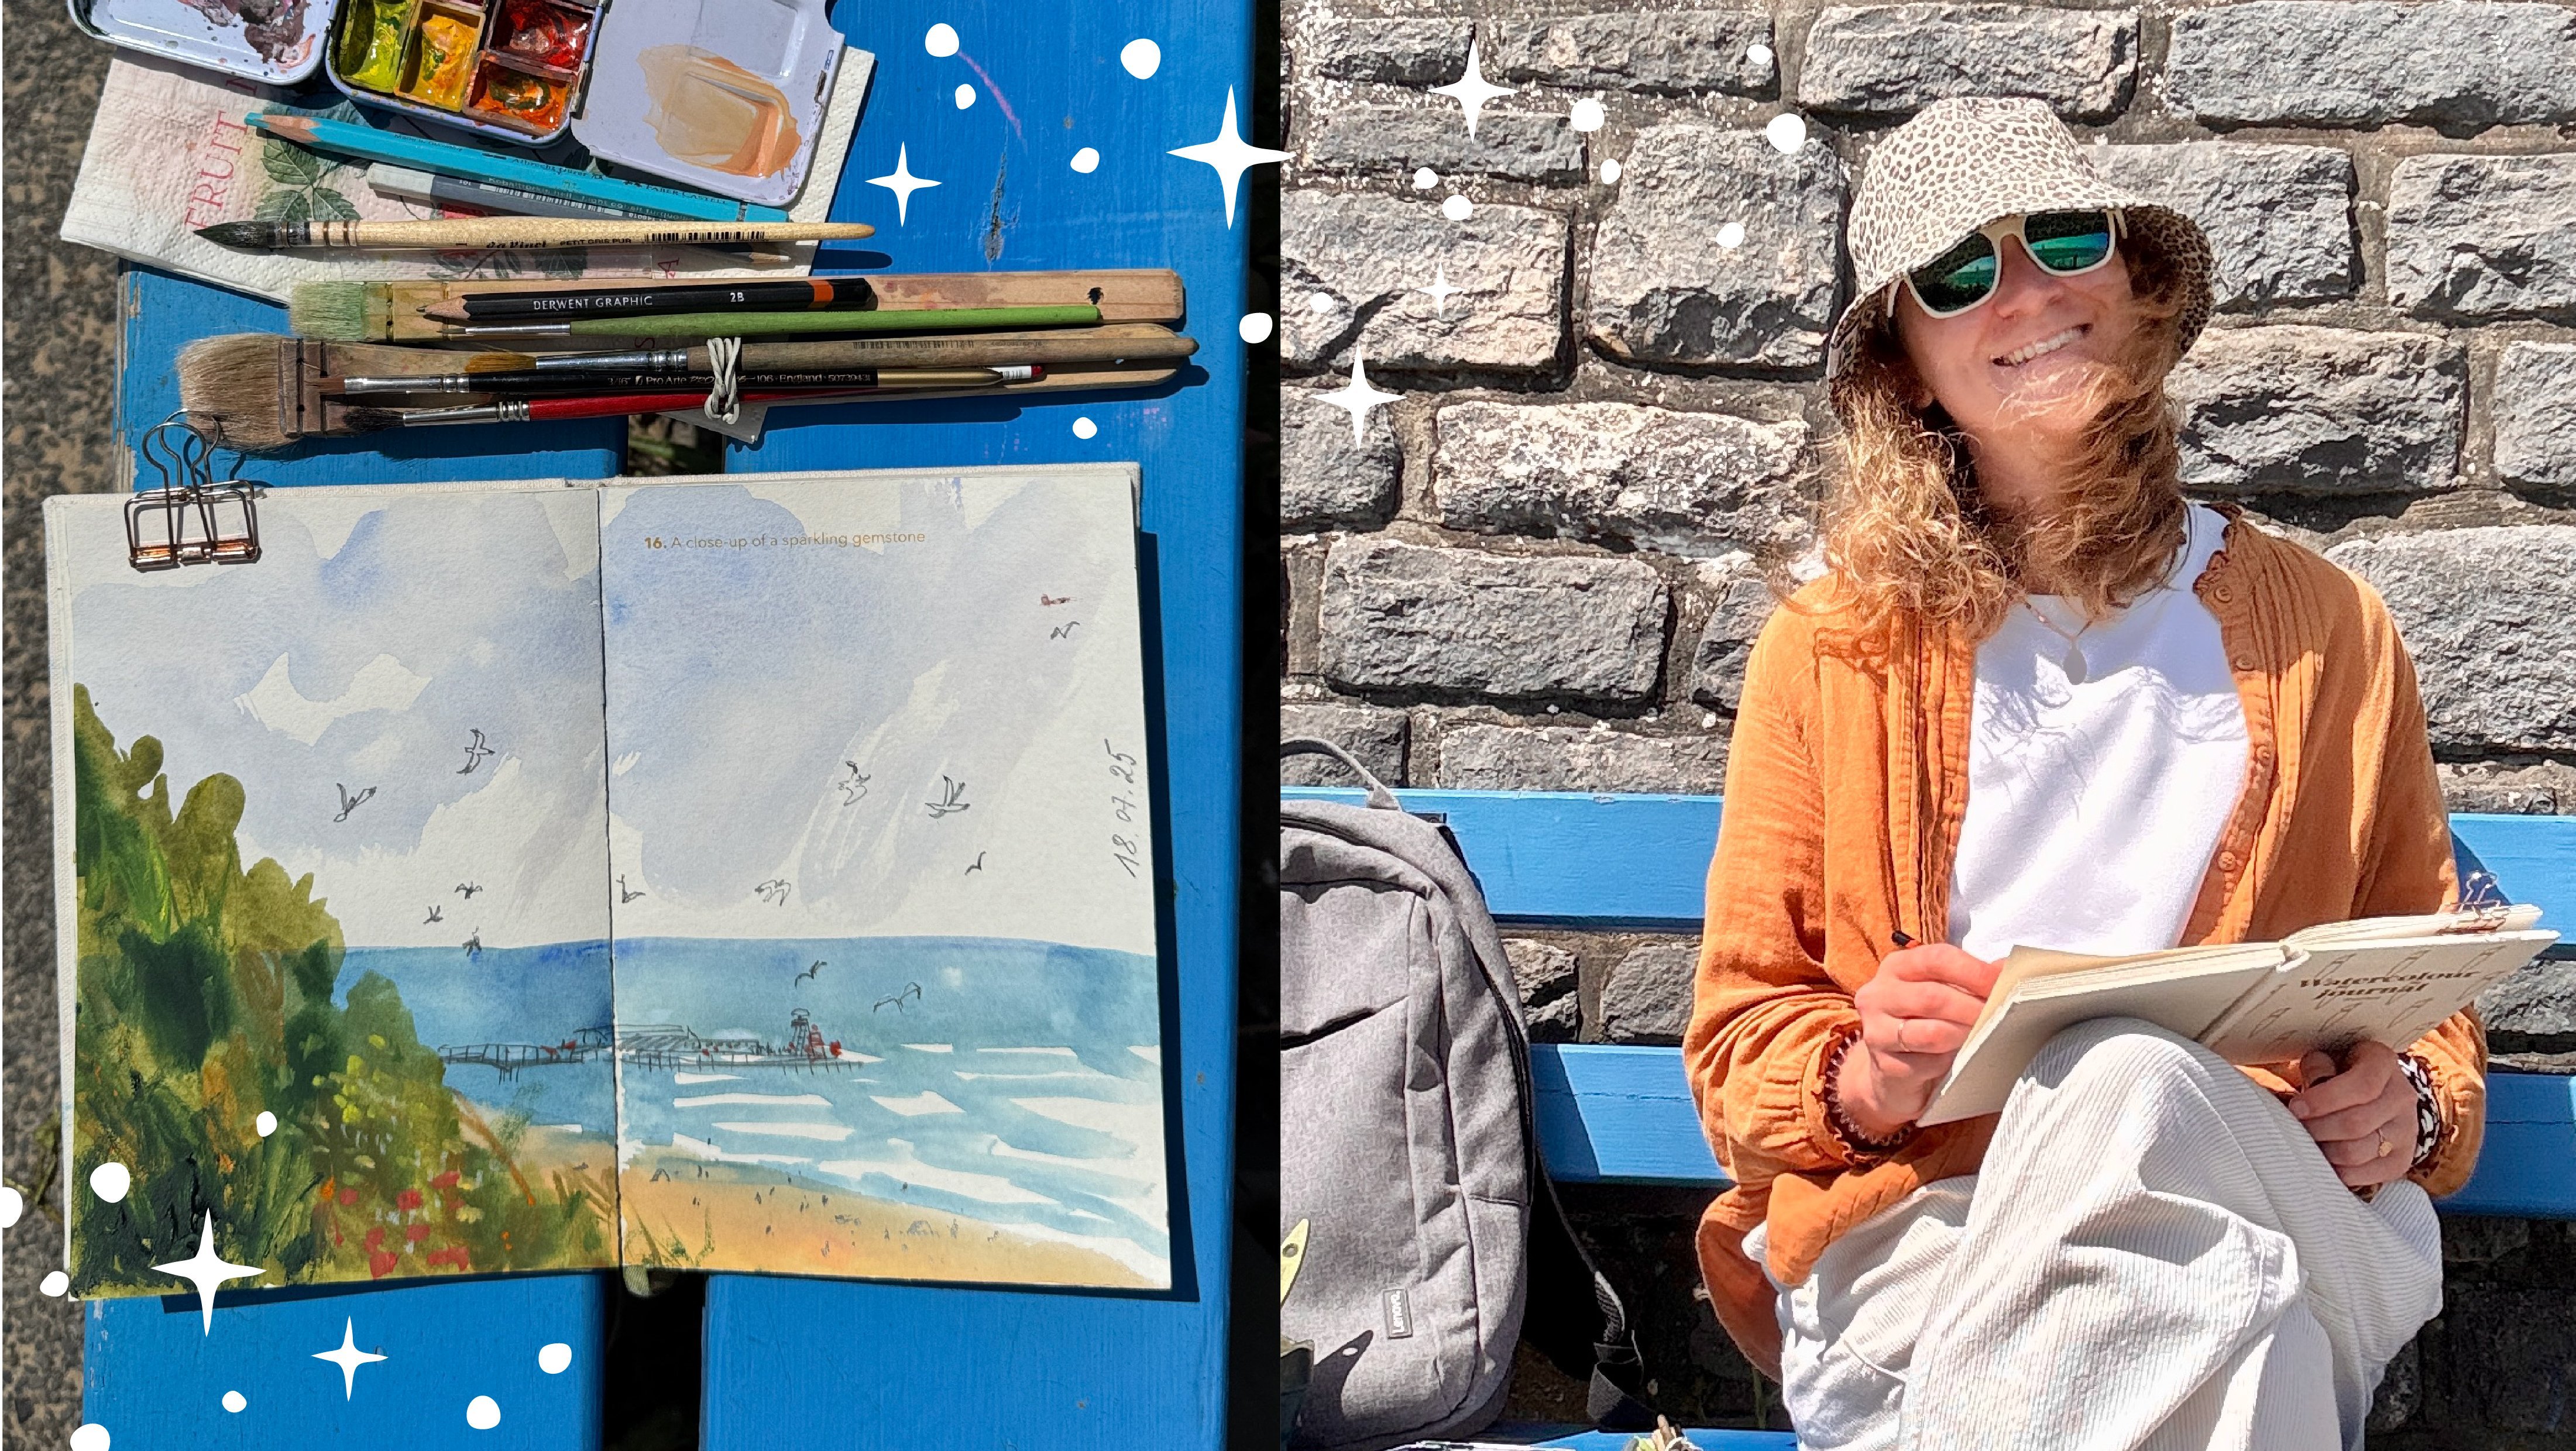
paintings again and again. Hey, I'm Mal go Banitas, a vote color artist
and illustrator. I invite you on an immersive journey into
the world of lighting. Together, we will explore
essential colors, learning to blend
the perfect hues. Engage in numerous exercises to master the fundamental
techniques of painting, shining sun and light th trees. We will learn how to use photo references
in a creative way. We will dream up and develop a unique character to
place in our illustration. And yes, we will create a final compelling
atmospheric illustration with magical lighting. The class is divided into
short, clear, actionable steps. Each can be completed in half an hour or less,
including preparation. If you can find just
30 minutes a day, you'll be perfectly
fine with this class. While lighting isn't
an easy topic, I'll explain everything in such detail that even beginner
artists can master it. Clear explanation
is my superpower, so we'll definitely succeed. So let's paint together, multiply beauty and
enjoy the process. Welcome to the class.
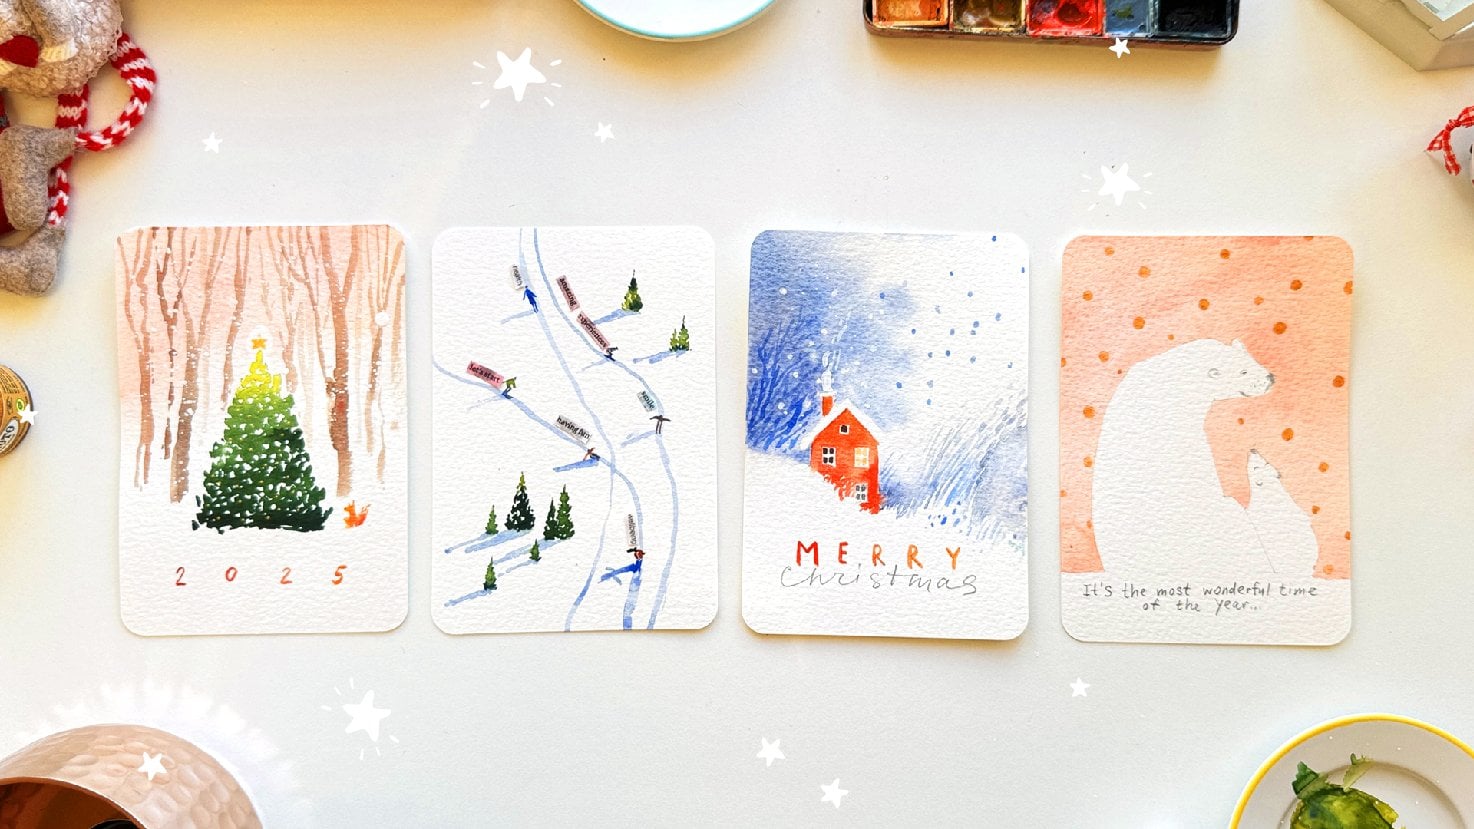
2. Class Project: As a class project, I encourage you to create your very own illustration with golden hour lighting and
a very unique character. Like this one. While it may
seem challenging at first, we will move step by step from the very rough sketch
idea and graphite drawing to several layers of watercolors and
spectacular final touches. I'll explain every
little step in such great detail that I have every confidence
you'll succeed. Let's start. First, let's discuss the materials
needed for this class.
3. Materials: All right, let's get started. Let's discuss the materials. We need paper. We need a lot of inequality
paper for sketches, exercises, color
testing, and so on. We also need watercolor paper. I will be using this one. It's inexpensive,
but I always say that the higher the percentage
of cotton in the paper, the better it is making it easier to work with watercolors. Now this particular
paper has little cotton. The packaging doesn't
mention it at all, which means it's minimal. But I intentionally chose this paper because there
are the students who use such ordinary
inexpensive watercolor paper or sketchbooks, and I want to relate
with them so they can also complete all the exercises and create a great illustration. But if you have good quality
cotton watercolor paper, that's great, use it. It will be easier for you to create smooth color transitions. So we need at least
two sheets of A three, one for the illustration, and one for the pencil drawing, and lots of any
paper for studies. Next, of course, we need
paints, watercolors. They can be in tubes or pens, both options are okay. Three colors are
essential for this class, three, and it's better to
use them in the tubes. This is ultramarine blue, Cadmium red and cadmium yellow. In the next two videos, we will talk about them in great detail and
study them a lot. We also need to various
shades of green, warm, cool, different tones. I have cadmium lemon, which obviously isn't green, but I love mixing it
when painting greenery. The names of the colors, except the first three
are not essential. Use the ones you have. We will also need white gosh for tiny finishing touches
in our big illustration. Next brushes. As you can see, I have many different
brushes here. Basically, we need several
brushes of various sizes, small, medium, and large. A flat synthetic brush
will also come in handy. But if you don't have one, don't worry, it's okay. And a big brush of any shape
for moisten the paper. We also need masking fluid. If you use the liquid type, like I do, you will
need a brush for it. Even if it says that your masking fluid
doesn't damage a brush, it is still better to have one only for this
purpose, just in case, what else Palettes,
this are essential for this class because we
will be mixing paints a lot. I love to use plates
of various sizes. Any palette suits just
make sure they can hold a significant amount of paint
and water. Colored pencils. They are not essential
and needed only for the final step of the illustration,
adding final details. We need a white pencil for drawing over the
watercolor layer. It doesn't have to
be just a pencil. A white gel pen or acrylic
marker will also work. I will use a pencil. It would be great to
have shades of beige, ok, light, brown, yellow
ish, something like that. Various greens, and one pencil of any saturated dark color. I have dark brown, but black indiga
dark gray will work as well for the very tiny
darkest final touches. A couple of graphite pencils, one hard, and one soft, and razor, papss and two
containers for water. It seems that so. Let's move on to
exploring colors. See you in the next video.
4. Essential Colors: In this video, we will discuss the colors that are essential for painting
sunset lightning. The red just three of them. Cadmium yellow. Currently,
I have the medium hue, but the light one is also okay. The cadmium red, I
have the light one, but the medium one is okay as
well, and ultramarine blue. Let's take a palette and
place all three colors there. Cadmium yellow. Cadmium red. And ultramarine blue. Now let's take a piece of
paper and try each color. Yellow. This is how
it looks on paper, add water to achieve a
light transparent tone. Red, a bit, and alime. Let's write down the
names of the colors. In the next video,
we will mix them and create a color
palette ranging from very warm and light
tones to cold and dark ones. Cadmium red. Ultramarine blue. Mm. That's it for now. See you in the next video.
5. Mixing Colors: The magic of these
three colors lies in their ability to mix and create an infinite
variety of shades, perfectly suitable for
painting, beautiful sunlight. Let's start with a
warm and light shade. I need diluted yellow
with a drop of red. This creates such
a nice golden hue. Let's add a little bit more
red and get a soft orange. Now let's take a slightly more
saturated yellow and red. This will give a brighter color. I'll add more red. Here we go. And even more. Now I'll mix these colors
almost without water. These gives such a
saturated opaque color. All right. Now I'll add a touch
of blue to this mix. The beauty of these three colors is that when mixed
in any proportion, they create beautiful
colors and never. I mean, no us. A bit more water. Such a beautiful golden color, a bit more blue. This results in slightly
muted brownish tones. You can mix colors in different proportions and get
infinite number of shades. What's important is not only
the amount of each color, but also its and the
amount of water. This tone will be a little
bit more saturated like this. Mm. And even more. I would like to make it cooler. So I add a drop of blue. Oops, It's too much. No worries. Let's fix it. I need more red. That gives me a brownish shade. I talked about these
three colors in another course of mind dedicated to painting
white objects. There we mixed them to
achieve a neutral gray. In short, if we take diluted cadmium red,
add cadmium yellow. Mix well and then add
ultramarine blue. We'll get this kind of gray. It can be slightly
warmer or cooler depending on the
proportions of the colors. This is called neutral gray. We won't be using
it in this course. I just want to show you the amazing capabilities
of these three colors. Let's try it on paper. Such a beautiful noble color. I explain it in details in the course on painting
white in water colors. White objects, white flowers, winter landscapes,
such a topics. If you asked me which colors are essential
to have in a palette, I would say these
three colors are a. Okay Let's get back to
our topic, our palette. Now, I'll exclude yellow and
we'll mix only red and blue. While filming, I
didn't notice that these shades weren't
captured on camera. Unfortunately,
guys, I apologize. It will be fixed in a couple of minutes and
then I'll show you again. I'll take a stratd red
and add a drop of blue. To it. It gives us a
reddish brown shade. If we add even more
red and less blue, we'll get a muted red, not bright, more like a red. Adding blue gives us
this shade and if we mix very saturated red with very saturated blue and
a small amount of water, we'll get a, very dark color. Mm like this. Now, finally, all the
colors are visible. Once again, guys, Sorry
for this inconvenience. Thank you for your patient. Let me show it again. So if we take diluted red
and add a drop of blue, we'll get this muted,
cool red shade. If we take saturated red, and add a bit more blue. It gives us this dark color. Mmm. L et's take more red and more white. You see you can mix them in a different proportions and get all of interesting new shades. Let's mix a darker
tone like that. To achieve a really dark tone, I take saturated colors
and very little water. It gives me such a tone that
looks almost like black. Well, let's recap all we've
learned about mixing colors. The top row of sheets. This one is obtained by mixing only two colors,
Cadmium yellow. And cadmium red. These shades are the
result of mixing all three colors,
including neutral gray. Cadmium yellow, Cadmium
red, and tamarin blue. These colors here are again obtained using
only two colors. Ultramarine blue and
cadmium red. Mm. You see, now we have the entire color
palette for painting remarkable golden hour
landscapes where there is always a transition from warm
light to cool dark tones. I want to add one more shade
here, a very cool one. For this, I need saturated blue and just a tiny bit of red. This results in
such a dark blue, not bright, but calm and deep. I'm not sure if the video accurately conveys the
color differences. Be sure to try mixing
this color itself, field them and create
such a palette. Let me show you perhaps the differences in
shades will be visible. I think it's better
and should be useful. Now, let's practice
creating this transition from warm light tones
to cool dark ones. I'll start with a
diluted light tone and then involve blue. Mm. Now I reduce the amount of
we and the color become This is the color
transition we've achieved. Try doing this exercise
several times. This is a truly important scale. Let me demonstrate
it one more time. First, a bit of yellow, very light and transparent tone. Loads of water,
and a drop of red. This gives such a golden hue. Mm. Then I'm adding more red The yellow is still wet, so the colors blend
beautifully into each other. More red. Then I calm
it down with blue. The tone becomes cooler. More blue and finish with a dark cool tone with just
a small amount of water. All right. It's done. Try it yourself. It's really important. And we are moving on to the next video where we will
explore sunset landscapes, trees, and paint thails. See you there.
6. Landscape Thumbnail: Simple Sunset: Before we start, it's important
to refresh containers. Clean water is essential.
I need a paper. I'm going to paint
on A three, again, the same paper I showed you at the beginning of the
class. This one. You can paint on
smaller pieces of paper or in a
sketchbook, that's okay. All right. I'm ready to start. What are we going to do now? We will paint three
thumb nails of sunset. Three variations of a landscape where the sun shines
through the trees. There will be small sketches, and I'm drawing three frames to mark the boundaries
of each sketch. First one, second, The third. That's done. Now let's prepare the palette and
mix three shades. The colors, a light, warm color, a muted, reddish color, and a dark one. I'll start with a
warm golden tone. For this, I need cadmium yellow, diluted with water,
and a drop of red. Here we get this beautiful
golden shade. Uh. I won't even lease my brush. I'll just set it aside until
I need this color again. For mixing the next shade, I'll take and a bit of yellow. H, a little blue and mix it all together
very thoroughly. Such a reddish brownish tone. Done. Now I'm going
to mix a dark tone, so I'll squeeze the paints
directly onto the palette. Paints can be taken
from pants as well, but it's more convenient
to do from tubes. Add some vota and mix
it all very thoroughly until it's a smooth
color. It takes time. I intentionally didn't speed up this piece of
video or cut it out. You can see it's really not immediate process.
It takes time. Now, it seems it's done. Look here, I left
some of the paint unmixed red and blue so
that while painting, I can adjust the
shade by adding red if I need a slightly
warmer toon or blue, if I need a cooler one. All right, this brush has
a lot of saturated colors, so I won't wash it. I'll just set it
aside very carefully. Finally, starting to paint. Let's imagine the sun
setting with loads of greenery in the distance
bushes and trees. The paint tone is very
diluted with lots of water. Then I take clean water and add it right here
at the very edge. Let me show you closer. And now look, I'm
making the edges very soft to create a
smooth transition from white to the golden tone. I squeeze the brush and
remove the am pigment. Squeeze again and remove more. The challenge here
is to ensure that the edges of the
paint remain wet. If they dry out, achieving a smooth transition
to the next sheet becomes difficult or it's better to see almost
unachievable. I'm taking paint from
the second palette, where there is
that reddish tone. Remember, see. Thanks for the paint is wet, the colors blend beautifully. That's why it's important to prepare pre mixed
paint solutions before starting work to avoid wasting time on this
during the process. Now I'm taking the branch that I used for mixing
the third tone. It has a lot of pigment in it. Remember, there
is a lot of water in the paint always should be. And finish this wash
with a dark cool tone. The paint flows beautifully
blinding softly. Nice. Do you notice how it hints at the sun with the
soft evening lightning. At this stage, we can
finish this sketch, but let's add a little extra and imagine we're
sitting in a cafe or in the park on a bench under a tree absorbing the sunset through the branches and leaves. Let's paint it very sketchy. Softening the edges,
but not everywhere, just where the sun
shines brightest. I always keep in mind this area. I'm creating the transition from a transparent warm tone
to a more saturated one. I'll add a reddish brown tone, then a dark, cool one, leave some white
spots untouched, that the leaves foliage, but avoid painting
a lot of details. At this stage, these exercises, it's important to understand the basic idea and technique
as this is essential. Here, some reddish tone needed All right, I think it's done. Always ensure to
create a gradient from light warm to dark
and cool tones. Now let's move on to the
next video, Next thumb nail, where we will paint another
example of sunlight trees.
7. Landscape Thumbnail: Sunlight through Tree Trunks: Moving on to the next sketch. There will be the trees, close up tree trunks. To begin with, I'm painting
a background using a very light
yellowish golden ton with a bolt movement
and large brush. I've left an untouched
white area for the sun. Let's make it a
suitable round shape. I squeeze the brush and
remove the pigment, softening the edges to make
the transition smooth. Smooth transition from
the white to the edge. Now I'm going to paint
the tree trunks close up. For this, I'll prepare a
mixture of red and blue. I always keep in mind the radial nature of
light distribution. I start with a warm light tune. Mm mix it with red. This will be the branch. While the edge is still wet, I soften it right here. And mark the **** of the trunk. Now I take a very dark tune and create a color transition. And here a touch of dark. You see we've achieved a
radial gradient from the sun. While the water
cool is still wet, you can make
adjustments if needed. I want to darken
this p even here. Now let's paint another tree
next to it. The same steps. I start with a warm light tone. The shape of the sun
has destroyed slightly. It's easy to fix. Mm hm. That's better. Here, I soften the edges again and create a transition
to the reddish tone. This is *** red with
the touch of blue. Oh. Now a mod and col tone. This branch from the
sun, so I'm painting. All right, down. And the third tree or
rather a piece of tree. All right. Let's take
a look to check if I've managed to make it look
like the sun is shining. It seems like it is. Meanwhile, my first sketch
has completely dried. I want to add a
lovely final touch. I'll take a saturated red
and carefully splat it. This will create the impression that something is happening
in the foreground. Maybe it is flowers, maybe it is
illuminated particles in the air or something
else. Who knows? Some drops has spread, creating even more
interesting effect. Love it. On the second thumb nail, I would like to paint something
behind the tree trunks. Let's say it is tall grass. There is no need to
sharp contrasts, so I'm painting with a
semi transparent tone. This creates the impression
that there is something far behind the trees. A tip. If you are painting and feel like something is
not going well. The sun isn't shining or the color transition
aren't smooth. Take a short break and then look at your
work from a distance. Most likely, a fresh sight will help you to see that
everything is fine. Well, this sketch
is also finished. Let's move on to the third one. We will paint sunlight filtering through the
branches. See you.
8. Landscape Thumbnail: Sunlight through Branches: On the third thumb nail, there will be many branches. To help myself, I'll place a cut out paper circle here to represent the
sun while painting. The second and the third
sketches are exercises that will be very useful in creating the final illustration
for this class. As usual, I start
with warm light tone, then rinse the brush well and fade the color
into transparency. Transition is soft. Mm hmm. On this side, I do the opposite adding red to make
the tone more intense. Continue the trunk,
the branch here, following the same steps. The each should be
solved. All right. The first branch is complete. Let's paint another
one next to it. Oh. While the itch is still
wet, I soften it. Let's add another branch here. I need to lighten
this area as well. Mm. And the reddish stone. Oh. Let's paint another branch
on the other side when painting branches and trees don't be afraid
to make mistakes. The beauty that they
come in all shapes, all forms, crooked,
straight and in between. So don't, don't and paint reed. While the paint is still wet, I soften it a bit here about the same distance
as the previous branches. To sum up, each time, we create the smooth transition from warm light to intense toes. The larger the object,
the easier it is to. On small ones, like
in this sketch, it is a bit more challenging, but once you've cut the
idea, it's quite manageable. Branches that are further from the sun are darker
and cooler in tone, but make sure that
the to the sun, the lighter the to. That's it, Let's remove
the piece of paper, our paper sun and look at the
thumb nail from a distance. We have painted three
different examples of sunlight during sunset trees. But each one features a transition in of
temperature and intensity, which is the secret to
depicting the shining sun. As I mentioned, sometimes
during the painting process, it might feel like
something is going wrong. Don't worry that's
absolutely fine. It means you need to
take a break and then look at your work from a distance with a
fresh perspective. You will see the glowing sun and feel the warmth
emerging from the sketch. In the next video, I will
clearly demonstrate how to choose of color scheme effects
on mood of the landscape. Then we will move on to
creating a large illustration.
9. How to Create a Mood in Illustration: Another trick that I want to show you is how the choice of colors influences the mood and atmosphere of
the illustration. Let's say I'm
painting a landscape. I have trees in the background somewhere
far away from us. According to the rules
of aerial perspective, they should not be bright green, but softly muted with the
calm bluish tint like this. This is trunks. Mm hmm. And in the foreground, there will be greenery. Bushes, grass,
something like that. It really doesn't
matter what is it. Now I'll paint the
same landscape, but in the background, I'll use warm tones. Yellow wish and In both cases, the tone of the trees
is transparent. Mm. In the foreground, it is still the same as in the first case,
lots of greenery. What feelings? What
impression do you experience looking at
these two options? Here, it feels more like
a cloudy overcast day. And here, it is
completely different. A soft evening sunlight sunset. Hanging just one color
ingredient changes everything. The colors of the trees have
completely changed the mood. Well, we've practice very well, painted three
different examples. We explored the influence of color on the mood
of the landscape. Let's move on to the most
interesting part of this class, creating a worm cozy illustration
with magical lightning.
10. Idea and Composition : All right, let's
get started with the most interesting
part of this class, creating a whimstical and
vibrant illustration. Finally. Here, I have
two sheets of paper, both size A three. One of them should be
watercolor paper and the other can be any type of paper as it is for
graphite drawing. To begin with, I'm
going to show you the overall idea of the
illustration that we will create. This is a small thumb nail, a quick graphite sketch just to explain the
composition and idea. I'm dividing my sketch in half, and then in half again. Then I'm dividing
the upper part into two equal sections and
the lower part as well. In the illustration, there will be a background with trees illuminated by golden light positioned just below this line. In the right half of
the illustration, there will be two large trees. The sun will be here. This is the trunk
of the first tree, and the the branches. I'm sketching very
roughly right now. And here is the second tree. Remember, the second exercise where we painted
two tree trunks. This similar situation will
be in our illustration. These are the branches. Here will be greenery under this line with two
large brushes here. This is where the
character will be. I encourage each of you to draw your unique
character here to make this illustration truly personal and reflective
of yourself. For me, it's a girl
with a bicycle just because when I was
designing this illustration, I was planning to buy a bicycle. And imagine myself
in such a way. This part will be in a shade, while the trees in the
background will be illuminated by soft evening
light. I have a phota. It doesn't have exactly
the same lightning, but kind of just to give you the idea of
how it will look. The foreground is in shadow
with cool green hues, while the background
is illuminated with warm light,
warm colors there. So there will be trees and
branches in the background, they will have a gentle
golden hue and look more like an azure pattern
rather than real trees. One more tree here, there will be lots of trees. All are different. The canopy will have a proper
ferrical shape like this. There will be various details in the foreground to make it
interesting to look at. I will explain each step in great detail so you can paint it easily and
enjoy the process. Even if it feels
challenging now, you will definitely manage it. Don't worry. The graphite
thumb nail is completed. It was needed only
for explanation, the idea of our illustration. I've prepared a very clear and
detailed graphite drawing, which can be found in the
classes attached materials. You can download it
and use as a guide. Here are two huge mighty
trees with lots of branches. Here is the sun. Light will spread from
it, from this place. This line marks the
boundary of the background. The trees there will be fill all these space like a pattern. They will be very
delicate and transparent. So we will paint
them directly with a brush without
preliminary pencil lines. Next, there is this tree. You see its canopy is literally marked
with a round shape. The main character
in the next video, we will discuss their design. Bushes and cute,
tiny birds here. Please find this drawing
in the attached materials. Now let's move on to
designing the character.
11. Character Design: Now, we are going to design the character that
will be placed here. I'll do my best to help you draw the character you really
want to see here? Let this illustration
this story be about you. Let's take a separate piece
of paper and imagine you have a chance to live inside the
illustration for a while. Immerse yourself in
a beautiful place with lots of greenery, blooming flowers, fresh
air, and magical lighting. How would you look? How
would you want to feel? What emotions would you
like to experience? When I was designing
this illustration, I really wanted a bicycle. So I do myself walking through the park
with a bike in my hands. I use this kind of
visualization quite often, drawing what I truly
desire to come true and believe it or
not, it often works. And it's not about
magical thinking, it's about paying attention
to yourself, your feeling, your dream and experiencing desired emotion during
the creative process. Our brains don't
distinguish between emotions from the imagined
picture and from real life. This helps us achieve our
dreams because mentally we've already lived through them and believed
in their reality. Try not to overcomplicate
the character. Keep it simple. I know from experience, it's easier to say than done. In this video, I'll draw a few characters to help
you create your own. I'll use a soft pencil
to make the lines bold, so you can see them better. Draw yourself in the outfit
you want want a new dress, draw yourself wearing it. Or maybe you want a new hair style or
something like that. Mm. Here is the girl I've got moving on to
the next character. Maybe you dream of having a dog. Draw yourself walking the dog, choose the specific
you've always wanted. Mm hm. It's hard to see my drawing at the
edge of the screen. So I'll move it up and make the lines bolder and more
visible. Just in a minute. Mm hmm. Okay. The girl is wearing a beautiful
summer dress. So do. All right. Let's draw the next character. Perhaps you dream of becoming
a m or n. In this case, a baby out to you. Keep it very simple
and schematic. H. H. Draw yourself bending
over the child, imagine you are smiling at
them or talking to them, what would you be talking about? Think about it. Try
to feel the moment. I'll scan this sheet and the sketches will also be included in the
course materials. If any details are unclear
while I'm drawing, download the image for
taking a proper look. Let it be such a sun dress or jumpsuit,
something like that. Mm hmm. Perhaps you dream of
meeting a person, a soul mate, want, love, and warm relationship, draw yourself and your partner
in a way you envision. This couple in love took me three attempts to
draw them nicely, and that's absolutely okay. When I draw, I always vividly imagine the
feelings of each character. It's amazing and
truly therapeutic. When characters are so small, you don't need to
draw facial features. Everything is clear
even without them. Nice. What if on the contrary, you feel like being alone, sitting on the bench, peacefully, reading a book
without distractions. As for me, I really
really want to do this. I've already illustrated it. At the end of this class, you'll find a bonus video
specifically about this. In it, I'm painting in my
sketchbook that video perfectly compliments this
class because it features all the topics
covered in this class. Golden hour lighting,
a warm atmosphere, lots of greenery
and a character. Ensure to check it out. What book would you like to read while sitting on
the bench in the park? It's a really good
question, by the way. Imagine you're in
no h and enjoying a quiet evening and your
reading time. Such a pleasure. Oh. Thank you. Let's erase the
unnecessary lines. Here is the bag or backpack,
something like that. So now, it's your
turn to draw a dream. Listen to yourself and leave
your wish while drawing. In the next video, we will transfer the graph
onto the paper. See you.
12. Transferring Graphite Drawing to Watercolor Paper: So I have the detailed
graphite drawing and I hope you have it as well. Each of us has developed a unique character according
to our own preferences as we wanted it to be as essential tip to mention about
drawing or painting trees. Thing is, I hardly ever draw
trees from imagination. I usually use phota references. For creating this
particular illustration, I use this phta as a guide. I will attach several photos of trees to the class
materials. Check it out. I look at these trees and draw
trees in the illustration. I don't replicate them exactly, but I observe how the
branches look how they bend, how they are arranged. This is something
you can't imagine in such an amazing and beautiful
way as nature does. Next, I look at these
birches and draw this tree. Here, it's important
for me to notice how beautifully the trunks
are arranged. To sum up. I use photos as references, but I don't copy them. I take only the elements I
need for the illustration. Will use these trees to draw the background,
this area here. Please find my photos attached, and by the way, you can use your own photos
of your favorite places with trees to make this illustration even more unique and personal. All right. Now I'm going to transfer all of these
onto word color paper. This is a three size. It's better not to use a smaller size
because in this case, our character already small
will become really tiny. Yes, many people are hesitant to paint on
a larger formats, but often it is way
easier than they think. Look, when I make a
graphite drawing, I use an erasor quite a lot. I don't like how the eraser
affects watercolor paper, and I don't want pencil marks
on the final illustration. I usually draw the pencil sketch on a separate
sheet of paper and then transfer it to the watercolor paper using
a light box or a window. So I've tapped two sheets
together here and here. On top is the watercolor paper and underneath is my
graphite drawing. Now I'll go to the
window and carefully transfer the drawing onto
the watercolor paper. Can you draw the graphite drawing directly on
watercolor paper? Yes, absolutely, many
people do it that way. It's perfectly fine
and up to you. I'm just showing you how
my creative process works. This is what the transferred
drawing looks like. The lines are light,
but really noticeable. Don't forget the paper son, and let's move forward. In the next step, we will apply masking fluid to the areas that need to be
protected from paint.
13. Applying Masking Fluid: All right. Let's get stated. I'm always keep my detailed
sketch handy in case some of my gentle pencil lines become hard to see
because of paint. The first thing to do is apply maskin fluid to
protect the character. I need a brush that
I'm okay with using only for masking fluid
because it can ruin brushes. Unfortunately. I
highly recommend having a brush dedicated
solely to masking fluid. I need to cover and
protect the goal. The birds and the
birch tree trunks. I'm starting now being
very careful as I cover all the areas where the paper should remain
untouched and white. Oh. Next, I need to apply masking fluid to the
birch tree trunks. I'm covering only the lower part of the trunks below this line. That's because there will
be a light background here and we'll simply
paint the tree over it. And over here, it
will be a dark green. To keep the trunks, we need to protect them. Okay, Don, now we just need to wait for the masking
fluid to dry completely. Look, if for any reason, you can't or you don't
want to use masking fluid. There is an option to draw your character on a
separate piece of paper and then in the final stage of
creating the illustration, glue your character in place. In this case, those white
areas that can't be cut out will need to be
painted the background color. So you would first paint the entire illustration
without the character. And then simply glue the cut out character onto
the desired position. Now let's move on
to the next step. We'll start painting with
watercolor. Finally.
14. Painting Background: The very first water color step is to paint the trees
in the background. This area is illuminated
by the setting sun, so it will have a gentle
light golden color. Let's mix the right color. I need a bit of cadmium yellow because the tone will
be light and transparent. And a drop of cadmium red. Mix it well and add
some clean water. Mm hmm. And then add a touch of ultramarine blue
to calm the shade. Mix it thoroughly. A little more red and
diluted with water. Let's test the
shade on the paper. Not quite right. Perhaps a bit more yellow would be better. Mm. I like this shade. Let's begin. I'll start
by filling in this area. I will refer to this
phta while painting the trees to capture the
character of the branches, the curves, and the arrangement. This ph is in in the
attached materials. I Here is the bottom line where the trees
will be positioned. To make it easier for myself, I've placed an extra sheet of paper so that it's each
aligns with this line. Mm. I'm holding the brush
in the very tip very end, further back than usual. This makes it harder to
control my movements, resulting in a
slightly unevel line, which is exactly what I need
for painting these trees. Try to relax your hand. It's impossible to paint
uncorrectly right now. The tone of the paint is very light and trees
can be any shape. You can't make a mistake. It's simply impossible. Relax and paint. The more uneven the
lines, the better. The branches intertwine, which can look like a
pattern of lines. Oh, Now, this is an important point. This is where the sun will be. So we need to leave
that area untouched. I'm washing the paint
from this place, so it should be
completely white. 00 Note that I'm not focusing on the two
large trees right now. We will paint them in the next in the next video
on top of this one, and they will be. Okay, perfect. We need to wait for this layer to before painting
the large trees. See you in the next video. A
15. Large Trees: The next step is painting
these two large trees. Again, I'll need a reference. I have this phota that I'll refer to while painting trees. I won't copy them entirely. Instead, I'll take the details, movements and shapes of
the branches that I need. You can find this ph in
the class materials. For the trees, I need to mix
a rich, dark, brownish tone. I'll use garium red, quite a lot of red,
and ultramarine blue. Mm. Now I'll thoroughly mix it. No everything just enough to achieve a saturated
reddish brown shade. There is more red than
blue in my mixture. All right. Let's test
it on the paper. Good color, but I want
to add a bit more red. Yep, this is the shade I like. I also want to add
a touch of yellow. Notice I'm mixing the yellow only on the one
side of the palette. The rest remains untouched. This is just to have
some variability. If needed, I can add more of the ultramarine that's
already on the palette. Now I'm making
myself comfortable, adjusting my work space,
removing unnecessarily ems. I want to place something under my board because the paper size is quite large and I need a slight tilt to
view it correctly. All right. Next, I'll
take a large flat brush. You can use any brush
that's comfortable for you, just not a small one
and get started. I remember about the son. Where is my paper? Okay.
I'll place it here. Since there is just a little
bit left until the sun, I'll take a smaller brush
to paint more carefully, diluting the paint with
water to lighten the tone. I'm painting right
over the first layer, the background without paying
attention to it at all. Now I need a bit of yellow. I'm creating a smooth
color transition. Make sure there is
plenty of water in the paint so it
doesn't too quickly. I completely wash off the
pigment and blend it into the. Okay. While the paint is
still wet, I continue. Look, there is a branch here. Again, make sure there
is enough moisture here, so the paint doesn't out I
will be working on the branch. I'm adding water here
to create a gradient. Remember the round shape of the sunlight area that
needs to remain untouched, softening the edge,
blending it gently. The next branch, look the each
of the paint is still wet. I always keep an eye on
that. That's essential. I'm holding the branch by the tip to make the
movements imperfect, ensuring the branches turn
out slightly crooked, just the way I want them. Continue to paint the trunk. The paint is still wet, so it runs smoothly. All right, the first
tree is done. Oh, wait. I need to finish
this little branch. I'm starting with a very
diluted transparent. And then transitioning
to a saturated color. Now the tree is completely
finished, Let's move on. I'll work on these branches now. Light tone, soft each. Now from this side, Oh. Here, I should paint
the branch gently because it's on the edge of the area that should
remain untouched. Mm. And here, I'll add a touch of blue to make the tone
slightly cooler. Here is still this branch. It grows from the trunk. So let's start with it. I'll begin from the
top and work my down. I'll please the person
here to understand where I need to make the tone lighter and where I can
paint confidently. Oh. Mm hm. Here, I'll make
it slightly lighter and. Not very noticeable because
it's quite far from the sun. Nope, I'll paint this
branch in the same. Towards the bottom here, I'm making the tone cooler. Oh, This branch is
illuminated by the sun, so I'm making it lighter and. I ensure that the illuminated
part has a radial nature. Oh The trees are
almost finished. I just need to add
some small branches. I'll take a thin brush and
holding it at the end, delicately add branches
in various places. To make them look
natural and realistic, I'm referring to the p and noting the
arrangement of branches. Some branches are slightly lighter while others are darker. So I think I'll stop here. The trees are done. Did you notice how
the sun shines? In the next video, we will paint this part the vibrant variety of green
strife. See you there.
16. Greenery: Look, since we're moving
on to shades of green, I highly recommend going
to change the water. Clean water is essential. I'll set this palette aside for now and take two clean plates. Move my watercolor set. Closer. Okay, I'm
ready to continue. Just reminder, we are now
focusing on this part. I need a dark green
shade for these bushes. Here, there will be spots that will be slightly
lighter and here, there will be a strip of grass. So I need a rich
dark green shade. I'll pick it up directly
with this flat brush. The specific name of the
paint isn't crucial. Use any dark cool green that
you have in your palette. I carefully put the
paint onto the palette, picking it up again
and apply more. This is the shade
of green I have, and you can add something
to it if you like. Okay, I'll set this
brush aside carefully. It holds a lot of pigment, so I won't rinse it now as
I'm going to use it later. Next, I need to prepare
a light green tone. I take another brush and mix
a different shade of green, which is warmer,
brighter, and lighter. The brush holds plenty of water. To achieve a saturated tone, I need to immerse is
thoroughly into the paint. This is olive green hue. I put the paint on the palette, then I add more water to
pick up more paint again. I intentionally didn't speed
up this video or cut it out to show you
that loading paint and achieving a saturated
turn takes time. Beginner artists
often end up with very pale paintings because these moments of loading paint isn't clear enough for them. Well, I have two
shades of green. One is dark and cool, and other light and warm. Everything seems ready to begin. I just need to make sure. I have a container
of clean water. I've used this one when I
was preparing the paint. Now I'll change the water. All right, let's start. I need a large soft clean
brush for wetting the paper. Very gently and carefully, I'm watering the each where
the bushes tops will be. This needs to be
done delicately, especially where
the dark trees are. M m. Very carefully. I'm removing excess water. We don't need puddles
here, just damp paper. Mm hm. Perfect. Let's
start painting. I'll tilt my board slightly
so the paint flows downwards. Notice how the ch becomes
beautifully soft. F. Now I'm using another shade of green
to paint the grass. I believe now it's clear why
it was crucial to prepare the paint mixtures beforehand to paint quickly while
the paper is still wet. If you are using high
quality carton paper, you have more time because
it says wet longer. There are smaller bushes
that are closer to us. I'll add some cadmium lemon to brighten slightly this area. Notice how one shade
of green smooth, beautifully transitions
into another. Here, I'm outlining the
borders of the large bushes. They are illuminated
by the sun from above, a couple of strokes here. While the paper is wet, it blends beautifully, and the shades transition
smoothly into each other. Now I need to wait for the
greenery to dry completely. In the next video, we'll focus on the birch tree. Yes, we have so many
different trees and shrubs here. That's true. I've noticed some areas where the paint has formed runoffs. That's perfectly fine. There is no need to
fix it. Don't worry.
17. Birch Tree: Now the paint has
dried or almost dry, and we can start removing
the mask in fluid. Do it very carefully and gently to avoid
damaging the paper. Mm. While the greenery
is drying completely, we'll focus on this
tree, the birch. For this, I need a, then what we have here. I'll add and dilute it with water. I believe this shade
will work well. Look, our light source is here. So on this side, I'll paint the branches with a cool shade and
on the other side, they will be warmer. I'd better switch to the
branch with a fine tip. Here, the shade is
warm and light, but darker than the background. This tree also has
a reference photo, which is included in
the attached materials. When painting a tree, keep in mind that there lively
and irregular you make it, the more natural and
interesting it will look. Don't be afraid of crooked
or inaccurate lines or of making mistakes,
embrace imperfections. Oh. Note that the tone of this tree is more saturated
than the background, and the branches are
thinner and more frequent. This helps it stand out. However, it is lighter than
these two large trees. With about half
of the tree done, I'm starting to
add cooler shades, especially towards the bottom. Oh. I want to add more
branches to make the patterns than the
trees in the background. I'll stop here. For now, I'll come back to
this tree litter when adding the final touches. We will add some fresh leaves and do a bit of pencil work. As the layer of
greary has dried, so let's move on
to the character. Let's make the bright
and notice. C.
18. Bright Girl: Well, it's time to work on the character to bring my goal, your goal to life. First, I'm removing
the masking fluid very carefully, taking my time. Mm. The same for the birds. From here, it's all about your imagination
and preferences. How do you envision
your character? Mm. I want my girl
to be vibrant. So I'm mixing a rich orange to make her, her jacket bright. I'm using the same colors, Cadmium red and cadmium yellow. Mm hmm. Perfect. I want her skirt will be
yellow, greenish. Feeding in lemon at the bottom. Such vibrant colors. Mm. This coat is also completed. Face and hands the same
colors from the same palette. Mh For the hair, I'll transition from a
dark tone to a light one. Look, the face doesn't have a
clear, beautiful shape yet. So I'll take a dark
green and correct it. Okay. Now let's move
on to the bicycle. What color do I want it to be? I want it to be pink. I've squeezed some white guage
onto my palette and mixed it with red paint to get
the perfect shade of pink. I use white gouache
only for details. In all other cases, I prefer mild water
colors to remain light, transparent fluid
and utf flowing. Later, I'll add some touches to my character with
colored pencils. But for now, I'm
creating the color base. Now, a bit of dark color. Let's use blue since it's
already on the palette. Shoes. Bicycle handles. All right, I leave it like this for now, it's challenging to work on such a small
character with paint, so I'll switch to colored pencils to add
details and clarity. L et he jacket, have a playful
polka dot pattern. Now I need a dark color. I have a dark brown, but any dark shade wheel work. I'll use it for the
bicycle wheels. Make a bit dark on the girl and the bicycle to connect her
with the surface she is on. Birds. They will look a bit old, I think, but I like it. They are poking at something. Mm. And I'd like to add
stripes on her skirt. And a few details on the wheels. I think the gal is detailed and beautiful enough.
Let's move on. Let's take a fresh look
at the entire piece. Yes, I like how the goal stands out against
the green background. The illustration is done. We just need to work
on the greenery, adding some details to make
it interesting to look at. See you in the next video.
19. Adding Spectacular Details: Finally, I'm now starting
my favorite part, adding interesting
and cool details. First, let's show that
there is a path here. I need a white pencil or any other material that
provides a fine white line. Separate the go from the bushes. She is walking beside
them, not through them. This, I'll draw a
decorative little fence. Simply without
going into detail, the pencil gives a noticeable
but not too bright line, and that's perfect
for our purpose. The fence is there, but it doesn't
stand out too much. All right, De. Now I want to add a touch of softness to the
top of the bushes. Remember, they are lit
by the setting sun. I place the pencil on its
side and draw a soft edge, making the bushes
look fluffy and cozy. I need a pencil
in a light shade, something like yellow
och or light brown. Such warm colors. Mm hmm. Here, I would like to
make a bit darker. A pencil over watercolor creates an interesting texture and
I really like outlooks. All I'm doing now could
be also done with paints, but I love adding final
details with colored pencils. Look, here I have two bushes. I won't highlight them
since they are in a shadow, but I will add some details. Let's make them flowering
blooming shrubs. I'll use white gas again to create delicate pinkish flowers. They look pale, almost, so I'll add a bit more. This hue is better. Create the flowers
playfully, sketchly, just to help define the shape of the bush without
highlighting it too much. I'm adding some variety
in the flowers colors, making some of them pink, and others almost white. You see, when we add
details, flowers, the shape of the bush appears standing out from the larger
bushes in the background. I enjoy creating this sense of and layering in
the illustration. I'll make some
flowers a bit larger, so they are not
all the same size. All right, this bush is done. Now let's work on the next one. Let's give it some
fresh green foliage. I'll take cadmium lemon and
mix it with warm green. Cadmium lemon is
slightly opaque. If you don't have it,
you can add a bit of white gosh to the
mix to make it opaque. These dots could be
light fresh leaves, or just the way the light falls. It doesn't really matter. Notice that the
density of the dots on the bushes various here, I'm making them more frequent. Then let's use a slightly
darker toon so the dots are less contrasting and
gradually feeding out. All right. This bush
is almost done too. I'll just add tiny
white dots to it. Okay. Now let's
create even greenery. Let's have some tall grass
growing behind these bushes. Make sure they aren't
just straight lines. Some leaves should
be slightly longer, sh, may be baned, growing with varying angles. Mm hm. And I'll add a
few light ones, as well. Well, and I would like to add some cute flowers in
front of the bushes. Let them be lilies
of the valley. Carefully, I'm going around the fence, those emphasizing it. You can draw these with
colored pencils if you find it difficult to paint such tiny
details with water colors. And let's add white touches for the lily of the valley
flowers. Believe it or not. Sometimes when I'm
drawing or painting, I feel I can smell fragens. It's like a magic. All right, this part is done. We've created the feeling of loose multi layered greenery. Well done for us. Now these small bushes are left. Let's work on them, too. I believe that's enough. Next, what I want to do
is to work on this tree. I need to add some young fresh
leaftd and create volume. To make this process
easier, I'll use a trick. I need a sheet of paper, any paper, even one
that's already been used. I'll draw here an oval, roughly the size of the
birch trees crown foliage. Maybe a bit bigger. In this case, it's better
to go bigger than smaller. And now I'll cut
it out this shape. It doesn't have to be precise. The exact shape doesn't
matter here roughly over. You'll see why I'm
doing this very soon. Place this piece of paper
here and on the side as well. And here, I need to protect
everything around this area. Now I need the palette
with warm green paint. I'll add a bit of *** lemon
and with light movements, I'm creating splashes of paint. This will be young delicate
leaves on the birch tree. Again, on this side, let's have a warmer
tone with more yellow and towards
the bottom here, more green, a cool tone because the light is
coming from this side. I need to apply quite a lot to make the spots look like a
noticeable mass of leaves. Add, if your hand
painted sports as we Mm. Now I'll take pure yellow and make some
spots from this side. Let's take a look
what we've got. Such a delicate light
translucent tree. It seems like we need to
add a few spots right here. That's done. Well, we are
very close to the finish now. Just a few very final
touches to be done. I want to define the tree
trunks a bit more sharply. I'm emphasizing them only on one side where
there is shadow. And that's it. Oops are
accidentally dripped here. I don't know if it is
visible on the video. I gently and carefully
remove it now with a brush. Well, now, everything
is definitely done. Let's take a look at what we've. I just want to the
pencil line here. H. Look, if for any reason you haven't
drawing the character, you can always add them to
your illustration later. In this case, you'll
need to paint these white areas in
the background color. Now, let's move on to the final video and review
all the work we've done. It's quite impressive. M.
20. Final Thoughts: So we did it. Let's recap. We have the background
and the glowing sun, the character, lots of greenery, and a delightful atmosphere. Congratulations.
Throughout this class, we've done numerous exercises, studies and learned a
lot about mixing colors. We've also developed our
own unique character. Please showcase your
illustrations, sketches, studies, and exercises, share your thoughts,
ask questions. I'm here, and I'm happy to
help and provide feedback. Take me on Instagram. You can find me there
as Oligo Banits. Thank you for having me. I love you all very much. Take care of yourself and
create with great joy. Goodbye.
21. Bonus: Sketchbook Painting - Girl Reading at Sunset: Hey, friends. In this video, I'm painting in my sketchbook. Here, I have the goal. I drew here and covered
with masking fluid. This will be an
illustration with beautiful lighting and
a unique atmosphere, which created a big
noise in my Instagram. The very first layer is
a warm green background. This is Cdnium yellow. I'll add some olive green here to achieve a very
warm sheet of green. This color is for
painting grass, illuminated by the evening sun. I'm adding just a touch
of red in my mixture. This is cadmium red. All right, let's start painting the very first layer
is super simple. Easy. Just grab a large brush
and enjoy painting process. We are focusing on painting the lower half of
the illustration, depicting grass illuminated
by the evening sun. All right, this
layer is complete. While it dries, let's mix the
color for the second layer. There will be a transition
from a very warm, light and diluted to
a dark and s one. I will use only three
colors for that. Cadmium red, Cadmium yellow. And ultramarine blue. Now I need a very
diluted warm tone. Yes, this one will work. Let's check it a
little bit more. Mm hmm. To make the
process easier for myself. I'll place the cut out circle
here just while painting. This represents the sun
and from this place, the illumination
will be distributed. Light will shine through
the branches of the trees. Around the sun is the most
diluted and warm tone, which will gradually become more and more
saturated and cooler. Let me show you and you'll understand everything very soon. Closer to the sun, I'm making the edges soft. This is the foliage of the
trees and the branches trunks. When painting trees, it's always better to look
at a photo reference. Just open any photo where trees are depicted and
use it as a guide. Painting or drawing trees
from memory or imagination can often make them look unrealistic and too
simply too basic. You can find reference in
the project and resources. O Gradually, I start making the tone and add. B. Add a bit more red here. You can already see
the gradient from the transparent yellow ish t
to the red one, can't you? It's better not to
with the bright red, so I calm it down slightly
and make it by adding. Gradually, I'm making
the cooler and cooler and creating smooth
transition from to color. Here, I still need. Oh. The edges should be soft, so I remove the pigment there. And gradually add the cooler. I truly believe that
these three colors. Cadmium red, cadmium yellow, and ultramarine
blue are essential. Their combinations provide
endless color shades to paint a white
variety of subjects. For example, white objects on a white background are also painted using these
three colors. I have a skill share
course on painting white where I talk a lot
about the neutral gray color. It is mixed from these
three colors as well, so they are and must have. Please note that hues become more saturated as I
move away from the sun. Towards the edges of
the illustration, the tone becomes der. M. The character, the girl, reading a book on the bench is protected
by mask and fleet, so I can paint with
confidence just above her. Now, look, I want to
create a lesy shadow here. The shadow from the
trees isn't solid. It has gaps, patches of flight. This is why I painted
the very first layer, which is warm green. It seems this layer
is finally done. Let's add some bright splashes. Just to make the
illustration look more natural, colorful
and interesting. Also, I'd like to mix a
rather dark and s. Turn to darken the bushes behind the g. They seem too
transparent now. Mm hm. Now this layer is definitely
complete and has dried. It's time to work
on the character, the girl who is reading. First, I should remove
the maskin fleed very gently to avoid
accidentally damaging the. Just a few graphite lines. This is the book to
help myself define the cloths and body parts
before moving on to the paints. Since I'm drawing
in my sketch book, this illustration is about me. The girl represents me, so I'm drawing my usual cloths, the red hoodie I have. I find it meaningful
to depict yourself in the way you want to be in surroundings and
mood you wish for. As for me, honestly, I am desperately lack
of calm time alone, time to myself to relax and
to reflect as a mom of two who recently moved to the UK and has to work hard
every single day. Painting myself in this
beautiful and peaceful place with cinematic lighting
makes me happy. It's truly therapeutic.
Believe or not, some of my imaginary
illustrations have come true. I've shared some examples
in my newsletters and will continue to share
it if it happens again. Steed. My girl is done, and I would like to add some
extra details around her. She is the center of
this illustration. The main focus is on her, so there should be more details around he making
it interesting to look at. The piece of paper protects
my girl from splashes, and let's make some of the
stains less saturated. And sleds at some
branches behind the goal. Pay attention that I used the brown pencil on
the warm background, then changed the car and used the dark green one
to draw in shadow. The light dots are like a
hint of the blooming bush, or maybe these dots
aren't flowers, but some leaves that are illuminated in warm light,
something like that. And I want to make this
area a little bit darker. Well, it seems it's all done. Let's take a look
at what we've got. Please share any
thoughts or questions you have in the comment
in the discussion tab, and don't forget to write
a review on this class. It helps a lot. Take care. By M.
 Olga Bonitas, Watercolour girl