Transcripts
1. Introduction: Hi everyone. Paul Richmond here
with my good friend. Hi everybody. We are teaching you
all about color. We're gonna be talking about value and How It Affects Color. We're going to be talking
about different types of Color Palettes. We're gonna be talking
about color wheel. We're going to
start at the basics and we're gonna
move up from there. So we're gonna make it
easiest to begin with. And then lead you gently through all the steps for using
color very gently. Learning the basics
gives artists a foundation to build on. Rules are made to be
broken, especially in Art. In this course will
go over the rules of color theory so you can decide how to incorporate them
into your own work. My name is Melissa Forman. I have been an artist
for as long as I can remember and always
enjoy creating. So I'm an Art Director by day. I work in the
commercial Art fields. I lead a team of illustrators for enlarged
greeting card company, but also a painter in someone
who loves mixing color and playing with color and experimenting with it
in all different ways. And I'm paul Richmond. I am in California. I'm a painter. I've worked primarily in oils, although I have experienced
with Acrylic and watercolor and well
pretty much all of them. And I show my work in galleries and have collectors
all over the world. And believe me, when I
tell you, I love color. Holly, ready for this? I'm ready. Okay. Let's do it.
2. Projects: In this course, you
better get ready because we're going to do a
lot, right, Melissa? Yes. We're going to throw so
much color as you yes. You're going to just
look like a rainbow. But at the time, and I'll be beautiful and
gorgeous each lesson, but pretty much will be
a different project. There are a couple that take two lessons but be
prepared to do a lot. And because they
are short videos, not everything we create in this course is going to be
a finished masterpiece. Although you certainly could continue working
on the ones that really speak to you
and make them into more evolved pieces
if you want to. But in this course
it's really about learning the concepts and
experimenting with color. Yeah, these are really
bite-size pieces of color theory and
how to use Colors. So you're getting a very
quick, short lessons, but they're gonna be, there's gonna be a lot of info in there. We are just found some knowledge and we're sharing
it with these to freely. I think it's really
up to you how you want to engage
with the course. If you want to paint along
with us each lesson, I encourage you to do that. But also, if you find that it's sometimes more useful
to just sit back, watch us, and kinda absorb
what we're talking about. You're welcome to do that, to really use this course and the best way that suits
your learning style. Yeah, these are gonna be
very quick, short lessons. You're going to do a
quick color sketch, explore color experiment
a little bit. The goal of this is to not create a bunch of
finished paintings. The goal is to just
experiment how Fun and explore the journey of
learning more about color. That's right, but that said, we would still love to
see your work and we encourage you to
share it with us in the Your Project section. Because I think it's
always interesting to see different people's
approaches Color. One of the things you'll
notice in this course is Melissa and I both have very different ways of working with color and
thinking about color in there. So many different other ways
of thinking about it too. So sharing Your
Work will actually help to show more of that. So few things we're
going to explore. We're going to start
with the color wheel. We're going to start about
talking about color theory, about primary colors, secondary
colors, tertiary colors. We're going a little, learn
a little bit more about what all of those things are
and what that means. And then we're going to
explore using color. So we're going to talk about
different color palettes, different types of
Color Palettes, ways to talk about color, ways to explore color in
different ways. So many things. I am so ready. Melissa, do you want
to get started? I am so ready. Hopefully all of
you are alone on the journey with us and ready to get started
playing with color. By the end of this, you are
going to be a color master, not promising too much. Here are awake. Oh, no, not at all.
3. Materials: So what materials are we going
to need for this course? Well, Paul, we're definitely going to need some
acrylic paint. So I have my
Liquitex paint care. You can bring whatever
brand you have. So we are going to need the primary Colors and we'll go into more details
on what those are. But I have a read, I have a blue, I have a yellow and then I also
have a black and white. We have pain, we
need some brushes, so I have a mixture
of brushes here, so something larger
to something smaller. We want to arrange.
Don't want to Palettes and mix your colors on. You can use actual
Palette Paper, use with a round plastic
palettes that have little wells. And then I also want
some paper to paint on. So this is watercolor paper. You can have a sturdy paper, whatever you have
on hand will work. You also need a
cup for water and some paper towels in
a Palette knife for Mixing if you're using paper or flatter surface
for your Palette, and then you'll need
a pencil for drawing
4. Primary Colors: Our first lesson is all
about Primary Colors. So that's why you need the red, the blue, and yellow. So this will be come in handy as we start our color wheel. So we're going to be creating a color wheel that will help us build on our Color knowledge for the rest of this class. Oh, some Primary Colors are the three colors that
make up any other color. They can't be broken
down any further. It's kind of like
a prime number, like you can't break it down
any further than what it is. So let's say it's too soon
to start getting all math. Sorry. The first
thing I thought of, I didn't mean to
be math into it. I'm so sorry. Most people have heard
of the primary Colors. We know what the primary
Colors are there, red, yellow, and blue. So I have my paint
with me here today. I've Primary Red, funny enough, primary yellow and primary blue. And we're gonna be
using these today to start making our
own color wheel. So the reason they sell
these colors in basic sets, as you can use blue or yellow or
red or combination of two of them or three of
them to make any other colors. So if you are making
Art on a budget, these are the three, right? Start with this. You also usually get
a white and black because those are kinda
the absence of Color. And you're gonna
need those to make anything a lighter or darker, which we'll talk more
about that later. But that's why usually
in a basic set, you get the white, the black, the yellow, the blue, and red. So we're going to draw
this color wheel, right? It I'm sure knowing Melissa, she has some tools that she is using to make it
absolutely perfect. What are we doing? I can't help myself,
you know this. Alright, so the first thing
I have my hands like lightly sketched out here just so I I had a plan going in because, you know, I like to have a plan. It's kinda my brand. So I just this sir, killer Palette, I'm just
going to use this to trace. I'm not going to put
paint in it yet. But I'm gonna pull it
this places on my paper. I have my watercolor paper here. I have a drawing pencil
with me. I have a ruler. So you probably want
to get those out. So I'm going to
place this Palette on my paper just
kinda in the middle, so I have room to
work around it. I like to have it
exactly centered. Now for those of you
who are not like the perfectionist
level of Melissa, It is also completely okay
for your circles to be wonky, lines to be uneven. As long as you
understand the concept. Yes, that's totally fine. So for anybody out
there who's a hot mess, I'm here to represent
representing everyone today. I had my circle drawn me to. The next thing we're gonna do. Of course, I spent a lot of time thinking about
how I could do this perfectly and I didn't come up with an easy solution. But the next thing we're
gonna do is we're gonna divide this circle into
three somewhat even parts. All right? And the easiest way to do
that I think is just fine, like mark them center
of your circle. And then you're
almost making like a peace sign without
that bottom crossbar. You're going to divide
this into three parts. The kind of looks like a weird peace sign
or a Mercedes Benz. I'll draw mine and
you can watch. And Paul will be
working on his as well. You lost me with the cart with the Carter reference,
but I know, right. I'm bringing in math and cars
and all sorts of things, just alienating everyone
who even Ru rate. You can use whatever
materials you want to do this to where we're moving using
acrylic paintings. But if you would rather use colored pencils,
watercolors, whatever. One little trick, we'll
call this a pro tip. So I have some tape with me. If you're having trouble finding the center of your circle, choose the widest part
and put some tape down. And then trim your teeth so it reaches the edge
of your circle. So it's kinda like the
same width as your circle. You're dividing it in half. And then take that tape
and just fold it in half. So stick it down, folded over, and then crease the
center when it's exactly hold it in the middle and that will tell you exactly where the center
of your circle is. So you can mark that before
you start marking it off. And then you could
also use this to kinda measure out
different sides. If you want to use this to draw your lines, you
could do that too. Can we pay meal? I think we can pay now, yes. Okay. What are we
starting with? Red. You can start with
whatever color you want. If you want to start with red, Paul, you can start with red. I picked yellow. Oh fine. Now you're the boss. So we're just going
to put a little bit of paint on the Palettes and yellow and red and
put out simply what? I'm just going to
use the same Palette than they used to
trace my circle. You can use whatever you have. If you have a paper plate. If you have a Palette
that you'd like to use. Wax paper works really well. Put it out a little
bit of each color Hello, reason I'm starting
with the yellow is because if I go over the lines, it's easy to cover up. And I just picked red because
I thought it was pretty. Here's a question before it, before I start painting, is there a certain order
that these have to go in? You only have three, so you don't really
have a lot of choices. So one has to go next
to the other two. You have to put them down
and just go with that. And what you have is what you
have options at this one. We will You'll see
as we move forward. And the reason Paul
asked that is because we will have to put things in a certain
order as we keep moving forward with
this color wheel. And it will be more important
where you put things in, how you put things down. But for this one, no, you just pick a spot and start painting and that's
what I'm doing. All right. So if you've never used
Acrylic paint before, you probably want
to get your brush a little bit wet first. It tends to flow a
little bit easier. If you have a wet,
slightly wet brush, you don't want it
dripping because then your paint is going to just run all over the place but a little bit of
water will be helpful. Yeah. And also if you thin
it too much with water, the color starts to change too. You don't get that yeah, intensity of the color. So yeah. So we want bright
color for this. We want pure color. Yeah. Yeah. And clean your brush
out in-between colors just by swirling it around in some water and then wiping it off on a paper towel? Yes, definitely. So that's
definitely important. You don't want to
mix the colors at this point because you just want that pure color in there. Some of the acrylic colors
are a little Transparent, a little bit see-through
when you put them down. So if you feel like
you put the red down and it's not really the red that you were hoping for. Feel free to put
second coat on it. I think just for the
sake of showing you, Paul and I will probably
just do one coat today, but if you want a
really bright color, I would keep going with more coats once the
first one is dried. Hang on to this color
wheel because we will be coming back to this in future lessons and
adding more to it. So put it in a nice safe space, maybe on your refrigerator. Beautiful. That's where you're
alright, ends up if you've done a really good job. So we're just using
all those lines we drew and we're just
filling in the shapes. Feel free to do the
edge your own pace, which usually Paul's is
much faster than mine. How many colors do you
have so far, Melissa? I am halfway through
my second one. Okay. Well, me to you. Oh, wow. With it that we
are in alignment. Did you start with a yellow or did you start with
something else? I started with the
yellow because I wanted to be just like Mullis. He does listen. All right. I'm done with my red now time for and I want to say that instead Paul is
going to make front of me, but just do your best
to stay in the lines. It doesn't need to be perfect. I don't know why you would think I would make
front of you for that? I have no idea. It's never happened before. You make me sound so cruel. Alright, there's my red to blue. If you have a different read, a different Ilona, different
blue, that's okay. I think on an, on the next
couple of steps when we start putting colors together
and mixing colors, you might get slightly
different results than Paul and I,
but that's okay. More about the
exercises of exploring color than it is about getting perfect
results at this point. Yeah, this will be
a good resource once we go a little bit
more in depth with it. But you can have with
you when you're working on your other Art
and refer back to and understand how to work with these colors a little
more. That's really our goal. We want to teach you
some of the basics and then show you how you can actually apply
that to your word. Yeah, there's so much
to learn with color. So really starting
with the basics, with the beginning
is really helpful. Yeah, because you can
just build on top of that to learn more about color and how to use it
more intentionally. I think like Art in
general, there's, there's a lot of rules
and there's a lot of things you can learn
to begin with, and then you can break the
rules later when you want to. And how you went to him of that? Yeah. That's false favorite part. All right. Yes, Beautiful. So hopefully yours looks
similar to colonize. Take your time. Feel
free to work on it. And we will see you
at the next step. Alright everyone, great job. We've learned a lot about
the primary Colors and how those work together
and what they are and what a color wheel is. We're going to expand
on our color wheel. So our next step is
Secondary Colors, and we're going to be adding to this color wheel that
we already created. So make sure you
have that with you and bring it to the next step. Fall. Are you ready? The more colors, the
better. Let's do it. Let's do it.
5. Secondary Colors: Welcome back to mastering
the Art of Using Color. And today we are going
to continue working on the color wheel that we
started in the last lesson. Only we aren't going a
little deeper this time, and we will be introducing
secondary Colors. You ready, Melissa? I'm ready, Paul, let's do it. Go. Okay. Let's jump
right back into this. Hopefully you still have, you are color wheel from the last lesson because
we are going to now build onto that and create
the secondary Colors. So the secondary Colors
are the colors that you get when you mix together
to Primary Colors. So to start with, take your ruler if you
want to be perfect, and divide each of
these sections in half. So I'm going to start
with my yellow section, find roughly the middle points and then draw another line. And they all do the same
thing with the blue and red. You can just use those
lines that you've already created and just continue
them across your circle, which is much easier than
trying to divide it in thirds, which was tricky last time. Now let's go ahead and mix up all of the colors
that will be using. So like I said, secondary Colors are made from the combination
of two primary. So I'm going to start
by mixing together red and yellow and clean
off my palette knife first. Don't want to get any
of that blue in there. Okay, So I'm gonna
take some of my red and scoot it up here. Red is probably going to
be the more dominant, stronger color in this pairing. So you might want to
start with a little bit less red and a
little more yellow. Just mix them together,
but you should end up with a nice
bright orange like that. Now if you're using one
of the plastic trays like Melissa is using
the Palette knife probably isn't going to be very helpful for getting
into those little wells. So you can also just mix
with your brush too. Yeah. What's their
whatever's easier. Yeah. Let's go ahead and mix all three
colors that will be using and then we won't have
to stop to do more of that. So we've got our orange, which is the combination
of red and yellow. Now let's make our purple. And that is from
combining blue and red. And if you're using
a Palette knife, you definitely want to wipe
the Palette Palette knife off before moving onto
Mixing the next color. Yeah. Don't want any
cross-contamination. We just want a
pure color here of two primaries together.
See what we get. And last, we are going
to do yellow and blue. Any guesses what
that's going to make? Fine. Big mystery. It's green. Gorgeous. If anyone is feeling like
they're they're back in kindergarten right
now, it's okay. Yeah. That is probably about my
mentality is perfect for me. Pro tip for today. If you have a brush that has
a nice flat edge like this, it could be a slant brush or
it can be completely flat. Those are really
good for painting. Shapes like this
when you want to clean edge because
you can just take that flat edge of the brush
and go right along the line. So I'm going to start
with the orange. So find your yellow section. And then the piece that is the closest to read is where
we're going to paint orange. So just paint it right
on top of that yellow. You to fool. So we're almost doing like
a gray dated color wheel. So you'll see is as we go
around the color wheel, it starts to feel like
a, like a rainbow, you know, and kind of the
Roy G Biv type of setup. So red, orange, yellow, green, violet, or purple
wherever you want to say it. This is very pretty basic but very helpful information
when you are mixing colors. If you are, for example, if you're trying to
Mix an orange to match something
that you're seeing that you're making
a painting of. And the orange just doesn't quite look like the
orange in your reference. You can, this gives you now some tools to think
about with that, you can ask yourself, does the orange Need to maybe be a little
more toward yellow? Does it maybe need a little more red to make it match
what I'm painting. Or will also be talking
more in the future about different values of each
color like darks and lights. So those are other
ways you can shift. Yeah, we haven't even gotten into using
black and white yet, which makes me, wait.
It'll be wonderful. But for now, we're
keeping it simple. So next I'm going to jump
over to my blue section. And I'm going to
paint the section of the blue that is
closest to yellow, because that is going
to be the green, which is what you get when
you mix blue and yellow. So go ahead and
paint that section. Just like before, if
you do a color and it feels a little too transparent, you can always do as
a second layer on it. Yeah, it might feel
that way this time because we're painting over
what we painted last time. So we're just going
right over that blue. So you might get a little
bit more of the blue showing through then you want. But you can, you can fix that
by doing multiple layers or you can add a little
bit more yellow to your paint just to
counteract blue. Just about finished
with my green. But here we go. Beautiful. This makes me want to go
play beach volleyball here. So cute. All right, and now I am ready
for my last color, which is the purple. And so that's going to go in the red section that is
closest to the blue, because that's what
you get when you mix red and blue together. Alright. It's also looking quite dark. It's okay. Yeah, that's okay. And honestly, it's just a
good guide for what you get when you mix these two
specific paints together. So actually we will be helpful as you're painting
something like, what am I gonna get if I put
this blue with this red? Oh, it's gonna be this
deep purple. Okay. Yes, it's not an
exact science because every tube of red is
a little different. Every, there are many
different shades of red. Some reds are more orange, some reds are more
toward purple. So what, depending on what
you're trying to Mix, it's good to look at your, your base colors and
try to understand what, Where would they fall on
this color wheel and how will that affect what the
combo will, will look like? If you're using a
very orangey red, your purple is probably
going to look more brown. Yeah, because it has
more yellow in it. So we'll we'll get
into that later. But if there's more yellow in that and you're going to
mixing all three colors. You're not gonna get a
true secondary color. You're gonna get something
that's a mix of everything. Yes. Okay, Let's do another little
clue here on the purple. Right? Beautiful. Awesome job, everyone. Now, hang onto those Color
Wheels for our next lesson, we're going to use
them one more time. As we introduced you
to Tertiary Colors. See you then, CSER
6. Tertiary Colors: Alright everyone, Welcome back. We are going to continue
working on the Color Wheels and finish them by adding something called
Tertiary Colors. So Tertiary Colors is
just adding the next step of Mixing color and
making a new color. So kinda like blue, green, red, violet,
all that fund stuff. Paul, Are you ready? That
does sound FUN. I'm in. Okay, let's do it.
So the first thing we're gonna do is we are going to divide each one of our sections of Color
here into halves. So I got my ruler, I got my pencil. I'm just gonna do
the best I can to divide each of these in half. Just draw a line
through each one. Very similar to what Paul
walked us through last time. But we're just going
a step further. All right. Okay. All right, Got it. So I have a second Palette
here because we're going to be Mixing about six more
colors this time. If you still have,
you're going to keep us busy. I know. Right. We want to do we got
to stay with me. I'm on it. Let's go. Yes, paul is gonna get
us moving forward here. So these colors are a little bit different because they're
not going to be pure color, so they don't have a
name on their own. So it's not gonna be
like orange or violet. It's gonna be blue-green, it's kind of a yellow green, it's gonna be yellow, orange. So it's a mix of each one. What we're going to be
doing more Last time, we kinda mixed half of
1.5 of the other half of red and half of blue
to get violet or purple. This time it's gonna be if
we're doing blue violet, it's going to be heavier on the blue and less than the red. So that's just the strategy we're going to use when
we're mixing these. So let's start with
this yellow, orange. So I'm gonna do a decent amount of yellow and a
little bit of red. I want it to be somewhere
in-between the orange I just painted and the yellow
that we started with. Got it. Let's make that up. We're going to mix all of these. And then if something, if you feel like you
start putting it on your color wheel and it
doesn't feel quite right. It has too much red in
it or it has too much yellow in it will
adjust as we go. One pro tip for
this one is to put a little bit of the
color you mix on the end of your Palette
knife or on your brush. And just hold it above the Colors and makes
sure it doesn't look too much like
one or the other. You want it to be standard stand on its own
against the tooth hallways, but it will be next to it. Yes. One thing to be
mindful of trivial probably always need more
yellow than you think. And probably less red and
less blue than you think. Alright, so got
our yellow orange. Next one we're gonna do
is our yellow green. So again, a lot of yellow. You might even want to put
a little bit of blue on your palette knife or a
little bit on your brush, and then mix it that
way instead of putting a whole job of blue in there because it can get pretty heavy. We will quickly overpower the yellow just because
it's a darker color. Beautiful. Here's my yellow
green. And again, wipe your palette knife off. If you're using a Palette knife, wipe it off in-between
Colors of using a brush, make sure you wash it out
really well in between Colors. Right? So the next one
would be blue-green. So this time or blue and
a little bit of yellow. Good. Next would be blue-violet. Trying to keep track of
these in my head and you're going I know I gave
you the hardest. Quite glad of that. Now, right? Give me
the complicated one. Alright, Paul. Yeah What I blow a little bit of red. Right? Next would be
a red violet, right? Right. Yeah. Please
tell me if I'm wrong. Okay. No wrong. You never know. I have to check this one, right. Everything. Oh, please. Lots of red, a
little bit of blue. Just put a little bit on your palette knife if
you're using it, we're, your brush isn't there because it will very
quickly take over the red. Remember, last one here? Yeah. You should be a red orange. So red with yellow, right? Okay. Little more red than you've
used in other oranges? Exactly, yes. Okay. And the yellow decided to
come out very quickly? Well, when it does,
exactly what I wanted. No problem. I'll
just add more red. It's fine. Melissa is just
demonstrating for you all. How do you deal with the view? Don't you appreciate that? You seem like you can
be a normal person. Just stop. Get to paint there. Yeah. So once you
have your colors mix, feel free to start filling
in the little shapes here. I will do that in 1 s once I fix my red orange that
decided to yellow. All right, sure, my brush, again, like paul suggested
in the last video, I'm going to use this nice
flat brush because it helps me so these areas in very cleanly. So where are you starting? So I'm starting with the first one we mixed Mis
was that yellow, orange. So I'm going to pick
the orange slice of the pie that's right
next to the yellow. And I am going to
fill that in with my yellow orange
that we just fixed. Alright? This is what might be tricky because it will be
pretty transparent. So this one might take
a couple of coats just to warn you ahead of time. Yellow tends to be
pretty transparent as a as a pigment paint. It doesn't matter what type
of paint you're using. Just the yellow tends to
be really transparent is just the way it goes. Again, we're just aiming
for something in-between the two colors we
already have on here. So that primary yellow and the secondary orange
that we already mixed. Your tertiaries are just a
step in-between the two. Blue, yellow or and then the other side
of the yellow. So the other shape that we drew within the yellow would
be your yellow green. This one, I'll probably
also be pretty transparent. Be sure to clean out your
brush in-between Cola. Yes, definitely. It will get very muddy very
quickly if you don't do that. One thing I do as I'm painting, as I tend to turn my
painting depending on, you know, whatever part
of it I'm working on. So it's easier for me
to turn this as I go. I'm going to angle my
hand and get in there. Feel free to do that. My yellow-green is
very transparent, so I'm going to paint first
layer and then I will go back and add more to that later. Next would be our
blue-green, right? Yes. That would be the other side. So leave that green in
there and then the pieces, the pie in between your blue
and your green. Blue-green This morning you
might have to let it dry before you can really see a difference between what
Colors and how close you are. Acrylic tends to dry
a little bit darker. Yeah, you put it on it also, there's just not as much of
a dramatic change because we're going in-between hallway. So when we started out
with the primaries, the red, blue, and yellow, those three Colors could not be more different
from each other, but now we're getting
into the weeds with it. Now. Next I'm moving on
to my blue violet. Again, just skipping
the balloon. And then your next piece
would be your blue violet, right next to that purple. Usually with the darker colors, It's a little harder to tell the step between the primary, tertiary and secondary colors
just because they are a little bit closer in value. We will describe that later. But preview. Then my red violet, my space in between
my purple in my red. And all of these
might take a second coaches because we're working over other paint underneath it. Yeah. I'm feel free to adjust to if
you're starting to see that the color scale to close and you're not seeing
a big difference, which you probably won't
see a huge difference. But if you're not seeing
a difference at all, feel free to mix a little bit more of whatever color you need. Like if it feel, It feels
too close to the purple, you're probably going
to need more red. If it feels too
close to the orange, you're probably
going to need more yellow in that yellow orange. So just depends which part
of the pie are working on. Okay, My last one here, which is my red orange. Look at all of these
cola, please. Yeah. So that is our color wheel
with our Primary Colors are secondary Colors and
our tertiary Colors. Hi everyone. Excellent job. We have some complete
Color Wheels and hopefully these are
really helpful for you because it tells you how to think about color and
different types of Color, how you mix colors. So the basics of how you mix
color to get other colors. But next we're going to discover warm color versus cool colors. It's gonna be like a battle
7. Warm Colors vs. Cool Colors: Hi everyone and welcome back to mastering the art
of using color. And today is an epic
throw down battle between warm colors
and cool colors. You ready, Melissa? Hi, I'm ready. Let's
do this. Let's battle. Okay, Today is all about
warm and cool colors. So first of all, let's just explain what
that actually means. Every color that you
use has a temperature. And the colors that
are on this side of the color wheel are
considered the warm colors. And the colors on this side of the color wheel.
What are those molars? The cool colors, Paul, Thanks, I've been working on it. Also, temperature is
something you can think about and use with each color. So for example, if
you're mixing a blue, you could make it go
a little bit more toward a really
cool blue or make it go a little warmer just
depending what you add and it even though it's still
considered a cool tone, but the closer that color gets to that warm side
of the color wheel, it starts to take on
a little bit more of the warm characteristics
and vice versa. Alright, so today we most
and I are both going to draw a very simple
little grouping of flower is very cartoony. And then we are going
to color them in each of us using a
different color palette. So which one would you like Melissa paul IN team
cool colors today? How did I know? Alright, I will be team warm. And for all of you
watching this video, you take your choice. You could do one of
each or you could just choose to work with warm
colors, are cool colors. But to start with, I'm going
to sketch out with a pencil. Very simple flowers and
losses during the scene. So we can both be doing
the same subject matter. Don't worry, your flowers do
not have to look like ours. You can make it as simple
or as complex as you want. Yeah, and this is just a
very simple demonstration of how to use warm colors
versus how to use cool colors. I think if you were doing
a painting in reality and trying to make something
look more realistic, you would probably use this differently, but this is just, just to show you
warm versus cool and what that can feel like and
what that can look like. Yeah, it can, it can completely change the feeling of a piece. I'm just finished
drawing the flowers. Holy cow, you are fast. Team pool needs to like move it because it's because
we're so warm over here. You didn't show. I love making everything into a competition.
I know, right? It's all the little
dots in the middle. B, so fancy, beautiful. And if you want to draw
something different or do something a little
more complicated, you totally can just practice
using warm colors versus cool colors and change
every color palette and just see what
that can feel like, see what that can look like. So I have three colors here on my palette that are all from the warm side
of the color wheel. So I have read, I have yellow,
orange, and yellow. So you can choose
any colors that you want from the warm side and refer back to your own color
wheel and mix those colors. Now at the start, what are you what colors are
you working with? Melissa? And I am t and cool, so I'm working with
three cool colors. So I have my purple here, which I mixed a little
bit of white in with that just for the purposes
of this demonstration, because this purple is very dark and allow for the colors on
the cool side can get darker, so it makes it a
little bit of white. So this is like my
lavender color. I have a blue-green and
then I have a yellow green. Beautiful. Alright, let's get started. Don't worry, it doesn't have to be accurate or realistic
color for anything. Just choose one and go. I'm starting with my red and
I'm using that on the stem, which is where already already feels like we're in another
planet or something. Yeah. I know. That's one of the fun things
about color actually, I think once you understand
how to work with it, it really frees you
up and you can start using more experimental colors in your work or use
colors where you wouldn't necessarily expect to see them Yeah, just teaches you to think about colors before
you start using them. So how are these going
to look together? Are these gonna work? Are they going to feel like
they go together in the end? And so if you think that through before you get started
really can help. Yes. And I think too, and this is something
that hopefully this little demonstration
will show you the colors that you do choose and the temperature
of the colors in particular, has a lot to do with the mood
and feeling of the piece. You'll see here, this is
a very simple example, but Melissa and I both drew
pretty much the same thing, but the colors will
make them each have a very different
feeling. Yes. I mean, you probably
are all aware what people say about painting certain rooms, different colors, and how that makes people feel and overall the mood of a color. Well, it's the same for artwork in it and it's something
to think about when you're planning
out of painting or drawing or whatever
you're working on. How is it going to
feel in the end is it doesn't feel the way
you want it to feel. Is it communicating what
you want it to communicate? Color is definitely an
important part of that. You can see it used
in every art form, really the colors that are, that are dominant
in a movie scene, for example, can make you
feel one way or another. I mean, color is very powerful. So this gives you everything that you learn in this
course hopefully will give you the information
that you need to be more intentional
about your color choices. In fact, I think that's a
good pro tip for today. Take your time at
the beginning of a project and think through the color scheme and what
kinds of emotions do you want, the colors that you choose
to elicit in the viewer? And we'll get into
that more later. I think we have a
session while role. We'll talk about creating
color palettes and how to put colors together and different types of
color palettes. But definitely something to think through whenever
you're using colors. Especially in this case, is how to warm colors make me feel versus cool
colors make me feel. Yeah. What am I more attracted to or what do I want to
use to communicate? What I am wanting
to communicate? When you are, if you're painting something
more realistic, chances are there will be a combination of
warm and cool tones. But this gives you just another way to look
at it and think about it. And if you're trying
to match a color and mix colors and
they don't feel right. You can ask yourself, do I need to change
something about the temperature of
the color to make it more like what I was going for. All right, I'm just painting
my little petals here. This is quite a bright, happy little bunch of
flowers that I've got going, how are your flowers
feeling, Melissa? Nine are feeling very calm
and relaxing, which I love. Mine are ready to go
to like a dance club? For sure? Yes. Full of energy. Yes. You can say a lot
about yourself. The colors that you
choose to wear also, color is every, everywhere. People who are
designers and artists, you almost can't even turn
off that part of your brain. You are always looking at an analyzing color
combinations everywhere. Yeah, that's true. Color can be really inspiring to me and I think a lot
of people see that, but don't really understand why. I mean, when you stare
at a sunset and you see all the beautiful colors
together, it's really inspiring. Yeah. And that's just because
of the way the, those colors work together. Yeah. Color is all
about relationships. It's color is very relative. It'll look one way, it next to other colors. Then you change that and it can make it look
completely different. Yeah. I'm just about finished here. Yeah. Just need to finish
these little petals and then I want to do my
little dots in the center. Just finishing up my stems, getting those in here, the dots. And then we'll be done. Another masterpiece. And then you'll be able
to see the difference between how Paul's
fields versus how mine. Yes. My fiery little flowers. Yes. And then this is
very chill. Flowers. Yeah. Decide whether you are
team cool or team warm. Warm all the way. Go warm. All right. So finishing up walmart
dot and then I'm good. Okay, alright, let's
compare these beauties now. Look on your screen and see the differences between
Melissa's painting in mind and how drastically different
the feeling that comes across is just based
on the simple color choices. Great job everyone. Tune-in for our next lesson where we are going to be working with saturation
versus neutrality. You read the most I already. Okay. See you then
8. Saturation vs. Neutrality: All right everyone, let's
start the next lesson. So we're going to be
talking a little bit about something
called Saturation and something called neutrality and the difference between each. Paul, Are you ready
to explore this? I am so ready. Okay. Let's do it. Come on, everybody. So today we're going
to talk about, I don't know, maybe
something that not everybody is aware of, but this is something that you use a lot when
you're playing with color and doing different types of Color and trying to get a different feel as far as
how you're using the color. So this is something
where we're talking about saturation of a color
vs. Neutrality. Neutrality is just the lack of a hue or the
lack of saturation. So it's more of a gray. When we talk about that, we usually talk about a 50% gray, which is half white, half black. And that's kinda the, the pure Neutral Gray that you're
going to use as the, the absence of color, but also a nice mid-tone when
we talk about mid tones. So halfway in between the
darkest and the lightest. And then when we talk
about saturation, That's the purest color, the brightest version of the color that you
could possibly get? My favorite, yes. So it's my personality versus Paul's Personality
talking about today. Okay, So the first
thing we're gonna do is we're going to
draw a value scale. And Paul and I already have this sketched out so you
can take some time, pause the video if you
need to and draw this out. Basically we just did five different squares
next to each other. So just kind of a long rectangle divided into five pieces. So draw that out. We're gonna do a scale of full saturation of
a color all the way to a very neutral version of a color just to show
you how this works. So pick your primary color. Paul has picked one color, I just picked another in
going with red today. And I am going with blue. Yeah. So if you want to go with
yellow, that works too. You can do something
different than the two of us, or you can try red or blue. So the first thing
I'm gonna do is take my white and my black, and I'm going to Mix
equal parts to get that 50% Neutral,
perfect Neutral Gray. Okay, so you can use
any Palette you want. I'm using my little white
pellet that I always used just because I
feel like with Acrylic, the color stays wet
a little bit longer. I'm gonna try and
get to dabs of paint equal amounts and then mix those up before just gray, beautiful. Do we get the
payment? So my gosh. Oh my goodness. All right. I get very impatient.
There's our Neutral Gray. So once you have a
neutral gray mixed up, put out a little bit of
whatever color you're using. So I'm going to use the reds are a little bit right
in my palette here. I think Paul's really
ahead of the game already. Which doesn't
surprise me at all. Raring to go over here. Yes. Okay. So I'm
gonna get my brush a little bit wet as they
start painting here. And I'm going to
start on the very far left here of this rectangular
scale that I drew. And I'm going to put
the purest version of my color on the left. So this very first square, I'm, if I read, you would put whatever color you're using.
Paul is going to put blue. It's okay if you'd get a little paint out
of the line hall. I don't know. We won't tell Melissa
she'll never find out. Yes. I like to use my flat
brush because I feel like it's easy to paint in the
lines with a nice flat brush. You see me straight
lines like this. So feel free to do that. Alright? Mll squared here. Feel free to make your
squares larger than mine. It could be a little
bit easier to paint if you're
sure of literature. Okay, I'm ready
for the next step. Alright, we gotta read. The next thing we're
gonna do is take that Neutral 5050 gray stuff and that is going to go on
the extreme opposite end. So that's gonna go
on the far right. Okay. Make sure you clean
your brush out in-between. Yes. Good tip Paul for sure. Clean your brush. Dry it off in the paper
towel a little bit, and then put your gray in here. And then this is just gonna
give you a little bit of experience of using a color and what it looks like when a color gets
less saturated. So What does it look like when
it goes slightly more gray? And this happens a lot
with color when you're looking at something
in natural lighting. So, you know, if you're
looking at my hair as I age, does lose saturation over time. That's why I just have to make
up for it with my outfit. Oh my gosh. Depending on whatever
Lighting you're looking at some object in. So if it's a brightly colored red apple and then
if you're looking at it in wedding that's
not as bright. The color is not going
to be as saturated. So that's just
something to think about when you're
painting for using color. Okay? So we have our two extreme. So now what we're
gonna do is we're going to work on
this middle square, which is a combination
of half of that gray and half of
your procure Colors. So mine's red, so I'm
gonna do half of my red, half of my gray. I'm just going to pull over some of that color that
I've already mixed until I have equal amounts
and then mix those together. Color is always an experiment. Yes, for sure. That was interesting to
see what you end up with. Slightly. It's always okay to adjust your pro
tip for today. Right? You're not stuck with
what you can make. But it will be fairly gray. It will It will not be well, definitely not mean
a saturated color. No. I ain't going ready. Yeah. Okay. So we're just
going to paint that in that middle square. Definitely needs usually when I'm painting, I always have a little pile
of gray on my palette. Because it's so nice to
be able to just grab that and use it to neutralize whatever Colors
I'm working with if I need to know, definitely. Alright, we have
our two extremes. Now we're going to mix the two. Middle ones are the ones
that fall in-between your saturated
color in your gray. So the next one to the right of your saturated color is going
to be more color than gray. So definitely I go like
75% Color, 25% gray. So somewhere around there. Just to get it a step
in-between each of those beautiful and whatever color you're using, you will get different results. So it's interesting to see how this affects different colors. Yeah, It's like if you are
using yellow, for example, it will start to get very strange looking
as you darken it, because Natural
value of yellow is a lot lighter than the
other two colors. So yeah, kinda will turn maybe greenish or brownish
or something. Yeah. It will start looking a little
weird, but that's okay. That's what happens to yellow
in different lighting. It looks very different than
it does in bright light. And that's really one thing
that can start to make your paintings instantly
more believable. If you are able to show the
true variations of the, of color instead of just
using 11 temperature, 11 shade of the Color. Hi. So my other one, I'm going to do the opposite
of what I just did. So I'm gonna do 75% gray, red or thirds or what
have you want to do the math for granted, trying to take us back to math. I know. I'm sorry. Secret agenda. I tried to make sense
of this in my head. It's only way I could do it. It probably makes
no Secondary Math. If there are there
any mathematician. I'm glad you do that. You make up for the
faults of the rest of us. All right. For my last thing. Okay. So as you're looking at this, it should feel like a a
slow gradation from that. Gray on the right to your
saturated color on the left. You should see a difference
between each square, although very subtle, in
some ways, very subtle. That's kinda cool though
I think, you know, noticing subtle color shifts
is yes, Very helpful. So that is definitely something you will get better
at as you start using color and more and start being more
intentional with it is You'll notice very subtle shifts that maybe you didn't
notice before. It is something you definitely
have to develop over time. Yeah. And Acrylic is a little tricky because it always dries darker, so some of your colors might look odd when you
first put them down, but let it dry and then examine later and see where she got. We are going to be reusing this. So save this one for
the next lesson to you. I a great job everyone. Hopefully that gave you
a better idea of what neutrality is and
what saturation is, and how you achieve both. So let's explore it a little
bit more this time using complimentary colors
and figuring out what happens when
you mix two of them. I can't wait. See you then?
9. Creating Neutral by Mixing Complementary Colors: Hi everyone and welcome back to mastering the Art
of Using Color. In today's lesson,
we're going to be working with
complimentary colors. Just like how Melissa, I compliment each other,
wouldn't you say? Exactly. Alright, let's get started. Let's do it. Okay, In our last lesson, we learned how to neutralize
a color by adding gray. And now we're going to show
you another way to do it using something called
complimentary colors. So if we go back to our color wheel that we
started out this course with, any two colors that are
directly opposite each other on the color wheel are called compliments,
Complementary Colors, and just even looking at it from the perspective of trying to
choose good color schemes, complimentary colors tend to work really well
together because they are as different
as to colors can be. Complimentary. Colors are also a way of neutralizing
each other. So for example, you, blue
and orange are opposites. And if you add orange to blue, it neutralizes it in a little different way than
the grade did last time. So we're going to
demonstrate that now by drawing another scale. So put five rectangles in a row, just like we did before. If you can do it
on the same page, that would be great, or you can do it somewhere else. Choose the complimentary
color palette that you want to use. So look at your Color Wheel. Choose two colors that
are opposite each other. I put out some blue. I'm going to stick with that, just like what I used
for the last one. And then I put red and yellow because that will
combine to make orange. What color are you
using most of? Well, Paul, in sticking
with a red since I used to read last time and okay. You know, everybody
watching, you can choose whichever
color you want. It was just easier
for us if we chose the same color and if you already have the color in
your palate, That's great. Just feel free to use
it. So I'm going to use red and then the complement
of red is green. I'm using red and green. I just adding a little more
yellow to my orange so it doesn't look to
read. There we go. Alright, so just like last time, we're going to start
with the extremes. And in someone who always likes the extremes
of everything. So I'm going to
start with Maple. You, you choose whichever
color you are starting with. And I'm going to
paint the rectangle on the far left side. So this will be an interesting
little experiment to see how this turns out versus
the one we just painted. Yeah, definitely.
If nothing else, they're going to be very good at painting in little
squares by the end. I know, right? If we teach you anything
until to paint a tiny square, which is a valuable skill you? Yes. Alright, I have my
blue rectangle. I get a red one. I'm
gonna do the opposite. I'm just going to grab a
different brush so I don't have to work so hard to get
all the blue out of that. Sometimes when I'm painting, actually here's a pro tip that you might be able to use in the future when I'm working
on a normal painting, not like a painting like this, but for me, for myself, I will usually have a pile of brushes that I use
for my cooler colors. And then another
pile that I use for my warmer colors because
then they don't you don't have those little remnants of one on the on the brush that changes the color
you're trying to work with. Look at you planning stuff out. I am so impressed right now. I think that that is
totally your influence. Someone you can hang out
with someone like Melissa for 20 years and not
pick up a few things. Alright. I have my blue and my orange. Howard Hughes coming, Melissa, It is very christmas
see over here. Yeah. I got my red and I've got
my green, my two extremes. Yes, now that you all know about Complementary Colors
and starting to think about more about
color relationships. You're going to notice Everywhere in the world, all of color choices that people make for
different reasons. You just won't be able to turn that off in your brain now. So you're welcome. So now we're going to go
for the middle square. So just like last
time when we mixed half blue and half gray, this time we're going to do half one Color and then
half of the complement. So for me it is blue and orange. Be very interesting to see what you get when
you mix these two. Because it's, It's different honestly for every
Complementary care. And it's actually, it's a very good skill to have to know what's gonna happen when you mix these two
are very useful. Because of the
yellow in my orange, my little Color has turned the kind of greenish,
which is fine. But I'm actually going
to add a little more red to my, to my orange. And then I go to a
little red middle because I'm wanting to push it a little more towards neutral. Yeah. So the goal
is to get it to not feel like either color
that you started with. So it doesn't feel
too like mine, one filter read or one field
to bring in any direction. It feels like
they're color on its own is definitely going to be more neutral than
what you started with. But I would not say
it's gonna be gray. Know, if anything, probably
more towards brown. Brown. Brown tends to be the brown
is also very neutral. I mean, it can be, or you can have rich, more saturated browns too. But a very neutral
brown like this is a great way to add some more
neutrals to your painting. So I've got my middle color. I am going to paint that
middle squared now with that, initially is good if
you don't have a brown. So you don't have a brown
tube of paint. Mixed brown? Exactly. I think sometimes using this approach
to neutralize Colors, Can you end up with a little bit richer
overall colors on your piece rather than
just using the pure gray. Although I do both and it just depends what you're what
you're going forward. You just so this can be really
helpful when you do start mixing colors and your painting something
more realistic. You know, say a portion of a person's face that's
your painting, is, has more red tones in it and you want it to get more
neutral as it goes into the shadows or as it wraps around the face of
the person or the, you know, as the
skin changes color, you add a little
bit of green to it and it will be
much more neutral. It will slowly get
more neutral as you go around the face. So this is a great tool to know when you're mixing colors. How to, You know, what, what do I need to add if I
want to take the edge off at this color and make it go
a little bit more neutral. Alright, so now I am
taking my blue and mixing in an equal amount of the middle color because I want to paint this
rectangle right here. So it's kind of a Louis
Brown and my kids. Yes, it's similar to when we mix those Tertiary Colors
on the Color Wheels. So you've missed something in-between that you just mixed. Okay. I'm going to think that one mixing a green brown and a red brown or blue brown
and an orange brown. Or it could be using purple and yellow or any of the
other Complementary Colors. I think it also just gives you a really good insight into
how complex color is. Somebody could say to you
that they want you to paint paint paint
something blue for me. But you would probably
need to ask for some additional
clarification because there are a lot of blues, just like there are a
lot of Every Color. And this gives you
some ways to start breaking that down and
thinking about it. Do I want my blue
to be more neutral? I want it to be more saturated. Alright. So now I'm going to go over to the other side and mix half
orange with half round. A lot of orange in. There we go. Liking this neutral green, It's kind of an olivine
army green type of color. I don't think I ever used a neutral color
before I met Melissa. All of my paintings were just rainbow explosions and
then she was like Paul, I can't look at it hurts. Oh my goodness. Pretty sure that's a true story. I don't think so. No. Her memories starting
to go, guys. Yes, that is what's happening. It's me, It's not paul. Whenever Melissa
tries to fact check, one of my stories I tell you will know what's
really going on, right? Yes. And you might want to, if you're going to
hang on to this as a resource for yourself
as you're working, you might want to make
some additional notes on the page so you remember what, what each of the scales are, and also even what colors you used because it is
helpful, color, paint. Colors look so different
on a canvas or on paper than they do when
you're just looking at the tube or even
on your palette. So that's kinda nice to have samples for
yourself that show you what the different colors
actually look like and what they look like
when you mix them. I'm going to resonate with C. Complement is one exercise to, to try some of the
other complements. So just to see what you get when you mix
purple and yellow. Yeah. Here I'm going to
write saturation to Neutral. This is primary blue, and this is primary
red plus yellow. Here mixing colors later, this can be really
helpful tool to, yes, absolutely. Great job everyone. In our next lesson, we're going to be getting into value and how that
affects color. I'll see you then
laws, CNN, poly
10. Value and How It Affects Color: All right everyone, welcome back to mastering the
Art of Using Color. This time we're going
to talk about value, what that is, and How
It Affects Color. So we're going to explore a few different experiments on how we get Color to relate to different values
from light to dark. Paul, What do you
think you ready? I think it is going
to be so invaluable. Oh my God. Let's go. Goodwill. But we are going to start learning a little
bit about value. Value is contrast. Value is how some light something is versus
how dark something is. So it is all the
things in between. It can be a white, it can be a black and
can be a middle gray. It can be all those little
tiny variations within those. We're going to talk about value
and How It Affects Color. But the first thing we're
gonna do is really explore value and How to render something with black
and white and mid grays and everything in-between. So we're going to do
something really simple, which is draw a sphere. And we're going to
start with a circle. So I have a roll of
masking tape here. I'm just going to trace
this to get a nice circle. You can choose to do that, or you can just
kinda freehand it, whatever, whatever
you'd like to do. I'm gonna draw my sphere and then just put a little bit of a shadow on one side. I'm just going to sketch
that out really quickly. Right? Alright. So we've got our
sphere, we got our shadow. And now let's start mixing
some different values. So I have white on my palette, I have black on my palette. I'm going to first
Mix a middle gray. So half white and half black. And then I'm going to
Mix to other colors. So while not Colors values, I guess I'm gonna do
one that is more white, so a lighter gray, and then we'll do one
that is more black, so a darker gray just so
I have some variation. All right. So my Pell
is very pleasing to me. That is very black and white. Yes, this is Melissa,
his favorite colors. Gray, gray, and more gray. I love it. Everybody makes phone
with me because I only wear black and
white and neutrals. And it's just easy for me because everything
goes together. I don't have to think
about the colors. But Melissa, maybe after you've finished
this color class, you will feel more
comfortable, frantic. Maybe, maybe not. If I were color at this point, everybody would just
not know what to do. They would think there's
something wrong with me. All right. I've got my different values for
everything mixed already. I do. Look at you. You are so fast. Well, while you're doing
while you're finishing, I can tell them a
little pro tip. I love sharing pro tips. A lot of artists will do a
monotone underpainting first, like what we're doing here, where we're just painting at
all with different shades of the same neutral
tone in this case. Because it does allow you
to focus just on value, the value structure
of the piece and then bringing color into it. As a second step. Yes, So we will show you that. But first we're going to do this with different
values of gray. So I have all my grades here. Paul obviously has all his
because you super-fast. I am going to grab
one of my brushes. I just have like a
small flat brush here. Okay, so I'm going to start
adding some values to this fear to make
it look more round. And I'm going to
start like I like to start with my highlight. I'll put a little white in there just for
blending purposes. So I'm going to imagine that my light is coming from
the left-hand side. So that just means
that my sphere will be lighter on the left and
gets darker on the right. So I'm just going to
start layering some of my values in here quickly. So we can get to the
phone part which is adding the color at the end. I'm just working in
a circular motion out from that highlight So right in the
center of your sphere would be where you're
50% gray would go, so your mid tone. And that's because it's not, it's neither in full
light or shadow. It's kinda in the middle. If you've never tried blending with Acrylic paint before it, you just have to kind
of go in-between the two Shades and
just kinda work them together a little
with your brush. Yeah, it can be a little
tricky when you're starting, but painting wet paint into wet paint is usually the
easiest way to try to blend. And for the purposes of
what we're doing here, do not worry if your sphere does not look perfect
at this, okay? It's more about understanding
the concept, right? Right. You just want a lot of different
variations of gray. So we just went
different values. Yeah, which will help us when we add color
in the end just to see how color is affected by value is kinda the purpose
of what we're doing. For my darker gray here
underneath my midtone. Now like to use my brush
strokes to find the, the forum or the sheep. So since we're
painting a sphere, I'm doing more
circular brushstrokes. Especially for Sir,
always thinking aren't just something quick like
this is just easier. Shadows, which
should be, you know, you do have a little bit
of black in their shadow. This can be very quick. Just think about it as like a sketch of a sphere just
to show different values. And then again, just
to see what it feels like to play with value and
how it works with color. Eventually here. I, Paul, how are you doing? Do you have your
sphere almost done? Almost. The shadow
on the ground yet? No. Okay. We'll get there. Okay. Are you
finished or anything? I am pretty much done. Yes. Wow. Alright. Well, carry-on. It was it was a
quick one for sure. I'm going to make sure
my highlight is nice and white in the center here. So I might know a
little bit more white. If you want to go back and
fix any of your values, Feel free to do that. Having one of these, I like to use this
disposable palette when I'm mixing on the go. Because it's easier to mix this way versus the ****
with the tiny wells in it. Kinda blenders you go, if you start with a couple
of different colors, you can change that and
make some of them together, which I think is easier. Yeah. Did you start each color or each value like from
scratch, scratch king it. Yeah. I thought it's a lot. Alright everybody. So we have explored value, we have our spheres. Make sure you hold onto
this for the next lesson because we are going
to go and add Color. Okay, Great job everyone. Hopefully, you learned
a little bit about value and what that
means and how to use it. So we're going to explore color a little bit further
in the next lesson, we're gonna talk a
little bit about tints and shades and what those are. Paul, are you ready for this? I'm ready. Okay. Let's do it.
11. Tints and Shades: Hi everyone and
welcome back to you mastering the Art
of Using Color. And today we are
going to be working with tints and Shades. You ready, Melissa? I already, Paul. Alright, let's get started. Okay. Okay. In our lesson
today we are talking about tints and shades. So we're doing a little
bit more with value. When you Tints a color, that means you are
lightening it, adding white. And to do a shade of a color that is darkening
it by adding black. So I'm going to show you
two different ways to go about doing that with an
acrylic painting today. The first one is called glazing. So if you still have your sphere painting
from the last lesson, that's what we will be working with if you need to paint
a new one really quickly, first put this on pause
and then come back. And then what I'd like
you to do is choose one color that will be our
main color for this piece, and then put out some black and also some
wines. Your Palettes. Okay, now we're going to
start with the glaze. Glazing is just when you paint a color over top of
something that's already there and you
paint it in a translucent, transparent way
so that you still see what's underneath it. So what? I chose
red for my color. And when I glaze the
red onto the sphere, you're going to see all
these different tints and shades of red that happened just because of the underpainting that's
already on there. So I'm using a a big brush. You can use whatever you want, but dip it in water, get it good and wet. And what you wanna do is
just pull a little bit of the paint away from the big pile and really wet it down
with a lot of water. So it's not you
don't want to cover up what's already there. It's almost like if
you were painting a watercolor painting, that's what glazing
should feel like. And so now I'm taking that
and I'm just painting it over top of the whole sphere. The fewer brushstrokes
you can use, the better. But that's why I like using
a bigger brush for this. Yeah, you don't want
to overwork it. You wanted to flow smoothly over what you've
already painted. And it'll be interesting because
you already start to see the different values
that appear based on the color and how
Value effects that. I think he'll start to see that the most saturated colors, so the brightest color
shows up in the highlights. Yeah. So that's called, you know, that, that's saturated colors. That's not yet a Tints, but you are getting
some Shades here. So you're getting some Shades, mostly in the shadow areas. So some of those darker areas that we painted on the
right and the cast shadow that the sphere
that's underneath it. You can do multiple glazes. If you glaze something
and decide do you want the color to be more five brand or you want to work
in other Colors. As soon as that layer dries, you can glaze to your
heart's content. But we're going to move on because my heart's content
says, Let's keep going. So now I'm going to show
you a different way to use tints and shades where that actually involves
mixing the colors. So we use the values on the painting to create
different shades there. But now I'm going to my
palette and I'm going to pull some of the red over
towards the white. I'm going to pull some of the
red over toward the black. And then it's up to
you how much you want to tint or shade the
color that will just it, that's determined
by how much of the white or the black
you put into it. I'm gonna put a pretty decent amount because I want to have a nice range of values. So you see when I add the white
to my red, it turns pink. And I'm working with yellow, which is a little bit trickier because once you start
making shades of yellow, it gets very greenish depending
on what black hair using. Grayish brown. So just to show you
what Yellow looks like as it gets more neutral
and as it gets darker. Side to do that,
but is kind of a, it's a tricky color
to work with. I will say yellow
is a very tricky. That's why I'm glad
boluses doing it. Going from the team at this one. All right, so now I have
my range of values here. These are all, these are just different tints
and shades of the red. And so what I'm going to use
this for is the background. And I'm going to paint
a gradation that goes the opposite of how the values are falling across the sphere. So on the left side, which is the light
side of the sphere, I'm going to paint
the background, my darker red color. And then I'm going to let
it blend to the light pink. The rate you can put your grade aided background
in any direction you want. It doesn't have to be like mine, but I just wanted to
give you a chance to kinda see what it feels like to create that kind of
gradation with more, more opaque paint rather
than just the glaze. So I'm starting over here on the dark side with
my darkest color. I'm not using
black, I'm just I'm just going with the dark red. And you only have to paint. You don't have to
cover the whole paper. I'm just gonna do a little
bit around the edge. I'm not going to fill
this whole street. I think it's a different
experience to when you start mixing values with the
color in the value. So included within that, it does get a little tricky. So it kinda makes
the right values and be mindful of that. And that's where you can
use the glazing technique. Or you can just look at are the exercise we just
did with how we glaze the color over top and the different values
that came out of that and use that as a guide. So think about where
we put that mid value, where we put the darkest value, where we put the
lightest value and How the Color affected it? Yes. And you can glaze
over top of any color. It doesn't have to
be black and white. Underpainting like
what we have here. If you're painting
something, just for example, let's say your painting a tree
and you paint the leaves. But you feel like maybe the leaves are a
little bit too on the blue side for some reason to cool and you want to
warm them up rather than just totally
repainting them. You could just glaze a little
bit of yellow over top and that will move the color in the
direction you want it to. So glazing is very helpful
and a lot of different ways. And it does use a lot of the concepts that we've
already talked about as far as using color and
thinking about color. So now I'm just blend, I'm kinda cycling through the different values
that I mixed here. So now I met my just the
pure red in the middle. And then by the time I get
over to the right side, then I will go for the pink
and to get Acrylic to blend. I think we've already
talked about this, but I'll just show you because this darker tone that I had
down already started to dry. So I'm just going to
re-wet it in that way it will blend into the red
a little bit better. Acrylic will dry quickly, but you can always add more when you need to get it to blend. And acrylic, It's something
that actually looks better than more layers you do. So don't worry about putting
paint on the other paint. Yeah, it's a good
thing. Right now. I'm over here on the right, so I'm gonna jump to
my lightest pink. And just something to
be mindful if you're using the yellow like me, is that it will be
very transparent. So anything you mixed with the yellow will take on
a transparent quality. Where that actually
means that it's an easy color to glaze
width because it goes easily over top of anything
else underneath it. Yeah. You don't
need to add a lot of water if you're
glazing with yellow. Let's just touching up
my background here. I think I wanted to kinda
bring it out so that it ends. Sort of a rectangular ish shape. It's very tempting to want to skip backgrounds
because usually we get excited about whatever
the thing is that we're painting and don't give
a whole lot of thought. So what's happening
back there behind it? But as you can see just from this quick little
example, adding the, adding a background or
even just a hint of a background totally
changes the whole piece. So police have been a lot more you feel like you're looking into place instead
of just add a thing. Yeah, it does give
it context for sure. Here we go. Awesome
work everyone. In our next lesson, we're
going to start working on how to create different
types of Color Palettes. And the first one will be
working with is Complementary. You read the Melissa, I already, Paul, I love color palettes. I'll see you there. Okay. See you soon.
12. Types of Color Palettes: Complementary: Hi everybody, Welcome back to mastering the Art of
Using Color today, Paul and I are going to
talk a little bit about color palettes and
how to use them. So specifically today
we're going to talk about a complimentary Palette, what that is and how to use it. Are you ready? I'm ready. Let's go. Let's do that. Today we are going
to talk a little bit about color palettes and how
you create a color palette, how you think about
Color Palettes, what color palettes you can put together and create
something successful. The first one we're
going to talk about is a complimentary Palette. And a complimentary palette is something that
combines two colors on the color wheel that are
Split so they're as far apart as they can possibly
get on the color wheel. So just some examples of Color Palettes that could be Complementary are red and green, or blue and orange,
yellow and purple. Those are kind of your basics. So they are opposites. Think of it kind of
like Melissa in me, your opposites in many ways, but we go together
so well. Yeah. They are opposites,
but still friends. So Paul and I just
got a quick start today mixing a few Colors. And so we are using a Complementary Palette
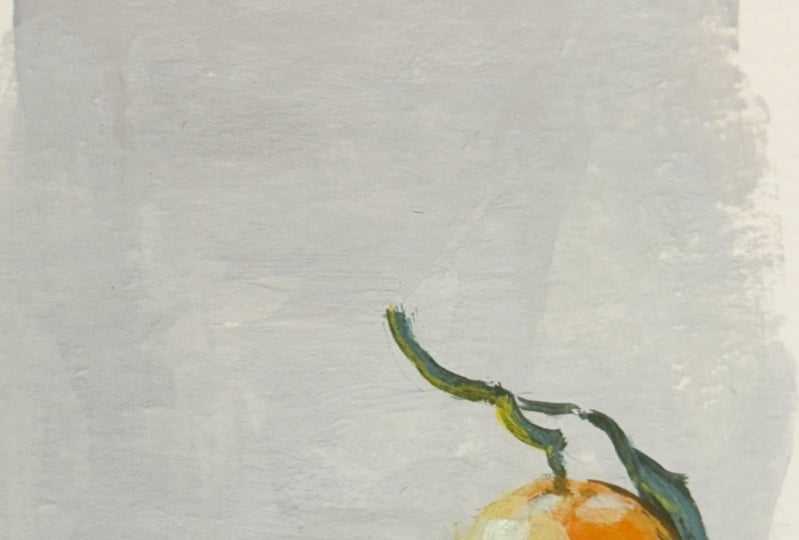
of orange and blue. So we're going to
paint a little orange on a blue background today. And Color Palettes are
not an exact science, is kind of an experiment
and how to use colors. So it's not gonna be perfect. Not everything is
gonna be exactly Blue. Not everything is going
to be exactly orange. But kinda the basics
of the color palette is the contrast between
the orange and the blue, or the red and green, or
the purple and yellow. And that's why it works, because you have two
of your main Colors. Feel like they're opposites
on the color wheel. Okay, so we sketched
out our orange really quickly and you can just take a minute to do that if you
need to pause the video, feel free to do that. So here's our reference
of our orange and we drew it out and we
also mixed a few colors, so it makes it a color
for the background. The light blue is gonna
be mostly our background. Some colors for
the leaf and stem, which is kinda like
a bluish green. So you can add a little bit
of yellow in that string, a little bit from the
Complementary Palette, but still within that
realm of orange and blue. And then I have to oranges
mixed for the orange itself. So one That's a little bit lighter with a little
bit of white in it. And one that's a little bit
more of a pure bright orange. Right? Let's go,
let's get started. So I'm just going to start
with that background. Just get that blue in there. You can feel free to start
wherever feels right to you. And we're not worried about making perfect paintings here. No, not at all. This is just to explore the combinations of Color
and what they look like. This is just an exercise
and how to use Color and how it looks when you put two complimentary colors
next to each other. Just get used to experimenting
with color in that way. So we're just continuing with
our Acrylic paint today, just kind of blocking
in some color to start. And if you don't move beyond the color blocking
phase, that's okay. It could be very
flat that you don't have to do blending
if you don't want to, It's really put your
own spin on it. This is an experiments. But I do think it's really
helpful to learn about different approaches to what
makes a good Color Palette. I think that's kinda like the underlying goal here we're going over the
next few lessons. We're going to show you
different ways you can use Color Wheel to choose colors that will work really well
together and that can be a good starting point
when you're trying to come up with a color
scheme in your own work. Yeah. It's just a tool to get you thinking more
intentionally about how you use Color and what Colors
could work together. And maybe expanding on
different colors that could inspire you to try new things or experiment with the way the
colors work together. So different way of thinking
about how you use color. Yeah Okay. I just got my background
rough can really quickly, so I'm just going to rough
in some of the orange, make sure you're
washing out your brush really well in-between
these two colors because they will get
really muddy as we found in past lessons, if you mix complimentary
colors together. One thing to think about
while you're painting this is if there are
more neutral areas, especially in the orange itself, there are some color
shifts within the orange. Think about mixing
the orange and the blue to get that
more neutral orange. So think back to one of our
previous lessons where we did the scale and we combine
two complimentary colors. And remember the color that you got from
mixing those two. And then see if you can find
any similar areas within the orange that would require
you to Mix orange and blue? I don't know, Melissa, that
almost sounds like a pro tip. When you're when you are working with a very limited
color palette. A way to make it feel a
little bit more expansive is combining the
two Colors and you get all these different
neutrals you can paint. You can make a painting
with very few colors, but make it feel like
you've used a lot of Color. That's true. Jail free to
use white and black as well. You always need those, no
matter what your painting. Definitely try mixing in
some of that blue and see what you get
and see if you can come up with some other colors. If you look in the bottom
left-hand side of that orange, There's definitely some
reflected color from the balloon and some areas
where it goes more neutral. I think in that area are
definitely not a need to try mixing and see what
you can come up with. A good idea anyway, when you're painting
something realistic and to, just to let the
colors reflect and move through and
not just have if everything be isolated if you don't want to Colors with within your
color palette to be used, but then be completely
separate within your painting. You want to combine
the two somehow. Make one feel integrated
into the other to make it feel like it
was all intentional. Look at this cute little orange. Get my leaf and
my stem and here. And I'm just roughing
these in really quickly to just see how these
colors interact. Don't you-all love Melissa's
version of roughing, roping it? Yeah. I'm just using a big brush
for this whole thing. So I can't get any
detail in there. Is that killing you? It's actually not at the moment and I'm enjoying
it at the moment. But you know, like at the end, I want to go and
add more detail. And that's when it's gonna be time for me to just
pull the plug. And Paul says, Are you done? Time's up. Yeah. Likes to do that to me. It's our world. I have to take it
where I can give it. Now that I got all that Rodin had a quick
shadow and then I think we have completed
first painting. Palette. Many more to come. Quick highlight. Beautiful, lovely. Right? Hopefully you all enjoyed playing with a
complimentary Palette. Alright everyone, great job. Hopefully you understand
what complimentary colors are now and how to use them, how to combine them, how to make beautiful
Color Palettes. And the next step we're
going to talk about is a Split Complementary
Palette and what that is, Jerry all what do you think? Let's go
13. Types of Color Palettes: Split Complementary: Hi everyone and welcome back to mastering the Art
of Using Color. Today, we are going
to be working with a Split, Complementary Palette. You're ready to get
started, Melissa. I'm ready, Paul, let's do right. Let's do it. Alright, my turn now, and we are doing a Split
Complementary Palette this time. So that is when you
take what would be a complimentary Palette or two colors that are opposite each other on the color wheel. But then on one side you just
take a step each direction. So it's almost like
they're complimentary, but they're just
kinda branching out a little bit, one each way. So for the piece that will
be doing in this lesson, I chose a beautiful strawberry. And I'm going to be using the Split Complementary
Palette of red with yellow green and blue
green for the background. So I'm going to change the
background from what we have in the reference image
right here on the screen. So if you look at my palette, I've already
pre-mixed the Colors. I made three different
shades of red. So this is just my pure
red from out of the tube. And then here I darken, did a little bit by
adding just a little bit of dark green to it that I had
already had on my palette. It'd be, you could
create that by using blue and just a
little bit of yellow. Since those are
opposite colors that worked really well to
just kinda darken it. And then for the lighter red, I just added some white. So I wanted to go ahead
and have those ready. And then I made a really blue green color
for the background. And I added a lot of
white to it because I wanted the background
to be pretty light. So remember to make
that blue-green, it's, you use mostly blue and just
a little bit of yellow. And then in this case, to lighten it also white. And then this is my yellow green that I
made for the leaves. And that is mostly yellow with
just a little bit the flu. So if you need to
pause the video to mix your colors and to also go ahead and sketch out
your little strawberry. I've already done
that part so we can jump right in
and start painting. Are you ready, Melissa? I am ready poly. Okay. You're probably getting
years old drawn and sketch while I
was blubbering away. Just work hard at
work over here. Okay, I am going to start with the
background and I'm using just this really light
bluey green color. It's like painting
with toothpaste. Yes. Oh, yes, It really is. And I am not going very far beyond the edge of
the strawberry. The most important
thing to me is just seeing the relationships of the colors to each other. So I'm not trying to fill
this whole paper or anything, but you can do
whatever you want. And for that matter,
you don't have to use the same color schemes
that we are ether. Like we've been saying. This is all about helping
you have some tools to use for creating
your own color schemes. So if you want to
change it and choose a different Split
Complementary Palettes, just look at your Color Wheel, and that is completely fine. Yeah, that's actually good
exercise if you want to decide on your own color
palette and you can always paint something different
than what we're painting to give you the
purple strawberry. Doesn't matter. It doesn't have to be realistic. It's more about it's more
about the colors, right? Okay. I'm just about finished with mine backgrounds. Okay. Good evening. Alright. Let me
clean up my brush. And next I am going
to just cover the whole strawberry
with my bright red, the medium one, and then come back and
use the other Tones. A lot of little detail
on that strawberry. Oh, yes. I know you have taken that all If you, Oh good. We can feel free to simplify your painting and
don't worry about the details. I'm forcing myself
to do the same. But also if you end up
getting really into one of these paintings and want
to go longer than the 10 min, nobody is stopping you. Yeah, definitely. You can paint on this
all day if you want. Yes, Paul a lot.
Not let me do that, but you are welcome to do that. Are you jealous of how
nice I am oliver students? Getting that painted in solid
red first and then we'll go back and see adding some detail. One thing I like to
do when I'm painting, Here's your pro tip
for this lesson is to get all of the
white of the paper covered before I go back and start trying to do a
lot of detail or even before I start going back and
trying to look and see what needs changed or
perfecting things. Because as long as you are comparing Colors against big
white areas of the paper, you're really not seeing the true color relationships and everything changes once you get all the white covered. So that's, I mean, not every artists
works that way. But I definitely like getting all of the white
covered before I start getting to particular. Alright. Using my other green now
to do the little leaves. That's my yellow green. It's very transparent
but that's okay. Yeah, so anything with a lot of yellow as we've talked about, as we've gone through
these glasses, going to be very transparent so you won't get
very used to that. Sometimes if you don't want to have to do 1 million codes, you could add just a
little bit of white to it. That can help to make it
a little more opaque. But you fread is probably also going to be
pretty transparent as well. Yeah. Alright, that is looking
gorgeous already. We could call this done, but I am going to
take it step further because I know that's
what Melissa would want. I'm going to take my
darker red now and just kinda follow along
where I see some of those darker shadow shapes. So over here along the right, let me come in and add
a little bit of shadow. And it kinda comes
up to about here. This is not a realistic
painting class, this is just a color class, but adding different shades, different values of a colo is definitely a good way
to make your pieces look more realistic
when you can start breaking down Color and seeing different,
different shades. The more you can, the more you can bring
out in the piece, the more realistic it will look. I'm just blending that
in Using a little bit more of the
original red color. And see it kinda comes
over here a little. I like to, just like we
did on the last one, I like to make the background color play
a little part in it too. So I'm going to grab a little of that and just kind
of thin it down with some water and put that
along the edge over here, just to bring a little bit of reflection of that
into the strawberry. All right. Now let me clean up my brush
again and we will do that. The big highlights,
the light pink. Along the top. It's
almost, it's almost white. Realize it is very bright. I'm going to make mine
a little bit more, a little more pink instead
of that pure white. But you can marry, is, if I was a strawberry, this is the kind of strawberry
I would want to do. See you as a Strawberry. Strawberry Shortcake maybe. Alright, and then there's
little highlight along this left side. Ok? And now really quickly I'm just going to make some
of those little dots. I'm not going for
the detail here, but just so it feels
very strawberry ish. If you want to break it up with some
little dots, you can. There we have our Split. Complementary painting. Beautiful, awesome
work everyone. In our next lesson, we're going to do another
type of Color Palette, and that is a Triad. See you then Melissa, CSM Valley
14. Types of Color Palettes: Triad: Welcome back everybody. And now we're going
to start talking about a different type
of Color Palette. Today we're going to
talk about a Triad and what that is
and how to use it. Paul, What do you think? I think we should get started? Okay, let's do it. We're
going to talk about a different color palette
today and practice using something called a triad. So a Triad is three colors. Obviously, three
colors make sense. Three Colors Split evenly
across the color wheel. So the Color Palette will
be using today is red, violet, blue, green,
and yellow, orange. And if you count the number of spaces between each of those
on the color wheel there, each three spaces apart
so they're evenly spaced. So you could use
something like blue, red, and yellow, which is
the common Triad, the primary triad, but paul
one and it goes something, go with something a little
more complicated today. I wanted to make it
a little fields. So we're going with that red, violet, blue, green, and yellow, orange, which is
actually a really color, really beautiful color palette. You're welcome. You have Paul to
think through that. Okay. I got my brushes, I got everything sketched
out really loosely here. I have my colors mix, so I mixed my yellow, orange, so that would be alive. Yellow, a little bit
of red and white. I added some white because
we're going with kind of a pastel palette
today we're painting a really beautiful lollipop. Went with the Pastel Candy feel. And then I have my red violet, which is more red than blue. So red, a lot of red mix up a kind of a reddish purple and then add some white to that. And then my blue-green, which is a lot of blue, a little bit of yellow,
and some white. Okay, So the first
thing I'm gonna do is get that background. Here. Choose a larger brush. And I'm going to paint
fairly flat today is just a exercising getting the
colors in the right areas. Like paint by number of
paint by number, yes. Paper number, lollipop today. We're doing very
sophisticated where it yes. But that's okay. This is
just taking a practice with these colors and
see how they feel next to each other and play
around with the idea of using colors that are Split far apart on the color wheel and
see how that feels. Just like last time you can make your own Triad if you want. You don't have to match ours. And feel free to use
that color wheel that we created in the first
couple of lessons. You can refer back to that and count the number of spaces between them to make
sure it's a Triad. I kept doing that just
to make sure I have this right when we're
talking about it. And this does get complicated talking about
the different types of Color Palettes and where the Colors needs to
fall on the color wheel. And it's not an exercise that artists do every time they
start a piece of artwork. A lot of times Colors
more instinctual. But I think that's a good
way to start thinking about color a little bit differently
and more intentionally. And just kind of
start to understand how color works and what
colors work together. I think it's just
a good exercise. One of those things where
you learn the rules first before you
start breaking them. Yeah. I think a lot of what
we're going to do in this class is pretty
intuitive really. I mean, you've probably all
chosen Color Palettes are chosen color schemes for
different things just based on what looks good to you. And that's, that's really
what it's all about. But some of this is
to help explain why certain colors look really good together or work well,
certain color schemes. Yeah, sometimes
you can just know things and feel things about Color or making Art in general and maybe not
be able to explain it. But I think this is something
that put words to it and helps explain some of
the thought behind it. So don't let it suck all the fanout of it for
you as you're saying. It's just another
tool like anything. Oh, right. It's not an exact science. And I think if you're thinking, I want to do something with
three very different Colors. I think that's enough
to just start thinking about a color palette and how you want to use color
a little bit differently. Yeah, he doesn't have
to be an exact Triad. You don't Every time
he started painting, you don't have to take
a Your Color Wheel and say, Oh my gosh, I had to fix, fit this into a Split Complementary
Palette or a No. Just to help you practice. Yeah. It's kinda like
if you're a cook, there are certain
ingredients that work well together and you can follow the recipe and you'll get
something that looks good, but also really good cooks just kinda go in and start
throwing everything together. And let's see what
happens, right? You kinda generally know
what works together, right? Which ****** work with which types of foods
in that kind of thing. And then you go from there. Well, most people, not me, I followed the recipe because I am a rule follower and Melissa, right, Paul, you follow the recipe that HelloFresh
tells you to follow. Yeah. And again, that's really isn't about making a perfect painting, which Paul likes to tell
me again and again. This is more about
just practicing with the colors and
seeing what works and seeing if you can mix these colors to feel like what you want them to feel like. Experiments in that and just an experiment in how
the colors work together. Yes, you don't need to
paint every stripe of the lollipop exactly how it is. You can just do what
you want, right? That goes for you to Melissa. I don't know if all I'm painting every every pink
strawberry in our Every year, red-violet baby steps, I guess. I think choosing colors
is something that we do in our everyday lives and maybe don't think
about it very much. So when you put an outfit
together in the morning before you leave or when you're planning a party
and you're choosing streamer Colors and
paper plates and things. You often choose a color
palette and maybe you don't do it all
that intentionally. But I think something that we do every day in our lives and maybe don't
think about it as much. But hopefully these
exercises will give you a chance to sit down
and think about Color. Think about how to use it a
little more intentionally. And you can kinda reinforce
what you're learning here by just paying attention
to color schemes that you see in the world. That's a good pro tip for
today as you are just going, going about your day. Look around and when you see colors that work well together, color schemes in the world, whether it's on people's
clothing or advertisements, or Every Color is everywhere and very intentional
Color is everywhere. So start kinda
breaking it down and analyzing what kind of Color
Palette is this white? Why does it, why does it work? Maybe weighted evenly
will be asked yourself, why did they choose this
particular color palette? As we're starting to talk about different types of
Color Palettes, start looking at colors that you see together
and trying to decide if you can figure out what type of
color pellet it is. A good little quiz
to give yourself. So beautiful. Now
I want a lollipop. Alright. I'm gonna make you
hungry with all these. See paintings that were doing. Okay now my yellow, orange now start putting some
blue green stripes in here. And again, this was just
kind of an experiment. So put some colors next
to each other and, and see how they feel. Paul is not going to let me go in and paint all
the details here, even though I would love it, I would love to do that. You are welcome to continue after the camera stops
rolling bullets. True? Paint to your heart's content. Yeah, it's true for all of our friends to feel
free to keep going. This is something
you want to work Boron or experiment or try to play around with mixing
your colors and see if you, if you weren't able to get the
colors that you wanted the first time, keep trying. It might also be a
good idea to try drawing a couple of different
lollipops and using different color triads
on each one so you could see how the different
color schemes look. You look at me creating
more work for people. Paul likes to do that. It's longer. Yeah, as long
as it's Bristol, What else? Right. Exactly. You go and try it and
then report back. Very good at outsourcing. Good skill to have
in today's worlds. I do like the way these
colors look together. Now we know why. Kinda FUN. Hey, happy and phon. Just working on getting
my blue green in here, a couple of more stripes to go. And I will just kinda get the colors blocked in
and leave it at that. But if you want to keep going
and refine this anymore, feel free to do so. When Paul and I say
blocking in color, we just mean putting
in some flat color, figuring out where the
color goes and just putting in some shapes. Instead of doing any kind of shading or blending or rendering
or anything like that. Just kind of a basic way to get some color in your painting. Some, some artists will do
a color comp before they go to a finished painting
or illustration. And that just helps them figure out where they
want to put their Color and what it'll look like
in the final version. And they'll do something
like this where they do very flat color and just lay it down and decide that the colors work
together or maybe not, and then adjust from there. Sometimes, color can be
very experimental when you start a painting and
you don't know how it's all going to turn out or
what it's gonna look like. So some people like
to have a little map for themselves knowing
where the color is gonna go and everything's gonna
turn out in the end. Even I like to have
a plan sometimes. Even Paul, I deviate from the play in your never
really locked in on it, but at least it's nice to
have a starting points. Yeah. I like knowing exactly
where am I Colors you're gonna go and how they're
going to work together. Yeah. Because it really does a lot to affect the mood of the piece, the colors that
you choose, nuts. That's an important part
of the overall concepts. Yeah. Okay, I think we've got
some basic color in here. Learned about what a Triad is, and we got to experiment
with mixing some colors. So I think it's
been a good lesson. All right everyone, great job. I hope you understand what a
Triad is and how to use it. How three colors can fit together and make
something beautiful. And next thing
we're going to talk about is something
called a Tetrad, which involves for Colors
and how to combine them. Paul, Are you ready? I am so ready. Okay. Let's go
15. Types of Color Palettes: Tetrad: Hi everyone and welcome back to mastering the Art
of Using Color. And in today's lesson, we're going to
continue working with different kinds
of color schemes. And the Palette that
we're gonna be creating today is called a Tetrad. You ready for that, Melissa, I am Paul Tones,
very sophisticated. Alright, let's go. Today we are using a
Tetrad IQ color scheme, which is basically using a rectangular shape on the Color Wheels to
choose for Colors. So you're choosing
essentially two sets of complimentary colors. The colors that I
am working with, and I think Melissa as
well is red and green. Then blue and orange. Here is our reference
of the leaf. And we made it black and white because we really
want you to be able to add your own ideas
about color to it. So if you want to take a minute, Melissa and I have
already sketched out the leaf and we've already
put out our colors. If you would like to
use a different kind of Tetrad it color scheme, that is completely fine. So take a moment, look
at your color wheel. Choose your colors, sketch
out your reference. You can put us on pause
while you do that. Then we'll get started. You ready, Melissa? I'm ready, Paul. Okay. So I think that I'm going to use the red and
orange on the leaf. Then I'll use the blue and
green in the background. I also put out white
and black in case I wanted to lighten or
darken the color as well. And I'm just going to do
that with my brush while I'm painting rather than mixing up a whole bunch of
Colors ahead of time. So this is a free-for-all. Q whatever you want. Your favorite, favorite way of my favorite way of teaching. I'm starting with
the leaf this time. Normally I start
with the background but mixing it up a little. What are you starting with? I started with the leaf, I can't help myself. Well, that's
interesting. We both did that this time. I know. I think the leaf is
just, I don't know. It's more FUN to start with
hanging in the foreground, which is the rule is dealt with the background and make it easier for yourself. So you're not painting over the background as your
painting the foreground? Yes. Yes. Painting into the
foreground as your painting, the background. You
know what I meant? And it makes sense to someone. Yes. But yeah, I always
get excited to start the foreground first because
it's, it's the Fun part. Yes, there's a lot of
interesting shapes on this leaf. Can you just kinda brush one color into the next
if you want to make them blend where you can leave it a little patch here, blockier. Just have FUN with it. I think when you're
experimenting with color, it's kinda gives you
permission to just paint a little free year. We're not going for a
realistic paintings here, so you might as
well just have FUN. Yeah. The idea is just to play with color and see
how it works together and what types of Color
Palettes you're drawn to and try different things. Experiment with some
different colors. Yes. I apologize if you hear some chirping
birds and the background, my studio is so hot if I
don't open the windows. So we're just having a little
nature moment this morning. Thank you, everyone here
in Bali really loud. Are they taking over? Yeah. They're aggressive like that
Alfred Hitchcock movie. The little scary. If I just get dragged
out the window by birds, Melissa, you're going
to have to finish this. I got your fall. We can't leave these
people hanging. They need to understand
triadic color scheme. I can't help but the birds, I'm sorry, you're stuck there, but I can help with
paintings on your own. That's how committed we
are to all of you know. Usually with a Tetrad, a color scheme in any kind
of color scheme when you start using more
complex ones like this, where there are more
than two colors, It's a good idea to think About having maybe one Color be the dominant color
in your composition. In fact, that would be a
good pro tip for today. When you do color schemes, it doesn't necessarily mean that every color gets used evenly. Sometimes you want to have
one Colors be the star, and other Colors be more of
like the backup singers. Yeah, So one thing to think about when you make
a color palette, and we could talk about this later in, in future episodes, but you probably
want to think about your main pillars and
then your accent colors. Yes, definitely. And I feel like in this case, the main color for
me is the orange, and then I'm using
red in shadows. And then the background
colors once I add those will be another component. But I think the orange is what's going to really jump
out in this one. So focal point or dominance
just means it's the, it's the thing that
stands out the most when people
look at your piece. Yeah, the thing that draws
everyone's attention and oranges a good choice
because it is very bright. And it will stand out
against some of the darker, more cool Colors
and the background. Yes. It took me awhile to learn that one for awhile when I was first
starting painting, I wanted to make
everything dominant. The colors are important. Yeah, it'd be like what's your dominant color and
it'd be like all of them. Yes. Took me a minute
to realize maybe that is not always
the best plan. We do want people to be
able to look at our work without having to
wear sunglasses. I mean, I think when
everything is dominant, you don't know what
to look at, right? You kinda lose the focus. Yeah. That also goes with the
saturation of color too. Even if you have everything evenly saturated
and really bright, you don't always appreciate
the individual Colors as much as if you have
some neutrals in there. So it's all about balance. Yeah. Sometimes we'll talk
about this later too, but sometimes neutrals can make a less saturated color
look even more saturated. So you can be mindful as to how you're using your
Colors and what you're putting Next to certain
colors to make them appear more bright statically. Alright, I'm just
about ready to put some of the blue and
green in the background. Let me just finish up. This last part of my leaf. Looking gorgeous. Feels like autumn is here. I know, right? I don't know what time of year it is for you right
now as you're watching this, but we are we're in the fall or Painting. Okay. My little beans and may stem. For the background. I'm going to clean
up my brush first. I'm just going to kinda put some random sections
of the blue and green. I'm not going to paint
a detailed background. I'm just going to let the colors blend with each other
and surround the leaf. So I'll just grab a
little blue. Go here. Then with my next brushstroke, I'll grab some green and go right into it so
that they just kinda overlap and create an
interesting background. Yeah, we're focusing
on the leaf so we don't need to have a
bunch of stuff back there. One thing you could do,
feel free to mix a little black in there to make the
leaf stand out even more. Make that dark room, that
background a little bit darker. Yeah. Help. That's a good idea. I will
do that. See you once again. I was just wanting
to use all yes, contrast of value, using
more darks against lights is another way of creating
a focal points, right? Yeah. Gorgeous. Look. Almost finished. I'm just going a little ways
beyond the edge of the leaf. I'm not filling in
the whole paper. Just making a vignette. Yeah. The point here is
just to play with color and see how they feel next to each other and
how they interact. So don't feel like
you have to do a very detailed
finished painting here. Yeah. Unless you
want to. You can. Did you that this is a really good example though
of how relative color is. Because think it looks at
how differently the leaf looks now that there's
some color around it, then how it looked when
it was just against the white of the paper. It's why it's so important.
I think when you're making a painting that
you get some color everywhere before
you start getting to critical because
everything changes so much depending on the
relationships of Color. Homeless, How is yours come in? Getting there? It is
definitely something I could spend a whole
lot more time on. But I think it's a good little experiment
and it definitely is something that can show you the difference between
cool Colors and warm Colors. I think that's an
interesting part of any Tetrad color palette. As you are going to have a combination of
warms and cools. And I think putting those
against each other can be an interesting little
experiment to see how that comes together and how
those play off of each other. Yeah, it makes it
makes each side like feel more like it makes
the orange feel warmer. It makes the blues feel cooler. And my favorite motto is more, is more ads, right? A couple of more brushstrokes, and I think we are done. So far. Great job everyone. Okay, we're not finished yet. We have a whole new
type of color palette to work with in our next
lesson called Analogous. So we will see you there. Are you ready for it, Melissa? I am so ready, Paul. Okay. Fine.
16. Types of Color Palettes: Analogous: Hi everyone, Welcome back to mastering the Art of
Using Color Apollinaire here to teach you the next
lesson about Analogous Colors. Paul, Are you ready
to learn more? I am so ready. Let's do it. Analogous
Color Palettes are just colors that are
adjacent on the color wheel. So colors that sit
next to other colors. So one thing to think about is, do you want to have
a more cool Palette? Do you want to have
more warm pellet? Do you want to have a
split between the two? Paul tonight, today are gonna be using more of a cool Palette. So we're going to start
with the blue-green. We're gonna go to blue, blue violet, and then all
the way down to red, violet. So just a grouping
of colors that feel almost like a
gradient of color. So they start one end of the spectrum and move to
another end of the spectrum. But you don't want to use
more than five colors because then it's not
really a color palette, then it's just
every single color. So you definitely want
to limit it, right? We're not going for rainbow, are going for a
collection of colors, but just some things
that feel close to each other within
the spectrum of Color. So colonize, sketched out a
little mountain scenes here. So we're going to be
working on that today. And then I have some
Colors already mixed. So I started with my red violet and when all the way
to my blue-green. So you can see that
spectrum of color here. I added a little
bit of whites in to my red violet and up to
my blue violet here. Just because I'm going to
start with those colors in the background and I want them
to be a little bit later. So take the time you
need to get that done, sketch out your mountains. Paul and I kinda
got a head start on that and mix all of your colors. If you need help
mixing any of these. It's really just what we've been doing it some of our
previous classes. So the blue, you
don't have to Mix, but all the other Colors
you're gonna have to Mix. So it's really just doing
more blue version of green and more red version of violet on one side
and a more blue, blue version of violet
on the other side. So that just the reds and the blues and then blue with
a little bit of yellow. I'm actually going to start
in the background this time. So I have my red violet
with some white in it. I'm going to use
that for my sky. I'm just going to start
putting that color back there. If you want to mix a
little bit of white in with any of your colors
are a little bit of black. Feel free to do that. You probably want to
have less contrast in the background and more
contrast in the foreground. And contrast is just how
dark or light something is. Usually. It will help add depth to a scene if you have less contrast
in the background. So if there's less of a
shift from dark to light, so I'm going to use a lot
of the same values in the background just to help
with that illusion of depth. So that's why I added a lot of white to some of my colors. Really just using a lot of
flat colors this time just to see how those colors
feel next to each other. Something about an
analogous color palette. It just feels very soft
because there is less of a shift between different hues are different colors
that you're using. They all just kinda get along. They play nicely together, which I can feel very relaxing. Anything, partly
because we're using cool Colors today to it. It has a relaxing feel to it. That's a good point about Color, is the different colors in different color combinations can definitely make you
feel different things. Yeah. Yeah. Well,
we'll keep talking about that too as
we continue with these classes and talk
a little bit more about mood and how you establish
that through Color. When you're using an
analogous color palette, you don't always have to put those colors next to each other, that fall next to each
other on the color wheel, you can move them
around and your pellet. But this one, I'm
just for the effect, I'm putting each color
next to each other as they fall on the color wheel. And that will just help with
your illusion because it, honestly, it does
happen in nature. If you look at the backgrounds
in nature or in, you know? Actually the way you
look at mountains, they tend to have somewhat of a Analogous color
palette the way they look as they go
into the background. Yeah, they kinda pick up
the color of the sky. The farther away. If you look at a sunset, it will often have
the same Affects. It will, yeah, yeah,
Analogous color palette. The way one color blends
into the next and usually it's one extreme to the neck, so more warm colors into
more cool Colors at the top. Okay, so we're just gonna keep going with each
of these Colors is the kind of go
into the background, just adding different color
per mountain range here. It's like a little
paint by numbers. You feel free to add texture if you want to add any texture to your
brushstrokes are. In the photo reference. There's some little
trees at the top of the mountains so
you can add those. Where are you can
just paint some colorful squiggles like I am. Paint some 3D shapes. Sometimes hear colors if you don't mix anything
else with them, they were be a
little transparent. So I'm noticing as I'm putting my blue down here, it's
a little transparent. So if you wanna do
two coats, you can. If not, that's fine too. It's just practice to see
how this color fields. I do like the combo
that's happening here. Yeah, it's very pretty. Just going to add a touch
of black to my blue just so it covers a
little bit better. Where else can you get a
beautiful mountain landscape in 10 min? Okay, I'm on my last Color. And then I might add a
little bit of detail on some areas or
go back and make some of my color a
little bit thicker. I'm going to end with that
blue-green in the foreground. Looks a little bit
of black in it. Just to get a little more
contrast in the front here. You, you might end
up having to juggle the lights and
darks a little bit. Sorry. Yeah. That's always
something you can go back and alter once you have
paint on your paper here. Looking good. And if you want to try this with a different Analogous
Colors game, feel free to do that too. You could do some
more warm Colors, which would give it more
of a sunset feel rather than a morning Seal? Uh-huh. Yeah. I always
think it's interesting to take the exact same subject and painting with different
color schemes that really shows you the
difference that Color. Me. Yeah, definitely.
Yeah, you could try this with with warm versus cool. You could try a
little bit of both because an analogous
color palette can bridge the gap
between warm and cool. So you could try something like that and see how that feels. The Melissa, that almost
sounds like a proved to me a pro tip. Tip for today. Yeah. Yeah. Try the same subject matter in different color
schemes and you're really see the effect color. Yeah. Okay. Well, I think we
have some mountains. If you want to keep painting on these getchar Colors fueling the way you want them to feel. Any add a few details, feel free to do that. But I think that's an
analogous color palette. Great job everybody. Hopefully you all
understand what Analogous color palette
is now and how to use it. So Paul and I are going to
talk about something a little different next time,
color in Context. Paul, Are you ready
to talk about that? Yes. Let's do it. Okay. Let's do it
17. Color in Context: Hi everyone and welcome back to mastering the Art
of Using Color. Paul and Melissa here. And today we are going
to be working with the idea of color in Context. We always talk about
how color changes depending on what's around it. So that is what we will
be playing with today. Are you ready to play, Melissa? Ready, Paul? Okay. Let's go. One of the things we've
been saying a lot is the color is relative. And today we wanted
to give you a chance to really experienced that
in a very simple way. So we started out by drawing three sets of squares
inside of squares. So go ahead and sketch
those out on your paper. You can see mine here. They don't have to be perfect, although Melissa, I'm sure
you drew yours with a ruler. I very much did. I had
to measure it all out. Oh gosh. Alright. And so for the colors that we
will be using today, you can choose whatever
colors that you want. But there is a little
bit of a thought behind why we chose
the ones we did. So let me explain
that to you first. So we chose one color that will be the center of
all of the squares. And I am using orange
for that color. I'm using a purple, so I mixed up a red, blue, and a little bit of white. Okay? And of course my
orange is red, yellow. And then what we need, so you can choose
whatever color you want as your base color. And then the next
thing that you'll Mix is the complement of that color. Or in my case, you don't have to Mix it because it's blue. You just squirt it out. But you'll need the opposite or the complement of
your base colors. So for me it's blue and
for you Melissa, purple. Wait, what are we talking about? The complement. The complement complement
of purple would be yellow. So I have a purple
and a yellow. Yes. Yeah. Alright. And then we
need a neutral gray. So I just mixed black and white. Melissa did the same
thing, I think. Yeah. Yeah. Then lastly, we need
a color that would be analogous to orange or on the same side
similarly next to, so I use red for that. You use Melissa, I have blue. Beautiful. Alright. So take a minute, put us on
pause if you need to get your Colors ready and
to draw your squares. And we will be here waiting
for you when you come back. Alright, let's go. So to start with, we're going to take
that base color. So for me, it's orange
for Melissa, it's purple. And paint all of
the inside squares. And you may want to give it
to coats if it's really thin, like my orange is looking
kinda, kinda sad. So I might come back and give it a second coat because you
do really want to get the pure is pure color as you
can for this example. Yeah. And depending on what
color you picked, it might be a little
bit translucent, so coats might be helpful. It's important you want
the color to really look like itself for this one. So it's worth taking the time
and it's not like we have a lot of detailed opinion
or anything today. We're just coloring
in some squares. But the thought behind what
we're doing is we're going to surround the orange with a different color in
each of these examples. And then you will see
how it changes the way we perceive the orange. In my case, it's the same
color. You see that? But once we put the
other colors around it, it's going to almost look like a different color in
each of the squares. If we do it right, will see some color magic here. Yes. So what's one thing
I will suggest if you are choosing a color
for your center squares, I would choose a color that
is not a primary color. I would choose a secondary
or tertiary Color. Good idea, because those colors can easily shift warm or cool. So we're doing a
little experiment here to see if this
color feels different. If it's placed next to a
warm color or a cool color. And I think you want to choose something that could
shift either way. And usually that's a
secondary or tertiary color. You get a nice review
of all your vocabulary. Yes We'll see, we'll see who's
been paying attention, right? If you need to Google
any of those, feel free. Yes. Alright, I've got my first
code of the orange on there. I am going to go
back through and hit them with one more
coats before I move on. Much better, that second
coat does the trick. It's a big difference.
Sometimes. You want it to look
pretty smooth and not brushy so that you
can really just see the overall
color relationships. And I mix a little
bit of white and less my purple just because
usually when you mix purple, it comes out very dark and
it's sometimes hard to see what color you're actually
painting. It's so dark. It can almost look black. Yes. So hopefully this does
not look black on camera. We will find out trust
me, it's purple. Can we do we really think
we can trust her. I Gone. All right. Almost done with my second coat. How are you How are
yours coming, Willis? It's coming along. I'm mixing a little bit
more white and my purple because it against
this white paper. Actually this is a good
experiment against this way. It does look very dark. So I might add a second coat
that's a little bit lighter. And that's, that's one
thing to think about too, is how you're color
looks against white or black and white. It will look darker. If it's on black, it will look lighter. So it's very interesting. Little experiment here. Yeah, you can change so many different things about the way you
perceive a color. You can make it look
darker or lighter, like Melissa said,
you can make it look more saturated or more neutral. You can make it look
warmer or cooler and it's all the same color. Yeah, it really is very
interesting how it changes or how we perceive it differently
based on what's around it. Alright, I have my
orange squares done. Let me know when you're
ready to move on, Melissa, I don't
want to rush you. Okay. I'm almost there. We each chose different colors on purpose so that
you would be able to see how this works with
multiple different colors. So okay. I think I'm okay. It's very
dark, but that's okay. That's fine. Alright, so for the top square, we are going to paint the opposite are
complimentary colors. So for me it's blue. For Melissa is yellow. Yellow. And make sure you take
the color right up against the inside square. You don't want any
white gap there. It's important to be able to see the colors right
next to each other? Yeah. Definitely. So any guesses? No. Not you, Melissa,
because I know, you know. Any guesses. What will happen
to the orange when we put the blue around it versus when we put
the red around it. Do you think that the
one that's surrounded by blue is going to look
warmer or cooler. We will find out as well. Alright, I'm almost
finished with this square. Probably use a second coat too, but I think we're
going to just let it go and we'll see
if we have time. It definitely gets the
idea across either way. Alright. So you ready for
the next one, Melissa? I think I'm ready, yes. Alright. So in the next square we are going to paint
the Analogous Colors. So for me it's red. For Melissa is makes sure if
you're using the same brush, clean it off really well. In-between colors
you don't want any. Definitely All right. So there's red for me. It looks very close
to the orange, but you can still
see a difference. It's really interesting. Yes, this one might
take two coats as well. We shall see R-squares. Something relaxing about just painting in a square. Sometimes. I know. It's like the
coloring book craze that happened for
awhile was just relaxing to sit and color something and just
fill it in February. Everyone so stressed out, we need to just have to
do to chill out something that just turns her brains
off for a little bit less. I don't have much
problem doing that. You are lucky creature you I know Your brain
is always working. It is, is if it's not trying
to figure out some problem or solve some giant problem that I could never
even think of solving. It is saying some song
that I don't want to, that I don't want it to say
it doesn't like to shut up. All right. I'm ready to move
on to the third square. How about you, Melissa? I'm almost there
getting close here. Okay. While you're doing that, Let's go ahead and
compare on mine the, the two oranges so far. So if you notice the orange that's
surrounded by the blue, feels brighter like more, everyone else feels more warm, like a really warm orange. And then even though it's
the same color here, look at how it looks
much LDL are much more. It's hard to imagine like
an orange being cool, but it is kinda pushing it more towards that direction
because it's surrounded by
something that's so similar and the contrast, the blue mix, it
feels super warm. So now for the last
one and you do you see that the same thing
happening on yours? It's interesting because
the purple looks so gray next to the blue, because the blue is
much more saturated and it feels a
little bit warmer, but it's definitely
feels gray and lighter. And then again, the yellow, it feels much more saturated. A little bit darker. More of an extreme color. It looks totally different
between the two. If you just square, stare at the purple square. It looks like a completely
different color. Yeah, same here. And it might take a minute for your eyes to adjust to
that because you know, it is the same color. But if you didn't know, just imagine you didn't
know and you looked at it. They feel very different. So now for the last one, we're going to use our gray
and see what that does. Just this should go on. Much more opaque than some
of your other Colors. Yes, it does. What do you notice
happening once you get the gray on their minds? Interesting because purple
can go gray very easily because you're mixing two
different colors together. And then I also added a little bit of white to the purple. So it does look very
gray against the blue, but against the gray, you definitely see that it's purple. It's not great. Yeah, it feels more saturated. Same here, my minefields super, supersaturated against the gray. And it's, another
interesting thing is happening with mine. My gray is a similar
value to the orange, like almost exactly
the same value. And when you put, when you put two colors
next to each other, or Color and a Neutral
that are the same value, you almost get this vibrating
edge between the two. It's like your eyes
working extra hard to try and see the difference. And that is called
scintillation. Your pro tip for today, central lesion is the vibrating edge
that you get when to, to Colors are the same value that are right next
to each other. Almost makes it like a
little hard to look at. Yes. It's something to be mindful of when you're
creating artwork. Either you can use
it on purpose or you want to avoid doing that. Just depends on what
approach you're going for, but something to be mindful
of when you're mixing colors and putting two values next to each other
that are very similar. Yeah, so interesting. So here we have it three
different colors that are actually all the same color. Awesome work everyone. Okay, in our next lesson, we're gonna talk about finding Color Inspiration.
You ready, Melissa? I'm ready to be inspired, Paul. Okay, See you then.
18. Finding Color Inspiration: Hi everyone, Welcome back to mastering the art
of using colors. So today Paulina
are going to talk a little bit about how to find color inspiration
and what that means. So where do you find
that color inspiration? How do you think about using it? We're going to talk
about all of that today. Paul, are you ready?
Let's get inspired. Okay, let's do it. Today. We're going to talk a
little bit about how to find color inspiration. Color inspiration is everywhere. I think it's just something that a lot of us
notice in nature or things around us or in
photos were looking at artwork. Even sometimes the
colors are just, they just worked
really well together. And it's something that we can often take inspiration from other things we see in everyday life and use
that in our own artwork. So colonized today are going to talk a little bit
about how to find color inspiration and how to use it and adapt it to
something else. So we're going to
have two pieces of reference today that
we're going to show you. Our first reference is a sunset.
And I think it's sunset. It's something that all
of us notice the colors. So it's something that's miraculous because the
colors are so beautiful. And so I think it's
something that we commonly look at and
take inspiration from. We're going to look at
this photo today and it's this beautiful photo
of this sunset. It goes from warm colors, cool colors at the top. And there's just a
beautiful gradation of color from that bright, bright yellow at the bottom. And that blends into the
pink up into the blues. So I think this is something
that everybody can take inspiration from and use
it in a different way. So I'm now looking at a lot of these colors today and just decide how I want to use these colors to paint
something different. So we're going to be painting
a flower and imagining how colors can be used differently as we're
painting our flower. So Paul's very
excited, obviously. Ready to start going here. So alright, so the first
thing I'm going to look at and think about is how I want to do the
background colors I want the flower to be and kinda
make some decisions. And that's something that you can think about as
we're drawing here. So we're going to start
sketching out this flower. And I'm just going to start just kind of sketching
out the general shape. Just so I have an
idea of how this is going to fall on my paper. I just like to sketch out
the general shape first, so I have an idea of
where it's going, where the center is, how large is going to be. We've been skipping this part in a lot of the
other videos just so we can get to the heart. Yeah. Yeah. But I do think it makes sense to sketch this one out together because that
is a lot of the time. That is when I am
starting to think about the color
schemes that I would want to use for a peace
is when I'm just working with the pencil and it's
just black and white. And you can just start to
imagine filling it in with, with different color choices. Yeah, I think it gives us a
chance to really think about the different shapes and how this composition
is going to work, and what colors might
work within this flower. And obviously this is just an example of
how you could use inspiration for
color and this can work for pretty much
anything you're doing. Yeah. Most color schemes do
come from somewhere. Yeah. Colors that are together
you can get combined in clothing and advertisements and grit unit graphic
design, all of that. The inspiration for
this color choices could come from solely
different places. Now you do a lot
of commercial art. Melissa, do you do like
mood boards and stuff? Yes, we do that a lot
where we will take different colors and we do it based on the
different seasons. So we deal with
Christmas allowed or Valentine's Day or
different things like that. And we take inspiration from
what's always been there. So the traditions,
but then we try to do something a
little bit different to make it more exciting. So we might think about like, how does Christmas
feel more moderate and what colors would
you use to make it feel a little bit different
without straying too far from what people think
christmas should be. So I think, yeah,
That's interesting. It's almost subliminal, like people who don't
really think or know a whole lot about color will
still respond when they see the work even though they
might not know why, right? Yes. Or if propellers will know why. Yes. If color is off to you, people will respond to that. This does not feel Christmas
or something we do. And the greeting card
industry is we think about. So what fields
Christmas to want feels happy holidays and happy
holidays is more general. So we'll use IC blues and
more winter colors for that. And Christmas is
obviously red and green, but everything feels like it goes together because
you recognize it as Something for that season. Well, art works the
same way like you. You can reuse color
palette in a, color palettes in a different
way to make something feel a little bit different or a little bit more exciting. And it's something
you can use in your, in your work all the time. Just think about using color
a little bit differently, or how do I play with warm colors versus cool
colors are what can I put in the background versus the foreground to make it a
little bit more interesting. Yes, people can always tell when a color scheme is not working. Is that a lot from some
of my wardrobe choices? Yeah. So I think
that's a common one. If you paint in a certain color in your house and
it looks really good in the store
and you've got at home and you put it on
your wall and I'm like, oh my goodness, that
is not working at all. Yes. It kind of goes back
to our last lesson to you in the
relativity of color. It looked great on that little
card in a hardware store. So many things can affect it, like the lighting in the room, the other colors in the room. Yes. Alright, so I have a basic
sketch of my flower, Paul, how are you
doing on yours? Me too? Okay, So let's just start thinking about how we're
going to use these colors. So I'm gonna go
with what I know of flowers and I know that usually there's bright colors
within the flower petals. So I love the really bright orangey yellow in this sunset. And I really want my petals
to look like a bright sunset. So I'm going to think about
the center of my flower is that bright orangey,
reddish pink color. And then my puddles will be kind of a bright yellowy orange. Okay. That sounds
like a lovely plan. Beautiful, right? Yeah. Okay, good. That's great. I'm so
glad you put that. And since I've got so
many bright, warm, happy colors and my flower, I want to do something a little bit different and my background. So I'm going to take some
of those more icy blue is that I'm seeing in the
sky more towards the top and in the water and do kind of a light blue in
the background just to contrast my sunset
palette in my flower. So I'm going to start
mixing up my background. So let's get some
background colors in here. And then in our next
session we can start thinking about
painting the flower. We're gonna kinda split
this one up into two. Yeah, So hang on. So this we will need it
again for the next video. Yes, definitely. So what are you mixing to
make your backgrounds? I have a little bit of my
primary blue and my white. So I want something pretty
light just because they don't want a ton of contrast between my flower
and my background. I want it to feel a little
bit softer and the way that this sunset does. Yeah. The colors to feel like
they can go together, but I definitely want
a cool background, so I don t think I'm just going to
use just a blue and white. I want my color to feel a little bit more complicated than that, so just a little less primary. So I think I'm going to make
a tiny bit of red just so is slightly has like a
lavender cast to it. So it kinda like which I see that a lot in that photo to you. Yeah. I really like how the flu has a little bit
of a red tint to it. It doesn't feel like a
straight primary blue. It has a little bit more
complicated than that. Which just means that there's
a little bit more color. There's some color
mixing going on there. It's not straight primary color. Yeah. I think that's something that happens when you
work with color a lot. That's our pro tip for
today even is that you find yourself being drawn
to more complex colors. Wanting to not just use colors
straight out of the tube, but create something a
little more unique, right? Definitely. Just something that feels richer about a color that's mixed or you
almost can't even tell what color it
is because there's so many colors in it. Something interesting
about that. So, alright, there's
my background color. I have a little bit of kind
of a purply blue tone. It's got a lot of white in it. It's not too dark. One thing you can do
while you're doing this, if you want to paint a little brush stroke on your paper just to make sure
this is the color you want, or put these colors next to each other as you're
starting to paint. Just to make sure this is the
color you're looking for, that can be helpful. Yeah, that's a great idea
because it's just like we were just saying with the colored
chips at the hardware store, it can look different
on your palette than it does on your paper. Yeah. So when did you get it on
the paper and maybe like, oh, that's way too dark. That's not at all what
I was looking for. Yeah. I actually, I am
anticipating that, so I'm going to add
some more white. I feel like that's a
common thing once you get the color on a white canvas or a white piece of paper like, oh, that's not what
I was hoping for. Happens all the time.
And that doesn't mean you're bad at color,
mixing or anything. It just means that it's, you know, you have
found the right one. Yes. Yeah. Yeah. And like Paul and I
were saying some of the previous lessons is
color is so relative. You can see it in
one instance and it looks totally different when it's next to
a different color. So great. So I'm just going to take this color and I'm
going to paint my background and feel free
to add as much as you want. And then in the next lesson, we will start paying
that flower and mixing some more colors
from our sunset. I can't wait. All right. We will see you then. All
right, Great job everybody. Hopefully you understand and
how to find color palettes out there in the real-world
and use them in your artwork. So the next thing we're gonna
do is talk about how to use that color palette that
you've just been inspired by. Paul, Are you ready
for the next step? I am ready. See you there.
19. Using Color Inspiration: Hi everybody, Welcome back to mastering the Art
of Using Color. So today we're going to
talk about how to use that color palette that we were inspired by in the last class. So Paul, Are you
ready to keep going? I am ready, hey, let's go quantum, everybody. Okay, So today we're
going to continue on our floral painting inspired
by or sunset color palette. And we have our
background all painted. And Paul and I went
ahead and mixed up two colors that we're gonna
be using for our flower. So we have kind of a
yellowy orange color here that we're gonna be
using for our petals. And then we have a pinky, orangey red color that we're gonna be using for
the center of the flower. And then I also just
had some black and white and a little bit
more red out just in case, I mean it one thing I did
not think about is the stem. So I think I'll probably
do a darker blue for this stem just to keep
within my color palette. So I'm gonna put a
little bit more blue on my color palette here
for what I need that. And we can start painting. Paul gets very excited to
get to start painting. If you haven't noticed by now, I get a little impatient, right? So I'm going to start with
those petals, actually. Paul, What are you
starting with? Start with the Sterling with
the petals to look at us. We're on the same page today. Can you believe it? I know it's shocking. I just have one color
mixed for my petals, even though there
is a little bit of a range of value in there. So I'm just going to paint that on here and then
I can go back and add rendering or some darker
values once I need it. But I think getting that color in there as a nice first step just so I can see how it's relating to some of
the other colors. You can paint this
how ever you want. You don't have to do it the
same way we are you doing. I'm to use the same
colors we are. Just the main goal is to be intentional about
your color choices. Yes, exactly. So if you wanted to use a different photo as inspiration
for your color palette, feel free to do that if you have something that you've collected that you really
liked the colors, or you have a photo
that you took, or just something
you've pulled out of a magazine or maybe some famous piece of artwork and you just love the colors that they used. Maybe you have a
Monet painting and you just love the
colors that you used. Feel free to make your
own color palette. Yeah, I think it's so
helpful when you're trying to conceptualize a piece
of Art and you know, you wanted to feel
a certain way. Sometimes it's difficult to
know exactly what colors you should use to achieve
that when you're just working with a concept
that's in your head. But if you can find something
in the world that has a color scheme that elicits
that seem feeling from you, then it makes it a lot easier. And that's really,
I think the main, the main goal of what we're
showing you with this, with this part of the course. Yeah, So I think we've
gotten through the part where we talked
about what color is and what colors
work together and all the different
terms and vocabulary that you can use
to describe color. And now we're getting more into the phase where
we're thinking about intentionally different ways to use color and different
ways to think about it, where you can put your own
spin on it and use what you've learned to make
your own decisions about what works
with color for you. I think it's not a copyright violation to use
someone else's color scheme. Nobody owns color. Yeah, you can't own red and blue and yellow
mixed together is just there's so many
different ways to use Color. I think as long as you're
using it differently in your composition is different and your overall painting
approaches different. You can use anything you see in the world as far as Color
and be inspired by it. Yeah. I think nature is a great place
to be inspired by Colors. So that's why Paul
and I decided to use this sunset Palette today because it is something that
we're all familiar with. An, I think it's hard not to be inspired by the
Colors and at sunset. And it does kinda have a universal starting
point because just about everybody has seen
a sunset and has certain feelings and
emotions connected to that. And so you can borrow
from that color scheme, then you're going
to tap into that. And most people
will relate to it, even though they might
not know that they're looking at the color
scheme of a sunset. It'll just give him
that feeling, right? It's kind of sneaky. I like it. But it's definitely a way to
be more intentional about your color choices and the Colors you're
putting together. Just a way to use inspiration
and a different way. I think normally you
would be inspired by something subject matter
wise or layout wise. Like, I wanna do something that looks like that instead of just seeing a color palette and deciding to use it
in a different way. Yeah, gives you more, more ownership and
control of the image. If you're not just trying to
copy what you know you see. But you're choosing colors
that you want to use, right? Okay. So I'm just blocking
in my color here. I have my pedal Color and then
the center of my flowers, I'm just going to
work on my stem now. A little bit of
dark, Neutral Blue. Wanted to kind of blend
into the background there. I really want the flower itself, the petals, and the
color in the center of the flower to be
the focal point. I'm using some cool Colors on the stem and the
backgrounds and kind of make those recede
into the background. I like to be the focal
point to in my life, so I just wear very
warm Colors and then stand against Neutral
cool tones all the time. That's all the time, yes. Sounds like a Plein. Yes. You could just have
your husband Where did the opposite view, which is actually probably
what he already does. I don't have to
work hard for them. Yeah. It's kinda like the one that we did with the orange against
the different colors. I just get to always
be against gray. So I Paul, it's perfect. Why it all works yet or are you hanging out
with you for that matter, you as we're blocking
wait to do. Yes. Ten is probably where it's
more color than I do. You see how I intentionally
choose the people in my life? Falls very intentional. That was color choices. Very yeah. Where the Wrong one. Sorry. We can't be sorry. If you dare to try
and compete with me for attention over well, that is not too far. Alright, so I got my
main colors in here, so I am just going
to go back and add a little bit of a
darker tone to some of my petals that are underneath. Get those to recede into the
background a little bit. One thing to be careful about
when mixing any Colors with yellow is it will go
very green plane. So you might want to add a
little bit more red just to neutralize it a little bit
so it's not too green, It's a little bit more warm. Cool. We're just going to add this darker color
to some of my petals. And then I think go add a
little bit of a shadow to the center on my flower
and we will be about done. We are turning out a lot of
paintings in this course. We have a lot of them are very quick, just
practice paintings, but you are welcome
to go back into any of them and complete them. I know 10 min is a very
fast quick little pro tip, saved them all, put them in
little frames and then have an Art garage sale at
the end of these 31. That is what Paul
is doing. I'm sure. Definitely. Paul knows a little
Art garage sale touch-up line work and some of my petals here just to define
them a little bit more. A little bit of a shadow
where some of them overlap. Yes, this one's going to be a
big hit at the garage sale. I can feel it's the sunset
inspired floral painting. What more could people
want that will sell it. That will give them so
many happy feelings? Yes. Great. And then on little more, one little touch on the center. And we are going to make this slightly darker
color for that shadow. The center. Solving a little black
into my orangey red. A little bit of detail. Okay. This one. All right, Great job everybody. I think we've made some
really great paintings inspired by some
beautiful sunsets. The next thing we're going to
talk about is local Color. So Paul, Are you ready to
jump into the next one? I'm jumping
20. Local Color: Hi everyone and welcome back to mastering the Art
of Using Color. And today we're going
to be exploring a concept called local Color. Your ad to get started, Melissa, I ready to find out more, Paul? Alright, follow me. In this lesson. We are
talking about local Color. And local Color just
means that the color doesn't like to get
around much stays put. So when you're
painting something and today we're going to be
painting this apple. We are going to keep
the color is very much contained within their
own little sections. And then we will be
reusing this painting again in the next lesson and branching out into
different concept. But for today, we're just going to kinda keep
it very simple. I've already sketched
out the apple on my paper and I put out red, yellow, blue, black, and white. So little bit of everything. But what I am going to
Mix is I'm going to start by making a few
different shades of red just by adding white. And then maybe I'll do one
or two with black also. But it's all just
going to be read. Even though I see other
colors in the apple, if you look, you
can see yellows. You can see places where the blue-green from the
background is reflecting. We're not going to
we're not going to pay attention to any
of that right now. So I'm just gonna take
me to leave some of my pure red because I want to
be able to use that to. And then I'm just going to make a few different
piles on my palette. Maybe three different
piles here where I can mix different amounts of
white and black with them. They get some different
tints and shades. Remember talking about that? It's back. So maybe
like a little bit of weight in one makes it
just a little bit pinker. Local Colors. One of the simplest ways of
thinking about color. So color just means if you break something down
to its simplest color, that is local Color. So this guy is blue, or an apple is red, or a lemon is yellow. It's a very basic, very basic, basic way of looking and thinking
about color. And it's something that can, stylistically, if you're
painting something realistic, oftentimes you want
to mix a lot of different colors in there
because that's how light and things work when we
look at them in reality. So local Color can sometimes hinder you in the way you think about color or the
way you approach it. And so Paul and I wanted to make sure everyone
understood local Color. And in the next exercise
we'll talk about something a little bit different
called Perceived Color. And I think this is a good
exercise to just begin thinking about color
in a more complex way. Absolutely. I think the way that we are going to paint
this today is probably similar to how maybe a child would paint an image and there's nothing
wrong with it. There are definitely
times when local Color is completely valid and might
be the way you wanna go, especially if it's more
of a stylized thing rather than realism. But we're going to use that
as our starting point. But then we will, like Melissa said
in the next lesson, get a little bit, let the colors mingle a little bit more. Alright, I have my different
shades of red here. And now I'm going to go
ahead and mix up a couple of different blue greens,
the background. So I'm using mostly blue, little bit a yellow. Let me mix that together
and see what we get. That turned very green,
didn't it's okay. We're gonna take some of that, put more blue because that
got little overboard. He has very little
yellow and blue, green. Yeah, there we go. That's pretty dark, which is good because there is a shadow. Let's keep some of that. But then I'm going to
pull it over here and mix white with it to get that lighter shade for the
rest of it, the background. Okay, Here's our Colors. I'm gonna put a
little more white in there with a pretty Light. Okay, let's do this. I'm going to start
with the background. Start with the
lighter one first. You can start wherever you like. But just remember, this is what painting
local Color here. So the Columbus or not mingling They are keeping to themselves. That introverts? Yes. Which is okay. Yeah. They might go to the party, but they are not
talking with anyone. They are hanging out with a dog. Yeah. Exactly. That's why I go
to parties is just put the dog just like before. You can only have to paint
out as far as you want. You can paint all the way to the edge of the paper if
you feel like it or you could just kinda keep it right around the subject like I am. Yeah. So just to reminder when
your painting that Apple, apple is just read
At this point. Though, hopefully by now you're seeing other colors
when you look at it. Yeah. That background
is just blew up. And like Paul said,
you feel free to mix black and white in
any of those colors. Because it's still
the same color, It's just different
tints and shades. So that's that's allowed. Listen to us making
all these rules. I know there we can do
whatever we want people. You can, but he out for
the sake of this exercise. Apollinaire doing exactly. We have no room for it over you though you feel
free to do well. Hopefully you're
willing to play with us and that's what we're saying. But I'm, It goes
if they've made it this far in the course,
That's probably true. Yeah. Or at least just
watch us, you know? Yes. Alright. And I'm putting I'm going with that little bit
darker blue-green for the part underneath the apple. So we'll have that shadow. Just kinda blending
it in the other coli. Okay, Now I'm going to clean
up my brush really well. Especially important
when you don't want the Colors to interact
with each other. Right? Now, I am going to start by just filling in the
whole apple with red, that just basic primary red. And then I'll go back and pull out a few
highlights and push, push a few shadows. We've painted a lot of
food in this class. I know it must be hungry.
Here's something. I don't know. Yeah. And if the background is
still wet like mine is, even when you're painting
along that edge, you have to be really careful so you don't drag any of that into it because it will
just want to get in there. Yes. You can always wipe it off. If it a little bit does. Okay. Just about got the
apple blocked, then it's almost like
painting something with, so think about the Apple painting it with a red
filter over the whole thing. Yeah, exactly. You still get
highlights and shadows, but it's all the same color. Okay. Then I'll just use a
little this darker color I mixed for now to put on the stem because I just like
to get everything covered. Come back, work on
that some more. Alright, now, let
me using that dark. Actually, I'm just
gonna go ahead and put in the darker shadows
that I see on the Apple. So I, especially
along the sides here, the bottom, it gets pretty dark. Looking beautiful. Now my reds already dried, so I'm just gonna get a
little bit more red on my brush so I can blend in. There we go. We'll do the same thing
with some highlights. And then that'll do
it for this lesson. Okay, shadows in. I'm gonna go for like
Colors here at the top. And it definitely,
you can tell you no, we do need some other colors eventually because
he painted on there. It's going to look
way too pink for what you're seeing in the
photo, but that's okay. Yes, that's totally okay in this step and that's part
of what you're supposed to experience using local Color because you will definitely
see the difference. And our next step, but pay attention
to how this feels, just using one color instead
of mixing other colors in and does it feel like an apple? There, there are a lot
of artists that do like to kinda start a
painting by just blocking in color
like this and just using more of a local
Color approach. And then going back and glazing in or painting
in other colors. So that's definitely
valid way to work. It lets you get some
color on there and then you can just kinda
build up from there. Alright, I've got my Apple. And again, hang onto this for the next lesson because
there will be a part two. Okay, Great job, everyone. Now hang on to
these paintings for the next lesson and
we're going to continue, but this time working with Perceived Color.
You ready, Melissa? I am so ready, Paul. Okay. See you then.
21. Perceived Color: Hi everyone and welcome back to mastering the art
of using color. Today we are going
to continue with our Apple only this time we'll be adding more color
to it that we perceive. Are you ready to start doing
some perceiving, Melissa? Hi, right, Paul, you make
it sound so magical. Okay, Let's go precede you. And we're back. We have our apple with us again. And we are going to dig
a little deeper this time into the colors
that we're seeing. Perceiving, I guess
would be a better word because today is all
about perceived color. So we have our local
color established. We have our red apple, we have our blue-green
background. But now we're going to
take it a step further. I'm still using the
same color palette that I was in the
previous lesson. I have my different shades
of red, darks and lights. I also have different
shades of blue, green. And then I have
some extra yellow and white and black
on my palette. Also. We're going to just
kinda move all around in the painting today. And I want you to
also feel free to deviate from what
you see me doing. Really study the image
and see what colors you see where and try to match
them on your painting. That's going to be the best, best way for you to
approach this one. But you can also certainly follow along with
what I'm doing to, but it's important to
have that critical, I think and compare European painting to
the reference photo. So for me, the first
thing that I want to do is to get some of those yellows, oranges, the other
colors into the apple. So it's not just this
bright red thing. I'm going to actually
take some of the like pinks that I made and separate them and
add a little bit of the yellow in so that I'll get kinda like light
orangey, peachy colors. Yeah, it's funny
how anxious I am to add yellow into this apple. Like it drives us crazy that
it's not the right color. Yeah, I guess so. Okay. I want to fix this pink
apple and not make it pink. It is funny though, because
that is how we perceive it. That's what we see when
we look at the apple. And so Paul and I are
so anxious to fix it because this is not what we see, local colors dot what you see. It's kind of a basic
Understanding, the most simplest,
simplest understanding of what color is and
how it appears. Yeah, it's not always reality. I think it can be
frustrating for beginning artists because we tend to want to paint things
the way that we think that they look
instead of what we see. And so the temptation would be to just paint in Apple
different shades of red. But look at, look at the difference it's
making already just putting a little bit of
those warmer yellowy, orange, peachy
colors here into it. There's very little
of this apple that's actually just like pure red. There's a lot of orange, There's a lot of creamy
yellowy color paint. What you see, not what you know, there's your pro tip, but everybody says that, but it's harder it's harder to do than you think you
really have to get out of your own head and just look at the reference a lot. Yes, definitely. And that's true for
any object that chair painting and it's
something that Paul and I talk a lot about, is just really look at what's in front of you instead of what you think
is in front of you. Yeah. It's two different things. Usually. Break it down into tiny shapes
are tiny bits of color. And what are you seeing
in those small parts? There is something in
there, there definitely is. To use some of the things
that you already established in the last round
and just add to it. That's like policy and some
people approach it that way. So people will start
a painting that way. You know, it can be
very overwhelming. When you are, when you're painting something
and you really start being able
to perceive color. Well, you, I've seen
this happen with a lot of my students where they start to feel very frustrated
because they're looking at a reference and they can see that there's so
many different colors, but they have no idea
how to mix it or how do I make this thing
look like that color? And it's usually, the answer is that it's not just a color, it's a bunch of colors. And you might have to do several layers of
painting before you get all of these
colors on there. So having a strategy can really help doing
an underpainting or doing a kind of blocking in the local colors first
is one way to do it We're doing a value
underpinning, but color can be overwhelming when you
really start seeing it. So that's not a bad thing. And after taking this course, you might find that you are feeling a little bit more overwhelmed sometimes
about color, but you're seeing more color. And I just wanted to assure
you that that is not bad. That's a good thing. Just means you might need
to take your time and do a few more layers and until you get all of the different
combinations that are there, because it's usually
not just a color. It's about the combinations
locally, right? Right. And a lot of it is
building up two colors. So layering colors,
especially in acrylic, you can layer a lot
of different colors over each other and it will, it will look so much better because you will start
to see underneath certain layers and
certain colors will shine through and certain
areas it will actually look more realistic. They'll start to see
some of that layering. That's actually one of the
things I'm doing right now. I noticed the parts of this
middle part of the Apple. Ten of the red takes on
a very orangey quality. Instead of mixing and
orange on my palette, I'm just glazing a
little bit of the yellow on top of the red and it's
turning orange for me. So take advantage of what
you already have there. Yeah, definitely. Then down here along the bottom edge and
even along the sides, that blue-green color
from the background is starting to reflect into
the apple a little bit. So I want to capture that
to clean off my brush. And I'm going to maybe start
by doing that as a glaze. Also. Take some of this, really thin it out with water. And I'm coming along this edge. Hope you know what,
That's too light. I'm going to use the darker one, the shadow in first. It's a pretty dark edge. There we go. You see this a lot with
objects that are rounded, especially the edges
will start to pick up a little bit of whatever
colors in the background. It's like reflecting that color. If you've ever painted
this way before, it might feel weird to be
painting clean onto an apple. An apple that's
not a green apple. Exactly. I read that. Well, that's great. But it really does. It really is some, it's
a complicated color. So Paul and I talked about complicated colors a
little bit before, but there are a lot of
different things mixed in there and it might have
a blue cast to it, but it might be, it
might still be a red. It's playing around with
what works down there. And that's why Paul mentioned
glazing is because that's kind of a slow way to build that color in there without
just adding straight blue. Because I think you did that, it would stand out for sure. And that can be a
fun thing to do to like if you want
a really dramatic, exaggerated style
type of painting and I push those colors,
relationships farther. But if you want to
stay more towards realism than building
it up subtly, probably the way to go. Now that apples, it makes it
look so much more around. Just from doing that. Yeah, it really starts
to come to life as you add more colors to this. Yeah, it's kinda cool. Color is one of the main
elements that can really help create the
illusion of volume. And in a piece, value is another one, but color also does a lot. To kind of go together. Yeah. You cheer. Color can have value. It can be darker or lighter. So that's something you
want to think about as you're adding to this. And then I'm just going
to put a little bit, I'm going to mix
some of this darker red with some of the orange so that I
get that stem color. It's kind of a oranges
brownish color. Paint that right on top of
what I already have on there. When I'm painting with acrylic, I like painting
lighter highlights on top of darker paint. You can't do that
with watercolor, but with acrylic and oil. You can. And I liked
the way that looks. Right. I think we're just about there. I'm just going to
put a little shine. The middle part here. And then I think we will have our apple uniform reflection. This is the kind
of thing that you could certainly keep going with two there a lot of
details that I skimmed over. All the little, you know, all the little dots. There's a lot more
texture than I painted, but I was able to
get the essence of it and it definitely feels a lot more realistic now that we have this other
colors in there. But feel free to keep going and painting on this as long
as you want to you. Great job everyone. Alright, in our next lesson, we are going to be
talking about and even different way
of working with color and that is
imaginative color. You ready for that, Melissa? I am so ready, Paul. Alright, I'll see you there.
22. Imaginative Color: Hi everyone, Welcome back to mastering the Art of
Using Color today, or we are going to use our
imaginations and try color. That's maybe a
little bit different than what we've been doing. A little bit more dreamy
and imaginative and phon, follow anything, sounds dreamy. Alright, let's do it. Alright, we're painting
these lovely clouds. And Melissa and I are each using different colors that we
have just kinda invented, different color schemes
that we've invented. And so we want to encourage you to take a minute and look at the black and white
image and choose a color scheme that
you want to work with. It could be like one of
ours or you could come up with something of your own. So what colors are
you using, Melissa? I have a Palette of kinda like a bluish
green for the sky. And then I have kind of a
pinky peach color and some of the clouds Mix was some white and maybe a
little bit of darker blue. Lovely. And I am using lavender is pinks and yellows to Easter. And we're just going
to dive in and start painting and you can
watch both of us. You can also ignore us. What we've been through a lot of different exercises
now that show you different ways of coming
up with color schemes. And now you just get to
kinda put that to practice. The color scheme
that works for you. I think we've given you a lot
of different ideas on how Color Palettes work together
and what colors can work. So choose the one
that works for you. And here's your pro tip. We're just going to get it, get onboard right from
the start here. You, when you're working
from a realistic image, as long as you can
capture the values, meaning the lights and darks
and how they're arranged. You really do have
a lot of freedom to be experimental with color because it will still
read as what it is supposed to be as long as
the values are working. Okay. Yeah, definitely. So keep some of those lights and darks in the same places, but they can be any
color you want. And I think Paul and I have talked through how to
mix different tints and shades of different
colors and how to add white and black to make something
lighter or darker, or adding other colors to
add a little reflected color so you can keep all that in mind while you're
painting this today. Exactly. What kind of reviewing
everything we've already done. Putting it into practice. You've earned a nice FUN, relaxing chill lesson here. Paint some happy, fluffy clouds. Painting clouds because
you can be very brushy and things don't have to have
clean edges or anything. Yeah, I actually really
enjoy painting clouds. There's a lot of
different color shifts and interesting things going on that you can play with. You know, one thing to think
about why you're doing this as the temperature
of the color and where it could get a
little bit cooler and where it could get a
little bit warmer. And playing with
that a little bit. Definitely a lot
of times in this, not always true because it
depends on the kind of white, but a lot of times
the shadows will be a bit cooler and highlights
would be a bit warmer. But also, you can
do the opposite of that sometimes
to just depends. I think the nice thing
about what a pain, happy clouds Every day. I was going to say the
nice thing about clouds is the color is always
shift and change. And, um, there's warms and there's cools and there's
a mix of different values. You get a lot of different
things going on in clouds. So yeah, do you can experiment with a lot of
different things and still make it look like a cloudy sky. There's a lot. It's
it's kinda like Elaine. I mean, it is a
landscape relates up to it's like a cloud scape, but it has all the
same elements. There's depth. You have atmosphere, you
have the effects of light. Not just big white fluff balls. There's more to it. Yeah, there's a lot
going on there. Hello, you can get all
my shadows and first, so that's what I
am doing and then I'll start getting lighter. And Brady, I can write for the different colors and start putting those in. Try to establish sounds
like a reversal of what you would expect from
the two of us, does it? All right? I'm like like having a
strategy and you're just going crazy with color
and will happen to you. Yeah, I think that's, that's what clouds do to me. Wow, Okay, we're going to paint
more clouds all the time. I think one thing that
is FUN that I enjoy with painting clouds is trying mixing some of the
Warm Colors you have Wix with the cool
Colors and see what you get. I have some of this
lighter peachy pink color and a slightly
darker aqua color. And I'm mixing them
together to get a more neutral color
and then mixing that in here to see how that feels when I put it next to
some of the brighter colors. I think you can really
set off some of the bright colors with some
of the more neutral colors, which is one of my one of the things I enjoy the most about
playing with color. Yeah, yeah, it's kinda like even just using a few
different colors, you can make it feel like a very robust color palette by starting to mix
them together, it won't feel like you're just
using two or three colors. It will feel almost like
it's the full range. I think this is a good time to experiment to see what happens when you mix colors that you
wouldn't ordinarily Mix? Yeah. Always a good
time for that. Yes. I know one thing that a
lot of my students say to me is that they're always
so afraid of wasting paint. I've seen them like putting out the tiniest little drops of paint and then being afraid to experiment with mixing colors because they don't
want to make something and have it not turn out right and then feel like
the color is wasted. You know, it's not wasted
if you are learning and experimenting and trying things and whatever you end up mixing, you can always adjust it and
make it work and we'll do, we'll cover that in
a future lesson. But don't, don't be
afraid to put out enough Color and to use it. I mean, that's what this is for. Yeah. And I know it's expensive. I know it's hard, but you do not have to buy the
expensive paint. You can definitely get away
with the cheaper paints. In fact, I'd recommend it, especially if that
will help you to feel more comfortable using it. Yeah. Hey, Paul
and I tend to use the cheaper paint for
things like this where we know we're just experimenting
or it's just a tutorial. Yeah, there's no shame
in that. It yeah. The biggest difference is just the cheaper pain is
usually a little bit thinner, so it might take a couple coats sometimes depending
on the color, but otherwise, you know, it's a great city, sensible. Yeah. I'm gonna go for my super
warm highlight color here in this light spot. Just by how you
arrange the colors, you can really make
it feel like there's light coming through.
I love that. Yeah. You can go right on top of one color with another
color with Acrylic. You don't, don't feel like it's once you've
painted a spot, you have to be done with it. You can. Acrylics
all about Layering. Yeah, that's the Fun part of it. It tends to look better
when you layer it, so don't be afraid of that. Yeah. You can do different levels of opacity
like paint some area. If your painting over
top of something, you can paint it really thin, like a glaze are a wash and the other information below
it will still show through. And this is definitely
a painting where you can use your brush strokes
to your advantage. Yeah. How's it coming
there, Melissa? And it's getting there
in definitely playing with color and having
FUN over here. Need. I don't think I'm going to paint the little moon in there. I don't run out
of time for that. A little abstract at this
point, but that's okay. Yeah. Well, this is going wild. I am going out-of-control
over here. Gas Melissa. This is what learning about
color theory was used to be, so in-control and now
C is going crazy. Just, I'm just about them here. Layering in a little bit
more on my cool Colors here. This is definitely a painting
you could keep working on and building on top of and
playing with different colors. Oh yeah. Really cute, fluffy clouds. Yeah. Getting clouds. Alright, beautiful job everyone. Hopefully you enjoyed using your imaginations and trying a different approach to color. The next thing we're
gonna do is examining a mood and how color affects it. Paul, What do you think? I am ready for that? Okay. I am in the
mood. Let's do it.
23. Color Mood: Hi everyone and welcome back to mastering the Art
of Using Color. Today we are going to be
experimenting with how color can affect the
mood of your piece. You ready to play with
some moody pieces? You know, I'm always
ready for that. Alright, let's do it. Are you ready to create
some mood, Melissa? I'm ready. Yes. Hi,
I'm in the mood. I am in the good. So we sketched out this cute
little palm tree and you, Melissa and I are
both going to show you are versions as we go along because we wanted to use two very different color
schemes to show you how that can affect
the mood of the piece. So also, what mood are
you going forward? Mine is going to feel more calm, serene, kinda right
after it's rained, it's in the morning. Very relaxed. I think cool Colors often have that Affects, feels more common. Kinda less energy,
just kinda serene, I guess in mind is going to
be the opposite of that. Mine is going to be
bright, warm Colors. Ready for the disk go. Sorry, D yes, pause
trays ready to party. So the Colors I
have on my palette you can see are a lot
of the warm tones, reds, yellows, and then
I lightens them some to make some pinks
and creamy colors. But then I also put out some
cool Colors to I have blue, green, and purple, so I have
a little bit everything. So mine is just going to be a
color explosion. You ready? Ready, and I'm not surprised. All right, Take a moment and
sketch out your palm tree. Choose your color scheme. Think about what kind of mood you want your piece to have. It does not have to match ours. Then when you're
ready, start painting. You can achieve a mood in, in a few different ways. You could go with
different colors, you could go with
different values. So maybe everything is
a little bit darker, or maybe everything has
a little bit lighter. So it just depends on how
you want to achieve that. And they're definitely
different ways to go about it. I think it's an
interesting thing to think about when you're
creating a piece of Art. Because a lot of times when people are first starting out, you choose a reference
to draw or paint. But you might not
always think as much about how is that going to make someone feel
when they look at it. It's more about just like the technical exercise of
recreating whatever is there. So now, using your
understanding of Color, you can actually
manipulate people's minds. The Tower of manipulation. It's the best responsibility or not. Abandoned. Yeah, with a bandwidth. That's my that's my approach. I'm just painting kinda
right over the palm tree for now and then I'll go back
and bring it out on top. Yeah, definitely got
my bright pinks. And I'm going to do a gradient in the
sky where it will go from the bright pink at the top to more of a
yellow at the bottom. Very tropical, colorful vibe. Mine's a little similar, but it starts with kinda cool yellow at the bottom in it feeds into a kind of a greenish blue, aqua color into blue at the top. Will hopefully. One thing to think about two, and you're trying to achieve a mood through Color is think about how much contrast
you have, your image. You know, depending
on how you do it. What's your values are? If you have, you have darker values and
a little contrast, you're definitely going
to have a darker mood. Moody, and deep. Yes. If you have a bright
colors and a lot of contrast is probably going
to have a lot of energy. I feel like we really did a good job of each
of us choosing the correct mood to fit
our personalities. Yeah. Yeah. So choose
the mood that fits your personality and what
you'd like to look at. Yeah. And you can paint
more than one also. I think that's always a FUN thing to do with
exercises like this. Trying out different
moods, same subject It's kinda like Painting
different rooms in your house. You probably want to
share your bedroom, just feel one way
and your living room to feel a different way in her kitchen to feel
different ways. So you pick different
colors depending on how you want to feel every day when
you're in that room. Who? Just about done with my sky. Know my little gradient here. And then I chose have a grayish blue and
Neutral Blue for my palm tree. I didn't want to go too dark, but it's definitely darker than my sky because I
wanted to stand out, but I still wanted it to feel
kinda calm and soothing. Who? In the other hand, I'm gonna go for a lot of
contrasts with my palm tree. So I'm going to start
by just painting it all with this dark purple. Then I'll go back and add
some more stuff on top. Let me just kinda get a
base coat on there for now. More of a feeling of being
kind of silhouetted. Oh, yes, this palm
tree is ready to party B minus ready to take it out. Answer is that in
a beach chair and not do anything for
at least a few hours. And pause, palm
tree keeps coming over and try to convince
it to go somewhere. Metaphor, is this
a metaphor for, for instance, maybe inspired
by true life experiences. I don't know. Maybe it's just a little come on you a palm tree. Here's a pro tip for you
for this, for this lesson. One thing you can
do once you've made a sketch of what
you want to paint. If you're not sure
about the color scheme, I'm going make some copies
of it just like, you know, xerox copies or scan it and printed out a few times
and then just use a quick medium like colored pencils or markers
or something where you could kinda just roughly try out different color
schemes on the copies before you go to
your real piece. Where if you're savvy
with digital tools, that's kinda how I do that. I will play with
color schemes in Photoshop before I
started on a piece? Yes, just helpful to
see how the colors are going to look together
and how it will make, how it changes the piece,
How It makes you feel. Definitely. You could probably do it on your phone to
after you paint something, you could take it into your
photo program and edit it, play with different filters
and see what you like. Maybe go with
something a little bit warmer and see how that feels. Yeah, for a little bit cooler
and see how that feels. It's not cheating, It's
taking advantage of the tools that are
available and go for it. Let me get this trunk on
there and then if I have time to a few little
accent colors on the tree, how is your Moody tree coming? Is coming along very nicely. Does it need a friend? Now? It likes being by itself. It enjoys its own
company really. Holidays for forage. Alright, I'm just
putting some accents of this really bright blue, green and some of us, please. Okay. Well, a little bit
of red into the trunk. Few spots. Oh, yes. Just kinda brings it brings that area to life a little bit. Yeah. You are having
a party over there and I can hear that. I can hear the techno beat blasting in just about
finished with mine. How about you? Yeah, I think so. I think is a very
chilled out palm tree versus versus my my little
party tree on the go here. Awesome work
everyone, you did it. Okay, in our next lesson, we are going to be tackling
a question that a lot of Art students have asked
us over the years. How do you Match Colors? You're ready to answer them. Finally, Melissa, I'm ready
to try my best, Paul. Okay. I'll see you then. See you soon.
24. How to Color Match: Hi everybody, Welcome back to mastering the Art
of Using Color. And today we're
going to talk about the very popular color matching. I know this is something
that trips up artists all over the world
and something that is always tricky
for me and Paul, I think, right, Paul. Oh, no, speak for yourself. I've totally okay. The policy expert, but
unfortunately I'm going to be teaching this section
where it all in trouble. Really great. We will figure this
out together and we will do our best
I color matching. I'm ready. Okay, let's do it. Today. We are going to
talk about color matching. All right? What do you think? I think that this will be a great job for you to teach us. All right, so I had
my palette here, I have a piece of paper. So we're gonna do something a little bit different this time. We're not going to do
a finished painting of the reference that
we're looking at today. We're going to look at this. We're going to analyze
the Colors and we are going to decide which
colors we're going to Mix. And do little
swatches on a piece of paper to see how
close for getting. Excellent. Then if
you feel inspired and want to paint the bird
afterwards, you absolutely can. But we wanted to focus
on the Mixing this time. Yes. Yes. Alright. So the first color we're
gonna talk about and what one of the things that's really important before you start, anything that you're going
to paint as analyzed, the main colors in whatever
you're looking at. So the main colors I'm
seeing here are the balloon, obviously in the
parent, the yellow. It has a little bit of
black and white and then some green on
the top of its head. So we're going to focus on mixing some of those
Colors and try to get as close as we can to a medium
tone for each of those. Alright, so the first
thing I'm going to approach is this Boolean, because they feel like this is the color that really
stands out to me. And I want to get this right. So whenever you're approaching color matching and mixing paint, you and decide what
your base color is. So obviously this one is blue. So I want to take out
a blue that I have. I had my primary blue that
I use for everything. But if you feel like you have a tube of paint and the blue is closest to this color
blue, I would choose that. Whatever blue you have, you can always mixin, get it to the right blue.
But I would choose. Make it easy on yourself. Start with the one
that's closest. So I'm going to put
out a little review here on my palette because I
know I'm going to need that. The next thing I'm
going to analyze. So if I'm doing a medium blue, I don't want it to be really dark and I probably
don't want it to be as dark as the paint that they just
put out on my palette. So I know I'm going to need
a little bit of white. If I'm going medium, I don't want a ton of white. I don't want to overwhelm
the color with white. I just want kind of a 50% blue, not too dark to light. So I'm going to add
a little bit of white and see where
that gets me. Okay? Yeah, it's always better
to start by adding just a little and then you can always
add more if you need to. Yes, definitely. And that's true with any
color that you're Mixing. It's always an experiment
and it's always a process. So you're going to
start with something, you're going to add a few
more things and you're going to see how
close you can get. So I'm going to start with
this blue and this white, and I'm just going to
mix these together and see what happens. I have my Palette knife, I'm working on my disposable
palette paper just because they feel like that's easiest to see for everyone. But if you feel like
you want to work with a different to the appellate,
that's fine, too. I'm going to mix
this up until I get something that feels
like it's not streaky. It's totally mixed. The two colors feel like
they're blended together. And then I'm going to
take another look at it and see how close am
one thing you can do, and this is a pro tip. Something I do in my paintings is I will
print out my reference. And as I'm mixing colors, I actually do a swatch of the color on top of
the print to see how close am that is a
true proved to break. It's if I'm trying to match a certain skin tone and I'm just not sure if I'm
going to get it right. I will just paint on top of
it and see how close you are and then you can tell which
direction you need to go. If you need to go warmer,
if you need to go cooler. Alright, so I have
my blue here and I'm looking at my reference. I'm looking at the bird's wing. The main color that I'm seeing, and my blue feels
a lot brighter. It doesn't feel as
smart as neutral. So that means I need more gray. So one way you could do this is that a little bit of black. Since we already
added some white, you can add some
black and that will probably tone it
down a little bit. You could also add some orange because that is a
complimentary color. So you could go either
direction with this. If you feel like your blue needs to go a little bit warmer, I would go with the orange if you feel like your
blue is already pretty warm and the hue or the color feels like
it's right already. It just needs to go a
little bit more neutral Go with the black. So I'm
going to choose the black. And I'm at a tiny bit
not allowed at all, just, just a little bit. I might even add a little
bit more of the white because then you're
essentially adding gray. And I'm going to try that. Okay. Sorry. I just got to say this is the
process that I go through, whatever I'm mixing a color and I'm obviously not talking
to myself as I do this. I'm just kinda taking note mentally like Where am I,
Where do I need to go? How far away? Mi all of that. It's worth taking
the time to do. It's something that most
artists want to skip, especially when they're
first starting out. They just wanted to
put out a few colors straight from the tube on their Palette and start painting. But you end up with such a more rich and diverse
color palette if you really take the time
and premix your Colors. Okay, so now I have something
definitely more Neutral. It's feeling to neutral to me, so I'm going to have a
little bit more blue. It's also feeling a
little too yellow. I might add a touch of red. And that's, that's the way you're constantly going
to examine color. Am I going in the
right direction? So if something feels like it
is more on the yellow side, so more on the green
side with flu. I want to push it more on the purple direction and purple, I'll get purple by
adding some red. So that's always kinda
the thought process. I think it's a handy to
still have your color wheel nearby so you can look at
it as your Mixing Colors. And if you see it's
going too far one way, then you can look on the colon wheel to know what you need to add to get it to go back. It's like you're
never it's never a lost cause when
you're mixing paint, you just have to keep taking baby steps until you get it
to where you want it to be. And I do think the Palette knife is really useful
tool when you're mixing color because
you can just grab a little bit
of Color You Like. I could put some red out of my Palette and just
grab a little bit with my knife and just slowly mix it in until I get
the color I want. Yes. I do think the red
is helping here. What I want. A little bit more blue, and then I think I'm pretty close to what I'm
looking for here. You see even an expert like Melissa just takes a
few tries to get us. It doesn't mean that, you
know, you're messing up. If you combine two colors are three Colors and
they don't turn out exactly like what
you were expecting. You just have to keep going. Yeah. It is definitely a process. And as you're working on this, if you have a little bit of paint on your knife
and you want to hold it up to your screen
and see if it's close. You could do that too. Sometimes I will do
that and just look at the two together. Alright, so I think I have
a blue That's pretty close. It's kind of a medium tone blue might be something that
I would use more in the shadows is the wing goes down towards the
bottom of the image. So what I'm gonna do now that
I have a blue that I like, I'm going to take
my brush and I'm just kinda paint a little
swatch on a piece of paper. This helps me see what the
color actually looks like once it's on a white
piece of paper. Okay. Gorgeous. All right, so the next
thing I'm going to focus on is my yellow. I'm going to clean off
my knife for sure. That's important. Yes. Looking at this yellow, it is very warm. It does not have a lot
of green tones in it. So I don't want any of that
blue left on my knife. I'm going to look at the
color in my tube of paint and I want to see
how close it is. I'm just going to
compare visually. So my yellow is pretty warm, which is good because, you know, the bird's feathers
are very warm. I'm going to start
with the yellow. I'm also going to put out a
little bit of red so I can grab a little bit on my knife because you won't need much. Reds, one of those power colors
when you start adding it, it goes along way. Yeah I'm actually going to put out a little bit of
black on my palette because there are some areas was where it goes a
little bit darker, but you have to be very careful with black
and yellow together. So I'm going to grab a little
of my red and I'm just going to Mix that in with my
yellow and see where I get. If it starts going towards
greens and you know, there's because of the
blue in the abundantly. I ended a little bit of red. Actually really happy
with this color. It's actually very similar. It's just a little too bright. So again, I'm going to
add a little bit of white and a tiny bit of black just to neutralize
it a little bit. One thing that might also
work with this is pull a little bit of that blue and a little bit of that
red to make purple. And that will turn it
down a little bit. Cool. That again, I will be very
careful with that because it can yellow can neutralize very quickly and turn into
something not very pretty. Yes, it's one of those Color is that it can go into
bad direction fast. Yeah. A little bit of gray. Mine did start to go a little
bit more green. Now a little bit
more white and a touch more red just to
warm it up a little bit. And it's just this
constant push and pull, push and pull of Where
do I need this color to go and what can I add to it to get it to go on
the right direction? Yeah. And how much do I need to add? And if you're not
sure how much to add, I would try very
little and just do small increments to where you need Where do you
need the color to go? I'm actually pretty
happy with that. Yellow. I feel like it's
a really nice warm tone. It's kind of a medium
tone that will make a nice base color
these feathers. So I'm gonna do a similar
thing that I did to the blue. And I'm just going to
take a little bit on my brush, on my paper. I'm going to do
something next to the blue so I can see how those colors look
next to each other. I'm going to look at my paper and I'm going to look
at the reference. I might have decided
those colors feel similar next to each other that
they do in my reference. They do. Of course, there's a lot more
colors in there, but this was a good way
to start the process. But I challenge to you as to Mix that green that you
see in the background. Yes. Yes, that's your goal and
what colors you have to Mix to get that
green. Let us now. Great job, everybody,
hopefully that gave you a better understanding
of how to match colors, what to Mix and when and how
to correct as you're going, the next thing we're going
to talk about is how to use Primary Colors to Mix
any color that you need. Paul, Are you ready
to get started? I am ready
25. How to Use Only Primary Colors to Mix Every Color You'll Need: Hi everyone and welcome back to mastering the Art
of Using Color. And today we're gonna
be working with primary Colors only and learning how to Mix
Every Color you could possibly mean just
from those three. So you're ready to do some
painting on a budget, Melissa? Ready ball. And so it, alright, let's go. Alright, let's mix
some more colors. Today are Inspiration is
this big pile of fruits. We're going to not
actually paint this, just like with the last lesson. We're gonna focus on
mixing the colors together and doing
some swatches on the papers so you
can see how they're relating if if it's
looking right, and then you are welcome to paint the image on
your own afterwards. But today we're just mixing. So I want to start. I actually, I
should say too that we are only using
Primary Colors, then that's what we've
been using all along. But there are some pretty complex
Colors in this reference. So I think it'll be a
really good challenge to try to match some of those. We will see how
many we can get to. You ready, Melissa? I'm ready. Alright. I get to steer the
ship this time. This should be interesting. I'm going to start
with the green, and there are few
different greens, but like the top-left corner that the green that I see there. So as we know, green as a combination
of blue and yellow. So I'm going to start
by mixing those two. You will see what
else we might need. I'm just gonna do about
half of each Mixing. Make sure you, if you're
using a Palette knife like in the colors together
really well so that they all become one. You don't want it a lot
of streaks and okay, so that is a very
bright, very dark green. And now I'm going to lighten it first if think if I
can get it closer to the value of what
I'm seeing there, then we can assess
the Color closer. So I'm going to baby steps like we were
talking about last time. So put a little white in there. Okay. About Light
and did some more. Now sometimes what I will
do when I'm mixing color, here's your pro
tip from me today. If I know that I'm painting something that has
different values, like shadows and
highlights and things. Sometimes I will start mixing the color and then separate
it in half and then just keep lightening
the other half of it so that you have that darker color already
made, already preserved. So that's that's an
option that you could do. I'm not gonna do it
right now, both. Alright, that's
starting to get closer. Little bit more white. And then, Then we'll study the temperature and
also the saturation of it to see if we need to
make any changes there. Alright, so I'm going to put
a little bit on my knife. I'm just holding
it up in front of the screen so I can compare. Now what I notice a
couple of things. First of all, looking at the
temperature of the color, the green that I have mixed fields just a
little bit too warm. It's got a little too much
yellow in it to be that green. So what do you think we need
to add to it to fix that? Melissa, do you have any idea? I think we need some blue Paul. I think you are right? I also think we might need more white if we're adding blue. Yes, because you'll
notice the blue is quite dark if you're
using this primary blue. So once you add that in, it will darken the
color overall. All right, that's, that is heading more in
the right direction. Now, I do think it's
interesting holding up your knife to the reference and
looking at it that way. And sometimes it's helpful
to squint to see if you can tell if the two
colors are in alignment. Before I held up the color, I thought maybe it was
a little too cool. So it is used to look
at it that way. Yeah. And sometimes your brain
will play tricks on you and it will think it's what, as you go one direction, when it should actually go
in the other direction. So yeah, that's really
helpful, absolutely. Well, you also have that whole
issue happening of Color in contexts like we
demonstrated a few lessons ago, when you're looking at
the image on your screen, you're seeing that color, but it's surrounded by a lot of other colors that
could influence it. So alright, so I've got, I think that that
looks pretty good. I'm going to hold it up
one more time in check There we go. Alright. Neil, did you aren't
quite there yet. Take your time and
keep adjusting and tweaking it until you
get the color you want. But when you're ready,
go ahead and paint a little swatch on your paper, and then you'll be
ready to do color. One other tip. I would start with a little
bit of paints because you could end up using a lot of paint if this wasn't going
to in the right direction. Yes. I just demonstrated
that for them. Well, I also
completely messed up my white so by getting
some green at it. So it's a good idea to clean off your knife in-between colors. So I'm briefing that
off of there and I'm going to put out
some more white. And we will just pretend
that never happened. Good as Mood. Alright, so next, let's see. Let's go for that orange
color that's at the top. The second one from
the right on top. So we know orange is going
to be red and yellow. Start with and yellow. Red. Looks pretty nice already. All right. I'm holding it up. It's not bad. I think
you're going to add just a little
bit of white to it? Yes, my orange is
very deep orange. Know exactly what
I was looking for. Keep lightening. You might actually add a little more yellow because
the red kinda takes over. Yeah, sorry, I was thinking
in those same thing. That's feeling
pretty good to me. Folders up a little more red. Again. It's always that
like pushing pool, you know, you'll
stearate one way, then overcompensate and
go too far the other way, and then you have to go back. But that's all a part of it. If you look at it as being like you are trying to
solve a puzzle rather than something that is just like really
scary and hard and, you know, thinking
You'll never get it. Those are two very different
mentalities and one will probably lead you to more
successful outcomes. Yes. All right, I'm going to
color it looks good to me, so I'm gonna paint that on my paper right
next to the green. Okay. Now let's pick a
complicated one. Let me go. Still on the top row, the only one that's left on top, the one that has kind of like that reddish red burgundy is Color grapefruit or
the sled orange. The grapefruit.
Grapefruit. Okay. So we're gonna go take a minute before I
tell you what I'm doing and look at
it and think about what you might use if you
were going to Mix that, if you were going to
Mix that color, right? The first thing I'm
going to put is red. I know that I'll need that. Sometimes there's always an
obvious answer at first, like an easy in easy answer. It's good to start with that
one because that means that it's like probably
got the most of that. If you look at it and that's where your mind goes right away, then chances are you're going to need probably a lot of that one. So I've gotten the red. But then what you can do
is like Melissa is TRC, put it on your knife, hold
it up and compare it. And then you can
start to see what does it need added to it
to go more that direction. It's definitely too bright. It's definitely to warm, it needs to be cooled down. So let's try adding a little
bit of blue to cool it down. And I'm just doing tiny bit. I don't want it to go purple. I mean, I I just wanted to take the edge off
of that bright red. It's already helping. What I might do next. Instead of adding more blue, I don't want it to
go to peripheral. Like I said, I'm gonna
put a little bit of black in it. Not much. The black also has blues, so it will continue
to cool it a bit, but it will also
help to darken it some and, and neutralize it. So it's kinda, those are
all things needed to happen to that color in
order to get it closer. So starting to hit
the right direction. Remember to hold it up
and look at it because I think that's really
important when you see this color on white, it's going to look very
different against other colors. Definitely. All right. I think that is like if yours isn't quite
there, keep adjusting. If you may be added too much
blue or too much black. And it went too far. You can always add
more red back into it. And again, remember my trick. If you're, if you're paint
pile is getting too big, you don't want to keep wasting too much paint to
mix this color. Just take a section of it
divided in half or in, into thirds or something, and then just keep
working on that one, on one section so
that you don't need as much paint to make
a drastic change. And you can always
use the other half of that color for
something else. Exactly. You could
turn it into something completely different
or it could just be like a different value or different different
alternative version of that same color. All right. I'm painting mice Color Swatch the vet,
it's Transparent. That red is a pretty
transparent colors. So to see the true color on the paper will probably
take two codes. But that looks pretty close. That is a very pretty color. I like that. And actually, I really like our little three
Color color scheme. Yeah, I like a Limited Palette. It's quite pretty. They look nice together. And for your homework, if you want own work,
you're already at home probably so this was homework. But if you want to, if you want to continue, try mixing some of
the other colors that you see in that image or different value versions of these colors by adding
whites and blacks. And maybe even paint
them if you want to. Yeah, if you want
a real challenge, tried to mix the brown
in the background. Oh, yes, you go. Great work everyone, you did it. Alright, in our next lesson, Melissa is going to
help us with something that I struggle with frequently. How to correct Colors, what to do when it
all goes wrong. You ready to show us
the way, Melissa? Oh my goodness Paul, I
am ready to try my best. Let's do it. Alright, I'll see you then. Sounds good.
26. Color Correcting - Where Have I Gone Wrong?: Welcome back everyone to mastering the Art
of Using Color. So today we're going to tackle something that
very challenging. We're going to talk
about what to do when things go horribly wrong. And I'm gonna do my best to gently guide you through it and help you figure out what
color you need Next, How It Affects things when they don't love the
way you want them to. Paul, What do you think?
Are you ready to join me? I think this is gonna
be a stretch for you because nothing ever goes
wrong in your paintings. But I'm ready to learn. Oh my goodness, Then I am
very good at faking it. All right, well, teach us
how to come on everybody. Alright, so we're gonna do
some more Color Mixing today. But the thing we're
going to focus on today is how to fix something when
it's gone horribly wrong. I feel like there's a
good representation because I don't know what
the heck is going on here. We paid off for the Colors. Way we did not know
what was happening. Something's broken,
something fell over. I don't know. It's also supposed to
be artsy, I think. Yeah, it's a thing. We're fine with it.
We're gonna go with it. Yeah. Yeah. Okay. So we're gonna
talk through some things today that can get in the way of mixing color
and trip people up as they're trying to have things go in
the right direction. So let's just let's
just start by assuming some things about
this photograph and then starting there, seeing where it
takes us and then trying to figure out how
to correct from there. So one thing we can assume is that this background
is pink, right? We can also assume that ball is blue and that tray is gray. So let's, Let's just makes pink. Let's just say that
background is pink. I'm going to Mix opaque. We know Pink is white and red, so we're just going to put
out some white and some red. And I feel like this, this
is the way a lot of students approach mixing color when
they first get started though, that's pink. I'll just mix pink. I think I know what
kind of make a pink. I'll just makes it
and then it's good. Yes. So let's just makes it peak. Then when you mix
it and you look at it and you compare
it and you're like, Whoa, wait a minute. Yeah. Like I have like a Barbie pink on
my palette right now. I got some bubblegum right here. Alright, so I mixed this, I'm going to do a quick
swatch of this on my paper. And you could use
scrap paper for this, whatever you have made you quick swatch on my paper just so I can see what
this pink looks like. So I can see where we
start and where we end up. So there's my pink. Look at that pink, and try and decide how it compares
to my reference. Obviously, it's not
the pink that I want. No. Throwing the
towel and give up. Right? We're done. We're over. We're going to paint something else besides this hot mess. Now, we're gonna, we're gonna
figure out how to fix this. So you're going to
use a trick we talked about in a few of the
other classes before this. So the other lessons that
we've sent out previously. So we're going to hold that
up and we're just going to squint and we're
gonna look at how the two colors compare. So one thing I'm
noticing right away, as the pink in the photo is lighter than what I have and it's definitely
more neutral, which means it's more gray. So I'm going to mix a
little bit of gray. I'm going to put a
little bit blackout. Little a little white Mix. Like a light gray because I know I don't want it very dark because the one
thing I'm noticing about the background
is it's pretty late. I'm actually going
to Mix that great. And I'm going to
hold that up and I'm going to see if that feels like it's the same value before
it Mix it into my pink. And I think that's
something that maybe some people don't pay attention to when they are Mixing Colors. Is, is it too dark?
Is it too late? Does it really fit? What I'm seeing? There's a lot to think about. Yeah, and that can
be challenging if you're not used to
thinking about value. And one way to tell if it's the right value is if you hold it up and you
squint and the to feel very similar like neither one stands out
over the other one. Alright, so I think I'm there. I'm going to grab a little
bit of this gray and I'm just going to start mixing
a little bit in. Just see where that gets me fully heading in the
right direction. Yeah, it's getting there right. It's it's definitely closer
than where we were before. Alright, I'm gonna hold that up. And I'm going to look at
the pink on my screen. And it's actually
pretty similarly, this is getting very close. I think what helps is making
sure it was right value. So I'm gonna do another swatch on my paper next to that
first pink that we did. And I'm going to look
at the difference. And there's a big difference. There's a big difference. So just seeing where
we started and seeing where we are now
holding up my brush. Yeah. It feels very similar to what I'm seeing on my screen. Yeah. So we fix it, we fixed our pink. We manage to do it. All right, let's think about something pretty difficult and that is the color of that tray. And it's it's kinda
weird, Neutral. I'm not even sure if I
know what hue that is. I would call it a
gray because it's extremely neutral and
I don't even know if it leans more yellow or
if it leans more blue. It had definitely has some
reflected color in it. So I'm going to
start with a gray. I'm just going to
assume it's great. That's fair assumption. And as far as
assigning the value, I'm just gonna go with a
middle tone kinda from the flat part of that tray
behind the green ball. Just for the sake
of this exercise, we're just going to pick yeah, because there's a lot of
different values of it. There's a lot going on there. Actually, there are a lot. Yeah. Yeah. Right. Alright. So
I have my gray. Let's just do a swatch on her
paper and see how that gray fields. Hello, my brush. I think working with neutrals
is even more challenging than working with Colors
because it's local. It's very subtle. But you all are ready. I'm actually feeling
like my Greg, once I held it up is a
little bit too cool. Yep. Same here. I do feel like there is some pink reflected
from the background. So I'm just going to
take a little bit of my pink that I Mix
above the gray. Mix that in here and I'm going
to see where that gets me. I'm just, I don't
want to use Paul's trick where you just mix it in part of the gray that
I've already mixed up. Paul didn't even
use pulse trick. Paul just like went for it. Has just totally went for it. I'm going to hold it
up and I'm going to see if that feels right. Well, minefields bedroom. Yeah. Actually feels like it's closer. Thank goodness. Since I
fully fully committed. It's interesting when
you paint the swatches, you can see it's not, this one is not as drastically different
from the first one, but it is, there is
a subtle difference. It really does shift
the temperature. Yeah, one thing you
can do is put the gray next to the second
pink that we mixed two and see how those field next
to each other and see if it feels similar to the photo? Yeah. And those do you
feel very similar as the right feel to it? I think that's a good pro tip for this one is that a lot of times you'll find if you
mix a background color, that color might end up
being mixed in with some of the other colors in the image because color is so reflective. Yeah, definitely. We want to try to
make sense to you anymore, Paul,
What do you think? Oh, we could try and do that
green if you want. Okay. I'll try new the green. We'll do a fast one. Yeah, let's do, let's do a quick approach to turn
to Mix that emerald green. So I know it's green, but I know it also feels a little bit more
on the blue side. Yes. It does have kind of an aqua Look to it. So I'm just going to start
with green obviously, but more bluish green. Yeah, yeah. If you know that his leaning
one way than you can, choose that ratio
of the two colors, but you're mixing together
so you don't have to do 5050 and then
try to even it out. Okay. And Mixing this blue with this yellow gave me
a very deep green. Hello. I'm definitely
going to add some white to this and see where that gets me. One thing I'm noticing as I'm looking at this image
is that green does stand out because it is more saturated that some
of my other colors. But that might just be my
eye seeing the neutrality of the pink and the gray tones and thinking that that emerald green as much brighter
than it actually is. So it's a good point. So I'm going to Mix. Okay, I know right now I
need a little bit more blue. So as I'm mixing more
colors for this, I'm starting to understand that all the colors in this
image are probably a little more neutral than I'm
thinking they are. For that I'm used to, using. Alright, so I have
my green here. I'm going to hold this
up and I'm going to see how close it is. I'm going to paint a
little swatch on my paper. I can see where we start. This one's actually not far off. I think this one's a
little bit easier. I think that this is just
such a fundamental challenge to try to try to match the
colors that you're seeing. And then also to try and
take the color you've mixed and adjust it until it works. Yeah. And I'm actually
pretty happy with that. I might add a touch more blue, but I think overall
success, yeah, yeah. That's a fundamental
color palette. I like it. Alright, You too. So
Complementary Palette to you. They know that. Yes. Yeah. It's Christmas Eve. Yes. Okay. Beautiful. Great job, everyone.
We got through it. We decided how to fix things
when they go horribly wrong. And hopefully you feel a
little bit better about fixing things when they don't exactly go the
way you planned. So the next thing we're going
to talk about is working with a Limited Palette
and how to approach that. Paul, are you ready
for the next lesson? I'm ready. Let's do it. Okay, I see you all soon.
27. Working with a Limited Palette: Hi everyone and welcome back to mastering the art
of using color. And today we are going
to be learning how to work with a limited palette. You ready, Melissa,
I write E Paul, I love limited palettes. But maybe not the right
person for this lesson, but I love that you're
teaching it anyway. I'm gonna give it my best. Let's give it a shot. See what. Today we are going to be
working with a limited palette. Working with a limited palette
is something I rarely do. I tend to like to put out
every color that there is. But hey, there's a first
time for everything. So limited palette for
this image is red, yellow, black, and white. So it's not super limited, but I did leave out the blue. And the thing that the reason
why we chose this image as the reference is because it does feel somewhat monotone overall. But then when you really
do start looking at it, you see that there are a lot of different
shifts in there. There are areas that are warmer. There are areas that are cooler. So I sketched it
out on my paper. I'm not going to
make a full painting of this today because they wanted to just spend the time
mixing the colors with you. But instead of just
doing swatches, I'll put them onto the
image so you could sketch out the reference
as well if you would like. Or you could just
do the swatches like we have been doing
in the last few lessons. It's totally up to you. But let's start mixing
colors. You ready, Melissa? Yeah, I'm ready poly. Alright, I want to
start by just getting that overall kinda
like warm tone that is used in a lot of
different areas here. So it is largely yellow, but it's got more
going on than that. So you can see because when
you just look at the pure yellow compared to the
reference is very different. Maybe even just hold up the yellow to the
screen and be like, Okay, now what does this
need to be more that, and one thing I know that it
needs is a little bit of red because it does lean a
little bit toward orange. Anytime you see
anything that's got browns or tans or
anything that is like that usually is in the orange family but
just more, more neutral. Alright, so I'm just going
to use a tiny little bit of this red to start with
because you don't need much. But apparently you
need more than that. Small increments is okay. Yes, baby steps. All right. Still very yellow. So I'm gonna do one more. Let's see what that does for us. Okay, That's going
toward orange now. Alright. Now, let's hold that up. Okay, It's very bright, but heading more in the
right color direction. Now we need to look
at saturation, trying to use all
of our vocabulary. So to neutralize it, I will add little bit of black and also a little bit of weight. You could also do like we
did in the last lesson and mix the gray
first separately. But it will also just
mix inside of the color. So you, alright, that's heading
in the right direction, but still two brains. So I'm going to put some more
black and white in there. Not that much blood is getting
better, getting better. You can see that the,
it for me anyway, the black is making the yellow
take on a little bit of a greenish quality because
the black has what in it. So to counteract that, to get rid of the green, once I get, once I get
it neutral enough. So I still just need to add more black because it's a
pretty neutral color. To counteract the green, we're going to add in
the complement of green, which is a little more
red and yellows are always interesting to work
with because they can go If they start putting green, they kinda get that
real gross shape. Then you can just pull
it right back. Yeah. So it lands where
you want it to you. We're going to put a
little more yellow in it. Yeah. Yellows are always tricky. There always a challenge. Yeah. Why did you give
me the hard one here? You don't get discouraged if your color doesn't
look right at right away. It takes a while.
It can take awhile. That's okay. Alright. So
I'm going to hold that up. That is getting so much closer. Yeah, yeah, much better. You can see that. One thing you could
do with this one too, is you could always
start with gray and just add a little bit of yellow
and a little bit of red until you get to the point where it feels right
because it is so neutral. Yeah. That's been
really tricky for sure. A little mercury into it. And I think these are
always good exercises to, because you actually
understand what makes up that color.
He started to. All the different ingredients? Yes. When you look
at a complex color, after going through after
going through this exercise, you start to just mentally
break it down and think, okay, what do I need to
mix them right now, that looks good to me. So I'm going to put my
first swatch of color. So this kinda feels to me like the color that I see up
in the top-left corner. So I'll put a little
swatch of it there. Where else do I see it? I see it a little bit right here beside the ball on the table. And now we need to make
a lighter version of it, which is easy. We deserve easy. After that, we're going
to add some more white. I'm going to hold that
up because I'm going for the background color now. So let me get even just
a little bit lighter than it looks good to me. So clean off my brush. A little swatch of that
in the background. And like I said,
we're just doing the swatches here
in this lesson. But since you're going
to have all the colors mixed and you might
even have it drawn. Feel free to carry
on and continue. It's the painting. I want to
go to the bowl now because that's the area that has the most contrast from against the colors that we've
already been mixing. So that is a little bit cooler. So I'm gonna take
my black and white mixed up a medium gray to start with. Lighter. Now there are areas of that bowl when you
look at it that you can see where it's reflecting
some of the yellow, especially, I mean, it's
not really bright yellow. It's more of a cream color along the bottom of the bowl
where it's wrapping under. I can see the cream color
reflecting up into that part. So I'm going to use just this
cool grade to start with. And put a swatch of that on
the top part of the bowl. And then we'll see if we can mix that more warm version of
it for where it goes under. So here you will take some of that gray, mix it with some
of this warm tone. Good. Kinda just like a
little bit warmer. Neutral. Lighten it a bit. And I need to add
a little more red to it because adding it to the gray made it go more green. There's already more
neutral reflected color. That's gonna go right here. And then Let's see if we can
get one more color in here. I want to mix the color that's on the handle of the brush. And I think we can do that using some of what
we've already made. That's the beauty of working
with a limited palette. There's a lot of ability to
reuse what's already there. So I'm gonna take this
color that we started with. I'm just kinda go a little
bit redder with it. I'm actually going
to add a little more yellow into it also. So it goes back to being
just a little bit brighter. Once you've got that
base color mixed, it's easy to mix
on your palette, pulling that base color
into some other colors too. Similarly, we've done in
some of the other exercises. So you will use that base color throughout this entire painting, which is nice when you have
a lot of that mixed up. Exactly, yes. And it makes a very
harmonious painting. I think that's one of the advantages of using a
limited color palette is that the colors all really feel like they work
very well together because they're
basically the same. All right. So there are my color swatches
and I want to keep going. I want to paint this
whole thing, but that doesn't mean you have to. You can keep painting if
you Great work everyone. All right, we did it. And now in our next lesson
we're going to tackle another question that we get
a lot from our students, which is how to mix flesh tones. You're ready, Melissa? I'm ready. Alright, see you all later.
28. Mixing Flesh Tones: Hey there everybody
and welcome back to mastering the Art
of Using Color. Today we're going to talk
about the ever popular topic, Mixing a Flesh Tones, which I know can get
a little tricky. And maybe you're not
sure how to approach it, but I'm gonna do my best
to walk you through it. All you write against started. I am ready. Let's go, let's do. Skin tones are, can be challenging to make C.
And I will be honest, I paint a lot of portraits
and I think you get to a certain point where you
understand, understand, scan and all the different
colors that come through skin because skin is translucent so it's about what's
underneath it, as well as the
color of the skin. So you're mixing all of
that and you're thinking all of that when you're mixing
certain colors together. I'm kinda understanding
what colors are in the more shadowed areas, what colors are in the cheeks vs. around the eyes
versus in the forehead. And it's all a little
bit different. There are some shifts. So today we're just going
to work in to tackle it in a very easy, hopefully easy way. Just by looking at two
different photos and mixing two different skin tones. We're just going to focus
on one tone per skin color. Today. I'm just two
different examples. Obviously, there's a ton
of different skin tones and different colors
that are in people scan, it's always different
no matter who your painting or what their
skin looks like. So you do have to analyze it. Understand all the
colors that are going on before you start mixing it. So today we're just
going to approach it by starting with some basics. So I have white, I have yellow, I have red, a blue, and black on my palate. So just the basics. We're going to start there. And so the first reference
we're going to look at is this man with darker
skin and darker hair. So we're gonna focus on a medium tone that we
see in his forehead. We're gonna have focused
on trying to match that. Paul, What do you think
our first step should be? We should probably
mix some colors. Okay. Paul, of your
work-up, what do we do? Please tell me to mix a brown
so we can do that. We do. So we're going to mix a brown and we're just
gonna do swatches today. We're not going to
worry about drawing these places because that's
going to take us too low. So the thing I like
to start with with skin tones is a nice
kind of orangey pink. So I'm going to mix a little bit yellow, a little bit of red. I'm going to see
where that gets me. And this always is
a process mixing skin tones because you're
going to start with one thing and you're gonna end up at a very different place. So here my orange obviously, his skin is not orange. No, we're not going
to stick with that. So I'm going to add
a little bit of white just to show me on
the orange a little bit. And also a little bit of whack. So similar to how we've
approached some of the other colors
that we've mixed. Now that I've added the black, I see that it feels a little bit too gray and a little
bit too green. So I'm going to warm it up. This again is it's going to
be a constant push and pull. You're gonna keep
adding and you're gonna keep seeing
where that gets you. And you're going to adjust and you're gonna go from there. Alright, so I'm getting
closer with this. I need a little bit more red. So I have this kind of
nice neutral, warm brown. It's a very neutral red. Gonna start holding
this up and see where, see where I'm at,
see how close am. And now that I'm
holding this up and I'm comparing it to my image. I feel like there's too
much yellow in there. I'm going to add a
little bit more red. If you feel like yours
is still too orange, maybe it's too bright. You could also add trying are also try adding a
little bit of blue. I often use blue one in mixing skin tones
because you will often see some of that blue coming through from
the veins underneath. You will often get
a blue undertone, especially in certain
areas of the face. So if you're looking
around the mouth, couldn't in the
shadow areas around the eyes, you'll
have a lot of blue All right, which is not a color that lets people I think we're expected to use for scaffolded. Yeah. All right. So mine is pretty close, but I am going to
add a little bit of blue because I do want to turn it down a little bit because I feel like
it's too bright. I'm gonna do this
very gradually. Touches a blue as I
go to turn it down. I feel like as much closer. So I'm going to make a swatch
of that on my paper here. See what that actually
looks like on the paper and see if
that feels right. Maybe a little
Transparent because it does have a lot of orange in. It. Actually feels really
nice. I'm happy with that. Beautiful. Alright, so let's
try the skin tone of the other example we have. And this is a lighter skin tone. This one, it does have
a lot of pink in it. So I'm going to
examine that first. Know that I need to start with probably a pink and
it's very light. So I'm gonna go probably
with a color that I see in her cheek because that is an area where the color somewhat consistent in one area. So I'm gonna go for that first. And this is something
you can do if you mix a base color and you
mix a lot of it, you can pull parts of that
off in Mix different parts of this skin tone from that main color and that will make your life a
little bit easier, which we always like. All right, so I have
this baby pink color here and I know this is
not the color of her skin. That's good. Are we would
lose faith in you quickly. Cotton candy, that's good. So I'm definitely
going to add some yellow because I know I
need to warm this up. Also going to put more white on my palette because
I feel like we're giving me a lot of white for
this one. It is very Light. And you would go through
the same process no matter what skin
tone your painting. So you would examine
the undertones. Does it go more red? Does it go more yellow? This is there a lot
of blue in here? You would look at that first. And undertones just mean like that base color that
comes shining through. It might be very neutral, but there's still
based color there. One pro tip to for painting
feaces is to also pay attention to the colors that are in the background around the, the model because that can affect the colors that are
reflecting as the skin too. All right, So I
think that's closer, but I'm definitely going to need some blue because I think I definitely need to tone down
this peachy pink color. It is not as bright as
I might think of this. That makes a huge difference between like feeling natural and feeling like a neon person? Yes, definitely. And hopefully as you
start getting used to mixing colors that
you wouldn't expect. Once you get a little bit
further into mixing skin tones, You'll be a little
bit more comfortable with it and understand the difference it can
make because can make a big difference when
you're mixing a skin tone. I know people have asked me before, what color do you use? What color do you like when
your painting skin tones? I can't really answer
that question because it's It just depends. It depends what the lighting is. It depends what a person's
skin tone is naturally. It depends how dark
or how light it is. There's really not one base. You just have to examine
everything as you're going. Yeah. I'm pretty happy with this. I'm gonna do a little
swatch on my paper, put it next to my first swatch
and see how that feels. See if that feels like
the photo reference. I think we got it. I think that's beautiful. I actually love really
complex Colors. I think they're really pretty
when you put them together. And it's just, it's
not something that you would find straight
out of the tube of paint. Something a little
bit more different. I think the more you
work with color to the more you start to
appreciate those things, you go beyond the, the, the basic Colors and you use
just like how a cook usually likes to eat the weird with the weirdest done it so much they want something
different and new. Yeah, so now that I
have these base Tones, I can take a look at
the overall faces, see what colors I
would need to add based on the different
parts of the face. Alright, everybody, Great job. I hope you feel a little
bit more comfortable with mixing skin tones and
how to approach it, what colors to use, how to correct things as
you're moving through it. And the next thing
we're gonna talk about is how to use a
Plein Air Palette, which is really interesting. You're ready to get
started on that. I'm ready. Alright, everybody,
we will see you then
29. Working with a Plein Air Palette: Hi everyone and welcome back to mastering the Art
of Using Color. Today, we are going
to be learning how to work with a Plein Air Palette. Plein Air is when you
go out into nature and you're actually
painting from life. So we can't quite do
that on the computer, but we're going to
show you how are you ready to go do a little
landscape painting, Melissa. Hi, I'm ready, Paul,
let's give it a shot. Alright, let's go.
Alright, today we're going to go
out on the trail. Plein air painting. Plein Air is when
you're actually out in nature painting
something from life. We can't actually do
that here on screen, but we will pretend because when artists go out into
nature to paint, they don't want to have to haul 20 or 30 tubes of
paint with them. So they tend to work with
a pretty Limited Palette. They don't spend a lot of time standing there mixing
colors either. They just put, put, put the colors from the tube out on the Palette and tend to just mix and paint with
their brush as they go. So we're starting with our usual primary palate
that we've been using, that's our Limited Palette today there are many
different versions of the types of limited palettes that Plein Air Painters use. Sometimes you can make those choices based on
where you know you're going or what colors might
be most prominent there. But we're going to start with the primaries because we can mix everything that we
need with those. So instead of using
my knife and mixing colors on the palette, I'm just going to dive
right into the painting. You ready to dive right
into the painting, Melissa, I'm ready,
Paul and still it. I think one of the main
things to think about when you're doing a Plein Air
Painting is the temperature, color because you didn't
have a lot of greens, a lot of blues, lot of kinda earth tones. But those Colors can
feel very different if they are more
warm or more cool. And looking at our example here, you can definitely see that if you look in the foreground, it's a much redder,
warmer color. And as it moves into
the background, the colors get
progressively cooler. We go to a warmer green, then we go into these
almost kinda like turquoise colors and then
it goes blue at the back. So that's what we're
going to try and capture here on the fly with our brush. I'm going to start
with some red. And I'm gonna put a little
bit of black into it. A little bit. A yellow can just grab a little bit with
the corner of your brush. Put mix it together on your
palette until it feels right. Okay. So I definitely see that color. I might put a little
bit of white with a T. Definitely see that
color in the foreground. There's also some greens and
some darker tones in there. But I'm going to start
by just blocking in that foreground patch of land. The other thing with
plein air painting is that you're not really trying
to capture all the details. You can't, there's not time. And we have that in common with them since we only have
10 min for this video, we're not going to
be able to capture all the details either. I would suggest using
a bigger brush. And it's more just kinda
blocking in the sections trying to capture like the different
planes of the landscape. So I've got that kind of reddish orange color
in the foreground. And now I'm going to
grab some yellow, some blue and put a
little black. Matt. Mixed myself like a darker
green so I can get some of those shadow areas
here in the front. I think when you're doing
a Plein Air painting, Here's a pro tip for you. It's all about the relationships of the colors in the values you might not be able to capture exactly what color you're
seeing in each space, especially if you're painting
the sky and the sun, you can't make your
painting emanate light, but you can make it capture the relationships of the
lights and darks and the temperatures of
the Color relative to what you have
in your painting. So that's what it really, what I kinda focus on. Alright, so I have
that foreground. Let's move to the
middle ground now. I'm going to mix
green, little more. Mixed a little of the orange into it now to make
it a little bit more, to just tone it down a bit. As things move. This green has so
much red in it. Yeah, it really does All right. And sometimes you
put down my color on your paper or your canvas and it's not quite the
right Color and you just, you know, Mix, make
something else into it until until
it feels right. So in my case it was
a little too dark. So I'm adding some white. I'm paying attention
to the relationship of that color to the
foreground color. That's really what I'm
trying to capture hearing. So almost like color
blocking. All right. That's looking pretty good. When I do want to get
a little more orange into parts of you. If you've ever heard of
atmospheric perspective, it's something that
really affects you when your painting outdoors. Yeah, thanks. Tend to have less
contrast is they go back in space and
they also tend to get a little bit cooler
probably depending on the Lighting or just a
little bit more gray. Yeah. Yeah. Picking up on those shifts is really how you
create the sense of depth than I think that's one of the most important things
in a landscape painting. Making it feel like, you know, it's not just a flat paper but something you could
walk into you. All right. I'm just about done with
that middle ground. I just wanted to get
that one little section of dark over on the right side and that gets a bit cooler than
the rest of it. So I'm adding a little black
and a little blue paint. That little shadow right there. Courage is a little bit over
here on the left side T. Okay. We're gonna move back
into the blue or section. Clean up my brush. Alright, so we know there's
blue in the immediate, like in the middle ground part, there is still a little bit of green in there too,
so I'm going to Mix, they're going to add some
white to neutralize it. I'm just going to add a little
bit of the orange to it because that will take the
edge off of that blue. I might put a little
gray in there also. Just kinda keep scooping
up little bits of color with your brush
until it feels right. It's all about working fast and trying to make
quick decisions. Because when you're doing
a Plein Air painting, everything is
constantly changing, the light is moving. Nothing's going to stay
the same for long. So you kinda have to just choose something
and get it down. Gotta be fast. Yeah. The light is literally
changing as your painting it, which is really interesting. Yeah, It's a great challenge. All right, I've got these
kinda darker areas late in. Now as it goes back, look at how on the left side is almost a pink quality
to it as well. But you get a little bit of
warmth from the sunlight. So I'm going to add
that in there also. The more you look at things, the more color you see. It's always interesting. Especially once you
start comparing, you start seeing a lot
of differences. Yeah. That can be a great thing. It can also be overwhelming when you're trying
to paint quickly. Do you have to make
some editorial choices? You can't capture it all
in this kind of settings. So you're just choosing what's the most important
color relationships that help to create the scene. That's what you
want to focus on. Just trying to get the idea across instead of every detail. Like a gesture drawing. If you're doing figure drawing, you only have 2 min to draw it. You can't maybe draw the
eyelashes and fingernails, but you can go via
the basic shape of the figure, that same idea. All right, I'm getting those distant mountains
kinda rough, Dan, and you can see how
they get lighter and a little bit more Neutral
the farther back they go. That definitely like
Melissa was saying, that's atmospheric perspective, we perceive color differently as things move away
from us in space. Alright? And now I'm going to
block in that sky. It's kind of a little bit
cooler towards the top. And then gets lighter and a little bit warmer
towards the horizon. In the days before photography, a lot of landscape
painters would go out and do quick studies, Plein Air paintings, and then go back to their studios and do more detailed paintings based on the information that they captured in the, in
the plane areas. It's still, still done today
to you because you can capture more sometimes
in a painting. Then you can, with a photograph, can see more subtle
relationships of Color. Yeah, camera will never capture color the way you will see it. I perceive it in her life. It's always disappointing. I don't know if
you've ever tried to take a photo of a sunset and been disappointed
with the results? Yes. You look at it and you're
like, Oh, it's so gorgeous. And you look on your phone and it just looks like nothing. That's not at all what
I'm same, same idea. Alright, there is my quick
plain air painting uniform. Great job everyone. You've done it. Alright, in our next lesson, we're gonna be talking
about the differences between natural and
artificial Light. You're ready, Melissa,
I already, Paul. Okay. See you can see you soon.
30. How Lighting Affects Color - Natural vs Artificial Light: Hi everyone, Welcome
back to mastering the Art of Using Color
with Paul and I. And today we are
going to talk about how Lighting Affects Color. So Artificial Light
versus natural light. Paul, you're ready to explore the differences
between Lighting? I am ready. Okay. Let's do a
command, everybody. All right, Melissa, when
life ends, you lemons. You get to painting. Alright,
Melissa, each Painting, different lemons today
talking about here lumens, my lemons are living in
their natural environment, growing on a tree and beautiful
nature with the sunlight, sunlight streaming
on top of them. In my lemons are kinda like me, tucked away indoors and
this beautiful pink neon that has absolutely
nothing to do with neat. So let's get to work and you can
paint either one of these or you can
just watch whatever, whatever we're
exposed to for you. But we are both going to
paint our women's for you in. So the reason Paul and they're both Painting
lemons is just to show you the way Natural Light or artificial Light
Affects something a little bit differently. And we thought we would paint the same thing just so you
can see the difference between the two and the
colors that result from each. Yeah, I've already jumped
in to start painting, but we could talk a little
bit about our palettes that we're using tooth
that might be helpful. So I mixed up some
different shades of yellow. I need some lighter
shades warmer by adding a little red cooler by adding just a drop of black to it
for some of the shadows. Then I have the pinks and
reds and oranges that I see in the background.
What about you? I started with my
primary palate and then I just mix two colors that
I thought I would need. So the thing about natural
light is the shadows or can be really intense
depending on where the sun is. So you get a lot
of contrasty high, I guess just a lot
of shadowing, right? Because the sun is
shining on something directly or indirectly
in casting shadows. I have a green mixed
up in the green is a little more Neutral, I guess it, in the
areas of sunlight, It's a little bit brighter
SLO of yellow in it. And then in the
more shadow areas, it's a little bit darker,
has more blue in it. So the thing about shadows in natural light is they
tend to be a lot cooler. Yes, exactly. You can see the Tones of the shadows in mind
or anything but cool. Yes. I think they're bright
red or they Paul. It was so funny, right? We started filming this. We were deciding who was going to paint
what it initially, I sent Melissa the artificial lighting,
the pink lemonade. Yeah. And she was like Paul. Seem a little more, you think? Well, he sent me
the pink lemons. Why would you ever do that? I don't know what I
was thinking because I definitely don't
want to have to pin all the You don't want the
browns and the dark green Natural to not
your thing at all. All right. I'm just going
to get some of these. I'm kinda working
from the outside in, so I'm getting my background
color using because a lot of those colors really
show up in the shadows, especially if the lemon, so it'll make more
sense if I have them already on the paper. And I mixed my two colors to start and I'm putting those on my paper just to block
the Colors in for now, and then I'm mixing as I go. So there are definitely some different tones
within the shadows, even though it's
natural light and the shadows tend to be
a little bit cooler. There is some reflected
light and there is just some some of that yellow is shining through so it does
get warm in certain places. So I'm paying attention
to where it's warm and where it's a
little bit more cool. Shadows in photos that are taken outdoors
can really tend to go very dark in the photo
and might not be exactly what was truly what it looked like if you were looking at it with your eyes? Yeah. I think sometimes
artificial lighting is a little bit easier to
capture in a photo. Natural lighting shadows, especially in the light to contend to get really
washed out if it's, if it's super bright. So you have to start, you have to really think about not only what do you
see in the photo, but how could that
be differing from what was really what
it really looked like? And natural light
really depends on the weather and the
time of day two. So you will get a
lot of shifts and how the color looks or
how the lighting looks, depending on what
time of day it is. You know, a lot of people
talk about golden hour being the best time to
take photographs because the lighting
is a little bit more. There's a little bit softer or you get kind of
nicer coloring. Where if you're
taking a photo in midday afternoon sun
with intense shadowing, it can be pretty harsh. Yeah. I think we're seeing a
little bit of that in the reference that I'm painting
it. It's pretty intense. And some places
intense little lemons. Yes. Now we're just doing a quick loose rendition
of this image obviously, because we're keeping it to
about a 10-minute video. You can certainly spend
a lot longer on each of these and bring out
a lot more detail. Yes, definitely. This is more of a color sketch to kinda get the idea across and decide how the color is affecting
the lemons differently. Look at these cute little guy is and do like painting fruit for some reason I found my love for pain
through this class. Yeah, we've seen it a lot, has been a lot of fruit to go darker now in the shadows. This is, we've talked about
this before, but you know, the shadows are usually
one of the places where a lot of the colors from the
environment will show up. So if you're not sure what
color to make a shadow, a good starting point usually is look at what's around it. And it will probably
pick up some of it. Although I'm impulse reference, when you have artificial light, you can make the shadows
and he color you want basically you can, you can, you can control what you get, which is often why people like taking portraits and
another photos indoors because you can control the amount of light
you're getting and how it's being spread
across the subject. How the cameras
interpreting that, which is difficult
to do outdoors, you don't have much control. Yes. That's why in all the
old TV shows and movies, they always were
filmed in doors, even the outdoor scenes. Look at it and see
all the painted sets and stuff in the background. I think that's so cute. They just did not
have the capability. They can't cameras at
that time did not have the capability to be
able to, you know, control how things would
look in and outdoor setting. Often changing. They're
showing movies. They will take artificial
lights outdoors and use them because it's
easier to control that. We have about a
minute left to go on. Our little women skiers
are coming together. Even. Artificial lighting can have very different
temperatures, depending what kind
of bulb is being used or how how close
it is to the subject. So I think in
general, no matter, no matter what kind of
environment your subject is in, it's just really
important to study it. Look and see what
colors are truly there and not just what,
what you think it is. I mean, that's that's a pro tip. Always look closely at
your at your reference. Don't paint what you
know or what you think, you know, paint what
you see, right? John, assume anything. Yeah. Color is always relative
depending on whether it's artificial Light
or natural light, it's always gonna be a
little bit different. Yeah. You can sometimes
even have both in the same image if
it's an indoor scene, but there's light coming
in through the window. You might have some
artificial light that's hitting 11 side of the subject and natural light coming in
and hitting the other. So this can get very complex and interesting as long as you are just studying what you see. I'm, You'll, you'll portray. Alright, how are your
lemons coming, Melissa? They are coming along, Paul
looking a little lemony. Just about to wrap it up, you get some shadows a little
bit darker in underneath. So feel free to experiment
with different lighting. You could even set up
your own Lighting, your own still-life and
see what the differences between an endorser life
at an outdoor still-life. See what you enjoy
painting more. I think it's really
good to think about these things and to start experimenting with setting
up your own reference, creating your own
references so that you have more control over all of
those choices that lets you. The mood of a piece can change dramatically
depending on whether it's artificial or
natural lighting gives me out totally different quality. We finished. I think so. All right, Great job everyone. Hopefully you
understand a little bit more about how color is affected by different
types of light and got a chance to explore
that a little bit. And our next lesson
we're going to talk a little bit about how layering different Transparent
parent Media Affects different colors and how to achieve
different colors with that poly. Ready to
give that a shot? I'm ready. Let's do it. Okay. See everybody next time?
31. Layering Color in Transparent Media: Hi everyone. It's great
to see you again. Welcome back to mastering
the Art of Using Color. So today we're going to explore Transparent Media and
how that affects Colors, so different layers and
achieving colors that way. Paul, What do you think
you ready gives us a shot. Let's do some layering. Okay, Let's go plight. Alright, so we are back
today to paint a landscape. But the thing we're gonna
do differently today is use Transparent Media to
get the color that we want. So there's different ways
of painting with acrylic. You can paint a little bit
more opaque Lee or you can paint a little bit
more transparently, which just means that a lot of the paper shows through the
paint's a little bit thinner. So you don't have
as much pigment. So I'm going to use more water today to make some of my
Colors and make some of them lighter instead of
mixing a lot of whites or something like that
to make the color lighter. So I'm just going
to start putting a little bit of water on
my palette and just mixing a tiny bit of red
because I'm going to mix a light pink to spread across the bottom of my paper here. And that's just going to
achieve that light pink color that's in my, my water. So it's not going to take
very much paint at all. And this is more of a
watercolor approach to acrylic, which can be used in a
lot of different ways. It's pretty versatile. So to get the color lighter, you just add more water. You're just diluting the amount
of pigment that you have. I'm going to decide
where my horizon is. Right in the middle there. And then I'm just going
to paint everything pink that's below
the horizon line. So just spread that
really thin layer of pink across your
paper all the way down. A good pro, tip for
painting this way is to just kind of slowly build up to the darks because you're
basically using the white of the paper
as your white. So once you have the covered, you can't really get it back. So you can do multiple layers
to build up to the dark. Okay, so I have my
light pink wash. I am going to move
on to the blue. And the top part of
my painting here. Just while that paint
dries a little bit. And I'm going to take the
same approach to the blue. I'm just going to mix more water into it to get a lighter blue. I'm going to spread that
above my horizon line. Pastel Lee. I know, right? So pretty I'm just going to
take that all the way up. And if you mix the two colors, if you get the wet paint
next to the pink wet paint, it might start to blend, but your pink might be dry
enough already that it won't. So it just depends on
the look you want. If you want a softer line, you can blend the two
in to each other. Beautiful. Alright,
so we get that. So next thing we're
going to think about is the purple in the water. So I'm just going to use
this blue that I had already mixed up for this guy and add a little bit
more pigment to it. So I get something a little
bit darker and as red, so I get a nice soft purple. Okay. Right. And then I'm just going to
take this purple right over top of that pink that
I already painted. Start blending that in. Deciding where that meets
that pink in the center, I want to make sure I'm
leaving some of that. They want that reflection, a nice reflection from this guy to remain
in the center there. One of the things that's
nice about painting this way is that you kinda take advantage
of each layers so you, that pink layer is still
showing through even when you start adding the purple on top. And then you kinda get
really nice, rich, complex Colors from all the combinations of the purple on there. I can come back to that pink
that I originally mixed up. Add a little bit more
red to it again. That brighter pink
towards the bottom We're just gonna
keep layering this way till we get the look
that we're going for. I switch to a slightly
smaller brush just to get a nicer blend between
the purple in that pink. If you feel like the colors aren't blending
the way you want, you can always just add
a little bit of water to your brush and mix
the two together again. I'm gonna keep layering
more of that purple over top until I get a darker tone. Each time I might add a
little bit more paint and less water just so I get something a little bit darker. Then you can use your
brush strokes to kind of imitate the shape of the waves. Really just going to focus on the water today because there are so many nice color
shifts and variations there. But if you want to
continue with the sky, you could do that the same way. There's a lot of similar
things going on with the clouds and the reflections
of the light from the sun. Since a good technique for
painting things like that, I think like things that are a little bit more soft edge didn't kinda just
grab the light, kinda gradually
moves through it. It's a good way of
breaking that down. It's a nice way to get a
soft blend with acrylic, which I think is difficult
if you're painting a little with a little
slightly thicker paint, I can challenge it. And then the other nice thing about acrylic is once you have this nice soft blend with
these transparent layers, you can go more
opaque on top and add some blue that Richard Color
and just continue layering. Yeah. I'll say use this
approach if you've started a painting and you started
with more opaque layers and you just wanna kinda maybe warm up a color or
something you could do what's called
a glaze over top of it where you paint thinner
like this and you still see the other the other
information underneath it, but it just kinda pushes the Color in a
different direction. I think about Layering
are okay Colors. You'll probably have to wait for these more wet
layers to dry first. Yeah. You really can get these
beautiful color effects and the soft transitions with something that's a little
bit more transparent. Yeah. That is something
I think people struggle with with the
acrylic is how to get it to be soft and to blend. It can be a challenging
medium to do that with. So just keep adding more
color, adding more pigment. I think this photo is
similar to the one we painted in the
Plein Air Palette. Lesson. This one, it gets a little bit lighter and it gets a
little less contrast it, as it goes towards
the background. And that's that atmospheric
perspective working again. So you probably want to
keep that in mind as you're working on your layers. Here. Makes me want to go
on another Cruz. I can see you being
all about cruises, Paul Revere, cruise ship
director. I think that's me. I could totally see who like teaching painting
classes on a cruise ship. Okay, So that's it
for this lesson. We're just gonna keep layering and keep building up
this painting as we go. All right, That was
awesome everybody. Great job. I hopefully you understand
a little bit more about Transparent
Media, how that works, how to get the colors
you want by layering paint and mixing with water and play a
little bit that way. So in our next lesson we're
going to talk a little bit about Thumbnails and how to achieve different
color results through different
ways of sketching. Paul, What do you think?
You're ready for that one? My Thumbnails are ready. We're all set
32. Color Thumbnails: Welcome back to mastering
the art of using color. Today we are going to be
working with color thumbnails, which is a way of trying out different color schemes
before you start on a piece. Ready to make some thumbnails? Melissa, lot of sounds fun. Alright, let's go. Let's do it. Okay, In this lesson
we are going to be creating some color thumbnails. And this is a great way to
explore different types of color palettes before you
actually start on a piece. So we'll be using this adorable
little doughnut today, continuing our theme of food and trying to
make you hungry. And so on my paper, I'm just going to start
by drawing a little, a small rectangle
that represents the canvas or the paper that I would do the
actual painting on. And I'm inside that rectangle, I'm going to draw an oval
to represent the doughnut. And then I'm gonna draw
a little squiggly line to represent the icing. And that's really it.
When you do a thumbnail, it's not meant to be
detailed, realistic piece. It's just, it's really just trying to get the
essence of it so you can see a lot of different
variations quickly. So let's go ahead for
this first thumbnail. I'm actually going to just use the colors that are
in the reference. So I'm going to mix up a pink, kind of a cool pink. So I'm going to put
just a drop of blue and then I'm going to mix
three different colors. No blending, nothing like that. So I've got my pink for the frosting and
I'm going to mix a little bit lighter version
of it for the background. Then I'm going to add a little yellow to it
to make the color for the untrusted part touchable. The goal of thumbnails
is to be quick and just let you visualize
how it will look. Okay, so I'm going to
do this first one. Coffee frosting, icing,
what do you call that? What is that? Is it frosting or IC? I don't even know that. So I think it can
be either right. You would think I would
know as much as I like. Now. Right? This should be my
area of expertise. I know, right? The gluten-free person
who doesn't eat sugar. Melissa, tragic. You're telling me this is probably a very torturous
painting for you then. Sorry. No, it's good. I think so. I'm
sure someone does. Right? I could just
dream and reality. I remember when I made you a vegan cake for your
birthday one year, that was really good. Yeah. Like a piece of cardboard. Actually, I did not
know what I was doing. I went and bought
like $100 worth of the weirdest ingredients
I'd ever heard of. Trying to follow a
recipe I found online. It was not it was not a success. Like 20 years ago
when they didn't have a lot of options, right? Okay, so now right next
to that rectangle, I'm going to draw another one. So this is the idea of
thumbnail sketching. You do a bunch of
them and you put them all next to each other
so that you can see, you can see them and compare them and make a decision about what direction
you want to go. I think for this one, I am feeling like
I want to do like maybe a very light pastel blue
color for the background. The background and
the frosting do not have to be the same like
they are in the first one. We are in charge
of this world so we can do whatever we want. So I think actually
for this one, I might keep the pink
for the frosting and then just change
the background to blue. Sometimes when you're
doing thumbnails, you don't have to
change everything. You can just try changing one thing to see how
that affects it. So I'm gonna do I'm gonna paint the same
color for my donut. I feel like that's sort of a Standard doughnut color. Then I'm gonna do my
pink frosting again. This is something that a lot of artists do, especially
commercial artists, they'll do a little color
studies before they move to the final illustration
that they're working on. The final design just to
see what feels the vast. There are different
ways you can do it. If you work digitally, you can do this on the computer that
can save some time too. But you can do it with paint, you can do it with
colored pencils. But it really is helpful. I think the, the pro tip for thumbnailing is that it lets you visualize color
relationships without having to deal with all the details and all of that because that's
totally different thing. It just lets you get
a big overview of it. And it, even though people are usually eager to get
to their finished piece, it really is worth
taking the time to do this process
because it helps you to make some important decisions
before you get started. Yeah, you can definitely
start to see things about your thumbnails as
you're working on them. So the first one, there's just not a lot of
contrast between all the pinks because everything is kind of in
the same color family. And then when you start doing that cool background
like Paul suggested, you definitely see
a difference in that doughnut stress to
stand out a lot more. And so you just start
discovering things before you move to
your final piece. Exactly. Alright, for my next one, I want to see what
it would look like with a darker background. So I'm going to mix up a purple using my blue and my wrist. And I might put just a
little bit of white in it, but not much because
I wanted to I wanted to see how
this would look against a darker
background that would make the doughnut
really pop out more. Might look great,
might look terrible. That's the beauty of
a thumbnail though, is that you're not investing
a lot of time in it. So if it does look terrible,
you don't really care. But it lets you
explore that idea. It's a lot easier than
making a big painting. And then realizing you need to change the color
of something or, or repeat something multiple times before you
decide what you want. I'm drawing my third little
thumbnail here. Oval. Got my squiggle. I'm going to go ahead and do the standard doughnut
color again. I'm not sure what color I
want for the frosting yet, so I'm going to start
with what I do know. So I know that I
want the donut to be that same color and I know that I want the background
to be the dark purple. So I'm going to paint
those two things and then I'll decide what might
look good with those. So I've got my
dark purple there. I think it's a good idea
when you're painting thumbnails to make sure
that you are trying, you know, drastically different
things in each thumbnail. There's no benefit to painting
the same thing five times. You want to explore really
different ideas each time. You can also explore
different moods too. So if you're trying to achieve a certain mood through color and maybe you try a few
different things and see which one feels right. Yeah. You want to make a moody
doughnut? Don't show. I do. This one's very
dramatic, I like it. And this is a good place
to think about color. Some of the different
color palettes that we explored early
on in the course. When you're trying to choose what colors you
want to work with. Think about colors that
work well together. That's always helpful. Alright, I've got my purple. I'm thinking maybe kind of an analogous color palette here. I'm going to use my light
blue that I had for the background previously and use that as the frosting color. Yummy. You. That dark background
does make it stand out. That might be my favorite one. You know, when I first started, I really liked the pink. So there's a lot of times you might have one idea
going into it and then doing this process helps
you to see that you might stumble into something totally
different and unexpected. Alright, so I've done three, and we are out of
time for this lesson, but you can definitely
see how you can continue this and do. Some people will do fives
and we can give ten. There's no set number, it's just how many you need to, to explore all of the
different variations that you think you might
want to try for a piece. Awesome work
everyone, great job. And you can keep going
with this as long as you want until you find the color scheme that's
right for your piece. So in our next and final lesson, I can't believe it's
already our final lesson. We are going to be
talking about how to find your color personality. Are you ready to find your
color personality moles, so it sounds very intriguing. Pauling, so ready? Alright, let's go do it.
33. Finding Your Color Personality: Welcome back to mastering
the Art of Using Color. You have made it all the
way to our final lesson. Congratulations. Today we're going to
have a lot of fund finding our Color Personality. You ready for that, Melissa? I am so ready, Paul, this sounds so PFK-1. Alright, let's go do it. Are you ready for our
last painting, Melissa? Hey, I'm ready, Paul, I
think the Soviets online, hopefully all of
you think the same. Let's jump right into it. We decided for this, for this last lesson, we would both paint
the same thing or painting this poppy. And we really wanted to
talk about how you can find your own kind of
Color Personality or your own color preferences. Melissa and I both have very different ideas about that and you'll see
that as we beat. So let's just jump right in and we can talk while we paint and you can do the same
thing at home too. You can put out whatever
colors you want. Just have a field day with this. Yes. So the first color
I went for was the black is a super
bright, happy blue. So we're gonna talk a
little bit today is just a little
personality quiz through color and ask yourself, what is your favorite color? I mean, it sounds like a
silly question, right? But what is your favorite color? What do you tend
to lean towards? What's the thing that the tube of paint that
you grabbed first? Yeah. It's a silly color, but think about are
silly question I guess. But think about why that's your favorite color and why you tend to
lean towards that. It's kinda funny
when your kid you, I feel like that's something
that you think is one of the most important questions
in the world because everybody asks what's
your favorite color? And then you grow up and
nobody cares anymore. But it's still a very
important thing because it helps you to know what
your own taste is. And I think your tastes to forgive you can figure
out your taste. That goes along way
towards helping you figure out your
style as an artist. Yeah. Yeah. So what's your
favorite color and why? Ask herself that and
then ask yourself, do you tend to go towards more muted colors or do you tend to go towards
more bright colors? And I think Paul and I can both very confidently
answer this question. Probably already know the
answer for each of us. Yes, I think that's a safe. But it also doesn't
know you have to be one-dimensional either. You know, there are
times when Melissa uses brighter colors
in her work there times when I use more neutral. So just because you do
identify a preference, does it mean you always have to limit yourself
to that either? Right? Right. So maybe it's whatever you're trying to
achieve through color. Yeah. That's a good weight, one. That's a good it's a great question asked herself
before you start anything, what are you trying to achieve? How do you want
this piece to feel? What do you want the
overall mood to be? And then think about colors that will help you achieve that. Yeah. And then it doesn't have to be anybody else's idea
about what colors would achieve that it could be what colors you
feel achieved that? Uh-huh. Yeah. It's interesting because
it isn't relaxing for you. Yeah. It's universal,
but it's also personal. There's, you know, everybody has their own ideas
about it to you. Yeah. You know, everybody
likes to say that black is depressing or black
is the absence of lights or it's all darkness. But I, I know there's
something very sophisticated and
luxurious about black. I think there are different
sides to every Color. And I think certain colors might speak to you in a way that they wouldn't speak
to other people. The way that you pair
colors together is also a big part of it to not
just choosing one color, but what colors do you combine and How does
that affect the peace? Definitely. I'm combining all the colors
you can see from my palette. I like, Oh, I'm going to
Have Fun with this one. I'm putting everything
out there and that's kinda true to how I paint. And I imagined that Melissa is a bit more methodical about it. But usually when I am
working on a painting, I will put out a little bit of everything on my palette
because I want to be able to grab whatever color
pops into my head as being the right choice
at any given moment. Now, what is your
typical Palette like when you're working on it, on one of your paintings. That's not like
for a class like. Well, as another side
of my personality is very organized and
very strategic, Right? Oh, I'm sure So what I lay out my colors. I like them to be in
the color spectrum. Light, I will go to yellow, I will go to orange,
pinks, reds. I will start with warms. I will fade into cools, and then I will do earth
tones at the bottom. All the way I
organized my palette. That is used a lot. There's a lot of photography. You put it into that. I do. I do. I like it organized
in a certain way so I know what I'm getting. I know where the colors
are when I start mixing. It's a little bit easier for me, so I am very organized
about how I do it in mind, as you can imagine, as a
total chaotic free for all the big blobs of
color everywhere. It's gonna say giant mounds
of color all over the place. I do tend to put my pure
colors out of the tube. Kinda. Normally when I'm
working, I didn't do it here, but normally I put
the pure colors around the perimeter of my Palette and then I use
the middle for my mixtures. But beyond that, there's really
no rhyme or reason to it. It's just kinda like, you know, what, everything goes
wherever it goes. I think as you're starting out, That's one question a
lot of students asked me what is the right way
to organize my Palette. There is no right way, but it's good to try
different things and to see what works for you and what
fits your personality. I think that's another piece of this whole Color
Personality topic is how do you work with
color in a way that makes it work the best for you? I like having chaos. I like having access
to lots of options. That's what helps me to to find the colors that
I want the easiest. And for Melissa,
it's the opposite. Sheila, she has more
control and more more more of a thought process
behind the organization of it. Yes. I'm very methodical when I do a piece like the
whole the whole thing, that's very methodical and I think Paul works
very differently. Aggressive and
spontaneous and he enjoys that part of it where
I like to have a clear plan. And neither neither
way is the right way. It's it's only, the
only thing that matters is what works for you. When I tried to paint in
a more controlled way, I don't like the
results as much. It just doesn't fit me. It doesn't fit my personality. So you're not as an artist, you're not competing
with other people. You're only trying
to find your way. Your, your what, what
fits your personality, what fits your taste, what fits your style? Yeah, I think
Polonaise whole point in creating this class
was allowed to allow everyone a chance
to explore color in different ways and see
what works for you. So I think everything about Art is centered around
experimentation and trying different things
and seeing what works for you and what is your way of creating Art
in the end, yeah. It might not be one thing. Maybe it's something
different every day. Maybe you'd like to
have a variety of different things in front of you and different
ways of trying. Yeah. Don't don't box yourself in, you know, too quickly. It's especially like try
different things and see what, see what you like and
what feels the dust. Try try to be a Melissa one day and
then try to be appalled. The next day. You'll have
more font on your Paul day. Just kidding me, nice and
calm in your Melissa. You'll be you'll be really
hyped up on your Paul, the cob full of energy. So Palette, I just want you to be able to discover
different things, experiment with different things in a safe space where you feel like you can try things with
a little bit of guidance. Yeah. Yeah. Yeah. Color is not
something to be afraid of. And I think that is a big, a big thing for a lot of people when they're starting
out because it feels so overwhelming in you might be looking at something
and trying to match a color and it just feels. So all these tubes of paint, you have no idea how to
get to the end result. So hopefully we've given you some tools and techniques to help you navigate
that a little better. And ultimately, the way
you choose to work with color is completely up to you. It does not have to
look like either one of us or any other
artists out there. It's all it's a very
personal choice. Yeah. It does not have
to follow the rules. We've given you all
the rules so you can decide which ones work for you. Yes, the rules in Art, kinda like in life, are
meant to be broken. So now you know, um, so Have Fun. Don't follow it. Exactly I've got my colorful little
flower here coming together. How is yours coming, Melissa? It's good. I like how this
bright orange plays against the dark background. I think it's Fun. And just putting some
finishing touches on here. The oh, my goodness. Or nine is definitely
just to start. We can do a little longer.
I'm fine with that. You let me know
when you are ready. Okay. I mean, it it doesn't
have to be finished. It's totally up to you. Yeah. Do pain as long as
you warm it up. Okay. I'm just going to do a
few more little touches here that I think I'll be good. I mean, I, I2 could work on
this for quite a bit longer, but I just wanted to get some basic colors detail so you could see how
it sounds crazy. Mine is compared to Melissa, my green stem here. And I do enjoy the dark colors, but I also enjoy the dark
colors versus bright colors. And the combination of
the two I think is fine. Oh yeah. Everything kind of
plays off of each other. You really do need both. I love Hello, one can
set off the other. Yeah. Courage. For the orange is definitely Transparent. So, yeah. Take awhile to build
on top of list. B little flower. I think I'm good
with that of a you. Let me do one more thing.
I just add a center to this flower and
then I will be good. Okay. Well, you know, good enough. Why not have that
qualification to them there? Yeah. It's definitely not good, but there's what
it is in 10 min. It's all about the color, it's not about the
finished product. That's good. Well, Centene on this all day if we loved him. Well. Let me a second. All right. Lobe or
black in the center and then I'll call it quits. Isn't that what you
said 3 min ago? Nope. I don't remember that. Japan has recorded. Yeah. Okay. That helped. Alright. So we did step away
from the paintings. Mads is rough. Great job everyone. Now, you know Your Color
Personality and you can use it in your work in
many different ways. We hope you enjoyed this course. We hope you learned a lot. We hope you feel a lot more
comfortable with color. Do you feel better about
color now, Melissa? I do. Getting the practice
was a lot of PFK-1 and I hope all of
you enjoyed it too. We love getting a chance
to meet with you. So thanks for everything. Yes, Thank you.
34. Closing Thoughts: While we made it all the way
to the end of this course, and it has been so much fine. I've had a blast exploring
color with you, Melissa. I know Paul II has been great. I've had so much fine. It's been very colorful with hanging out with you as nothing if it's not colorful. Ready. And hopefully for
everybody taking the course, you feel a little bit more confident now about
working with color. I know that is one of
the things that a lot of beginning artists
really struggle with and feel insecure about. And there's no reason
to feel that way. It should be a FUN exploration. It's kinda like a color
that venture, right? Right. We hope you loved the chance getting to explore
color a little bit more, learning all the roles and then learning that you can
break those rules. We hope that you
discover it a little bit more about yourself and your own art-making ability and your own personality
through Color. Absolutely. And we would love to see
the results of all of that. Please, please, please
share your work with us. Makes it so much more funds to know that all of you
are out there working right along with us
and we love to see your work and share
comments with you. So please take a moment
and take some pictures of your favorite projects from this course and
send them our way. Yes, we would love to see it. We love all the
different ways everyone interprets the different
lessons that we share with you. We love to see all
the ways that you come up with to explore color. Everybody's a little
different just as you saw between Melissa, me, we each approach it in very different ways.
Very different. Those are just two options. There's so many
other approaches in each one of you will
have your own style, your own way that
you approach color. So if you enjoyed this course, we would love for you to come back and take some more
courses with us, wouldn't we? Yes. Oh my gosh, please come back. I love hanging out
with each other, but we love hanging out
with you even more. So please, always
more FUN with you. Yes. Explore other classes. We have a lot more ideas, a lot more teaching to do in the future and a lot more
courses coming your way. And when your friends
come over and see your artwork in your house
and start complimenting you. You can invite them to come and take the course right
along with you next time. Invite all your friends,
all of your family, because our motto is
everyone is an artist. Thank you all. Next time. See you soon.
 Paul Richmond, Everyone is an artist.