Mastering Dynamic Poses: The Ultimate Guide for Artists, Photographers, and Models
 Giulia Martinelli, Animation Director / Illustrator
Watch this class and thousands more
Watch this class and thousands more
Lessons in This Class
-
-
1.
Mastering Dynamic Poses
2:10
-
2.
Welcome: Project & Tools
1:53
-
3.
Line of Action
2:47
-
4.
Negative Space & Silhouette
3:09
-
5.
Asymmetry
2:17
-
6.
Push It!
2:37
-
7.
Recap
1:40
-
-
- --
- Beginner level
- Intermediate level
- Advanced level
- All levels
Community Generated
The level is determined by a majority opinion of students who have reviewed this class. The teacher's recommendation is shown until at least 5 student responses are collected.
406
Students
7
Projects
About This Class
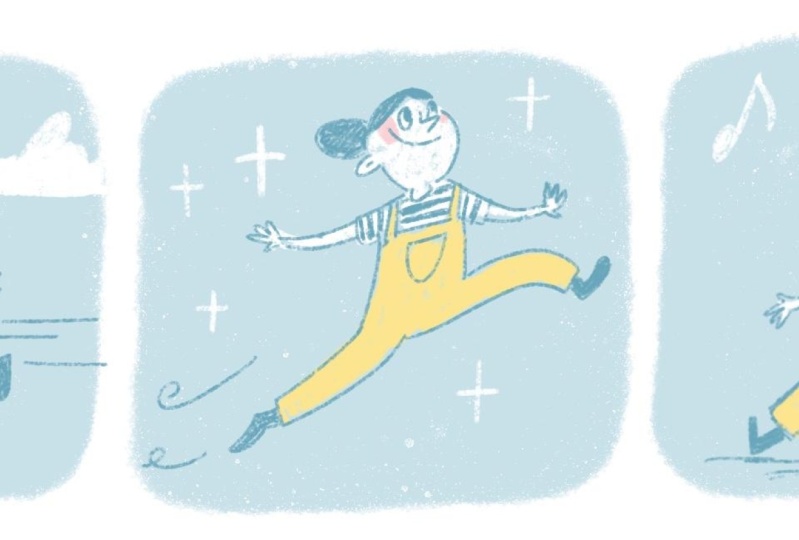
Are you tired of stiff and boring characters in your artwork or photography? Do you want to learn how to create dynamic and original poses that bring your subjects to life and improve your storytelling? This class on mastering dynamic poses might be the perfect fit for you.
In this class I merge my experience as an animator, illustrator, and model, to bring you the top tips and secrets for creating poses that are both dynamic and authentic.
Who this Class is For:
Whether you're an artist looking to improve your character poses, a photographer searching for more interesting compositions, or a model wanting to nail your next photo shoot or life-drawing session, this class is for you!
Tools:
No special materials are required to follow along – simply use your preferred tool, whether it's a pencil and paper, or a camera. Through a combination of step-by-step instructions, practical examples, and insider tips, you'll gain the skills and confidence needed to create dynamic poses that are unique and original.
About your Teacher:
My name is Giulia: I am a professional animator and illustrator. I have also been working also as a model - both for photography and for life-drawing classes - for many years, and in this class, I am combining the experiences I collected as an artist and as a model.
Through this unique perspective, I have discovered how these seemingly distinct fields interconnect, allowing me to develop a deep understanding of the nuances and subtleties that make a pose truly dynamic and captivating.
This class is not just about mastering the human body but also about creating harmonic compositions. I'll break down the class into easy-to-follow tips that will help you create poses that are both dynamic and authentic.
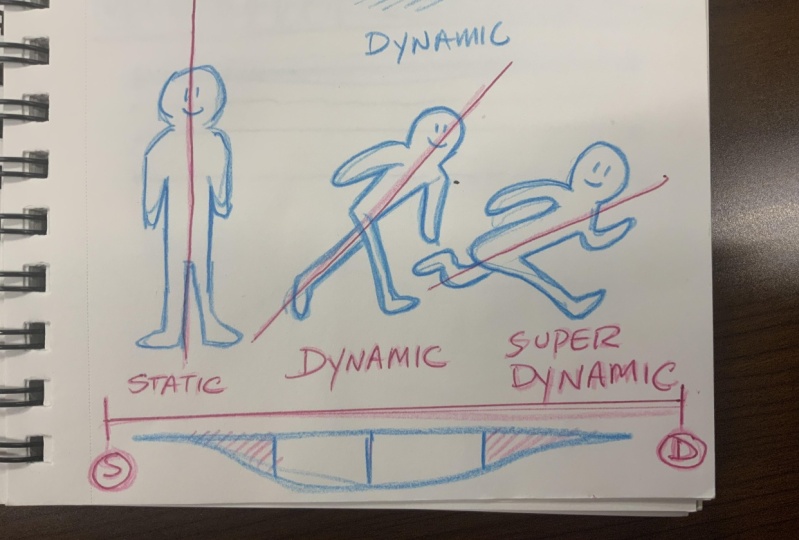
This is not a class about anatomy or a particular technique, but we will analyze poses that work and are aesthetically pleasing.
Resources:
Together with the class, you will get a Recap .pdf with the most important concepts and takeaways, and some extra sketches and slides.
What You'll Learn:
At the end of this class, you'll be able to apply my tips to your illustration, animation, or photos.
You'll learn how to convey emotions and expressions through body language and how to create poses that are unique and original. No matter what your preferred tool is, whether it's a pen or a camera, this class is for you.
Join me in this class and take your posing skills to the next level!
Meet Your Teacher

Hello, I'm Giulia, a full-time freelance animator, and illustrator.
After graduating from in Animation (Turin, Italy) with my animated film MERLOT, I started my journey as a freelance artist and I hopped around Europe for a while, before settling down in Zurich, Switzerland.
In my daily practice, I juggle client commissions, teaching, and personal projects.
If you want to stay in touch and receive a monthly newsletter from me, Creative Crave is the place where I share some behind-the-scenes and updates from my desk. You will also find me on Instagram and on YouTube.
See you in class :)
Giulia
Here are some of my favorite students' reviews:
See full profileHands-on Class Project
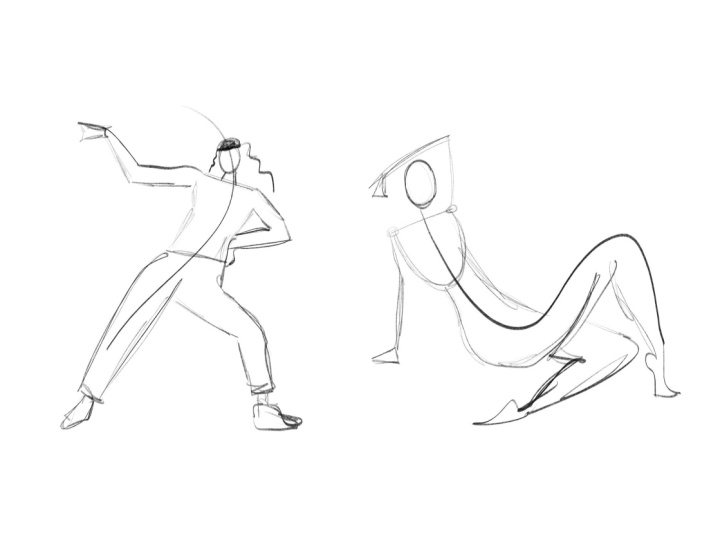
In this class, you'll be creating sketches of dynamic poses and/or photographs that demonstrate your ability to apply those top tips and secrets for creating dynamic poses.
Whether you're an artist looking to improve your character poses, a photographer searching for more interesting compositions, or a model wanting to nail your next photo shoot or life-drawing session, this project is designed to help you take your posing skills to the next level.
Share your work in progress, sketches, photos, before and after shots, or whatever you feel comfortable with. Don't be afraid to experiment and have fun with it!
At the end of this class, you'll have a collection of dynamic poses that showcase your skills and creativity.

Class Ratings
Why Join Skillshare?
Take award-winning Skillshare Original Classes
Each class has short lessons, hands-on projects
Your membership supports Skillshare teachers
Learn From Anywhere
Take classes on the go with the Skillshare app. Stream or download to watch on the plane, the subway, or wherever you learn best.