Transcripts
1. Mastering Contemporary Art: Composition and Perspective: Do you want to learn how to make fresh and exciting contemporary
artworks like this? This, or this. This course will walk
you through the do's and don'ts of using
different materials and how you can apply what
you've learned to any medium to create realistic
compositions and perspectives. Throughout this course,
you'll have access to comprehensive lessons,
additional resources, and course assignments
which will guide you through
the entire process of creating exciting artworks using a range of
different materials. We'll begin with gaining a
firm grasp over the basics of focusing on the fundamentals
of contemporary art, such as how to properly
use your tools. Creating perspective,
drawing in three-dimensions, and using different color values to represent light and shadow. Will then move on
to practicing and ingraining these principles
by applying what you've learned through
creating a variety of artworks that focus on different
painting and drawing methods, such as creating realism,
using multiple layers, accurately replicating
reflections, and using ink to add intricate
details to your paintings. During these lessons will cover common mistakes
that are made when using different
mediums together and how you can use a
variety of tips, tricks and techniques
to avoid them. By the end of this course, you will not only have
the confidence to create artworks that utilize a
range of different mediums. But you also have
the knowledge and understanding to use
these mediums in a way which complement
one another and enhance your final artwork.
2. Get to know your tools: Hello everyone and welcome
to a new tutorial. Today, we're gonna be
learning about ink and how we can use ink and
water for drawing. To work with ink and water, we also need a brush, round brushes that have
a pointed tip like this. These brushes have
different types handmade or with natural hair. They also come in
different sizes. Take your time to
make the selection more comfortable for you. Natural hair brushes
have higher-quality, but they're also more expensive. Now, to start working, we need a round tip
brush like this, where the hairs do not
fall so that we can easily apply the
touches on our paper. Take your time to
hold your brushes. See how you feel. Now we need to use medium to large brushes when
it comes to size. As the small brushes
are typically used for adding details, we do not need them
that much also, because we can use
the pointed tip of these medium or large brushes to achieve the details desired. We use a typical ink
with a water bases. And we can use any color
that we want for the ink, black, brown, or any other
color of your choice. The point is to start practicing
and using this medium. We also need to have
some clean water nearest like this and
also some dry tissue. These are the materials
we're gonna be using to start working. First, we're going
to learn about the different techniques
and methods of using ink. And later on we'll be applying all those techniques
and practice together on different samples. Try to get a feel
for the brush and its pressure and see you
in the next tutorial.
3. Object Drawing Practise: Hi there. Welcome to a new tutorial. Today we're gonna be using different pictures
as our models. And together they're going to be a combination of a still-life. First, we're going to
draw them in a 2D view, and then later explore how
to draw them in more 3D. Here we have pictures
of a kettle and a few lemons and a
knife beside it. And the knife is in perspective, we're not able to see it, so we don't draw
the knife actually. We want to make this 3D picture into a 2D image and draw it. We're going to start off by
creating a combination form. We're going to draw a polygon. I'm using a pen here, but feel free to use a pencil. Now I've used the triangle and a rectangle for the handle. And the teapot lid. Next to the kettle,
I'm going to draw a circle, a few ovals. Just to create the
shapes for the lemons. Two ovals and some
triangles, as you can see. Now, we've drawn these shapes, determined geometric
shapes and lines in order to create our
primary flat images. We'll add a semicircle as a cap at the end of
the kettle here. So here too as well. We're drawing a still life
here with simple lines. Now to add more perception or
depth of perception to it, we're going to draw shadows with dark and light triangles. All the lines we're creating
are pretty regular. Even shading is in
simple straight lines. It is simply to bring
in some difference and show the differences
in the lines. And how much you can achieve by applying your lines in
the right perspective. Exactly where they need
to be in the shadows. And to leave the
highlights white. Let's simplify another object. Let's draw a bottle. Place your object
in front of you so you can see it comfortably. Draw a rectangle and
a rectangle cap. Here's a circle of as a fruit. Then an oval. We have a mug here
with a handle. Now we draw simple shapes on the bottom surface just
to show reflection. Just using these
triangles and thin, long rectangles, we're
implying a sense of light or reflection
onto these objects. Try to simplify objects
around you and make them into D view, analyze them. That's the point
of this tutorial, is that we want to create
imagery in 2D form. Next, we're going to draw a milk pot handle. This is a cone shape. We want to draw it in 3D view. Simplify and objects and
make combinations of shapes. Don't be overwhelmed
by creating. If you're straight lines, they're going to be very long. You don't have to create
them in one stroke. You can do it in little dashes. Now choose a
complicated object to learn how it would
be simplified. Maybe a picture which has some reflection and maybe a cap, which is curved or
is of unusual shape. You can create a sketch of the object and then begin
drawing it with the pen. If that helps. But notice how my first-line
is a curved line. Curved up and then
it curves down. Now although I have
a circular shape for my jug and the handle. But they are more
curved than they are uniform like the others. Again, this is our attempt to simplify what we're seeing
are a complicated object. Sometimes beginning
with a pencil drawing and then going over it
with pen might help. It might be a good
practice as well. Now I'm drawing two apples. It doesn't matter that
they're not symmetric. It's just about practicing
and getting a better sense of what 2D images in drawing look like or
how to achieve them. How to look at objects
right in front of us and make these 2D
drawings of them. You could also do the
exercise of drawing them within 30 s or 1 min. That way it kind of puts
pressure for you to make those quick lines and rely
more on your observation. Now we're creating a lamp. We draw our rectangle triangle again and another triangle. Circular, oval shapes. Then a small rectangle. And all these shapes are
stacked on top of each other. Simplifying this complex shape in front of mirror
complex-looking object. We continue stacking
those shapes, circles, rectangles, ovals. And just like that,
we've created the lamp. Let's use another
complicated picture. Let's start with a triangle. A vertical oval, a
horizontal oval. Another triangular shape
or rectangular shape when circle one handle. This is how we
simplified this object. The idea is that these shapes,
the geometrical shapes, are very helpful and the
way to create simple, simple drawings, simple 2D
drawings of any object. It doesn't have to be complex. It can be simple, straightforward, or
even more complex. If it's more complex, it's simply taking more
shapes and combining them or stacking them on top of each other like we did
with the lamp here. I'm just setting up
a flower pot here. Just for me to be able to
look at it comfortably. You can use anything
around you really. Remember that practice
will help a lot. It's not about making
perfect, perfect drawings, but it's about approaching
your medium and your technique with
ease, with confidence. Where you are not worried about. Using your pen, making
those extra lines and really not considering
them as mistakes. We learn from everything
that we draw. But we need to practice bringing those shapes are
referencing those shapes in order to create complex objects. I've created a
reflection on the pot here with a little
bit more details. But now let's try to add some shading with
the rectangles. These rectangles
are the lighting. They are the highlight
where the light is hitting. And that's what I
mean by shading. It ends up leaving the rest of the object known as
the darker part. Just because we've highlighted
a rectangle right there. We should keep practicing. Again, remember, symmetric, symmetricity
is not important here. It's the simplification that
we're trying to focus on. Keep drawing different objects, a kettle, a tea pot, a basket. Any object around you
that's appropriate to be, to be observed and simplified. Feel free to send me any
questions you might have. You can even share with me
your drawings if you'd like, and I'm more than happy
to share some pointers, some feedback, and address any, any questions, any
concerns you might have. Now, we want to draw a 3D model. I've placed the fork
in front of me. But we want to draw
it in a 2D view. Ideas to look at 3D things and
to draw them in a 2D view. Observe your object and create
your lines accordingly. Next is a perfume bottle. We're drawing it with some
rectangles and a triangle. And the more, the more we, the more we do this, the better our practices get, the more defined our lines are, the quicker we are. Now a cup and perspective. We can draw it shading just by creating one line like this. That there's a shadow
inside the cup, but also on the left side. Keep practicing any object
around you just place it in a comfortable spot
and dried in a 2D view. Drawing is a great art form and it's also a great exercise, something that I find
a bit meditative. It's primary. You pick up a pencil
or a pen and you simply start to draw
your lines down. And even if it's not perfect, but the idea is to practice because the
more you practice, the more you're really
looking at the objects and making the lines
that you need to make to show their shape. Maybe show some highlights. Work on these kinds
of objects and simplify them by drawing
them in a 2D view. Keep practicing. Hope you've enjoyed
today's tutorial and see you again next time.
4. 2D and 3D shape practise: Hi there. Welcome back to
another tutorial. Today we're gonna
be working with the general basic shapes. As you know, they are a circle, triangle, square, and rectangle. As we are in the
beginning of our course. Let's practice simply creating our base sketches here with
any pencil available to you, create these shapes
on your page. There are simple
geometric shapes and we're going to
illustrate characters. In order to do so, we
need to learn how to observe the work
and simplify it. Observation and
simplification are two of the initial steps in illustrating characters
and designing them. These are also some of the
most important ones that help us easily draw
different things. Take your time to
create your sketch. You can use a hard eraser
to erase your lines. What we're doing now is creating characters out of
these simple forms. U-shapes don't have
to be perfect, but do mark them as I
have here on the page. Remember to make use of your
downloadable resources. Every tutorial has a
downloadable resource which has all the
information necessary with all the materials
we're gonna be using. So do take a look at them. It'll include all the
information necessary. The idea is to start getting comfortable with
drawing your base. Now using a pen or a fine liner, go over your base sketch you
created with your pencil. Forms we are all
familiar with here, the circle, the triangle, the square, and the rectangle. In fact, we're using these familiar simple
geometric shapes to illustrate different characters,
animals, and objects. We need to be able
to analyze things. And to do so, we need to be completely familiar with
a different forums. Know how to observe
the curvature. Maybe it has some lights on the right side
or the left side. And after analyzing and we exaggerate the
sizes and we color them and give it texture and make it a unique
character illustration. First, we need to eliminate the details and
see the object as a general form to simplify
it to its simplest form. And after that, we add the
element of exaggeration to draw that unique character
or object we're working on. By adding color to it as well as texture and other
visual elements. We get closer to completing it. Now, let's start by looking at these shapes
and taking each one and breaking them down into different,
different perspectives. We have a circle here. And we want to create the most common forms we use
while sketching circles. You have an oval here that's elongated
horizontally, vertically. We're going to do the
same for the next form, which is the triangle. And we can show the different angles and change it vertically
and horizontally. This is also to be able to visually study the different perspectives
of these shapes. By knowing these
different forums, we can simplify a complicated
object or figure. We mostly use the combination of these forms to create figures which we'll go through together and we'll
continue working on. As you know, each of these
forms can be in 3D forms too. Simply by shading and giving
a shadow to a circle, we can turn it into a
sphere just like this. So we've indicated the
curvature of it and giving it a shadow
makes it more to d. So this is simply to visually have our eyes
practice looking at these different
shapes and how they can create different
perspectives. This will help us
draw our subjects and sketching in general by adding some lines and we can give some dimension to a triangle
and make a cone also a square can change
to a cube like this rectangle into
rectangular cube. We're going to use these 3D shapes a lot as we move forward. We use these forms
a lot in creating space are working on the
form of the figures. In fact, we create
a figure out of these forums are a
combination of them. And by knowing these
forms and elements, we can simplify a
complicated thing and learn the process of simplification by practicing
it over and over again. We know all these forums. If we combine them, like what we're doing right now, we can create different
things and even draw them in perspective
by drawing the lines, drawing the shapes in
accordance with those lines. It's basically creation of
shadows and highlights. The highlights are
leaving the white of the page there and
not adding any lines. But it's to visually
locate where it is. Observe how I'm combining two different shapes
together here. These are some compound
forms which we can draw and practice before starting
to draw figures, spaces, objects, and so forth. We can use these forums and draw familiar simple shapes like a house in a way that we
did when we were kids. We can also create a lot of different forms and
characters by combining them and finalize them by coloring and giving
them texture. What matters is practicing and getting used
to the techniques. So make sure that you go
through the assignments. I would also suggest
practicing and playing around with those shapes and
the lines we've created. Do them again, have your own playful approach to it and discover more
about your tool. Hope you've enjoyed
today's tutorial. See you next time.
5. Turning your 2D drawings into 3D: Hi there. Welcome to another tutorial. After introducing
some general shapes like rectangles, square, triangle, and a circle
in different 3D shapes. In our last tutorial. Now we're going to use them
and draw simple objects by combining them or
building from one shape. E.g. look at my ink bottle. We're going to just put it
here so we clearly see it. Now we will use the
geometric forms to draw it. Plays your model
in front of you, so it's easy to look at. And to simplify it, we see that we can use the form of our rectangle to draw it. We first draw the
cube like this. The upper and lower
surface are drawn based on our point of
view and how we see them. We draw it in this way
and then we're going to Use the oval shape to determine the right place
for the cross section of it. Continued to observe your model. The bottle will be
drawn by drawing half cone sketches like this. Keep observing your model, keep observing the bottle
and look at the lines. We have an oval here as well. We go across the shape
from top to bottom. We draw these ovals in this
way joined by a cylinder. This is combination
of a cone cylinder and square rectangle that
we're going to use together. And easily like this, we can draw a bottle of ink. This is it for the
bottle that we drew easily by using
geometric shapes. The idea is to observe
your model and generally put together
these different forums. The point to be taken into consideration at
this point is to know to what extent we're
going to add details to it. We did not consider the details. What we draw is the
general form here by using the cylinder and the
cube with different sizes. For the bottle cap, we use the shape of
a small cylinder like this to draw it. This is, we just have to add
the sticker on the front. So this is the ink bottle. Some parts of it may
have different sizes. But what matters at this point
is being able to simplify this form by drawing it in these shapes
which we just did. E.g. if we want to
draw this brush, we should put it here
right in front of us. Observe it. Draw a rectangular
prism shape like this, which is quite long. And then we add an oval
like this on this part. Observe your brush. Look at the different
shapes within it. Now we have to draw the
brush out of this shape. So when simplifying
the form of a brush, we use the shape of
a cube to draw it. And we combine it with an, with an oval at the top. And it's long. It's as if you're looking at
the object inside the box. And what shape does
it need to take? That way we're able
to simplify it. So we're trying
to turn this cube into the object we want to draw. We're drawing a rectangle
and then an oval. Then we add the
shading if we need to. And this is a brush. We can draw objects around us just by simplifying
them into shapes. To draw a glass of water. This would be like cylinder, which becomes smaller
at the lower part. And that's it really
simply like this. We can turn a complicated
shape to a simple one. If I added some shading, then I'll indicate
the curvature of it. And you can apply this
to different objects. E.g. drawing scissors
from the front view, we need to consider a cube
in perspective like this. Now we're going to draw
it from the top view. We can eliminate
perspective as we do not need to apply it here. To simplify and
draw scissors will draw a simple surface
like a circle, one oval, one triangle, and one rectangle which leads to a triangle at the
end of the scissors. In this way, we simplify different objects
we're going to draw. We can practice more and more by drawing the different
objects that we can see around us using this
method of simplification. Now, to draw a fire
extinguisher will draw one simple cylinder and
a cone on top of it. And a hanger just like this. And just like that,
we were able to draw a fire extinguisher. And these very simple lines, it's a matter of observation. And this technique we analyze and simplify different
objects and we start drawing them in these
simple geometric shapes. For instance, and analyzing
and drawing them in 3D, we should put them
in a cone like this. If you want to draw 2D shapes, which is not in perspective, we'll draw them by using
forms such as a circle, square, triangle, and rectangle. But if you want to
draw objects by combination of these shapes, this drawing won't be in perspective view
like the scissors. Now, to draw a glass, we should draw it like this. In 2D shape. To draw an ink bottle, we draw half of a cylinder. And we do not add any
dimensions to it. We use the simplest shapes and forms like this to simplify
different objects. We can draw scissors
and different sizes by simply changing the
sizes of these forms. We draw a triangle like this, joined by a bigger triangle, and then we add the outlines. This is another kind of scissor. If we want to draw
open scissors, we'll draw two triangles with a bit of distance between them. Practice and practice
is my advice as much as you can and draw
objects around you. By simplifying them. Do this exercise how to
simplify a complicated objects. So look at something
around you and start this process of simplifying
and using geometric shapes. If you want to make an example, use a bag, e.g. to draw a bag and a
rectangular shape. Again, we'll draw it
in a cube like this. This is a bag with no straps and a hanger and the
front like a handle. Unlike this, we've drawn a bag in perspective by
simplifying it. To draw this in 2D again, we need to draw a rectangle
joined by a circle on top. We add these two circles to
show the buttons on it and to give it characteristic to know what it
is, is an object. So we've drawn them simply
by four main shapes, square, circle, triangle,
and rectangles. Also a sphere or a cone, a cube, or a rectangular prism in
2D shapes and 3D shapes. When we draw something in 3D, it means that the object
is in perspective. Keep practicing. Start with this shape over here. Play around with the medium
and see you again next time.
6. Applying light and shadow to your work: Hi there. Welcome back to
another drawing tutorial. After drawing and practicing 2D shape drawing and learning how to make objects
with simple lines. Today we're going
to draw them in a 3D shape using a pen liner
or a pencil if you prefer. First of all, we're going to
draw 2D shapes of a teapot, a cup, and a sugar bowl. Using those regular
simple lines, look at your objects or your model image and
make your drawing. Draw the lines that you see. A 2D drawing of an
object is quite flat. We're going to
differentiate today between the 2D drawing and a 3D drawing. As we complete this sketch, this 2D sketch, I just want to remind you to make use of
your downloadable resources. They have all the information for every tutorial
that you follow. Don't worry too much
about symmetric reality. You're simply trying to create a sketch with regular lines, simple one lines to create
an image of these objects. And this is a simple sketch of them or a base drawing
if you'd like. Now, if we observe
our drawing here, we've created them
using a circle, a rectangle, a
triangle, and an oval. Now we're going to
draw the 3D shapes of these objects like cones. So we start off with a form of cylinder right at the top here. And then we move on to create a circle which we're shading
will become a sphere. Created a Spout and the handle. Now we have another semi sphere. We created an oval
for the saucer. But even the nature of
the drawing that I'm creating in this
sketching manner. It's not just one sharp line, it's light lines that are coming together to
form a final image. And the Sugar Bowl holder. Now there's a shadow over
here on this sphere, this curvature of the
cylinder and the sphere. I'm adding the shadows as if the light is coming
from the left. The shadows here
indicating the curvature. They're giving a more 3D
field to the objects. The way the light
hits objects that are standing together
needs to look logical. If it's coming from the left than they should all be hit with a highlight from the left and the shadowing is
on the other side. Now that we've created
the objects on the left with these simple lines
as a simple picture. It's still a simple
picture on the right here. But simply with more hashes, it doesn't need more analysis. In complicated objects two, we simplify them by combining
more geometrical shapes. Now, let's draw
these shapes here. It's more about the shadowing, the highlights and
the shadows here. The sun is hitting
from the left side. And to draw this cone. If the sun is hitting from
the left side as indicated, we'll draw hatching on
the side. On the right. Just for you to notice
a difference where the light is hitting
the highlights, which is where the white is, the middle and then
the right edge. Again here with the cylinder. This applies for all shapes. The right part is darker. The middle is a little darker. A little like it's in
the middle tonality. Then you have the
highlight on the left. We should make sure that the
shadow is actually dark, a few, a few shades darker
than our middle ground. The top part of our cylinder, the light is hitting the
inside on the right. Now. Now we're drawing a sphere. If the sun is shining from the, from the left here. We're going to start
from the dark part to the light part. Just to indicate
that curvature here. And shading the
kinds of lines you decide on to use to
create the shading and to show the highlight that's that depends on
the texture you want to achieve or the material that you are that you are
shading the object. For now I'm going with these curved lines
next to each other. But generally speaking, we're considering these
objects, the cone, the cylinder and the sphere in a mat and a matte
texture or MapView. Just remember that the
more you practice, the easier it will come to practice looking
at the objects. Because then you'll observe the texture that
you need to create. The different lines that are necessary where the shadows are, where's the darkest tonality? And even within the
dark is tonalities, maybe there's a
lightest gradation. And the same thing
with the highlights. What's the darkest highlight? What's the lightest highlight? In general, we're considering these objects in
them math, color, but also we can make
the shapes simple with these main forms of the
shape that triangle, the rectangle and the
cylinder and the sphere. And as we combine them, we can create different objects. This is an exercise to simplify complicated objects and make 2D drawings or 3D
drawings of them. That's the whole point. We practiced a lot and made complicated
and simple objects into line drawings to show them in 2D and
in 3D, 3D shapes. It's time to work on
the heart stages like drawing animals and humans. Drawing still-life of nature is simpler than drawing
human or animal anatomy. But these are all things
that are going to be practicing As they have a
lot more detail to cover, a lot more decisions in terms
of texture and perspective, and lighting and
highlights and shadows. But we can definitely achieve a realistic image with practice. I hope you've enjoyed
today's tutorial. Keep practicing and see
you again next time.
7. Learn different brush techniques: Hello everyone and welcome
back to another tutorial. One of the most commonly used techniques
while working with ink and water is the
wet on wet technique. For this, we need to apply water to the surface
we want to work on. We apply the water on the
paper, just like this. I'm marking a square here. Then we apply the ink
with a water-based, which is watery itself in this way on the wet
area on our paper. You almost infused the color
lightly and let it spread. I'm using a brown ink here, a water-based brown ink. There is water on
my brush and color. This is what a wet on wet
technique looks like. You want to be careful
not to flick your brush. It might splatter on the sides. This is the kind of
texture we get when we work with a wet
on wet technique. The color ink or even
watercolors mixed with the water as if
they are running on the surface, are
seeping through. This kind of texture has
lots of usage as well, working on different samples. Another technique we
can use to work with ink is applying a
dry on the surface. In this technique as
it is visible here, we're applying the ink on
the dry cardboard or paper. You can take your time to practice the field
for the brush. Both while using a wet on
wet technique or wet on dry. In this technique,
the colors we add on the surface dry quicker and also it is more manageable and we can control
what we are doing. We can see clear lines and
edges in this technique, something that we did not see in the wet on wet technique as the water made the colors
blend with one another. Here we were still
using the wet brush. This is why we can still see water droplets on
the touches we have applied on the surface,
a dry surface. Take your time to practice
and get a feel for the medium and observe the
different kinds of effects. The following technique
is dry on dry. Using this technique, we can take advantage
of the texture of the paper or the cardboard that we are applying the color to. This might affect our choice of paper or cardboard
in the future. Take your time to
practice applying dry color to dry paper
or water-based color. Take your time to apply your brush in
different directions. Maybe use only the tip, maybe tilt the brush as well. This practice helps you get
familiar with the medium. We can say that the touches
we apply on the surface with this technique
are all a bit harsh. However, the different
textures can be used for different purposes to achieve different details depending on the sample we're working on. We can even continue applying the color with this
technique so that we reach a very dry color and surface
with a minimum amount of ink on our brush and create
yet another new texture. For instance, this technique and this kind of texture can be suitable for drawing
trees and dry branches, even meadows, to draw the C or a street on a rainy day or
a distant foggy horizon. The wet on wet
technique here can be a good choice in normal situation and
also for mixing colors. We can use wet on dry technique. While working with
ink or watercolor. We're supposed to work
on lights and shadows. It is important to
keep in mind that we go from light to dark. Playing around with the medium helps a lot with being
able to manipulate it. We start the work by adding
the very light colors first, using lots of water and
a small amount of color, either ink or watercolor. And little by little, we can add more and more
ink on our surface while we are creating a light
surface of color. The darker colors
on the other hand, are created by adding more concentrated of the
color and less water. The idea is to have a higher
percentage of color in a water mixture in order
to create darker colors. Whilst lighter surfaces need
less concentrated of color. Mixed with water. Using the tip of the brush, we can keep more ink on
the wet area in this way. As the cardboard,
the surface is dry, the ink would not go
on the dry parts and will remain on the part
we have added water to. And also this part, as it is obvious here,
will become darker. On this part here as we have a wider wet surface and our
brush holds more water, we can achieve lighter colors. Whilst on this
part we have added water to a small surface, and therefore it will
keep the ink inside that parameter and it
will become darker. This is how we create
different tonalities of color and using ink
and water by wedding a particular part on the
surface we are going to work on and also adding
certain amounts of color and water on our brush. So it's a question
of controlling how much ink you're
adding to your water. This is how lights and
shadows are created and we can easily add them
onto our work. Remember, it's always
better to start lighter and then build
up those color layers. Now, the reason we
need to practice this, because we can move and use
our brush in different ways. We can create wide marks
on the paper like this. Or we can work on
more details and thinner lines using
the tip of the brush. We can also apply
it like this and the result would be
a wide colorbar. This kind of hand movement
gives us this texture. With the help of the
tip of the brush, we can draw very thin lines. Here as we have applied wet
color on a wet surface, we're actually doing the wet
on wet technique and it is obvious that the colors are
going to blend like this. If we pay close attention, we can see that if we
know our materials well, the water, the ink, the brushes, and the papers, we can create different
textures easily and add details in
different ways. We just have to play around
with the medium and practice. Take your time to
explore the medium. And the more you practice, the more you're closer to
developing your own style. The most important
thing is to know and master the usage of the brush, the ink, and the water mixtures. And then we can easily create beautiful scenery and
diverse textures. The next important point
is to pay attention while working with ink
and water is time. We have to consider the
fact that we cannot spend too much time on each part
and we need to be quick. It's not wrong if we say
that the element of surprise plays such an
important role here when we are drawing
with this technique. As you can see on this part
we worked on together. We can see that the simple
line we drew looks like a forest and the
distance at sunset. And this is created in
less than a minute. It shows us the importance
of the element of speed while using these
materials and techniques. With more and more practice, we can master the techniques step-by-step and then use
them to the full extent. These are the initial techniques
that are typically used. I look forward to
creating samples together and using
these techniques. Remember, the more you practice, the more confidence you have. See you in the next tutorial.
8. Beginner Tree Practise: Hello everyone and welcome
to another tutorial. Today we're going to apply all the techniques and methods
we started practicing in the first tutorial using watercolor and also ink
and water drawings. Today we're going to
create a sample of a tree and we start by
using a sword brush. Take your time to make sure
all your materials are handy. You have clean water
and clean tissues. And let's get started. The first technique
we're going to use is the wet on wet technique. This is a challenging technique, but we need to practice. I'm placing down a
water-based ink ocher. We apply water on the area we want to draw the brand Sean. Make use of your downloadable
resources that have all the information necessary for every tutorial that we do. You're downloadable
resources will also list the colors
we're gonna be using, the brushes, all the
materials necessary. Now, we add color on the parts we have
just added water to. We must be quick so that
the services don't dry. We need to be quick while
working on this sample. However, it takes
practice to be a little bit quicker as we are
working with ink and water. If you need to pause the video, take your time and reapply
water onto your paper. Please do so. Remember the more we practice, the more easily a
medium comes to us. All these decisions about how much water and ink to
apply will become instinctual. But at this stage, I would recommend simply
practicing and not being disappointed by the result and simply learning from the
process as much as possible. Now I'm using a
brown ink and it's water-based as we are applying
a wet on wet technique, we're adding more and more ink, but I'm being more decisive as to where I'm placing my ink. We're looking at our
sample and we're, we're seeing that there is more shadows on the right
side of the branch. So this is where I'm
applying more color. Are more concentrated
color to be correct. As we have a wet surface, the more we move the
brush across these parts, the more blending of the colors will happen
on the surface. Whenever we're using
this technique, we need to be careful
about the light parts of the work and not
touch them so much. If they need to be much lighter, we just need to
leave it be and not, not divert the color
towards these parts. We want to leave them undamaged. We must not move our brush a
lot on different surfaces, as in watercolor painting. We do not work on the samples repeatedly and we need
to be able to draw what we are supposed to with a limited amount of
number of brushstrokes. So take your time to
observe your sample. Look at where the shadows are, where the darkest parts are, and where the
highlights are to also make sure that you don't
touch these parts. For instance, on this
branch who were working on, we can use these small
lines that are created here in some way as we keep working on different
parts of our work. In some places we
might need to remove texture like these small
lines that are created. Again, we dip our brush in
water and we start fading these parts and removing the lines that were
created initially. So water is used in a way
to alleviate or change or edit our primary placement
of the water or colors. What matters is to keep
these lighter parts, the highlights, not touch them. We can add the dark parts
in the process of the work, but not the lighter parts. We can even direct
the dark parts from one place to
another in our work, like move the ink
around with the tip of the brush to be exactly
where we need it to be. So it pulls, it creates
a kind of stain there. On some of the
edges of the work. We can add more water with our brush while it's still wet. And remove the paint
that was previously applied in this
way by lifting it. Finally, using a
brush with more ink, we're going to add these
dark parts to our work. One of the points
to be considered is that we do not bring
the dark parts on the edges as we tried to have
a lighter line like this. And our works. No matter what we're working on, be it a branch or anything else, we do not add a dark
line on the edges. We need to practice on the
way we apply the ink and work with it so that we can control the ink on our surface better. Sometimes when there is
more water or ink on the surface that we're working
on and we do not want it. We can easily remove
the extra water or ink with a dry tissue as
I'm doing right now. You can also use a cotton
if that's more comfortable. That way we can erase
some parts of the work or lift some color
off of the page. However, we need
to be careful not to press the tissue too much or repeat this too often as it
may remove the textures, the different
textures that we have created at the bottom. From the start, we are only using the wet on
wet technique so far. And this is why all
the colors spots we add become faded like this. We tried to keep the
ink on some parts by applying the brush like
this on the surface, using the tapping of
it on the surface. The wet on wet technique
allows us to become more familiar with this technique and understand
better how it dries, how the ink sets, and what's the aesthetic. So tap your page just like this. When you want to add
a very dark part, you're creating basically
a concentrate of the color in that specific spot. Notice the background layers, how they are drying, how the color is seeping. Now, notice how the work would look like if we
use this technique, the more you add color or you're being very decisive
unintentional, where you're placing your color. You get to look at your drawing
and see it come together. Now we're going to work
on this branch again and this time on a dry surface. So we're not going to add
water to the surface. Instead, we will use the ink
and water that we have on the brush and start working
with only these two. Sketching the branch. We need to wash our brush first, then dip it in the ink
and again in the water so that it does not give us a very dark color
tone to start with. And that way, we're starting with a lighter color,
the lighter base. And now we're going to
paint the branch again. But remember the surface is dry. I'm using the tip of my brush. We are applying our
color very lightly. We want to be careful
with the pressure or where we're placing our color. We're observing our sample and making our
sketch accordingly. Make sure you have clean
tissues ready to use. Just in case. And clean water. We're going to use the width of
the brush like this. We also make sure to keep the highlighted part or the white parts on the
surface untouched. Follow my lead. Just like this other branch
on which we use the wet on wet technique and kept the
white parts over here. We're going to keep
it here as well. Observing my sample and
continuing my sketch. Now, we're going to apply slightly darker
layers right now. We need to have more
ink on our brush. And just like this, we start working on
the branch again, adding shading
layers in this way. While adding the different
touches on the paper, we should always leave
some parts untouched. Firstly, because the texture of the tree has these holes in it. And also we need to save the lighter parts
from the beginning. We can always work
on them and fill them later on or as we
go on with our drawing. But keep them in mind. It's always the
best choice to show the highlights and
the rough texture. They are dressed as
powerful as the outlines. So take your time,
observe your image. If we don't mark the areas
of the highlights or the white parts in our drawing
right from the beginning. And instead we add color
to all the surfaces. Our work would not look like
a watercolor work anymore, and it loses that
unique texture. That ink and water
or watercolor has. That blending of two liquids or a color seeping through a liquid and then drawing on the surface, we want to pay
attention to that. It's good to know and
important to keep in mind that a work of watercolor is
playing with the lights. The highlights are just as
powerful as the contrasts. Feel free to send me your questions anytime
or share with me your drawings at different
stages or completed. And I'm more than happy to
share some pointers with you. Maybe give you some feedback. Maybe some guiding pointers. Just make sure to practice. Use your brushes and the ink and the water to
practice what kind of effect you could achieve with this material with this medium. The more we practice, the closer we get to
recognizing our own style. Practicing also achieves
a higher confidence and approach to the medium. So the way you use it, the way you apply your color, the confidence
with it increases. Now, these lighter parts
that we have kept from the beginning look like the small branches
coming out of the tree. That is why they look brighter
than the other parts. Now we need to add
more ink to our brush, creating a darker
color tone so that we can start adding
another layer on our work. In this way. Again, we make sure that the darker color
tones are added while considering the lighter lines that are right next to them, we don't want to add the
darker tones on the edges. We move on to the next step. However, we do not apply the
ink solely on the paper. We mix it with water. This is a wet on dry technique. So if your brush gets dry, you need to add water to it. We need to wait for
these parts too dry. So that's something like what happened when we were working with a wet on wet technique
would not happen. If we add the
additional layers right away without waiting for
the previous layers to dry, something like this would
have happened where we have a seeping of color that's
bleeding onto the page. We want the different
layers to translate into each other and
not fully blend. We are using the tip
of the brush to add these kinds of details
and the thin lines. If you need to pause
the video at any point in time, do it. Just to maybe practice, maybe clean your brush, maybe get a clean tissue. But be as quick as you can. Then play again and
we continue together. Now, we keep on adding the
hatching lines in this way. This isn't using the
dry technique that we can move the brush
in this way and add hatching lines to create
these textures up there. If there are any parts
on which we wish to remove or reduce
the dark parts, we can use the dry tissue
and apply it in this way on the paints while they are
still wet and remove them, lift them off of the page. It takes a little
bit of practice. You don't want to press your tissue too hard
onto your page. You're simply lifting some of the color and not all of it. We continue to add
our details of this. Shadowed areas are darker areas. Just like this. We use the tip of
the brush to add the details and more
concentrated parts of color. Take your time to
observe your sample. That's the model from which we are drawing or creating
this watercolor. As we keep adding
details step-by-step, the level of
contrast in our work increases because we have brought a balance across the
highlights and also the, the shaded parts of the
darkest parts of our picture. If we keep on adding these
hatching lines to build up the necessary layers on the tree trunk and
show its texture. The more and more
image will look realistic, more natural looking. Rich as well because we've
added more details and we're being intentional as to where
we're adding our details. So make sure that your
highlights are untouched. Where we add the dark and
light parts and how we shape them as something that we learn by practicing a lot, mainly by training our
eyes to look for it. When we're looking
at the highlights, noticing what's the
lightest of my highlights? What's the darkest of my
shadows or the lightest? Right now we're just
applying and practicing different watercolor and
ink and water techniques on a sample to see how they should be applied
and how they work. Watercolor has its
own aesthetic. And the more we practice, the more we understand how to create these different textures. How to bring out the best from
this watercolor technique. That's why I say, Take your time observing your image and have fun
while you are practicing. Figuring out this medium. Because the more we practice and the more we play
around with our medium, it's the only way to
have happy accidents. Things that are unexpected in a way that we didn't
know that our brush can create this kind of mark or
with this kind of pressure, we achieve a certain aesthetic. It's just by playing around with the medium that we
can learn more. I'm taking my time to
add more details here. I'm applying my gestures
and the direction with which the branch or the
green of the branch is. We can easily see
how different a work would look when different
techniques are applied to it. The difference
between our branch on the right and on
the left is clear. While we were working on it, we realized that these
two parts can be symmetrical and create some kind of a balance in our work. However, as we move down, it looked better to
remove the lower one and make it darker to
show the shadows. This is how we do it. Notice how I move
the color upwards. Now I'm using my
tissue to bring back a bit more of the highlight
that I'm shading. We must apply the brush on the surface like
this to add ink, but also removing sometimes
with just water on our brush. And the tissue helps as well. Follow my lead. Observed my application
of the color. It is important to know that while working with watercolors, we do not only use one
technique for work, actually, a combination of
several techniques is used to complete
the whole drawing. This is how we've
increased the richness of our drawing here by using all
these techniques together. Working on adding
the shadows and the lights in the
right place and building that
richness of layers. All of that increases
the depth of perception and the
richness of the image, making it look more natural. But also making the
work look harmonious. We continue to
observe our work to add some more final
shadows here. We want to complete our drawing. Add any final details. I hope you've enjoyed
today's tutorial. Thank you so much for joining
me and see you next time.
9. Complete Tree Branch Painting: Hello everyone and welcome
to another tutorial. In this lesson, we're gonna be working on drawing a tree and applying different
watercolor techniques we have learned and practice
together so far. We start off with our
mechanical pencil. First, we're gonna do a
general sketch of the tree. You want to make use of your
downloadable resources. They have all the
information necessary for every tutorial we work on. They will even have
the sketch and the grids available for you to practice your base sketches of any drawing that
we're working on. This tree has a rough surface
and entangled branches. We're going to start the work
with a lighter color spots. I'm using a sword brush and
water-based ink, brown. We try to add the colors
quickly and be fast. Make sure you keep in mind where the highlights are or
the white parts are. So you keep them the
white of the page. Take your time to
look at your sample, determine where the
light parts are, and begin your work. You want to be intentional and decisive as to where
we're applying our color. If you feel a
little bit worried, you can make your color a
little bit more runny or watery, making it lighter. With the tip of your brush, you're able to add your color to specific
parts of your drawing without touching any
of the highlights or the white parts are lines
that need to remain white. Now we're trying to determine the right places
for the dark parts. We're building up
layers which need to dry before we work
on the next layers. Here we're adding this
background color. We're going to use
our dry brush now and add dry touches
of ink on our work. Just to create the texture
of the tree trunk. This is a natural bristle. It's a large sword brush. Apply your color
as I am doing now. This is called a dry
brush technique. Follow my lead. We're actually using the
texture that the brush itself is giving us
and not the water. We want to keep observing
our sample image. Take a look at where
the highlights are, where the outlines are. When you look at the
darker parts, the shadows, trying to, try to notice what's the darkest
of the shadows? What's the lightest
tonality of the shadows? Just so we are more aware
as we work on our drawing. I'm applying these little
details with the absolute tip. Using a dry brushes
to add more texture. That texture makes
our tree look more rich and more realistic as well. These are all the tree trunk
textures we're working on. If you need to practice using the dry brush or working
with it on a dry surface. Because as you notice,
our primary layer, the watery layer, is
drying or dried up. Now I'm going over it
with a dry brush and ink. Even on the light parts, you can add some dry
patches of color just to have an intersection between the darkest and the
lightest parts. This would help us better show the rough texture
of the tree trunk. As we start to mediate and
put this texture in-between our lightest background and the darker parts
that we applied. This dry brush technique
is usually used to show textures
and rough textures. Specifically, the more
water we add to the brush, the softer the texture
we would be on paper. And on the contrary,
the dry or the brush, the harsher the surface
we're working on would be also more expressive where you have the gestures of
the brush are very, very, very detailed
and textured. It is better not to
outline different parts of our works when we are
using watercolors. And the best choice is
to deal with surfaces, not just the lines. Because as you know, we are building different layers here. We want each layer to
dry so we can create the next layer on top of it and have them translate
into each other. Because with watercolor,
we're building more transparent layers with a dry on dry technique that
we can have more lines. And actually this
is the technique that enables us to add, to add hatching lines. We're using the combination of several techniques to
work on this piece. Remember to practice. Practice. It's not only that it will make a perfect final drawing if you're repeating
the same drawing. But it brings a lot
more confidence in the way we apply our colors, our use of this medium, our confidence with adding
color and water and mixing them and knowing
how much to do of it. But generally, the more we practice and play
around with our medium, the more confident we are, and the more beautiful
the results become. Because how freely we apply color comes across in
our final drawing. I'm taking my time to
observe my sample. Now we add some water to
the brush we're using. Then take out the water
with a dry tissue, add ink to it and once more, take out the extra water
and start working again. You can use this technique
just to clean out your brush and go back
into apply more color. We are working in this way so that the whole surface we're working on does not
become too dark. Now we start adding more
contrast to our work. As you can see, we keep working on the tree trunk in this way as it was
mentioned earlier, it is important not to add
the dark parts on the edges. If we leave a small link between the dark
parts and the edges, it will help us better
show that dimension of the curvature in the tree and
also the circular shapes. I'm trying to add as
many details as I see. I want to accentuate and make my tree look more realistic. We're using curved lines,
long brush strokes, dry ones, some dotted technique. Moving on to the next step, we add ink to the brush
and not water at all, so that we can start applying
darker spots on our work. We can see this whole on
this part of the tree. We determined the place for it. Please remember that you
can send me your questions anytime or maybe share with
me your final drawings. And I can share with
you some feedback, give you some pointers, and address any of
your questions. I'd like to take pictures of my artwork at different
stages as I'm completing it. It gives you a sense of
what I've focused more on, how the image got built up. And it helps with visualizing, looking at your
image and seeing, is it harmonious, is it
balanced or the dark parts? Similar, consistent. And my, uh, my applying my
technique consistently. That visual aspect is something we practice looking
at our artwork. We try to keep the light parts, the white spots clear and
untouched as we work. If we fill all these
parts and spots, the right side of the work, which is already dark, would become darker and we won't have the dimensional
feeling in our work. We lose that sense of
depth of perception. Our highlights are just as
important as our shadows. The dimension and shape
which is created by all these concave and convex
points on the tree trunk. The usage of the lights
and shadows would be all gone if we fill
in the highlights. And we would have
more of a monotone all across our drawing. Also, the harmony
we have created so far with the lights and
shadows would be gone. If we fill these parts, then we would have one
dark and one light part next to each other. This is why we must
be careful about the light parts of
our work and try not to lose them or have them get lost with the rest
of the tonalities. As mentioned earlier, we need to take our time to
look at our sample, look at what it is
that we are drawing. We do it constantly. Of course, the image, our sample image or the physical object
in front of us is not gonna be like our drawing is not going to look
exactly like it. But we want a reference that's very strong
and we want to keep looking because
sometimes we can make an assumption in
our mind as to, oh, this is how, this
is how it looks, because we have information, we know what a tree looks like, but then we can forget
where the highlights are, where the shadows are. That's why it's important to
keep looking at your model. It allows you to add details
that you didn't know. Maybe are there. The practice of looking and seeing the work is the best practice you can do. Now, we can also use the kind of texture
that the cardboard we're using is giving us the
paper that we're drawing on or the cardboard has
its own grain and fibers. Then we can take advantage of that and bring out
that texture as well. And we'll see how our
colors sits on this kind of texture and consider it
as part of our drawing. And especially if we're
using a dry brush. Just something to keep in mind. I'm adding details as I see
them and I keep working on one part and then continue
and move all across. We need to add the dark
spots on our work in there right places and scatter
them in order to harmonize, make sure that
they're consistent in different parts of the work. Also practicing to keep our application with our
brush to be consistent. It will be evident in the final, final drawing that there is harmony because although we've
used different techniques, our application is harmonious
across each technique. We're going to add more texture and detail on this part as we have not worked on
it as much as we have worked on the other parts. We make the branch
bolder by adding more details and textures to it. Now, using the
width of the brush, we add these textures
to the work. So yeah, just like that. If you need a moment to test a certain mark that you want
to create with your brush. Just pause the video and
try it on a separate sheet, and then play again. And we continue together. We are adding the
leaves and also the bushes with the
same dry brush that enables us to better show the texture of the paper or cardboard that
we're working on. This way we're
adding more details. Look at the way that I'm
applying these gestures. They're really light there
with the tip of my brush. They are more sporadic
or irregular. We can still add the contrast of the work, even darker parts. We're now adding dark spots like small dots on the lower
parts of the branches. And also where the texture
of the tree trunk becomes rough or exactly where
we see it in our sample. Like here. Also practice one more thing. As you're working on a drawing. Take a split moment just
to pull your head back. Take a look at your drawing, look at what you've
created so far. This visual aspect, like
you have to look at the work and look whether
it looks visually logical. That maybe you have some parts that are standing out more than other parts and you want
to balance that out. So take a moment every few minutes just to take a look at what
you've created, the drawing you've
created because it has its own aesthetic. And Mike mentioned
earlier it's not gonna be exactly like your sample, but it might be even more beautiful and it
has its own life. And we're working on this. We're working on the drawing. The sample is there
just for our reference. Now, as we want to use all the techniques we have
learned on this work, we're going to use
water and apply it with a brush on our surface. Just like this. Follow my lead. We're going to use the water just as a way for
fading different parts. Some parts of the paint added to achieve a texture that's closer to our primary
layer that we created. We're bringing the
work together. Fading of these parts alongside the dry texture that we
have on these other parts. So wet and dry techniques, they help us create
harmony in the work. And it adds beauty and
a depth of perception. Now practicing is key
here, it's really key. That's how we get
to be better in this technique and this medium
with all these techniques, in order to create
that kind of harmony, we need to be able to
control our brush, both when it's dry
and when it's wet. On wet paper or dry paper. This only comes with practice. Watercolor or water
and ink drawings are among those techniques
in which we must be fast and paint. Against time. We have a limitation as to how much we can work on a
watercolor drawing. You can keep working on it
because the layers are drying. We keep adding touches of
color on top of one another. What we can do is increase the contrast in one
or two steps and work with water and ink on the surface and lift
color with a tissue. There would not be another step after these and we need
to finish our work in these limited number of steps if we insist on
adding more to it, the feel of the work as a watercolor or water
and ink art work. It would be gone or disrupted. You're adding something that's not supposed to be
there in a way. So that's why we need
to work on it now. And it would look like a
gouache or acrylic work if we add too many
touches and layers. Here we've added a
soft layer of shadow. We can speed up
the drying process by using a hairdryer as well. We're finishing the work
by adding small lines. Thank you so much for joining me and see you in the
next tutorial.
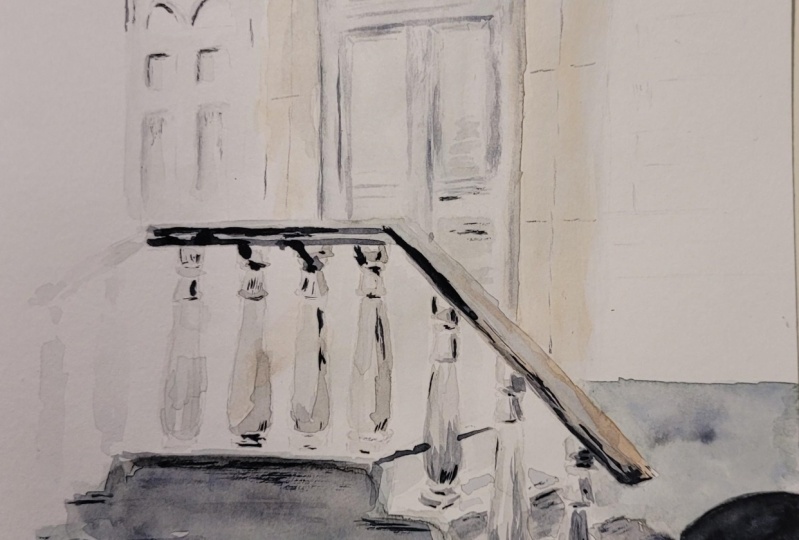
10. Do’s and Don'ts of Still Life: Hello there and welcome
back to another tutorial in this lesson as a continuation of the previous lessons on
watercolor and ink drawing, we're going to
focus on the common mistakes that might happen while working with these materials and see how they can be avoided. We're going to work on a
still life sample of fruits. So we're going to
start by sketching the model very lightly. Make use of your
downloadable resources. They will have all
the information necessary for your tutorial. The sketch that you need, the grids to create the sketch. All the materials
we'll be using. We need to do the initial
sketch very lightly here. Because when the layers of
watercolor added to the work, these light lines
shouldn't be visible. Take your time to
create your sketch. Go over the details that you need there as your guideline. Even though they are light, they will still be
indicators of where to apply our ink
and water mixtures. If you've already
created your sketch, you can skip two minute 5.45 s, where we will begin applying
our colors and water. Now we're gonna
be adding colors. The same techniques
and methods that we have practiced in
the previous lessons are going to be used with different colors on this sample. We need to be careful and have
control over our brushes. The amount of water we
add to the surface. And actually the
balanced created between the water and
ink enables us to portray what we're
going to do in the simplest and best way possible. In this way, all the
complexities of the form can be simplified into shape that show the composition perfectly. This actually is not something
to spend so much time on. Instead, it's something that is learned by practicing and we can transfer what we're
going to portray on our piece of paper very quickly. Just some touches
of ink and water. We're going to work on the
sample into good and bad ways showing the do's and don'ts of watercolor and how
they are applied. Our subject can be anything that we see in front of ourselves. And we can also use
different techniques such as wet on wet or dry on dry. These do not matter that much. What matters is to know what are the most common
mistakes that may happen while we're
using watercolors. Now that we've applied water
to our paper or cardboard, this is the don'ts version
of the work and we're going to talk about the
correct ways of doing it. It's wrong to start working
with the watercolors by applying the dark colors first. It is wrong to start adding the dark colors we
see on the work. First, we're gonna start
with a brown here. It's an Indian red. That's a don't. At this stage it had added to the
beauty of the work. However, the wrong thing
to do now is to keep working on it and add
more dark spots on it, which we are going to do. We observe the work to see
where the darker parts are and start applying
the darker tones on them. I'm using a Van **** brown. As we move on. We keep working on it
more than it requires. This is also a don't. By adding too many layers of mostly dark colors on the work, we cover all the spaces that let different parts of the
work showed themselves. We want to avoid doing this
in the future because we end up turning this shadowed part to become even more
dark unnecessarily. As it is visible on this part, we have removed the watercolor
feeling from the work. That aesthetic that you get from watercolor paintings
is disappearing. The next mistake is to
add a very light color, like a light yellow color
to work on this pair. The first mistake
was starting with the darkest color
tones of the work. The next mistake is to apply the light yellow color tone
right next to the dark part. What we're trying to do is
to work on the texture of the pair as our brushes actually
making the colors dirty. No matter how much
we clean the brush, the color is still
gonna be dirty and not pure and this is
going to damage the work, the quality of the colors that
are appearing in the work. As mentioned before. We are going to do all that, the don'ts that can be done on a watercolor work
here they are like mistakes that often happen. Now the next thing
we're gonna do, which is a don't, is to add a dark
outline for the works. Now we're trying to add
a shadow for the work. Trying to work on the shadows, we applied dark colors on
the brush again and then on the paper without giving the work that
needed time to dry. Working on it while
it's still wet. Placing another layer on it while it's still wet is a don't. This is the contrast between
this brown color tone and this yellow one here that we
are working on right now. This is why we add this spot here just to try and
differentiate between them. But it's still problematic. Working in this way
is problematic. It doesn't achieve
you the best results. Now we continue
working on the pepper. Again, we're going to
start the work by adding the darker color tones,
which is strong. When we start the process of adding the colors with
a darker color tones, especially with
something like brown. The whole work and the
surface we work on would be stained and looking
dirty as we move on. Now we're doing another one of the common mistakes
of watercolor, which is directing the
paints from here to there, moving the color
on your surface. Immediately after that,
we're going to start applying the red
color to the surface. This is a cadmium DPU read. There are also some light parts, shiny parts on the edges
of the pepper as we are showing the common
mistakes of watercolor. We're going to cover them, not leaving the right
spots for them untouched. You know how usually we leave the highlights, the white spots. They are the light
the light parts, they are the white of the page. We are not doing that. Are pepper will lack
some highlights. We've actually covered the
lights here, which is wrong. Now we continue doing this. We're actually adding more
and more to the shadows of the work in order to create the dimensional feeling in it. However, watercolor is not the tool with which you can add more and more layers to create the dimension you
are looking for. Instead, the
dimension needs to be created with just
one brush stroke. But here we are trying to create the dimension of the work by several back-and-forth
movements of our brush, which is actually wrong. You should direct
your brush and be intentional as to where
you're applying your color. The colors are mixing with
one another as we have added water on the whole surface
before adding the colors. If we tried to remove the colors with a dry tissue like this, all of the colors
that we have added on the surface would be gone. There would be lifted off. The next mistake is to add
a dark layer of color, a dark outline all around the
object we are working on. By adding more darker
layers and the shadow of the pepper on the pair and
moving from dark to light, which is again wrong. You have added dark spots
on our work that alongside these other dark
spots are going to damage the whole work
and how it looks. It's almost difficult to
differentiate or even know what it is that
we are drawing. Now the surface has dried. We can see the spots
that are created on the work which are not
placed in the right places. And also by using the
right color tones. To fix this, we're going to
add even more dark spots, which is again another mistake to try and give some
definition here. And they're using
a darker tonality because that's
what's necessary to create a little
bit of an outline. As a mistake. The way that I'm
applying the color now, these back-and-forth
movements of the brush is going to add excessive layers on
the work as we're trying to work on the
yellow dimension over here. We keep working on it with a wrong techniques and apply the lightest
color tone here, which is not going to work. It will not, will not
look the way we want it to look because the
color has been stained. The highlight is not there. Even if I add that
bright color on top. We cannot apply the
lighter color tone on the darker one and
watercolor painting. And the right way
of applying colors using watercolor is
to go from light to dark as an applying
the light colors on the surface where we are also using the
texture of the paper. And we cannot work
with watercolors in the same way that we work
with acrylics, for instance. There is a layering aspect here where you work from
lightest to darkest, leaving each layer to dry and then start on every
next layer as they dry. No matter how we work on it and add more layers to
create dimension. Now, we are unable
to achieve it. We keep adding these
darker parts to the work. And what is happening right
now is that the more we add the dark layers that dirtier
the whole surface looks. We have also added
more water that we actually need to the surface, which is disabling us from
controlling the colors and how where they are applied. Take a moment to look at
to look at your drawing, your current drawing right
now where it's the don'ts. In watercolor. We apply the yellow
color tone here. And as it is visible, the existence of
yellow and brown next to one another
with excessive water on the surface will only make
the whole surface more dirty. Working in this way also makes the previous color layers
we have added disappear. Another mistake is to have so much color concentrate
on your brush. You want to do it slowly
and layer by layer. But also dragging the color
as such is not going to help. As we've added
more water than it is actually needed
on the surface. And in order to be able
to keep on working, we have to wait for
the layers of color and water to dry or remove the extra water with
a dry tissue that removes the colors
with it as well. Then we need to work
on the color spots once more on the whole
watercolor work feeling. The aesthetic that watercolor
gives you this limited set of brushstrokes is
kind of taken away, it's ruined, were unable
to achieve that process. We're actually trying
to make it work by repeating the mistakes, which is something that
is not going to happen. Watercolor is a technique
which the work is shaped by just one
or two brushstrokes. And how we control the water
and colors and the brush. It's a calculated
amount of water, calculated amount of ink, calculated amount
of brushstrokes. The sample we're
working on right now as we have applied
the wrong techniques, the don'ts, we are pushing ourselves too far
to make it happen. And this is not how we should
work with watercolors. We're adding even
more darker layers of color on these parts and actually add the
new shading layers on top of the previous shadows. We're going to add
the green color right away from the pen
on the surface. Adding colors in this
way will not result in a beautiful work as we've
established already. I'm using a hookers
green dark color here. As it can be seen, the
colors are starting to mix with one another
on their surface, and it is because of
the water we have applied onto the surface. We have actually covered
all the parts of the work with color and left no white parts like no
highlights, no empty spaces. To differentiate between
the different parts here. We're going to work
on the background. Also show one of the other commonly repeated
mistakes of watercolor, which is working on the
background with a black color. I'm using an ivory black. Using the black color here is wrong as it adds more
dirty spots on the work. And also the color black
does not go well with the other colors
that have been used in this work up until now, we actually must have tried to create these darker parts by adding different gray
tonalities and not black. One of the very
important points is keeping the light
parts on our work. And it comes from
the good observation we make of the work. Here. There is a very
important light part on the back of the
sphere of the pair. We're going to cover it. This detaches the watercolor
feeling from the work. Here. We have too many
dark spots that have taken the usual brightness of a
watercolor work away from it. And the work has become dirty by all the brown tonalities
we have used. You want to look at
your image and look how there's a lack of separation
or highlights in it. E.g. on this part, we cannot see the beauty of
the red color. We have added. Only the small spot that we
have over here remains on the side that is bright where
we can enjoy the color, the green, even all the yellow
is seeping into the red. They've all been mixed
and they have removed the dimensional feeling of
the work and has become flat. The brown outlines all
over the world have completely damaged the
sketching of the work. As it was mentioned before, it is important not to add
this dark outline around the objects as the light strain from all parts of the object. And adding this dark
outline and not considering the light parts makes
the object looks flat. The pepper we have here
has become completely flat by all the dark
outlines we've added. We actually were
not able to control the color spots and
the light that we originally had at the
back of the pair is now gone with all the
dark parts we have added. The next mistake is
to add colors all around the object
and actually cover the space around the objects. For instance. We can use
a brighter color like this around the objects like the blue that we are
applying right now. Adding alkynes in any form is
wrong and we should not use a brush and the color and cover all the spaces around the
objects in our works. We are covering it all of the empty spaces by
adding colors on them. We're filling all the fibers
of our paper or cardboard. We are now going to apply the complimentary
color for this one, for instance, orange
on these parts. As it is visible, the colors
are going to look dirty. The complimentary
colors must not be used alongside one
another like this, as the colors were, will mix and look as if they've tainted
each other. At the end. We are covering all the
parts and not leaving a space for lights
or unnecessary gaps. We're exaggerating
on this sample, but this can easily happen while we were working on a landscape with lots of different colors. If we cannot control the colors, the brush and the
water we're using, we're not going to achieve
a beautiful final effect. It's very important to have some empty and untouched
spaces in between the colors so that
our watercolor piece of work can breathe. Take your time to observe
your image and look at the problematic
aspects of it. The white parts can also show the lights and let
the work breathe, but also look more
realistic, more natural. And different parts of
the work will better show themselves because it's a balance. Remember
how we talked. It's a balance between the highlights and the
outlines and the shadows. The highlights are
just as powerful as shadows and the dark parts. And we mustn't apply the dark outlines all the way to the edge it
takes away from showing the curvature of the
object that we are drawing. We're now going to continue
our work on the same sample, but this time with
control over the colors, the brush, and the
water we're using. The first step is to wash our brush completely
so that it is clean. We're going to use
the tip of the brush. One important point
for the beginners is not starting
their practices with a wet on wet technique as it is a difficult method to control. We're going to apply water
and color with our brush. Remember how in our
sample on the left, we applied the
darkest tone first. Our colors bled into each other. We didn't allow enough time
for the layers to dry. It also made the whole
work look dirty and the colors lost their brightness
after getting mixed up. So we're going to start
from the lighter colors and then we will
add the dark parts. We're starting with a yellow
color tone of the pair. And for that we will use a
warm yellow like cadmium. And we also add
water to our color. We have on the brush, so we have water on our brush, watercolor on our brush. Later on we will add
more water to it and add the color in the same direction
of the form of the pair. But this is how
we're supposed to start with a lighter tone. As we reach the lighter parts, we need to add more
water to the work. So add more water to your brush if you're getting
to an even lighter part. We add the color in this way on the different
parts of the work. The color we have
now is very bright. We need to keep
this brightness in the process of the work as
we're building the image. So keeping an eye out on the highlights
is very important. If there are any
parts that need to remain the white of the page. You also want to keep
an eye out on that. We leave these
parts untouched and white like the edges
of the object. Keep observing your
subject, your, your sample. As you are drawing. We wash the brush once more and start working on the
pepper with a red. We're going to mix the red color we have with a bit of orange. To have a better
color combination, to have a little bit
of a brighter red. The next step is to add some
water to the combination, this color combination
that we've just created. So becomes lighter
and more watery. And therefore we can spread
it a little bit more. We start adding the
color in this way on the pepper using the
tip of my brush. We also add a bit more water. We're careful to leave
some parts untouched. For instance, on the
convex point appear. Do not cover it with any color. We keep looking at our sample. Although drawings
don't turn out to be exactly the same as our samples, but that's not the idea. The idea is to create a watercolor drawing in the
aesthetic of watercolor, we practice and we achieve
a drawing that does have the highlights and does have the contrast and
shows the image well. We need to practice
looking at our work. And visualizing the harmony. As we're applying,
look at my speed. My speed has lowered. I'm allowing more time
for this layer to dry and observe my application. I'm applying with
a tip of my brush. As I work on the body of
the pepper, I'm using, the length of my brush, the side of my brush. Wherever I see there's a
concentrate of color I create. I leave a little pool
of color in that place. We add colors in this way, step-by-step from light to dark. Although my speed has
slowed down in this sample, which we are doing it correctly. I'm not going to slow Either. We let the colors move freely on some parts that we have
added water on before and let the work happen for itself as a watercolor
piece of work can be similar to it has like a happy incident where
we should let it happen, let the colors dry and seep into the paper and take that effect. The drying process
reveals that aesthetic. Next we're going to
use an ocher color. And after adding
more water to it, we apply it on our
surface in this way. Feel free to send me
any questions you might have or drawings you
might have completed. I'm more than happy to share
with you some feedback, maybe some guiding pointers. But do make use of our
downloadable resources that has all the information
necessary for every tutorial we work on. Now, we need to start working
towards the darker shades. We want to make our
drawing slightly darker. So as I'm applying
this secondary layer, the ocher is a darker shade than the primary yellow that,
that we've applied. With the yellow ocher. I've
added a color spot like this. Then we wait and see
what happens to it. We direct it to where we want
by our brush. In this way. We need to prevent this creating different spots like
stains on the work. We want to apply them
exactly where we see them. Take your time to
observe your sample. Look at where the highlights
and the shadows are. You don't want to cover
the entire yellow parts, especially not the highlights. We can use the dry tissue in
this way and extract extra, extra water on the
surface carefully. You don't want to
press too hard. Now we have to wait for the different parts
of the work to dry. At this point. We go towards working
on the pepper. We have this red spot over here. Now we're going to add the
shading layers step-by-step. We add the color to the brush. We are using a brown
at the moment. You want to be careful where
you're applying your color. To make it a bit more watery, we add some water to
it with our brush. In this way. You can also dab your brush
onto a tissue if you feel like there's too much
water on it or too much color. A color spot like this is created in the
process of the work. We can keep it. The aesthetic of the
medium allows for this kind of little
extension of color. It's okay. Now we're going to add more of the brown color tone here
to make it slightly darker. Remember, the best
practice you can do is looking at your model. Look at what it is
that you are drawing, observe the lightest parts and try to give them a gradient. What's the lightest part
is white and what's the darkest part of the lights? And then also take a look at your darker parts, the shadows. What's the darkest
of the shadows? Is it a brown? Is it closer to black? Isn't more blue. So that's the best
practice you could do is to actually
observe and really see what it is that
you're working on in your drawing to make node either visually
or on a paper next to you that these are the tonalities you're
gonna be using. The, this is your palette. And, and practicing because
the more we practice, the more we're able to
blend and mix our colors with the right amount of water and also
work on our speed. Although we need
those layers to dry, we also want to be
able to work and have them translate into each other without bleeding
into each other. So we keep adding the
colors like this, adding only adult
on the surface. But as the surface is wet, the colors are going
to move and blend on the area that we added water on. We need to keep
practicing the way we add our colors so
that we learn how we should do it and how we
can actually control the ink or the watercolors
on the surface. As it is visible at this point, the colors are moving
on the wet part, so we wait for them to settle before we continue our work. In the meantime,
we're going to add the green color on this part, which is the top of our pepper. We're going to add a little
bit of orange tone to the green we want to use just so that we have an
olive green color. It will make our
green a bit warmer. If you need to
clean your brush or get fresh tissues
or clean water. Go ahead and do that. You also take a moment to just mix our green with our orange. We start applying it. With the tip of my brush. I apply the green, we remove some of the color with the
help of a dry tissue. Again, you don't want to apply a lot of pressure
on your tissue. You're simply lifting color of if you feel your brush
has too much water, you can dab it onto your tissue. If not, then just go ahead. Now we have to wait
for it to dry. We have kept this
white part over here. What do you see it right
underneath the green stem. We may not have it on
our sample necessarily, but it is very
important to actually use these white parts. Even if the highlight on your sample is just
a little darker, It's okay to leave it
white on your drawing. It gives you a
chance to maybe add a very light tonality later or maybe even leave it as white. The surface has dried
to some extent. And now using the
brown color tone, we start adding
the darker parts. After we take the extra
water from our brush. I've added a tiny detail
on the top of the stem. Also here on the top
rim of the pepper. We're adding the dark
parts step-by-step. And very carefully. You want to allow for
the watercolors to dry as they naturally do they
have at their own aesthetic. You see how our red turned
into this light pink. And it has an orange tonality
also our browns are softer. So try to visually take in this aesthetic
and work with it. We wash the brush and
start adding more of the red color tone
to these parts. You want to be careful here. Add them just like this. We have another red
layer to the work, just to make it a bit bolder. But notice how we didn't do
that right from the start. We added a layer
by layer because we still want that
lighter shade, that aesthetic of watercolor
to still appear through our layers and dress like that. We've added another layer. Making our work a
little bit bolder. We continue to
observe our model. We want to make sure that we're not covering up the highlights as we're adding these layers because it can very
easily happen. That's why it's all a matter of controlling how much water, how much color we're adding. Now we wait till the other parts dry so we do not
work on it anymore. For now. We leave
the pepper dry. We go back to work on the pair. We're going to use
an ocher color and we start applying
it on these parts. As you can see here, when the red color
of the pepper is getting mixed up
with these parts. We try to direct it to different parts that
we wanted in this way. In order to take
control of the color, you can lift it with
a tissue like that. And it fits a little
bit less than you directed to the shadowed parts. But we take more controlled
by removing the color from the surface and tapping
the dry tissue. We continue to work on the pair. On the third layer
with our ocher. Or adding the top stem detail. With the Van **** brown. We add the darker
parts in this way. Follow my lead. Now it's time to start working
on the shadow of the pair. I start off with a really light, light layer here for the shadow. We are careful we're not
applying it everywhere. You also have a slight shadow
underneath the pepper. We're going to add this
dark part over here. We're using the same brown tone. We add the Van **** brown on the shadow here we let though, we let the color move
on the wet part. We want to focus and be patient and spread
our color correctly. As we were working
on the pair here, Let's talk about that part that bled from the
pepper to the pair. We could have done better
control of the water. You might have achieved
it better than I have where that
bleeding didn't happen, where the red did not
access the yellow. So it is, it is amazing how
every time you practice, you learn, you learn, you learn. And watercolor though,
has its own aesthetic. Even now as we build the image, it might not even be as
visible as we think it is. But we need to work with the colors and the medium
and keep practicing. As we're working
here on the shadow, we let the colors move on
the wet part we've created. We're going to use
the same brown tone on this part of the pair. The colors are moving on this wet part and this
is something we're not going to prevent as it is the
nature of watercolor work. We just direct them in
the ways that we want. We wait a little bit so that the surface we have
just worked on dries. This drawing process
can be sped up by using a hairdryer or
we can wait for it to dry as the hairdryer
might move the colors in different parts because of the pressure of the
air if it's too close. So sometimes it's just
a better idea to leave the colors dry on their own. When we're using the hairdryer, we need to make sure
that we hold it vertically so that the colors move into the texture of the paper and not anywhere
else like left or right. We don't want to be bending our hairdryer directionally
to the right or left. As it is obvious, we have
this light part here. And actually added to the beauty of the watercolor
work altogether. We directed the color in this
part, in this direction. We want to keep
observing our image. We continue mixing our colors
in using a clean brush. As we're adding more shadows
here with a Van **** brown. We'll have more
contrast in our work. These are the final color spots
we're adding to the work. We have water on our brush, we have a concentrated
color on it. We don't want this dark color to bleed into anything else
more than it needs to. We tried to show
the light parts on the pepper on the
surface with watercolor. Take a moment to pull your head back and look at your image. Using red. We are carefully adding
these colors spots while being careful about the lighter
parts of the work here. It's just an attempt to clean
up our image a little bit. We are almost done with
a pepper as we have created the texture
and the look of it. I'm simply harmonizing between the different colors that we've placed and their textures. We're still waiting for
this part to dry on the pair so that we
can work more on it. In the meantime,
we're going to start working on the
background of the work. We're going to use brown, which has some small
touches of blue. And we start adding
the colors lightly. And we start adding the
spots for the darker parts. Look how light my color is. Adding my spots,
allowing the color to pool or sit in certain spaces. I'm looking at the
shadow as I see it. I'm looking at the background. I want to give a final
field to our image. If you need a moment to practice the application of the light
color on a separate sheet. Pause the video, work on a separate sheet
and then play again, and we complete the
drawing together. We are adding these darker
parts on the areas outside the objects we
have worked on and adding these random
shapes with them. This way we can show the
texture of the fabric. There's a convex point here on the fabric that we show
with these brushstrokes. We just need to keep
observing our model. Now we need to start adding a slightly darker color
tone on these parts. We've marked the primary layer. Then we go back in
with a Payne's gray. To add more detail. I'm using my tissue to lift
some excess color or water. We can make sure
that the surface we're working on as dry by tapping a dry tissue on it
before adding the color. Just like this, we
add the darker parts. Observe your image. And add the details accordingly. At this point, we need
to make sure that the colors are not
going to be mixed up with one another
so that we can better show the texture of the fabric. We show the texture of
the fabric and it's convex and concave points by
simple touches like these. Follow my lead. Although
we're using a darker color, we have to be intentional with where we're placing
our gestures. Because at the same time we need to make sure
that the surface is not dirty or looking
dirty or messy. We keep adding these simple
touches and whenever we feel like they are affecting
the contrast of the work, we can easily remove them with
our dry tissue like this. We need to remove them before, like before it completely dries. When I look at the shapes and the composition of
what we're drawing, keep your tissue handy. This part is almost dry. And a beautiful texture has been created with a mixture of
the dark and light parts. We need to make sure
we do not damage it by working too much on it. What happened on this part was that the colors
on the pepper and the pair mixed up as the
surface on them was wet. So we remove the color
where they got mixed. Make sure that this
part was dry and now we're going to work more
on this part of the pair. The good thing is that
we lifted some color off of that mixture
very quickly. Just so it stops it
from going further. But we also redirected
the color to other parts. Now with a Van **** brown here, I'm just adding this spot again. We add this color spot here
and we keep working on it. We want to make a little
bit of a differentiation here between our
pair and the shadow. We're being very careful. Although this is a tricky medium and a tricky technique to work. Wet on wet or wet on dry. Don't let it hold you back. Play around with the medium. It's the only way to practice and to learn and to
get more confident. We keep working on
these parts here with a slightly wetter brush
because we want a light layer. We add this dark
part here while, while we make sure that we have this lighter part
right beside it, that line, we just need to
keep an eye out on that. And now we're going to add a
darker layer on this part to create a better
contrast for the work. We want to differentiate, like accentuate the pair itself. We worked very delicately
so that we better show that the lights and shadows and
the shape of the pair. Remember to take moments
to pull your head back. Look at your drawing, observe your sample
and look at where your highlights are and how and whether you're achieving
this curvature that we're trying to work on. Just by adding a darker shadow. We've, we've accentuated the
roundness of the pair here. We've differentiated
between that shadow which is a little bit
in the background, is behind the pair. The pair itself. We do not add the dark layer
on the shadows completely and tried to create
different tonalities of the dark color. We also make sure that
we're not using the color black, we use brown. Black, complicated
it, it kind of just dirty is the
surface a little bit, it becomes difficult to control. Black is not a
color that is made by combining different colors, so it's not gonna go well with the other colors we
have on our surface. We're using the dry on dry
technique at this point. And we start adding
more details. We make sure that we get the
extra water off the brush. Dab your brush into your tissue. Remove any excess water. Now that our surfaces
are dry or dry, That's how our technique
now is dry on dry. We continue to add the
final touches to our work. Comparing these two samples, we can see that the
second one looks better just with a control we
had over our brush, water and colors and also not working too much on some parts. And also using the
right techniques and methods by applying our
colors in the right places. We don't need to
work too much on, on our image or on our drawing. For instance, we kept
the brightness on these yellow parts even if they were not on
the sample picture, as it is the nature of the watercolor
aesthetic or medium. And what helps us better show the objects are the lights
and the shadows of them. We also kept the light parts here and we just have some
green pigments on this part. It's also okay because it shows the texture and the nature of the object which
we're working on. We should not add
too many dark colors beside one another as we
need to be able to show the delicacy of a watercolor
piece of work and also the delicate nature of
light colors in watercolor. The way they dry.
They're a little bit hazy and a little bit
bleeding into the paper, which is quite beautiful. We did not use very sharp green on the stem of the pepper. Beside the red color tone we had on the pepper
As we need to be extra careful while adding these sharp colors
next to one another. And you'll notice that there
are layers separating the green and the red. It is in the nature
of a watercolor work to happen by a limited set of brushstrokes and actually
letting the incident happen. So we do not add too many layers and take
the space for the work to breathe the way we want
to let it breathe, let it have
reflections and light. So by keeping the
highlights and marking the, marking the shadows,
we're bringing a little bit of dimensionality
to our, to our work. Now we can also direct the colors and the ways that
we want by our fingertips. Depending on whether you have good control over
your fingertips. If you need to clean your
brush, take a moment. Look at your sample and look at the drawing that
you've created. Also look at the two
different drawings that we have created, whether it's the
don'ts and the dues, and what can be, what can be
improved even on the do's, the image that we
have on the right. If we tried to do it again, we'll do it better and
better every time. Now we add this layer
down here very lightly. We're just trying to accentuate a little bit of this
background here. We are almost done here, and we can see how much more delicate the sample looks
compared to the previous one, the one on the left. We need to make sure that we add the colors in a clean way and we do not lose the
highlights of our work. And we direct the colors
to go in the right places. It's very important not to work too much on the sketch
and actually start adding the layers of color by
11. Contemporary Vase & Fruit Painting: Hi there. Hope you're all well. Today we want to choose
a simple painting. This painting has limited
with white and green color. It means that we
don't use a lot of color in this painting, so it can be good for
working with watercolor. There's a shade of
this apple and flower that we will create
with wet technique. First, we're going to start
by drawing our main sketch. Using a mechanical pencil. We want to keep our marks as light as possible as we don't want these lines to show through
our watercolor painting. Remember to make use of your
downloadable resources. They have all the information necessary for every tutorial, including the grids in
order to draw your sketch. Take your time to
create your sketch. If you've already
created your sketch. Fast-forward to minute five, where we start our
watercolor painting. Feel free to use any pencil that you are more
comfortable using. As mentioned earlier, I used
a mechanical pencil here. One note to make about
drawing your base sketch. You want to add as much
information as you can. Right now I'm just monitoring the periphery of my base sketch. Almost like an outline or where all the parts
need to be drawn in. Creating the general space here. Take your time. It's completely normal
to erase several times, go back and forth. Make sure that your
wrist is nice and light. Your pressure on your
pencil is really light. Working on our base sketches, one of the most important parts. It helps you remember
where the highlights need to be or the
shadows need to be. That's why I was saying
that it's the main sketch really needs to have as much
information as possible. As we are working on our sketch. There are few points
we need to consider. The first one is
good observation. We need to see the
different forms thoroughly and
specify their shapes. We can either use simpler lines or geometric
shapes for this process. This is the second point. Also. Another important
point is to work on the initial sketch with
the minimum hand pressure. We have a very light sketch on which we can apply the
layers of watercolor. Build them up. When we are
going to apply watercolors, we need to make
sure that we have all our materials
ready by our side. Like the glass of water, the color pens, and the tissues. It makes the whole
process easier and we can move forward much faster. Remember, watercolor
is a fast medium. We need to analyze and know
what we're going to do. And make sure that we
are leaving the layers dry before we move on to the next thing and
then start the work. Now that we have
our general sketch, next step is painting
with watercolor. The pot and the flower
have the same color. That's white. We don't have a lot
of colors here. It's not quite a sharp white, It's a warm white. If we have atmosphere on light, this white will be
warm and vice versa. In watercolor, we should combine colors with water, then use it. We use a light color with water. It can be ocher or light brown. But for cool tonality, we use a light blue color. Now we use a light brown color mixed with a good
amount of water. It becomes a very light
stain when it dries. Observe the way that
I'm using my brush. The pot is not clear, but it is shiny. So we have to keep
some parts white, the white of the paper. You want to apply
this color all over or most areas of the vase here. Although our primary bottom
sketch is really light and not visible through
the watercolor layers that we're gonna be creating. But for us it is a guideline. It will take practice
to be able to tell how much water to add to
these really light colors. If you feel like
it's too watery, you can remove some with
a tissue or let it dry. It's also a matter of instinct. After some time, once
you've practiced it enough, all these decisions will
come more instinctually. But for now, even applying
a really light color, we might have less color in
our brush than we think, or more water than we think. Now that we've drawn the part, we're going to use
a more dark color. We add a little purple
to our mixture. We create these stains which
are really we can faded. We want to maintain that are vases white and it
has some shine on it, but it does have some shadows. I'm going over the
handle of the vase here, leaving a little bit
of the color sit and some areas just to indicate a little bit
more of a shadow. Now we darken our
color a little bit. I'm using an indigo color here. Just to mark the spots. Again, keep your
tissue handy just in case you need to lift
color off of the page. Make sure you don't
use a lot of pressure, neither with your brush
nor with your tissue. These details right here
look how subtle they are, but they're just about enough. My drawing or my boss
does not need more dark, dark tonality because
the vases white. We can make the
tonality a little bit more purplish by adding
a bit more of that hue. But see how we need to be
careful with the white. And we apply our purple very
lightly and very delicately. We don't want to
apply it everywhere. Notice how my speed is not
too quick but also not slow. I don't want my surface
is to completely dry, but I also don't want
them so wet that my colors are bleeding
into other areas. I'm allowing a little
bit of time for drying. And still I'm applying my tonality is the
purple tonalities, the indigo tonalities in the places that are necessary
only and not everywhere. Look at the handle of this
of this jar or a vase. I'm not, it's not completely
covered with, with color. Now we're going to
work on the apple. We wash our brush and
completely dry it. We mix our color. We add water. We're going to
use a neutral green color. We make this phosphorus green neutral with a little
bit of orange. We need to keep a
highlight right here. So I'm not going to
touch that part. Take your time to
observe your model. Look at the highlight. Look at the darker parts where
the shadows are sitting. We just want to
be careful not to touch the parts that are light and remove
any excess water or paint from your page. We want to do it lightly and
not with a lot of pressure. I go in with a sap green color. If there's excess
water in your color, you can lift it
with your tissue. Otherwise direct
your darker layer in this way with a
tip of your brush. I'm also keeping an eye out on that very slight line between
the apple and the vase. We can use one tone of green, but the more tonality is you use either for the shadow or
even the brightest parts. The richer your image looks, tonalities that match
each other or serve the purpose of where
you're placing them. After we've added
several green layers, we need to wait
and let them dry. We wash our brush, dry it, and go back in
to add more details. This is a very
good technique and a very good habit to have
while working on watercolor, to wash your brush, dry it, and then go back
in with a clean brush so your application is not mixed with it with
any other color. It's also not been sitting there for some
time on your brush. Maybe some fibers are on it. Right now we're just adding a darker tonality of the green. Our speed is still median, where we've waited
a little bit for the layer underneath to dry. We're going to use this color as well for the flower here. Before unable to achieve
the detail that we want, we could use a smaller brush. Make use of what's available
to you if you don't have the exact same
colors or brushes, don't let it hold you back. Use what's available to you, What's more comfortable to you. I go in with a brush pen and I start adding
my details for my flower. We use a little dry
white color for this part because the
leaves are thin and small. But I've also added
some sepia here. As we work on different
parts of our drawing, we allow other parts to dry. Make it a habit to always, every few minutes,
pull your head back. Look at your drawing, look at what you've
created so far are the highlights
matching where you see the highlights
in your model. Have you tackled or marked where the shadows are in
different parts? Now I'm drawing the
stem of the apple here. I want to be careful. I'm still using
the same pen brush to achieve that detail. Remember when stains become dry, they get more beautiful. It's that effect that they
have when they sit or staying into the paper and the
fibers of the paper, that's the aesthetic
of watercolor. Achieving an entire image or objects in a more
natural looking way, more realistic using
this medium that's, that needs a lot of control. Here I'm using a burnt umber
and I'm using a wide brush. Again. I'm adding a viridian blue
on the bottom left here. When stains dry, when our colors dry, they
become lighter. Dress, keep that in mind. There's something very beautiful and leaving the colors dry, the more you
practice watercolor. The war you
understand better how these colors dry on
a certain paper. Then you're able to
make decisions as to how much color to
have on your brush, how much water to add. All these decisions will come much easily to you and
much more instinctively, the more you practice. Look at how many tonalities
I have on my Was. It just makes it
a lot more rich. And this is me still
building the layers. Being very decisive
and intentional with the way are where
we're placing our colors. Making sure not to pull colors
through different parts, replacing them exactly
where you need them. Keep looking at your model, keep referencing
the image there. Of course, our drawings are not going to be exactly the same. But the idea is to
keep an eye out on where the highlights are
and where the shadows do not rely on the information we have about what
a vase looks like. And to just keep working, we want to be informed by the model that we're using
to create this drawing. Pay attention to
that highlights. That is right across from
the from the vas handle. There's one line of
highlight that I kept there because I see
it in my model. Whatever shade we're creating, we want to fade it. You can use your tissue for that without a lot of pressure. Not, not simply
press a little bit, but just pull a
little bit to create a fade in the direction needed, not any direction. After it dries. That's when we
strengthen the shadow. Now with a viridian hue, I'm going in again
onto the apple. I'm adding the
shadow that I need, directing the color to
where I need it to be. Now we add a little
warm green here. You notice the different
tonalities that this green that's next to the stem is different than
the one after it. And the green
that's highlighting the curvature of the apple. All of these decisions come from looking at
your model a lot. You look and you observe and you study where the
highlights are. And the more you practice, the more you see what
you're drawing very well. That's the biggest practice
that we need to do is looking and actually noticing
where the highlights are, where the shadows are. They are what will make our
works powerful and beautiful. I'm going in with
a sap green here. Yet another tonality. I'm doing it lightly and I'm controlling where
my color is going. I want I want my colors to be watery and I want to
allow each layer to dry. That as I'm applying
thin layers, the drawing process
is not very long. We just need to allow them to
translate into each other. That's why we create
all these tones. We control our design by removing and placing
stains in order to put more stains in
the correct places. We add them and we fade them. Just like this. I want to be careful not to
take away from the stem. We've created a very tiny shadow underneath the stem.
If you see it. We have a highlight
and we have a shadow. The longer you
leave a color dry, the less you can pick it up with a tissue or remove it off
of your page with a tissue. Please remember that
you can send me your questions if you
have any at anytime. I'm more than happy
to share with you some pointers, some feedback. You're also welcome to share
with me your final drawings. I can share with you
some guidelines. Now I go back to
working on the vase. I placed some more water
here because we can control stains with water and
faded more and more. Fade or stains more and more. Because it has this effect. The stain aesthetic
is what's going to show the watercolor effect
much better in here. I'm also working on the
curvature of the vase. We're just trying to
allow for the layers to dry and observe our model,
observe our drawing. And I'm looking at
the curvature and how I can show it a little
bit more on the vase. This part is the
shade of lights. We wet this part
in order to show the reflection with
a wet technique. This is the wet
on wet technique. So I'm placing some water onto my page and I'm placing it
exactly where I need it to be. You have the
reflection of the vase underneath it and you have
a reflection of the apple. Because I'm working
wet on wet and I have some color underneath the apple. Don't worry too much. You can lift that color
with a tissue or simply marking the area where we have
a reflection of the apple. I'm observing a shadow here
that's within the reflection. We create that stain
just like that. If you're hesitant,
just follow my lead. Otherwise, just have
fun with a medium. Make the mistakes, and
draw your work lightly. Start from the lightest
tonalities to the darkest. Because it's only by playing
with our medium and testing those techniques do we find
out more about the medium, its strengths, how
to manipulate it, how to use it. And after so many practices, we get closer and closer to
achieving our own style. And as you can see here, we're forming the stain according to the
form of the apple. We want to make this part
a little bit lighter. So I'm lifting the color off. We want to work across the
entire reflection here. Washing my brush,
mixing a bit of color. I'm using a viridian hue here. It's combined with a little
bit of the ivory black. Not too much. Be careful with the blacks. You don't want. To have too much dark tonality, especially the dark tone, the black tones specifically
they can be too harsh. I'm applying my shadows in the reflection exactly
where they need to be. If you need to
pause for a minute, pull your head back, look at your drawing logo
which you've created. Look at your model
and see where else, how, where you are at this stage and how we
can build it up further. We let these parts dry now. And now we're going
to add the final, the final dark, dark
tonality to the apple. We let these parts dry now. We continue adding more of that final dark
shadow of the apple. If you're unsure at any point in time what to do on
a certain part, just follow my lead. Makes sure you use
your tissue to dab off or remove any
excess water or color. Take a moment to look at
your watercolor drawing at this point and just to see what might be missing
or what can be added. If you need to leave
certain parts to dry. Just go ahead and do that. We've added a brownish
tonality here. I'm using my tissue
to lift it off. I want to work a little bit
more on the apple here. Remember that it's okay
to redo certain parts. Here we need to wet
the surface. Again. Wetting the surface can
be used to add more color and it can also be used to
lighten a certain part. Here I'm using a sap green. Feel free to use different
green tonalities that you find more suitable or
you are more attracted to. As you know, we can repeat
the stain several times. However, try to do it carefully. And don't use this
technique a lot. Because if we don't
do it carefully, it can make the work
a little bit messy. So make sure that
your surface is dry before you apply
more water onto it. You want to take your time. Also make use of your
tissue to lift-off color. Here I'm using a hookers green dark just to work more on
that shadow over there. Also working on the
reflection here. Take your time. Use the tip of your brush for details, small details and
delicate details. Now we give it a
bit of time to dry. Let's wet this part here. The form of our Apple
is almost complete, but we're leaving it dry. And now we're working on
the reflection of the vase. I'm using an indigo color, darken these parts and we also
wet the handle of the pot. We're use a purple color or a purple tone in order to create stains in this part here, keep observing your model image. You need to leave one part dry and then move on
to the next one. Next we're going to work on
the flower and the leaves. Make sure you only want the
part that you need to paint. Take your time. Now,
we wash our brush. We have a white flower up here and the atmosphere
around it is warm. So we use a very medium brown
color mixed with water. Of course, we start by shading. We don't have to copy the
exact model of the flower, but we want to get the
general gesture of it. Follow, follow the
movement of my hand. I'm using the tip of my brush. Use the length of it in the
beginning just a little bit. Now we add darkness
with a purple tonality. I'm observing my flower and adding some shadows
where I see them. We're going to add a
lot of stains here so we can use water and tissue
in order to edit them. There's a line around the
stain that can be good or not, according to our model. But we don't want that line to be very obvious in any way. We just want to add the
tonalities necessary. Just adding a little touch
on the handle of the vase. I'm completing the
shadow over here right next to that
line of highlights. That's why we have
to be very precise. Take your time to
observe your image. My wrist is very light. My application is very light. I'm barely using the
tip of my brush. We darken this part a little
bit just to create a shade. Just to imply that curvature. But look how light my color is. In order to create these tonalities for
the very light shades, they are considered to be hazy
colors like dirty colors. Using a purple tonality, remove this, this feeling that it's
more brown or blackish. It prevents it from
looking messy. So purple is the trick. We try to use clear colors
in watercolor painting. Especially with these
light tonalities, you want your color to
be as clear as possible. So it's very little, very little, very
little hue in it. Whatever lines we're creating. If we put color in a
more concentrated place, we want to fade it. Remember to take a moment
to pull your head back. Take a look at your
drawing and what you've created so far. Visually you'll be able to see where maybe you've missed
on some of the highlights. Maybe you need some more
shading here and there. It's that moment of looking away and looking again
at your image and noticing that maybe
you focus too much on the reflections
and not the objects. Maybe some shadows are
missing from the flower. We're looking to make
sure that there is balance and harmony all around
our watercolor drawing. I'm adding a sap green
here onto my flower. I want a little bit of detail, but without taking
away the highlight. If you need to use the brush pen at this point for more details, go ahead and do that. You need to use the tools that are more comfortable for you. If you feel a different to achieve a close result
are the same result, but you are more
comfortable with it. Then go ahead and use it. Make use of what's
available to you. As you can see, we have brown, green, and purple
in our palette. If we use thick
colors are painting will not be attractive because the elements that we're painting there quite
a light and they have this beautiful reflection
as well that we want to keep their sense of
transparency within them. We're going to add
some orange stains and this part with another
brush and almost dry brush. I'm applying it in
these little stains, very little stain dots. I'm just looking at
all the details around the flower, maybe the leaves. Just taking my time. I want to add a little
orange tonality here. Now, when we've
added some lines. And you remember how we
talked about when we add a concentrate of color and align that
we should fade it. But that doesn't mean
that if sometimes you've created a line that's quite beautifully
delicate and it's there, you don't need to feed it. That's something
completely up to you. Because every artist
is different. Every person applying and using this medium
uses it differently. And we have preferences and we have comfort zones as well. In terms of what brushes to use, what tonalities we might
be more attracted to. I'm just going over
the details here very lightly with my brush
pen because I want to achieve those lines had such a beautiful contrast to how the watercolor aesthetic, which is the staining, staining effect of different
tonalities on top of each other that are creating the app on creating the vase. These defined points
like the stem and the stem of the flower
and the stem of the apple and the little leaves, they somehow anchor the image. They create this balance
from the top to the bottom. Just wanted to add a
little detail here on the reflection of
the apple stem. Now we're going to add some color in order to
show the horizontal line. There's a horizontal line which we kind of took a look at in
order to draw our sketch. And have our vase and Apple
balanced on the surface. We make a warm colors
such as a lilac color. Wash your brush, dry it. If you feel like it
might be stained, your color mixture
may be stained are affected by the current colors. We go in. We're adding with a
very light in deco, very light watered down indigo. We're going around to
create this shape. It doesn't fill the whole paper. We just want to
show a halo of it. Like a halo that's around these two objects which we
have watercolor painted. Be careful work very lightly. You can even go a shade lighter than the
one I'm using here. Just remember that having such light colors they
dry even lighter. Our watercolor drawing
is nearly done. You can take even longer time to add more details as you like. But as you know, with
a watercolor painting, we don't want to work
too much on the layers. Hope you've enjoyed all the
techniques we've used today. Thank you so much for joining me and see you again next time.
12. Mixed Media Forest Artwork: Hi there. Welcome back to
another tutorial. Today we'll be
painting with ink and water and have a
more expressive, personal approach
towards the painting. We're going to start
with any pencil, any generic pencil you have. And we're going to
start by sketching out the image and placing
down as grid. Make sure you make use of
your downloadable resources, which have all the information necessary for every tutorial. It also has the model or
the reference image from which you can draw your base
sketch and the grid for it. You will also find
the color palette and any material we're
going to be using. As you're creating
your sketch now makes sure that your
lines are light. Your pressure on your
pencil is very light. We are trying to
create a sketch that does give us an indication
of the whole image. The highlights, the way maybe where the shadows go
or the outlines go. Now, this is a tree trunk
that we're going to work on. Later. We'll fade these
areas around the work to create a kind of like
Beyonce or mood of the work. We can use watercolor pens
for our work as well. Here we're using a paintbrush. We're using a light black color, so that's a really
watered down black color. First, we're gonna be working on the lighter
parts of the work. So although we chose a
watered down black color, but we're applying
it very lightly. We create the different
tonalities much easier and also more
expressive in this way. As we've learned earlier, we need to work from the lighter tonalities to
the darker tonalities. Follow, follow my hand motion. I switch between using
the tip of the brush to also the side of it in
terms of adding detail, but also maybe
spreading the color and dragging it across to
the areas that I need to. Keep in mind that as
you're using your brush, There's a mixture of
ink and water in it. But the more you use
it without renewing or adding more water
and ink mixture, the lighter your
application is going to be, the lighter the ratio
of color and water is on sometimes that can
work to our advantage. Now, keep in mind that we use the whiteness
of the paper to show the light that's
shining from the, from the image itself,
like the paper, the white of the paper
is going to play a role in the highlights. If we're drawing
without using a model, we must imagine the source
of the light at some point, like is it coming from
the right or the left. And we add the shading layers accordingly as they make
our work more attractive. Notice how I'm using the
lightness of the mixture on my, on my brush here. And I'm continuing to apply
the background base color. So it's almost like my
watercolor base sketch. I'm adding details
where I need it to be. I'm also avoiding the
highlights, the whitespaces. Take a moment to
observe your work. Here we're making this
part slightly darker. Because as I'm
looking at my model, I'm just adding a couple of shades darker
tonality to some areas. Let's keep observing our model. It's the best reference
to let us know where the highlights are and
where the shadows are. Notice how lightly I'm
applying my color. My wrist is free. I'm not leaning too
hard on my paper. I'm holding my brush
comfortably lightly. And my fingers are lifted off of the page because
you don't want to drag that color around
as it is still wet. Now these are our
tonalities here. We've created a gray
tonality for our image. We've indicated apart. Our tree trunk. And what's looking
like a ladder. Now as we've created our base, base colors, it's time to work towards the
darker tonality. With every layer. We're going to go a little
bit darker and darker. It doesn't only mean black
or the darkest colors. It can also mean
a yellow or red, but the ratio of color
is higher than water. The concentration
of color is higher. So therefore it gives you more defined lines
full of color. And as I'm going darker, notice it's just a
few shades darker. It's not ultimately very dark and I'm creating
a high contrast. We slowly build up towards that. And we continue in this way
and we keep adding details. Take your time to
observe your model, but also observe
your own drawing. If you feel you've added too much ink to your
brush, wash your brush. And we apply the mixture
in a lighter tonality. You can also use a tissue
paper to lift the color. Now as there's a ladder here, we're just adding some
more detail to bring it into more focus. We use a much darker tonality around it to show
its shadow as well. Now we want to add a little bit more
color, more darkness. So I'm adding a little bit
more of the black color here. And I start working around the
tree trunk and the leaves. We keep switching between
using the absolute tip of our brush and maybe
the side of it. That's the wider side, That's the side that
drags color down. Because we're using a few shades darker tonality here
we want to be careful. We want to be intentional with where we are placing our color. Hello, my lead. Look at those really tiny small
gestures that I'm making. We can easily start applying
our color everywhere. But we should refrain
from doing that. And trust that it will dry exactly where we have placed it. Just because we have
water in the mixture. It doesn't mean that
it will go everywhere. That's the balance. With watercolor painting. We need to continuously balance the amount of color
in the month of water and the amount of application
we create on our page. As you can see that even
at this level of the work, we have created more
expressive gestures. So we're not trying to draw realistic version
of the tree trunk, but we want to create something that looks natural
and it looks great. So make sure you follow
my hand movements. Also pay attention to the kind of brushstrokes being used. And try to work in the same way. Keep in mind to always practice. After the tutorial is done or before you start
the tutorial, if you want to practice, That's the best way to
get better at the medium. That's the only way we get to test the different
techniques we've learned and also grow our confidence and our own approach to
watercolor painting. Our confidence affects
our application, how freely we're applying
our colors are instincts towards our color
choices and mixtures. So practice does
help a lot, a lot. Not just for repeating
the same image, but in general, our techniques. Take your time to observe the details and add
them accordingly. Going over the steps here, I want to make the ladder a
little bit more prominent. I'm observing the
shadows and making the darkest marks
where they need to be. The darkest part is this
section right under the ladder. So we add additional
layers to it. Here. We add more details
on the right. Because we have the
tree and its shadow. We use different
brush strokes to show different tonalities and
textures all around the work. We want it to look
balanced everywhere. We distribute
different tonalities on different parts of the work. Creating these tonalities
helps us bring the work into life and let the eyes
move all around the work. Keep your tissue handy
in case you want to reduce or remove color either from your page or your brush. Always take a moment to
observe your drawing. Pull your head back, look at what you've
created so far. Look at how the primary
layers have dried. Now we've created
our first layer, the initial layer of our work. Now we're going to use
our Pen, our dip pen, to add more details to the work and make it
a lot more expressive because the dip pen achieves us those very exacted
lines and outlines. Adding details is
another important step in our work and we need to do it gradually and delicately and make our marks exactly
where we want them to be. Continued. Keep observing your
model. Follow my lead. Observe how I'm
applying the ink here. My lines are irregular, they're direction changes
depending on what it is that I am pending
in our drawing. If you want to take a moment, observe how I'm applying
in using this tool. And just watch. And then rewind back. And then we can do it together. That's also an option. But it's just this tool allows you to create more exact lines. And now it's a balance
between the background, which is the watercolors, and those tonalities that are nice and
beautiful and cloudy. This pen lines which are more exact and then we will
need to harmonize between them by adding the lines in accordance
with our brushstrokes, we create an even more
expressive piece of work. We increase the depth of
perception of our work. I'm simply adding details
where I see them. Make sure to apply your details in the direction
that they need to be. So if you're doing the
steps of the ladder, then your lines are more
horizontal across that space. If it's within the shadows
underneath each step, then it's more irregular
and a mimics the shadows. We add more details
on the trunk of the tree by adding
lines. In this way. It may look like we're
doing these lines randomly, but all the time we're aware of the brushstrokes and
thus the right angles and directions of our lines. I'm reflecting off of the direction of the
tree trunk grains. The steps here of the
ladder, even the leaves. Just using their shape as the guide to how to
apply my lines here. Again, we use our brush to add more layers of
color to the work. Notice my application. I've added a yellow
color mixture here. As my brushstrokes are about
to dry of the ink and pen. I'm adding my yellow
tonality here. Our initial drawing, we use black ink and now
we're combining black and brown to add
more colored layers. My brown is really light,
It's almost yellowish. For this part, we're mostly
using the brown ink. When we apply the color
with our brush on the black ink lines we previously
drew with our dip pen, they combine and create an attractive texture with
our watercolor painting. That's why we have to have
a base watercolor drawing. And that is light and allows for these next layers to
harmonize with each other. To also give us more detail
with the pen and ink. We continue working in
this way where we're balancing between these two, these two styles,
these two aesthetics. And just like that, we continue to add details
by adding these lines. If you feel like your
page is a bit wet, give it a moment to dry, and then go in with your pen and ink and continue
adding your details. Now remember as you're applying your lines to different
parts of the image, you're also adding
hatching lines, which are the lines that
are close to one another. They can also cross each
other at certain sections. We add more hatching lines on the edges of the ladder here. Take a moment to look
at the drawing you're creating and look at your model. Our drawings are definitely
not going to turn out to be exactly like the
model we are referencing. They might be even
more beautiful. They also have their own
sense of aesthetic and style. We're just trying to use
our model to make our drawing look as realistic as possible and as
natural as possible. I'm adding some hatching
lines on these parts here. Just to show the leaves. We add dry leaves in this way. Taking a moment to
pull your head back, look at your drawing, maybe step away, even look away. Look back again at it, is to observe what kind of effects are lines are creating. What do we need
more of or less of? And of course,
always keep an eye out on the highlights being the white parts to be
white in order to work on them as the last step
if they need it. Now we're going to use the
wet brush here once more. We want to add some
color just like this. Notice how I'm
applying my color with the absolute tip of my brush. We add more leaves on these
areas around the work. As mentioned earlier, we use different parts of
our brush and we also apply it in different angles for drawing different
forms and shapes. We're adding a darker
layer on this part here. Remember how we said it's the darkest part that shadow
underneath the ladder, going over any other
shadow that I see as well. But very delicately. Take your time. Now, I'm going to use the
white part of our paper at the lower parts of the work
here to show the grass. So I'm leaving some of
the light of the paper to play a role in how
the grass is showing. I continue to observe my model. Just to continue referencing
where the shadows go, where the highlights are. In this way, the
more layers we add, the more tonalities
of gray recreating, the more tonalities of
our brown we're creating. As mentioned earlier, we're
dressed now balancing between these 22 techniques that
we've brought together, we want to make sure that
the highlights are just as strong as the shadows
and the outlines. I'm taking a moment to just
look at my work to make sure I'm applying my
lines in the right place. This work is a combination
of different tonalities. And what we want to
show is the tonalities from the darkest
to lightest ones, which is how we worked. We started from the
lightest layers and move it up step-by-step
to the darkest layers. We want to also look at
the edges of our image. We want it to look like
it's fading out on the edges but
nothing too abrupt. So I'm making sure that the edges are looking
nice and natural. My tree trunk here needs
a little bit of color. Now remember we dry
our brush tissue. It has to be slightly
wet so that it absorbs color and let's us apply
it on the surface. You can point your
tip as you wish. Then you can see how
different touches of the brush are creating
different gestures. When we use a dry or wet or very wet technique
like of the brush, you can see these
different textures. And I would advise playing
around with your medium. Try creating these different
tonalities and textures and lines on a different
practice drawing. And the more you play around, the more you get to learn how you can
manipulate your tool. What kind of textures
that can give you. Look at the texture
created on this part over here with those leaves. And then the top part,
delicate, it's beautiful. The layers underneath
have dried so they're not moving
or sinking in there, simply translating
into the new layers. At the end, we only use a dry brush as the work
is not wet anymore and we can apply the
dry brush and add final touches completely dry. And finally, it's finished
and expressive work full of tonality is full
of contrasts here. Hope you've enjoyed
this tutorial using different techniques. Please make sure you go through
the assignments as well. Feel free to send me
any questions you might have and see you in the
next tutorial. Thank you.
13. Figure Painting: Hi there. Welcome back to
another tutorial. Today we're going to
draw some figures and paint them with watercolor. Starting with a
mechanical pencil, we're going to draw
our base sketch. Make use of your
downloadable resources. They have all the
information necessary for every tutorial,
including the sketch, the grids in order to draw it, the color palette, and all the materials
we're gonna be using. Let's start by drawing
the figures, basic forms. Take your time to decide where they're gonna
go on your page. With this mechanical pencil, we're not applying
a lot of pressure. The idea is not to have
this outline show at all through our
watercolor painting. We just want to have
a guideline as to where we're going to be
applying our watercolors. If there are any shadows
you need to indicate, do so in your sketch, as well as the highlights. The highlights are very
important to make note of either visually or
within your sketch. They will accentuate
just as much as the contrasting shadowy parts. If you can see how
easy we can create the figures with
some simple forms, you'll be encouraged
to do them more often. They can look intimidating
and beginning. Now we can make the figures. We drew a little wet
with a wet brush. We mix a little bit of
sepia color into our brush. We begin applying
it to our page. We're just trying to create
a general form here. Make note of my application. Follow my lead. We want to leave some
of the color pooling in some areas just to
indicate a higher shadow, like at the knee or
the bottom of the leg. And we want to leave some
areas white completely. Because they are the
highlights such as the color a little
bit on the body. Take your time to
observe your sample, make sure you can
view it easily so you can look up as
often as necessary. Getting the proportions
right is the difficult part. We've marked the head here. We need to complete
this part of the body. The more you practice. Not only do you get better
at creating figures, but your confidence with
the medium increases. And therefore your application
becomes more free, more confident, and it will
show in your final drawing. Drawing figures with watercolors requires very simple gestures, but they need to be intentional. And we need to know exactly
where we're applying them. The more you practice, the more you understand
how this medium dries, which parts will remain as
dark as we've applied them. And what's the general aesthetic
of watercolor painting. We will also be able to study visually the size of the head
in comparison to the body. And therefore, it's a
practice of proportion. We left some parts
white, as you can see, or lighter because it's
a watercolor technique. And we don't want to apply
the color everywhere. We do want the highlights to bring forward some
details in the figure. I'm adding a very
light red here. And we apply it in the
exact same technique. We're simply going
over some parts showing that the jacket
is a little bit browner. Use your tissue
paper in order to lift color off of your page. We didn't press too hard
onto our tissue paper, but just enough to lift
the color without damaging the other areas which
might not be 100% dry. If you've lifted a little
bit too much color, don't worry, you can go
back and dressed like this and add more
details or more color. But the idea is we want
to feel a sense of ease with the medium and
with the techniques. And that's the only way to understand the medium
and the techniques better is by applying them and practicing and making mistakes. No matter if we
use a wet brush on wet cardboard or paper, or dry brush on dry paper, the form will create out of, out of it is very important. That's what we meant
by proportions. We need to study
visually our model. Take a look at how far the distance is from the knees
to the bottom of the foot, the torso, the head. There's dimension here. We want to increase the
sense of perception, but we want the
proportions of the body to look correct or balanced. We're showing different
techniques of watercolor on one single work to show that you shouldn't
be afraid of it, and that it's not that difficult to
make a little bit of corrections here and there. Again, we can remove color just like we
did with the tissue. Notice how I'm using the
tip of my brush here to apply some details
on the skirt. To leave the highlights, we need to leave some
parts untouched to indicate that the skirt has
a reflection of a light, that there's a shirt underneath
that jacket as well. In the primary figure. We're free to play with
the color and the paper. As you saw, we worked
with wet on wet here and now we work dry on dry, which is easier to control
the brush and the color. Our characters have a
beard as well and a hat. The second character is
wearing a traditional dress, which is a skirt and a short
one by both men and women. Called Celinda to man. Again, we're using a dry
on dry technique here. Look how much more
controlled my detail is. It's just that the aesthetic
is a little bit difference. The shoulders of the
third finger bit wider. So I had to indicate
that because his perspective is
facing the viewer as opposed to the middle
figure whose perspective is sideways and therefore the
shoulders are less wide. We add some stains to
our figure here just to beautify an add more texture. We want to show
these loose trousers versus tighter trousers. We want to look at our
figures and maybe go in and add any extra details that
we might have missed. There's also a stick here
in this figure is hand. So we drew it in very lightly. Look how beautiful
the highlights are. And observe your
drawing as it's drying. Now we're going to work
on the next figure. We need to learn to
look at things in simple forms or shapes and draw them as simply as we see them exactly as we see them we
draw and you'd be surprised, you'd be making a
mark on the paper thinking off That's
not going to show. It's not going to
show as you see it. But then you look back, you pull your head back, you look at what you've
created a new realize, okay, that looks logical,
that looks harmonious. It's actually looking
like a knee and the shoulder and the head. It's simply practicing
the proportions. We continue adding the
details as we see them. Feel free to send me
questions at anytime. You can even share with
me your final drawings. And I'm more than happy to
give you some pointers, maybe some feedback,
and some guidelines. Keep observing your sample. Our drawings are
not meant to look exactly like the sample
we're drawing from. However, our sample is there to reference where the
shadows need to be, where the highlights need to be an all the elements
of our drawing. But our drawing in itself
has its own aesthetic. But we continue to
attempt to bring it as realistic as possible, as, as natural
looking as possible. As you can see here, we can vary the amount
of saturation of color we have on our brush in different parts
of the drawing. Just to accentuate
some clothing, maybe the beard, maybe a hat. You can add more
pigment to your brush. You can concentrate the color by reducing the amount of water. We want to work a little bit lightly just to have a chance
to make changes later, because we can always make
something darker easily, but to make it lighter is a little bit more of a challenge. This figure has a dark hat. Using the same technique here, I'm applying some
dots on his coat. Now we want to work
with our brush while it's full of color. We want it to be
pointed just like that. It has a higher percentage
of color than water. Now we go into add
details like this. Look how precisely I
can apply my details. I achieved the eye, a little bit of the
beard and the hat. Here we're using a
dry on dry technique. We keep the brush like this and with the
tip of our brush, we draw smaller details
like the eyes and the nose, and the mouth and the
mustache and beard. We are in control. If you feel like your
brush has too much water, dab it onto your tissue. We're sketching quickly, but we were also using the
dots and lines technique. My wrist is very light, the pressure on my
brush is very light. I'm working downwards and
then I go back up like this, which has allowed this part
to dry a little bit more. I continue to add the details. Take a moment to look
at your drawing. Look at the different
figures, their movement, their distances from each other, also distances in
terms of background. Our middle finger
is the furthest. The figure we're working on
right now is the nearest. We want to just make sure that they all look
visually harmonious. These different techniques
achieve you different details. At the bottom, we draw a woman who's walking
along the street. We use the same technique. And we apply the color in the direction that
it needs to be. Look at the curvature on
the jacket of the woman. We applied it in a
circular motion. We need to be intentional with
where we place our colors. Here. We're going to draw a
father and a child. We've created his trousers
with only two lines. Make note of the simplicity
of the gestures to create these different
elements of the body. And now the child,
as you can see, we drew these figures
in a far distance. What if we want to
draw other things like cars or bicycles or
trees or buildings, we can draw them by some
strokes of the brush. Just like what we've done
so far with the figures. We draw a man from behind. He has something in his
hand and going away. This figure is
walking away from us, looking the other way, carrying something in his hand. And now we're going to draw
two men wearing over codes. One of them is wearing a hat. Pay attention to how
we move the brush and how we stroke it
to create forms. We can make them
darker if we want, by simply adding more
color to our brush. We can even add their shadows. We do it in the
simplest of strokes. Just like that. Notice how our watercolor is drying across all figures
that we have created so far. The most important thing here is drawing the right
proportions of the figures. The different parts
of the bodies, or even clothes or accessories, need to be very
specific gestures and applied as we see them. Because if they're
out of proportion, they wouldn't seem as the
things that they are. They would look more like a mistake or out of
proportion as opposed to a package looking like a package that
a man is holding it, or a stick looking like a stick that the
man is leaning on. We want to practice this
proportion drawing. We need to look at our
fingers really well. Be able to make either
visual measurements or with a pencil
measurement and apply, apply the perspective
that we see on paper. With watercolor. We must use the
whiteness of our page as well and leave
some blank spaces. And that brings very
strong highlights. It brings the elements to life, gives them a bit
more to D field. With some simple vertical and
horizontal lines like this, we draw some pylons
and far distance. The idea with this
tutorial is to understand the simplicity
of some gestures. And making the same stroke dark on one end and maybe
light on the other end. Now we're drawing another
figure with a hat on his head. This figure is sitting down. The face of the figure
is in profile view. I'm adding a little bit more
color to the body here. This figure is created with
a wet on wet technique. Now remember the wet
on wet technique is when we apply Clearwater to the area where exactly
we're going to add color. But on our brush we would
have both water and color. That's a wet on wet technique. I'm simply accentuating the seat this figure is sitting on. We need to leave it dry as well. Now we're going to
draw more figures. This is a figure from behind. This figure is
wearing hat as well. When we draw the hat, the figure becomes more like a human being and less of a
random shape that we see. Just because this figure drawing is trying to indicate a figure that's
sitting on the ground. They can very easily be lost. And that, and that
stroke of watercolor, the hat kind of balances or gives us an indication
that this is a person. Now we want to draw a statue of a horse or an image of
a real horse, really. Like we said,
watercolor technique. And this medium has
its own aesthetic. Sculpture of a horse would look like a sculpture if it's on a pedestal or on some kind of structure that is lifting it. But a horse is
going to look very similar. Without the pedestal. We're doing the wet on
wet technique here, so we're applying some
water to our paper. I'm being very detailed. I have the legs of the horse. There's a figure on the horse. And I'm adding the tail. Now I'm adding more color. I'm going in and placing my color exactly
where I need it to be. So look at the way that I
mark the head of the figure. The head of the horse, the body. You need to practice a lot. And then it becomes
more enjoyable. And you see how easy it is
to work with watercolor. The idea is to build your confidence and your
approach with this medium. It has its own aesthetic and we need to be able to
understand this medium, how it dries, how to apply
it simply by practicing more or applying the shadows
where they need to be. If we create a platform
for this horse like this, then it's become a sculpture. It's in the background
behind our fingers. Our concentration of
color is different, even though we're
using the same color, but the concentration
is different across different
parts of our drawing. If we darken the main
parts of this statue, becomes more attractive
and eye-catching. Where we've added some
darkness on the figure here. Just like this and
this dotted technique. We use it to darken
the main parts to make our work a little bit more
outstanding and noticeable. We create a higher
contrast between the shadows and the
highlights of our work. We wash and dry your brush, and this time we
work dry on dry. Now we want to draw a post lamp. We want to be very precise and place our color exactly where we want it to be. A dry on dry
technique means that the surface of the paper holds onto the color
very strongly. This technique is to achieve
very high amount of detail. I'm holding my brush very
closely to the bristles. I'm keeping my wrist loose. Now we're adding a little bit
more details to the statue, but we needed it to dry. So we gave it a little bit of time making sure that it's dry. Then you go into
add more details. Continue to add details
as you see them, or as many as you want. I'm going over the beard
of this figure here. This figure doesn't have
a lot of detail in Him. We can add a stick here. Accentuating the
hat, the ideas that it dry on dry technique allows for a higher concentration
of color to sit exactly where you've applied it and not seep into the page. Anyways, as you accentuate
these details are worked gains a lot of richness because
we've increased the contrast. We've made it a little
bit more two-dimensional. By adding lines like this, we create a ground. So all our figures are grounded. We can even draw a
much smaller figures without any details,
some simple gestures. These are very small, very small figures
and very far away. Practicing those minimal
gestures takes time. The main idea is to
observe your fingers very well and to include the
absolutely necessary details, even if it's only two gestures, but they will indicate that
there's a figure there. I hope you've enjoyed
this tutorial and we're able to practice more
than one technique. Thank you so much for joining me today and see you
again next time.
14. Beginner Building Painting: Hi there. Welcome back to
another tutorial. Hope you're well. Today we selected a
painting for two reasons. First, we want to use watercolor in a different technique. The stains that we used in
previous videos was small, but they are different. This work is somewhat easier and we get to explore
a very new aesthetic. We start off by drawing our sketch using a
mechanical pencil. This is a dome of a church. We have to pay attention
to the symmetry here. Remember to make use of your
downloadable resources. We make them available
for you with all the information
necessary on every tutorial. With the color palette, the sketch, the model we're going to be
drawing from the grid. You need to create
your sketch as a, as a little tip, you can print out this sketch. Practice by creating it directly
on top of this printout. Or you can draw the
sketch separately on another page while
observing this sketch. Of course. Let's take our
time creating this sketch. You want to put down the markings as a guideline for you so you can add shadows, you can add points where you feel This is the highlight and you don't want to touch it. So do take your time to
make all the marks you need and of course make them
as lightly as possible. We do not want
this outline to be showing through our
watercolor painting. If you've already
created your sketch. Fast-forward and join
me at minute 6.5. Okay, Now that we have
our general sketch, Let's talk a little bit
about today's painting. In order to achieve a
simple color technique, we're going to use
cold colors to show distant parts in our image. And warm colors for things that are in the
foreground and nearer to us. Actually, we use cold colors for the shade of our building. There are lots of techniques, but now we're going to use this simple technique
of colder colors indicating subjects and elements that are further into
the perspective. And warmer colors
for anything that's closer and in the foreground, we want to work on these
different tonalities and creating them
in order to give our image a sense of richness and enjoy creating
this depth of perception. Now, let's start by
making our brush wet. And then we apply the water to the areas
that we're going to paint. Be careful to keep the
white parts which are the highlights of
your image untouched because you don't
want the color when added to this wet
surface to seep into the highlights or the white parts
which are meant to be the white of your page. We are using a sword brush here. And notice the application. I'm using the tip of my brush. I'm holding my brush quite
closely to the bristles. And I'm going over the parts where the surface
needs to be wet. Keep in mind that
practicing the medium, not only will it
allow you to apply this technique in a
more skilled way, but it builds our confidence and our approach to this medium. How we hold our brush, how we mix our colors, the way we apply the
water to our surface, we pay attention to
our highlights more. We're able to really practice mainly
looking at our model. That's the biggest practice
you can do is to look at, look at what you're drawing
on, what you're painting. And really make, make note
of where the highlights are. What's the darkest
of the highlights? What's the lightest
tone of the highlights? And the same thing for the
shadows, the darker parts. What's the darkest
of the highlights? Is it a brown? Is it a bluish tonality? And what's the lightest
of my shadows? Making note of all these points is something that we
practiced by looking. So we need to practice
looking, looking, looking. Because sometimes we
get taken as we're creating drawings and we continue working
on them based on what we understand the
building looks like e.g. or what a tree looks like. But you really need to keep
looking at your model, even though it's not
going to look exactly the same as, as our drawing. And that's completely fine
because it has its own beauty. Now, we're going to start
by using a neutral green, blue on our drawing. That's our first color. Take your time to
mix your color. Make sure you have clean tissues handy, clean water handy. I'm using a viridian hue here. I'm going over not only
with the tip of my brush, but also the side to spread
the color downwards. Note how light my color is, how watery it is. I'm spreading it all
over the building. We can Bolden the
outline later if needed, or keep it faded. It depends on really each, each artists aesthetic
or preference. But if it is faded, it gives this nice
aesthetic as well, especially that it's further
back in the background. The more we fade, the more it seems
farther because it is more of a general feel. And we accentuate the point
of entry into our drawing, which is this foreground
to the right. Follow my lead. We use the tip of our brush
when we're trying to be specific and avoid
some highlights. Notice that even
though I've added my green to my dome
and the building, I've also left highlights on the left where we have
a simple column here. You can also leave a
little bit of the color pooling in certain
parts if you want. All of these details
which come with the nature of doing a
wet on wet technique. Because our brushes wet
and it has color on it. But our page is also wet. You can make lines and little, little details on
the top of the dome. That line in the middle, that is diagonal
where I accentuated that that direction
of the ground. I'm leaving a highlight
in the middle. I continue to work
on the details. Keep your eyes focused
on those guidelines. You've created this sketch, the base sketch you've
created for yourself. I'm making sure my
wrist is light. My fingers are a bit further
away from the bristles. And we do have to
maintain a certain speed, but don't let it stress you out. We don't have to be
very quick or even as quick as I'm as I'm
applying my color. If you need a moment,
pause the video, apply your base color, and then play again and
we continue to gather. We do, we can't be very slow either just because of
the nature of this, of this medium, of the
watercolor medium. But I'm applying and adding
as many details as I can. And I'm also giving moments, four different parts too dry. So when I work on something, I leave it and I move
on to the next thing, giving it a chance to dry. You want to fade this part here. Keep looking at your model. The more you practice, the easier it'll come to you. And it builds our confidence, build our confidence
with this medium and this sense of freedom
with application. It will show through
your drawings. But don't let the final result, if it's not up to what
your expectations were, Don't let it hold you
back. Keep practicing. Because there is some
fluidity to this aesthetic, to the watercolor
aesthetic that allows for the result and be different
to be faded, to be light. We need to wait for
our image to dry. Because we do have
similar tonalities, but we want each layer
to translate into the layer underneath it and
not really blend into it. You do need to give time
for your layer to dry. We're going to use
more warm colors on this part here in the front. And the color should
not be too contrasting. It's a very soft image. And we continue to
use a wet technique. Notice, notice how your colors are drawing all
your application. Notice how this technique dries. It dries a little bit lighter. It has this faded
effect, almost cloudy. So be patient with
the drying process. Give it the time it deserves. If you notice something is dry, then then maybe you
can add more details. I'm using a sap green here. That's a warmer color
than the viridian. Them carefully
adding my details, I'm observing my model and
I'm adding my details here. I'm adding horizontal
lines of the building. They're not complete. Lines are one gesture lines. We instead shade slowly
across from dark to light. We want to be careful
because we're using limited amount
of colors here. As if we're given
only two colors to create an entire
set of tonality. So the tonalities are where the power lies of
the final drawing. So this sap green, notice how it stands out. It's definitely different
than the other green. And by making sure I'm applying
it in the right places, it just brings more richness to my image, more definition. Using a warm color
for this part, we show the perspective
better as well. We're only coloring the
parts that are shaded are darker and we keep the
white parts as white. That's why we need
to be careful and we needed to spend more
time on our sketch. Because we have to be very intentional with where
we're placing our color. Feel free to send me
your questions anytime. You can also send me your final drawings and I'm
more than happy to share with you some feedbacks and maybe
some guiding pointers. I'm giving my image here a
little bit of time to dry, but I'm also mainly
just focusing on the highlights and making sure I'm applying my color
in the right places. The aesthetic of this watercolor
painting is delicate. It's also very nice
and cloudy as well. And we want to maintain
that aesthetic. There are some
empty spaces here. You want to bring out that detailed by very small gestures. If you feel your brush
has too much water on it, just dab it onto a
piece of tissue. We're creating this
building in a very simple, simple way with
very little color. Observing our model
really well and applying the lines
were necessary. So as I'm applying my details, I'm using the tip of my brush. I'm holding my brush with a
little bit closer to the tip. And I'm applying my colors in the direction that
they need to be. We can use a dry brush
for this part here. Just to add some more texture to the ground in the front and the absolute
bottom of the page. But my brush has very little, very little liquid in
it, very little water. I'm okay to continue with it. When we're using limited colors, the techniques vary
and we could use a dryer brush or a
brush that's completely dry with only very little color. Or we can use it with
very little water. That's a decision
that's up to you. But now we're working
on these columns here. We create the columns
of the building. And we complete it with just
a few gestures with a brush. Dry brush will help a lot in
these little details here. And we complete this figure
with very minimal additions. I'm adding more water
here and color. I simply want to
add more shadow and this part while still keeping the highlights
where they are. So notice how I went around, but there's still two lines of highlights and
whites right there. I want to show the shadow
that's underneath, underneath that top
of the building. And reflecting off of
the top of the columns. Remember, we need
to be intentional with where we're
placing our color. We're not putting it everywhere. We're observing our model. We're looking at where
the shadows are. And we're adding, we're adding
our shadows and outlines. This continuous change of pressure because we
changed the application of our color by changing
the pressure with which we're pressing
on our, on our brush. We change what we're using. Are we using the side
of the brush or we may be using the
tip of the brush. All of these
decisions will start coming very
instinctively for you. The more you
practice, of course, the more delicate, the more detailed you have less pressure. Because we want to be careful. We'd rather work
lighter than use a very dark color or
dry brush as well. With a dry brush and just color, we want to be very,
very decisive. You know exactly where
you're putting your lines because it becomes very
difficult to change. We're going to add some stains. I'm using a hookers
green dark here. We're going to add some
stains in order to show the the large perspective
of the building, this sense of verticality
that's upwards. The Grand toys, the toys
feeling of the perspective. We're adding some figures
here at the bottom. And figures need
practice for sure. So, do practice creating figures in this very
simple, simple way. Just practicing how far to create the detail of the
shoulders and the head. It's things like that
that adds so much, so much so much detail. This very simple,
simple gestures. As you've noticed that I've
used a darker shade of green to add the
final details here. They are more like stains, they are not long lines. There are simple stains. The figures are simple stains. These little shadows on
the columns are stains. We make the perspective
better with a warm lines. Notice how the columns and the building in the front
here on the right bottom, as a lot more present and accentuated than the
building in the back, although the one in the
back has a lot more color. But the one in the front has
detailed the highlights, the white of the
page are dressed as powerful as the outlines that
we've created in the dark. The dark shading and
outlines that we've made for the columns and the shadows
and the bottom of the column. Also the figures give a sense of perspective of how high
these columns are. As mentioned earlier, it's
a practice of looking. Need to train our
eyes to see, Oh, there's more shadowing
between those columns. There's a, there's a little
dark part underneath the top of the roof
of the columns. We want to show this powerful
gradation of perspective. The building in the
back, it's high, it has a highlight
in the middle, which is like a pond
or or a space to walk. We've also left the highlights of the back of the building. But it's the one in the front
that has a lot more detail. We're going over
all the details, especially if you see any of your sketch, your pencil sketch. You either erase those
if you don't need them, or you go over them and
complete your image. Our work is nearly complete. Were simply working
on the the elements, that environment of it. Making sure that we take a
moment to pull our head back. Look at the drawing we've
created and make note visually. Does it look balanced
in terms of tonalities, in terms of the elements in the page is the perspective
as we intended. And just by using cold and
warm tonalities of one color, the green, we were able to achieve great perspective
in this image. Thank you so much
for joining me. Hope you've enjoyed
that. See you next time.
15. Boat on Water Landscape: Hi there. Welcome to another tutorial. We're going to draw a wharf with watercolor and ink today. First, we're gonna do a fast sketch of the scene
using our mechanical pencil. We're gonna do
this very lightly. We want to put down our
sketch as a guide line, which will help us place our colors and
paint in our image. Whilst keeping in mind where the highlights and
the shadows are. Here, we're going to draw a
horizontal line like this. And we're going to work on the initial sketch of the boat. Try to follow my hand movements
as precisely as possible. Remember, you can make use of your downloadable resources, which have all the
information on every tutorial that you work on. It'll have the sample image from which you can practice the sketch which we're
creating right now. The grids for it are available. Also the color palette and all the materials
we're gonna be using. If your color
palette or available brushes are slightly
different than the ones we are using. Don't let that discourage you. Make use of anything
that's available to you and that you prefer. The idea is to practice, learn more about the medium, and have fun along the way. Take your time to
create your sketch. Observe your model, and sketch the lines
and any extra detail. The most important part is to visually keep in mind
where the highlights are. If necessary. You can also
mark where the shadows are. That way when we begin, water coloring will
have a better guide. Very well. Now that we're done with
the initial sketch, we should apply water
to our surface, exactly where we
want to add color. This is how we're going to start our wet on wet technique. We're using a soft brush and
we're applying water with very little color in it to the area which we are
going to be painting. We should pay attention to
the white color of the paper. That's the highlights, the parts we're not going
to be touching. We're going to pick a
brown color here and mix it with green
as you can see. And then we start applying it on the surface with our brush. Follow my lead on the
application of the color. We've created a raw umber here. I'm using the tip of my brush to go over the more
detailed corners. And I would apply a
little bit more pressure to add more color to the paper and less pressure as I get to the edges
and the thinner points. Try to consider the shapes
and forms of the boat which were made clear
in our initial sketch. Remember your initial
sketches, your guide. It's there to help us
make the decisions as to where we're
applying our colors. If you have too much color, color and water
combination on your brush, make use of your
clean napkin and dab your brush onto your
napkin and continue. But I would encourage
you to practice with your brush with the amount of liquid and color in it and practice applying your
color very lightly. People on the boat are drawn
easily just like this. By letting the color pool in a certain shape that
indicates the figure. Very simple brushstrokes
can help us draw these different
shapes and forms. They have a more
concentrated color than the rest of the boat
and their shapes, of course, but the color is definitely pooling
in these figures, these human figures
that are sitting down. I continue to observe
my image really well. If you've applied excess water, you want to use either
the edge of your tissue just to remove some color or lift some color off of the page. What we're doing right now
is basically fast sketch of an old wharf with a boat and
also some people on board. I've added more color, so the ratio of
color to water is higher now, because remember, you always start
with the lighter, the lighter layers, and then you work upwards to
the darker layers. That's why we keep
observing our image. Noticing what's, what's the
next two shades darker? What's the next
two shades darker? And where do I apply my color? It gives a chance as well for
your primary layers to dry. Notice my application here, you take more of the
same color combination we used earlier. We've added it lightly onto the reflection of
the boat on the water, but then we've added
more color to create, to create these very
dark lines here. We're adding darker
details to the work we're working up towards
giving a definition. Observation is the key
observation of your model. Take a good look at
both the model and your own work and add
the details accordingly. Your model is there for reference of where
the shadows are, where the highlights are. But that does not mean that your drawing is going to
look exactly the same. It needs to have its
own aesthetic and we need to work on
it and continue adding our shadows
and making sure our highlights are
beautiful and accentuated. Working towards making our
drawing more realistic, balanced in terms of
tonalities and beautiful. Of course. I'm simply adding
my base details anywhere I need them to be. I want a more complete image. Before I move on
to the next step, we draw straight lines like this to add different
parts of the boat. It's not one long stroke, it's smaller. Dashed strokes. Try to use your brush wisely. Four lines like this. We only use some
parts of the brush, That's the tip, but
also very lightly. And then slightly from the side when you're
trying to spread color. Just remember to practice, use your tool on a separate,
separate practice drawing. I'm applying some water
to my paper here. I want to work on
that background with a blue-green color. We're going to start
working like this on this part and add
these layers of color. Look how light the
ratio of color is here. I mixed a viridian
hue and a turquoise. But look how lightly, how little it is, the ratio of color to water. I want my background
to be very light. And the lighter it is, the more in the
background it is. I'm simply accentuating
my boat here. I'm giving you a context
where it is on water. Remember to be careful not
to go over the highlights. We need the highlights
just as much as we need the outlines and
the darker shadows. They are just as powerful. Here we're adding these layers at the top to show that land
far back in our painting. If you need a moment
to wash your brush and dry it and reapply
a mixture of color. Go ahead and do that. Just pause the video. You want to be a little
bit speedy, not too slow. Because here we,
although our colors are light, they will, they are on a wet surface and we want them to
translate into each other. So we want these tonalities, how the green comes
on top of that, the other background,
the primary background. We want them to translate
into each other. We're working on how the
whole work looks in general. This scene is painted without
considering the details. I mean the water and the
land in the far back or simply keeping in mind where the highlights are
and avoiding them. But we want to apply that color. Now we're going to use
a brown this time, as it does not have
that much water in it. We mix it with olive green and we start applying it
to these parts here. Observed my application
and how I'm letting the color pool in some
places to give it shape. Observe your model, and
observe my application. If you feel like your
brush is too wet, just dab it on a clean tissue. Now we let these parts dry
so we can continue the work. That top part is wet
so we leave it dry. It is better to let them dry and continue working
on them later. In the meantime, we add
more details to the boats. A few shades darker here. I'm applying my color
again on the boat. I'm observing my model, observing my own drawing and adding the shadows
where they need to be. E.g. only, only the right side of the boat is much darker. If you feel that your
painting is too wet, give it a moment to dry. That's okay. If you like the effective created and you don't
want to lift any color, just give it a moment to dry. We determined the outlines
of our work by adding wet on wet touches to the
work on these parts here. We've also determined
the project's frame and its area for working on. Notice how the different
parts have dried as well. We should keep these touches on these parts of the
work as they will. Let us show the water
in our painting. We're going to use just
one color as we don't want to make this
painting too colorful. We want to maintain
that aesthetic That's, that has a little bit
of a mono tone where all the tonalities are a little
bit close to each other. Now we start working on the tree again, adding another layer. Pay attention to the
brushstrokes used for the tree and the markings
it's leaving behind. We use the wider, the wider
tip of our brush and we add some touches in this way to show the general
form of the tree. This is how we painted. And we keep some white parts, the white parts that
are around some of the, some of the branches. In-between. With the
tip of the brush, we add the leaves. We let the color pool in the places where we want
to add some leaves. We're going to work
on this part now. We previously worked on it
with a wet on wet technique. Now we're going to apply
the next layer is dry. Our color is mixed with
a little bit of water, not too much, but our pages dry. Be very intentional as
to where you're placing your color now as there
isn't much liquid, it's difficult to move
the color around. It's also going to be exactly showing the lines
that you have applied. We try to be delicate and draw a boat on this part like this. And we continue to
add more details. Were using simple
lines and forums to show that these
objects are there. These far-away
details are drawn by adding simple lines and dots. The important is to add them in the perspective
that they are. Just with a gesture enough
to show what they are. We take off the excess water from our brush so that we can add more delicate details with a pointed tip of our brush. We also try to use the texture of the paper to our advantage. Because there is a
grain to your paper. And if there's something
textured or we want to make use of or have
a reflection of a building over here which
will add just like this. We also add more details in
the form of trees and humans. We keep our brush
closer to being dry because it allows us to apply these details in a very fine, fine way, very fine lines. Which is a beautiful contrast to the aesthetic of the background. And the wet on wet technique, which is a bit cloudy, still has detailing but
it is a cloudy aesthetic. This technique of
dry on dry or wet, dry but very, very little
moisture achieved. So as those fine, fine details which are a great contrast and we'll end up creating such a
beautiful image for you. We're adding a few more lines
and dots far away here. We diffuse harsher lines by
adding more water to the mix. If you've created a line
that's a bit too harsh, just add a bit of
water to fade it out. Otherwise, continue
to add those details so we want to show
that far away. Escape the landscape. We paint these details
with a dry brush. Perhaps later on
we can blend them. As we do not see the
far-away details very clearly in our work, but for now we've added
them beautifully. Just keep in mind that
we can fade them. But it's very good practice
to keep your brush dry. Apply your colors
to specific places, and to use your brush
in that technique. It's very good practice. Again, just as a
reminder, we are, we do have very little
water in our brush. Here. I've added a bit more water
just to fade some details. It really depends on your
tastes are your aesthetic. So we are to fade the
colors into one another. On these parts it
would be like this. And we will have this
kind of texture and color where we see the boats, but the landscape behind it, It's a little bit
more haze doubt. Anyway, the layer on this
part is a combination of warm colors faded
into one another. Now, let's dry the
brush and take off the water from it to
continue the work. We are sharpening the brush
with our hand like this. We take some color. We create our mixtures on
the pallet and then we can add water to them as we move
along and we need them. Now we're going to work
on the fabric texture on this part here. We do this exactly
like when we are working with color
pencils or charcoal. It's almost like hat
tours are little lines. We create the texture of
this fabric with our brush. Dress like this. If you need to practice on a
separate page on the side, go ahead and do that,
pause the video and then play again and
we continue together. We add a little water on our palate so that we can
work on our colors better. So you have access to your little bit of liquid on
your palate if you need it. Now we continue
working on the texture of the fabric of the sale. We add some touches of
color with our brush. Just like this,
creating the texture. But notice how the
lights and the shadows appear as we're creating them and placing our texture is
exactly where we want them. Notice the folding, how now it looks like it's folding up
and down or in movement. I'm continuously
observing my model and I continue
applying my details. Take a moment to
pull your head back. Look at the drawing
you've created. Look at all the highlights, the shadows, the lines
you've created as outlines. Or maybe look away for a little bit and look
back at your drawing. And visually, you
will be able to see if there's an
imbalance of something maybe is too light and
needs more detail or too dark and maybe we can
add water and fade it. But make it a very, make it a habit to stop and look just for a second or two. Sharpen your brush again to continue adding those details. It's enough for that
part now and we can go to draw the lines. We added a little bit
of water to our brush, but not too much. We've sharpened did
it with our hands. We're marking the beginning and the end of the lines here. We just need to be detailed. Take our time. Don't be intimidated by the line you are creating it in this little, little strokes as if they're dashes to complete
one long line. Just follow my hand movement
to create that one line. We did the same on each side. We've drawn a few dots as well, just to show the knotted
rope and the whole boat and how it's rising and there's that shape with the
lines around it. Take your time to add
any necessary details. Now there are more details
to add to the work. And these are just to accentuate the beauty
of it as a whole. You can always use details
like this to create the shape and form of
what we're working on. You want to give the details. The fair amount of the fair amount of
visibility with your, with the brush
that you're using. There are some figures on
this part which we draw with a dry brush like this. We did a background
color for them earlier, but now we just want to give
them more definitive color. We work on the texture
of the boat here. The same dry technique as well. We're drawing the
head and the body. Just to show that they are a
human figure sitting there. We simply make a
little gesture for the head and then
the body with dots. Just like that. Follow my lead. I continue to work
on the figures, but also the texture of the
boat as they are on the same, on the same line. In a way, this faded part of the boat is adding to the
beauty of the work. So we're not going
to work more on it by adding more
layers and details. It's the right side of
the boat that has darker, it has more shadows. And the left side is
more faded and lighter. And there's something
really beautiful about that faded aesthetics. So I'm going to leave it. Simply to give that balance, There's that beautiful balance. Just want to add this part here. This part needs just
a little bit of accentuation with a few
simple lines and shapes. Then we're going to leave it. It's that kind of aesthetic in this painting doesn't need
to be colored completely. Drawing the boat is complete. Now we've given it
the details that it requires in order to
show the figures, the shadow, all the outlines
and it looks complete. There's one more line here. Now we show the
water reflection by drawing a few lines like this. These horizontal lines
added on the water are always useful to show the
reflections on the water. We also need to make sure to
leave some parts in-between untouched so it's not a space to completely filled with color. And these untouched parts are the lights between the lines. They are, they will show the
rippling or the texture of the water and the reflection
of anything around it. So closer to the boat, It's a bit darker, a bit further, it's
a bit lighter. The main picture, this part is covered by stones and sand, but we've deleted them and added a water reflection to
make it more attractive. I'm just working on
this part right here. Just to make it
look more complete. We add some dry touches. We want that texture
to come through. Remember to practice,
practicing your, your technique or using
a specific medium. Not only does it
help you recreate the same image again
and again and better. It's getting comfortable
with this medium. That's the idea is to practice
enough to understand your, your brushes, the colors, the mixing, the techniques
of wet on wet or wet on dry or dry, dry on dry. So all these techniques
require practice. And the more you practice, the better you are at using these techniques
and manipulating your brush in a sense
of like playing around with the medium to realize what textures can
it achieve you? And what brushstrokes are better for different objects like
brushstrokes for a tree or the tree leaves is
different than the ones you would create for the
water or for buildings. So all of that needs practice. Notice how I'm adding
the leaves here, but I'm leaving
white places so it accentuates that light
that comes through. Feel free to send me your questions or maybe
your final paintings. I'm more than happy
to share with you some feedback, maybe
some pointers. Here we're adding more leaves on this part with our dry brush. It helps us create
the texture we need a up at that point of the tree. There's sunlight
in on some leaves, which is shown like this, which also makes the
highlights even more bright. By creating that contrast. We add the initial
layer like this, and then we will add more
details for the leaves. Small and big touches of the
brush together can bring more beauty like heighten
that sense of detail. We do it on this part because
there isn't anything in the sky in this part
and we can add more. Just like that. It helps us to work better on the
composition of the work. Now using a lighter brown, we are going to be painting
leaves that are farther back. They are smaller and
gesture therefore further back in terms
of perspective. So all of these
different tonalities, that darker ones and
the lighter ones plus the different
brushstroke gestures. They bring such
richness to our image. They add so much to the depth of detail and how much
we can enjoy it. As a viewer, I starts to travel all over the
image to these details. We're adding a darker layer here to this part of the tree. But obviously we don't
fill the entire space. We're still always
being specific as to where we're
placing our colors. Adding different touches with
different qualities helps us work more on details easily. And of course it adds to
the beauty of the work. We keep observing our models
and adding our details here. Essentially, we're
working on distributing the darker parts
equally on the work and maintaining the
balance of the work. And what I mean by
balanced visually. Notice as we have this
darker part here, we tried to add
smaller dark parts around that so that the balance of the
work is maintained. So it's clear that the shadow of the tree or on the
leaves are on this parts. And the rest are more illuminated or lighter
because of the light. So by doing these
different dark parts, we are creating the
sense of curvature or a body that is curving for
the tree that it's not flat. We continue working in this way. We add a darker layer
on this part as well. But we do it delicately. If we try to look at the
work with half-open eyes, we can see the layers
we've just added better. Remember that visual
balance we talked about. This is how to kind
of check and take a look at it and see maybe you need to add a bit
more somewhere. We need to work on different parts just to
allow them to dry as well. So if you're working
on one part and you move on to the next one, you're allowing the
first part to dry. We can observe our
tree in the way or different marks
are drying by now. That allows us to build on
that and add more details. I'm keeping my wrist light. Here. As you can see, the source of the light is at the top left corner of the tree. So we add the shading layers accordingly and
more to the right. I'm just observing my model
and observing my image. We need to add some more
touches of color on this part. Dressed like this. They're very quick,
quick gestures. I've added some water and
color to my brush and I'm applying those details here. Don't leave the corners
of your work untouched. Add the necessary details
to complete your image, at least to visually create
that sense of togetherness. And not that it was forgotten. Just trying to make sure all the lines are
connecting well. I want to fill in a little
bit of this foreground. Now by adding these
simple touches of our brush like this, we can finish the work. At least on this part. We need to add another dark
layer on this part here. And we do it carefully. Because we can see
that accentuation just a little bit in the model. We want to add that detail. We must keep in mind that the
dark shading layers are not typically added at the end
of the objects like this. The end of an object is lighter. So you lift your brush
off of the page. We add unnecessary layers
here under the rope. By a simple line, we add more detail on this part. We repeat the same process. We want to create a balance
and a distance as well. There's always distance between the dark parts like the ones
we added on these parts. We keep some parts
lighter in between, of course, the darker layers. In order to give each
part it's justice. We add a continuous dark
layer on these parts here. If we don't create this
kind of visual balance, we lose a sense of bringing the image closer to
looking realistic. Just adding some darker
details here and there. I'm taking my time just
observing my image. We need to add just a little
bit of a darker layer here. We want to just look
at our image and covering the edges just to
see what it looks like. We observe the work and add the necessary details
on different parts, not just one single part. So all of them just to
if you need to look away and then come back
and look at your image, that's also an option. Usually the process of
completing an image can take a long time from
one artist to the next. Because sometimes it's
difficult to decide that an image is
done, it's finished. Know more details needed. And it depends on your best
static that you prefer, how much darker
you prefer to go. So these are all
questions to each artist. However, our work is
essentially complete here. There are parts that
we leave untouched. We are done with them and it adds to the beauty of the work. If there are any
details that are missing or you feel like they really would
complete your image, I would go ahead and add them. The key is to observe our work, to observe our
drawing and practice, of course, keep practicing. Enjoy the process, play
around with your medium. Happy accidents happen and
they teach us that this, this creates this
brush stroke, e.g. but the idea is to simply stop and look at
our image often. And what we've created. Here, we have this
completed background as well that creates the, the base for our image
and it's complete. Thank you for joining me today. I hope you've enjoyed
today's tutorial and see you again next time.
16. Complete Doorway Artwork: Hi there. Welcome back to another
tutorial of watercolor. We're gonna be creating a watercolor painting
of a set of stairs. Let's start by drawing our base sketch using
a mechanical pencil. Make use of your
downloadable resources. They will have all
the information necessary for every tutorial. With all the details on the color palette
we're gonna be using, the materials and any
information necessary, including creating the sketch for our model and
the grids necessary. Take your time to
create the sketch. We want to create the sketch
with very light pressure. If your lines tend to be a little bit darker
than necessary, just erase them and do it again. We want to indicate in our
sketch all the details necessary to know where
the highlights need to be, so we can make sure we
don't add any color there. And all the details for where
the shadows are gonna go. Remember, this sketch
is just a guide, but it needs to have
all the details necessary so that when
we're applying our color, we don't miss out on any
of the details that make our drawing so much more beautiful and add to its
depth of perception. If you already have
your sketch done, you can fast forward
two minute eight, where we begin working
with our watercolors. Take your time. Keep observing your model image. Your modal image has the most information when
it comes to the shadows, the highlights, and the lines
that you're sketching down. If at any point in time you're unsure what to do
on a certain part. Just follow my lead. Mimic my sketching. Make sure you're sketching
as lightly as possible. Our base sketch is our guideline for when we start
coloring in our drawing. I keep looking at my model image just to make sure that I'm capturing the details as I see them and that I
don't miss any details. As mentioned earlier,
use your base sketch as an opportunity to add as
much detail as you want, indicating where
the shadows are, what the highlights are, which are to avoid and keep
the white of the page. To add all the elements
of our drawing. Don't worry if you have
to erase several times, make corrections multiple times. That's completely normal. Take your time to create
your base sketch. You can pause the video,
rewind several times. An exercise you could do in
order to practice and improve your sketching is
to sketch on a, with a timer on, gives you a chance to
be speedy and select the most important lines in
order to show your drawing. And it helps us
improve our sketching or our viewing of proportions. I'm just making sure I'm adding the details across my drawing. Take a moment to look at
your sketch so far and see all the elements
that you've added and compare it to your model image. Just to take a moment
to look at it with fresh eyes and maybe check what might be missing. Take your time. Okay, Now that we have
our general sketch done, Let's start with our
watercolor techniques. We're going to start
using a dry technique. We are mixing our color
combinations here on our palate. And again, remember, all the
colors that we're gonna be using are listed in your downloadable resources
for this tutorial. If you need some time
to mix your colors, pause the video, create
your color combinations, and then play again, and
we continue together. We're going to start by using a little blue and a little brown. We can paint dark parts
when we are working with dry technique because it will
not make light parts dirty. It'll hold onto the
texture of the page. This is a wet on dry
technique because our colors are a
little bit damp with water and our page is dry. Using my sword brush. I begin applying my colors. Make sure your model can
be seen comfortably. Keep looking at your sample. Using your sketch
as a guide line. And looking at your sample, you start applying the
shadows accordingly. Notice how closely I'm
holding my sword brush. We want to be intentional with where we're placing
our colors here. If you need a little
bit of water. Add some to your brush, but only a very small amount. We are drawing a
Bannister right now. We're in a way sketching
with watercolor. Because our pages
dry our colors. We're really hold onto
the page right away. It's not a wet surface. That's why we need to be careful where we're applying our colors. We will be adding water, but later on in the
process to the page, we use the texture
of the surface or the paper that we're drawing on. To our advantage. If there's a texture there, we want to know the application
of our brush on it, what kind of effect it has. If you need to practice
on a separate page just to get a feel for it, go ahead. But as we are adding the details in the
shadows to our drawing, the main important thing is to not add any color
to the highlights. You want the white parts to remain the white
of the paper. You don't want to take away from the brightness of
these highlights. They are just as
powerful as the outlines and the shadows that
we're gonna be creating. We keep those white parts
in order to have form. We give a sense of a
more realistic image. In the end, we are trying to give some
detail to these stairs, the diagonal lines here. Take your time to
observe your image. Our drawings, we're
not going to look like the image we are referencing. But the idea is to
be able to pick up where the shadows are, where the highlights are. Our own image has
its own beauty. Make it a habit to every
few minutes, stop. Pull your head back, look at the drawing
that you're creating. Let's not get taken
with just filling in, filling in the sketch
that we have created. We want to keep an eye out on the shadows and the highlights. Apply your lines
in the direction of the object that
you are painting. If we want to show
the perspective of the stairs very well, we want to draw them properly. And it's not about
accurate measurement, it's about perspective
and proportion. To visually be able to look at you're looking
at your model, look at your drawing, e.g. make sure that the
distances between each step is logical, visually logical, that
it looks balanced, that none of them
look too close to each other in that perspective. Or maybe too far. If you need a lighter
tone at any point, you just need to add a
little bit of water. We just have to continuously
pay attention and considerable shadows
and highlights. Notice how on the outside of the stairs my lines
are vertical. They are not
horizontal as I drew them on the stairs, the steps. Notice how my speed is medium. I'm not working too quickly. I am more relaxed as this
is a wet on dry technique. If it was a wet
on wet technique, I would be I would have
to be quick and also precise and choose
the right moment to stop and let the layers dry. But here my colors, what I need to be careful with is to have my colors light. Apply them in the right places. Make sure they're dry before
I move my wrist onto it. As we can see here, the color of our brush
becomes less and lighter. It can be a good
feature in order to show the shades and wetness. So don't wet the brush just yet. We have to create a
general view or sketch. And then we will use water to make our brush wet
again are more wet in order to show more
contrast and add more details. And work on keeping the perspective
balanced on all sides. We want to keep
building those layers and working on the
realistic aspect of it. As mentioned earlier, don't add water to
your brush dress Yet. Make use of this very
minimal dampness of it to add those
very light details. Because at this
point, our brush has little color and little water. We want to apply the
lightest lines here. So creating that
very little tonality between the columns, e.g. at the top of the stairs, those lines on the side. Now I've added a little bit
of water just to darken it. The outer, outer
wall of the stairs. I'm mixing a little
bit more color, of course, wet color. And I'm applying my
shadow over here. I mixed a viridian hue and
I hookers green light. Again, it is a watery mix in order to keep
my colors light. And to maintain this aesthetic,
this light aesthetic. But I'm still achieving
shadows that I need. And notice the change
in the color tone. We want to use our brush in
all directions necessary. So I use the side
of my brush here to drag the color horizontally. That indicates the ground. I added my shadow and this
little entrance down here. I'm adding a bit
more color into it. Just to give it a
little bit more detail. Mixing a bit more color. I'm going in to add that shadow. Placing our shadows
in the right places. And making sure that the
highlights are still there and accentuated heightens the depth of perception of our image. It becomes richer and looking more natural and more realistic. We have a shadow
up here as well. I want to maintain
the aesthetics, the aesthetics of
the stairs here. With a tissue paper. I've lifted some of the color as it was a little bit too much. Notice how the inside of
that that darker opening, the curved opening, it remain darker because it was
able to dry a little bit. We continue observing
our model and we continue adding our details. Feel free to send me any
questions you might have. You can also send me your
final drawings if you want. I'm more than happy to
share some feedback, maybe some guiding pointers. Another way I get to see how I've built up an
image is that I take a picture of it at different stages of
completing my drawing. I'm able to see visually
whether there is an imbalance, whether there are parts that I worked on
more than others. What to focus on
maybe the next time that I practice ideas, the more we practice, the more familiar we are with the medium and our
confidence grows. And therefore our
application grows. Notice how the parts are
drying in different places, be the stairs or
under the stairs. Now we're creating the door
at the top of the stairs. We've created the outline here. We want to fill that wall. We want to show the perspective that there is a wall there. Now to create the door itself, we need to mix
orange with brown. The way we're going to
apply our color here is we add it with a
staining technique. The idea is to use this
technique to bring out the texture of the door or to accentuate a
texture of the door. Now you can achieve texture
by primarily taking advantage of the green of
your paper or cardboard. Make your color wet
and apply your color. You can achieve this texture that we see here on the wall. I'm making sure
that I'm applying my color in the right places. We must give it time. Now, the paper needs to dry, it needs to absorb the color. As our application of
the door and the wall, although they are
different colors, the application of them is
a little bit different. The door mixture of water
to color was lower. Whilst the wall with the
orange and the Brown it was, it had a higher amount
of water in it. But they're both vertical and upward so they can
easily maybe mix. So we need to just leave it dry and go on and work
on a different part. We've added some more water
and color to our brush here. And we're working on the
steps of the stairs. We want to add more contrast. Let's continue working with all the techniques
we've used so far. We need to pay
attention to where we're applying our shadows. We need to avoid the highlights and
leave them white so we can add a very light tonality
to them in later on. And we want to continue adding these darker outlines very
carefully in the right places. I'm going over this shadow
here under the stairs. Now I'm applying more shadowed lines
where they're needed. Add some water to your
darker lines if you want to lighten them or maybe
extend their shadow. If you're unsure at any point
in time what to do next, just follow my lead. We show the light edge
of the roof like this. We darken it in order to
create such an arch shape. The most important rule is to
keep observing your model. Your model image has
the most information. When it comes to shadows, highlights, what
needs to be darker, what needs to be left as
the white of the page. Adding these
vertical lines here. Use the tip of your brush
for delicate details or more accurate or
a specific details. I'm using my tissue here to
lift off some of the color. Remember, you can redo any part several times that's
completely normal and okay. Just make sure your page dries before you work on it again. You want to add some shading
in these parts here. Feel free to share
with me or drawings. I'm more than happy to
give you some feedback. Now we let it dry. The next thing is,
we're going to, we're going to use our dry
brush for these parts. We, we use our dry brush in
order to get more detail. We have to be careful
where we're applying our color because it's dry, so it really hangs
onto the paper. The becomes difficult
to make changes. Feel free to send
me any questions you might have along the way. I'm here to help adding those details here, which are the contrasting lines. They bring a depth of
perception to our work. They also bring clarity to the different elements
in the artwork. When we shade these parts, it makes the work more beautiful
because we can see more. Make sure your wrist is light. You're not applying a lot
of pressure onto your page. Keep observing your model image. I've applied some water here just to add
this shadowed area. Are shaded area. Keep focused as
you're working on more detailed parts
and take your time. Drawing lines and surface are dependent on ourselves
and our experience. We should consider the
model, our model image. And we should also
consider our own style. We should try different
techniques, like dry technique. Or wet on wet technique. Just to find out which
one suits us best. Which technique is the
one that lends itself to you to be more creative
or enjoy the process. And don't worry if you make mistakes and maybe
miss your drawing. It's completely normal
for that to happen. And these mistakes
can help us learn better and give us a
better experience. Now I'm going to wet this part. So it's a second layer
on top of the details which I've applied
with a dry brush. That's why it's
important to make sure your layers are dry before you go over them with
another wet layer so they stay in place. If you need a break
from your art work, just take a moment
and look away. And then look back at your
work with a bit of fresh eyes. Just to notice what
might be missing. We continue to add some
shading on our door here. And we can fade this part in
order to have better depth. You need to continue adding these contrasting lines and
shading different elements. We need to look at
the whole drawing and assess it and analyze it. We need to darken
this next part. We combine brown and
blue in order to have a dark green, bluish
tonality color. You need to practice controlling the moisture in your brush. The more you practice controlling
the your watercolors, drying them wedding
surfaces, applying color, the more confident you become, the better your results will be. Working on the
darkest parts here. This space underneath the stairs also is one of the
darkest parts. We always use another tonality
in the shaded part or a dark parts in order not to be an absolute black or very dark. So it's good to give it to. Different shades are two
different tonalities. At least. Dry our brush here and we
use it for the surface of the banisters in order to
show it's flake texture. The texture of this part is
different from the wet parts, so we use a dry brush. It's important to look at the general art work altogether. Make note of the highlights. And just to know whether
something is missing, R can be added. I'm adding the details,
as I said, see them. We need to go over all
parts of our artwork. Take your time and give
different parts a chance to dry. Also use your tissue in order to control your watercolors. We use a more wet brush
in order to create some shading or some shaded
areas which are bit lighter. We also apply more color and a little bit of a dryer brush. When we want to
create bold lines. We want to work on
these parts carefully in order not to mess
the white parts. There are some light parts like white lines that you
don't want to get rid of. You want to make sure
that they remain. So do not remove this light
and white parts on this step, so it's not all colored in. You want to make sure that
the steps are distinguished. And that only happens with a combination of both
the contrasting lines, but also the highlights. Now we're going to add warm colors here
with another brush. We're going to use a
brown and orange color. We create the color combination. And then we start applying it. Here I'm using a brush pen. A brush pen allows you to
release water as you need it. And it's up to you
to add more color. Take your time. Now remember, we do want some white parts which are in the right places. But if we leave all the
white parts really wide, our work is not going to
look really harmonious. They need to have a tinge or a very light tonality
in some parts. This is something you
practice or work on improving the more you
practice and use watercolors. Keep observing your model image. Feel free to share with me your drawings or watercolor
artworks at any stage, I'm more than happy to
give you some feedback, maybe chat about them. I'm here to help. Now, watercolor has
its own aesthetic. It's a little bit of
a cloudy aesthetic. It also has these water stain aesthetic and it's just something that
we need to accept. And obviously if we're
using this medium, we need to find the beauty
of it and work within, within its, its aesthetic. Keep observing your model image and also your own artwork. Go over as many
details as you need. Adding details to
different parts of your artwork is
really up to you. If you prefer that
the second window on the left remains really faded without any details,
That's okay. Now we shade this
part here. Okay. I hope you've been enjoying
water coloring this image. Also. I hope that the use of the pen brush was
super-helpful because it helps us add all
these details and smaller and smaller
contact with our page. Now we're using our
sword brush again. We need to shade this part here just a little bit
in very lightly. Notice how the colors
we've had on our palate. It's okay for them to dry and for us to add
water to them and reactivate them or add
more color to them and reactivate them
as we proceed. In our watercolor drawing. Now we're going to start using
the wet on wet technique. So we've applied
water to our page. We also have water on our
brush with color as well. And this technique is not easy. But it doesn't mean that
we're unable to achieve it. The mixture here is viridian
blue and Hooker's green. And we need to simply keep practicing with the
wet on wet technique. The idea is to control, control the water and control
where the color is going. Adding water to our brush or to our page gives us more shadows. It allows for the color to
pool in certain places. So you can achieve that
darkness in a different way. So here we've achieved
this whole block. We gathered this entire space, but we've given it several surfaces by applying
more than one layer. Remember, just like I worked on the part on the right bottom. Then I left it to dry
and went to work on the left on the left side of the bottom part
of our drawing. Now I'm leaving them both dry and with a higher amount
of color on my brush here. I'm going in to add
the darkest details. The dark is details. They are the outlines. They're going to bring
the real richness, but we can't have a lot
of water on our brush. We need to be very exact and intentional as to where we're placing them. So notice e.g. on this handrail here, notice the highlight in the middle of those two
lines that I've created. At the top of the columns, there's a highlight
there which I've left. The highlights are dressed as
powerful as my dark lines. Take your time. Observe your
image, observe your model. I'm using my pen brush
here because I want to, I want to achieve those details. The pen brush is water-filled, that has water inside it
so you can directly take some color and it'll automatically be mixed with
a bit of water for you. But the idea of this brush is more control and
therefore more detail. Or a more precise detail. Makes sure the placement of your wrist is not
affecting your drawing. Observe your model and
add those details. As mentioned earlier. Every few minutes, take a
moment to pull your head back. Look at the drawing
you've created so far. And visually study the balance. Does, does the,
does my watercolor drawing look, look harmonious? Do some parts look
inconsistent with others in terms of application? Where else do I need to add my, my outlines, my darkest shapes. We keep referencing our model because they give
us the clues as to where all these highlights and the details
that we might miss. It's not to have our watercolor drawing to
look exactly like our model. That's not the idea. It's the fact that our
drawing might actually be even more beautiful
than the model. But we need to work
on it and look at it separately on its own. But our model is there too. Guide and reference as that, that is our reference. It tells us where the
shadows need to be. We want our image to still
look realistic and beautiful. We remain focused on every
part we're working on. We add all the details
one step at a time. There's a little
outline here that I need to bring forward. These detailed lines like that first column
on the bottom step. They, they create
such a presence, especially against this faded
background of the steps, the steps, the style of it, the technique we've
used for the steps is different than
this very precise, small brush detail creates
a very beautiful contrast. Notice the texture we
have on the handrail. We want to work on all parts. We have more shaded
darkness at the top of the columns on this part just because there's a
shadow that's being cast. Also our color mixtures,
if you notice, the mixtures that we've
created take away from from any unnecessary sharpness of using a black color
because I'm black color, not only does it, not only does it contaminate
the other lighter colors, but it's too harsh, especially in watercolor
drawings where you have this cloudy
style aesthetic. So you want your shadows
are the darkest parts are the darkest details to
be dark, but not black. They look more olive, more brownish, more
bluish, cooler, warmer. So all of these details, we have some
scattered lines here. We're just adding
these as we see them. Remember to share with me any questions you might
have along the way. Even share with
me your drawings. And also, if you have, if you practice a
medium quite a lot, you keep playing around
and you're approaching it in this relaxed way and
you're being playful as well. We end up discovering so
much more about the medium, but also about our
own sense of style. What's more comfortable for us? What's more
comfortable? It's more aesthetically pleasing as well. But the more you practice, the more you'll
discover these details. I'm trying to go over all the details in
between the columns here just to complete the steps and give them the
definition they need. I always worry about
missing out on some details because I'm
too focused on one part. I find the water coloring
or being taken by shading or fading the
tonalities that I've created. It becomes meditative
for me and I kind of get taken and I forgot
to look at my model. And I forget to look
at the details. And I'm working based on
the information I have in my mind that I have an assumption of what
stairs look like, but we need to avoid that and we need to
keep looking at our model. Adding some more details
to my door here. These delicate lines, if you've created lines for one-step, makes sure to apply
it to all the stairs. Check for where else you
can see those lines. Just like we've created the
bottom lines of the door. We went up and we
added those details. I go back to work
on the door here. I'm just grabbing
some more color. And I'm going over
this second door. We want to show and
specify the windows. I really enjoy the pen brush. It allows for such details. Even though at a, at a distance you might not tell
those little lines, but the whole texture
changes entirely. We're giving more and more
detail to the windows up here. Just to get the whole field. I'm working on the door frame. We need to make
sure we're applying the lines exactly
where they need to be and not thicker
than what we then, what we see they need
to be as we see them as delicate because they
imply the perspective. If some lines or horizontal
or vertical or diagonal, that perspective
is very important. So this line that's crossing horizontally between the doors and on the wall and
now vertical lines, these are very important. They imply the verticality
of the building. They're also not a horizontal all the way
they are diagonal. That direction is
very important. With the pen brush. The technique is drier than the other techniques
that we've used. So we need to be more careful, especially that
our page is dry so it'll catch the
color right away. Or adding another element here. Notice the texture that's being
created with these lines. I've left the bottom part of my drawing to dry completely. Now I'm adding my details here. I have worked on the doors from the left to the
right just to avoid having my wrist go over a door on the right
had I started from there. You want to make sure that
that line that's going across that wall horizontally,
slightly diagonally. You want to make sure that that perspective is maintained. With this pen brush. I'm able to create these little lines right
next to each other. They are hatcheries. I'm simply observing my model and applying my
lines as I see them. And keeping in mind the
highlights and the parts that shouldn't have
any color on them. Remember to stop
every few minutes and look at your drawing. Pull your head back. Maybe take a few
minutes to look away. Have a snack, come back and take a look at the drawing that
you've created so far. We're visually looking for harmony between all the
techniques that we have created. We want to, we want every
element of our drawing to look like they all belong
in this drawing together. If there's something that's
standing out too much, either really dark or the shadowing of it
as a bit too harsh, or maybe the highlight
is to white. We want to go over that. But to be able to see it, we need to take a moment to
look away and look back at our drawing and see
where the imbalance is. If there is any. We're going to use a little
orange and brown color for, for the shade of this part here. Notice how applying
a shade on top of these tiny vertical lines or even a dark line on top of this cloudy part of the wall. It's still remains very visible
because we've let it fry. Now we're working on the
flooring, the terrazzo. The whole image together
needs to be complete. We want to work on the
entire environment. Altogether. We shouldn't be afraid when we're
working with watercolor. You want to just be
comfortable and relaxed. The style of it is very free. And yes, we've applied a
lot of very detailed lines. But in the end, because we're
looking so closely at it, we tend to miss that
this style has, has this very beautiful,
relaxed aesthetic. It's cloudy, it's
loose, it's delicate. And the more we practice, the better we achieve
all these qualities. But if it's not as we anticipated or not as good
as we wanted it to be. Don't let it discourage
you or hold you back from practicing and trying
and making mistakes. Because the reality
is the more you play around with a medium and you find out more
about the medium itself, your own style. But you also create
happy mistakes. E.g. you might be using
a certain tool and then applied it with a certain amount of pressure or a
certain direction. And then you realize,
oh, I didn't know that this can create this effect. These happy accidents are good. We tend to learn
a lot from them. I'm just taking a split
second to dry my brush, pick up some more color and just fade this
dark part here. On the handrail. That black was it wasn't a black but that dark
part was too dark. I wanted to tone it down. I want to go over
all the details. Now we're going to paint
behind the banisters. Pay attention to the highlights. You don't want to cover any white parts that
need to remain white. Because on a single on a single column of
the railing, e.g. up the stairs. It has highlights on it and we don't want
to cover that part. Keep note of the color
combinations you've created and what effect they've had on other colors as you've
applied them on top. Again, we combine
brown and blue. Just to darken this part here. Having a variety of
tonalities that go together. Just bring richness
to your artwork. Add as many details as you can. It's a very good challenge. We don't paint the rest
of the bannister here. As we know, we just draw
these parts in watercolor. We want to imply
the shading here, but without too much detail. Now we use a larger
brush and we darken the roof. Take your time. Here. We're going to
use our sword brush. And it's the large part of
the brush to darken the roof. So our color is watery. We've added two layers so we can see how they're drawing
on top of each other. Must be in the perspective and
direction of the building. Here. I'm adding
some more tonality around the doors and the window. We want to complete
the entire field, entire environment
of the drawing. Just like we've done the ground. Now we've done the roof. We're adding this
very light shade. We don't want it to take away from the details we've created. It's a much lighter tone. Now we're going
to add some more, some more shadowing
on this part here. So I'm adding a bit
more color to my brush. And I'm adding the shadow over there that is
caused by the roof. We want to be precise where
we're applying our shadow. We want to create the edge here. There's a shadow on this door. Now we can draw a tree
or a bush in order to make our final watercolor
painting more beautiful. One of the important things
is that we want to know which technique is good
for different elements. So we should learn
to use the wet on dry technique correctly. We should practice more. And simply. Just don't worry,
don't be afraid of the medium or make
it hold you back. Created. Do all the
mistakes, discover more, and that's the best way to
practice and to achieve those techniques more
beautifully, better. And it builds your
own confidence. I've added some
water to my brush. I'm adding these details here. We are simply
accentuating every part. We want to look at
our perspective and make sure that it's balanced. We can wash this part
here and faded a little bit more right there. Just by adding a bit of water, we're able to lift some of
the really shadowed parts. You don't want to apply
a lot of pressure when you apply
this little bit of water because you
don't want to take away from the details
you've already achieved. You're simply adding more, more, more contrast here. You're achieving a
more delicate contrast and bringing together
the entire image. We use the dry technique at
first and then to create harmony with wet
technique and dry lines. So pay attention to these details and also
to your highlights. Are drawing is now done. Thank you for joining me. Hope you enjoyed that
and see you next time.
17. Cityscape with Watercolor & Ink: Hi there. Welcome to
another tutorial. I hope you're well. Today we're going to use
watercolor in order to draw a picture of
a canal in Venice. I'm using a pencil here
to draw my sketch. This sketch is a base
sketch that will be guiding where we're gonna be
applying our watercolors. Let's start off by
drawing a general sketch. Remember to make use of your
downloadable resources. They will have all
the information necessary and what you need in order to create
your base sketch. Our initial sketch can indicate the periphery of our artwork, the spacing, maybe the
general form of it. And later on we get
into the details. Drawing buildings in general
is very good practice. There's a bridge here. Take your time to create
your base sketch. It's going to be
your guideline for when we start
adding watercolors. Add as many details as
possible on your base sketch. You can even add really light hatcher lines
to indicate shadows. There's some wooden parts in the water here and
the reflection. Make sure you add your
details very lightly. They're there to guide
you and help you. We just don't want
very dark lines that might disrupt your
watercolor painting. If you're unsure at any
point in time what to do in a certain part or
how to draw something. Just follow my lead. Mimic my drawing. Keep observing your model image. It has the most
information for you. Feel free to send me any questions you might
have along the way. I'm here to help. The buildings of
Italy and Venice are a very good practice
for working with watercolor because of
the various textures and the various watercolor
techniques that we can apply. Make use of your
downloadable resources where all the information on every
tutorial is available. For you to have access to information on
the color palette, we're gonna be using the
grid with which you can draw your sketch and all
the materials necessary. We don't add a lot of
details in our sketch, but we want to indicate
where the highlights are, mark the buildings,
the reflections. In our current drawing, the right part is
darker and has shades, but the left side has more light because
the sun shines on it. First, we're going to use
pure and light colors. There's a pink color
for the wall here. Make sure you have all
your materials handy. We're going to create
different color combinations. In order to achieve
our full drawing, we need to have clean
tissues, clean water. Take your time to make
your color mixtures. Here we're going to be
mixing pink and red. As mentioned, we
have a pinkish wall. We add a bit of
water to our brush. And airbrush is a sword brush. And we begin. Remember to keep an eye out for where
the highlights are, the parts that are
completely white. They are the white of the page. There are different white
lines across the buildings. That's why we indicate some
details on our sketch and how they are the guidelines for us as we apply our watercolor. We're using an
alizarin red hue here. The concentration of
color is very low. We want to start always from the lightest colors to
the darkest colors. Lift color off of your page with a tissue just like
I did right now. You don't need to apply
a lot of pressure when when placing the
tissue onto your page. Feel free to send
me any questions you might have along the way. You're also more than welcome to share with me your
final drawings. I'm more than happy
to share with you some feedback, some
guiding pointers. The lighter color is
while we basically sketch with our watercolor
at this stage, the better. Because we can easily
make our drawing more, more shadowed or darker. As we, as we progress
in our drawing. Remember to keep an eye
out for the highlights. We want them untouched. Even if we're gonna be adding a very slight
shadow or tonality. But later on in the
drawing, for now, you need to leave them
as clear as possible. I'm using a raw sienna here. As you can tell from the mixture
I made on my palette and my application is that there's a higher concentration
of color on my brush. Make sure you can
comfortably see your model. Keep looking at your model. Every few minutes. Take a moment, pull
your head back and look at the drawing
that you are creating. The more we look at our
image and our model, the more we understand
where the highlights are, where the shadows need to be, and visually how to progress. Or adding the details
as we see them. The more we work on this part, the more we are specifying the windows and the
lines between them. These white lines or
separations are the, are the highlights but
also the element that is going to make these
windows stand out. Gain their form. And we'll have a better
indication of where to also apply our shadows around
these highlights. We want to make
sure we're applying our colors in the
right direction. I'm keeping my wrist light. And keep working with your brush without adding excessive water. Only if you really need to use the amount of dampness in your brush as it
currently is right now. Take advantage of what
texture it might give you. I added some more color here because I need to
work on the roof. Now I'm going over some
little details on this part. Now we combine orange
and green color just to create a warmer,
warmer tonality here. Now we add green and pink
in order to have a more, a more cloudy pink. We're going to use that
color for the bridge. This is the shaded
part of the bridge. We need to go over
all the details that we've created
in our sketch. We want to work on
every part and keep working through to every
next, every next section. We're specifying the lines. We want to be able to basically create a sketch in
watercolor for ourselves. I hope you were able
to achieve some kind of freedom with the
medium at this point. Enjoying it a bit
more, playing around, discovering more about the
medium and the materials. But also maybe
discovering more about yourself and your style. Because the more we
practice a medium, the more we're able to know
more about our comfort with it and our preference with using
the different materials. This part here is darker. So we're going to change
our colors slightly. We're going to combine red
and blue and a little yellow. And then we start shading. We've achieved this warm,
warm, purplish tonality. Pay attention to the way
I'm applying the color. It's very light. I'm using the side of my
brush to spread my color. There's no light or
highlight in this section, so that's why I'm
applying it everywhere. I'm adding more water using a little bit more
of a blue tonality here. I'm applying my color in
a very vertical manner. Take your time to
observe your model. Here I'm using an indigo
and then alizarin whew. I want to work on this part
underneath the bridge. Generally we specify the shadows with the tip of the brush. And then we use the wider part of the
brush for sketching. In fact, we add colors and shades and lights
and several steps. And we go in a
back-and-forth movement. After that, we use the dip
brush and sketch the place. And finally we add colors again. We're building layers. As we work on one part
and move to the next one, we're allowing the
first part to dry. We apply our colors lightly. Pay attention to the movement of the brush and also the
use of colors here, we want to make sure that
there's harmony visually on the entire, entire drawing. We want those colors
as well to be reflected in different parts, although we've made different
color combinations, there's still this harmony
in terms of tonalities. We use a very light turquoise
blue for the water. Again. Keep notice of the
movement of the brush. Take your time to make
your color mixtures. Pause the video if you need to, and then play again
to continue together. Notice the application. The concentration of
color in my brush. There is less water
and more color. We added this turquoise blue in the shadows underneath
the bridge. Needs to be visual
logic to our image. That's why we have that
color in the bottom of the, the bridge in the shadow because it's
reflecting the water. We don't want these
different tonalities to look like they're
alien from each other. That's why you mix
a little bit of each other's tonalities
in reflective parts. Here I'm creating the
shadow with a viridian hue. When you're changing colors, make sure that you wash
your brush and dry it. For the viridian blue, we've combined
blue-green and a little brown to make a dark
green blue color. I'm going in again with more of, more of the bluish color
underneath the bridge. Now we're combining the
red and pink color. Keep in mind the
highlights and where and which parts need to stay completely white or the
white of the paper. Every few minutes,
take a moment, pull your head back and look
at what you've created. Look at your drawing. Make note of what
needs more shadowing, what needs more details. Pay attention to how I'm
applying my colors on this water, water area. Although we're creating a general sketch
with our watercolor, we've given it quite a bit of, quite a bit of quite
a bit of character. After this part dries, we're going to use a dip brush. It looks like this. We're going to use brown ink
in order to create space. We don't use black ink. Black is too harsh. We don't want it to clash with all these beautifully
delicate tonalities. I'm checking that my pages dry. With a tissue. You can remove any
excess water or color. Now we're going to create this building with
linear sketching. We use linear sketching
in the last tutorial. We can dissolve it with
some water later on. But this doesn't mean
that you should be less careful with your application. Be very intentional on specific. It is a simpler
form of sketch with various lines. Follow my lead. Although we have details
and smaller lines that are horizontal or main lines are more vertical to imply
that rising perspective. The amazing thing with buildings is that they're rising
against gravity. That's in terms of only
perception when we look at them. And they have a lot
of vertical lines and horizontal lines. But the point is
to make sure we're drawing our lines in
the right perspective. So what we think is a
horizontal line might be more diagonal or more curved. This is a technique
that requires focus and the little bit of concentration while constantly
looking at your model. Look at where the lines are, where the highlights are. It helps you place your shadows correctly and your outlines. It's okay to make mistakes or have some lines
that are out of, out of, out of measurement. Because generally we're drawing a lot of lines and you
can start by making them lighter and then
choosing one of them and decided to make that line darker to accentuate
a certain column or a certain line at the
edge of the building. But the idea is to enjoy
creating these details. This delicately. It does take time to
draw these lines. The idea is to keep looking at your drawing and
looking at your model. I'm looking at where the
details of my buildings are. You want to pay attention
sometimes that our brush doesn't release more
ink than necessary. If we're releasing
more ink, it's too, is to basically add more
shading to a certain part. You don't want to put a lot
of pressure on, on your tool. Which in, which in turn
creates more pressure on your paper because it might be wet and you might
over apply your color. Try to hold the brush like this. Exactly as I'm holding it. Remember to be intentional
with your marks, even if they are not perfect. Just simply choose
where you are placing your lines as opposed to
placing them randomly. We want to take ink with
the edge of the ink stand, not dipping it all the way in. Just at the edge like that. We release any extra
ink from the dip. And we continue
adding our details. When we dip our brush and ink, it starts off by having
a little too much ink. So you want to start with a darker shaded part and then
go to the lighter parts. Also keep in mind that when we press the brush with
a light pressure, we have less ink
transferring onto the paper. So it's just a matter
of practice really. We're using a high-grade
dip brush here. Keep observing your
model image and apply your details accordingly. Our brush has lots
of ink at first. So as mentioned before, we need to work on
the darker parts first and then we'll move
on to the lighter parts. And remember, you can remove any excess ink using
a paper tissue. Take your time. Keep in mind that the more you practice, the more you'll start enjoying creating combinations
of mediums. Over here we're combining watercolor and using
our ink brush. We should look at our
painting more than the model just in order to make sure that we're
placing the lines properly. Because at this stage we have a lot of information
on our art work. So we know where to
apply our lines, but of course, check
your model image. Every now and then. These white stains are helpful for making our work beautiful. You need to leave
some parts white. We can remove any excess
ink using a paper tissue. When it comes to
watercolor though, don't be too worried about it. We can create stains. And that's the technique in watercolor that gives
us that aesthetic. Take your time. Focus on the details. There is a structure here. If we draw it, it will make
our work even more beautiful. Make sure you keep your wrist light and your
application light as well. You don't want to
transfer too much ink onto your page, unintentionally. Go over the details and thicker
lines and thinner ones. We started from this part. Then we increase the pressure that we're placing onto
our ink brush here. And that makes it
release more ink. So we're able to work on the thicker parts where
the thicker lines. And to give more
contrast to our work. Keep observing your model. If you feel like you're not
sure what the next detail is, your model has the
most information. Now when it comes to using several mediums or combining two different mediums
with each other. You need to look at
different model images. Practice drawing them, practice using two
different mediums together. It can be watercolor and
pastels or watercolor and ink. Our ink and pastels, It's really up to you. Now we're going to work
on these arches here. The color that we used
below is just a halo. And now we're going to
hatch or on top of it, just to make it more beautiful and to give it that clarity and those details that
will define it even more. Keep focused on the details. It's about placing the lines
in the right places and not about filling
in all the spaces. If we had to create this
artwork with only ink, it will take longer because there's a lot of
information to be added with. One tool or one medium. Be careful here not to get
your hand dirty or palm. And the important part is
not to pick up ink and then transfer it onto other parts
of your drawing by mistake. Always keep an eye out
for the highlights, the parts of the
artwork that needs to remain the white
of the paper. We keep the line between
these two shades here. Perhaps there are other
details in the painting, e.g. there's a chimney here and we
don't draw it because it is just a stain at this point
and it can indicate distance. There's a texture
on this roof here. You want to increase
your hand pressure on your ink brush just to release more ink and get that
shadowed area done. Keep focused on the details. When we are working
on watercolor parts, we have to hatch to connect the watercolor and the white
parts of the cardboard. In order to create
harmony between them. We should pay attention
to the transition of the mediums into each other
and the details and how, whether they have a
background color or not, and whether they need
more color in them. It's really all about creating that balance and
adding the details in accordance to our background and the different textures here. So we need to work
on these parts and work on the visual
balance of it all. Look at all the tips
of the buildings here. Make sure that you've got
all the details down. We use dots and small lines
for this part of the roof. And we use Y dots
for shaded parts. Take your time. Now we're going to work on Windows. We should draw the
windows in one direction. First, we need to
specify the lines. We should look at our
work generally in order to add the
details properly. Especially with buildings,
their windows that need to line up either
horizontally or vertically. Just on the same line, even if it's diagonal. Take your time. Now we're going to work on the bridge. The movement of
our brush is fast. Our brush movement
shouldn't be too slow. You want to make it quick
in order to also achieve that gesture or that texture
that is created with, with this with the Ink brush. It also helps you keep your
hand pressure really light by creating these marks
and lines quicker. Keep looking at
your model image. We continue adding details to
every part that we work on. We use several dots
in a row or dashes in a row in order to create a general form of
this part here. As long as the detail
is uniform on a line, it will add to the texture
of the bridge here. The darkness of the Congress
of the bridge should be equivalent to each other and there should be consistency or a consistent transition
really of that shadow. To take a moment to
observe your own artwork. And also look at your model image and add
the details as necessary. We don't use a very wide
line for this brush in order to work on light
and delicate parts. This part of the
bridge is delicate. We draw this arch
form of this part. I hope you've been
enjoying adding those details with
our brush and ink. Now, as you can tell, by this point in time is
that we don't widen the line of this brush for lighter or more delicate
parts are darker parts. This part of the bridge
here is delicate. And we draw the arch
form a couple of times with several
lines to darken it. But when we're
drawing the shadow, we are basically almost, almost sketching these
lines right next to each other to achieve
that darkness. And we want to cover
this part completely, but we don't remove
the watercolor parts. We want to leave those, those tonalities coming
in from the background. We work on this part when the lines become
thin and delicate, some parts need
more hand pressure and some parts need
lighter pressure. We have some some wooden poles here that are into the water. So we're just adding them. I hope it's been somewhat enjoyable and meditative
to act to the, add all these details on
the different buildings. And to work on the
different parts. We want to keep observing our model and adding the shadows exactly
where they need to be, as dark as they need to be. With the lines here
I'm using my brush to create lines right
next to each other, creating a relatively
dark tonality, but not completely covered. We need to leave some
parts to allow that beautiful tones of blue and browns and the
background to come through. If you need more, practice with this tool, I would practice
different forms. So in this drawing we have
buildings and a bridge. But what I mean by
different forms is to draw trees or flowers, or even a blanket, e.g. where the lines will
become more irregular. And that's very good practice. It tells you a lot
more about your tool. Learning better how to switch between
different pressures. Because we're not
making our lines thicker with this
specific brush and ink like we are basically
drawing more of the lines, but applying them in the
different directions. So even under the bridge, notice how the lines
start off horizontally from the top and then
start curving downwards, almost becoming vertical because that directionality
is very important. It director eyes
into the drawing as to what the curvature of
the bottom of the bridges, that part that's
under the bridge. We continue adding these
sketches vertically here. We want to complete all
parts of our drawing. We want to mimic that
texture that's on the water that we created
with the watercolors. Now I'm adding more details
here onto my bridge. We're adding these details
here, we're sketching them, but we're going to
work on it with the brush in a little bit. Because we want our
image to look complete. Remember what we talked
about in terms of balance across the
entire drawing. Not just in the
tonalities of colors, but also in the techniques we've used different techniques, but does it look balanced? Is there a part that looks
like it needs more details, more of the tonalities, maybe in the background. We need to work on them. If you need a few moments to
stop here, stop the video. Look away, take a break, come back with fresh eyes, and take a look at what
you've created so far. There are some windows here. But notice the
movement of my hand. Notice the back-and-forth
sketching where I'm not creating one solid line in one direction and that's it. No, my lines are light and they are back-and-forth to
create a complete a line. Just taking a moment
to look at my drawing. Noticing some lines here
that needs to be added. We want to go over those
details here that are mediating between
a very dark part which is underneath the bridge and then also these
reflections on the water. We want to be able
to add our marks in such a way that is
harmonious with the water. So our lines closer to the bottom of the bridge
are near each other. And as you move away, they start to space
out a bit more and then you have those
squiggles on the shadows. Now on this building, we have some more shadows, but the idea is to look at the main diagonal line in
the middle of our drawing, the one that's accentuating
the top of the bridge. You want to make sure
that it's connecting to the vertical building
we're working on in a very logical way. You want those lines going
across your drawing or vertically across
your drawing with a windows above each other. The towers that they are
aligning really well. Because if they're not aligning, our buildings will
look kind of skewed. So we can own this building. We're going to draw the windows, but we don't make it very dark. We keep those parts really light as we're at the edge
of the drawing. And we keep those parts
faded a little bit. We let the first layers
of ink dry before trying to add further
details. At this point. If you've just worked on
the building on the right, you need to let it
dry a little bit. If you're worried
about picking up any color with your wrist, if you're resting your
hand on your page, place a piece of paper under your hand as you're working
on this building on the left? I'm holding my brush halfway. So my risks, risks
rests a bit further. There are some banisters that
we create with lines here. The color density of
these windows is low. Some windows are open in
some way, those are closed. We need to continue observing our model and picking
up those details. We might think that it's not
very visible or won't show, but these little gestures
show everything. And notice how the
highlighted lines we didn't touch in the initial, initial tone we placed in the background of the building here that we're working on. They are our guidelines. They remain our guidelines as to where we're going
to put our windows, allowing those horizontal
lines to be balanced and allowing all the windows
to sit correctly next to each other and
on top of each other. Also the highlighted lines
will remain as highlights accentuating that
horizontal perspective. Please feel free
to send me any of your questions that you
might have along the way. Or if you just want
to share your, your drawing, maybe I'm more
than happy to look at them. It's always beautiful to look
at watercolor paintings. We can have a discussion
about them and I can address some concerns or maybe
give you some feedback. Remember to practice and
simply enjoy the process. Enjoy the medium, enjoy playing around with the tools you
have and the colors you have. And practice those techniques. The wet on wet, wet on dry, dry on wet. All these techniques have their own aesthetic
and their own effects and their own use as well. Some of them are better
or more powerful for trees and nature and
these kinds of lines. And others are better for
beautiful cloudy skies and, and textures and clothing. So it's just a matter
of practicing. Look at how little
gestures and dots I'm placing to indicate
the windows here. But they're very important. They make the entire
left half of our drawing look almost
totally complete. Now our windows are completed. We add some details. If we see we've missed some. But we shouldn't add
too many details in some parts because we
don't want to overly darken them and becomes unnecessary and it
creates an imbalance. We have to maintain the
harmony between all the parts. This consistency in the view, it implies the distance. If you make one of
the windows too dark, it'll just look like
it's not sitting right and it's a bit alien in
the middle of the building. So take your time
to view your work. Bring it together. Look at visually
the visual logic. Look at it from the
top to the bottom, from the left to the right. Look at the perspective,
the dimensions. If anything, looks
really out of place. It's just a matter of noting
what could have caused it. Then try it again. Try it again, practice again. Some windows are open so
there's darkness inside them and some are close
so they're a bit lighter. I'm just reflecting
off of my model here. And what I see these arches here can use a little bit
more detail and shadow. This brush here with its thin lines and all
the details we've added. We also use it as a mediator. Let me explain. So it's a mediator
because it's mediating between the watercolor
tonalities you've created and sketched our
drawing with primarily. So we created our pencil
sketch and then we created a watercolor sketch
that had some details. Then we went in with this, with this brush that added
much smaller details. But when you, when you apply it in more lines like
we did under the bridge or in the shadows of the
arches of the windows on the bridge are
different windows. It becomes this mediator
in several lines. It's brings together the
watercolor painting, this brush and ink painting. We continue to add details of the building here on the right. The idea is to look
at any parts of the watercolors and
all the parts of the brush and ink application and see if there's a part
that needs to be harmonized, that needs to be
brought together. So e.g. let's take the water. We have watercolors there. We've also applied our pen, but by creating those
squiggly lines and reflection of the wooden
sticks in the water. We've brought
harmony to our image because two techniques
are together. And they're reflective
of the buildings. And these two techniques and
harmony are everywhere on our drawing and not
simply isolated. The water would have looked separated from the rest of
the drawing if it wasn't for these few squiggly lines at the foreground
of our drawing. At the very bottom. I'm only adding
these details here partially because it's
the end of our drawing. This building looks
very complete. Now we want to add some
lines onto the water here. Just a little more lines. Observed my application. Very light pressure. Horizontal lines,
really lightly. So remember what we said. Mediating. We're bringing harmony to both, both techniques of coloring. We've used a sword brush
with our watercolors. And we're using this
brush to apply our ink, but we're bringing
them together. These are the shadows of the columns and
the windows here. We need to create that balance. Look at how irregular
my lines are. We just add them as necessary and as lightly as we need them. We create texture on the
bridge by hatching like this, vertical lines,
horizontal lines. Go over all the parts. First look with your eyes, go over them visually and
then apply your lines. I'm noticing something
at the top of the building here
that I can add. Our hatchling is
almost complete. We're just making sure we're not missing any last details. Now our work is almost finished. We're going to wet our brush or sword brush and use it directly
on our hatchling parts. If you feel you need to wait for your ink
to dry everywhere, just give it a moment to dry. Pause the video and play
again when you're ready. Now with their sword brush. There is shade here. We wet this part with this
color and we apply it lightly. We can remove it
with a paper tissue. If you've applied
a bit too much, you should be able to see your hatching and
all of your ink. Ink brushstrokes through, through your sword
brush. Coloring. The paper tissue and
picking up color allows you to lighten the color
lifted off the page, but also make your
drawing a bit more clearer if you want to
see more of your ink, ink, paint, paint, gestures. Just keep looking at your image. You want to keep looking
at the whole picture. And we want to keep the texture that we've achieved everywhere. We cover this part
with a little bit of blue because it's different than the rest of
the other parts. On the bridge. We've
applied our yellow ocher, but there's some blue within it. And down here as well. There's a beautiful faded, faded effect by lifting the color off of the
page with the tissue. I want to maintain
that aesthetic. Adding some color into
the windows here. Just to make sure
that my, my ink, ink application has not, is not overpowering
my watercolors. We still want the watercolor
effect to come through. Now, we let it dry and
we keep making edits. We make it better with a dip
brush and add hatcheries. If we feel like the
watercolor effect has overpowered in some places, it's a constant
creation of balance between the two techniques. Remember that
completing an art work can really vary from
one artist to the next. We all perceive our images very differently and
our preferences in terms of aesthetic
and different effects from different mediums. It varies. So I can look at this image and feel it's complete, it's done. I don't have any
more details to add. I've added all the
details that I need. And sometimes you can look at
it and continue to see, Oh, I want more contrast
or more highlights or more of the watercolor technique or the watercolor aesthetic. So it can take some time to complete an
artwork or a drawing. But the idea is to continue
looking at our art work. And to look at it's what
we've achieved so far. I appreciate it for what it is. The different techniques
that you've applied. And the most important thing
is that you've enjoyed it, you've learned
something from it. I'm adding more details here
just because I feel like this part of the bridge
needs to be more complete. And if the final result, if you're not happy
with the final result, just remember that all the
techniques you've used, you can reapply and try again. But take a break. Take a break in the middle. Because we always learn. We always learn from practicing. We at least gain more
confidence with the medium, with the tools that we're using. Now our work is complete. I hope you've enjoyed
all the techniques we've used today. Keep practicing and
looking forward to doing another drawing with
you in the next tutorial.
 Ava Moradi, Art and Design Instructor