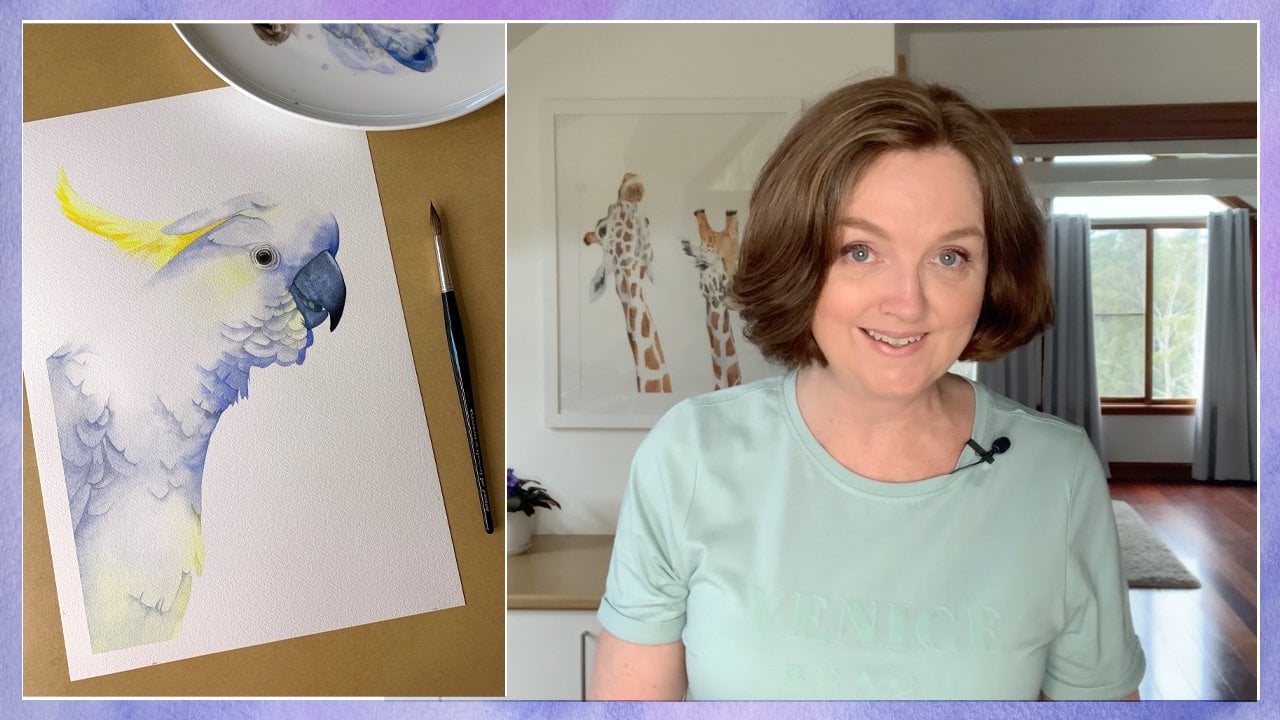
Transcripts
1. Trailer : My name is [inaudible] and I'm a professional artist from Australia. I sell my paintings all around the world by harnessing the power of the internet and social media. My favorite medium to work in is watercolor. No other medium can produce the exciting and beautiful effects that watercolor can. It's a sensitive medium, it is delicate and transparent, and it's perfect for capturing the subtle variations of color and light in nature. Painting full-time allows me to work from home in a beautiful light-filled studio. In this class, I invite you into my studio and you can join me while I paint these beautiful succulent in watercolor. You can watch over my shoulder as I demonstrate how water and pigments interact on the paper. You can learn about some of my favorite paints and painting tools, and I'll show you some of the techniques that I use every day when I'm painting. Painting white on wet is undoubtedly my favorite watercolor painting technique. But I'll show you why using this technique doesn't mean you have to lose control of the paint.I'll provide you with a line drawing and a reference photo of the succulent so you can paint along with me. If you're ready to take your watercolor painting to the next level, then join me while I show you step-by-step how I painted this beautiful succulent in watercolor.
2. Supplies: Hey everyone. Before we begin painting the circular, I'm going to show you all the supplies that I used to complete my painting. Now I don't expect you to go out and buy the exact same colors and the same paintbrushes. I just want to show you what I used and then hopefully you'll have something similar. First are the brushes that I used, this is a Da Vinci Casaneo oval pointed wash brush, this is a series 898 and it's a number 16. It's a flat brush that has a rounded head on it. This is a Da Vinci Squirrel Mop brush. It's a series 418 and it's a number three. This is the one that I used for the painting and you can see that I use it often that the writing is rubbed off the solid. The reason I love using this brush is because of its beautiful point and it holds lots of water and lots of paint. This is a Da Vinci Casaneo brush, It's a series 5598 and it's a number four. I use this brush when the mop brush is too big. This little one is a Da Vinci Nova brush. It series 1570 and it's a number three slash zero. I use these for all the detailed work in the center of this succulent and for the pink edges, any thin fine brush will do for this. This is a Winsor and Newton short flat bright brush. Now it's a stiff flat little brush that's used for painting with oils or acrylics. I use it to remove paint after it's dried to create highlights or fix areas that need to be fixed and now for the paints, I used Sap Green, this is a Winsor and Newton color. It's a beautiful transparent green that I use quite a lot. I used Perylene Green, this is a Daniel Smith color, It's a lovely shade of dark green. I used Phthalo Yellow Green, this is another Daniel Smith color, It's a pretty yellowy-green color. I use Winsor and Newton's Terre Verte, which is a real pretty pale semitransparent blue-green color. This is Windsor and Newton's French Ultramarine blue, which is a beautiful transparent blue that I often use. This one is Daniel Smith's Cobalt Teal Blue. It's a lovely color, but I only use a little bit of it in this painting. I used Windsor and Newton's Payne's gray, this is a semi-opaque color, and this is Hansa Yellow Light, it's a Daniel Smith color but any bright yellow will work okay. This is Daniel Smith's Quinacridone Pink, which is a really vibrant and pretty pink and I used Daniel Smith's Potter's Pink on the stems and this is the last color, this is Windsor and Newton's Burnt Sienna, I don't use a lot of this I'm mainly using on the flower stalks. This is Windsor and Newton's white Gouache, this is an opaque watercolor, I used a little bit of this on the water droplets. This is the little ceramic palette that I like to use. The reason I like to use this one is because the wheels way the paint are sloping. Now I'll talk more about these in the next video. You'll need a water container to wash your brushes in, I use a water spray bottle to wet my paints. I've got a big one and a little one that I use. I always have a box of tissues handy when I'm painting, just in case I need to soap anything up or need to wipe my brush quickly. The paper I used with Arches Hot pressed watercolor paper and this is 640gsm in weight, it's really thick and I didn't need to stretch it. If you use anything lighter in weight than these, then you'll need to stretch your paper. This is Alvin masking tape, it's low tech so it doesn't damage the paper when you remove it. Now, I use these to tape off the edges of the painting so that I get that nice, tidy white inch. I use a hairdryer to speed up the drying time and I use a mechanical pencil. This is a Staedler Mars Micro, it's an HB, but an ordinary HB pencil will do two if you don't have one and I used in a racer as well. To get my drawing onto the paper, I used some tracing paper to trace over my reference photo. Now because the paper is thick, I used to Sharpie to do this so that I could get a nice thick dark line that I could see. Then I put the tracing under my paper and I put them both on a lightbox, then I use my mechanical pencil to trace the drawing onto the paper. Now I demonstrated this in my Sun Conure class. If you're unsure of what to do, I recommend you have a look at that. [ NOISE ]
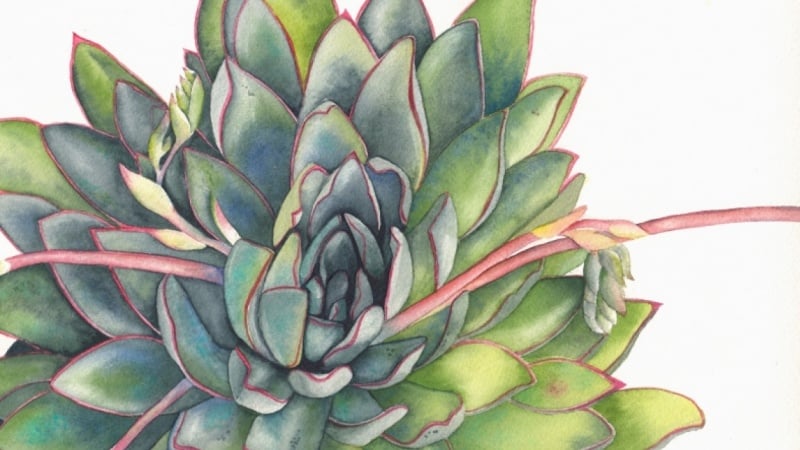
3. First Wash: It's time to get some paint onto a paper. I'll paint the first wash on some of your leaves in this video. I'll also show you how I place my paint on my palate. Now you probably have your own way of doing it which is fine. But if you have trouble with how much water to use or you're not sure what consistency the paints should be, then you might want to take note of what I do. When I started doing this, my paintings improved. As you saw in the Supplies video, I like to use a palette that has sloping wealth. Now if you put your paint at the top of the palate like I do, that means that the paint won't be sitting in the water and it won't get all sticky and gooey. After an hour or so, the paint goes hard, and that's when I like to use it. I can get rich pigment just by wiping my wet brush over the hard paint. If I want watery paint, I can vary the depth of color by mixing more water or more pigment into the watery mix at the bottom of the well. Now, I'm sure by watching me paint and listening to what I say, you'll start to understand what I do. So let's get started. My drawing is on the watercolor paper. I'm almost ready to start painting. Because this succulent is cropped and it touches the edges of the paper, I've taped off the edges with some Alvin drafting tape, so that I'll be left with a nice straight edge when I frame it. The matte will go over the top of the white paper that's left and I won't lose any of my painting behind the matte. I'm drawing in a couple of lines that I didn't see when I trace the drawing on. Now I've just removed the two flower stalks that touch the top of the painting because I decided I didn't need them. Now when I look at my reference photo, I see the leaves around the outer edge of this succulent flower, a yellow look to them. I'm going to paint a wash of yellow over the top of the those. This is head say yellow light that I'm putting on my palate. It's Daniel Smith color. Notice that I put the paint on the highest point of the wheel. That way when I give it a square root of water, the water repaint will separate from the hard pipe. When I'm painting, all have the choice of either using the paint at the top of the palate or I can use the water repaint that's pulled at the bottom. Now I'm going to prime the leaves with some water before I paint them. This stops hard edges from forming and it keeps the paint soft and luminous. This is hence a yellow light and I'm painting it onto the damp paper. Now I've painted these three leaves together as one down the bottom to save some time. Now I've gone ahead and I've painted all those leaves that I thought looked yellow in color. Notice that I've left white-paper showing on the turn backs of the leaves. There's a few leaves over here that look yellowy to me. Okay, so that was easy. That's the first wash down. I've provided this image as a download for you so that you could see which leaves to paint in yellow. It's called initial yellow wash.
4. Second Wash: It's time to get some green onto the leaves or put some paint onto five different leaves in this video. I'll show you how wet my paper is. I tend to paint fairy with all the way through my paintings. It helps to keep the edges soft and my colors vibrant. Because the paint its a little thinner, the paper can still show through and that helps to add to the vibrancy. I'm putting some phthalo yellow green on my palette. This is a beautiful vibrant green and some sap green and this is a color that I use quite often. Before I go any further, I'm going to reduce the darkness of some of the pencil lines, so I'm rubbing over them with my eraser. Here's the reference photo of the succulent. In this video, you'll see me working on this group of leaves here. I'm going to paint the leaves darker on the top side with the edge of the leaf above, touches the leaf below. When I drop in my darker paint, or place it on those top edges and I'll let it bleed softly across the leaf. I'm going to work on one leaf at a time. I'm carefully wetting the first leaf with some water. I want to show you the amount of water that I have on the paper. The paper is wet, but the water is soaked in a tiny little limb, there's still a shine on top of the surface. I've just painted that first leaf and on the second leaf I've painted a wash of the phthalo yellow green. Here is the degree of wetness of the paper again for you, you can see that it's quite wet. Now, I'm painting on some of this sap green. The turn back of the leaf has no water on it. That's what is keeping the paint contained into each leaf shape and here it is from above. The phthalo yellow green wash is still wet while I apply the sap green on top of it. I'm painting this sap green onto one side of the leaf. I run it carefully around the perimeter so I get those nice tidy edges. The water has spread the sap green further than I want it to, so I'm pushing it back with my clean brush. I'm drawing in a guideline for myself here, I don't want to take the paint right to the edge. This time I'm not going to wet the leaf first. The area is small, I'm just going to use watery paint on it and this is phthalo yellow green. Now, I'm painting the sap green onto the wet paint. I'm trying to keep that darker paint along the inner edge of the leaf. I've just watched some of the lighter yellow or green over that fat leaf. You can see the difference in the amount of water on the paper. This leaf has absorbed most of the water, but it's still damp. Now, I can drop some more sap green onto it to deepen the color a little. Here's the top view of it, I'm deepening the color. Now, I've just got water on my brush and I'm softening the edge of the sap green. Now, back onto this fat leaf, I'm dropping on some sap green and the moisture on the paper moves the pigment. Now, I've picked the sap green up from the top of the palette where there's lots of pigment. I'm putting some of the sap green on the tip of this one is well. This one has a layer of the phthalo yellow green. It's still wet as you can see, so now I can drop in the sap green again. This leaf that's tucked in here is only small, so I'm using the watery paint on the dry paper here. Before this color dries, I'll drop in some of these sap green again. These are the leaves that I've just worked on, 1, 2, 3, 4, and 5.
5. Turn-backs and Deepening Colour: I'll pop a few more colors on my palette in this video. One color I want to tell you about is called Terre Verte, but I'm not sure if I'm pronouncing the name correctly. It spelled T-E-R-R-E V-E-R-T-E. I'm calling it Terre Verte. I'll probably mispronounce it all the way through the class. It's a really soft blue, gray, green color and it's very pretty. Now, I'm going to work on the leaves from the previous video and I'll add a few more. Now, I don't know how to say this color. I'm going to say Terre Verte on my palette. This is how you spell it. It's a pale, blue-green color. I find it to be a little bit oily. I make sure I mix it well with the water. Now, I'm using that color to paint on the turn back of the leaf. You can see how large in value this color is. I'm painting on dry paper here, and I'm using the watery paint that I just mixed. I've gone ahead and I've used that color for the edges of the other leaves. Then before I paint this one, I want to tidy up that edge. I'll rub it lightly with my wet bristle brush and that cleans it up for me. I've switched brushes here. I'm using my Nova branch so that I have more control of where the paint goes. Two more colors for my palette. Now, this is perylene green. It's a rich, dark, green color and this is French ultramarine blue. A square root of water fridge and I'll make some pigment into the water. I've drawn off the painting with my hairdryer, and now I'm going to deepen the color further. I'm wetting this leaf here with water and this is perylene green that I picked up from the top of the palette. You can see that my pipe is quite wet. If you aren't comfortable working on wet paper like this, just wait a few more minutes and let the water soak in a little more. Now, I'm dropping in some of the watery French ultramarine blue. I'm going to work on this section just here. I can see on the leaf that there's a slight shadow cast by the flower head. We'll wet that area with some water to keep my edges soft. Then I drop in some of the perylene green. You can see that the water keeps those edges soft, and this is some French ultramarine blue. I'm deepening the color of this one here with some perylene green. I'm using my fine brush so that I can get into the nooks and crannies and I'm using the watery paint. Here is the reference photo for you so you can see what leaf I'm painting. Now, I'm dropping some more pigment to darken up further. Down the bottom here, I'm using water [inaudible] green. I've damped in the paper slowly with some water because I want soft edges and on deepening the color of the leaf. But I'm not taking it right to the tip of the leaf, and exactly the same thing on this one. This one is getting another wash of the Terre Verte over the top. The paper is dry here. Unroll its width. I've picked up some more paint and this time from the top of the palette and I'm deepening the color on the left side there. Now, I'm using the Terre Verte to paint along the edges of some of the others. I'm painting on dry paper here.
6. Unifying Leaves & Starting Edges: In this video, you'll see me with my large flat wash brush. What I do is, I wash over all the leaves gently with some plain water, and that leaves some of the pigment, and it redistributes across the area that I've wet. It helps to unify the leaves so that they're part of the whole plant, rather than looking like a jigsaw puzzled leaves, little tiny pieces, piece by piece. You need to make sure that the paintings really dry before you do it though. I also start to paint a few of the pink edges. I've just wet the tip of this leaf with some water, and now I'm dropping in some perylene green. I want to make the tip of the leaf a little bit darker, just like I did on this one here. Now, I'm going to do the same thing here at the base of the leaf. I wet it first, and then I dropped the paint onto the wet paper, and the water keeps the edges soft. I repeat this again down on these bottom leaves. I'm taking it carefully along the edge where one leaf touches the other, and I'm deepening the color further here. This is perylene green that I'm using. I've just placed some cobalt teal blue on my palette. I've just used it on this leaf up here. Now, I'm going to paint down to this leaf. I wet the paper first, and then I drop some of the watery paint on randomly. The same on this one. Now, I'm going to dry it off with my hair dryer because I need it to be dry for what I'm about to do. I'm using my Casaneo oval pointed wash brush to gently apply some clean water over the top of the leaves. This leaves a small amount of the pigment and it helps to soften the edges and make the leaves look like a whole plant, rather than individual leaves. I guess it helps to unify the subject. Make sure your painting is dry before you do this, and press really gently with your brush. You don't have to do this. It's something I like to do if I've been painting a subject that has lots of individual elements, like the petals of a flower. If you are going to do it, your painting must be thoroughly dry, and the keywords are, do it gently. I'm putting some quinacridone pink on my palette. I'll use this pink for the edges. Use your fine brush for doing this line of work. I'm running the watery paint along the edge where I see the pink on the reference photo. Now, I'm coming back with some more pigment to darken the color. The paper is dry for this. My best advice for the edges is to paint the pink in a light color first to establish with the edges, and then when you are happy with the way you've placed it, come back with more pigment on your brush. In other words, use the water repaint first, and then when you're happy with the placement, run your wet brush through the hard paint at the top to pick up that darker color. Notice on the reference photo the color of the pink varies. It's not dark everywhere. The edges are a combination of dark pink and light pink, so I'm making sure that I show that difference in color on my painting. I'm putting some water on this leaf here because I want to drop a few little drops of pink onto it. I can see a little marking there on that leaf in the reference photo, and I want to add it onto my painting. I'm going to keep going with these edges, and I'll see you in the next video.
7. The Centre - Stage 1: I start the detail in the center of this document for this video. It's a little time-consuming because it's so detailed in the center. I've got to keep looking at the reference photo to make sure I get it right. In some places, I start off lighting value just to get my bearings. Then when I'm happy with where I've placed everything, I come back with some darker paint. I'm painting in a few of the 10 backs with some of the terre verte. I'm using the watery paint on dry paper. I've mixed a fair amount of the pigment in with the water because this is such a light color. This is Paynes gray that I'm putting in my palette. I'll use this to paint all the dark shadows in the center of the succulent. I've gone ahead and I've painted a wash of the terre verte over the top of the center of the succulent. It's dry now and I'm ready to start separating all those leaves from one another and to start adding detail. The first thing I'm going to do is paint this dark shadow in at the top here. I'm using my fine brush and this is Paynes gray. I'm using the watery paint and I'm painting in on dry paper. I've got lots of pigment mixed into the water to make it nice and dark. I'm just painting that shape that I see on the reference photo. Moving down he now, I'm painting in that dark shape that I see there. I've mixed a little more water into the watery Paynes gray mix, because I'm a little unsure of myself at the moment. I want to make sure I get the shape right before I deepen the color. I'm still painting on dry paper here. I keep glancing at the reference photo as I paint. I've still got the color light in value. I'll deepen it as soon as I'm happy with where I've placed all the shadows. I keep it light in color in case I have to remove it. I know I can either dab it off with a tissue or I could let it dry and use my bristle brush to rub it off. If it was darker in value, that would be much more difficult. This is cobalt teal blue. I'm using it to paint that pretty blue hue that I see on the reference photo. It also helps to create color harmony in the painting. I used this color on the leaves I painted earlier. It's good to repeat it elsewhere on the painting. Now I've got some of the terre verte on my brush and I'm darkening the front half of the leaf. I've just dropped some water in to help blend the two colors together. I did the same thing on this leaf here. I painted the cobalt teal blue at the back, and I painted the terre verte at the front, and I dropped in a tiny bit of water. I'm painting some watery terre verte onto the dry paper here just to darken it slowly. Now I'm using perylene green to paint that shape that I see on the right side of the leaf. Now I have a small amount of water on my brush and I'm softening the edge of the paint. This is fairly dark, so I've picked the paint out from the top of my palette with my wet brush. I'm painting in the darkest area on the left side of the leaf. Now I soften it with water. This is some more cobalt teal blue to deepen the color slightly. I'm softening the edge here with some water. This is perylene green again. This is watery perylene green that I'm painting in the moment, I've really watered it down. I'm painting in that shadow that I can see on the front leaf there. I'm still using the perylene green, but I've deepened the color by mixing in some more pigment. Now I'm comfortable with where I have everything placed, so I'm ready to increase the color of the Paynes gray. I've wiped my wet brush up near the top of the palette and I've picked up some really dark pigment. I'm keeping an eye on the reference photo as I paint. I'm using my fine brush here because I want really good control of where I put the paint. It's a bit of a pain because I've got to keep reloading my brush. But I really do want that control. Now I'm painting that dark shadow area at the front. This is Payne's gray, I've mixed it with some water, but there's lots of pigment to keep the color dark. The paper is dry. I'll leave it there and I'll continue in the next video.
8. The Centre - Stage 2 : I continue with the center of the succulent in this video. The paper tends to suck the pigment in, so I have to repeat the process in order to get the depth of color that I made. You can see by the end of the video that I've built the color up until it's quite dark in those center shadows. I'm continuing on with the center of the succulent. I've just painted some terravate just to deepen the color a little on this leaf, I've dried it, and now I'm deepening the Payne's gray area. I soften the edge of the Payne's gray with a little water. Now I'm adding the terravate again over the top. I dried it off and as you know the paint always dries lighter than it appears when it's wet so I'm repeating the process. Payne's gray first, some water to soften and now some terravate. A little more Payne's gray onto wet paper here and now softening and blending with only a damp brush. Now I'm pushing the wet pine up over the edge of the leaf to push it back into the center. I've only got water on my brush. A little line of Payne's gray here. I soften the edge with water. I'm deepening the shadows here with some Payne's gray. Just as with painting in other mediums, watercolor requires you to layer the paint. Some areas of the painting only have one or two layers of paint, and other areas require a lot more. This beautiful rich dark color really helps to define the edges of the leaves and it creates contrast in the painting, which is an important element of design. I'm painting some watery periling green onto this leaf, the paper is dry and now I'm softening the edge with water. While it's wet, I can deepen the shadow at the base with some Payne's gray. I have just painted some terravate onto this leaf and while it's wet I paint some periling green to darken this bottom edge. Now there is just water on my brush and I'm pulling the color away from the edge to soften it. A little more watery periling green over here. I'm drying it off with the hairdryer really well. I'm using clean water here just as I did earlier in the painting. I'm using a very soft touch when I do this. Remember that this leaves a small amount of the pigments so be very careful. It helps to soften the edges and it makes the leaves look like a whole plant rather than individual leaves painted separately. If you're going to do it do it carefully.
9. Continuing on - Outer Leaves: Continuing on with the larger leaves, I add some more color and detail, and I paint some of the little shadows that are on the turned back part of the leaves, is these parts here. I'm darkening the inside of this leaf with some Sap green. I've dampen the paper first so that I don't get any hard edge forming. This is Perylene green, I'm painting it onto the wet paper so that my edges will stay soft. This is watery Perylene green here on this leaf, I'm deepening the color on it. This is Perylene green again, but this time I've got more pigment. I picked the paint up from the top of the palette. I'm using my fine brush now to tidy up the edges. I want the color darker at the base of the leaf. Now I'm dropping in some French Ultramarine Blue straight onto the wet paper down at the base of the leaf. Okay, some Terre verte onto the side of the turn back and a little more on this one as well. I'm softening the edge here with just water on my brush. I am painting a wash of Sap green over the top of this leaf, and this is Sap Green too. I've dampen the paper here before I started to paint the Sap Green. Back onto this one now, the paint has dried and I'm using a wet brush to remove some paint along the edge of the leaf, and the tissue takes off the wet paint. The same on this one here now that it's dry. I've just painted Perylene green onto this leaf, I allowed it to dry slightly and now I'm dropping in some French ultramarine blue. This is a little Cobalt teal blue. I'm taking off a little bit of the paint here while its still wet to see if I can highlight those edges. This is Perylene green with my fine brush. The paper is wet and I am defining the edge and creating a little shadow at the same time. I've painted some Terre verte here and now I'm softening the edge. I'm doing the same thing here, but here's a different angle for you. This is Terre verte on slightly damp paper, and now I'm pulling the paint across with just water on my brush. Okay, so I'll leave it there and we'll continue on in the next video.
10. Top Right Leaves: I'll work on that top section of the succulent now. There's more working wet on wet, where I drop different colors onto the wet paint, and I let them merge softly together on the paper. Before I work on the top right section of the succulent, I'm going to put a wash [inaudible] on this section of leaves here. I'm going to work on this top section of leaves now, where I've painted the yellow wonder wash earlier. I wet the paper with some water because I want the paint to go on smoothly and easily with no hard edges. You can see how much water I have on my paper here, it's not sopping wet, but the surface of the paper still has a shine on it. I'm going to use this sap green. It's gone hard, which for me it's the best time to use because I can just wipe my wet brush over the hard paint, and then I paint it onto the dry paper. I don't have to rush because another water on the paper will stop it from drying too quickly. It gives me an even coverage of paint. Now while that paint is wet, I drop in some of the parylene green onto this side that looks darker to me in the reference photo. I let the moisture on the paper mix the pigment. Now I'm dropping in some French ultramarine blue. I've just painted some sap green onto this leaf, and this leaf here is almost dry. I'm going to drop some water on it to create a bloom. You need to wait until the paper is almost dry, not completely dry in order for it to work. I'm painting some of the parylene green onto the top side of this leaf, it's still wet from before. Now I'm pushing some of the paint away from this larger side. It's spread too far across the leaf, so I'm sopping some of it up. There's a little section of the solid that I need to paint. I've just painted a wash of parylene green over this leaf, and now I'm dropping in some French ultramarine blue. I'm wetting this leaf with a little water, and I'm dropping in some French ultramarine blue. This side on this one. I've just painted this one in sap green, and I've dropped some French ultramarine blue onto the wet paint. I'm wetting this one here with water, and this is parylene green. A little deeper in color now. I've wet along the edge where one leaf touches the other, and this is parylene green again. I'm painting in that shadow that I see on the reference photo. Now I've washed my brush and it's damp with a little water. I use the brush to soften that edge of the dark green paint I'm dropping in some French ultramarine blue, and this is parylene green again. I'm painting on damp paper, and now the French ultramarine blue again. Because the paper is damp, the colors will merge softly together. Sometimes I find I haven't got enough water on the paper, so I just drop in a little bit extra and that helps me blend the colors together. I'm drawing it off now. A little part of it has gone up onto the turn back and I don't want it, so I'm using a tissue to try and contain it. Now I have water on my brush and I'm softening the top edge of that paint again. Okay, we'll continue on in the next video.
11. Removing Highlights, Softening Edges & Blending : I go back to the outer part of the center of the succulent and I add some more detail there in this video. I rub some pigment off in places with my bristle brush and then I paint a couple of leaves in the top center part of the succulent. I have got my fine brush here and I'm using paint gray to paint in the dark areas I see between the leaves. I'm using watery paint on dry paper. Even though the paint is watery, I've got lots of pigment mixed in with it to make it quite dark. Now I just have water on my brush and I'm softening the edge of the paint. I did the same thing up here with the edge of the paint, I wash the paint out of my brush first and I just use water to soften the edge. The paint is still wet and I'm pushing it up over the bottom edge of the leaf. I'm using my bristle brush here to remove some paint. I have just got water on the brush. Now I'm rubbing a little bit off the top of this one as well. I'm wetting this leaf with water. You can see how much water I have on the paper here. Now I'm painting some watery heads to yellow light along the right edge of the leaf. I dry it off with my hairdryer and now I'm re-wetting the paper with some more water but this time I'm going to keep that edge where the yellow is dry. This is paralleling green and I'm basically just painting it onto the damp paper trying to avoid that yellow strip of paint that I just painted. I want the edge where the yellow meets the darker green to be soft. Now I have to have a very tie on my brush and I'm blending it with the paralleling green. Just to soften that hard edge, I use a wet brush. It is still wet but I think that the dark green area needs to be darker, so this is some more of the paralleling green. Now I'm running my wet brush down the edge where yellow meets the green. I'm trying to keep that edge soft. I'm putting some more yellow paint on this side to brighten it up. I take that wet paint down between the leaves to define the edges. A little bit more of the paralleling green again. I wet this one, I paint with some water and this is paralleling green again.
12. Colour Deepening, Detail Adding & more Colour Blending: There's more colored deepening, more edge softening, more detail, adding more wet on wet work and more color blending in this video. I've wet the leaf here and I'm using some of the paralleling green paint. I'm deepening the color on the leaf. Got some of the cobalt teal blue on my brush now. I'm carefully painting over the edge of the area of paint that I removed earlier. A tiny bit of paralleling green here onto the tip of this leaf. I'm painting on dry paper. There's a tiny little area of leaf here that I want to show. I'm removing some of that darker paint with some water. I'm using paralleling green to paint between the leaves to define them from one another. I'm working on dry paper here. Now I've switched to my bigger brush and I'm softening the edge with some water. Now that there's a bit of water on the paper. I can add a little more of the green paint. This is fellow yellow, green on damp paper. I'm wetting the leaf here with water. I dropped in some of the fellow yellow green. This is terry verity on this other side and a little bit of cobalt teal blue, while the surface is still wet. Fellow yellow green again up here. Now I'm using watery french ultramarine blue. I'm keeping the colors very soft. There's lots of water mixed into my paint. I wet this leaf with water and I'm painting on some watery french ultramarine blue. I've just finished painting on some of the fellow yellow green on the right edge there. I wet this leaf with water. This is paralleling green. It's quite dark. What I've done is wet brush through the hard paint at the top of the palate. A carefully preserved the lighter edge along that leaf that sits in front of this one. Now I just have water on my brush with just a hint of the paralleling green left on it. While it's still wet I drop in some of the fellow yellow green paint. In the next video, I'll begin painting the flower stalk on the right side of the succulent.
13. Flowers Stalks: I painted this painting last year. The succulent had all this little flower stalks coming out every which way. I've since cut them all off. So I haven't got them to show you. We'll just have to rely on the reference photo. This is a Daniel Smith paint that I'm using. It's called Potters Pink. I'm going to add it to my palette. I'm using it to paint the flower stalk. I've dampen this stalk with some water so that the paint will go down smoothly onto the paper. I'll paint one stock at a time. The pink paint is still wet and this is thellow yellow green that I'm painting at the bottom here. I dampen the stalk in sections so that it doesn't dry before I get to it. My ceramic palette is full, so I'm using this little plastic palette for some burnt sienna. I use the burnt sienna to paint along the top edge of the stalk. The pink paint is still wet. If it's drying to quickly dry it off with a hairdryer and then re-wet it before you apply the burnt sienna. I've just put some more Potters Pink onto the stalk and am softening the edge of the burnt sienna. More burnt sienna now onto the wet paint. This time with my fine brush. This is some quinacridone pink that I'm dropping to blend in with the burnt sienna. I've wet the top of the stalk here, and I run some burnt sienna along the edge. I keep the darkest color near the flower head and I let it fight away softly towards the edge of the paper. Now some more potters pink along the bottom edge. This is French ultramarine blue, and I'm painting it onto the wet paint. I've dried this stalk off with the hairdryer. Now I'm rubbing the surface with my wet bristle brush to create that highlight. I also did that on the bottom half of this stalk. So I've just wet this top stalk and I've applied some Potters Pink. Now I'm painting some Trevertine to the base of it. I'm increasing the color with a tiny bit of perylene green. I'm coming with my fine brush to get into those nooks and crannies. Some more Potters Pink here. The paper is dry because the area is quite small and I can paint it fairly quickly. The stalk I'm working on at the moment is damp. This is quinacridone pink. The other two stalks beside this one or dry. I'm deepening the pot is pink here. I'm working on dry paper, this is a tiny bit of thellow yellow green. I've wet this area here and I'm painting some Potters Pink onto the damp paper, softening the edge with water nail. A touch of [inaudible] yellow light here. I reserve the white of the paper. I'm dampening this little section here with water. This is [inaudible] yellow light again. A tiny bit of quinacridone pink to blend with the yellow pied. The paper is dry here. I'm just increasing the color along that edge with some quinacridone pink. Okay, I'll leave it there and I'll paint the flower head in the next video.
14. First Flower head: In this video, I paint the flower heads on this side of the succulent. It's really not that difficult as long as you remember to keep the pine on the left side of each little petal. I use my little NOVA brush for this, so that I can get into all the nooks and crannies. Now I'm going to paint this little flower head on this succulent. I start by painting this little section here with water. This is Tera Verte. I'm keeping it on the left side. This is a touch of cobalt teal blue, dropped onto the wet paint. I'll do the same thing down here. I've wet it first, and I've painted some Tera Verte into the damp paper, keeping it to the left side of the shape. Some more Tera Verte up here, but the paper is dry. This is some watery, burnt sienna. I dampen the paper a little here first. I'm trying to keep the color on the left hand side of each little shape. This is pthalo yellow green here. Now I'm softening the edge with water on my brush. Back into the Tera Verte here, on damp paper. Now a little more pigment to darken it. Tera Verte again up here, and Pthalo yellow green on damp paper here. Some Tera Verte to blend further down. Now I'm using watery, hence a yellow light. And on leaving the white of the paper showing where I see it on the reference photo. Tera Verte again here on dry paper, and some pthalo yellow green again. Now I'm using sap green to deepen the color, and I'm painting on dry paper here. I'm using the sap green to deepen the color along the edge there. Some part is pink on the tips. I'm painting on dry paper for all of these little tips. Now I'm defining some edges with my pencil. This helps to lift the flower from the background a little. I'm using sap green again here to try and define that little pink stem there. Some Tera Verte up on the top here. Now I'm brightening the yellow with some more pigment. I've just painted some Tera Verte onto this petal here, just to bring that color across further. I'm increasing the green here, this is pthalo yellow green. The whole time I'm painting, I'm trying to make sense of these flower head. Some watery yellow heat at that color I see on the reference photo. Up the top here, I'm painting some Payne's gray. Now I know it's not this dark on the reference photo, but I want to be able to see it on my painting. I'm using quinacridone pink here, and I've got a fair amount of pigment on my brush. Some sap green here. I'm softening the edge of the plant with some water now. I'm brightening up this leaf here with some watery, pthalo yellow green, and also in here on the edge of these leaves. I'll continue on in the next video.
15. Lower Leaves: I create a shadow on the leaves under the flower head and I make sure that the paper is wet because I want soft edges for the shadow. I redo one of the leaves because I wasn't happy with the way the paint has dried, and I zoom in nice and close for you so you can see what I'm doing. We get to almost halfway through the succulent in this video. There's a bit of a shadow on the leaf near flower head. So I'm going to paint that in now. I'm wetting the pipeline with water because I want the shadow edge to be soft. This is paralleling green. I take it right up to the edge of the flower head. Now, I just have water on my brush and I'm softening the edge. I do the same thing on this leaf. There is a shadow there already, but I wanted to open the color a little bit. I run my paint pressure along the edge of the flower to tidy up the edge here. So I've just painted this area of leaves interior verti, and while I draw, I'm going to work on these lower leaves. I'm waiting this one with water because I want to put a lovely soft water over the top. This is tallow yellow green. On this side, I have tara-verti. The water on the paper will blend the two colors together softly. Some water on this one, and this is tara-verti again. Now, got lots of pigment on my brush. So what I did was on warped my brush through the hub paint at the top of the pellet. I'll leave that one in the middle because if I went at now the color from the one on the right will running to it. Tara-verti again on here, and a little bit of tera yellow, green into the [inaudible]. While I let those two dry, I head on up to a leaf that needs attention onto the flower stalk. This is sap green, and I'm painting it on dry paper. Now, I just have water on my brush and I'm softening the edge of the paint. I'm painting on dry paper with the watery sap green. So here is the succulent zoomed out, so you can see how far we've come. I'm not happy with the way the paint is drawn on this leaf. So I'm going to paint over it. I'm applying some water over the top of the dried paint. I'm carefully covering the surface of the leaf, and now, I'm painting some paralleling green onto the left side. On the right side, a little more of the tera yellow green. From above, that's what it looks like now. I'm tidying the head job, and this one needs some more tara-verti a on the left side. I'm painting on dry paper here, and a little more on this right side too. This is watery tara-verti and dry paper. This one, needs to be deep in color. This is paralleling green again. Now, I'm softening the paint with the water on my brush.
16. Lower Leaves - Stage 2: I'm working on the chunky leaves in the center bottom part of the painting. I work on both wet and dry paper in this video. Sometimes when you're working on dry paper, you might apply the paint too dark and then it ends up looking flat when it dries because you can't see the paper through it. Now I do that on an area down the bottom here, but you'll get to see how I correct that. This leaf here has a strip of a darker green down the right side of it, I'm going to try and paint that in now. I'm wetting this surface with water so that my paint is going to remain soft and blurry. This is terre verte. I'm just increasing the color over the last wash that I did. Now I'm trying to bring in that darker strip of green that I see. This is perylene green. I've got a little bit too much paint on my brush, so I just wiped some of it off. Now I'm moving the paint where I wanted. This is cobalt two blue that I'm dropping in. I'm going to let that one dry, and I'll point this one over here. This is terre verte again. I'm painting a little strip of the fellow yellow green down the right side of the leaf. The two colors will blend softly together because of the moisture on the paper. I'm painting in the little shadow I see on the left side of the tone back. This is terre verte on dry paper. I'll leave a little strip unpainted because that's where the pink edge will sit later, and I'll do the same thing on this one. This is a little bit of the terre verte. The paper is still slightly damp from before. I'm just trying to paint in that little shadow that I see there. I'm painting on dry paper here and this is sep green. Dry paper here too. This is perylene green, the leaf next to it is dry. I've switched to a smaller brush so that I can tidy up the edges. Now to keep the paint transparent, I'm running a wet brush down the surface, just to take off a little bit of that dark pigment. That way I can see the paper again showing through. I'm painting on dry paper here, this is watery perylene green. Now I just have water on my brush. This is watery perylene green here, and I'm deepening the color slightly.
17. Deepening Colour - Tidying Edges: I'm deepening colors again, I soften edges, and I use my little nova brush to define the edges of the leaves. I think we probably make it about two-thirds of the way through the painting on this video. In this video I'm going to work on this section here. I'll deepen colors and I'll be tidying up some edges. Now, I'll start with this little fat leaf here. I'm applying some water to the surface because I want to deepen the color on it, but I won't be edges to be nice and soft. This is trevorite. Now, wipe to my weight brush through the hard paint and I'm implying it on the left side of the leaf. While that paint is wet, I've picked up some cobalt teal blue and I'm mixing it in just to pretty up the color slightly. I've just wet this leaf with water, and this is hence a yellow light. I'm applying it to the right edge of the leaf. This is trevorite. Now, my edges is soft because of the water on the paper. This is cobalt tail blue again. I'm deepening the color inside this one with some trevorite, I'm painting on dry paper here, because there are no painted just for me to worry about. Now, when that paint is wet or use some paralleling green to deepen the color on the right hand side. This is the leaf I'm working on, and here's the darker green area that I can see. The paper is starting to dry, so on putting the color I wanted, and then I can use my damn brush to soften the edges. I'm looking at the reference photo as I paint. Now I use just water to soften the edges of the paint and then I use my fine brush to tidy up all the edges. This is pine's gray and I'm taking some of the pines gray up into the shadow area up here as well. The paper is dry here and the paper is still slightly damp here. I can see on the reference further that this area is dark and then I have it at the moment. I need to bring some of these color over the top of the area that I've painted before. I'm painting some trevorite into this little space here. This is pines gray again here. I'm bringing in the shadows that sit between the leaves. I'm glancing at the reference photo all the time to make sure that I'm putting the paint where I'm supposed to be. This is water repair elaine green here. The trevorite just isn't dark enough. Now, I've got a bit more pigment on my brush, and this is pines gray again here. We've got lots of pigment on my brush. I've wiped my wet brush over the hot paint to get at these dark. I'm keeping my eye on the edges of the leaves as well as the space that on painting, and make sure that the edges of the leaves stay rounded. I'm just walking that color up over the edge of the leaf to keep it soft. On darkening the outside edge of the leaf here with some trevorite. I have a little bit of moisture on the paper, to keep the edges of the pipes soft. I'm giving this one another wash of trevorite to deepen the color of it. Now I'm dropping in some cobalt tail blue. This one here gets another wash of trevorite as well. Okay. That's where up to now. We're getting there. Were probably about two-thirds of the way through now.
18. More Wet on Wet & Wet on Dry: I've gone ahead and I've painted a wash on the rest of the leaves. I work wet-on-wet again, merging parallel in green with Sap Green on one of the leaves. I also work Wet on Dry in this video. Sometimes you can find on dry paper and then if you're quick enough, you can get a wet brush and soften the edge of the pint if you need to. Sometimes, although not in this video, I'll work with toothbrushes in my hand. One has paint on it, and the other one is just loaded with water. You lay the pipe down, and then you use the watery brush to soften the edge. I'm working on the darker side of the succulent now. Some of the colors are quite dark. I'll start by working on this leaf here. It has a green strip down the right side, and the strip of green has a hard edge. I'm painting that stripping with Sap Green. Because the edge of the strip is hard, I'm using watery paint on dry paper. I'm softening the edge just a little bit with some water on my brush. I've gone ahead, and I've painted a wash on the rest of the leaves. These ones here, were all painted in Sap Green, and these ones were painted in Terror Verity. This one here, this one taught in here. These two up here, were all painted in Paralleling Green, and there's one up here that I missed, and this is Terror Verity. I'm wetting this one here with water, and here you can see the water on the paper. Now I'm painting on some Paralleling Green. There's lots of pigment on my brush so I've used the hard paint at the top of the palette, and you can see how the water keeps the paint edges soft. I'm pushing the pigment further up the leaf. As it moves away from where I first applied it, it gets lighter in color. Now I have no paint on my brush. I'm just moving the paint further up the leaf. Now I have Sap Green on my brush. The moisture on the paper merges the two colors together. I use my fine brush to keep my edges neat. This color is defining the back of the leaf in front of this one. I've just worked on this one, and now I'm going to come back to the one that I started with at the beginning of the video. I'm wetting it with some water, and this is some watery French Ultramarine Blue. I'm running it along the top edge of the leaf. Now I only have water on my brush, and I'm softening the color. I'm wetting this front edge again, and this is Paralleling Green. I've deepened into the color, along the front edge. I think it needs some more blue, so I'm dropping some more in. I dab it around to soften the color. I'm painting on dry paper here. This is Paralleling Green again, and a little bit of the Cobalt Teal Blue here. You can see there's a hard edge along the top of that leaf. Now on to the leaf that's next to that one, and this is French Ultramarine Blue on dry Paper. Now I have no paint on my brush, I've only got water on it, and I'm using it to soften the edge. Now I'm deepening the color of the shutter between the two leaves. I'm painting on dry paper here. Now I use my wet brush to soften the color again. I'm wetting along the edge of the turn back, and this is French Ultramarine Blue. By painting this darker blue on the edge, it helps to create the illusion of roundness and make the leaves look rounder. I'm softening the edge here. I have to come back to these shadow area, and increase the color once again. As the paints absorbed into the paper, it dries lighter, so I'm just repeating the process. That's where I was just working, you can see that little dark shadow there. Now there's a soft callus shadow on this leaf. It's been cast by the flower stalk. It's very central, so I'm using very watery Paralleling Green on dry paper. Now I'm wetting this leaf because I want to paint some dark green on it, and on it soft edges, and this is Paralleling Green. I run it down the edge of the leaf in front, to get that nice shape. Then I push the pipe up onto the leaf. The water on the paper keeps those edges softer remember. I'm doing exactly the same thing on this leaf, and now, I'm going to French Ultramarine Blue as well. Again, I Tawny out the edges with my fine brush.
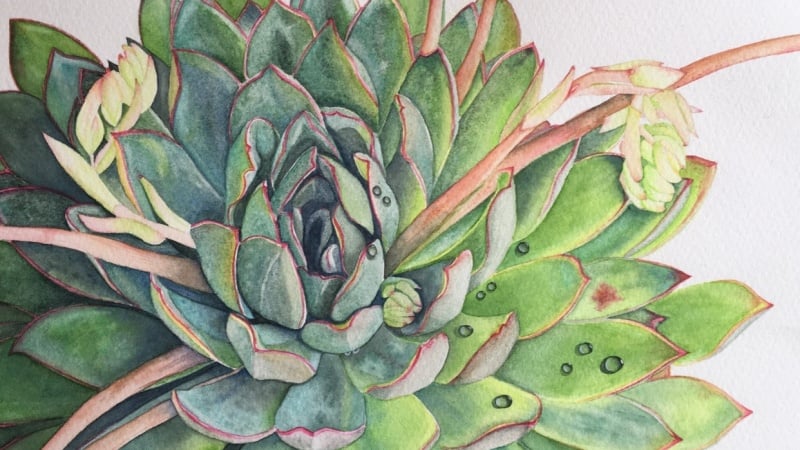
19. Bottom Left Corner: I paint a few of the markings that are on the leaves in this video. I use a tissue wrapped around my finger to soak up some moisture. I drop some different colors onto the wet leaves. I work on the bottom left corner of the painting. I'm working fairly wet because that's the way I work. If you find your paint is going everywhere and you've got no control over it, then you've probably got too much water on the paper. Just wait for it to absorb into the paper some more before you start painting. There are some markings on this leaves that I thought I'd include on the painting. I've just drawn some lines in where I see it. I'm wetting the area with some water. I'm using some shallow Yellow green. I'm dabbing it onto the damp paper. There's a few more little spots elsewhere on the leaf. On this leaf too, I am painting on dry paper on this one. Now I'm painting some of the Fellow Yellow, green down the left side of this little flower stoke thing. I'm painting that shadow that sits underneath. This is perylene green and I'm painting on drawing paper. Now I'm softening the edge of the paint with small width brush. I've wet this leaf at the back with some water. This is perylene green that I'm painting onto the damp paper. I'm pushing the paint back here into the area where I want it with a damp brush. I can sap some of the excess moisture up with a tissue wrapped around my finger. I'll the edge with water and I'm running some of the paint down the edge. The same with this little one. I'll wipe the edge first, and I'm running the paint along the damp page. Again on this one. [inaudible] on this one and some perylene green again in the dark exterior. This is Sap green. The moisture on the paper blends the colors together. I've washed the paint off my brush and I'm softening the edge of that paint again. Some perylene green down the edge of this one. Softening the edge again with some water. The paint has been absorbed into the paper and the colors in as dark as I wanted. I'm going to apply some paint again. This is Ultramarine blue. I'm dabbing it onto the damp paper, just deepening the color on that area. I'm leaving this one with some water too, because I want to put some of the blue here as well. I'm going to deepen the color down here as well. This is Payne's gray. Now I only have water on my brush and I'm taking away that hard edge. Now I'm just going to spin the board around because I don't want my hand in the way of the camera and want you to be able to see what I'm doing. A little bit of water on this one. Now some Sap green. I'm dabbing it onto the width surface. I'll do the same thing with some Cargo tail blue and some Ultramarine blue down at the base here. This one needs another wash over the top because the color isn't deep enough. This is Sap green again. It makes a nice even wash over the top. The water helps to keep that nice and even. Now some Ultramarine blue dropped onto the whitewash. Some more Cobalt Teal blue as well. I'm deepening this strip of perylene green with some more paint. A little bit of water on this leaf so that I can paint of perylene green on there without having any hard edges in the pipe filming. This is Sap green. The two colors will blend softly together with a mate because of the moisture on the paper. Now some more perylene green onto the dark exterior. Just to deepen it further. I'm painting this little leaf here on dry paper. This one made some water on it because I need to put some perylene green on the edge where it touches the other leaf. There's just water on my brush now. I'm tidying up and softening the edge of the paint. I've just painted it on some perylene green onto this leaf. Now I'm softening the edge with some water.
20. Working with Dark Colours: We're headed into the harm strike now, I've been working on the succulent for three days in a row now and I'm anxious to get it finished. I'm still working with dark colors, but I've got some moisture on the paper because if I have a docking value, I don't want them to look flat and dull on the paper. I'm painting another wash with sap green over the top of this leaf to boost the color of it. My painting board is turned sideways. While the paint is wet, I add the dark area with some paralleling green. I just have water on my brush at the moment because I'm trying to keep the top half of the leaf lottery in color. I have wet this leaf with some water, and I'm using paralleling green on the dark area of the leaf. I've taken it up the leaf a little further now. Now with just a damn brush on painting a small amount of water back onto the leaf to soften this top edge. Here is a look at where I'm up to, I'm on the home strike now, this is day three on this painting. I'm at the point where I'm eager to finish on painting in the other sign of this leaf in terre verte. Now I'm painting paralleling green onto this leaf tucked away in the back. I'm painting on dry paper here, and I leave a little gap of white paper around the edge of the leaf in front so that I can paint on the pink edge later. A little bit of paralleling green on this leaf that's tucked in here, and I continue the color up onto the rest of the leaf. I've switched to my smaller brush again, and this is Payne's gray in this little area here. This side of the succulent is darker in color value than the right side of this succulent. I'm using on my dark colors over on this side. A little bit of water on this leaf here, and now I'm painting paralleling green onto the damp paper. Now I'm softening the edge of the plate with a damp brush. I'm moving the paint where I want it, I haven't picked up anymore paint, there's only water on my brush at the moment. The paint's a little darky now, so I've watched my width brush through the paint at the top of the palate and some ultramarine blue now onto the wet paint. The same thing on this side of the flower stalk with paralleling green, and now I use my small brush to tidy up the edges and make sure that the leaf in front has a nice shape. I need to make sure that the edges line up with the flower stalk, dissects them. This little one up here need some paralleling green on it to darken it up. I'm painting on damp paper here, and now some ultramarine blue again. I've just painted paralleling green all over this leaf, and you can see that the paper is damp and some more paralleling green on this one beside it, but the paint is much more diluted now, so it's not as dark. Now I have a little more pigment on my brush and I'm darkening that front edge. The paint is soaked into the paper here and it needs another wash over the top to darken it. I'm using my smaller brush so that I can control whether pinker's better.
21. Second Flower Head & Flower Stalks: I work on the flower on the left side of this ocumen in this video, and I've paint the other flower stalks that you see. I start painting this little flower here with fellow yellow green. I've dampened the paper, and now I'm painting down the left side of the, I don't really know what to call it, so I'll call it a petal. I'm painting down the left side of the petal. Now, I've washed my brush and I'm using water to move the plaint over the rest of the petal. It's still damp. Now, I'm using quinacridone pink to paint the pink tip. This is a little bit of perylene green. I do the same thing with these petal here. I've skipped to petal because I want the first one to dry. The colors will run into one another. Then the same on this little one here. I wet it first with water and then I use the fellow yellow green down the left side. This is sap green on this outside petal. It's very watery. The bulk of the color is painted down at the base. This is some of the pink dropped onto the damp paper, and brushed down the sides a little. Some watery pink at the base here. Now, I start to paint the petals that I've skipped. There's some little spaces in-between the petals, I'm using perylene green to fill them in. This space here is sap green and I'm painting onto the dry paper. Now, a little perylene green to darken it. This area here needs to be darker, so I'm using perylene green over the top of the base wash. The paper is dry here. I'm using watery paint with lots of pigment in it. Now I'm taking a little bit of it off with a tissue just to lighten the bottom part of the shape. Some sap green up here, the base of the petals, and just around the edges to paint a tinny little shiner. Some extra water to soften the edge. Quinacridone pink tips, again, just onto the dry paper. Here I've put a little bit of water onto the paper first. Some perylene green here to paint on the tip of this leaf that's missing. Now, I'm using my pencil to lightly define and tidy up some of the edges. This is perylene green here to darken this leaf. Now, I've washed the water out of my brush and I move the paint down further. That keeps it darker at the top where I wanted. A tiny bit of watery ultramarine blue to paint a little shadow, and some here too. That pushes the flower stem behind the edge of the stalk where it needs to be. This stem over here is Paris pink. I'm using watery paint on dry paper and some watery hansa yellow light up here. While the paint is wet, I run some quinacridone pink down the bottom edge. I am darkening the bottom edge slightly with some more Paris pink. This is hansa yellow light again. Some more quinacridone pink here. I dropped the pink onto this one while it's still wet. It's time to draw it off now with my hand draw. Some Paris pink on this stem too. I've dampened it first with a little water just so the paint goes on smoothly with no hard edges forming. I'm using my smaller brush now, and I've walked through the paint at the top of the pallet. This is quinacridone pink. My paper is damp here. I'm trying to make this stem look round rather than flat. This is hansa yellow light. Now, I have washed my brush, and I'm moving the point where I want it. A little bit of ultramarine blue now onto the damp paper. This is sap green. I've damped the paper here first, and I leave the white of the paper showing. I've just painted both of these stokes down here with potters pink. Now, I'm using the quinacridone pink to run along the side just as I did before, and some blue again. Same on this one. The paper is too dry, so I'm re-wetting it with some water, and a few spots of sap green onto the damp paper now. Some ultramarine blue at the base again. A little bit more of the ultramarine blue now. Here too, the paper is still damp. Some sap green here. Now, I'm going to use my pencil to make sure that the edges of the stalks are even, and then not bulging out in spots because I could see a little bulge there, that I want to get rid off. Because this stalk is sitting against the dark green of the leaves, I can use my graphite pencil to smooth out the lumps and bumps on the flower stalk. This also helps to make it look a little more rounder because of that dark edge. That's where I'm up to now.
22. Finishing the Pink Edges: I paint all the pink edges in this video. The thing to remember with the pink edges is to paint them pile at first, and then come back over the top with some darker paint. But don't put the darker paint everywhere. Keep your eye on the reference harder because the pink edge is very in lightness and darkness. To paint the pink edges, I'm doing the same thing that I did back at the start of the painting for those edges that are painted them. I'm working on dry paper to do this. I paint some watery quinacridone pink along the edge of each leaf. Its lighting color first, while I establish where it goes. I look at my reference photo before I paint each one because I want to make sure that I put it in the correct place. When I'm happy with where I have it, I can come back in with some darker paint, and I can darken it in places. If you look at the reference photo, you'll see that the edge is darker in some areas and lighter in others. To get the pink paint darker, all I did was wipe my wet brush through the paint at the top of the pallete. Just remember to keep looking at the reference photo, and keep it light at first, so that it's easy to remove if you put it in the wrong place. Also, it helps to hold the handle of the brush upright or perpendicular to the paper, so that you're using the brush right up from its tip. This gives you better brush control and a finer line. You also need to make sure that your hand is anchored to the paper. That just means to make sure your hand is resting on the paper; it's not floating in the air while you paint. So I've painted just about all of them now. Now, I'm going to remove some paint to create a few highlights from the leaves. My bristle brushes damp with water, and I rub it lightly to remove some of the pigment. This is one of the reasons I like using ashes paper. It's a fairly tough, robust paper, and it takes a bit of punishment for me. I just dab the pigment off with a tissue. Now, I'm using my oval wash brush. It has a small amount of water on it, and I'm using it to wash over the areas that I've just removed the pigment. This helps to soften any hard edges that may have been formed when I was rubbing off the paint. Now, I give it a good dry with my hairdryer. I can come back in, and paint any areas the one I might missed with my fine brush. I'm wetting the flower stalk behind this leaf here with some water because I want to paint a little bit of a shadow there, and this is Payne's gray. Now, I just have water on my brush, and I'm softening the edges of the paint. I'm painting on dry paper here. I'm painting in the little marks and blemishes that I can see on some of the leaves. Really, you can put these wherever you feel like putting them. I'm using water repair lane green to do this. I've just increased the color on the inside area of this leaf with some watery Sap Green.
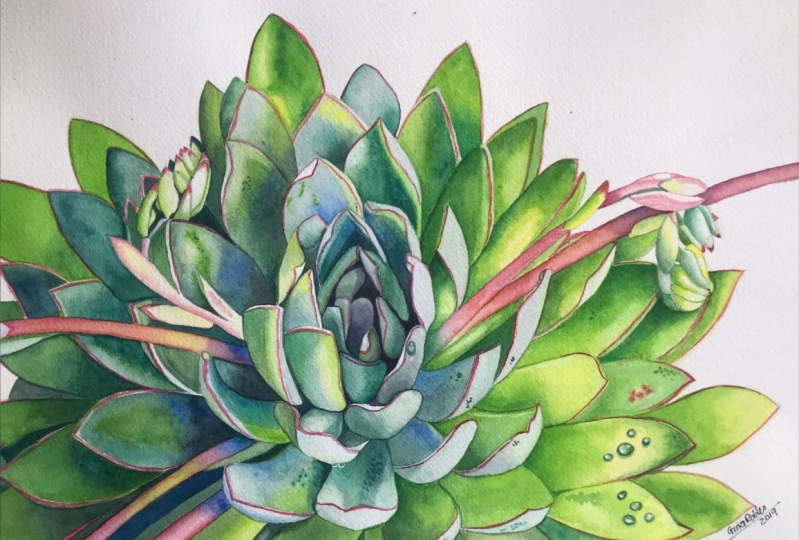
23. Water Droplets: This video is all about the very last detail, and that's the water droplets. It's totally up to you whether you include them or not. I put a few on. You can put more on if you want to. This is the final video. Finally, I can put my brushes down and enjoy my painting. I've decided to add a few water droplets onto some of the leaves. But I'll demonstrate on this piece of paper first so you can see what I'm doing more easily. I'm drawing an egg shape water droplet onto a square of sap grain here. Then I carefully paint inside the water droplet with some water. I paint the whole area inside with water, not just half of it. Now I've picked up some [inaudible] green from the top of the palette and I place it on the darkest area of the droplet or the area of the droplet that I want to be darkest. Then I just let the paint bleed up the surface of the droplet. I let the paint go to almost the halfway point. Now I've got some more pigment on my brush and I'm deepening the column on that bottom edge. Now I've washed my brush and I've picked up some of the hansa yellow light and I paint that on the top half, and still wait from before. Now I dry it off well with my hairdryer and then I carefully paint a cast shadow on the lighter top edge of the droplet with watery parallel in green. Now because I made control of where the paint go I haven't width paper. The paper is dry here, and you can see that the paint is quit bit larger than that first washes the paint I put on, and then I dry that off. Now I'm re-wetting the dark area with some water and this is white quash. I'm dabbing it onto the damn pipe or to create a highlight. Over onto my succulent and I'll draw a few droplets where I want them. I've just filled in this droplet and now I'm painting the cast shadow with the watery paralleling green and a few little white quash highlights. I'm putting in a second quash highlight here on this one. Then I repeat the process on the other droplets. This time now because of the lighting on this succulent, the dark area is at the top of the droplet and the cast shadow is on the lower left side. Now I'm painting the cast shadow in watery parallel green, and this is on dry paper. Some little white quash highlights here. I've painted a few on this side of the small upright in a leaf in the layout. Now I'm using a tiny little bit of quash here just to create some little droplets that are running down the side of the leaf. I think that's about done now. All that's left for me to do is to remove the masking tape from the sides, and that reveals a nice straight edge for flaming. There's my completed succulent painting ready to be flamed. Thank you for joining me in this class. I hope that you enjoyed painting with me and that you learn some new skills and I'm eager to see your paintings.
 Louise De Masi, Artist - capturing beauty with watercolour