Transcripts
1. Welcome!: Hello. Welcome to mastering the Pentl in affinity
designer for iPad. The Pentl in Affinity Designer, Adobe Illustrator or any
other vector drawing app can be pretty intimidating. Lines are not doing what
you want them to do, handles sticking out like
pins in a pin cushion. And worst of all, curves seem to live a
life of their own. Yes, I recognize this. Your artwork comes
out differently from what you had in mind
or what you had expected. So you escape to using the pencil because
that is much easier. Well, it's not easier.
It's different. Think of the time
when you were a kid, you picked up a crayon and started scribbling
and doodling away. Then remember when
you had to learn to work with scissors
and colored paper and not scribbling because using a ruler and a triangle to get lines you
were asked to make. In that, you succeeded, as well. And even if you've
never done it before, you will know what I mean
when I talk about hammering tiny nails into a wooden board and then connecting them
with colour threads. That's called string art. Vectors and
especially the pentle can be compared to
that string art. You plot your pins,
anchor points, and you start connecting
the points with thread, in this case, lines and curves. Well, that doesn't sound
too complex, does it? Don't worry, we're going to do this string art bit
with the pencil, and you'll be on board
in no time. Hello. My name is El raids. I'm a graphic
designer, illustrator, photographer, author, and
I'm a Skillshare teacher. I live in the Netherlands. With many years of
graphic experience, I love to help people in
developing their skills. Requirements and other
useful information. This class is for
beginners, but, of course, everyone is welcome to
join. What do you need? An iPad and an Apple pencil. The software I've used is
affinity designer for iPod. The version is 2.6 0.4 In
the resources section, you will find downloads of the JBAG files that I
use in this lesson. That way you can
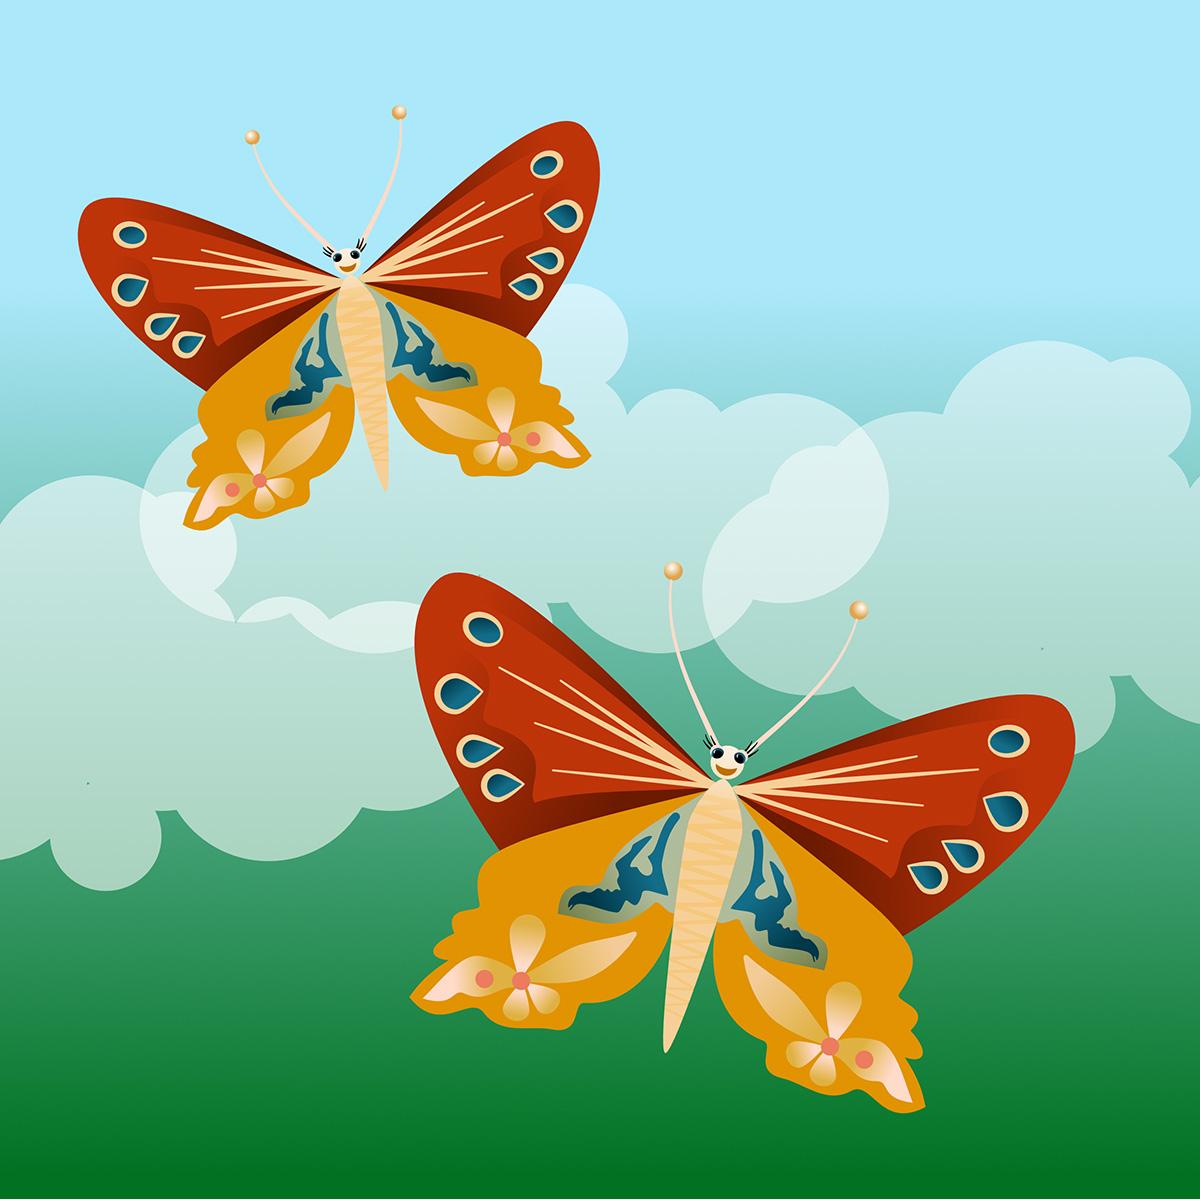
join me right away. About the class assignments, the assignment is to create a
butterfly using the pentel. In the resources section, you will also find the one that we're going to work
with in this class. Feel free to experiment, use your own favorite colors, use fills and
gradients. Go wild. Post a JPEG of your butterfly drawing in the project gallery, and as always, if you have any questions, I
would love to hear them. And now, without much further
ado, let's get started.
2. Why vectors?: The pen tool seems intimidating, but it really isn't that bad. If you follow this class, you'll see that by the end, you will have a much
better understanding of what is happening and
how to work with it. First, some explanation
why vectors? Why not pixels? Vectors provide razor
sharp edges and lines regardless of
enlargement or reduction. This is very different
from pixels photos. Here you see the same
image three times. On the left, a photo at 72 DPI, low res, in the middle, a photo at three on
the DPI, high res, and on the right, a vector with no resolutioning involved. When I enlarge this image, you immediately see that photos start to become blocky
and grainy and blurry. The enlarged vector
remains razor sharp. You can always export
vectors to JPEG or PNG, in which case, the image
will behave like a photo. You can also export vectors
to SVG, in which case, the scalability, the sharpness, and editing possibilities
are preserved. SVG is also supported online. Vectors are widely
used in logos because they often need to be used
in so many different sizes. The final size file of
vectors is also much, much smaller than a photo, even when the artwork
is very large. But the sharpness after
enlargement or reduction in size is probably the trademark and the unique selling
point for a vector.
3. A short intro at the pen tool: How the pen tool works. When you draw, you put
your pencil on paper and immediately start
drawing lines and shapes. That is also the way you draw
digitally in, for example, Procreate Photoshop,
Affinity Photo, clip studio paint or within Affinity Designer
with the pencil tool. Vectors work differently. If you select the pen
tool and try to draw, as I just described,
nothing happens. Remember, vectors connect
strategically placed points. Uh, help? What does that mean? This is difficult?
I'm going to give up? No, no, no, don't. It sounds much more
complicated than it is. After all, you can also work with a ruler in a pencil, right? Well, this is the same thing. A vector is a
mathematical method for creating lines and shapes. Simply put, a vector is a line based on mathematics
rather than pixels, so you can make it infinitely large without becoming blurry. Do you remember from school, when you learn what
a straight line is, a straight line is the shortest connection
between two points. An equilateral triangle is the shortest connection
between three points, a square between four and
so on, you get the guest. The lines are therefore formed by connecting
points to each other. These points are
called anchor points. By placing anchor points
in the right places, you can create the
shape that you want. Let's start with the
most basic vector that Affinity Designer
has the line. The pen tool has several modes. You can see it in the menu pen, Smart, polygon, and line. Roll through these or
click the arrows beneath. Before we continue,
set the fill to none and give the stroke
a color and a thickness. I will give mine a
thickness of ten, 15 points, but this is mainly
to see easier in the video. You can choose any line
thickness that you want. With the line tool, you can
only create straight lines. You tap once to indicate the
starting point of your line. Keep the pen on your screen and move to the position where
the line should end. Release, and you have your line. You see the line while you drag. Affinity Designer connects
these two anchor points, and the action is complete. This is sometimes
called self terminate. To make another line,
repeat this process. So tap, drag, release. The line can go in
any direction you want and can have any
length that you want. If you want to make the line perpendicular or at
a 45 degree angle, click on the Command controller. The circle is always somewhere on your
Affinity Designer screen, and press the shift key. As long as this is highlighted, the perpendicular 45 degree
setting remains active. To apply this setting only
in your current line, you do not necessarily have to use the command controller. Tap at the first position, put two fingers on the screen, tap at the second position, and lift your fingers again. Another useful
gesture combination is four fingers on the screen. This moves the entire line
to a different position. As you can see, the anchor
points are small squares. This may not be very easy
to see in the video, but in your own work, you
will detect it instantly. It indicates that these are right cornered angles.
More about this later. One more thing about
the command controller, by holding the
circle for a moment, you can move it to any
position on your screen. Sometimes it's just in the
way when you're working. At 12:00, you'll see
the shift at 3:00, the command, at 6:00, the Alton option, and at
9:00, the control key. These correspond to the same
keys on a separate keyboard. You can use multiple
controllers at the same time.
4. A closer look at the line: The easiest way to start with the pen tool is by
using the line. You can get there by tapping on these little triangles
until you see the line, or you can just
scroll through them, and the line is right there. Choose a color for your line. I've chosen orange and
choose a thickness. I've chosen ten points. Tap, hold, and drag and let go. This line is self terminating. So when I start a new line, it will not continue from the previous one, it
will be a new line. I can make them straight by putting down two
fingers on the screen. I can make them vertical
by putting two fingers on the screen or in 45
degrees increments. And remember that because
that's going to happen a lot. Now, I have turned on
snapping enable snapping. And when I look right
there under the magnet, I want to snap two
notes turned on. Because I've turned on snapping, you can see instantly when I
reach the height of a line, I get a red intigator that tells me that I'm at the
same height as this line. And when I let go, I'm
sure that these two are in the same height.
A red line again. Here's a green one that
gives me a vertical line. And that's part one.
That is the line tool.
5. A bit of polygon: Et's see what we can do
with a polygon tool. To get there, first, I'm
going to do something else. That's three fingers wipe down, select all and throw
this in the bin. I'm going to import an image, go to place from files. Go to resources. And start with the
what's Basics. Drag to place. Well,
let's drag this. Okay, and it looks like
this, which is great. Perfect. Can also make sure that it is a bit bigger or
smaller, but this is perfect. The next thing I'm
going to do is change the opacity to multiply. And then I'm going to lock this. Next, I'll make a
new vector layer, and I'll call these polygons. Okay. When I go
back to the basics, I want the opacity to
go down a little bit. Okay. And I'm going to make sure that I have my pentol selected, the orange color again. And I'm using ten points, so you can see it better. I'm going to choose
the polygon tool here. There it is. Now, a polygon
works like the line tool. You can't make any rounded
or circular lines. You just tap, and then you tap. If you want to go
in a straight line, put your finger down. And as you can see, I'm just tapping a little
off the image. I'll show you in a minute why. It's very easy just put
your finger down if you want lines to be
exactly straight. If you want your lines to go perfectly straight,
you've got it. But you can't make
these lines around, and that's what we're
going to do in a minute. Now, you've seen that
I want my lines to be slightly different from
what I've drawn here. So what I will do is
take the no tool, make sure that Snap two
nodes is turned on, and then just simply move it to a place
where I want it to be. And you will see that
thanks to snap two nodes, the parallel lines are much better in balance as I
have drawn them initially. So that's the most important thing about the polygon line. What I would like you
to think of is that a polygon line needs a stroke. But if you start drawing with
a polygon line as a fill, show you what happens then, you will, let's see. I have it. I've changed it now,
and as you can see, this doesn't really
work very nicely. It's only until I
close the shape, I really get the fill visible, and it doesn't
work like that. Not very easily. So what I would like you to do
is make sure that when you work with a polygon line that you just have the stroke, and I like this orange color. You just have a thickness, stroke width, and no fill, and you can see
what you're doing.
6. The pen tool: So let's see what we can
do with the pen tool. Select the pen tool.
Make sure that you have the pen right there. Pen. Make sure that you have a fill and a stroke.
Here is the pen. And in the layers panel, you can see that
I've imported or placed the Dodge JPEG file. I already changed the
opacity to about 25%, and I turned the blend option to multiply so that I
can see it properly. And I've added
another vector layer by tapping the plus where I can draw and show you how
it works. Let's get the pen. Now, just tap once. Tap in another spot, keep
your pen on the screen and start moving your pen in the direction where you
want the next curve to go. Let's stop right there. I can see these two blue
control handles, and one is sticking out
in the direction where I want the first part of
the next line to go to. Now let's step again and hold, and as you can see, that's also going in the
right direction. So let's make sure that this understands that the next line
needs to go there as well. I want this wavy
curve right there. So the length of these
control handles determines the shape of the
stroke, the line. There it is. Tap this little X, which is over the
trash can twice. Otherwise, you would
continue with your drawing. So that's just tap, drag. Now I put a finger on the
screen two fingers, sorry, on the screen to get this perfect 45 degrees
increment corner. And I'm going to do it again. You can see that
when I cross with my control handle over
the other control handle, I get a very strange shape. So it's important to keep the control handles
close together. Make sure that they don't cross. It's like ghostbusters. Don't cross the beams. So that's not very
difficult, is it? All right. This is one of the most important
things of the pentil. You've got these two wavy lines, and that is basically what
Bzier curves are all about, working with the
control handles. But let's do something else. I want to have a straight line. And now I want a line
to go over there, but have a curve.
How do we do that? Keep the hand or keep
the pen on the screen, put two fingers down to get a nice parallel line
and then let go. Great. You can see that I
have two control handles, and they are equally long. So if I press here now, I will have first some sort
of swoosh right there. Let's do it. And that's
not what I mean. I want it to go straight down. In order to do that,
just tap there. And now tap down again.
And I'll do it again. I'll just tap there, hold, put two fingers on the screen. Move. Let go and let go. Again, just tap once to make sure that you have a
straight line and you can tell because it's a square now instead of a circle,
move it down. And if I want to go up there, let's say there, just
move, move, move. And I have this beautiful
shark coming up. Go. And again. And if I want to go that
way, then that's the same. Just tap, hold, go down, and make sure that you
have these nice lines, these control handles at your service in
the parallel area. Now, let's go here. And now
I didn't need to do anything because those control
handles were equally long and I have these dots to
guide me where to put them. And I want to have this one go, let's say, right there. So I'll just tap one,
tap one, and tap ones. I Pac Man. And let's go here. And this is a way that
you can just make anything work for you in a
beautiful, beautiful way. Now, if I want to go that
way, it's the same story, tap, hold, and you have
the same idea, right? I want a corner there, and now I am completely round. And that's how you use the pen tool and you
can use off course, you can use the controller. But to me, this works best. Just use the tap on the point method to change from smooth to cusp
or to straight line.
7. Node editing: You might feel that it's necessary to change some
things in your drawing. Well, this is, of
course, beautiful. So let's see how we can do that. I can just easily move
that anywhere I want. That's not a problem, right? But I don't like this point. So I can use the node
tool to do some editing. I can either make that round, and I can do that
by double tapping, and now I will have
a smooth line. Or I can just throw that away altogether and
move this one up. As I have my snap two nodes on, I will get the perfect
horizontal reference line that I need and that I showed in the previous
lesson, right? Now, let's say I want this line to be around as
well or have a curve as well, or this one. That one may. So do I have to press those
two lines to change that? I can just stand on it
and just move it about. And it doesn't make a difference if you hold your
fingers on the screen. This just turns into a curve. And that can be very useful. If I stand here now, I get the control handles, and then I can use the parallel direction that I want when I put two
fingers on the screen. So that's right there. And now, my drawing, let's tap out of it. Now my drawing has
this cute bulge there. And let's make this
move it about a bit. And I want this part
to be round, as well. So I'll go to the now tool
and I'll just move that. I'll tap there. Two
fingers on the screen. I can't go that far, of course. Oops, as I am. Already near the edge
of my paper. And again. So I might want to change this. If I take this out,
just tap on the bin, and that particular
point will be taken out. And we'll have a straight line. Now I can change that. I can put this one over there. And as you can see, it's
all coming together, right. And this is the way that you
can change the direction of existing nodes just by
simply using the node tool. These control handles are
really, very powerful. I can just use those to put
nodes in a different spot. And as you can see now,
everything will change. But I can also use it to move the control handles more to the left
or to the right. So that works really well. And by using those nodes, what's called Snap two
nodes and the geometry, it will try to find
the same height and the same vertical position or horizontal position as
the adjacent points. Sometimes it's really difficult to think of how to say this. But that's just really
what it's all about.
8. Working with predefined shapes: Getting these shapes done is often much easier when you think about them in straight lines. So instead of making
them in a cross, I'll begin by using
a good collar. Let's begin with. Let's
make this four points. And then I'm going
to draw, well, that's maybe even
a bit big three. Okay. And now I'm going to duplicate this and
then turn it around. Okay? Select both. Go back to the shapes and make sure that they are all turned
into converter curves. Now, let's use the corner tools to change all the corners at the same time.
That looks good. Next, I'm going to
use the line tool, and then it's the line. Remember the one that
we started with these select all and make sure that I have a correct line right there. That's good. I'm going
to take that line duplicate it and then
change direction. I'm going to select
all of these. Make sure once again that they're all converted to curves. Pick the shape builder tool, grab the minus and make
sure that that which overlaps is taken out. And this one is going all
the way to the center. So this one has to go
and this one has to go. And in this case, that one has to go and that
one has to go. And now I have the shape, and I'm going to turn it 45
degrees, put it in place. Maybe enlarge it a little bit. Make the line a wee bit
smaller. It's a bit big. Two points is great. And my drawing is done. I'm going to select it
going to match curves, and they form one shape. So that was not
difficult at all. So I'm going to pick an
ellipse, make it really big, make sure that it is a completely, beautifully
full circle. And it's probably not what
I need. This one's better. Let's bring it there and
then enlarge it like that. Well, as you can see, it's important that this line
ends up right there. It's not going to be
exactly in order. So I do this. And maybe one here as well. Alright. Now I'm going to
pick a rectangle tool. I hardly ever use the
rectangle tool with the corner options because
corners can always be made, but you can't undo them
if they're in there. That's right. It to be an arrow. Let's convert these to curves. Alright. Now, let's
pick this one. And I want these
two to have curves. So I'm going to move
these in. Like so. If I look at it in the outline, I must take a good look if
they are close together. Yes, they are. That's good. What I'm going to do
now is select all, go back to the merge tool again and take out, which
I don't want to have. Mmm. That's the shape. And if
I turn off the example, I think this should
be a way, as well. So we're not ready yet. And here's a problem. I don't need I still need
that, but I can't use this. So what I'm going to do is turn this as we've done before
into a straight line. Now I can take this out, move this up a little,
turn this down. Move it up a little.
And as you can see, sometimes you really
have to do a little bit to get it to work as
you want it to work. And second Tulip logo
is done, as well. I'll group this group. Tu Like that. Okay, let's look that, and this one's the cross. I think it's just
like a Band Aid. Rename I would take up too much time to show you the entire drawing process for all the logo
shapes are made. So I've sped up the video. As you can see, I made extensive use of the
standard shape library. I combine these with the
pentilll give it a try yourself. Don't forget to
convert those shapes to curves so you can
edit them further. Make use of the merge tool
to bring parts together, for example, split them
and delete unwanted parts. Always try to make use of the existing shapes
as much as possible. Vector artwork is often
about working efficiently, and the shapes provide an
excellent starting point. Look through the
design, as it were, to identify the
basic shape and use that insight to determine
the most effective approach. So good luck and enjoy yourself while figuring out your
personal way of working. You
9. Class assignment: the butterfly: In this last lesson, I'm
going to make the butterfly. Again, think of the
best way to work. By the way, many ways lead
to roam, as we say here. If you feel more
comfortable using straight lines and
then adjusting them to curves, later, great. If you want to draw the curves right from the get go, great. In any case, make sure
you look at the extrema, the bounding box
that will help you position your anchors
in the right way. It makes sense to draw one side of the wings
and once it's done, turn it into a group, duplicate it, and
mirror the copy. Another amazing approach is turning your wings
into a symbol. You can place an instant of
that symbol and mirror it. But the advantage here is
that the changes you make in the original wing will instantly be updated
in the instance. Especially when
you're working with a strong mirrored image, the use of symbols
works like a charm. Don't worry, you can break
the link to the symbol if you want to change one side and make it different
from the other. Of course, you don't have
to do this, but as stated, efficiency will help you work better and with more
ease in vectors. Drawing the butterfly is the last what I'm
going to show you. And with the Pen tool now, we've been able to do
quite a lot of things. The first thing I would like
you to do is import or place the butterfly dot JPEG and bring down the opacity a little let's bring that
down a bit more. Then add a new vector layer. Pull this butterfly vector. And then we can start drawing. I've taken a red color, and I'm going to go for a nice, not too thick line because
this is a smaller drawing. And first, I'm going to draw
one side of the butterfly. So I'll just tap using
a Bentle I'll tap. I'll go to this point
to this and to that. What I'm trying to do is find the extrema in this drawing. An extrema can be seen
or found when you are thinking of a box around the
outer edges of an image. I think this is a point
that can be used very well to make a curved line, and I'm going to show you how? If I use this part,
I can see that I can put it right on
top of this edge. And I made this butterfly
in different software. So it's not that I know exactly where I've
put them before. This is really just how you work when you are
more experienced, and you will find it if you do this a lot, it gets easier. So that's one part.
Okay, exit out of it. Get the pen tool again. Let's see, somewhere
around here. The point. I'm closing it again. And I'm doing the same, moving the image to where
I think it should be. And now, when I look at this, I can see that this is
still a square point. So the moment I start moving it, you can see the point
change into a circle. So maybe I should try to see
what happens when I use, I hope it can be visible. And now this is a point
with equally sized handles, and that's probably
best in this case. And again, right there. I'm also going to take a look at the previous corner
square point. So I want to turn it into
a round point like that. Okay. Now, that looks good. And what I'm going to do is I'm going to put these two together. And when I go into the layers panel, I
can see it's a curve, and then I'm turning
those into a group, and I call it upper wing. Okay. So you can see it's really not that difficult to
make at all. Good. Now a new one. Exit out of it. Let's
pick a different color. I'll choose blue. I'm going
to do more or less the same. I'm going to look for
points where I think I can change the direction
of the handles. Maybe I can just
this seems right. But this is probably
a good place. And maybe I'm entirely wrong, but we'll find out soon enough. Let's draw this one that one down or drag
a should draw drag. And let's see what happens here. Look, this is exactly the
shape that I was going for. So you can use the
node tool to either drag on the handles or
move the point itself. This one's not yet
entirely good. So maybe I should
move that a little. Ooh. And there it is. This
one is still straight. Right. That looks good, and this was on the same shape. So I think I've done
a pretty good job in just a few minutes. Let's turn this into a
curved line, as well. Curved point, I must say I
curved line, it's a point. And, in fact, I
think I'm done now. I might want to change that
one into a curve as well. It's not really. Entirely
to my satisfaction. These points, as you can
see, these are all squared. So they are corner points. And these points, well, this one, that one
are curved lines. So it's a good thing to
see the difference in two. I'm going to turn that
into a group, as well, even though it's only
one, and I'm going to call this lower wing. Alright. Now, let's look the lower wing and
the upper wing. And I'm going to
make the antenna. Now, here's one. As
I told you before, think about the
most efficient way. I want a small circle here, so I put a finger on
the screen to get a circle and then just move
that right there. Okay. Tap here, to convert
it to curve, so it won't behave
like a circle anymore, okay? I'll tap out of it. And then I'm going to use
the pen tool and I will pull a straight
line, and that's it. And then I'm going to
draw and get this right. And now half of my
butterfly is already done. So I'll use the antenna
and that little ball here, and I'll select them, and I'll turn it into a group. I'll call it antenna. Okay. And I can also lock this. Now, I'm going to turn off
the visibility of these, and I'm going to make
the center part. Let's pick the ellipstol and form the head
of the butterfly, maybe a little
smaller. Like that. And the first thing I'm
going to do is head back to the shapes and then
convert it to curves, so it won't behave like a
regular circle anymore. Next up is the body. And what I want to do
now is, let's see, take this diamond tool, bring it in the right place
and convert it to curves. Now, select both points
here and move them up. All right. And now,
selecting all. I'm going to turn them into soft curves and look
done in an instant. So that was very quick. Again, I'll put
these two together, and I'll call that body. And now if I open everything
or I show everything, let's take off there. It all looks quite nice. What I'm going to do now
is select everything. No, everything but the body. And I'm going to
group those again. One side. Okay. Now, I'm going to the symbols, and I'm going to put
turn this into a symbol. So I'll say add symbol
from selection. It's a bit difficult to
see, but it's right there. And if I say insert
symbol, it's right there. It's exactly the same. What I'm going to do now
just move it a little. Flip horizontally and
then move it into place. Using the symbol makes
it very easy to change. Just suppose that I
would double tap. I would change this into a fill. Now both are filled, which is fantastic, of course. And I'm also going to swap this, but I'm also going to
give it a gradient. Okay, maybe the
other way around. Like so. And as you can see, I'm only changing one, but the other one
is coming along effortlessly because
it is a symbol. Let's see, I have a grittinOly if I'm not mistaken, right. Let's take that out. Same going
to do for the lower part. Do I have that one? Yep,
the curve, the lower wing. And I would like this to
be gradients as well. I will change the
antenna. That's good. And the body is something that can go the
other way around too, but I'm going to turn that
into brown and right there, turn that around into brown. Maybe I want them to be
merged, merge curves. Let's give that a nice color
as well, bit like that. I want this to be
radio bit like so. Let's say you can tell that the body is not
exactly in the middle. So what I'm going to
do is tap the body, and I'm going here
at the bottom, a line, and I'll just make it line to
the center of the page. Then I'm going to select the two halves which are
already in the same height. I'm going to group them. Wings. And I'm going to do the same alignment
relatively to the page, and now it's exactly
in the middle. Now, last but not least, let's say that I want to add something right near
this blue wing. Take out my pen, make sure that I don't
have anything selected. And I want this nice
pop this light green. And I'm going to wildly do
a bit, turn this around. Okay. Move it below
the curve of the wing, and they're right
there on both sides. I can already tell that it's not really following properly, so just let me change
that a little bit. And I would love for that
to have a gradient as well. I'm really a sucker for
gradients. I really like that. And I want this one, this
color to be more like that. And the butterfly is ready.
10. Final words and finish: So, final words. Before we call this a night, I want to emphasize that the logic in the way that
Affinity designer uses, the command controller or the two finger
gestures and those two combined are not always as
transparent as they could be. Remember that the moment you put your finger or fingers down, make a lot of difference. The tool you have selected, the direction you want
to go to, et cetera, this is really a matter
of getting the feel for it rather than learning by heart
what everything does. So don't despair,
give it another try, maybe change the order in
which you execute an action. And with that, we've
reached the end. Yay. Hopefully, you've
come further in understanding how
the pencil works and in your efforts to try. Share your project in
the project gallery, leave questions and
comments there. If anything is unclear
and vector away. Review would be
highly appreciated. Bye. Thanks for now, and we'll see you again
next time. Bye bye.
 Els Ruiters, Graphic Designer from The Netherlands