Transcripts
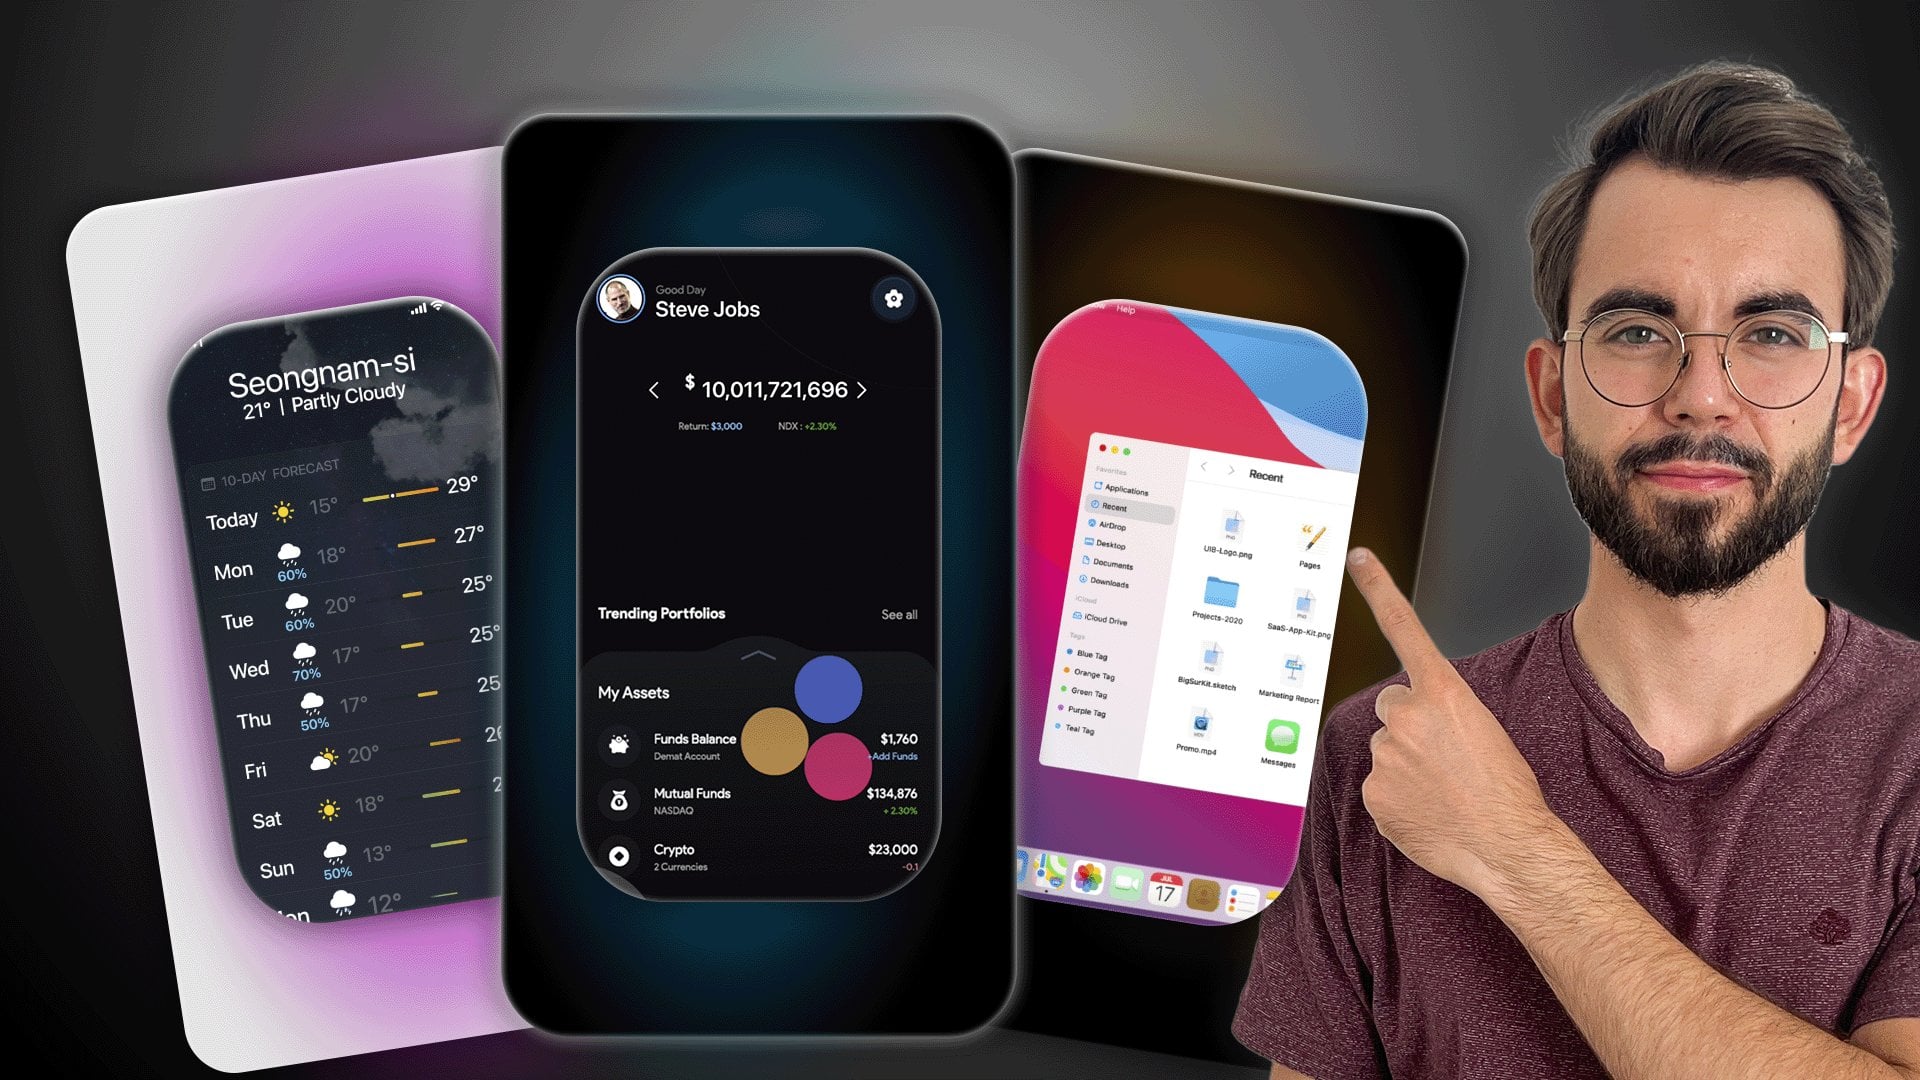
1. Class Trailer: Viral Motion Graphics: Do you want to create premium, scroll stopping motion graphics like the top creators on TikTok, YouTube, and Instagram, the
kind that look like they will by Apple and make people
stopped and pay attention? Then you are in the right place. This is not your average
after effect course. This is where you
learn how to build high end cinematic
level animations with three D inspired design, smooth transitions,
and visuals that feel ultra premium and
professionally crafted. Yes, we're using after effects, but we're using it
like the pros do. You will learn how to design
and animate premium UI inspired layouts using three D cameras and
layered parallax. Create battery
smooth transitions, dynamic camera movements,
and reach depth. Use fast box blur, motion blur, masking, and the graph editor
like professional editors. Animate text, overlays, and objects with realism
and interaction. Push pull physics
that feel alive. Design cinematic
sound effects that add weight and punch
to every motion. Mimic the style pacing of the most viable short form content creators
on social media. This course is not
for beginners. It's built for
editors, designers, or content creators who
already understand the basics, and now you're ready to level up into premium level
motion design. Throughout the
course, we'll build full short form
animations from scratch, projects that look expensive, feel intentional and
are designed to work on platforms like Tik Tok,
Instagram and YouTube. If you are wondering who blood. I've spent over a decade
editing videos and managing two of the
most successful YouTube channels in the niches. I've built editing systems that generate millions of views,
and in this program, I'm giving you the exact tools, workflows, and creative
processes I use every day. This course has
everything I wish I had when I wanted
to become great, not just good at after effects. If you are ready to
build a portfolio of truly premium animations
that clients notice, audiences share, and
creators admire, this is your next step. Let's master the motion
graphics that feel premium, cinematic, and absolutely
viral LC inside.
2. Welcome! Start here: Welcome to the ultimate After Effects Master recourse for
viral short form content. I'm glad, and I'm excited to be your instructor as we
dive deep into one of the most high impact
in demand skills in the world of content
creation today, designing sleek viral motion graphic animations
in After effects, specifically for platforms like YouTube, TikTok and Instagram. These aren't just
any animations. We're talking about dynamic
UI inspired visuals, smooth three D layers. Fluid transitions and ePopping
motion graphics that are dominating social
feeds right now and pushing videos
to millions of use. This course is a roadmap to
mastering that exact style. This is the third class in my social media editing series. If you've taken my
previous courses, master short form video content, and after effects
motion graphics, you've already laid
the groundwork. In this class, we're taking
things to the next level. Before we dive into
the tutorials, I want to make sure that you are completely supported
and set up for success. This class is for
editors, designers, and content creators who
already have experience with video or motion design and
are ready to level up. I recommend watching
every video in order Every lesson builds
onto the previous one, giving you a smooth and
natural learning curve that compounds as you go. You can also control the
playback speed and the volume of every video so that you
can learn at your own pace. If you get stuck you
have any questions, be sure to leave it in
the Q&A section below. Just make sure to
check the existing questions first because there's a good chance that the
question you want to ask has already been
answered in detail. Finally, at some
point, you'll be asked to leave a
review of the scores. I ask that you wait
until you've had a good chance to really
experience the material. Your honest feedback
helps me improve the course and better serve
you and future students. I am truly excited to help you unlock your potential
with after effects. Let's jump into the first
lesson and get started.
3. Important Update for This Class: I just want to give you a
quick update about this class. There's some feedback and people say that it is a
little bit too fast. And so for that
reason, I created master viral Motion Graphics and Dobe After Effects, Part two. So if you start
this class and you find it to be a
little bit too fast, go ahead and go into the
project resources section, scroll down until
you find Part two, or just go ahead and click on my profile and access
it through that. The Part two is a lot more
manageable and the skills and the results that you learn from that is just unbelievable. It's super good. So go ahead and start
watching in next video, and if anything, there's always part two. See
you in the next video.
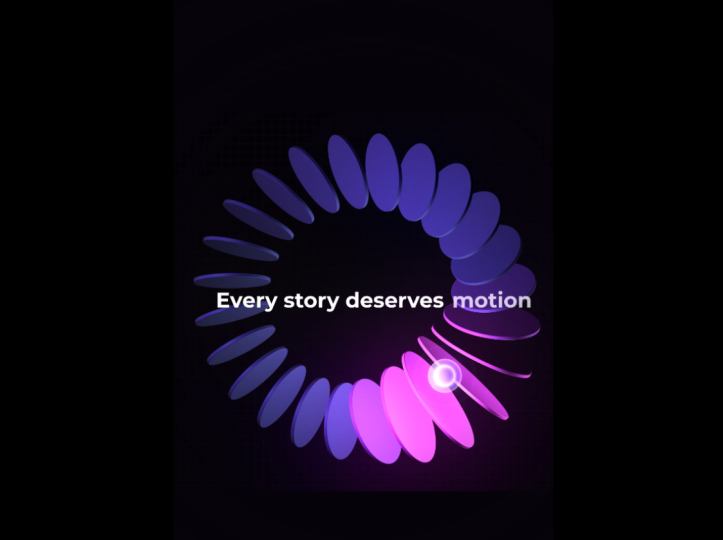
4. Reverse-Engineering a Viral Apple-Style UI Animation (Part 1): Welcome. For this video, we're going to recreate one of the videos from this creator. His name is creatorly
or creatorly. Not sure, but this
person is doing absolutely beautiful
next level animations. Recently, he's been doing more of an Apple style animation set. And this is the video that we're going to
recreate super simple, just like seven, 8 seconds long. But how beautiful is it? So we have text and
we have all sorts of pop ups, animations,
moving parts. Yeah, absolutely beautiful. So let's jump in. Okay, so this is a
five X bid recording, and first thing I'm doing is I'm just
seeing what he does. Create the composition
1080 by 1080 because his recording is square, and now I just have
to take a look at what he's doing and
then actually create it. First of all, I created
a big text layer, and then I broke it into three text layers so that I can animate each
word separately. But then I wasn't able to put the words exactly in
the right location. So I created the text once
again as one big layer, and then I had to move
the little texts, each single word to fit exactly. Okay, then I had to
rotate the word animated, and I had to create a gradient. And because he's using sort
of like Instagram colors, I decided to use
the same colors, had to search for color code, create the gradient, and then track mat the
gradient to the word. That's how it is.
So as you can see, very similar to what he's doing. Rename a couple of things. And now for the text pop ups, we're actually going to
use animation composer. You can definitely
do it by hand, but I thought, why not
use animation composer. They already spent all the
time to create this animation. Why not do a very similar thing. Then I also had to
animate the opacity a little bit because it doesn't
just come to the screen, but it comes with a
little bit of opacity. There's a little bounds, and that's how it's been done. I created a camera and a null to be able to
move back and forth. Because in a lot
of his animations, he's kind of moving
back and forth, just a little bit and
adds that better dynamic. So we have the text, basically
exactly the same text, maybe just slightly
different animation, but to be honest, a lot of
it is just personal taste. And now we have to move it down. So we connect
everything to the null, and then we're moving
everything down. And then we are also
decreasing the opacity. Next thing, we need to create the circle cutout where I'm
going to actually put myself, just inputing the file
and then track matting the picture to the cutout that I create the circle cutout. Now, because we already have text moving down with the null, I'm just going to
connect myself, the cutout of myself
to the null as well. And therefore, it's going to go down with the text
at the same time. You also saw that there's, like, a little bit of the twist
head or, like, the cut out. So that's what I'm
doing here as well, creating a little bit of a twist when I'm appearing
onto the screen. And then there's, like, a growing background
behind the head cutout. I think that's how it it. I'm not necessarily sure, but I decide to do it
with a rectangle, rectangle with rounded
squares because if you maximize the roundness of the squares, it
becomes a circle. So I can actually put
hide it behind myself, and then parent it to myself, and then once I'm going down to increase the part that's
the background, basically. Now we're going to
have to animate these files or these screens
or whatever that is. One thing I'm doing all the time is going back and forth to actually see because the
animation might be very similar, but might not be perfect, so that's why I'm going
back and forth to make sure everything is exactly
as I want it to be. Now, we need to create a
stroke, a rounded rectangle, and now basically need to do a very similar animation.
To what he did. So I connected the
rectangle to the null, and we're going to connect a lot of things to the
null in the future. But for now, we're just going to animate it coming
onto the screen. And then we'll have to
animate every single piece. So the folder, the text, the, you know, whatever
else there was, all sorts of icons,
we're going to have to animate every single thing. So it's time consuming,
but it looks next level. Okay, so I'm animating
the rectangle and I'm animating the null
that rectangle is connected to animating
both at the same time. You can definitely
do it with one, but in this case, it
worked better like this. And then I'm also animating
rectangle on the left. So I basically duplicated
the rectangle, and now I'm just changing the
positions. And that's it. Basically what also
needs to happen is when these rectangles
come onto the screen, it also moves the
cut out of myself. Like, the picture
of myself has to move first to the
left and then to the right because that's exactly what's happening
in his videos. It's as if it actually is true, and it's as if if I push my arm, my arm gets pushed. So a similar effect he's
trying to achieve here. And also a picture
of myself has to rotate a little bit to
left once it gets hit, as if we're actually
trying to do a real thing. As you can see, a lot of
keyframes on the screen, that's because the way
you animate all of this is actually just doing
going hand by hand. There are definitely ways
to speed up the process. If you do it 1,000 times, you know where to
save certain presets, where to save certain templates. But because I was
doing it actually this animation for
the first time, it's not like I
did a 1,000 times, so I wasn't able to
speed the process up. So the first thing I decide
to do is to actually do the animation
things appearing on the screen and then
getting off the screen. And after that, I'll
be able to actually customize the way
certain aspect looks. First, we need to
create three dots as if it's an option
to click there, and I'm using a repeater effect, and then I'm going to
rotate the repeater, and I'm also going to center
the anchor point by pressing command and the center
anchor point at the top. So I have to put it in certain position and then
parent it to the null. And then basically just take
a look at what he's doing. So he has text that has
different formatting. I am indeed using
a different font, and I wasn't trying to
use his phone because I actually enjoy my phone a
lot more, which is Tasker. If you like this font,
you can use it as well. And then I had to download
an icon from the Internet, but I wasn't able to find,
like, a proper icon, so I had to go a little bit
back and forth and using the color key to get
rid of the background. Smaller icon, a little
bit bigger text at all different formatting. So different icons, one
for, like, pictures, one for video, and another
one we'll see in a second. But this is a pretty repetitive
process with nothing. It's not like rocket science. Like, to be honest, this
is super simple to do. It just takes time
and thinking through. As you can see,
we'll also need to create a folder,
and for the folder, we'll need to create a gradient, and you can see in
second how that's done. Search for a folder. If you
can find the folder that's PNG or any sort of icons that are PNG,
it's actually better. First of all, you don't have to do an extra step of
creating the color key. Secondly, it actually takes
less power for your computer. So doing exactly the same thing, and I actually copied
the gradient that I previously did and just did the track matching with the second gradient
or you just need to put things into the position. Now, because there are
so many moving parts, it was a little bit
tricky to parent everything because one thing has to be parented to the other, and it's a bit troublesome to do it when there are
so many moving parts. So you can see, I did have to go back and forth quite a lot, and I also mark
everything with color. So everything that's
on the right square, it's yellow color, and then
we'll go into the other one. Now, I also created a four
gradient for the left square. And after fase, you can create
just a normal gradient, which is going to
be two colors or a four gradient,
which is four colors. First of all, putting those
colors and then moving those colors into
swing positions so that it does
look pretty good. You can see that his
gradient is slightly different because he has
a white in his gradient, and yeah, I mean, you
can certainly do that. It looks expensive. It looks great, but
I was trying to go for IG from the
very beginning. No, this is going to be
our notification center, so we're going to reate one, then we're going to
create another one, make it a little bit smaller, a little bit less transparent, put it on the
background so that it actually looks like it's a
notification on an iPhone. Now, I'm going to add some text and work with
different formatting. In after effects, actually, you cannot use Imoges. So in order to use emojis, you have to use an
image of an emoji. And to do that, there's this website called
emoji to Image converter. So JPEC optimizer.com. And I also need to
create an outline like a stroke for the left rectangle. Now, I would say it's always better to turn things
three D first and then do the animation because
once you do an animation, then you turn layers
into three D, they actually change their
position a little bit based on the camera because
you move the camera. If you don't move the camera, yeah, they can definitely work, but if you do move the camera, then it's going to be
a bit of a headache. Now, I'm also going to
animate the popping up of the layers using the
animation composer. So what I'm doing is I'm doing the blur and also making
it a little bit faster, so I had to move
it a little bit to left and every
single one of those. You can actually do it in bulk. I believe if you select
a number of those, and then you go into
Animation composer into Edit, you can move in bulk, but I did by hand. I tried to experiment with different animations
that animation composure had and now everything to the left is going to get animated as well and going
to be colored as pink. So we do have this Gagen
blur popping up effect, but we also need to actually animate every single one of those in terms
of the position. Every icon and every text on the video that we're trying to recreate has a little
bit of movement, like, very basic movement
just a little bit up. And you will also notice that
these kind of expensive, very cool three D animations, it's basically
things moving onto the screen with at the same
time as the opacity appears, and that's why it
looks seamless. Okay, so I'm trying to
animate the position of many layers at the same time, which is a bit of a headache. We just have to go through that. Now, you'll see that things
are moving onto the screen, and then I went ahead
and just tried to animate every single one
of those separately. So I'm doing basic animation
for all of those and then customizing animations
for every single layer. So, for example, we have the lower icons
moving from below, icon moving from the top, text moving from the side,
and things like that. And then I'm also slightly
changing the timing of when each thing appears so that
it looks even better. Now, we have to do the same exactly the same thing
with the left right angle, animating the text and making sure things
appear one by one, not like everything
at the same time. And this is the way
they actually do it, and this is the way it
looks so expensive. And by the way, I also
decided to create the typewriter fact animation for the text that's going
to appear on the left. That was it for this video. If you have any
questions, let me know. But than that, I'll
see in the next video where we are going to
finish this video. So see you there.
5. Completing the Viral UI Animation: Motion Design Deep Dive (Part 2): Welcome to the second part, and let's finish this video up. So the next thing
we're going to have to do is we're going
to have to animate a circle that's going to transform into a
different shape. First of all, what I'm
doing is I'm cutting and I'm trying to make it disappear just like I plained in the
previous video where we have a movement that also is
animated with opacity. And this is the part which we're going to have to animate. First of all, we're
going to create circle. Secondly, I duplicated
the gradient at first, but eventually
we're going to use a gradient effect applied
onto the circle itself. First of all, customizing
the gradients to make sure it is like so. Now, I completely forgot where the outer glow and inner
glow effects are located, so I had to use HAGPT, but you have to right click
layer les inner glow, outer glow, and that's
how you do this. I'm also creating a bigger shape exactly what Create really did. And basically, it's two
shapes appearing at the same time and then
changing the shapes. Now, putting things
to the middle, changing the roundness of
the rectangle at the back. And I did want to use a glow, just a regular glow, and this is how it looks. Also, I'm going to animate the black square
that's appearing with animation composure and
then do the circle by hand, because the animation
is slightly different. One is just being smooth. The other one is appearing
a little bit more rigid. So the square with
animation composer, the circle just doing by hand
with opacity, by the way. Now I thought, Okay, what
are some of the ways that we can create a plus
sign or like a cross? And that's what I'm
asking TBT about. Turns out the best way to do it, at least that I found so far, is to do it by hand. So we turned the circle into busier paths by right clicking, turn into bezier pads, and then we are
customizing basically, we're changing the points of the circle so that it
looks like a cross. And that's just what we have to do. We have
to do it by hand. You can definitely do
it with a plus sign. And do it, you know, by copying the path and
pacing the path in. It requires just a
little bit more work, and we're always trying to do
as little work as possible. So this is what
we're doing here. Exactly. So what you're saying
is exactly what I'm doing. To get rid of the handles that control the smoothness
of the sides, you have to press
on option or Alt, then click on that
basically the keyframe. And then we have to animate
the rotation as well because a circle turns into
the cross by rotating. And that's actually how they
hide all sorts of movements in between is by doing
little movements, and then those little movements hide all sorts of
transformations. Now, we have to
animate the cross that's going to the right, and at the same time,
we are going to increase the size of
the black background. Basically, this cross is increasing the size
of the background. And first of all, we're going to shrink it down a little bit, so make it just a little
bit smaller so that it looks like it's
kind of jumping out. Then doing the rotation,
moving to the right, and as it's moving to the right, we're actually going to
convert it into another shape. But this time, we're not going
to convert it into shape. We are just going to
make the same gradient. We're going to apply
the same effect, and by moving it super
fast to the right, we will able to hide
the transition. The only reason we're
able to do this is because it's going
fast to the right. There's definitely a way to
do it with busier paths, certainly, but I just didn't
want to deal with that. And as I always say, the thing with after effects is there are like 1,000 times to do
exactly the same effect. So whatever effect
works for you, yeah, you can certainly do it. They might have done
it the other way, but I decide to do it this way. By the way, the background of the basically the black background is
also changing the color, so it's taking your
attention and you don't actually pay attention to the transformation
to the morphine. Now, we're just going to
have to add some text, change the phones,
the formatting, and I'm going to run a script, which is a text evo script. It's a script that
helps animate the text. Basically, it's like a new panel appears that you're able
to animate the text with, and I'm animating both
basically the arrowheads and the text itself. And in the end,
we're going to use our camera to make
this whole part smaller and then we're going
to decrease the opacity on many of the layers to make
sure it just disappears. I'm just going to customize a little bit of the smoothness of the picture of me
appearing on the screen. Now, there's one thing that
we completely forgot to do, and it's this sort of
interesting gradient highlight below the things that are appearing
next to my picture. So I copied the gradient, the four color gradient. We added a stroke, and now in order to create
this sort of fade effect, I decide to use a mask. I precomposed the thing that's going to
appear on the right, and now I'm just using the
mask to hide its ending point. Now, one way we could do this is we could animate
it with a mask, appearing it onto the screen. But the other thing we could do is we could just move
it onto the screen, and it would look
exactly the same. We're just going to
change the position of the thing and it's going
to appear from the right, and then we are going to have to do exactly the same
thing on the left side. So duplicating it,
delete the key frames, changing the position
of the mask, and now doing exactly the
same thing on the left side, trying to make sure that things are perfectly in the middle. And you can see,
I had some issues with some of the things just kind of being on
top of each other. So I had to go back and
forth a little bit, moving things around to make
sure it's not overlapping. If you have any questions,
let me know, but than that. I'll see in the next video.
6. Sound Design Breakdown: How I Crafted the Audio for the Viral Edit (Part 3): Let's take a look at the
audio and break it down. First of all, I downloaded a song from a website
called Pixabay. It's a website with free music. The only thing I recommend
is if you want to use it, you want to make sure
to read their license. So I just download the song by downloading
you agreed to license. Make sure to read
lessons and comply. But long story
short, you can use their content for free use
content without having to attribute to the aor and modifying tap content
into new works. When I come to premiere, I
take a look at the song. Sometimes I like to
start from the end, but sometimes I like to
start at the very beginning. So in this case, you can see I
selected the end and really helps to end the video. So sometimes I do
start from the end, especially if the
video is short, there's something
that we can do. So if I disable this one. You can see that it goes
from being very active to ending very fast,
but super smooth. I just literally have to search for the part of
the song that ends, then put it in and maybe
manipulate it a little bit. But overall, that's
how it's done. For this part of the song, as you can see, this is
the part that I used. I actually decided to
use right away the bit. So I oftentimes explain
that I usually want to start the bit when an interesting part
of the video begins, but because this
video is so short, we just don't have that
much time to add anything. So this is the reason I decide to go with the
bit straightaway. This is where it starts. And this is exactly
what we have here. Now, in terms of because you can hear it's a
little bit less loud. So if I press on G, we can see that the gain
is set to minus ten, so it's lowered by 10 decibels. And then we just
add in transition in between those so you
can either right click, Right click Apply default
transition by just click here or press on Shift Command
D or Shift Control D, and you'll be able to do
exactly the same thing. As you can see, I just
click here, pressed, and I was able to
do this transition. When it comes to
the sound design, if we mute the song
by pressing here, or there's another
thing we can do. We can actually just press on S, and we are going to play
solo just a certain track. So if I press here, we're only going to play track number two. Okay, so we have
interesting pop up. We have three boards, so that's why we
have three sounds. Actually downloaded
the sound from Pexels from sorry,
Pizza Bay as well. So if we search for UI, and then we go into
sound effects and yeah. We can search for Oh, actually, this is exactly
the one that I used. So you can come
here, search for UI, and it's very
interesting sounds, very simple, easy to understand, but
absolutely beautiful. And if you add the hundreds of them become super expensive. But actually, I'm not
going to press on S. I'm going to press on M
to mute the top one. So we have three sounds. And I also take a look at what exactly is happening
in the screen. I want to make sure
that each movement, each motion has
some sort of sound. So in this case, we have three, one, two, and three. And then when things are going
down and my head appears, we have a s posh, Swoosh
that's going down. And then for the background
that's growing behind me, we have the sound effect. You can barely hear
it. But it's sort of just UI sound as if something
just moved in the UI. Then we have another
swoosh and another swoosh, because we have a swoosh from the right and swoosh
from the left. We don't have much more, to be honest here, so that's why I'm not adding
anything else. Technically, what we can
do is we can animate the movement of every
single part that's here, every single thing that
appears on the screen. But then it becomes a
little bit too much. And this is also kind of an interesting balance you have to find that yeah, you can always go for more, but then sometimes
you have to go for less because sometimes
less is more. Because if you go too much becomes unbearable.
Let's go further. So we have another switch here
when things are going up, and then Okay, so
we have another UI. Let's look at this one. Just another UI sound. Dan, let's take a
look at this one. Yeah, just simple sounds. As this one is growing,
there's a sound. So we have two sounds
one after the other. One is when the plus is
starting to grow and transform, and the other one is when
the text starts appearing. Technically, we can add a few more sounds here,
but to be honest, I think it would
be a bit too much, and I want to keep it
kind of simplistic. And in the end, when things disappear, there's
another sposh. So let's take a look at everything just sounds
without the music. Yeah, now let's listen to
everything with music. So when we have the
music, the sound effects, everything just comes together, becomes beautiful,
premium, expensive. That's how it works.
Simple things, little things that add up a lot. If you have any
specific questions, be sure to leave them below. But than that. I'll see
you in the next video.
7. Congratulations!: Congratulations. If
you're watching Miss, it means you've made it halfway through the
course content. I know we've covered a lot, so congratulations to you for
making it to this point. There's a lot more valuable
content coming soon. But before we get
to the next video, I want to simply ask
you if you found value in this program
up until this point, to take 60 seconds to
leave you honest review. Of course, I will
immensely appreciate this, and this will also
help hundreds of future students in choosing
the best program for them. So leave you feedback now. And of course, if there's
anything I can help you with, let me know in the
Q&A section below. You're doing great. Keep going. And without being said,
let's get to the next video.
8. Concepting a Viral 3D Edit with ChatGPT (Part 1): Welcome. In today's video, I want to show you the behind
the scenes and show you the whole process from coming up with an idea to
creating a script, recording audio and
creating a whole video. And you'll see I have a
couple of notes here. This is from yesterday. So this is the plan for
today to create script, record audio, and
create a video. And then in the very
end, I have an idea. I wasn't sure about what kind of video I would create today, so yesterday before bed, I was kind of
thinking, you know, when you ask yourself
questions in your head, your head will try to find the answers just
throughout your day, and then you'll get an
answer sometime after. So that's what I did, and
I had an idea before bed. The idea is, how much does Mr. Beast make per second minute, hour day and do to research, either to use all of those
or to use one of those. And in order to research, I'm going to use HAGPT. So we'll put it here for
now. Let's do some research. And I'm going to ask HAGPT directly, just about everything. The best way that I
found about HATGPT is to give it as much
details as possible. So what you are trying to do, what you are struggling with, give it just details
about the situation, and then it will give
you the best answers. It's also great if you can name HATGPT like a specific expert. In this case, it would be a
professional scriptwriter that gets paid like
$100,000 per script. Let's give it a try. You are a professional
scriptwriter who gets paid $100,000 for each script. You need to consult me. On the idea of my script. The idea of my script
is called dot dot. How much does Mr. Beast make per second, minute, hour day question mark? What I'm trying to
understand is, first of all, for your information,
this is going to be a vertical video for platforms like Instagram,
YouTube, and TikTok. Secondly, should I
use one of those? So, should I use
how much does Mr. Beast make per second per
minute, hour or a day? So one of those or should I
use two or all four of those? And this is going to
be the opening line. And this is going to be like, motion graphics with three D, all created in after effects, like a bunch of just
cool animations. So this is going to
be an opening line. And then after that, I'm thinking about showing the calculations and
saying something like, let's calculate and
showing the calculations. Let me know about everything. Let's see. Use one
preferably per second. Why? It's fast, immediate
hooks with microscale money. Sounds more insane than per day. Psychologically per
second feels richer, faster and more viral
worthy. Great. I agree. How much does Mr. Best make per second per minute? Mm hmm. Okay. I think then in this case, by the way, you can post
the video and read it. I'm just not going to
read it out loud for you. Because of what
the HGPT suggests, I think we should
stick with per second. And, okay, what
was her call that? We're sticking with per second. Everything is great. I like it. Okay, so we will stick with
keeping just the seconds. And based on that, I need
you to create script. I kind of like your structure
and the timings are great. So let's calculate that. On top of that, I
need you to calculate actually how much misty
Beast makes per second. Take into account all the information that you
can find online, you'll definitely do
a better job than I will put everything
together all his companies. So we're talking festivals, views staats, just mystery
Beast, all the channels, everything, and do
the calculations and send those to me
as well as the script. Hmm. I remember this that Forbes income at 85 million
or something like that, but miss Bess, I don't remember. Was it more or less? I
know what we can do. We can increase AVD
by saying that, so I like the way you say Beast Industries pulled
in 473 million 2024. And after that, we should say, so we shouldn't say it in the hook, but we
should say it later. So that is how much that is per month? Should
we do calculation? No, I think we shouldn't
do any calculation. So you should mention that it is what that is per
month per week? Actually, don't say per week. Just say per day and then
per hour and per minute. Okay, instead of this weird CTA, let's use CTA for
people to share, something like that, like share. Okay, now, put the whole script
together in one message. Send it to me and send
it to me in two parts. One is just a script by itself. And then on top of that, exactly the same script, but with your comments. So one is with no comments, just the text itself
so that I can read, and then the second so that I can take a look at
it while editing. Okay, now I'm going to put
everything into notion, so we can just go ahead and
copy everything, put it here. Okay. So let's do it like this. Great, so this is our script. How much does Misty
Beast make per second? Let's break it down. In 2024, Beast Industries
made 473 million. That's $39 million a month, 1.3 million a day, $56,000 an hour and $730 a
minute and $15 every second. Now, send this to someone who thinks UTi bus don't
make real money. I think it's an
interesting script. So, we did the first part.
We created the script. Chuck Mark. Now, let's
create an audio. I can create an audio
using a voice memo. That's something I've
done in the past. Let's just record it.
How much does Mr. Beast make per second?
Let's break it down. In 2024, Beast Industries
made $473 million. In 2024, Beast Industries
made $473 million. In 2024, Beast Industries
made $473 million. That's $39 million a month. 1.3 million a day. $56,000 an hour, $930 a minute. And that's $15 every
single second. Now, send this to someone who thinks YouTubers don't
make real money. Okay. Let's listen,
and let's see. Does much does Mr. Beast make per second? Let's break it down. In 2024, Beast Industries
made $473 million. Actually, I quite
like it sprisingly. Okay, now I'm just going to drag it from here to here so that, and I'm going to
delete it from here. So let's close it.
Close hat TPT. Now, let's organize
after effects. Miss beast. Video. Okay, put it here. I'm not sure why it's
calling it this name. I don't live there anymore. So miss to best video. We created script. We recorded an audio,
Jack Mark. Boom. Now, I will see you in the
next video where we are going to create this video
and edit this video. If you have any questions, be
sure to leave those below, but other than that, I'll
see you in the next video.
9. Building a 3D Viral Edit: Starting From a Blank Composition (Part 2): Welcome to this video,
and let's begin. So this video is
going to be a five X. You can see that I created a Premiere Pro
project, imported the audio, created sequence,
added the audio, and now I'm just cutting it. This is something that you
can do in after effects, but it's just a lot
easier for me to do it in premiere because then you
can go with dynamic link, literally one button, and then you're editing
in after effects. Just cutting,
cutting, and cutting. Okay. One thing you will
notice that you cannot dynamic link the audio
to after effects. So you have to create some
sort of visual layer. And in order to do that,
I created a text here, and now I'm renaming
the sequence, and now I'm importing
that in after effects. I have a shortcut option A. You can create shortcut
for yourself and then you'll be able to do it easily. I deleted that text
because text is imported as
compositions weirdly, then precompose the audio
to make things easier. Command Y to create the solid white background,
Addit the text. Major, it's a tasker font. Put it in the middle,
made it darker. Now, we need to find a
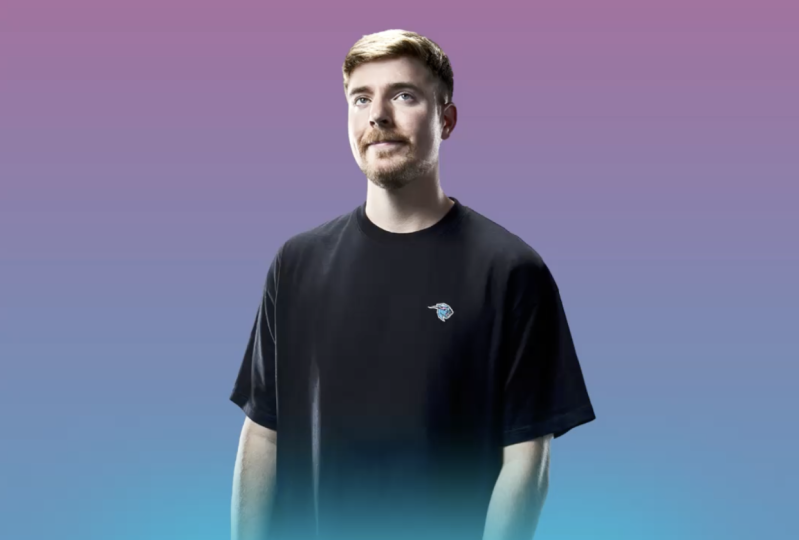
picture of mystery Beast, and kind of like this one, but then I thought, it's a bit problematic to cut
that out in after effects, but then I thought, mm,
I can use Photoshop. And then with a
click of a button, you can literally
remove the background, and then you can actually import the Photoshop file
into premiere. Oh, sorry, after effects. So that's exactly what I did. You can see that the file
format is psd dot pSD. Now, I opened the
Camera Raw Filter. If you go into filter
camera raw filter, you can customize the colors to make sure it has
a bit more live. Now, I created the camera. I created the null,
connected the camera to the null and now I'm
just writing a script, which is the text Evo script. It's a script that
helps animate the text. So you can see with
the click of button, I was able to do that
super, super easy. Now, I play around
with settings, the way it works is you
have two keyframes, you animate things
on one keyframe, and then text just becomes
normal on the last key frame. And then as you can see,
I'm just playing around. I never did de plur but
now I decide to do it. Okay, now I'm changing
colors to make sure things are organized
and it's easy to find. Now, I also need to find
the misty Best color codes, and as you can see
them on screen, I added a gradient, like, a four color gradient, and that's what I tried
to do in the beginning, but then you will find
out that it didn't work. And so in the end, I had to use a normal gradient and
just use two colors. And this is what we have. So I'm just playing with the null and the
camera a little bit, and then eventually I
create another solid. I added a fast box blur effect. For this effect, you want
to make sure you have the repeat H pixels ticked off. Otherwise, it's not going
to be not going to work, this effect the one
I'm trying to achieve. So I had the second viewer, and now I start moving
things around a little bit. Now what I'm trying to
do is to put things in three D perspective so that
when we move the camera, it doesn't just move
like one sort of piece. It moves in different ways, in different interesting ways. The text is not stuck to Mr. Beast. It is in
different positions. And you will see the
way it works in a bit. Right now, what we have is I'm just change doing the text a little I realized one long line probably will not work best. And I think the way I've done here worked absolutely great. You'll see the final product. You'll be surprised
the way it worked. So we have the null dragging
the camera closer to Mr. Beast, and by the way,
the gradient stays two D. The reason for that is
because if we make it three D, it's going to be like
small on the screen, but we want to make sure it fills the screen
at all times. So that's why I'm
doing it like this. So once again, text Ivo
to animate the text. And now we had a couple
of issues with text. It's an issue I
never had before. It's when I tried to do two
animations at the same time, so I had to go back and forth
a little bit with this. But then we were
able to solve it and everything worked great. Okay, now we're creating
an adjustment layer, and it's an effect
that I wanted to try. It's an invert effect. It's something I've seen while
researching these videos, but it's not something
that I decide to go eventually because
it didn't look good. So, eventually,
it's a black solid, which is two deep,
and I'm putting Mr. Beast above it, and then the black solid
above everything else. And this is something I tried
to experiment, as well. There are some very
interesting videos like these when the
text moves around, but then realized if it's
just the text itself, yeah, it might look great,
but then as you can see on the screen,
whatever this is, it didn't look good,
so I just decided to go back and not experiment. So right now, I need to separate Mr. Best
from the background, and that's what I tried to
do in the very beginning. But then I realized maybe
we shouldn't separate him, and we should just hide
him on the background. Let's break it down. I was trying to make it perfect,
so you can see me going back and forth, like 100 times. Now I decide to rename
things a little bit and create another gradient. I install this flow
script or sort of, like, extension,
which worked great. But then eventually I decided to work
mostly with pressing F nine and customizing
the easiness or easing, basically, easing, easing
out manually myself, like you are seeing
right now on the screen. It's just a little bit
easier for me this way. I'm still not used to the flow, something I need to
work on to get used to. Then decided to get some
inspiration, went to Instagram, found a person that we
did the previous video with I wasn't quite sure
what I was trying to do, but then once I understood
what I was trying to do, things became a
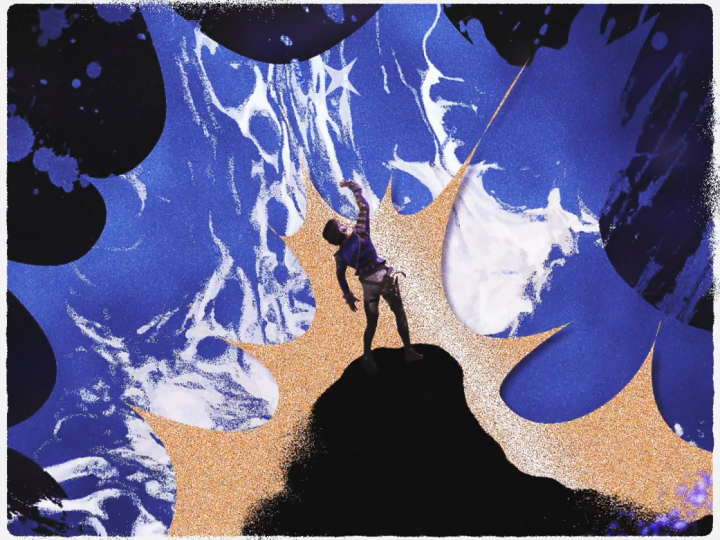
lot, a lot easier. Basically, what we're
doing right now is we have a solid with a gradient, and I'm trying to achieve, like, a specific certain effect, where it's as if you are painting the screen
with these gradients. And whatever that is, it's going to cover
the background. And we're going to
separate the text, the black background, and then we'll have the new foreground. So something like this,
pretty interesting act. I have never done it before. But yeah, turned out
to be pretty good. Right now, we just need to
animate the linear wipe. And first of all, when you apply this effect,
it goes from left to right, and I had to change the direction so that it
goes from top to the bottom. And then once I do it for
one of the gradients, I can do it for other
gradients as well. I will just need
to copy and paste. And you will see that
one of the gradients will be going the
opposite direction. So you can see these
are going all down, but kind of need to separate
them so that one goes down, the other goes up, and then
it goes down again, exactly. So for that, we just need
to change the direction and change the timings so that we have left,
middle, and then right. And I'm always going
back and forth to see exactly what's happening. Sometimes you can
get so caught up into editing that you just
don't see what's happening. So that's why I have
to go back and forth. To see exactly what I'm doing. Okay, moving further, 2024, putting it over here. And I thought it would be so
interesting to track mat the 2024 to one of the gradients so that
the gradient reveals it. And so I just did a
track mat, that's it. And you can see that once I
made these layers three D, they kind of move, so I
had to move them around. And yeah, just going
back and forth, back and forth, a
little bit crazy. I totally understand, but yeah, this video took me like
half 1 hour and 40 minutes to do this portion. I had to go and do things a little bit creative
with the gradients that were on the right on
the left because it just I could probably do it with a camera and moving them, but then I decided to
make things a little bit easier and then
change the position so that they disappear
when I zoom in and just made things a
little bit smoother with the graph editor game, and I had to go with
HDPT little bit. Oh, yes. Here, I just wanted
to have a confirmation that what GPT helped me to
create is actually true. And so I made sure that
he found an article. Then I took a
screenshot of that, put it right over here, and now we just need
to track mat it. So I'm creating a big
shape, a big square, making sure it is solid and it's not just so it's a solid field, not just a stroke and then connecting, say, track matting. And then I'm creating
another shape, making sure it is multiplied. The way you can switch between different blending modes is
pressing Shift and plus, and then you'll be able to
see whichever works best. In this case,
multiply work great. Now we just need to animate the linear wipe to make sure it is highlighting
the $473 million. Making sure I'm naming
things correctly as well. And then, of course,
the timeline looks a little bit messy. I'll have to clean
that up in a bit. So this is what we have now we also need to make it three D, put it behind the gradients
on the right and the left. At first, I want to
move from the left, but then eventually we are going to create a very,
very cool animation. So eventually, I
decided to literally just animate the size
and the roundness of the rectangle path to make
it smaller so that as if it's a ball that's just
coming from the bottom, then appearing and, you know, growing in size looks
super, super cool. Like, a very interesting
UI animation. And at this point, I
decided to take a pause. If you have any questions, be
sure to leave those below, but other than that, I'll
see you in the next video.
10. Advanced 3D Motion Design: Completing the MrBeast Visual Breakdown (Part 3): Welcome to the second
part. Let's continue. First of all, what
I decided to do is to download an iPhone model. On a website called Sketch Fab, you can find different
three D models there. Really great, as you can
see, and as you will see, the file format is called GLB, and to be honest, most of
the files that you can download from this website
will work in after effects. So what I want to
do is I went to create an iPhone UI Animation. I didn't have a complete
final product in mind, and that's actually the issue that I had with this project. I was kind of experimenting and I wasn't sure what the
final project would be. And so it took me so much time to figure things out.
That's the issue. One thing I would definitely
recommend it is for you to think through what you
want in the very beginning. It's going to make your
life a little bit easier. So I did have a couple
of things in mind, but, like, not strictly. Okay, so eventually, it turned
out that I actually would not use the iPhone because it's just it didn't work.
It didn't look great. However, I decided to use a mouse cursor and the
mouse cursor from Mr. Horse or premiere
composer, as we call it. So you can see in
the bottom right, if you search for a mouse,
that's the animation composer. And it was so troublesome
to get just the cursor because you can import the whole composition
where the cursory moves, clicks and things like
that, it's all animated. But in order to actually use just the cursory and take
away the cursor from that, you had to open the composition, play around with the settings,
and it be troublesome. So if you want to do
that, I do recommend you going to the composition
and then pressing on E. That's the shortcut.
Opening layer, press on E, it's going to open all the
effects that the layer has, and then you'll be
able to get rid of all the codes that
the layer has. By codes, I mean, expressions. Now, the second thing
I need to do is I need it for the cursor to appear
and then to kind of click. So by clicking, kind of
it will drag the clip. I needed the cursor to click on the pop out of mistabst and then it will drag
it to the right. And because I was trying to do everything sort of like real, it did take a little bit
more time to experiment, and we're going to
see this in a second. I wanted to drag the
misty Best to the right, but I wasn't sure how to do that because I wanted
to stay in the frame. And it's confusing for our
brains to understand how it works or at least for my brain to
understand how it works. Eventually, what I
decided to do is to work around it creatively. I wanted to create
a solid layer that would be a gradient, a
transparent gradient. And then I would actually
just move this gradient onto the screen and move
the 2024 to the left. And therefore, it will look like we're moving
onto the new scene, and we're dragging the Mr.
Bies onto the new scene. By 2024, we'll go to left and then the gradient will appear. The issue with that is it's a little bit hard
to do the gradient, and the way you actually
do the gradient is you have to use a luma matte. That means that basically I
need to create two gradients. One is actually the color, and the other one is
the luma gradient. And so you have to track mat
one layer with the other, and the bright parts are visible and the dark
parts are transparent. I believe that's how it works
or the other way around. So if you ever do this effect, this is
the way you do this. And just play around,
experiment a little bit. So that's what I needed to do, and that's exactly
what I did here. And now, the issue was because I had so many things parented, like one thing
parented to the other, you can see I'm doing a lot of just trying to identify
where things are, trying to parent them
in the right location, it was a bit of a headache
to do all of this. Eventually, what I
decided to do is to move the camera to the right, but because the misty best
pop up is not three D, it will stay in the
middle of the screen. So as you can see, that's
exactly what we're doing. We're moving the
camera to the right. Everything moves to the
left because of that, but misty Best stays
exactly in the very middle. The idea behind that the cursor actually drags misty
Best to the right. In order to do that, we well,
if we do it in real life, if you drag something, it's actually going to first
stay in this position, and then it will follow. So it's not like you drag it and it follows exactly
where you drag it. It's like there's little delay, and that's what I'm
trying to do here, because that's how physics work. In order to do that, I need to twist a little bit and then
move to the left little bit. A bit chaotic. But the
way I do this is I have the highlight and the
misty Best text pop up. It's all connected
to the track mat of this article because I have
the layer called Track Mt. So I parented everything,
one thing to the other, always parented
to the track mat, and then I'm just
animating the track mat. Like the positions, you can
see that like it's swining. And then I had to play
around with eating easing out to make sure it
looks like it is in real life. And overall I think I
did a pretty good job. Maybe if you pay
real good attention, you will feel like
something's wrong, but other than that, I
think it looks pretty good. Now, I'm decreasing the size and the roundness playing around with those key frames
of the track mat. Basically, what we're
doing is we're dragging the missed beast
onto a new scene, and then it just
disappears because we're going to have some other
extra animations there. The only reason we're doing it is because we want a new scene, and we don't want to just, like, to not be
smooth, in a way. Okay, next thing I need
to do is I need to create this outline and the outline, as you
can see on the screen, I wanted it to be hidden behind the misty Bist article so that when the misty
Bist article disappears, this thing appears
so that people don't expect it's
like a bit magical. And that's exactly
how I did this. Then I selected both the
outline and the text, and both of them at
the same time and then align them to be
in the very middle. Then you gain parent one to
the other and then align it once again so that it's not like in the
middle between each other, but they're in the middle
of the conversation. Then I needed to create
another outline, and then I needed
to animate that. But I didn't want it to
scale just uniformly. I wanted to become
like a circle, as you can see, that's
what we're doing. Become circle and then it grows. So you have to press on the
button to scale uniformly and animate the height and the width in terms of
the size for this. And then we need to animate
to come from the bottom up. And so when the circle
hits the 39 million, the 39 million
supposed to bounce. And as you can see, I'm
animating everything by hand. There might be a more efficient way to do this, but once again, because I wasn't sure where
I was going with this, things are a little bit
chaotic, and as you can see, once the ball hits, 39
million goes up and then it is animated razily we will have
39 million per month. Then we'll have per
week per day per hour, maybe not necessarily in this
order, but that's the idea. So we go smaller and smaller and smaller and we'll have to do this animation for every
single one of those. One interesting thing
that I decided to do is the text that's what I'm doing here is trach matted
to the outline, but how is it trach
mated to the outline if the outline is empty? Well, it's not because in the color, it's
actually a solid. So it's not just the stroke. It's actually the field color
is filled, but it's black. That's why it feels
like it's empty, but it's just the same color. So we are doing the
same for a day, an hour, then we
need to do a minute. That's the fourth one.
And then in the very end, we have to do a very
different animation. So these four are
kind of building the anticipation of a person of knowing what's
going to happen next. By the way, after
effects crashed for me. And this is exactly the reason, exactly the reason
why I tell to go into the preferences
and to enable autosave and autosave like every 5 minutes because it
crashed, and no problems. I crashed, I
remembered everything. So we're building
anticipation of the viewer, month, day, hour,
and then a second. And for the second,
we're going to have a very special, interesting, neon colored animation screen with changing the shapes
and things like that. It's super cool. I also need
to animate everything out. So I created an animation out for one of those,
and then basically, I animate one and then paste
the same keyframes onto the other shapes because it's just exactly
the same shape. Then move the key
frames slightly to the side so that they are not decreasing in size
all the same time, but there's, like, you know, it's like, like a
coniferous tree. It's like, small at the bottom, big at the top. Or vice versa. And now, the last
part that we need to animate this
special neon thing, first of all, I'm
going to create a circle and I'm going
to work on circle. So basically, I'm working on a shape layer and I'm
customizing the shape layer. And I thought I would
use the circle, but then I realized circle
is not going to work. I will need to create
another shape. But because I'm going to
create the same shape layer, it's going to have
all the same effects. Okay, so first of all,
I'm playing the gradient. Secondly, I'm applying
the inner glow and then outer glow. You can also apply glow from searching the effects, and
that can definitely work. But in that case, and actually this is something I tried to do it in this video. But that also illuminates
the inner colors, and I didn't want that. I wanted the inner colors
to stay exactly the same, exactly as the
gradient and to have maybe the inner glow
like we have here. Eventually, I added the inner, outer glow and just played with the colors a little bit to
find exactly what I liked. Now, you will see that I
have this shape layer, and you will see that I can add to this exact shape
layer another shape. This shape is going to have
exactly the same effects, but I can now delete the
circle that I had before. And we're going to have
exactly the same shape. Now, I wanted it to be inspired
by the previous video. I actually got really inspired
by the previous video. And so I need to
put this cross or the plus sign for it to help
me to customize the shape. So I needed to convert it
into the busier paths, our big shape, and then
customize it like this. Looks a little bit weird, but it's going to
look very great. Okay, so in order to get rid of the handles that make
the edges super smooth, you need to press on option and click on it or
Alt on Windows. And then, obviously,
we also need to put the key frames for the size or for the scale for the path. And then I did the rotation
because I wanted it to rotate and worked perfectly. So it comes from the
bottom to the top, and you will see that
the key frames are not all at the same time because
this is done on purpose. First of all, it's going
up, then it's sliding, and then it's growing in size. Last thing we need to
do is to add the text. The text is track
madded to the shape, and then we're adding other
texts every single second. This is the text we're
adding in the end. Pay attention that I'm
keeping the same style, so I'm keeping the same colors. All these colors are
just from mist to best. So we have the pink, the blue, the black and white. These are the only
colors used in this video to make sure
that things are consistent. Then it's going to disappear, and I had some extra
speech in the very end. But for that speech,
I didn't want to have any sort of
crazy animations. It's just kinetic typography
animated the text Evo. And you'll notice that if
you look at the properties, the VA part, I had
it squeezed in, so I had it VA at minus, and that's why the letters of the text were close
to each other. So I had to undo
that, put it to the zero so that there is a bit
more space between text, and it's easier to understand. Take a look at everything,
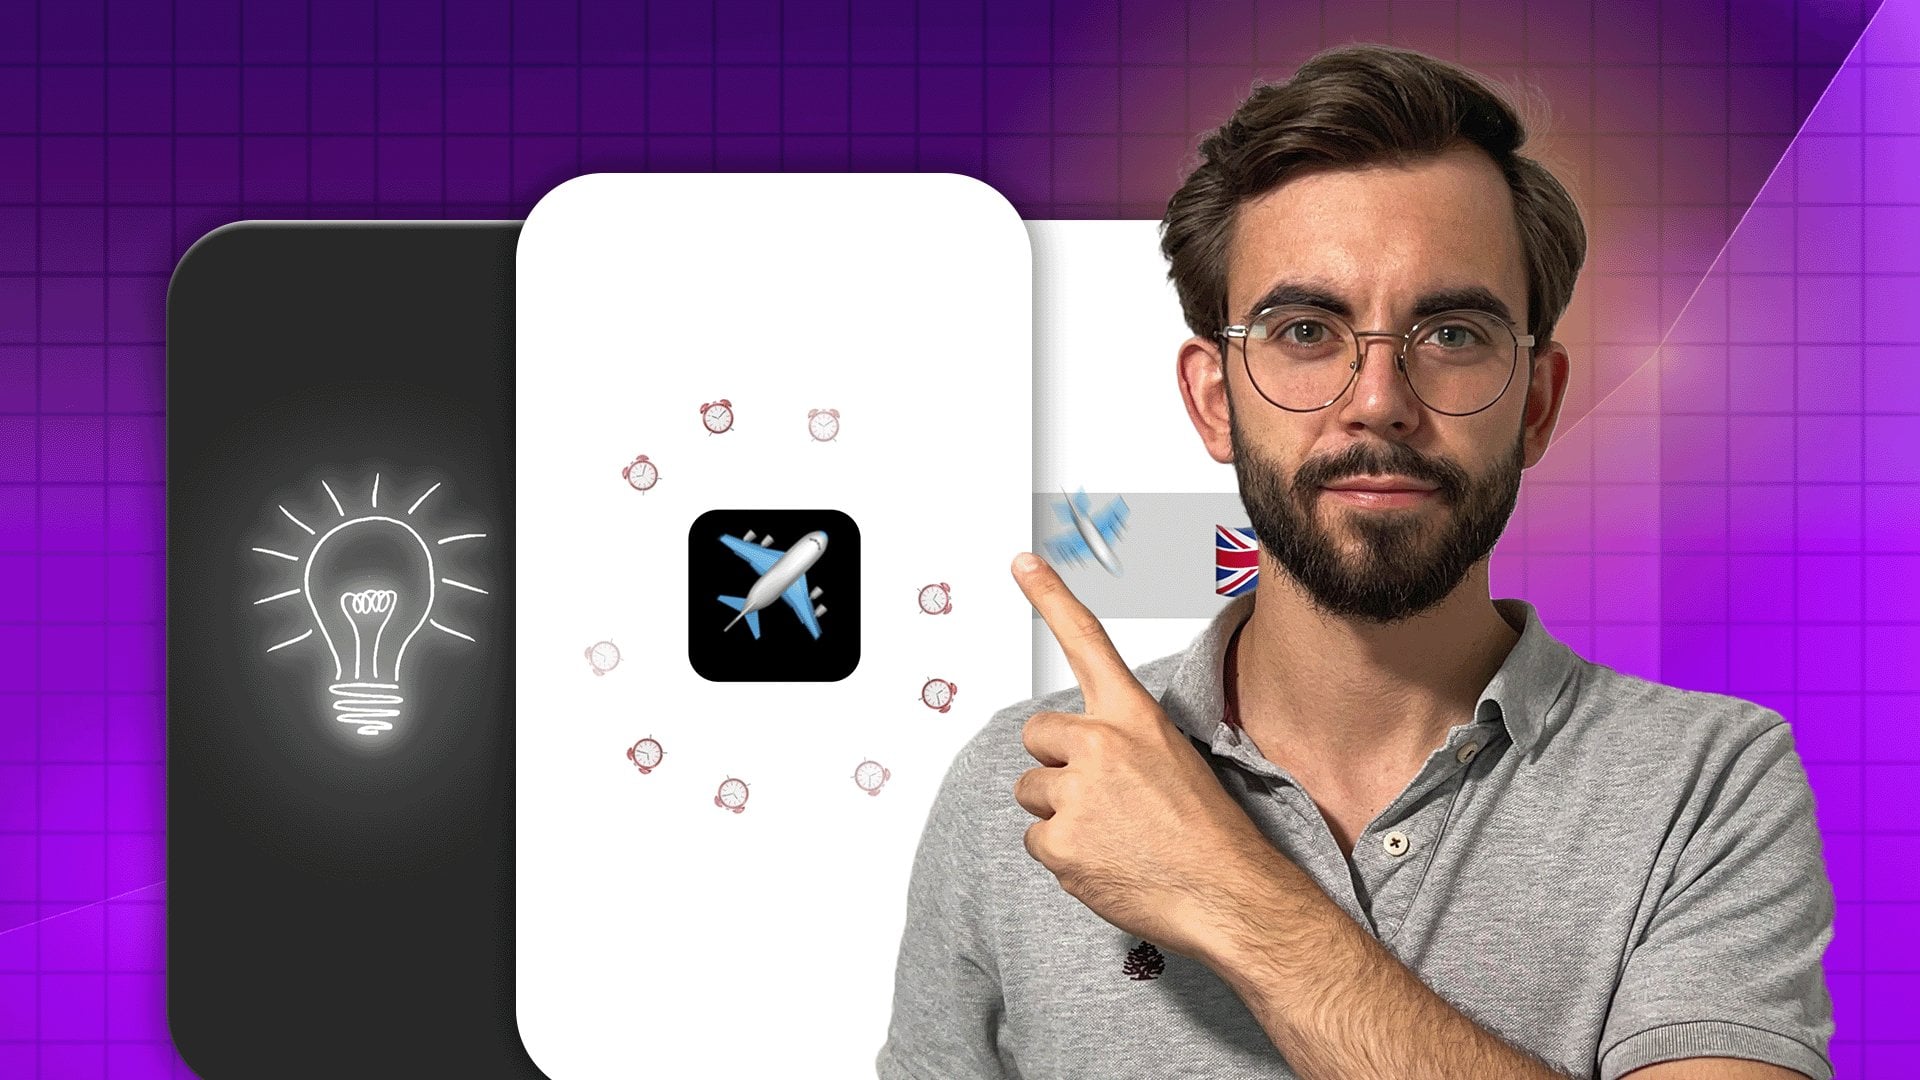
make sure things are perfect. Now, one of the things
I wanted to add, as well, is the clock behind Mr. Beast because when I
mentioned every second, I think it would
look really cool. So put behind Mr. Beast, then just animate it to
appear on the screen, and it appears exactly
as I say, per second. Next video, we're going
to work on the audio, so for that, we'll need to
use the timer sound effect. So like tick tick
tick tick tick. You know, when it clicks, anyway, we're going to work
on that in the next video. In the end, I just wanted
to play around with the key frames a little bit
to make sure it is on point. And the last thing I
want to do is when the text the 39 million
per month per day when the heat happens, the background to change colors. And I use misty Best colors, and in order to do this, I just literally had to cut on exactly the point
where it hits. I need to create a solid layer, and each one would be a misty BselorFour
different colors. And after that, it was time to export and work on the audio. So if you have any
questions, let me know. But other than that, I'll see in the next video where we are
going to work on the audio.
11. Sound Design in Action: Annotated Breakdown of Audio Editing Process (Part 4): Welcome to the last part where we are going to
work on the Audio. Now, I imported the
file into Premiere. Make sure I organize files. In the downloadable
resources section, you will find all the
sound effects that I always use and that I've downloaded for this
project as well. So you can see, I have some of the files that I always
use in my computer. That's one thing I did. Then the second thing I
did the premiere composer or miss horse, which is also great for
all sorts of swooshes, clicks, you know, there are a lot of other
interesting sounds. So if you want to
check them out, by the way, I have no
affiliation with them. They're just, like,
really, really great. And the way I would just go
around and paste the sounds, literally just search for
some sort of movement. And every single moment I try to put some sort
of sound effect. So when we have, like,
paint, I use a marker. When the text appears or a highlight, I also
use the marker. But then any sort of movement, zooming in, zooming out, that's Wushes and
then for all sorts of appearing for, like,
UI animations. I used UI sound effects. Like, literally, that's
what it's called, and by the way, a lot
of them, actually, most of them were
downloaded from not Bacels, but we're going to see
this website in a second. So yeah, just going
back and forth, back and forth, every single
movement gets its own audio. And yes, I went on
to Pixie Bay as well to download some extra stuff
because I didn't have it. I only keep the files
that I use often. If I don't use something often, I'm not going to keep it because it's just
going to make a mess. If I need it, I can always
download it from the Internet, and you don't have to pay
for it every single time, because, for example,
pizza Bay's free. And then I had to search
for a curious song. Just literally search for
curious or curiosity, and that's what I go there. The way I like to
work with music is I always try to search for the
first beat or the first, like, big change in the music, and then that's when the
bit hits on a change. So it's the beat doesn't always come in the
very beginning. It's like, not the first
thing that people hear. But it's like, usually in the very beginning
of the songs, there's like a quarter
part and then a bit hits. And when the bit hits, I like to have something significant happen in
the video as well, or to put it where you can
actually hit something. Things start to move a little bit faster or
something like that. And that's exactly what
I did here as well. And I actually
decided to go back to aftereffects to change
a couple of things. One of the files was lost, and there was a little
issue for some reason with finding it with
the screenshot. I'm not sure. Still a
little bit confused. I'm not sure what the issue was. Never had this issue before. The issue is that
for some reason, the screenshot had
only two frames. And it would also
change within frames. Like as if it was like a
live video on an iPhone, not sure what happened
I had to go with TTPT. Still, it didn't work. Eventually, what I had to do is to use the
time remapping. So I click on T remap and then everything
just worked fine. Not sure what happened. Never had this issue before. But if you ever get that issue, just make sure to use
the time remapping. Right click, T time remapping and you'll
be able to use it. So I want to do a
couple of things here. First of all, there was, like, a little hole with
the gradients. There was, like, a
little black piece that I wanted to make
sure. It's great. Then in terms of the cursor, I wanted to put the cursor on specific path so
that it doesn't just appear on the screen but
actually slides from the side so that people can see it because you couldn't
really see it. It was just like, appearing in one place where things are
already black and white, so I actually forgot how to
put the cursor on the path, but then what we had to
do is to create a path, copy the path, pace the
path, and that's it. Then just had to move things around a little
bit, and that's it. Or actually had to
pace the path onto the knoll and connect
the cursor to the null, and that's how I was
able to do this. Another thing I want to do is to add money behind Mr. Beasts. I did have a money animation
some time on my computer, but then I deleted
it for some reason, and I had to go onto Invotu
elements to search for it. By the way, I decide to turn on the blur in the very
end, so directional blur. And then for some reasons, with the gradients, I was
not able to do that. So I had to force the
Uh, the motion blur. And you saw that
I used the effect called force motion blur, CC force motion blur, which worked pretty quick. You just have to customize
it a little bit so that it looks, real? I wasn't sure exactly what happened to some of the layers. Maybe because they
were turned into three D. I couldn't turn
the motion blurer. And yeah, this project
took me like 4 hours, maybe even more of
just nonstop sitting and changing things. I think it was
more than 4 hours. So at the very end, I was quite exhausted, and I didn't want
to mess around with everything because
when one thing moves, the other thing moves. So I just made it as
simple as possible and exported it, and that's it. If you have any
questions, let me know, but than that. I'll see
you in the next video.
12. Download All After Effects Project Files & Templates Here: Welcome. As students, you have access to the files that
we're going to work on. First of all, we
have two folders. These are the project files, and this is the sound
effects slash Music. So let's go into the first one. This is the After Effects file. So you can just go ahead
and click RClick download. Then once you have it on your computer, just
open the file. It's going to look like this. So we have the
video Project file. This is exactly this folder. You have the aftereffect file, open it, and you're ready
to use it if you want to. Although I do recommend you
creating it on your own. Project two file.
And by the way, we have the footage,
we have the overlay. Everything is organized to
make sure things are easy. And in the end, we have the
music slash Ss fex folder, and this is exactly what I used to create these
videos and nothing more. If you have any
questions, let me know. But other than that, I'll
see you in the next video.
13. Last Step!: Congratulations.
You are nearly 100% done with the viral motion graphics for social
media course. There are just two small
steps you need to do. First, take action. As Cafuch said, a journey 1,000 miles begins
with a single step. So if you haven't already, take your first step by
editing your first video. All the best information
in the world means nothing if you
don't act on it, and even small steps lead
to massive outcomes. Lastly, if you found
value in this program, I would really appreciate
if you could take 60 seconds to leave
you honest feedback. I will be immensely
grateful to you, and this will massively help future students in deciding
the best program for them. Although this
course is complete, your journey has just begun. I'm excited to see edits online, so be sure to keep me and
your fellow students posted. Remember, if there's
anything you need, don't hesitate to reach out
in the QNS section below. Thank you again for choosing
me as your instructor, wishing you all
the best, and I'm looking forward to seeing
you in future courses.
 Vladislav Sateev, Video Editor