Transcripts
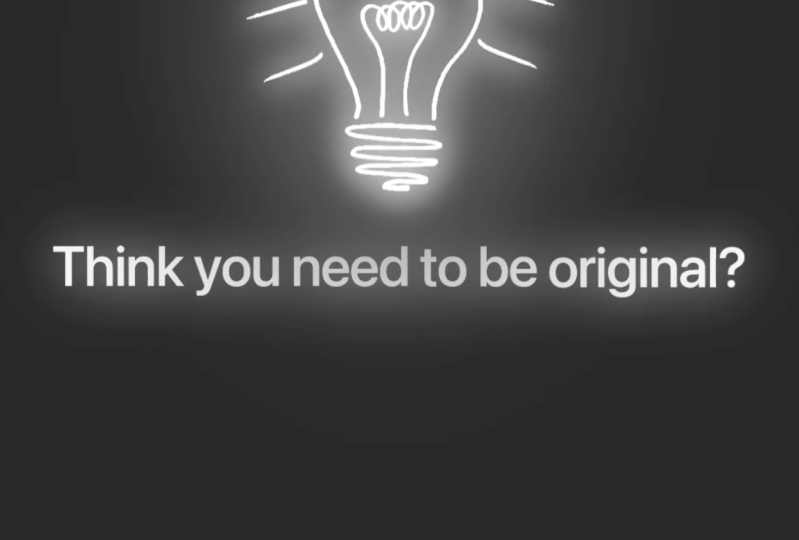
1. Welcome! Start here: Want to create motion
graphics that look slick, premium, and ready to go viral? Then you are in the right place. This isn't at the
beginning course that teaches basics and stops. This is where we level up to full three D YUI style
animations inside after effects. This is the second part of the premium viral motion
graphic series. If you've already
taken part one, then you've learned
the fundamentals. In this class, we go deeper
with more structured lessons, two complete short
form video builds, and clearer step by step pacing design to
help you level up. This class is designed
for creators, editors, and designers who
want to stand out in the world flooded with
generic templates. With over ten years of experience editing
videos for YouTube, managing two of the
biggest channels in their niches,
I know it works. I've spent years fine tuning the workflow I'm about
to share with you. In this class, you learn how to break down and
recreate the basing, structuring, animation logic of real viral motion graphics. Build Apple style UI motion from scratch using
Dayot animation, camera moves and
smooth transitions. Design original video
ideas from scripting with RGPT to final expert
with pro level polish, Master core animation
skills and after effects, working with nos comps, graph editors,
syncing, and more. To get the most
out of this class, I recommend watching
every video in order because every lesson built
onto the previous one, pause and practice with me. After effects is best
learned by just watching. You can also control
the volume and the playback speed to
learn at your own pace. If you get stuck you
have any questions, be sure to drop them in
the Q&A section below. Just make sure to check the Q&A section first because there's a good chance that the
question you want to ask has already been
answered in detail. At some point, you'll be asked to leave a review of the course. Please wait until you've
had a good chance to really experience
the material. Your feedback helps me
improve the course and better serve you and future students.
Thank you for joining me. I'm genuinely excited to see
the animations you create and give you the
confidence to bring your own through these
stories to life. Let's jump in to
the first lesson.
2. Tools You Need to Get Started: In this video, I just
want to quickly go through the tools you
need to get started. And specifically, there are
two tools we'll be using. One of which is Mr. Horse, and the other
one is FX Console. Let me quickly walk you through. So first of all, Mr. Horse,
click on Try for free. There is no need to kind of put your credit card
or anything like that. You just download it
and use it for free. If you want to get
everything Mr. Horse has to offer, yes, there is a paid version, but I never use
the paid version. To be honest, I always
use the free version. And click on Try for free. Download it for Mac and then install it
for after effects. If you use Premiere Pro, you can also install it there, and I'll be using
Premiere Pro to put the audio sounds
later in the scores. So I have it set up for both after effects and
for Premiere Pro, and something I recommend
you do as well. Once you're in after effects, come to Window
Animation composer. And it's going to float
like this in a Window. You can just drag and put
it in a specific location, then, let's say,
motion graphics. You can use this letter
to make it bigger, make it smaller, and you
have a ton of stuff here. You have transitions,
titles and typography, animation, presets,
graphic components. If we go into Premiere Pro, it's sort of similar
going to Window, but then go to extensions
and Premiere composer. By the way, Motion Doc
is also pretty good. Unfortunately, I don't use it because premiere composer is, like, super good,
the free version. But if you want, like, a library free assets, you can also get Motion Doc
and to clkonPremire composer. Similarly, it's going to float, but for me it's
already here in place. And then I can open this up and I can go
into, for example, the text boxes or
transitions sounds, and this is where I'll
be using the sounds. Next, we have the FX console. This is specifically
for after effects, there's an equivalent
to this in Premiere, but it's expensive, and this
one is absolutely for free. Once you install
it, go to Window, and at the bottom, you will have the FX console click here. So you can customize it. And you can customize
your shortcut. So for me, it says
control space here. You can put your shortcut
over here and then click on a K. And now you can
close this window as well. The great thing about this is, let me quickly create
the composition. It's great, like a
shape, for example. And let's say I select the shape and I click on our
shortcut to activate it. This FX console is going to help us search for
different effects. It's just it speeds up
the process dramatically. So, for example, I can
search for glow and you'll see that our shape
will now have glow. So if I increase the radius, you can see our shape
having the glow. So instead of me having to go to effects, search for, like, glow the dragging it here, I can just literally
just click on our layer, search for it, and
it's good to go. Now, you will also find some extra files in the
downloadable resources section. So whenever throughout
this course, I'll be mentioning that, go
to the resources section. You'll find extra files there. If you have any
questions, let me know. Butt than that, I'll see
you in the next video.
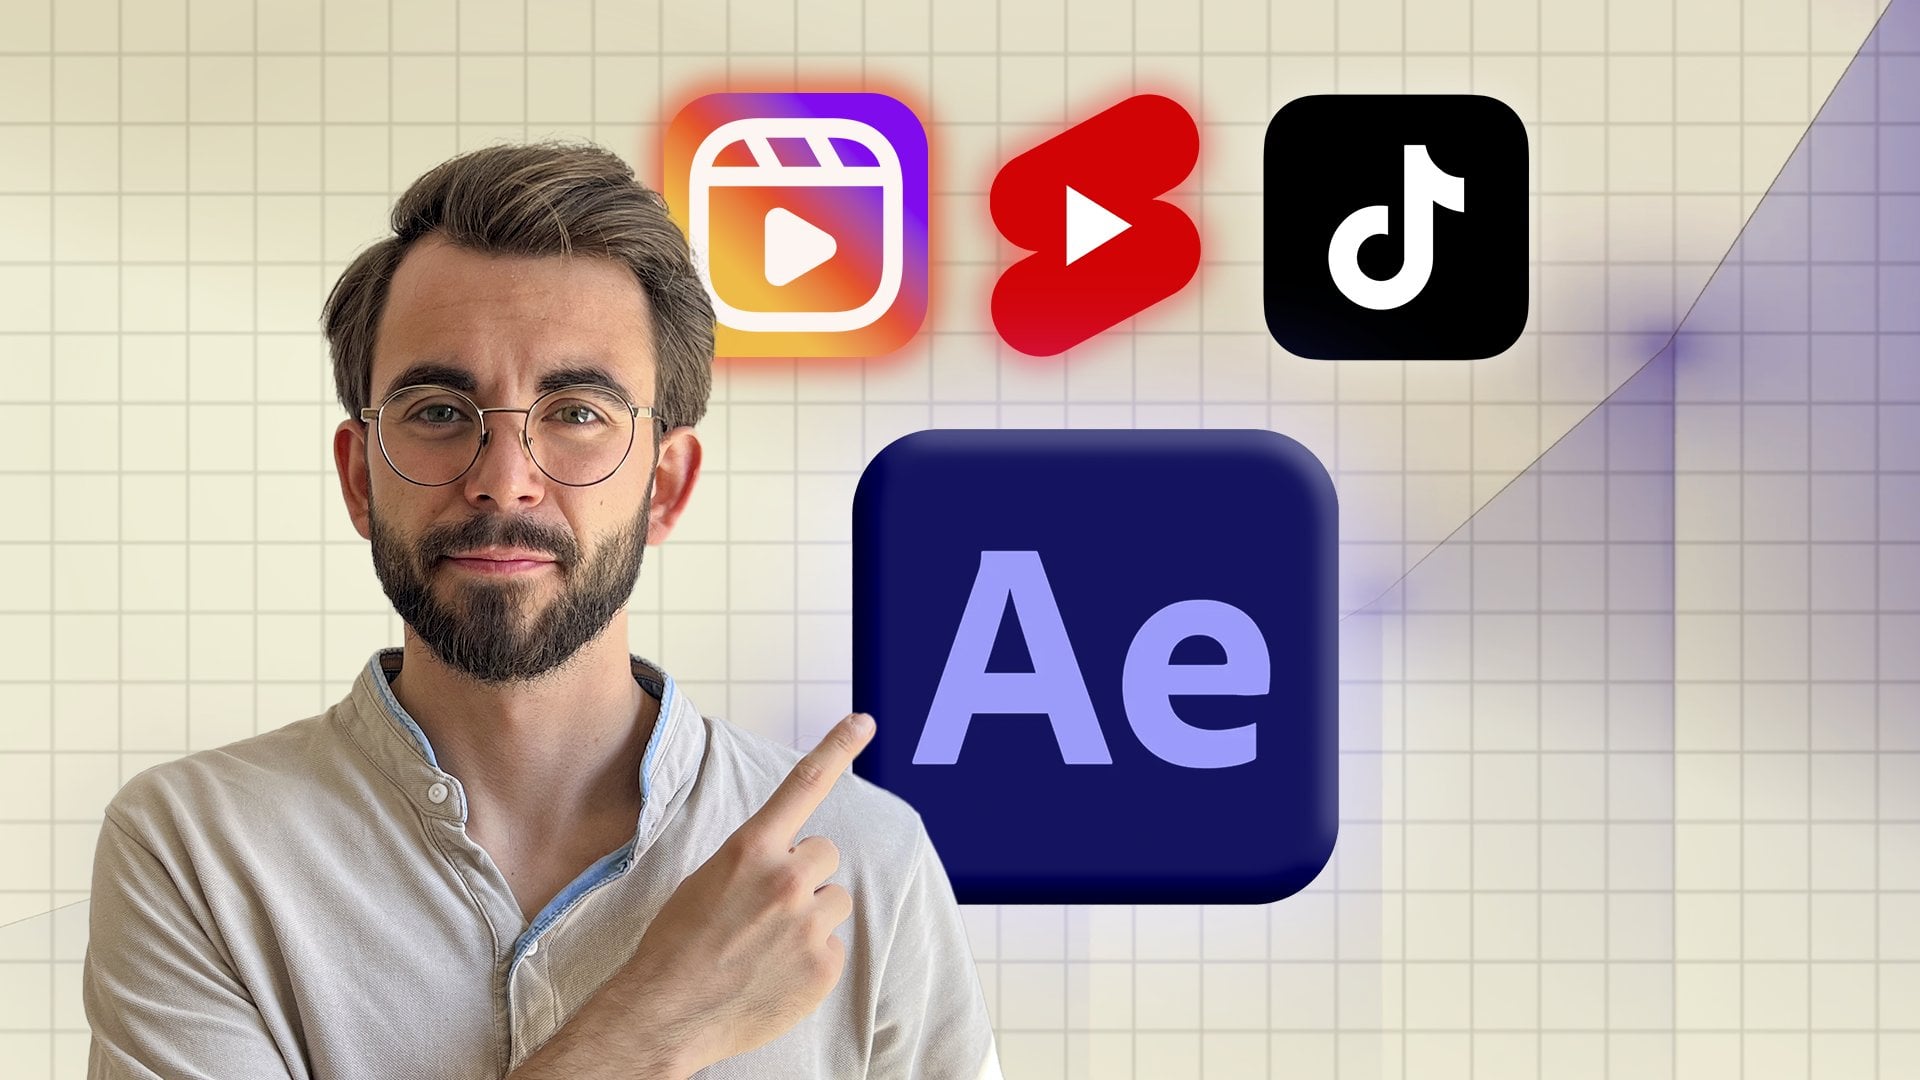
3. Dissecting Viral Motion Graphics for Reels, Shorts & TikTok: Welcome. In this video,
we're going to break down a viral motion
graphic video. Let's jump in. First, I'm
going to open Instagram, and you can get inspired
by a lot of people. To be honest, I have a separate account for Instagram where I
just get inspired. I started watching people who just create motion graphics, and one of the things that
you can do and something I recommend you do either
on YouTube on TikTok, whatever you start watching is going to be recommended to you. So whenever I open
these accounts, I get recommended
just motion graphics, just after effects, and I see people just doing
unbelievable job. So this is something I
recommend you do super easy. Go ahead and search, and you can follow
with tons of people. But one of the best people
that I found on Instagram is creator, creator
unbelievable video. So in the first course, we
got inspired by this person, and I'm still inspired by him. So we're going to recreate
one of his videos. So let's take a
look at this video. You can see that there's a lot of stuff happening
on the screen, right? And when you watch
for the first time, it's kind of hard to
understand what's going on. And it's also fast, and you cannot pause
it in a browser. And even if you're on a phone, you can pose it on your phone, but you cannot scroll and watch through every
single frame. So in order to download this video, which is
what we have to do. We have to go to copy Link. I'm going to go to this link, which is td.com, and it's a website where you can download videos
from YouTube. But if I paste this
link from Instagram, you'll see that it
will give us a link to download it to download
Instagram videos. So I'm going to
click on this link, and it's absolutely for free. I mean, there's, like,
a paid option to do it, but you don't necessarily
have to do it. So we are going to
download the video. Boom. And the video
was downloaded. Perfect. Yes. So let's open it up and
watch it frame by frame. Let's break it down
what's happening. So we have text
appearing on the screen, and in the very beginning, the text is blurred, and there are a couple of
ways that we can do this. We'll see which for
one works best. Mm, interesting.
You can see that even these animations are not
sort of perfect in a way. Because we have the word miss go before the plane
hits the word. Hmm. Interesting. So
we have the plane. Hit the words and
there are some stars, which is something we can
easily do in after effects. We have a little bit of glow, which is also very easy to do. Then we have a very interesting
and elegant animation. The clocks pop up. Mm. Yes, this is very smooth. I like it. So you can see an interesting
thing we have because the background changes colors, and while it's changing colors, like an outline around the plane appears
like it's an emoji. They have lots of timers, and this one changes. Mm hmm. So one of the things
that we that's not so straightforward
is with these sorts of, like, very, very
smooth animations that are bouncing like these ones. So these kind of pop ups that are flying
around other than that, like, it's going to be
relatively easy to do. Okay, it's gonna take some time, but there's, like, nothing that's really
hard. So we have the text. Then we have these pop ups. Oh, by the way, the plane is three D. You can see that it's flying kind of beneath us
and then starts flying up. So there's a little
bit of three D work, but once again, we are going to easily
recreate all of this. Okay, great. So this is
going to be our project. Let's get into the next video where we are going to
prepare our assets. If you have any
questions, let me know. But other than that,
I'll see you there.
4. Prepare UI Layouts, Fonts & Visual Assets for Animation: This video, we're
going to prepare our assets and materials. So we have our video, and let's take a
look at what kind of assets and materials
we have to prepare. First of all, we need
an icon of a plane. Then we need the clock icons, the Apple clock icons. We need the Apple
font, as well, right? We need the images of the
flags or basically the flags. Now, the important thing
is that Aftereffects doesn't support Imoges
and I'll show you a work around and then
we'll just have the Yeah, so just a couple of things. We have the plane, the clocks, the Apple font. That's
the same plane. Okay, in order to
find any of these, I'm just literally going to
go and search for actually, because these are emojis, we can go straight
to the website. I'm going to show
you the website. It's a website called
JPEC optimizer.com, basically emoji to
image converter. So we have to insert the emoji,
for example, like plane. This is going to be our
emoji, generate image. Let's make it bigger, like 500 by 500. Let's see what we get. So it's slightly cropped and I don't like the
way it's cropped. What if we do we need
more at the top, so we need to
increase the height. Let's try like 600. Mm hmm. Nothing is crop. Just click
and download the image. And by the way, the
way you open emojis is control command space on a MacBook and if
you're not a MacBook, just literally go
ahead and search online for specific Emoji, like, like, France, Emoji. M MGPDA is a really good one. So we can just go
ahead and copy it and paste it in, generate image. Perfect. Now we have France.
It was England and France. Okay, so we're going to
download this image. Search for England. Actually, let's try UK. Let's copy this one
and generate download. Actually, I'm not sure if
we have, like, Apple Clock. Oh, alarm clock, yeah. I think this is the
one that was used. Okay. I'm trying to read. Oh, click here. Okay, let's see what we
have. We have the plane. Actually, this
plane doesn't have the white stripes around it. Sorry, not the white stripes. The blue stuff, this
one doesn't have it. Let's search for
plane, maybe here. Plain Emoji. Let's search for it like this. White, plain emoji. And let's just do it in the search results
to see what we get. Sometimes it's good to use services like voto, for example, where they already have the prepared assets
in advance. Mmm. Like, one of the
ways, of course, one of the ways that we can go about after effects is we
can change this color. We can change the
blue color to white. However, because it's a
bit of a gradient, like, you can see you can
see, for example, here, it goes from, like, a
light blue to darker blue. It's a little bit harder
to do and, you know, the gradient here as that's
why I'm searching for just the white plane because
it's going to save us just a lot of headaches while we are
going to be doing this. One of the things that
we can do is we can go to a website
called Sketchfab. It's this website, and we can search for all sorts
of three D models. So it doesn't only
work with after effects it works with other
applications as well. So I'm going to put
the downloadable ones, and I'm going to
search for a plane. Search for white plane. Okay, so something like this, so you can see we have
the three D model, which is going to be three
D from the very beginning. Looks kind of similar
to what they had. Maybe this one is
slightly different, but we are going to download it. Let's just double
check which HGPTkd which formats does
After effect support, and then we'll be
able to download because this one has a
lot of different formats, and we'll see which
one is the best one. Okay, FBX. So we are going to download FBX, which is the very first format. Let's unzip it, and this is
our play here. Let's call it. Actually, we can
just take it out and call it plain, rename it. The way you can rename
is by pressing Enter. So that's kind of a shortcut
to rename like this. I'm going to delete this, and I'm going to well, I'm going to give this plane. It's called this Emoji plane. This is going to be clock. This one is going to be UK. This one is going to be France. Okay, I'm going to
delete the Zip file. And what we, this is the example video, so
we have the clock, the Emoji the clock, the plane, the France, the
plane, and the UK. Awesome. Let's double
check that we do not forget anything. Perfect. So all the assets
are now prepared. I'm just going to
select all of them, and I'm going to create a
folder with all the emojis. Let's call it video assets. Great. And we'll be able to
just go ahead and use them. Instead of searching
mid video or MIT edit, it's going to save us a bit more time and a
bit more headache. So you'll be able
to find these in the downloadable
resource section. Just make sure that
if you want to use these models,
like for example, on the sketch fat website, it's important to adhere to their guidelines,
for example. The license is the
standard free license, and if I click on it, it's important to take
a look at exactly what they allow and what
they don't allow. Sometimes you have
to do nothing. Sometimes, you know,
on different websites, there are different
rules, for example. Some websites literally
require nothing. Other websites require to
talk about the creator who created it to put them in the captions
and descriptions. If you use that
for social media. If you buy these models, oftentimes you don't
need to do anything, but if these are
three, it does require sometimes like a little bit of an extra step
because it's free. It does require you to, like, share the credentials
or things like that. If you have any
questions, let me know. But other than that, I'll
see you in the next video.
5. Animate Viral UI Layouts Step-by-Step in Adobe After Effects (Part 1): Now it's time to
recreate the video. So let's jump into
after effects. First thing, I'm going
to create new project. I'm going to create a new composition that's
going to be, let's say, how long was the video?
Let's Let's see. The video is 9 seconds. Okay, so let's make
the composition, the length like 10 seconds, which is going to be
this video is square, but we are going to make it with 1080 and the height 1920. So this is going to be the
ratio for social media. An important thing is
about the frame rate. Some people struggle
with frame rates. Honestly, don't worry about
it too much, set it to 30. Long story short about
the frame rates. 30 is the best one, in my opinion,
because first of all, 60 is a bit too
smooth sometimes, and social media will just
eat the quality of that. It will lower the frame rates. Eventually. 24 is
a bit too smooth. So I do recommend setting to 30. In terms of the resolution, if you computers slower, I do recommend putting
it as low as possible. So maybe for you, it would be 1080 by 720. Now, important thing
about if you have, like, a very powerful computer,
you want the best quality, you might think, Oh,
yeah, I want four K. Well, yeah, you can definitely set four
K, but once again, social media is going to just
eat the quality of that. If you think about
this, there are like, millions and millions
of videos are uploaded every single day
on social media. And it's just a bit too
hard for social media to keep the same quality because these files are going
to take some space, and they don't want to
take so much space. And if you take a look at the video that we've
downloaded, like, the video 9 seconds
that's 348 kilobytes, that's less than a megabyte. Like that's very slow because social media works on the
video to make it even smaller. So it cuts the quality. I'm pretty sure the
quality was a lot better when this creator did it. So 1080, 1920, 30 frames a
second at Pres new game. Let's go into the
vertical workspace. If you don't have a
vertical workspace, go into the default workspace, drag this thing to the right, drag it like this, hold it, and drag it to the right, then rearrange some
of the other stuff, just drop it like this. Like, so like so and so we don't necessarily need the audio, so
we can close it. Align panel is good.
Effect is good. Properties is good. So actually, we don't
need the preview. So we can keep it like this. I mean, if you want, you
can put the effects, like, to the right,
little bit like so. Okay. And then just go ahead, right click Save
as new workspace, and it's going to be your new workspace.
Just give it a name. In my case, it's vertical. And you can see the
layout that I have here is the best for vertical videos. Let's call this the main comp. I'm going to rename
it once again by just pressing on Enter or you can right click and
press and rename, or you can see the
shortt is Enter. Let's create a folder first. I'm going to create
a new folder, and we'll call it
AE airplane video. And I'm going to create
another folder called AE. We'll put the video
as it's here as well. And now I'm going
to come to after effect press on Command S
to save the video file, going to go into AE, and we're going to save it here, let's call it A E airplane
video person save. So now our file is
going to be saved. It's going to be saved automatically every
couple of seconds. If you don't have that setup and then go into after effects. Settings, autosave. Save every 5 minutes. Number of projects,
doesn't matter, but make sure to put it
in hundreds person K, and now it will save you
project all the time. And if after effects lags
and the project just dies, you'll be able to revive it. It's only not going to
save the last 5 minutes. Now that we have things
prepared, let's jump it. Let's select our
video assets and drop them here by having
them all selected. Actually, it did not import
the plane, but it's okay. We are going to
create new folder. And, okay, let's
select all of these, drag it into the folder, rename the folder called video assets to make sure
things are organized. So now if I open the folder, you can see that we
have our assets. So let's open the main composition, and
let's see what we have. We have a white screen. At the very beginning, and
then we have the text appear. I'm going to press over here. I'm going to press on
Command Y to create a solid and it's going
to be a white solid. C person came. And it basically creates like a background. It's going to be the
size of the composition, f selected, let's search
for solid solid settings. This is the shortcut. You
can go into the settings. You can see it's 1080 by 1920, the same size as
our composition. Let's search for an effect. We are going to search
for change to color, and you will see that
the background changes. It changes here, but
here we have a cut. Of the background colors. But then here we have a change. So we are going to have a
background change colors. This is the way we can
do this because we can key frame the change
of the colors. We'll have our text
appear like so. This is done with a script
called text Evo Script. It's this one. You can easily animate text with the script and actually
really recommend it. It does cost a
little bit of money. It's like $30 to get it. I really recommend it because
it saves you a ton of time. We can do it by hand can
take us a bit more time, but let's do it by hand. And I'm actually
just going to copy this text instead of writing it. So I'm going to either click here or I can press
on which is going to be shortcut through Command
and you can see it selected. And I'm just going
to paste our text and make it black for now. Also going to keep this
font because this is the font that I like the
most it's called Tasker, and you're free
to use this font. It's one of my favorite fonts
ever going to select it, and I'm going to put the
paragraph in the center, and I'm going to center it. So now, if I type
anything extra, it's going to keep things
in the middle at all times. I'm actually going to ask CHADPT on how to
animate the text because I don't always remember how to animate
every single thing. Oftentimes, you just come
to HAGPT and ask it, and it saves me a lot of time. Animate position. So this is going to be
our final keyframe, and we are going to change
the beginning keyframe. Let's come to hetGPT again. Then we have the blur.
We have the opacity, and we need to animate
the range selector. Under animated open
range selector. Okay, here we have
the range selector. Great. Keyframe the
star property 1-100. Okay. Here's where we are at right now. Basically, you can just go
ahead and copy these settings. So first of all, we have the
start at zero and at 100. Offset is animated from -100
to 100, as you can see. Then we have the mode ad based
on words units percentage, Ramp is super important. And you can see we have
our animation completed. Now, you will also see
that this animation is a little bit smoother,
and it's a lot easier. I mean, we can definitely
play around with this even further to
make it even smoother, but it's also important to know that it's so
much easier to do it with text Evo because literally takes like
literally seconds. So I'm going to give that
to you as an example because you can just go
ahead and replicate it here. But for example, let's
do it with text Evo. Let's put this one
in the middle. Let's do it exactly the same. Now I'm going to run a script. So this is the
script, and I'm going to open presets that I've
already created for myself. Then let's do up opacity. Yes, for example, this one, we can still customize
it a little bit. I'm going to press
on you to open the animations to transform. And I'm just going to change
the initial position. And we can also
increase or decrease the decay to like this and
increase the animation length. Yeah, so you can see this is exactly the kind of
animations that they have. So very similar, right? Maybe still, like, a little bit different but, like,
not significantly. Now, I'm going to press on P, and I'm going to lower it down. So you can just continue with the previous animation if you don't have the text
if you do have it, then you can just go
ahead and get it. Text, it was script. So this is the one you can
go to AE script, get it $29. Really saves you a lot of
time. You just saw it. Like, I spent about
like half an hour going back and forth with TGPT just in the very beginning. Let's see what we have next. So we're going to
think about these effects a little bit later, for example, like
the gagem blur, and they also have if
you pay close attention, they have a light sweep. This is something
that's super easy to, but we can do this
a little bit later. Let's just focus on
the animation first. Okay. So then we'll have every single word just kind of going in
different directions. In order to do this, we'll have to separate
every single word. So let's see exactly
where this happens. Like at what frame
are we going to have roughly at around
like 1.5 seconds. So let's call it, like, let's call it 115. The way I'm able to jump between different frames exactly is by pressing command and arrow Case. If I press Command
Shift Rukeyse, I'll be able to
jump by ten frames. Okay, so here we will have our
plane crash into our text. So I'm going to split our text by pressing Shift Command D. By the way, if
you're on Windows, instead of command, you
just have to press control. So it's going to be
Shift Control D, Shift Command D,
shift control D, and we are going to cut it. So this is where the plane
is going to hit our text, and we need to break
down our text. And I'm going to duplicate by pressing Command
D, once again, Control D. I'm going to
remove text Evo from here and from here so that text D just doesn't
influence anything. And I'm going to
select the top layer, the text layer, and I'm going to delete everything that's to the writ of the first word. Basically, we just
need the first word. Then I'm going to press P, and I'm going to put it in exactly the same
location where it was. Duplicate this one again, and I'm going to do the same
but with the second word. And I know it might be
not very convenient, but this is just
what we have to do to exactly do it like this. Duplicate again. Like, so now we can delete this
one at the bottom, the text that was used
just to align the text. So now we have all of our words, and now we can animate
every single word. When we see this
animation happening, when every single word
is flying around, well, this is also done
with null objects, and I'm going to show
you how to do this. We are going to put a keyframe for every single text layer. We're going to come a
little bit to the front. Now we can just press on V, and, for example, select this one
and move it a little bit. Actually, you know what? Let's also select
all of these and press Shift R so that we open the rotation and create a keyframe for
rotation as well. Now I'm going to just, for example, click on
Dont, drag it here. Something like this, and
we just need to change the rotation slightly.
So this is what we have. Boom. Great. I'm going to
select all the keyframes, press FN, F nine, and I'm going to open
the graph editor, select all the keyframes, zoom in by pressing
Option or Alt on PC, and let's just do it
something like this. Actually, in the very beginning, it has to move fast, right? Yes. So instead of it being smooth in beginning,
we can do it like this. Great. We kind of have, like, sort of like an explosion, in a way, let's see
from the beginning. Great. Also, an
important moment is that when we have all the
animations like put together, because there's going to be,
so much, even if we have, like little imperfections,
it's not a problem at all. So, for example, we can see that we have a pretty big jump
here in the very beginning, but, like, nobody's
going to notice that we'll have just so
much stuff happening. I can guarantee nobody
noticed that the word miss moved in the
very beginning. Now we need to put our plane in. So let's see if this
is going to work. We'll go to our video
assets. This is our plane. Let's try to import it. Hmm. Interesting. The FBX
doesn't work for us. I love hat GPT sometimes. I just gives a bit
of a headache. So turns out we're
not able to use FBX because we're only able to use FBX if we use the
different render. If we use the Let's
do something three D. If we go to Cinema four
D or Advanced three D, then I'm pretty sure we
will be able to do it. Let's just double check. A VX still doesn't
work. Anyway, let's think what can we do
here with this plane? Why not use the
plane that we had? It's going to be
slightly different, but it's not a big problem, so I'm just going to
drop it in here. This is going to be our plane. Press on R, change the rotation 45 degrees or -45 degrees
to make it straight. We are going to make it three D. I'm going to select
a little text, press on P to make
sure you disable it. So we have three D.
Let's open it like this. And in order to work
with three D, actually, I would prefer to go into
horizontal workspace. We are going to set two viewers so that we can see
what's happening. Let's make all of our
text three D as well, aside from the white
solid because we are going to create the camera
later or not necessarily, but I'm just going to quickly
explain how this works. If we have the white
solid in two D, it's not going to be
affected if we had a camera. But everything that's three
D is going to be affected. It works with three D objects, for example, if we want to
animate three D objects, but want to keep the
background the same, then we just don't make the background three D.
We just keep it two D, and it's not going to be affected in any
way by the camera. So I'm going to
select our plane. I mean, we'll have to play
around a little bit with it. Let's make it just
a bit smaller. Like, so let's change its
position so that it hit. Actually, maybe we
need to make it even, definitely we need to
make it even smaller. So let's put it to, like, 50, maybe even 45, even smaller, 35. Yes, 35 seems more like it. I'm just trying to see if
it's kind of the right size. Around here is going to
be the final position. So let's put the
position, scale, and which one of the
rotation do we need? We need this one
for the rotation. Okay, so we put
the keyframes in, and now I'm just going
to go back in time, move it a little bit down, make it a little bit bigger
and change the rotation. Like, so Mm hmm. Great. Now we just
need to move it even lower so that we
don't see it in the frame. Great. And now we need
to press FN F nine. Go to Graph Editor,
make it super smooth. Once again, we need
to make it super smooth in the very end, not in the very beginning,
because it can fly out fast. Let's see how it flies. See if we have
something similar. This is where in order
to make it super smooth, battery smooth, we will
have to use a bit of nulls. So we are not going to
make it smooth here. We are going to
press on command. We're going to select
everything and press on command in
order to make it linear because when
we press N F nine, it becomes bussier paths, which is a lot smoother. But if I press and command, it becomes linear again, so it's not smooth at
all, as you can see. And it's important for us to find a point where we have
the text start moving, and at that point, we need to move it like this. And now here in the very end, we are going to create a
null object by pressing Shift Option Command Y or
Shift Control Alt Y on PC, and we are going to
connect our plane, parent our plane to the null. And using our null, we are going to press on P. You can see we can change
our object now. I'm just going to cut
it here and delete. Once again, shaped
Command D to make a cut, and I'm going to press
P to set the position, and now I'm going to move
it a little bit further. Why was it unlinked? Not sure, but let's
link it again, position and change the
position of our plane. Okay? It's going to let's see where these keyframes
stop, like here. Going to now smooth
this one, F N, F nine, come here, select, make it super smooth. So it's not smooth in
the very beginning, but then becomes smooth. And when we add motion blur, which is something we
can do right away, but it's going to take a bit
more power of our computer, you'll see that the plane
looks a lot better. And all the stuff with text
looks a lot better as well, but we're not going
to do it right now because it's going to take
extra power for our computer. Right, so let's act everything
by pressing Command A, and then I'm just going to press A until everything disappears. Next, we have the plane
move with the text. There's definitely like a number of ways
that we can do this. For example, I'm thinking
about, like, precomposing this. What precomposing does is it collects all the layers that you have in another composition, and then you influence the whole composition instead
of every single layer. Let's give it a try, and then we'll just figure it
out in the process. So I'm just going to cut
this one, the white solid. I'm going to go into
layer solid settings and let's make this one. I know, let's make it black. So this one is white. This
one is going to be black. We are going to make
all of our text white by selecting it
and making it white. Press on R for rotation. So we're going to put a
keyframe for our rotation, move a little bit to the front, and move it a little
bit to the left, too. Let's say -70, just
to make things easy. And we're going to start
the movement around here, press Shift and this line. This line by doing this way, I'm able to do the same
as fit the screen. Basically, this is the
shortcut to fit the screen. And if you're looking
to learn shortcuts, you can search for keyboard
shortcuts, which is this one, you can see the shortcut is for me option command and then
this comma at the top. So if you click here, you can search for all
sorts of shortcuts. This is the way you
can learn shortcuts. Literally search for a
specific shortcut when you do a specific task like a number of times and
you'll be able to do it. So we have our plane
turned to the left, and we're going to
create another null, and we are going to connect
our text to the null. So we are going to select our text and parent
it to the null, press R. And if we change the rotation, this
is what happens. So we're going to press the rotation here
and here, like so. And then for the plane,
when the plane turns right, let's put it to zero degrees, and we'll put another
keyframe here, like so, and then we'll
have the text disappear. So let's see. Now, let's
just select the keyframes, press a fan of nine. Let's open the graph editor. Mm, yes. And while it's
turning to the right, we'll have this thing appear. For this, we are going
to create a shape. So we are going to create
a square shape like this. Actually, for now, we
can close this view, so I'm just going
to click on one, and let's go back to vertical so that we can see things
a little bit better. And actually, let's
open the plane. Pressen and we are going to put our shape layer
beneath the plane. Let's put it just in the very middle and then move it
a little bit higher. I'm also going to present
command or control, and I'm going to click here. And this way, we
are going to center the anchor point of our square. It's really important
because we're going to animate our square, and
a lot of the stuff, like the front and all
this stuff is going to happen with this
shape, parental shape. To the plane. You will see that now you
see what's happening, right? We'll have the
background change. Let's come to effects. We'll have a change from black to hue saturation and lightness, and we are going to go
from black to white. Okay? So let's press. So we have the key
frame for the black. We'll come here and
we'll become white. So this is the way
we can do this. Let's just do F
nine here as well. And at this point,
for example, here, we can just go ahead
and cut the text and delete the text because
it's not visible anymore, so we don't even need it. Let's open the shape properties, and let's make it round. So we have the rectangle path. Let's make it round. Like, so when things around, it looks a lot more expensive. I've noticed that
many, many times. Actually, shape, we
have the stroke color. We're going to set it to none. And actually, our shape is going to
change colors as well. So we can go ahead and copy the change color and
paste it into our shape. Press Actually, let's
press U here as well. Let's see if we can
do it like this. But instead of going to white, it's going to become black. So we'll put the key
frame halfway like this. And then here we are just going to make it
black once again. Okay, so this is
definitely delayed. Okay, I just copied this key
frame and pasted it here so that it stays gray for
a little bit longer. Now, we're going to
animate our shape layer, and then let's rename
it to black square. We are going to make things a little bit cleaner
a little bit later. For now, let's just
continue animating. Next thing we have is we have the plane
moving a little bit, while it's moving a little bit, we have the clocks uppear. Couple of things we need to
do. First, press on P, R. Let's chose the rotation first, and let's move it a
little bit to the right. Actually, this is
interesting because we need the plane to be
connected the square. So let's delete the rotation
keyframes for our plane. We're going to animate the
rotation of this part. First of all, I'm
going to unparent it, change the rotation. I'm going to parent the plane to the black square. So
this is the beginning. This is going to be when
it goes to the left. Then here. Okay, let's
press a fan of nine, and let's double check now. We will be able to animate the movement
of the black square, and it kind of jumping a little bit and moving around like
it is here, minus two. And then here we'll put
it to, like, one, zero. Let's press a fan of nine and see what kind
of results we have. Now, I'm just going to
move key frames a little bit so that it's more natural. I'm going to delete
this keyframe that's just kind of stopping
it at this point. Let's see what we have. And then we have the clocks appearing. So this one can be cut here. This one can be
cut here as well. The plane is not cut yet, and the background, we'll
leave it there for now. So let's have our clocks, lots of clocks on the screen. Let's make it smaller by
pressing S. You can see we have the same pattern because we have the same amount space
between different clocks. So these were animated in badge so a badge
of three clocks. Three batches of three clocks. Instead of animating
nine clocks, we'll just animate three
clocks and then just duplicate them and then change the rotation. Let's
give it a try. So we'll have the position. We can make it even better. We can change the
position and we can also change the rotation. So it's going to start here. We're going to hide it behind the black box
a little bit later. At this point, we
are going to move this one up like so to the left. Scale, we can hide it
by pressing Shift S, and we can change the rotation. So it's going to be like this. I'm going to just duplicate
it, press on you, and I'm going to change the final position and
rotation of this one. I'm going to put the rotation of this one to zero,
then duplicate it, press on you and then change the position and rotation
of this one as well. Select all of this, press
F nine graph editor, zoom in and smooth it out. Okay, we definitely need to bit more space in terms
of the keyframes. Let's select all the keyframes. Make these start very fast, and then move in very slow. Let's animate the opacity first, and then we're going
to precompose. Shift T to open the T
proper the opacity, press on opacity, move it
a little bit to the right. And now let's select
the first one, opacity. Then we go a little bit further, decrease the opacity
on the first one, and then even further on this one. So let's
see what we have. Great. Now I'm going to
press Shift Command C, and this way, we're going to precompose, let's
call it clocks. Going to just cut it to around here and we'll move it below the black square.
So let's see what we have. Mm hmm. Go to duplicate
it, person P, R, and now we just
need to move it. Actually, we can change the rotation of this one
a little bit to the left, once again, duplicate it, or change the rotation. You can see the anchor point
is a little bit lower. What that means is that
the top one starts going from here and the bottom ones start going from here as well. I mean, you can see the
difference. Basically, the space over here and here is the same. Space between here and
here is different. So we do need to change
the anchor point. Just move it a little bit
closer to the center. And potentially, I think we
should go over here and then just change the positions
slightly person, the final positions because these are a little bit too far. And because we are duplicating the same precomposed
composition, it's affecting all of those. So I don't have to change
it every single time. I just change it one end,
and it's good to go. Then the plane is going okay, so we're going to
change the shape of our square and it's going
to go up and then down. These three, we can select them and cut them because we don't see it at
this point anymore. Going to close everything else. Let's select our shape. Open it up, content
rectangle rectangle path. Let's click on the size. Let's disable the
basically increase in size in proportions. We don't want it to be squared. We will change the
ratio to be like. So we'll come from
here and we'll need to increase the horizontal size to probably something like this, and we need to change
the position of it, press U, Shift B to add
the position property. Let's move it up. We are going to press N nine, move to the left, select these, move them closer. They are using
nulls here as well, and I'll explain you
why in a second. It's der to create the
very smooth movement. And now I'm going to
create another null, and we are going
to place it around here and we're going to connect our black square to this null. The reason why are doing
this is because we have the plane going
up with the square. But if we try to kind of change the position
of it to make it lower, it's going to be
something like that, right? It's not smooth at all. But while this animation
is in process going up, we will use the null to make the square with
the plane go down. And that way, it's going
to be very smooth. This is the secret to
smooth animation is using the nulls to just move it like this. So
let's give it a try. Let's press on P.
We're going to go from here to here and we're
going to select, press F nine, quick here. Smooth it out, like so, and let's see what we have.
Exactly what we need. Just need to play around
with key frames a little. Okay, and in the very end, we can just make it kind
of bounce a little bit, so we can make it
go a little bit up, a little bit down, then
kind of in the middle. So let's see. Let's see what's happening
with keyframes here. Yes. This is what's
happening. And F Nine. If I do F nine here, yeah, kind of went a little bit
weird, but It's okay. So I'll just select
all of these, made them a little bit smoother, and let's see what we have. I think that's exactly
the problem once again, so I'm going to just duplicate
this null and I'm going to connect the null that's controlling the black
square to this third null. And while this one is going
down to this position, I'm going to change the position and make it go a little bit up. And that's how we're going
to make it very smooth. Yes, this is exactly
what we're going for. Maybe we need to just move
it a little bit to start a little bit faster and this one a little
bit faster as well. Okay, then the
background needs to change to white or to actually just like
something like gray. When it goes up or here, we are going to put a
key frame on the color. And and as it starts going down, it's going to become
gray, very light gray. Yeah, something like that. Okay, the plane
needs to disappear. We can just put it
below the nulls. The plane. Actually, it
goes a little bit up. So the plane doesn't only
need to be parented, but also need to be
tract, track matted. Sorry. So we'll
select the plane. I'm going to press on
Command S to basically, I'm clicking this button,
but instead of clicking, I'm pressing Command S
to open the track mat, and I'm going to track mat
the plane to the square, and I'm going to enable
the black square. And now, when this one goes up, we'll have the plane
continue going up. So we're going to press on P. Put the key frame
for the position, and here, have it go up, so that's exactly
what they have. But the plane kind
of disappears. I think it's more interesting
when it just goes up. It's like jumping
from a moving car. You will continue your movement. So that's kind of
what's happening here. Now we have the
England and France. Okay, so let's have
France and UK be dropped. I'm just going to get
to the final position, press on P. Going
to move them both, a little bit up, press on S, make them both a
little bit smaller. Press on P, select one of
these, move it to the left. Select the other,
move it to the right. And we're going to select both, and we're going to track mated to the black
square, like so. And we're also going to parent
it to the black square. So we're going to parent it Now we just need to
animate this kind of bounce, select these present
P put key frames, move them a little bit down. Basically, we are animating
them independently so that they jump in a slightly
different motion. So it goes up, then it
goes down over here, like so, and then we go up
again to basically the middle. Now F N F nine to make it smoother, and
let's see what we have. Okay. The movement
here is a bit huge. Let's make it a bit smaller. Maybe here, smaller as well. Okay, now we need to
animate the text. And we can animate the text, and part the text just to the flags because the
flags are already animated. France, put it in the middle. Let's make it black. We'll figure out the
font a little bit later. Select France, press on P, move it a little bit
up, duplicate it. P. Let's call this UK. Put it in the
middle. Arrow down. I don't remember if
we can use it here. Yeah, we cannot use it
with this font, at least. So let's just download, like arrow down let's
use something like that. Okay, let's use this
one. Drop it in. Drop it in. Move it
as, make it small. P. Great. And I'm going to search for
an effect called color key. And this way, if I
select the white stuff, it's just going to get
rid of the white stuff. You can customize the
color tolerance slightly. Depending on the kind of acid that you got
from the Internet, it's going to be
slightly different. Let's connect or text. Actually, let's cut it slightly. Actually, I'm going to select all these and I'm going to parent it to, for
example, France. Well, let's see what do
we have. Now I'm just going to track mat all of this to the
black square as well. Like so. And let's
animate France or UK. Select UK, select the arrow, press on P. This is going
to be the final keyframe, and we'll do this one from here. And we're going to
Fp Fn in it as well. Okay, we have another plane
coming in from the top. Let's find our plane. It was here. We're going to
duplicate it, put it on top. We're not going to link it to anything we're not going to print or track mat
it to anything. It's going to be independent. Okay, so I'm going to
just delete everything. Let's have it looked down.
Move it a little bit up, and then we're going to
animate it going down. I'm going to take a little pause because
I've been working on this video for a
little under 2 hours. If you have any
questions, let me know. But than that, I'll
see you in the next
6. Animate Viral UI Layouts Step-by-Step in Adobe After Effects (Part 2): Welcome. And let's
continue editing. I think we should take a look at everything we
have at this point. We had a little hiccup in the
very beginning yesterday. So let's take a look at it. And let's take a look
at the original Mm hmm. So first of all, things
look a little bit better because they
do have motion blur, which is something
that you can see here. Like, you can see
there's a little bit of blur on the England and, like, on the plane as well. Okay, so we had this hiccup in the beginning where
we had our plane. Let's take a look at our plane. It's not visible because
of the black square, but if we make the
black square huge, that's a bit of a problem.
Here's the thing we can do. We can just go ahead and come to the point where
we have the black square, and we can just make a cut. And let's not track mat
this one to anything. And let's not parent
it to anything either. So we have our plane flying. Actually, let's go to the horizontal select
the second viewer, and we will see exactly
what's happening. This is everything that we
have visible right now. And let's move it like this. It's going to hit it over here. I'm pretty sure we had no
object controlling it. What if we parent our
plane to the snow? Yes, I remember having that. Now I understand what happened. So because we parented our plane to the black
square, remember, we had our plane
connected to the noll to make it move a little
bit up, like so, okay? We have, like, a little
hiccup here as well. Actually, this is interesting. Why is the position of this one changing?
Let's delete it. And I'm just trying to
understand, you know, we have this little sort of movement right around
where we have this cut, you know, this kind
of little jump. And I wonder why this is. Let's just see where we
have both of these planes. And just for this keyframe, let's move it maybe just
a little bit up to make sure we just match it. Yeah, there are a number
of ways we can do this. We can just create
an animation from scratch where we can just
match it. Let's see. Great. One thing, by the way, you will notice that I
did sort of a shortcut in a way to create
this bounce here. You know, when it's bouncing,
the flags and things. It's not the best
way that I did this. I mean, I did it the faster way, and they did it the longer way because you can see that they have like their bounce is
a little bit smoother. And it's smoother because
they use null object. And I didn't use null object. Or I did, but I used, like, one of those probably.
We animated fronts. You can see the key frames here when it's just
flying a little bit. And the best way to do this is to do it with null objects. I know this is the
trade off that's going to save a little
bit of time for me, so I'm actually kind
of fine with that. But if you want your movement
to be super super smooth, it's done with null objects. And once again, the
important thing about the nulls is that the
key frames overlap. When you have one movement,
still in the process. The other movement stops, and this is the way
you can create, like, super super smooth
transitions or movements. This is not a very best example because we have two
different nodes. They are animating
different things, but this is the way you do this. When the key frames overlap, one movement ending while
the new movement starts, and then it sort of, does it in a very smooth
way. Let's continue. Now we'll have a plane
flying from above. One of the things we can
do with this plane is we can actually set it to
follow specific path. We can animate it by hand, but you can see the movement of this plane is very smooth. And it's sort of following
like a big circle. Our plane to follow
specific path. Let's create a sold by
pressing Command Y. Let's create an llipstool and let's select an lipstool
and create a mask. And I'm going to press V, and I'm going to move it around. And I want our plane to follow, well, something like this path. Now we need to follow
the mask path, and we need to open
the position of our Emoji and paste it in. Let's see if it follows
it. Yes, perfect. First of all, we can
delete the black solid. And you can see that we have
different keyframes here. And so this is
important as well, because this is a
regular keyframe, and this is regular
keyframe and what's in between are not
regular keyframes. So we have it rove across time. Basically, we can drag the last keyframes and the first keyframe to control the speed at which it happens. And we can also press a fan of nine and it's going
to start slow. And then fly fast. If we select all of these,
we just move them around. If we select the last
one, you can see, we just make it appear
on the screen longer. Next thing we need to
do is we our plane to kind of turn with the
motion of where it's going. So in order to do
that, we need to go into first of all,
we need to select it. We need to go into layer,
transform, auto orient. Let's press on
this. Orient along path because that's
what we need, and that's its path. And you will see that it's looking a little
bit weird in a way. Well, that's because we
need to change its control, and let's turn it to D,
a little bit easier. So I'm going to turn it
like this and Great. Now we have exactly the
kind of moment we need. Let me delete this part.
While we have this part here, we'll have our plane move down. And while we have
the plane flying, it will kind of
drag these pop ups. Let's create a null object,
shift option command. Why? Let's cut it over here. Let's call this one background. And I'm going to make this text white color want to
make sure things are organized because it becomes a little bit hard to follow.
We'll have the clocks. This color, it's
okay because that's precomposed and it's
easy to understand. The plane is going to be
white as well for us, and while we have
plane over here, it's going to be white as well. Black, square. Let's make it brown. So this can be one
color as well. Let's make it green. Just so that it's a
little bit easier. Let's see what this is
disconnected to null number three. And you can see, because we
have two null number three, we can also see
which layer it is. So you can see it's eight dot. So it's this one.
It's number eight. And we can actually rename
it to, like, null three. And let's do this one null
like four, for example. And now that I'm going to disconnecting null
number three, okay? And I'm going to name this
one null number five. I'm going to connect null
number three to null Okay, this is connected to
null number four. Okay, I see what's happening. So we need to connect it to nothing and connect null number four to
null number three, because we have it
like a pyramid. So we have our black square
connected to number three. Number three is connected
to number four and number four is now
connected to number, we'll call this 15. When we have our
plane move down, press on P, delete this, press P over here, we are going to move it down, press F N F nine. I'm going to duplicate
null number five, and I'm going to parent
it to null number six. I'm going to press
on P. Delete this. And while we have this
movement in process, we are going to move it up, and I'm just going
to press FNF nine. Let's duplicate it again. Press on P, delete the previous keyframe, move
it to something like this. Move it a little
bit. Actually, we need to connect to parent it. Move this one a little
bit down, duplicate, parent P, delete, start from here, move
it to a little bit up. So let's press FNF
nine for all of these. Yes, definitely,
definitely better. Let's go to the graph editor, and now you can see the
movement is very smooth because we have movement and start kind of
it's overlapping. That's why it's smoother. So you can see the difference
between the bounds when we had the
bounds like here. It's not as smooth here, but this one is
very, very smooth. Let's give it a specific color. Let's set brown, and we know
that these are connected. So this and these
four are connected. Great. Now we need
for the new box to appear as well. This new box. So actually, let's
copy this black box, we'll call black box number two, press on you, and we are going to delete absolutely
everything about it. Let's go to the effect control. Yeah, we can delete the change color because it's
going to be black. Let's change the position, make it a little bit lower
the final movement, right? Maybe a little bit higher. Now we need to make
it a lot bigger. Put the keyframe for the size, and I'm going to increase
the size around. So let's also put
the keyframe for the position so that over here, it's here, but then
let's make it lower. At this point, I'm going to put another key frame for the
size and the position. Actually, this is the
way we need to do it. So it goes from basically
nothing to here. Great. I'm also going to
disconnect it to the nulls. And here, I need to basically
decrease its size to zero, but I'm going to click on the size to see the
line of where it is, and I'm going to move
it a little bit up. Let's press F N F nine. By the way, one of
the things you can do if you, let's say, like, go to a specific keyframe,
you can double click on it, and you can actually change
the smoothness of it here. So you can change it by let's say doing it like this and you
can see what happens. Just one of the ways
that you can do it. Instead of kind of playing
with these handles, you can put, specific numbers. Let's make it smoother.
As it's appearing, we need to make it
a lot faster. Sure. Okay, and I think in
the very beginning, we actually needed
to be like this. As the planes flying, it needs to be fast, and then it kind of ends a
little bit slower. Potentially, we need to
get rid of the keyframe. Instead of moving up and down, we will have nulls control it. Select these nulls now. Let's duplicate them, and
let's move them up over here. And just going to come to this keyframe and
make sure it goes like this. Select all of these, make
it here, press on you, and we will have this black
square follow this one. This one's going to
follow this one. Now we just need to change the overall position of
it so that actually, we might need to
animate the position. So let's go from here to the last position needs to
be, like, roughly here. Mm, I see what happens. I see the big
difference we have. Okay, so we do need to
animate the position here. The reason for that is
because you can see it. It stays roughly the word France at all times,
and then it goes up. But for us, when we
have the animation, it just grows up in a way, and that's not what we need. Eventually, we
wanted to end here. And let's press of nine. Should be better now. Yeah, I'm kind of liking
it a little bit more. Let's go to the graph editor
and see what we have. Now we need all of
these parts to appear. Let's come to where all the
animations end and basically, now we need to rebuild
this whole thing. We have this line at the top. Let's start with it. It can be rounded rectangle. We can select everything
by pressing Command A, but pressing Shift command A, we can diselect everything. And now I'm going to draw it. And I'm going to put
it in the middle. I'm also going to make it. What color is it?
Like, dark gray? Let's come here and make it
maybe a little bit darker. Okay, let's open its properties, disable this and make
it just to be thicker because this one
is a bit thicker. So we have this part, great,
and we'll keep it blue. Good contrasting color.
Just select everything. Now we need to make
these stripes. So let's select these
stripes and make them. Maybe we need to make it
a little bit smaller. So once again, go into the
path and decrease the size. We can use an effect
called repeater. So we can go to add and
search for a repeater. You'll see we have a
repeater on the right. So let's go and customize it, transform repeater position, so we need to make it lower and then let's put this one to zero, and this one to Well, let's put it to 100. And now we need to increase
the number of copies. And let's change the
transform the position. Basically, when we have the transform properties
of the repeater, we customize the repeater. But when we have the
transform properties of the layer itself, which is always at the bottom, we can customize
the layer itself. Counter closes. Port encloses? I didn't even see that
there was any text, to be honest, the
first time I did. I can only now see
it. Great. So let's search for counter closes. Counter closes. Select all the text, make it very dark. You can get the fonts of Apple if you search for
Apple font developer, and you can see that they
have their fonts here. You can just go ahead and download and sold it
in your computer, and you can see that
this one is SF Pro. And I'm going to select it because I
already have it selected, I'm going to search for SF Pro. And let's search for, like, a regular medium. Interesting. It's having
this sort of delete it. Let's put it to medium and
write gate gate closes. Not sure what the
problem there was. Press and P, move it. Around here. Then
we have boarding. So I'm just going to
duplicate the text. And actually, let's
select both of these and cut it so that I'm going to cut the shapes as well. Duplicate the text, press
on P, lower it down. We have the word boarding, just going to copy it
instead of writing it. Boarding, this one needs
to be white and bright. Let's copy the gray one, move it up. P, boarding closes. We might need to select it, make the fonts a bit smaller, move it a little
bit to the right so that it looks
more like apple. I'm going to
duplicate this shape, which is kind of this one, go into contents,
delete the repeater, press on P, lower it down. By the way, we are going
to make things, you know, set the colors and
everything just in a second. Interesting. W color. Something like that. And now we're just
going to parent everything to this black square. And we are also going to
track mat everything. So I'm going to press
Controls or olds. I'm going to track
mat and enable it. We need to create a
mask around the shape, precompose it, create
a mask around it, sew and increase feather. The reason we are
doing is because we don't have very sharp edges. Things are a lot smoother
like it is here. Let me select these
parts, the top parts, make it a little bit smaller, bottom parts, make it a
little bit higher as well. Okay, so now we have
all the text move. So now we need every single
thing to appear one by one, or we can leave it like this. Depends on whether
we want to, like, exactly animate it like what he's the
interesting things I'm noticing is these pop ups appearing on the
left one by one, and we can actually do
a very similar thing. So we have it in this shape. The one that was precomposed. I'm just going to cut it and move it a little
bit to the left, going to select it. And here, when we
go into the shape, content repeater
transform, we can animate the position of it like this
sort of position, right? And this is going to be
our final key frame, the one that when
we have keyframe, well, let's come to
the first key frame. It's going to come from, let's say, a little
bit from the left. Let's see how we have it. Yes, perfect. We need to find our
shape, which is this one. Great. Let's put the
keyframe position in. So this is going to
be the final one. Let's find where it is
the final one here. And before that,
we are just going to drag and drop a little bit
to left, see what we have. So everything is great. However, it starts
a little bit higher just because we have some of
the animations go like this. So at this point, we can
have it at this point. Actually, this is going
to be our final keyframe, and this is going
to be our keyframe, like, so let's see. Okay, for the sake of time, because this is tedious, boring, uninteresting, the same work that you
can do on your own. Basically, you have to
animate every single layer. And because it doesn't really
add a lot to the video, I'm just going to
leave it like this. But if you were to
do it on your own, for example, we can use something like
animation composer. We would go into let's find the word boarding,
the big one, right? And let's search for actually,
let's go into vertical. Now, let's go into horizontal, select one of your.Go
into vertical, and we have our
animation composer here. So I'm going to select
our boarding too and let's make it smaller. Appear with calcium blur
so you can put it in, and you'll see that it's going
to appear with cadm blur. We can just make it
a little bit faster. This is something
that they have and they have a lot of times where sometimes the words just appear with
animate tapacity. Sometimes the words appear with a little bit of this blur, which in our case, can be
Gargan blur, for example, like over here, right, you can see that this word
is slightly blurred. So we just do it hand by hand for every
single one of those. I'm just not going to use it. Once again, save time because
you know how to do it. We just do it for every
single one of those. Now, let's see what
happens in the end. This part goes down, then we have text
appearing on the screen. We need this black square, and we need another black
square, which is this one. So if a person P, both
of these will go down, and on top of that, we need
just like the shape layer. Yes, great. Let's create another null. Put this null to the top.
Let's make it white. We need to connect the nodes that are controlling
these parts. For example, I have
this black square. It's connected to
null number three. Number three is
connected to this null. This one is connected
to this null. This one is connected
to nothing. So we need to connect
the null number three to the null number four. So that's what I'm going to
do. I'm going to parent it. And we should be able to
press on P, move this one. Yes. Great. Now we need to do the same thing
for the black square. So it's connected to
looking at the hierarchy, this pyramid, and I'm trying to see which
null is connected where. And now we need this part as well to be connected
to this snull again. Great. Let's put the
position in. Move it down. Press select these keyframes, press F and F nine, select this one,
move it like so. Move this one, a little bit this keyframe a little bit to the
start, a little bit faster. And now we'll have
the text appear and the text is
get your tickets. I'm going to use the text
EvoScript once again. Let's do it down
a pacitPlus word, and I'm going to
press and apply. Get the tickets, and then we'll have the word now
duplicate this text. And when you write
opacity plus character, apply press and P,
move it to the left. And instead of
having so much text, I'm just going to put now Presson P, move it to the right. It's interesting that it's on slightly different
levels, but it's fine. We can make it on
the same level. One thing we can do
is we can click here, Impress and Command R and
put a so called ruler. And now we can move this one a little bit down, a
little bit to the right. You will see that we have the text move a little
bit to the left, so when the word now appears. So it's done with two
null objects as well. So we're going to connect, let's put this one
just to the middle, get the tickets, create a null, shift option command Y,
put it to the very top. Let's get the
tickets to the null, press on P. And over here, when the word now
starts appearing, we are going to move it to the left and then we're going to duplicate it presen P, which is going to create
another null but this time, we're going to delete
these keyframes, parent disnll to this one while this one is still moving to left, we're going
to press and P. By the way, we're also
going to connect the word now to this other null because both of these phrases or words are moving
in the end, right? You can see it here. Boom,
it's moving in the end. So we'll put that key frame, move it a little
bit to the right. F nine. And then they
have another null, we are going to connect it all. Then this very last null, we're just going to move things
a little bit to the left. So a nine, so it's just shaking
a little bit in the end. Let's watch everything
from the very beginning. We had, like, a little hiccup
here as well, once again. So let's open here, have the position key frame, and I'm just going to match it. Let's forge it from
the very beginning. You can see there's a
very slight difference in some of the animations. Like the timing is maybe
slightly different, but overall, this is
the way you do it. I want to do it with my font, but potentially we can do
it just with Apple font. So let's search for SF Pro. They have a lot, so let's
make it this color. You can see it's also
a bit of a gradient. So once again, something
we can do here as well, is we can command
Y, create a solid. We can search for
a gradient ramp. Let's drop it to the very bottom to
where we have our text. And let's make it
specific colors. So one of these is
going to be like this and the other one is going to be very similar but just darker, so we can just decrease
the brightness, right? Like, so. And then we
can change the points. Basically we don't need to track mat the text
to the gradient, but we need to track mad
the gradient to the text, but because the
text is like this, because we cannot track mat, let's call this one gradient. We cannot track mat the gradient
to four different texts. So we need to
precompose the text so that the texts are one layer, and then we'll be able to do it. So I'm going to
select all the text, Shift Command C to precompose. We're going to track
mad the gradient to the text and enable
the gradient, exactly. You can see exactly
what they have here. Just potentially
we need to change the something like that, right? Now, track mat the gradient
to the text with the text. Let's precompose, and now let's apply glow, increase the radius. We can also add glow
around our plane. So let's find our plane. Now we also need to
track mat the gradient, we need to track mat it to
the movement of the plane. So let's parent it to the plane. Okay, when the plane is
moving to the right, the text, let's press on
T to select the opacity. And when it's turning
right, the opacity is going to go to
zero like this. Let's select this text here, which is, don't miss
the next flight. And let's make it as F P, and let's search
for just medium. What was the text like
in the very beginning? Also, like, gradient ish purple. So let's search for gradient, just copy and paste it in. If you select the layer, you
will paste above the layer. So that's why I
selected don't miss the flight two or the
other one at the bottom, because if I do not
have it selected, it will paste it at the top. But if I select and paste it, it's going to paste it above
the layer that's selected. We have our gradient and we
need to enable to see it. Let's track mat it to our text. So for this one, we need to
create another gradient. We're going to delete because
you can see there's, like, dark, bright, dark, so
we need something else. For that, we need
four color gradient. Like so. And now, if we track mad it to our
text by deleting this one, we have exactly the kind
of effect that they have. Now, the only thing we need
to add is this sort of, like, globe once again, select our text and precompose it with our
gradient actually, let me cut the
gradient here so that it's exactly the same
length as the text. So let's precompose this, Shift Command C, going
to select it, cut it. And let's search for globe. Let's see if it's going to work. Sometimes it might not work, and the reason for that
is because glow doesn't work well with
bright and bright. So we might we might have needed to add a shadow
instead of glow. Shadow is very
similar to the glow, right, it's just dark
instead of white. For the clocks, we also need to change the timing of
when these disappear. Oh, by the way, in
terms of the text, I completely forgot
because I was talking about the
light sweep effect. So we actually achieve
the same effect, and we can achieve the
same effect by doing this. Let's apply a light
sweep effect a little bit later
when our plane here. And we can just search
for light sweep, CC light sweep, and we
just need to animate it. You can already see
the effect over here. So we can change the
light intensity. But what we need the most is
to animate the width of it. We need to make it a
lot bigger and we need to animate how it's
going the position. So from center to
something else, like so you can see the
effect in the process. We can see the
effect here as well, so we need to person you
search for light sweep, and for this center, we need to move it. We need to move the
center a lot higher, like far, far from the screen. Now, one thing you will
notice in the very beginning as well is that
the zoom in here. There's a very slight zoom. This is something
that we can do, and this is something we are
going to do with the camera. In order to create the camera, I'm going to press
Shift Command Option C, and it's going to
create the camera. I'm going to enable
the depth of field because this is something
we might use as well. I'm going to shift option
command Y to create a null, and I'm going to connect
our camera to the null. Now remember that the camera only affects everything
that's three D. The reason it's
out of focus is because if we go
into two viewers, we'll see that our plane, let's see where our plane is. Our plane is over here, but our focus point
is over here. That's why it's out of focus. Camera, the depth of field. Let's set the focus
distance further for now because we might change in the future.
We'll set it here. So we'll have the plane
come onto the screen. This text, Okay, so this text is a little bit
blurred in the beginning. So we might need to
make this part three D. Let's make it three D, and for our camera, in the
very beginning, let's set the focus distance
to a little bit closer. We made the text three D, it must have been
something else. It's this one. That's three
D. So we'll start Oops. We'll start with our text out of focus on the screen, right? We can do it over here. It just adds a little bit of, like, drama in the
very beginning. And let's do, like, a slight zoom here. So we're going to make
our null three D, press on P position. Here, we're just going
to zoom in slightly. Like, so press F N F nine, and make it smoother as well. Like, so Then we had this part, the England out of focus. There's something that we can do with the camera over here or we can force it
with Gagen blur. It's going to be a little
bit easier to just force it with Gajmblur because
when we make it three D, it's going to slightly change the sizes of things,
the location of things. So just to make it things a little bit easier, let's
just do it this way. Apply Gaussian blur, blurriness, going to set a key frame. And this point, I'm going to
increase it to let's say 50, and I'm going to copy this blur, and I'm going to apply it
to K But for this one, I'm going to disable repeat H pixels to make sure it
blurs everything around it. Okay. Let's see if
there's anything else. Oh, and we have this gradient in the back at the
end happening. We can duplicate our background
and we can apply the four sorry, the four gradient. Let's search for gradient,
four color gradient. We can delete the
change to color, and so let's set it to white. We need a three color gradient, but we don't have the
three color gradient. So I'm going to move that
one far, far, far away. And here, let's select
like relatively close, and that will work for us. So let me put the white one, like in the very middle. Actually, let's make
this one white as well and bring it back. Let's bring it to
let's say here. The other white one will
go a little bit higher, and now we'll have
these points animate. So we'll have 0.1 and 0.3,
the ones that are colored. By the way, that's M, you can
kind of move them around. It totally works. Let me open. So I
have these two. These are going to be sort
of, like, in the middle. In the very beginning, I want both of these
to just actually, we don't need the color.
We need the point. Yes. It's not the one that
I needed once again. Let's disable this
one, enable this one. Okay? This should be the one. I'm going to press on you to see both of them,
or to the left. Let's see. Should work. Okay. Then they will
come onto the screen, and then they will come out of the screen and
roughly around here. Let's make them come onto the screen and
out of the screen. And let's make it a
lot smaller, slower. Let's move it a little bit lower so that it's not as saturated. In the end, I want to
move it higher as well. Okay, we need to change
the text color properties. By the way, if you don't
have the properties, you can go into Windows and
set the properties here. There it is. Let's make it dark, something like very dark blue, very, very dark blue. Let's take a look
at what we have. Create an adjustment layer by
pressing Option Command Y, and let's apply lumetri color. Let's lower this down
to the very bottom. And then right before
this transition, we are going to set a key
frame for the exposure. Here, we're going to increase
the exposure to one, and here we'll make it like zero again so that
we have a little bit of exposure thing I wonder if we can apply glow
here as well like this. Maybe we don't let's disable
it metric color for now. Let's increase the glow the
intensity and to like so. Then let's animate the glow
radius and intensity going to press on you to see the values. So before we are going to
put everything to zero, and here we are going to put
everything to zero as well. Yeah, I think this is actually going to be better
than the metric color. Basically, in the transition, so if you make a spark, it helps the
transition because it doesn't just hide
the transition, but it helps it to just appear, which makes it more interesting. And then we can drag these key frames a little
bit, like, to the side. Maybe we can decrease
the intensity here so that it does
glow but not as crazy. Now I'm going to
select everything, and I'm going to press
here to add Motion blur, and we're going to export. I'm going to go
into File, Export, at the Render Queue,
and I'm going to put high quality with Alpha. Just put the name onto
the desktop, main comp. Let's give it a try. Render, and a
cliffhanger for you. You'll see the final
result in the next video. So if you have any questions, let me know better than that,
I'll see the next video.
7. Add Sound Design & Final Polish: Welcome. In this video, we're
going to work on the sound. First of all, I'm
going to go into Premiere and create new project. I'm going to click here
to select the name, going to go to desktop,
airplane video, PR. I like to create a PR folder to save all the
premiere project files, and we can call it
airplane Video created. Now, When it comes to audio, I recommend two websites. One is free, one is paid. Pixie B is a free option. Epidemic Sound is Beta option. Long story short, epidemic
sound is better because they have budget and they're able
to source high quality. With Pixabay, it's I mean, you get all sorts of stuff. There's very good
quality as well. There are some really
good quality people, but there's a lot
more quality on epidemic sound,
like, no questions. So if you have a
bit of a budget, I recommend you Epidemic
Sound, by the way, in the resource section,
you will find a link for a 30 day free trial if you
want to try Epidemic Sound. First of all, you have an
extension to Premiere, so you can just literally go ahead and instead of
going to the website, go and work with it in Premiere, you have music here, you have your generous moods, and one of the favorite
things I have here is themes. So, for example, if we go into, like, travel, for
example, with my clients, I'm currently working
on the travel videos, and I like to come here and, for example, Brazilian carnival. You know how to listen to song. So just go ahead and
try it out if you want to add than that with Pixie
Bay, it's very similar. You can search.
First of all, it's not only about music
and sound effects. It's about, for example,
three D models, videos, so it's B roles as well. And I'd like to recommend
you a couple of things. First of all, if you search for Kirk orchestral on this website, you get some well, it's a genre of music that's
just very interesting. Like, it gets it goes like, stratospherically
viral on social media. And there's this creator
as well, who's like, creates super just unbelievable
music on this website. I really recommend this guy, and I also really recommend you searching
for Corker Castro. So this is the song
that I want to use. As you so I just
press and download, download it and you don't even have to log in or anything. And you can read their license. So let me click on
Download once again. You, you can learn
about the license here. So I do recommend you to
read the license that let's jump into premier
and put things together. So first of all,
I'm going to create sequence by pressing here, pressing sequence,
create sequence, 1080, 30 frame second. Let's open the sequence settings
by pressing in my case, Command K, but you can come here and press on
sequence settings. And if you don't have a
shortcut for yourself, you can press Option Command K to open the keyboard shortcuts. And here you can search
for, for example, like sequence settings and put yourself a sequence
settings short. Going to press Command K, and I'm going to
put 1080 by 1920. By the way, this needs to
be 30 frames a second. That's one of the ways to
create sequences in Premiere. But if I come and take
a look at our export, I can just click on it
and I can press Shift N, and it's going to
create the sequence out of the selection
that I have. So I can actually just go
ahead and delete the sequence. I'm going to select the afile press Shift
B and call it raw. For the sequence, I'm
going to select it, press Shift B, and call it see cis to make sure
things are organized. Now, take a look
at what we have, and we can go into the
vertical workspace, which is for me, you probably don't have it in
the very beginning. Actually, you don't have
it in the very beginning. So in whichever workspace you are just like in after effects, you can go ahead and drag and drop things
like that, right? I'm going to put
it to the right to make sure I have it
in the same location. And you can save the workspace, save Es new workspace, and then just go ahead
and click on that. So let's take a
look at our video. We have lots of lots of stuff, lots of stuff, but
it looks great. Okay, so first of all, we
have the text for this. Actually, I'd like to use a specific transition
that I have here. You can find it in the
downloadable resource section. It's a premiere project file. I'm going to import
the entire project, and we have the NASA sequence. This is the one
that we need, and I'm just going to
drag and drop it. And this is actually
what I was talking about to you earlier,
for example, like here, you can see
that it becomes blurry, metric color, the
exposure is timed here. So if we take a
look at the effect, you can see that we have
the gaussian blurin we have the lumetric color,
the exposure going up. And then for the sounds, we
have the sounds as well. Sounds are really great. So if we come here, let's put it like around here. I'm just going to
select everything. For these sort of movements or most of the
time for the movements, you want to use swooshes. You can download the
premiere composer. It's absolutely free. Just search for it online so I'm going to search for swoosh here. Probably for the slower one in the beginning. So let's see. Or maybe not. For the
Light sweep effect, by the way, in the
downloadable resource section, you'll also find my
library of sounds, which I'm just going to
drag and drop here Sci Fi. This is the one, I believe.
Yes, this is the one. So I'm going to select it, then come here, select it. You can also press I and O.
So this is going to be I. This is going to be
O. If I go here and press on O, I'm going
to select more. I'm going to drop it in and
when it starts go on here. Oh, by the way, our clocks, they don't have the motion blur because they were
precomposed, if you remember. And so we need to go
into the composition and turn the motion
on themselves, because we have motion like
everywhere aside from this, but it's not a big deal, to be honest, people rarely
notice anything like that. I'm going to use pixiway
because everyone has version to the free options, but once again, if you
want to the best quality, epitym sound is the one to use. So here, let's search
for UI sounds and Okay, this is really good for
when the clocks appear. Then when we have movement up, we are going to use
swoohes as well, so I'm going to come to premiere because there's
a sharper movement, I'm going to use this
swoosh over here, which is a little bit
faster instead of this one. There's even faster, but we'll
see. Okay, this was great. I'm going to copy it
by pressing Option or Alta on PC and dragging it. For This one, let's try to
use this one for the plane, I mean, probably around here. And let's use the big
swoosh around here as well when this part
is moving down. Okay, let's take a look
take a listen to what we have currently. Great. When our plane is flying, I want to use this swoosh, which is the shorter, which is this swoosh. Let's
have a listen. Actually, for this part,
when all of this kind of, like, jumps and
bumps a little bit, I think it would be interesting to use something like tactile sounds like it's
touching a little bit. So let's have listened
to what we have here. I'm also trying to look at the waveforms and see
if there are, like, bumps because bumps
usually mean, like, there's going
to be something. No. Mm. Something like this, yes, you can see there we
have like four sounds. Let's just drag and drop it. Yeah. I also would like some sort of sound
in the very beginning. Basically, what I'm
trying to do is to find the sound for
every single movement. And because there's
usually no sounds for these kind of movements
because it's not real. We don't have something
like this in real life, we just have to
creatively think about, okay, what can be like, close to that or just
use our imagination. Sometimes it can be
something you would never think that would
work and it works. So it's just a matter of
trying out and see what works. I know that's a
little bit weird, but you can see there's, like, this almost like a water
drop sound over here. And I know it's unrelated, but I can do this
out with my mouth. There you go. That's my skills. Hm. I like this one. It's just simple,
like, one note. And we can repeat this one at the very end
when this appears. And then have this one. We have the now sick look
from the very beginning. Great. Now we just need to lower the volume of everything. And by the way, it
doesn't matter. If you use other application not premiere, doesn't matter. You can use the same you can
use different applications. What matters is just kind of how you put
everything together. Even if you use like
other applications, it's not a problem at all. I'm going to select
this press on G, and I'm going to press minus ten so that it's not as loud. For this one, I'm going to
press minus ten as well. For this minus ten as well, although it's already at -20. Oh, yeah. This one is
too loud, like -20. This one at minus
ten, this one -15. These at -15. This at minus ten. This at minus ten, as well. This at -15, this at minus
ten. Let's take a loosen. I'm going to use this song, and I'm just going
to drag and drop it to our project selected. So this is going to be the
beginning because we have a very short clip we need
to find, like, the end. This is going to be the
end, like this part. I'm going to appl
this transition by present shift command D, and I'm going to make it
smaller so that there is no, like, sometimes you hear
this like bump in the audio. When the two audio files
meet and they have loudness, there's, like, just
like very loud. And in order to avoid this, you just have to
put this transition and it becomes very smooth. I'm going to shorten
this one like this, make this one like this. Okay. And I'm going to apply
lower music for voice. This is the preset
that I've created, and you are free to copy it. I'm going to show
you it in a second. So this is the
simple parametric Q, which you can search for
simple parametric Q. It's over here. Just
copy these settings. Basically, what it does is
it lowers the heights of the music so that it doesn't compete with the voice, usually. Because we don't have voice, it's not really a problem. But if we want people to really focus on the sound effects. It can compete with sound
effect a little bit. So if we do here, it's
still really good. And we are going to
select it present G, put it to, like, -20, and
let's see what we have. Now, let's make it
louder and Dover by ten. Oh. It's exported. Come to the very
beginning Presson, I come to the very
end press on O, and you will see that if I
come just to the very end, we have this and presson O, we have this one annoying frame, and we can either move it like this or I'm
going to press on O. There's one frame
going to press left, O, this is what we have. Then I'm going to
press on Export. And let's export it to
desktop, press on Export. And let's see what
we have. I'm going to open it. And
let's take a look. Great, great. Love it. So this is how you do it. If you have any
questions, let me know. But than that, I'll see
you in the next video.
8. Congratulations!: Congratulations. If
you are watching this, it means you've made it halfway through the
course content. I know we've covered lots of congratulations to you
for making to this point. And there's a lot more
valuable content coming soon, but before we get
to the next video, I want to simply ask you if you found value in this program up until this point to take 60 seconds to leave
you on this review. Of course, I will
immensely appreciate this, this will also help hundreds of future students in choosing
the best program for them. So leave you feedback
now, and of course, if there's anything
I can help you with, let me know the
Q&A section below. You're doing great. Keep going. And without being said,
let's get to the next video.
9. Brainstorm Viral Content Ideas with ChatGPT: Welcome. In this
video, we're going to generate viral IDs with HATGPT. Now, in the downloadable
resource section, you will find a link to
this specific HAI GPT. It's a custom HGPT
that I created myself. It consists of a
number of books and the best practices on
viral idea generation. So you can go ahead and use it, and I'm going to show
you how to use it. Well, in order to use hATTPT, it's always best to name
them specific expert, and I want to give it as
much context as possible. I brainstormed in advance, and I'm going to show
you exactly what I did. So I ask JDPTGive it a prompt. Hey, JDPT, I'm creating a video. It's a motion graphic
video in After Effects and you to come up with a list of different ideas. The mean it is that
to create a script, the video will go viral. I'm going to put links in my social media bio description, and the video will go viral, then people will go and
learn motion graphics. Now, you start coming up
with a list of ideas. I didn't quite like
any of these ideas. I decided to help JGBT move
in the right direction, saying that it needs to be very, very simple because we are not going to
have audio in that. Although we might do it, but we don't
necessarily have to. Like, it's an extra step
with audio because we need to combine the audio
with motion graphics, so we need the timing
to be precise. If we don't have
audio with them, we can just go ahead
and do it ourselves. Then gave me and list, and actually kind
of liked this idea. Thinking need to be
original question. Nope, everything is remix. The trick is knowing
what to steal, learn how to in bio. This is kind of a great idea. However, that's not necessarily
about motion graphics. And I was like,
Yes, I like this, but let's make it even better. I told that I like this idea. However, we need to really tell people that they're
going to learn motion graphic instead
of being like, it's more like stealing an
artist because the idea is, it's as if people will learn
how to steal like an artist. The idea is behind
motion graphics. And so, eventually, it
came up with this script. Thinking to be original, no, everything you
see is a remix. The trick, knowing how to design it, that's motion graphics. Learn after effects step by step and start creating
today linking bio. I think we should add the word start here. Very beginning. And that's how it created
the script very fast. So if you want to use this DT, you are welcome to do it. I'm going to go
ahead and copy it. I'm going to put it in notes. So this is the script
thinking to be original. Everything's remix.
Tri how to design it's much graphs tar after
fate, step and start. And start creating today
leaking bio. Very well. So let me share a couple
of things with you. Thinking need to be
original. That's a question. People want to know
answers to the questions. We're just trying to make
it as simple as possible. Thinking to be original, nope. Everything you see is remix. And these three lines, these are really great
because it kind of breaks the pattern
of what people have. Oftentimes, people think
they need to be original, reinvent the wheel
every single time, but that's not true. You can remix a lot of things. The trick, knowing
how to design it. We are going from the stop part, which is we're going from
here to the snext part, which is actually, let
me do it with nut color. Let's do it with, like, blue. Okay, so basically we have
two parts of the video. We have a hook. We have a first
part of the video, then we have a transition, and then we have the
third part of the video. So this video is going
to be under 15 seconds, maybe 10 seconds long,
so very, very fast. I think we can create some
very interesting stuff here because originality, there's a way to express it and how it looks and
things like that. This is really good script. This is how you come up
with ideas and Chat DPT, go ahead and use the
viral Story lab. If you have any
questions, be sure to let me know the QNA section, but other than that, I'll
see you in the next video.
10. Build a Scroll-Stopping Motion Graphic from a Blank Canvas (Part 1): Welcome. In this
video, we're going to build our video
in after effects. So let's jump into
after effects. First of all, I'm going
to create a composition, make sure I have 30 frames, and it's 1080 by 1920,
so it's vertical. Sometimes I get confused and
it's not a problem at all. Even if I create a 1920 by 1080, it's going to be
horizontal, I can just change the numbers
later, and that's it. So here we have our video, I'm going to press Shift and this line to make sure
I fit the screen. Now I'm going to
press Command Y, and I'm going to create
a white background. Next, let's copy the script.
Copy the first line. Come to text, create
a text layer. Think you need to be original. I will definitely
come up with ideas on the fly because I
just had an idea. Let's apply change
to color effect, and we will go from white to black hue, saturation
and lightness. Great. And in the very
beginning, we'll have our text. Let's select our text, it's going to be white. Now, let's come to Google and search for lamp or not lamp. What is this one called?
Maybe we need lamp drawing. Oh, it's called Light bulb. Light bulb drawing, Bingy. This is not Bingy. This is This is Bingy. Great. So I'm going
to download this one, and I'm going to drag and
drop it into after effects. So we'll call the main comp, the just main Comp, and then we will have
a folder for assets. Okay, let's apply change
to color here as well, and let's change it from
Let's like the color of it. Hue saturation lightness. Great. P. Let's move it
up a little bit. Think you need to be original. Actually, I'd like to
put this text right in the middle and I'll have our
lamp a little bit lower. Let's call the lamp lamp
so that it's like this. I'm going to run text EvoScript. Once again, you can
either get this one or you can do
it the way I showed you in the previous
project where you have to open it up and
do it with the animate. So our text, I'm going
to open presets and go up opacity plus words and apply. I definitely wanted to
move a little bit faster, so I'm going to
press on you to open the keyframes, see what we have. Let's decrease the
delay a little bit so that it's and Let's
put it to two. What was the next text we have? Nope. The reason why I'm doing a fast text in the beginning
is because for social media, you just want to hook
people in immediately. Other than that, if they are not hooked from
the very beginning, you know, you lost them. Select or lamp. I want to experiment a
little bit with glow. So I'm going to apply the glow
effect, which is this one. Definitely want to increase
the radius and the intensity. I'm trying to do here
is I want to create a transition from this
from black to white. And the way I want this
transition to happen is the light will emit
so much light. It's going to get
so much brighter. It's going to make
everything white, basically. And we'll have this
interesting transition. For that, we need
to make it glow. Sometimes in after effects, this happens when, you know, we can continue
increasing the intensity, and it's not going to really
increase the intensity. It's like it's stuck
for some reason. And a very good plug in that's created for after effects
called a deep glow, and I believe it's paid as well. I don't really have a deep glow, so I'm just going
to show it to you. Pretty sure it's this one
from A script as well. I know it's a really good one, so if you ever want to get it, you can come and check it out. But for this, we can
just duplicate the glow. So let me see if I can
copy the glow and paste it in Command D to
duplicate it like this. Okay, now we're talking. So let's set a key frame on glow radius and glow intensity. We'll put glow intensity at two, and let's press on here. So this is what we are going
to have duplicate it again. Command D. Okay. And
I'm going to press on you again to see
the key frames, right? So now we can see
the key frames. And from the very beginning, let's have it at glow
intensity at zero. When we come here, we are
going to have our radius more. So for the first time
for the first globe, we're going to have
a small radius. For the second globe, we are going to have a
slightly bigger radius, and for the third one, we are going to have an
even bigger radius. Let's duplicate the third one, Command D. It's going
to be even more. Going to press on
you and you again. We need number four,
and we need to make the radius even bigger. So let's see. Let's see. At what point do we
have the maximum glow? Okay, so when the globe
radius is at one, so it's important for
us to put glow radius here at one because it's
not going above one. Let's see. I'm also going to keyframe the
opacity on the lamp. So Presson T, added the
key frame around here, we'll put the keyframe at
100 and here we'll put it at zero so that this
is what we have. For the solid, we need
to change the color too. So I'm going to press on the keyframe here and
I'm going to press U. Now let's change the color
from black to white. Let's say when it gets to here, put a keyframe to set
everything to white. Yes, very interesting
transition. It's also a good thing because
we had the text in white. We had our bulb in white. And therefore, when we have
our background turn to white, then we don't even need to
kind of animate anything. It just completely disappears. So at this point,
we can just make a cut and press into lid. And at this point, we
can do this Kobe one. However, remember, we cannot
use emojis in after effects, so it's important for
us to go to Emoji PD, put the Emoji generate image. I believe we did 600
by 500 previously. So let's generate it or maybe
vice versa. So this one. 500, this one, 600 generated. Yes. Just make sure that it's not cut at the top.
Download the image. Let's drop it in and
put it into assets. So we can call this one amp, and this one is going
to be thumbs down. Thumbs down. So now we need to animate Nope. Let's come to T, and
let's put our text in. Let's make it black. We can customize it later. We can put it like so, and I'm going to cut it to get rid of the
part on the left. When way here, I'm
going to once again, go to Text Evo and
let's select something like left opacity
plus character, and let's apply it. So it's going to collect this. While it's going to the right, we are going to have our
emoji come from the right. So it's inspired by what we
did with the previous video, going into Drag and Drop it
and decrease it in size. So let's put this text
in the middle, like so. Press on P, move
it to the right. Make it a little bit smaller, and let's going to get rid
of this punctuation mark, which is just driving
me crazy. Hate it. Now, let's put it in the
very middle at this point. And then when we have the thumbs down,
move from the right. It's going to move
the text to the left, and it's going to wiggle a
little bit with the text. Something we did previously. I'm going to put a
position key frame, and I'm going to move
it out of the frame. Actually, going to
do it vice versa, so it come F N F nine, going to select it,
move it a little bit. Actually, we need
to move it like so so that it comes
fast to the screen. Let's see the final keyframe, maybe move it a little
bit to the left. Great. Now I'm going
to create a no object. I'm going to cut it, and let's have thumbs
down and the word nope, both connected to the null so
we can move our lamp down, like so. Let's double check. Yeah, so we can
move both of these. And around here,
I'm going to set a position and move it a
little bit to the left. Go to nine. Going to duplicate it,
parent this null to the second present
P, delete this one. And move it a little bit to
the right to the center. And let's do another
one, P, delete, parent, move, and then
move it to the center. Okay, maybe we need to just
have a bit more movement. So this one needs to
go more to the left. This one needs to go
more to the right. Okay, something happened. Not sure what happened.
Let's do it once again. So I'm going to
parent, press and P, delete this keyframe,
move this one, and move this one to the left. So let's double check that. Maybe we need to have this
whole animation start a little bit faster. So let's have this one move
a bit more to the left. Sorry, this one. The
last keyframe of the first null needs to
move more to the left. Then the last keyframe of the second null needs to
move more to the right. The last key frame of the last null needs to
move more to the left. Let's see if I move the key frames a little
bit to the right, just to adjust the
animation slightly. And potentially we just
need to move the keyframes, slip a little bit
closer to each other. Yes. Now, let's come to the graph editor and then
just Oh, interesting. We have different graphs,
so let's press N of nine, select all of these, and
just drag them out a bit. So let's see. Okay, now we need a bit more space
between all of these. Everything you see is a remix. Here, I was thinking
about putting clips of social media
onto the screen. I'm going to go to Instagram, going to take a screenshot. I think this is going to
be a really great example. So we have a couple of things. I'm going to select everything, press and P. We have our screenshot of
Instagram of social media. Great. So I'm going to
press and P S and I'm just going to Do it like so. The reason why I'm doing
is because I just want to have, overall what's happening. One of the things
we can do is we can download kind of like the Instagram page layout
and do it with Figma. It's going to take a
little bit more time. If you want to
learn how to do it, you can watch my other
course on how to do it. Just come to my page
and you will see it's about Apple UI designs. If you want to learn
how to download UI designs or create UI designs and create sort of like Apple style glass animations,
you can do it that way. Let's cut this one. I'm going to just remake
it here very quickly. I'm going to deselect it, and I'm going to
draw a line like so. And let me hide it for now. From this video,
I'm actually going to create a mask by
selecting a shape, and I'm going to
select it like this. Now, I'm going to import the new Superman and I'm just going to make
it the same length, and I'm going to track mad it. We're going to press Control S, and I'm going to track
mad it to the shape, press on P on the Superman, make it a little bit higher. This is actually pretty good. You can see this kind of
the Instagram layout. We can create another null
and create this to the null. So we'll select this and we will parent it to the null so
that I can press on P and move it a little bit down so it's more in the
center of the screen. So this is going
to be one color. Let's put this color for it. This is going to
be another color. Let's do white for this. And for this part, let's make it black or something dark,
something like brown. And for the background,
let's make it white as well over here so that it's
a bit more organized. Let's actually create a transition from
animation composer. I'm going to go into Tarter
precomps transitions. Let's have a transition. Something like this,
we'll just put it in, and we will cut it over here. We're going to delete
it. And we will add another screenshoot
of flows about the Superman dragon drop it, press on P and S,
move it to the right. D. Just so that I
can see the age. So I'm going to cut it,
move it a little bit down. Let's select our screenshot. Let's create a shape on top. Let's make the
color of the shape. Why don't we make it yellow? Like this? In mode
in the overlay mode, we are going to put multiply
so that it's transparent, and I'm going to cut it here. Going to move it below the Zoom. Now, for this part, we also
need a linear wipe effect. We will need to
animate it. Let's see. The completion, yes,
this is kind of what. Actually, we need -90 degrees, so that it goes
the opposite way. And let's key frame
it, press on you, come here and move
these around now. So now we can customize this. Let's see if we can do it later. And now we'll have
this highlight effect. Like so, let's take
a look at close up. And we can also select these
keyframes to FN F nine, so that it's starting and
ending a little bit smooth. Beautiful. While this
one is still happening, we mode like so, select everything press on P. While this one is highlighting, we are going to move it a little bit further so that the
highlight takes a bit longer. And while it's doing
this highlight, I'm actually going to select
the screenshot and select this to press Shift Option
Command Y to create a null, and I'm going to select
these once again, I'm going to parent it
to the nome and then I'm going to whilst it's doing this, I'm going to just zoom
in on it, like so. And we're going to
press F nine here, select these key
frames, do it like so. Because we're doing the Zoom, the linear be changed slightly, so we need to change it
here as well, like so. Let's see what we have
from the very beginning. Think you need to be original. Nope. So actually, very
like what we have here, everything from this
part to the transition, now we just need to
connect these two parts, and it's going to take it's going to take
something for us to do it. We are going to increase
the size of the Nope, like, really, really
increase the size of it. The reason we are able to increase in size
and it's not going to lose any quality is
because it's an SVG file. Basically, detext
and after effects is SVG and if I increase
the size of it, it's going to if we have this button here,
it means it's SVJ. It can rasterize. So if I increase the
size, for example, of this part, we increase, and you can see it loses
quality on the edges here. But because some
of the layers have this button and we can click on some of it
because nope has it, if I increase it in size, you can see the quality
is super sharp, even though we've increased
it in size, like a lot. And that's what's
going to help us. We can basically
increase it in size and do a transition this way. Sort of as if we're zooming in, but we're not going
to zoom in really. I'm going to create
another null, and I'm going to basically
duplicate this null, press you and delete these
keyframes so that I'm now able to control it without affecting any of the
previous animations. I'm going to press
shift S to side both P and S. Put the
initial keyframes like this, and then zoom in and
see what we have. Let's select all of this here, move it a little
bit to the right. What if we come here
and do it with O, for example, move
it a little bit down so that we don't have
the edges. Let's see. Smooth it out, select
all the key frames, come here, select it, move it to the
right, to the left. And when we have motion blur, it's going to look beautiful. So I'm going to select
all of this now, and I will move it to over here. And here's the interesting
part what we'll do. I'm going to select all of this and I'm going to extend it, like so, and at this point, I'm going to connect
this null to this null so that when we, this is what's going to happen. Let's open these. Let's press on T to animate the opacity, press on opacity 100, at this point, and let's move it a little
bit to the right. And let's do it like
so. Yes, there you go. Screenshot, I would
like to create a mask around it around
something like this. It's controlled by
this null, right? Yes, I'm going to
duplicate this null, press on P, delete, delete, and I'm going to connect
this null to this null, going to create the position, and we are going
to move it down. And the reason why I
created the mask is so that we don't have tabs at the top. So I'm going to move
it down, select it, press N F nine, make it smooth. Let me select this one
and make it smooth. Actually, we might
not have to do it in the end there. What
if we do it like? I have to press Command
Z because the animation just kind of got lost a little bit. I
see what's happening. I was being a little bit stupid because we don't have just P. We have P and S animated.
That's why I was doing that. Okay, press P, connect
Disnll to Disnll. And now when we move it down, select a fan of
nine, do it likes. Let's see. By the way, when the snope happens, we can cut this whole
part over here. First of all, we can customize
the mask around here. So let's press on M. It's
going to open the mask. Going to zoom out a little bit, select these two and move
it a little bit down just like so that we don't have
this part at the top. Let's create our
text. The trick. Put it in the middle. Actually, I have an interesting
way of animating this. The trick. Let's put this
whole thing in the middle. And let's use the text Evo Let's go down opacity
plus character, apply, press on, delete
everything that's before this. And we'll have our
text appear like so. Why don't we have this arrow, and we can create this arrow? I have this extension in Alfred called I don't remember
what's called but like TF. If you search for it, online you can easily find it if you use Alfred down and it's going
to create an arrow down, which I'm going to copy, and I'm going to create
a text over here. It's going to be an arrow
down. Put it in the middle. Press on P, move it
a little bit higher. I'm going to duplicate
this text, press on P, move it down, select
put it in the middle. What I want to do now is I
want the arrow to sort of get birthed from the
phrase the trick. So it's like the trick is
going to get pulled down, and then the arrow will appear. Let's animate position. P, it will come
from here, like so. To make it even smoother, I'm going to put it here
so that it's going to be the size of the letter
T. And when it goes down, it's not going to be like on the side, it's
going to be exactly. Like, this looks
cleaner than this, just because it does because
it's aligned perfectly. I'm going to press F
nine here and mode, so just for
organization purposes. Now I would like to
create another null, cut it, and I'm going to
connect these to the null. So the trick and the arrow down is going to
be connected to the null P. It's going to go down a
little bit very quickly. When this is going to appear, even quicker, it's to
a fan of nine, is in. You can see that a lot of
it is just playing with keyframes and seeing which
animations look better, which ones look worse
and just experimenting. There's no sort of
secret to this. And as these went down, I'm going to duplicate the No. I'm going to connect
this null to this null, press on P. To the keyframes, press the key frame, and I'm
going to bounce it back up. And if nine going to
really easy ease. Actually, when the
arrow is going down, we should start this text. Okay, let's take a pause here. We'll see what we can do in
the next video with this. If you have any
questions, let me know better than that, I'll
see the next video.
11. Build a Scroll-Stopping Motion Graphic from a Blank Canvas (Part 2): Part two, let's
finish this video up. First of all, let's look at what we've created from
the very beginning. A couple of things.
First of all, I think it's going
to be important to put the date here of the 2025 Supermanth because
we highlight the 1978, but it's a little bit
confusing at this point. I'm going to select our text, put 2025, and going to
lower down the layer. Let's make it white. And for the font,
let's put Tasker. You are free to
download this font. It's free. You can
find it online, and I'm going to
cut it over here. And I'm going to parent
this to null number one, the null that controls
this huge zoom in. Great, great, great,
great, great. Okay, then I'm going
to press Command K to increase the time
of the composition. So let's set it to 15 seconds. This is the part that goes out. Okay? So we can
cut this part over here because it's out of
the frame at this point. Then we have the trick,
and let's do it, like so and shorten this one. Let's increase the length
of the white solid, which is the background for us. Let's take a look at
what we have next. That's motion graphics. I have an idea of how I
want to present this. Basically, I want to create a shape that's going
to act as a track mat, and we will reveal
text with the shape, and we'll reveal it in
an interesting way. So we're going to reveal
these next two lines by using the shape. So let's create the
shape. The shape is going to be rounded rectangle. So I'm going to
diselect everything and I'm going to draw it. We will definitely
have to customize it. So we'll put it in
the very middle for now and I'm going to cut it. I'm going to first create this part and then
I'm going to connect it to the previous basically
to connect this and this. Let's make this black. Let's come to contents,
rectangle path. Let's select all of
this. Let's select actually we don't
need the position. So we need the size
and the roundness. Two keyframes, and here, I'm going to set the
roundness to zero. And then for the size, Okay, let's keep actually, we do
need the position as well. Okay, so we will put
everything in the middle. Great. So this is how
we have it right now. Let's copy this. That's
motion graphics. I'm going to create a
text layer and I'm going to write it over here as a pro. Let's set a regular medium. Okay, let's delete this. Let's start from
the very beginning. I found that there is a problem. If we go from Tasker to ASAP, so just it's better to set the ASF pro from
the very beginning, and then when we put
it, it's good to go. So let's put it in the middle. Make it a little bit smaller. Let's do, like,
the font size 65. Then I'm going to
cut it around here. And now we need to
customize the size. I'm going to disable
proportional sizing, and let's change the position. Actually, let's change
the position of this one so that
it's in the middle. So. In terms of the size, let's decrease the
horizontal size. So we have it in the middle. This part is in the very
middle as well. Great. Now, one thing we'll
do is we will track mat this text to our shape, and we will make our
shape visible as well. Now the interesting
part about this is that when we let's say move, we will have our text appear
only when we have the shape. Actually, for this
part, we can even do like the linear wipe effect. Instead of animating the
size and the position, let's do a linear
wipe effect, linear. And actually, we already
have it here for this one. So we can just go ahead and copy this effect from here to here. Great. Let's just press on
you and we'll go 100-0. Actually maybe we
don't need 100. Let's go from whatever this is. When I'm just finding the point where it
disappears completely. So it's actually
82 instead of 100. The reason why I'm doing
82 and not 100 is because basically it starts from
the side of the screen. It starts from here, and we don't need
it to start from here because there's going
to be a little delay. You will see that, you know, it takes some time to
get from here to here, and we don't want it. That's why we're doing it. And the same thing
in the end, right? We need to find a point
where it's fully visible. So it's at 17. That's motion graphics. Great. I'm also going to
come to the graph editor, and I'm going to smooth
it out a little bit, like so, and I'm going to let's select this one
and speed it up a bit more. Actually, I like to go to the graphics and make
it even smoother. Like, so so we have that's motion
graphics, and by the way, I'm going to press on
P, and I will move it a little bit higher because we're going to have text
a little bit lower. The reason why I'm able to move the position of the shape layer, even though we have a
keyframe is because we key frame specific shape
within the shape layer. So let's take a look.
I know it might be a little bit confusing. Let's
open the shape layer. So we have the shape, which is rectangle, and we keyframed the position
of the shape itself. But then we can also
animate the whole layer. So under this layer, we
can have multiple shapes. This is the reason
we're able to move this position and have this
position separately animated. Let's select the other text. Learn after effect step by step. I'm going to
duplicate this text, press on P, move it
a little bit lower, paste the text in. It's still going to
be track matted. Basically, it's the same effect. And at this point, we need
to make it a little bit smaller so that it's roughly the same size
as the text above. It's one of the
ways that kinetic typography or just in general, typography works is when you
have text the same size, it just looks beautiful. And we'll see that in a second. So that we have different
sentences going to different sizes in terms
of, like, the font, but it's going to be aligned, sort of like boxed, and it's going to look
very, very beautiful. So we need to go to our shape, and I'm going to increase the size to something like this. I'm going to come here, person
command R to open rulers, set a ruler over here exactly to where
the top of that is. And for the position, I'm going to lower it down. Like, so, actually,
we need to decrease the size a little bit
because it's too much. I'm just trying to
see that this space at the top and at the
bottom is the same. So we need to decrease
the size even further. And for this part, let's
increase the roundness slightly. And also, let's
decrease the font of this text and potentially
move just a little bit up. And now I'm going
to move it further. And let's do F N F nine. Now, let's add the last text, which is and star creating
today, linking bio. Actually, I quite
like the animation we had here and because we have very similar
setup with the arrow. Okay, so why don't I just copy these everything
with nulls as well. So duplicate
everything with nulls. Now, it should work if I
just put it over here. Press on A to
select the k point. And let's change the enco
point of one of the nulls. Let's select one of the
nulls and this text, and we will be able to move it. Okay, let's see. Here, in the very end, instead
of having the word trick, actually, we can just increase
the length of this to, let's say 16 seconds and
increase the length of this so that we have the
animation, this animation. And now we can start
animating today. I'm going to select this text
and put it in the middle. Link and bio let's see. So now we need to go
from here to here. I have a couple of
thoughts in my head. Let me just put it together, and then I'll give
you an explanation. Okay, so I created
a solid layer, and I was able to just
move it from the top. So I just find the point until it's just
out of the frame. Then I make sure it just comes back to kind
of its original position, which is 540 by 1960. If you ever forget this, you can always just
create another solid. Put a keyframe for that solid. And then put the key
frame a little bit later, create the first
keyframe and then just move it out of the frame
exactly what I did. And now, for this
part, actually, it would be great
to change the text. Basically change every
single text color here. So for the shape layer, we are going to select Y. For the texts, we are
going to make it. Let's do black. But for these three, we need to actually
make it white. So basically the opposite. Let's take glo. Okay, I'd like to move all of this to
start a little bit faster. I want to delay this arrow and movement down to
a little bit later. So as I understand, I can just copy all
these keyframes and move it a little bit later. Let's see the arrow. Let's
press Shift T so that we have the position and the past at the same time going to
add a key frame of 100, put it around here, and here I'm going to put it at zero so that we actually
don't see it. When we have the animation here, because it's exactly
fitting here, it's not a problem, but when we do it a
little bit further, I think it's going to be
better to do it like this. Let's see everything
from the beginning and then we'll see what
we can do about this. Okay, I like
everything aside from this part needs
to happen faster. So everything we have here, we just need to move it
a little bit to left. Okay, great. And now we need to move everything a little
bit faster even here. That's motion graphics. I feel like it's important
to emphasize and have 2025 appear because right
now it doesn't appear. So let's put a key frame for opacity and here,
let's head it to zero. Let's see. I know
what we can do here. We can just change
a couple of things. Change the formatting
of the text slightly because the text looks
it's all kind of the same and we want
every single layer to be slightly different so that we can know that it's different. Otherwise, it just
looks like it's just one big piece of text. And potentially we just need to move this thing
up a little bit. So if we change the position of this so that there
is a bit more space, it's a little bit more let's try to add a couple of
effects, for example, glow. Link in Bio, I'm going
to search for glow. Let's copy this glow and
paste it everywhere, aside from Link in
Bio. Let's see. Hmm. Maybe we should
get rid of this glow. Maybe we shouldn't
add it to everything. So let's just add it
to the bottom text. We'll select this
and this and paste it let's see if there's anything anywhere
else we can add it, for example, like
here for this text. Thinking need to be original? Nope. Let me come here. And for Lincoln Bio, I would like to I'd like to make it a
slightly different color. So slightly maybe like blue, maybe darker blue, lighter
blue. So this blue. If there are any ways that you'd like to
improve this video, if you have any
thoughts, you know, please welcome in the
cuna section below. But other than that, let's
export these videos. I'm going to go into File
export at the enroQu I always recommend people to
set high quality with Alpha because if you have
something transparent, it's going to be transparent. If nothing is transparent, it's not going to
be transparent. So these are the best settings that I found to work for me, and I recommend it to
use for you as well. So high quality with Alpha, just set where you want
to save the video. Person save, person render. Let's render. Stop
wait, wait, wait. We forgot to add motion
blur to all of this. This is going to be even better. Okay, now let's export it. So Export at the Render Q. I'm
going to just delete this. I'm going to overwrite
the main come, replace, render, press okay. Let's see the final render in the next video
with Motion blur. If you have any
questions, let me know, better than that, I'll see
you in the next video.
12. Mix Music & SFX for Sound Design: Finish this video up by adding the music, adding
the sound effects. And before we get to it, let's watch the video itself
after we exported it. Looks a lot better
with motion blur. I'm just going to drag
and drop it here, press Shift N, press, select the first
one, press Shift B. This going to be raw, press on the second
one, Shift B, and let's call it. Sequences. By the way, you can press on like
Command plus and minus to change the size of
each of the tracks. And then one thing you can do is you can go into settings. Save preset, and then
you can put yourself a specific shortcut for one of the presets that you
have for the track. For example, see if a press K is going to be
small track height preset. So if a present K, it's going to become
the way I like it. Because if it's big, for
example, if press Shift plus, you can see, we can drag and drop the opacity accidentally. I hate that, so I present K
and make this part smaller. Let's come to Pixels, searches search for something
electric. Editor's choice. Honestly, I wasn't
I didn't know where I was going with
music for this video, but this is pretty good. I'll start with the end because it's kind
of easy to addhe. Let's start from the
beginning around here. Mmm. Actually, this
is pretty good. So now we have our songs. I'm going to select it, press Option or Alt on Windows. And with the arrow case, I'm going to move it down
a little bit so that we have a couple of tracks
for the sound effects, and I'm actually going
to just mute it. For this, I want to have, like, a very loud
zoom here, swoosh. Probably we need
to use this one. Or, you know, we need
to use maybe this one. The big one. No,
this one's too long. Let's use this one.
Okay? So let's find the part where
it starts to zoom in. And add another one. Copy it by pressing
Option or Alt. And then here for the
highlight effect, we are going to use the
marker from the SFX folder, which once again is in the downloadable
resources section. So this is the marker. I'm going to drag and
drop it. And let's see. We need to make it a
lot quieter, so -25. When it goes down, I'm
going to duplicate the ssh. And then when it
kind of goes down, I want there to be sort
of like a click in a way, We downloaded some of
the UI sounds earlier. Maybe we can use like
this. Let's good toy. Then for this part, I'm going
to use swoosh, as well. For this, we can actually use a marker for the white part. Maybe we need to
end it a little bit sooner than it actually
ends like this. And then for the last part, let's try to use this sound. When our shape becomes
a little bit bigger, let's try to use this sound. Then for this button press, we can use this again. Move it just a bit further. Now, in the very beginning, I want there to be I'm not sure what kind of sound this is, but it's sort of like
light sound in a way. Not night light or
maybe it's not light. Maybe it's like
stretching sound. Okay, let's try to use
this one at the top. Going to download
it, drop it in. And I want it to be when
we have the transition. So something like this. And then for this part,
let's use swoosh. Well, maybe we can use
another swoosh, this one. Or when it's going like,
from side to side, we can use this sound that
we've downloaded previously. Okay. Actually, I'd like to use this
sound in the ban as well. Mmm. Let's do it like this. Make this one quieter by -15. This one is pretty quiet
as well, -20, okay? These, let's do -15. Actually, this one
minus five extra. Okay, these -15, this minus five this This minus five
is G, minus five. Okay. Let's take a look
Listen at everything. We need to make this one louder. Let's put it to five. Pretty good. Let's take a
listen with everything. Let's do like -15 for the song. Let's use the lower
music for voice. Oh. There you go. Well, that's
how you do the sound. I'm going to come to
the very end over here and going to select here
and I'm going to press 02, select it, go to Export, and I'm going to export. One thing I recommend you to
export with is, for example, you have priests here
that you can save and recommend you to just
copy these settings. This is much source because if you export
from after effects, you've already created the right composition
after effects. I recommend hardware
encoding, profile 4.2, frame sampling, then
for bitrat encoding. Recommend setting
to something like 19 because social media is going to compress the
videos even further, so there is no need to
have a high B trade. Then for effect, I
recommend you to apply a QT Gamo compensation
lat, just select. You can find it in the
downloadable resources section. The reason for that is
because if you don't have it, so let me just disable it. You will see that the colors are going to be
slightly different. I mean, you cannot really see because we just have,
black and white. You can really see
it, but basically the color is less saturated. Without it, there's
a big difference, and I really, really,
really recommend it. So find that in the
downloadable resources section, export, and this video is ready to go. So
let's export it. Take a look at the final
main comp, final export. Let's take a look
at the final video. Great. If you have any
questions, let me know. But other than that, I'll
see you in the next video.
13. Capstone Project: Build a Viral Motion Graphic for Social Media: Come. In CVD, I want to quickly walk you through your
capstone project. I just want to say right away
that there is no pressure. Sometimes people
feel like there's, like, a need and
they have to do it. But, you don't have
to do anything. You don't have to
do this project. It's just something I
really recommend you do because that's the best
way that you can learn. And not only you, if you create a project and you share a couple of
details about the project, about what you've
learned, your struggles, or just anything
you want to share, might help other students
learn better as well. The reason for that is because let's say
you have a struggle, you overcome that struggle
and the struggle is different from some of the
struggles that I have, if another student has the
same struggle that you had, it means that by sharing
your own experience, you will help other students just because they'll be going
through the same thing. It's just something
I really recommend. There's no specific criteria. The only thing
recommend is for you to practice whatever
is best needed, either for your work or whatever skill is lacking
the most for you, just go ahead and practice
that applod that Skillshare project and share just a couple of words about your experience. Have any questions, let me know, but than that, I'll see
you in the next video.
14. Last step!: Congratulations to you. You are nearly 100% done with motion graphics for
social media course. There are just two small
steps you need to take. First, take action. As Kafuha said, a journey of 1,000 miles begins
with a single step. So if you haven't already, take your first step by
editing your first video. All the best information
in the world means nothing if you
don't act on it, and even small steps lead
to massive outcomes. If you found value
in this program, I would really appreciate
if you can take 60 seconds to leave
you honest feedback. I will be immensely
grateful to you, any feedback will massively help future students in choosing
the best program for them. Although this
course is complete, your journey has just begun. I'm excited to see edits online, so be sure to keep me and
fellow students posted. Remember, I'm here
for your success. If there's anything
you need, don't hesitate to reach out on
the Q&A section below. Thank you again for choosing
me as your instructor, wishing you all the
best and looking forward to seeing you
in future courses.
 Vladislav Sateev, Video Editor