Transcripts
1. Welcome! Start here: Welcome to After
Effects Mastery. The complete course
that takes you from total beginner to confident
decorating motion graphics, animations, and visual effects. This course is for anyone who's opened After Effects
and felt lost. Offer someone who hasn't opened it yet, but knows
that they need to. If you wanted to create
professional visuals but didn't know where to start, you're in the right place. This course is
built differently. Over 1,000 student reviews were analyzed across top
After Effects courses. Find exactly what
people struggle with, what they search for, and
what's missing everywhere. Every lesson in the scores
exists for a reason, and anything that didn't make the cut was left on purpose. You will not just learn
to click buttons. The techniques here come
from real experience, years of creating content for
social media and delivering video work for clients
that generated millions of useful results. The tips you'll pick up
aren't textbook theory. They are the kind of
things I learned by actually doing the work
professionally I had a privilege of
teaching over 10,000 students across the world with hundreds of five S
reviews from people who used these exact skills
in real projects. Over 20 focus lessons. You learn how After
Effects things, how to animate anything using
keyframes and expressions, how to build real
motion graphics, including logo animations, kinetic typography,
and three D scenes. Everything is current and
kept as concise as possible. So you get exactly
what you need without sitting through dozens
of hours of videos. Recommend watching
videos in order because every lesson builds
onto the previous one. You can also control
the volume and the playback speed
of every video to learn at your own pace. If you get stuck, we need any help, drop
your questions below. Just make sure to
check the existing questions first because there's a good chance that the
question you want to ask has already been
answered in detail. At some point, you'll be
asked to leave review. Please wait until
you've had a chance to really experience
the material. Your honest feedback
helps to improve the course and better serve
you and future students. Footage, presets, custom tools, and links mentioned
throughout the course are available in the downloadable
resources section. Thanks again for
joining this class. I'm genuinely excited to
help you build real After Effects skills to give you the confidence to
create motion graphics, visual effects, and animations for your own projects
or for clients. Let's jump into
the first lesson.
2. Interface Tutorial: How Every Panel Works: So let's just move to
the first video and talk about the interfaces
and the workspaces. This is what you get when
you come to after effects. It might be the
Where does this do? Where do I click? What
are these buttons? Well, let me explain.
So in front of you, you have a window, and this
is going to be your preview. So everything we'll work on. Basically, this is like
a screen that's going to visually show what's
going to happen. At the bottom, we'll
have the composition where we'll put all
the layers together. On the right, we have
things such as align, audio effects, and on left,
we'll have our files. Now throughout the course,
you might see that my workspace looks
slightly different. That's because you
are able to if I get my cursor to the edge
between the two workspaces, I'm able to move it
around to however I want. Then I can move the
composition, for example, bottom to the right, and
you'll see that we have the blue highlight that shows
where it's going to be put. So if I put it
here, there you go. And then I'm able to just drag it back to the same
place to where it was. Now, at some point, you
will close a panel on purpose or accidentally.
How do you reopen? Let's say you close a
panel, the composition, all you have to do is
go into Window and search for composition
right here, and it's just going
to be put back. And by the way, if
you moved something around or you deleted something, it looks weird, you
can right click on the default and reset
to save layout. Is just going to be put
back to the default one. Now, we have
different workspace. We have the review,
learn, small screen, standard libraries, and then
a couple of other ones. You'll see, I have
horizontal and vertical, and these are the ones
that I created for myself. You'll see it looks
slightly different from the one that by default. Some people work in
different workspaces, but to be honest, I prefer to work in
only one workspace and customize it to my liking. And so this is the one I have
for the horizontal video, and this is the one I have
for the vertical video. And we can switch
between them by just literally clicking
on the one that you need. Let's go back to default.
Now, the tools that we'll be using are in
the top left corner. So we have home selection
tool, hand tool, and a lot of other tools that we'll get to know
a little bit later. Again, a couple of
things to remember. If you close the
panel, just go into Window and open a panel. You can move your
workpiece around, customize to however you want. You'll see some of my
workpieces in the future, if you want, you
can just copy it. If you have any
questions, let me know. Other than that let's
jump into the next video.
3. After Effects vs Premiere Pro: Compositions, Layers & the Key Difference: Now a lot of you will
come from premiere, and before we create
our first composition, we have to understand
the difference between premiere
and after effects. And even if you don't
come from premiere, this is still going to be
useful because we're going to explain how after
effects works. So premiere things in time. You have a sequence,
and it's a timeline where clips play one
after the other. You're assembling story. A
clip ends, B clip starts. Everything is
linear. While after effects things in space. You have a composition,
and it's a canvas where layers stack on top of each
other like in Photoshop. The time still exists, but the primary question isn't
what's going to play next. It's what sits on top of
what and how does it move? In Premiere Pro, Eclip
is a piece of footage. You cut it, trim it, move
it along the timeline. After effects,
everything is a layer. Footage, texts, shapes,
solids, even audio. And layers don't just sit
there. They transform. Each one has a position, scale, rotation, opacity victim. You animate those properties
over time using key frames. So here's the mindset shift. In premium Pro, you're
editing content. In after effects you control
how things look and move. Another analogy, Premiere
Pro is like a film. Whilst after effects is like
a scene inside that film. You build the elements
in after effects, then bring them into Premiere Pro to live
inside the edit. If you have any
questions, let me know. Other than that, now
that we understand the difference between
premiere and after effect, let's jump to the next video and create our
first composition.
4. Setting Up Your First Project: Frame Rate, Resolution & Color Settings: Let's create your
first composition. There are a couple of
ways we can do this. First of all, we can
click on the screen, click on New composition. It's going to open
the composition settings that we
have to customize. Now, we can also go to
the top and click on New composition or here's a hat. You'll see that in the
settings to the right, there's going to be letters. And if you click on those
letters, that's a shortcut. Shortcut will save you a lot of time because when
you learn shortcuts, instead of going to a
lot of different menus, you'll be able to
just click buttons. So I really recommend
you to learn shortcuts. And basically the
third way to create a composition is not clicking anywhere on the screen
with the mouse, but pressing Command or Control and is going to open the
composition settings. Now at the top, we have the
name of the composition, and then we have a number
of different settings. First of all, we
have the presets. Yes, it looks a little so here's how do you
think about this. If you are creating
a vertical video, I recommend 1080 by 1920. If you are creating
a horizontal video, I recommend 1920 by 1080. This is in terms
of the resolution. In terms of the frame rates, if you know nothing
about framewves, you're not sure which
one to use, use 30. Some people use 24
and people use 25, and people use 60.
What's the difference? The lower the frame rates, the more abrupt the video
is going to be, and the more frame
rates you have, the smoother the videos if you're going to use
it for social media, social media is
going to decrease the size of video,
like compress it. And therefore, it's actually going to lose the
number of frames. Now, 24, 25 is something that movies use and definitely
can be used as well. But if you don't want
to think about this, then just stick to 30. In terms of resolution,
keep it to full. Start with the time code, put
it to zero, the duration. This is just how long your
composition is going to be. We'll always be able
to customize it later. If you're not sure, we can just put it to
something like ten, so we just need to put ten
here and then put zero here. Now, another portant note is that the bigger the resolution, the more framers you
have, the more power is going to eat
of your computer. So if your computer
is not very powerful, just try to minimize that
as much as possible. Computer is super super fast. Go ahead and use
four K, 120 frames if your computer
can handle that. Now, I'll show you a
couple of techniques in the future to speed up the
process for your computer. But overall, I'll say
this, if you have specific resolution
framework that you're going for,
you will know that. If you don't know that,
just put 1920 by 1080 or 1080 by 1920 and
30 frames a second. And for the background
color, let's keep it black for now
and press new game. So you'll see the background
color turned black, but it doesn't mean that the
video is black, actually. It's transparent
because if we look on this button, it
becomes transparent. This grid always means that
something is transparent. So when we export it, it's actually going
to be transparent. As a shortcut Command K, we're going to open the
composition settings back, and here we can change the
color of the background. This background color
is just a helper for us in different situations. So if we don't want to be black, we want to be gray or whatever, we can put it, but
it's not going to be visible when we
export the video. So if you have any
questions, let me know. And let's jump into
the next video.
5. After Effects Keyframes Explained: How to Animate Anything: This video is all
about keyframes. What is it and how it works. So I'm actually going to go into top left corner and click
on the Rectangle tool, and you'll see that
we have a shortcut, so we don't have to click on it. We can press on or click. And if we click
and hold, we'll be able to choose different shapes. So it's not just rectangle tool, it's actually shaped tool. So we have a rectangle, we
have rounded rectangle, basically rectangle
with rounded corners, ellipse, polygon, and start. Matter as much
what we create, so let's select an ellipstool. And I'm just going
to draw a circle. By person shift, I'm
going to make sure that the circle is precise
because if I splding shift, it's going to become squeezed, but by person shift, it's
going to be very round. Now I'm going to
person V to select the selection tool to the
right in the properties panel. Once again, if you
don't have it, go into window and properties. I'm going to select the
field color of white. Now for this shape layer,
I'm going to select it and press on P to reveal
the position of it. And by clicking
on the stopwatch, I'm going to create a key frame. This is the key frame. Now, if we move further a little bit to, let's say in 1 second,
which we can see here, I'm going to click and
drag to the right. And the if frame
is going to move. So basically, we're
telling that at this time, it's going to have this
position and at this time, it's going to have
different position. So if we go back, this is the movement that
we not to go back, you just have to press Command
set and it's just going to go back to the
default position. So if I select the Shape layer, person P, we're not going
to have any keyframes. Now, how do we animate
other properties? Well, if I click here to close
the shape layer, open it, it's going to open
the transform, and we have our co point, position, scale
rotation, and opacity. And we can activate each and every one of these
without actually having to click and open
because usually it's closed you just have to click number of times and trust me, when we spend 8 hours
moving your mouse, you want to learn circus
as much as possible. So if a person P, it's
going to be position. If a person it's
going to be scale. If present T, it's
going to be opacity. If a person R, it's
going to be rotation, if we click on A, it's
going to be ca point. Now, we only get
them one at a time. How do we get multiple
at the same time? Well, we just have to press
Shift at the same time. So I have Inca
point, and now I'm just pressing Shift P, STR. And this is basically the same as clicking here and
opening all of these. Now, if we go into the contents, ellipse ellipse path,
stroke, dashes, taper, fill, transform see that we have a ton of
different stopwatches, so we can animate each
and every one of them, create E frames, and then customize it to however we want. If you have any
questions, let me know. Let's jump into the next video.
6. Smooth Animations with the Graph Editor: Easing & Curves: Let's go back to our
circle and press on P, create a keyframe and something
that we can do is we can move the keyframe further away and then change
the position, and it's basically going
to do the opposite thing. We're going from
this position now to the position that we
had in the beginning. So it's actually going
to do the opposite way. And obviously, if want, we can move the
key frames around, but this is not the
point of the lesson. The current movement that
we have is quite rigid, but there's a way to make it very smooth and after effect. Oh, I'm going to select the keyframes and press
F nine on a keyboard. Sometimes you have
to press F and F nine depending on the type
of device that you use. And if we play it, you'll see that the
movement is a lot smoother. It all has to do
with a graph editor, which we can open by clicking
on this button here. If we select our shape layer, we'll see the graph
that we can customize. So this is basically the
smoothness of the move. This is the kind of
movement we had before, and then we can
select the key frame actually from here as well and press N F nine
and make it smooth. So before and after,
big difference, right? But here's an interesting
thing. We can select the keyframes and then make
them even smoother, like so. So basically, I'm just
dragging these handles. And if we take a look
at the movement, it's going to be even better. So we have a very slow
start of the movement, and then we have a
very big speed here, and then it just ends
very slowly, as well. So we have a lot
of movement here. See, we have, like, big
jumps right over here, but then by the end, we
have barely any movement. Now, if you're someone like me, and you like precise
things, you will love this. We can actually double click on the keyframe and customize
the keyframe velocity. It looks a little bit confusing, but basically the maximum
that we can do is 100 and the minimum
we can do is 0.1. And so we can put
a precise number here and it's going to
customize how it looks. And we have two velocities,
incoming and outgoing. So for the gif frame that
we have on the right, it's going to be
incoming velocity. And for the i frame
that we have on left, we actually have
to close this one, double click on that keyframe, and as you'll see, it will
have the outgoing velocity. So here we can put
precise numbers. Just remember, for
the first one, let's just put 65 and it's
going to be exactly 65, this one, and double
click on this one. The influence for the incoming, let's put 65 as well. And so we'll know
that we now have precise movement on
the left and on if we put another
keyframe here and then click on this keyframe,
this one says 32. But if we move it a
little bit to the right, this one is going
to change as well. Now, you don't have to
use the keyframe velocity and most people just
use the handles, but if you want
something super precise, then there's a way to do it. And another to show you here is something
called motion blur. Whenever you have movement, like you see on the screen right now, there's a little bit of motion blur when I'm waving my hand. And if you wave your
hand in front of you, you'll see a bit of motion
blur in your eyes as well. So we can actually achieve a very similar thing here
because as you'll see, we have zero motion blur here. It can be achieved by
clicking on this button, which literally is
called motion blur. So if you click on
it, you'll see that the edges become not as smooth. That's because we
have the motion blur. And the motion blurr increases
the more speed we have. So let's take a look
at how it looks now. I have a bit of motion blur. But then if we really move it closer and speed
up the movement, we'll have a lot
more motion blur. Like, you can see the edges
are a lot more blurred. So if we let it play, it does require a bit more
power for your computer, but once it renders, it's
not a problem at all. So I'd actually really
recommend you to use it. It takes videos to
the next level. It looks a lot more professional and I really recommend you. If you have any
questions, let me know, let's jump into the next video.
7. Layer Parenting & Linking: Control Multiple Layers Together: In this video, let's
talk about parenting, something super useful
in after efacts because let's say I want to draw
another circle within this one, let's make it red so
that's easy to see. And what if I want to stay in exactly the same position,
move with this layer. So we have shape number two,
we have shape number one, and we have a very
interesting tool called parent and link. And so if we jack this whip and whip the shape layer number two to shape
the layer number, these are now going
to be parented. So if we go back
in our movement, it's just going to
go back with it. But now, if I come here and if I click on none in the
parent and link, these are not going
to be together. The white wine is
going to move on to. Now, here's the
interesting thing. The two shapes or the two
objects, whatever you do, two videos, they will say in exactly the same position
relative to each other. So if I come to the very beginning apparent
shape layer number two, two shape layer number one, these are going to stay
exactly in the same position. And you will also notice something that if a
person commands that, come here and par the red
circle to the white one because we don't have
the motion blower enabled for Shape
layer number two. If we go to this
very fast movement, the red one is not going to have motion blurr while the
white one has a lot of it. But if you click on this button, both of them are not
going to have the I actually don't like when
things are not super precise. And so if we select
the two shape layers, and we go into the align
panel, once again, if you don't have it going
to Window and align, when we select the
two, we are going to align them relative
to each other. So, this one is going to
align them horizontally, and this one's going to
align them vertically. And now we have the red circle perfectly in the center
of a white circle. However, it's also important
to know that we changed the position of the white
circle a little bit, and so it actually changed the position of it and
created and not the keyframe. So it's important
to note that if we want to do something similar, where we have to build a certain structure and
then do the animation, it's better to
build the structure first and then do the animation. Because in order to keep them
precisely in the middle, we have to delete
these keyframes into the animation
from the beginning. So let's move it to the right. And then select them,
go to the graph editor. The graph looks a
little bit weird now, but let's just
customize it like so, and let's let it play. It's going to be
perfectly in the center. And you can parent as
many things as you want, so we can create a number
of different circles. We can create a number
of different star tools, triangles, and by the way, another tip for the star tool, you can customize
the number of angles it has with the scroll
wheel of a mouse, so you can make it a triangle or add a lot of
different angles to it. So let's add a triangle. And actually, another
thing that we did is that under one shape layer, we created a number
of different shapes. So if we didn't want this to happen, we have to delete it. Then make sure we diselect any shape layers,
create a shape, and now press Shift Command A to diselect it or just
click somewhere on the screen with not
selecting a layer, click somewhere and we can create a lot of different ones. Now, you will see that
a lot of layers are open and we're not able
to see all of them, and we can press on A and A. So when you select all the layers and
you press on A and A, you basically open
the anchor point for all the layers and
then just close it. So you can do the same
thing with position, so you can press on P and close, and just going to close all
the layers simultaneously. Can select shape
layer three to eight, and I'm going to press shift in between to
select all of them, and we can parent all of these to Shape layer number
one or to number two. It doesn't matter because number two is connected to number one. So if you parent to number
two and select Shape layer number one and click on to reveal the keyframes
and then start the movement. There you go. It's going
to have the movement, and we'll have exactly the
same thing if we select all of these and parent it
to shape layer number two. Since everything moves together, it's actually very convenient to connect it to
either one of them. Also select a number of them. So let's select the shape layer and click on the color and
then put specific color. It's just for you
to identify it. So we can put it to red. And then for the circles, for example, we can put it
to something like green. It's going to be a little bit
easier for us to identify. We know that all of
these are triangles, and the green ones
are the circles. Another useful thing
we can do is we can shorten specific layers, so we can select one and then
shorten it up a little bit. And so it's actually
going to disappear before it and there are a couple of things
that we can do. We can either shorten
up from the end by literally dragging
it to the right or we can move the whole
layer to the right. But then we're actually going to extend the layer a
little bit to the right. So if I preson Command K and make the
composition a little bit longer, let's put it to 15, and by dragging this, I'm
going to zoom out. You'll see that we can move the whole layer to the
right or to the left, or I can preson shift to make sure we have
precise fitment. I can just shorten
the layer like so. And we can select a number of different layers and do the
same thing at the same time. We can select layers, and then they're
going to appear or disappear relative to each other because we had
this space here. It's just going to keep it.
If you have any questions, let me know that let's
jump into the next video.
8. After Effects Text Animation: Animator & Per-Character Control: In this video, we're
going to talk about text animation and presets. First of all, we need to
select the text tool. We can go into top left
corner and click on the text or as you can see the shortcut Command I prefer to
use the shortcut. Command it's going to
open the textol and we need to click to start
typing and then type something. For example, let's be very creative and type
something like text. I'm going to put it
right in the middle. My preference to keep
things in the middle and let's make the text white. I'm going to press
some V to select the selection tool because if we have the text tool enabled, if we click somewhere
to the side, it's just going to create
another text layer, which is something we text
animation is pretty simple, and there are two
ways we can do this. We can build it
custom manually from the ground up or we can use
already created presets. Presets basically already
pre made animation, and we can easily apply by going into the effects
in Presets panel. So we have the animation
and preset text, and then, for example, animate in is going
to let the text appear let's search for something like fade
up by characters. It's one of my
favorite animations. So if I drop it in, the text is going to disappear. Let's select the
layer, press on you, and it's going to reveal
the two keyframes. So this is going to
be the first one, and this is going to
be the final one. Basically, what happens
is we animate it 0-100. Obviously, if we don't like the position of the keyframes, we can just select it,
move it to the front, for example, and started
from the very beginning. Great things that we
can move the keyframes closer or further apart, and therefore, our text is going to be very
fast, like so. Or it's going to be
very, very long. Here's the super
useful tool that if we want to do a very
precise animation, we can do it here by animating
the start and the end. So at this point, I want it to be a
specific letter, let's say we have a different
word text animation AE. So if let's say, at this point I want it to be like
text animation, the word animation be
visible on the screen, we're just going to
drag it a little bit to the right to,
like, this point. And then we can move this
keyframe closer, as well. So it's going to type
text animation very fast, and then the other part is going to take very
long. Let's play. This is the way you can
customize it to play around. Hopefully, at this
point, you're like, Oh, this is how I can do it
because you will have a lot of realizations
during after effects. You'll learn different styles
and techniques throughout. And when you have
the realizations, it opens the new world
for you in a way. So let's close the
text open top. Let's see what happens.
It adds the animator, and then in the animator, you animate the range selector. I might be like, Oh, it's
confusing. What is this? Let's do it manually
by hand from the very beginning and
you'll see exactly what's going to
delete this animator and we'll have no animation on screen and click on Animate. And here, we need to click on what exactly
want to animate. Do you want to
animate the opacity? Yes, let's try to do it. It's going to be very
similar because opacity is just how visible or
unvisible the layer is. Let's click on opacity, it's going to create a
very similar thing, the animator with
the range selector. The opacity. So
I'm actually going to open the range selector, and we have a very
similar thing. We have the end, and this is
100% exactly what we need. So I'm going to move it
to roughly 1 second, and the first keyframe, I'm
going to put it to zero. And let's let it play. Nothing happens because we
have the opacity to 100%. So if we lower it down to
zero, let's see what happens. So it's actually a good
animation for out. But how do we do it appearing? Well, instead of end, we actually have to
animate the start. So if we keep the end at zero, let's select this keyframe and delete it so that this
one is kept at zero, and we can actually click on the stopwatch to get
rid of the keyframe. Let's click on the
start and then animate the start so
that it goes 0-100. And in order for it to start
appearing the right way, all we have to do is to
make the end to 100%, and it's going to appear. And then we can customize
it exactly the same way, going 0-100 of the keyframes
further or closer. Let me make it just a little bit bigger on the screen so that we can see there's a number
of ways we can smooth it out, make it a little bit
more interesting, if we add the
position, for example, and then change the position, it's going to start from a different position, as
you can see on the screen. But most of the time,
you don't want to do the manual animation
hand by hand. You want to either use presets already in after effects
or create your own preset. This is how to create a preset. You want to make sure you
select certain animation. Let's say this is the
one that we have. We bit of the position
customization, we have the range selector. And if we select this animator, and we go into the
effects and presets, right click and click on
Save Animation Preset. It's going to save the animation that you have selected
here on the left. And let's call it animator
opacity plus position. And click on say I I disable the search and go
into Animation presets, user presets, it's actually
going to have the one which is saved Animation
opacity plus position. And if I completely get rid of this text and write
another text, let's write text on the screen, once again, go to a line, put it right in the and I'm
just going to either double click here or drag it
onto our text layer. It's going to apply
the animation. So if I press on you, it's
going to reveal the keyframes, it's going to have exactly
the same animation as the one we just
created and saved. And I would say that this is
a solid way to animate text, but it's not
sustainable long term. There's way better and
way faster way to do it, which we're going to
explore in the next video. Let's jump.
9. Kinetic Typography: Advanced Text Effects for Social Media & Presets: I'm really excited about this video because we're
going to talk about advanced text animations
and kinetic typography. Now before we get into this,
what is kinetic typography? Basically, it means
that the animation reinforces the
meaning of the word. So word fast will appear like
that on the screen or it will be typed very fast
while the word slow. Well, it's going to take a lot longer to appear
on the screen. Usually it's animated with music with bits of the songs,
things like that. So I'm going to show you a very interesting and easy
way to do this. First of all, you need
to go to Ascripts, the link is going to be
in the resources section and into download text. Say, flat is $30. Well, it's actually not
because if you want, you can put a price of zero. It's just a suggested price. Then add to card, go ahead
and download it, install it. It's very, very simple to do. Once you have it installed, you should have it in
the window and text Evo. You're not going to have this
blue Moji it's just the one that I put to easily
identify for myself. So let's click on it. This
thing is going to appear. But actually, what you can do is you can just make it a little bit smaller and then stick it
to where should we put it? Let's put it to the top. And then let's make
it just a little bit smaller in the screen so so that it doesn't
take a little space. So the way this works
is we either have to type a certain
text on the screen or we just need to
click on plasm. It's going to
create a text layer with text that we can animate. It's called Texebo that's
why we have it on screen, and has two keyframes. The keyframe on the right
is the final position, and the keyframe on the left is the one that
we need to customize. Right now, we have no animation because we have
no customization. Let's go to transform
and put opacity to zero and let it play
as simple as that, it's going to do the animation. And the interesting
thing is that you don't have to be precisely over this keyframe in order to customize its
initial position. So one of my favorite things about is that we can click on position and then move the
position a little bit down, and it's going to have a
slightly different animation. Let's take a look. It
already looks next level. And this is exactly
how we can create those viral text animations that you see all
over social media. It takes literally, how long did it take us?
Less than a minute. And it's similar in
terms of the animation. We can move the keyframes
further apart or closer. So if we move them
further apart, it's going to take very long to appear on the screen or we
can move them very close. Let's take a look very fast. A couple of things to
pay attention to is the delay in the
top left corner. Currently, it's at 1.2, but let's put it to
something like five. Basically, it's going to
delay each word a lot more. So you can customize that,
play around with that. If you go into styles
and go into a blur, we can actually blur
the animation as well, because right now
it's very sharp. If I zoom in, it's like it's
really, really sharp, right? So if I zoom in and I press
on shift and this button, it's going to fit
the screen exactly. It's the same as going
to fit the screen here. So we can do, you know, like 800 and then go into fit screen. Way.
This one is sharp. And if we put something like, let's put 50 and 50, it's going to blur the text. And once again, I'm not
over this keyframe, but I'm customizing its initial
position and condition. Pull it a plate. So how do we
do the kinetic typography? Well, we can play a lot with it. But basically, we need to
put specific text here, like, for example, fast. This one needs to
appear fast on screen. So I would just move
these a lot closer fast and decrease the lay
to something like one. And it's going to appear
very fast on screen. And if I select this layer, press Command D or Control
D to duplicate it, and then I'm going to select
it right in the preview and literally just start
moving down and press on shift to make sure the
movement is precise. Press on command T to
open the text tool, and let's write something slow. Now if a person you to
reveal the key frames, so this one just move a
little bit further away, maybe increase the lay
to some like three, and we'll have the
difference, right? One very fast, the
other one is slow. That's basically the difference, and you have to play
around with it. Sometimes you have
word appearing with a certain color when
certain color is mentioned. Sometimes it's like flickering. And the way you kind
of come up with the stuff is you take a look at what already exists and
just try to use creativity. Creativity is basically taking a look at a lot of stuff
that already exists, and then just combining
it into what you like, because there's no other person who likes the same stuff as you like exactly has the
same experiences you have. By combining your experience and combining just a lot
of different styles, you'll be able to
put it together and create something
of your own, and that's basically
how you do it. So a couple of things
about text as well, is in the properties, we have the paragraph. We have the alignment.
So it's center text, left alignment or
right alignment. If we have it in the center, it means that whatever we type, the text is going to
stay in the center. But if we click on left
alignment, whatever we type, it's going to be aligned based on the left and the
same thing with the right. So it's going to be based on
the right and type from the. We already know that we
can align the things, but we can also align the text. So we can put the text right
in the middle and then align in the middle the horizontal and vertical
alignment, basically. And if there are any
specific questions, you can always leave them below, but other than that,
this how it's done. Like it's not rocket sized.
It's not super hard. It's just sometimes when you
see it for the first time, might be a little bit
confusing and overwhelming. But once you practice
a little bit, it becomes so great. So I really recommend
you to install text It's going to take your life
to the next level, play around with it. The more you play around, the
more experience you'll get, and easier is going to
be for you to do this. So if you have any
questions, let me know, let's jump into the next.
10. After Effects Shape Layers: Motion Graphics Fundamentals & Stroke Fill: In this video, we're
talking about shape layers and booting graphic
fundamentals. So we already know a little
bit about the shape layers. If we go into the shape tool and then we can
select the rectangle, front to rectangle, ellipse, polygon, and a star tool. Now, we don't necessarily have to click on it in to
create the shape layer. So if we go into layer, new and click on Shape layer, we can create a new shape layer. And then if we select
a specific shape, we can draw it and it's going to draw it in
the shape layer. And the interesting thing
is that we can have multiple shapes in
the shape layer. So one and two, and we have them both under one
shape layer, but manta. And in order to avoid this, all we have to do is to diselect it and draw a different shape. And there's also a
thing called a solid. You can create a solid by once again going to layer, new solid. Click on a game and it's
going to create it. People confuse the stuff a little bit. Let me
explain the difference. A solid is basically a big rectangle that
has a fixed size. So you're not able to
stretch it in any way. I mean, you can
change the color, but it's not something
it's designed for. Like, you cannot really animate its color from its
base properties. You can still move it around and you can make it a
little bit smaller in the screen by dragging a handle pressing on shaft that's going to scale uniformly. But usually it's used
as a background. It's just a lot easier
to use this background, although it looks
like a rectangle. We can create it with a
shortcut command wide, and usually the solid settings are the same as the
composition settings. So it's with 1920 by 1080, we use pixels as units, so these are the units, and we click on Okay, it's just going to
create a new one. Now, if I select
the rectangle tool and I double click
on the rectangle, going to create a shape exactly the same size
as our composition. So very similar
situation as a solid. But in this case, we actually get properties to the right. So if I click on the solid, it doesn't have the
shape properties. It only has a couple of
layer transform properties, but it doesn't
have, for example, the fill and doesn't
have a stroke as well. I'm going to press on S
and decrease our shape, delete the solid
in the background. Let we have a couple of things. First of all, even
though we created a rectangle without
rounded corners, we can still come to
the shape properties and increase the
rounded corners. If I start doing it
and press on shift, it's actually going to
do it a lot faster. It's going to
multiply the values. So we can increase
its size here, and these are the
shape properties. Then we also have
the shape transform, and I know it might be a little bit confusing, but
here's the thing. If I close and open
the shape layer, we have the transform
of the layer itself. And remember, under each layer, we can have multiple shapes. And if I open the content,
we have the rectangle. Rectangle has its own transform. So if I draw another rectangle here under the shape layer, if I open the rectangle too, it will have its own transform. The transform under
a specific shape is going to be different
than the transform of the layer because
the transform of the layer controls both of these as you can
see on the screen. But if I transform
just one shape, it's just going to
transform one shape. Now on the right, we
can change the color of the field to white or to
any color that we want. We can click here and
we can set it to none, so it's literally going
to be non existent. We can set a radio or linear
gradient. Let's click on it. So if I click on
the field color, it's going to give
us the gradient. The Bottom one for the
gradient is the color, and the top one is the opacity. Let me put this one to red, and let's keep this one white. I can actually select the
opacity top right and put it a little bit
less or to zero. So we'll only be able to see the red stuff here in the
transformation state. Now, let's put it back
to maximum and presion. If I click on our rectangle, so it can be the
rectangle or it can be a gradient color, it
doesn't really matter. The main thing is that we select the rectangle and
do the shape layer. We are able to
customize the gradient. So we can drag this handle
and then by pressing shift, I'm going to make
it straight so that the gradient is not as abrupt. And then we can click on this one and drag it
to the left as well. So it's going to be a
very smooth gradient. Do a very similar thing
with a radial gradient, but here we need to
customize the center point, and the one on the right
is going to control, how far from the center the
gradient is going to be. We can actually go to the
solid color or disable this one completely and
then go into the stroke. Stroke is something a little
bit more interesting. So if I click on
the solid color, we cannot see it
because the stroke width is at zero right now, but if I increase it,
it's going to be visible. So stroke is just an outline
around a certain object. We can put specific color, exactly the same
thing, make it red, or we can put a gradient or a radial gradient
or put it to a non. Now, the word motion graphic
means graphics in motion. So we just need to add
motion to the graphics. This is the graphic
that we have on screen. So how do we add motion to it? Well, we have to do
it with keyframe, something you already
know how to do. So if I was to press,
for example, on P, change its position,
and let's move it from here to maybe like here. So we have a basic movement
from left to the right. Let's start from
the very beginning. Select this, press F nine, go to the graph editor, select these again, and then make them a
little bit smoother. So here's our move.
Bit too slow. Let's move these closer to 115. So it's going to
take 1.5 seconds. 1.5, even though it says 15, a little bit
confusing, right? Well, it's because we
have 30 frame rates. If we go to, let's say, 2 seconds exactly and then
go a little bit to the left, it says it's 129. And the way you are able to move like frame by frame is
by pressing command, and with the arrow keys, go to the right or to left. And if you press on
shift, you'll be able to jump ten
frames. Like so. So if you go to the
left, it says 129, although that's 58 milliseconds. So hopefully this
is understandable. If not, please let me
know the QNsection below. No, the shape layer, and we go into content
rectangle, rectangle path. We're able to customize the
path of the rectangle itself. Because if we use, for example, the scale of the shape
layer and I click on this button to disable
proportional scaling, basically, if it's enabled, it grows or decreased in size proportionally,
it keeps its shape. But if I disable this button, it's going to do this thing. And you'll see that we
have a bit of a problem. Our rounded rectangles
become a little bit weird. That's because we increase and decrease the size
of the whole Now, in order to avoid
this, we need to use the size of the
rectangle itself. So if we increase the size
of the rectangle transform, we'll have exactly
the same issue. So we need to use the size
of the rectangle path. So click on this button, and let's click on size. Now, I'm going to
select the layer, press on to reveal the key frames. Now have two keyframes, and I'm actually going to move this keyframe to
the very beginning, so we're going to
start from here. But at this point,
why don't we make it a little bit
smaller on the screen? So we can make it precise, we can make it 600
by 600 pixels, so it's going to be
a precise square. Let's go to the graph editor. This might look slightly weirdly because we have disabled the
proportional scaling. Now, in the size, we
have red and green, and you'll see the two
colors, red and green. So it's just a different
representation of the same data. If we select this
and press F nine, it's going to be a
very similar thing, and then we can customize
it and make it a little bit smoother and do exactly
the same for the green graph. Let's take a look at what we have Now we have a bit of a shape morphing
becomes a lot more interesting. Now, if I click on
the shape layer and we can actually do a bit of
customization on the right, and I click on the roundness, it's going to create
another key frame. And by doing the roundness, we can actually make the shape, a circle because
basically a circle is just a square with very
rounded corners, right? So if we increase it to the maximum to
roughly 340, right, select it F nine, go to the graph editor, select it and make
it a bit smoother. Let's see, just becomes a bit. We can play around
with keyframes. We can do the movement first, then we can do the size, and later, we can
do the roundness. And in order to do
a precise movement so that one keyframe
is over the other, I just have to press on shift, and it's going to stick
like a magnet a little bit. So let's take a look at
what we have so far. Now, another trick
is that if you want movement to be super, super smooth, you
want to overlay the keyframes a little bit so that the movement
is overlapping. And while we have one movement, the other movement starts to happen on the screen.
Let's do exactly that. Let's select the size, overlap the key
frames a little bit, and overlap the keyframes
a little bit here. So, it's a little
bit overlapped. Looks a little bit
weird, but let's take a look at how smooth
the movement is. It's a lot smoother than
what we had before. We don't have to
wait until we have the movement finished to
start at the next moment. We can just overlap it and
becomes extremely smooth. So if you ever saw a super
smooth camera movement in after effects, then
that's how you do it. It's basically done with
a number of keyframes, just overlapping each other.
Now, this is the basics. In order to do the
advanced stuff, all you do is you just play around with lots of
different layers. Remember, you can
parent the layers, you can move them
together, animate them in all sorts
of different ways. And when you play around, like, five different layers in different situations
at motion bloer? Oh, yeah, it becomes
like next level. If you have any
questions, let me know, let's jump into the next.
11. Logo Animation: Step by Step: In this video, let's
do a logo animation. Now the thing about after
effects is that there's 1 quadrillion ways
to animate a logo. Well, maybe not that much, but there's a number of
ways to animate the logo. There's no right to wrong. The question is,
what do you want? Or what does your client want or maybe you since you
got inspired by that. Is there a specific request
that you're going for? Let's explore a number
of different options. This super basic logo. We have the text and we have the shape layer in
the background. Let's call it circle. And by the way, the way we can rename this is by
pressing Enter, and let's call it circle. First of all, the most
basic one is just animating the opacity so that the logo appears
on the screen. We have to let both the
text and the circle. The way it's like both
is by pressing command at the same. We can
press and shift. The difference between
command and shift is if we had multiple circles, if I press on command, I have to select each one of
them separately, but if I press and shift, I can select all of them
at the same time. So basically everything between the two that I'm selecting. So I'm going to
select the two and press T to animate the opacity. Set the keyframe and this is going to be a final keyframe. So I just have to
move it a little bit further away to 1 second. Put this one to zero,
and let's let it play. Now, we don't necessarily
have to put it for the word logo
because it's black. So we can play around
with colors a little bit. We can delete the keyframe,
we cannot animate it at all. It's just going to be
at 100% all the time. And what if we add a background? Let's person command Y and add something like
a gray background. And I'm going to put
it to the bottom. In this case, we'll have the
word logo on the screen. So actually, what we did in the very beginning
would be very useful. Put it to zero, and
let's animate both. Now, what if you have
100 different layers on a logo and you don't want
to animate it hand by hand? Well, we can just delete
the key frames and delete it from here
so that we just have it at 100. I'm
going to close it. And let's select the
circle and the logo, and we'll do some crazy. We will press Shift command
C or Shift Control C, and it's going to do a thing called precompose.
Let's click on. Basically, what it
does is it takes these layers and puts them
in a separate composition. So if we had 50
different layers, it would take all
those 50 layers and basically put them into one
layer, like precompose them. So now we can press on
T immediate opacity, go 0-100, and we don't have to worry about each layer.
It's all together. Now, we can press
in Command set, command set, command set, command set, two, and do, and it's just going to undo it. Or we can press Shift command Z and it's going to redo it. Now, we have a number of
precess that we can animate. One of my favorite ones
is the inky Irish wipe. So if we search for it, you'll see it's called a transition. So if I select the pre comp
and double click on it, it's going to apply it,
and if we let it play, it's going to have this
beautiful animation. Or we can do it
completely different way. Pressing Commandet do, select the press on S to
reveal the scale, create the key frame, so this is going to be the final keyframe, and let's play
around a little bit. The way the scale works is it works based on the ink point. The inc point for the logo, for example, is here.
It's not in the center. So if I decrease the scale, it's going to decrease based
on this point over here. But what if I want it
to be in the center? Well, we have to press command and double click on this button, which is pun behind tool
or the ink a point. So I double click, and the inc a point goes
from here to here. So let's take a look Before The same we have to
do for the circle. The ca points to the right. So once again, command or
control and double click, it's going to be
right in the center. So now we can select the
two and decrease the scale to zero so that
it's non existent. You cannot see it, because
if you go to negative, you'll actually be
able to see it. This is going to be inverted. So let's put it to zero,
and we have the animation. Now, there's an interesting
technique where we can do a bit of an offset in
terms of the key frames. So at this point, we can do a slightly bigger keyframe and it's going to
create a bounce effect. So if we select the
two and press 110, we're going to make
this one a little bit bigger and then it's going to become a little bit smaller. Let's take a look. But
the moment is very rigid, so we have to select
it and press on FN, F nine, and let's take
a look. Beautiful. What if we move it closer? What if we move this closer? Beautiful. What if we open
the graph editor and select all the keyframes and just make everything a bit smoother?
What about this one? Let's take a look? Maybe move these ones a little
bit further away. Don't forget to turn
on the motion blur. It's going to make things just a little bit better.
Let's take a look. Yes. Now, another thing, if we're animating the
transform effects, remember, we don't necessarily have to animate both of them. So I can actually delete all
the if frames from the logo, and I'm deleting these ones because I want to keep
this final position here because it's
going to just delete these and logos going to
stay in this position. If I delete this one, it's
going to stay like this. But if I delete, for example, like the first one
and the last one is going to be bigger
based on this key frame. So delete these and we
can actually de this one. And remember, we can
parent the logo to the circle and it's going to have exactly the same effect. If you're building a logo here and you have 100
different elements, you can animate each
element separately. It's going to take
quite a bit of time, but it's going to take
things to the next level, and it's going to make it much, much better. So there's
no right wrong. You just have to
experiment a little bit, see what works for
you if there is any specific requests from
the client or from yourself. Don't worry about copying others because that's
the way to learn. That's how you get your
creative stuff going. So take a look at
the stuff floating around the Internet
and see what you like. And then just come here and
experiment a little bit. If you have any
questions, let me know that let's jump into
the next video.
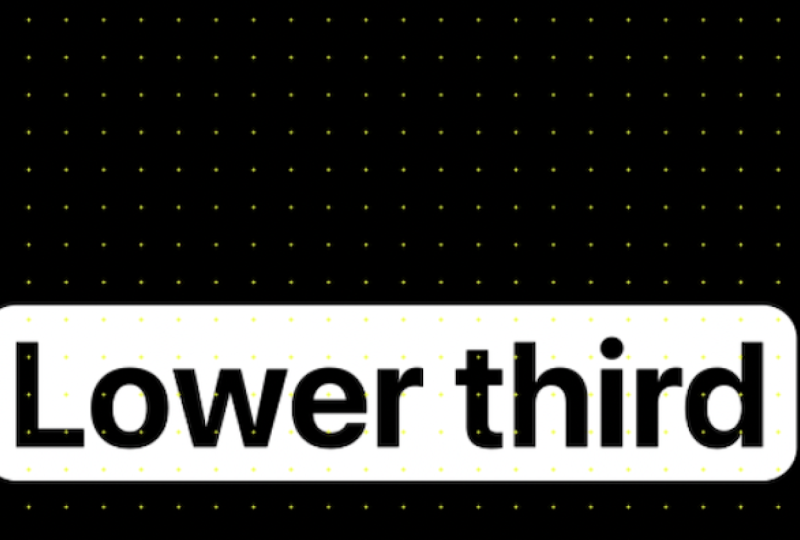
12. Lower Thirds: Build a Professional Lower Third from Scratch: In this video, we're going
to create lower thirds. Lower thirds is the
text overlay in the bottom corner of the screen that identifies
something or someone. You constantly see it in
news, YouTube videos. It's where a title
slides in from the side. So we're going to create
one from scratch. Now I will say that there's
a bunch of templates on websites like Infatu
elements, motion array, art list where these
lower thirds are already pre made and you don't have to come up with
them from scratch. That's actually
really easy to do. So if you don't want to pay
money to these websites, you can just build
it from scratch. Do it is once again going to
create some sort of text. Let's call it lower third. You cannot see it
because it's black, so just select all text
by pressing Command A, click on the film
and make it white. So I'm going to
select the text and make it a little bit
smaller in the screen. It doesn't matter how you
make it smaller or bigger. You can increase the font size. You can press on S to make
it bigger or smaller, or you can just make it
smaller on the screen, like so, whichever option
works best for you. Do something a
little bit creative. We are going to have an
outline for the text. So I'm going to select
the routed rectangle and I'm going to
diselect the text, shift up from Command A and
draw rectangle and then put it below the text and actually we need to make
the text black again. Let's select the shape
and the lower third and put them right in the middle so that
they are centered. This was before
and this is after. I'm going to parent the
text to the shape layer so that these both
work together person command Y to add a gray background so that we can easily
see what's happening, sect the shape layer,
move it a little bit lower and a little
bit to the side. Once again, just like a logo, there's a number of
ways to do the reveal, but one of the more interesting
things that I think we can do here is press on
P, press in the position. This is going to be
the final position. Let's come to and lower it
down in the very beginning. So the keyframes
press on F N F nine. But now, I'm going to move
this keyframe to 1 second. Select the graph
editor, and actually, instead of this moment, we're going to do
something different here. We are going to move this handle to the left to the maxim, and this one, so the moment is going to
be slightly different. It's going to start
very fast and then end very slow.
So let's play. It's a different moment
to, for example, this because we don't see
it for a big portion, but in this case, we see it almost instantly
appearing on the screen. So it just allows us to
have a bit more control. So it appears on the screen. Remember to add the motion blur to make it a little
bit more expensive, and then we can play around
with a font with colors, and it's going to be
as easy things that you can take a look at motion
array and Vato elements. Take a look at the
templates that these websites have and get
inspired by the templates, and then combine
multiple templates together with the skills
that you'll learn in the squares and what you've already learned and just
use it for your own self. And then you can save
it as a template. And I'd like to show you how to save templates,
which by the way, you can also use in Premiere Pro in the next video.
So let's jump to it.
13. Motion Graphics Templates: Create & Export MOGRTs for Premiere Pro: In this video, we're
going to talk about mogart and templates. Mogart is a motion
graphic template. And the interesting
thing about Mogart is that you can save it in aftereffects and
use it in Premiere Pro. However, it doesn't
work vice versa. You cannot save it in premiere and use it in after effects. And also the one that you
save in after effects, you cannot use in after effects. So you can only use
Mgartz in Premiere Pro. However, you can save
it in both software. If we were to use after effects, we need to create a template. It's really, really simple. All you have to do is
to save your project. So I'm going to person
command as save a project, save it to any location, and let's call it
lower third animation. Person save. I'm actually
going to close this project by parsing shift control
option command S, and now I'm going to
create a new composition, 1920 by 1080, and let's say we have a person
on the screen. I'm just going to draw an unpleasant or maybe pleasant for somebody person
on the screen. Anyway, let's say we want
to present this person. So we'll go to the place
where we saved our project, then we go into
the project panel, and we need to import this
project into our panel. And so it will have
the composition. What we can do is we can
drop the composition here, and it's going to present
it in exactly the same way. And if we want to customize it, we can come here and we can either copy things
from here so we can copy the lower third and the shape layer so that we
don't use the gray solid, or we can just delete the gray solid, it doesn't
matter at all. So we can use it
both ways, right? Or we can come here,
select both of these present command X to
cut and then paste it here, and it's going to appear on
the screen just like so. Now, the great thing
is that it doesn't actually influence
the original project. So if I close this
project, let's save it. This is going to be a person. I come back to the
lower third animation. This file is not changed at all, even though we did some
changes in the person file. Now, how do you use
this in Premiere Pro? We need to go into
the top Recorna and click on Essential Graphics. And basically, the way it works is whatever composition we have, it's going to export
this composition. So we need to select
the composition. It's going to be this
comp number one. We can call it lower third. We can delete the background so that it will not be visible, and it's going to export the
shape layer and delay third. Things that we can select which properties we want to
change in Premiere Prop. So let's close and open
text and source text. So if I drop the
source text here, we'll be able to customize the text itself a
little bit later. So let's see it here. If I type something extra, it's going to type
it here as well. But the one left is
just kind of a title. So we can call it title
or we can give it a name. It's basically the name of the property that you will
be able to customize here. It's just for your reference, this one left and the one right you will be
able to customize. Drop things like
scale, for example, and we'll be able to increase
and decrease the scale. Or, for example,
for the shapelyer, if we open the
contents, rectangle, for example, fill,
we can drop the fill and then change the
color of the background. And not to export,
you just have to click on Export, Motion
graphic template. It needs to save the project. Yes. And then you just select the folder where
you want to save it. The local template
folder works by default, so you'll always have it
in premier pro as well. So I would just
save it going okay. Once you finished, we need
to go to Premiere Pro. Let me just create like a
basic sequence. Lower third. This is the animation
that we have and actually has a
preview as well. So you can see if we
go from left to right, it's just going to work
exactly the same way. And then we just have
to drag and drop it, keep the existing settings. And let's zoom in, and let's let it play
and just go into appear. And if we go into properties, we'll be able to customize. Remember, lower thirds,
that's exactly what we had. So we had lower thirds, the scale, the
fill and the name. So we have the name,
the scale and the fill. So that's how you do it.
If you have any questions, let me know, let's jump
into the next video.
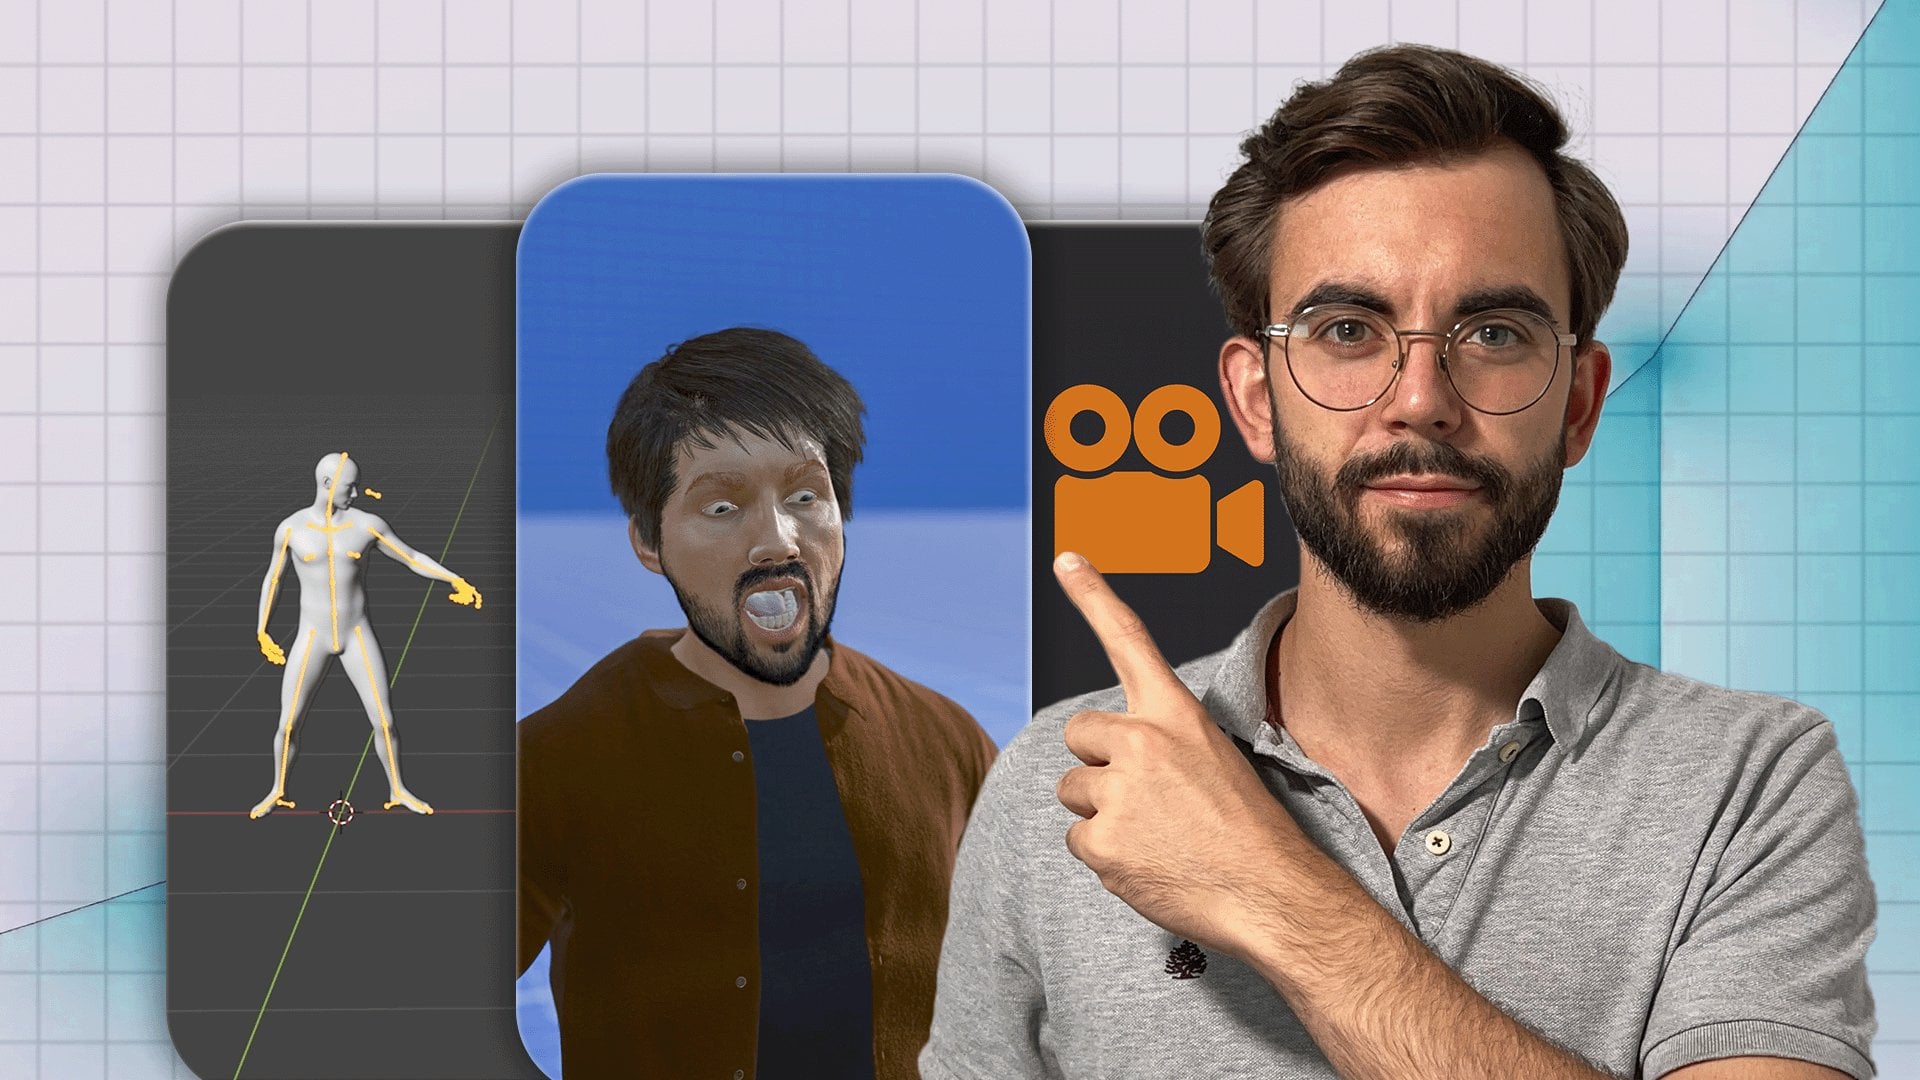
14. After Effects Masking Tutorial: Mask Real Footage Like a Pro: In this video,
we're going to talk about the basics of masking. Go to drag footage of me
into the project panel. So this is the way we're
going to input the file. Next, I'm going to drag the file to the bottom to our timeline, and it's going to
create a composition, the size of the image. So if you click on Command
K, it's going to open the composition
settings and the width is 6,000 by height, 3,030. That's because that's the
resolution of the image. Although if you don't like
it, we can put something like 1920 by 1080. To be just a horizontal video, and we can select
our footage and press Shift Option Command G or So G means it's going to fit the video by the
top and by the bottom. Shift Option command H is
going to fit it horizontally. So we either fit it
vertically or horizontally. A better example
would be to show it with the rectangle tool. So let's draw a rectangle, no stroke, a fill. Shift Option command G, is going to fit it by
the top and the bottom. Shift Option command
it's going to fit it horizontally to the
right and to left side. Now, masking in after
effects is super useful. In this case, we're using
an image index video, we're going to use on a
video to track the mask. So the way you can
draw mask is two ways. Use a shape tool, which
we know how to use. We have a shortcut, and we can select any shape and
whatever shape we select. So let's start with
the start tool. If I select our image
and start drawing, it's going to create a mask. Now, how do we create shape? Well, if a person commands
that and dis select our video, we're going to create a shape. But by selecting
our video or image, start drawing, we're
going to create a mask. Polygon, rectangle, it's
going to create mask. That's the basics
very important thing here is that if we select a rectangle with rounded corners and start drawing the mask, it actually has rounded corners. It's just rounded very small,
so you can really see it. But we can control
the roundness of the edges by using
the scroll wheel. So if I scroll, as you
can see on the screen, it's becoming more
and more round. Now, in terms of let's
say we close our layer, how do we open the mask? What do we do with
it? For Spurs fall, we can open the layer, and
we'll have the masks this way. But what I prefer to do is just click on the
layer and press on M, and it's going to open the mask. If I press on and select
the selection tool, we can customize the mask. So if we select it and select
all the points of the mask, we are able to move the mask. If I select just, for example, two of the points, we'll be able to move just
two of the points. Now, if you're not
able to select it, just make sure to
select the mask on the clip and you'll
be able to do it. You will also see that
we have these handles. With these handles, we're able to customize the roundness. And this is actually
something that comes from the next way that we can create a mask, which is a pen tool. I delete the mask by clicking on the pressing on delete,
select the pen tool. Let's create
something with a pen. So the way the pen tool works
is we need to put a point and put another point somewhere else and make sure
that for the stroke, we do enable it because
there is no fill, so we can disable the fill and enable the stroke, and
there we have a line. So it's very similar to the shape tool in
terms of that we can select the stroke and
the fill similar properties. Let's delete this one and draw a shape that's
going to be completed. So we can draw, for example,
something like this shape. We have our stroke
color. We can enable it. And then for this shape, because we closed the loop, we can actually include
a solid color as well, and disable the stroke, for example, and it's
going to be shape. So as you can see, we
can create a shape very similar to the shape
tool, but a custom one. Another board note
about the Pentool is that we can click and
start moving to the right or to the left in p
pressing shift and making it straight
or by 45 degrees, we are able to add
these handles, and these handles
allow us to create very smooth so if we were
to shape something like, let's shape something on
the screen, say, look, we can easily
create a shape here of the mac book by dragging
some of the handles. So, of course, you know,
to make it perfect, we have to spend a bit
more time doing it, but this is going
to be pretty good. So there you go. Like, a very quick shape, the
shape of the Macbook. Now remember, if you
want to fit the screen, press shift and this button, the screen to fit it. And creating a mask with the
pent tool is very similar to creating a mask with a shape tool. Let's
create a mask. Let's select your layer.
Click on the Pen tool, by the way you can press
on G to select it, and let's draw a mask by selecting our layer
first. And there you go. We have a mask. I
chose as the mask, and of course, we can
delete it if we want. Now, let's amend it
a little bit and do a very similar thing
like we did before. Select your image, and
let's draw a mask. Here. So in order to
make it smoother, remember just to click hold and drag the mouse and it's going
to make it a bit smoother. Doesn't have to be
super precise or perfect because we
can select the mask, and then by pressing on Vt, we can customize the
mask to our liking. So if we select certain points, we're able to move them around
just like so very useful. Another important aspect of the mask is that
we can invert it. So if I click on this
button to the mask, click on it, it's going
to invert the mask. Basically, it selects
everything else at we had before
doing the opposite. And if I click on the mask
and opens properties, there are a couple of
things that we can do here. So we have a number
of modes that we can select by clicking
on this button. So if I click disable
the inverted, we can click on
subtract and it's going to subtract from the mask, basically the same thing as the inverted or we can do
something like intersect, lighten, darken or select the based on the
work that you do, sometimes these
things can be useful. So I'm not going to go
through all of them now, but just remember that
you can play around, experiment with
this a little bit, and find the one that you need. In terms of the feather, it's going to allow
us to have not super precise edges
because right now it's like we can see each
individual pixel here. But if we increase the feather, it's going to just make
it a little bit smoother. So we have almost
like a gradient. Obviously, we can also control the mask opacity and a
great thing as well. If we zoom in a little bit, we can do the mask expansion. So if we start expanding the mask so that we
don't see the computer, in this case, let's expand
it a little bit more. We don't see the
computer, the mask became just a little bit bigger. It's very smooth and yeah,
it's just really good. Now we can put anything
we want there. Now, if I delete the image
and I want to draw a shape, for example, let's draw
a circle on the screen, put it right in the middle. Say, I want to mask the shape
layer. How do we do it? Well, if I start
drawing the mask, it's just going to draw
other shape layers here. So something we did before
with you is precompose. Let's select our layer,
person Shift Command C, and it's going to precompose it. And once this layer
is precomposed, we can mask it
out, just like so. So these are the
basics of masking. If you have any
questions, let me know. Than that let's jump
into the next video.
15. Mask Tracking: Track Masks onto Moving Objects: In this video, we're
going to track a mask. Let's come to After Effects, and I'm going to drag a
video of me in this case, and I'm going to double click on the video. A couple of
ways that we can do this. We can put the whole video here and it's just going
to play the whole video, but the whole video
is very long. We don't really need
the whole video, I'm going to person
Command to do. And here, we can actually select just a
portion of the video. Let's, for example, select it from here and I'm going
to use the in point, and let's go a little bit to the front until I
run past the camera. And now we did this selection, and if I drag this
clip over here, it's going to show
just this part from the in and the outpoint. And we click on this window and press on Command W to
close this window. And we can press Command Y to
close this window as well, or just click on a closed button in the top
left corner of any window. So in order to track, let's select our footage and
select the Pen tool. Obviously, we can do it with
the Shape tool as well, but with the Pentl we'll be able to make a better selection. Let's zoom a little bit
with the scroll wheel, and I would like to mask out, for example, the ship here. And let me just do
a quick selection. It's going to select the ship. For the mode, I'm actually
going to set it to none so that we can see how
things are going here. And for the color of the mask, we can make it
something a little bit more viewable.
Let's make it a blue. In order to track the
mask, we need to right click on the mask and
click on track mask. And the pop up on the right is going to appear other window, and here we have a tracker. We have a couple of methods
that we want to track. We can either track the
face at the bottom. We can track the perspective or other aspects
such as position, position rotation,
position scale rotation, position scale rotation
squePerspective. In this case, because we're tracking just something
in the background, we can actually
choose the position. And in order to start
analyzing and just track it, we can either do
it frame by frame, but we can also click on the playhead and just
start analyzing, it's going to track the
selected mask forward. So let's click on
it. It's great to do it in real time. No
cutting anything here. So let's see what it does
when I'm in the frame. So when it goes a
little bit weird, we can actually help
it out a little bit. So by pressing command
and arrow head, I'm going to move to the
right and to the left. Okay, so it starts going
here a little bit. We can press on V to
select the selection tool, select the mask, and then just move it to the place
to where it should be. So let's press on command left and then right,
command left, right. Actually, maybe it's a
little bit too much. Let's try to analyze
now the frame forward. Okay, so we need to select it again and move it a little bit. But maybe a better solution for this would be to
move to the point. So let's see. This is this ship. Where do we see the
ship in full again? So start it from here. Let's select the mask
and select it here, and then analyze
one frame forward. Another. Yes, this is good. Let's click and play. And just going to continue
analyzing the mask. For the next frame, we need to just move it a little
bit to the right, and the last frame is just going to move out of
the frame completely. Great. So now we have the
selection of the mask, and we just need to come to this point and then
track it backwards. Let's see if it does a good job. Okay, so here it goes
a little bit wrong. Let's just move the
mask a little bit, another frame, and we know
that it should be there. Another frame should be
somewhere over here. At this point, we can
just move it, like, so just roughly to have
the selection there. So we have the ship
visible here a little bit, so we can start
putting it like so. And let's see if it's
going to analyze things. Not really. We still have
to move it manually. So there's a bit of manual work sometimes that's unavoidable
because obviously, Aftereffx is not a super smart AI machine
at this point yet, although definitely
will be in the future, but in this case, this
is how we have to it. Okay, and at this point,
it does a good selection. So let's come to beginning and see how our mask
went. Pretty good. Obviously, if we open the mask, we are changing the mask path. And when we come, for example, to this point when
we have the arm, we can actually select the point of the mask and
move it a little bit, then press in command arrow to the right and move it
a little bit as well. Like, so and arrow
right, move it Excel. And then we can play around
with every single frame, which is going to take
quite a bit of time. So for the sake of time, just so that we don't
waste it for you, I'm not going to do it through every single frame,
but you get the idea. So if I select the mask and
we move it a little bit, you'll see that the mask kind of follows around my hand here. And if we select the subtract, it's going to subtract the
can apply a certain effect if we go to the effects
and price span of some Gaussian or Gaussian blur. People pronounce
this differently. And if I press on E, it's going to
reveal the effects. And if I open the
gaussian blur and click on compositing options,
click on plus, we need to select the mask and then press on M and
click on inverted, for example, and it's going to blur the shape there, right? So we're basically applying the effect specifically
to the mask. Like, this is the reason
why you would use it. So you can blur
somebody's face in this way or blur the
name tag of the car. If there's something in to blur, this is the easy way to do it. And then something we'll
do in the future, as well, is to completely erase
something from the screen. So this is going to be
super, super useful as well. If you have any
questions, let me know. Other than that let's
jump into the next.
16. Congratulations!: Congratulations. If
you are watching this, it means you made it halfway
through the course content. I know you've covered a lot so congratulations to you
for making this point. There's a lot more valuable
content coming soon, but before we get
to the next video, I want to simply ask you if this course gave
you values so far, could it take 60 seconds
to leave a quick review? Your feedback helps
the next person decide whether this course
will help them too, and it helps me continue
creating better lessons for you. So leave your feedback now. And, of course, if there's
anything I can help you with, please let me know in the
Que in the section below. You're doing great. Keep
going with that being said. Let's get to the next video.
17. Track Mattes Explained: Alpha Matte vs Luma Matte: In this video,
we're going to talk about really exciting
topic called Track Matt remember
press command to create new
composition and press. Now I'm going to track a
picture of me here, once again, Shift action command G. Track MT is basically another
form of a mask. And the way we do it is we
have to select, for example, a shape layer and then draw something on the screen.
Let's do it like this. If you don't have it
here in to click on Toggle switches and
modes at the bottom, and then you have to track mat your image to
something else. So if we track mad the image to the shape layer, this is
what we're going to have. If you select the
shape layer and I press on selection
tool selected, and I move the shape layer, it's going to move it. So it's a very similar
thing to the mask. But there are a couple of interesting things we
can do about this. First of all, we can track
mad literally anything. So we can track MD star
tool, exactly the same way. So let me put it on my face, like so and then track mad
the image to the shape. And it works, by the way, both for video and for pictures. And one thing as well,
is that the shape layer, it becomes invisible, but we can actually
make it visible. So we will have the image
track matted to that, but this one but if
we click on the icon, it's going to be hidden, but the image is going to be
tracmded to the shape layer. So let's delete it
and come back to the rectangle tool and track our image to the shape layer. Now, these are the
settings of the track Mat. What we can do is we
can click on the invert the MD and it's going to do basically the
invert of the mask, almost exactly the same
thing, or we can click back on Invert to just
do the selection. And something we
can do here is also click on Alpha this
is something that allows us to use bright parts of the trach mat of
the shape layer, for example, for things to be visible and dark parts
to be not visible. Might be a little bit confusing, so let me delete
the shape layer, and let's draw it again. And let's go to the properties
of our shape layer. And here we can do
a linear gradient. Now, I'm going to open the
setting and for this one, I'm just going to put black
just for the ease of it, and I'm going to drag it a little bit to the right
and a little bit to left, B person shift, I'm going to make it super
straight and perfect. So you'll see that on the
right, we have a dark gradient. On the left, we have
a bright gradient. And if we track mat our
image to the Shapler, the dark areas will
be not visible and the bright areas
will be visible. So if I put something
like a command wide, and let's put a red background, going to drag it
on the background, you'll see that it's not
just becoming black, it's becoming trans
so the white parts become not transparent and the black parts become
super transparent. And this is called Luma mat. But if we come back
to the alpha mat, you're just going to do it
based on the shape without it being brighter with darker,
it doesn't matter at all. So this is how we
do the track mat. If there are any specific
questions, please let me know. But other than that, I'll
see you in the next.
18. Green Screen Tutorial: Keylight for Clean Chroma Key: In this video, let's talk
about the green screens. Green screen is when you have a green screen in
the background. Usually it's used to just completely get rid
of the background, isolated, isolate subject from the background, object
from the background. And there are a couple of
ways to do it After Effects. The old way to do it
is called a color key. It's just an effect
that you apply, and then it completely gets
rid of the green color. But there is a better version
that's been added in 2019. If you search for key,
it's called quilt. And so we select our footage and double click on the effect and it's going
to apply the effect. And in the screen
color, we need to select the pick and then
just pick the green color, and it's going to get
rid of the color. You sure that's how you do it. If I press, for example, command Y and add a
background to it, just going to add a background. And if we come back to the effect controls
and select our image, there's a number of
settings that we can customize if we
open everything. And obviously, it
depends on the footage because sometimes you
have a bit darker green. You have just, you
know, the green background or, in this case, you have a green shirt, so you have to play
around with settings. There's no one setting
that works for every single so you do need to come here and play
around a little bit. So, play around with the black, and you'll see that if we set
the clip black to mangum, we have a lot of pixels. So that doesn't work here. So in this case, we
might need to do a bit of a white, and
then replace color. It's replacing the green with gray or we can set
it to something like red, for example, and it's
going to do red color, and we can clearly see it
something like at the top here. So it goes from gray to green. Necessarily use this every day unless you work
with green screens. So most of the people
are not going to use it, but if you're one of the
people who is going to use it, I just recommend coming here and getting yourself
familiar with it. The more time you spend with it, the more experience
you get with it, literally spend 10
minutes playing around. And trust me, you'll
be better than 99% of the people on the planet because you'll
understand how it works. And of course, if at any
point you have any questions, drop them in the
Q& section below. Other than that,
I'll see you next.
19. Rotoscoping with AI: Roto Brush Tool Step by Step: This video, we're going
to learn rotoscoping. It's an advanced way to isolate the subject from the background, basically to mask it. And here we can do a very, very precise and
interesting selection. So we have this very
challenging video because we have a
lot of movement, and in this case, we're going to completely isolate myself
from the background. I'm running, I'm moving. I have hair, the background, there's foreground, and then I disappear at some
point from the screen. It's like, how do we isolate myself from the background?
Is it even possible? Yes, it is. So it is done with
a tool called roto brush, and we have this tool here. And another tip that
I'll give you before we get into this is
that in After Effects, there's a ton of really
useful shortcuts, but I don't mind having a
shortcut for the roto brush. I created a custom shortcut, and I'll show you
quickly how to do it. So if you press Option
Command and upper comma, it's going to open the
keyboard shortcuts, or you can search for
keyboard shortcuts by going to Edit and keyboard
shortcats There's a shortcut. So click on it. And here
you can search for, for example, Roto Brush tool. I'm pretty sure it's not
by default, this one. So I put option W to be able
to access it very fast. So just click here to
add a shortcut and delete if you have a previous one or just keep the
one that you have. And click on Okay. And whenever you press Option W, you'll
be able to have it. And this tip will also save you a lot of
time in the future, because you can create custom
short in order to use it, we have to double
click on the footage, literally, double
click on the screen. And we have this green pop up selector that we need to
select the footage with. I will zoom in with the scroll wheel and
by pressing space, I'll be able to move around.
Here's how to control it. So if a person
command or control, click with the
mouse and literally just drag the mouse up and down. It's going to make it
bigger or smaller. You want to add the selection, just click on AD and it's
going to start selecting. It's going to do it
with a purple outline. If you want to get rid
of a certain part, you have to, for example.
Let's click here. It's going to select it,
but I don't want it. I have to press Option
or Alt on Windows, and just delete this part to make sure it doesn't select
it and this part as well. I found works best.
If you selected something extra, in this case, it's better to just press in Command Z until we get
rid of that because we have a bit of a history in the road of Bartl that
we can revert back to. So let's make it a
little bit smaller, command and with a mouse and do a bit of a
selection on my head. Selection here, here,
get rid of the rocks. Zoom in even further, select the shoes, great here
and get rid of this part. Okay. So let's see is everything okay?
Yes, everything is. Shift, and this button, we get back to the full screen. And now, in order to
analyze it forward, we just have to press on space. And it's going to start playing and analyzing every
single frame. It might take a
little bit of time, and it's going just to
do it automatically. Now, at some point,
you will see that the selection actually
goes a little bit weird. So, for example, this bottle is not selected. We wrote that. We just go back to the place
where it starts going wrong. So we have to search for that
literally just like that. Let's see. Busing command and arrow keys, I'm able to just
go back and forth. So it goes wrong here.
This is the first time. So a Zoom in literally just
select these two places. It's going to do the
selection again, get rid of this
part and this part. And just present space. Actually, we need to
select here as well. And I present space,
it's going to just start playing and
continue analyzing. Okay, so let's check if
the selection is good. Should everything be good here? Okay. Eight. Here's
something for me to tell you is that when
we zoom in on the hair, for example, we'll see that the hair selection is
not super precise. Like, for example,
at this point here, it's just going to look weird. Actually, if we go back
to the composition, we'll see that we have
lots of this white stuff, and something that we can
do to avoid that is go back to the layer and select
the refine edge tool. And let's just find the point where it starts
going, for example, wrong here, and we need to just select the point where we
need to refine the edge. We can do it like so and it's
just going to do a much, much better selection
of this place. It's going to take more time and more power for
your computer. So at this point,
let's let it play. And as you can
see, the selection became a little bit slower, but it does a much better
selection and isolation. Great. So let's come to this point and just double
check that everything's okay. So if we come back
to the compositions, you'll see that
the selection here now is just it's much better. Like, it selects the
hair 100% better. So we can actually
do similar thing with the glasses as well. So let's come back to
the composition zoom in. And yeah, it looks a
little bit weird here. So let's come back and find
the place where it starts. It starts roughly here. So we need to select this point. Actually, let's just
select the glasses, like so, and let it play. And then once it goes
a little bit weird, we just need to select it again and cut this part out because we don't
really need it. So at this point, let's
say we are satisfied. Obviously, for this shot but we need to customize
a little bit more, but let's say we are ready. At the end, all we have
to do is click on freeze. By clicking on freeze, it's just going to
freeze everything, so it's not going to
render it in real time. It's going to save power of your computer and a
lot of your nerves. Ahead and click on freeze. You don't have to
click on freeze, but this is going to make
your life a lot lot easier. You have to wait a
little bit until it does the cutting and then we'll
come back to the compositions. By the way, if you
want to unfreeze, you can just click
on this button because right now you're
not able to customize. But if you want to customize, you just have to
click on freeze. It's going to
unfreeze it, and then you'll be able to
customize it again. So let's come back
to the composition, fit the screen, and let's see what kind of
selection it did. You can clearly see
that at this point, we don't have the
refined edge tool on the hair, but at this point, we do have the
refined edge tool, and you can obviously
just go back customize, but it just takes quite
a bit more time to. If you want to get
the background back, you can easily do it. So in this case, I'm going to duplicate the footage and
the one on the bottom, going to press on E to
select the effects, and I just have to delete it. This is the interesting thing that we can do here is we can add something in between
myself and the background, so we can add something like
let's add a shape tool and put it behind myself and
behind the background. And it's just going
to stay there behind myself and
behind the background. If you have any
questions, let me know that let's
jump into the next.
20. Warp Stabilizer: Fix Shaky Footage the Right Way: In this video, we're
going to learn to stabilize the footage. So I have this very challenging
video of me running. You can see that it's hard to watch the video because
of how challenging it is. So the question is,
how do we stabilize? Well, we have to go
to the Effects and precess panel and
search for stabilizer, specifically for the
warp stabilizer, and I'm going to drag and
drop it onto our footage. It's going to start
analyzing all the frame. So it does most of the
work automatically, and we just have to
wait until it does so you can see it's
like 10 seconds left, and for the footage of
like 10 seconds video of this very crazy stuff happening. And then it's going
to start stabilizing. May stabilize the video, but then we will get
a lot of distortion. And because we have a ton
of stabilizing to do, it's going to look a little bit weird because if you take
a look at the background, the whole background is just
shaking, going weirdly. And the way it does is it
really zooms in on the video. So it has a lot of
space to work with, and then it just moves the
camera to stabilize the video. So in order to control
the warp in the bagon, we have to go into advanced, and then for the crop
plus and then smooth, I would actually recommend you
to setting it not as much. So, for example, go
for something like ten instead of 50 or
something like nine, and then letting it play. And so you will still have
quite a bit of moment, but it's not going to be as crazy as it was in
the very beginning, and we won't have as much warp as we had in the very beginning. We'll still have it,
but not as much. And so we have to find this
kind of middle ground. So I wouldn't recommend you setting the highest percent of stabilization because
you're going to crop the video complete Si, if you have a footage
that's very shaky, there's almost no
way to save it. It's like trying to make a good sound out of
a bad recording. There's just literally
no way to do it. So it's just like
a tool that allows you to do the stabilization, but it's not going to make the footage look
really, really good. So if you have any questions, let me know, other than that let's jump into the next video.
21. Motion Tracking: Pin Text onto Any Moving Surface: Welcome. In this video, we're
going to learn how to track motion both automatically
and manually. So we have two clips
here to practice with. One of the clips is just
me walking at home. I'm just walking, and here
we will track the walls. And then for this video, track something on the
ground and let's jump in. We need to go into the
top right cardinor and go into motion tracking. This is going to change
the outline a little bit, and we need to
click on the video. And the first thing I
like to do is I like to click on track camera. It basically tracks the camera, which we can see in
the top left corner, similar to kind of
stabilizing the video, and it gives us these points where we can create
certain things. So if you come here,
we find this point, we right click and create
solid and camera, for example. And then if we play this video, this is just going
to stay there. So we can actually put a text
there or anything you like, and it's going to completely just stay in that one of
the things that I like to do when I'm creating a solid is precomposing the solid. So shift command C to
precompose, go in compositions. We can completely delete the solid and then change the
resolution to whatever one. So this one is a
little bit too small. Let's do 1080 by 1080, it's going to create square. We can put some text here, text. Here, let's select the text. Go to the horizontal space, and for the fill, let's set a white color and
then put it in the middle. So if I go back to our compositions just
going to have a text, and the text is going to be just on the screen
floating at all times. So this is one way to do it. The other way to do it, if we
delete the three D camera, we delete the effects, everything is we go
into motion tracking, and we click on track motion. And we need to decide what
we want to track position, rotation, scale or all
two of them or three. So we just need to do a selection of what
exactly we want to track. In this case, we will track and it will have these
two square pop ups. So with this, we need to select certain points
that we need to track, and it's just going to
track those two points. It's really important
because if, for example, you track like a rubbish bin, and then you put your text on the left, it's not
going to work. You track this
part of the video. The left part of the video
most completely differently because we have a lens
lens has a distortion, so the moment is very different. So in this case, if you want to put a text or something simple, it's better to track the
place where you want to add. This case, let's zoom
in a little bit, and let's give this a try. I'm going to click in between the two squares and then drag it to the left until
we get to this point. So we will track this point. And let's go for something else. Let's put this point to here. You want to select
something very contrasty and super good
in terms of the focus? Because After
Effects, obviously, it has to connect to something. If you just select tree, it's not going to
work really well. Trust me, you'll have
to do it by hand. But if you select, very contrasty and isolated points, it's going
to do a good job. So I'm going to
click on Analyze, and it's going to
do the analysis. Although you'll
see that this one actually does a bit
of a weird movement. So we don't want this to happen. So I'm going to press
on command set, and we can tell that
it doesn't work. Potentially, one thing
we can do is we can increase the space so that it has more
space to work with. It takes more time
to think about it, to render, to
analyze everything. But it does in much
better selection. So let's give it a try.
Let's click on Analyze, and it still jumps, and then when I move into the
frame, doesn't really work. So let's try to find
a better place, and let's go for this bunch
to be very contrasty. So let's click on Analyze. You can see does a much
better selection here. Here's the very
interesting part is that when we get into the frame, it moves the selection, but we can actually do
something very smart here. We have to find a point where the selection
starts going wrong. So it's good here, good
here, here, here, here. And this is the first
frame where it goes wrong. So when you come back
to the previous frame, and by pressing Option or Alt, we have to find another
very contrasty place, and it's going to move the
selection based on that point. You'll see outward in a second. So let's press option, and you can see that the cursor changes from black to white. And now we have to move
it to another place. So let's actually move
it maybe a little bit to the right and put it to another contrast
to place like there. And you'll see that
the selection is here. But we just move the enca point basically to another place. And let's click on Analyze
one frame forward, forward, forward.
Does a good job. So we know it works,
and let's just let it play and continue.
There as well. Like, we lost the tracker
there at the top. So we have to find a
place where we lost it. Yes, this is the last
frame where it's good. So click on option and
move it to another place, and let's go more beef, something like here,
and analyze forward. Yes, and then let's play. Great. So you did this
very good selection. Now, what do we do next with it? Well, in After Effects, there's
a thing called in null. Null is an object that can
apply lots of effects to. You can control lots
of effects with, you can power in things to it. And we created this by pressing Shift Option Command Y
or shift control Alt Y. Going to add a null. And when
we do this tracking motion, we need to edit the target. So click on Edit the target, and here it already
selects the null, which is perfect for
us and click on Okay. And then we have
to click on Apply X and Y dimensions and click on. So now our null has all the
tracking that we just did. And now, if we come back
to another workspace and drop like a text
on the screen text. Play the text, it
just moves around. But if we select the text and then parent it to the
null and let it play, the text is going to
stay perfectly there. Okay, so something went
wrong there at the end, which I'm not sure
what exactly happened, but we can just go
back, re analyze, reapply everything or create a new null and apply
it to new null. Now, in this case,
we did the position, the rotation, and the scale. In order to select
it, you just have to select the footage. So we did all three rotation, position, and scale, but
we don't have to do it. So, for example, if
I open the footage, motion tracking and we have a tracker, I delete
this tracker. Let's select our footage again. Motion. Let's do
just the position. We have the tracker
appearing on the screen, and then let's go for
a contrast the place. Let's go actually for
one of the boats. For example, let's try this one. Oh, actually, let's go to the very beginning and
then get it to the boat. So let's start from here. Let's click on Analyze. It's going to do the analysis. As you can see this
one's Zoptoster because it's just one analysis. And then the same thing, let's create null
Shift Option command Y and edit the target. In this case, let's
do null number two, press New cap, and then
apply and click on Apply. And if we go back
to the horizontal, we can create another
text let's call it boat. And let's move the text a
little bit to the left, make it a bit smaller
on the screen. So he one of the
boats there and then parent the boat to
the null number two, and then the boat is
going to stay there. You can see this text, it changes a little
bit in perspective, but that one doesn't
change at all. And if we do it for
the second image, which is at home, so let's drag it to
the composition. Radio over here is going to create a new
composition with it. Very similar thing,
go back to the motion tracking outside with
something like track camera. It's just a little bit easier
for most of the stuff. And then, if not, I can
do the track motion. So let's go for a track camera. It's going to quickly analyze it and solve Once it did it, you'll see we have a lot
of points on the screen, we can put something on the right or on the
wall on the left. Once again, something
like clock. You can always create a
text with it as well, but the solid just
something that I'm used to. And then whenever you move, it's just going to
stay on the wall, and you can create something
on the screen as well. So let's create a solid as well, and it's just going to
stay there all the times. And then remember, you can
always just precompose it, put something else
there as easy as that. And then if you wanted
to be behind the person, all you have to do is
roto brush the person, now that you know
how to do it, and then it will be
behind the person. That's how we do.
Have any questions, let me know, other than that,
let's jump into the next
22. Content Aware Fill: Remove Objects from Video Using AI: Welcome. In this
video, we're going to do some proper effects. We're going to explore a tool
called content aware fill, and so tool that allows us to completely get rid
of certain objects, whether that's video or a
picture in our compositions. So here's an example. We
have a video of me walking. I'm going to drag it
into the composition, and it's just a video of me, it's not record on tripod or
anything is just me walking, and I want to completely
get rid of myself here. This is going to be
challenging. It's not just me. It's the back as well. The background doesn't
have a very simple wall. We have the floor, we have
the different colors, all that stuff. How
do we get rid of me? So the way the content of our
field works is we have to have an empty space in the picture and then
it's going to fill it. So the first thing we
have to do is we actually have to mask myself out,
and the way to do it, easiest way to do a person is by selecting the rotabt or
something we already know I'm just going
to double click on myself and do a selection of me. In this case, it doesn't have
to be super super perfect, but once again, the
better the selection, the better the results
are going to be. So I'm actually going to start
from here from this point, and I'm going to press in space and going to analyze it forward. Perfect. I'm out
of the frame now, I'm just going to
go back and going to do the analysis backwards, and we just need me to completely disappear
from the screen. Okay. Let's see what we have. So I'm just going to check
so that my shoe is selected. As you can see, right over here, it's not really selected, so I'm going to
click on it as well, and let's see if
everything is good. Let's go forward. Yes, on this
front, everything's okay. Let's go until the end and just double check
that everything's okay. Everything is okay. Perfect. So I'm going
to click on Freeze. Okay, so just completed
this selection. Let's go back to
the compositions, and there we have me. Black on the screen.
I'm going to duplicate the footage by present command
D. For the bottom one, I'm actually going
to click on E to reveal the effects and
delete the Roti Brs tool. We need to create
an empty space, and we can actually do
it by doing a track mat. So I'm going to select
the footage on the bottom and track mat it to the
footage at the top. Now we also need to click
on Invert the selection so that we have an empty space of me walking on the screen. So if you click on this button, it's going to toggle
the transparency grid, and we'll see that this part
is actually just empty. I'm going to go into Window and click on content aware fill. Now, the way this works is we
can do a number of things. So we can do the H blend
surface or object. In this case, I'm going
to click on object because we are basically
removing an object. And for the Alpha expansion,
if we put it to zero, it's basically doing this
selection of what we have here. But obviously, we
don't want to do it, I want to give it a little
bit of extra space. So if we increase it to maximum, it's going to just
take a bit more space. And then we can obviously do
the same thing for the mask. If you click on the
footage on the top, click on E roto brush, and then if we go
into roto brush MT, here we can do the shift edge and basically, increase
it a little bit, and then this one is going to increase a little bit as well, because it's based on the
one that we have here. So we took a little bit of
actual space everywhere. Great. Now, we need to click
on generate fill layer. It will ask us to
save the project. I'm going to save it, call
it content aware fill. Important to save because
it's going to create another folder with content
to where I feel images. The images that After
effect is going to generate while it's generating, I'll explain how it works. So let's click on Save, and then you'll see that it
created a new layer, and now it will start working. So it's analyzing here at the bottom. You can
see the progress. If you cannot see the progress, you just need to make this
thing a little bit higher. You can always put it,
something like that. So the way it works is
it analyzes the frame. If you're in certain position and you cover certain objects, once you move out of the frame, the frame that you used to
cover will now be visible. And so After Effects
will look at that and generate feel that way. And now that it's done, we can actually see this in real life. So if I scroll, we'll see that I'm actually
nowhere on the screen, and if I disable this layer, we'll see where I'm at. But if I enable, we can
see exactly what it does. Does, honestly, an amazing job. Obviously, we can see
a bit of the shadow. But still, this is pretty incredible because we don't
have to track anything, I just does everything
on its own. And the only way that
we can identify that the person was there
is by the shadow. But imagine if we
didn't have the shadow, if the person wasn't
stepping anywhere, and we just need to remove some object from the background. This is such, such
a powerful tool, and we're really
stepping up the game by using this video is available for practice or
you can use your own video. It doesn't matter at all. Please go ahead
and give it a try. When you give it a try, it will take things to the next level. And the last thing I'll
show is that if we go into the folder where
we saved the project, so this is the contract
where I fill the project, and then it actually
generates the fields. And if I go into the folders, we'll see exactly
what it generates. So we can see frame by
frame how I'm walking, and we can see exactly
what's happening. Another thing we
can do is we can select the background present and just remove a
little bit the opacity, and then we'll be able to see it frame by frame, how it does it. Honestly, really,
really good job. So if you have any questions, let me know and let's
jump into the next video.
23. After Effects 3D Camera: Depth of Field, Lens Types & Camera Setup: Welcome. In CD,
we can talk about the three D layers
in camera basics. So our current composition
is 1920 by 1080, and let's give it 30
frames per second. Now, an important
thing to understand is that what we have in front of us right now
is already a camera. So we always have a
camera in after effect. It's just this one, we're
not able to move around. We cannot add things
like depth of field or change
the angle of view, but what we have in front
of us is already a camera. Now, we can create an
additional camera, and the shortcut for that
is shift option command C, and it's going to give
us the camera settings. Camera settings, if you
have experience with real life cameras
or you ever play the DSLR or you know
the camera triangle, shutter speed,
ISSO and aperture, then that experience
will be super useful. If not, don't worry,
I'll walk you through. So we have two options. We have the one node camera
and the two node camera. And the difference
between them is that a one node camera is
just like a layer, the way it moves, but a two node camera
has a point of interest. So for example, a two node camera has a point of interest. This is where it so
if we move it around, it's going to always face
this point of interest. So it's always going
to almost, like, rotate and it will
always look at it. However, the one node camera doesn't have the
point of interest. So the way it's going to move is just the
way you move it. So it's going to move
like a layer right left up down to the
front to the back, and it's not going to
rotate around the object. So that's the only
difference between too. Now, obviously, you
can give it a name. And in terms of the preset, it will just make your
life a little bit easier. And once again, if
you're going for something super, super specific, great, but if not, then you can use
default settings. And presets give you
the default settings. So once again, if you know
anything about the camera, the smaller the
millimeter of the lens, the wider the view
is going to be. And then the bigger the
number of the millimeters, kind of zoomed in
it's going to be. So if you want to
go for something in the middle 50 or 35
works really well. And then if you go for
something like 15, we are going to have a
very wide field of view. So I believe the video
that you're watching right now it is like
35 millimeters. And if we had 200 millimeters,
it would be like this. You know, really zoomed in. Now, Zoom, the film size
and the angle of view is just some of the numbers that show is based
on the preset. And honestly, don't
worry about this. Obviously, you can
move them around, and then the other values
will move with it. But it is so specific. Like, honestly, I have
never touched this, even though have ten
is with After Effects. And in terms of the units
and the measurement, it's just the way the
information is presented. So if we change it, it's just going to change here, just the way the
calculation is done. So the comp size changes. And then if we change pixels, inches, millimeters, it's just the information
is going to change. But honestly, it's not something that you
should worry about because it's not going to
influence any of the results. For 99% of people,
don't worry about it. In terms of the camera,
I actually prefer to create a two node
camera and then there's a way to make it one node camera very
easily if we need to. Let's go ahead and click on, and it will tell us that we need three D layers for the
camera to have its facts, certainly. Let's create
something simple. Let's create a shape, and
instead of the linear gradient, I'm going to put a
solid and I'm going to select it and put
it in the middle. And for the shape
layers, let's make it three D by clicking
on this button. No, if I open the camera
and it transform, if I move it to
the right, so I'm going to change the
position to the right. It will always look at this. Actually, a better way to say it would be to have two viewers. So this is the
front view and this is the top view. Let
me do it like this. So if I move the
camera to the right, you can see the camera
is moving to the right, but it's looking here.
So let's continue. It keeps on looking here because this is the
point of interest. Let's double click on the camera and select one node camera. Now, if I change the position, it's just going to move like
a basic layer. That's it. So that's kind of the
difference how do we override the camera
right over here. We just have to create a null. So, let's press Shift
Option command. Why? Remember, the null
is just like a layer that we can apply effects to or do
certain controls with that. And this is the way that
we can control the camera. And if we click on the camera and then parent the
camera to the null, if I change the
position of the camera, it's still going to have
the point of interest. That's because I
change the camera, but if I null, and by the way, we need to make the null
three D if we want to move things in three D. If I change
the position of the null, it's going to move
like a normal camera. So this is super powerful. Actually, let me create
command Y a background, in this case, let's make it red. I know it's going to be
a little bit contrasty, but we'll be able to
see things clearly. And another important thing is that if the layer is two D, it's not going to be affected by the camera. So
let's take a look. If I change the
position, because the shape layer is three D, it's going to be
influenced by the camera, but the red solid is not going to be influenced
at all because it's just two D. So it's
going to stay like two D and it's just going
to be like a background. Let's go through the
settings of the camera because we have a number of
different camera options, but it's important
to understand that there's also different renders, and in this case, we are using
a classic three D render. So we can see it here. We can also switch
to advanced three D, and we're going to have
different options. And then we can do
a Cinema four D basically another
application which is super super
advanced, and with it, you can do some
incredible 3d4d work, but we're not going to cover it here because this is super super advanced and you have to have Cinema four D installed in
order for that to work. I don't have it installed.
So if I click on it, it's going to say that
it's not going to work. But we can go from classic
three D to Advanced three D, and you'll see that
the camera options actually change quite a bit. So let's go back to the classic three D. In
classic three D, we have things such as the Zoom and you'll be able to see
the changes on the screen. You shouldn't worry
about knowing exactly how things are going to move
and how it's going to work. I don't always know how
things are going to play out, and it doesn't stop me
from creating videos. So if it feels a little bit overwhelming, it's totally okay. Once you give it a
bit of a practice, trust me, you will get it. I will click in your head.
So don't worry about it. Let's just go through
the settings. So the depth of field just
means blurry background. If you ever wanted to create blurry background or
blurry foreground, do it with the depth of field. And let's do it right
here on the screen. So I'm going to put
a shape layer just for the organization
purposes a little bit lower. For another shape
layer, let's select a start tool and then
draw it on the screen. Let's make it three D, and then for this one,
I'm going to press on P, and I'm going to move it in
three D. So you can see that our shape layers shape layers
located right over here, exactly where we have the focus and we have the
point of interest. But this shape is located
a little bit further away. Which means in the camera, we have the depth
of field enable, and we have to
focus on this one, because if I move
it a little bit, you'll see where the focus is. It's in the same
position as this. If I increase the blur level, the thing in the background is going to become out of focus. So let's go back to one
viewer and fit the screen. This one is going
to be out of focus because it's located
further away. Let's go back to two viewers, and we can achieve exactly
the same effect by, let's say, putting the
blur level back to 100. Then increasing the aperture, and it's going to become
out of focus as well. The aperture in real cameras is basically how wide
your lens can open? Because the more it opens up, the more light comes in, and therefore, the blurrier
the background can get. Once again, if you
know something about the cameras,
you understand it. If not, don't worry about it. We go further, everything
that we have here is basically the customization of the blurriness of
the background. I'll give you a quick example, press on Command Y
to create a solid, this one's going to be white. And let's apply an effect
called CC ball action. I'm going to drag
it onto our layer. So for grid spacing, let's put 22 for ball size,
let's put seven. So it's going to be kind
of small on the screen, and let's make it three D, press on P, and move it a little bit further away
just a little bit. And then let's go back to one view so that we can
see things very well. To delete the
second shape layer, and everything we do from this
point on and until the end is basically this blurriness of the small things
on the background. So we can play around with it. We can do a triangle, and you can see it
changes a little bit. We can do like Pentagon, and everything that we change is going to change
it a little bit. Basically how the light is presented in the background
because sometimes it can be like circles
on the screen and it can be the shapes, this is the way you
can control it. I'm just telling
you this so that you don't worry
about this because this is so niche and specific
that if you have to use it, you now know what it does. But if you don't have to use it, like, trust me, don't use it. It's just a waste of
time because honestly, this is not going
to really change the results of the video,
the results of your work. And if it's not going
to change the results, you're not going
to get paid more. You're not going to get
better video out of that. Why would you even spend
time just wasting on this? So another thing I'd like
to show you is that we have advanced three D as
well, and if I click on it, you will instantly notice
that the background is not blurry anymore because
in the Advanced three D, we don't have the
depth of field. We don't have the
blurry background. So if I open the
camera settings, we only have the Zoom, so we can just zoom
in, and that's it. But we have something
interesting here because we have our Shapler and if I open have
geometry options enabled. If I go back to classic three D, the geometry options
are grade out. We're not able to do it. But
in the advanced three D, we have geometry options. And here we can add
extrusion depth, and if I rotate our object, it becomes three D, and then we can move it in
three D to however we want. This is the big difference
between these two. And unfortunately, there's still not really a way to combine it. So that we have
something three D and also have the
depth of field. But it still allows us to do
some incredible things and to be aware that if we want
to create certain effects, we have to creatively
think about it. There's still a way to do, to use three D stuff at the blur, but it's a lot more advanced. You can always just
search for it online. I'm not going to
go through it here because it's just going to
take quite a bit of time. But it's relatively easy to do, and if you want, you can
always just search for it. If you have any
questions, let me know that let's jump
into the next video.
24. 3D Text Animation: Create a Cinematic Title in After Effects: In this video, it's talk about
three D, text animation. Now that we have a little bit of experience
with the camera, let's go ahead and
experiment with text. So I'm going to create new
composition Ns and 20 by 1080. Bras o. Let's write
text on the screen, and let's make it
three D. Once again, we can make it advanced
three D or go into classic three G. And remember the difference is that
in classic three G, we have the depth of field, the blurry background
to foreground, and in the Advanced three G, we can make the text three
D, we can stretch it out. So depending on the
work that you do, depending on the
type of video you want to do, just pay
attention to that. In this case, why don't
we use Advanced three D? So I'm going to the
geometry options, and let's increase
the extrusion depth. We can select the text,
and then with this, we can move the text around. So it became quite three D, so let's actually
make it not as much. Let's do something like that. For the text animation, just like for the regular
text animation, we can use something
like text evil and apply exactly the same
animations or we can use the animations from
the text layer itself, we can go ahead and
click on Animate, create the position,
change the position. Everything is exactly the same. But there's nothing
that is super useful, and it is animation composer. It's a free plugin. I
use the free option. It is so good in
the free version that I don't even
upgrade to the paid one. So what it does is it has
the animation presets, has titles, typography,
transitions, graphic components. I mostly use it for transitions. It's really good and
for motion presets. So we have some three D stuff, and if I search for three D, it's going to give
us some pop ups. Obviously, we can use
just like two D. This is actually one of
my favorite ones. It's called overshoot. So if I click on D layers do not support effects when Advanced three D render is being used. And the way we solve that is
we go to Classic three G, click on In, and then go
back to Advanced three D, and we are going to
have the animation. So it's going to have this pop up, then we can
select the layer. And in the edit in
animation composer, we can customize the
length of the transition, the number of bounces, the
scale, things like that. I prefer to have one bounce,
so that it's like this. But this is two D. This
is not as interesting. So I'm going to remove it. Let's once again search for three D. Actually,
real like this one. So if you click on remember, we still have to go back
to Classic three G, click on In, and then put
it to Advanced three. And let's look at
what we have here. Or we can remove it and go ahead for something
more interesting. So let's go for this
one at the bottom. Once again, classic three G, click on In and then go
back to Advanced three D. And there we have our text. And if we use the TextEvo, let me click on plus
to add the TextEvo, there's a way to do
it right over here. So if I click on this button, it's going to actually turn
the text three D. So if I move it to the side and then
add the geometry options, it's going to make
it three D and it's still going to have exactly
the same animations. In TextEvo, you
also have presets. So if I click on one
of the presets that I created in the past,
let's click on apply, and it's going to apply the animation person
P and person R and put this 20 so
that we can see it in front of us and in
terms of the TextEvo, I'm going to give
you my presets. The way it works on
a Mac is you have to go into documents, TextEvo, presets and literally just download it in the
resources section, drop them in here, and you'll have exactly the
same presets as me. On Windows, you just
have to go into the TextEvo folder and then go for the presets and
drop them there as. The prices that we have
here from all four sides. So it's right left,
top and bottom. We have both by
characters and by words and just moves with opacity
just like we had it before. So I use this most often. It's really good. You can
go ahead and give it a try. And no need to pay for
anything. It's all for free. But if you go to
classic three G, it's going to make
it two G. In a way, it's not going to have
the scrutin depth. And we can add camera shaped option command C,
something very simple. Let's add a
background, Command Y. Let's apply something
like a grid effect to it. So let's search for
grid, apply it. Let's put it in the background, and let's customize
it a little bit. Let's put border to
something like one, and then we can customize
it to make it square. So we have the text
animation on the screen. But with our camera, we are going to add
the depth of field. Let's just make sure that our white solid is also three D. So let's press on P. Then move it a little
bit further away. Let's press on S to make the
scale a little bit bigger, and let's increase
the blurr level so that it's a little
bit out of focus, then we can go back
to the white solid, add a bit of a background. We can also change
the color of it to, I don't know, something red. I'm not sure what's
wrong with red today, but I want to use red, and then we can obviously
invert the grad to have an even more interesting
effect. So there you go. There we have our text,
there we have our blur, and we're combining both
the camera and the blur. So if you have any
questions, let me know, let's jump into the next.
25. 3D Models, Materials & Lighting: HDRI & Light Setup 2026: Welcome in video, we're talking about three D modeling
and lighting. Lighting is something that
was available before, but three D modeling
is something that was added in After Effects 2026. Might be a little bit scary
and confusing, but trust me, I'll break it down
to the simplest way possible. So let's jump to it. So the latest update of After Effects 2026 is that we
have this new tools. These are the three D tools. So we have a cube. We have a sphere, plane, tours, cone, and a cylinder. The shortcut for
that is Shift D, and we can switch between
them by pressing Shift D and just going to go into
the next one fronts. So Shift D, shift D, D, D, D, D D, and it
just changes them. So let's begin with the cube, and let's just draw
a cube on a screen. And you'll see that it's created in three
D automatically. And by the way, the tool
that I'm using in order to do this movement,
the rotation tool. So if I click on W,
that's the shortcut, and then we can move it around. Create all of them
on the screen, then I'll show you kind of the interesting things
that we can do with them. So we can do plain tool, the sphere tool, then the
Taurus, then the cone. And by the way, in
terms of the cone, it will grow in the direction
that you draw it in. So if I do it upwards,
it's going to go upwards. But if I do it down,
it's going to go down, and then the clin
door as well. Great. So this is the
stuff that we have, and we can make this one a little bit smaller
on the screen. Here's why it's
interesting is that if we click on it and we go
into the properties, we can customize a ton
of different properties. So we can customize the width, the height, the depth. So if I rotate it a little bit, that's the way we
can customize it, then we can customize
the radius, so we can do the rounded
corners or in other words, bevel, and we can customize
a number of sides. In terms of the
compositing options, this is in terms of the light. We'll talk about the light
in a second, as well. And then something
very interesting at the bottom is we can
have the material, and we can set a
different material. Right now it's set to default, but if we click the burger and go to the Get
substance community assets. It's going to take
us to this page where we can download
different materials. And if we go into the types and go for materials,
for example, all categories, we'll be able
to download the materials, and we can download any of them. All you have to do
is just to login into your Adobe account. So here we can download
any stuff they want. Let's go for some self
luminous technology or Oslk burns steel. Let's come to After Effects, and literally just I'm going to drag these from the folder
and drop them here. Important that we
select the material because there's
other types as well. There's smart material,
and not all of them works because they have
a different file format. So the file format that
we need is called SBSAR. If you go into materials,
it now appears. Remember, so we have the cube
selected, the materials. And if I click on Oil
slick, click on W. I'd be able to move it around, and we'll have this material, which looks really interesting. And then if we go
for something else, we'll have in terms
of the material, we can also increase
or decrease its scale, so we can make it really
small on the screen, that small or we
can make it bigger. And then we can
customize some of the other stuff like
change the rotation, you know, the texture, offset. This stuff is really interesting because something like this would have to be done in
Blender, for example, before. By the way, if you ever want to learn blender, you can
click on my profile. I teach you how to learn blender the easiest
way possible, as well, at the same time as
creating content in blender. So, those kind of three
D explany before that, I'd have to come to blender
to do stuff like this, but now we can do it here,
which is really amazing. Now, in terms of
lighting, not to create a light and After
Effects we have to press Shift Option Command L and it's going to
create a light. And we have a number
of different lights. You can create a parallel spot, a point, ambient,
and environment. Parallel, it just means that all the shadows are
going to be parallel. So let's create it, and let's make the thing on
the background a lot bigger. So and then just move it so that we have a
bit of a background. And then we can actually
duplicate the plane, click on R, and do a rotation of 90 degrees, move it a little bit lower, and just going to be kind
of as the bottom of page. Now, in terms of
the parallel light, let's decrease the
intensity to 100. Now, let's go into two views and for plane in the background. Basically for backdrop, I'm just going to click on
it and move it in three D space a little
bit further away so that we can see how
the shadows work here. Now, we get the shadows,
and this is the parallt. Basically, all the
shadows are parallel. This to explain this is that
let's say our sun is so far away that if we look at the shadows that
are cast in real life, all the shadows are parallel. So it's not based on lamp, because if we use the lamp
as the shadow source, not all shadows are going
to be parallel because the light source is so close
to us that gets spread out. But in terms of the sun,
all shadows are parallel. Now, if I double the light, we can actually change the light to something like spotlight, it's going to be
completely different fact. So let me come back
to one viewer. Obviously, we can move
it around as well. So we can move it a little
bit to the left to the right, and we can do the rotation
of double glycon again, instead of the spotlight, it's
going to be a point light, a slightly different effect. Then we can do ambient
light just means that everything is going to
be lit up at the same time. If we go for an
environment light, this becomes quite interesting because we can actually download a file called HDRI and
use it as our light. So you need to go to Link
in the resources section. There's going to be link
for the HDRIs and if we download Newport oft let's
go ahead and download it. Now let's come back
to After effect, and I'm just going to drag the the way it should work is if we go
into light options, we should be able
to have the AGRI. But because of the current bags I have with After Effects, I'm actually not
able to select it. But the ARI file
that you add here, you'd be able to just put it into the source
and then you'd be able to let up your objects
and your scene with it. Now before we wrap this video, I want to say that
obviously there's a lot more to explore here. And if you are into this,
I just really recommend you to come here and to play
around with the settings. It's going to be best
because me going through every single detail is going
to take quite a bit of time. You don't need to know
every single thing. So whatever you're
looking to do, just go ahead and
try and explore. When you come here,
trying to explore, just remember trying
to think visually, so just try to think
of something in your head and then
try to do it here. Obviously if you
have any questions, go ahead and ask me in
the Q&A section below. Now, if we select our shapes, we can do some really
interesting customizations. For example, for the cylinder, if we decrease the
number of sides to, let's say, three, it's
going to become a block. Next, if we go into the cone,
we can do the same thing. We can decrease the number
of sites and then we can customize the radius
to the bottom radius. And there's a lot of interesting settings that we can
play around with. Something like this
wasn't available before in Afrix now it is available, and it's just such
an interesting and powerful tool that just make sure that we're not
limited by our tools, but now we're
limited creativity. If you have any
questions, let me know. Other than that let's
jump into the next.
26. After Effects Expressions Tutorial: Wiggle, Loop, Time & PosterizeTime: Instead, you were talking
about expressions. Expressions is a line of code that you put into After Effects because After Effects actually
is a coding platform. So with expressions, you
can control After Effects. If you know how to code, obviously, that's
going to be great. But if you don't
know how to code, I'm going to show you the
easiest way to approach this. So personally, I'm not a coder, but I still use expressions. And the way expressions work is when to have a composition, we need to create
something on the screen. So let's create the
cup tool, create it, and let's do a bit
of a rotation to it, like so that we
can easily see it. Let me press on P, and it's going to open
the position values. But let's say I don't want
to customize it manually, if I wanted to move
randomly, how do we do this? Well, if a person option or Alton Windows and
click on the button, it's going to open the
expression window. And here we can write something like wiggle. There's
a wiggle expression. We person Enter,
and in this case, I'm going to put
on one comma 20. It does is it says it's
going to move once per second by 20 pixels in
basically all directions. So let's click off
and let's hit play. And you'll see that it starts moving just a little
bit in all directions. So if I put it from the top, it's going to move
from here as well. Now, we can't really see it. So let's put something like 100 and it's going to
move a lot more. And if we scroll, we
can actually see how the values change
right over here. If something is red, it means
that it has an expressions, and we can do it for every single thing
that we can keyframe. We can also set
it to, let's say, it's going to move three times by 100 pixels every second. Let's play. You'll see that
it starts moving a ton. So if we're going to one,
it goes a little bit crazy. And then we can set
whatever values we want. We can set it like ten times going to move it even crazier. So let's hit play. So this is how you can
really easily do it. And wiggle is my honestly
favorite expression After effect because
first of all, it saves you a lot
of time, gives you a lot of random stuff, and then sometimes
it's also quite funny. So that's why for show you how to learn all of this stuff
very quickly and actually, you don't have to learn
this in order to use this. Let me show you some
other expressions. So let's delete this one. And in this case,
let's click on R, and we're going to
change the rotation. So let's see which one we need. This one is going to be good. I'm going to put
a keyframe here, and then by second one, I'm going to move like 45. So this is our movement. Now, let's click on Option or Alt on our stopwatch
and write LoopOut. So, this one is just going to loop this animation
forever. Let's play it. So if I make our
composition not 215, but 5 seconds and put zero here, and then make this a
little bit longer, it's just going to
loop it out forever. If we were to set
it to, let's say, like 90 instead of 45, it will seem like
it's just going forever because the cube
is 360 degrees zero. So if we do 90, it's
like the quarter, and if it's a quarter, it means like it's a precise movement. So if we let it play, it's just going to move
like this forever. Although actually
not moving forever. It's just looping by 90
degrees all the time. If we put it back to 45, we have this abrupt movement. But we can actually extend this movement and say
to After Effects, like, actually continue
going like this forever. And if we write time times 100, it's going to allow us
to just play it forever. So we will have this
movement, basically forever. And there's another
really interesting one, and one of my favorite
ones, actually, it's called posteuriz time. This one just says
how many frames per second it's going to have. So if you want to make it
a little bit more abrupt, it's not oftentimes used, but it's used in graphics
to make it cool looking. So if you set something
like 12, we should have it. But in this case, we
should actually write time times 100 and
it's going to work. So you'll see that it
becomes a little bit abrupt. I'll be completely
honest with you. I'm not sure why the pasteurize
time itself doesn't work. It's just, you
know, to solve it, I actually used a solution in order to come up with
expressions on its own. And it's called
artificial intelligence my personal AI of
choice is Claude. Before this, I used to use GPT. HGPT honestly is super great
with After effect stuff. But I found that
Claude is even better. I was able to troubleshoot
this issue with Claude, and if I ever need
to come up with expressions or I find a
way to use expressions, I always do it with AI. So I can ask it to generate
specific expressions. We can do some really
hard expressions. And instead of me thinking through it and then
learning how to code, I can just ask AI plus
Claude is so good at coding and AI stuff that I would just use it. So
let's give it a try. Hey, Cloud give me a new
after effect expressions that I don't know that's going to just allow
me to learn, like, a new expression after effect, something simple in
the very beginning and explain how it works very short and concise and give the
expressions to try it out. Okay, and I'm just
going to send it. No cutting this video,
so we'll see how fast it works. Wiggle, okay? I already know the wiggle. I know the loop out. I know the time, and I know the posterize time.
So I know those for. Sample A properties value at
a specific point of time, apply it to any property. This grabs whatever the opacity was 0.5 ago and applies it now. This is actually the update
for the latest After Effects. Okay, so obviously, you can
read the explanation quite concise in terms of the
After Effects explanations. If I delete these
two and actually let's use it for this example
as well for the rotation. So I'm going to copy it. This the way it works. So you can see how fast it is, and I can give you an example
of what I used before. So about a year ago, I created this animation
After Effects, and in order to do a
lot of the controls, and there were really
specific controls in order to save it as a mogurd in Premiere Pro, there's
a lot I had to do. If I double click on E, it's going to give
the expressions, and this is the expression
that ChatGPT was able to create.
Quite a bit of work. Honestly, I'd not
be able to do it on my own, but he created, and then I had a
very precise control over very precise settings, save it as a mogurt, put
it into Premiere Pro, be able to control every
single thing that I needed. And it just saved a lot of time. So this is the easy stuff in terms of, like,
these expressions, but this is the kind of stuff
that you can create it, and there's way
more advanced stuff that you can create with it. So just remember that
AI is your friend. You can ask for expressions, and honestly, you can
ask any question. It's so good at it that it will tell you
exactly what to do, when to do, and 90% of
the time it's correct. Sometimes it's not correct. If not, you can always use
Google because Google, first of all, is also an AI. And secondly, it's a search
engine that will find you like a video
explaining how to do something may not
always find it, but most of the
time it will find exactly what you're looking for. If you have any
questions, let me know. I let's jump into
the next video.
27. UI Animation: Design App & Social Media Motion Graphics: In this video, I'm going
to show you how to create UI animation for apps
and social media. Now, this is not a super, super in depth tutorial
on how to do it. If you click on my
profile, I have a separate course
specifically on how to do it. There's multiple ways to do it. This is a very easy way
to do the animation. But if you are actually
looking to do work, you can just click
on my profile, get that course started, and I go a lot more in
depth on how to do it. But in this case,
I'm going to come to After Effects
and I'm going to drag a screenshot that I just took of my Instagram page
and then drop it here. Most of the time to
do the animation, we just have to separate
all the layers. All we have to do is
to do a duplication. If we don't do it, let me
show you what happens. So I'm going to select our tool and I'm going to
start drawing a mask. And the only thing that will be visible is the thing
that we masked out. And if we start doing
something else, of course, we're going to
create another mask and the other stuff will
be visible as well, but the problem is that we don't really see
what's happening. So what I prefer
to do is just to duplicate the screenshot
in this case, and then start creating mask. And when we start creating mask, everything is going
to be on its own. So what we have to
do is just create as many masks as possible so
we can do it for Vladislav, then for this, for
that, for that. And then this can
be its own mask. This can be its own mask. And every single button just
needs to be masked out. And then we're
going to use a very interesting tool that's
going to allow us to turn every single
mask into its own layer. So let me not bore
you with this, let me just do a couple
of more things selected. Obviously, we want to do
a very precise selection. In this case, I'm going to make it fast so that
you don't get bored. So as you can see, we created
like 15 different masks. So I'm going to select
our screenshot, and here's a thing
you need to do. So in the resource section, you will find a tool
called Blood tools, and you need to drop
it in this direction. So it's after effect script, script your panels, and
then just drop it in here. So I have the Vlad tools. If I go into Window and
click on Vlad Tools, it's going to have
this window pop up, and usually put it
here at the bottom. It's a good position like Tom. And if I click on this layer, click on split masks. It's going to create
15 different masks. So if I delete the
layer at the bottom, and each and every mask is going to be on its to animate
it is very simple. We just have to select
all the screenshots, and we need to do some
sort of animation. The easiest way to do it is with animation composer,
in my opinion. So if I go into motion
presets and actually, one thing before we do
that, we have to click on Command and double
click on this button. The reason why
we're doing this is that we need to
center the co point. If a person commands that, for example, let's go for this one. Click on S and decrease
and increase the scale, it's going to decrease and increase based on this ca point, based on this one in the middle, which is not what we want. Want to person command so that we don't
increase the scale. Select everything. Command and double click on this button, it centers the ca point. If I increase or decrease, it's going to be based
on its own center. So let's select everything,
go to animation composer, and let's do the overshoot,
my favorite one. Go to animation composer,
the number of bounces. Let's set one, and let's
play the animation. There we have a ton of UI
pop ups on the screen. If they overlap a little
bit at some point, like, for example, here, you know, if we want to get rid of that, we just need to select all of it and decrease
the number of bounces to zero so that it
just appears on the screen. Like so. Now, one of my favorite things
about composer as well, if we're going to edit and
go for layer selection, we can do layer staggering. So if I move it to
the right or to the left by literally dragging,
you'll see what happens. We'll have layers appear one by one. We can
do it like this. Obviously, in order
to have it not appear just on the black screen because it doesn't
look professional, create Command Y to
create a white solid, put it on the background, and there we have the animations. We can select all
of this, put it, roughly in the middle, and there we'll
have the animation. Let's zoom in a little bit. Let's see. I mean, it
looks pretty cool, right. Although one thing I notice
that with animation composer, I need to select all the
layers and then click on motion blur and motion blur again because the first
time it's not visible, but now you will have
the motion blur. It's going to be just a
little bit more professional. So you can do this
with any UI panel, like something on your
phone or YouTube, Google, whatever, a really easy
way to do the animations. And in terms of the Vlad tools, here's a couple of other things. For the frame rate, I have a bit of an issue when I import things from Premiere
into After Effects, and we'll talk about that in the future, like how to do it, how to properly
import things from Premiere to After Effects,
the proper workflow. I always an issue
with frame rate. So if I put it to
35, in this case, if I click on just 30, it will make it 30
frames a second. So Command K makes it
always 30 frames a second. And then for clear cache, After Effects not
afraid to work faster, you have to have some
space for cache. It's going to render things out, but it takes quite
a bit of space. And so sometimes you run out of space After Effects become slow. So this button
allows you to clear all the cache from your
computer from After Effects. It saves you time time because
instead of going to After Effects settings and then
memory CPUs going to disc. And then you'll see here, so the maximum disk cache
size is set to 50. The more you can
allocate, the better, but the more you can allocate, the less space you'll
have on your computer. And then if you want to
speed up the After Effects, I recommend going
to memory CPU and setting this number to as
low as possible so that you give After Effects and other Adobe products as
much RM as possible. For the CPU as well, the less you allocate
something else, the more you'll
give power to After Effects and other Adobe
software if you use it. Therefore, the faster it will another thing in order
to speed up the process, you have the full resolution, but you can set it to quarter, so it's going to have the
preview words on the screen, but it's going to work
a lot, a lot faster. It doesn't have to load
it. I as good for quality, that's why it makes
things better. Another tip I'll
give you is if you go into preferences as well, if you go into autosave, I recommend setting the
autosave to every 5 minutes, and then the maximum
project versions obviously as high as
possible, as well. It's going to take a bit
of space on your computer, but not it's going to
autosave every 5 minutes because After Effects
has a tendency to crash, and if it crashes, you will completely lose everything
that was unsaved. So save it every 5 minutes. If you lost data of
the last 5 minutes, it's not such a
big of a problem. So if you have any
questions, let me know. Remember, if you want to
really master UI design, then go ahead and
click on my profile and explore the UI design. But other than that, let's
jump into the next video.
28. Transitions & Social Media Effects: Glitch, Shake & Zoom Punch: In this video, we're going
to talk about transitions and all sorts of
social media effects. And this is something
we have to think about a little bit because yes, obviously, we can
create custom stuff, but the custom stuff,
if you create it by hand from scratch
every single time, it's going to take quite
a bit of your time. And obviously, we don't
want you to waste a lot of time on something
that you can automate. Every single transition,
everything you can do by hand, you can do it with Cloud, you can do it with ChatGPT, you can write expressions,
blah, blah, blah blah blah. But there are tools that
speed up the process. And one of the tools
that we've already taken a look at is
animation composer. Honestly, it is absolutely mind blowing how good it
is, the free version. And so I recommend it to anyone. So the animation composer, we have all sorts
of pop ups right. But then if we go
into transitions, we have a ton of
different transitions. And if you come
from Premiere Pro, you will really appreciate this because the
free version also works for Premiere Pro and
is just as good as this one. Let's create a command Y, white solid, and the other
one, let's make red. We will have two of them. I'm going to cut the
white one by pressing Shift Command D to
make cut tilt it. So we have the white
and then rewrit stuff. In order to apply a transition, we just need to click on it, come to the point where the
transition is happening, click on Add, and then
have the transition. So this one is super easy, but then let's go for something more interesting. Let's
click on this one. And even though I'm
not in the middle, I'm just going to
move the cut to the precise spot right over here. So let's
see what we have. Next. Beautiful. We can
customize the colors, customize all sorts of stuff. It's really, really beautiful. And then what I really like animation composer
for is that we have the social
media stuff as well. In the titles and typography,
social media stuff. Let's take a look at how
much stuff we have here. So we have all sorts of, like, buttons appearing
on the screen. Let's click on Add. It's going to have, like, YouTube logo, YouTube shorts, and then we have all sorts of other social
media stuff popping up here. Let me make it a
little bit bigger. The thumbs up, the all
sorts of subscribe buttons. And we also have a mouse cursor. How good is that? Click
on the mouse cursor. Click on Add. Let me
just delete everything. It's hide from the mouse cursor. Put it here and let's play it. If you want to customize
it, we can absolutely do. So customize the cursor, the colors, everything.
It's really, really good. Now, another one, another
free plug in free extension, if we go into Window, I have
it here called Motion Doc. MotionDuck honestly, is
really good as well, but I think it's a little bit worse than animation composer, just for the kind of
workload that I have. So it has tapography presets, animation presets, as well. I would say that for premieppros
a little bit bigger. If you want to give these a try, there's going to be links
in the resources section. I have no affiliation with them. They're just really,
really good. So that's both in terms of the transitions and all sorts
of social media effects. Instead of creating from
scratch, which, of course, you can do is going to be
way more customizable, way better for the brand, but it's going to
waste a lot more time. So you need to find the
sweet spot where, you know, the customization
doesn't take forever, and you also bring
the results in. So if you have any
questions, let me know, and let's jump into
the next video.
29. How to Export Video in After Effects: Render Queue: In this video, we're
going to learn how to export from After Effects. People overcomplicate
this, but I'm going to show you the
easiest way possible. You save it once and
you are set forever. Unless, of course, you have
to do some customization, but it's something specific, but with this method,
we're just going to set the settings one
and change it forever. So in order to export
anything After Effects, first of all, we have our
composition on the screen. We have this and we'll see that we have this
empty space here. So if we don't like the
empty space at the end, we have to do is
to come to the end until our animation ends. Press on N, it's going
to do the selection. So if you want to
customize it from left, you have to press and B, but we don't need to click and B. And then we have to
press Shift Command X, and it's going to cut
the compositions, make the composition smaller to the area that
we have selected. So it's going to
make it this big. Shift Command X. That's
the first thing. In order to do the Export,
you have to go into file. Click on Export and
add to render queue. For me, going there all the
time is not a good thing. So I don't want to
go to render queue. Option Command and
upper comma and search for add to render Q. And then you can put your
own shortcut in my case, it's Command E.
All you have to do is to be in the compositions
and pressing Command E, and then we are in
the render queue. So this is how you export Natefcts you add something
to render queue, you set the settings, and
then you click on Render, and it's going to
render, export it out. In the very beginning, you
have slightly different set. And you have so many
different options. Which one do I choose
Let me explain. If you set the
export with Alpha, it means it's going
to be transparent. So in this case, let me
click on this button. This video is
actually transparent. We don't have the
background. It's just, you know, this black background
is just for reference. But this video is transparent. And if we want to
keep it transparent, we have to use Alpha. Let's come back to the rantqu. If you just set high quality, it's going to export it
with the background. But I don't want that,
and I don't want to set it every single time. I don't want to
think about this. So that's why I always have high quality with Alpha set here automatically.
How do you do? Well, in going to Edit,
templates, output module, set the default as high
quality with Alpha, and then you can give it your
own name if you want to. Click on K. And then if you are in the composition
you press Command E, it's going to be
added right over here with high quality
with Alpha settings. And then all you
have to do is to click on the output module. Let's save it to the downloads. Click on render. It's
going to do the render. So let's come to download, see what we have.
And there you go. You see that our
animation is transparent. If we send something like Command E and we set
it just high quality, click on render in exactly
the same location, the background is not
transparent anymore. But for this one,
it is transparent. So instead of me just having to think transparent
or not transparent, I just set it once and
forget about this. And the good thing
about it is that if we add some sort of
background to here, so command Y, let's not do red. So in order to by the way
open the solid settings, it's Shift Command Y. Let's set something like yellow, where it's great, and put it
below the heart animation. Great. So Command E, delete the other exports, just to make sure I don't
export high quality with Alpha, click on Render
doing the render. Now, when we have the
background, as you can see, we have the
background, and that's the perfect animation.
So that's what we do. Set it once, forget about this. And honestly, I never touch
the settings ever again. And once again, if you need
something super specific, you'll know about it, and then
you will put the settings. If you have any
questions, let me know and let's jump into
the next video.
30. Dynamic Link Workflow: Connect After Effects & Premiere Pro: Premiere and After Effects
software that work together. Now, how do we connect
them together? Well, there's a thing
called dynamic link. And in order to do it, we
have to be in Premiere Pro. We need to click
on a new sequence to great sequence.
Let's click on. Whatever settings we put
in our sequence is going to be taken into After Effects. This case, I'm going to
go into the starter. And in order to import
anything in After Effects, we have to have something
in our timeline. This case, I'm just going
to create a graphic, and we just select the graphic, right click and click on replace with After
Effects composition. We click on, it's going to
open After Effects right away, and we have to save the
project, give it a name. Let's save, and there we'll have a graphic.
Couple of things. First of all, if you
are in Premiere Pro, you will have a live
preview from After Effects. So right now it's stationary. But if a person P,
create a keyframe, move it a little
bit further away. So we have a bit of a moment
in the very beginning. We'll have exactly
the same thing happening in Premiere Pro. So this is literally like a
live view from After Effects. And if we do a change
in After Effects, we have the same change
in Premiere Pro. No, this is good, but sometimes it takes
quite a bit of power for your computer
because we can have an extensive animation
in After Effects. It's going to take forever
to load in Premiere Pro. There's another way to do it. In Premiere Pro, I'm just
going to click on Command Z, it's going two and two and it's going to
have the graphic. Then in After Effects, I will just export the video. Option E, do the export as we learned you set the location, click on save, and then just
render the animation out. It makes things a lot
easier and a lot better. And then when I come
back to Premiere Pro, I can just put the
exported video, which is going to be
this one just on top. And so we'll have the
exported animation, and then the one at the bottom, I can just disable the
whole track or I can select a press Shift Command E and
disable the graphic itself. And so we'll just
have the animation that we had in After Effects. Or there's another way to do it. This is our After Effects
project that we just saved. We can drop it into premium so the composition
that we had the animation in, it's going to be this
untitled link comp. Click on. It's going to be added
to Premiere Pro, and then we can
drag and drop it. So the red one means
it's premiere, the kind of bluish color means that it's render
from After Effects, and the purple one is the
graphic that we just created. So we have exactly
the same thing just spread over
time a little bit. So this one stays
stationary because it has no animation because
we command edit it. This one has animation
because it's exported, and this one has
animation because it's live view of what we
have in After Effects. If your computer
is super powerful, you can keep it as After
Effects project here. If it's not powerful,
you can use this option and just export it from After
Effects, put it here. And if you need to make changes, yes, quite a bit more time. Now, super useful tool if you have the After
effect project, and you want to do changes to the project into right click Reveal Infidr here you can always put shortcuts
for yourself as well. Real infiders going
to reveal it. You can double click on it, and then it's going to
open in After Effects, and you'll be able
to make changes to it very quickly so
that you don't have to search which file you have where because
sometimes you can get, I know, up 50 different After Effects
files in Premiere Pro, so you can have 50 of
these files in Premiere. To search and
reference the names is just not really useful. So right click
Reveal and finder, you can put your own
shortcut and use it. So if you have any
questions, let me know. And let's jump into
the next video.
31. Last Step!: Congratulations you. You are nearly 100% done with
After Effects master. There are just three
small steps in today. First, take action.
Every big result starts with one small action. So if you haven't already, take your first step by
editing your first video. All of the best
information in the world means nothing if you
don't act on it, and even small steps lead
to massive outcomes. Secondly, if you want to
continue learning with me, follow my profile
here on Skillshare. Lastly, if this course
gave you value, could you take 60 seconds
to leave a quick review? Your feedback helps
the next person decide whether the course
will help them too, and it helps me continue
creating better lessons for you. Although the course is complete, your journey has just begun. I'm excited to see
Eddie's in line, so be sure to keep me and your fellow students post.
I'm here for your success. So if there's anything
you need, don't hesitate to reach out in
the Q&A section below. Thank you again for choosing
me as your instructor, wishing you all the best looking forward to seeing you
in future courses.