Transcripts
1. Welcome! Start here: Welcome to automatic
proximity animations and after effects where
you will learn how to animate beautiful
motion graphics that respond automatically
as you animate. This course is for motion
designers, animators, and anyone curious
about after effects, especially if expressions or complex ata felt
intimidating or confusing. In this class, you learn how to make multiple layers to react to a single controller using
proximity based motion. We'll start with simple two D, then move into powerful three D setups that you
can reuse again the end, you'll have a clean, flexible system you can
use for personal project, client work, or your
motion graphics real. I recommend watching
videos in order because every lesson builds
onto the previous one. You can control the volume and the playback speed
of every video to learn at your own pace. If you get stuck
you need any help, drop you questions below. Just make sure to check the existing questions
first because there's a good chance that the
question you want to ask has already been
answered in detail. At some point, you'll be
asked to leave review. Please wait until you've had a chance to really
experience the material. Your honest feedback
helps me improve the course and better serve
you and future students. Thanks Ken for
joining this class. I'm genuinely excited
to help you create beautiful professional
animations and to give you the
confidence to use it in real projects whether
personal or clients based. Let's jump into
the first lesson.
2. Build a Fast 2D Object Grid in After Effects: Welcome. The first thing
we need to do is to create sort of like
a grid of objects. Basically, lots of
objects on the screen. They're proportionally
placed to each other. Let's just go ahead and do it. So first of all, I'm going
to create new composition. It's going to be the
size 1920 by 1080, 60 frames, full resolution, duration, 30 seconds and press. I'm going to create a solid basically like a background
by pressing Command Y, and I'm going to set
a specific color. Let's use something like a gray, just make sure we can see where the edges are because
if we disable this one, we cannot really see the edges. We cannot really see
the top and the bottom. Now, the first thing, let's
go ahead and create a shape. It works with any shapes
at all, but in this case, let's go ahead and
create a lip stool and let's go ahead
and create a circle. So let's put it right in the middle horizontally or
vertically, vertically. And then we need to put our
ca point right in the middle. The way we can do this
is person V to make sure we have the
selection tool enabled, and then press in command and double click on this button. And by doing that, we are
going to center the co point. So let me actually
select this one. So you can see the
ink point was here. Now, command, double or control. Double click, and now
it's right there. What we need to do
next is duplicate it. Let's count roughly
like, one, two, three, four, five, six, seven. So we need to duplicate
it seven times. Press Command D or
Control D seven times, one, two, three, four,
five, six, seven. And then on the
last shape layer, actually just go
ahead and select it. Make sure to select
the selection tool. Now, move it to the right and press
shift at the same time. So it's not going
to go up or down. And now let's just place it roughly in the same
position. Great. Now select all the shape layers. And now when we go into the line tool,
if you don't have it, you can go into Window Align and it's going to pop
up on the screen, then you can just go
ahead and put it here. So let's comp here and distribute horizontally,
pressing this button. Now, they are all going to be evenly spaced throughout
the composition. Now, let's go ahead and person P. So this is
going to be this one. And let's see how much
we have to move in order to get to here. So let's just moved. So it was 153, and now it's 1728, which is like 225. We just need to remember
roughly that number. It doesn't have to be precise, but I just like when
things are precise. I'm going to select all
of this and once again, press either Command D, if you're on Mac or Control
D, if you're on Windows. Get it up, press on
P. Let's say, 540. Let's move it up. That's
going to be like three, 15. So let's say three, 15. There you go. So now it's perfectly the same space we have
here as we have here. Now I'm going to duplicate
it again and move it up a little bit so that we know all of these at
the top altogether, press on P, now we just
need 540 plus two to five, which is going to be like 765. So let's put it seven, 65. There you go. Your values
might be slightly different, but this is the way we do this. Now we can go ahead and do
it at the top, as well. So we can just select all
of these at the bottom. Now, press Command D, once again, move it up person B. Actually, we can move
it down at first. So there's going to be 990. Let's go ahead and put
it there. Perfect. And we can duplicate again, person B. And let's see. That was 315, so that would
be 315 minus two to five, which is going to be like 90. So let's go ahead
and put it to 90. Now we have an even placement of every single circle here. So this is the
easiest way to do it. If you have any
questions, let me know, at C, next video, where we're going
to start animating.
3. Control 2D Shape Layer Position Using a Null Object (Expressions): Now that we have our rid
of objects in place, we need to create our
proximity animations. Now, the way we do this
is through an expression. We need to do a couple of
things to prepare everything. First of all, we need to
create two null objects, and we can create
them by going into layer new and then null object. But if you know shortcuts,
it's a little bit better. So you can actually press
Shift Option Command Y or Shift Alt Control
Y on Windows. So go ahead and press that and you're going
to create a null. Let's duplicate this one
because we need to two. And we're going to call
one of them controller. Make sure to use
caps because we are going to use these names
later in the expressions, which by the way, you don't have to
rewrite anything. It's going to be automatic. You just need to put
the right name here. Otherwise, the expression
is not going to work. And for this one,
let's put null, which is going to be
just null with caps. Next, when we go
onto the controller, we need to add a slider effect. So I'm going to use a shortcut in order to
apply a slider control. This is an FX console
which you can download. It's going to simplify
your life dramatically. You just press the
shortcut and you can search for effects
in after effect. So this is going to be slider
control, which by the way, you can also go ahead and
find in slider control, but instead of going here, I'm just going to
use the shortcut. So slider control, and we need to select it
and duplicate it. So we need two slider controls. This one needs to be
called Max distance. Make sure to use
this name precisely, so make sure to use the
D here and the M here. Wise funds again is
not going to work. And here, we need to use nth. Now that we have this prepared, we need to use an expression. In the downloadable resources, you will find the PDF with all
the necessary expressions. And for this very first one, we're going to use the
influence position. So we need to select
this, copy it, and then we need to get
into our shape layers. Next to the position,
we have this clock, inter press on
option or Alton PC. And it's going to give us
the expression window. And here we need to
paste our expression. You might get this error.
It's not a problem at all. All we need to do is to
go into the controller. We can put 500
here and 100 here, and we're not going to have a problem with the
expression anymore. Now, we need to do a
bit of a manual work, and we need to go through every single shape layer and just do it for
every single one. What I found works best is by pressing Alt or option
and then clicking the position and clicking on every single position
so that it opens, like so, or we can go to the
bottom and click like so. Just have to do it
for every single one. There you go. And
now we can come to the top, paste, paste, paste. Another thing we can
do is we can press on till day this button that
you can see on the screen, and it's going to open
this up a lot more, and then we just paste it like, which is going to save
us a bit of time. Okay, do we have it everywhere? Perfect. Now we can
press on Tilda again, and we can already see the effects
happening on the screen. Now, we need to select
not the controller, but the null and actually
recommend you to use the yellow color
just to make sure we can easily identify
it. Inter selected. Or if you don't
have it selected, you can just select
it on the screen, but we actually
have this red null here because it's on top,
it's going to select it. So we can press on this
null, put it in the middle. So and then make sure to double
click selecting the null, pressing command and
double click here. So that's going to put the c
point right in the middle. Otherwise, it's going to be
a little bit to the side, and the way we have this animation setup is
based on the encapoid. So whenever we are
going to move our null, it's going to be based
on the ken point, not on the null itself. So we can have, you know, we select this button and then move just
the anchor point, the null stays here
in the same position, but then we have the
animation, like so. If you forget to
click on this button, let's click on it, you try to move the
null, it doesn't work. It only moves the ca point. So make sure to
click on V or just click on this button
and it's going to work. Perfect. Now, a
couple of things. When we go to the controller, we can actually influence
how much it's going to, like, bounce around
and be affected. So can increase
the max distance. So if I move the null, you know, all of it is going to
move a little bit, and then we can increase
the strength by how much. So if we decrease, it's
actually going to contract. And whenever we play down null, it's just going
to sort of, like, magnet everything together. But then if I press some control again and we
do the positive values, it's going to do the
opposite of contract. We can put it to 100
and this one to 500, which is what we had
in the very beginning. And make sure to remember the controller is just
kind of these values here. And then our null is what
we actually move around. Now, one thing we can do is we can put our null
right in the middle. And let's say we want these shapes to be
influenced by another shape. Let's say we want to
have, like, a red circle. So let's draw a red circle. Let's just draw a circle doesn't matter what size it
is, put it in the middle. Make sure to put the ca
point in the middle as well, just to make sure it's
always in the middle. And now we need anchor our
shape layer to the null. And now, whenever we
move the null, right, the shape is going
to move with it, and it will seem like everything is being controlled
by this circle. We can change the color to
make it a little bit easier. So if I go into the
properties panel, which is going to
be, once again, window properties if
you don't have it, and then we can change the
color to make it like red, for example, and there you go. This is how we are going to control Ops We
to select the null? Yes, there you go. And we can
actually do the opposite if you want specifically to
control it by the shape layer. So, in that case, we need to put our null right in the middle just to make sure
it's, like, precise. And then we need to D
parent the shape layer, which is red circle. Let me do it so Red circle. So we need to press
some P here on the red circle and
P on the null. And now we need to parent the position of the
null to the red circle. If we do it like so,
then whenever we move our red circle, it's going to work, right? There you go. This
is how you do it. If you have any
questions, let me know. Other than that, let's
jump into the next video.
4. Offset & Individualize 2D Proximity Reactions with Expression Logic: In this video, I want to
quickly explain how we can influence
objects differently. Specifically, the
animations look better when it's
not all the same, but it's like there's different
levels of animations. And so we can actually do
it in a pretty simple way. Let's say we have this shape
layer selected, right, it's going to be shape,
in this case, 33. I'm actually going to
duplicate it and press on S and decrease
the scale of it. And let's change the
color to some like black. If I press on E and E two times, it's going to open
the expression or it's going to
open the effects, and by the effects, we
have the expressions. Okay. So it's this one here. So let's change it to
a different color. Let's put it to orange, for example, so make
sure we don't forget it. And what we need to do is on the controller, if we're
going to the effect, we can duplicate
the max distance and the strength, change it, and then just tell
this black circle to follow new instructions. So we can, for example, let's change the strength. Let's call it strength
two. It's going to be great for us. And now let's just go ahead and search for this orange one. Great. And now when we
get to the expression, all we have to do is find this strength and then
just put two there, right? Now it's going to be influenced
by the strength, too. And let's put this guy here. Okay, so right now it's influenced exactly
the same, right? It's like, right in
the middle there. But if we choose the controller, and then we change the
strength to, let's say, 50, ooh, it's going to
be slightly different. Let's go ahead and
build in this one. So you can see it moves in
a slightly different way. I see if that's sort
of like an eye. If we want, we can
go ahead and do it for all 40 of our shape layers. And I found the best
approach to use this if let's say you
want to do it this way, then to think in advance what exactly what kind of animation you want
to do exactly. Then once you have that in mind, just think through
what kind of what kind of layers you have to animate. I would actually be a lot
easier to do it right in the very beginning to have
the expressions put in. So, for example, if we
have to do it right now, we have to go ahead and do it
through all the 40 layers, which is going to be
pretty time consuming. But it's just something
we have to do if we want to do these
kind of animations. One tip as well that
can really help is to reduce the number
of layers you have, for example, the number of shapes that you
have on the screen. Even though it didn't
take me a lot of time, it took me like 5 minutes
still a little bit of time. So it really depends on
what you want to do, but this is just one
of the ways to do it. And yeah, it looks really good, really good, very alive. So if you have any
questions, let me know, let's jump into the next video.
5. Animate Time-Based 2D Proximity Reactions Using Expressions: Welcome. In this video,
let's talk about how to influence time specifically. Let's say we have an animation, and we want this
animation to be based on the location of the null or the location of
whatever we want, you know, like this red
circle that we have. Let me give an example. I have this animation of a
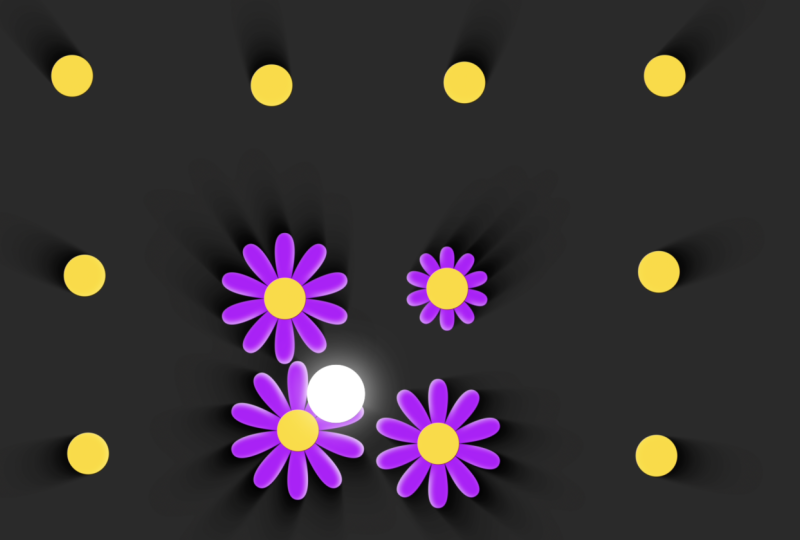
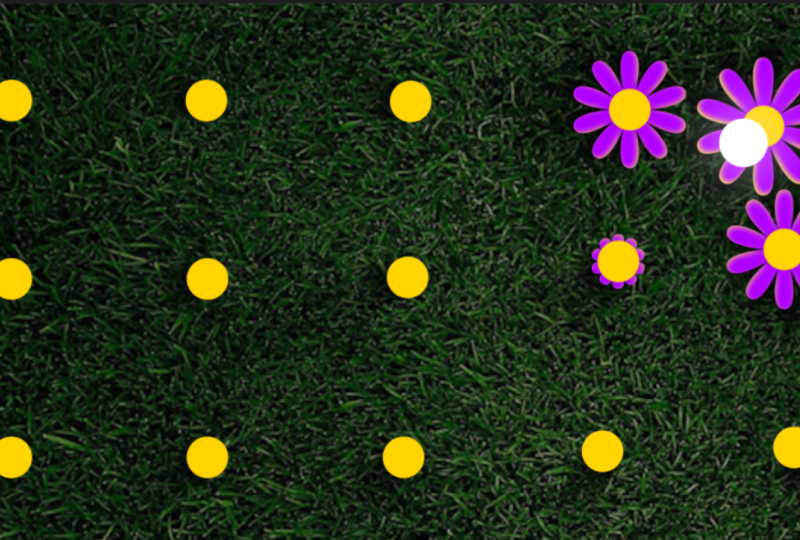
flower popping up. I want the flower
to appear only when we have the circle to
be near the flower. As if when the light gets
close to the flower, it will now to do that, I'm going to create
new composition, and I'm going to drop
our flour in here. So this is going to be it. I'm going to decrease
the scale and make sure it is small.
Like, let's see. Let's do maybe like size 50. That's going to
work. Or actually, maybe a little bit smaller
40. How many can we fit? Like, one, two,
three, four, five? We can definitely fit five here. I'm going to press and
P, move it to left. So let's create the background. Maybe let's make it
a little bit darker. Like so, so we can see
it a little bit better. Great. So once again, remember, in order to create a background, press on Command Y, and then
you can choose the color. Now, I'm going to
duplicate the flowers, just like we did in the
very first video, so one, two, three, four, so that
in total, we have five. Now I'm going to take
the last flower, move it to the right, select all the flowers, and then place it,
like, so horizontally. Now, let's just check how much we need to
move to the right. So 13 58 and we have
to move roughly 400. Great. So let's
select everything, press in Command D, move it up, press on P, and move it up 500, so we need to leave
it to, like, 40. Let's just put it here, like, because it will go out of frame and then
duplicate it again. Move it a little bit
like Z, press on P, and let's move it
down roughly like. Perfect. And now we will have our animation of
every single flower. So now we need to do
exactly the same thing. We need to create nos,
and we can actually go to our very
first composition, and we can duplicate the
controller and the no. And actually, let me just
go ahead and copy it. Place it here. Let's open it up. Let's see what kind of
effects do we have? Okay, so we have this
expression here, and I'm just going to delete it. So I just deleted the position that we had here that was
connected to the red circle. I'm going to go
ahead and close it. So now we need to
select all the flowers. Let's select all of
them. Right click Time Enable time remapping. Now that we have
the time remapping open for every single flower, we need to go ahead and
select another expression, which is going to be the
influence time remap. We need to select
all of it. Like so. Come on, C. And now we need
to do a very similar thing. We have to click on this
clock here by pressing Option or Alt and then paste
this one in here. Now, it's missing the
max distance time, and that is correct because we need to go into the controller, duplicate the max
distance time and strength so that we have
it here at the bottom. And now we need to press
and rename to time. Press Enter and
rename it to time. Perfect. So let's go ahead and copy this expression from
the very first flower. And let's just
select all of these. Make sure to press Option or Alt and open the
expression window. Okay, so we have expression
for all of these. Now I'm just going
to paste it in. And let's just do it like so. There you go. Okay, so
all of this is good. Let's select the null.
Okay, and there you go. This is our animation. Now, something I want to do in the very beginning is
to do the opposite. Whenever we have our null
get close to the flower, the flower is going to open up. So we need to do it
basically the opposite. And for that, we need to
change our expression. In this case, let's, for example, click on this
flower in the very first one. And when we go to
the expression, you will see that we
have two numbers. We have zero and five. It means that we
have this animation happening zero between 5
seconds and 0 seconds. Actually, we needed
to be the opposite, so we need to put zero
here and five here. Perfect. So that, for
example, for this flower, whenever we get close to it, let's put our null here, the
flour is going to open up. Mm. Very good. Now we just need to
open this expression, copy it and paste it once again to all the
other expressions. Like, so I think this should work now for
every single one of these. Yes, perfect. There you go. We have our time map animation. Whenever our none moves
close to any of the flowers, the flowers open up. Now, we can do something we
did in the very first video, which has changed the position
of the flowers as well. And for that, we need to
select our influence position. So let's just go
ahead and copy it. Let's select all the flowers, press on P, and now we have
to do exactly the same thing. So it's once again, if you forgot how to
open this window, you have to press on Tilde, which has this button here. And now we just need to paste this expression in
let's see what we have. We have our null, and there you go. Now it
moves a little bit. But for this, it's
actually would be interesting to have to
do the opposite way, basically, to
contract or retract. At this point, it's a
little bit confusing. But anyway, basically,
the flowers get closer to the null instead
of getting away from it. In this case, we can
use the strength of -100 and it's going
to be the opposite. Now, if you move the
null, the flowers are going to get
closer to the null. And we can actually
make it just a little bit bigger so we can
use the controller. We can use, like, you know, let's try 800 so that more
of them are affected. Let's select the
null, move it around. Perfect. There you go.
Doesn't this look good? Let's jump in the next video
and see how we can have different effects be influenced
by the null. So see.
6. Angle-Based & Directional 2D Proximity Effects in After Effects: This video, let's
see how we can use different effects to be
influenced by the null as well. The first thing you need to
do is to select your layer, and in this case, we will
add sort of like a glow. But in this case, we have
to use we need to go into layer cells and we need
to select inner shadow. Now, it's going to be
here at the bottom, and it's going to
be for this layer. So if we move our null
close to this layer, you will see that we
have the shadowy effect. F, disable or enable the
effect, you can see there. We need another expression, which is going to be
the angle control, and just go ahead
and copy it from the PDF and go ahead and
paste it onto the angle here. So we need to select click
on option, paste it in. And now you will see that
whenever I move the null, it's going to move with it. If I can do it like so, you will see the
difference clearly, right? It's now following
the null as well. Now, we can customize
it a little bit. We can, first of all,
set a white color, and you will see that it
just disappeared because we need to change the
blend mode to normal. It's going to be like,
sort of like a highlight. And we also need to
change the size, change the size to something
so. This looks good. Another thing you'll
see is that we have this highlight
all the time. So we have it here, and when we get closer,
so it stays the same. We can actually create
proximity of the opacity. So for that, we need
another expression, which you can find
in the PDF as well. Just go ahead and copy it. And then when you open
the inner shadow, opacity, once again, option, click or Alt and click there. Then paste it in, and we'll see that whenever we get close, we are going to have more of it. And whenever we
get further away, we're not going to have any
of this shadow or highlight. Now, what we can do is we can go ahead and
copy this effect. So inner shadow, Command C, and I'm going to select
every single flower that's below the very
first one, paste it in. Perfect. And now let's select our null and move it
around, and there we go. We have this beautiful highlight
on every single flower. One more thing that we
have is we can select everything by pressing
Command A or Control A. So let's press on E to make
sure we close everything, Shift Command A, and we can see that we have a lot
of different layers. So I'm going to select
all the layers once again with Command
A. I'm going to press Shift Command
C. Basically, we need to precompose this. And in this case, let's call it like flowers, precomposed. Now I'm going to create
another null by pressing Shift Option Command Y
or Shift Alt Control Y. So let's double click on
our flowers precomposed. Move them a little bit down. You'll see that we have two different compositions
at the same time. So we need to select your
renull, press on P here, and select your renal, this one, and press
on P on it as well. And now just connect
this null to this null. Click on the swip and
drag it to the position. So now, let's say, let me
track it up a little bit. So now I can actually
move this null here, and we are just going to have
exactly the same animation, but now we don't have to go into this composition
with many layers. We just have this
snull to move around. We don't have to use
the null. We can use the same with
the shape layer. So for example, if we have
a circle floating around, we can do exactly
the same thing. So let's go ahead
and create circle. Make sure to disect the
null, create circle. Let's make it wide. Perfect.
Put it right in the middle. We can connect this
non to it as well. Make sure to click on P, and now let's connect the
position of the snow to the position of this one, and there you go. We can actually just make sure the k point
is in the middle. And there you go. Now we can move it like so. So now we have this light
that's floating around. And another effect we can add, we can add like a
glow effect to it, increase the glow radius. It's as if it's like shining and the lights are attracted. Last unbelievable effect
we can do is we can create shadows and make it like three D, put it to
the next level. So for that, we
need to duplicate the flowers precomposed. And the one that's
on the bottom, we need to apply an effect. So we need to search for
radio, radio, fast Blur. And actually, we need to come here and get rid
of the background. And then put the background
here at the bottom. And we also need to apply a fill effect to the
bottom composition. Let's make sure it is
black so that now we get these shadows and we can
actually go ahead and change it. We can change the amount of, let's call it shadow
a little bit. Now, a very important thing, we need to have this
radio fast blur. Let's open it up here. Affects CC radio. So we need to connect the center of it to the position
of the null. So let's have the center, click on the whip, connected
to the position of the null. And now let's select the
null or the shape layer, whenever we move
the shape layer, we are going to have
the shadows move, so just makes it a lot better and a lot more expensive
looks unbelievable. Now, if we do some
sort of animation, let's change the
position from here to let me move further
to let's say here. Let's see what kind
of animation we have. Wow, really, really,
really, really good. So, this is how you do it. If you have any
questions, let me know that see you
in the next video.
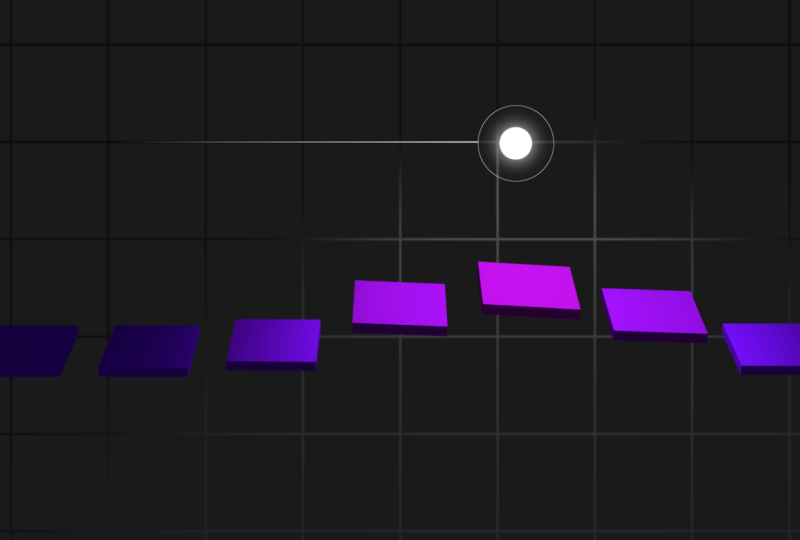
7. Create Automatic 3D Proximity Reactions with Expressions in After Effects: In this video, we can take
things to the next level. Now that we've learned a couple of things we are going to get into three D and learn how to create all sorts of
interesting stuff in. So the first thing we can do is grad decomposition 1920 by 1080, the same settings
as we had before. I'm going to press
Shift Option Command Y, and I'm actually going
to start with the null. I'm going to make sure the enc point is
right in the center, and I'm going to put it
in the middle just to make sure it's right there
from the very beginning. Now, we need to apply strain
effects to this null. And first of all,
we need to call it a control with caps roller. We need to apply a
couple of effects. So we need a slider control, and we'll need three of those, so I'm just going
to duplicate it. Then I'm going to
three D point control. We will need two of these, and we also need color control, and we need two of these. Now, we need to do
a little bit of renaming to make sure
it is perfect for us. So the first one needs
to be called radius. The second needs to
be called radius. Strength. And the
second one we need to call scale to make sure to include the Big the caps So this one needs
to be position XYZ, and I'm just going to
copy it pace here, but this one needs to
be called rotation XYZ. Rotation XYZ. This one needs to be
called color from, and this one needs to
be called Color two. Okay, great. So we have radius, radius strength, scale two, position X Y Z, rotation XYZ, control front, Control two. Perfect. So we have a lot
of these things set up, and now we need to
create our shape. So let's create like a square, put it let's put
it in the middle. Make sure to put the co
point right in the middle because it's going
to be based on the income point, once again. So let's call it
square. Okay, great. Now I'm going to make it D, and we'll need to
paste a number of expressions because we have
a number of controls here. So we need to paste as many expressions as we have controls, maybe
a little bit more. Let's begin. So for the
first one, let's press on P. For the position, we
have this expression. Make sure to copy it, then Alt or option, paste it in. Perfect. Then for the scale, we need to do exactly
the same thing. We need to copy everything, press on S, option and
paste the scale in. Now, let's go further. So we have XYZ rotation. We need to copy X. So I'm going to press on
square and press on R, and we have different rotations. So this is the X one, right? So I'm going to option
it and then click on it. For Y rotation, let's do exactly the same thing.
It's paste it in. And for z rotation, let's do exactly the same
thing and paste it in. And then we also need
to do it for the color. So I'm going to
select all of this. I'm going to open our square
content, rectangle, fill. Here we have the
color, paste it in. Perfect. Now, if I
move this around, we'll see what we have. Now, I will duplicate. Actually, let's move the square
a little bit to the left, like so, and duplicate
it nine times. Move the last one to the right, where do we have the end? Do it roughly so
select all of these. I forgot that we cannot do it. So disable the three D, move them, and then
enable the three D, and we're actually
going to have all of the expressions left
as we had before. So now let's increase
the radius to 300 strength to
300, scale to 50. For XYZ, we can put this one. Let's do it like so, and then color from. So we will start
from the red color. Actually, we can do
it to something a little bit more Beautiful. So let's change it
from this color to let's see to
this red one, okay. We'll keep it for now. I'm
going to set two viewers. Now, let's put the
radius string to 500. And now, whenever we
move our controller, you'll see what will happen. Each one of these will
move in a certain way. We can actually put this one to zero to see what happens
from the very beginning. So let me put it to one viewer. First of all, first of all, we're going to have
the color change, as you can see, on
the screen, right? On top of that, we have
the position change, so it changes to 50, but we can put it to zero, and it's just going to decrease
or increase the scale. We can also do is we can turn it all three D. I'm going
to select all of these. Actually, let's select
one of the squares, go to geometry options. By the way, I completely
forgot to tell you in the previous videos
that in order to have the object
three D and to turn on the advanced three D
instead of classic three D, to have the extrusion depth. So we can add it like so, and we are going to see the
effect a little bit better. So now that when we move it, this is what's
going to happen. We can change the position of it up and down so that
whenever we move it, here's what's going to happen. Like so. Then we can obviously move it a little bit to the
front and to the back, so we have all
sorts of controls. And then we can also rotate it a little bit so that
let's say we move it, and then it does a
bit of rotation. So. And now let's add
a camera by pressing Shift Option command C or shift control C. So this
is going to be our camera, and I'm going to create a null, Bpresson shift option
command Y or shift Alt Control Y and then pairing
the camera to the null. So let's turn the null
three D, press on R, and let's rotate
it a little bit, like so so that we can see
a bit more from the top. Of course, we can change
however we want this to be. Now, if I select the
control, there you go. This is the kind of
movement that we have. And let's say we press on P, put the position
here, move 4 seconds, and move it to the right. We can see what kind
of effect we have. It's going to look a lot smooth a lot smoother when it loads. Well let's take a look. Beautiful. Very smooth,
very beautiful. Now, let's actually
make it, like, very pleasant to watch so
that it's on the next level. So I'm going to
open one of these, and I'm going to select these. And actually, I'd like to
decrease the exclusion depth. And I'd like to press on
R and and rotate these. Let's rotate these
to what to make it. So actually, we
can just press 360 -90 and it's going
to be straight. Perfect. Now, whenever we have the movement
of the controller, let's make sure it
goes up a little bit. Let's make sure the
scale doesn't change, but stays to 100. Like so. Decrease the radius strength, but increase the
radius, like so. So we have it a bit more smooth. I'd like to decrease the
extrusion depth even further. It's a little bit too
big for my taste. Okay? Let's keep it
to let's try 20. Yes, this is a lot better. We can actually change the
material options as well. If we select these and
we go into material, we can make it shiny so
that it looks like this. And we can play around a
little bit with the settings. Then we can change
the rotation just slightly so that
when it gets to it, we get a bit of this movement a little bit, like on the side. Maybe we can put
it to like minus five or slightly less movement. For the color, we can also
change it a little bit. Let's have it go from very
dark orange to bright. Orange, something
like this. Perfect. We can actually change
the controller, and we can have the controller go from up instead of down, so we can actually move it down and let's keep it let's put
it right in the very middle, and then we can attach
something like a sphere. We can create a sphere to make sure it is followed by sphere, sort of by a light source. Put it right in
the middle, and we will attach it to
our controller, and we can call it sphere. Perfect. So now, whenever
we move our controller, it's going to float
with it, like so. We can also create a light, which we can do by pressing Shift Option command L and creating a
spotlight some like so, and then we can move
it a little bit up. And let's move it
down by 90 degrees. Then we can move it
a little bit up. Let's have two viewers so that
it's a little bit easier. So this is from the front,
this is from the top. Let's just move it a
little bit to this point, this is default, Let's
have active camera. And now we can have
the light selected. Move it a little bit higher. Let's have it from the side. Let's have it from the left. Let's move it a little
bit higher up xo, and then go to the
active camera. Now we can actually
parent the light to the controller as well so that when we move
the controller, it's going to illuminate
it even further, like so. So let's have one view, and
let's see what we have. So there you go. There we have our illumination. Now, what we can also
do is we can have, let me select all the squares, press on P and P to make
sure it disappears. Press on Command D
to duplicate it. Move it a little bit higher. And we can press on P and change its position
a little bit. So we move that to the
front, Swart to the back, then duplicate it again, press P and move it a
little bit to the front. And you'll see the interesting
effect that we have is that we have our movement slightly differently so that the points that are further away from the camera
move a little bit less. The points that are close
to the camera move less, but specifically where we
have our non the three D, in that space specifically, it moves the most. We have the most light there. So to exaggerate
this, there we go. We can do it, like so Beautiful. Doesn't seem like after effects
at all, because mostly, you have to use different
software for this, but as you can see, we can do this in after effects, which is just beautiful. So that's how you do it. If you have any
questions, let me know. I'll see you in the next video.
8. Save 3D Proximity Systems as Reusable Expression Presets: Now that we've created
all animations, we've put all the expressions, all these letters, save it as Breeze so
that we don't have to recreate it every time we can just click on a
button and reuse it. So for that, we need to
select one of our squares, and we need to select everything we want to
replicate in the future. In this case, it's
going to be color, and I'm going to press Command or Control and Windows position, scale, X, Y, z rotation.
Going to select all of this. Then we'll go to the
effects and presets. Right click Save
Animation Preset. And we're going to
give it a name. In this case, as you can
see in the background, I called it proximity
shape layer. CMT shape layer. And I'm going to click on a K. The same we going to do
with our controller, so we need to select everything. We can just select
one of them and then press on Command A. Then go to defects and presets,
save animation preset, and then let's call it
proximity controller, and then save it. Now, let's create new composition
by pressing Command N, and let's create a null quickly. And let's search for proximity so we have
proximity controller, which I misspelled, and we'll
just drag it onto our null. So we have all our
settings here. And then if we create
a shape layer, let's turn three D.
And let's search for proximity shape layer, apply it. Let's just rename our null to controller and there you go. If I click here, we have all of our expressions. If we click on our controller, we have all of our
settings here. And now, if we move it around, you can see, it's going
to jump a little bit. We can also save settings
like extrusion tab. So if I click here, go
to geometry options. And material options as well. We can save those as well. I'm just not going
to save it because I don't necessarily need it, but if you want to make
sure you always have the same thickness of your tiles or the same
material options, then you can go ahead
and click that. So just make sure
with, for example, with the rotation and
all the other settings, just go ahead and click on excrusion depth and you
can also open materials. Like you can select
all the materials. So something like that. And then just once
again, go ahead. Right click Save
Animation Preset, and then you'll be able to
reuse it, and that's it. So if you have any questions, let me know that see
you in the next video.
9. Last Step!: Congratulations to you.
You're nearly 100% done with the automatic
proximity reactions in after effects course. There are just two small
steps you need to take. First, take action. As Kafuhi said, a journey of 1,000 miles begins
with a single step. So if you haven't already, take your first step by creating
your first animation. All the best information
in the world means nothing if you
don't act on it, and small steps lead
to massive outcomes. Found value in this program,
I would really appreciate if you could take 60 seconds to
leave you honest feedback. I'll be immensely
grateful to you. A feedback will massively help future students in deciding
the best program for them. Although this
course is complete, your journey has just begun. I'm excited to see
Edits and Lines so be sure to e me and fel
students posted. Remember, I'm here
for your success. So if there's anything you need, don't hesitate to reach out
to the QN section below. Thank you again for giving
me as your instructor, wishing you all the
best and looking forward to seeing you
in future courses.
 Vladislav Sateev, Video Editor