Transcripts
1. Introduction: Hello, everyone.
I'm Manton Patel, a video editor and
a course creator. In this course, I'm going to teach you how
to use scape cut in your mobile application for editing your
Instagram rails, your TikTok videos,
your podcast, even for video captions or
subtitles, or even lyrics. Yes, you heard that right. We
are going to perform all of these actions in your mobile
phone or your iPhone. We don't need to have a computer or laptop for that reason. We can do all of these things in your mobile phone by
downloading PCAT application. In this course, we are going to cover all of the features
and functionalities that PCAT has to offer so that you can become a
professional video editor, and you don't need
necessary premium pro, final cut, or Daven
resolve in order to do so. Yes. We are going to do all
of this in our mobile phone. And don't worry. Trust
me, it is very easy. And if you don't
trust me, it's okay. I'm going to prove it
to you in this course. This course is ideal from any content creator,
video editor, or any beginner who want
to start their journey in video editing in
your mobile phone by downloading
PCard application. In this course, we are going
to cover audio features. Music synchronization, text
features, video effects, masking and cloning,
human cut out, auto caption and lyrics,
stabilization key frames, filter and color correction, overlay features,
editing your reels, editing your podcast, and many more helpful
tapes and tricks that we are going to look
in this entire course. All right, I'm pretty excited
for this entire class, and I hope to see you
in the first lecture.
2. Getting Started with CapCut Mobile Video Editing: First of all, download PCAT in your mobile phones
or your iPhones. And for any reason if PCAT is not available
in your country, so make sure to check out the resource section where I have shown you how you can download PCAT in your mobile phones. Welcome back, everyone.
In this course, I'm going to teach you how to
use Cape cut from scratch. So we will start with
our audio feature. First, we start from the
first option, which is audio. When you click this audio icon, you will see many
options. First is sound. In sound option, you
will see in build Cape cut sounds and music that you can use in your videos. Brand music and copyright option is not much usable,
so avoid them. Next is sound effect. When you click
sound effect icon, so you will see a lot of sound effects which are ready
to use for your videos. Can use the sounds in your
videos ordo tutorials. So as an example, I just search a typing
keyboard sound. So this is an example sound. Next option is extracted. You can import any video
sound from this option. Just click Extract icon
and import any video. Eight by monton. Then your video sound will be converted into sound
only like this. Eight Sabi monton. You can adjust or you can set your sound in your
video anywhere. Also, you can split your
sound and direct to anywhere. You can adjust the
sound by using fading or fade out
feature like this. Eight Sabi monton. It's 27 January 8 Sabo monton. It's 27 January 2024. Also, you can use voice effect
to give different look at your voice or a sound by choosing any style
from these options. Eight S by Mont, eight S by Manten. It's 27 January
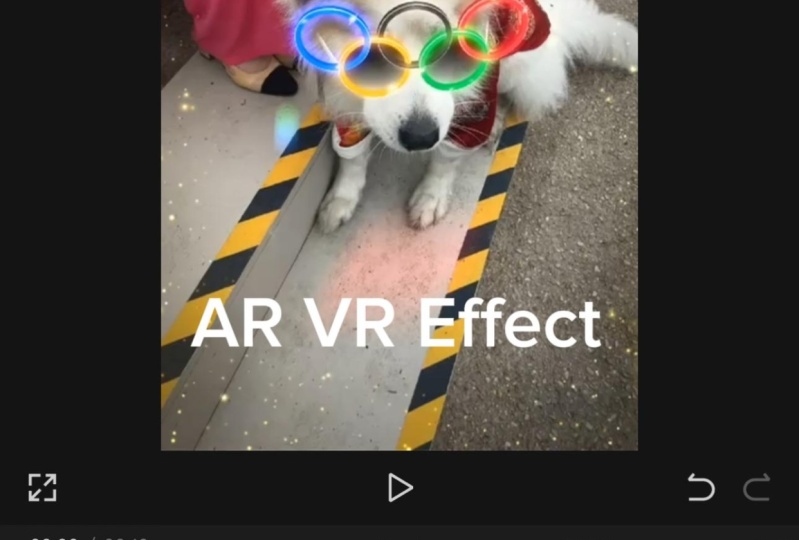
2008 S by Manton. Eight Sub. Eight Sub by month. Now I'm going to show you a powerful feature in
Cp cut, which is beats. You can add beat
points in your music to identify where your
sound have beats, so you can adjust the animation or effect according to beats. Just add beats according
to your music. I'm just showing an example
how this beat feature works. Eight Sub month's
27 January 2024. I added beats, and
now music bar shows these yellow dots where
the beat is so that you can cut or apply effect on beat points in your main
video or your overlay. So this is just an example. You can use any effects here. And as you can see, there are a bunch of effects in there, which also look
professionals and stylish. And now I'm adding a vertical blur
according to the beats. So when the beat comes, my effect will
appear on the video. Eight by Monts 27 January 2000. This was an example video only. You can customize and create effects and sound
according to you. So our audio tutorial
is completed. Amazing. But I want
to mention that the first seven to eight
lectures will be going to cover the basics or
fundamentals of Cp cut. And then we will move on to
advanced features in Cp Cut. So I urge you to watch all of
these lectures one by one, and they are bite size, meaning they are very small
and easily digestible. That way, you will have
a strong foundation of all the features in pcut, and then we can proceed
to advanced features. All right, I will see
you in another one.
3. CapCut Essentials: Text Animation and Effects: Now I will show text animation, and tax effect in CP cut. Click on Tax icon, and here you will see a tax
option when you click it. So you can add text on
your photo or videos, and then you can also change the font style or by
using cap cut finds, or you can also add your custom funds also just
by input from your funds. In the style option, you
can change your font color, shadow, opacity, and background, according to your video. Here is a popular
globe tax option, which you can use and customize from your
own globe intensity. Also, you can use background in tex with color customization, which looks great and
easy to read for viewers. In effects, here are lots of ready made templates or text
present in every color, which you can use
directly in your text, and your text will
look professional just by selecting any
present and using it. In the animation feature, you can set your text, how it comes with any
animation on your video, and you can also adjust the
timing or speed of the text. In the out option, you
can set your text, how it goes from the screen, with animation, and you can use both in and out animation
for a single text. So I have chosen both animation. So your text will
look like this. In the loop option, your text will be animated
in the full time. Just select any loop animation, and your tax will be sliding. Moving, blinking all the time, according to your text style. Also, don't forget about the sound effect
that you can use with your text animation.
So I have a text. I will use animation. Then add sound accordingly. I'm using a glitch animation. So I will add a sound of glitch and set with
my text timing. So here is an example. You can use any animation
with the sound effects, which turns your boring videos into an attractive presence. I hope you understand tax
animation and tax effect, so that you can play around with this feature and create
amazing video for yourself. For light, that's all
for this lecture, and I will see you
in another one.
4. How to add Lyrics in Capcut Mobile: You can easily create
video lyrics or caption by simply
clicking on one Button. Let me show you how if you want to add lyrics in
your video or photo, just add music and
click on the Text icon. Then select Auto
lyrics O option so that it will generate
automatic lyrics for a song. If your video has
already sound in it, then select from video option. Otherwise, if you have MP
the file or audio file, and then simply select on
audio and click Start. Now, lyrics are in processing. I won't be able to play music in this class due to
copyright reasons, but feel free to add any music, any song to your videos, and then it will instantly create lyrics or
caption for that. Now our lyrics are
generated perfectly. And if your lyrics
have some mistakes, so you can easily correct them by clicking on
this dit caption, and here you can change
wrong words or s. Also, you can customize your
lyrics by style options. You can change the font, effect, animation, and
many other features. So this is just a basic
example to show you. Now go out there and
create your YouTube videos or Instagram wheels by
using caption feature. All right, I will
see in another one.
5. How to add Captions/Subtitles in Capcut Mobile and Stabilize your Video: In this tutorial,
I will show you how to add captions
into your video, if you are the one talking or if any other person
talking in your video. If you are speaking or telling about something in your video, you can instantly
add captions for it. I have this video where
an interview is going on. And they have this
amazing ability to create an environment
where you feel. But I want to add
captions in it. So just go to text Option. Click on auto captions. If you are speaking clearly, so the quality of e
captions will be mind brew. Captions will appear on the screen according
to the speech, so select any effect which
we want to use for captions. Let's say I will
select this one. Now the captions are generating. To create an
environment where you feel like I've got no You can also customize the caption
fun style or animation. Just select your caption
text and go to style Option. And here you can change
everything as you like. And if your caption
have some mistakes, which happen sometimes, so you can easily correct them by clicking on this
it caption button. And here you can review or correct words or
later the are wrong. Now, I will show
you how to style your caption animation
and caption size. So watch this example
very carefully. So it is just an example. You can customize much
better in your way. And they have this
amazing ability to create an environment. And they have this
amazing ability to create an environment where you feel like I got
Just use funds animation, color, according to you. Let's talk about stabilization
feature in Cape Cut. If you have a video which is not professionally short
or too much unstable, so you can stable that
video very easily. As an example, I have a video where you can
see it is not stable. So simply go to the stabilized auction feature and just click the stabilize and drag for more stable, and
there you have it. Now you can see the different. So just stable any
video with one single.
6. Keyframes 101 in CapCut: In this tutorial, we are going
to learn about key frames. Well, key frames are the most
important feature in Cut. Watch this video carefully. I have a car video which is on normal so that we can add
keyframes in this video. So I'm adding a keyframe in the starting position and second keyframe a
little further. Now you can see both
keyframes added, but not working now
because we didn't give any position to
any of these keyframes. If I want a custom
zoom in my video, so I will zoom on my second
keyframe. Video will be Zoom. If you start the video, it will come from normal
position to Zoom, because we have added a
keyframe in the starting, which is on the default
position or original position, and then it moves to
the second keyframe, which is on actual
Zoom position. If I add one more keyframe and go back to the
normal position, so it works like this, and it is called
keyframe to keyframe. You can adjust your
video position according to your wish. Now, I want that this video comes Zoom with a
rotating position. I just go to the second keyframe and just rotate my position. This is how it works, and your first and third
key frame would not affect because you have
already set the position. Even your video comes
from any moment. It will just end up to
your key and position. Now, I will change the
position in downside. Just add a keyframe and
keep your video anywhere. It will automatically
go there like this. Now I will show you how
you can use key frames in any effect and other
things like opacity. Go to opacity, and now I
will add two key frames, and I want to reduce
the opacity of video from one key frame to
the second key frame. It depends on the time
between keyframe, so you can adjust that
according to yourself. Now I will just
reduce the opacity on the second key frame so that
it will look like this. If I add one more keyframe and increase the opacity
back to original, then it will look like
this amazing video. So I hope you understand
key frame function. Again, remember that
this is very important, and we are going to use
key frames every single time in our advanced
tutorials. Thank you.
7. Filters and Color Grading in Capcut Mobile: In this class, I will
show you how to use HSL color effects so that it will completely
change your video quality. So in filter option, you can apply effects
on your photo or video, whichever funds, or whichever effect that
you like the most. So in filters option, you can apply effects
on your photo or video. There are lots of
amazing filters, which will totally change
your video quality, which will also look
professional and beautiful. And in adjust option, you can manually customize
your video color, exposure, sharpness,
brightness, and more. You can customize the brightness if your video is dark or light. Also, you can use
contracts and saturation for color correction and exposure to hide
the video colors. Use sharpness or sharpen to enhance the quality of
your video or your photo. Just keep it under on 30-40%. HL is a very useful feature to increase and
customize the colors. It's also called color grading. Just customize specific
color of your video light. So if you want to
adjust any color, let's say yellow green or blue, whichever the girl is wearing, simply select that color in HL and you can customize
the color according to you. HSL turns your normal video
into an attractive video. Big net option is common effect, which you will see a lot in your Instagram reals
or tto videos. It is basically fading your video or photo border with dark black or white color, which will look
different and amazing. Also, you can customize the temperature of your video
or photo according to you. It's like weather
changing effect. We also have an option
of color correction. It's a powerful feature. This feature works by analyzing the image data and removing any unwanted noise and make your video or photo
clear and cleaner. So after filters, jell, and all of your adjustment, your video will look like this. I set the adjustment a little further so you can see the
difference in the video. So I hope you now understand that how we can
use color grading, HSL filters in your
upcoming video to create amazing and
professionally shoot videos. All right, I will see
you in another one.
8. CapCut Overlays Made Easy: Finally, we are going
to talk about overlays. Overlays is yet again the most powerful
feature in CP CA tap. If you know how to use overlays, you can easily create
unexpected videos and amazing videos that will
blow your audience mind. So let us begin with it. Basically, you can add any photo or video as a overlay
on your main video, that's the use of overlay. So in this example,
I have selected an image as a
overlay on my video. You can adjust the position, and you also have an option of splice which you can use
from transparent effect. So this splice feature works
like this in overlays. So in the second example, I have use a same
video as a overlay, and you can apply
animation on this overlay, which decides how overlay video comes on screen with animations. Here are lots of animation
effects which you can use, and also you can adjust
the timing of animation. You can also use out animation, which decides how
your video comes on the screen and
out from the screen. So here is an example. Now I will show you a
remove background feature, which is highly
popular on Instagram. Just select on remote
background icon and select customized cutout or custom removal and brush on
your object or your car, which you want to cut
out from the video. So our car cutout is ready, and now you can a position
of this car cutout, which will look amazing. You can also use
key frames option to move your cutout
or your object. So I just add a key frame in the starting position and second key frame
a little further. So I set cut out in starting frame on the same car position. And now I drag out my cut out to side on the second key frame. So it will automatically
move my cut out like this. If I add one more
key frame to move my cutout again on the
original position, simply add a key
frame furthermore and drag your cutou to the
original car position. Now it will look like this. Also, you can use graph to make smooth animation
for your cutouts. Graph only can be added in
between the key frames. So use any graph to
create a smooth move. Here is an example. I hope you understand cutout animation by even including key frames, so that you can use key frames or you can use cutout
anywhere in your videos. Alright, I will see you
in the next lecture.
9. Mastering Slo Mo and Text Templates in CapCut: Let's talk about slo moo effect and text temperates in Cap Cap. In this video, a
guy is working in a normal speed and
to add slomo effect. Just split your video from where you want to
start your slo mo. Then select the clip
and click speed icon. Then adjust the speed
on 0.3 seconds. 0.3 seconds is the
perfect slomo time. Now, this slo mo is good, but not amazing or perfect. Most of the people will do this and export their
clip or their video. But they are wrong.
Let me show you why. Here is an advanced method, which give you slo mo effect or takes your slo mo
effect on pro level. Just click on it,
make it smoother button and select
better quality. This will however
take some time, but the slo mo effect or slow
moo will be super smooth. So here is an example. You can also use graph from
custom slow or fast motions. Just click on Speed O option, then select the C.
And here you can see many graph options
which are already created. But you can also create yourself by clicking
on this custom button. And here is an example. Now, just add music
to your slo mo effect to give the authentic
and aesthetic feel. Now, let us look
at text templates. In the text feature, you can see a text template option where you will get pre
made text templates, which you can use in your
videos or your photos. Also, you can change the text and use it
in many better ways. I hope you found
this lure useful, and I will see you
in the next w.
10. Advanced CapCut Techniques: Effects You Need to Know: If you want to add
the premium effect in your videos that you most likely to encounter in
Instagram eels or tik videos, you can easily do that in pcut, and let me show you how take any video and go to
the effects I can, then select video effect. So here are a lot of amazing
effects which you can use. So as an example, I will use this
split figure effect. And also, you can adjust the position of
effects like where you want to start or where you want to show this
effect on your video, You can also adjust
the effect speed, glow, intensity, or timing. You can use multiple
video effects in the same video or customize every effect
according to you. Here are tons of good effects, which will look amazing
for your videos. Now I will show you
an advanced method to use video effects. Simply, we have to add
effects in background only and not on the
object or the person. In order to do so, just copy that clip and make
it as a overlay. Now cut out that object or person by using this
removal background. Now sit the overlay in the same video position
as your original. Now, the effect will be shown on the background and not on
the object or the person. I hope you understand my point. For body effects, you can add a photo or video
of the person, then select body effects. So here are some of
the cool effects which you can use right
away in your videos. These are all very
popular video effects that will level up your
video editing scales. We also have photo effects which we can use only for photos, like three zoom effect, im effect, dis effect, So I hope you understand how to use these effects
into your videos.
11. Master Masking and Cloning with CapCut: From here on, the
fun part starts. We are going to locate
advanced features of masking, cloning, and many
other features. So let us get started with it. You can create amazing
videos with mask option. So I have a video where
some people are cycling, and I want to change the video with mask after the pillar. So just add any video that you want to change
after that piler. Then select the main video
and click on mask option. Now select horizontal
and drag split line till the pillar only. Then add a key frame there, and add a keyframe in starting. Now go to overlay and
select mask option. Then select horizontal. Now rotate split line, and clip the horizontal
or split line after the pillar starting, and then play the video, and add keyframe in overlay to match pillar according to
the video speed like this. Just repeat until Olay
covers the full main video. And here is an example. Now, I will show you how you can clone yourself with mask option. Just shoot a video
in a stable frame and shoot yourself onto
different position. But remember to
keep a gap between. Now add video and
split to videos. First, where you stand
on the right hand side, and second, where you stand
on the left hand side. Then select the second video
and make it as a overlay. Now keep overlay
with the main video. Now select overlay and click on mask Option and
select horizontal, and just keep the
horizontal line between the clips. Here is an example. You can even create more clones, keep the position perfectly, and use the mask
option properly. So this was some of the
basic example of masking. In further lectures, we are
going to deep dive into masking and use advanced
features of masking. So I hope you to see you there.
12. Advanced Cutout Effects with CapCut: Let us have a look at an
advanced cutout feature. Now I will show you how
to cut out a person from the video in just one click
and use it in a magical way. Just add any person
video as a overlay. Then click cut out or
remove background option, and then select,
remove background. It will remove the background if there is a person
in the video. So our cutout is ready now. So you can use this
type of background changing effect by this
human cutout option. Now I will show you
a trending person or cutout animation. Basically, in this
type of videos, a video part comes
before the video, so that if will look amazing. Just stop the video
starting point and click on the freeze option. Freeze option captures the
video of the same moment where the video start and
convert it into a photo. So we will extract
the object or person, anything from the fraze video. Just select the phrase video and click on remove
background option. Our cutout is ready. Now just use key frames to give animation or movement
to our cutout. I have used a keyframe in the starting and second key
frame a little further, and I will reduce the size of cutout at the starting keyframe. So this will look like this. You can also use graph between
keyframes for smoothness, which gives a professional
look at this cutout animation. You can add animation
effects like shake or other effects
for better version. Use any animation effects that you want to match
with your cutout. You can also use video effects. Just click on video effects
and select any effect. Like I choose this ripple effect from distortion in section, and keep in mind always
switch your effect from object features to use effect
on video or your overlay. Now I'm using this
effect on overlay. So I just set my effect
on overlay only, and here is the final look. Now I want to show you
how you can cut out the object from the same video and put that cut
out into background with animation and
bounds with graph. Also, it is known as
puzzle animation. So first, go to phrase option on the main video
and click on phrase. It will create a same photo
from the video position and then turn it into overlay and keep it in the
same position. Go to remove background in our overlay and use cut
out and cut the object. Our cutout is ready. But it is showing
about the video, and I want to set cut
out behind the car. Just copy this cutout overlay and again keep it in
the same position. Now we have two cutouts. Keep second cutout
on car position, and our first cutout will go
behind the second cutout. So it will look like this that our cutout is
behind the car. I hope you understand
this point. If you don't, rewatch the video. Understand the topic of layer because it
is very important. Now use key frames to move
our cutout to give animation. Just I'm adding a keyframe in starting and second key
frame a little further. In the first frame, my cutout will be in the original place, and I will move my cutout upside from the car on the
second key frame. So my cutout will
automatically move upside slowly according to the
key frames distance. If you want to rotate
the car or adjust the size on the second key
frame, it will look like this. Lastly, I will add one
more keyframe to go back to my original car
position in a proper size. So it will look like
this amazing effect. Now I will create a
puzzle cutout animation. So I will go further and stop on the second
scene of the video. And again, freeze
the frame where the second scene starts and freeze the frame
to create a photo. Now make this photo
as a overlay and drag this photo part in the previous lecture
or previous scene. Now click on remove
background option and customize the cutout to cut
the object from the photo. Our cutout is ready. Now you can add key frames
to move the cutout. Like I have added a key frame in the starting and
second key frame on the end of the cutout. So I direct the cutout
in downside manner and also by reducing the
size in my first key frame. And in my second key frame, which is already set on
the original position. Now we will also add effects when our cutout
matching the video. So click on this icon, which is between the clip, and here's are a lot of effects, but I will choose a
effect from distortion. So it will work like this, which looks so amazing. So these all are just example. You can create many different
videos by using effects, animations, keyframes,
remove background. I hope you like this
advanced cutout tutorial, and I will see you in
the next lectures.
13. CapCut Stickers: Enhance Your Videos: In this lecture, we
are going to cover a simple yet powerful feature, which is sticker that you can
use for a YouTube videos, your Instagram wheels,
or a TikTok videos. Let us start it with it. In the text feature, you
will see a sticker option. When you click on
it, you will see many attractive and
amazing animated stickers, which you can add in your
photos or your videos. Just select any sticker according
to your video category. And also, you can add
multiple stickers at a time. Or even you can also customize the position in the
size of stickers. Here is an option
to give animation to your stickers
like text animation. So your sticker will
appear on the screen with animation and go out
with animation also. You have one more option in sticker section where you
can see a photo icon. By clicking on it, you will
be able to use any logo, any PNG, or any image
as a sticker also. So play around with this, and it is a very interesting
and exciting feature.
14. Editing Instagram And Tiktok Reels In Capcut | Part 1 : Welcome back, everyone.
This lecture will be going to the best lecture
in this entire course. So watch it very carefully. And if you don't get it, just rewind the video, and you will get
that aha moment. Basically, this lecture is all about editing your
Instagram rails, or TikTok videos in a professional video editing
manner in your CPC app. So let us get started with it. First of all, Kontext. And then let us
add auto caption. Don't worry about the
video footages and overlist that we are going
to use in this lecture, because I have already attached that in the
research section. So make sure to check it out. And I urge you to follow
this integral with me because it will
be a lot more fun, and you will learn
a lot from it. First of all, kc ontext, and then let us
add auto caption. Select anyone you like? Like, I've had a bunch. Amazing. Then click
on templates, select any finds you like. And in style, click on glow. Keep the intensity
30 and range 75. So your text or your caption
will look like this. Now it's time to
add a grid overlay, click on add overlay and
add that grid footage, and then position
it in the bottom. Then decrease the opposity
to 60 or 70% and add a masking feature
of horizontal sped and use the feather option to provide this gradient effect. Amazing. Now drag this
overlay to the entire video. Then we will also add
a black gradient. Click on add overlay and
add that bd gradient. Position it to the bottom. In layers, we want this black
gradient on the back side. So click on B, and
then click Okay. Now it's time to add the photo. So we will add some
motion effect into it. Therefore, we will use mask
and then click horizontal. First of all, add a
key frame and then hide that entire photo and
add a second key frame, and then reveal
the entire photo. Use graph to ease
out the process, and it will look like this. Also, you can add to
another key frame to move the position of
the photo two upside. Also, use graph e two, and it will look like this. B if kids are making
poor choices, you know, Now again, add a overlay of
the great style. And then change the layer of
the clear side to the back. Click on layers
and click on back. Now we will add a green
screen of arrow effect. Then click on add. And then we want to remove
this green screen. So click on remove
background, and in chromak, just select the green color, increase the intensity to 100%, and shadow two 100%. Then go to adjust because we want to transform the
color of that arrow, which is black to white. Brightness, increase that to 50. As well as in graph, simply just drag the
point to the upside, so that our arrow will
be in white color. Position your arrow likewise, and as you can see, the speed
of arrow is quite slow. So click on speed and
increase the speed by two x. Amazing con arrow. Now delete the rest of the part, just click on speed
and then delete. And then let us add an
effect to the main footage. Again, click on split and
click on that white option. Click on Light effects, and we will use cold films. Make sure to set the
time to 0.3 seconds. In School and Add school. Kids are making poor choices. In School and add Now, we'll add a popular
zooming effect. Simply add three key
films one by one. And in the second key film, just zoom the main video. So it will look like this. You know, in school
and out of school. I'll sit them down and
be like, Hey, listen. This is the easiest
effect that you can do without any efforts. Now, add a overlay of a
black video background. But adding a black background
will look harshly. So simply go on the
main video and just instant or a frame before,
split the main video. And then click on
that white thing. Again, in camera, we
will use a left option. So it will create this
left motion effect. Now, add a overlay
of the picture. Then let us make a motion
effect by adding key frames. So add two key
frames, one by one, and in the first key frame, we will track the
picture upward, so it will look like this. And then use graph is
out one or is two. Then add a green screen
arrow like this one. Again, repeat the process
Croma ke, intensity hundred, shadow hundred, brightness 50, and in graph, strike that point. Now adjust this arrow
according to your own need, and it should look
like this arrow is pointing to the next
frame on next slide. Now add key frames on all
of these three object, but make sure that key frame is in that exact same position. Then add a second keyframe
just a little further. And then in the
second key frame, drag all the elements or all the object to
the left hand side. But make sure to
keep the head of the arrow still in the scene. Hey, listen, you're making
decisions here that are Use graph out one
to smooth the process. Be like, Hey, listen, you're making
decisions here that. Now add a overlay, and let us introduce a picture. Let us click on animation, and we will use fad and option. So it will create
a grand gesture. Hey, listen, you're making decisions here that
are going to str Now add a green screen
arrow, G upside. Again, repeat the
process, 100 hundred, and then in Now reposition
this arrow going upward. It should look like
this. Then add again the key frame one by one in all of
these three object. And the second key frame, all of this object
should go down, but the arrow should be
pointing upward like this. Use graph is out one
to smooth the process. Due for the rest of
D for the rest of. Like, Hey, listen,
you're making decisions here that are going to start to affect you for the
rest of your life. Then let us add a overlay, which is pointing to this arrow. You can also add tax element. Let's a good decision
or bad decision. Feel free to play
around with the style, funds, effect, et ca, et cetera. That are going to start to affect you for the
rest of your life. Yeah, you. Amazing. Cut all of
this Xs or extra part. And then let us add
and paper cut effect. Click on overlay and
add this effect. Again, go to remove background, chroma key, and then
apply to the green part. Yeah. Right. You keep
making these decisions. Awesome. But the speed of
the effect is very slow. So go to speed, and
then double the speed. Okay. It is looking
a lot better. Now we can also do
a pulling effect. So Speed the main video at
the time of paper effect. Click on that white
thing, click on camera, and the third option is pulling. So apply that effect. You keeping. Right. You keep
making these decisions. I have divided this Instagram
real editing lecture into three sub lectures so that it is more understable to you
and digestible to you. If you have any
questions or doubt, feel free to reach out to me or ask any question if
you have in your mind. Don't fear we are all
in this together. So I will see you in
the next lecture.
15. Editing Instagram And Tiktok Reels In Capcut | Part 2: Hey, there, it's our second part of editing our Instagramary. But one thing I want
to point out is I'm not just adding all
of the stuffs srandomly. I'm using every word and then relating that
word to the photo, sound effect, or that image. So make sure to pay
attention in this lecture. I will use photos of high school kid when the
word high school came out. Or when the word
school came out, I will use a photo of school. Again, I'm not pulling
all of this out of thinl. I'm using synonyms, terminology, and that's the magic or the secret source
of video editing. So make sure to focus
on that part as well. Click on Olay, and we
will use a green screen. First of all, remove
the green screen. And then in animation, use one in combo. So you will have an
animation like this. You keep making these decisions. You're not going to Right. You keep making these decisions. You're not Then, let us split the mean video because
we want a cut out. So we will duplicate this scene and then
use it as a overlay. Duplicate this and
click on overlay. But make sure to position this overlay in the exact
position of that clip. Click on that overlay and
click on remove background and use auto removal or
customer removal as per ar. I'm using auto removal. As you can see, our
background is being removed, and you can play around
with this photo. Again, we have to add some
kind of motion effect to it. So we'll add a key frame at the starting and second key
frame a little bit further. But in the second keyframe, we will drag the photo to down and then use graph to
smooth the process. We will use es out one. Then add a black screen
or black overlay and go to layers because we want the black layer on
the back end side. You're not going to
go down the path that you're starting of the clip. You're not going to
go down a path that you're Now add a overlay of an image or background
of a mountain view. Now, add another overlay
of a running man. Now reframe or reposition
that running man. Let us reduce the opacity
of the background so that our main picture and main running man
is looking good. Click on effects, lilick
on video effects, and there are tons of effects. We will use It's fun having those
conversations. I like happen. Vibration flash. It's fun having those
conversations. I like happen. But remember that this effect is applied on the entire video, but we only want this
effect on the running man. So click on Object and then
select the last option, which is our running mare. It's fun having You're not
going to go down a path. We can also apply animation to the running man.
Let's say Zoom one. No. Then let us add a overlay
of a green screen arrow. Remove the green screen. This time, we want
the black arrow. But the layer or the position of the arrow should be
behind the ting. T You're not going to go down a path
that you're going to. Now, let us add an overlay
of the final image. You're not going
to go down a path that you're going
to really enjoy. First of all, we have to add
some motion effect to it. So we will add two key frames. And in the first key frame. We will drag the
image to the top, so it will look like that. The image is coming
from the top. And use graph, let's
say is out one. Not going to go down a path that you're going
to really enjoy. We can also add animation
to that last image and use. You're not going
to go down a path that you're going
to really enjoy. Now cut all of the excessive
part and dealt that. Again, did you remember
the paper effect? So just copy that effect
or duplicate that? And just like that, we
have a paper effect. It's fun have. Also, did you remember
the pulling effect? Click on that right button, and in camera, use the
third option pulling? It's fun having. Let us rewatch what we
have done till now. Keep making these decisions, you're not going
to go down a path that you're going
to really enjoy. It's fun having the
Isn't this amazing, like all of these transitions, motion effects, text temperates. All of you can do it
with your fingertips. And actually, it
is not that hard. Once you are just a hang off it, like if you have created 23
hips with this animation, you will be like a pro at
editing videos in tape cut. So carry on this motivation. Now, let us add a overlay
of a conversation photo. And then click on animation, and I'm going to show you a super useful animation that will save you
a lot of time. Click on Combo and use Funhouse Mirror, so it
will look like this. Having those conversations.
I like having that. And, like, I remember you won't have to use key
frames because this will already have
an animation in the entrance and the
exit of that image. Great. Let us add another
overlay of the school image. And did you remember
the left animation? So simply just move two, three frames earlier and
split the main video. Then go to camera and use left. It will look a lot better and not harsh or rude animation. So that when the
school image enters, the transition of the talking
men will look awesome. Now let us add an overlay
of a high school student. Obviously, we need
some motion effect. We will use key frame, and we will introduce this high school student
from bottom to the top. Also, don't forget to use graph. Was doing high
school? What a mi. Even we will reduce the size
at the first key frame. Was doing high school? What a mi then cut the black overlay
and then apply another key frame to smaller the size of that
high school student. I is doing high school,
one of my hardest. Now, we also want to show the
talking men in the frame. We will use mask option
in order to do so. So click on mask and
click on horizontal. Then rotate it to 80 degree. And obviously, we will use a key frame to reveal
the talking men. Drag that horizontal line to
the top and add a key frame. Therefore, in the
second key frame, we will drag the horizontal
line in the middle. Also use that feather
option to give a premium look and don't
forget to add graph. Hardest things. Now, we will add an overlay
of a bunch of students. Split the main video. And
then go to like effects. And we will use that
old film effect. Let us rewatch our animation. Seeing kids making decisions. And you keep making
these decisions, you're not going
to go down a path that you're going
to really enjoy. It's fun having those
conversations. I like having that. And, I remember when I
was doing high school, one of my hardest things was seeing kids making decisions.
16. Editing Instagram And Tiktok Reels In Capcut | Part 3: In this last lecture, we will add some
sound effects and S effects to level up
our editing scale. Let us plat this screen
because we want a cutout of the talking men. Click on split. And then click on duplicate, click on overlay, position that overlay exactly below
the main video. Oops, where did the overlay go? Okay, it is right here. Now position it down here
exactly below the main video. Then click on remove
background or to removal. So I will remove the
background of our overlay. Now click on layers
and arrange our layer. O bviously, we will
use key frames. We will start by adding a
keyframe at the starting point, and then second key
frame a little further. In the first key frame, we will let the cutout to be
on the original position. In the second key frame, we will drag our cutout
down and don't forget to add the graph. Let's
say ease out one. In decisions. Now let us add an
overlay of this image. Go to layers and bring
our talking men front. You can also use text element. Click on A Text and
write whatever you want. Feel free to add funds,
styles, effect, animation. For example, we will use a typewriter animation
where it is. Okay. That did impact the
rest of their life. This will look a lot better. Making decisions that
did impact the rest of their life. To their life. Like, I've had a bunch of times if kids are making poor choices, you know, in school
and out of school, I'll sit them down and
be like, Hey, listen, you're making decisions
here that are going to start to affect you for
the rest of your life. Yeah. And you keep
making these decisions, you're not going
to go down a path that you're going
to really enjoy. It's fun having
those conversations. I like having that. And, I remember when I was
doing high school, one of my hardest
things was seeing kids making decisions that
did impact the rest of their. Now, did you notice something? We haven't added sound effect. So let us go to audio. Then click on sound
effect for sound effects. Then let us search
for keyboard typing as we have set our text
template in a keyboard manner. That did impact the
rest of their life. Delete the rest of
the part. I missing. That's how you can
add sound effect or sound effects to
your current scene, current animation, or
current motion effect. Also, don't forget to use feeding or feed out
effect as well. Did it that did visions
that did impact. Now we will add another
sound effect as well. Let's try with
different sound effect, like transition effect, oh, swipe, keyboard, et
cetera, et cetera. We can add a sound effect here, so click on audio, sound effect. Latest search. Wish.
Okay? I spell that wrong. It should be Wish. Ts if kids are
making poor choices. Amazing. The level of our
video editing just went a lot higher. Pc transition. If kids are making poor choices, you know, in school and act. You can also che the position of the sound effect to make the sync between the
mic and the video. You know, in school times if kids are making poor choices, in school and out of school. I'll sit them down and
be like, Hey, listen, you're making decisions
here that are going to start to affect you for
the rest of your life. Yeah. Right. You keep
making these decisions, you're not going to go
down a path that you're going to really enjoy. It's fun. Also, we can add sound effect in our newspaper transition. Simply s per and use
whatever you like. It's fun having
those conversations. It's fun having those
conversations. I like having that. And, like, I remember when
I was doing high school, one of my hardest
things was seeing kids making decisions that did
impact the rest of their life. Let us watch our entire il or our entire short term content
from starting to end. But I haven't added
sound effect in every single domain because
I know you get the point, and I hope you understand
that you can use sound effect to level
up your video quality. Like, I've had a bunch of times if kids are making poor choices, you know, in school
and out of school, I'll sit them down and
be like, Hey, listen, you're making decisions
here that are going to start to affect you for
the rest of your life. Yeah. Right. You keep
making these decisions. You're not going
to go down a path that you're gonna really enjoy. It's fun having those
conversations. I like having that. And, like, I remember when
I was doing high school, one of my hardest
things was seeing kids making decisions that did
impact the rest of their life. Wow, we just dictate. We made an entire rl
under just 20 minutes. But it took me 20 minutes
to explain it to you. But usually, it takes me ten or 15 minutes to make this type of
high quality rales. These high quality eels are also known as professional
video editing. I hope you understand my point. You can also start your own
short term video agency by using your mobile phone. Don't worry, you will
also get on that level. Once you have a little bit
of practice with animation, sound effect, motion effect, etc, et cetera.
Isn't that amazing? Well, I will see you
in the next lecture where we will edit
podcast in CBCT. B.
17. Editing Podcast in Capcut : In this lecture, we'll edit
a podcast video so that you can understand how you can edit long form
content in Cap Cut. I have this clip of a podcast. I was wondering, what's your earliest childhood
memory that you think defines the
person you are today? I heard somewhere you
mentioned your All right. First of all, let us
add our subtitles. Click on auto caption and select the font or to select
the caption you like. I was wondering, what's your earliest childhood
memory that you think defines You can also correct your caption if there are some
mistakes in your captions. Let's see what's instead of 40s. I was wondering, what's
your earliest All right. You can also position
your subtitles according to your
preference or your liking. Now, click on style. Then we have a bunch
of templates here. Use whatever you like, and
then create video out of that. Feel free to use
any funds you like, or you can even add your own
fund from your mobile phone. So Cap Cut has all of the
features that she need. Now I will show you the
famous glow effect. Click on style, click on glow, select the second option. Now, if you want to highlight one particular word
and not entire line, you can simply just
select that word, and then apply color to it. I was wondering what's? You can see all the words
are in white color. Expect our wondering
words, which is in yellow. Let me show you another example. I was wondering, what's
your earliest childhood? This time, we will select earliest and use a
pink or purple color. This tip is very
premium and exclusive. And there's you can
apply particular color to that word and not that
entire sentence or line. Now go to Google and
search for animated ta. Open the first or
the second link. Let's say, I want the
question mark mog. I will type question mark. I will type question mark, and in the web link, you can see image source. Simply copy that link of f and then open it
in another tab. You can download
this image or give, selectnate, and save to photos. And as you can see,
save to my camera role. Then add that question
mark as a overlay. What's your earliest
childhood memory that you think defines
the person you are? Now, let us add an
image as a overlay. Then click on remove background, and click on auto removal. Wow, Auto removal is
update. So let's see. Awesome. It is working fine. Then go to adjust Let us
increase the brightness. And obviously, we will
need a motion effect. So we will add key frames, and you already know
this stu, right? On the first key frame, dg that image down, and don't forget to use graph. We will use out one. Fines the person you are today. Now we can also add to another key frame
from out animation. Hard some the person
you are today. I heard somewhere you mentioned. This is looking a lot better. We can also add sound effect. Let's say oh or transition. Is the person you are today. I heard somewhere you mentioned. You can also copy
that sound effect and apply the same sound
effect for the outscene. Person you are today. I heard
somewhere you mentioned. Now, let us add two overlays, and then let us add a
motion effect to it. First of all, let us split
the screen of the main video, and then drag that overlay
to the split screen. In the first frame of the
overlay, add key frames. Drag the overlay to
the left hand side. As well as the second overlay
to the right hand side. Use grab is out one. N breakfast. N breakfast. Your father made you
earn your breakfast. I was thinking this is kind of a motion effect
you can apply to overlay, which will introduce
both the overlays from right and left hand side. Breakfast. And I was thinking, What is that now on
the scene change? We can add a transition there. Click on that hit thing,
go to light effects, and use glare too. Also, you can enhance the transition with a
camera sound effect. So go to sound and
click on sound effect. Then search for camera. I de them. I your breakfast. And I was thinking, what
does that feel like I rude. This podcast is
definitely going to be vital because we have added
first of all, sound effects, video effects, as well
as we have added all of the relevant words to the
relevant photo on media. Gave me the drive or gave me
the ability to visualize. Amazing. But also
don't forget to use stackers because they
are already animated, so you won't have
to do everything. Now add a green skin image, and then click on
remove background, and then auto removal. It will work just fine. We want this overlay
behind this ting. So we will split this screen. Duplicate this, then
make it as a overlay. End. And then position that overlay
just below our main video. As you can see, our first
overlay is not visible. So we need to remove
the background of it. Now our first
overlay is visible, but we need to kind of add
some motion effect to it. So we'll add key frames, add two key frames like this and position them and don't
forget to use graph for them. Send. Mos and all that. But I think it was Also, you can apply animation
to this overlay. Well, I'm going to show you
a super awesome technique. Click on Animation, go to Combo, and then select Zoom one effect. Course in order. But I
think it was a comp. So your will zoom out like this. Course in order. But I think it was Now
I will show you how I add videos and photos
to my podcast. Simply add a video, then position that
click on effect, click on video effect, and let us search for vibration flash, and then apply that effect. Second World War in 1947, it was born after the
Second World War in 1947, it was Just by adding video and applying that
effect of vibration flash, you can see the improved
version of our video. No. I don't know exactly know exactly
know exactly what. Really don't know exactly.
18. Logo Animation trick in Capcut Mobile: In this lecture, I will share two helpful twigs that you will not find anywhere
in the world. Let me show you how to get
this logo effect in cap cut, which looks like after
effect animation. Just open Cp cut, add your logo as a overlay. Now go to video effects and search for play
pendulum effect. Then adjust this effect
with your overlay, and now apply these settings. In effect, keep intensity 30, twist zero, speed 75, and sharpness or sharpen zero. Now click on your overlay
and go to animation. Click combo and select
Zoom in effect. Now your logo
animation is ready. The next helpful technique I'm going to show you
is Glow Effect. There are literally
100 plus videos on Internet about text glow. But nobody shows a
professional glow like after effect software. But I will show you
how you can apply that perfect glow in your
text very easily with CC. Go to Style Option
and select glow. Keep glow intensity
and range 60. Now click stroke and
select black color. And reduce the
thickness to three. Now your perfect low is ready. You can apply this glow
in any color you like. Let's say orange, yellow, select the yellow color and
apply the same settings.
19. Class Project: Hello, everyone. And
welcome to this lecture. In this lecture, we are
going to talk about our class project or
our class homework. So the class homework
for you will be use any of our techniques that we have covered in this course. For example, masking, cloning, cut out, remove background, key frames, and et
cetera, et cetera. Just share a screenshot of your timeline or export that
video and add a link in our PDF or award document
and share that in the resource section or share that in the project section
to earn your certificate. I will be genuinely excited if you share your projects here. And I will give you my insight and feedback to your projects. So that's all for this lecture. Again, I will repeat. Just use any of the features that we have covered
in this course, for example, masking, cutout, sound effect, et
cetera, et cetera. Then add a screenshot
of a CP cut timeline, and then attach it in
the project section. All right. I will see
you in the next one.
20. You Made It! Closing Moment: Finally, we did. Yes, finally. We completed our
entire course on how to do video
editing in CPCut, in your mobile phone. I hope you found this
course valuable. And I hope you learned
this new skill of video editing in your mobile
phone by using Cp Cut. So if you have any questions or any doubt or any questions
regarding our lectures, feel free to ask me, and I will answer that
question instantly. I hope you to see you in some of my other classes. By way.
 Manthan Patel, AI Instructor