Transcripts
1. Class Introduction: Welcome to your Blend
Modes master class. Blend modes are one of the
most magical things in photo editing because they allow you to easily
combine layers. Just take one layer and another, and then you can use blend
modes to merge them together. I love using blend modes
and in this course, you'll learn everything you
need to know about them. We'll start by learning how
blend modes actually work. That way you won't
have to wonder why you're clicking on
random blend modes. You'll have a deep
understanding of how they work, so you can know exactly
when and why to use them. Once we know how
blend modes work, then the fun can really begin. We're going to do a bunch
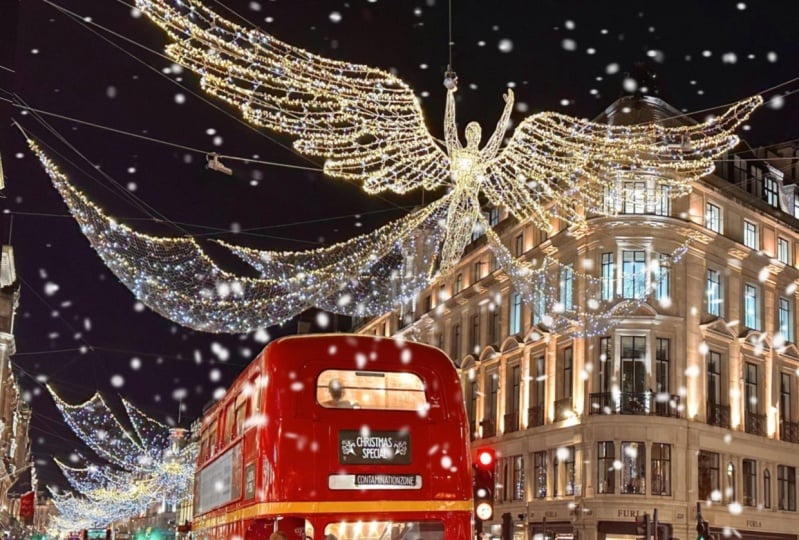
of projects together so that you can see how to put your new skills to good use. Using blend modes, we can add dreamy snow to a winter stay, or we can take the
opposite route and add beautiful sun rays
falling from the sky. Or we can take a regular photo and dramatically
enhance its lighting. Or maybe you want to
take a photo like this and completely change its mood
with a misty layer of fog, or maybe you want to
do something simpler, like adding a flock of
birds flying in the sky. Or you can have a little fun and add a firework
show to any image, or you can be more
subtle and add a glimmer of stars to
the nighttime sky. You can take a dull photo like this and add sunshiny
warmth to it, or you can take an
image like this and turn back time with
a vintage effect. You can also do artistic edits like adding texture
to a photo or creating a soft glow or a double exposure or
adding neon light. You can even use
blend modes to create amazing designs
for any occasion. We'll cover all of these
examples and more so that you can walk
away from this course as a blend mode master. It's going to be a lot of fun, so let's get started.
2. Download the Class Files: Before you begin this class, I recommend you download
the exercise files. These files will be necessary for you to
follow along with the tutorials to
download the files, come to the project
and resources tab. Then click on the Download Link. The files will
then be downloaded to your computer and you'll be totally prepared to follow along with the
rest of the class.
3. Introduction to Blend Modes : To start off this course, let's learn the basics
of how blend modes work. Blend modes allow you to combine multiple
layers together, and they work like opacity. So to begin this video, let's take a quick
look at opacity. For this demonstration,
I'm just going to put a red fill layer
on top of this photo. So first, I'll come up to the
top of the screen to layer. Then I'll go down to where
it says new fill layer. With that applied,
we can go ahead and change the color over
here in the color panel. So I'll just make this red. Now we can go down
to our Layers panel, and we can adjust the opacity by clicking and dragging
on the word opacity. So as I do this, notice how
the red gradually disappears. And as I bring it back
up, the red comes back. By changing the opacity, I'm able to effect how this red fill layer will blend with the
photo underneath it. But there's nothing
smart about it. I'm really just making the
red more and less visible. But if I were to
use blend modes, then I can combine
these layers in more interesting smart ways. Let's go ahead and
take a look at how it looks when I use
different blend modes. First, I'm going
to apply multiply, and you can see what
that looks like. Then I'll go down to screen. And last, I'll go
down to overlay. We'll learn more about these blend modes in the next videos. But for now, there
are three things I want you to keep in mind when
working with blend modes. Those three things
are the blend layer, the base layer, and the result. The blend layer is the layer that you're applying
the blend mode to. In our example, the red fill
layer was the blend layer. The base layer is the
layer that's underneath. It's the base of everything. In our example, that
was the photo of the woman and the result is just what the final
image looks like, which in our example
looked like this. By knowing these three terms, you can begin to understand
how blend modes work. At the most basic level, every blend mode is really
just a math equation. By using math,
affinity will create a resulting image by combining the base layer and
the blend layer. But depending on the
blend mode you use, the exact variables in this
equation will be different. Just as an example, here's the equation for
the ten blend mode. You do not need to
memorize this formula, but in simple terms, all this equation is
doing is it's finding the brightest pixels from our base
layer and the blend layer, and then the result only keeps the pixels that
are the brightest. So as a simple example, you might have a base
layer that looks like this and a blend layer
that looks like this. Then if you use the
ten blend mode, only the brightest pixels from each layer would be kept
in the resulting image. Every blend mode has a
different formula that it uses, making each blend mode useful
in different situations. So in the next few lessons, we'll take a closer look at a few of the most
important blend modes, and then we'll learn when you'd want to use
each one of them.
4. Multiply : This video, we'll take a deep dive into the
multiply blend mode. If you remember nothing
else from this video, just remember that multiply
will make your photo darker. That's the main
thing to remember. But of course, there's much
more to it than just that. Now, before we dive
into multiply, I want to take a look at an even simpler blend mode
that's related to multiply, and that's the
darken blend mode. To see how this works, first, I'm going to add a fill
layer to our image, just like how we did
in the last video. For this fill
layer, I'm going to make the layer 50% gray. Basically, what that means is over here where you
can see the values, I want the luminosity
value to be 50, and you can adjust
this by going up and down on this side
of the color wheel. Now we can take a look at
the darken blend mode. So I'll click here and
then change it to darken. This blend mode is the opposite
of the ten blend mode, which we learned about
in the last video. So instead of keeping
the brightest pixels from the base layer
and the blend layer, it will keep the darkest
pixels from each layer. So if I turn this
layer on and off, you can see that gray is
being added to the sky, her skin, and sunny
parts of the grass. That's because 50% gray is darker than
those bright areas. On the other hand, her
black shirt is completely unaffected by this blend layer because black is
darker than gray. The resulting image is only the darkest pixels
from each layer. Knowing that, now let's take a look at the
multiply blend mode. With this blend
mode, you can see that everything
has become darker, even the black shirt. That's because multiply combines the darknesses from both layers. If I make the fill layer darker, then the resulting
image will become even darker and if I make
the fill layer lighter, then the resulting image
becomes less dark than before, but it's still darker
than the original photo. Here's the before, and here
it is slightly darker. So why is that? If I change the fill layers
blend mode back to normal, you can see that this is a
pretty light shade of gray. Even though it's
such a light color, the resulting image still
becomes darker when we use the multiply blend
mode. So why is that? What's the math behind that? Well, get ready because
we're about to learn the secret formula for
the multiply blend mode. Drum roll, please.
And here it is. Look at that beautiful equation. Using this equation, the
multiply blend mode will take the color value of the base layer and then
divide that by 255. Then it will multiply
that by the blend layers color value
divided by 255, and then multiply the
whole thing by 255. That will give you
the new color value for each pixel in
your resulting image. Now that I've told you what
the secret formula is, I'm sure you know exactly how the multiply
blend mode works. Well, not really. Unless you're an even bigger
affinity nerd than I am. This formula probably doesn't
mean anything to you, and that's totally fine. I've been using affinity
for nearly a decade and I've never needed to
use this specific formula. In fact, the main
reason I'm showing you this is so that
you can see that it's not important to understand the math
behind every blend mode. I've watched videos
where people explain the math of each and
every blend mode. Honestly, knowing these
equations just isn't important. What is important is knowing
the general principle of what a blend mode is
doing and then when Y, you would want to use each one. So knowing that, let's learn the general principle
of how multiply works, and then we can see
it in practice. To understand multiply, I like to think of
this simple equation. In this equation, you
just combine the darkness from the base layer with the darkness from
the blend layer. And really, that's
all you need to know. Just remember that multiply works by adding the
darkness from each layer. Okay. Now let's jump
back into affinity and see how multiply works
on a practical level. This gray fill layer
isn't very dark, but it does have a
little darkness to it. So when I change the
blend mode to multiply, then that little bit of darkness is added to
the photo beneath it. And if I make the fill
layer even darker, then more darkness is
added to the photo, since the fill layer has more darkness to add
to the equation. Because the darkness
from each layer is being added together using multiply will almost always result in a darker image, almost always. There are two
exceptions to that, and those are when pure white
or pure black are involved. To see what I mean, let's
make this fill layer totally white by bringing it
to this corner down here. Now if I turn this
layer on and off, you can see that
nothing is happening. That's because the color white
has zero darkness in it, so it has no darkness
to add to the equation. To see a simple example
of why this is important, I'll place another
photo into this image. I'll go to the top
of the screen to file and then down to place. I'm going to add this black
heart image to our document. Then I'll just click
and drag to add it in. In this example, I want to add this black heart
to the main photo, but I don't want to include the white background
that's surrounding it. Lucky for us, this is super easy to do with the
multiply blend mode. So with this layer selected, I'll just change
this to multiply. Now, the heart is all that's
left because white becomes invisible when you use
multiply. Isn't that cool? In addition to that, now that we've added
this black heart, we can also see how
multiply works with pure black I mentioned
before that multiply almost always makes things
darker because it will combine darknesses
from your blend layer and the base layer. But I want you to
pay attention to the heart as we change
the blend mode. I'll set the blend
mode back to normal. This is how it looked before
and then back to multiply. I'll do this a couple
of times and ask you, does using multiply make the heart any darker
than it already was? You can probably see
that the answer is no. It looks exactly the same. That's because black
is already 100% dark and you can't get any
darker than 100% dark, so it will look the same. So when you use
multiply on black, it just stays black because black is already as
dark as it comes. Okay, now let's see
another example of multiply by using another
image from the exercise files. I'll go to file and
then down to place. In this time, I'll select
this gray heart image. I'll click and drag to
place this image. Okay. Before I change the blend mode, I want you to try to figure
out what will happen. What will happen to the gray
heart when we use multiply. And what will happen to the white that's
surrounding the heart? Okay, you have your guess. Let's go ahead and change the blend mode and
see what happens. Once again, the white
background has been removed. And this time, the gray
heart has become much darker because its darkness is being combined with
the darkness of her hair. Hopefully, that wasn't
too surprising for you, but now let me ask you
a trickier question. What would happen if I moved
the gray heart up here in this bright area the sky is so bright that it's
actually pure white. And we've already learned that white has no
darkness in it. So what will it do
to the gray heart? Well, let's move the heart up
here and see what happens. Tamura clearly see
what's happening. We can jump back and forth between the normal and
multiply blend mode. As you can see, the
gray heart looks exactly the same as
the original image. Remember, multiply will add the darkness from each of
these layers together. Since the white sky
has no darkness, zero is being added to the
darkness of the gray heart. Anything plus zero will just return to whatever
it was before. That's why the heart
looks exactly the same. Now I have one final
question for you. What will happen to
this gray heart? If I move it on top of
the black heart Remember, black is already 100% dark. What will happen if
we add gray to it? Are you ready? Let's
see what happens. And just like that, the
gray heart is gone. I know that might look
a little strange, but mathematically,
it makes sense. If you add any amount
of darkness to black, then it will still be black. Since the gray heart is having its darkness combined
with the black, it's also become black, which is why you
can't see it here, even though this layer is
on top of the black heart, and to finish this video, I just want to mention
that everything we've been learning about applies
to color as well. To see this, I'll add
a red fill layer. I'll go to layer, and
then new fill layer. I'll change the color to red, and then I'll set its
blend mode to multiply. Now the entire photo has
become darker because the darkness from
the red is being combined with the darkness
of the original photo. But you'll notice that the black heart still looks the same. As we learned, that's because
black is already 100% dark. So adding any darkness from the red color won't change it. Alright. And with that, you are now a master of
the multiply blend mode. Nice job. I know that was a lot to take in,
but don't worry. We'll see how to use multiply in some more practical situations
throughout the course. But for now, we can go
ahead and move on to the next video and learn about another
important blend mode, the screen blend mode.
5. Screen : This video, we'll learn
about the screen blend mode. Lucky for us, this should
actually be pretty simple because screen is just
the opposite of multiply. As we learned in the last video, multiply works by
combining darkness from the base layer and the
darkness in the blend layer. Screen is just the
opposite of that. It will combine
the brightness in your base layer with brightness that you add
in the blend layer. And really, we could
end the video here. Screen is exactly the same as
multiply, but the opposite. So take everything we learned in the last video and
just reverse it. Now, even though we
could end the video, I want to show you
a few examples of screen just to make sure
everything is crystal clear. To begin, I'm going to place the Black heart that we
worked on in the last video. So I'll go to File and
then down to place. I'll just add this
black heart by double clicking and then I'll
click and drag to add it. Before I change the
blend mode to screen, I want you to try to figure
out what will happen. Remember, we just learned that screen is the
opposite of multiply. Think back to what happened in the last video and
then reverse it. Are you ready? Let's turn this into the screen blend mode. By using screen,
the black heart is removed and the white
background stays the same. Because remember,
screen combines the brightness of the base
layer and the blend layer. Since black has no
brightness to it, it's completely removed
when you use screen, and since white is 100% bright, it will just stay the same. Now let's see what
happens when we place the gray heart We already know that white
will stay the same. But what about gray? Well, let's turn on the screen blend mode
to see what happens. All right. Interesting.
By using screen, the gray heart combines with the brightness of the
underlying photo. So if I place the heart
over her dark shirt, can see it looks pretty much
the same as when we placed it because her shirt doesn't have much light to
add to the heart. But if I place it
over her bright face, you can see the heart
becomes much lighter and transparent as it combines with the brightness
underneath it. Okay, now let's place one more image just to see
how it works with screen. First, I'm going
to delete both of these heart layers just to
clean up our workspace. Then I'm going to place the
image with the red dots. So I'll go to File Place, and I'll select
this red dot image. Okay, before I turn on screen, let me just ask you
a few questions to really test your
understanding of screen. First, what will happen to the black background
when we turn on screen? Okay, question two, what will happen to the circles
that are on her shirt? Remember that her
shirt is very dark, so it doesn't have
much brightness to contribute to screen. Question number three, what will happen to the circle
that's on the sky? Remember that the sky is so bright that it's
actually pure white. And question number four, what will happen to all
of the other circles? These circles are
scattered throughout the image on areas that
aren't quite white or black, but have different
levels of brightness. If you want to take a minute to try and figure out the
answer to each question, go ahead and pause
the video here. Then after you
have your answers, we can go ahead and
continue with the video. All right, here's
the moment of truth. Let's turn on the
screen blend mode. And there you have it. That's what screen
does to this photo. So let's take a
minute to examine it and see the answer to each
of the four questions. Question one was, what would happen to
the black background? If you guessed that it would be removed, then you're correct. Black has no brightness, so it's removed when
you use screen. Question number
two is what would happen to the circles that
are on her dark shirt? You can see that
these circles look pretty much the same because the underlying
photo doesn't have much brightness to
add to the circles. Question number three was, what would happen to the circle that's up in the bright sky? You can see that the
circle here is no longer visible because
the sky was white. White is already 100% bright. Adding brightness
from the circle doesn't make any difference. White is already at 100%, so white areas will
just remain white. And finally, question
four is what would happen to all of
these other circles scattered throughout the image. As you can see, these
circles have all blended with the brightness
of the underlying photo. So in areas of the photo, where it's a little
bit brighter, like the grass down here, you can see that the
circles have become very light and transparent. And in darker areas
of the photo, the circles have a little
bit of light added to them, but they look pretty much the same as before we
turned on screen. All right. And with
that, we are done. You now have everything you need to work with the
screen blend mode. We'll be practicing using this blend mode a lot
throughout the course. But for now, we can go
ahead and move on to the next video and learn
about the overlay blend mode.
6. Overlay : Let's learn about the
overlay blend mode. Overlay is an
interesting blend mode because it can
brighten or darken, depending on the situation. To see how this
works, let's compare overlay to multiply and screen. To do this, I'm just going
to add a new fill layer. And then I'm going to
make this layer darker. A nice dark gray like that. Then we can go ahead and turn
on the multiply blend mode. As we've already learned, multiply will combine
the darknesses from both layers to create
a darker image. Even if we make the
fill layer brighter, it will still darken
the image because even a light shade of gray has a little bit
of darkness in it, and if we change the
lend mode to screen, then the photo becomes very bright because it combines the brightness from both layers. And even if we make
this layer darker, it will still brighten
the image because even a dark shade of gray still has some
brightness in it. But now, let's see how
this compares to overlay. Overlay has made the image a lot darker because we're
using a dark gray layer. But if I make this layer
a light shade of gray, then it will brighten the image. But why is that? Why does overlay sometimes brighten the image and
sometimes darken it? Well, to see why,
let's take a look at these five squares which range from pure black to pure white. To understand how overlay works, you need to know
what its goal is. The goal of overlay is to make
your photo black or white. Overlay loves both
of these extremes, and it's willing to push your photo towards
either one of them, depending on whether you give it a dark or light
layer to work with. So if you add a dark layer like a fill layer with
25% luminosity, then overlay will make
your image darker. Since you added a dark layer, overlay assumes you want your
overall image to be darker, so it pushes everything
closer to black. But if you add a
light layer like one with 75% luminosity, then overlay will make
your image brighter. Since you added a bright layer, overlay assumes you want the overall image
to be brighter, so it pushes everything
closer to white. But what if you add a layer
that's not bright or dark? What would overlay do to a
layer that has 50% luminosity? 50% gray is actually
a special color for overlay because overlay doesn't know what to do with it. It can't decide if you want to make the photo
brighter or darker. So if you use
overlay on 50% gray, then nothing will happen. So to summarize what
we just learned, using overlay on a bright layer will make your photo brighter, while using overlay on a dark layer will make
your photo darker. And if you use overlay on a
neutral layer of 50% gray, then nothing will happen. Okay, now let's jump back into affinity to see how all of
this works in practice. As we saw before, making this layer darker will
darken the image, and making it lighter
will brighten the image. But if we make it a
neutral 50% gray, then you can see it has no effect with the
overlay blend mode. That's all easy enough, but now I want to really test your understanding
of overlay. First, I'm going to duplicate
our photos layer by pressing Command J on a
Mac or Control J on a PC. Okay. Now for your
review question, I want you to figure
out what will happen if we use overlay on
this duplicate photo, will it make the overall image brighter, darker, do nothing? I'll give you a second
to think about it. All right. Now
let's go ahead and turn on overlay to
see what happens. Now if I turn the
layer on and off, you can see that our image
is both brighter and darker. To see why this is, let's take a look at a couple
of specific areas. First, let's look at her shirt. In the original photo, her shirt was
already quite dark, definitely darker than 50% gray. On the duplicate photo, overlay applied a
darkening effect to this area since overlay will use anything darker than 50% gray to
darken the image. That's why this duplicate photo made her shirt even darker. Now to contrast that, the sky in this photo
is very bright, much brighter than 50% gray. On the duplicate photo, overlay applied a
brightening effect to this area since overlay will use anything brighter than 50% gray to
brighten the image. In other words, the
bright areas of the photo have
become brighter and the dark areas of the
photo have become darker or even more simply put. Overlay has increased the
contrast of the image. That's why overlay
isn't considered a brightening blend mode
or a darkening blend mode, but it's actually considered
a contrast blend mode. In fact, overlay is
really useful for adding contrast because of
another trait that it has. Overlay is a special blend
mode because it will brighten highlights faster than it will brighten up the
shadows in your image, and it will darken shadows faster than it will darken
highlights in your image. This allows you to brighten your highlights without
affecting your shadows too much or to darken your shadows without affecting
your highlights too much. To see how this works, I'm going to delete
this duplicate photo layer that
we made earlier. And then I'm going to add a
gradient to this fill layer. I'm just going to click and drag from one side to the other. I'm going to leave this
color stop set to black, and I'm going to change
this one to white. Now if you look at the
right side of the photo, you can see that this
black gradient is making the shadows much darker without affecting the
highlights too much. So you can see the trees
have become almost black, while the highlights in the sky are still nice and bright. And if you look over
on the left side, you can see the
opposite is true. The sky, the grass and her skin have all
gotten much brighter. But this dark shadow in the
trees is still very dark. That's why overlay is such
a great blend mode for brightening or darkening
a photo because most of the time you'll want to brighten up your highlights
without affecting the shadows too much or darken your shadows without affecting the
highlights too much. Okay, that's pretty much
all you need to know. But before we finish this video, I want to mention
one last thing. We've been using overlay
throughout this video, but there's another blend mode that's very similar to overlay, and that's the soft
light blend mode. All you need to know
is that soft light is a less intense
version of overlay. So it works the same as overlay, except it brightens
highlights less quickly and darkens
shadows less quickly, too. Some people like the extreme
contrast that overlay makes, but other people prefer the softer appearance
of soft light. Both of these blend
modes are great, and depending on the photo, one of them might work
better than the other. So feel free to try
using both of them. And with that, we're done. Now you have
everything you need to work with overlay
and soft light. We'll practice these blend
modes later on in the course. But for now, let's move
on to the next video where I need to tell you a little secret about blend modes.
7. The Blend Mode Secret : In this video, I
want to tell you a little secret
about blend modes. When I first started
planning this course, my goal was to cover every
blend mode and affinity photo. There aren't a lot of
tutorials for each blend mode, so I thought it would be useful to explain
what they all do. But I soon realized why there aren't a lot of tutorials
for every blend mode, which brings me to the
secret about blend modes. The honest truth is
that 99% of the time, there are only three
blend modes that you need multiply,
screen, and overlay. These are by far the
most common blend modes, and you can pretty much
ignore the rest of them. So instead of
bombarding you with information on blend modes
that you'll never use, I decided to focus this course on the things that will
actually help you. So to start this course, we took an in depth look at the three most
important blend modes. And now for the
rest of the course, we're going to take
that knowledge and learn how to apply it. That way, you'll be
totally prepared to use your blend mode skills after
you finish this course. But before we dive into the practical application
of blend modes, I just have one quick tip
for you in the next video, which will help us to
work a little more efficiently throughout
the rest of the course.
8. Place Image Tool : This video we'll learn how
to use the Place Image tool. The Place Image tool allows you to quickly place images
into your document, which we'll be doing a lot
throughout this course. If you've worked in
Affinity Photo for a while, you might be thinking,
Wait a second. Affinity Photo doesn't
have a Place Image tool, Affinity designer
and publisher do, but Affinity Photo doesn't well, that might seem true at first, but it actually does
have a Place Image tool. You just need to know
where to find it. Go ahead and go to the
top of your screen to view and then go down to where
it says, customized tools. This is a list of every
tool in affinity photo, not just the ones that
are visible by default. Most of the time, the default tools are
all that you need, but the Place Image tool
can be quite useful too. So we can go ahead and take the Place Image
tool right here, and we can place this
wherever we want in our tool bar by clicking
and dragging it into place. You can also remove
tools that you don't use if you want
to clean up your list. I'm just going to remove
the mesh Warp tool. If you ever want your tools to go back to the way they were, you can just click
Reset right here. I'm going to close this. Now we can try out
the Place Image tool. Go ahead and click on it, and now we can quickly add any image that we
want to our photo. This is the exact
same as going up to the top of your screen to
file and then down to place, but it's just a
little bit faster to have a tool that you
can quickly pull out, select an image, and open up. Now that you have the
Place Image tool, we're ready to jump into
the next chapter and learn about some practical
applications for blend modes.
9. Adding Birds : In this chapter, we'll learn useful ways to apply our new
knowledge of blunt modes, starting with how to
add birds to a photo. To see how this works, we'll be working with this photo from the courses exercise files. With this open, we
can go ahead and add our bird photo using
the Place Image tool. As a reminder, if you don't
have this Place Image tool, you can just go back
to the previous video where we learned how to put
this tool into our toolbar. Okay, now that we
have this bird image, we need to decide which
blend mode we should use. We want to keep
these dark birds, but we want to remove the sky. The sky is pretty much white, so that should help us
decide on our blend mode. In the last chapter, we learned that multiply will keep
the dark parts of a layer, and it will remove the
white parts of a layer. So that's the blend mode
that we should use. Now we can go ahead
and zoom in and see that this is almost perfect. It's so close. You can still see some lines
right here on the edges, and that's because while
the sky was almost white, it wasn't pure white. Multiply only can
remove pure white, but even very light
shades of gray will still have some darkness to
them that gets left behind. So to fix this, we
need to make sure that the birds sky
is pure white. Then it will be totally removed. To make this easier to see, I'm just going to select this layer and then change it back to the
normal blend mode. Then I'm going to add a curved adjustment to
brighten up the sky. I only want this curves adjustment to affect
the bird photo. So I'll click and
drag it on top of the bird photo so that it
becomes a child layer. That way, it only
affects the birds. Now, to brighten up the sky, all we need to do is bring
over this white point slider. This makes things closer and closer to white as
you drag it over. And you can see this. If
you drag it over too much, even the birds will
start to turn white. So I'm just going to drag
it over a little bit. Now the background
should be pure white. With that done, I'll
just close out of this. I'll select the bird photo and I'll set it
back to multiply. Now we can go ahead and
see that those lines are gone and our birds are perfectly
blenting into the sky. Now that the birds are in place, there's a few bonus
tips I can show you. First, if you want less birds, all you need to do is apply
a mask to this layer. With it selected, just
click on the mask icon. Now we have a white
mask applied here. All we need to do is
grab the paint brush. And then paint in black paint on this white mask to remove any of the birds
that you don't want. And if you want more birds, all you need to do is duplicate this bird photo to duplicate
press Command or Control J. Now using the move tool, you can go ahead and move this to add more
birds into the photo. You can do this as many
times as you want, and you can also
continue to mask off areas if the birds are
overlapping in strange ways. And that's it. That's how you
can add birds into a photo. In the next video, we'll learn how to add texture to a photo.
10. Adding Texture : Let's learn how to add
texture to an image. To begin, let's add our texture by using
the Place Image tool. And if you want to do
this a little faster, you can double
click on your image to automatically load
it into your cursor. I'll click and drag to add this. But as you can see, it's facing the wrong
direction for our photo. So I'm going to click and drag on this little knob up here. And while holding Shift, we can lock it in, so
it's perfectly aligned. Then we can just
stretch this like that. So it's covering
the whole photo. Now it's time to blend this
texture into our photo. To blend this in, I want
to make sure that we keep the light areas and dark
areas of this texture. In other words, I want the bright areas to make
our base layer brighter, and I want the dark areas to
make the base layer darker. So should we use multiply,
screen or overlay? If you answered overlay,
then you're correct. And this is what it looks like. Very nice. Here's the
before and after. You can leave your photo
like this if you want, or you can do some masking. Maybe you want most of the photo to have a texture applied to it, but you might think it
would look better if the subject of the
photo wasn't affected. If that's the case,
you can add a mask. Then you can grab the
paint brush and paint in black paint to remove the
texture over the flower. So I'm just going to paint over the flour to
remove that texture. I have a very harsh edge on
my paintbrush right now, so I'm just going to lower
the hardness down to zero, and then I'll continue painting. Now, if you do still want
some texture on the flower, you can always duplicate this texture layer with
Command or Control J. Now the texture is very
intense on the outer edges, but it's still not
on our flower. So as a little trick, you can select the mask, and then you can invert it
with Command or Control I. You can see on our
mask here that this is now applying the texture
only on the flower, not on the background. Now you can go ahead and select
the main layer and lower the opacity so that the flower has a little bit
of texture applied to it. So now you know how to
add texture to a photo. But before we finish this video, I want to give you some tips on how to find textures
for your photos. To find textures,
I recommend you use pixabUnsplash, or Pexels. All of these websites
have millions of free photos, including
free textures. You can find links to
all of these websites in the PDF that's included in
the course exercise files. This PDF has links to all of the resources that we'll be
using throughout the course. So we'll be using this in a
lot of the upcoming lessons. After you go to one of
the free photo websites, you want to find
a texture that's a similar color to the photo
that you're working on. So for the flower photo that
we edited in this video, you might want to search
for something like green texture or green abstract. So I'll just type that
in and then press Enter. Then you just need
to scroll down to look through these
textures to try to find one that you like after you find a texture
that you like, you can go ahead and click
on it and then download it for free, and that's it. Now you know how to
use free textures to add an artistic
effect to your photos. In the next lesson, we're
going to learn how to use blend modes to
sharpen your images.
11. Sharpening : This video, I'll show you my favorite method for
sharpening a photo. To begin, let's apply
the high pass filter. When you add this filter, it will cover your entire
photo with 50% gray. We'll be using the
overlay blend mode on this as we learned
earlier in the course, overlay has no effect on
anything that's 50% gray. If we used overlay right now, this filter wouldn't
do anything. But as I bring the radius up, you can see that it will
change from this 50% gray. Now the filter has become
dark in dark areas of the photo and lighter in
light areas of the photo. To make this even easier to see, I'm going to turn on monochrome, which will remove any colors
that are bleeding through. So now you can really see that all this is is varying
shades of gray. And just to make
this even clearer, you can see that the
dark and light areas on this filter match up
perfectly to our photo. If I use the overlay
blend mode right now, what will happen to
this gray layer? If you remember back
to the overlay lesson from earlier in the course, I think you already
know the answer to this. But let's take a look. Now that this is set to overlay, the dark areas in the filter have made those
parts of the photo darker, while the light areas of the filter have made
the photo lighter. Here's the before and after
of that before, after. And really, that's
all sharpening is. It just makes dark areas darker and bright
areas brighter. But sharpening is
special because it doesn't darken
all dark areas, and it doesn't brighten
all bright areas. Instead, it looks for edges. Edges are parts of the
photo that transition from dark to light
or light to dark. For example, think
of someone with a dark shirt in front
of a light background. The area that transitions
between the dark shirt and the light background is an edge that the sharpening
will add contrast to. So the shirt would become darker and the background
would become brighter. But when sharpening, you usually want to sharpen something
with small edges. For example, a common thing to sharpen would be dark eyelashes. On the edge of an eyelash, there's a transition
between light and dark. When sharpening, that's an edge that would have some extra
contrast added to it. And the best part of
sharpening is that you get to decide how big
the edges should be. Using a large radius we
look for large areas of light and dark like different colored stripes
in the tiger's fur, but using a small radius will add contrast to small edges in a photo like tiny eyelashes
or individual pieces of fur. Usually, it's best to
use a small radius, like something around
one to three pixels. Okay, now let's come back into affinity to see how
this works in practice. First, I'm going to turn the
blend mode back to normal. Then I'm going to make
the radius smaller. Now we can only see the faint
edges of the tiger's fur. Most of the filter
is still 50% gray. What you can see really
is just the smallest of differences between dark
areas and lighter areas. As an example, let's look
at this area right here. We have a light fur and then a dark spot
right next to it. You can see if I turn
the filter off that this perfectly corresponds
with the photos light and dark areas. Now, if we turn on overlay, you'll be able to
see that that area becomes lighter and
darker along the edge. So here's the before and after adding more sharpness and
contrast to that small area. And now we can go ahead and zoom out and see the
before and after. It can be hard to see
zoomed out like this. So if you do want
a stronger effect, you can go ahead and duplicate
the high pass filter a few times until you get
the look that you want. I'll just hold Shift to
select all of these layers, so we can see a complete
before and after you might be wondering
why you would duplicate the filter instead of just
using a larger radius. And that's a really
good question. When we duplicate the
small radius filter, the small areas get sharper. This tends to make the details of the photo look really nice. In this case, I duplicated
it a little bit too much, just so it's easy to
see in the video. But you can see that
the individual pieces of fur are nicely defined here. Now, if we raise the radius
really high instead, then the large areas would get sharpened,
something like this. This definitely has added
more contrast into our photo, but the fur is not well defined. It looks a little bit
strange when you compare it to how nice the photo
looked with defined fur. So that's why I suggest you
keep the radius nice and low and then just
duplicate it over and over until you have the
sharpness that you want. Okay. Now let's see another
example of sharpening. This time, we'll do it
on a portrait photo. To start, we can go ahead and
apply the high pass filter. Then as a first step, I always like to turn
on monochrome just so that the colors don't have weird contrast being
added to them. And then we can go ahead
and raise the radius. You can see that only the
small details in this photo, the small pieces of her hair, and details around her eyes will have contrast
added to them. This time, instead of overlay, I'm going to use soft light. I actually prefer the
softer appearance of soft light when
I'm doing sharpening. So I tend to use soft
light instead of overlay, but feel free to try either one. Alright. With that done, I'm just going to duplicate
this filter a few times. And now we can go ahead and zoom in and take a look
at the difference. I'll hold Shift to select
all of these layers. And now we can see
the before and after. I think this filter
looks really nice to give her eyes more detail, but I don't really like how
her skin and hair look. This is a really easy fix, so let's go ahead and do that. First, with all of
these still selected, I'm going to click and drag
them above our photo layer. Then I'll press Command or
Control G to group them. With all of these
filters in a group, I'm going to add a mask
to the whole group. That way we can paint the filter just over the
areas where we want it. Right now the filters are still being applied to
our whole photo. I'm going to invert this
with Command or Control I now the filters aren't being applied
to the photo at all, and we can just grab the
paint brush and paint in white paint to reveal the sharpness just over the
areas where we want it. So I'll just grab
some white paint. I'll lower my flow so I
can softly paint this on. And then we can go
ahead and paint this over her eyebrows
and her eyes. Although I tend to avoid
the whites of her eyes, you can see that's created
some strange speckling. So I'm just going to grab some black paint to remove
it from those areas. Now, right now, I think the filter is a little
bit too strong, but it is helping me to
see where I'm painting, so I'll lower it later. So now that it's painted over
her eyes and her eyebrows, I think this does give
them some nice pop, and you can see the
before and after. But I think I'll select
the whole group and lower its opacity to make
this less intense. Or we could always just delete a few of these
high pass filters. Either way, it's the same thing. Sometimes you want to sharpen a whole photo like with
the tiger photo and other times you might
just want to sharpen a specific part of the
photo like someone's eyes. Now you know how to
sharpen a photo. In the next video, we're
going to learn about a really fun technique
called dodge and burn.
12. Dodge & Burn : In this video, we're
going to learn how to dodge and burn a photo. For those who don't know, dodge and burn is just
a fancy term that photographers use for brightening
and darkening a photo. Dodging a photo means
you're brightening it, and burning a photo means you're darkening it like burning
a piece of toast. But don't worry. This technique
is actually really easy, and it's one of my favorite ways to enhance the
lighting of an image. To start with this technique, add a new pixel
layer to your image. Just to see how this works, I'm going to start by
making some extreme edits. Go ahead and grab
the paintbrush tool. Then you can go
ahead and paint with white and black paint to brighten or darken
different areas. I'm just going to paint
over the waterfall. Then using black paint, I'll darken all around it. Now that we've
done our painting, we can set our pixel layer to the overlay blend mode to blend this white and black
paint into our image. Now this is pretty extreme
so we can lower the opacity. And now with the
before and after, you can see how this has
shaped the light of the image, drawing more attention to the bright waterfall by
darkening everything around it. Now, we should probably be
a little more precise with our paint job if we want
to do this for real. So I'm just going to delete this pixel layer and
I'll add a new one. And we can begin by already having this pixel
layer set to overlay. So as we're painting, we can just see this a
little bit better. And I also like to paint
with a lower flow. That way, all of this light
that we're painting on our photo can be
nice and subtle. I'm also going to use X on my keyboard to switch between
black and white paint. So if you push X, you
can see those colors switch and press it again
to switch them back. That way, we can just
quickly paint this on. So again, I'm going to
brighten up the waterfall, and I think I'll
also brighten up our subject by painting
white over our subject. Then I'll press X to switch to black so I can darken
around the waterfall. Can even add more darkness
to the waterfall. By painting where you
see little dark spots. All right. Now with all
of that painting done, you can see the
before and after. Dodging and burning is so fun. Feel free to play around with it on this photo and
your own photos. I really love this technique
for enhancing the lighting, and now that you know
how to dodge and burn, we can go ahead and move on to the next video where we'll learn how to create
a vintage effect.
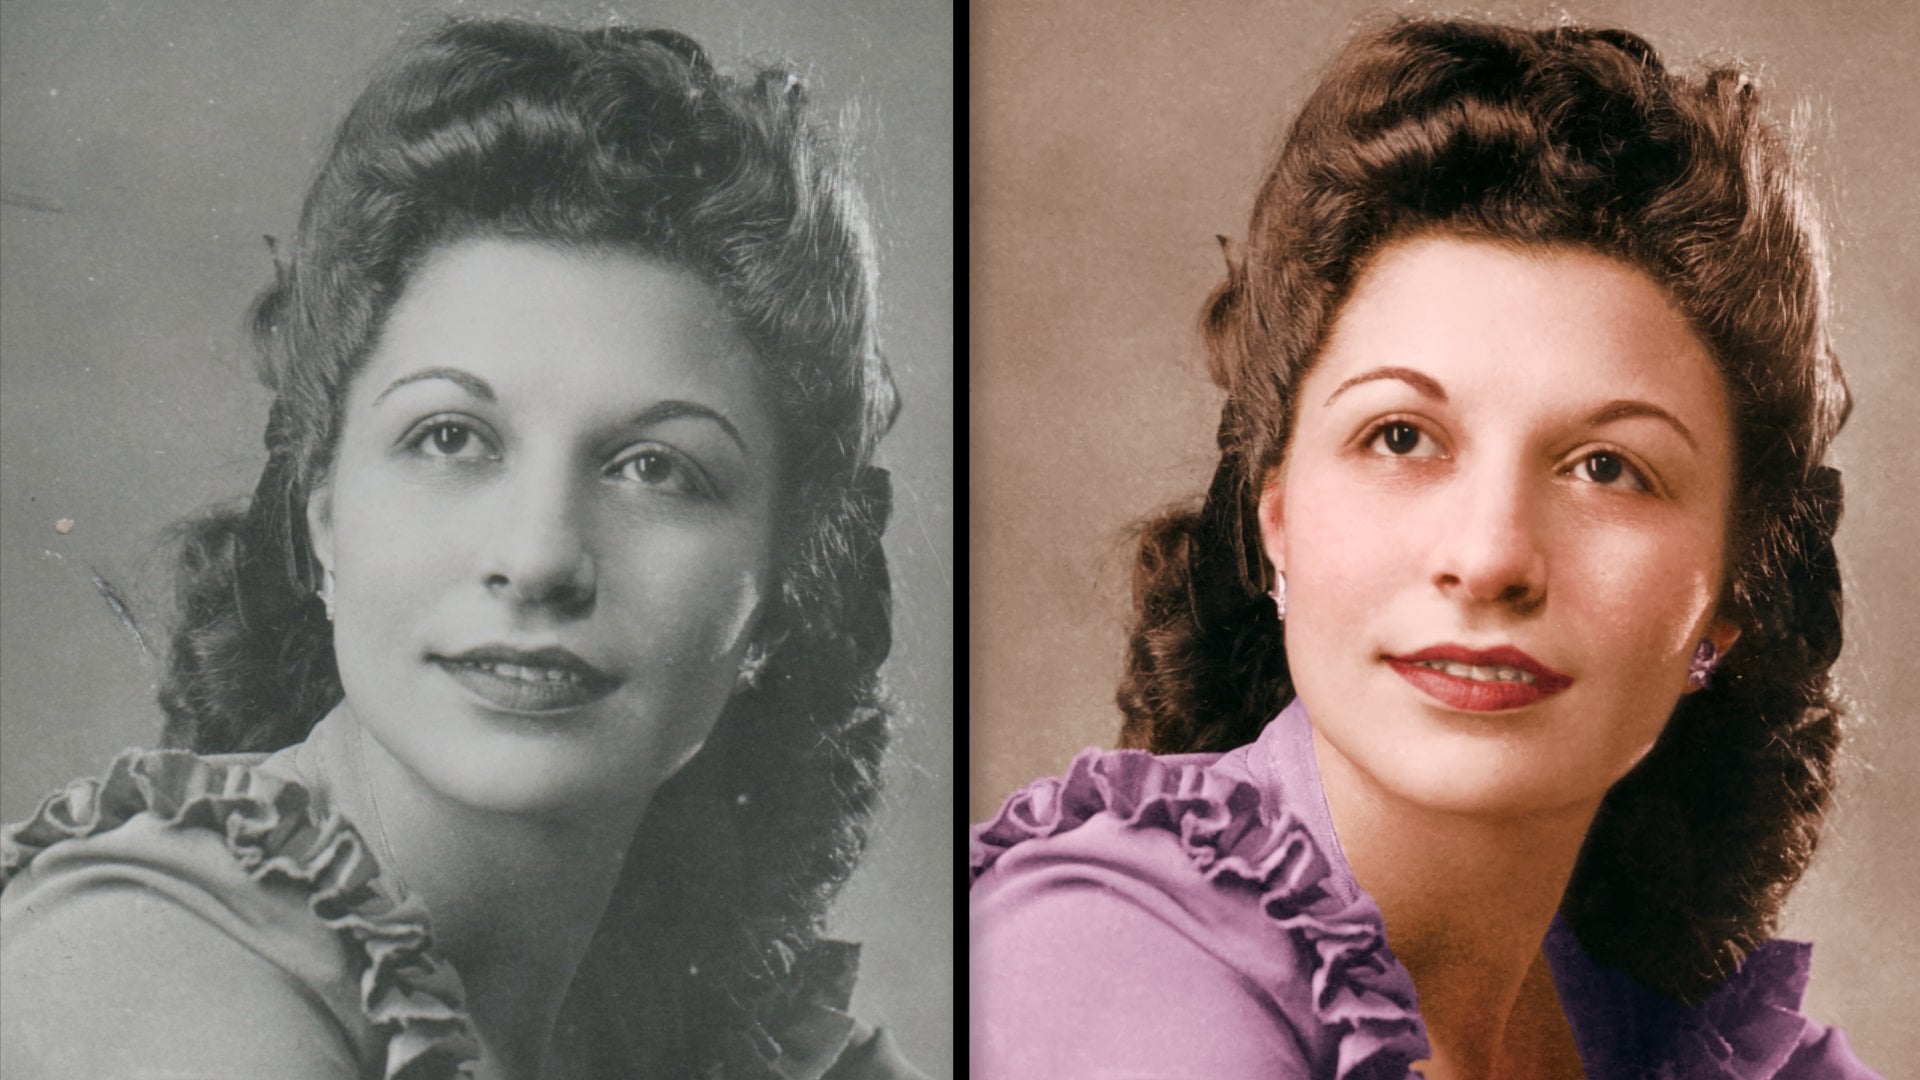
13. Vintage Effect : Let's learn how to add a
vintage effect to any photo. To create this effect, we're going to use some
free overlays from online. To find these overlays, open the free resources PDF that's included in the
course exercise files. Then you can click on the
Vintage Overlays Link. This link will take
you to this page. From here, scroll down a little ways until you find
a big button that says, download my free vintage
photo texture overlays. Go ahead and click
on that button. This will pop up
asking if you want to download all of
the free resources, say, no, thanks, and now you should have a
folder downloading. Okay, that took a little while, but once it finishes
downloading, just unzip the file. And now you should have a folder full of these beautiful
vintage overlays. After you've done
all that, go ahead and come back to Affinity Photo. Now we can go ahead and download one of those vintage
overlays to this photo. So I'll just use the
Place Image tool. And I'm going to use the
first one for this effect. I'll click and drag to
add this to the image. And you can go ahead and feel free to adjust this
however you want. You can also squish this a little bit if you want
to keep the edges in this. And with that all set up, now we can go ahead and use
the overlay blend mode, just like adding the texture
in a previous video, Olay works perfect for textures. Now, obviously this
needs a little bit of adjustment to make this
look more vintage. So let's start by
removing the color. I'll go to our adjustments and I'll apply an HSL adjustment. I'll lower the
saturation all the way. That looks pretty good. Now to add a little bit
of yellow tinting, we can use the white
balance adjustment. I'm just going to
increase this slider a little bit to add that
vintage look. That looks great. Now that the colors are better, I don't really like how dark this overlay blend mode is
making the temple look. So I'm going to click
on our vintage layer, and I'm going to
add a mask to it. Then I'm going to grab the paintbrush tool and
I'm going to paint in black paint with a low flow just to remove a little bit
of the texture on the temple. That way, it doesn't
look quite so dark. Okay, this already looks better. Here's the before and after, brightening up a few areas. And now that I've seen the
temple looking brighter, I think I want the whole
thing to be brighter. I'm going to click
on our top layer, and I'm just going to add a curves adjustment to
brighten everything up. I'll click and drag
on the center of the curve to bring that up. Then I'm just going to invert this layer with
command or Control I, that's being applied to nothing. Then I can grab white paint and paint this only over the
temple to brighten it up. Now, I'm painting with
a pretty low flow. You can always raise this
to speed up the process. As I was painting,
I accidentally brightened this area and
now it looks too bright. I'll just take black paint and paint over that to
darken it again. Now you can see the before and after of brightening
up the temple. As one last finishing touch, old photos usually have less contrast because
they're a little bit faded. To create that effect, we can use the curves
adjustment again. This time, I'm going to lower the white point right
here, bringing this down. This will make the
highlights darker. And I'll also raise this side, making the shadows lighter. I don't want the shadows
to become too light. I'm going to click about here and I'll bring this
down a little bit. But you can see how this has
faded our photo quite a bit. Here's the before
and after of that. Now I'll just hold Shift
and click to select all of our layers so that
we can see the complete before and after. This effect is so cool. I think this looks amazing. Now that you know how to create a vintage effect
in the next video, we'll explore the
soft glow effect.
14. Soft Glow Effect : In this video, we'll learn how to create a soft glow effect. This effect is really pretty. I'm excited to show it to you. The first step to creating this effect is
duplicating your layer. So go ahead and press
Command or Control J. Photos with a soft
glow are very bright. So to make this effect, we can combine the brightness from both copies of the photo. To do that, I'll use the screen blend mode on
this duplicate layer. Here's the before and after. But to make this the
soft glow effect, we can't just make
the photo brighter. We also need to make it
look a little bit fuzzy. So to do this, we need to
blur this brightening layer. Go ahead and go down to the filters and then select
the Gaussian blur filter, which is the one at the top. From here, go ahead
and raise the radius. This is a little too strong. Maybe something around here. That looks pretty good.
I'll close out of this. And now we can see
the before and after of blurring that layer. This looks really good so far. Now, adding a soft glow might make your shadows
look a little too bright. So to fix this, we can go
ahead and add another layer. I'll just go to our
adjustments and I'll apply a curves adjustment
to fix the shadows, all we need to do is darken the black point by
bringing this over. So you can see
what that's doing. If you want, we can brighten
the whole thing a little bit just to make sure everything
stays nice and bright. I think that helped our
shadows quite a bit. Here's the before and after. And now I can just select
both of these layers, so we can see the
complete before and after of the
soft glow effect. As a tip for you when you're
creating this effect, I find that this looks great on photos that are taken
outside on a sunny day. If your photo already has
nice bright spots like this, I think it really helps
to sell the effect. All right, with that finished, we can go ahead and move on to the next video where we'll learn about the double
exposure effect.
15. Double Exposure : This video, we'll learn how to create the double
exposure effect. This effect uses blend modes
to combine multiple images. I'll just grab the
Place Image tool so we can add our second image
on top of our first one. Now, back in the olden days, double exposures were
made on film cameras. The photographer would
take a photo and then instead of advancing
to the next frame of film, they would take another
photo on the same frame. This would combine
the light from both images onto a
single frame of film, allowing multiple photos
to be combined together. Now in affinity, we can create this effect by using
blend modes to combine the light from two images and to combine
light from multiple layers. We already know what
blend mode to use screen. So with this top layer selected, I'll change its blend
mode to screen. Now only the light parts of this image are being revealed
on top of our photo, so we can see our
subject through it. And with that all set
up, now we can go ahead and adjust this
however we'd like. I think that looks pretty good. Now you can see the
before and after of this double exposure Now I want to share a
little tip with you. You can actually change
how these layers blend together by using a curves
adjustment on the blend layer, just like how we did with the birds earlier in the course. So to change the lighting, I'm going to add a
curves adjustment, and then I'll click and
drag this on top of our blend layer to
make it a child layer. Now this is only
affecting our top layer. Because only the light parts of this top image are
being revealed, if we make this layer darker, then even less of it
will be revealed. So you can see, as
I drag this down, you can see our model even more clearly before she had more
of a haze on top of her, but as I lower this down, you can see more of
our model's face. And you can darken other
parts of the image, too. If you want to darken
the black point, this will also affect the image, making less of it visible. And you can also darken
the white point. This makes the
highlights darker, which is pretty nice if you
want this to be very subtle. So now we can see the before and after of
that curves adjustment. We can see a lot
more of our model, but it's still a very
nice double exposure. Okay, so now that you know
how to adjust your top layer, I want to share a
few tips with you on how to pick the right photo
for double exposures. So to see this better, I'm just going to
turn off curves, and I'll change this back
to the normal blend mode. When you're doing
double exposure, it's important to remember
that only the bright areas of your blend photo will be kept while dark areas will
become less visible. This will allow your
base layer to be seen. So in this photo, only
the bright areas of this plant and this table
and this sheet will be kept. While the dark background
will be removed. And when we turned on curves, that background became so dark that the model became
much more visible. So when picking a photo
for double exposure, it's important to
look for photos that have interesting
light areas, but also have a lot of dark areas where your
subject can show through. Now that you know how to do
this double exposure effect, we're ready to move on to
the next video where we'll learn how to add film
grain into your photos.
16. Film Grain : This video, I'll show you how to add film grain to a photo. To do this, we're going to use some free overlays from online. To find the overlays, you can open up the
free resources PDF that's included in the
course exercise files. Then you can just click
on the film grain ink. The link will take you
to this page from here, go ahead and scroll down a little ways and then click
on this Google Drive Link. Then click the Download button. After it finishes downloading, remember to unzip the file, and then you'll have a
folder of free overlays, which we'll be using
to add film grain. Okay, so after you've
done all that, go ahead and come back
to Affinity Photo. Now that we've
downloaded the overlays, we can add one to this photo. I'm going to use texture nine, this one right here, and then I'll place it
on top of our image. Now, we need to decide which
blend mode we want to use. I want to take advantage of
the light and the dark areas. So I'm going to use the
overlay blend mode. That actually seems
a little bit strong. So maybe we should
try soft light. I think this gentler appearance looks a lot better
for this photo. Here's the before and after. And we can add more than
one film grain overlay. So I'm going to go back
to the Place Image tool, and I'm going to add the first one For this overlay, I want to keep the white
speckles that are on here, but I want to get rid of
all of the dark areas. This time, I'm going to
use the screen blend mode. Alright, that looks really good. So now you can see the before and after of
adding those speckles. And I'll just hold Shift to select both of these so that you can see the complete
before and after. Adding film grain overlays
is a really fun way to make your photos look a little more interesting and old. In the next video,
we're going to do another fun effect
called a light leak.
17. Light Leaks : Let's learn how to
add light leaks. Light leaks are originally from the days of
film photography, and they happened when the film was unintentionally
exposed to light. But nowadays, they're
just a fun way to add extra color and
light in your photos. To begin, let's download some
free light leak overlays. You can find a link
to this page in the free resources PDF that's included in the
course exercise files. From here, you just need to
scroll down a little ways. And then click on
the button that says download my free Light
leaks photo overlays. This will download
a zip file onto your computer and after
you've unzipped it, you can come back in
to Affinity Photo. Now that we've downloaded
the Light leaks, we can add one into this photo. I'll use the Place Image tool, and I'm just going to
select the first one. Then we can go ahead and place
this on top of our image. I want to remove the
black background from this overlay and combine the
light from the light leak. So to do this, I'm going to
use the screen blend mode. Alright, that looks pretty good. Here's the before and after. And we can go ahead and add as many of these light
leaks as we want. So I'm going to add one more. This time, I'll use
this one right here. And then I'll just place it on the bottom so that the bottom has a little bit
of color as well. And then I'll change this
to the screen blend mode. That the left side is fully
covered in this color. I think this looks really nice. Here's the before and after. This looks pretty good,
but light leaks look much better when you add other adjustment layers
to help sell the effect. Since light leaks are originally
from film photography, let's try to make this
photo look older. It looks like it was
taken on a film camera. First, I'm going to decrease
the photos contrast, which is typical for
photos as they age. To do that, I'm going to
add a curves adjustment. Then I'm going to
darken the white point, which will make all of the
highlights a little darker and then I'll lighten
the black point to make the shadows more gray. Then I think I'm just going
to add a little bit of brightness overall like that. That way, the photo
still looks nice. Now, this curve can
be placed above or below the light leaks
depending on what you like. Another thing that can happen
over time is discoloration. The white balance adjustment is a great way to add
subtle tints of color. So for this one, I'm going
to add a little bit of yellow orange and a
little bit of green. And here is the before and
after of that discoloration. And another fun thing we can do is we can actually
add some texture. We can use film grain, as we learned about
in the last video. For the film grain, I'm going to use number
seven right here. Then I'll click and drag to apply this to
the whole photo. Now I want to remove the white background and
keep the dark speckles. This time, I need
to use multiply. With that, now I'll just
select all of our layers so we can see a complete
before and after. This photo looks so cool. I really like how this
effect turned out. Now in the next video, we'll learn about how to
add even more light to our photos by adding
fireworks. So
18. Fireworks : This video, we'll learn how to add fireworks to any photo. To begin, let's download
some free firework overlays. You can find a link
to this page in the free resources PDF that's included in the
courses exercise files. From here, all you need to
do is click Free Download. This will download a zip
file to your computer. After you've unzipped it, you can go ahead and come
back to Affinity Photo. Now that we've downloaded
the firework overlays, we can add some to this photo. I'll select the
Place Image tool, and then I'm going to select
three different fireworks. I'll choose number eight. Then I'll hold
Command or Control, so I can click on
number 18 as well. Then I'll go down to 35. Command or Control and click. All three of those
should now be selected, and we can go ahead
and open them up. Now I'll just click and drag
to add these into our image. So for each of these fireworks, we want to keep the
bright colorful firework, but remove the black background. So screen is the blend
mode that we want to use. I'll hold Shift to select
all three fireworks, and then I'll change the
blend mode to screen. Okay, that looks pretty good. Now I'm just going to adjust
where they're placed. This is looking
pretty good so far, but the fireworks
look like they're a little bit too in focus. They should be a little
bit farther away. So let's blur them. In the soft glow effect video, we blurred a photo using
the Gaussian blur filter, and that's a totally
fine way to blur photos. But I just want to
show you another way. I'm going to select all of these again by holding
Shift and clicking. Then I'm going to click
down here where it says FX. Now we can affect all
of these layers at the same time by adding
a Gaussian blur. I'll just check that on and then I'll increase the radius. Now you can see the before and
after of that blur effect. Using layer effects is so nice because you can affect all of these layers
at the same time. Another thing we need
to fix about this photo is that the fireworks are overlapping with
the gas station, which doesn't make a
whole lot of sense. So we need to add masks to remove them from
the gas station. I think this pinkish
red one is fine, but let's go ahead and add a mask to this
copper colored one. Then I'll grab the paint brush, and I'll paint in black paint to remove these parts
that are overlapping. I think I'll increase my flow
just to make this faster. Okay. With that looking better, I'll do the green one next. So I'll select its layer. I'll add a mask, and then
I'll paint in black paint to remove it. Okay. Now let's add just a
few finishing touches. First, I want the fireworks
to look even brighter. I'm going to select all
of their layers and then I'll press Command or
Control G to group them. Then I'm going to duplicate the entire group with
Command or Control J. They look a lot brighter now. We can go ahead and
lower the opacity a little just so they
don't look too bright. But you can see how this
has brightened them up and they look
a lot more bold. Another thing we can
do to make this look more realistic is we can add some light reflecting on the surface down here
from the fireworks. To do this, I'm going to add a new pixel layer to our image. Then I'm going to
sample and paint the colors of the
fireworks down here. To sample these colors, I'm just going to make my paint brush a little bit smaller. Then I'll hold Alt or Option and I'll click to sample
one of the colors. With a larger brush, I'm just going to
paint this down here. And then I'll do
the same thing with the other fireworks
using a smaller brush, holding Alt or option and
clicking to get the color. And then with a larger brush, I'll just paint that
color in down here. With those colors in place, now we can go ahead and blur the colors with
the layer effects. I'll click here and I'm just going to add a
Gaussian blur again. As I bring this up,
you can see that does blur the colors, but not enough. I'm going to click in the
box and then type in 500. I'm also going to check
on preserve Alpha so that the colors keep going
all the way to the edge. There we go. To help this painting blend in
better with our background, maybe changing the
blend mode would help. Because I want to keep the
light from these colors, I'll change the blend mode to screen. That didn't do much. That's because the
original photo is pure black screen doesn't look any different than
having no blend mode applied. Screen would normally
work for this, keeping the bright colors and blending it into
the layer below. But when working with
a pure black area, we really just need
to lower the opacity. And now you can see the before and after of adding
those colors. All right. And with that, we are done with our fireworks. Here's the complete
before and after. Now, you know how to add
fireworks to any image. In the next video, we'll learn how to add snow to any image.
19. Snow : Let's learn how to
add snow to a photo. To begin, let's download
some free snow overlays. You can find a link
to this page in the free resources
PDF from here, go ahead and scroll
down and then click on where it
says Free Download. This button will download a
zip file to your computer. After you've unzipped it, go ahead and come back
into Affinity Photo. Now that we've downloaded
the Snow overlays, we can add one to this photo. I'll use the Place Image tool, and this folder comes with so
many beautiful snow photos. But for this one, I decided
to go with number 21. I'll just click and drag
to fit this to the image. We're going to make
more snow in a minute. But for now, let's just keep it sized to the
width of the photo. Because I want to
keep the white snow but remove the black background, I'm going to use the
screen blend mode. This already looks really good, but there's a few things we
can do to refine our snow. First, I'm going to blur the snow just so it
looks a little softer. I'll go to the FX. I'll click on Gaussian blur
and I'll raise the radius. It's a good idea to blur the snow because right
now in this picture, the house and the
people are in focus, it makes sense for the
snow to be out of focus. And now that our snow
looks nice and soft, we can go ahead and duplicate it to cover the whole document. I'll just press Command or
Control J to duplicate it, and then we can go ahead
and move this around. I'll start by raising
this copy up like this. Then I'm going to press
Command or Control J again. Now, duplicating a layer
that you just duplicated and moved will move your next
layer that you duplicate. It's a funny feature of affinity that is
sometimes useful. But if your layer jumps, just know that's why it did it. I'm just going to place
this one down here. And now we have snow
covering the entire photo. Now that we have a beautiful
base layer of snow, I actually want to add
a little bit more snow. So I'll select the
Place Image tool. And this time, I'm going
to select number seven. I'm going to make this
one a little bit larger, so our snow has a
variation in size. These bigger clumps of snow will look more like they're
closer to the camera. I'm just going to set this
to the screen blend mode. Then to make this look
like it's falling snow, I'm going to use a blur. Let's go to our filters, and this time, I'm going to select the motion blur filter. This will add a unique blur to make the snow look
like it's moving. I'm just going to
raise the radius. And then I'm going to change the rotation just so it looks
like it's falling downward. And now you can see what a
difference this has made, adding that motion blur. Here's the before and after. I'm just going to
select this layer and I'll duplicate it with
Command or Control J, just so the bottom part of our photo can have
some snow as well. And now I'm just going
to select all of our snow layers by holding
shift and clicking. I'm going to group these
with Command or Control G. We can go ahead and select
the entire group and move it around as we'd like. Maybe the snow is covering
the people in a bad way, so you want to clear some
space for their heads. But if moving it around
isn't solving the problem, we can always add a mask to this group to remove the
snow off of the people. So I'll just add a mask. Then I'll select
the paint brush, and I'm going to increase
the flow to 100%. With snow, it looks better
to fully remove it. If you only partially remove it, it can look a little strange. So I'm just going to paint
this off of our people. It's okay if the people
have some snow on them. I just want to make
sure that they look fully clear
in this picture. Alright, this looks so nice. With all of that finished, now we can go ahead and see the complete before and after. Adding snow just makes this
picture look so magical. Now that we know how to add
snow in the next video, we're going to learn how
to add stars to the sky.
20. Stars : This video, we'll learn how
to add stars to a photo. To practice, this time, we're going to use
a photo that's included in the courses
exercise files. Let's go ahead and use the Place Image tool to
select the star photo. Then we can go ahead and place
the stars into our photo. For the stars, we want to keep the bright white spots but
remove their dark background. I'm going to use the
screen blend mode. This already looks so good, but we need to do a
little bit of cleanup. First, let's remove the stars that are overlapping
with the mountain. I'll add a mask. Then using the paint brush, I'm just going to paint
to remove these stars. Another thing we
can do to clean up the photo is removing the
color from the star photo. The star photo has a little
blue spot over here, as well as just adding some
other colors into the photo. In order to keep the
original color of the sky, all we need to do is add an HSL adjustment
make this a child layer to the stars
and then lower the saturation, and that's it. Easy as that. Now, you can
see the before and after, just so we can keep the
original color of our sky. Another thing we can
do is we can add more stars into the
sky to do this. Let's just select our
star photo and then press Command or Control
J to duplicate it. By duplicating these stars, they look so much brighter. If that's the look
you want, then you can just duplicate it. But I actually don't want the
stars to overlap like this. I'm actually going to
use the move tool, all right click and then go down to transform, flip horizontal. This will flip the stars. Now you can see they're not
overlapping the same way. Now that I flipped
this, you can see some stars are overlapping
with our mountain again. I'm actually just going
to delete this mask. And I'll add a new one. That way we can make sure all of the stars are fully removed. I'll just quickly grab
the paint brush and I'll paint in black to
remove these stars. It looks like I painted a
little bit too much right here because you can't see
any of these misty stars. I'm just going to
switch my color to white to add that back in. With that, you can see
what it looks like now that we've doubled
the amount of stars. So pretty. Now I'll just
select both of these layers. You can see the complete
before and after. In some of these star photos, you might want to
make a selection of the sky and completely replace
it with a different one. But by keeping the original
sky and just adding to it, we can keep the photo
looking a little bit more realistic than a full
sky replacement. And now you know how to
add stars to a photo. In the next video, we'll
learn about adding fog.
21. Fog : This video, we'll learn
how to add fog to a photo. To begin, we'll download
some free fog overlays. You can find the
link to this page in the free resources PDF that's included in the
course exercise files. From here, just click
on Download now. Then you can go ahead and
click Proceed to checkout. Here, you'll just need to enter your name and your
email address, and then you can
click Place Order. Even though this
is totally free, the website will still
send you a purchase email, and I know these
freebies are a little annoying to download compared to the other freebies
in the course, but these ones are the best fog overlays that I could find. I think it's worth
it. Just so you know, this website will
try to send you marketing emails after
you make an account, but there's an
unsubscribed button at the bottom of their emails, so it's really not a huge issue. Okay, now let's come back
into Affinity Photo. Now that we have
the fog overlays, we can add one into our image. I'll press the Place Image tool, and then I'm going
to use number 19. You can probably guess which blend mode we're
going to use because we want to keep the bright fog but remove the black background. So let's go ahead
and apply screen. And just like that, we've
added some beautiful fog. Let's go ahead and
add a little bit more with the Place Image tool. I'm going to scroll down, and I'm going to select
number 214 Once again, I'll change the blend
mode to screen. And now you can see this
looks a lot stronger, but it's sort of a
different type of fog. So I thought it would be fun
to have two types of fog. So because this is a
little bit strong, I want to show you a
little trick you can use to reduce how
strong the fog is. I want to keep some strong fog at the bottom of the photo, but have less at the top, where you can see
our bird's head. So I'm going to add a mask. Then I'm going to grab
the gradient tool, and since I want the
fog to stay on the top, I'm going to click
from the bottom up. Where the mask is white, the fog is still fully
visible and where it's black, the fog is removed. Now we can see the before and after of this
additional fog. I think this looks really nice, but I'm going to
lower the opacity of our first fog just to make
it look more realistic. To finish, I want to really
sell this effect by lowering the photos highlights since a foggy morning like this
would have dull highlights. I'm going to select
our background layer and I'll place a curves
adjustment on top of that. Then I'm just going to lower this so the highlights
get darker. I'm going to bring this back
up to meet the curve line. Now you can see the
before and after. It's made our bird
a little bit more dull and I think it fits
the picture better. Another thing we can
add is a little bit of blue because this is a
cooler foggy morning. I'm going to add a white
balance adjustment. Then I'm going to lower this
slider to add some blue. You can place this where it is, or you can bring it
to the top if you want the whole photo
to become more blue. I think this looks pretty nice. Here's the before and after. And now I'll just select all
of our layers so that we can see a complete
before and after. What a beautiful,
mystical, foggy picture. Now that we know how to do this, in the next video, we'll learn how to add light
rays to a photo.
22. Light Rays : Let's learn how to add
light rays to a photo. To begin, let's download
some free light rays. You can find a link to this page in the free resources PDF. Once you're here, go ahead and
scroll down a little ways, and then you can
go ahead and click here on this first
download link. This will download
a zip file onto your computer after
you've unzipped it. Go ahead and come back
into Affinity Photo. Now that we've downloaded
the light rays, let's add one to this photo. I'll go to the Place Image tool and I'm going to
choose number ten. I'll just place this
into our image. Then we can change the blend
mode and you guessed it, we're going to use scream. All right. Now it's
time to adjust these light rays in
the original photo. You can see we have a
light source over here. It's very bright and it's
going in this direction. For these light rays, I
need to flip them around. A quick way to do this is
just to right click and then go down to transform,
flip horizontal. Now the light is streaming
in the right direction, but I think I want to tilt it a little bit by rotating it. There we go. Now that
angle looks right. Now, the light wouldn't be
overlapping with this tree right here because this tree
is more in the foreground. I'm going to add a mask
to the light ray layer. Then I'm going to grab the
paint brush and we can go ahead and paint away this
light from the tree trunk. I want it fully removed, so I'm just going to paint carefully right
along the edge to remove it. That's much better. Next, I want to recolor
the light rays. The original light in this
photo had a more golden hue. So to fix the light rays
and make them more golden, I'm going to use the
recolor adjustment. I'll make this a child
layer to the light rays. Now you can see it's only
affecting the light rays. I'm just going to change the
hue to a more golden color. Beautiful, and then I'll lower the saturation
so it's not so bright. This looks really pretty. Here's the before and after of that adjustment. So much better. Now, to really sell the effect, we can also make some
parts of the photo darker. For example, if light is
coming from behind this tree, then this tree should
look a lot darker. I'm going to add a
curves adjustment. I'll make sure it's
not a child's layer. There we go. Then I'm just
going to darken this. To make this so it's only
applied to the tree. I'm going to invert this layer
with Command or Control I. Then using the paintbrush, I'll paint in white paint on this black mask to reveal
this darkness over the tree. You can also add a little bit
on this side if you'd like. I think that looks pretty nice. For some extra fun, we can add a little bit of
fog to this photo. I'll go to the Place
Image tool and we can go ahead and
select one of the fogs. I'm going to use number eight to apply fog just to the
bottom of our picture. Then I'm going to change
the blend mode to screen. And I'll go ahead and
lower the opacity, so this is a very subtle effect. Now, right now,
this fog is white, but I wanted to have
the same yellow color that we just gave
our light rays. So I'll go into the fog group. I'll select this
recolor adjustment, and I'll duplicate it
with Command or Control J then I'm going to take this free color adjustment and make it a child
layer to the fog. The fog has more
of a golden color. As just one finishing touch, I'm going to add a
curves adjustment, and I'm going to make the
shadows deeper overall. With all of this added light, the shadows are
getting pretty light, but by darkening this, you can add some much needed
contrast to the photo. I'm darkening the
shadows and then bringing the highlights
back up to meet the curve. I think this looks really nice. So now you can see the before and after of
those darker shadows, and I'm just going to
select all of our layers. So you can see a complete
before and after. We took this nice
normal forest photo and made it super magical. I think this looks great. In the next video, we're going to learn how to make sun bursts, which sounds similar
to light rays, but it's actually even easier and it's just
a different effect. I'll see you in the next video.
23. Making Sunbursts : This video we'll learn
how to make sunbursts. Now, unlike the light
rays in the last video, we can actually make sunbursts
completely affinity photo. No overlays needed. To make a sunburst, let's go ahead and start by
selecting the Ellipse tool. If you don't see it
here, just click on this little gray triangle and then you can go
ahead and select it. I'll hold Shift as I click and drag to create a perfect circle. Now to get the colors
of the sun but right, I'm going to select
the gradient tool and I'm going to go
to the center of the circle and click outward. Then we can go ahead
and change the colors. So I want it to be white in the center and go out
to an orange color. So with this black
color stop selected, I'm just going to change
this color to orange. Also, I want the orange to go all the way
around the circle, not just in one direction. We can go ahead
and go up here to type and change this to radio. Perfect. With that all setup, we can go ahead and change
the blend mode to screen. Now you can see this ball of light is brightening everything
that's underneath it. To blend this even
better with our photo, we can blur this ball of light. You can go ahead and go to FX, or you can go to the filters
and apply a Gaussian blur. Either way works just fine. But I'm just going to click
on the FX for this one. Then I'll click
on Gaussian Blur, and we can go ahead
and increase this. This is pretty good,
but not quite enough. So I'll click in this box
and type in 500 pixels, and then I'll press Enter. And you can see now
this is much fuzzier, and I think this
looks really good. So now we can close out of
this and select the move tool. We need to decide where
to place this ball of light in this photo, it's hard to tell where
the sun is coming from. But if you look at the picture, we know the light is coming from this top left area because the sun is shining on
that side of her body. I think this building is
just in the way of the sun. We can go ahead and
place this ball of light right up
here in the corner. I can resize it while
holding Shift to make it a little larger. There we go. And now we have a nice
ball of light up there. Now, this is just phase one. If you really want to
enhance this golden glow, you can duplicate this sunburst circle a few times to
cover the whole photo. With this layer selected, I'll duplicate it with
Command or Control J. Then while holding Shift, I'm just going to
make this a lot larger to cover up
more of the photo. Then I'm just going to lower the opacity to
make this one more subtle and we can go ahead
and do that one more time. Command or Control J. I power duplicated to
cover the whole photo, and that's actually
what I wanted. I'll just place it so it's really covering the whole thing, and then I'll lower the
opacity even more. All right. And with that, now we
can go ahead and see the before and after
of our sun bursts. After adding in
all of that light, our photo is starting to look a little bit faded and washed out. So as one final step, I'm just going to add a curves
adjustment so that I can add a little S curve to
add contrast back in. Raise the highlights,
lower the shadows. I think this looks really nice. Now we can go ahead and see the complete before and after. And now you know how to create your very own sun verse to create this beautiful
golden light effect. In the next video, we're going
to do the final effect of this chapter as we learn how to create a neon light effect.
24. Neon Light Effect : In this video, I'll show you how to make the
neon light effect. Just like in the last video, we don't need any
special overlays. We're going to create our neon just by using the shape tools. To begin, let's make a
circle that we can use. So I'll just select
the Ellipse tool. And then I'm going to click and drag out a flat
circle like this. For this circle,
I want it to have a white stroke going
around it and no fill. So I'm going to click right
here to make the fill, none, and then I'll click on the stroke color,
and I'll make it white. Then we can go
ahead and increase the stroke up here in
the Context tool bar. With that all set,
we can go ahead and add some layer
effects to this circle. I'll go down here
and click on FX. Then we can go ahead and
add two different effects. First, I'm going to
add an outer glow to create some fuzzy lighting
around this neon circle. Let's go ahead and increase the radius to create
that fuzzy lighting. I think this looks good, but I'm going to increase this to 250 and then I'll press Enter
to make it extra fuzzy. Then I'm going to
change the color. Here's where we get to choose what color the neon will be. Looking at this picture, I
can see we have a lot of orange colors in the background and her skin has
orange tones in it. To contrast that, I'm going to look at our
color wheel and go to the color orange and then go straight across from that
to choose the neon color. You can use the color
wheel in this way, going to the opposite colors anytime you want to
add extra contrast. I'm just going to drag this around to create
that blue color. Luckily for us, by default, the outer glow effect uses
the screen blend mode, which looks really good for brightening everything
up in this outer glow. The second layer
effect I want to add is just a little
bit of blurring. The circle looks very
sharp right now, but if we blur it
just a little bit, I think it will look
more fuzzy and natural. Okay, with that finished, we can go ahead and
use the move tool to adjust how our
circle is positioned. I'm going to tilt mine
just to make it a little fun and I'll bring
it up a little bit. Okay, now that we have
our circle all set up, we can go ahead and
mask the circle right here to remove it from
overlapping her head. I'll just click on
the mask button, and then we can go ahead
and paint to remove this. I'm going to change
my color to black, and then we can go ahead
and zoom in and paint. Right now, my flow
is a little low. I'm just going to increase
that all the way. And with the edges looking good, I'll just use a larger
brush to remove the rest. Now that the neon circle
is looking great, it's time to add some light
reflected onto our model. But before we carefully
paint on light and color, I want to see what blend
mode we should use. So just to experiment, I'm going to add a
new pixel layer. Then I'm going to choose
a blue paint color. And I'll just roughly
paint this over her face. Now we can take a look at
the different blend modes to see which one we should use. If we use multiply, that looks way too dark. It's not reflecting
some nice bright light, so that one doesn't work. If we use screen, it is
reflecting a lot of light, but we're losing a lot of
her features underneath. Overlay is probably
the best so far, but it still looks pretty dark. So I think I'm actually
going to use soft light. You can see that this has
the blue light on her face, but we can still
see some brightness and we can see her orange
skin tone coming through. So now that we have that setup, I'm just going to delete this pixel layer and
I'll add a new one, and then I'll set
it to soft light. So now, as I paint, we'll add blue color
onto her face, and I'm just going
to lower the flow. That way, I can gradually
add this color. So first, I'll just
do an even wash of this color over her face. Then with a smaller brush, I'm just going to add
extra onto one side. Then I'm going to add this
onto her shirt as well with a larger brush and then
with a smaller brush, I'm just going to add this to
some of the lighter areas. By adding this color, especially
to the lighter areas, I think this just makes
it look really nice. Now that she has
the right colors, it's time to add a little
bit more light to our model. I'm going to add a
curves adjustment, and I'm going to
brighten this up. I'll just invert this
layer with Command or Control I and then
using white paint, I'm going to add this
brightness onto our model. So first, I'm just going
to take a larger brush to add a little bit more light
to our model in general. Remember to use a
low flow for this. We don't want her
to become really, really bright, but just a little added brightness
will look good. And then with a smaller brush, I'm going to enhance some of the highlights that our
model naturally has. She naturally has more light
on this part of her face. So while adjusting
my brush as I go, I'm just going to brighten
those areas of her face. Then I'm going to do
the same for her shirt. So we already painted
on these wrinkles. Now we're going to paint
light on these wrinkles. So any light areas you see, just add a little
extra light to them. And now that we've done that, we can see the before and
after of adding this lighting. And I forgot to show you, but here's the before
and after of the color. These have both made such a
big difference to make it look like she's really in this picture with
the neon around her. So to finish this effect, I actually want to
darken everything around our model to make her
stand out even more. So I'm just going to add
a curves adjustment, and I'll make this
nice and dark. I'll invert this with
Command or Control I. And then I'm going to
use a larger brush to paint this around the
edges of our photo. And now here's the photo
with that darker ambience. I think this looks really nice. I'm just going to select all of these layers so we can see the final before and
after of this effect. And now you know how to
create the Non Light effect. Great work with this video
and with this chapter. In the next one, we're
going to learn about how to use blend modes
for graphic design.
25. Creative Text Ideas : This chapter, we'll learn
how to use blend modes in graphic design and
to start things off. We're going to
learn some fun ways to enhance text
with blend modes. So just to start off, I'm going to grab the
artistic Text tool, and I'll click and drag
to make some text. Then I'll just
grab the move tool so that we can change the font. I'll change it to RL black, so it's nice and bold. Then I'll just center
this in our document. Now we can change the
color of our text. I'm going to use the
color picker to do this. As a tip, as you click and
drag on this color picker, you can actually pick
any color you want. I'm going to go up here and use the magnet icon for
this color red. Then I'll click here to
apply it to our word. That's just a random tip. If you see a color on
this screen you like, go ahead and use the color
picker to capture that color. Now that we have our text, I'm going to add a
rectangle to it. I'll click and drag it, so it's overlapping
with half of our text, and then I'm going to
change the color of this rectangle to a
nice contrasting color. To make this rectangle
blending with our text, we can use different
blend modes for this. But what blend mode
should we use? When working on photos, we used multiply,
screen, and overlay. But is it still the same
for graphic design? Well, yes and no. These blend modes are still very important in
graphic design. But when it comes to art, things are a little
bit more flexible. For a design like
this, you can just scroll through these blend modes until you find one
that you like. And if you want to
quickly do this, there's actually a keyboard
shortcut you can use. If you hold Shift and then click on the plus
or the minus keys, you'll be able to
quickly go through different blend modes to
see which one you like. Okay, so this is one way
to design your text, but we can go ahead and
see another example by holding Shift to click
both of these layers. Then I'm going to duplicate
them with Command or Control J. I'll just move these out of the way and we can go ahead and
work on this one again. Another way to play
with blend modes is to make your shape a
child layer to your text. Then you can go ahead and play around with this rectangle. Maybe you only want some
of the letters to have this or maybe you want to fully cover a
few letters like this. From here, you can go ahead and change the blend
mode however you'd like. Okay. Let's do one more example. I'm just going to select this group and I'll press
Command or Control J, and then I'll bring
this to the bottom. Let's keep working in the
center just so it's easier. With this group, I'm
actually going to open it up and delete
this rectangle. Then I'm going to duplicate this text with
Command or Control J. For this duplicate copy, I'm going to change the color
to that nice blue color. Then I'm going to
change the blend mode. I think linear Bron looks
pretty good for this effect. Now to play up the effect, all we need to do is press the down arrow key on
our keyboard 20 times. Then we need to move it
to the right 20 times. But if you want to
do this faster, you can hold down
Shift and then press the right arrow key to move
it ten pixels at a time. All right. And now you can
see what that looks like. Since we used blend modes, we can change the
color of any of our layers to play up how
these combinations look. So just to show you, I'm going to change the color of this one, and you can see how this
changes our letters. I'll do it to this one, too, so we can see what
this looks like. And now you know a
few ways that you can use blend modes
for text designs. In the next video,
I'm going to show you great ways to add texture
to your graphic designs.
26. Adding Texture : This video, I'll
show you how to use texture to enhance your designs. To begin, let's download
some free textures. You can find the
link to this page in the free resources PDF that's included in the
courses exercise files. From here, just scroll down a little ways and then click
on the Download button. This button will
download a zip file onto your computer and after
you've unzipped it, you can go ahead and come
back into Affinity Photo. Now that we've
downloaded our textures, we can add one to this design. I'll go to the Place Image tool, and then I'm going
to select number one I'll click and
drag to add this, and I can see it's going
the wrong direction. I'll hold Shift as I rotate it, and now we can go ahead and cover the whole
design with this. Because I want to keep
the white speckles but remove the black background, I'm going to change the
blend mode to screen. I like how this texture
makes our design look, but now the design is a little bit brighter
than I wanted. I'm just going to go to the adjustments and apply
a curves adjustment. Then I'll just darken this
to make it look as dark as it originally was. All right. There we go. And now we
can go ahead and see the before and after of adding
texture to this design. I think adding texture is such a great way to make designs look even
more interesting. Let's see another example
of using texture. I'm going to select
our texture layer, and then I'll press Command
or Control C to copy it. I'll go to our other
exercise file, and I'll press Command or
Control V to paste it. Now I'm just going
to rotate this, so it fits our document. So I'll hold Shift to lock
it in place like that. Because this was copied
from our other document, this layer is still set
to the screen blend mode. I'm just going to make this a child layer to
our text like this. And then I'm going to duplicate this to make the
effect even stronger. So Command or Control
J a couple of times. And now you can see
what that looks like. To get extra fancy
with our text, we can combine this with one of the techniques that we
learned in the last video. I'm going to add a
rectangle to this text, and I'm going to make sure
this is a child layer. And then I'm just going
to change the color. From here, we can go ahead
and adjust where this is positioned and we can change the blend mode
of this rectangle. There are some really
cool ones in here. I think I'm going to go
with screen this time. And now that we've
chosen our blend mode, I think I'm just going
to make my color a little bit more dull so you can see the text a little bit better, something like that. So that's one technique of how you can use
texture with text, but I have one more texture technique that I
want to show you. I'm going to press
Command or Control Z until we can get back to the beginning of what
our text looked like. To start this technique, I'm going to add a fill layer
to our entire document. I'll go to the top of the
screen to layer new fill layer. I'm going to place this
layer underneath our text, and then I'm going to sample this red color and I'll
apply it to our fill layer. Then I'm going to paste the texture that
we had just used. It should still be
in our clipboard. Press Command or Control V. Now we can go ahead and rotate and
reposition this texture. As you can see, this creates kind of a cool effect where the texture is only
applied to the background, so our text still stands out. Now, if you want the
text to stand out a little bit better so
it's easier to read, you can always change
the color of our text. But what if you wanted to
add the texture to the text? Well, we can go
ahead and duplicate this texture layer with
Command or Control J. And then we can make it a
child layer to our text. But as you can see,
nothing is happening. Here's the before and after, and that's because
this white texture is not going to show
up on white text. Instead, we can go ahead and
use the multiply blend mode, and now you can see the texture. But if you want your letters to stay white, this
doesn't really work. So instead, we can actually invert this
layer with command or control I so now you can
see the letters stay white, but the texture becomes black. That's just a little
workaround if you want texture on white
text like this. Now that you know a few
techniques for playing with text and you know
how to add texture, we're ready to start one of our final projects
in the next video.
27. Project: Cool Party : Let's make an invitation
for a cool party. This will be a fun
way to practice blend modes and a ton of
other great affinity skills. As part of the invitation, we're going to use
these smoke textures from resourceboy.com. And like all of the other
freebies we've used, the link to this page is
in the free Resources PDF. Go ahead and download
these textures, and then I'll meet you
in Affinity Photo. To begin this project, I've made a document
that's 2,700 pixels wide by
4,000 pixels tall. You can use whatever
size document you want, but I just thought I'd tell you that's what I'll be using. To begin, let's create a really beautiful
dynamic background. To start, let's add some color. I'm going to go to the top of
the screen to select layer, and then I'll go down
to New Fill Layer. Automatically, the gradient
tool will be selected. With this, go ahead and click and drag from
the top to the bottom. I'm going to leave
the bottom black. I'm just going to click on
this top white color stop so that I can change its
color to a purple color. All right, so now we
have our color set. So let's add some textures. First, I'm going to go
to the Place Image tool, and I'm going to
choose number 34. I mostly want the smoke to be in the purple area of our document. So I'll click and
drag like this. Then to remove the
black background, I'm just going to change
the blend mode to screen. This already looks so nice. But I want this to be a
little bit more subtle. That way the text that we
add later will be very readable to help blend
this into its background. First, I'm going to
change the color of the smoke to a purple color. I'll go to our adjustments and I'll apply a recolor adjustment. I'll click and drag
this on top of the smoke layer so that
it's a child layer. Then I'll change the
hue to a purple color. With that finished, next, I want to add a blur
to our smoke layer. I'll make sure to
have that layer selected and then
I'll click on the FX. I'm just going to add a blur to this smoke, something like this. Then I'll close out of this. This is a really good
start to our poster, but I think I want to add
a little more texture. I'll go back to the
Place Image tool. This time, I'm going
to choose number 19. I'm going to add this smoke, it covers this corner
up here in smoke. I'll just click and drag until there's smoke
in that area. Then I'll change the
blend mode to screen. Then we can go ahead and add some effects to this
to make it blended. To start, let's add another recolor
adjustment to this one. I'll make it a child layer to the smoke and then
I'll change the hue. Next, I want to blur this smoke. And as a really fun trick, I just want to show you that
you can click and drag on any layers effects and add
them to another layer. Now this smoke is just as
blurred as our other smoke. Okay, I just have one more
texture I want to add, and that's a film grain texture. I'm going to use the
first film grain texture, and then I'll press Open and I'll just add this
into our document. Right now, it's being placed as a child layer to our
other smoke layer. I'll just click and drag
this on top of everything, and now we can adjust
how this looks. Because this has a
black background and I want to keep
the white speckles, I'm going to change the
blend mode to screen. I really like how the texture looks at the top of the design, but toward the
bottom, it looks a little intense on this
black background. To make this more subtle, I'm going to add a
mask to this layer. Then I'm going to grab
the gradient tool, and I'll just click from
the top to the bottom. This has made it, so our
mask is white at the top, so it's fully revealing that film grain and
black at the bottom. So the film grain
fully disappears. But I actually don't want it to be fully removed down here. Instead, I'm going to make sure this color
stop is selected, and I'm going to change it
from black to 50% gray. That way, we can see some of
the film grain down here. It's just not quite as
intense as it originally was. Here's the before and after
of adding that gradient mask. We've come really far
in our project so far. Now it's time to add some
text into our document. I'm going to grab the
artistic Text tool, and I'll begin by adding a little bit of text
up here at the top. I'm going to type out
Affinity revolution. Then with the move
tool selected, I'm going to make sure we
have a nice bold font. It's actually already
set to the font I wanted, REL black. Then I'm just going to
make this text white. And I'll make it a bit smaller. Now, these letters look
pretty close together, and I'd like to fix that. An easy shortcut
to fix spacing of letters is to have the
move tool selected and then hold down Alt or
option and then use the arrow keys to decrease or increase the
spacing of the letters. All right. This
looks really nice. So I'm just going to make sure this is centered
in our document, and then we can go ahead and begin with our
next line of text. I'll press Command or Control
J to duplicate this text. Then I'll drag it down. To edit this text, I'll triple click on it, and I'm just going
to type present. Then I'll select
the moveTol and I'm just going to change the
font to a simpler font. And I'll make sure this is nice and centered in our document. Okay, we're done with the top. So now let's add some
text to the bottom. I'll duplicate this with
Command or Control J, and I'll drag this
toward the bottom. I'll triple click
to edit the text, and I'll just type in
a date for our party. Then I'll make this larger. This looks good to
me in this font. I'm just going to
grab the move tool and I'll press Command or Control J to duplicate this
text. I'll drag it down. I'll triple click
and we can just type in some more
information about the party. For this text, I'm just going to grab the move tool
and I'm going to unbold it just to create a little variation
between the text. All right. I have one more
line of text four down here. I'll press Command
or Control J to duplicate this, and
I'll drag it down. I'll triple click, and then I'll type in a
little bit more text. I'm just going to shrink this down, so it's nice and small. And I'll place this
at the bottom. All right. This all
looks pretty nice. I just want to add one
more detail down here. I want to add a little
line going from here to here to divide these
two pieces of text. We can do that using the Pen
tool. So I'll select that. I'll hover right here, so it lines up with the
edge of this text, and then I'll click to
lay down the first point. I'll hold Shift to keep this
a perfectly straight line, and I'll line it up with the
end of this line of text. Over in the color panel, I'm just going to
change this to white. And then we can
adjust the width of our stroke in the
context tool bar. With this all finished,
I'm just going to grab the move tool so I can make sure everything is
centered in our document. You can see this green
line keeps appearing right here saying
that it's centered, but this is not the
center of our document. I'm wondering if
it's trying to line up with some of our
backgrounds down here. I'm going to hold
Shift to select all of these and then I'll
group them with Command or Control G. Then I'll lock them
so I can't move them. Now let's see if that helped. There we go. Now it's lining up with the
center of the document. Okay, I just wanted to
take a little bit of time to clean up the positioning
of all of the text, and now we're ready
for the main event. I'm going to add the title of the party to the center
of our document. I want the font of this large
text to be big and bold. I'm going to use this font that we used for the
beginning of our text. I'll press Command
or Control J to duplicate this and I'll
drag it down here. Then I'll triple click and we can go ahead
and type our text. I'll grab the move tool, and I'll make this
quite a bit larger. Now, this text is still spaced the way we spaced
the letters up here. I actually want to fix this. So I'm going to
hold Alt or option, and I'll use the left arrow key to make the text closer again. All right. This
looks pretty good. I'll just duplicate
this with Command or Control J. I'll drag
this down here, I'll triple click, and I'll just change this so it says party. I'll use the move tool. And for this second word, I'm going to shrink it down so it fits in the width
of the word cool. Alright. Now I'm going to
change how the text looks. I want this to look
really cool and bold. So there's a few things
I want to change. First, I'm going to add a gradient to each
one of these words. So I'll select the
gradient tool, and I'm going to click from
the top to the bottom. I'm going to keep the top white, but I'll change the bottom
to a nice purple color. And I'll make it a
little bit lighter. Then I'm going to do the exact
same thing for this text, so I'll select its layer. And with the gradient tool, I'll go from top to bottom, changing the bottom color stop to this light purple color. It's actually been
stored over here, so I can just click that now our words have the
exact same gradient. Next, I'm going to hold Shift to select both of the
words at the same time. Then I'm going to get out
a shape tool so that I can access the stroke option up
here in the Context tool bar. I'm going to change the stroke, so I'll just make this a
little bit larger like that. Then I'm going to change
the stroke color right here and I'll make it
a little bit lighter. This stroke looks really
nice on these letters. To finish off these effects, I'm going to click on
the FX down here so that we can continue to
make these words pop. First, I'm going to add an
outer glow to these letters. I'll increase the radius. I really like that glow. Maybe I'll just make it
a little bit bigger by typing a larger number
and then pressing Enter. Then I'm going to change
the color to purple. I don't want it to
look white like this, so I'm just going
to change it to a similar purple color.
And I'll make it lighter. Okay, this looks a
little too intense. I'm going to lower
the intensity slider and the opacity slider. Okay, I think that's the
look I was going for. Here's the before and
after of that effect. Next, I want to add an outer
shadow to our letters. Outer shadow can help separate our text
from the background. So to do this, I'm just going
to increase our radius. I'll raise the offset. And I'll raise the intensity. Now you can see this is more separate from
the background. Here's the before and after. I think this has
made the letters a lot more easy to read. Okay. And with that, we can go ahead and adjust how anything is
positioned if we'd like. You can hold Shift to select multiple layers in your
document and move them around. And I think this
looks really great. As a finishing touch, if you click on the very
top layer of your document, you can always add an HSL
adjustment to the very top. Then you can change the colors however you want
using the hue slider. Very nice. Here's the before
and after of that change. And with that, we're
done with this project. Blend modes are so great for creating dynamic and
beautiful backgrounds. And with all of the textures and overlays that we've collected
throughout the course, there's definitely
plenty of options to find a background that
works with your projects. In the next video, we're going to work on the
final project of this course to make a
beautiful flower shop flyer.
28. Project: Grand Opening : This video we'll make a flyer for the grand opening
of a flower shop. And since we used
blend modes for a cool design in the last video, I thought we'd mix
it up this time and do the project
in a vintage style. And for this project, we'll use these textures
from resourceboy.com. Just like all of
the other freebies we've used throughout
this course, there's a link to this page
in the free Resources PDF. Go ahead and download
these textures. To begin the flyer, I've made a document
that's 4,000 pixels wide by 2,700 pixels tall. You can use whatever
size document you want, but that's what
I'm going to use. To begin, let's work on the
background of our design. I'm going to use the
Place Image tool. Then I'm going to
select number 16. I'll open that. I'll just zoom out so I can click
and drag to add this. Then I'm going to rotate
this while holding Shift. I'll line it up in
one corner and I'm actually going to stretch this to fit our document like this. This is a really good
base for our design. But next, I'm going to add another overlay to make this
look even more vintage. If you remember from
earlier in the course, we had a whole video
to make a photo look vintage and we can use these
same effects on this flyer. I'm going to use number four. And then I'll just click and drag to add this
to our document. I'll stretch to fit
this one as well because I want to keep all of the detail that we have here. Then I'm going to
change the blend mode. I want to keep the dark
and light parts visible. So I'm going to change
this to overlay. This looks really cool, but it might be a little bit distracting for our text
that we'll add later. So I'm just going to
lower the opacity of this vintage overlay to
make it a little softer. But you can still see some of that interesting
detail coming through. Here's the before and
after. All right. Now that our
backgrounds all set, I want to add a few
other graphic elements. This will be a flyer
for a new flower shop. So I want to add some
flowers to this flyer. I included the
flowers that we'll be using in the course
exercise files, but I also want to show you
how I found the flowers. To find these flowers,
I used pixabay.com. All you need to do is search for flowers, then press Enter. But you can see,
as I scroll down, these are all photos. I don't actually want photos. So up here in our filters, I'm going to change it from
all images to illustrations. I'm also going to
change the color. I want all of these to have
a transparent background, so I'll check that on and
then I'll press Apply. Now as I scroll down, you can see all of
these flowers have transparent backgrounds and
they're only illustrations, which makes it a lot easier to find the flowers
that we want. Here it is. These
are the flowers that I decided to use
for this project. All you need to do once you
find it is click on it, and then you can
download it for free. So now that we have our flowers, I'm just going to go to
the Place Image tool and I'm going to select the
flowers and open them up. And I'll just place them
right here in our document. I want this to blend
into the background. I'm going to change the
blend mode to overlay. Not only is it showing
the background more, but it looks like it's golden and I think
that looks so pretty. Now that we have
that graphic detail, I want to add one more by
adding a frame to this flyer. I included the frame
in the exercise files, but here's how I found it. Once again, I went to
pixabay.com and I just typed in Vintage frame,
then press Enter. Again, make sure you change
it from all images to illustrations and then change the color to have a
transparent background. Now you can just scroll down to see all these
beautiful vintage frames. I scrolled for quite a while
until I found this frame. This is the one we
ended up using, so I just clicked on
it and downloaded it. So now that we know
how to find the frame, we can go ahead and place
it in our document. I'll just use the Place Image
tool and I'll select it. Then I'll click
and drag this out. I'm going to rotate this
while holding Shift, so it stays nice and straight. Then I'll line it up with one corner and I'll stretch it so it fits the
rest of our document. Now, this looks okay, but it's really
close to the edge. I'm just going to
make this smaller. Then I'm going to center
it in our document. I think this spacing
looks a lot nicer. Now that we have even
spacing on all sides, we can go ahead and blend our
frame into the background. So let's go ahead and choose
a blend mode for this. Here's multiply. That looks okay. We
could try screen. That definitely doesn't look
good and maybe overlay. Because this design is yellow, I think the colors are
making this look strange, but I did think
multiply looked best, so I'll click on that one. To remove some of this
strange yellow color, I'm going to add an HSL
adjustment I'll make it a child layer to the frame and then we can remove
the yellow color. With the yellow color removed, that's better, but now
there's no color at all. To fix this, I'm going
to select our frame, and I'm going to
change the blend mode. Instead of multiply, I'm
going to use color burn. Color burn is very
similar to multiply. It just makes colors
more intense. It's not as common as multiply, but in this case, I think
it looks pretty nice. With that all set, I'm just
going to lower the opacity of this layer until it looks similar to the
flowers that we have. Okay, that looks so good. Those both look really pretty. Now it's time to add
text into our document. Also like the text tool, and then I'll click
and drag so we can add our first word, which is grand. With the move tool selected, I'm going to change the font
to something old timey. You can use whatever
font you want. Once you find your font, we can go ahead and adjust
the size of this and place it then I'm just going to duplicate this with Command or Control J. I'll drag this down. I'll triple click in here and we can change
this to say opening. I'm just going to
shrink the size down so it matches the
width of the word grand. I think that looks pretty nice. Also like the move tool and duplicate this word with
Command or Control J. Then I'll move this down. I'll triple click in here and now we can type
the date of the event. Also like the move tool, and this time, we can
choose a simpler font. I still want it to be old timey and sort of look
like a typewriter. There we go. I think
this looks pretty nice. I'm just going to
shrink this down. And then we can go ahead and duplicate this with
Command or Control J. I'm just going to continue to do this to add
a few more lines of text. And each time, I'm
going to shrink it down to match the width
of the line before it. Okay. With all that typed up, I'm going to select
the move tool just to make sure everything's
spaced out nicely. To divide this text, I'm going to add a
line right here. I'll grab the pen tool. Then I'm going to line it up with the edge of the text here. I'll click, I'll hold Shift and line it up to
the end of this text here. And now we have a little
line to separate our text. For this line, I'll
go up to adjust our stroke and I'll
make this wider. Then I'm going to change it from a solid line to a dashed line. I'll come down here to
change the settings. For the dash in the line, I'm going to make it a
little smaller by typing 0.5, then I'll press Enter. And then I'm going to make
this space of our line bigger by typing two and
then pressing Enter. This looks pretty nice. I think I'm just going to
increase the width a little bit more. Very nice. Alright. With all
of our text added, it's time for some
finishing touches. I'm just going to group all
of these text layers that we just made by holding Shift
and clicking on the last one. Then I'll press Command or
Control G to group them. Using the Move tool, we can go ahead and
move the position of this to line it up nicely. I want this space over here to be similar to the
space over here. So I'll just click to select this flower and I'll
move it over a little. I think that spacing
looks really nice. To finish, we just need
to adjust the colors. So I'll select the text group, and then we can change
the color of our text. I want this to be a
light brown color. I'm actually going to sample
the color of our flowers. This is hard because there's
a lot of colors in here. So just try your best to
find a nice color for this, and we can always
adjust it more. I'll click that to apply it, and then I'll make
it a little darker. Okay, that looks pretty good. This text is also
fully solid right now. To blend it better
with the background, I'm going to change the
blend mode to multiply. So now you can see the
texture through the text. You can also lower the opacity to make this even more obvious. Okay, you might have
noticed as I recolored our text that this line
didn't get recolored. I'm just going to double
click to select it. So we actually changed the
fill color of everything, but the line has a
stroke and no fill. So I'm just going to click on this arrow to flip the colors, and now you can see the
line is the right color. To finish everything off, I'm going to select
our top layer and I'm going to add a curves adjustment
on top of everything. I'm going to make
a little S curve to make everything pop better, and now I think we're done. Here's the before and
after of that S curve. Great job on this final project. I think this turned out so cute. I'm really excited to go
to this grand opening. Great job on this final project.
29. Conclusion: Congratulations. You
finished the course. I know that was a lot to learn, but now you're a
blend mode master. Thanks so much for watching, and I'll see you in the next Affinity
Revolution Tutorial.
 Affinity Revolution, Affinity Instructor