Transcripts
1. Class Introduction: Adjustment layers are the bread and butter of Affinity Photo. They allow you to edit the color and lighting
of your images. But with so many to choose from, it can be hard to know
which ones to use. In this course, we'll take a deep dive into all of
affinities adjustments, all 23 of them. By the time you
finish, you'll know exactly how every
adjustment works. But even more
important than that, we'll learn when and why you should use one
adjustment over another. When should you
use levels versus curves or color balance
versus selective color, or even posterize
versus threshold. We'll learn the pros and cons of every adjustment so you can know exactly
which ones to use. But before we jump
into affinity, I want to mention that
this course comes with some important
exercise files. I encourage you to download these files because
practicing what you learn is the best way to retain all of the new
skills you'll be learning. You can download those files
in the next lesson and then we'll jump right into the
adjustment layer master class.
2. Download the Class Files: Before you begin this class, I recommend you download
the exercise files. These files will be necessary for you to
follow along with the tutorials to
download the files, come to the project
and resources tab. Then click on the Download Link. The files will
then be downloaded to your computer and you'll be totally prepared to follow along with the
rest of the class.
3. Right vs. Wrong Adjustments : To begin the course,
we need to lay some groundwork information
for this lesson, I want to talk about the right versus the wrong
adjustment layers. I've been teaching people
how to use affinity photo for a long time and
over the years, one of the most common
things beginners want to know is if they're doing something the
right way Honestly, that's a totally
understandable question. But the problem is, there's no right or wrong way to
do things in affinity. While working in affinity,
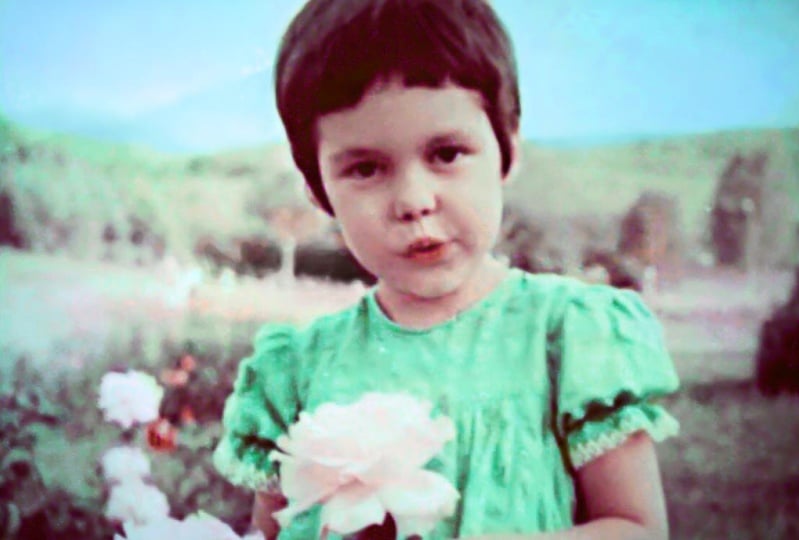
you're creating art, whether you're editing
a family photo, a beautiful landscape, or
a professional portrait. These are all forms of
artistic expression, and when it comes to art, there's not a right or
wrong way of doing things. All of these paintings were
done by very skilled artists, and it would be silly
to say that one of these artists was making art the right way while all of the other artists were
making art the wrong way. The same way, there are many ways to make
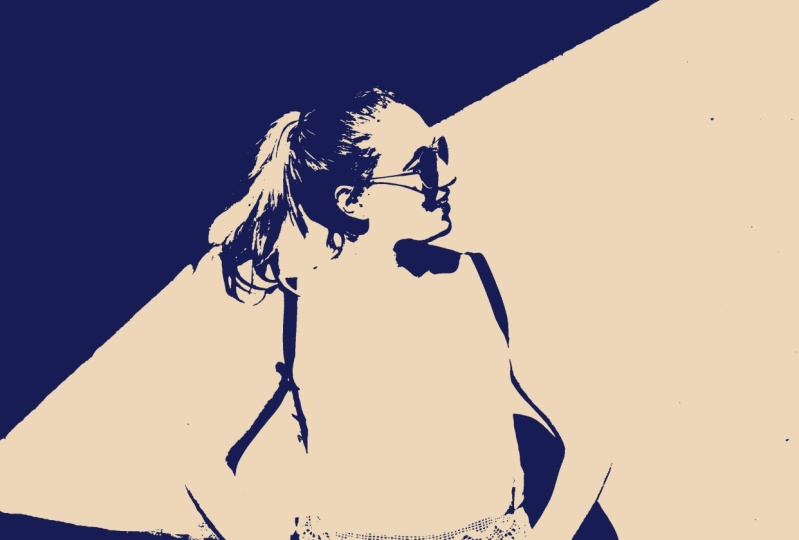
art in affinity. As an example, let's say you
want to brighten an image. Well, in that case, you
could use levels, curves, exposure, brightness
and contrast, or shadows and highlights. All of these adjustments
can brighten a photo, but which one is the
right one to use? Well, none of them. They can all be used to
create wonderful photos. But coming back to
our painting analogy, just because all of
these are valid forms of art doesn't mean you can't
have a personal preference. Personally, I like the woman
with a parasol painting the best because I think the flowy brushstrokes and
the lighting are so pretty. The same goes for
adjustment layers. Just because all of these
can brighten an image, that doesn't mean I don't have a personal preference for
which one I like the best. Throughout this course, I'll explain how to use all of
the adjustment layers in Affinity Photo and then I'll also tell you which
adjustments I prefer using. These lessons are
titled Does Allie use Blank with the name of the adjustment
layer in the blank. During these lessons, I'll tell you whether or not I like to use that specific adjustment and why or why not, I
like to use it. Maybe you'll agree with my
reasoning or maybe not. Either way is totally fine. My only hope is that you'll have a greater understanding
of why or why not, you'd want to use
each adjustment so that you can discover which
ones work best for you. Now that we understand that, I just have one more
introductory lesson for you. We'll learn some
important color theory in the next video and then we'll jump
into affinity and start looking at all of
the adjustment layers.
4. RGB vs. CMY : This video, we'll learn
about RGB versus CMY. Of these two, you're probably
most familiar with RGB, which stands for red, green, and blue, but you might not
be as familiar with CMY, which stands for cyan,
magenta, and yellow. These six colors are
very important in photo editing because
they're opposite. Red is the opposite of Cyan, green is the opposite of magenta and blue is the
opposite of yellow. But what exactly does that mean? What's the opposite of a color? To see what this means, let's take a look at the
most common opposite colors, black and white. In this gradient,
the color goes from completely black to
completely white. But because these
colors are opposite, there are two special
things to notice. Number one, the colors
cancel each other out. If you look in the very
middle of the gradient, the color is pure gray. That's because opposite
colors will always cancel each other out
and form pure gray. Number two, I want you to notice how black and
white affect each other. As you move from one side of
the gradient to the other, you will always
affect the amount of black and the
amount of white. You won't affect one without
affecting the other. For example, take a look at this color compared
to pure black. You could say this color is more white or you could
say it's less black. Or take a look at this color
compared to pure white. You might say it's less white or you might
say it's more black. Either way, you're
saying the same thing. That's because black and
white are opposites, so they're always
connected to each other. Now let's come back
to the topic of this video, RGB versus CMY. In this image, I
want you to look at the center of each gradient, just like with the black
and white gradient, the center of each of
these gradients is gray. That might look strange because the left and right sides of
the gradients are so vibrant. But remember, opposite colors will always cancel
each other out, eventually leading to gray. But even more importantly, I want you to see how
these opposite colors are connected to each other. In this example, we have
the whole color wheel, just like you'd find in the color panel of Affinity Photo. As an example, let's say you want to make your
color more cyan. You bring your color
over to the left. At this point, you could
say your color has moved more into the can
side of the circle, but you could also say
that your color has moved farther away from the
red side of the circle. If one of those
statements is true, the other has to
be true as well. And of course, the
reverse is true as well. If you move the color to the
other side of the circle, you could say you've
moved it towards red, or you could say you've
moved it away from Cyan. Both are completely true and
it would be impossible to do one without doing the other
and as you might expect, this is also true for
other opposite colors. If you move the color
towards magenta, you're also moving
it away from green, or if you move it towards green, you're also moving it
away from magenta. Just to really solidify this, we can see the same thing
with blue and yellow. As you move the
color towards blue, you're also moving
it away from yellow, and as you move it
towards yellow, you're also moving
it away from blue. I know that was a
lot to take in, but this knowledge is
really going to help you as we learn about
different adjustment layers. RGB and CMY will come
up all the time, and now you're totally prepared to understand
what's going on. Now in the next
chapter of the course, we're finally ready
to begin mastering affinities adjustments
and we'll start off with the two most important
ones, HSL and curves.
5. The Big Two : This chapter we'll learn about my two favorite adjustment
layers, HSL and curves. The HSL adjustment is great
for enhancing the color of an image and curves is my favorite adjustment
for editing lighting. So this chapter is
actually the only one that won't have does
Alli use lesson? Because spoiler alert, I use both of these
adjustments all the time. Instead, we'll spend the
next few lessons taking a deep dive into HSL and curves. Then throughout the
rest of the course, we'll see when you'd
want to use one of these two adjustments and when a different adjustment might be a better tool for the job. With all that being said, let's jump right into it
and start mastering the two best adjustment layers
in affinity photo. What
6. HSL for Beginners : This video, we'll do a basic overview of
the HSL adjustment. To start, let's apply the
HSL adjustment by going to our adjustments and
then clicking on HSL. This adjustment has some
very powerful sliders for affecting the colors. So let's quickly go
through each of these. First, we have the hue slider. As you shift this.
You can see all of the colors are shifted
in your image. To reset this slider, I'll double click on the node. Next, we have saturation. As you raise this,
the colors will be boosted and as you lower it, they'll become less saturated until they become
black and white. I'll double click on
this to reset it. And last, I'll show you
the luminosity slider, which makes the colors
lighter or darker. I don't really use this slider much because I think it makes the colors look lighter or
darker in an unnatural way. I'll just double
click to reset that. Now, as powerful as
these sliders are, the real power of HSL comes from being able to target
specific color ranges. So let's go through each one of these to see how they'll
affect this image. First, we'll go to
the red channel, and to see which parts of the
image are being affected, I like to raise the
saturation slider all the way to see which parts
of the image change. In this case, her skin is really being affected in this
red color channel. All skin colors are in
the red and yellow range. So as we adjust both of those, you'll see her skin change. I think it looks nice
to boost her skin, maybe not quite that much. So I'll just raise the
saturation slider like this. All right, for the
yellow channel, let's increase the
saturation slider. Okay. I can see that most of the image
is being affected here. Maybe I'll raise
this just a little bit so this image
isn't too affected. And we can also adjust
the hue slider. As I shift this
over to the left, you can see those yellow areas
become more green tinted. And as I shift it
over to the right, you can see the yellow areas
become more red tinted. We'll talk more about why
this is happening later. But for now, I'm going to add a little bit more warmth by just raising the
slider a little bit. Okay, next, let's go to the green color channel
and raise the saturation. I can see there's
some strange coloring in the dress with those greens. I think I'm actually
going to fully desaturate them because I
don't like how they look. And now we can move on to
the star of the show Cyan. Since her dress is Cyan, I think this one's going to
be really fun to play with. As you raise this, you can really see what's
being affected. I think I'll raise this a little bit and play around
with the hue. We can lower it to make
the dress more blue, or we can raise it to
make it more green. Okay. And next, we can go to
the blue color channel. As I raise this, you can
see nothing changes. I'll just lower this down since there's no blue
in this picture. And that does happen.
Not every picture will have every
color represented. And last, we have the
magenta color range, which, again, isn't in this photo, so I'll lower that down. Okay, with that all done,
I'll just close this. And now you can see
the before and the after those changes were
some pretty good changes. But let's say you want to go back and change
the colors again. Maybe you want the dress
to look a little bit more blue and less green. In that case, all you need to do is click on the layer
icon right here. Then you need to click on the color channel that
you want to effect. The HSL adjustment will remember whichever color
channel you last had selected. In this case, it was
the Magenta one. So make sure you're
working in the right one. I'm going to shift the hue
to make the dress more blue and I'll lower the
saturation a little bit. All right. So so far, we've added color
to the whole image, but you can also apply HSL
adjustments to specific areas. As an example, let's add a little bit more
color to her skin. We'll need a new HSL
adjustment for this, and I think this is a
great time to show you the shortcut for adding
an AGSL adjustment. If you press Command or Control, it will automatically bring
up the HSL adjustment. I remember this because
rhymes with Hu. So if that helps you to remember command or control,
that's great. Okay, to affect her skin, we need to choose the
right color channel. So I'm going to click
on the red channel, and I'll raise the saturation. Okay, so as you can see, we've definitely
boosted her skin, but I really only like how this looks on the left
side of her arm, where it was more desaturated. This area that's more in the shadows looks
way too bright now. So, to fix this,
we're going to need to use the built in
mask on this layer. I'm going to invert this
layer with command or control I now you can see that
mask pop up there. Now using the paintbrush tool, I can paint in white paint to reveal that red color on
the left side of her arm. I'm just going to adjust
my brush settings here. I'll completely lower the
hardness and I'll paint with a little bit lower of a flow just so I can build up my paint. I'll change the color to white, and then I'll use
the bracket keys on my keyboard to make
my brush larger. Now I can gradually paint this
color over her left side, adjusting my brush as I go. Okay, let's see how that
looked before and after. I think her skin looks
a lot more even now before and after. All right. And now we can see the before
and after of both layers. So I'll hold Shift
to select them both, and you can see the complete before and after
of this picture. I think this looks so good. The HSL adjustment is definitely my favorite tool for enhancing
the color of an image. And in the next video, we'll take a deep dive into
how this adjustment works, so you can become an HSL master.
7. HSL Deep Dive : In this video, we'll take a deep dive into how the
HSL adjustment works. When you apply an
HSL adjustment, you'll be given a
color wheel like this. This will show you which
colors you're affecting, and by default, it's all of
the colors in your image. But as we learned
in the last video, you can target
specific color ranges. For example, this
is what it looks like when you're editing
just the reds in a photo. That's simple enough, but what exactly do the
four circles mean? Well, those circles
are actually how we know that we're only
affecting the reds. In between the two inner circles is the color range that
you're most affecting. Any changes you make will be fully applied to those colors. So if you increase the
saturation slider by 20%, then all of the
colors in that range would have their saturation
increased by 20%. And as you move to
the outer circles, affinity will apply
your changes less and less until they're
not applied at all. So in our saturation example, the pinks and the
oranges would only get their saturation
increased by 10%, not the full 20%. And any colors outside of the circles wouldn't have their saturation changed at all, but we can actually
move the circles. So if we moved the outer
circles farther out, then we would increase
the number of colors that are having their saturation
partially increased. And if we move the
inner circles, then we'd increase the number
of colors that are getting the full 20% saturation boost. We'll put this knowledge to
good use in the next video. But for now, let's set the
circles back to normal. At this point, we know
what the four circles do, but there's still something else we haven't explored because the HSL adjustment actually isn't one color
wheel, but it's two. We have an inner color wheel that shows which colors
you're affecting, which is what we've been
talking about so far. But the outer color wheel shows what color your selected
colors are turning into. This is applicable as you move the hue slider in
the HSL adjustment. As an example, here's what
it looks like when you move the hue slider to 180 degrees. By looking at the inner
and outer circle, we can tell that
all of the reds in the photo are going to
be turned into cyan. This is because we moved the
hue slider by 180 degrees, which took all of the cyans
from the left side of the color wheel and moved them all the way over to the right side of
the color wheel. And that makes sense because 180 degrees is half of a circle, and the sians moved
halfway around the circle. But this is just
a simple example. And when you're
working in affinity, it's not always so
obvious what's going on. So instead of telling you what's going on,
let me show you. For this demonstration,
I've already opened one of the photos that was included
in the exercise files, and I applied an HSL
adjustment to it. And just so it's easier to see, I've also zoomed in the video. Okay, now let's take a closer look at how the
two color wheels work. First, let's select
the red color range. As an example, let's
say we want to change our red
colors into purple. So this red area, we want it to turn purple. So how do I get the purples from up here down into the reds? Well, it's actually easier
than you might think. With the hue slider, we can
move the outer color wheel. So if we move the hue
slider to the right, the color wheel will
move clockwise. This is like a car
tire moving forward. We move the hue slider forward, and this rolls forward. And if we move the hue
slider to the left, then we'll rotate the color
wheel counter clockwise, like a car tire
moving in reverse. So coming back to our example, if I want the reds in our
photo to become purple, then I need the purples to
come from up here and move down here like a car
tire moving forward. And as we just learned, we can do that by moving
the hue slider to the right All right. And you can see
that that worked. We've successfully changed
the reds into purple, and you can see that over here. I'll just turn
this on and off so you can see before
that circle was red, and now it's purple. Let's do another example to really solidify
how this works. But just so this
doesn't get confusing, I'm going to reset
the HSL adjustment. For our next example, let's select the green color channel. In this example, let's
say we want all of our greens to turn into blue. On this color wheel, you can
see where the greens are, and you can see the
blues are up in here. So this time, we need to move the color wheel
counter clockwise to bring the blues
down into the greens. This is like a car
wheel going in reverse. So we know we need to move
the hue slider to the left. So I'll move this to the left until our greens become blue. As you can see, over here, this worked perfectly, and over here, this
worked perfectly. Here's the before and the after. All right. Nice work. I know this was a pretty
technical lesson, but I hope that it helped you to demystify the HSL adjustment. I think this
adjustment is amazing, and in the next video,
we'll learn how to put our new
knowledge to good use.
8. HSL - Advanced Application : In this video, we'll take what we learned
in the last lesson, and we'll change the color of a man's shirt from blue to red. Okay, to get started, let's apply an HSL adjustment. I'll use the shortcut to do
this with command or control. Okay, if we want to
change his shirt to red, we need to go to the
blue color channel. If we want the reds on this color wheel to move
over here to the blues, then we need the outer
color wheel to move counterclockwise like a
car moving in reverse. We need to shift the
hue slider over to the left so that it's
moving in reverse. With that moved over, you can see that this doesn't
look like red, and it doesn't look very good. Even though this
color wheel is set to red now, this
just isn't right. I'm going to reset this. And this time, let's use
the Cyan color channel. Again, we want the reds
to move in reverse like a car wheel going counterclockwise
to get over here. So I'm going to shift the
hue slider over to the left. Okay, so the color
wheel looks right, but his shirt just
doesn't look right. It doesn't look red, and
it doesn't look very good. So, what have we
learned from this? Well, I think now we
know that his shirt has cyan and blue in it, since moving the hue slider did affect his shirt in
both color channels. So if we want to change
the color of his shirt, we need to move the
color wheel circles so that blue and
Cyan are included. To do this, I'm
going to click right in between these top
two color circles, and I'm going to click and drag to move them up into the blues. Okay, and with a little bit
of adjusting of the hue, you can see now his
shirt looks red finally. So now that his
shirt looks good, it's time to do a
little bit of cleanup. I'll turn this on and off
so you can see what I mean. Here's the before and after the background has a little bit of redness
on the building, and his blue jeans
have turned red. To remove the red
from those areas, I'll grab the paint brush tool and I'll paint in black
paint over those areas. Always leave his pants
red if you wanted to go for a monochromatic look. But I think blue jeans are
a little bit more classic, so I'm just going to
remove the red from them. All right. And now
we can see the before and after
turning his shirt red. And I think this looks great. So this was a great strategy
for recoloring his shirt. But I want to show you another way that you could do this. As a bonus, it's a
little bit faster. To start, I'll delete the HSL adjustment and
apply a brand new one. This time, instead of
adjusting the color circles, we're going to use a special
feature called the picker. When you click on
the picker option, you can come over to
your photo and click anywhere on the photo
to choose that color. So I'll just click right
here to choose that color. With that color sampled, now we can adjust the hue and you can see his shirt
turned red right away. That looks really good,
and it was even easier. So if the picker works so well, why didn't we use
it to begin with? Well, for this particular photo, we could have, but the picker doesn't really
work for every photo. So it's important to
know what's actually happening so that you can adjust the color
circles as needed. Let's take a closer look
at how this picker works. First, look at the
color circles right up here and look at them as
I click the reset button. Notice how those color circles move when I reset
the adjustment. And now, as I click the picker again and
choose a new color, watch the circles as
I choose a color. So you can see that
they just shifted. I wanted you to pay attention to the color circles so that you can see that the color picker
isn't doing anything fancy. It's just moving the
color range circles. And, you know, we can
do that manually, too. Just click on the center
of the color range and move it around.
It's that easy. The picker is just
moving the center of the color range to the
color that you clicked on. So for some photos,
this works really well. But for other photos, you will need to extend
the color circles on this color wheel to include the whole color range
that you want to effect. Or you might need to
tighten up the circles like this if you're affecting
too many colors. That's why it's important to
know what's actually going on and not just rely
on the picker option. Okay, and I have one
last tip for you. To use this picker option, you need to be in one
of these color ranges. The master color wheel doesn't have any color
circles to move, so the picker option
isn't available. So just choose any color range that's close enough to the
color you want to pick, and then you can use
the picker to adjust that color range. All right. Congratulations. You are now
an HSL master. Great job. Now in the next video, we'll learn all about curves, which is my favorite adjustment for enhancing the
light in an image.
9. Curves for Beginners : This video, we'll learn how to use the curves
adjustment layer. To keep things simple, I've prepared a
few screenshots of the curves adjustment to
help you see how it works. The main thing to know
is that this line controls all of the
lighting in your image. If you bring the line up, it will make your photo brighter. And if you bring the line down, it will make your photo darker. But if that's all
that Curves did, it wouldn't be all that special. What makes this adjustment so
useful is the fact that we can independently
affect the shadows and highlights in our image. If you move this
part of the line, you'll affect the
highlights in your image. And if you move this
part of the line, you'll affect the
shadows in your image. So with this control, you could brighten
the highlights in your photo while also
darkening the shadows. And it gets even better
because this line isn't actually broken
into just two sections. In reality, this
line is a gradient allowing you to
control every shade of lighting in
your entire image. This gives you incredible
control over your lighting, and it's why I'm such a big
fan of this adjustment. Okay, now that we understand
the basics of curves, let's jump into affinity
to see this in action. For this demonstration, I've prepared a photo
that's divided into 16 sections with
nearly pure black over here on the left side, and over on the right, we
have nearly pure white. Okay, now let's apply
a curves adjustment. This photo will help us to see the difference as we adjust
this line right here. So first, we can
click and drag on the line and raise it up
to brighten our image. We could also lower this
down to darken the image. That's just about the
most simple thing you can do with the
curves adjustment. Let me show you a few
other things you can do with it. I'll reset this. This time, I'm going to go over here to our highlights and I'm going to raise them up and then over here on the
shadow side of the line, I'm going to click and
drag this downward. This is called an S curve because it's in
the shape of an S, and this is a great
way to add contrast to your image by brightening the highlights and
darkening the shadows. Another thing you can
do. Let me just reset this is you can darken
just the shadows. To do this, pull down this part of the line
down here to darken the shadows and then go about here and bring the line back
to meet the center point. Now you can see that we're only darkening the dark
parts of our image, and the bright parts of
our image are left alone. And of course, you
can do the opposite, brightening the highlights
and then bringing the line back to meet itself so the shadows
aren't affected. So now you can see we've
brightened the highlight side, and the shadow side
is left alone. So at this point, you have almost everything you
need to use curves. But there's just one more
thing we need to cover, which is how to use the black
point and the white point. So the black point is
this node over here. This controls the darkest
shadows of your image. And the white point
is right up here, and it controls the brightest
parts of your image. As an example, let's say you wanted to brighten the
white point of your image, which would make your photos
highlights even brighter. In that case, we could
click and drag on this white point and move
it over to the left. You can see as I do this, more and more of the
image becomes pure white since white is the brightest that
anything can ever be. We've also brightened the
whole image quite a bit. And if we take a closer look
at the curves adjustment, we can see why that's happening. When we moved that white
point over to the left, you can see what
we really did was increase the slope
of the entire line. So now the whole line is brighter than where
it originally was. Even the shadows
down here have been brightened and of course, we can do the same thing
to the black point. So I'll just reset this and we can move
the black point over. As I click and drag this over, you can see more and more
of the picture becomes black since black is the darkest that
anything can ever be. And just like before, we've affected the entire photo. Here's the before and after. But now that you've seen that,
let me ask you a question. We've seen how we can
make the white point brighter and how we can make
the black point darker. But what if we wanted
to do the opposite? What if we wanted to make
the black point less dark? Well, we already know that raising the line makes
things brighter. So really, all we need to do
is raise the black point. And just like that, now we
have some very bright shadows. And as you could probably guess, we can do the exact same
thing with the white point, lower this down, and now the bright parts of the
image have become darker. But just so you know, darkening the white point or
brightening the black point, that's not a very
common thing to do. But sometimes for
artistic reasons, you might want to do that. So I just wanted to make
sure that we cover it. Okay, now you have everything
you need to use curves, and in the next video, we'll put our new skills to the test and edit a
few photos together.
10. Curves for Light : Let's practice using curves to enhance the
lighting of an image. We'll practice by editing multiple photos together all
with the power of curves. So let's go ahead and start with the most common
thing I use curves for brightening an image. I'll add a curves adjustment. And then to brighten
up this image, I'm just going to click
right in the center of this line and raise it up. You can see how that looks. Here's the before and after. Curves works really
well for brightening a photo because the black point and the white point are kept in place unless you purposefully move them like we did
in the last video. This makes it so your photo gets nice and bright while keeping the highlights and
the shadows from getting too bright. All right. Let's do another example. I'll add a curves adjustment. And for this photo, I do want things to get a
little bit brighter. So here's how that
looks before and after. And just to edit this
a little bit more, I know I mentioned how the black point will keep your shadows from
getting too bright. And while that is true, we don't just need to rely on where the black
point currently is. I'm going to add a node
right here on the line, and we can bring
this up and down to just how bright or
dark the shadows get. I think having them a little bit darker looks nicer
for this image, and now you can see
the before and after. Being able to brighten
the overall photo while keeping some depth in
our shadows is really nice. Now let's come to
our next example. Here we have a really fun photo of the Marina Bay in Singapore. This is such a cool photo, but I do think it
would look even better with more contrast. So we're going to use curves
to darken the shadows and brighten the highlights to make the city
lights really pop. And for this photo,
let's practice using the keyboard
shortcut to apply curves. To apply curves, just
press Command or Control M I don't know why M
is the shortcut for curves, but I like to think
about how M is a very curvy letter
M for curves. I don't know if that
will help you remember. But now that we have
this pulled up, let's go ahead and
edit this photo. I'm going to darken the shadows and brighten the highlights
to create an S curve, and you can raise or
lower either one of these points as much as you want to create the amount of depth that
you're looking for. Here's the before and
after. Very striking. Let's go ahead and move
on to the next one. For this photo, I thought
it would be fun to make the giraffes look very
dark, like pitch black. And then after that, I thought we could
brighten the sky to add even more contrast
to this photo. So let's do our shortcut Command
or Control M. All right. And from the last video, we learned that we could move the black point to make
our photo more black. And to do that, we'll
just move this node over. We don't have to
move it very far for the shadows to become black. I think I'll just
move it like that. And with that moved in place, we can also brighten
up the highlights. But since we don't want the
sky to become pure white, I'm just going to
leave the white point alone and brighten
the line from here. Okay, I think this
looks pretty nice. Here's the before and
after. So pretty. Okay, for the final photo, you might be
wondering what we're going to do with this photo. It's already nice and
bright and it has good contrast between the
shadows and the highlights. Those things are
usually really good to have for a good
looking photo, but they aren't the only way
to make a photo look good. You can also make
artistic decisions to make your photo
look however you want. Like with this photo, I thought
it might be fun to lower its contrast to give it a more vintage feel.
So let's try that. So to give it a vintage feel, I'm going to raise our black
point to make it lighter. I'm also going to lower the white point to make
the whites darker. And to give the photo a
little bit more depth, I think I'll also lower this
line down a little bit. You can play with this
however you want, but the point is,
I wanted to make this photo look a
little bit more faded. Here's the before
and after of that. I think this looks pretty good, but to give it a
really vintage feel, I think we need to
edit the colors. We'll learn more about color adjustments later
on in the course. But for now, I just
want to quickly show you the color
balance adjustment. This adjustment is one of my favorite ways to add
color effects to a photo. Quickly going through this and we will go deeper
into this adjustment. Click on where it
says tonal range. Go ahead and change
that to highlights. Then we're just going to add some yellow to the highlights. Then we can go to the shadows. And let's just add a little
bit of red by moving the red slider up Alright. With those colors done, here's the before and
after of those colors. And here's the before and
after of the whole photo. Alright. Great job. I know that was a lot
of photos to edit, but I hope you feel more
confident using curves. It really is an
amazing adjustment, and I use it all the time. But curves can actually do more than just edit the
lighting of a photo. So we'll take a look at
that in the next video.
11. Curves for Color : Let's learn how to use curves to edit the color of an image. To start, let's use Command or Control M to add the
curves adjustment layer. Okay, so far we've been
working in the master curve, which allows us to control
the lighting of an image. But if you click
where it says master, you can actually see that curves allow us to edit the red, green, and blue color channels. Let's start in the
red color channel. I'll raise this up, and you can see that by
raising the red curve, we're adding red into our image. But what would happen if
we brought the curve down? Would affinity remove red from the photo? What
does that mean? Well, if you watched the RGB versus CMY lesson from
earlier in the course, then you might already
know we learned that red, green, and blue
are the opposites of cyan, magenta, and yellow. You can rewatch that lesson
if you need a refresher. But in short, removing red
will add cyan to the photo. So if I bring this line down, you can see we are adding cyan. Here's the before and after. And just like when we
edited the lighting, we can use curves to independently affect the
shadows and the highlights. So if you wanted to, you could lower this
line to add cyan to the shadows and then
raise this part of the line to add red
to the highlights. Here you can see what this
looks like before and after. Let's quickly look at the
other two color channels, and then we'll
practice what we've learned in an actual photo. I'll reset the line and change to the
green color channel. As I raise this up, we're
adding green to the photo, and as I lower it down, we'll do the opposite,
adding magenta to the photo. We can similarly lower and raise different parts of
this line to add different colors to the
shadows and highlights. I'll reset this,
and we can look at the last color channel,
which is blue. We can raise this to add blue
or lower it to add yellow. And again, we can add color to the highlights and
the shadows separately. Here's the before
and after of that. Alright, now that we've seen the color
channels in action, let's go to this practice photo and see what we can do with it. In this photo, I'd like
for the shadows to have blue coloring without
affecting her skin. So let's see if we can do that with the curves adjustment. I'll press Command or Control M to add the
curves adjustment. And then we can go ahead and start in the blue color channel. I'm going to raise this blue shadow side to
add that to the shadows. But then I'll lower
this highlights part to match it
back up to the line. This looks pretty good so far, but we could also go to
the red color channel to add a little bit of
cyan to the shadows. So I'm going to lower this red line over
here to add cyan, and then I'll bring
the highlights back to meet the line up here. Okay, with that done, we can go ahead and see
how this looked before, and here's the after. You can see that we've
added blue and cyan to the shadows without
affecting her skin. Curves is mostly used
to edit lighting, but as you can see, it can also be used to
edit the colors. We'll learn more about color adjustments later
on in the course. But in the next video,
let's put the skills that we learned in this
chapter to the test and edit an entire
practice project using just HSL and curves. H
12. Practice Project : This video, we're going to edit a photo from start to finish. I'm really excited about
this practice project. We're only going to use HSL and curves to completely
transform it, and I think it will be a
really good way to wrap up this chapter and solidify
everything we've learned. So let's go ahead and start
with a curves adjustment. I'll press Command or Control. And we can go ahead and start by brightening up the photo. I'm going to brighten up
the highlight side and then bring the shadow side back down so the shadows aren't
over brightened. That's a pretty good start. Next, I'll press
Command or Control, and we can go ahead and
play with the colors. Now, there aren't too many
colors in this photo. So I think I'm mostly just going to edit the red and
yellow channels, since that's where her
skin and hair fall in. So let's start with
the red channel. You can see this is affecting her skin and hair, like I said. I think I'll just raise
this a little bit. Then I'll go to the
yellow channel. You can see this also affects
her skin and her hair. So I'll just raise that up. So other than those
two color channels, I'm not seeing much other
color in this photo, but I do think that the back
wall has some blue in it. So I'm going to go to
the blue color channel, and you can see, yep, the back wall is blue. As I boost this, I think it's
a little bit distracting. So I think for this photo, I'm actually going to desaturate the wall so that that blue
color isn't distracting. We could even completely
remove it if we wanted to. Alright, let's take a
look at our work so far. I'll hold Shift to
select both layers. And now you can see
that before and after. This is already a
really big improvement. Now, because this is a
full practice project, I think it would look
nice if we also masked some adjustments
on specific areas just to really polish the photo. One thing I can see
right away that I do want to adjust is her shirt. After we boosted the yellows, it made her shirt look
a little bit yellow, and I think this shirt
is supposed to be white. I'm going to add
another HSL adjustment with Command or Control U, and we can go ahead and adjust her shirt to
make it white again. Since we're going to mask
this over her shirt, I'm just going to go to
the main color channel, and then I'm going to lower
the saturation all the way. Then I'll close out of this, and we can go ahead and invert this layer with
command or control I. Now we have a black
mask we can paint on. So I'll just grab
the paintbrush tool. I'll make sure I'm
painting in a low flow, and I'll change my color to white so that I can paint
this over her shirt. I'll use the bracket keys on my keyboard to adjust
my brush size, and then I can go
ahead and paint. As I'm painting, I can see that I am desaturating her hair. I'm just going to leave
that for a moment, and we can come back to that. Okay, I did my best to
avoid her hair over here. And since I was painting
with a low flow, I don't think it affected
her hair too much, but over here, you can see her hair was very much affected. To bring back the color there, I'm going to change my
brush color to black. Then with a nice small brush, I'm just going to paint
to reveal that again. It might also reveal a little
bit of yellow on the shirt, but I think it's worth it to
have her hair not be gray. Go ahead and do this
over. Any other areas that you might have painted the gray over? All right. And once you've
finished with that, we can go ahead and take
a look at the difference. Here's the before and after of turning her
shirt back to white. Now, while we're
working on the shirt, I think it would also
look nice to enhance its highlights to make the
shirt look more shiny. To do this, I'm going
to press Command or Control M to add another
curves adjustment. Then to brighten the
white areas of her shirt, I'm going to brighten
the white point. So I'm just going
to bring this over just a little bit to make the white parts
even more bright. Then I'm going to invert this
with command or control, and I'm going to paint
this only on the shirt. Once again, you can use the bracket keys to
adjust your brush. Then I'm going to change
my paint color to white, and I'm just going to
paint this over the shirt. Since we're not changing
the color this time, we're only brightening things. You don't need to be as careful as you paint around the hair. Alright, let's take
a look at this. Here's the before and after,
brightening up her shirt. I think this looks good,
but I do want to click on this curves adjustment again to make one other adjustment. This really brightened
up her shirt, but I want to make
sure the shadows in these folds are
still nice and dark. So I'm going to click and drag downward on this
part of the curve. So now you can see there's a bit more contrast. I
think that looks better. Okay, that was a lot
of work on her shirt, so I'm just going to select
both of those layers, so we can see the before and after making her shirt
nice and crisp and white. I think that looks
great. Another thing we can target in this
picture is the background. You can see that
the background's nice and dark down here, but up here, it
looks pretty bright. So I want to fix this by
darkening the background. I'll press Command or Control M. Then I'm just going to
darken this midpoint. You can see this is
darkening the whole photo, so I'm going to invert
with command or control I so that we can paint this
only on the background. So with white paint,
let's paint on the black mask. All right. So I just painted on these top areas since the
bottom is already very dark. And I think this
looks pretty good. Here's the before and after. Now that we've darkened
the background, I think it'd look nice
to brighten our subject a little bit more,
starting with her hair. You can see it's
starting to blend into the background
since we've darkened it. So let's press
Command or Control M. Then we can go ahead and
brighten up her hair. I'm going to move
the white point over quite a bit to
brighten her hair, and you can already
see the difference. Let's invert this with
command or control I. Then I'm going to gradually paint this over the
highlights in her hair. Anywhere where her hair is
already nice and bright, I'm just doing this to
enhance her highlights. Okay. I think that added
light looks really nice. Here's the before
and after of that. Now that we've done
that, we can go ahead and adjust the curve
however we want. Maybe we can
brighten it a little more or maybe you want it
to look a little darker. However you want, I
think I'll brighten the whole thing. All right. And now that her hair
looks nice and bright, let's go ahead and
brighten up her face. I'll press Command or Control M. Let's just brighten
this a little bit. I don't want to make
her face too bright. Then I'll just invert this
and paint it over her face. Here's the before and after
brightening up her face. And while I do think it looks nice to have her
face be brighter, I think it did take away a
little bit of her color. So I'll press
Command or Control. And in the master color channel, we can just increase
the saturation a little bit to bring
the color back. Now that we've added
that saturation, you can see that her skin
looks a little bit red. Skin is pretty tricky. So let's take a closer look at how to fix light
skin color issues. In this example, you can see the color range that skin
is normally found in. As you can see,
it's mostly orange, but it can also have a
little bit of red and green. In our practice photo, her skin is looking
a little red. To fix this, our only options
are to move the wheel to add more red or move the
wheel to add more green. So since her skin
is already red, we don't want to add more red, we actually need to add green. It might sound strange to
make the skin more green, but doing this will help
to shift our colors more toward the natural orangy
color that skin has. Okay, so to add
green to her skin, I'm going to go to the
red color channel. Then I need to bring the
greens up here to the reds. This would be
moving the car tire in reverse, moving
counterclockwise. I need to shift the hue in reverse and move it
over to the left. So you can see this is
adding green to her skin, and this is adding more red. Since this slider can
be pretty sensitive, I'm just going to move it
a tiny bit over toward the green just to take away a
little bit of that redness. I'll invert this with
command or control I. That way, we're not
affecting her hair. And then I'm just going to
paint this over her skin, so I'll paint it over
her face and her hands. Here's the before and after of this very subtle
skin adjustment. I know it's hard to see,
so maybe I'll zoom in. Here's the before, a
little bit more red, and here's the after bringing
in more orange tones. Okay, and we're almost done. As a finishing touch, I want to add some more
contrast back to her face. I'll press Command or Control
M to add another curve. Then I'm just going to add
some darkness to her face. I'll invert this with
command or control I. And then with a nice
small paint brush, I'm going to add contrast to some key areas
around her face. So I'm going to paint this
darkness over her eyebrows. Well, I guess just this eyebrow. You can't see the other
one. I'll paint it over her eyelashes to
make them nice and dark. I'll also paint this with a nice low flow around the
outer edge of her face. And if you want,
you can also apply this darkness to her
lips to make them stand out a little bit more by making her lips darker against
her light skin. I think this just makes
them stand out nicely. Maybe I painted a little
bit too much there. So I'm going to change
my color to black, and I'll just swipe
over the lips to remove a little bit of that. Okay, we're done
adding contrast, so you can see the
before and after, and what a difference
that makes. I'll just zoom out with
Command or Control zero, and I'm going to select
all of our layers, so you can see the
complete before and after. Can you believe all
of that was only done with two of
Affinity's adjustments? That is amazing. I think
this turned out really nice. So as you can tell
from this chapter, I really love curves and HSL, but there's so many more
adjustments in affinity photo, and in the next chapter, we're going to take a
deep dive into all of the ways that you can
edit a photo's lighting.
13. Levels : This chapter we'll learn all about affinities
lighting adjustments, starting with the levels
adjustment layer. Okay. To get started, let's apply the
levels adjustment. So this adjustment
is pretty simple. We only have sliders to adjust. So let's go ahead and start
with the black level slider. This is similar to the
black point from curves. As you move it up,
the dark parts of your photo get even darker. So you can see
what that's doing. Next, we have the white level, which is similar to the
white point from curves. With this one, you
move it downward, and more and more of the photo
will become bright white. Next, we have Gamma. This is for the mid tones. So as you move it, you can see that everything
in the middle gets brighter. And as you raise it, everything gets darker in the mid tones. So this is a little
bit confusing because as you move it
down, things get brighter. And as you move it up,
things get darker, you would think it'd
be the opposite. But when you move this,
you can think about it like an extension
of these two sliders. So you move this one
up to darken things, and you move this one down to brighten things. And
it's the same here. Move it down to
brighten, up to darken. Okay, and last down here, we have the output sliders. The output black level will make the darkest parts of your
photo even brighter. So as you raise this, you
can see that gets brighter. So this is sort of like
the vintage effect that we did with curves, and the output white level will make the white parts
of your photo darker. So again, that vintage look, and that's pretty much it. That's the levels adjustment. Now that you know what
all these sliders do in the next video, we'll answer the
important question. Is levels better, worse or the same as using the
curves adjustment? Oh
14. Does Ally Use Levels? : So do I use the
levels adjustment? As we saw in the last video, levels is very
similar to curves, allowing you to edit your
lighting in similar ways. But as similar as they are, I still prefer curves, and there are two
reasons for that. The first reason is that
curves is more flexible. Unlike levels, which only has five sliders you can effect, you can use the curves line to affect any shade of
light in your image. But as great as that is, that's actually not the main
reason I prefer curves. The main reason I use curves is because
it's faster to use. So to see this, let's
quickly jump into affinity. All right, to brighten
up this wedding photo, we're going to use curves, and then we're going
to try to use levels. Let's press Command
or Control M. We can go ahead and brighten up the midtones and as you can see, that was super fast and
it looks super good. Alright. Now, let's
try using levels. And just so it's a
fair comparison, I'll use the levels shortcut, which is command or Control L. So so far, it's just as fast. And now, to brighten
things up in the same way, I'm going to shift
the Gamma slider over so you can see
that was just as fast, but this just looks so bad. The bright parts of the
image have gotten really bright and the dark parts
look too bright as well. It just brightened everything
and looks really bad. You can fiddle around with levels to try to make
it look as good as curves by adjusting
the black level to make sure your
shadows stay dark. You can also adjust
the output white level so that the bright parts
don't get too bright. And now you can see this
looks a bit better. But let's take a look at
the curves one again. The reason curves looks
better right away is that the black and white
points are locked into place. So it only is brightening
the mid tones without overly affecting
the shadows and highlights. So this allows you
to very quickly and naturally brighten a photo
in one swift motion. So even though you
technically can get levels to look pretty
similar to curves, you have to fiddle around with all the different sliders to
get it to look just right. So I find it's just faster to
use curves from the get go. If you've watched
my other courses, you might have seen me teach
using the levels adjustment, and that's just
because I think levels is easier to understand
for beginners, since it's only
working with sliders. But if you're willing to put
in the time to learn it, I do think the
curves adjustment is much better for
adjusting the lighting.
15. Brightness & Contrast : This video we'll take a look at the brightness and
contrast adjustment. Let's go ahead and
get started by applying the brightness
and contrast adjustment. This adjustment
is pretty simple. We just have two
sliders to work with. Brightness works the same as brightening and darkening
the mid tone and curves. You can see as we brighten this, the shadows still stay
nice and dark and the highlights aren't getting overly brightened,
which is nice. As you darken it,
the same thing. This is a very nice even way to add brightness or
darken a photo. Then we have the
contrast lighter, which is the same as applying an S curve with the
curves adjustment, like what we did with that
nighttime city photo. So as I raise this up, the shadows get darker and
the highlights get brighter, and as I lower this,
everything becomes more vintage looking because we're
taking away that contrast. And that's it. It's a very
simple adjustment to use. So now that we
know how it works, we'll talk a little
more about how this compares to curves
in the next video.
16. Does Ally Use Brightness & Contrast? : So do I use the brightness
and contrast adjustment? As we saw in the last video, brightness and
contrast and curves can edit lighting in
very similar ways. If you increase the
brightness to 50%, your photo will actually
get brightened in the exact same way as raising the curves
mid tone like this. Or if you raised the
contrast to 50%, then your photo
would look the exact same as if you made
an S curve like this. Actually, brightness and
contrast does a pretty good job, especially considering
how simple it is to use. But as good as it is, brightness and contrast
can only get you so far. With curves, you can
just do so much more. For example, maybe you want to brighten the highlights
without affecting the shadows, or maybe you want to
darken the black point, like how we did with
the giraffe photo. Or maybe you want to make an
S curve but customize it. The highlights are much more
effective than the shadows. All of these things can
easily be done with curves but are impossible to do with
brightness and contrast. And because of that, I never
use brightness and contrast. Curves can do everything
that brightness and contrast can do
plus so much more. So if you're willing to put
in the time to learn it, curves really is the
better adjustment.
17. Shadows Highlights : Let's learn about the shadows
and highlights adjustment. To get started, let's apply
shadows and highlights. So just like our
last adjustment, this one is very simple
with just two sliders. Using these sliders, you can brighten or darken the
shadows in your photo. And using the highlights slider, you can brighten or
darken the highlights. It's nice that we can adjust the shadows and the
highlights separately. And that's all I have to
show you for this one. It's very simple to use.
18. Does Ally Use Shadows Highlights? : So do I use the shadows
and highlights adjustment? We saw in the last video
that you can use shadows and highlights to brighten or darken your shadows
and highlights. But as we saw earlier
in the course, you can do this exact
same thing with curves. For example, if you darkened
your shadows by 200%, then your photo would
look the exact same as if you made a curves adjustment that darkened the shadows, while putting the highlights back onto the original curve. Or if you brightened
your highlights by 50%, then your photo
would look the exact same as if you made a curve that brightened the highlights while putting the shadows back
to the original curve. But as you already know, curves can do so much more than this. I never feel a need to use
the shadows and highlights adjustment because curves can do all of the same
things and more. Curves really is amazing. In the next couple of videos, we'll see how it compares to affinities final
lighting adjustment, the exposure adjustment.
19. Exposure : Let's learn about the
exposure adjustment. To start, let's apply
the exposure adjustment. This one is the simplest
adjustment so far. There's just one
slider to adjust. As you can see, as
you move the slider, it makes the photo
brighter or darker. If you move the
slider to either end, eventually your photo
will become all the way white or all the way black. That's it. It's a very
simple adjustment. In the next video, we'll talk about how useful
this adjustment is.
20. Does Ally Use Exposure? : So do I use the
exposure adjustment? We saw in the last
video that you can use the exposure adjustment to
brighten or darken your photo. But as you're well
aware of by now, you can do the same
thing with curves. For example, if you brighten
your exposure by two, then your photo would
look the same as if you brighten the curves
white point like this. As you could probably guess, that's why I never use the
exposure adjustment layer. Curves can do the exact
same thing plus much more. So to summarize this chapter, we've seen that curves is the best adjustment for
editing lighting because it can do everything the
other lighting adjustments can do and more. So in my opinion, there really isn't a need to use any of the other
lighting adjustments. But what about the
HSL adjustment? It's my other
favorite adjustment. So can it do everything that the other color
adjustments can do? Well, not quite. I do love HSL, but in the next
chapter of the course, we'll see when and why you
might want to use some of Affinity's other color
adjustments in addition to HSL.
21. Color Balance : This chapter we'll
learn all about affinities adjustments
for editing color, starting with color balance. To apply the color
balance adjustment. We briefly saw
this adjustment in action in the first
chapter of the course, but now we can take
a deeper look at it. Using the color
balance adjustment, we can add colors
to the shadows, midtones, and highlights
in our image. These colors, as you can see, are CMY and RGV. They're each paired with
their opposite color. As you move these sliders, you can see that you're
adding the different colors. Because the sliders
are color coded, it makes it really easy to know what color is being added. So as you can see, as you bring any of
these sliders over, we're in the shadows
tonal range right now. The shadows are
being affected with that color while the
highlights are left alone. This is so nice so that we can really
target areas with color. To show you another example, let's go to the highlights
and add a color there. So you can see what
that looks like. With that color added
to the highlights, it gradually fades through
the midtones and shadows, but it's affecting the
highlights mainly. So that's the basics of how the color balance
adjustment works. Let's see this in action
on this exercise photo. We use this photo in the
curves for color video. And just like in that example, I want to add some nice
blue color grading to the shadows without affecting
her skin or her dress. So to do this, I'll apply the
color balance adjustment. Then I'll change to shadows. And I'm going to add cyan
I'll also add some blue. All right. There we
go. Now you can see the before and after, you can see that her skin and
her dress are unaffected. All right. Now you know how to use the color
balance adjustment. In the next video, we'll see how useful this adjustment is.
22. Does Ally Use Color Balance? : So do I use the color
balance adjustment? We saw in the last
video that you can use color balance to add color
grading to the shadows, midtones, and highlights
of your photo. But how can you do that
with the HSL adjustment? Well, the answer is you can't. The HSL adjustment is
meant for enhancing the color that already
exists in your photo. It's not for adding new colors. Instead, color balance is actually a lot more similar
to the curves adjustment. As we saw in the last video, we can use color balance to
add blue to the shadows, just like how we
did with curves. Between color
balance and curves, which one do I like to use? Well, this might surprise you, but I actually prefer
color balance. To see why, let's
compare how you would make blue shadows
using each adjustment. With color balance,
all you need to do is go into the
shadow section of the adjustment and
then use the sliders to add cyan and blue,
simple as that. But to do the exact
same thing with curves, we need to go to the
blue color range. Then we need to
increase the blues in the shadows and then bring the highlight part
of the curve back down. Then we need to go into
the red color range. And we need to remove red
from the shadows to add cyan and bring this part of line back up so this color is not
affecting the highlights. Both of these achieve
the same result, having beautiful color grading in the shadows of this photo. But in my opinion, color
balance is much easier to use. So yes, curves might
allow you to achieve color grading that's slightly more precise as you
adjust the lines, but I still prefer color balance for its speed and simplicity. Color balance is one of my
favorite adjustments to use.
23. Selective Color : Let's learn about the
selective color adjustment. Let's start by applying the
selective color adjustment. Then we can take a look
at how this works. This adjustment has
sliders, as you can see, we have CMY sliders, which as we already
know means we also have RGB sliders if we go
the opposite direction. At the bottom, we also have a black slider which adds
black or white to your image. To use this adjustment, all you need to do is
adjust the sliders. As I add Cyan to
this photo though, you can see nothing happens. That's because with
selective color, you can affect
different color ranges, just like the HSL adjustment. Since this photo has no
color, nothing's happening. But we can open up these colors and select different colors
to adjust our image. Since this photo has no color, we'll skip past
all of the colors. But down here, you can
see we have white, neutral and black categories. This represents the highlights, midtones and shadows
in our image. So not only can we adjust
all these color ranges, we can also adjust the shadows, midtones and highlights,
which is pretty nice. For this photo, I'm
going to select the black category and then I'll raise the Sian slider
so we can see how this is adding cyan
color to the shadows. To see this in action, let's go to a real photo in color and apply the selective
color adjustment to it. Let's do the same thing we've
been doing with this photo, adding cyan and blue
tones to the shadows. To do that with selective color, we just need to make sure
we're in the black category, then we can go ahead and raise the cyan and lower this
yellow slider to add blue. With this adjustment,
it's really nice to have the opposite
colors memorized, since it doesn't say what the opposite colors
are on these sliders. If you know yellow and
blue are opposites, it just makes this a lot easier. Alright, now we've added
blue to the shadows, and you can see what this
looks like before and after. So adding different colors
to the shadows, midtones, and highlights is pretty nice, but there's even more you
can do with this adjustment. I'll add this adjustment to this photo and show you
that another thing that you can do with this
adjustment is you can boost the colors in the
different color ranges. In this photo, I see magenta. I see some yellow
and some green. If we go to each of
those color channels, let's start in Magenta. You can go to that slider and bring it all the way up
to boost that color. So in Magenta, I'll
boost magenta. In the yellow category, I'll boost the yellow. And then in the green category, I'll boost the green, which means I need to lower
the magenta slider. All right. With that, we can go ahead and see what
this looks like before and after. This
is pretty subtle. So if you want to increase
this color boost, you can duplicate this layer
with Command or Control J. Now you can see this is a much
more intense color boost. So you can always lower
the opacity of one of the layers until you get
the look that you want. Okay, let's look at
one more example. Another way to use
selective color is for color correction, especially when
working with the skin. So I'll add the selective
color adjustment, and then we can take
a look at this photo. So as a reminder, all skin types are a
mix of red and yellow. So if we go into the red
and yellow color ranges, we can adjust the sliders
to affect her skin. So let's start in the reds. I'm just going to
go through here and see how these different
sliders affect the skin. Once I'm done in
the red channel, I'll move on to
the yellow channel and adjust the sliders. This isn't an exact science
adjusting these colors. Just do what you think
looks good for your photo. Now with that, we
can go ahead and see the before and after. To sum up this video, selective color has a
lot of different uses. You can add color to the
shadows and highlights. You can boost color ranges, and you can correct skin tones. With all of those abilities
in the next video, we'll see how this adjustment compares to our
other adjustments.
24. Does Ally Use Selective Color? : So do I use the selective
color adjustment? To see how it compares, here's one of the photos
that we edited in the last video with one copy of the photo being edited by color balance and the other one being edited by
selective color. These two photos
look very similar. So let's take a closer look. I'll jump back and forth
between the photos, and as I do, I want you to try and see which one
you think looks better. You might have a
different opinion from me and that's totally fine. But to me, I definitely prefer one of these photos
and it's this one. Which one is this? It's
the color balance one. So why does color balance
look better to me? Well, I think it's
easiest to see. If you look at the red
pillar in the background, color balance gave it that
blue can look that I was going for while the selective
color version looks a little muddy. So even though you can color your shadows and highlights
with selective color, I find that color balance
usually does a better job. But of course, that's not
all selective color does. In the last video, we also saw that you can boost
colors in your photo. Instead of comparing
this to color balance, let's see how it compares to the HSL adjustment
for boosting colors. Here's the photo that we
edited in the last video. One copy was boosted with the HSL adjustment and the other was boosted
with selective color. Once again, the two versions of the photo look
pretty similar. So just like before, let's take a closer look. I'll jump back and forth between the two versions of the
photo and let you decide. Which one do you
think looks better? In this case, I really don't think there's a right
or wrong answer. Both versions of the
photo look great. Now, even though I like
both versions of the photo, they're still one of
the adjustments that I prefer using and that's
the HSL adjustment. But why is that? Well,
take a closer look at these areas as I jump back and forth
between the two photos. Notice how these areas look
different in each photo. In particular, pay
attention to the lighting. If you look closely, you
can see in this photo, the areas have deeper shadows, but in this photo, the
areas appear brighter. Neither of these photos is objectively better
than the other, but I still prefer using
the HSL adjustment, which is this photo, the one with deeper shadows. That's because the
original photo did have deeper shadows
in these areas. The HSL adjustment
boosted the colors in the image while keeping
the lighting the same. In this photo, the one
edited with selective color, the colors were boosted and
the shadows were brightened. And in other photos, I've seen that
selective color can also reduce the
brightness of highlights. In other words,
selective color can boost saturation like
the HSL adjustment, but it can also
flatten your lighting. That isn't necessarily
a bad thing, but I still prefer using the HSL adjustment so that I
can only affect my colors. If I want to edit my lighting, I'll use the curves adjustment. Okay, but there's
still one more way to use selective color, and that's for color correction. Let's take a look at
the photo we edited in the previous video and
compare how the skin looks when we edit it with the HSL adjustment and the
selective color adjustment. Based on this comparison, I think it's pretty clear that selective color looks the best. The HSL version was able to give her skin an extra
pop of saturation, but the color still seems off. This is where
selective color really shines in color correction. That's especially true when
working with people's skin, which often needs very precise adjustments in
order to look right. So in summary, I
think color balance does a great job of adding colors to the shadows
and highlights. I think HSL is great for
boosting colors in an image. But when it comes to
color correcting skin, I think selective
color is best now, remember, these are
just my opinions. It's totally fine if you want to use these adjustments
differently than I do. There's a lot of ways to do similar edits and
affinity photo, and in the next lesson, we'll take a look
at another one of affinities adjustments
for Editing color, the gradient map adjustment.
25. Gradient Map : This video, we'll take a look at the gradient map adjustment. Let's start by applying
a gradient map. As you can see, this looks a
little bit wild right now. So to better see
what's going on, I'm going to click here to
select this middle point. Then I'll press Delete. Then I'm going to click this button to
reverse these colors. This just makes it a little easier to see what's going on. So the gradient map adjustment
is applying a gradient of colors ranging from
the shadows in your photo all the way up to the highlights
in your photo. For this picture, right now, we have red applied to all of the highlights
in our photo, and you can see that
as I turn this off. Her bright white shirt, the white wall behind her and her light skin all turn red. And the darker areas of the photo like the
corner of the wall and her dark skirt all turn blue because right now we have
blue for our shadow color. Now that you know
what's going on, we can customize these colors
to change up the look. To start, I'm going to click right here to select
the shadow color. Then I'll click here
to change the color. I'm going to make this a nice
dark blue for our shadows. Then I'll click anywhere
outside of that color wheel, and now I can select
the highlight color. I'll click here to change it and we can change it
to anything that we want. I think I'll go with a nice lightish orange color like that. As you can see, this
is a very strong look just applying these two
colors to the photo. So if you want this to blend
into your photo better, you can always change the
blend mode right down here. I'm going to change
this to soft light. Soft Light looks best
most of the time, so that's why I'm
using this one, and you can see the before and after softly applying
those colors to our photo. And you can always lower the opacity if you want the
look to be even more subtle. Okay, let's do another
practice photo. I'll apply the
gradient map to it. And then I'm going to do the
same thing we did before. I'll select this middle color
point and I'll delete it, and then I'll
reverse the colors. For this one, I'm going to
select our shadow color, and I'm going to make this black then I'm going to select
our highlight color and I'm going to make
this white with a gradient ranging from black shadows to
white highlights. You can see our photo has
turned black and white. We can make this a little
bit more fun by adding a tint of color to our
black and white photo. To add just a little
bit of color, I'll double click right here to add a point
in the middle. Then I'm going to change this color to a nice
light orange color. You can see that this
creates a sepia look. I think this looks pretty nice. Here's the before and
after of that one. For extra fun, you can also change the shadow
in highlight colors, making the black a
really dark blue and the white a
really light yellow. This is just another
way to tint your photo, and I think it's pretty fun. All right. Let's do one more
example with this photo. I'll just turn off
this layer and we can apply a new gradient
map adjustment. For this one, I'll
delete the center color stop and reverse our colors. I always like to
reverse the colors, even if it's not completely necessary because
I think the photo looks more natural
having blue in the shadows and red
in the highlights. Now I'm going to change
up the colors again. For the shadows, I'll make
it a dark blue again. Then for the highlights,
I'm going to make this a nice
light orange color. And last, I'm going to
add a center point. I'll double click, and I'm going to make this a
nice orange color. And now that I'm done
adding those colors, I'm going to change the
blend mode to soft light. Now we can go ahead
and take a look. Here's the before and after. By adding these subtle colors, I think this looks really
nice for this photo. Since we added a
middle color stop, we can actually do a little bit more to refine our editing. If I click and drag this, I can move this down making more and more of the
shadows, this orange color. You can see how this
lightens up her hair, and I think this
looks pretty nice. The shadows are still blue, but now we have a bit
more warmth in the photo. I really like how
this adjustment turned out. I think
it's so pretty. I would love to be able to see what this looks like
on other photos. And lucky for us, there's an easy way to do that. We can use something
called adjustment presets. Go ahead and keep
this photo open with these two gradient
map adjustments because we're going to
use it in the next video.
26. Adjustment Presets : Learn about adjustment presets. Adjustment presets allow you
to save an adjustment that you've worked on and then apply that adjustment
to other photos. To see how they work, we
can go ahead and turn the gradient map
adjustments that we just worked on into presets. To start, I'm going to
click right here on the layer icon of the first
gradient map adjustment. Then over here in
its dialog box, we can click where
it says, add preset. Now we can go ahead and
name this whatever we want. I'll call it blue orange,
then I'll press Okay. We can do the same thing
for the other one. I'll turn on its layer. I'll click on its layer icon, and now you can see those
colors are correct, and we can add this as a preset. Again, we can call
this whatever we want. I'll call mine warm, black and white. Then
I'll press Okay. With those two
adjustments saved, we can apply them
to any other photo. But in order to do that,
we actually need to add another one of
these panels over here. So let's go to the top
of the screen to window. Then we can go down to
where it says adjustment. I'm just going to
click and drag on its name to tuck it right here next to the Layers
panel for easy access. Then we can go ahead and
scroll through all of these different
adjustments until we find the gradient
map adjustment. Once you click on that,
you can see there's a few default gradient
map adjustments here, and we also have the two that
we created the blue orange, and the warm black and white. You can click on these to quickly apply them
to your photo. Here's that first one and here's the warm black and white. You can actually turn any
adjustment into a preset, as you can see by this long
list of adjustments here. Adjustment presets are
really good to know about, but they aren't
always that useful. For example, a curves
preset doesn't really make as much sense since every photo will
need a different curve. But some adjustments can work
really well with presets, like the gradient
map adjustment, since the same gradient map can look good on lots of
different photos. Now that you know all about the gradient map
adjustment and presets, in the next video,
we'll talk about how useful this
adjustment can be.
27. Does Ally Use Gradient Map? : So do I use the gradient
map adjustment? Let's take a look
at all of the pros and cons of using
a gradient map. First, let's look at the pros of the gradient
map adjustment. By turning the gradient map
adjustment into a preset, you can apply it
to lots of photos. The gradient map
works on lots of photos because the color and the lighting of the image are affected in a
very natural way. And here's a quick fun fact. Gradient maps are how a lot
of Instagram filters work. Another pro of the
gradient map is that it can help you to
keep a consistent style. Lots of photographers use
gradient maps to quickly edit a bunch of their photos
in their own personal style. Now let's look at the cons of the gradient map adjustment. This adjustment can be a
little bit heavy handed. I find myself needing
to lower the opacity every time because the
colors are so intense, even with the blend
mode changed. Another con is that this
adjustment gives you less control than using separate adjustments
for light and color. Since both light and color are
affected at the same time, it can be harder
to make the photo a little bit brighter or darker because that means you'll also need to
change the colors. To sum this up, I usually don't use gradient maps because I like to do more
subtle editing, and I also enjoy
crafting each photo as a unique piece of art
without using presets. So personally, I like to use adjustments
like color balance, HSL, and curves to craft each image
exactly how I want it. But I totally see the
appeal to gradient maps. Lots of people love using them. So if you want to make some gradient map presets and use them on lots
of your photos, that is a totally
great thing to do.
28. Channel Mixer : Let's learn about the
channel mixer adjustment. To start, we can go ahead
and apply the channel mixer. And then we can take a
look at how this works. The channel mixer adjustment is probably one of the most
confusing adjustments. So as I explained this, don't worry if it's
confusing for you because it is a
confusing concept. So to start up here, we have the output channel. Whatever the color is set
to for the output channel, that's the color that
we'll be adding or removing from these different
colors in your photo. So to see how this
works, right now, we're adding or removing red
from these three colors. If I add red to
red, in this case, nothing happens as I raise
this and try to add more red because the red in our
photo is already fully red. But if I want to remove
red from this red color, you can see that
it becomes black. Next, we have green.
So as I raise this, I'll be adding red to green. And as I raise this, you can
see that that makes yellow. So that's an interesting
combination. Red plus green equals yellow, and as I lower this down, it just returns back to green. Since we are removing red and
there's no red and green, it will just stay green. Next, we'll be adding red
to the blue in our photo. As I raise this up,
you can see that red plus blue equals magenta, and as I lower this, it
goes back to being blue. So you can see we had some interesting
color combinations, and these color combinations
will be the same no matter what color we're adding to the different colors. To see this, let's go to
the green output channel. So we'll be adding or removing green from these
different colors. If I add green to the
red in our photo, it will turn yellow since green plus red equals
yellow in this case. If I add green to green, nothing happens
because the green in this picture is
already fully green. But as I remove it,
it will turn black. If I add green to
blue in this picture, it will turn cyan. Green plus blue is cyan. We have one last output
channel to look at blue, blue plus red makes
magenta as I raise this. Blue plus green makes
cyan as I raise this and blue plus blue doesn't change anything unless you remove
it and it will turn black. I know this is very confusing, but let's see if it makes
a little more sense when we use it on
a real picture. So here we have a beautiful
picture of a ladybug, and I'd like to
change up some of the colors with
the channel mixer. To start, I'd like to add
more green to the green in our photo to make it look more vibrant. That's pretty easy. We'll start in the green
output channel to add green. Then we'll go to
the green slider and raise it up to
increase the green. I think it would
also look nice if these plants looked a
little bit more warm. To add more warmth
to this green color, I'm going to go to the
red channel and I'll add red to green to make them look a
little bit more yellow. Now they're starting to look
a little bit too yellow. So to counteract that, I'm going to go to
the blue channel, and I'm going to add
blue to the green just to cool it
down a little bit and add a little bit of cyan. Now you can see the greens
look quite different. Here's the before and after, and I think that
looks pretty nice. And finally, just
to finish this off, I think we should add more
red to our red ladybug. So I'll go to the red channel, and using the red slider, I'll raise this up, and you can see the ladybug
becomes more red. Now, you might have noticed
as I was making all of these adjustments that the sky is starting to look
a little strange. Originally, the sky was
a more neutral color, and now it's glowing
reddish yellow. That can happen because
white is made of red, green, and blue
all put together. So that means as we raise or
lower any of these colors, it will always affect
the highlights. Luckily, the channel mixer
has a way to counteract that. If you go to the bottom
where it says, offset, you can lower this down so that the highlights
aren't as affected. Okay, so that's the
channel mixer adjustment. I know that I adjusted this
ladybug photo pretty quickly, adding colors and switching
the color channels. I probably looked pretty
confident as I did that, but I just want to
let you know that I did practice editing
this picture beforehand, and I carefully wrote down how I wanted to
change everything. Why did I have to
do that? Well, it's because I think this adjustment is very strange and confusing. I never get the sliders
right the first time around. So knowing that, let's see if I ever use this adjustment
in the next video. Oh
29. Does Ally Use Channel Mixer? : So do I ever use the
channel mixer adjustment? We can keep this video
short and sweet. No, I do not use
the channel mixer. But that's just because I
personally find it confusing. I have seen people
who have mastered this adjustment and do
great editing with it, but it's honestly
just not for me. I can't really keep
the colors straight, and I would rather just adjust colors using the HSL adjustment. That's just what I do. But if you play around with this
and like the results, then I say, go for it. But for me, I don't
use this adjustment.
30. Vibrance : Let's learn about the
vibrance adjustment. To start, I'll apply the
vibrance adjustment. So as you can see,
this adjustment has two different sliders here. We have vibrance and saturation. So what's the difference
between these two? Saturation boost the saturation of all of the colors
in your photo. Vibrance, boost the saturation
of the muted colors in your photo while leaving colors that are already
saturated alone. In addition, it also avoids saturating colors that are
found in people's skin. So to see this in action, let's go ahead and start by
raising the vibrant slider. You can see that this
is pretty subtle. I'm just going to
press Command or Control J to
duplicate this layer. Now as I turn this on and off, you can see that
this is boosting the more muted
colors of our photo. We have a lot more yellow once we've applied
this adjustment, and you can see that that
yellow was very subtle before. Also, as I go back and forth, take note of how her skin is not affected by the
vibrant slider. All right. I'll just delete the duplicate copy by pressing
delete on my keyboard. Now we can go ahead
and see what it looks like when we change
the saturation slider. I'm going to raise this and I really don't need to raise it very far before her skin
starts to be affected. Here's the before and after, you can see her skin looks a
lot more red and saturated. This adjustment is basically just two different ways
to boost the colors. In the next video, we'll see how it compares to the
HSL adjustment.
31. Does Ally Use Vibrance? : So do I use the
vibrance adjustment? So between the
vibrance adjustment and the HSL adjustment, I prefer using the HSL
adjustment, and here's why. In the last video,
I mentioned that the vibrance adjustment
protects the skin tones. It won't boost their color. Even though this can be
considered a benefit, I actually find
this benefit to be a curse because usually I want
to affect the skin tones, whether that be boosting the
color or shifting the color. HSL lets me boost the yellows
and the red separately. So I can choose how little or how much to
boost the skin tones. HSL also allows me to shift
the hue by a degree or two, whether that be
adding a little bit more red or green to the skin, and the vibrant
adjustment can't do that. So because the HSL adjustment
has more flexibility, I prefer to use it, and I don't use the
vibrant adjustment.
32. Recolor : Let's learn about the
recolor adjustment. The exercise files
for this video, all have the recolor adjustment and the HSL adjustment already applied because I made selections of different parts of the picture to demonstrate. So to go ahead and start, turn on the recolor
adjustment and then click on its layer icon
to open up the dialog box. The recolor adjustment is
a pretty fun adjustment. It allows you to apply a solid wash of color
over your entire image, or in this case, over your
entire selected area. Using these sliders, you can adjust what the
hue looks like. You can adjust the saturation, and you can adjust how
light or dark the color is. Okay, so now you know the basics of the
recolor adjustment, and I want to show you how
this is different from the HSL adjustment because these two adjustments actually look quite a bit different. So to go ahead and start, I'll just turn off the
recolor adjustment. So we can take a closer
look at our original image. The rose petals are all pink, but if you look a little
bit more closely, you can see that there's
variations to this pink hue. Some areas look a little bit
more purple than others, and some areas look a
little bit more red. So there's quite a
bit of variety here. When you apply the
HSL adjustment to change the color
of these petals, you can see all of the
colors are shifted. Now with the recolor adjustment, the colors are also
shifted to blue, but it looks different somehow. So here's the
technical explanation for why this is happening. The goal of the recolor
adjustment is to change all parts of the picture
to the exact same hue. There are still light parts
and dark parts present, but they're all the
exact same hue. This is different from
the HSL adjustment. The HSL adjustment shifts
the colors while taking into account their original hue,
saturation, and luminosity. So if part of the flower was a little bit more purple looking and a different part of the
flower looked more red, as you shift all those colors, those colors will continue to look different
from each other. Because things naturally have
color variations like this, HSL tends to make
things look more natural because it takes into
account those variations. The recolor adjustment
makes things look a little bit more
flat in comparison. Okay, so if the HSL
adjustment looks better, you should always
use HSL, right? Well, there are some
limitations to HSL, so that's why we have a
few more exercise files up here because I want to show
you a few more examples. In this example, I made a selection of the
sweater and then I added a recolor adjustment and an HSL adjustment to
turn the sweater blue. Let's take a look at what
the HSL adjustment does. Here's the before and after. Well, the sweater might
be slightly more blue. It really isn't
making the sweater a nice blue that I
was looking for. Let's see what the recolor
adjustment can do. There we go. Now
that's a blue sweater. The reason why the
recolor adjustment works better is because the
HSL adjustment actually doesn't work very well
on white objects because white objects don't really
have color present to shift. The recolor adjustment,
on the other hand, does a beautiful job because it doesn't care what the
original color in the photo was. I'll cover your photo with the color that
you want every time. Because the HSL adjustment
can't add new colors, the recolor adjustment is much better for adding a new
color to your photo. And the HSL adjustment has
some other limitations too. In this example, I made a
selection of her dress, and then I added the
HSL adjustment and the recolor adjustment to recolor the dress
into a yellow dress. Let's see the HSL. Okay. With this one, there are a few
problems I can see. The natural color variation of this dress actually looks
pretty bad in this case. Instead of yellow
sunshine over here, it shifted it into a
ghostly blue color and it looks pretty strange. In addition, the colors
are very splotchy here. This can happen when colors
are a little bit too saturated next to
unsaturated colors. It just doesn't
look quite right. Okay, so we know HSL looks bad. Let's see how the recolor looks. Ah, so much better. Because recolor
doesn't care about natural color variation or how saturated the
original colors were, this still looks great. It's applied a very
beautiful even wash of color over the whole dress, no splotchiness, and no
ghostly glow over here. Okay, I have one last
example to show you. In this example, I selected the jacket so that we
could change its color. So let's start by looking
at the HSL adjustment. You can see in this case, this actually looks pretty good. But there's one problem, and you can see that
as you zoom in. We have a bit of fringing
on the edges right here. So the original blue color of the jacket is still
showing through. Let's see what happens when we apply the recolor adjustment. Now you can see
that fringing has mostly disappeared and
this looks pretty good. However, we did lose some of the natural color
variation on this jacket. The original jacket has
different shades of blue throughout it and you can see that especially on
her back right here. The color is a bit more faded. But with the recolor adjustment, it flattens that area. In this case, this is actually
a pretty unique example. Neither adjustment
is ideal on its own, so we can combine both of
them for an all new method. So what I like to do is apply an HSL adjustment to the whole jacket to
change its color. Then I like to apply a recolor adjustment on top of that to help with
the fringing issue. I'm not going to adjust
the color quite yet. I'll just close out of
this and then invert this layer with
Command or Control I. Then using the paint brush, I'll paint to reveal this. I'll increase the flow, and then we can go ahead and paint in white paint
over the edges of the jacket to fix
the fringing issue. I'm just going to paint a
little bit to save time. There we go. And then I'll show you how I
like to adjust this. So I'll just click
on the recolor adjustment to open it up, and then we can go
ahead and change this to make it match
the jacket better. So first, I'll just
desaturate it, and maybe I'll shift the
hue just a little bit. Okay. Here we go. Now you can go ahead and see the before and after of that area. It's really helped
to clean that up and you can continue
painting and white paint all around the jacket to eliminate that blue fringing. That's how I would combine
the HSL adjustment and the recolor adjustment if
I'm having fringing issues. Now you know all about
the recolor adjustment. For such a simple adjustment, I had a lot to show
you in this video. Now in the next video, we'll do a quick summary
of what we learned.
33. Does Ally Use Recolor? : So do I use the
recolor adjustment? In general, I think
the HSL adjustment looks better in
the Rose example. The natural color
variation looked a lot better than the flat colors
of the recolor adjustment. But in the last video, we saw that HSL has limitations, and the recolor adjustment is a great backup for
those situations. So personally, here's what I do. First, I start with
the HSL adjustment. It usually works best. But if you see that
the picture needs color added or is splotchy, like the splotchy dress, use the recolor adjustment. And if you have fringing,
use them together. The recolor adjustment is a great adjustment to
have in your toolkit.
34. Black & White : In this video, we'll learn about the black
and white adjustment. To start, let's apply the black and white
adjustment to this photo. This adjustment is
pretty easy to use. It automatically makes your
photo black and white, and by using these sliders, we can adjust how bright or dark the different colors
will look in the photo. Now, not every photo
has every color. So as you shift these sliders, you might not see a change, but I think it's good
to go through all of them just to see how
it affects the photo. Now, this is all really
easy and nice to use, but there's actually
a hidden problem with the black and
white adjustment. Before we can fully
understand this problem, we need to learn a little
bit of color theory, and it's actually really
interesting to help us learn. I have this color
card pulled up here. And I'm also going to make one change over here
to the color panel. I'm going to change this
from the wheel to sliders, and then from grayscale to HSL. These HSL sliders allow
us to see the hue, saturation, and
luminosity percentages for all of the different
colors in this photo. To start, I'm just going
to have the move tool selected and I'll select
the black rectangle. You can see that the HSL
values are all 0% for black. On the right, we have
white, and as I click here, you can see the H
and the S are zero, but the L is 100. For all of the
colors in between, they all have the same saturation
and luminosity values. Saturation is 100 and
luminosity is 50, but they all have
different hues. So as I click through these, you can see that
hue number change. But the saturation and
luminosity stays the same. Okay, so now we've gotten
to know our document. Let's go ahead and apply a black and white adjustment
on top of everything. Okay, so that's interesting.
Did that surprise you? I know the first
time I saw this, I was pretty surprised. So what's going on here? Why did affinity turn all
of these colors white? Well, remember what I
showed you earlier? All of these colors have the exact same saturation
and luminosity. As far as affinity is concerned, it doesn't matter that
their hues are different, since the black and
white adjustment just removes the hue. But with one of these
rectangles selected, you can see as soon as I change the saturation or the
luminosity slider, the colors start
to look different. Okay, so it's starting
to make sense. But when I turn off the black and white adjustment,
look at these colors. Doesn't this dark blue look so much darker than this
green or this yellow? Why are they all the exact
same brightness level? Well, the answer
to this question is actually pretty simple. We have weak human eyes. Scientifically, these colors all have the exact same
level of brightness. But as far as our
eyes are concerned, the blue will appear darker. That's because the human eye
is actually really sensitive to greens but not as
sensitive to blues. Even though these are
technically the same, they look a lot different. As another example, we can come back to
our portrait photo. I'm going to delete this
black and white adjustment and I'll apply a brand new one. Right off the bat,
you can see her skin looks way too bright with
this default setting. That's why earlier
I lowered this down quite a bit to make
it look more natural. Technically,
affinity isn't doing anything wrong with
its default settings, but it sure looks wrong. That's the problem
we need to address. The question is, what
can we do about it? Lucky for us, there were some really smart
people that ran into this same problem and they already
found the solution. During the 1950s, the
world was beginning to switch from black and
white TV to color TV. Obviously, color TVs are great. But during this transition, there was a hurdle to overcome. How could TV stations
play a show in color, but also play that same show on a black and white TV without distorting the
colors brightnesses. As we've seen, turning
colors into black and white is not as straightforward
as it might seem. Well, to solve this problem, they came up with a
formula to calculate the perceived brightness of
color based on RGB values. The formula is this.
Perceived brightness equals 30% red plus 59%
green plus 11% blue. These percentages take into account that we see green
as a very bright color, red as a fairly bright color
and blue as a dark color. Using this color
code, they could easily convert their
shows into black and white so that the shows could be broadcasted on all types of TVs. So now that we know
this magic formula, how can we use our new
knowledge and affinity? Well, first, let's apply a brand new black and
white adjustment. We know the default values that we have here aren't right, so we can use the magic
formula to fix it. I'll put it up on the screen
so that we can reference it. So first, red should be 30%, so I'll type that in
and then press Enter. Next, we have yellow, which isn't in the formula. But as far as computers
are concerned, yellow is just red and
green put together. So if we add 30%
red to 59% green, we get 89% for yellow. Next, we have green. So I'll just type in 59. Then for Cyan, this is just green and
blue added together. So we can take 59% green
and add that to 11% blue, and we get 70 for cyan. For blue, I'll just type in 11. And last, magenta is
just red and blue. So I'll add 30% red to 11% blue, to get 41% for magenta. All right, take a
look at this now. Now the colors look
the way that they should for a black
and white photo. Of course, this formula will look perfect on
regular photos too. I'll copy this with
Command or Control C, and then I'll paste it onto our other photo Command or
Control V. As you can see, this does a perfect job. Now, as great as
this formula is, you're probably not
going to remember all of the different
numbers that we use. So to keep life simple, we can turn this
adjustment into a preset. Just open up the adjustment
layers dialog box and then click Add preset. Then you can go ahead and
call this whatever you want. I'll call mine accurate black and white, and
I'll press Okay. To access this preset, you can just go to
this adjustment panel, then go to black and white, and as you can see,
you can now access the accurate black and white
preset whenever you want. Just to make things
simpler for you, I also added this to the
color card exercise file. If you go to the layers, we have the accurate
formula right here. So you could just open this up. All the percentages are correct, and you can add this as a preset to save you a
little bit of time. And I just wanted to tell you
that for artistic reasons, if you ever have a photo
and you want to make parts of it lighter or
darker using the sliders, that's totally fine to do. Maybe you want the
red to look even deeper for a moodier look. You can go ahead and
use the preset as a starting point and
then adjust from there. Alright, now you know all about the black
and white adjustment. So I'll answer the question
in the next video. Do I ever use the Black
and White adjustment?
35. Does Ally Use Black & White? : So, do I ever use the black
and white adjustment? Well, it depends. If I just want to remove
the color from a photo, I actually just use HSL. Since I haven't memorized, I'll just press the shortcut
Command or Control U to add an HSL adjustment, and then I'll lower the
saturation all the way. It's super fast, and honestly, it's almost as accurate
as our preset. But if I want to craft a
beautiful black and white photo, then I'll use the
black and white preset and then I'll adjust
the colors from there if I want things
to be a little bit more artistic or less realistic. The answer is, sometimes I do use the black
and white adjustment.
36. White Balance : Let's learn about the
white balance adjustment. To start, we can go ahead
and apply the adjustment. The white balance adjustment
is used to adjust the temperature and the
tint of your photos. Most of the time, you'll just need to make your
photo a little bit warmer or cooler by moving
this first slider around. But sometimes if you've used artificial lighting
to take your photo, you might need to adjust
the tint as well. So that's why this
slider is here. And you might be wondering how
to find the right balance. And the answer is just move the slider around and
see what looks right. For this particular photo, as I warm it up, it
doesn't look right. But as I cool it down, you can see the white walls in this image look more correct. So I'm going to bring
it down for this photo. And now you can go
ahead and see the before and after of the
white balance adjustment. In the next video, we'll talk about how useful
this adjustment is.
37. Does Ally Use White Balance? : So do I use the white
balance adjustment? To answer this question.
Yes, all the time. This adjustment is
so simple to use, and the white balance is a very common thing
to correct in photos. I find myself using this, especially after adding lots of different brightening and
saturation adjustments because after using a
lot of adjustments, the white balance
can get thrown off. In the first chapter, we did this practice
project together, and after looking back at it, I can see that this photo could look better with the
white balance adjustment. We really warm things up
with all of our editing, and now when we cool things back down with adding a
little bit of blue, this picture looks a lot better. The white balance adjustment
is a very useful adjustment.
38. Lens Filter : In this video, we'll learn all about the lens
filter adjustment. To start, we can go ahead
and apply the lens filter. This filter lets you add a subtle wash of color
over your image. You can increase or decrease the optical density to make
this effect more or less intense and you can change the color of the tint
by clicking right here. For this picture, we can go ahead and change it to
see what it looks like. Maybe we'll make a
nice light red color. And we can increase
the optical density. And now you can see
what this looks like. Here's the before and
after. That's it. That's how you use the
lens filter adjustment. Let's talk more about
it in the next video.
39. Does Ally Use Lens Filter? : So do I use the lens
filter adjustment? To be honest, no, I don't. Because yellow and blue are by far the most common lens
filters to add to a picture, I'd rather just use the
white balance adjustment. Instead of applying
one color at a time, by using white balance, you can quickly move between those colors to see
what it looks like. Sometimes it's hard to tell
which one your photo needs. And if I want to color grade a photo with more
creative colors, I like to use color balance. Color balance strikes
a really good balance between simplicity and control. Simplicity, with all of the color sliders
clearly visible, making it easy to try different
colors out and control with choosing what
colors to apply to the shadows, midtones,
and highlights. Well, I don't use the lens
filter adjustment anymore. I used to use it as a beginner. Now I just prefer other options. Feel free to play around with it to see if it would
be useful to you. But for me, I don't
use this adjustment.
40. Split Toning : Let's learn about the
split toning adjustment. To get started, I'll apply
the split toning adjustment. This adjustment is very similar to the lens
filter adjustment, but it has the added
ability to add colors to the highlights and
to the shadows separately. I think contrasting
colors look pretty good. So I'm going to change
the color to orange and the highlights and
then I'll raise the saturation to make
it more apparent. I might have to raise this quite a bit to be able to see this. Then in the shadows, I'm going
to make this a blue color, and I'll raise the
shadow saturation. Now, I found that the
shadow saturation slider is a lot more sensitive
than the highlights one, so I definitely should not raise it as high
as I did that one. I'll just raise it a little bit. And last, we have a
slider called balance. This can be a useful slider. If you increase it or
move it to the right, it will make more of the
photo considered a shadow. So in this case, more of
the photo will turn blue, or if you decrease it or
move it over to the left, it will make more of the
photo considered a highlight. So in this case, more of the
photo will appear orange. And that split toning, here's the before and
after for this image. Now that you know all
about split toning, we'll talk more about
it in the next video.
41. Does Ally Use Split Toning? : So do I use the split
toning adjustment? No, I really don't use it. I like color balance
much better. I find it easier to use, and I like that you can
add colors to the shadows, mid tones and
highlights instead of just the shadows and highlights like the split
toning adjustment. So because color balance is
a more powerful adjustment, it's the one I choose to use. And now we're done with the
color chapter. Great job. I know that was a
lot to get through. We just have one chapter left, and this last chapter
is pretty interesting. We're going to cover all of
the rest of the adjustments, and some of these are for
pretty specific situations, but you might find one
that's useful to you. I'll show you how
to use each one.
42. LUT : This chapter, we'll learn about a few miscellaneous adjustments that are included
in affinity photo, starting with the t adjustment. Lut stands for Look Up table, and it essentially is a preset for editing the color
and light in your image. Lutz are used in all sorts of programs even beyond
the Affinity Suite, and because of that, there are a ton of louts that
you can find online. Some of them cost money, but there are also lots
of free louts online. In this video, I'm going
to show you how to make your own ts and how to get
free luts from online. Let's go ahead and
start with this photo. When making a lot, affinity
will take into account what changes you've made to the color and the
lighting in a photo. So to make a lot,
we first need to change the color and
lighting in this photo. So to start, I want to
make the shadows blue, and maybe we'll warm up the highlights and
brighten the image. So to achieve that, first, we're going to add a
color balance adjustment. I'm going to go to the shadows so that we can make
the shadows blue. I'll raise the blue. It's also nice to add
a little bit of cyan. All right, very blue. Let's also go to the highlights, and we can warm
these up by adding yellow and adding a
little bit of red. While we're in here, we can
also go to our mid tones, and I usually like to apply the same effects that I
did to the highlights, warming up the mid tones. I'll just add some yellow. And maybe for this one, I'll
add a little bit of magenta. We have some nice color grading. Next, we can go
ahead and brighten up the image with a
curves adjustment. To brighten up the image, first, I'm going to raise
the black point, so the shadows aren't
quite so dark. I'll bring this line back down to meet the line
a little bit there, and then I'll raise
the highlights. Okay, that looks pretty good. Now I'll just select both of
these layers so that we can see the before and
after of our changes. Okay, so with those
changes made, now we can export
these changes as a ut. To do that, go to the top
of the screen to file, then down to where
it says, Export ut. You can call this
whatever you want, and then you can click Export, choose where you want to save
it, and then press Save. Now we can go ahead and
see if that ut worked. So I'll just select both
of these and delete them. And now we can finally
apply the ut adjustment. With this adjustment,
we can load the lot that we just
made by clicking here. I'll just select
that and press open. You can see that that worked. Here's the before and
after. Very nice. Let's see how this lot that we created looks on other photos. I'll go to this one and then I'll apply
the ut adjustment. I'll load the ut that we made. And there we go. Now
it's been applied. Here's the before and
after of that one. I think this looks pretty good, but I want to see it
on one more photo. To speed things up, we
can just copy and paste this adjustment with our
lot already loaded into it. I'll press Command or
Control C to copy this. Then I'll go to our
last exercise file and I'll paste it in Command or Control V. Okay, so with this loaded in, I don't think this one looks
very good for this photo. It's turning her hair blue, and I just don't really
like how it looks. Not every lot will look
good on every photo. Usually, certain lots look good on certain types of photos. Some lots might be
designed to look good when applied to
very dark photos. While other lots might be
designed for bright photos. Okay, now that you know
how to make your own Lutz, I want to show you how you
can find free Luts online. This is a great
website for free Lutz. It's called freshlts.com. You can go ahead and
browse different Luts. I'll click up here on
Popular Luts for this video. And then I'll show
you it's very easy. Just go to one that you think looks good
for your picture, and then you can go
ahead and download it. I think this lot should
look better on this photo. I'm going to delete this one. I'll apply a new adjustment, and then I'll load the new one. That looks so much
better for this picture. Here's the before and after. Now, to save you time, you can turn any lot into a preset. That way you don't need
to keep the file on your computer and you can access it very
easily at any time. Now that you know
all about the lot adjustment in the next video, we'll talk about
how useful it is.
43. Does Ally Use LUT? : So, do I use the ut adjustment? No, I don't use adjustment. I find the effectiveness to be extremely hit or miss with Lutz, depending on the photo
that they're applied to, and I think I can edit a photo
much better than a ut can. Also, Luts are way
more limited than a similar feature that
affinity has called macros. For any automated work like
this that I want to do, I'd rather use macros. We're not going to cover
macros in this course, since they're not an adjustment. They're actually a
special feature of affinity that lets you apply multiple adjustments
and effects to your photo with the
click of a button. After you click that button, you can still access all
of the different layers, so you can make any fine tuning adjustments
that you want. You can't do that with a lot that's only applied
as a single layer. If you want to learn
more about macros, I actually made an entire
course about them, and I'll leave that
linked below this video.
44. Soft Proof : This video, we'll learn about the soft proof adjustment layer. The soft proof adjustment
allows us to see a preview of what our photo will look like after
it's been printed. To see this, we can go ahead and apply the soft proof adjustment. As you can see, once
our photo is printed, it looks a lot brighter
and less saturated. We'll get back to the
settings in a moment. But for now, this is how I would use the soft
proof adjustment. Since this is what
our photo will look like after
it's been printed, I'm going to apply
layers underneath this adjustment to
counteract its defects. To start, I'm going
to press Command or Control M to apply a
curves adjustment layer. One of the main things
I can see here is that the white areas of our
photo are way too bright. So I'm going to take
the white point node right here and I'll
just lower this down that way you can get more detail in
the highlights again. I'm just going to bring this
back up to match the line. That looks pretty good. And now you can see the
before and after. This already looks a lot better. Now that we're
done with that, we can go ahead and
adjust the colors. I'll press Command
or Control you. And in the master color channel, I'm just going to raise the saturation to bring the
color back into this photo. I'll just select both
of these so that we can see the before and after. I think this is a
big improvement. I do think our photo
still looks a bit bright, so I'll click on this
curves adjustment and maybe I'll
darken the shadows. There we go. That
looks better to me. With all of that taken care of, now our printed photo
will look a lot better. So if we're ready to
export this for printing, first, we actually need to turn off this soft
proof adjustment. This is just a preview of what your photo will look like
after it's done printing, so you can see the
final product. But we need to make
sure to turn this off. That way, the photo is now
prepared for printing. If we were to keep this on and then send it
to the printers, our photo would
become bright again. So it's important
to turn that off. So that's how the soft
proof adjustment works. But before we finish this video, I need to give you a very
important disclaimer. I mentioned at the beginning
of this video that the soft proof adjustment gives a preview of how your photo
will look when it's printed. And while that's true, it's not the whole story. The truth is the soft
proof adjustment is actually designed to give you a preview of how your photo will look if it's
commercially printed. But what does that
mean? Well, it means if you're printing your photo at a
place where people normally print
photos, like Walmart, Costco, Amazon,
Walgreens, Shutterfly, or even a home printer, then you do not need to worry about the soft proof
adjustment layer. Instead, this
adjustment is useful for people that are
printing thousands of brochures or magazines and are working with a large
scale printing company. But why is that? Well, most
places that print photos for regular people will assume
that you're submitting a photo that has an
SRGB color profile. This is by far the most
common color profile. So most printing places will
tune their printers to make sure that SRGB photos
print as well as possible. If you want to make
sure the photo that you're using is SRGB, you can go up to the top of
your screen to document and then down to convert
format slash ICC Profile. Your photo will probably already be in SRGB, just like this. But if it's not, you can
change it from here by scrolling through this list
to find the SRGB format. You can select it and
then press Convert. You can also see your
photos color profile from the Context toolbar if you
have the view tool out, so you can see right up here, it says SRGB Okay, so with that taken care of, I also want to mention
that if you are going to print thousands of
brochures or magazines, then the soft proof adjustment might be really useful to you. I'll open this up. Because
I want to show you that this list has all of the common printing
configurations that commercial print shops use. By default, this US web
coded option will be selected because it's
the most common option for commercial print
shops in America, but it's a good idea to ask
the company what profile you should use because they might want you to
use something different. In summary, use SRGB so that you don't have to
worry about any of this. Or if you are printing thousands of items with a commercial
printing company, ask them which printing
profile you should use.
45. Does Ally Use Soft Proof? : So, do I use the soft
proof adjustment? To be honest, no, I just use the SRGB
color profile. I've actually never printed anything commercially
on a mass scale. So the default color
profile is fine for me. But if you are printing
with a fancy print company to print thousands of brochures, then the soft proof adjustment
would be helpful for you.
46. Threshold : Let's learn about the
threshold adjustment. To begin, we can go ahead
and apply this adjustment. So the threshold
adjustment turns your photo into two
colors, black and white, with all of the bright things in your photo becoming white, and all of the dark things in
your photo becoming black. You can move this
threshold slider to alter how much
of your photo is considered a shadow and how much is considered
a highlight. So this looks
really interesting, but you might be wondering why you would use this adjustment. Well, there's two reasons. You could be using it
for artistic purposes, which we'll explore in a minute. Or you could use it for research purposes to find the brightest and darkest
parts of your photo. So first, let's take a
look at research purposes. If I bring this threshold
up quite a ways, maybe let's bring it up to 90%. This will make most
of the photo black, which allows us to see where the brightest highlights
are appearing in our photo. You can see these areas
are super bright. And you could also
lower this down and whatever's leftover in black are the darkest
parts of our photo. You might be wondering
why this would be important and it's usually not, but it can be useful information if you're editing your black and your white point and you want to know which areas you'll
mostly be affecting. Now that you've seen that, let's go to our other exercise file so we can take a look at using the threshold adjustment
for artistic effect. I'll apply the threshold
adjustment to this photo. And this time, rather than
moving the threshold around, we could use
targeted adjustments to create a cool effect. So I'm going to close
out of this and I'll select this
background layer, and then I'll apply a
curve underneath that. And now we can go
ahead and adjust this, and this will change how our
threshold adjustment looks. To start, I'm going to
make this curve very dark. Now that it's darker, we can decide which areas
we like better. So here's the before
and the after. Personally, I like
how the lace on the bottom of her shirt looks now that we've
darkened the photo. I also like that we can see a
better outline of her face, particularly her
nose and her chin. So knowing that, we can
close out of this and then invert this curves adjustment
with command or control I. Then we can take the
paintbrush tool. And we can paint
with full flow and 100% hardness to bring those
areas back into our photo. Just make sure
you're painting in white paint since
this is a black mask, and now we'll be able to reveal that pretty lace on the
bottom of her shirt. The reason I turned
up the flow and the hardness is because I
wanted to fully be applied. It just makes it a little
bit easier in this case. Okay. Now that I've
painted those areas, we can go ahead and
do the opposite. I'll press Command or Control. And this time, I'm going
to make this very bright. Closing out of this, now we
can take a look at the before and after to decide if there's
any areas we like better, and this is a little
bit harder to see, but I like how this wall looks better before there
were speckles of black, but now it looks cleaned up. So I'm going to invert this layer with
command or control I. Then I'll paint in
white paint over this area to remove
those speckles. And now you can go ahead
and see the before and after of our cleaned up
threshold adjustment effect. To finish this artistic effect, we can also apply a gradient map to change the colors
in this adjustment. I'm going to apply this above the threshold adjustment
so that the colors appear. If we applied it underneath
the threshold adjustment, everything would
just stay black and white since that's what the
threshold adjustment does. So with the threshold selected, I'll apply a gradient map. And now we can choose any
colors we want for this photo. All right. And there we have it. The threshold
effect is finished. That's how this
adjustment works. In the next video, we're
going to talk about how common it is to
use this adjustment.
47. Does Ally Use Threshold? : So do I use the threshold
adjustment? Usually, I don't. This isn't really an adjustment you would use on every photo. But every once in
a while there is a really specific use case for when I would want to use it. Like making an artistic effect
as seen in the last video. I do think this
effect is pretty fun, so feel free to play
around with it. It can be fun to see your photos take on a whole new look.
48. Posterize : This video, we'll look at
the posterize adjustment. To start, let's apply
the adjustment. So this adjustment has
a fun effect where it reduces the number of colors that are
present in your photo. And this might be a
little confusing, but we have a slider down here, and the number does not
represent the amount of colors. We currently have more
than four colors here. This is more of a
strength slider, which can be a little confusing. But basically, as
you raise this, more colors will
appear in your image, and as you lower it,
less colors will appear. So you might be wondering why you would want to
use this adjustment, and I would say this is
purely for artistic effect. So to play up the
artistic effect, let's add a few other layers to really make this
look interesting. To start, I'm going to apply a gradient map so that we can play with the colors
that we see here. I'll just delete this
middle color stop, and I'll reverse the colors, and we can go ahead and make these colors whatever we want. I'll just go with the
classic dark blue shadows, and we'll do a nice yellow
color for the highlights. And then to add one more color, I'll double click on the line, and I'll go ahead and make
this a nice orange color. The gradient map made
this look really cool. Here's the before and after. Another way we can
adjust this is using the curves adjustment to affect the dark and light
parts of this image. One thing I'm noticing is
that we have this area down here that's a sort
of strange brown color. So I would like this to be the same blue that
our shadows have. To do that, I'll use curves
to darken our image. I'll select this bottom layer and apply a curves
on top of that. And then I'll just lower this
down until that turns blue. I'll close out of
this and we can go ahead and invert
this with Command or Control I so that we can paint this just over that
area using white paint. I'll paint over
that. Just for fun, I'm also going to
paint this over his shirt to give it a
little bit more depth. I also like that it's making
his shirt have more detail. I think that looks pretty nice. If we want to, we
can always click on the curves layer icon to
adjust this even more. I think I like how that looks. Another thing we can do with
this effect is we can add a blur to make the
effect less grainy. I'm just going to zoom in
here so you can see that. We have a lot of
little spots all over his shirt, which is fine, but if you wanted
those to be smoother, you could go to the filters and then apply a Gaussian blur. Then you can bring up
the radius to blur this as much as you want to make the colors
look smoother. Also, make sure to
check on preserve Alpha so that your edges
don't become transparent. All right, with his
shirt looking good. I'd like that to
be over his shirt, but not over his face. I don't really like
how that looks. So I'll press Command
or Control I. And now using white paint, I'll just paint this
over his shirt. So we've been able to keep
the detail on his face, but his shirt looks
a lot smoother. I think this looks really good. Now, if you want his face
to become smoother as well, you can apply a separate
Gaussian blur adjustment and then just make it a little bit lower of a strength
for the blur. Because we raised it so much for the face and we didn't
like how that looked. I think this time, I'll just
raise it just a little bit. Remember to check
on preserve Alpha. I'll close this and invert this layer with
Command or Control I. Now I can paint
this over the face. Now, after doing that painting, I don't want to lose all
of the detail of his eyes, so I think I'm going to switch my paint to black so that I can undo the painting over
his eyes and eyebrows. Maybe I'll also undo it over
his mustache and his lips. Did he have a beard? Oh,
yes, he had a beard. So I think I'll paint this
over his hair as well, so we don't lose those details. He has hair on his head, so I'll just paint to
bring that back. There we go. All right. With all of that finished, we can go ahead and take a look at how this
adjustment looks. So here's the before
and the after. Now you know how to use
the posturize adjustment, and you can combine it with other adjustments to customize
it however you want. In the next video, we'll talk a little more about when you
would want to use this.
49. Does Ally Use Posterize? : So do I ever use the
posterize adjustment? As you've seen, posterize
is used for artistic effect and the effect
looks very similar to what we achieved with
the threshold adjustment. Whether you use posterize or threshold is really just
a matter of preference. To compare these
two adjustments, here's a couple of examples. I made this first picture for a YouTube tutorial
a few years ago, and for this one, I use
the threshold adjustment. Another example is
the Hope poster that was used in Barack
Obama's political campaigning. This one used the
Posterize effect, which you can see because
it has more color. Personally, I find
the threshold version of the effect to be easier to create and I like the striking appearance
of only using two colors. That being said, posterize is a great option if you want to include more than two
colors in your design. I don't use these
adjustments all the time, but both of these adjustments
are good to have on hand.
50. Invert : Let's learn about the
invert adjustment. To begin, we can go ahead
and apply this adjustment. This is a very
unique adjustment. It doesn't have a dialogue box. All it does is it turns every color into
its opposite color. You can see that
the red sign that she's leaning against
has now turned cyan. We can also see the yellow part underneath the sign right
here has turned blue. And her black hair
has now turned white. This is even easier to see if
we come to our next photo. If I apply invert to this one, you can see this black
and white picture has become fully reversed. Why would you want to
use this adjustment? Well, in all honesty, before making this course, I'd never used this
adjustment before. Why? Because a short cook
key already inverts layers. I'll just turn this off and you can see if I have the
photoayer selected, I can press Command
or Control I, and it achieves the
exact same thing. Command or Control I works on photoayers, masks,
and adjustments. So again, why would we
use this adjustment? Well, we're really getting
into the weeds here, but here is the only use case that I could figure out
for this adjustment. It's a little tricky,
but stick with me. For this example, we have this photo and I want to
apply a texture on top of it. To do that, I'm going
to go to the top of the screen to file and
then down to place. Then we can select the texture for this
video. I'll open it up. And then I'll click and drag to apply this texture
to our document. Now let's say, I want all of these dark spots to become
light spots on the bike photo. A good way to blend
layers together is to use blend modes. So
let's start with that. If you use the blend
mode multiply, you can see the photo again, but the spots are black. I want them to be white. So let's try another one. If you use the
blend mode screen, this lightens everything up, but the dark spots
are still dark. So it looks like instead
of using blend modes, I need to invert the layer to
make the dark spots light. I'll press Command or
Control I to do this. Up here, you can see that this layer has
become rasterized. But what if I don't want
the layer to be rasterized? I'll explain more about what
rasterizing means later on. But for now, let's just say we didn't want
this to happen. I need to undo this with
Command or Control Z. Instead of directly
inverting our layer, we can use the
invert adjustment. I'll turn that on and I'll make it a child
layer to our texture. Now that that's inverted, I can go ahead and select the main texture layer and we
can use blend modes again. Multiply still doesn't work, but if we go to screen, you can see finally this works. The white spots are still there and we can see the rest
of the photo perfectly. Let's quickly talk
about rasterizing because I think that was the
most confusing part of this. If you're wondering
why you wouldn't want to rasterize a layer, well, we're really getting
into the weeds with this one, stick
with me again. Whenever you use File Place, this allows you to easily change out the photo
with a different one. So with this layer selected, you can go to the
Context toolbar and click where it
says replace Image. Then you can select
any other picture, and it's automatically switched
with the original one. And once you replace the image, it even keeps all
of the blend modes and adjustments that you had originally applied to the photo. I'll undo that with Command or Control Z because I don't think this texture
works for this photo. There we go back to normal. That's why we wouldn't want
this rasterized if I go back in time by pressing Command or Control
Z a few times. You can see if I inverted this
with Command or Control I. Then set this to screen. Well, this looks just fine, but now we no longer have the option to replace the image. I know that was a
lot to take in, but now you know how to
use the invert adjustment. And in the next video, we'll talk about if I ever use this.
51. Does Ally Use Invert? : So do I ever use the
invert adjustment? I mentioned before that I had never used this adjustment
before this course, and after finally figuring out a way to use
this adjustment, I can honestly say that no, I've never used it and I don't
think I ever will again. Whenever I need to
invert something, I prefer to just press
Command or Control I. It works for photos,
masks, and adjustments. I use it all the time, and this invert adjustment is
just more annoying than that. I would highly
recommend that you just learn the invert shortcut.
52. Normals : This video, we'll learn how to use the normals adjustment. The normals adjustment is
a very unique adjustment because I don't think
you would use it unless you have a very
specific use case, and that's three D animation
or three D modeling. So this adjustment is used to edit something
called a normal map, which is what you
see right here. Basically, these maps store different height values that you can apply to
a three D object. This is like adding a texture to an object with different raised areas
and depressed areas. If that all sounds a
little over your head, don't worry, it's
over my head too. I'm not a three D animator, so I've never worked
with normal maps before, but I wanted to at least give
a simple demonstration of this adjustment in case you do want to work
with normal maps. So let's go ahead and apply
the normals adjustment. So basically this image is using different colors to store height values for
your three D object. So by changing the scale, you can adjust how deep these grooves are or
how shallow they are. And you can also use this rotation slider
to move this around. I know this is all
pretty confusing, but if you're a
three D animator, then this is the
adjustment for you.
53. Does Ally Use Normals? : So do I ever use the
normals adjustment? Like I said, this adjustment
goes over my head. I wish I was cool enough to have a need for
this adjustment. Only three D animators
would use this adjustment, and I'm not one, but if you are, maybe you'd like to
use this adjustment.
54. OCIO : This video, we'll learn
about the OCIO adjustment. So this is a special
adjustment that allows you to work with
OCIO configurations. OCIO stands for open Color IO, and it's used in professional
video production. This allows people working in different pieces
of software and on different computers to all view the exact same
colors as each other. Similar to the
normals adjustment, this is an adjustment I'm
also not very familiar with. So I'm just going to give you
a simple demonstration of the adjustment to at least give you an
idea of how it works. So the first thing you
need to do is load an OCO configuration file. To load this up,
we first need to go to the assistant at
the top of the screen. Then we need to go to
the color section. And finally, we can go
right here where it says, open Color Io configuration
file, press Select. Then go ahead and open this up. All right, so now that's all setup. We can
close out of this. And we can go ahead and
restart affinity Okay, so I just restarted affinity
and reopened our photo. Now we can go ahead and
apply the OCIO adjustment. From here, you can
go ahead and choose your source color space and you can go ahead and choose your destination color space. After you choose both of those, your photo will
be previewed with whatever color
spaces you have set. That's how you use
the OCIO adjustment. In the next video, we'll
talk a little more about it.
55. Does Ally Use OCIO? : So do I use the OCIO adjustment? Like the normals adjustment, I don't use the OCIO adjustment. Again, I wish I was cool enough
to have a need for this. Professional video production
sounds really interesting. So if you do that, then this is a great
adjustment for you.
56. Ally's Favorite Adjustments : To wrap things up in this video, I'll remind you of
the best adjustment that I use all the time. To break this down, I have a few categories, and I'm going to award different adjustments
for each category. So let's see who's going to
come out on top with awards. Okay, the first reward is for the best
lighting adjustment. We have all of our
lovely contestants here, but you can probably
guess the winner Curves. Congratulations to curves. It truly is the best
lighting adjustment from simply
brightening things up, adding contrast, or
creating moody lighting. The curves adjustment
is always the best. It's easy to use
and works great. Now, for each one of
these categories, I'm also going to do
an honorable mention. And for this one,
we actually have a very shocking first round with honorable mention
going to curves. Unfortunately, for
the other nominees, I just never use any of them. So I once again need
to award curves. It's truly a standout. All right, the next category is for the Best
color adjustment. There were quite a few nominees, and this round is
a little harder, but there is still a clear
winner, and that's HSL. Congrats to HSL. This little adjustment
really pulls its weight from boosting existing
colors to changing colors. This little
powerhouse adjustment is easy to use and
gets the job done. For honorable mention, I need to award two
different adjustments. First, congratulations to
the recolor adjustment. This adjustment
does amazing work on its own to create new colors, even on white clothing. And when it works together
with the HSL adjustment, it really pulls its weight. And for the other
honorable mention, I need to award the
selective color adjustment. I may not use this
adjustment all the time, but it really does a great job
with adjusting skin tones, and that needs to be praised. The next category is a fun one. Best color grading adjustment. As a reminder, color grading is when you add new colors
into your photo, usually in a subtle way
to change the mood. Now, you can use a few
different adjustments for this, but the winner of the
color grading category is color balance. With the power to change colors
in the shadows, midtones, and highlights, this
subtle adjustment seems to always have
absolutely beautiful results. Congrats to color balance. For honorable mention, I need to award the white
balance adjustment. While this adjustment
is meant to make the white parts of a photo
look more true to color, I find myself using
this adjustment for artistic purposes, warming up or cooling down photos to give them
the right look. And this adjustment is
just too perfect at that. And now we've made it to our
final category of the video. Best special Effect adjustment. I know this is a broad category, but the winner of this
one is black and white. Black and White
photos are a classic, and the black and white
adjustment is just so great. Adjusting the color sliders can really change the
look of your photo, and it's so easy to use. And if you made the
Black and White preset, your photos will always have
a perfect starting point. Okay. And for honorable
mention, again, I have two adjustments
I need to award, and they're basically friends. The honorable mention
goes to threshold and posterize both of
these adjustments are really fun for creating
a special effect photo, and they're both
very easy to use. I think they both
deserve a mention here. And with that, now we have all of our top adjustments awarded. I hope this helps you as you look at that long
list of adjustments. Not all adjustments are
useful for every photo. So if you want to
simplify things, you can just master
these adjustments, and you will be set for
all of your photo edits.
57. Class Conclusion : Congratulations. You
finished the course. I know that was a lot to learn, but now you're an
adjustment layer master. Thanks so much for watching, and I'll see you in the next Affinity
Revolution Tutorial.
 Affinity Revolution, Affinity Instructor