Transcripts
1. Introduction: [MUSIC] Hi, I'm Elizabeth, and welcome to Mark-Making
Beyond The Brush. I'm an artist and a high
school art teacher. I've been teaching
art since 2005. In 2020 I began teaching
for Skillshare. I love working with
students of all ages, celebrating those
exciting moments when something new clicks, and helping artists explore
new ways of creating. I love experimenting with different art media and
really pushing art media and tools beyond the
conventional uses, and processes, and techniques. One way that I do that is by shaking up the
tools that I use. I love a great
paintbrush and just laying down that
beautiful color or value. But sometimes you want to shake
things up a bit or you're trying to work in your sketchbook and you're
just not sure what to create or you've
got time to create, but you don't know
what to create or you're stuck in
a creative rut. This class provides a great way to shake up your
creative process, add some more resources and options to your
artistic tool kit and get you outside
of a conventional when it comes to what tools
you create to make art. I use these techniques to
warm up when I get down into the studio or if I have a really great project
and I'm excited to start, but I don't really know where to begin and I think you're
really going to enjoy it. We're going to explore mark-making
beyond the paintbrush. We are going to set
the brushes aside. We're going to get out our
watercolors, acrylics, inks, as you go hunting
around your home for unconventional
mark-making tools. We're going to able
to incorporate all of these techniques into
your art-making practice. This class is great for
artists no matter where you are in your creative
journey and I am so excited that you
are here to join me in mark-making beyond
the brush [MUSIC]
2. Materials: [MUSIC] There aren't
there many supplies that we made for this class, but there's a few
art supplies and a few unconventional
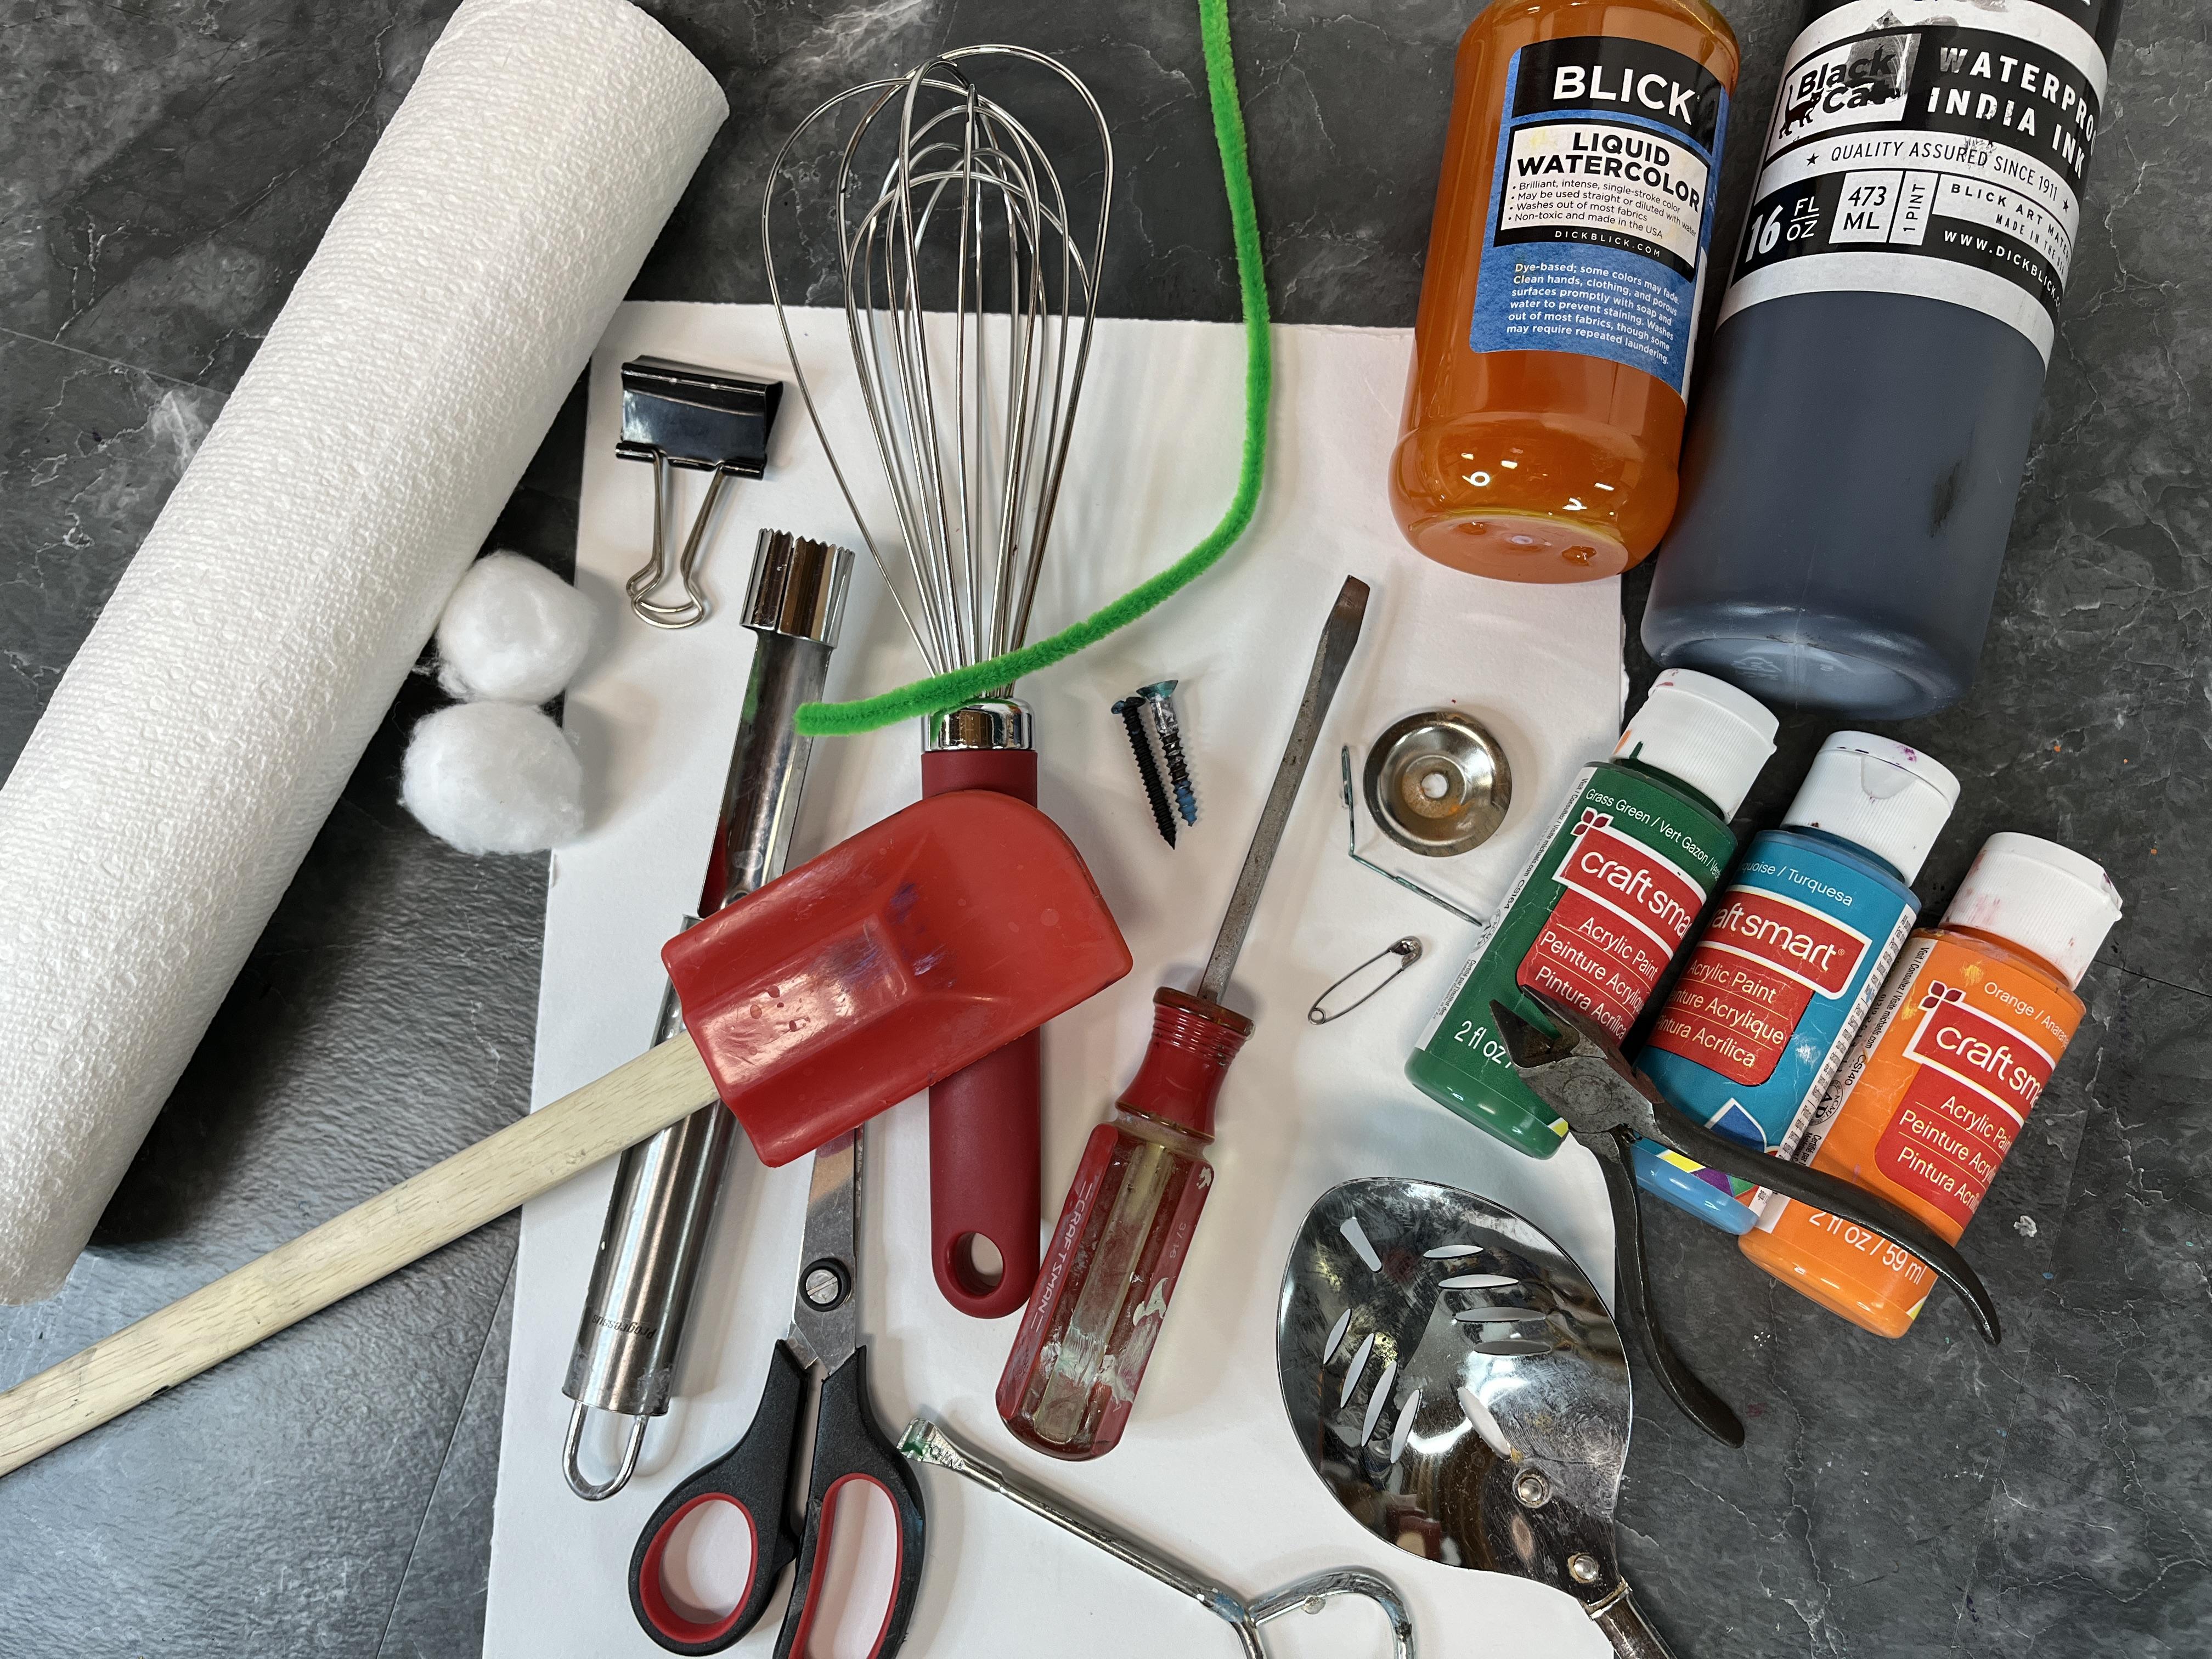
art supplies. First, you're going to
need a couple of sheets of 8 by 10, nine by 12 mixed media
or watercolor paper. I have some Canson
mixed media paper. I tear the sheets down
to quarter size from my 18 by 24 inch pad. Something to write
with, I'm going to use an ink pen so it shows
up nice and dark. I'm going to use a
liquid watercolor but you could also work with tube watercolor or
pan watercolor and just make up some nice
big juicy puddles. I'm also going to
get out some ink. I've got some India ink
and then I've also got a couple other jars of colored
ink that I might get into. Then I also want to play
around with acrylic. I've got some Blick
acrylic paints and then I've also
got a couple just Craft Smart brand that
I've picked up from different art supply
stores so that I have a variety of
viscosities for my paint. We also want some paper towel or some old rags to wipe off your tools and a
larger cup of water so that you can
wash off the tools we'll be working with
as you move through different media or as you
finish working with that tool. We're going to be looking
for different supplies around our art studio, our toolbox, our kitchen, and our office desk. For the kitchen, I've got
a spatula and a whisk, I've got an apple core, and I've also got
a slotted spoon. From my art supply
and tool area, I have some scissors and I've got a couple
of different screws, I've got a paperclip
from my desk, I've got a screwdriver, and that's some wire cutters, and the paint can opener, as well as a binder clip, and this metal disc that
is actually from one of my camera filming
stance that just fell off. I think they'll make
some really cool marks. Think about what tools
you're going to want to use from these different areas. We are not just going
to be stamping. Although they might make
an interesting stamp mark, we are going to really
play around with drawing with them as well and using them as we would a paintbrush and seeing
what happens there. You can choose what
medium you want to use as far as liquid watercolor, big juicy puddles of watercolor, ink, acrylic, a
combination of all three. I'm really curious
what happens when I try a variety of tools
in a variety of media. I'm really going to play with each tool in each media
to see what happens. Gather up your supplies, think about different tools
you might not use them all, but I would have like
7-10 tools across those areas of your home to
play with for our class. What you grab is up to you, but be thinking about variety as far as what marks
they might make and then we'll explore and
experiment and see what marks they do create when we get back
to the art table. Once you have
everything collected, you're ready to dive
into our first mark making lesson. I'll
see you there [MUSIC]
3. Class Project: [MUSIC] It's amazing what you
can do with the paintbrush, but it's even more amazing
what you can do when you set your brush aside and start rummaging through your
art studio tool box, office desk drawers, and kitchen drawers for
unconventional mark making tools. You could go far beyond that. You can look in the garage, you could look in the bathroom, you can look in the bedroom, [LAUGHTER] you can look
anywhere that you have anything that will make interesting marks or lines would be wonderful. That's exactly what we're
going to do in this class. I've also included a
suggested tool list that you can access on
the project and resources section of our class. In case you want to
get some inspiration, then we'll head back
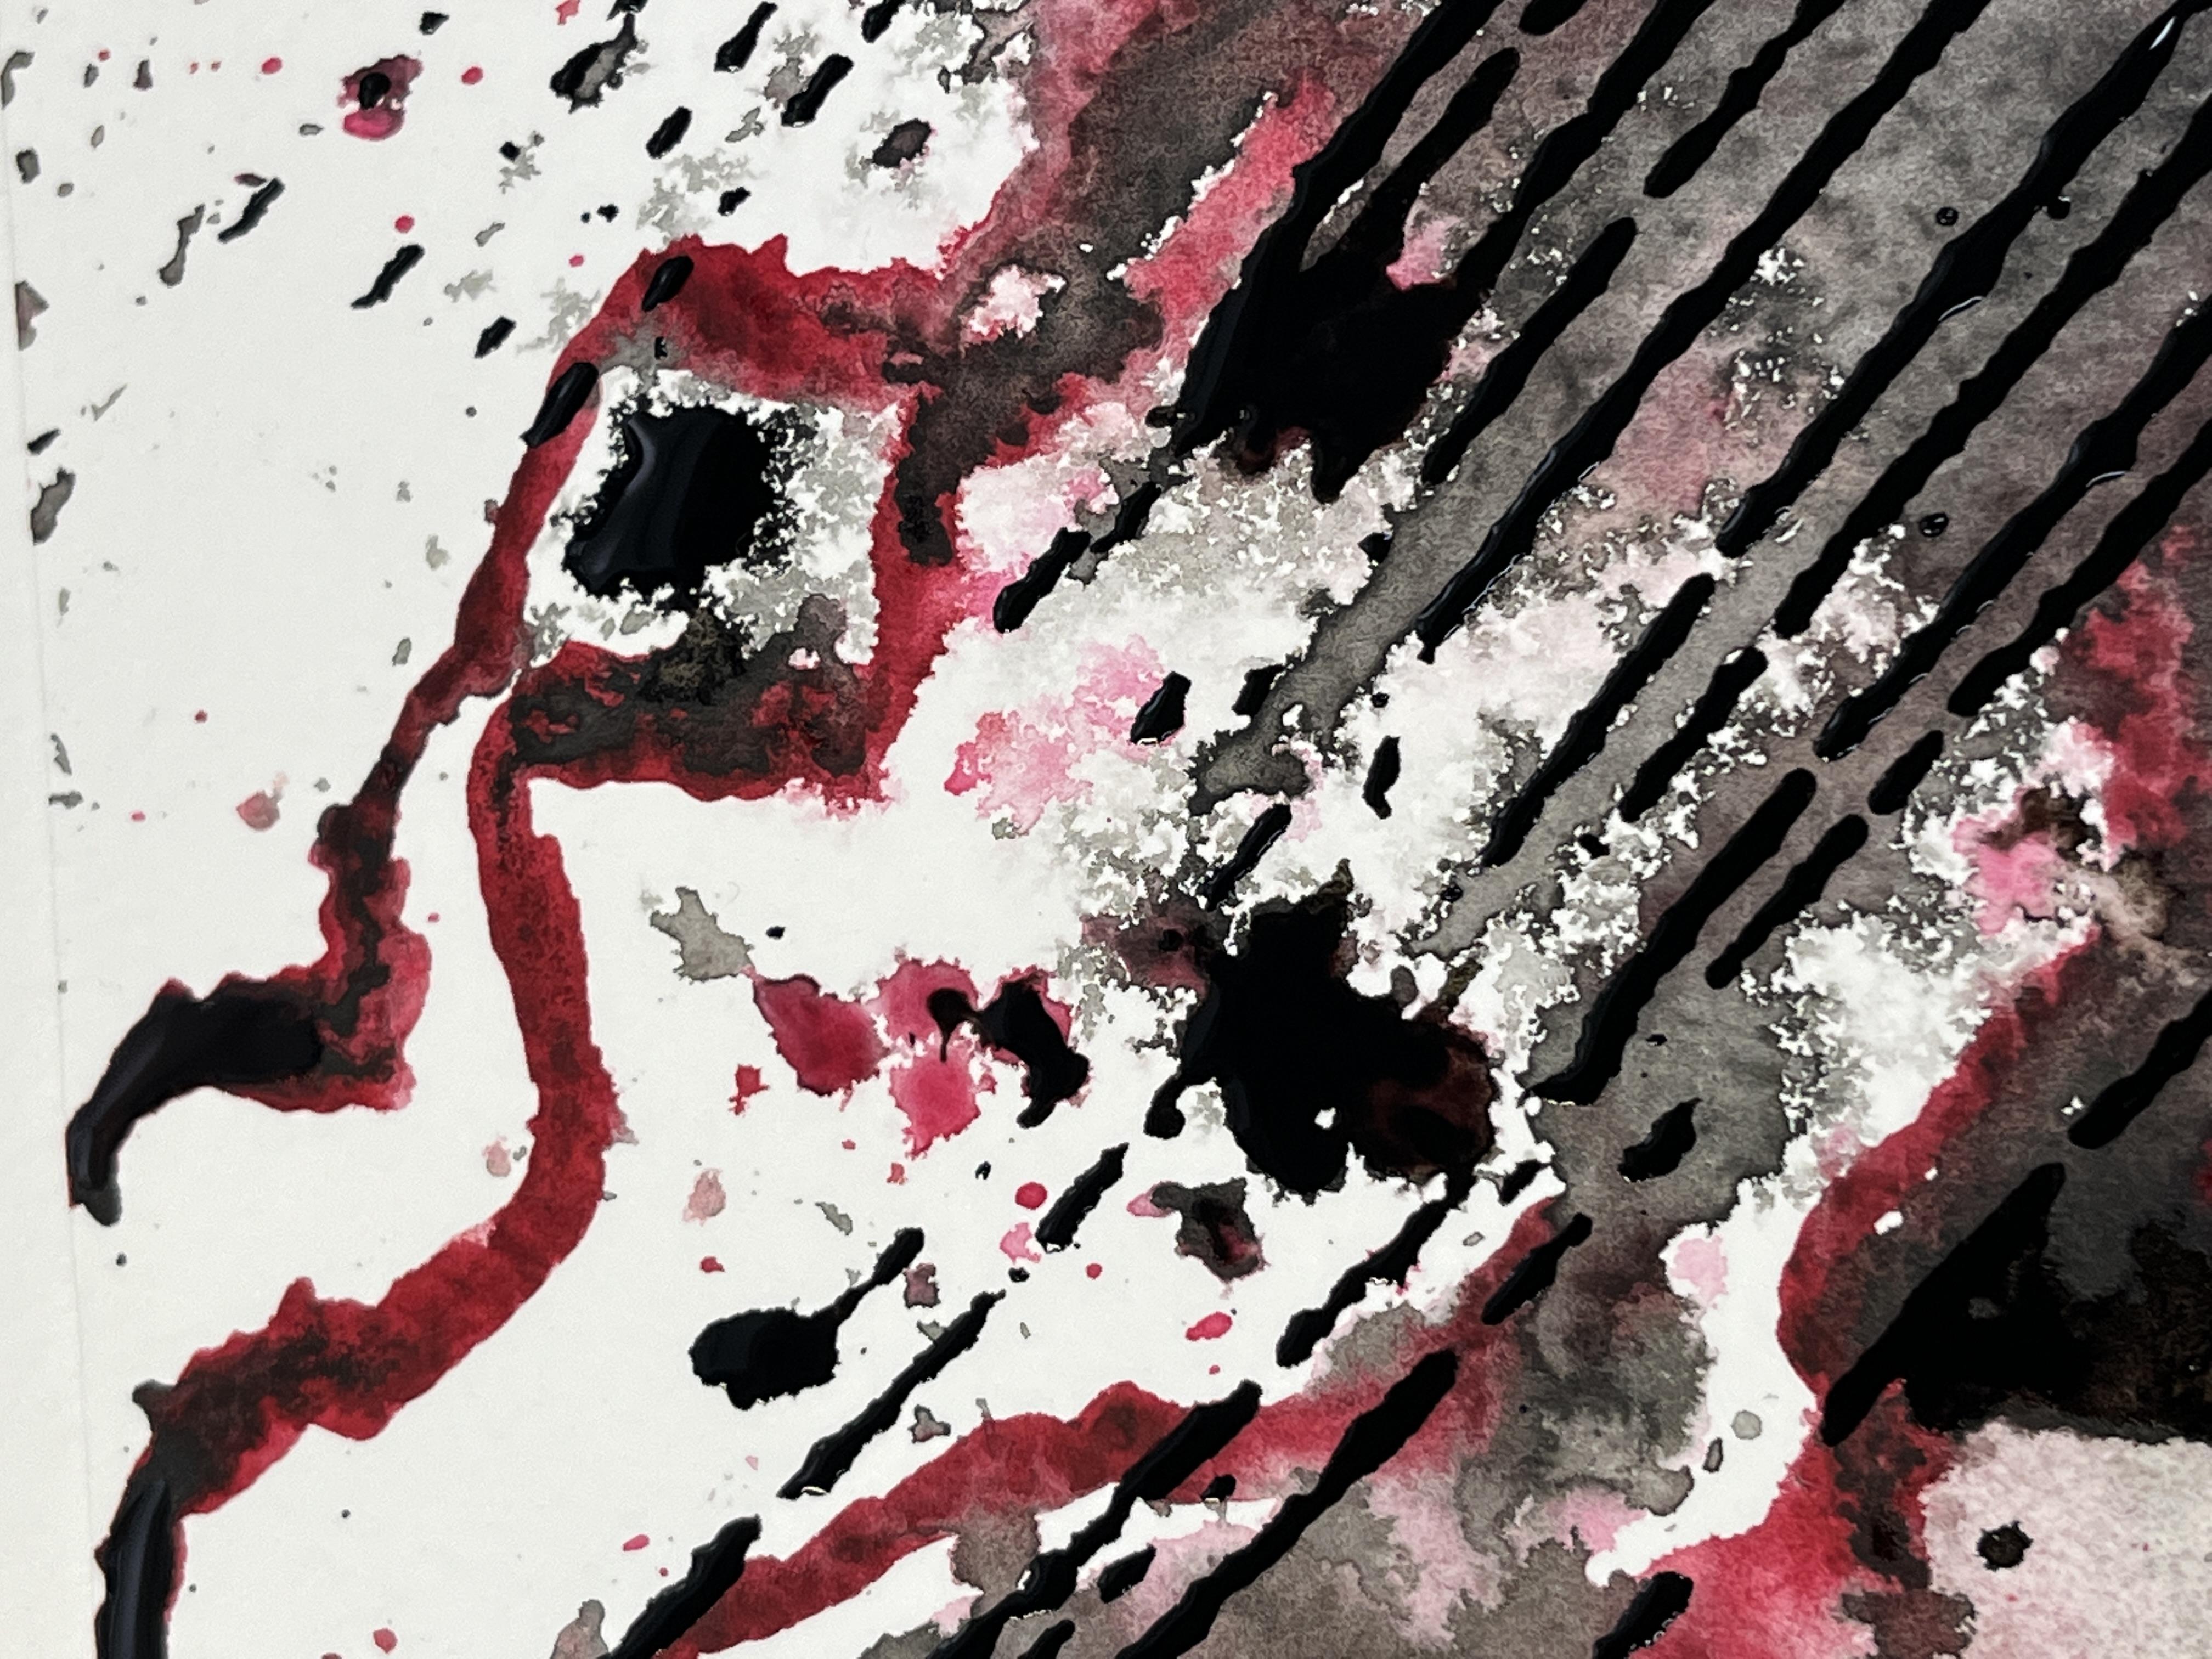
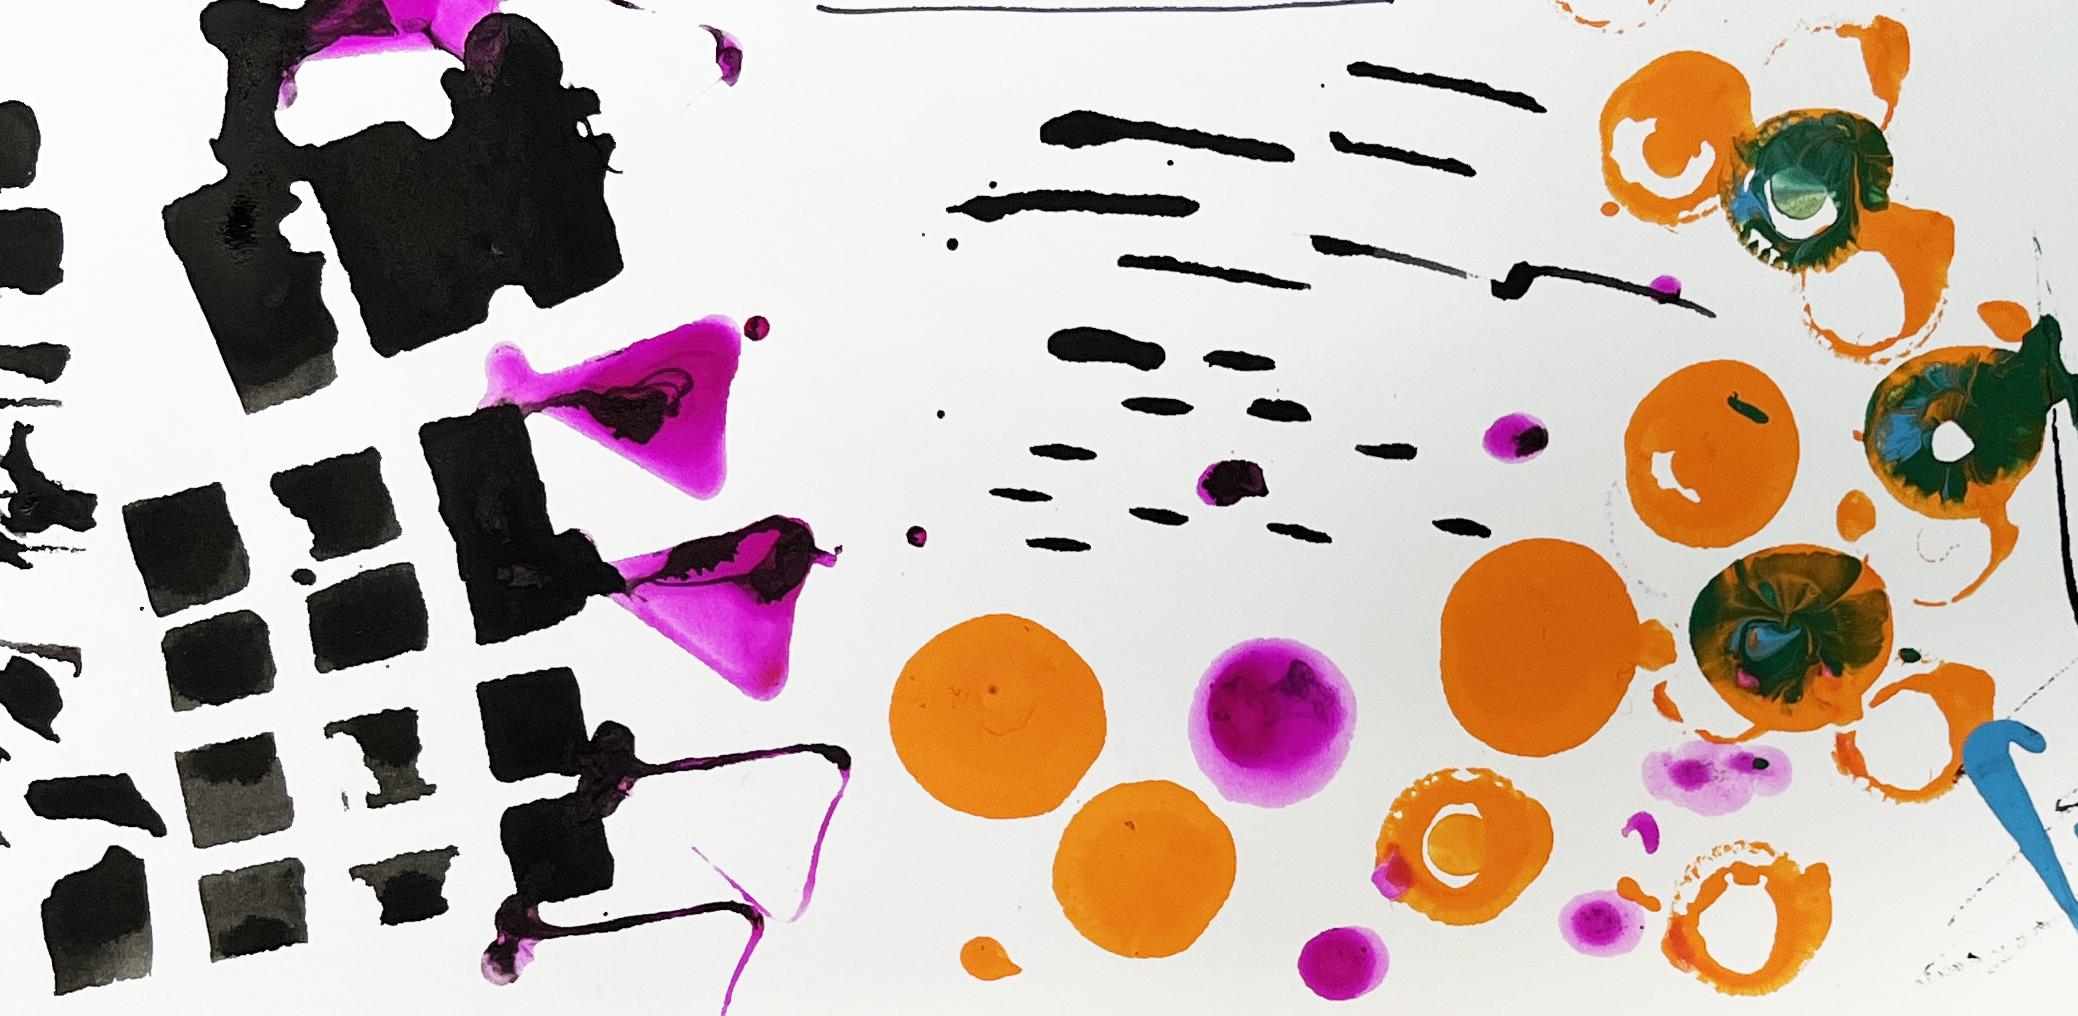
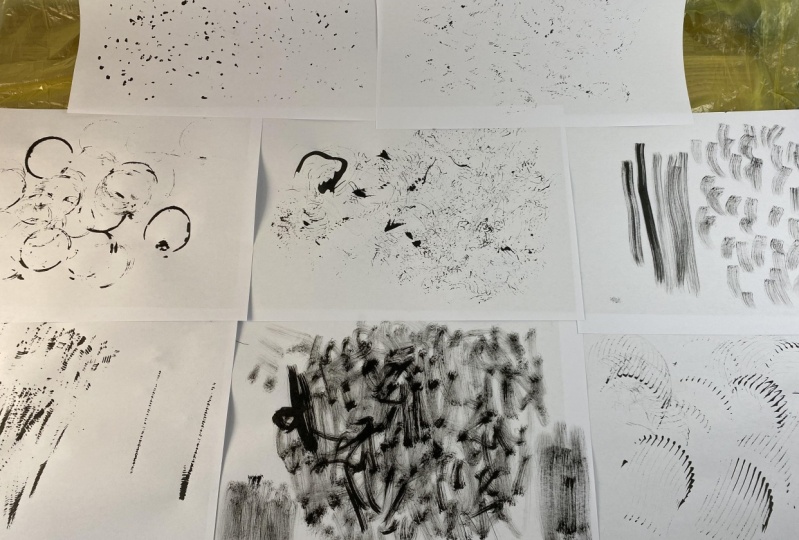
to the art table and see what marks they create. What happens when we dip a whisk into a puddle
of watercolor? What mark does a paperclip make? How many ways can we
draw with a screwdriver? The possibilities are endless and so are the
marks we'll create. After we play a bit and make some notes about
the tools we used, and we'll combine our
favorite marks to create a mini artwork where you go
from there is up to you, but I can't wait to
see the tools you gather and what marks they make. Let's get started. [MUSIC]
4. How to Label Your Pages: [MUSIC] I'm going
to note what tool I'm using so that I can keep track of which
tools make which marks. In the end we're going
to have a wide variety of tools and marks on the paper, and I want to be able
to look back and say, that is a really amazing
mark that screwdriver made, I want to use that
in my mini artwork. This way it'll help organize our experimentation so that we have as a reference
for later on. I've gone through and I've
labeled all of my pages. Up in the top left corner, I've put where the tools came from and then
I've written down which tools I'm going to be exploring in each
of those areas. I tried to leave myself enough space to work
with the tools. When I get to the kitchen
tools, they're bigger. A slotted spoon is significantly bigger than a paper clip. I wanted to give myself
some more additional room, but I also have
some extra sheets of paper off to the side. As I'm exploring and playing, if I'm really on a roll
or I run out of space, and I just want to keep going with it or try a
couple other things, I have extra paper on hand
so I can just quickly grab a sheet and keep going
with the exploration. Now that I've got
everything labeled, I'm going to go ahead and get
out my watercolor inks and acrylics and start
playing around with these tools and what
marks they make. [MUSIC]
5. Demo: Art Supplies and Tool Box: [MUSIC] For our
first experiment, we're going to try out
some of the items we've collected from our art
supplies and our toolbox. I'm going to work
with pipe cleaners, some cotton balls,
a screwdriver, and a few random
nails and screws, as well as some wire cutter
and a paint can opener. I got some small cups here
that I'm going to use for my liquid watercolors
as well as my ink. Then I've got a palette
and some acrylic paints. I can get going with those. First up, I think I'm going to use some of my
liquid watercolor. Since I'm using liquid, I'm going to go ahead
and put it into a cup. For the art supplies
and toolboxes, the tools are pretty small, so it doesn't really matter
that I've got a smaller cup. When I move to my kitchen supplies I'm
probably going to want to get a larger container so that I can actually get the
kitchen tools in there. But for this step of the process, this is
going to work great. I'm also going to tear
off a couple of sheets of paper towel just so I can have that on hand to
set my tools down on. You could also put out a
tray or a cookie sheet or anything just to
have like a messy area, and then you can keep
your work surface clean. It's completely up to you
how prepared you want to be. Or have a bunch of different
materials that have been dipped in watercolor
or acrylic ink. Starting out with watercolor, I'm going to go for
my screwdriver first. Great thing about the
screwdriver is I've got the end, I have the handle end, and then I also
have this as well. This is probably
going to come into play more so with the acrylic. But let's see. I'm
going to go ahead and dip it into the watercolor. Blick watercolor
has a thickness, and gummy this to it. Putting it down and dragging
it across the paper. A long way, I'm
going to play with mark making the
short directions. Can do stamping. We can create some
thinner lines that way. I'm going to wave off the tip, and then I'm going to go
ahead and dip in handle. We're going to see
what happens there. Roll it around. That's a little more
interesting to me. Also, do some stamping. Now, what you also might find is that
you want more space. I've already found the
screwdriver section, and I haven't even used any of my other types of
materials. I don't have to. I could say, I understand what marks
the screwdriver makes. I'm not going to worry about
experimenting further. Or if you're really interested in pushing
the experimentation, you can always get
an extra sheet of paper and I have
some extras on hand. I can pull out another sheet of paper and I can keep going. I'm going to get out to
the side for a second. I'm going to get out
some of my acrylic. I'm going to go ahead
and put some of this. On my tray, you put
a flatter area. I want to try rolling the side. I'm going to see
what happens there. I'm going to roll it in my page and then I'm going
to go to my extra sheets. Then if you need an
extra sheet like I do, I can just label
this after the fact. I can just know. Interesting. I liked the
stamping better because that gives me like a really
nice line to it. This could create a nice
background texture. But I'm really not
going to focus on how I can use these
marks in future art. I really just want
to focus on what marks do they make
and leave it at that, then I'll go back and explore. Actually, the more I do this, the more I enjoy it. I want to see what happens if I throw
another color in the mix. You can go as far into
this as you want to. If you're really enjoying
it, keep experimenting. I'm going to go ahead and stamp some of the green in there and layer over and do like
a rocky movement. Play with that. The more
I do, the more I like it. Now, acrylic spreads less than liquid watercolor, in general. The screwdriver has
an abrasive badge. With the acrylic, it scratches into it more, which can also be really fun. You can also play with
layering match too. This would be something
that I could think about with my mini artwork that
I'm going to make later on. How can I really
get the most out of these tools and their
mark-making ability? Then as you play with
color and value, you'll have even more
variety happening. I'm very happy with
the screwdriver and the marks I've created. I'm going to go ahead
and wipe that off and consider that done for
my experimentation. I'm going to set this one aside
so that I can get back to my main page and then I can keep revisiting it as I
need more space. Now, I want to work with
the pink can opener. This one I really love
because it's got a couple of different shaped edges
that I can play with, which is really exciting. I can already figure
out that the edge is going to make a similar mark to my initial screwdriver marks. It is curved. That's going to create another
interesting factor to it. I'm going to try rolling it, it gives me some thicker marks. I'm going to try tabbing it. Gives me a stippled effect. I'm going to try dragging
it through the wet paint. I really enjoy that.
That's the other thing. The paint can go on there. The media can go on
there and it can move based on
what's on the tool. But then you can also put media down and
then mark into it, much like we did
with the scratching. I'm going to go ahead
and dip the handle in, see stamps that that creates. This help spread it out
to liquid watercolors. It gives me some variation. I think I like better the
scratching that happens. But again, I want to reserve judgment and opinion
for later on. This is just about playing. I'm going to go ahead and play
with some acrylic as well. I'm going to see what happens
with this curved edge. Like go in and get fat stamp, roll it to get a
little bit on it. I liked that line weight. The weight that I get
from the thickness of the metal creates a nice
rounded stamped edge. Now, I'm going to go
for the scissors. Scissors are fine. I think they're going to
be fine because they move. I can play with what happens
when I open and close them. I think that will become
more exciting in the paint. I like the randomness of this, just the fact that you
don't really know when the paint is going to go
down and when it's not. The other thing you have
to work with here is that this edge can be
another scratching option. But I think more than that to a couple of
colors. I like this better. I like what's happening with
the randomness of that, even though it's a little out
of control at the moment. The other thing I
want to play with is what happens with the handles. I think it's going to be similar to the paint can
opener, or maybe not. We can roll it. You get some interesting
marks that way. Stamp it. The thing to remember
is when you're testing out different tools, you may be underwhelmed
by some of them. You chose them because
you thought they might do something
interesting and maybe it's not as exciting as you thought it
was going to be. But don't discount
the experiment in the time that you spent on it, because this can give you
inspiration for something else. You can always come
back to these pages. Something might
spark down the road. Now I'm going to move
on to the screws. I've got two different screw
heads in different sizes, so there should give us
different marks. We'll see. Then you can do that. You can just drop the
whole thing in there and this is why we want
paper towel on hand, and if you don't enjoy getting some art supplies on
you, wear some gloves. I don't mind getting
covered in India ink, and [LAUGHTER] I'm an artist. I work with
traditional materials in unconventional ways, so messes are just part of the
game. It's not a big deal. I'm going to go ahead
and dip the end of it in and play around
with those stamp marks. The cool thing is when you're
stepping with anything as you stamp down the
amount of material, whatever you're stamping with that transfers over it changes. Each time you stamp, it's going to be different. Could I control this
if I wanted to? Yeah. Like I know those
first marks that I made are going to be pretty
close to solid circles. Then for the screwdriver inserts into the top of the
screw, starts to open up. If I was going for
solid circles, I could stamp one
dip it stamp dip. If I wanted to go for more of the open look, I could dip it, stamp the first one off to the
side and then do a couple. You have some control in the unconventional
art-making world, so rolling it gives me
some variation of line. I can also draw with it. This is the one where I
was most excited about. I really liked making line. I love different line quality. I love the fact that different art supplies give
you different lines and the different tools used with different supplies also
give you different lines. Drying with something like a screw gives you a much
different line than I would get. I could not recreate that with any other
traditional art tool. Then it's a whole
other ballgame when I dip and draw with
the other end too. So fun, I love it. I'm going to wipe
this off and I'm going to play with what happens with the watercolor. I get similar line quality
their, which I'm rolling it. Not going to do much
and it's going to go in a circle in the nature
of the top of the screw. But that is really fun.
I really liked that. I want to see what
happens with the acrylic. It holds onto the
spiral section one. I'm going to try stamping
at similar but gummier, here the acrylic has
thicker than the ink. This is my most exciting
one in my opinion. But again, reserving judgment and I never even used
the other screw. Let's try that one too
before all is said and done. I'm just going to start
going down here for more. This one has a rounded top to it and you play with that a little bit
for drawing my line. [MUSIC] The stamping
is different. The ends are going
to be very similar because they're
both pointed ends. This is why it's also good
to have wet paper towel or a wet towel and wipe off
your hands for that as well. If you're not
worried about having a little cleanup at the end of the day, don't worry about it. The wire cutters are similar to the scissors in that they have that open and close quality. I do want to make sure that I don't gum up the spring section, so I'm going to be a
little bit more careful. The fact that they
have the double ends, I can keep them open
to a certain point and have some nice
parallel lines going. I can draw with them, I play with what
happens when the lines overlap one another, and rock it and do
a side stamp with it if the watercolor
changes anything. I can also open and close
it. A little more awkward. If you wanted to do more
playing with the movement of the tool you might want to tape your paper down. It's pro tip. This pro is not going to follow, [LAUGHTER] not today anyway. Let's try to ping the handle in. Depending on what
type of tool you got you want to be
careful if you're going to use the handle and it's got a sharp other end. Be careful. The line quality of this is
very similar to the screw, but I like the ability to
control the screw better. The pipe cleaner that
I used last time was a metallic one,
instead of the fuzzy. I think it's going to behave
differently. But we'll see. This makes some really cool, thicker marks when I go on the side and then it's
got the wire inside, but it's also got the
fuzzy which is absorbing a ton of the ink. That's really taking
over that section. I'm going to go ahead
and set this part off to the side for a second while I get out my other
sheet of paper, and then I've got a couple
of different pipe cleaners, so I'm going to go ahead
and grab another one. This time I'm going
to loop it and then try to be a little
slower in how I do this. This would be the stamping. This would be really
neat if I was going for a certain like feather feel or scales can
also just dab it. This liquid watercolor
is a little gummy. It's going to react
differently than other stuff. Here also draw lines with it. Pipe cleaners,
great for big bold, expressive marks, and I
got the cotton balls. Now I didn't leave
a very big section, so I'm going to go
ahead and squash this down a little bit. I've done cotton balls
with watercolor, both stamping with it before, as well as absorbing the
watercolor to create the wispy. I don't think I've
done it with ink. Similar to the big bold
marks of the pipe cleaners, this is absorbing it more so I'm getting the gray than the black. Now, if I do the ink, I also really like how the
acrylic ink are playing together by doing this
while they're still wet in areas where
it shows through. That one wasn't
terribly surprising. There's not a ton more
I can do with this. I can get a little
wispier with it, but it's just going to absorb. No, actually. Just play, tearing this apart
actually gave me my favorite texture that these
cotton balls have created. I would say, I'm
glad I pushed it. I'm glad I said, let's just do one more experiment to see, because I can see using
this texture quite a bit in different things
that I do. So we go. Cotton balls or it's
applied tools and toolbox tools are all down. I think I got everything. So I'm going to go ahead and clean up my workspace
and get set up for my office desk tools, and I'll see you in
the next lesson. [MUSIC]
6. Demo: Office Supplies: [MUSIC] Everything is
going to be the same. I've got my watercolor, my ink, some acrylics. These tools are
relatively small, so I'll be able to make
more marks in less area. The binder clip is really fun because you can move
it so you've got the different sides of
it and then you've also got the ways that you can
change the shape of it. I'm going to go ahead
and start with the ink. I'm going to dip in
and there is rolling. See which is interesting
because it's symmetrical, but it's not making
symmetrical marks. I would not have thought that
was going to be the case. The other thing I
want to try doing is putting it down
after I stamp it and then ended up trying to do it
so it wouldn't close again. There we go. Yeah. That
could be really cool if you were doing some
different texture for a building or a surface area. I'm going to go ahead and stamp the side shape and
that triangle. That's a fun shape and
it makes a bubble. I get the bubble
where it's filled in, which gives me those solid ones. But then as that bubble pop, I can get those really delicate outlines which is very fun. Then I'm going to try going that way with it and then I'm
going to dip to this end. Doing a rolling and a stamping. Subtle, I like it. I'm really enjoying
the binder clip marks. I'm going to go ahead and get an extra sheet so that I can play a little bit more
with the acrylic. I'm going to bring it down. It makes some really
fun stamps that way. I'm going to play around
with dragging it. I can rotate it because
the initial mark, but then there's also how
we can play with that. Reminds me of cauliflower. [LAUGHTER] [inaudible]
cauliflower. You're right, I like it. Metal disc. This is from a filming stand. Now goes between the
support of the stand and the item that you are
attaching the stand too It has a really
fun thin edge. I'm rolling at. Getting some neat line that way. Stamping it gives me a
little squashed overlies. I also have the rounded
end that sticks out. If I dip that part in, not terribly exciting
with liquid watercolor, but I bet if I drop it in the paint just
makes the larger one. There we go. That's
what I was going for. This is where I was
going to use this. If I was going for this
texture in this mark, I would need a cloth
to blot it off on, or I would just have to know that it's going to
be a mix of those. But actually, when you use them together, it's pretty cool. That's got super
muddled because I have so many colors going
on in that green. Paper clips are really cool because you can sculpt them
for the initial experiment. I just want to play with what it does in
its traditional form. Very similar to other ones, I can dip it like you would
do with a bamboo skewer, if you were drawing
with a wooden skewer. It's metal so it doesn't
absorb like the wood would, but you do get a
similar line to it. I can also stamp. I'm going to distort the
shape of this so that I have more control over
the mark it makes. It's probably the
only tool I'm using where I can actually
destroy it to maximize its mark making
capabilities. I love that. That makes me so excited. Many possibilities for
using a method like that. Then I can also think of
creating value with mark making. You could use it, is a mix between
hatching crosshatching, and stippling or pointillism by layering up our marks
to get darker values. You could really control this. You are doing a piece and really get some
beautiful shading. Wasn't the goal of the class, but that is a pretty cool bonus. Then I can also
scratch through it, create the marks out
a different way and also dip it and then scratch and have some bolder lines where I'm controlling more
so where the white is. Then also go into my acrylic
and see how that changes it. It gives me a little bit bolder initial mark
just because it fills in that gap
where the curve is a little bit. I like it. Then I can keep manipulating
the paperclip even more. Still want to maintain some
of the integrity of the tool. I want to know on some level that it came from
the essence of a paperclip. I've got two more for
my office desk drawer. I have a pen and a safety pin. These were impulse
grabs when I was getting a new paper
clip, so we'll see. The pen is going to give me a couple of different options. I can stamp with it, just like I would
any rounded shape. I can draw with it. That gives me a
thicker line just because the edge is
thicker. She's pretty nice. Can also, take it apart and use the cap and draw with
that a little bit too. Create all these drawing of
seed like a paint to paint. None this is for fun, but it's my acrylic
on there too. Damping effects is pretty nice. Nice variety of marks. Now we're going to
do is safety pen. This is going to be very similar to our paperclips I'm guessing, but we have two different ends. We have the lines that
we can create with each one we tried it for drawing is not going to
be terribly different. That looks very
similar to the pen. If I had drawn more distinct lines with the paperclip, I
get the same thing. I can get some
interesting smaller marks with the rounded and spend
a nature of its design. Captures a little bit
of a crescent there. Then I also have
the other end too. It's going to give
me different ones,. Then I can manipulate these, so these are down and
then I'm swiping up, which is something you could
do with any of the tools. You've got the initial
mark that it makes, but then how do you lift
it off of your page? How does that change? What happens? I'm
going to clean up my area and I'm going to get out my items
from the kitchen. I'll see you in the next lesson.
7. Demo: Kitchen Tools: [MUSIC] These items
are relatively big compared to what
we've been using, so I went ahead and
I put my ink into Tupperware bowl that I have in the studio and I've
added some more. First up is the whisk. This one is interesting because again, it's got a couple
of different areas to it that we can work with. I'm going to start
with the handle first, draw with it and
scrape through it. It's a rubber, so it's resisting a little bit
against the paper. If you're using ink
and you don't want to stain your kitchen
items, be careful. This seems to be okay. I think because I'm wiping
it off pretty fast, it's not going to stain it, and then I'm going to also
play with the wire end too. Roll it around in my Tupperware, I really like how random it is. This would be really nice
for a surface texture or a background texture or just
if you're working abstract, break up the surface
a little bit. It's also really fun when you do it on top of this orange, I'm going to try
standing with it too. I can take the part that sticks up the most
though and I can roll that to get interesting
line or scratch it, and that creates some
pretty nice variation. With the kitchen
tools you do want to make sure that you wash them really well before you put
them back into kitchen use. Disclaimer there, just make sure you're not accidentally putting them back in the kitchen after they've been
covered in art supplies. My slotted spoon is interesting
because I have this part, but then I also have this section that's cut
out in the back, so I'm going to try doing
a little bit with that. It's not absorbent at
all so I do have to keep dipping back into my paint. I like the textures I'm getting, that play where it hits
and where it doesn't hit. Now I can also just do
a straight down dip, and that because it's got
the little cut-out bit, it gives you that
partial amazing staple shape like a bracket. Then what happens if I try that again with my inks similar? It's a nice dotted
effects there. If I put this on a flat area, I could get more
marks out of it, if I put the ink in
a low-sided tray. But let's see what
happens if I stamp there. For this one I'm going to
get a second sheet of paper. Not what I expected, looks like an ink
blot [LAUGHTER] but it's not a bad thing, it's just I thought the slotted sections
would show up more. But I do really like
the delicate line that I get from the
edge of the spoon. That's really appealing, and you can roll it, that's fine too, I
really enjoy this now. Has organic grass texture, like a roughness to it
that I really like. I could do a bigger
picture where I drew the whole
thing with the spoon, maybe an idea for another
time in the studio. I need to get a
second slotted spoon that I can keep in
the other studio. I love this. I like this too but I love this, very exciting stuff I can't
wait to explore that more. The fun part about the
spatula is it's thin, so you can get some cool
smear stuff happening. We're going to need
another sheet of paper, so this aside because
I really want to play with this some more. I want to try the end
and what happens there, actually is a stamp down
with it a little bit. It's a nice ghost
images as you go. That's fun, I like
that texture a lot. What happens with the
wooden handle side? Now because the
wood is absorbent, I'm not going to
put the wooden part in the ink because
that will stain it. I like when it scrapes
through and it stains it, but it doesn't completely scratch it through,
that's really fun. Last but not least, apple corer. This one has a bunch
of different parts, it's got this end, it's got this end and
a little of cup cuts. I'm going to start with the ink, I'm just going to see what
the serrated edge part does. Can you see that?
just the pokey ends. Super light texture. Now, if I tilt my ink and
I get inside of it, I get the edges and I get
more of a defined edge, it's inconsistent because it's
not giving any of the ink. It is giving me a little
bit of that serrated edge, which is super fun. I want to play with
this in the paint. The paint sticks to it
more than the ink did, so I get a little
more definition. It's an uneven edge, but you still get
the serrated dot, you can get bolder
crescent section and drag. That is my whisk, slotted spoon, spatula and apple corer
from the kitchen. Feel free to play more, make as many sheets
as you want to, share as many of them as you like to the project section, and I would love to see
pictures of your tools too, so we can see the tool
that made the mark, because some of these
tools are going to vary. Your apple corer might
look different than mine, or you might have a
kitchen tool that I have never heard of before, and I fall in love
with the mark that you make with it and I really
want to explore that too. If you could share a picture of your tools along with
your mark making sheets, that would be even better, and it's just really
fun to see how everyone approaches
the class and decide which techniques you are going to revisit for
your many [inaudible].
8. Demo: Mini Artwork: [MUSIC] Now I'm ready to
begin the mini artwork. But first, I need to decide which marks I want
to explore further. The piece is still going
to come together very intuitively guided by
how you're feeling, which marks are speaking to you, what colors you feel
like working with. I'm going to go back through my pages and I'm going to make notes of which ones interest me. I want to make some initial
instinctual decisions. I'm all set up, I
have all the media out that I think I want to use. I've got a couple
different sheets of paper so I can play. I'm going to work
with one tool at a time and set the pages aside and then
come back to them, and revisit them
with fresh eyes. I got my list of tools that
I'm interested in exploring, I've got my tools around, and laid down some initial marks to break up the white space. Sometimes it is really challenging to approach a
blank page with nothing on it. I'm going to start off with
the spatula and I'm just going to lay down some marks. We're not trying to
make a masterpiece, we're trying to loosen up
and we're trying to explore, and we're trying to play. If something is not
working for you, just reset and go again. [MUSIC] Let me get some
basic marks in here, just stamping and dragging. Then I'm going to just
set this aside to dry. That is all I'm going
do to that one. I could tape it down to keep
the bend from happening, but I want to keep
jumping between pieces. I'm just going to
go ahead and let it bend knowing I can
flatten it out later. I want to try a
different approach to breaking up the
space on my page. I'm going to go
back to my whisk, I have some liquid
watercolor around. [MUSIC] I'm not trying
to go for an even cover, I'm just trying to give myself a jumping-off point so that I don't get caught
up in how it's looking. It's all I'm going to do
for that initial one. I'm going to do
four in total and then I can review them
and see where I'm at. I'm not worrying about
making a series, I'm not worrying
about repetition of color or marks or anything. Each one is its own
independent exploration of taking what we've learned and explored in our
initial mark making pages, another step further as I continue to loosen up and relax. I really like the
binder clip and a nice big puddle of
red, liquid watercolor. I might just do some
flip-flops here. I can dip a bunch of the
sides, just roll it. There's no way to know
what's going to happen. This is a very
awkward tool to use, but I think that's
why I love it. I don't want to overwork it. I'm going to go ahead and use the screwdriver and
I'm just going to create some very
loose lines with it. [MUSIC] Now what
I'm going to do, I could look at them all, I could overthink it, but I'm just going to go back to the first one and keep going. I want to keep going with the screwdriver,
maybe some stamping. Just stamping the round end. Ink is a very intense medium and it will take
over everything. Just be aware, if you're going to
play with India ink, it's going to be a very
dominating aspect of your piece. But I like contrast
and I like boldness. I'm going to go wipe
off my screwdriver, I'm going to set this one
aside and I'm going to go back to the second page. You're not limited to
the tools you used. You look around and you can get another great inspiration. If you want to incorporate a different material or medium, if you want to incorporate some traditional
art-making tools, there's no limitation because it's all about loosening up, experimenting,
seeing what happens. I'm going to go back to my spatula and I've
got some acrylic here. I'm just going to roll it. Here's some boldness. There is no certain
amount of steps to do. Whenever you feel
like a page is at a good point and
you're satisfied with the experience you've had
creating it, move on. Now back to this one. The other thing
you can do is keep rotating your pieces around. They might speak to you
the next stage that it should move to if you see it from a
different perspective. This one tells me it
wants to go that way. I have already red on this, but I can still create some
boldness by layering it up. Let me go on with the whisk. I'm going to go ahead and
duet with India ink because I really liked that when
I did my experiments. On my acrylic tray, I'm just going to
add a puddle of India ink that I can
get my whisk into. Then I think I'm just going
to roll it, twist it. I'm going to push
it a little bit and squash out some of the rings. Just the nature of
the red and black is giving this a
very graphic feel. I might see if I
can play with that a little bit and mellow it out. I'm going to go
ahead and go in with a spatula and put
this very light teal. I'm going to actually
dip the spatula in to the ink with the
acrylics still on there. Now we're getting somewhere. I don't want to lose what I put down in the background and I actually might come back
in next time around, reintroduce some of
those angular lines. This is very fun. The great thing about this is I love pushing
art materials and seeing how far I can go and what happens because
it's always interesting. The science behind it is really fascinating when you
do these experiments. This is something that I
have not tried before and I'm very excited. That's great. If nothing else, if this piece never goes anywhere further, the fact that I've learned
that I am very excited about acrylic and ink
having this reaction. I'm going to set this
one aside and go back to the first one. I'm going to go on with the screwdriver because
I just feel like I want something bright in there. The thing that I loved about the screw was that I could get that openness to it
and I currently have very thick, white acrylic paint. Get some scrap paper, if I dip it in the
white over here, making a stamp off the excess. Maybe if we just roll it. If you do something in one area, we get it's nice to have
it pop up somewhere else. I'm going to let
this one be done. I may let it dry and I may go back into it with some
drawing materials, who knows? Missing some black. I'm going to do a little
bit with a spatula, create a little
layering effect there. This was not quite done, but I'm not quite sure
what I wanted to do next. I'm going to set aside while
I move on to the third. This one is close. I want to take it away from the graphic and make it
a little brighter. I'm going to go
with the paperclip. I really enjoyed the mark
that happened when I opened it up and started
stamping with it and I have that acrylic. I'm just going to put
a couple of these down and overlap them. I don't think it needs much. I don't know if it's done, maybe done as far as the
materials that I have out. I'm going to go ahead
and let it be done-ish. This one needs some of
that purple to come back. Let's see what we can do there. I feel like it also
needs a bolder marked. Let's see if I can
get spatula in there. I'm still not sure
about this one. I think it actually
needs something like white POSCA pen, that's going to have
to wait till it's dry. I'm going to let this
one be done too. I only have one-piece
lab that didn't quite yield result and you
don't have to resolve these, but I like to intuitively
work until my brain says, we're done with this
now, and this piece is not quite done yet. Maybe we'll go in a
third teal again. I picked up my
paperclip with that. Let me see what
happens when I use a paperclip attached to a whisk. Now we're going to
go into the ink. I lost my paperclip, decided to stay in the ink. The other thing you can do with these pieces is cut
them up, collage them, save part of it if nothing
else is a reference for a cool thing that accidentally
happened one time, you know that you might want
to explore in the future. I'm going to do one
last thing to this, and that's just going to
go for it with the black. If nothing else,
it's therapeutic, so just really go for it. Last one, not my
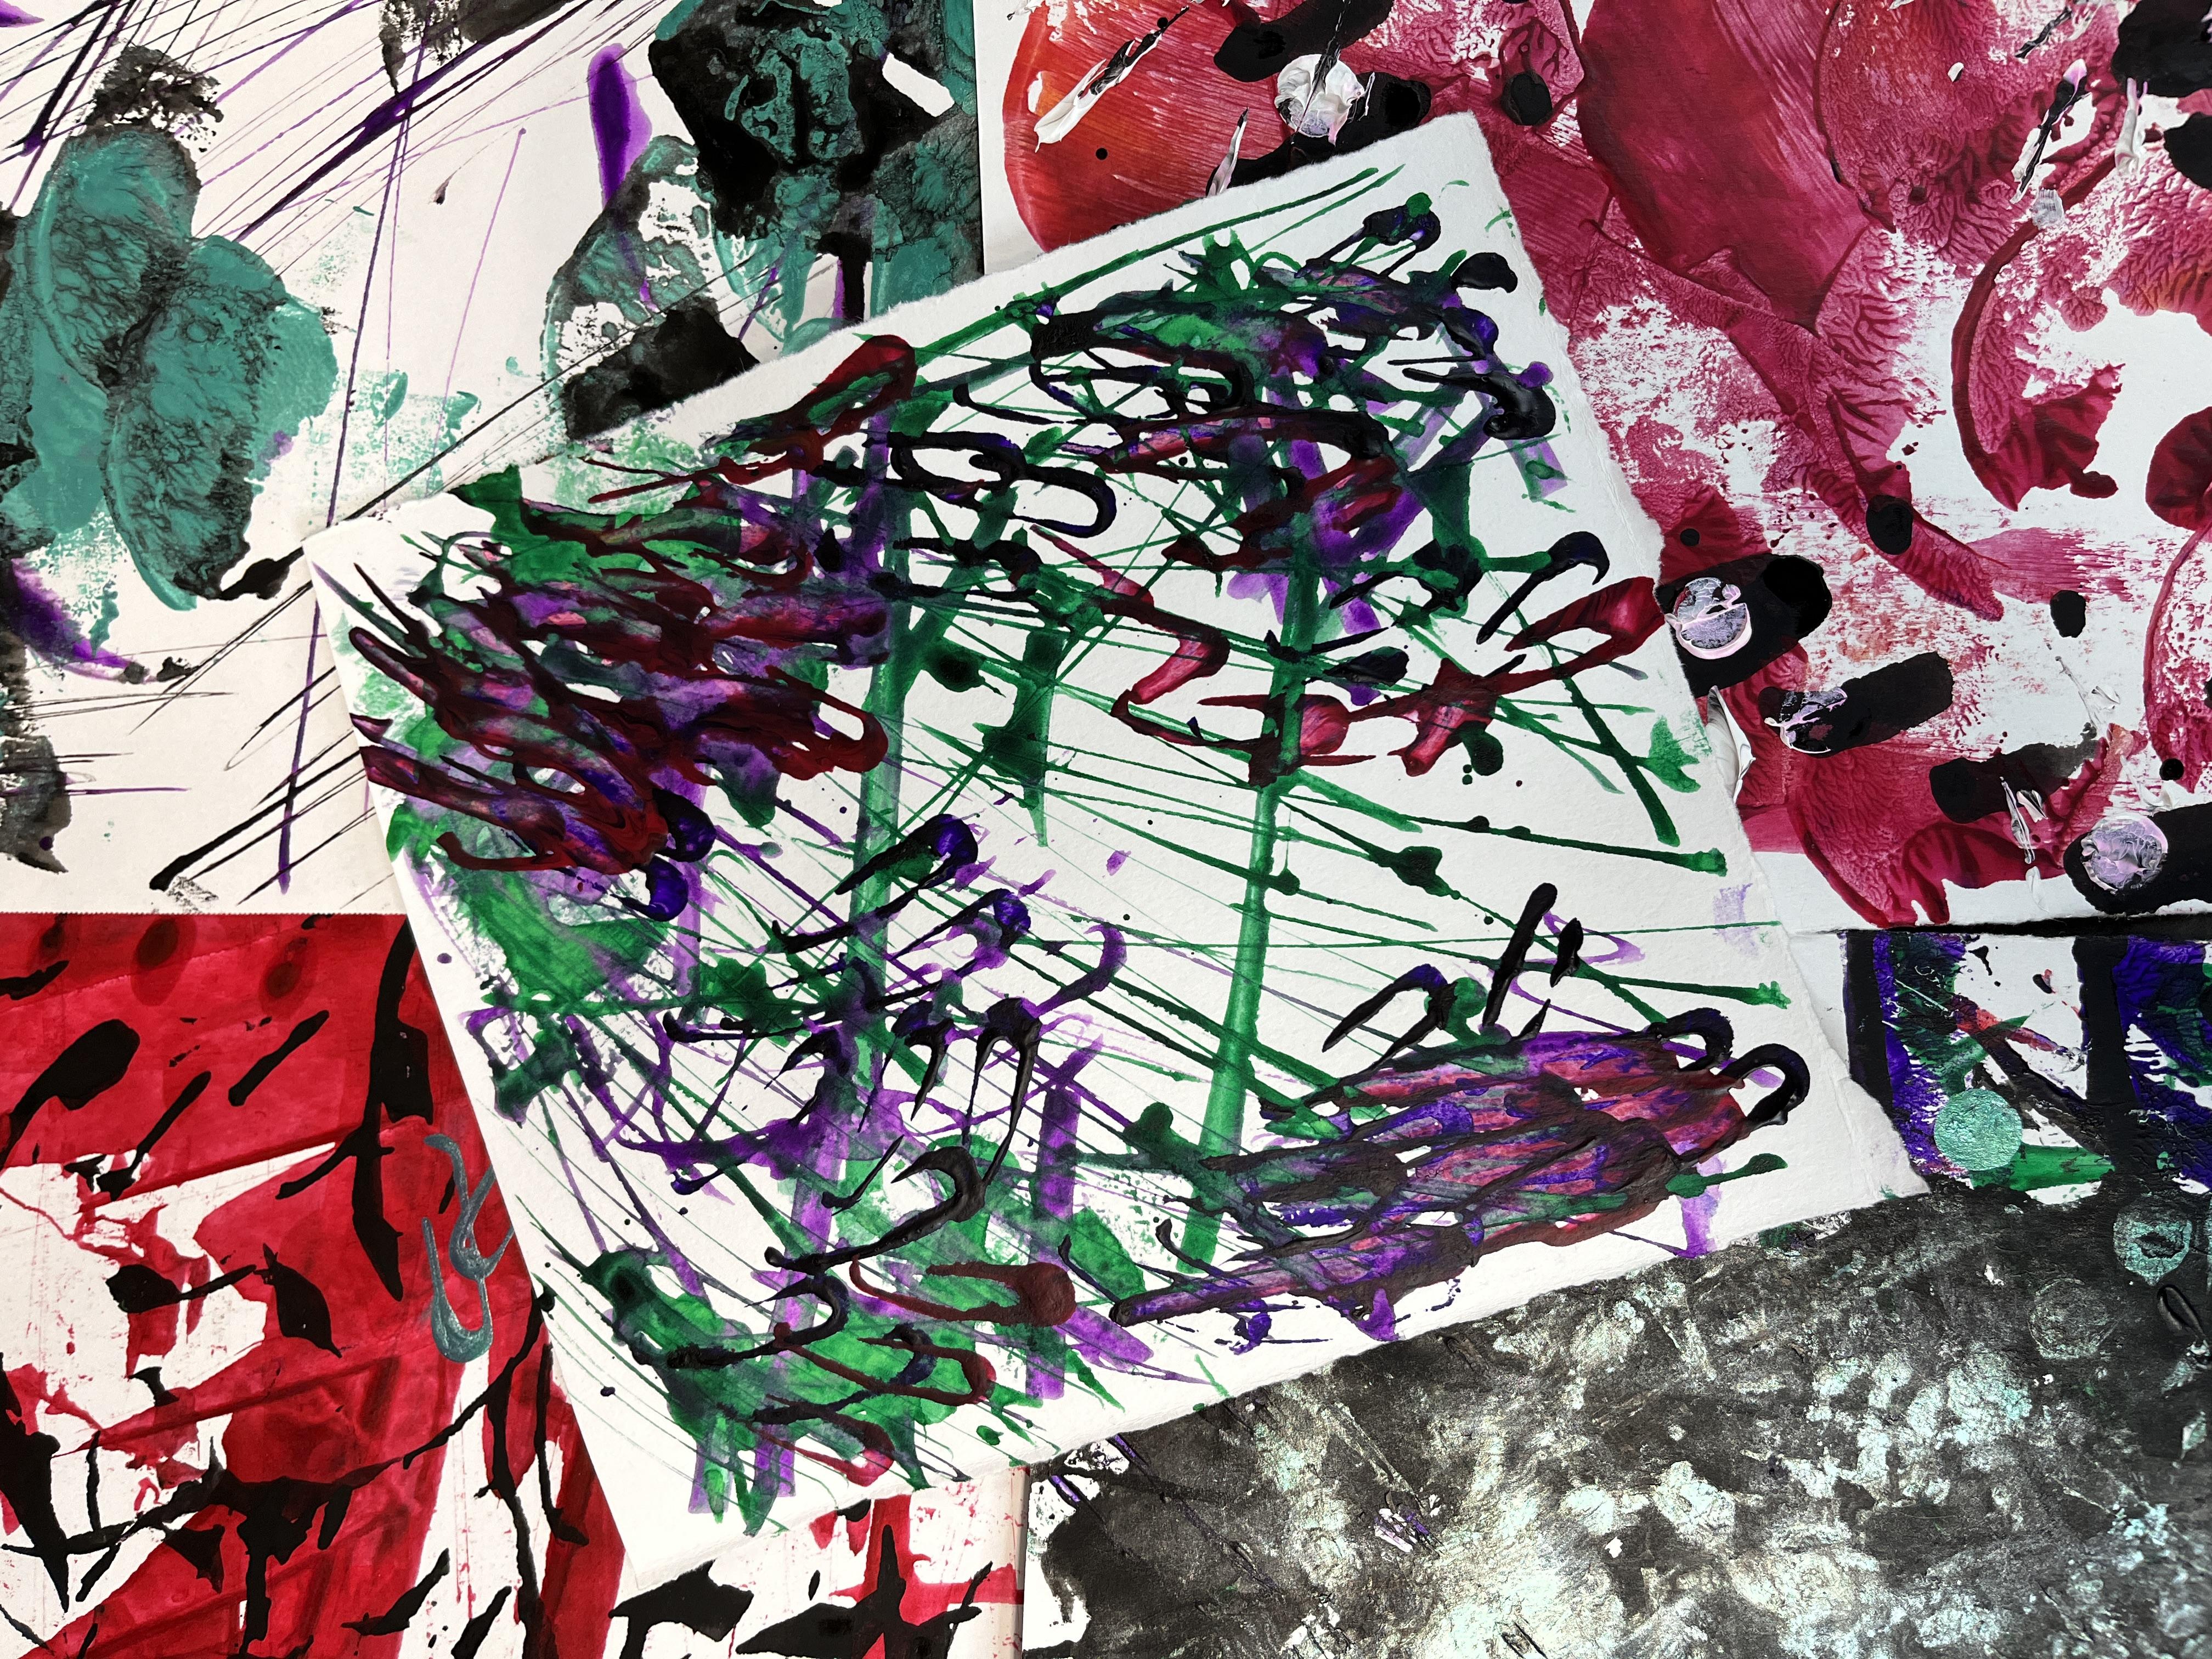
favorite. That's okay. Let me pull up some of this. Four pieces done. I'm going to let
them dry and then I will show you all four
of them together. These are my finished
experiments. I'm really excited about the
marks that I discovered, both our warm-up and exploration cheats
that we did before and additional inspirations in
these mini pieces of art. I'm excited to put a
little more contrast into them and pull
some lights out, put some darks back in, both with ink, maybe drawing in with ink,
painting in with ink, some POSCA pens, some
colored pencils, who knows? Maybe use some oil
pastels because that would be a
nice and vibrant, bold color on top
of what's already down there in the
media that I used. If you have any
questions along the way, don't hesitate to post them
to the discussion section. I love interacting
with students. I hope you had as much fun
experimenting with mark making in unconventional ways and getting beyond
the brush. [MUSIC]
9. Final Thoughts: [MUSIC] Thank you so much
for taking this class and exploring mark-making
beyond the brush. These marks were so inspiring for me as an artist
and I cannot wait to incorporate them into
future projects and future warm-ups and art
experiences along my journey, I have a couple of
other classes where these mark-making
techniques would be exciting to combine. Be sure to check out
intuitive art-making, simple watercolor
and ink techniques, as well as my decorative
papers class. Because these would be
a wonderful addition to the art projects that
you make in those classes. I hope you had as
much fun as I did and you found a few ways to shake
up your creative process. I cannot wait to see
what tools you use. I cannot wait to see
what marks they made. Please take the time to share your projects to the
project section, both your experimental initial sheets as well as
your mini artwork. A great thing, but that area of class is that you can edit it. Feel free to upload a
couple of images as you began exploring
different tools and different marks and
then add to it as you work through the class or
as you revisit some items. It is really fun to see the artistic process that students go through
in a class like this. I really hope you
will consider sharing your project to that
section of class. I'd love to feature your
projects on my Instagram page. Please include your Instagram
account name when you upload your project to
the project gallery. If you do post your
artwork on Instagram, please tag me Elizabeth
welfare Skillshare, or add Elizabeth welfare, so that I can find
that your art online. If you want to stay up-to-date
on my newest classes, be sure to click the
"Follow button above". That way you will be
the first to hear about new classes I create on Skillshare and I'll
see you next time. [MUSIC]
 Elisabeth Wellfare, Artist, Art Educator