Transcripts
1. Intro: Dive into the beautiful
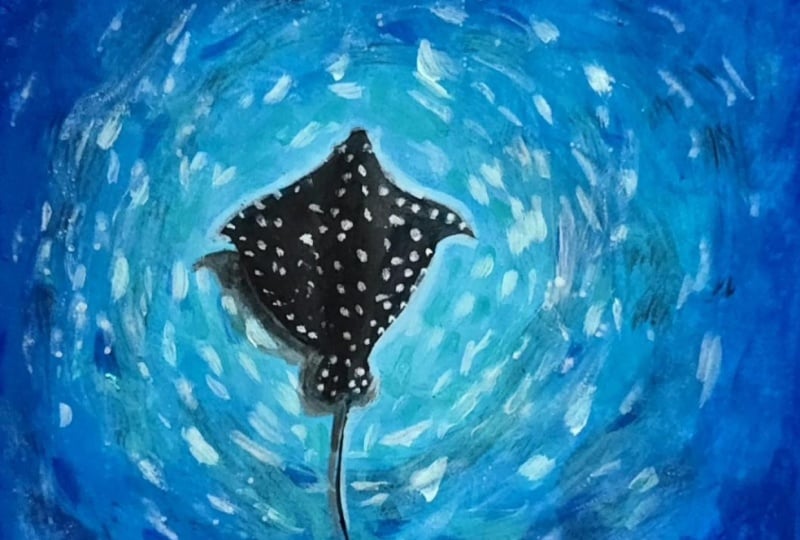
world beneath the waves and create a striking manta
ray acrylic painting with me. We will explore how
to create a rich, textured underwater background
using beautiful shades of blue and then bring the
graceful manta ray to life. So we will start first with the colors
which we will need. Then we will start
with the sketching. Then we'll start with the
outlining of the sketch. Then we will paint
the background using the circular motion
using our round brush. So we will fully block in the entire background with this all different
different blues. The outer part will be dark, the inside part will be light. Then comes the filling of this fish with black
and gray color. Then comes the texture adding of the background using
my texture brush. So just all around, we will be adding these textures just to create
underwater effect. Then the detailing of the fish, starting from the face
to the whole body, adding some small, small dots to the entire part of
this whole body. Then the final detail is the
shadow which is underneath and little bit of textures all around so that it
becomes more glowing. So let's start with this beautiful manta
ray fish painting. Oh
2. Materials Required: Welcome back. So let's
discuss about the materials. Let's first talk
about the colors which we will need here. The first color is
the windsor blue, which we will be needing here. So this is windsor blue. If you don't have winsor blue, you can use serelium blue also. Then the second color
is the naples yellow. Again, if you don't
have naples yellow, you can use normal cadmium yellow and mix extra
white in that. Then is the teal color, that is cobalt teal. This also you can make just
by adding yellow to blue. Then is the turquoise color. It is similar to teal color, a little darker than
the teal color. Then comes the Prussian blue. So all these are
different different blues which we will be using here, and then black and white. So these are the
colors which we will require for the
complete painting. So how we will do the
blending of the background. So in the corners, mostly we will add
the darker colors. Here you can see these
are darker colors which we will add here, and middle is the lighter color. So in circular motion, we will do the painting. So first, we will add
this darker color, which is a mix of Windsor
blue and Pristian blue. Then is the Cobalt teal. Then comes the naples yellow
and mix of Kobalt teal. So this is how we
are going to do the combination of colors. Then a little bit of white to this naples yellow to
make it more lighter. So this is a combination
which we will be using in our
background painting. So these are the colors
which we will be using. So let's discuss about the other materials which
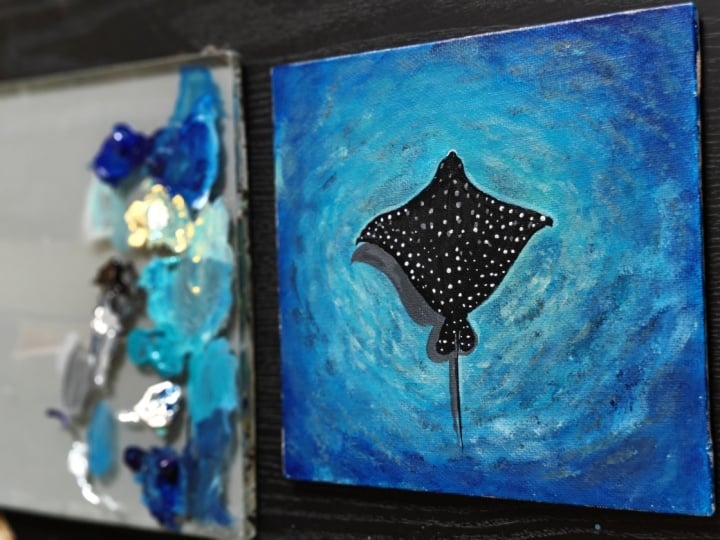
we will be needing. So this is the painting
which we will be doing here. It's a form of three day. And also, we will be you can see it is a board
canvas like into 6 ", and I have primed it
two, three times. And the color brand
which I'm using here is mostly the camel brand, then the Windsor
and Newton brand. Different different
brands are these, which I will be using here. This is the Fabio brand. So all these brands. Now let's discuss
about the brushes. Now for the background painting, we will be using the fan brush, the round brushes of
different different sizes, then the liner brush
for detailing. And there's a filbert brush, which is a Bristol
filbert brush, which has a nice texture to it. So all these brushes we will
be using for our painting. Then comes the other
materials which we will require here is the
scale for drawing, then the technical pencil. Then comes the palette. You can use any palette. This is a glass palette
which I will use. Then the water jar, at least two jars of water
we will be kneading here, one for dirty and one for
clean water, as you can see. So cloth or tissue paper
for cleaning your brush. So these are the materials
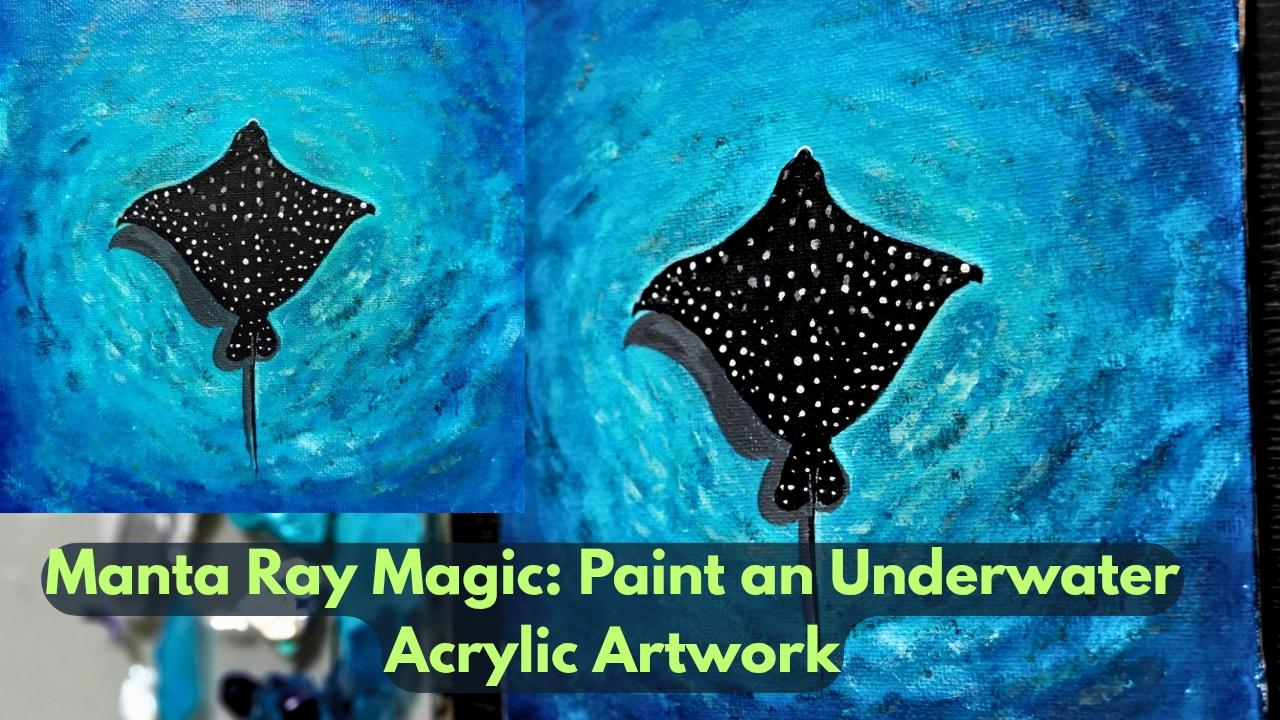
we will be using here, and this is the painting
which we will be doing. I hope you will enjoy this, and let's start
with the painting.
3. Sketch & Blocking: Welcome back. So let's start
first with the sketching. So this is a square canvas
which I'm using here. So it is six by six canvas, which I'm using here. It is a board canvas. So as you can see, it is a very thin canvas. I have already primed it. Now I will make the lines first, and then we will start
creating the manta fish. So first, the horizontal line, try to make this fish in the center so that the
water will surround it, and not very big. It can be of medium size. So using my scale, I'm putting it like 7 centimeters
and 3.5 I have divided. So in that, I will draw
the vertical line. So the vertical line above
will be a little smaller in size that should be
around three centimeter, and the lower part
will be till seven. So the whole down part is more longer than
the above part. And just joining it
with the with my brush. So this is almost like you
can see it is six almost. So at three, I've
just marked in, and I'm making a triangle. The easiest way to draw this
fish by using the triangles and the shapes so that
both the sides are equal. So just drawing again
another triangle on the top. It's just like a kite, how we draw the kite. It's just the same shape. So just drawing the lines. Now we will add the curves. So from the top, there's a face which is a little bit outward. So first, we'll draw,
start with the face, or you can draw first with the curve lines that
also we can do. So a little bit of
round shape and a little bit of C type round
shape on both the sides. And then it is a curve which
is going till this line. Similarly, I will do here
also the curve to this line, and then again, the bulging
curve which joins the tail. So like this, we can create a prox exact shape
on both the sides. So the measurement is like that. So if you're making
a bigger one, you have to take a
bigger measurement. So depending upon the size, you have to decide
the measurement. Mine canvas is 6 ", so I have taken in
centimeters, as you can see. So this is the exact
drawing and there's a tail which is coming out
like an antenna. So this is the whole sketch. First, we will outline the
sketch so that we know where to fill the colors
outside because here, water plays a very
important role. So now we will start
first adding the lines. For these lines, so these are the colors
which we will be using. So first color is
the Windsor blue, then naples yellow, cobalt, then turquoise, white,
and Priscian blue. So first, we will use this
Windsor blue to outline this. So we will outline this first, and then we'll start
with the painting. So first, I'm making a very
thin Prussian blue color and using my liner brush, that is a long liner brush
for creating the lines. This is a time when
you can fix the lines if you feel that
it is more bend, more curved, then
you can fix it. So just trying to draw the
lines which are there. So you don't have to
draw the reference line, you just have to
draw the object, the fish which we have created. And then we'll start
doing the outer painting. So that we know where is
the boundary of this line. Even if little bit Colors
goes inside this fish, it doesn't matter because
we are doing it with dark color, fish body. So even if little bit of colors goes inside,
it doesn't matter. So just do it very
carefully and very slowly. And now we will do
the entire part, which is the outside part. We'll start with one
side and slowly, slowly, we'll go
towards the other side. So a little bit of bend
here, I will do it. Little bit of shapes
you can always correct it whenever you are
done with the painting. Then also you can
correct the shape. So this is how I have
just outlined it. Now we will start blocking the background using
my round brush. Now, depending upon the
size of your canvas, you have to choose
the round brush. If you're using very big size, you have to use big size. This size which I'm using
here is size eight. So any size you can use depending
how big your canvas is, either size 12, if you're using a very big
like eight inch canvas. So it depends how bag your
canvas or your sheets. And now I'm just moving
the brush in circles, just mixing a little
bit of white. And this windsor blue, I'm just applying the colors. So currently, I'm not bothered about the blends or anything. I'm just focusing on
what colors will be. Now, naples yellow and the
kubal teal have just mixed it, and I'm just using the brush in circular motion and trying to blend
both the colors. So I'm not using the
tip of your brush. I'm using the side of the brush. So always use the side of the brush when you are
blending the colors. Don't use the tip of your brush because we don't
need the tip here. We need the side of the brush. Only to the corners,
you can use the tip. I just rotating and
as it goes near, it becomes more
lighter and lighter. So this is how you
have to blend. Mostly the corners will be
darker and the center will be a little more of the bal
teal and naples yellow mix. So just rotating
it and filling it. Currently, in the first coat, you will see a lot
of brush marks, so don't worry about it.
Just fill the colors. Just enjoy the filling
and the blocking of those beautiful blue colors which are there
inside the water. So this Kobal teal is a very beautiful color
and a very vibrant color. If you don't have Kobal teal, you can use light blue also. Light blue color in that just
mix a little bit of yellow. You'll get that color. Just rotating the
brush and filling the sides with a
mix of this blue. So try to do it in parts
like first the upper part, then the lower part, then the side part, then
again, the upper part. So try to do it in parts and try not to
use too much water. We need thick colour. Water is only there on my
brush. That's it. That much water we require. And once your brush
feels sticky, just wash it off again
and then take the color. This is how we do the
circular motion blend. So you can see one
side blocking is done, but there are a lot of brush
marks, but we will fix that.
4. Blocking: Welcome back. So
let's start with the blocking which are left. So one side we have done. Now we will do the other side. So same color we have to use. That is the blue, and this is Windsor blue
and a little bit of white, and we'll start with
the corners and then we'll start moving
towards inside. So don't do first
blue and then start with this teal and
the lighter color. You have to do simultaneously. Once you have done blue, then you have to
start with this. So in parts, you can see I'm doing because if both
the colors are wet, then only you will be able to mix the colors and
blend the colors. So you have to be careful when you are doing this
type of blending. You have to do it in parts, not in one go, that you have applied first blue, then this, then this, then that
blending will not happen because acrylic
colors dry very fast. So you have to do in parts. So you can see first
above I have done, now I'm doing it below. So this is how we have
to do it in parts, little bit of the Prussian
blue you have to mix in order to make the blue
color a little bit darker. Then comes the balt and
then a little bit of turquoise you can mix just to make it a little bit
more darker color. So just applying it everywhere. Turquoise is not required
too much, but I've kept it. So in a little bit here
and there, we can use it. But the three colors
which you can see here, the three, four colors,
these are the main colors. So just I'm filling
it with these colors. So middle part is lighter and the side part is
a little darker. So that is how we have to do
the filling of the colors. Now you can see I
have done one coat. I will wait for the
first coat to dry. Then only I will do
the second coat. So this side almost
my coat has dried. We can apply it first
to the other side, and then we can do
it to this side. I've also taken a
little bit of black because black will make the
blue color more darker. So first, I will apply
again towards the sides, and then simultaneously,
as we go inside, it will be more lighter
and lighter color. So a little bit of shape
I wanted to rectify just a little bit more
curve because you can see the other side is more
curvy than this side. So I'm just making a little
correction to this shape, just trying to make it more like inside because that is
also a little bit inside. So I'll just fill it with,
again, this lighter color. So this is the actual
shape of the fish. So I was not aware
of this fish name. When I started painting this, then I thought it is, like, a starfish, but it
is a manta fish. So I was not really
aware of this name, but I used to like
this fish a lot. Especially because of its shape, very different shape it has. So just adding, again,
the second layer. Now, for the second layer also, we will be using same color
mixing this Prussian blue, then windsor blue, and just
rotating the brush in circle. So try to use a big thick
round brush so that you can easily rotate your brush and
use the sides of your brush. Don't use too much
water on your brush. Otherwise, the colors
will become thin. You have to use thick color, and water should only
be there on your brush. And if you feel there
is too much of water, then just have a towel or something and just remove some water and then
use the colors. So you can see I'm just rotating and just blending the colors. I'm not pushing the lighter
color towards dark. I'm just trying to blend the
sharp lines which are there. So this is how we have to blend slowly and slowly
one by one in parts. You can only blend the colors
if the colors are wet. You will not be able to blend the colors if any
of the colors dry. And if any of the colors dry, you just have to apply again that same color and
then try to blend. Try doing it first on a smaller size paper
or on a canvas. Don't use very big
canvas for doing this. If you feel that you can
do big, you can go ahead. But first, try to do it on a smaller canvas and then go
ahead with the bigger one. So just rotating it and
trying to blend the colors. All these marks which
are very sharp, I'm just trying to blend it. Again, taking the darker color
and putting to the sides, mixing Prussian blue
and Windsor blue. Prussian blue is a
very dark blue color. Now, if you don't
have Prussian blue, you can use black and blue
mix. That will also work. So try to do it
slowly one by one and very carefully and try
to blend the colors. If you feel while
doing this blending, your brush is being sticky, wash it off again your brush and then again, do
the same thing. Because when we do
all these steps, our brushes become sticky. So try to wash it and then
again, apply the colors. So you can see how and do it
with very light pressure. Don't press the brush
while you are blending it. Do it with very light pressure. And slowly or slowly, you will see it starts blending. Take your time while
doing all these steps. It looks like we are
filling the colors, but you have to give time for blending and do it with
very light pressure. Don't press your brush too much. Otherwise, it will
create brush marks. So try to do with
very light pressure. So you can see slowly, slowly. We are filling it
and you can see a little bit of neat
background is coming. We don't want proper neat background because
this is water. We have to give textures, but still a little bit of
blending should be there. There should not be sharp edges. So almost we have done the second coat
just above is left. So you can see all the
corners, all the sides, it's dark and the center part
is a little more glowing. So that's what we
have to do here. And just filling it, the gaps and everything. So we will wait for the
second coat to dry, and then we will move further with the details
and the blending. If required, we will do
the third coat also. Let's wait till it dries, and then we will start further.
5. Third Layer & Fish Blocking: Welcome back. Let's start
further with the third layer because I felt we need
third layer because there are some sharp edges
which are still visible. Now my painting has
almost dried up. Now I'll start the third layer, same color, same
technique, and same brush. Just using the Now, this time, you can use a little thin color because we have already
applied two layers, not very thin color, like milky color you can
use for blocking it. So just mixing turquoise and the teal color and just
blending the colors. Now, focus here more on
blending because this is the last blocking we are doing here the last
layering of the color. So at least three
coats you have to do when you are
using your canvas. Sometimes when especially
like this type of painting, you cannot see the result in just one or two coat
because there are lots of Colors we are using and we are trying
to blend together. So always go in parts. You can see first I'm just
doing the upper part and then I'm just gradually
with very light pressure, I'm just pushing the colors and trying to blend the colors. So, this is a very
important part where we have to
blend it very nicely, go slowly step by step. Don't do it in a hurry and
try to blend all the colors. The more neatly you
will do the blending, the more beautiful the
painting will look and more the textures when you
will apply it will look more. It will pop out more. So try to do it very
slowly. Take your time. So every time I repeat
the word slowly because I don't want you guys
to finish this painting, like in a speed and then when you will not see a happy result,
you will feel sad. So do it slowly. Take time, give time to your brush, also, give time to your mind also that where you have to
blend and how you can make the lines a little more blurry so that the
sharp lines are not visible. This can only be done
with full patience and with not putting too
much pressure on your brush. So now I'm using a damp brush here because there are
already lots of colors, and with the sides of the brush, I'm just trying to
blend the colors. This is also one
way of blending. So you don't need every
time colors to blend. You can just use the
brush to blend it. But here, try to use
big size round brush. Don't use smaller size, even if your size of
the canvas is small. Suggest rotating and filling the colors slowly and
trying to blend the colors. I'm not totally pushing the light color towards
the dark, as you can see. So just filling it
slowly and slowly. And with very light pressure, you have to blend the colors. Again, you can wash off your brush and you
can just blend it with a damp brush
also over here. Also, you can push a little bit of blue towards
the lighter color. That also you can do. So see how you can
blend the colors so that it becomes like
neat and perfect. So slowly slowly, you will
see that the blends are becoming more nice and neat. All these steps take time. If you're not happy with
the third code also, you can apply the fourth code. That is totally acceptable. So if you're not happy
with the third code, go for the fourth code and
try to blend the colors. It happens sometimes
that we do feel that at least one more code
we can do such so that we can make the painting
look more round. And you can see this
when I'm doing it, I'm trying to make it a little round the colors, especially. So I'm not making it
square trip or something. I'm just making it
a little round. O. So a little bit textures will be there
because this water is never like underground
water is never clean. So we want textures in this, but at least try to
blend the colors. Now we will wait
for it to dry and then we'll start with
the more texture part. But before that, we'll
start painting with this fish which is there with a black and a little
bit blue mix, we can use or we can just use black color also. It's
totally up to you. So first, we will
outline it again, and then we'll start
filling the colors. You can outline a
thick line also, because we have to fill the
whole thing with black only. So it's perfectly fine if
their lines are thick. And try to use smaller
size brush for doing all these filling
small small areas. So try to use
smaller size brush. Here, I'm using my liner
brush only for filling it up. But yes, it will
take time to fill it up this part because
this part is small, so I thought of filling it
with this because I don't want the colors to
come out of this line. This has to be very sharp
and clear the shape. Now I will outline
the above part, and then we'll start filling
the colors so that it will be easy for us to know
where the boundary line is. First outlining it. Everywhere, I will
just outline it, and then slowly, I will
start filling the colors. The above part is a little
bit lighter in color, and as it goes down, it is a bit dark. I've just added a little bit of white to make it gray color and then we will move downward
to more blacker color. So just adding dark
grayish color. So do it very slowly,
very carefully. Try not to take out the
colors outside the line. So slowly adding first
the dark grayish color. And as we will go down, we will add more darker color. So do it very carefully, first outline it, and
then fill the colors. Once you have given the shape, it is a little bit easier for
you to fill in the colors. If in case any black part
comes outside the line, so how you can fix it? You can just wait for
that black to dry, then apply a little
bit white on it, and then apply this
background color which you have used earlier. That is the teal and the
naples yellow color mix. This is how you can just
wipe it off your mistakes. This is the only technique
which you can use to remove or erase your
mistakes if you have done. So just applying it slowly with my liner brush only because I don't want the
colors to come out. So just enjoy the process
and do it slowly. You can see there's
a line which is coming in between
black and gray. So I'm just trying to blend both the colors so that there
are no lines in between. Now, this time, I will be using a little bit bigger brush for blending because this will
help me to blend the colors. So using it very softly
and very gently, I'm just trying to
blend the colors. You just applying again this black color to the
sides which are left. Still my upper part is left, which we will be doing
with the detailer brush. So currently, I'm focusing
on filling the body. So we can see it's very
bright and vibrant. This black is coming
out when we are using this cool color background. So a little bit above is left, rest we have done the
blocking of this fish.
6. Water Texture: Welcome back. So let's start
further with the textures. Now my background has completely dried and fish we
will complete later. First, we'll draw the textures. So let's start
adding some textures around using my textured brush. That is the Bristol flat brush, and you can use normal
flat brush also. If it is normal flat
brush also you can use. But again, it should
be a very dry brush. Everywhere we have to
use dry texture only. So just adding a little bit of black and blue mix
and a little bit of prussian blue and white and
just adding some textures. But this texture will
create a thick pattern, so you have to use
a bristol brush for creating the textures. Either Bristol fan brush or if you have
bristle flat brush, you can create all
these textures. But if you don't
have bristle brush, try to use a normal flat brush
for creating the textures, but use it like a dry brush. It should not be a wet brush. So this is my filbert
textured brush. So it is a bristol brush or
hog hair brush, you say. So just applying some textures
all over with this brush. Just very little little colors, and I'm just applying
it everywhere. So it's a very dark color
than the background color, which I'm trying to
apply it all over. Take very less color and
your brush should be dry. Don't make it wet. It
should be a dry brush, and very little little
textures you have to apply so that it
looks like there are, like, some fossils and
something is there, which is inside the water, which is creating
these textures. So just use the darker
color instead of adding white and just add some more textures to
the darker bluish area. So you have to go in
around, which you can see. I'm just making it in,
like, a half circle. So like that, I'm just
applying the textures. Again, take a little bit of the dark bluish color and again, apply some more textures around. Just remember that your
brush has to be dry and use very less color when you are doing
all these textures. A little bit of lighter
textures around the fish part because
this area has to be a little bit more brighter
than the outside one. So just adding some
more textures, and the outer textures are
mostly in darker color. So again, I'm taking
some more darker color and applying it to
the other side. Taking a mix of white and
blue and just adding some more like a mix of both
dark and a light color. So just creating some underwater textures
which are there. Just apply it
carefully and slowly. And remember to take
very less color, very less amount of
color on your brush, and your brush has to be dry. So wherever there is
dark background use darker color a little bit and then mix it with a light color. And where there is
lighter background, use more lighter color
by using naples yellow, and this cobalt teal. Because the center
part has to be a little bit more brighter
than the outer part. Just applying it
slowly to one side, then I will do the other side. Just rotating it, and then
we will do the other side. If you feel that your brush is becoming sticky,
wash off your brush, remove all the water and make it damp brush and then
do this texture part. There should not be any
water on your brush. It has to be a dry
texture technique. Color is also not having water and the brush is
also not having water. Very little little amount
of color you have to take when you are creating
this type of texture. So these textures will
look like that there are some underground
stones or rocks or some like some underground, which we call it the flowers or whatever it is,
the plantations, whatever there is inside, which is looking giving
the shape of this because there are so many things inside the water underneath. So that I'm just trying
to create the textures. So one side, half, you can see I have done. So now I'm doing the other half. So again, the lighter
color a little bit. Then just applying here and then then a little
bit more darker color to the outside area. Then again, more lighter colour towards the fish
area which is there. So this is how we have
to give the textures, and I think almost we have
done with the texture part. So this is how it looks
when you add the textures. Little bit more textures, we will apply with
our fan brush too. So we'll now take
a little bit of fan a little bit of textures because when we use two to
three brushes for textures, it gives a different
different textures. So now we'll use the fan brush and give
some more textures to it. Whenever you're adding textures, you have to use dry brush. And this fan brush
which I will use here, it is completely dry, and it is a small
size fan brush. It is not very big size. Is size is one number. And it is a Bristol fan brush. So just taking the
colors and mixing blue, black, and this cobalt teal
and adding some more texture. So see you can give See, this is a little bit
of different texture that is giving just like a dot. So little little we will
add here and there, just making a color a
little bit darker and just adding some nice
textures all around. Try to make it in
a circular form. So this will add
another textures beauty to this painting. So there are two
textures which we have applied one with
the filbert brush and another with the fan brush, but both are bristol brushes. So again, taking a
little lighter color with a mix of naples, yellow, white, and this Cobalteal and adding towards the area
which is in the center. This area has to
be the brightest. So we are almost done
with the texture part. Now we will do the fish
detailing, which is left. It's blocking is
also left above, and little bit colors
have gone inside also, so we have to fix that also. So let's start with
the fish painting.
7. Fish Details: Welcome back. So now let's
add the fish details. We have just done the
blocking of the fish. Still the upper part is left, that is the mouth
and the face part. Let's add those first. I'm using my again, the liner brush, and first, I will give the shape to it, and then I will start
filling the color. So it's better to first
give a little shape, proper shape, and then you
start filling the color. So try to do it very slowly, especially this part and try to give a
proper shape to it. And then with the same brush, I will just fill it
with black color. So this is actually
the face of the fish, which is the fish
is moving forward. It's like that. So just
adding, again, the colors. So a little bit of shapes you can correct it if you want that the shapes
are not proper. Little bit of lining can
make your painting look more neat because this shape
has to be proper and neat. So try to do it very slowly. I'm just outlining it
with black so that any corners which are
left is shown nicely. You can add one more coat
of color if you want. If it is not properly
done, the blocking, then you can obviously
add the second coat, which I'm doing here
with my same brush. I'm using the side of my liner brush and I'm
just filling this color, a thin black coat of color. So try to give it first the outline and then
fill the colors. So it should look like
proper neat blocking. So just taking a little
bit of white and adding some on the mouth part, which is the mouth of the fish, just a little white there. And also the eyes, I will add on both the sides. Everything we have to
do with liner brush. Again, taking very little amount of light grayish color and adding a small dot
on both the sides. Oh this will act as like
there's an eye which is there, just facing towards
going upward. Or you can say in the water, it is in the middle of the
water and it is flowing. Also, there is a
line which is there, which we'll be doing with
black color, just black color. A simple line. Whenever
you are creating line, use a little thinner color, then only you will be able
to create nice thin lines. A little turn we have to both
the sides, as you can see. I'm just giving a
little shape to that. These are very minute, minute details which
we need to take care when there is like here, the center of point is our fish. So the fish has to be properly
detailed and very neat. So whenever we will
watch this painting, we will first see the fish. Then we will see the water. So this is our
main center point, so it has to be very
neat and clear. Now we will add the white
details, but this time first, we will add a mix of white and little bit
of black details. So it is not completely white, and I'm using here my round
brush for creating the small, small, light grayish
dots first on the top. So just use the tip
of your brush and try to create these small dots. So try to do it very
slowly, take your time. So dots are big,
some dots are small. So just adding some few
grayish color dots everywhere. So there is no
pattern on the top. I'm just adding it randomly. So when you're adding the dots, try to add the dots, like if two dots are there, then the third dot
should be in the center. Like it should be
like a triangle. So like that, you
can add the dots. These are very light
grayish colored dots. This is not completely white. So now I will start adding
the more white colored dots. So just washing off my
brush and taking, again, the round brush, it is
a thick round brush, but I'm using the
tip of the brush so I can easily create the dots. So now I'm taking
completely white colour, thick white color and starting
to add some more dots in between the grayish color also and to the below part also. Oh so try to do it very slowly and carefully if in case any mistakes happen
while doing all these dots, how you can correct it. You can just apply
the base color when the white color dries and then again,
try these dots. So you can always correct
it if there is any mistake. Like if some of the colors go
outside your boundary line, you can use the background
color to cover that up. But do it very slowly and enjoy the process of putting
dots one by one. It's a very relaxing and
a repetitive process, but it is very relaxing. Once you will put the
dots in the entire body, it will look very beautiful. And make sure that
you use thick color, not thin color, and just
use the tip of your brush. Every time take the color
and start creating the dots, then you will get a
perfect round shaped dots. Now, the center one
is a little straight, so I'm just adding a little
straight in the center, and rest are just in
random directions. So do it slowly and
take your time to draw all these small,
small white dots. So you can see already it
is looking very beautiful. The dots to the sides
are a little bit more, and in the center, it
is a little bit less. So this is how we can
create the manta fish. Now, again, I will take a mix of this white and teal color, and I will give a nice border, a thicker outside border
to this painting. This will act as a glowing
effect to the painting. So the teal and white color, and I'm giving a outline the outside outline
to this whole shape. So this outline is
actually a game changer, and you will see when you will
add these thick outlines, the object, which is here, the fish, it will become more
shiny and more popping out. So you can see how beautiful
the color is looking. It is looking very shiny, giving a very shiny
look to the fish. So all around, you have
to add these thick lines. So you can see the glowing
and the brightness which is coming when we
are doing that outline. Wait and watch the
painting and see where you can adjust and
where you can keep more dots. So this is how we
see our painting. Little bit lines, white lines
I'm putting inside as well. And just making the line
a little bit more clear. Little bit of lines, I'll just add to the sides
with my liner brush. So this is the whole
fish painting. Now we will create
the shadow of it.
8. Final Details: Welcome back. So let's start
with the final details. So we have done the background. We have done the fish.
Now the shadow part, which is the reflection part. So I'll just draw the same
pattern like I did on the top. So I will not be drawing
reflection on both the sides, but you can draw it on
both the sides also. I'll just draw it on one side with a similar pattern
like how the leaves are, I will first draw
with my gray color. That is a mix of
black and white, and I'll just outline
it like this, how the shape is, and similarly
the below shape as well, and I'll just fill
it with this color. So this is how we create shadow. So just one side, I will be adding this shadow. Try to make a color
like mid gray, not very dark gray, and I'll just fill it with just this gray color
with my round brush. So use a thick color. Don't use very thin
colour or watery color. It should be a milky
color for filling it. And this is the final
part of a painting, and just a little
bit more details we will add to the water, and we are done with this
beautiful manta fish painting. So you can see when we are
adding those highlights, it's already so glowing that
it is looking like a three D. So do try out this painting. And if you have any doubts
regarding colors or anything, you can always ask
me. You can DM. You can DME on my Instagram
that is Mohini Art Gallery. And you can share your projects. You can tag me, and
I will love to share your story on my Instagram
that is Mohini Art Gallery. So this is the reflection. We will adjust a few lines
across the water part, and rest is all done. So just giving a
little shape to this. So you can see I've just added the reflection on the one side only just to show that some rays are coming
from the other side, and the reflection is
on the other side. So a little bit of lines with a light color of naples yellow, and the teal color, adding few lines and
dots here and there, just to make this area
look more glowing. The lines also I'm adding
in the circular motion. So you can see after adding these teal colors and light
teal and naples yellow mix, the painting, the background
looks so glowing. So that's why it is
important to keep the inside part a
little bit more lighter and outside
part, more darker. So we can add a little
bit more darker to the outside part just by mixing this blue
and Windsor blue, the Prussian blue and Windsor
blue to outside part. If you feel like that
it should be more dark, that you can make that area a little bit
more dark, the outer area. So just taking a thin layer of color and just applying
it to the corners, just the corners, thin
color, not thick color. So I'm just acting this
color as a glazing effect. So when you add thin colors, the colors will not affect much, but it will make the colors
a little bit more darker. So just adding this dark
color to the sides only. This is how we have
to do our painting. So do try it out and
share your project works. I will love to see them, and it's a very, like, step by step painting. So I'm sure you will be
able to do this painting. Do try it out, and I will love
to see this project work. And if you want to
protect this painting, you have to apply varnish. This will help you to
protect your painting. So lastly, I'm just
giving a touch up with a light color of
naples yellow and the teal color just to the sides
of the fish, and this is it. So this is the
complete painting, and thank you so much
for watching it out and to share your project
works. Thank you so much.
 Mohini Sinha, Acrylic and Gouache Artist- Nature Lover