Transcripts
1. Introduction Manga drawing course: Hello everyone. My name is Israel Sousa, and you are very welcome to this manga and anime style
character design course. This course is
straight to the point. You will learn proportion
and anatomy techniques as these are the basis for the correct design
of any character. You will see character creation techniques
that will make it easy to draw copies or
create your own characters. You will see techniques of initial sketches,
finishing pencil drawing, and you will learn how
to make final art both with ink on paper and
on digital platforms. Next, we will see how to color
a character digitally with the same characteristics as the animation
professionals anime style. After completing this course, you will be able to
reproduce drawings in digital painting and
Mongo or anime style by observing and copying
existing drawings and even venturing to
create your own characters. I'm here to help you. And whenever you need any help or suggestions for improvement, albeit your complete disposal. Most. Welcome to this manga or anime style character
design course. Grabbed your favorite drawing
material, and let's draw.
2. Do I Learn to Draw: Hello guys, how's it going? Welcome to this lesson. Today, I'm going
to show you guys some techniques
about saying that. I think almost everyone
knows how to do. Some people say that they
don't have the gift of drove, uh, you know, they don't know
how how to drop anything. But I'm gonna show you
guys on this lesson that everything is
possible when someone wants to learn and
know how to draw. You have to draw here a real
simple, simple character. As you guys can see, I'm using just simple lines. Look at that. It is the most it is the simplest drawing
that anyone can control. It just using stack. Some lines below it is
a circle right there. And then we just draw, draw some, some simple lines. So I believe that everyone
can do this, right? Everyone can, can do joint is like this. I really believe. But now I just draw
simple circles okay. Like this. And see, we have now the
chest of the drawing. We have right here, the waste. And now let's draw the arms. We have some circles also here. Now another line, l, k. Just like this. We already have two arms, we have a chest,
we have the waist. Now let's go to the legs. Deselect the same thing
that we did with the arms. We have the knee right
then we have the ankle, we have the feet. We can do the same thing
on the other side. And now we have guys, a character with a, with two arms, with
two lives, with waste, with everything that we
want to draw any character. And everyone can do this. I believe anyone can, can follow these steps and draw the head with the simple
circle and a Chasse, the West and the arms and legs. And the truth guys, the truth is that if you
practice a lot, if you really, really decide to
learn into practice, you will be able to
do a drawing just like base rule will
be able to draw, to draw designs, battery and
you know, amazing drawings. So it is just a matter of practice and learn
the techniques. And now, as you guys can see, I'm just adding more
details on the character. Very simple lines. We have some triangular shapes. We have of very simple shapes. At first we have a real, real, real simple drawing, and now we have a drawing more
and more complex. We have more body
parts on these, this bigger, bigger drawing, you know, as a tool, as I said before guys, everything is a
matter of practice. Everything is a matter of
you decided to do was to, to learn and you will
be able to do so. Now I'm going to use
my mechanical plans. So to add more details to this character will be
very simple details too. As you guys can see. I want to talk about, I will talk a lot about
each one of the body parts. I will talk a lot about all the techniques you
could use on this drawing. Of course, this is not
the goal of this lesson, but I'm just showing you
guys that if you practice, if you choose to
learn how to draw, you will be able to do this. We'll be able to draw
amazing designs. And as you guys can see, I'm just using very
simple shapes, very simple lines, very
simple techniques. I'm being able to
control a very nice, draw, a very nice character. Now, look the arm. Look the arm that I'm drawing. Just curvy lines just like this. We have, you can
add more details, then we can go to the hand. And that's it. That's it. If you want, you can just pause the video and look
how I'm doing it too. Can go back and
see how I'm doing it and just try to
do the same thing. It is very, very
simple, very nice. I want add a lot of details, okay, it is not the
goal of this lesson. So a want. At a lot of details. But as you guys can see, I'm adding the most firm
parts of the drawing. I'm going now to
the lag right here. We have some pants
on this character. And I'm going to draw
it just like this. So it is very simple guys, just look how I'm doing it
and try to do the same. Of course, if you
are a beginner, if you're starting now
to learn how to draw, you will, you will
find some def, cute. You will find some, some tones on the, on the path. You know what I mean? Anyway? Again, it is hard. But if you, if you injure, if you keep practicing, if you choose to
learn how to draw, I'm sure that you guys will
be able to draw amazing, amazing designs, will be able
to draw amazing characters. You know, as you
practice better, because we should
practice a lot. You will learn more techniques at all and it will
become better. And as you guys can see, we have, we are, we are drawing a
real nice character. We have some nice details, Okay? And, and every time we try
to draw some character guys, after you finish it, just, just keep your
drawings and all. You can have a box
where you can put all the drawings
and you will see the evolution that
you will have. A lot of the time. You will see how better
you will become. As much as you
practice, as you study, as you learn other
techniques and new techniques around the virus, you guys to just keep all the drawings
that you made, make. See the evolution, the
evolution that you will have. Okay. We can go now to the hair. It will see I'm just using
triangular shapes again. Very, very simple
and nice shapes. Okay? Just like these guys. Indeed, it is a very
simple drawing. It is not that hard to draw. But anyway, just practice a lot. Use any tool that
you have available. You don't have to buy a really fancy mechanical
pencil, fancy pen pencils. We just need to use
whatever tool you have available and do the best
for our winning you. Who can, you know? You can just watch the
videos right here on youtube and learn about the
techniques and learn about all the things that
you can apply to a drawing. Of course, we have
a lot of healthy. Those are the internet with bad, too bad information,
with bad tips. I'm sure that you
guys will enjoy to see the videos right here on my channel and apply
the tip that I'm, that I'm teaching you guys. Okay? We have a lot of designs, tiles, we have manga, will have an MA, we have a lot of, a lot of different styles. You can just choose whatever
was tells better for you, whatever title you want
to learn how to draw. And you can focus on
just one style and learn all the techniques about
that specific style. And then after you, after you master Mustard, this is tiled, they
chose who can go to, to another, you know, guys. And now of course, if you just watch the videos
and you don't practice, you won't evolve, you
won't become better. You wanna learn. It is very important
to practice. So watch the videos. Of course it is very important, but also practice a lot. Because if you don't do this, you won't guys won't become
better, it won't evolve. You will learn how to draw
better in cool designs. And as you guys can see, this is very, very nice. We started with a real, a real simple throw in with just one circle
and some lines, some simple lines to represent
the arms and the legs. But then we just add more detail as we add more
lines and more circles. And we drew the chest in the West and the
legs and the arms. And a withdraw, withdraw
a really nice character. Just need to follow these tabs. You know, just need to
understand the techniques and follow the techniques
and these taps. It doesn't matter if it is a male character or
a female character. You just need two guys. Choose whatever character
you want to draw and to do the way you want. Okay? And of course, you
can't give up. Don't give up guys. Practice a lot. Learned a lot. Watch videos, try to practice. And don't give up. Don't give up. Because if you give up, she will never learn how
to draw in all guys. So choose a reference, which is a reference whatever character you liked the most. And then tried to draw it, the reference and try
to do the same thing. And I'm sure that
as you practice, you will see that
you will evolve, you will grow, you
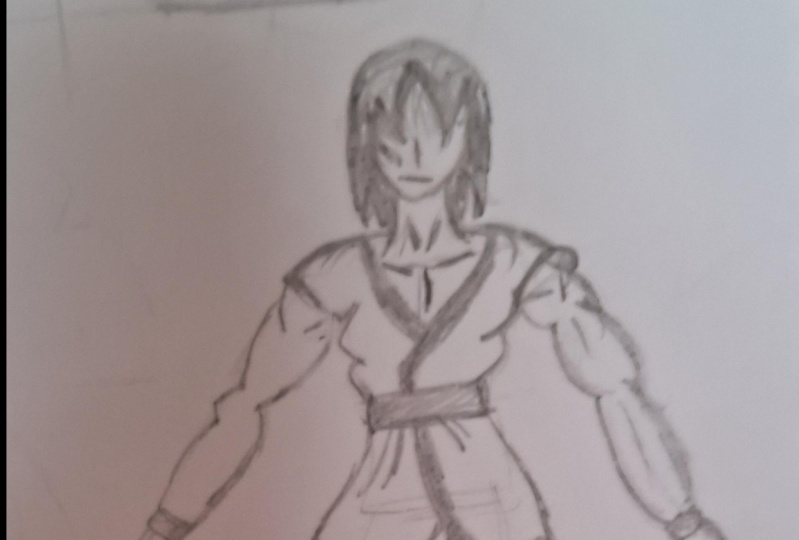
will become better. So just don't give up. And we use a real simple
drove it at first. And after. Look at this middle character, this middle draw it. It is a very nice character
with a lot of details, with lots of muscles, with an, a really nice outfit. We have a really nice paints. I would like to draw
this kind of pants. We have a really, really
simple here also. And that's it guys. I know that at the
beginning it is hard. It is really hard. But if you don't give
up, keep doing it. If you keep practicing, you will become better guys
who will become bears? I am sure about it. That's it, guys. Please like this
video, you know, in the comments right
here about why to, what are your thoughts
on this lesson? And feel free to
make any question. If you have some questions, please just contact me. I will be very, very
happy to help you guys. Okay. Thank you very much. And I really hope you
guys enjoyed this lesson. See you buy into next.
3. Basic Tools and Materials: Hello guys, I'm miserable, and we gotta be here
with you in this journey from the beginning to the
end of this training. Let me first start
our first-class. I would like to
talk to you about the tools and materials
that we'll use. Some people have a down TBI, other material that we use. But you can be sure
that we'll only use the very simple materials
that were basic tools. I'm going to start by
talking about the lip paper. This sheet of paper
is irregular. A4 sheet of paper. It is a very nice and
fine this kind of paper. And it's not inexpensive
paper to buy. The other kinds of papers
with inflamed better quality. For example, this one here
is a sham acts paper, isn't really a white paper
and it maintains its color. Over time. There are other
kinds of papers with a inferior quality by a relative finds you to use
a quality sheet of paper. That's really important to use a good quality sheet of paper. Let's talk about pencils now. I prefer to use a
mechanical pencil, but you can use a regular
pencil if you went. Here, I have a mechanical
pencil of HIV. This one is a very
simple mechanics paints, so I bought it some
time ago and it's a cheap way to get it. So I don't really like to
use this mechanic pencil. And I'm using a to
B to B pencil lead. There's one here is a
mechanic pencil 09. It is a very good one. I have used it for some time. And this is a 07. Both of them aren't OS haven't. They might kind of pencil
that you're going to use doesn't matter that much. Actually, you can use
any one you want. You don't have to
buy an expensive one to make good trolling. So what you draw with this one, you can draw with the father. So don't worry about brand, Do not worry about the model. Just use the one
you like the most. If you prefer to
draw with a pencil, always use a sharpener. Because the thinner
the pencil tip, the Battle of the
results had thick tip, leave them lying less
precise and end up, end up making the term ugly so the tape must be always fan. So it's really, really
important to use a sharpener. This other pen. So here is a two beat to beat. Say if you can see it, I use it to sketch. If you don't have
this kind of pencil. This is a fiber castle. It is easy to find, but there are other brands to, there's no problem if
you choose another one. After all, at the end, we erase this Kangxi and on
the finance tropes remains. So doesn't matter the brand
that you choose to buy it. You may use a pen, so two, but to make these catch, the two b is definitely,
definitely better. Now. They're rubor, they rhubarb. I use these rubbers. It is a Pentel rubor. It is a very good one. I really like to
use these rubbers. They are soft and has a
good, a good precision. I can erase well the traces with them and they are soft rubbers. Equality of the paper
is not a fact it, so I really like to use them. Look this, this catch that
I am joined by paying. So look how I'm doing it. But if you prefer to
use the mechanic pen, so instead of the pencil, that's just fine. Okay, That's okay. Both pencil and mechanical
pencil that I'm using on this Raman
has a TBI graffiti. But I must say that they think that the mechanic
parents who is better. The strokes more
precise as you can see. But as I said, this is optional and you can choose the
best material for you. Some students prefer to use
the mechanic pass Hilbert. They're all there is the pencil. I prefer a mechanical pencil, but it's also good
to use a pencil. It is important
actually you know how to use both of them. Okay? Just a quick sketch
here to show you. That doesn't matter
what you use them. It can a pencil or a pencil. That's just fine. Use any one of them. Basically, it will make a difference to
make the final art. Well, we'll use
these fancy pants. I use two models. I have this one from your pen. It's a good pen. If I'm not mistaken, it was made in Vietnam. And there's other
pen is from securer. It is a Japanese pan. And I really like to
use this felt-tip pen. This one is a 05. There's all there is a 08 and it is a little
thicker than the 05. And his brother who's a
one you can use in a van, which is the bus, which
do you prefer to use. So doesn't really
matter what kind of felt tip pen you
will choose to use. What you can do with one, what you can do with one, you will be able to
do with the others. Although I think
pencils from Sakura, they have a software tip, almost like a brush. And this is very nice for
this kind of drawing. So I really like to use
pencils from secure. It is very, very good to use secure as mechanical pencils. I like it a lot. I also use this one a lot too. It has a thicker tip. It is a o. This tip is thicker. It's important to have a
good control of your hand. What makes use this type of penalty at all,
hardwired to use. You may say, I have no
money to buy these pencils. These mechanical pencils
are kind of expensive, I know, but it's really
nice to draw with them. You can find them for a better
price in the air in that. Another option is this
other Phelps to PAMP. I don't even know it's brand, but I know that this
one was not expensive. Actually, it was
for pretty cheap. And this one has two tabs. The first one is a
little bit thicker. I always use a to fill larger parts as I'm
doing over here. And the result is pretty nice. Looks pretty good. And it has a second
tab over here. Although it doesn't
have the same precision as other kinds of
mechanical pencils. Look there. You can also make a beautiful,
a beautiful drawing. If you can't find one of those expands have
mechanical pencils, you can use this one that I'm using here. That's just fine. You can buy a cheap
mechanical pencil. That's okay. Maybe you
live in a small town and it's hard to find better
materials, but that's okay. You can use whatever
material you find. I advise you to wait until you learn the abilities
you must learn. And then by better materials. See how nice our joins getting. Very beautiful. See that we use on
this Roman at first a pencil and a mechanical
pencil to make the sketch. And the final Aren't we
use it a unique pins pan, a secure his pen and
irregular felt tip pen, which is very easy to find. Look into the drawing. I'm not really able to
see the difference at all between the different strokes made with different pencils. I don't know if you
will be able to see, but all of these pencils are
pretty good to work with. Although this one here
is good for beginners, there's thinner tip is
going to make the online, but of course, you must
be careful when using it. This bigger tip,
I always use it. I recommend you
to use it to fill parts in black color
parts in black. So these are the pencils, the mechanical
pencils that we're going to use in this course. It's a very basic material. I believe that everyone
will be able to have some of these materials. I also have a Shatner. I really like this Shatner. You also must have a sharpener. I also have this other one, and it is a very, who do I have this
one for a long time. I don't know if it's brand, but it's a pretty nice one
to use the burden of things to keep the tip of the
pencil thin at all times. And of course, the
sheet of paper. And that's it. I'll lay it
all a little further on. When we were working
with digital art, we're going to use
this row over here. This is a way cone drawing
table during pant. This one is a affordable
model on the market. It's the model CPL for 80. It's a nice drum pad and we'll
use it with some software. Photoshop, Paint Tool SAI. These are the most
accessible programs, so we're going to use these two programs are
just the paint is high. If you don't have pads
like this, don't worry. Just because I'll
also show you how to, how you can make in any
name is tau character with the same quality
that we would do with a drone pan
using only the mouse. However, it will take
a little longer, but the result will
be very similar. So don't worry
about drawing pen. You've already have
one like this. Great, but if you
don't have one, don't rush to buy it. Now, it's partially because it's expensive to
buy a drum pad. It may not be a good investment if you
buy one of them already. So take it easy. Go into the end of the course. And when you finish the
training after you complete the first digital
drawing using the mouse, then you can think about buying them drawing pad. I don't worry. Now, there's room parent is compatible with
almost all computers. It has a USB. When I started working with
digital coloring, I will explain a little
more about it and I'll give you tips on
how to use it better. But for now, let's focus on the traditional pencils,
pencil and paper. Let's focus just in their pencil on the
paper at this moment. Okay guys. Okay, that was it. We talked about the material that we'll use in this trainee. And if you don't have some
of them, it is boring. You try to buy them. Pick your favorite pencils
and your sheet of paper. If you don't have a secure pen, for example, you can buy
regular tail to tip PAMP. And that's fine. If you can find out the panel
width to tenth grade, but if you don't, you can buy. It's happening slowly. Some parents has
just say Sam tab and there are others
with the thicker tip. But that's fine. Can't use both of them. That said guys taking
materials because in the next class will start and trauma and characters
in the animated tile. Thank you so much and I'll
see you in our next class. Bye.
4. Basic eye drawing Part 01: Well, let's turn our class making a basic
construction of the eye. Here I will draw
a horizontal line and on this base will mark
the shape of the eye. I just drew this line to show that the outside of the
eye in the inner corner, I will always, always
this tape below the curve that goes
towards the year. So see how I'm doing it. To make easier drawing the eye, I divided this part, varied colleagues so that we can mark the trauma of the iris. Now the propel, and
here you can see the, the standard shape of a manga I. This is the basic shape
of any eyes towel. Even those with a lot of
details use this kind of shape. So you must learn
how to draw this. I can make the shadow over here. When that flower, we are making a manga
trawling the lashes, the upper part of the eye. If it's a male, I, we don't have to draw lashes, but it's foreign to Highline. Well, this part, the upper part to create the eyelash effect. Notice that the lashes strokes need to be thicker than
the rest of the drawing. The contours of the iris is the eyebrows till here. And expression the Marne, it is a little bit
angrier character. The eyelid usually follows the shape of the upper
part of the eye. Because if he does
in this part of the, I won't be able to see that the upper part of
the eye is always the most prominent and
hit a tiered duct. It is below as we saw
here on the line. I'll mark it at the beginning. We made this line. It will make it clear that there's a channel
partner that we are mark and now it
always has to be higher, higher than the corner
of the tear duct. So here is the basic shape. After you do this, it's nice to draw a
very simple shine. Shine doesn't
appear if you don't draw a shadow in the eye. And the year, I'm going to make another shape and all
the basic construction. We wanted to tell
a lot about it. Now, this is not the
purpose of this class. The goal is to help you to make a better trace detail of
the basic construction. You can see these tender
shape of the eyes. Although the top and lower
parts are different. You can see that it
has a similarity with the farmer with a shape that we use it in the previous model. Even though it is
not the same format, the same town, but
it is very similar. You can notice
certain reference. The manga is tau allows us to use a lot of details
on and try wins. That allows us to
escape the row, which makes our work
as a manga artist, as a graph as man,
I'll either easier. However, if you're using a
reference to draw what you have to try and be faithful to the character shape to
make hand recognizable. But you may also be adding
details that you want. You don't need to draw with Dragon Ball character,
for example, with those ions and this halo of Dragon Ball made by
Akira Tory Yammer. Here consider very large iris. It fills all the space between the upper part of the eye
and in the bottom part. Riot at the centriole
will make the propel. Okay, very nice. The papilla is only
at a bigger example, so will completely
fill it in black. Playfully. Usually, will
always use the papilla, fill it with black. Regardless of the color. I'll make the shadow
and also the shine. I won't fill the Shannon
Millay. I'll leave it. That way it is preserving
the white of the paper. Notice that the darker this area is more on
the shadow appears. So there's no shine
without shadow. So it is very important
that you've made this channel it to make
the shadows softer. You can, you can draw some lines in these cracks will
form a gradient here, indicate the eyelid. That's all famil ies. So I'm going to
draw some eyebrows. Details, make the
design more feminine. It looks good, and
there's details. Remember that to make
male characters, we'll do not draw that
way only if ten male, female characters were almost. Finishing this. In this part, you can draw more lashes, are
little eyelashes. You can choose the drawing
sharp lashes and they can see count the strokes,
maintenance, hate her. This kind of IE's use it a lot in manga with
female characters, the eyebrow and xydA, we can make it
slightly simpler shape like this, with a tab. In the beginning,
a little thicker, lead that direction of the nodes will live
to trace a ladle, take care these appliance
for male character as well. However, the male, the male
eyebrows is a little bigger. And that's it folks, in this class we'll learn about the basic construction
of the eye. So you must practice
and try to draw it. Isn't part of that. You
make the answers highs. Any questions or
any help you need. I am always available. I want to help you. Thank you very much and I'll see you in our
next video lesson.
5. Eyes facing Part 1: Let's start by drawing
a line here, a stroke. And American behind all the upper and
lower base of the eye. We're going to use this
metal part to draw the eyes. If you want to use
a ruler, you can. Actually, I advise
you to use a ruler. But if you don't want to use a ruler or if you
don't have a ruler, that's just fine. Can you guys? Right here, I will define the size of the
eye in this page. Remember to leave East pay similar to the size of
the eye in the middle. In here we'll make
the other eye size. I'll just adjust this part here. You have drawn these squares
as equal as possible. The fair use any ruler that make your writing measurement. But if you're wants
to do it free hand, you can also use a pencil and my pencil to make
the measurement. I'm going to divide
in the middle. This will help us
to better define behind the tear duct and
in the upper corner, then you can notice that it is easier to add a
model of the eye. I've always as a baseline to
help me to know the height. And that's pretty cool, That's pretty nice for me. It really helps me. So always do it. Here. For example, the rice
height in the last hide, the tear duct I angina. And then with a lion for that, they are at the same height. Here. I'm dividing the middle of the eye and I'll
make the drama of the iris in a
sketch of the iris. This is a sketch of the iris. These lines are baselines. They will help you to be able to draw the eyes just
like the same. You can measure the distance
from woman's of the eye to the other and try to make
it as equal as possible. If the eyebrow must draw a
line to mark the height. If you want to make both of
them with the same height, this will help you, including the upper part of the eyebrow. Here, I'm doing the same process where dominant
initiatives catch. Now we're going to start mark
making more final details. You can see that I didn't
make it strong traces, but now I'll be adding
darker details. Because now we're going
to do the final base. The outline. May can hear the pub pill. Manga characters has eyes with the most varied
types of iris. And the appeals has
a lot of details. Manga allows it. We have a lot of details. Here. In the upper part will
make you stronger outline. Here, I'm making a
small adjustment. Whenever you find
it as necessary, use the rubber to
raise some detail. Don't be afraid to
use the robotic. And as I want to show you the entire process of the
drawings, step-by-step. You will see drumlins arrows. I want to show you that it
happens and that's okay. I believe that you
will learn from Tom's tags and you will see
that they have solution. I'll color the papilla in black. I'm going to make a shadow here. Notice that this is a gradient. So I'm going to make
some traces over here because you can do the same. This trace has gives a nice look to the
drawing and a gradient. This makes the design in
which more harmonious all claimed the left
eye and erase some of these lines that we
made at the beginning. Now it's time to finish. The second line will do
exactly the same thing. We start with a stronger
definition at the top. And to mark better the lashes,
we can make it stronger. Defamation highlighted
the upper part of the idol in the eye. The eyelid margin. Usually the idle aid follows
the same outline of the eye. And here, the same thing
that we made earlier. She hadn't hearing the
iris mark in the papilla filling it with
black. Same thing. You can see that our
drawing is almost finished. It I forgot to leave
the shine here. And it is important that you
leave the Cheyenne always on the same sign so that the
character doesn't look weird. Here. Then China was marked
here on the left side. So you also mark
the brightness of the second eye on the left side. Gradient here at the end
of the shading of the eye. You may be market may can sound more adjustments by
adjusting some parts, by increasing the tongue of
the refeeding. Clean it up. It is important that you remove access lines
from the drawing. So this was our video
tutorial about ice guys. Let's go to our next
video lesson that it is the part two with
different eyes.
6. Eyes facing Part 2: In this video lesson, will make the same mark that we did on the previous lessons. I will mark the
height of the eye, brown, the eye height
and the base line. And this metal part, we're gonna draw on the ice. So I'll mark the size, marking of each eye with
his pace between the eyes. Within this space
will turn the eye. And so I'll be
capable to know where exactly each I will be located. Remember, it will leave the
space between the eyes. The same error. Man
two of the, I measure. On this couch, I'll draw
the trace of the eye. The upper part, it is important
to highlight more with his turn to trace
because of the lashes. And this is a female. I even so I will add lashes. But even so we will make a more defined line
of the upper part, it always gets a little
more highlighted. Remember to keep the table, the lashes always fan. Okay, that's the
shape of the eye. And it's a little different
from the other we made. And as you can see, this eye is a little flatter due to the characters
angry expression. The IRS will not appear
completely at the bottom and edit top part will be slightly off due to the shape of the eye, so it won't appear fully. Then I'll take the entire lower and
upper part of the eye. Here you can see
the papilla marking the brightness and the
shadow always on the top. I usually drawn
them some shadow. Color, the whole
propelling black, regardless of the
color of the eye, the pupil will always be black. I'll answer charming character with some different styles. But if it is a common character, always color the
book pill in black, the shadow mark,
and it can be done with blank as I'm doing here. Can draw in some lines
here like these. But afraid to leave the
top and blank and to make these lines at the bottom. As the character is few years, the eye brown, the part
that goes towards the nose. It'll be very close to the eye and you can see that
the closer it is, the gradient, it will be the
expression of hangry, anger. You can see it There's the
characters of Dragon Ball. When they're angry. Actually, even some
of those who are, is myelinated have
an expression, they eyes of anger and have
a lot of these details. Even though it is a very
unique style of Dragon Ball, it really reinforces
the expression of anger and any type of eye. Here, uh, we're gonna
do the same thing. Always remember to
compare the eye's height. For example, here I did a quick visual configuration of the online or the upper part of the eye that I make
in the tear duct. This is because we want to
keep the eyes look in the same, exactly the same. So this tip is very good for you to leave
the same eyes at the same height and
at the same size. The same size. It's very
good to use these lines. Here. I'll divide in the meadow
to make the iris drawing. It is important to also
observe the details on the sign so that the eye
is exactly the same place. The iris of an eye is an
exalted same place with the same distance and the
shine in the same times. So if you've made it
on the right side, a lifetime, you also must do
like this in the right eye. To highlight the shine, I'll draw more shadows. I usually did this detail
on the flat shadow, the detail of the pill
painted in black, the eyelid detail,
and the lashes. Okay guys, the base of the lash, always a little
thicker and thinner. Remember to always
leave this TEDx theme. And here it is, the trauma and it's done
a lot that x tau of I and other shape a little more different from
the first bond, the same way of doing it. Okay, next, we'll draw
one more example. Here. You can highlight a little more and just hint
anything you want. But there's, your army is
already completed and then can always make the
adjustment you want. Okay guys, Thank you so much and see you in our next video.
7. Eyes facing Part 3: We're going to start
basically doing the same thing that we
did in the last classes. The eye height, the
division of the size, the space between the eyes, just like we did in
the previous classes. You can notice that this pace is a little different
from the others we made. We're going to draw one
here, a vertical bigger. I am going to mark
the upper eyelash, the bottom of the eye. And the size of an eye
measuring the height. Same eyelash model. In the bottom part, you must compare both eyes. They should be the same. And then you can adjust
or change some parts. This is necessary
for one to be as similar as possible
to the other. Always as similar
as possible guys. Here the iris is being
drawn from the bottom to the top part in a oval shape. The shadow to tell
the shadow you can, you can do the mark and by
following the upper lash, you can draw it a little
bigger or smaller. You can choose how you do it. I may can the most
standard design here, but you can change
the parts. You want. The phrase Lenhart drawn
these tender details. And then you can try to use another format or create
a different shape. And Amato, did you
tell him the eyebrow? Also very simple. I brown. Now with the
hippos catch bullets, start to define the final art
of the characters I shine. Remember to make the shine on
the same side of both eyes. Always, always. It is important that you
always remember this detail. They must be drawn at the
exactly same signs site. Now, we're going to finish the drawing detail of
the lives that we did. It is a really a take one. Lot of eyelashes. Remember the drone, the attempts always thin out and drawing lashes on both sides. Although usually they aren't
traveling in one side, I'll draw them on both sides. You can also draw a
lot of lashes or less. If you want, you can choose. This varies a lot. I'm gonna color. They propel in black. Now. They propel always. The shadow detail. You can draw some traces, fine lines over here. I refer to just
color it in black. I use these tropes to
create a gradient effect. But as I saved, mine got allows you to make
a lot of variations in, so you can create a lot
of different details. And you can do
this and each item the character in the
mangas town animate to. Here, I use these strokes to create the gradient in
the shade that we mend, the upper part, the iris, highlighting the lower
part of the eye, the outline of the iris. And the drawing is
almost finish it. Let's finish the second i now we choose the right
eye of the character. And it's basically the
same thing failing here, the eyelash and black. So let's do it. So at this point, there's not much
to explain because everything is saved until
now applies to this Rowan. While you're doing
here is basically defining the outline and fill in the blank some parts like the propel and the shadows. So pay attention to
what I'm doing here. In trying to
reproduce this Roman. Here, it is nice if you
draw some hair details. Usually always turn drawing those locks of hair
between the eyes, between these pays on
one ion and a laba. Then we can find the
other is trains here. Some are over the ion. You can draw the hair, alright, if you want. And the hair makes your
terrain later more real, a little more natural. That's pretty cool. All right, that's our German. Let's just clean the trauma
and by using the rubber. At this point, you can also make some adjustments that you
think it's necessary. It is very important
that you look to the drawling before
it is finished it, and see if it is all okay. Beefy. It is the way you want. Okay. So that's it, guys do the
exercise, practice a lot. And I'll see you
in our next video.
8. Profile eyes: In this class,
we're going to have an overview of how to
draw another kind of i1. I'll start making
irregular shape of an eye. And so I'll explain to
you how to draw the eye. I will divide it in the
middle and see that I'm going to draw on
just half of the eye in utero have a
triangular shape. The book pill part. It'll have the
bigger side between the upper and lower
part pointing towards the end of the eye. And the shape of a triangle. Regardless of the ice town, regardless of where the
character is looking. It will be always
with this farmer, it, with this shape. You will just inverted
the triangular shape. This is valid for
the propel twos. So the tail is the basic
trauma for this kind of AI, this shape of i. Now I'm going to make a
detail of a more defined and I am going to start
making the upper part. Notice that I'm making basically a triangle shape following the
circular base of VI. This detail, this is part of
the propel, the outer part. It is kind of raise it
in the, this part here. It makes the upper part albedo a hand and a width
feminist stroke the papilla you can
draw the shine. It is always good. Create
a shiny here on the iris, a shadow to some traces here to create a gradient fact. Basically the same thing
that we did in the front I. All of that in the
profile shape, the visual angle,
change the lay it over with this triangular shape. If you're drawing a
female character, you may be adding eyelashes. If you're drawing
a male character, there is no need
to draw my lashes. We don't draw my lashes
on male characters. And always remember to make
the lashes tabs always thin. At the end. Also
varies by Brown. Now, drone. See what I'm doing. Now. I will draw some
parts. As you can see. The forehead and nose can see better that we have here
the details of the eye. You can add some details,
some hair details. All these details may be
tomorrow, it looks better. And we're all in natural to. Here it is our first example. Let's make this second one. In basically we're gonna
do the same thing. But with a better villa angle
from the upset designed. The eye will now be
looking to the left side. Then you may draw in bigger
or smaller and attain, it depends a lot on this table, the Irish Roman, you can make a different model like
I did in the beginning. Always they used to
throw in New York all characters to define
the profile, et cetera. You can do like I am doing here. It'll help you a lot. It'll guide you. This I, over here is a little different
from the first one. As far as getting
very this tile, their way of doing this will
be the same for anyone. Just forget about it. The end telling the
iris of the eye. As I said before, I'll decrease in a
little bit here. There's the tail of the eye, but it will always depend on
what you want to draw them. Well, the character,
your trauma, and if he has a bigger
eye is monitor I. That's why it's so important
for you to do the study. They would tear the
beginning of the class. If this is a male character
and the drawing is complete, and if it is a
female, you cannot. Eyelashes. Here, the eyelids and the top of the eye. A cheek detail. I'm going to erase some
of these traces here. And if you want to add some
more details to the trauma, you can draw some hair detail to another phase detail. And here you can
see the trawling designing with different
angle of view, one on, one to the right
and one to the left. Now, a third example, a slightly more
indifferent nine. So we can vary the trace. Notice that this eye it is, it is not a regular profile. I won't be completely triangular
by the way of doing it. It is basically the same. What changes is
the online detail. And I had some more detailed in the inner
part of the honors. This is quite a common
Japanese tile of adrenaline. As Haidt, you are
creating designs totally different
phone already saved. You can invert the colors, for example, where it is, why you can paint it in
black to those characters, really, really angry characters. But as you can see the way
of doing it, it's the same. It is a very similar
results hold though attains the shape of the online a little bit by the
details will be the same. It won't be the same. It is just the online variation. And that's it folks. I hope you understood
how to draw on these kinds of ions
and any questions, or if you need my help, I'm here for you to
forget to practice along. And let's go to our
next video lesson.
9. 3 x 4 eyes Part 1: We're going to draw here a
non-linear example of an eye. Last term mark in the height
and the base of the drawing. I will divide the
mid of the ice. It is a vertically trace
the pace and less defined. The eyes, making one nice
Find larger than the other. Two. The one line
is bigger than the other and that's the
way of doing it. Now, the nose, a simple shape that will vary according
to the face possession. I will define the size and
the modern of the eye. When you feel more confident, you may don't need these catch. Although I always prefer to
work with a initio is catch, it increases the chance to make the drawing just the way I want. When you draw without using a sketch and the chance
of error is very big. So you have to be very
careful with that. Here, you can already see
the shape of the eye. It is a little more rounded. If it is Himalaya, you can draw some lunches
if you want. The shadow. You can draw some traces
here as I'm doing. Or you can just paint it
in black as I usually do. Some strokes over here to
create a gradient effect. The eyes basically finish it. You can highlight some
parts if you want. The lashes. The amount of lashes very, you can draw more
or a little less. It is according to the
character you're drawing. Now the second eye. Let's draw the iris the same
position of the first one. Remember that as the face is
starting to lay them back, we have to maintain the
proportion of the eye. So we have here a
certain variation in the detail all the eye you
have to be aware of that. Define the shape. The size is basically alignment
highlighted the outline. May can the shadow
and the shine. This upper part? If you want to add hair
to the drawing, you can. As I said before, it makes
the Troy more natural. But the main part in
this class is the I. So focus on the drawing of
the eye, how to draw hair. We will see later on. So guys, any questions, feel free to contact me. I'm available to help you. And you must practice a lot. Mainland this detail of the
space in-between the eyes, the size n. Now you can get an overview of
the German of the eyes. Later. We're gonna see how to draw
the nose and the mouth. So thank you and see
you in our next lesson.
10. 3 x 4 eyes Part 2: I'm going to start by making a circle in order
to troll the face. I will divide this middle part
of the face and I'll make some horizontal lines to mark the height and
the size of each eye. Here, you can notice that we're going to draw
a smaller ion. This pace between the
both ice is also here, as you can see you. And one bigger, a lot bigger. This part of the phase, there's right side here, is more evident than
the other side. We have one year here. So to create a better font here, this, I need this to
be a little bigger. Part of the faith
that we can see more. The eye must be a little
bigger than the other. Otherwise, you won't create the prospective
effect that we want. Here can see already
the eye shape. They will do the same thing that we did previously
in the other eyes. The important things
that you define, the shape and the size. After you define it, you just have to
draw the details. For example, the errors. You must pay attention
to the sign and date your training during it. If you drew, drawn it for
the right sign in one night, you should do the same
thing in the last slide. The eyes must be equal. They must be just the same. Now, I'm already highlighting in defining the final
outline of the drawing. The iris, the shine
and the propel. A small glow here in the propel. This child is not the main glow, but it highlights even more
the eye shadow detail. As you can see, the way of doing it, it is exactly the same. So the most permanent thing
here is the beginning. The lead in the eyebrow. At the beginning, you must set the space between
the eyes correctly, the hind to this size, one I bigger than the order. After you make the sketch, it is very easy to add the details because you
already know how to, how to do it. Details. So you will just turn them then. The final effect of the
drawing will be amazing. One more shine here. Remember to draw on the channel both eyes at the same side. By doing this, you will see two where the
character is looking. And this is very important. You can see that
you draw in any of the eyes is almost
done. At this point. You can make some adjustments. All drove some hair to make the drawing
even more nitrile. But this is a patient. But if you want to, but if you want, you can
already draw the hair. The important thing
is the drawing of the AI will learn how to draw
the hair in another class. And I really hope you guys
have understood how to draw the eye in ICU
in our next class.
11. How to draw mouths Part 1: Let's turn this class
by making a line and dividing it just like
we did with the eyes, will also divide the mouth into three parts to make it easier to understand how
it was divided. See how I'm doing it. We make a shape
similar to the letter M. This is the basic shape
of the division of the labs. We must highlight the corners. The upper part of the
under part of the labs. It'll be kind the
shape of the letter. Tom will you Mel's mouth is usually we don't do
a capitally close it. So we do the division
on the lips. The upper part is
practically equal to the division of the
lab that we made. It follows the same outline. The upper part and
the middle part with a M shape and the lower
part with a toggle U-shape. You must know that
the most perm part, if the central part, the middle, the middle part gets redefined, the expression that
the mouth will be showing the drawing. So always highlight eight. Another mouth shape
is this other one. We use a rectangle to turn
trauma and then you can divide it into three parts as well if you find it necessary. But I'll well-defined
into four parts. And do you must do the
shape that I'm doing, tried to reproduce it. It is really important
to make this catch. Your character's face in this example is
kinda looking right. So the left side of the
mouth will be more evident. So pay attention to
the angle of the face. Here if it's the same
thing and name shape, the metal and the bottom part. So this drawing is
going very well. Let's keep doing
then in that set. So this Roman is done. If you are going to
draw a profile mall, for example, only half of
the mouth will be apt. And so instead of dividing
it into three parts, divided into two parts
in drove this stroke. Their upper lip and
also the lower-left. Always remember it laid the upper lip slash malaria
than the lower one. That's the way of doing it. The upper left must always
be ahead of the lower lip. You may be drawing
in some lines to make the shade shadow. Here just one more highlight. It is always important
to make this tab here in the corner of the mouth to create a more defining
the character. You can make the
adjustments on the mouth that you feel it's necessary. This one is a three by four, is all there if profile mouth. And these other one,
a frontal mouth. That is basically
the mouth shape that we always see
people drawing. Let's draw another
mouse example. This is gonna be
a's myelin mouse. Journal. This mouth also likey
through by four, this tile. Actually, I'll
change, I'm going to draw a mouth a little bit angry. So we must draw these
details of the teeth. And also online, these part is in the
kernel of the mouth. The corner of the mouth
is really important guys. You don't have to make the
drawing all the teeth. They don't even have to
draw in all the teeth. Some details over here. Now, another mouth, but this
time a close its mouth. The bottom part. The top part in a little different way will
make now another example. In this one, we will
highlight the upper part. A very common mouth
shape that is often used in
animation draw wins. And that's a close its mouth, but it's very highlighted
and define it. Here. We already made all the top part in practically all
the bottom part two. This is a much more
highlighted mouth than the previous model. Here we will go on and
trauma and a mouth, basically just like the model
above, but don't drawn. This one is myelin. This is a simple
and issues catch. And after you see that there are these tropes
are just the way you want. You can highlight then the
division of the teeth. I'm here ready, may, can define a tail and lag. The prayer is x hand
poll of trauma, some tooth divisions in some divisions in the
middle of the teeth. This same thing here. You don't have to
draw the teeth with very strong lines around the mouth. The bottom part. You can also draw on the nose that Tait Guys skewed examples of
how to draw a mouth. So keep practicing. And let's go to the
part two of this video.
12. How to Draw Manga Style Mouths Part 2: Hi guys. In visitor class we're going
to draw a simple math model, simpler than those we made
in the previous class. This one's more usage
in the manga is tail. The last class was just laying overview of how to draw a mouth. And this one is a
manganese towel so that it just simple strokes. That's the chin and the corner will make his strongest trope
to analyze the expression. We always wants to highlight
the corner of the mouth. As you can see. That's a smiling mouth
and is mainly mouth. They tip is up. The mouth who with
the anger expression, the tip is down. So how much up or
down the stroke is modal be the expression
of anger or the smile. To make the mouth open, almost opening
showing the teeth. You can make the same shape and highlight the bottom
part in the corner. Always highlighting to
the corner of the mouth, the outline of the upper part of the mouth will be
the same as if you were a closed mouth and then you make a
opening at the bottom. Now an angry character
with an angry expression, seed that after you
draw the mouth shape, you must divide in the middle the teeth in these upper
and lower his pace. I am lying to the online. I'm drawing a relative
small models. They are not big drones. And you can do this same. Actually it doesn't
have in ideal size, according to what
you think is best, you make your, your own drawing. Some people are afraid to make a bigger drama and others
is smaller, drop one. So it's up to you. The important thing is that you understand how to
draw the mouth. You have to understand
how to draw different types of Malthus. For example, this one, this is mildly model. Always highlight the corners. Don't forget about it. I'll divide it in the
middle, over here. The chin. This details at a corner is very common to using the
manga is tail occurs, it gives deep to the mouth. So our simple models, Let's draw others models
with a mouth open. So basically you
define the shape of the mouth and the teeth. Usually when the mouth is open, the teeth appears, appear, the upper and lower
teeth will appear. This part of the
roof of the mouth. Usually we color it in black. It gives a deep
effect to the mouth. And it also highlight
the teeth ended tongue. The teeth on this side, we can highlight them and
also create some divisions. Let's keep coloring. It's in black. In a year. Let's just
keep defining the Allied. That's the final
line of the drawing. And hit is the model of the
mouth already completed. If you want, you can draw
some strokes on this side. Of course, guys, It all depends a lot of the character
you want to control. If it is a younger
or older character. Now an example with a big
smile or character is myelin. The tapes, they must stay up. If it is a cartoon character, you can make the
mouth more rounded. You can draw a
variable of t If you don't have to make
it perfect model. The bottom of the teeth will appear a little more
than the upper part. Of course. This depends on
the angle of the mouth. If it is above, below. And they are very simple
models quick to make. You can draw a simple
nose over here. Here, another very
basic mouse shape. It is the same thing. We had to find the mouth shape, the size in Daniel
highlight the outline. N here is false. That's our first lesson. That's our video
lesson, actually. Sorry. I hope you enjoyed guys, don't forget to practice a lot. Any questions? I'm always available.
Okay. See you in our next video lesson. Bye.
13. How to Draw Manga Style Mouths Part 3: Well, let's keep jarring. Mouth is. And this one will
be very simple to draw. But before we make
some other models, I'll make it basic
model to show you that the upper lip has to be slightly ahead of
the lower-level, is basically almost in
every design will make, it will make your
design much more beautiful if you live them
both in the same measure, at the same height. Well, you don't want to do this. It doesn't look good. And this is valid for some
other mouth is models. One is this myelin, so it's important to
highlight the upper lip. The lower lip. This one has
a more neutral expression. As you can see,
pretty basic models. One model with the open mouth
and the teacher throwing. So here it is. All the parts of the mouth. We must have aligned to
the site of the mouse. And here is a little
more complex mouth shape than the previous one. But you can see that the way to make this is basically the same. It's just some more details. Don't forget to
highlight the drawing. Now, another model
with Martin details, see this curve that I'm doing. Mangas tile. It allows you to make a lot
of details in the characters. Now I'm drawing the upper
teeth and lower teeth. That's a very nice
mouth to draw. I think guys, that this is one of the bad things about manga. It designer can choose
what details will draw. You can vary these tropes. You don't have to follow a
single palm tree every time. They designer is
free to make designs even better and the
more attractive. So I really like to draw
manga is tells trouble. Here we'll draw similar models. But with open mouth is here, for example. And no pen mouse almost screaming or surprise
it with something. In this model are well aligned. The mouth and the teeth. I wouldn't draw a
town in this example. This is a simpler example. As a saint. Manga allows you to use a lot of
details in your drawings. Another shape here, this will look similar
to the previous one. But in this example, I've drawn the tongue, the teeth, and this
side of the mouth. You can color this
space in black. Outlining the drawling.
Basically here, I'm doing the final
art by pencil. I advise you to start
traveling by making a smoother stroke and
Avogadro and gets ready. Or after you are satisfied
with the initial design, we can make his fingers
stroke is an a for B phi B, or maybe even a six B pencil. The way I advise you
to the Harvard pencil, because you're able to
make a good stroke, strong stroke with
the 4-bit pencil. And to finish our drawing, our video, halide is mouth
and add some more details. Feel free to do the same. So folks, that was a really awesome Thank you
very much. And bye.
14. How to Draw Nose Part 1: Hi folks In this class to draw a nose will use a
very simple shape. Here, we'll do a basic
division of nodes. When seen from the front. Three divisions, the middle one, and add the two signs. Here, we can already
see a nose shape. Although it's not
completely drawn. It is just a sketch in
here, the nostrils. Okay. Remember guys to
highlight them as trails. This is very important because the nostril is what
highlight the nose. So that's the part you
should highlight more. Now it is time to define the main outline
of the drawling. Do we use a sketch, guys? Because if we want to make
a real good drawling, it is important to
have his catch. And then we can make the
final allied counter. So we always, always
make any nation online. Even if you have a
lot of experience, I still advise you to always
make an initial sketch. Now I'm making a shadow. It's also very important
to draw a shadow. It will be projected
on the bottom. I won't color the
shadows in black. I'll make just some traces. We call these traces cracks. In, That's the shadow we
use in comics, drawings. Manga two, we use this
kind of knows negative. You'll see a lot of this
kind of shading with cracks. And it's pretty easy
to do to make them. That's the basic model, one of the most
common knows models. This is a model of the
nose seen from the front. Here, some traces. Are there any issues catch? So I erase them. Very going to do the
shading of that. We do not use it in
comics drawings. You have to pay attention about the direction
of the lines. So I can draw this shadow
in the right place. Now, draw a nose in profile. In those in profile has
a triangular model which is like the eye or the
mouth and profile, this kind of knows
we change the shape, the angle of vision. It's changing how I am doing it. I hope you have drawn this
triangular shape guys enacts. You can make the nose shape that are a lot of no's shapes. Big nose, small nose, etc. The important thing is
that you understand how to make the basic notes. And then you will be able
to draw any kind of knows. So pay attention. At the end, the final contour, the outline, you can add the details you want a car into the character
they were drawing. This is the basic standard. Knows. A regular knows. In our drawing is
basically complete. It. I'm highlighting
the outline here, erasing some of the traces
we made in this catch. As I said before, you must always highlight in Australia a lot and
make the shadow, we draw a shadow will
create a deep effect. And that's what we want here. I'll make the same
shadow style that we made in the previous
drawing with cracks. If you make some
cracks over the, the, the nose, you can
get a gradient effect. This nose model is
very simple to make. So let's make another
Knowles model here, but with more details. The way of doing it will
always be the same. You make a triangular shape
and then you add the details. This nose has a rounded tip. The nostrils, as this
is a bag bigger nose, you must make the nostrils proportional to the
size of the nose. Here, the same thing that we
did in the previous drawing. Remember that this
shadow I'm doing, you necessarily have to make it all your nose is in all your noses in every
drawing who make. But I make him the
shadow because I want you to understand how
to draw the shadow. Okay. So that's it guys. That was our clients. In our next video lesson, we'll see other examples
of how to draw a nose. Okay? See you.
15. How to Draw Nose Part 2: Now guys, we're given
his current drawing, probably the most
complex knows design. So make this rectangle shape and this other
part more triangular. And make a division
at the marrow. Well, making nose seen
from the bottom up. This nose a little
complex to draw. All we can do it.
So it is important that you make this catch first and then we add the details. That's a nostril. We thinks Catch it is easier to properly located in
that the elements of the nose here is right side of the nose and
the right side of the nose. Now, the other side of the nose. And the second nose Trail. Although I'm highlighting
all eight or more here, you can anytime adjust any details you think
it is necessary, erase some trades, increase or decrease the drawing.
It's up to you. As I said, this wrong and
there's a little complex, so you must observe
how it is being done. Guys, don't forget to practice. Don't just watch
the video classes. Practice on law, and see
how it is your progress. This is important in order to improve your drawing skills. And here is our drawing. Now I am erasing the unwanted, the traces, and then you can see how our drawing is getting. Well, this nose is not
exactly the way I wanted. So I'm gonna make some changes here and I'll try to
make it a little more, a little more perspective. See that ACIP
adjustment that you may like this one
I'm doing completely changes the trauma and
sometimes you may control and N because of in detail the drawing don't get it
the way you intended. So if you see the
incorrect detail, you have to just change it. The shadow dislike we did
in the previous ones. But here we're going to
make this entire part. There's lower part of the nose as this nose has been
seen from the bottom up. In Detroit. Create
more perspective. I'll make this part senior. See how it improves the drawing. And now basically more details. You can add more details
to your drawing or cracks to greater
deep fact, a shading. In fact, in as a state, you don't have to be
afraid to the rubber. If you think you can improve some part that you just
erase it in draw again. Don't be afraid to make your
drawing more than one time. This is an exercise. So don't be afraid to
make mistakes in face that don't make just
one kind of drawing. Just an exercise. Search for references,
the morning study, the more you dedicate yourself, the more you will become
a great designer. And I believe in you. Okay? There is no magic formula guys. You only learn to
draw by drawing. That. There's no other way. Once again, here at the top, I'm trying to make the
respective more evident. That's it guys are drawing
is getting pretty nice. That was the perspective. I was looking for. This nose here. It
is very complex. It is not easy to draw
this kind of nose, so you must have a good sense of enlightenment and pay
attention to the signs. So once signed it will be
bigger than the other. So keep training in practice and in dedicated
in yourself alone. I'm sure you can come in
amazing design designer. Now let's draw some
more examples here. On this side, I'll
make a simpler model. This is a regular knows shaved and truly circuit to make
the tip of the nose. And from it I draw the
sides and the nostrils always highlight the nostrils. The shadow. The shadow is very
important. Gods. This nose shape, it is very common because it is a
simpler Margaret to make. It is more simplifying it. You don't, you don't
take long to do it. And it is a very nice model. Also. Laura, again, I'll do a crosshair model and see how simple it is. To make the drawing a
little more interesting, you can make a three by four
shape seed that will say, will appear more in the other, just a part of it. You can draw this
bottom part so you can create the shadow
and make it better. Lateral is packed. In fact, that's a nose model very interesting to do. He requires a little
more practice too. Knows motto is done. If you want to add more
details, feel free to. You can make more shadow
details, for example. Okay, one more example here. This first part of the nose. Let's do it. That's a more
rounded nose shape. But the way of doing it, it'll be always the same. It's always the same principles
in same parking pattern. Here we have one more
example, complete it. And just to exemplify again, you can use this shape, this formula to, there are several Minos models
by the principals, as I said earlier,
remains the same. So see how I'm doing
it and tried to reproduce it in
your drawing board. I was making an initial sketch. And then you can make online
it with a stronger is true. Always will be. This way. Well done. Here we conclude our
lesson on those designs. And I hope you guys
enjoyed it and practice. Hello. In any questions, I'm always available. Okay. Thank you.
16. How to Draw Stylized Nose in MangaAnime Style: In the last video lesson, we saw how drawing those
rationalistic gnosis, their real nose of a
human being and manga, the nose is usually
a little different. You can see here the
basic construction of a more realistic knows. But in main guy you can
make other noses shapes. So yes, you can obtain
this format here, this shape, but you can
also do a different valley. Megan knows shapes tend
to be much simpler. The arrow P and American
dropping style. For example, you can just
define the nose like this. A triangle shape in there make a shading here. There are many designs that
use this type of nose, but this one fits well
in the mangas tile. See how simple it is. A triangle and a shadow. If you decide to pull this
part of the nose part, you can pull annexation. Otherwise you can also just use the triangle design in here as it is immoral profile shape a
three by four per file. It is nice to make
the nose extension. As you can see, very, very basic models. Here, another format, another
shape, also very simple. And remember guys, that
we're drawing mangas, character's nose and the, we know the real noses, people's noses like that. But that's just fine. Because manga, except
his drawings, his tiles. So you can, you can make the nose a little more
detail it like this. Or you can also make other
types of details like others. And that's the
bottom of the nose. And they made a line. You can draw some cracks. These traces, I'm drawing here it is
the shadow of the nose. Another way of doing the nose is by simply marking the nostrils. Some characters
mainland to drink characters and
secondary characters. Draw with this type of nose, a simple one to make. I don't particularly
use this tiny mites Romans of the well-liked
to make the l nose shape. I don't like to use
these nostrils details. I think it is too simple and
kind of ugly to buy fruit, to choose, use the kind of those trills and
knows that you want. I used to define
the nose this way. It isn't an L shape. I mark the nostrils and this makes the nose a
little more realistic. It is still minus tau
bar more realistic. Let's do more examples here. That's a profile
knows this well, it looks like exactly
the same the one we did previously with the lion in
the meadow, in the nostrils. Now a bigger nose. And it is also very simple. And you heard just
to make the nose more visible as simple, I if very basic, basic one. It is important to remember that the design of
a profile nose, it is in triangular shape. So you must make this
trope that I'm doing here. Also some cracks
in those trails. It is always important to
highlight the nostrils. And here we have
three different noses with triangular shapes. Here you can see the
difference and the attorney. Now, a three by four knows this mark on the side is
really cute to do. Mentally if you want to
create a shadow facts. Of course, you know, always very pardon
to the nose tau, a three by four
Ville of the nose. Now another example, this one is a little simpler
than the previous one, but following the same shape. And seed that until
they are very similar and follow
the same pattern. They have differences. Sorry, is important for you to understand how to draw each one. Manga love these
different styles. Actually the manga is Tyler varies according
to the designer. Some prefer more
realistic style, but there are others who prefer
a more is to analyze it. And it's tile, which more in details and those
kind of things. Now, the last example, the nostril, some more
details around the nostrils. I'll make a shadow on this part. Highlighting the nostrils. This is another nose shape and other very simple
nose shape that is widely used by designers. We can choose what's tile
shape is better for you. So don't forget to
practice a lot. And if you have any questions, please guys, just contact me. Thank you very much and see
you in our next video lesson. Bye.
17. How to Draw the ears Part 1: Hello folks know, let's
tar drawn the years. I start by making a rectangle, square and Lance divided
into four parts. Basically, four squares. Inside. This quieter will mark the size of the
year and eats model. So here it is, the
external online. I advise you to this term may
can be external comb turn the external outline and then
making the internal parts. And here it is, the
internal details. O, K. Usually we don't add a lot
of detail than a year. One on one or two divisions is enough to draw on
the year actually. So these are the main
divisions of the year. If you draw these, your ears are going to be
excellent and beautiful. As we did in initiatives
catch earlier. Now let's make the final
destination of the online. It is basically
highlight the online. If you see something must be improved or fixate
on your design, then you can just
adjust, adjusted. This part here, a well-defined the final
line or the German. So it is extremely important
that you notice and adjustments to be made or
improvements that you can make. Because after you highlighted the outline is very
difficult, very hard guys. For you to view any
improvement to be made. See that the shadow is May with flat black lines and these
tropes that we call cracks. Cracks. Okay? These details
over beautiful, it is a gradient of phi from
this shadow, the drawing. We don't smudge
the graffiti here. It is all in black and white in the refresh on paper
so we don't smudge. You use the blood,
this tab here. So here is the design of
our first completed ear. Then you can use the Robert
to raise some detail. They loan want to remain. And let's turn our
second drawing. I will make the same thing. That's a thinner rectangle, but the four-part and
division remains. You can, you have to
divide it into four parts. Okay? And now we can draw a
year with another shape. Seed that this ear
is a bigger one. So as I said, it is very important and you
just started doing it on the external online and then
drawing the internal parts. And here it is the
same divisions of the year we drew earlier. And now with these Catch Done, I'll will align the
trauma and the final ON. And yet it's enshrined done. You can draw them this year in profile R3 by foreign drawings. Now I'll make another U-shape that's gonna be an
even thinner year. The same division, four parts. Let's define the model
and the size of the year. Guy is it is the same process. What changes the angle of view, the size, the shape? These tabs to be
followed to conclude the trawling are exactly
the same as you can see. So here is the initial
sketch of the drawing. So let's align it. Here we are almost concluding
the drawing of this year. So keep practicing. In the next video, we'll see some more new examples of a person's huge rolling. Okay, so see you.
18. How to Draw the ears Part 2: Well, let's continue
talking about huge Romans. This example, I won't
use those queers to mark the size and the
shape of the year. I'm defining external
contour initially. As I said earlier, this will make it much easier
to draw on the year. And then I'll add
the inner parts, the inner divisions of the year. And all the other parts. This is a near of a face
view it from the front. So now every ear
details will appear. Just the main parts because we don't have a
completely open view. Here is the ear. You may add some
hair details too. If you want. Remember to
highlight some parts, mainly those that you want
to give a deep effect. This part, I will make
a more prominent year. And while highlighted
here, again, the external can turn
the model sides, internal details,
internal divisions. We can see more
details on this year. In our profile phase trawling, we can tell a lot of your
details and all the divisions. Actually, that's a
real basic drawing. As I say, the model
varies, the size varies. Other way to make it
is exactly the same, basically the same divisions. Another highlights and in
the inner part, the shadow into halide Detroit even more, it is important to
draw the cracks. Now, let's draw a
different example, omega near being
seen from the back. Look how simple it is. We must make the mark
of the top of the year. Here, the inner
part of the year. This part right here that
I am handling it in. Well, you won't always
see this internal detail. But even so it is nice and draw these details here.
Yes, get headlines. The drawing, the shadow, almost like it. Suppose it to be the hair. But the important thing here is not to handling of the hair. We are focusing in
the year drawing. So here it is very simple. Another one now that's also in the ears, same for the back. See how I'm doing it and
try to reproduce it. Now, the inner part. And that's it guys, some weird samples. So keep practicing.
19. How to Draw Ears Part 3: Hi guys. In this last video
lesson about eardrum, and we'll see a
different ear model. And elf ear. I really liked to draw
this kind of ear. I'm, I'm drawing a pointed ear. But notice that the format, the shape of the year, will change only in the
upper part of the year, the lower part of the year. We'll just adapt
the shape of this, this kind of ear. For example, here this
cavity gets a little bigger, but it is the same
shape of the regular. Here you can see that
the difference is the size will change
dramatically. It is the end of the ear. Here, another example, this one has a
slightly smaller hand. But you can see that the U-shapes vesicle
the same that we did purposeless with the
same internal divisions, with the same internal details. That will not change
does, and the end, the change is only in guys, only in the end of the ear. The inner part
will just adapt to the external shape of the ear. So let's keep doing it. Here. You can see better. So there is not much change. O k n. Now guys, another
example in this one, and instead of the end
of the year it goes up, this one will go to the side. Just like you're seeing. Nothing will change on
the inside of the year. It just follow the outer
contour of the year. So the same divisions. And then you can
add the details. For example, here the cavity change the directionally at all. But it is basically the
same way of doing it. It is just a matter
of direction. That's why it is so
important to understanding how each part of
the body is made. Because if some change appears, you just have to change
the external contour. But the way you way of doing it would be the same process. Just like the same. As you can see. It is not
on disk codes to do it. It's not hard to do it. And the knowledge that
you already have about eardrum you will use to
make this type of ear. And this other model here, I will make a regular U-shape, basically a normal year. Extend our model. But now we're going to make
a small change at this size. Inside the year. Our character is
username here rank. So the upper part of the
year will not change. We just add these
exchanger here in the ear. This example is basically
irregular shapes, so it is just to draw it. Now, you can draw the
internal details of the year. Just a small adjustment here. And well, guys, that was
our eardrum and training. Any questions I'm
available to help here. K. But I believe you will not have any trouble to make
these travels. Don't forget to practice. I'll see you in our
next video lesson.
20. Variations and Styles of Ears: Draw. This class, we'll see different
styles of beers included, some that I do not
recommend you to draw. This first model, rounded shape. It is okay to draw
one like this. Here is second shape. And also these
tender ear-shaped. You can draw them the
detail in the inner part. And also there's detailed down here that is not a wrong shape. It is okay if you
choose to use it, but it is not
advisable for you to use it in main characters. The second shape
with these in turn, oh, well, I do not
advise you to make it. The third model. It is a standard model. Folks said on the actual
shape of the year. You can draw the
standard IR model and make some hair details. If you want. This inner
part of the year, you can draw basic details
base for all types of years. You can use these details. And for any character, you can make him,
there's internal, pardon, these detail
that I'm doing here. It creates a deep
effect in the drawing. In order to make them
more closely at Erie, you must draw on it like this. You can do just like the ear in the first-class is a rectangle. So it will get thinner, horizontally, it to get thinner. But that's fine. The inside of it
will not change. It will follow the outer
cone term or the ear. Even this model, you will make the inner part following
the outline of the year. You can see that the inner
part doesn't change much. Now I'll make it in the year
being seen from the back. The upper part of
the year and year. The division between
the ear and these cold. If you want to draw
on this call and not Hand Details, that's fine. That's okay. That's basically
how they view of the year being served
from the bank. These are very basic to
make a very simple model. And it doesn't have these
high detail of the year. Even, even if you choose to
draw a near like this one, you want to change. And that's it guys,
very basic models. In the next class, we'll see more complex models.
21. How to draw female hair Part 1: I have these, these models done and we'll use
them to draw the hair. Although it is not the
focus of our class. I'll add some fakes
details to the characters. Okay? So scared. Here I market the eyeline, that middle line of the face. And I'll mark the
divine a dividing line between the forehead at the
beginning of the hair will use this division at the beginning of the
hair and at the end of the forehead to add
the character's hair. Here it is. The ice, as I said, is not a focus, but it is worth two and both the eyes draw in
the mouth drawing, and also in nose. And by doing that, you can practice what we saw in
the previous classes. It'll help you a lot. So let's practice. Here. You can see that even
using the baselines, left eyes a little bigger
than the right eye. That's fine. That's okay. You just have to fix it. Now, at the end of the drama, we want, we don't
want any surprises. The iris plantation to make this sound signs
same height and at the same place inside
of the year of the eye, the pulp pill, the shine. Remember that the
two shines must be on the same side of the eye. In a very basic nose. And also its myelin mouth here. And that's the face, that's the face
of our character. The eyebrow. And let's start
defining the hair. The line we made
at the beginning, at the end of the forehead, at the beginning of the hair. We're going to use this
line to draw the hair. I draw some over the
left arm and I'm doing, I'm going to also draw a bigger one between
the ear and the eye. You don't have to make too
strong strokes, strokes. I'm just doing
little moist trope, strongest strokes here. So that is visible to you who are watching
this video lesson. I'm going to make
the same thing here. Okay, Well done. And here I will make
some more heads, tails. I'll make, I'll
make these details to turn or character's
hair even better. Now, I'm going to define
it in the middle and see that the height of
the top of the hair, it is a little higher
than the height of this coal k. Here, I'm defining the height
and size of the hair. Now see, I'll mark
this dot and the other side's to and from, from these little points, I'm going to drop all the hair. See how easy it is. S this hair, hair is
divided in the middle. Well, because of this. The other part, it will
also be in the direction of this little point
in the left side. So one dot in size and the hair and the direction
of the middle of the characters had
this bottom part. We don't join it
with the dot made, but just the upper part. Seed that both how join
it with the lady doth. These tropes are. Now one more detail here. You can draw brooch, moles on the top of
the hair. Creative. Urine. I will make strokes drawn
this other part of the hair. Once it's signed, she
remembered to make care of its tropes and not
as straight lines. When you make it
like this curve ID, you make your hair more natural. If you draw very straight
lines it or lose it. Naturalness and we don't want this also in the other side. And just like with dead and
the other one, we do here. Remember always to
make finally, tips. Do not make thicker, thick hair. As I want a light hair. I'll well drawn fill divisions
and not a lot of fun. Here basically,
Harry's already done. I'll just read some
of it because we have another drawing
to make, signed it. But it will not
change the design. Always curvy strokes with fine tips, don't
forget about it. And now I'm using the rubber. I don't want to read the drawing but just cleaned some
of the graffiti. It doesn't completely
erase the drawing, this rubber and it clings in. It. Remove the excess
proofreading where it facilitates when you make the
final outline Eddie stage, you could already use the pen
to make the final outline. You can use a fountain
pen or pencil. I can m. It is, it is nice to use a pencil
to that. That's okay. Because it makes
a stronger trace. I'm using a mechanical pencil. For me. It is enough, but you
can use it for B2. That's fine. Here finished our first example. I'm just how adding
the trace is, the drawing is done. And here you can
see the division on the hair and the Farhat, her falling on the forehead
dance we did initially. You saw how to make
fine and thin traces. And this is a lighter hair
with a lot of details. It didn't call her the hair, but in this case, it could be a blonde
hair, for example. In the next example we'll
draw a darker hair. So that's it, folks. Any questions? Contact me and see you in
our next video lesson.
22. How to draw female hair Part 2: Just like we did in the previous example
we're going to do here. We divide the middle
and Margaret, the height of the ice. Omega I is smaller than
the previous example. Close it eyes, by
the way of doing it, is basically the same. I'm going to make a nose
a little different. It knows trails to want
to mouth more realistic, the upper lip and
very basic lower lip. Lot of very detailed mouse. But that makes the character
later more serious. And that's what we want. The difference here, if
the size of the eye. But the way to do
it is the same. The iris pupil pill
and the shine. Remember that the Shan must be exactly on the same
side of each eye. See that there's
something wrong here. So I must make some adjustments. Some more details over here. Now I'm going to make the lashes to highlight
the characters I, D, the iris, the shine, the exactly same site. And finally the propel. The lashes over here in the
eyes getting very beautiful. The lower lashes
and the eyebrows. Now I'll make the division between the forehead
and the hair. It is basically the same thing. This tab here is basically
the same for any character. It is a pattern model. Divides and let's divide the left side in
the middle and make her details between
the eyes are raised. Some of these traces because it is important to clean
up the drawing. Now I will keep German the hair. That's the main lock of hair. And I'll make the other logs of hair with these same shape, the same model, in
the same direction. I usually draw the loss of hair or from the left to right. But it is okay if
you want to draw from the right, the left. That is something
that we can choose. How we do know that I'm going
to change the direction of the locks of hair will make a bigger one
between the ear and the eye. Now the external online
or the hair shape here, left side and the right side. This right sides kinda
different from the left side. As you can see, we have here a division but
not in the middle. I keep making the hair shape. That's just his catch. So you don't have to make
his trunk trace here. And now we can highlight
the final online. I'll make locks of hair
just the bottom part. Seed that I divide. I divide here. Remember that the tabs
should always remain thin. It must always end
with fine tips. Here it is the division
of each main log. Now the left side, see how easy it is
after you're making an issue sketch gives you already know exactly
where each log will be. This is valid for n character. You can try to do this on any other character that will
help you, help you a lot. To complete the drawing. I'm going to color it in gray department behind
the character's head. And this other parts, I'll use the division or the
main lots of Heron and I'll hadn't liked then this will make the hair and a
little more realistic. Remember to always leave the hair division
more highlighted. Internal traces that we're going to do will be a little thinner. And these tropes from the
Division of each luck, they will be stronger
strokes because we want to create
volume in the hair. Let's join the upper
part, the bottom part. And then you can
keep highlighting. Then if it is a dark
haired, even better. But if it is a light hair, like the perfect sample, we don't do this. Here, you must do it. Never part of the hair. As you're all wire by wire, you should do the same. The hair follow the
outline of the drawings. The inner part, it has to
be in the same direction. And then they draw, the hair will look really good. In here with
finished on drawing. Don't forget to maintain
some shiny the hair. Just a detail here on the mouth. That's it guys. You can see here that it
knows a little out of place. Or we can fix it. If you pay attention the
face-to-face version, you can adjust these parts before finishing the
trunk completely. Now you can see the
finished drawing. You can improve it along
this throbbing, aching, some adjustments
highlighted it better. It's up to you how much
more shine in shadow you add to the drama and
better it will look. In here, you can see how the position of
the hair was made. You can see that one
side is different from the other end. That's it, guys. The gate. That was our last one, our video lesson, and I'll
see you the next one. Thank you very much.
23. How to draw female hair Part 3: In this last video
lesson about how trauma, we'll do the same thing that we did in the previous examples. The division of the marrow of the face and the
height of the eyes. I'll star mark in the upper
part of each one of the eyes. And then I'll highlight
the corner of the eye and also the
upper part of the Cianni. As we saw in the
previous examples, the female I is always
very highlighted, mainly the corner and
the upper lashes. In the masculine, we will
highlight the upper part a lot, but the highlight on the
female eye is a little bigger. Let's do it. This one is very similar
to what we did previously, just with a small
town variation. But you aren't using it to
make this type of drawing. You already know how
to draw the eye. So this one will certainly be very easy
for you to draw them. Here you can see
the shine mark and remember to always make
them on the same side. I end up Mark and
on the right side, when actually shine
is on the last slide. Because there's all these
also on the left side. Then if you mark one on the left side and the
other to the right side, the character's eyes
won't look good. So it is important to make
them in both the same side. So after you make
the propellant trawl and you can color
this part here in gray and the iris into highlight here you
can draw some lashes. Remember to always draw the
lashes with thing ends, Tirith with a tech tip and
end of always with a fan one. Lashes always ends
with sand ends. Here a small highlight
on the checks. I didn't draw this telling
the previous ones, but I will try it now. Here on the second example and also on the first exam power. Okay, Let's make heavy drama and that is the
focus of our class. I'm going to mark here in the middle that define
the hair in the forehead. And then we'll mark the
hair division and make the lungs remember to keep these lots of hair always thin, at the end, always thin. And at the beginning
I'll add a thicker. I'm not gonna draw
them over the eyes. Just drawn some here. But the olders will just be
on the side above the eye. Here you can already
see some finish it. Lots of hair. I made a sketch and
now I'm gonna make a highlight here,
a stronger one. But I'm making this trunk
and had alive cares. This catch was just fine. Otherwise, it should erase
and adjust the wrong parts. I only highlight the
online after I'm satisfied with the result
with babies catch. Now here, a very simple knows. That's gonna be a
different models. That's not a Smiley mouth. And now the eyebrow. Now let's make the
outer part of the hair languages smart the shadow
of the character's chin. First. To draw the external Warren can do just like the
previous examples. I'm going to draw
the hair model. This will be a sharp hair. And I'm defining the heart shape just like the previous examples. However, it will
have a division, as in the previous models. I will draw some lots
of hair in each site, but this division again into chips here on the outer contour. The inner part, I won't make her mark and I keep adjusting. It should lock of hair, as you can see. You will place then according to the mark you made
at the beginning. Remember that here we reverse
the direction of the hair. So you have to make these lungs to the hair is as
natural as possible. And the bottom, the
bottom of the hair. Now I am coloring it in gray. I'm using the graffiti
of the Ponzo. Simple and straight lines. They go is just
highlighted the hair. And they're very simple
and basic pattern for manga and anime style. Okay, that's it. Pope's anything you need? Any questions? Please contact me. See you.
24. Basic Face Drawing Part 1: Hi guys. In this video lesson will see an overview of how
to draw faces. It is going to be a
very nice video lesson. I'll start by making a circle. I'll divide it in the middle and drawn the science of the face. See how I'm doing.
It. Decides on the face must be larger in this coal and thinner and the chin. I complete the outer contour of the face here and the chin. This shape varies a lot, but usually we make
the external online, the eye height and
also the mouth. Here in the Division
of the eyes, you can divide the
space into three parts. One part more lens with the same size of
an eye in the middle, and the second eye with the same measure
of the first one. Now we can draw the nose, a very simple nose. The mouth. You can draw his myelin. Angry. You can choose kind
of mouth you want to draw. You can also vary the
shape of the face. You can make faith thinner. I can do here. Or you just have follow
the same pattern. But you can also do the
face shape if you want. Before we draw the hair, Let's make the ears. We don't want years
with different sizes, so you can use
parallel baselines. Now the division between
the hair and the forehead. We don't want eyebrows
with different shapes. So you can also use a
baseline to help here. Now I'm going to make
another face drawing. I draw insert code, but this time I wanted to
find it in the meadow. There's gonna be a profile face. Here. You can see the
shape of the face. I'm also going to
draw the map here. The thicker the nag, the stronger the character
and don't forget about it. The eyes over here. And as this is a profile phase, we must draw the nose like this. See how I'm doing it. In order to draw the mouth, it is important to make
the upper lip little larger than the lower lip. The chin. Over here. The mouth. In the eye, the profile face, the eyes look a
little different. It didn't have MR.
triangular shape. Obviously, the shape, these
tile of the eye will vary. It will always make this
x specifically pattern. It depends on the shape of the eye or the character
you're drawing. So it'll vary a lot. In vain, when you are
ready make these parts. You can add details
like more plank, some cracks, shadows,
and define the online. The year. This is a profound phase. The ear has more details and
it is kind of bigger Also. Now we can make here the hair mark and also
very simple division. One circle. Again. This is going to be a
three by four face. Here we can see
these titled face. It is important to
pay attention to it. To this part. The nose here, it'll be
placed it in the meadow. The mouth will usually
be on the bigger side. Pay attention to the eyes size. We have one smaller ie, the metal side, one bigger ion, the burger site in a
space between them. These are the main parts, the three mine for face. After you do it, you can add the
details as you wish. Highlighting the online here. In the three by four phase, we can see a lot of the ear to less than the profile
phase of course, but even so, we can see it. So we must add a lot of details. If that is something
you want to adjust, like I'm doing here, don't be afraid to
erase some parts. Intro. Again. That's
part of the job. We make his catch. And sadly because of this, we see what can be
improved it and then when improve it until we finally achieved our goal and until we finally is
satisfied with the drawing. I'm going to adjust the school. And then you can draw the hair. You can draw the hair as
you wish or according to the characters,
character your drawing. Here I will this term
making a new design, pay attention to
the face division, this major division of the face. It is a three by four phase. And it is extremely
important for you to understand how the
angle of view works. K. So here, one side of the face to face you can do
just like him doing here. Shape must be just like this. There is a curve over here and you must do the
online like this. This kind of a simple shape. Actually a guy that's
not a big face, it is a small one. So that's the reason I
made a drawing like this. And here we can, we can keep drawing this call. Inner can also make
a shadow here. It is nice actually to trial it, to make a shadow here. And now the eye's height. And this part, we can choose to where the character
will be looking at. Human looking up. And let's make mark
the nose to nose. And the eye drawing. Remember to follow the pattern. One eye is smaller and bigger. It is also important
to take into account than the same division. You use it to mark the eyes, you will use to make all the
other parts of the face. For example, if this
is a Captain America, I will use the metal
line to help me place the a of Captain America. The eyes, the mouth. They must be at the
same angle of the face. Will, other face will
be disproportionate. A very common mistake,
especially beginners. All of us must use a
baseline and the sketch. So we have here the eyes mark and they are looking
up and down here. We have eyes looking down. You just have to
change your baseline.
25. Basic Face Drawing Part 2: Let's go to another example. So first, we draw a circle
and divide it in the middle. I actually don't want
to make a large face. These a face seemingly
from the top-down. As this face is looking down, I'm going to make the eye
mark in here this way. And now let's draw the eyes, the nose, the mouth. That can vary. You can make a Smiley mouth or
any other kind. It'll depend on what you want. Now we can complete to these
cold drawing. The year. I'm using a base line
because I want these years equal with the same size
and with the same height. Up to mark in the main parts, you can add the details. I don't have my two,
it's play at this point. So just keep practicing and trying to reproduce
this drawing. Okay, so let's go. That's it, guys. Let's make another
examples here. The character here
we'll be looking now. And it is the same
division of the face, the same external online. As you can see, this character has
a different chin. You want a bigger Chen? Know the baseline
to draw the eyes. We can use this bass
line to draw the US too. Here we can see that the
character is facing upwards. It knows a very simple nose, and of course, the
mouth in a large chin. Now the eyes,
notice that we have a middle line between
the two men Bayes lines. This is important
for us to make. Well, in line eight eyes, I actually don't be afraid
to make a lot of bass lines. The lines you do, the bottle you're
trying to will be, these lines will be erased. It added their own progress. It will be raised it, and it will only be kept
to those lines that we intend to keep at the
end of the drawing. One of the reasons I don't
like to the rubber at this point is because
when we erase, we are not able to see all
the mistakes and the drawing. Our brain temperatures is like if that was the only mistake. So I like to raise only
in the end. Now the neck. You can add these
details in the lab. Here. I am making
small adjustments. And contrary to who we made in the first night to what
we made, the first snack. Here we're going to
draw it bigger knife. As you can see, all of those, obviously this will depend a lot on the body size
of your character. So it can vary. Here we have the
completed examples. You can add more details. So feel free. I'm going to
make the mark of the hair. I forgot to mention it. This first example, Reagan
and trolleys mall for r hat. And the second one,
a bigger forehead. Here, I will make the profile
face example, looking down. The same mark by
the character is facing down the nose, the upper lip bigger
than the lower lip, to forget about it. And now the hair. Of course, this will vary a lot of crying to
your character. But the important
thing here is not the details in this class. The important thing is
that you on this ten, how to draw a face. It is very important to
practice and a lot of guys One 2310 times if necessary. Another example is here
of a profile face. The same Markin. What will change is the angle, the nose, the lip, the lower lip, and the chin. This point, you have just
to see how I'm doing it and trying to do the same. I always like to make a
shadow below the chin. Here, the angle of view. I'm using the base line to
help me to draw the eyes. Notice that the eyes, in this case are at
same height of the ear, are at the same
height of the year. I'm now finishing the
design of this call. The mouth. If you understand how to make There's catch with
all the baselines, you will be able to draw any
character, any character. At this t, you feel free
to make any adjustment. If you see that
something's wrong? Well, just you raise
it and do it again. That's totally fine. Don't be afraid to
the rubber trend to make the bathroom can make it is only by practice and the same thing over and
over that we learn. You just learned how
to draw pie traveling. Of course. That said guys, keep practicing. Any questions,
please contact me. We are also on Facebook. On Facebook. It is going to be my pleasure to see one of your
drawings there. Okay. Thank you very much. And I see you. Bye.
26. Male Face front Part 1: Hello guys last time
making a circle here. Don't worry about making
a perfect circle. But if you want to
make a perfect circle, you just have to support
your hand on the paper. Ink tried to rotate the pencil and then
draw this article. It is almost perfect. You'll be able to make a
gets hurt because that way. But, you know, guys don't, don't worry about making
a perfect circle. Last divine, it's in the middle. There's gonna be the face. You can mark where the chin will be and you can already draw these signs of the
face from the chin. You make them trace to
form the side of the face, trying to make these two
parts as equal as possible, same height and of
course, same size. Now, the bass lines
to draw the eyes. Now the nose height
in the mouth. And here we have the first
one space between the ice. And of course the second I the eyebrows. At this stage, we don't, we don't have to worry
much about the details. Let's just make a sketch. Now the bass lines to draw the ears don't be afraid to
draw on these baselines. They are extremely,
extremely important. You must also focus on the shape of the
parts of the face. For example, the
shape of the years. Now we can start making the
base length of the hair. We have some locks
of hair over here, but there's very alone to paint and only character that
you're controlling. In our case, the
Heron's over the eyes. But if your character
has a hair up, you can do up. Then you can add to the
details of the hair. I'll draw more
locks if necessary. Don't worry about the
final outline here. We aren't just
making these catch, not the final drawing. You can make adjustments. Erase some parts. I did not anti-violence you to erase everything is bacteria, some parts and adjust
them gradually. On the eyes. I usually highlight
the lashes a lot, regardless of being a
male or female character. This will help me to define the expression
of the character. It gives more emphasis
to the character. To that I'm using. It baselines because
I want to draw the eye exactly at
the same height. Both of them. I don't want when i higher
than the other, for example. So it is very important in an actual divines you
to use baselines. Maruti is as baselines
as you meet. And here we have the eye shape, these baselines, I
will erase them later. For is the pub Hill. It is important. Always check if the eyes
are at the same height. If you need to fix something. Yes. And that's just fine. Use the rubber and
erase in drawn again the parts you want to adjust. When we draw the propels always pay attention
to these paces. The bigger part is smaller part. The pop pills must be equal. And the eyebrows also tried to draw them
at the same height. Even if later you had trauma
to lock of hair over it. Then now I am aligning the Pope held at the center of the eye. I will make his hurt her. It is the iris. I usually always
painted in black. Shine. It is important that the side is
always, that the shiny. It is always on the same side. For example, here
the Cheyenne is on the upper left
part of the eye. So how to make the shine of both eyes at the same direction, at the same height
on the same site. Because it defined to what
the character is looking at. The direction of the characters
look won't be defined it by the shine of each eye. The eyebrow, eye shadow. I usually make the top part
darker than the bottom part. It'll lighter, you know, and hear the same
thing they tell parlor dark and the bottom
part later, lighter. You can do decimating the same. The gradient. The gradient is very,
very beautiful guys. I'm going to highlight
them all the I on line and the nose
and the mouth too. If you do the stroke and the mouth down like
I'm doing here, the lower aghast, the mark, the angry I'll
sadness expression will be if you
make his choke up, the chromatin becomes happier. So this one, I will
make a very downstroke. I will just make a nap. No trial, no true expression. So pay attention to this. Nike adding some details here. Now I'm drawing the eyelid, but there is an order of
how you should proceed. Ty, what can improve it. He didn't draw in
and add the details. You say it is important to don't worry about them in order. Don't think that you
have to draw first the nose and the
mouth and the eyes. Because after you make
an initiatives cabbage, you can draw the
parts you want to, that is no order to follow. Usually ten characters
has think noch. So we use the metal
of the AI to do the measure of the neck. Just a little detail
here of a t-shirt. Let's keep drawing the hair
seed then some locks of hair will be over the
eyebrows are over the eyes. And this is okay. That's what we weren't actually. Now, more hair details. I actually guys, I don't
have much his plane here, so you must see how I'm doing it and tried to practice it. Okay, so that's good. It's important to
draw the ends of the lock of hair,
always, always thin. And the rest of the logs, they must be enlightenment. You can adjust the
drawing as you wish. You can erase all the parts
to think it's necessary. Have no fear. Let's make the drawing
as best as possible.
27. Male Face front Part 2: Let's keep drawing
the locks of hair of this character will continue drama and then in
the same direction. Okay, So let's go. Let's highlight the main
locks is very important. And it is also very important
to pay attention to the details between one
block and another one. You have to try and draw
them in a way that will lock of hair follows
the other lock of hair. Just like I'm doing here, is a small detail by the human. Human eye will understand
that it has an enlightenment between these trends
one side and the other. So it is really, really important and it
is really good actually to be aware of this detail. Okay, so see how I'm doing it. Here. You can see the
details of the year. And you can also
define in highlight the parts of the hair that
you think it is already done. Now Sam, lots of hair
behind the neck. That's in a nature is cash. If I think it looks cool, I'll end the trauma
all otherwise, I raised this part
into it again. Okay. I think this just fine. So I'm going to get
undefined the final outline. So basically this is
the design of the hair. Add more details or
just the parts that needed, highlight the traces. Anyway. At this stage, you can do the adjustments
you want until the trial become the way the trauma
and the way you want. Here, I'm using the detail
of the middle of the face, the metal line to
draw the locks of hair on the right side
and on the left side. If you do, there's your drawing
will become more natural. So plantation to these details. And whenever necessary you
can add more lots of hair. You can erase them
or adjust them. Feel for you guys to make a
drawing the way you want. There's no road. Here. The drawing
is almost done. You can highlight some parts to make it a little more
cool and beautiful, to make some shades of black. Shadows. Here, for example, I will highlight the
hair with some shadows. Remember that you cannot shine the outline
with these details. The online must be well-defined. It the goal is not to make
your hair totally black. So just make soft strokes, soft traces in gray shadow. As you can see, we're already finishing
the detail of gray. Radios highlight the drawing. You can make a stronger
shadows, a darker gray. You can do the mechanical
pencil to do it, or I can even use it. Pass hold to that, that's okay. These details give us much more volume to
the character's hair. It looks very good. That's it guys. That's our face design. So keep practicing as
many times as you need. Okay, let's go to
the next lesson.
28. Male Profile face: Even though there's
gonna be a profile face, we'll keep using insert
code to start drawing. I'll will highlight this
circle a little bit more to make it more
visible to you. Although when you draw this, don't make it too strong. I'm just making a strong stroke because if I make it lighter, you won't probably
see home to win it. You can divide it in the middle and draw the
outline of the face. I like to make the inside of
the face a little bigger. You can join the channel
with the front of the face and the neck. We're going to draw
some hair here. The year, the height of the eye, and now the nose. Try to draw the same
shape I'm drawing. You can make, it
can't make his trade knows some artists
make business. Take. This tail here is two and
volume to the face design. The upper left has to be slightly larger
than lower level. He cannot be 100% straight. Now I'm highlighting the online. That's why it's so important
to make his catch. After you make his catch
when you have is catch, it is much more easy. It's easier to define
the main parts. Now, I'm going to
define the size and shape of the eye and
also on the ear. The IR is must be
alley at a more vertical and the I will
have a triangular shape. So let's keep
highlighting the Online, mainly the upper lash, the pill and the iris. Well, they have an oval shape and they aren't kind of beggar. That's how we draw the
eye in the profile face. The eye shadow I keep making
the top part I'll add is stronger and live at the bottom part and
I'll add a lighter. It is also important
to leave his pay, say, a space between the mouth
and the article and turn. It doesn't look good to draw the mouth touching the
outline of the face. So leave a space. You can already highlighted
the same parts. You can highlight some
parts of the face. And I will add the detail
of the locks of hair. Sample trace is that
first the light one, and then I highlight the traces. It is important to
make a light stroke at first and make
an initial sketch. Because if you make a mistake, it'll be much easier to raise a well-defined
it in strong land. Well, it is much more
difficult to raise, much more harder, much hotter. Here I am making it a stroke or stronger
trace the normal. Because I want it
to be visible to you who's watching
the video lesson. Remember that you shouldn't
cross these tropes. Do just like I'm doing here. It gets much, much more beautiful when you
do it like this. And here, the detail of the eyebrow and the
AI related to two. I will keep drawing the
hairy details, okay. And I'm going to also add some locks of hair
behind the NAT. The most important thing
here is to pay attention to the direction of the locks
of hair and to the ends. Remember to draw the
end, always fan. Here you can see
that the direction of the loss of hair change. So here in the
middle of the face. Can, we can make this division. And after this you can
keep drawing the hair. See how nice it is
getting it right. You can do just like
I'm doing here. You're drawing will also, will also be very,
very nice guys. Variable two. And here you can hear, can already highlighted
the outline if you are satisfied with the shape and the
details, of course, all drawing is almost finished. It, the designs are really nice, but you can prove it
in an even more tails. I like to draw a lot
of details because it makes the design
much more cooler. And that's what I want. People will like more
drama when you add beautiful details and
shadows and shine. So that one more reason. So that's one more reason
to make the bathroom. You can. Now I'm going
to draw a shirt here. Some more details. Also own the shadow under
the chin and the hair. Just simple in light strokes, this won't be a perfect shading. I just wanted to demonstrate
what you can do here. Here. You just want to draw in
and I want as much here. Actually, I never use
the finger to as much. And I don't advise you to
use your finger to as much. But if you have a blood is
tap or even entirely paper, you can use these
to smudge few free. I'm making here a
darker shadow detail. This is very nice and beautiful. Cars highlights the hair, enhance more volume
to the hair design. So notice that what? We have a darker shadow. We also have a deep effect and it also highlights
it a lighter parts. Remember to, especially
when you are making a shadow to the sheet of
paper under your hand. Your hand won't touch the
drawing and mass some part with the rubber. I'm going to create
some shine here. I'm going to make it shine, but you can make it, you can make it smaller. That's fine. You can increase or decrease the shine according to what you want. Just remember to not erase the online in the
anti-matter are in main guys title you have to make the contents and
very, very evident. That said guys,
That's our drawing.
29. Male Face 3 x 4 view: Hi guys, how's it going? As usual, let's power
making the circle. Actually, every time
we draw a face, we're going to
start with a sarco. This is a three by four phase, so let's divide it. And notice that the line
is not in the middle part. I like to make the
division with this curve. It is like a 3D effect. And that is pretty nice. After making this
line on the face, Let's mark the chin and
the site of the face. This part that I'm drawing
here is very important because it creates a real aligns
3D effect in the drawing. The height of the eye. Here, we must make
these traces like, like this, in this shape. It is always this shape guys. Here I'm making one
other part of the face. The eye is going
to be right here. So I'm going to draw the ear. You can add the details here. Now, I'll define the size
and the shape of the ice. Remember that it is a
three by four phase. One night of the character. In this case the left side, there must be a little
smaller than the other. You know, the I in the right side is going
to be a little bigger. So we can get the effect of perspective in the
character's face. And that's what we want. So the eye in this side there, we can see more. It has to be bigger. Here I'm in some lines in
parallel to the eyeline. All the other baselines
in the face must be in parallel with the baseline. Here we can already, we
already have the ten, So let's turn making the knack. So even though this is
just his temples catch, we can already see
every part of the face. And this makes it
much easier for us to draw the details on the face. For example, here I'll highlight the icon, turn the lashes. Now the propel, the shine. The iris. In the shadow. The upper part is darker
than the lower part. Don't forget about it. When you have an initial sketch, it is much easier to make. Although the parts
of the drawing, because you already
know exactly what each part of the phase
must be placed it, and that's really good. With face catch. It is much, much easier. In here. We're gonna do the same thing. We're going to make
the propel them shine and of course the iris. And now we can highlight
the main parts. I also like to make a shadow on the eye and it makes the eye
looks very cool, Very good. So you can also do this shadow. Now guys, the mouth. And let's highlight it. This is a Smiley mouth. Okay. You just have to
make it curvy line. The detail of the
check can be bigger or smaller depending on
the shape of the face. If you want a beggar face, you make it larger. If it is a smaller face, then you make a small cheek. The eyebrows, arms. That's not the final art. Anything you do here, you can adjust later. Everything we do here
can adjust later. Now I'm going to draw some
locks here over the ice. Locks of hair. I realize it is that the
eyebrows were not enlightened, so I'm going to fix it. So now I can keep
drawing lots of hair. We can make the
hair as you wish. Don't worry about what
you have to do first. Alaska, just make the drawing according to what you
prefer to do first. I like to start with
these lots of hair over the face on the forehead
of the character. Also like to highlight the parts that I'm already
satisfied with the result. And if I see that there
is anything ugly, anything that needs to be fixed. So I just said just
do it to just fix it. Now, let's make the
upper part of the hair. Usually on this part of the hair or the upper part doesn't
have a lot of logs. And we can see here the lots
of hair and near the neck, the forehead of the year
beforehand in the year. But this varies a lot to paint. The other cavitary depends
a lot on the type of hair. The important thing here, if you make the locks
and align it with the size compatible with
the shape of the hair. And remember that the ends of the locks must always,
always be thin. No detail on the
shoulder, a t-shirt, just a small detail. The neck, I always like to make this shadow here under the chin. We can also make some shadow details on
the character's hair. The online was already done. And to add some
volume to the hair, we can make these details. I'd advise you to add
shading details if you want a deep effect to the drawing and make the
harem much more beautiful. As usual, a lighter shade of gray and the shadows
with a darker tone. We can see that darker part give us a nice deep effect
to the drawing. At this point, I don't
have much to talk about this row and just see
how I'm doing a ten, please try to reproduce
indeed the same. And finally, I
will make a shine. Remember that the
dark him only hair, the more the Shannon will
appear in the dark of the hair, the moral the
Shannon will appear. And that's it, guys
keep practicing. And I see you in our next video.
30. Basic Expressions: Hello guys. How's it going? Welcome. My name is Israel. And on this video lesson, I'm going to teach you guys
some tips and some techniques about how to draw a face
with a mango taste title. You know, we're gonna see a lot of techniques
that you can use. As you guys can see, I started with a
real simple circle. Then I divide it to the metal, and then I divide it into, with two horizontal
lines that we have here, of course, the height, this base, I'm going
to draw the eyes. And I'm also drawing the
nose of real simple laws. And, um, I was also
really simple mouth guys. See, between the two eyes, we have the space to a third. So it is important to
follow this proportion to, to draw the distance
between one to the other. It is the another. Just like this, do the same. And it is very important
to highlight the eye. So I'm doing this right now. We have here this upper part. It doesn't matter if it is, it is a male character
or a female character. It is very important to
highlight the upper eyelid. The upper eyelashes,
actually guys, it is important to
highlight the eyelashes. We have the iris, we have the Pope
pill of the eye. I'm gonna do the same
thing with the other eye, the iris and then the Pope pill. As you guys can see, I painted
the papilla with black, okay, and that is very
standard to do this. We have some light, of course, on the eye and it is very
important to add lied to you guys because the
light of the eye, it gives life to the drawing. If you know what I mean. As you guys can see, I drew the two lights
on the same side low. It is important to draw two
lines on the same side. Now I'm drying the hair. Of course, a real simple ear. Okay? And now we can add a
lot of details to the hair, to the locks of hair. I'm going to draw some lots
of hair to one side and all the logs of hairs to the
other side, you know. So I divide the
hair, metal in Rome. The lots of herring two
different directions. We have the neck right
here, very simple. Snack. That's not a long hair. I don't want to
draw a long hair. Feel free to use your, your raise a guise because sometimes you make a
mistake and that's fine. You can just erase your num. Let's keep drawing the the hair. Let's draw these
upper part for him. The cake on top of the, the top of the hair. Now we can go to the other side. Okay. I'll have here a
real simple hair with a lot of locks of hair, a very nice lots of hair. We have here, the eyebrows. And it isn't, we're
going to draw the eyebrows with the same side, with the same size. You know, when this same
side in the same site. Let's go to another
example I'm going to start with again, the circle. Okay? Of course, as you can, you can draw the shape, the face with a
Chan, right value. So we have a face, we have a regular shape. As you guys saw, I
use it to my phrase a lot girls, No, that's fine. Sometimes we make
mistakes and we just and when it
comes to the drawing, you can just take your
eraser and fix this. I'm going to draw this
character with an angry face, actually, a sad face. No, this character is sad. So I'm gonna, I'm gonna
draw the mouth like this. It is very important to practice different expressions,
different emotions. Because if you practice
characters with different emotions
and will become a better designer, of course. Now we have the ice and we have here basically our character,
angry or character. It said actually, you
know, this guy there. He said, We have a really simple lows
in all the eyebrows. We have the eyebrows
with the same size. And with this say
on the same side. Now the hair. Let's draw the year. And that's a main gas phase. That's a face with
the manga style. So all these
techniques that I'm, that I'm teaching
you guys right now. We actually can use in any
intro and in manga trawling. Ok, that's gonna be a
simpler, simpler hair. Okay, we have three
different divisions. We have the marrow and we
have the beard of the metal. And you can just draw
it like this. Okay? Now right here on
this lower part. And we have here another face, very simple face with a
different expression. The first one was happy
in the second one is sad. Indeed. I'm going to use my eraser just to clean the drawing alone. I know that maybe on the screen
you guys the scene there, it looks like I'm
erasing everything, but I'm not I'm just erasing some lines that
I don't eat anymore. And it is very important
to clean the trauma norm, use it or not the pan, you know, my pain. This band that I'm
using, this very nice. I'm just outlining all the, highlighting, all the
outline of this drawing. And I'm going to
do just like this. Of course, if I want to change
something, I can change. I can adjust any
thing that I want. But it's very important to highlight the outline
of the drawing. I'm doing this right now. Okay? Basically guys this
day is basically, is this really hope
you guys enjoyed this lesson and saw
how to do a manga. A face with a main guys tile. And it is very
important to practice a lot because of course you guys have seen all
these video lessons. How to do draw in a manga. Face is titled draw it at all. But of course, if you don't, if you don't practice,
you won't learn. We have the eyebrows right here. The eyelid. We can do the
same thing on the other side. Knows, you know, of
course the mouth. In basically we have
here the drawing completed with all the
parts highlighted. And ever very nice
and simple drawing. Let's go to the other example. I'm gonna do it a
little bit faster. But basically I'm
going to just online in highlights are the main
parts of the drawing. But of course guy, you guys, you need to take your time. You don't, you
don't have to rush to draw a yellow your character. You can do, you can take all the time of the
world that you want. You can just be patient eNobe. But that's really a really
simple stage of the drawing. You just need to outline. Okay? If you want to, if you want
me redraw any character, especially character, comment
right here down below, and let me know about it
to know if you wanted me to teach you guys how
to draw something, especially just tell me, I will be happy to help you. Help everyone. Guys, please like
the video, comment. It. I'm really happy
to have you all here. And that's the drawing. We have two very nice characters with very nice details. Okay? And that's it guys. Very nice drawings. You can just use your eraser
to claim the drawing. Thank you very much. See you guys.
31. Female Face front: Folks, now we're gonna
make a female face design. It'll be very similar
to the male face. Cats will always start with a circle and a line in
the middle of the face. So let's do it. The initial is catch would
be just like the same. But pay attention to the chin
and the female character. As you can see, it is slimmer. It is not a robot. The female face will be usually more thinner
than the male face. As you can see, the divisions of
the eyes, the nose, the mouth is exactly just as
we did with the male face. Also the distance
between the eyes, the female eyes is usually
bigger than the male eyes. They usually are
wedded to slowly roll. It varies a lot according to the character style
or the designer. Now the details of the face. I'll start drawing and also some hair details over the face. I'll make I'll make lots of hair on the right side
and on the left side. Some more details
here. The year. And of course the
internal details. Now the neck. It is not a role, but usually the female neck is thinner than the male neck. And the hair. I'm making simple
strokes gives the goal here is not to define,
define our line. We just wanted to
have a sense of the size and the
shape of the hair. So very simple traces. Here, we can already see
how the hair will look. So if I want to change
something, that's the moment. The parts that I
consider finish it can start outlining in highlighting. That's the final
line of the drawing. And that's a very
important part. Let's highlight the face online and the mouth detail. Remember to highlight more
the corner of the mouth. And here a shadow
under the chin. Now I'll define
the final traces, all the character's hair. These are stronger strokes. That's the final outline. Don't forget to draw the
ends of the lungs of hair. Always Tan. And did lots of hair. They are side-by-side. They must be parallel to that. They do not become so
different from each other. You can adjust any part to
feel the entities necessary. There's no problem. Increased it created the
lock of hair to free. Go is not making perfect
trauma and at first, so keep making this sketch. Increase, decrease, erase. Try to make your design
as good as possible. Now the ies, mainly
in the female I, you must highlight
more the upper lash. The other parts of the eye
will have the same shape. Darkish shadow and the top part, and a lighter tone in
the bottom part on the bottom part to create a
gradient of heart in the eye. The eye browns. Now on the second, I will do exactly the
same thing that we did in the first i in. Don't forget that
these shine must be placed it on the same side, same part of the eye. Now, I'm going to
use it in one bar. I won't erase everything. But only those trucks we
made in the beginning. Let's scatch. Your final drawing must
be as clean as possible, so don't be afraid
to you the rubber. Some more adjustments
here on the, on the hair online. Now again, this term
may candy shadows, see that at first and
just made them gray hue, not too light, not too dark. Make shadows on the entire
surface of the hair. When we finish with the
medium hue of grey, we can start making some parts with a
darker tone of gray. And this will create a
greater effect on the driver. Now a shine right here. This is a sample shine. And finally a
highlight on the eye. Okay guys, that's our drawing.
32. Female Face 3 x 4 view: Let's start by making
a circle over here. Let's mark the
middle of the face. This is a three by four phases. So we mark the
middle of the face, we think curve in the
line just like this. In then we can get a smaller
site and a beggar signed. And here we can
see the two sides. Now this side of the face, you have to do just like this, just like I am doing. And they can get a 3D effect, the nose and an open mouth. Now I'm going to mark the
height and the size of each. I make them as enlightening as possible with these
parallel baselines. Remember that the eyes
will have the same size. Well as bigger,
they are the older. And that's okay.
That's what we want. And then you can draw
the shape of the eyes. They propel the lashes and all the parts of
the face, the neck. In now, the ear, unless you're on the year. You can change or improve the parts you think
it is necessary. Just pay attention
to the size of the year and also the height. Don't be afraid to
fix the mistakes. Now the height of the hair. So I'm going to make these
trains from this part here. And I'm going to draw the
locks of hair over the face. Some locks of hair will
be placed over the eye. And this is normal
and even cool. Now. So lots of hair
behind the neck. On this low part, I made a little bigger locks when you draw the
front and part of the hair and this is normal. Now some adjustments
on the face shape, the outline, and also the
neck and shoulder height. Now a shadow below the neck, and I will keep
drawing lots of hair, but this time it's smaller ones. Notice that the hair is being done in an upward direction. The top part of the hair. Now, this part actually will
have a lot of lots of hair. You need to take care of all the signs and the
height of this part. You must not make it too big, but also must not
make it too later. Also don't make it too
close to the school. After make the hair and
the face is catch will now start to define the main online that
will be the definitive, the final art of drawing. A very highlighted
eyelash propel. The iris can be o
painted in black. The shadow detail, the top
part I'll, it'll darken. And the lower part,
I'll lay it a lighter. We can draw. So now the eyebrows and the eyelids in some
hairy details too. I'm making a very
strong alliance because I want you to see well the details by usually I don't make another
line so strong. Now, the second eye. Remember to highlight
always the upper lashes. Same shape that we did
on the previous one. So there's no much
to talk about now. The shine Don't forget to make the two shines
at the same place. If you mark it, the first
child on the left side, the second eye has
he has to be on the left side to always
replace it in the same side. Her nose and the mouth with the triangular shape
and the upper teeth. A shadow. And it's also
a good gradient effect. And I highlighted the
corner of the mouth. This highlighted the corner of the mouth is very important. Now I'm defining, define
an outline of the face. With the initial sketch
that we did before, this part of finishing the trunk will become
much, much more easier. Basically, we just have
to online the drawing. Remember to my fine
strokes and make the end of the lots of
hair thin and not rounded. Any year, the top
part of the hair. We are almost finished
in our drawing. It is important to try make your intro and it looks natural. So don't be, Don't be
hurry. Take it easy. The in-breath thing
would be the result in all the time you will
take to make the drawing in after the trauma was
done where the online is already defined it
let's make the shadows. It is a gray here. Here it is it the
same thing that we did on the others,
others previously? You can start with
him, medium gray hw. Do this on the entire hair. It may take awhile. I'm using a
mechanical pencil 09, this kind of mechanism pen, so it takes longer
if you use it. If you use a regular pen so
you can finish it faster. A shadow under the chin. Now let's define
the darker parts. At this point. I don't
have much more to explain. So just see how I'm doing it
in try to make these same. You have to practice a lot. This is really important. Don't just watch. You have to watch. In practice. We only learn how to
draw by trawling. There's no other way. So see how I'm doing it and try to reproduce it in practice. When you see how I'm doing, it'll give you a perception, but you will only
understand how to draw it by practicing. And here are drawing
is almost finished. It just make the shine
on the top of the head. Just some more shine
details in that seat. Thank you very much. And I see you.
33. Female Profile face: Well guys, let's go. Let's start making
our usual circle. Remember that the
goal here is not to make a perfect circle. So let's make a division. You can divide it in
the meadow or you can make the front
part a little bigger. They Chan. And also the jaw line. The ear right here. This year is going to
have a larger size. Hey kids in the
height of the eyes. You know. I will also make
the neck usually the female neck is a little
thinner than the male neck, but be careful not
to make it too thin. The nose, again, didn't nose is slightly larger
than a chimp needed chin. As you can see. The upper lip is a little bigger than the lower lip and the chin. You can do it at the same
height as your lower lip, or do it a little
bigger, you can choose. I'm doing here the
mouth drawing that to make the mouth touching the external contour
of the face. They propel in the eye shape. Any profile phase, we already know that the I have
a triangular shape. After you make this catch, you can highlight the details like the upper
eyelash, for example. Keep highlighting all
the face details. The shine in the iris. I'm now highlighting the online. Then if you want to add more
shadow details, feel free. I think makes this charming. He didn't matter. Lashes here. It looks really nice on the femoral eye and the
ear on the profile face, you can make the ears
land larger than normal. That's because you can't
see the entire year. So it is okay to make it larger. Internal details. Let's finish the change Rowan, and also highlight
the neck outline. I always like to
make a shadow under the chin. The eyelid. Highlight the lashes
in the eyebrow. Remember to make one part
thicker than the other. I'll draw some lots of hair over the forehead and the eye. Just a few. And the others. I'll
draw around the, I keep drawing lots of
hair in all this part. And also highlighted the
part to think it's already done. At this point. Who can write a make? The upper part of the hair. This is also his cat. So don't make strong
and dark strokes because it may increase or
decrease the part of the hair. The initial part of the hair, we are just making these catch. And after this, we can make the find it online and
then highlighted. This part is fine for me. So I'm highlighting
the online here. I'm going to use
the rubber here, kids, I want to
adjust this part. And now it is time to highlight all the
outline of the hair In see how much better the drawing gets
after the outline. And that's it guys. The drawing is
almost finished it. But we can keep
adding some details. That's just fine. And I'm
also dropping shadows here. Basically, you can color
all the hair and gray. We can use the mechanic
pencil to do it. Highlighting the
shadow on the neck. Now, I'll make darker
shadows on the hair. It makes it very cool. To finish it. We're gonna to make his Shane. I'll make it a little
bit differently. The mouth in detail, Olive, just this simple mouth. Some more details here. And that's it, guys. Thank you so much and see you
in our next video lesson.
34. Initial Sketch and differences between male and female body design: We're gonna make here a basic
construction of the female and the male body will see that they have
some differences. I'll start to draw the face, and this one is a female face. And notice that it may
make some baselines here. It is basically why we made the previous module about faces. So he will just apply
the same principles. But here we'll draw
the face and the body. It is going to be a
basic construction. So see how I'm doing. It. Can draw the neck, the
shoulders, height. You can make this detail here. To draw the body, it is important to
make the central line, or it's pine line. With this line, you can
better placed the body parts. In female bodies. I make this stroke
here on the chest and this triangle
to mark the valley. And this detailed
to make the hips. This is very cupboards,
tropes in this case. Using this method
makes it a lot easier. Now you can define the legs. Remember to make a thick fight, thigh and the rest
of the leg thinner. See that we can already
see the body shape of our character is a
very simple method. And this way, we are almost
finishing our sketch. Between one part of the
body in another one. We draw these circles, see how I'm doing it. Some strokes and assert code in the entire arm and also
in the entire lags. The Jude this term,
arms and legs. No base construction
of the hand, the palm, the TM, and also the fingers. The fingers, modules,
models you can draw. I'm going to draw
here a basic model. Very use it on female
characters in manga as towel. The other hand, the same thing. They fingers. This type of fingers
is really nice. Finish the sketch should draw the lines just like
we did with the arm. Does insert coats. You know, it is nice and
don't make straight strokes. Try to already drove the body
shape in the body shape. Now the fruit. Remember that this Roman, this anatomy, the
more you study, the more you will be able
to draw any character. So practice a lot. Nelson. Now some
details of the chest. This is just a sketch so we
won't make the final art. And here you can see the initial sketch
of the female body. Now, let's make a male body. The construction
of the face will be exactly the same thing. Is circa. If the shape of the
shape of a face, the height of the ice. You can already define the sum. You can already define
some face details. This is a profile face. I remember that we can follow, so we have to follow some rules. As we saw earlier. The upper layer, for example, has to be in front
of the lower lip, and the eyes will
have different sizes. Now, the school a
very simple shape. Of this cool, we can also
define the neck here. This upper part of this
coal guys will not appear, will draw hair in this part. And the width, this catch we
can see here is that clear. We must draw the hair, where exactly we must
draw the hair details. Make the basic
outline of the face. We can draw the body here,
the shoulder height. It is very important
that you draw them this land correctly because we're going to use it to define all the other body
parts into place, then the central line
of the spine in line, you can call this
whatever you want. But it is very important
that you draw this line and in handy character because
it will help you unlock, will hear when he stands around with
the other body parts. Here, basically just like we did in the drawing of the
female character. The metal body is similar. Just be careful
about the shapes. It badly the hips. As we solve, the female
body has a lot of curves, but the male body has more
muscles in less curves. The psi and the armed tail. You can make the same shape
that we use it to do before. You can really define
the musculature. If you already have a cer, certain acknowledge,
a certain practice, you can directly mark
the muscles and make, it makes much faster. You're all the male body, but it can also make the
sketch and after this, draw the muscles that,
That's just fine. At this stage, we don't want
to draw a lot of details. This isn't initiatives catch. You got to define the
position of the character, the propulsion, the
height, the anatomy. So we don't want to do, to add a lot of details. But the truth is that
with this simple sketch, you can draw any character. This is the basis for every type of character
you want to draw. So training a lot, practice hot, draw a
lot of characters. If for every element,
for example. And it's tired during the
characters who liked best. And here we define it. The lags, the chest, the arms. As I was saying, keep
studying a lot to draw several characters and try to
understand this difference. Differences between on
character and the other, between the male and
the female body. 11 has more muscles and the other has more
curves as we solve. So we study these shapes a lot. Okay, well done. So let's go to our
next video lesson where we'll draw the
body details. Okay. See you.
35. Basic Drawing of the Female Body: Okay guys, so here
we're going on to find the body design
of the female body. And as we did the
previous catch, I make these trucks, I lead to stronger so you
can see it traveling. But here I'm going to decrease
some of those tropes. I'm going to use the
robot to make it lighter. I don't want to
erase everything. I just want to make
a lighter is tropes. And now I can, I can
highlight the contour line. At this stage I'm going
to do the final aren't. At this T is important to, to make the adjustments
that you want to do, that you want to make
this not because we made a sketch that we have to, to keep making the
drawing just like that. So we can adjust something, fakes, some part of that
we want, that's just fine. At every part. We can fix things that
we want to improve. I'm doing here a simple face, the basic phase female
face and the hair. And here is basically the same thing that we did
in the previous class. The construction of the face. This is important
when you are drawing the inherent that you
have to define well, the lots of hair. For example, here you can see
where we divide the hair. One part to one tide and the
other part to another sign. This is a nice Heron to draw. Let's set some more
lots of adherence to make the drawing on natural. Let's put some
details on the chest. This is a part that we must
to be very careful because you want to make both
both right and left side at the same same way, with the same size. And we can adjust if we did something wrong,
that's just fine. Don't worry to make a perfect
drawing because we can just use the robot and fix
if we did something wrong. But if, but of course, we have to try to make it a
better drawing the bass drum and we can size. The height of this part will vary a lot according to the
character you trawling. When you are doing this part, it's much easier to make this
part when we make a sketch. It is kinda hard to already making the final art
without his catch. So a real defines you
to make one's catch. Because all the body has
to be proportionate. We have to carry about the proportions and the
size of the height. So it was really important
to use a sketch. And it is important to,
you keep practicing. Because as more you
practice better, better, a better design, you're going to become nowhere me to make mistakes or
to make perfect drawing. Because that's fine. It is hard to make it
perfectly for all in. But as you keep practicing, as you keep starting, I'm sure you're going to become an amazing trawler,
an amazing designer. And see how I'm doing this
part here and tried to direct, produce it and make the same. For example, here it is
very important to you, you understand how to
draw a female lags. So it is important to practice a lot of female lags and try to understand the
proportions of each lag. In the female body. It is not good to draw
a lot of muscles. It is not very good to
draw a lot of muscles. Unless that's, unless
this is your goal. But if it is irregular
familial body, I'd advise you to making to
make a regular famil body. You don't have to draw
a lot of muscles. The hand, as you can see it is okay to use the
rubber and draw it again. I advise you to practice
the hands drawing a lot because it is
a hard part to draw. Here we are almost
finishing on drawing. And we can see here the knee. It is important to draw
the knee and the feet. It is very important to
make all the details. And try to make the
bass drum and you can, the feet change. Shape is very,
very easy to make. When we add to the
fingers details. It can become hard
to draw the food. That's fine. Any here
we can see the drama and completed a
very nice drawing. You can make any adjustments that you fill it as necessary. So that's just okay.
Good is a rubber. You can draw some part again. And that's it, guys. Practice a lot. And I hope you
enjoyed this class. And that is just a
pleasure for me to, to be here with you. Okay. Just more
adjustments here. And that's it. Thank
you very much. And see you in our next class. Bye bye.
36. Basic Drawing of the Male Body: Hi guys. In this class we're
going to do basically the same thing that we did
in the previous class. Less tar in here
using the Webern. And I want to raise
some, some strokes. I want light strokes. I don't want to
erase it completely, but just make the strokes
turn light, lighter. And see, are you the rubber
and it gets kind of dirty. So I use another sheet
of paper to planet. And it must do the same. It is important to the rubber. They'll weigh in here in the Phase I started
doing the online. This is a profile face. So pay attention to the
pylab in the lorry lab. You can make a bigger
nose, those smaller nose. But the shape of the phase, of the profile phase is, is, is ten, is the same, the mouth, it can
be a simple mouth. The eyebrow here, and the
eye with a triangular shape. The year. We can see the
details tie to the year. That is a simple shape. You don't have to add a lot of details in the year
and all the hair. You can, there are
actually a lot of, a lot of hair shapes. You can choose the best
shape you want to draw. I'm drawing here and not a, a too big here. And here I am defining
the locks of hair. We can see here just Waller, lots of hair and
bigger locks of hair. Here we can see the hair
basically completed. That's a very, very
nice hair to draw. It's a very simple actually
to draw this type of hair. Okay, Now the neck, the shoulders, a shadow under the
chin and is very, very nice too to add a
shadow under the chin. And here we can already
start drawing the muscles. You can choose to make, to draw a baker arm
or smaller arm. You can choose. The arm you want to draw. Some characters has
a lot of muscles, but some characters doesn't
have a lot of muscles. There's one year,
has some alsos, but now not a lot. The chest him the valley. It is very important to
make carpet strokes. As there are a lot of
muscles in this part, so on this part, so it's important to
make coverage strokes. It is also nice to add
shadows under the chest. And in all of this part, some more details here. And after define the muscles, you can add all the shadows. You have to add. Now we are drawing, you hear the abs
in other muscles. Do not draw straight lines, always covered covered lines. I'm going to just
adjust the arm. I want a bigger arm. And as we can see, the drawing is almost completed. We can see the chance, the head, the arms, and we can adjust. If we see that some parts
need to be adjusted. We can add more details
on this part here. And now the hand, I raise the
initiatives card here, so that's just fine. We can do it. In. Now I'm drawing the fingers. See how, how easy it is
to draw the fingers. You can add to
details if you want. You can add shadows
in this part. That's just fine. Now the lags, you must be careful about
the shape of the legs. Because both of
them must be equal. You have to pay attention
to the proportions. We don't want one lag
bigger than the other. And the muscles here. We all also have to draw them. These are basic shapes or
female and male bodies. If you learn how to make
this basic constructions, you won't be able to
draw any character. The other arm, now, the hand with the fingers. Some details here. Our character is
almost completed. We are here in the final part. The rubber to claim this
part and they need, it is very important
to trial the knee. You can draw some muscles in this part and make
a seeker time. It is really important
to pay attention to the shape of the lungs. But do not draw away to mask learn character unless
this is your goal, but do not draw a very-very muscle character
in all of the feet. You can make this shape. It is a simple shape. I think this is a very, very easy feat to
fit shape, to draw. Advise you to use this shape. You just have to
pay attention to the position of the defeat. This case, as this is a
profile characters, you know. So the, the feet, you can see that well food has a bigger size than the
other. That's fine. That's okay. That's the purpose. It is important to
draw also the toes and make these divisions
in all the details. Okay, Very, very nice. Here. Honduras
basically complete it. You can add more details, you can adjust anything. They use, fill it as necessary. I'm just adding a shadow
under the character, but this is optional. It's up to you. You can the important things
that you understand the differences between a male
body and the female body. You can see that the, the male body has a lot of muscles by the female
body has a lot of curves. That a lot in practice, a lot to turn a lot. Thank you very much
for this class. N by
37. Drawing the male torso front view: Hello guys, how's given? In this class,
we're going to draw the upper part of the male body. I'm going to try to
teach you the bias and the easiest way of doing the
upper part of the male body. As you can see, we
have a shape in the upper part is a little larger baker
than the lower part. Because the male body is
kind of a triangular shape. Now, we can add some baselines. It is always important
to draw the baselines. And as you can see, it is a very basic and
simple construction. Lots of divine the
meadow, the NAG here. With this simple line, as you can already see, the definition of male body. So we can now draw the
curves of the body. The shoulder, and
all the other parts. Trying to make the left side
disliked the re-signed. We equal, tried to make they were the same size
and with the same height. Of course, it all depends a lot on the character
you're drawing. But usually we draw
muscles in the male body. And here this detail
of the chest. When you drawn a sketch, it is much easier to draw
into place all the details. So I really advise
you to draw a sketch. At this stage, you just have to divide the parts of the chest. This is a muscular character, but he doesn't have
a lot of muscles. You know, they have
desert a field. If you want to draw a
character without muscles, without a lot of muscles. So these drawings
already completed. It is just fine if you leave
the drama the way it is. But we want to draw me a muscular character who wants
to draw all the muscles. So it varies a lot according to the character
who wants to draw. Here can see that orange
Germany's almost completed. But let's add some more muscles. As I said earlier, visit a Ms. Clark current term, but he doesn't have
a lot of muscles. So let's make these details
in these divisions. So the abs, you have to draw
all the parts of the abs. It is nice to draw
three divisions. You know. You cannot draw five divisions, for example, it is not good. Handful, simple base catch. Just three divisions. Divisions. You can start in the metal on the lateral side or the
sign you can choose. There is no rule about
where to start by. You can start in the
middle or on the sides. You can do what you think
it is easier for you. And here I'm drawing
the division between the chest
and the shoulder. This part also has some
also do like this. The division of the chest. You can draw just one line. Or if you want to make
your drawing more natural, you can divide it
into two parts. I think it's better to
divide it into art. Some details in the chest. This is some muscle which tells some details here too. I'm making a strong strokes. But you don't have to
make that strong strokes. You know, this catch that we did initially. You can, you can see that we
basically erase all of it. We can see here just the
final outline of the German. In this part here we
also have some muscles. So it is important to make
this strokes. I'm doing here. You know, with this shape. As you can see, it's one stroke. In another stroke. It is usually 33 parts,
seeks coverage strokes. Usually we do not make more than just the 66 strokes is enough. And here we're gonna do the
same thing in both sides. And it is very important
to highlight this part. Here can already see the
muscles of the character. A lot of muscles. Strokes over here. It is kind of a M shape. You do one stroke, recovery stroke, and
then another stroke. It is like a name. It looks like a mouth shape. Well, some people make this
part with straight lines. You can do it. Well. I actually do not advise you to make straight strokes here, Bob, but you could try. If it looks good. That's just finding, if
it looks good to make, to draw his train lines,
That's just fine. Just more details down here. Some shadow details. In this video clans
we're gonna do, we're gonna make just
the upper part of the male body. And
then nice cleanses. We're going to see all the
other parts of the male body. We also have some answers
in this part in here. So let's add more details. And strokes with this
shape that I'm doing. You don't have to make very strong strokes with
these details and designed. And basically, this is the drawing of the upper
part of the male body. The chance the abs, the muscles. You can add shadows if you want. You can add shine. That's just fine. But they're basically
construction of the body. Is this. I really hope you understood
how to make this Roman. So I advise you to
keep practicing. Don't just watch the
video, Rowlandson. Try to do it to practice. Okay. Thank you.
38. Drawing the male torso profile view: Hello guys, how's it going? So he, in this video lesson, we're going to draw
on the upper part of the male body about
with a profile shape. So I'm going to start with
this shape. As you can see. We have here the
divisions of the chest. And we have a curve in the external contour
and that's the shape. I will not make a very
mass muscular character. I don't want to
draw, It's a way, it's a lot of muscles, but I'm going to draw
them some losses. That's not a 100%
profound Sherman. But as you can see, it's kind of a profile drawing. I'm going to add
some details here in this part of the chest. Here we can see the
second part of the chest. We can see the rice
signed in the last slide. And the shoulder over here. I'm defining here
is some muscles. The knack. And what is really
important here and this part and at
this stage is do, is make here a very
definings catch. Because when you do is catch
when you have a sketch, it is much more easier to draw all different
parts of the body. And you can see
that we do not make straight lines,
straight strokes. It's important to make
those curvy strokes and add some details
in the chest. Someone to tell us here. This middle line, the
meadows trope that I made. It is a baseline. With j. We can define all the
parts of the body. The back here. I'm going to use
the rubber just to fix this shrub that I made. As Ms. Clark, a
character's March trade. This stroke should be. But this card that
I'm drawing is not a not very muscular character. And here the division between
the chest and the abs. No, can already
sunshine the abs. Remember to make just
three divisions. To not make more than
three divisions. You can see that one side
is bigger than the other. It is a three by four drawing. But actually, we can say that
this is a profile drawing. Once signed bigger than
the other, as you can see. And it is important to make
those strokes down here. Here we can see that is your earnings is
almost completed. You just have to add
more details and make some adjustments that you see they feel that
it is necessary. I'm just this part
here because I think that it's important
to just this part. We're going to add
more muscles here. We saw in the last video
lesson about this part. It is really nice to
add these shadows here under the shoulder because
it makes a deep fact. It gives a dip to
factor the trauma. And after doing the
initial sketch, you just have to
keep adding details are raised in some parts
they fear it is necessary. That said guys, that's a German and see you in our
next video lesson.
39. Drawing the male torso 3 x 4 view: Hi guys, has gotten. So in this class we're going to also do the upper
part of a male body. But this time we're
going to make it three by four inch rolling. So let's, let's Terje
doing this patch here. And I'm gonna make one
arm up, one arm down. So here I'm already
making the shoulder. And let's add some details
here in the chest. It is important to
make the division of the middle part of the chest. We can see here the rice
hind and the left side, but one side is bigger
than the other side. And that's the purpose. That's what we want. One arm is going to be to hone
in on arms is gonna be up. Basically, is just like we
did in the previous examples. We have to make a sketch, and I have to make a sketch. You can add all the
detail that we want. Some more. Here. Don't be afraid to
use the rubber, okay, if you make some mistake. So as you can see, there are some
differences between the right side and the
left side of this trolley. And so when we are drawing
the muscles of each site, well, they are different because this is a three
by four orange rolling. But later we're going
to talk about it again. Here we are drawing the
details of the mass of the muscles in the chest
is division of the chest. I like to make two
divisions over here, but it's also nice to
make just one division. That's just fine. It can, it can do just one division. It also looks good. Now, let's draw the army or you can see that there are
some authors in this part. So you have to make
covered traces. Novice treat, strokes guys,
always curvy strokes. Well, I'm going to draw just
this part in the class. We're going to learn how
to draw the entire arm. But in this class,
just this part. It's okay, It's fine. It is important while
you're drawing, pay attention to
the details that you aren't doing,
you are making. And if you see something
that you want to change, if you see some detail
that you feel that it's necessary to change,
that's just fine. You can use the Robert, can use the mechanic
pen so you can erase and do it again. Well, see that it is not
as trade strokes here. It is a coverage stroke because this character is not really
Moss Clark character. You know, he's not, he doesn't
have a lot of muscles, but just the feel of that. But if you want to draw a Rayleigh really
muscular character, so you can make these
tropes very straight salary shadow over here. And now they have this. At first we make this division between the chest and the abs. Remember to always
use the base line in the meadow to place
only part of the body. Just three divisions. It's okay. You don't have to make
more than three divisions. Here. Let's add more details here. And as you can see, it is big muscles in here because this character
has a very muscular. So it is very simple. Details are actually drawing, as you can see, is basically just how to add more details. But all the muscles
of the body parts. It is alright. Be careful to tone drove
a lot of muscles where, even where there
is not any more. So so do the basic, you know, just make the chest, the abs, the arm. And you can add more details in the neck and the chest to free. It is really important
too that you keep practice and they keep making, enjoying this kind of drawings. So you're going to
improve your skills and you're going to become
very good signer. Look for references
and try to draw them. As you can see, I'm just adding
details, shadows, shine. I'm just some strokes here. How much more details
you add that better. I actually likes to draw
muscular characters. It's very nice to draw
this kind of characters. We have muscles in
this part here. So let's add. You already saw how to
draw this kind of details. Here in this part, more details. We can highlight
the details if we want our insurance
basically completed. That's it, guys. That's what I would like to teach you about the male body. So keep practicing,
keeps drawing. And I really hope you
enjoyed this class. And if you have any
questions, please contact me. Thank you very much and see
you in our next video lesson.
40. Defining the character on the initial sketch: Well guys, in order
to make this row one, we're going to use a
regular sheet of paper. And you can see that I
use some tapes as edges. I use it. I use these tabs because I don't want the sheet of paper to move. You know, we're going
to use a rubber, a mechanical pencil, a
pencil if you prefer, and some felt tip pens
to make the final aren't very simple,
very basic tools. Actually with basic tools, it is possible to make
amazing drawings. So less tar making a
circle, a basic circle. Dislike this. This is gonna be the face, the hands of the character. I'm going to divide it
and then meadow vole. And I can already make
the shape of the face. The Cham. That's a catch. As catch can add
a lot of details. I made this horizontal line to mark the height of the eyes. I use it, the rubber
to read this part because I feel that it
needs to be adjusted. That is the division
of the hair, the eyebrows. I wanted to draw a
anger, angry character. So that's why I use
this kind of ion Brown. And I can already
draw all so the eyes. It is definitely a
angry character. The nose and the mouth. The ears in this type of
Germany is kinda bigger. So don't be afraid
to make big years. Now, the hair, we again draw each one
of the locks of hair. So I usually make the
main lots of hair. And I also it's turned her army, the auger, lots of hair. See how easy it is to
make this kind of hair. And as you can see, this drawing is very nice. It's very new to pay
attention to the left side, into the right side. Because we want both
the signs to be equal. We want both of them
with the same size. Okay? So pay attention to this. And you can keep trying lots of ham and the details of the hair. This is just a sketch. So if you make some
mistake, Let's just fine. We can fix it later. The NAG and let's mark
the in lots of make also the shoulders, the chest, the upper part of the shoulder. And it can make
those, these senses, heracles to make the
drawling, the metal line. This is a foreigner
important to draw this baseline in the
middle, the abs. And see how simple it
is to draw the arm. It is just a stroke
with a solid coat and another stroke and
another circle. I'm going to draw this hippo, the simple hand model. And now you can already
draw the shape of an arm, of a muscular arm. Remember to make both
arms with the same size. There are a lot of modules, of hands, lot of
shapes on the hands. You can choose the bus hit you, you you want to use. Because it already to make
the divisions of the fingers. It is this hippo drawing, but it is very nice to
draw this kind of hint. More divisions here. Singers. I think this hand that I, that I drew is not okay, so I raise it and I'm going to, I'm going to draw it again. This is very important guys. It is okay to make mistakes. We just need to use the rubber, erase what you think it is. It needs to be raised it and then you can just
charge it again. It is much harder to fix some part of the drawing
app to use a felt tip pen, for example, after you
make the final art. So it is important to
make very light strokes. Now let's draw the legs. Just simple strokes
with those circles in the knee and all
the food over here. And then you can just draw
the shape of the legs. Very simple lines. And as you can see, our drawing is
basically concluded. The catch is already finish it. The next video
lesson, we're gonna, we're gonna make the final
art of these drawing. And it will see that
it is also very, very easy and very nice
to make the final arm. Okay, So guys keep practicing and do a lot
of germs like this. And for sure you become
very good at it.
41. Final Sketch Part 1: Hi guys. So let's turn this and elastin making a claim
that is rolling, we don't want to raise the
ED drained completely. He just went to
erase some strokes though that we made
stronger, you know. So use another sheet of paper. Because when you
raise with a rubber, you can see that in rabbit
gets a little dirty. So it is important to use another sheet of paper to clean it and then you can erase. And now we can't highlight
the outline of the drawing. That's the final art. So I started taking the shape of the face. At this point. I don't really have much
to explain for you. So just watch how I'm doing
it and tried to rip it, does hate trying to just
like I'm doing here. This part in front
of his whole lot, dependent on the character. So it is important to you. It is important
that you understand how to make the highlight will be the online
or the contour. So at first we make his couch, then we can highlight the
cone, turn the outline. Eight, Very nice final art. Just be careful. While you're making the
Hajnal line or the online. It's very important to add all the details and
pay attention to the size and the proportion of the parts of the face
and also of the body. Trying to make the both
sides of the body, the right side and
the left side equal. Of course, sometimes
hard to make perfect, but try and do your best. Here the eye, a very simple
line. The purple pill. The propel of both eyes must
be placed it in the same, in the same part of the INO. So if you draw a pill
on the right side, at the center of the eye, you must do this Samy, same in the other eye. And the mouth. Very simple. Mouth. The NAC. The night must be in alignment to the ice. You know. It is
important to make all of the drawing to the proportions. That's a very
muscular character. So I'm adding all the
tails of the muscles. I'm going to draw here a, a cloth to the character, a very simple cloth. Of course, this will depend on the character
that you're drawing. Some character has different
kinds of qualitative. So it varies a lot. These baselines, they can see the body of the character is
very, very important guys. Because we use these align, these baselines to place it
all of the parts of the body. We want all the parts
with the same size, with the same height,
shoulders, the arms. Of course, there
are some kind of characters with different
shapes of bindings. So it also will depend on the character
that you choose to draw. This tape. I'm just
highlighting the online. I'm not adding a lot of details, but but I will, but I will. When I use a felt tip pen on
the drawing at this stage, I do not add a lot of details, but when I use the
felt-tip revamp, I'll will add all the details. But if you feel more
comfortable making the details already at
this stage, that's fine. You can also do it. Of course it will
take longer but, but feel free to
make the drawing. Asked you what. It is also a key to use the rubber
to adjust all the parts. You think it is necessary. Now the chest here, it is just once a patient, as you can see, the abs. One detail over here, it is also part of his clothes. So this is kind of a
fabric you notice. So I'm going to add
some details on it. Some avid details. We have muscles at this part, and this part is very important to add those details in the
muscles on the muscles. Also here, on the chest. Some shadows over here. And now I'm going to
start to draw me in the arm that I'm divined
in the parts of the mouth. So I'm defining the part
of the bus so the muscles. Be careful at this
part because it is very important to pay attention to the proportions of the arm. And remember that one arm must be just like the
other arm, both arms. Should it be the same? So pay plantation to
the anatomy of the arm. Let's say you very
muscular arms, legs, head month, tails here. Okay. Here I'm already
defined in the hand. They details of the hand. So I'm just drawing the fingers. At the upper part of the hints. You can see that we have
some some curvy lines. So did not make a straight stroke at this part is a barn
to make some curves. We want our drawing to
be natural in the trial wins also has some,
some details. We also have to add these tails. Okay, very nice. And see the difference
between this arm right now and these
catch that we did. Earlier. That is really hard to
make this type of arm, this shape at all, these details without
a initial is catch. So I really advise you to
make an initial It's catch. It makes it much easier
to draw the arm. Now let's draw the second arm. And it won't be
the same process. It will bleed the same thing. Have to add the mass of
the details of the arm. It is a cake to the rubber and fix whatever
you want to fix. Remember that when
we used the rubber, the goal is not to
erase everything. We just have to
erase some of them. Rewrite it, made the
upper part of the arm. So let's make now
a second apart. They are the head, it just like the other
one that we draw, drew. But he has slowly
differences, as you can see. But we all also have here the fingers and the
divisions of the fingers. Always carry the line. The anger. This hand is kinda day afraid. Probably other hand. But it is also important to highlight that these
strokes of the fingers, the align of the hand. And here we can see that
our drawing is completed, at least the, these upper part. In the last class. The next video lesson, we're going to make all the lower part of the
lower part of the body, the length of the feet. So don't be hurry while
you're, while drawing this. It's important to be
patient and that's it. And then as it unless
we will continue. Okay. Thank you guys.
42. Final Sketch Part 2: Hi guys. So let's continue on trauma. And this little n So we can make the lower part of the
body so eyes tight, divided the middle of the pants. But first, I'm going to just
add these details here. And the goal here is
not my x train lines. If you drunk care of your lines, you can make your drawing
much more natural. And that's what we want. This hippos strokes
and curved strokes. That's what we want. And see how I draw the
ends of each height. It makes a drawing more natural. Now I'm drying the
pants, very large pants. I'm just adjust ten
this part here. Okay. And it's over here too. I'm going to use the rubber
and just make light strokes. Very simple strokes. I'm highlighting the
outline of this part, some details inside of it. Now let's keep trying the pants and see how covered
the strokes are. It is not straight lines at all. It is very important to
highlight those curves. Then we can highlight
how the parties, though we think it is done. Both sides of the
parents must have the same height
and the same size. Pay attention to this. As you can see, I'm making a base line and I'm going to use this bass line to draw both part of the paint
with the same size. Here, I am adjusting all the parts that I
think it is necessary. It is important
to be hurry while doing those kinds
of details, guys. So we call a shaped. I've got to erase these
parts here of the NHS cash. We don't need it anymore. And it is very important to highlight the part that
you think it is done. The parts that you
feel that isn't necessary to fakes and adjust. Don't be afraid to you. The rubber don't be
afraid to adjust and fakes all the parts
that isn't necessary. We want to make the bass
traumas that we can write so there'll be afraid
to fake synergist. Why you need it? Some more details here. This part, you see that I am
highlighting the outline. See how many times
I used the rubber. It is just okay
guys is the rubber. And here we do the same thing that we
did in the other side. And now I'm going to define
the trauma of the feet. You get to see that the the right foot and left
foot has different angles. So they will be different. That's, that's nice kids. It makes your drawing even
better and even prettier. That is not hard to make. You know, as you can see, highlighting the food online
and added some shadows. This is tail over here. Well, I have to make it bigger. So I raise it. And I'm going to make
it again charity, They can I make the
external online. And then I can add
all the details. Some shadows on the food here. And I'm gonna, I'm gonna add some details, some
strokes, dislike. I made you the other side. Here guys, the
drawing is completed. We can now just make some adjustments and add more
details and that's normal. We can do this, but base
Cloud journey is completed. In the last class, we're
going to use thoughts tip pants to make the final art. We're going to highlight all
the online or the drawing. Okay, guys, Thank you very much and I will see
you in our next two. The last one. Keep practicing and keep making
a lot of these drawings. And again, improve your skills. Thank you. I see you.
43. Male character Traditional Line Art: Hello guys. Before we start to
make the final art, I decided to draw
just one local, the hair right here. I think it will look very
good on the character. Just as him poem
basic lock of hair. And I draw, I'm drawing it with the mechanic pass a
regular mechanical pencil. Now, I'm going to clean
the entire drawing. I don't want to
erase everything. I just want to make the
strokes in a more soft team. Tonight. It is important to
always clean the rubber. And then I'm going to use a felt tip pen to
outline the drawing. Be careful to add
all the details. And it is important
to know who make any mistake at this stage, guys, because it is
very hard to fix. Enemies take after you
use a felt tip pen. So it is just outline
the entire drawing. I'm outlining here, the hair, the external online. We usually make it with
a stronger stroke. But the inside details, well, we can make it with
a lighter stroke. Be very, very careful guys. If you make enemies take, at this stage, it's gonna
be very hard to fix. If you are using any software
to make the drawing, you can fix the mistakes. But if you do it by hand, well, that it is hard. The female details, so the hair. Very nice. Now, the mouth. As you can see, we already have all the details of the face, the eye, nose, the
mouth, the years. I like to add a shadow
under the chin also. So let's turn making the
cleaning on the drawing. I'm using the world burn. So just be careful
to erase everything. We just want to make this
tropes lighter and softer. Okay, and now can start. They align. Well done. Then in here we are highlighting
all the ally chest. Well guys, at this stage, I don't have much to explain
because basically you will just have to align the
entire drawing at first, erase and make these
shrubs ladder. And then you just use a pen
to make the online fine art. Pay attention to every detail. Never makes treat strokes. As you can see, we have
a lot of curvy strokes, so you have to do like this. Here we gonna keep
online in the drawing. If I have to tell them something explains something, I will. Okay. So let's keep on. Let me draw it. You can see that in the hands or actually we didn't
change anything. All the fingers, all the details is very
important to align everything. If you have more than one
felt-tip pen, you can vary. And the bass you think, keep adding all the details. Instead that the strokes that we are making here, not long, they have the same none of
them have the same thickness. So if she put more pressure, the panel with your hand, you can make a take care stroke. But if you don't put
a lot of pressure can make a thinner stroke. So it's up to you. It's according to drawing. Here, can already
see the upper part of the body already completed. And I'm going to
make the lower part. I'm going to change pan and
you will see the difference. But at first, let's make the same thing using
the rubber to make these tropes lighter.
Almonds clean. The rubber, can use another
sheet of paper to do it. That's it. And also be careful you
don't erase everything. I'm just making a small
adjustment on the feet. And now we can make
the final art. Tried to highlight all
these tropes that you are. Aligning ice is
actually very simple. And see that it's
important to make it as natural as possible. We want make the Basque
German as possible. So it's important to
make a natural drawing. This pen that I'm using is very, very good to make this kind of online and see how myosin
training's getting. Band is amazing guys. I changed it the pen
that I was using. But as you can see, the result is the same. So it doesn't matter the
brand they choose to buy. The important thing is
highlight the outline. Actually, you can even use a regular pen to
make the outline. Of course the results
will be different, but it is okay. And now we are almost
finishing as your own and let's keep highlighting
the, the online. See that I'm using a
sheet of paper to support my hand because I don't want
it to touch the drawing. No. I don't want to smudge
the drawing with my hand. So I use a sheet of paper to protect the drawing
from my hand. And now we are almost
finishing that drove the feet. And see that I
make every detail, every one of them. Of course you can
add more details. This part, that's okay. And it makes the
journey even matter. Okay? N here, we'll finish
your drawing. It's very nice to your army
and that's the final result. I advise you to wait a few
moments, a few seconds. And after you make the
final RT can just take and rubber and erase all
the left to trace this depend passes traces. So just wait a few
moments and then can, you can do it disliking. And here, we just want
the final art to remain. I really hope there's a
class was good for you, and I hope you have
enjoyed so, Kay Guy. Thank you. Thank you very much. And see you.
44. Drawing Male character 6,5 Head Height Part 1: Guys, let's start visited
Lassen already making a circle. We want to make a
face right here. So as you can see, a divided in the middle and I'm a writing making the shape of a face. I'm making here a middle line, a pan line, the central line. See that I make in these
baselines to help in place all the parts
of the character. I will just adjust
this part here, okay? And then the shoulder height. I'm going to draw those
circles of each side. And then the chest, the belly. One more detail
here on the chest. Now the arms is very simple
to make this kind of arm, which is how to
draw some strokes. As you can see in
those hard posts. You can do the same thing. On the other side. We have
here one arm up, one arm down. And the harem. I'm
already defining the fingers on this hand. Tongue. In every single finger. Well, I will I will not finish drawing the finger right now. I will just make this
mall. It's catch. Instead that I'm adding
all the details or the hair to that every
finger has three divisions. And that's the way
of drawing it. And also, in the other hand, we sum all the fingers and see that in this case the
first is kinda take care. And that's fine. That's because of the angle
of the character in here. I keep drawing the fingers. And that's it. Those
baselines is very, very important to police
all the parts of the body. I really advise you to, to also use them. Now we can start
drawing the legs. This arccos. We draw it because
they are their knee. Okay, it is important
to draw the knee. It will always, always be thicker than all the
other parts of the lag. Now the fruit. As you can see, the food is actually divided into
three, into three parts. That's it. And all the other leg. Same thing here. Now I'm going to add some
details on the face, the mouth, the eyes, the eyebrows. A simple, I'm brown. And we're going to
use a detail here. We're going to drag
the tail here. It's kind of a mask. And then the keratin that I'm drawing has this kind
of face covering. I'm making here. Very,
very light strokes. Just to have a kind of
sketch to draw the hair. Now I can already draw
some lots of hair. I think I have to
just this part here. There's always some party to make a draw as
clean as possible. Now, I'm going to make a more defining stroke
on this part here. Remember that you can make
adjustments and change any part on the trauma
and that's just fine. We're actually just making
a initiatives catch. So you can change any
part of your drawing. That's why at first we
make an initial sketch and later we make the final art. Because you can make
decided to change anything during the process. And that's just fine. I'm making here a
stronger stroke. Because I really think that
it is okay This part here. So if you feel that some part of their Detroit is just fine as a case done so they can
make a strongest stroke. I'm using a mechanic
pens have 0507 actually the rubber
to make this drawing. But if you don't have
a mechanic pants so you can use a pen, so that's just fine. I'm also using a special rubber
to this kind of drawing. But if you don't have
a special rubber to this kind of drawing,
that's just fine. You can use any of them. Rubber. Very nice detail on the face. So the nose here, a very simple nose. Usually animate how
Charlie's characters has very simple noses. Mouth here, with
some teeth details. Here, I'm going to make
a very simple eye shape. Well done. That's fine and
very simply medic. I then now highlighting
the eyebrows that we use in very simple
and basic shapes on the face, we can see that the
journey is getting very cool, very nice. So you can use basic King tiempo shapes
when you're drawing. I'm going to make some
shadows around here. I'm adding those
shadows because I want to highlight this part. And now I'm already
trying the loss of hair. It is important to
pay attention to this ties in to the former, to the model, the lock of hair. It is important to make
one look of Hattin parallel with the
other lock of hair. This is valid for any
kind of head trauma. It is very important to
pay attention to the size, to the direction of
the lots of things. And drop all of them
with in parallel. As I'm doing here, that I made a sense. Her coat and this part here, and this base line will
help me into place. The Lots of hands. I'm just, it just
send this part here. Is maladjustment. This character has a
different this part of the hands different
from the other. But that's the character that
I'm drawing. This sentence. How good that I made
is very good in helps a lot to
draw, lots of hand. So I advise you to
use a circle just like this to help you
to make your drawing. Okay? And we already have here the initial
sketch of the hair. We didn't draw
random, lots of hand. It is important to pet tasted this ties to that direction. And they're very, very,
very good result. It looks very nice. I'm just adding some
shadows on the hair. Some details here on the neck. This is a detail all the armor or the character
here on the neck.
45. Drawing Male character 6,5 Head Height Part 2: Hello guys. Let's keep making
that is rolling. And we're going to add a lot of details on the armor
of the character. As you can see, I am drawing the part of the
shoulder, right shoulder. It is a circular shape,
curve ID, strokes. This card has a
pretty nice armor. I'm going to make some
divisions over here. It is the details of the armor. That's now the final art. It is just a sketch. I forgot to make a detail here. So I'm going to fix it. As you can see, this
part of the arm or the character has
kind of a 3D effect. So I'm trying to
make this a 3D fact. It has a deep effect. So it is just small squares. And well, well, then that's it. Very nice. We want a 3D effect. And that's what
we can in Merkel. And now it's shadow him. Now let's add some
details on the chest. As you can see, we have some
baselines here on the chest. And let's make the
same thing that we did on the other side here too. But actually this part
in this kind of bigger. But again, I'm also trying
to create a 3D effect. Let's have a little bigger. As you can see, it
is the same thing. Withdrawal some
of those squares. And we make curved lines. Always trying to create
a team, in fact, a 3D effect with a rubber. I'm going to clean
some of those strokes. I'm going to erase
some of those tropes. And trial jaw then again. Okay. And of course, the shadow. Feel free to add as many, as many shadows you want. Now let's draw the arm. Already have a
sketch of the arm. So we just have to
add the details. Mainly the clothes, the details because all character
has a nice close. So it is important to make
the muscles evident in, in what our character is
using a pretty nice close. This part. On the first, as you can see, it's
kind of larger beggar. And that's the purpose. That's okay. Or keratin is that way. You will not make all the
drawing with a vague, vague at that big first fist. But this character
has a real large. First. We also have a
sketch of the hand. So it makes it much
easier to make the final aren't the fingers,
the entire hand. And then I can define all the fingers in all
the details of the hand. The TM. I'm going to make
this a little bigger. And I can already make
a stronger stroke. Because this is kind
of the fine art. Almost define art. And all the chest. Let us define all the muscles and all the details
of the chest. And here's the chest. It is a basic definition. Doesn't have a lot
of details actually. Is a sample chest. Lot of details here on the neck. Some more details
here on the arm. Now let's draw the abs. Then I add some
details on the site. I might actually make at
first the external details. And then I'm gonna control
the inside to details.
46. Drawing Male character 6,5 Head Height Part 3: Well guys, now in
this video lesson, we're gonna make the lower part of the bottom of our character. So let's make the
drawing over the legs. Would kit add some details. Here on the character. O current has a
pretty nice paints. So we have to add all the
details of the pants. We have a detail of a here. It is a regular arm. It is his bout. What is important in on the lower part of the
body of the character. It is the details and all the divisions in
all the details of the pegs because
we have a lot of details on the parents
or the character. I'm going to use
the rubber to claim some of those strokes. I make an irregular strokes. It is not straight
strokes at all. And as irregular you
as much as Martin regular makers tropes that matter because you
enjoy it again, it's more naturalness
and that's what we want. As a stage. At this stage, what is important is, are all the divisions in all the details of this
lower part of the character. Just like we did
on the other side. Here we are making
regular strokes. It is important to
pay attention to every part of this
stage of the drawing. So let's add these
details of the metal. Then we can again
draw the paints. I'm making a line
that defined each, each part of the
pants and the man, all the deviations around the mean. This final part here depends. We'll have a lot of divisions, a lot of details. At this point. I really have mice
to explain to you. So unwinds you just to keep
watching and keep trying to practice and rapidly said, Okay. But as you can see, there are already
a lot of details. And we always use Kelvin
lines coverage strokes. That was trade strokes. The past follows the
shape of their lives. This is valid for any character
that had tried to draw. But as you can see, it is not
hard to make those details. You just have to
pay attention to the shape of the legs and where. You must do add more
details and you must add. Now let's draw the the boot. Usually when we
draw boots, well, we haven't to change some things of the initial sketch,
but that's fine. Just race and do it again. You can choose the motto of the boot that you want to draw. There aren't millions
maintenance of modals. But it is important that you follow the shape of the legs and the size of the boot
cannot be very big, but it can all be
very small either. It is important to
pay attention to the proportions between
the land and the boots. Bank can add small details
aren't allowed to towns. It is up to you. Now the food irregular shape. Now let's draw the other
foot with the boot. It is the same process. Don't forget to pay
attention to the proportion. Same details. They've food over here,
the regular food. They just simple shape. It is bigger than an issues
catch, but that's fine. Any detail here, all the foods. It is a very nice boots, very simple one to draw them. Here we conclude the drawing. As you can see a drawing, it's very nice, It's
very beautiful. Just made it my pencils. So let's do the final art now.
47. How to Draw hands Part 1: Well guides. And this
is going to last how? We're going to learn how to draw hands again and draw
a lot of heads. Heads is actually a
very complex relevant. Some people think it is
very hard to try our hands. I'm going to show
you that it is not the heart will make it
harder to draw some, some hands is the angles. Because we have a
lot of angles and depend on the character and depend on the drawing.
They want to make. The fingers and hands a lot of science and a lot of angles. So think that's
the potters part. I'm trying hands. But I'm gonna try to
show you and help you to draw a head. Okay? Again and see that it's not that hot and that is possible to draw YouTube and myosin heads. Actually, it is not, it's not easy to draw hands, but it is possible
to draw a good hand. As, as I said, there are
a lot of shapes and a lot of ngos that you
can use the hand. So I'm gonna, I'm
gonna really try to help you to throw a hand. Let's turn making
this part the head. Okay. So let's make his couch. I started with a circle. It is a very light strokes, so I'm going to try to make it stronger because I
want you guys to see. I think now you guys can see. So that's the the
palm of the hand. See that we have a
curve, our hands. So I'm gonna do the same here. These bottom part, omega naught is turned
your own fingers. To forget that
this is his catch. Well, it is important
to make rounded shapes. But first let's define where each one of the
fingers will replace it. Fine fingers can make
now these circles, that's where our
finger, we'll start. Just simple circles that this part of the hand is equal to this other
part of the hand. So we can management
this part of the hand. I'm going to measure it
with my mechanical pencil. I'm going to do the same
measurement of the top part. The biggest finger. The largest finger will
be just right here. Okay. So it is the same measure. Our fingers are not all equal. We have some variations. They are different.
So it is important to make all the fingers
here also different. So there are a lot of ways of showing the hands
and the fingers. Lot of wastage wrong the
outline of the fingers. But I'm going to teach you a very simple way of showing it. As you already made
all these circuits. So we just have to
draw fingers and see that between one finger and another finger we have
a space between them. It is not a V-shape. Just kind of it you shape. So one finger on the space. And then we can draw
the other finger. Usually, the hands of
the finger usually is thinner than the
beginning of the finger. It is not that Tanner, but it's kinda hear any year we already
have the four fingers and the hand has some crack some divisions so we can
control those details. So we get a says
run a detail here. It is just a sample in detail. In now we're going
to draw the tongue. We can start here
and make this tip. The, it's kind of a
triangular shape. Is here where we're
going to draw the thumb. And do we gotta use
this detail that we made to know the exact
size of the fainter. The home just have
two divisions. The first one a year. Raise it and do it again. First evasion. And the second one is just two divisions at the tech trying to
make a curvy line. It is a thicker finger. That's the basic
division of the thumb. The basic shape. The other fingers, as you, as you can see, they
have three divisions. The first one, the
second one is hurt. The thumb does have
two divisions. By the other fingers,
has three divisions. I'm going to
highlight the contour of the fingers so
it'll be easier for me to make the details stronger strokes. That's what we want is almost a final art
is quite alarmed. Well, here we have our
hand almost completed. Want to highlight is
detail over here. First. I'm going to add other
details to the pole. Is very subtle lines
because you can add different details
on this part here. I'm going to draw
into those details. Well, let's talk about again, the divisions of the hands. So as you can see, we have three divisions. The hat on the fingers. You got to make one
here, another here. We got to now make another divisions on
these other finger here. And see that I follow the same. Well, that's it. Here. How the three
divisions of each finger, and it is a very simple detail. We just have to make
simple strokes here. And here is our hand. Are open hand. Write a simple shape. Very nice hands drop. And now we're going
to try to f two days. We're going to try to close it. But advise you to start
drawing this one. And after you draw this one, you can try to draw
the other hand. There we go. Okay, so that's it, guys. See you on our next video. We'll ask any questions you
have, please contact me. If you enjoyed this
class, please. I like it.
48. How to Draw hands Part 2: Hi guys. In this second of inelastic,
the mountain hands, we're going to draw
a close at hand, the parents, but alas, somebody draw a open hand. And we're going to actually make the same angle with
the same angle. This time it closes
hands with this shape. Let's start making a
sketch of the poem. Let's make this shape over here. And as you can see, it is very rounded. It is a very rounded shape. I'm going to make stronger
strokes because I want you guys to
see what I'm doing. So we are already making
the poem, the sketch. So it is important to make a
division over here to help us to place the fingers and
other parts of the hand. This division is this
part here of the fingers. You know, we are
drawing this part. And it is important to tell you that our handy will
not have this trait. Lines will have some angles, we have some curvy lines. As you can see, red lines. It is just like we did
in the previous one. It is not a straight baseline, it is a caravan. One, has an angle. The fingers will
not be straight. They also have a variation. They also are COVID. So we have to make
the same thing. Here. We want a natural drawing. So it is important
to pay attention to a human hand and
just try to draw it like that in the marrow. Let's make this baseline here. The first sample fast. This bass line here in
the metal will help us to place the fingers. As you can see, we have
here 1234 fingers. Those will be all fingers. I believe you can
already see kind of a shape of the fingers. That's just a sketch. And as we kept
making the drawing, we're going to make
curved lines and rounded, rounded, rounded shape. Okay? This baseline here that we girl, well we're going
to use it later. These home will be over
the other fingers. So it is important syndrome. On this part over here. You can already draw the sum over the
first second fingers. This time. It has
kind of an angle. Angle, as you can see. We have here the first division and the second division two. So let's roll. Let's
connect this to the palm. Okay, Here we have
it in the show, his catch of the
fingers and the palm. And we also have
the fist down here. So low with yellow
drawn those parts here. And as you can see, they have a curved shape. If you want to make very
pointed tips, you can, it is not wrong
too to make this, but I advise you to make
more rounded tips around it. The COVID stroke, that we have a space between the other curve. It's shrunk. So you can make a triangular
shape or a rounded shape. We can choose actually
fix this part here. I want a little
more pointed tip. Actually, I'm gonna
do this part again. I'm going to actually make
more triangular shape. Actually, it is still
a rounded shape. But you can see that we
have a more pointed tip. So we make one will leave a
space between 1 and another. I'm making here is
trollers strokes. Because I really want you
guys to see what I'm doing. Now, let's define the fingers. This middle bass line that we made earlier will be
this division over here. Let's make it also rounded. Shape and curving lines. I know guys, it's kind
of hard to draw hands, Bob, but I'm sure you can do it. There's a space between
one finger in the other. So we can highlight this, paste these space between
one thing and end, the other end we have kind of a, it is the Y-shaped. As you can see. We can highlight the comb
turn on the fingers. You can already do it. When the hands are open, we have this shape. Close. The hands. We have a different
shape, as you can see. So we will not make this part. Here is trade. Who make these little variation? It is a little point. You just a little pointed shape. And here our hands
basically completed. So we just have to make
the fine art In highlight. Oh, they can turn all
the outline of the head. That's the easiest part of a hand drawing,
highlights the online. I want to erase the
base lines here because I think they
will help you guys to understand how to draw
it close at hand. But I will highlight only
those parts that I want. I want to, I want to really
remain on the drawing. You can erase the base lines. I'm going to just adjust
this part, these parts here. Then I, I live East pays
between one stroke in the oven. If you want to make a
drawing even prettier, you can add some shadows
on this part here. If you add some shadows, it'll make you
trying even better. But that's up to you. You can choose to add. Those shadows are
just don't add them. But it is very nice
to add those shadows. So that's it guys. That's how I read in less
than a constant hand drawing. I tried to help you
and to teach you the easiest way of
drawing a close at hand. As you, as you can see, it is not easy to draw hands. It is kind of complex,
complex drawings. But if you follow
some basic rules, I'm sure you're
gonna, you're gonna be able to draw a hand. So keep practicing and
practicing and practicing. And they're gonna be
able to draw a hint. Okay. Thank you guys.
49. Drawing Female character 6,5 head height (Initial Sketch): Hi guys, how's it going? So in this video last
time we began to draw a pretty nice catch. I'm gonna make a very simple
and very basics catch. And after this, we'll
make a final art. Okay? So let's make it a
circle, a regular circle. Let's divide it into metal. And then I can make
the shape of the face. A year, the eye height. We're going to make
it nice and big, ice. And it is a three by four shape. The eyebrows, the nose. Very simple.
Eyebrows are simple. Nose, nose, and a mouth. Let's make a open mouth, but also very simple mouth. Now I'm trying to Mac. You can already see the basic
construction of the face. And we saw how to make it
to in the other classes. I'm sure you practice it a
lot in it is going to be very easy for you to make a beds construction
of the face. So we can see here
the shoulders and a base line in the
middle is pine line. Those are the first things
that I made and then drawing. Now we have here the badly, the chest, the hips. Remember that this
is a image show is catch so you can erase, you can fake, so you
can adjust some parts, some parts that you want. You can just N
part and any time. So he driving the arm, a very simple ARM, a stroke, a circuit and on the stroke and
then the cervical. I think this kind of arm, it is very, very
good for beginners. Let's make a simple
shape of the hand. The second arm. Remember to always make you
want to stroke one circle. Now the stroke, and then you
can make another circle. And now some fingers details. Also a very simple hand. At first we won't, we won't add a lot of details. Just want to make a very, very niche is catch. Now let's draw the legs. Just like the arms we draw. We draw a stroke, a circle. And now this trope,
another circle. Some more details
here on the hips. And now I'm gonna just add some more details
on this part here. And making shape of an arm. I'm already making the shape of a body rotation to the height and the size in the proportion of
all parts of the body. That's a female character. So be careful you don't
make a lot of mosquitoes. Female characters
has a lot of curves, but they usually don't have
a lot of muscles. It's high. It is thicker in the
beginning, the end. You can see it gets
kind of center. Now we can finish the turn
of the legs animation. This other part here also Way suggest
strokes and spherical. And the food. And see that this height is much thicker than the lower
part of the leg. As you can see, these are
very same Whole Foods. We're going to make
very simple feet. And here is a very basic
content post catch. A very, very nice
and very beautiful. I'm trying here some hair. Let's see how easy it is to
make a sketch of a drawling. So I really advise you to use as a base lines to a
EarSketch just like this. Okay, so keep practicing, keep trying to make a sketch like this is catch like this. Okay, so that's it, guys. Thank you. I see you on our
next video lesson.
50. Drawing Female character 6,5 head height (Final Sketch) Part 1: Well guys, let's visit a
lesson using the rubber. We want to solve ten, the traces that we made
in the initiatives catch. This part is very
important when you want to make the final armed. Let's start with the eyes. I advise you to make a very, very defining stroke
on the lashes part. Especially female eyes. Very highlighted lashes. And we can see here the propel, it is a very big book pill.
51. Drawing Female character 6,5 head height (Final Sketch) Part 2: Here, I keep making
all the online. The clothes that we
don't have muscles on the arm suggested curvy
lines can be strokes. In some details on the globe. Again, I'm using the rubber
to soft ten the traces. And that's it guys. It is very important to
be patient. Don't hurry. It is really important
to be patient and comb in do easily the drawing, paying attention to all the
details and all the parts. Ctcf, it is important to fake Some thumb part
and adjust some part. This final art, it
is Accenture guys. It is the most important
part of the drawing. Now I'm going to
draw the fingers. That's the final
art hold the hand. Soviet is very important
to pay attention and be careful that we don't have a lot of details on the
fingers and on the hand. So just make curvy strokes. Very simple strokes. Of course this is valid
for this kind of hand. There are other
kinds of hands that we add a lot of details. As simple as better. In this case. Now let's draw the second hand. I use it, the rubber. Now I can make the
final art. At first. These town know all
the other fingers. And that's the final
art of the hand. We can make a stronger stroke.
52. Drawing Female character 6,5 head height (Final Sketch) Part 3: So guys, let's keep
drawing the hair. As you can see. I'm adding the detail here. The truth is that you
can add detail you want. It came important thing is that you understand
how to make the drawing. Of course make a good
drawing and pretty trying. For example, see that
I'm drawing here is tar. By, you could draw
another thing. You could draw a
horn, for example. So feel free to what you want to draw in a wild kind
of detail you want to add. We're going to draw here
just curious cars, okay. So let's keep draining
the lots of hair now. I think these cars
are pretty good. Maybe I'll change later. Then I'll see that I keep
outlining all the drawing hair. It's not a part of hard to draw, but it's really important
to pay attention to the directions of
the locks of hair. The end of the lock of hair is always ten year. You can see that our drawing your hairdryer
was pretty nice. Well, I'm gonna, I'm gonna
change this part here. I'm going to make
a simple detail. That's fine. Here I'm drying the
upper part of the hat. The hair. A very long hair. I advise you to draw each
one of the locks of hair. Do it the best way you can. Remember to make all the
locks of hair in parallel. We want a natural hair,
a beautiful hair. And at the end, here you
can see that it is a sin. Always sand. I also devise you to always
clean your trawling. You the rubber and you re the traces there you
will not use anymore. You trace that we
made only scatch. The nature is catch. Of course you don't have
to pay all these tropes. Just have to learn to solve ten. Then. After you make
your final art, well, then you can erase completely
the stroke that we made me. Then issues catch. Some more details here. Some locks of hair. See that all the loss of
hair are in parallel. And the hairdryer means already completed in the
upper part of the, of the character as well. So let's draw the legs. We've made dig into his CAG. So it's gonna be very easy to make the height of comb part. It's final art. I'll just adjust tin. These parts here. On his card. Relax. It is very important guys to understand the how
the anatomy of the female anatomy works. See that we don't
use straight lines, we use just curving
lines. Inside. It's kinda faker. It'd be other parts I don't
like Well, it is Taylor. Don't make the mistake to draw all the lag with
just, wow, what size? It is not. We have here curving
lines, curvy strokes. That's why it is important
to you at this time, the female anatomy
over the lines. And now I can draw here. This should have some detail. You see that I am making strong strokes. That's okay. Now the second lag. And it is the same thing. Just like we did with
one lag beginner, do with the black mamba
to make the pie take her. And the other part
is on the lights. Tanner know was wrong. The food all the food. Let's just define the
shape and add the details. I don't have much to
explain at this page. So please just see
how I'm doing it. Try guys to reproduce
it and practice it. Then you can add more details. Some shadows. If you wanted to force. Then fakes this part, you know, the, all their food. As you can see, the same
thing, the same details. See that the angle of this foods is kind of different
for the other foods. So it is important to pay
attention to the angle. You can add details and shadows. If you feel that it is
necessary to get some part of your kid does arrays and do
it again as I'm doing here, as I did here. That's it, guys, I'm
drawing is completed. It is not an easy trying to
make these kind of hard. It'll maybe take long for you to draw this
kind of drawing. Butternut advise you to practice and trying to
make this kind of crime. It is very nice and draw this shape of this
kind of character.
53. Drawing female character 4 head measurement (Initial Sketch): Well, let's make
another character. This time is going to
be smaller character. The shape of the face
is gonna be the same. So let's make a circle
and then we can define the outline of the face. There's gonna be a profile face. Okay. So to the IM, adding in some details here and we can see the year already. It is very important to use
those, these baselines. And then we can draw
the eyes and said that the eyes will be at the
same height of the year. They said that I, that I draw a pine line is very important. This middle line will help
us to place all the parts of the body and the legs. Very simple lines. Targeted is kinda of Balkan. And we can make the
shape of the leg. Remember that the time is kinda thicker than the
rest of the leg. And it is a very
simple shape of lags. We make one stroke a circle. Now this trope in his article, of course, the feet. I'm going to adjust
this line here. I'm going to make it longer. That's a natures catch. I do hit the same thing. The biggest shape of the leg. Same thing here. With the arms. It's
trawl pacer to a non stroke and then on a circle and all the
fingers of the hand. You can make very simple, simple fingers, simple hints. At this stage, ada will, will make more
details on this part. And the other arm here. It is very nice to you
that the baseline guys, because we want the
drawing to be in line, needs to, we have to pay
attention to the proportions. So I really advise you to use
the baselines. Of course. And maybe later you will
become an expert or to pro, then you will not be
the baselines anymore, but for now, please, either it was used baselines. This carriage, she's a very
nice and simple is catch. We can adjust all the
parts that we want. It is all all also important to, to make the right side
just like the left side. And pay attention of course, to the angle of the character. And see now some
details on the face, the eyes, the nose, the mouth, the year in some details on the hair. That said, guys, that's all
we're in the show's catch. All the body parts. There'll be is it okay?
54. Drawing female character 4 head measurement (Final Sketch): Well, let's start this drawing. Making the outline. I start all the face that I made it very simple nose and also very simple mouthwash. It is kind of a
smile your mouth. As you can see, we can highlight all the cone
torn all the online. Their mouth, a child. So we don't have to add
a lot of details in. The eye, has kind of a triangular shape because
this says a profile face. And you can add the shine at
some shadows, the Uyghurs. And you can also start
making the hair. The year. Different catabolic the
inside details of the year. I'm going to adjust this
part here. And that's fine. If you make some mistake or if you feel that is necessary to
just some part of just all. If you just want to
change some part, you can erase and do it again. I think that this
year is much better. Now let's keep drying the hair. It is a short hair and
then rounded hand. So we don't have to make
these, these fine tips, defined ends, you know, is a sharp to really short hair. Then you can keep adding the details that you
want until the eye. Lashes. If you want to add
some shine or shadows. As you can see, I
make an open mouth. You can add all the
details that you want. You don't have to
make your drawing just like your reference, for example, you can
change some parts. You can make the way you want. And here we are almost finishing the drawing of the
hair and the face. But of course you
can add more details here like him doing. Say that I am drawing a
very nice detail here. You can do it too. You can choose what you want
to add on your trauma event. To add more details
are less details. You could make here, for
example, a larger hair. Or you can choose guys, you can really
choose the details. I am making a shine. So I make these
horizontal strokes. This is gonna be the shy. And now I'm adding some shadows. Now let's draw the other
parts of the character. I started drawing the neck, the eye, you raise it. The, I use the rubber to re
these caves and issues catch. And you can do It's too, it is very important to
the rubber to solve ten. The trace is this is, this will help you to
magnify this catch. Here we go this time
making the trellis. And it is a very
simple trust to draw. See how I'm doing it. Let us start with
the upper part. I already have here. Innovations catch. So it is much easier to place all the parts of the character. Shoulder here. See how simple it is to make this part in here. Or the arm. It is hairdresser. And you can do the same thing, the part of pores. But let's keep
trying jazz dress. The same thing. And now I am trying the
height of the crest. Some more details here. With the online completed, you can now add all the
detail that you want. Other divisions or the troll That's defined aren't. So you can make very,
very strong strokes. Don't forget to add the shadows. The shadows, it is
very important to add than your drawing will look much cooler if you
add to the shadows. And it is nice kids the
shadows give to young trauma. Atp in fact, the
highlights, the shine. So you can really
make the shadows. Cars if you're drawing, if you don't want to add sanitary draw me,
that's just fine. I really advise you
to use shadows. Well, this tape, you don't
have much to explain. So you can't just watch
how I'm doing it. Please try to record this head. Don't forget that it is
now because I'm doing it that way that you have
to do just like V, you can increase or decrease. So part of that you
want your drawings, so you can't trawl
weight as you want. We are almost completed
the drawing of the dress. All we're going to
start drawing the legs. The difference here is that these legs of a character
is walking, you know? So let's say the
barn details here. The upper part furnished. Well, very nice. So the legs. Pay attention to the curves. Of course you can add
some shadows here. Some designers don't like
to use a lot of details, but I really like to use I really like
to add the details. So the lags, Let's make
the shape of the legs. The otter, coal tar. So a will make this food kind of be heard
because we have one foot, the front, foot to the back. So I want to make, to make this effect. So we're going to make the, this boot kind of bigger
than the other one. Well, it is more at this point. I also don't have
much to explain. So you just have to watch it. Just like we did with
this first trauma. While we get to do with
the other drawing. The same shape. Here we are almost completed. The drawling. We are here. Well, the last part, edges. I am just did this part here. Just to finish. I actually forgot to
draw this head here. So let's draw it. You can also highlight
these parts here. It's kinda simple to draw
this kind of Heron head. So we just have to
draw the fingers. It is very simple
and small fingers. This is a child, is rounded thinkers, and
that's what is finish it. That's it guys. See you next video lesson.
55. Drawing female character 7 head measurement (Initial Sketch): Well, let's start
another exhale. That's our third character. So as usual, let's make a sarco and divide
it in the middle. We can already draw
the shape of the face and the bass lines,
nose, the mouth. I'm going to draw the ice. Define the signs of each eye. One slightly bigger
than the other. And some heroine tales. In that of course,
the shoulders. One cycle in H signed. And here you guys, I'm drawing the hand. Yeah, This is the hand. It is easier for me to draw the head and then draw
the hand, the arm. This helps me to make the arm
and align it with the hand. And all A's pen line. It is extremely
important to make this middle line Hamline,
some hairy details. And now I'm going
to draw the chest, the abs, the hips. See the shape that I'm using, tried to make this
kind of shape. It is a very nice shape. It said that the arms
have very simple, has very simple shape. Does trawl because circuit
is trope in the lags, we got to do the same thing. Just one stroke and a
circle at the edge. And now I'm making the
shape of the legs. Here. I'm defining
the arm shape. It is very easy to
use this kind of delicious catch guys too, that it is not hard at all
in basically all characters. Almost completed. Now another part here, well, the lag in a very
simple food shape. Always pay attention to the angle of the characters
so you can try your food. It is very simple food chain. And that's it guys. We already completed the
initiatives carriage. Then lastly the last
time again to make the final art of Israel. Okay? So try to make this
kind of scatch. You study a lot in practice. Okay, so let's go
to the next class.
56. Drawing female character 7 head measurement (Final Sketch) Part 1: Well guys, probably
going to make you define it aren't of this character. So let's start
highlighting the outline. I start with the face. As usual, I prefer to make the parts of
the face at first, of course, is not a road. But I really like to
start with the face, the mile of the ice. So I really like to
start with these parts. People pill, it is a very
big propel, the iris. And don't forget to add the
shine and also the shadows. Some lashes here to
highlight the eye. These very nice to add lashes. And the female eye, the eye brown and
of course the nose. Don't be afraid guys, to add as much
detail as you want. If you made something wrong, if you make some mistake, you can just take your rubber and erase the
parts that you wants to. Fakes are two, chest or
just to change. Feel free. Here on the AGA. The same thing. They
propel the iris, the shine, and of course, the shadows and the lashes. Mama, to make this second
eye a little bit smaller. Okay. And now I'm going to
start drying the hair. Each one of the locks of hair.
57. Drawing female character 7 head measurement (Final Sketch) Part 2: So now let's make the lower part of the,
of this character. We have here ace card. So less than find
the heights and the signs of this curve. As you can see, we have a lot of COVID traces. Now, I am adding the divisions. August card is a
very simple division that are a lot of
ways of doing cards. But in real life to make
this kind of scared here. Is he that all those trucks are parallel strokes and they do not have the same size. And it did not have
the same high tea that we have some details here. So more details over here too. This character has a
kind of a web. Here. Seven, drying the web. It is a bag where we have kind of a
heart at the end. And you can keep, adjust ten, fixing all the parts
of your drawing. Of course, adding the details
you want. Strong strokes. Now, these details
are very, very nice. That are always curving strokes. Those kind of strokes gives
volume to the drawing. And now some shadows. A very nice width. And you can add all
the detail they feel it is necessary that you want. Now let's run the legs, the manner that the pie is. Always take her. Okay. It is important
to draw the knee. All the other details
of the black lab. Now, we can make the
same thing here. Of course highlighted all
the external called for, as I always say, to free to erase
the part of they went to curl our
adjust or change. I'm going to draw the boots. Boots. Very nice boots. Pay attention to these details, the divisions, to the
size of the food. They tell us shine. Hello far as adding shadows. Where we don't have China, we can add shadows. Here. On the other boots, we can do the same thing. External coal tar, plantation to the divisions
into the details. The shine, right? Hello, of course. All the shadows is very important
to draw the shiny guys. Let's draw some more shadows. Here are the signed UK highlights the shine
with the rubber. You don't have to use
your robe or discharge. You raised things. You can also use your rubber
to highlight, shine. Shine. Actually. With these shadows and shine, we are almost
completing on trial. And I really enjoyed to
trawl this character. It wasn't very hard. Keratin is draw. A very, very nice drawing guys. That's it. I advise you to keep practicing and keep trying to make
this kind of trawling. Very nice female character. Well guys, thank you very much and see you on
next video lesson.
58. Line Art using Nanquim and a litht table: Hi guys, how's it going? This is enlightened table. Let's see how it
is inside of it. We have here two lamps. So let's turn on these lamps. Okay, well done. So this is a light table. But how are we going to use this light table to draw
or to make control? And I'm going to show you,
remember this drawing. We made it on the
male character class. Remember, we're going to
use it to use our line. You're going to see, Well, I have here a sheet of
paper and I'm again to put this sheet of paper
over, over our drawing. Okay. So I'm going to use a tape because I want I don't want you should've paper
to be moving. So trying to align
the sheet of paper, you can use any shape you want. And then that is, as you can see, we are capable of see the troll. And on the other sheet, sheet of paper, we have
here a o for 08 pins. Well, they are from
different brands, but this k, Very nice. Now let's start. Remember that how much
darker your room is better. Because you will
be capable to see all the details and
see how I'm doing it. With a light table. You can just make the trauma and very fast and it is very
easy to use a light table. But I really advise you
to be in a dark room, maybe a night anyway. Well, this is a whole
new light table. But actually there are
a lot of new models with with eight a
affordable price. I see that. I'm just outlining, I'm just highlighting the
outline of the drawing. All these shocks. This is basically the
final colon turn. The final art. That's why I use this
pen and not a pan. So arm I cannot pass
Ashley with a pen, so it is not it's not good
to use with a light table. You can, of course. But with this kind of pad
is much, much better. Remember that this is
a final art. Okay? Of course, when you make a
digital, You should align. You can adjust, but if you will not use Ichiro
arm to draw him, well, it is important to
try to make any mistake. Actually, I don't even
have much to talk about. I don't have my tics plane could basically we just have to, to highlight the outline. When I turn off the light table, you can see the results. A very nice results, right? Okay, so let's keep making, Let's keep highlighting
the online. It is not hard to make the
draw them in this way. You are using a panel, of course you may, you may feel kind of fear
to make some mistakes, but don't worry guys. Just be careful and pay shades. Don't hurry. And tried to
make the best drawing camp. Okay. Don't love this, Tom. Q. Don't be afraid to
make any mistake, as you can see, is very, very fast to me. Loves catch. Basically, that's it. You just have to
highlight the cold hard. If you don't have a light table. That's fine. There are other ways
that you can use. But it is very nice
to use MY tape, but it is not very
expensive to buy one. Actually, you can find a lot of line tails on linear night. And if you wanted to, I can make this
kind of online with a pan on your original traumas. But actually any kind of light any kind of Lambda
you put it on there. Those, those two
sheet of papers, while you will be able to
make this kind of online. Oh, cave, very nice. All of these tropes
on the traces. We can add all the details. You can make stromal strokes. Okay. Be careful cast as you saw, I move the sheet of paper. So it is very important
to pay attention to this. We don't want to move
the sheet of papers. Why detail here? Well done. We don't want to move
the sheet of paper. So I advise you, for example, to use a tape on the edges
of the sheet of paper. Okay, Is very important. Download the sheet of papers. And then we are almost
completely non trauma. We are hearing all
the lower part. We have some details here. Very curvy lines. It is very important to
maintain every detail. Okay guys. All these shrubs, all the
curves, all the details. Tried to well highlight
all of these parts. Well guys, as I say, I don't have much
to explain here. I just have to become torn. The highlight, all the details and make very strong strokes. Try it, don't shake your hand. Is very important to
make firms strokes. So keep practicing. They going to become a pro. Ask much you study as
much you practice better. And that's a very nice trauma. And the very, very
beautifully trauma. How easy it is. We have all the details, all the body parts is very
nice to use a light table. We can add some
more details here. You can even make more
details if you want. That's it guys.
That's our final art. Let's go now to the next lesson.
59. Digital line art in Paint Tool SAI: Hi guys, how's it going? We can see here on drawings
and Photoshop software. So let's focus just
on the first drawing, on our first character. Again, I color it and to
make some adjustments. Okay, So let's focus
just on this first term. Alkane, this highs,
okay, for me. And now let's adjust
the saturation. And the hue. Saturation. And the hue over here. Inland suggests the colors. I like to work with
green or blue hue. So I'm gonna leave with these, with these lewd you. Okay. Very, very nice. Now I'm going to save it. And remember guys to
save it with a PSD file, a Photoshop file. So save? Yes. Okay. Lance, he is now
the paint to cite. It has a very nice tool to make the adjustments
and color are drawing. Okay. We want to be able to move these tropes
that we made with the past. So you know, yeah, that's what we want. And now I will, we will be able to
make the final art. And remember that I'm using the draw and paint
a true impact. But actually, you can also
make it with your mouse. And the painters psi allows you to make all these strokes. Adjust the strokes. You can adjust it and make
it as perfect as possible. So I keep making it. The most part, part here is to plantation to the curves
into the locks of hair. Remember to leave the ends
of lots of hair always fan. No, I'm going to make the ice. So this barn here. And see how nice the lashes scan and Okay. And now BI that we have here a larger
lash and the Rs, the propelled the
shine. This same thing. Let's highlight the lashes here to a very nice and
very big lashing. Ladd suggests they propel that tension to the size of
the pope pill and of the eye. Iris over here. The shine. Remember that this shiny here is not the final orange and
the nose and the mouth. I'm making some adjustments. Some teeth details. Okay. Now let's keep highlighting the other
parts of the drawing. Lots of hair. Highlight all of the online and then try to make it
as perfect as possible. It details. The way of doing it is
pretty much the same. Thing is to pay
attention to the comb, turn to the online. And of course try to make
it as perfect as possible. If you need to adjust
some part of fake, some part, that's just fine. You can do it. You can make any adjustments
that you feel is necessary. Here you can see that the
process or the final art, while the paint is sine. Well, it is easy to make it. As you can see. Their disease to my kids with a drum pad
but also with a mouse. I'm thinking period or keep
defining all the traces, all the loss of hair. With the drawing pad, it is actually much more easier, much easier to make. This final art. With the mouse. It is okay to see that I keep adjusting all the
traces, all the strokes. And you can see that in turn, we got to just do it. Does make the strokes. There's highlighting the
online and that's it. I don't have moist to
explain now to say now. So I will not keep picking
speaking the same thing. But if you have any questions, if you want to ask me something, you can just contact me. Okay. We have we are
on Facebook too. So keep watching. Keep seeing hello, I am toilet. Remember that you cannot just watch you how to watch
to see how I'm doing it. Of course you have to try to do the same,
how to practice? Yes, we just learned
how to draw my drawing and see how light they tried scanning a fairly nice outline. So let's keep making the online. No means the most part. I really prefer to use a mouse of car that they
drove him pad is very nice. Sometimes better
to use the mouse. And that some trauma and
really align kinda results. And let's keep, let's
keep making the online. Very nice. Drawing. The upper
part is getting very nice. Does a result that
I was writing for? Well, scarred. Now, let's draw all the
details of these curves. Okay, Very, very nice. You can make it from the left
to the side to the right. You can choose where
you want to start. In a YOU want to finish. Of course, you can move the
image to be better for you. The unknown. The frame. This half trays very, very nice. Drawings. Okay. The shirt is done. This is curves already done
than just this part here. I forgot to make this part here. Lots of hair. And now the legs. This tiny with the thigh. Sometimes I use the Myles, Sometimes I use the problem pad. Well, I'm using the
trial pad now here. The pen. I'm using the PAM, all the drawing pad. But if you don't
have a trackpad, but I'll have a digital pattern like this one that I'm using. It is okay, you
just your models, your competitor,
that's just fine. Or even your laptop. And that's it guys, on drawings already completed. We can see here
they resolved very, very nice trawl and I'm
really liking the results. I'm gonna save here. And then we can color
it in Photoshop.
60. Drawing Natsu Initial Sketch: Hi guys. How's it going? And visit Alaska? We get and draw
the upper part of the body of a character
in a made not to. It's a very nice character. Again to make, we're going to
draw a three by four phase. So undivided in the middle. And now I can make the height. Let's draw the eyes. As it is a three by four phase, you can see the
winner is bigger than the NBA and that's just fine. That's the way of doing it. And now we can draw
the mouth and nose. Does this catch and
see that we use it. Ebay's line, this bass line on the metal to place all
the parts of the body, of the face, the eyes, and the nose, and the mouth. And now we can also
add some head details. Some lots of hair. Pay attention to the direction
of the locks of hair. And trying to make both
all of them in parallel. And see that the direction, all the lots of hair
are different up here. This part is very simple. You just have to understand
how undrawn the logs of hand. The end of the lots
of hand always tan. But they began of the
lungs block of a hat. I kinda take care. And this is valid for
any kind of trauma, any kind of animate your own. Make the same details and
every and each lots of hand. You can make as much lots
of hair as you want. You can draw labs or more. That's up to you. Okay. Don't worry about the
number of locks of hair. Papilla over here. Let's keep adding
more locks of hair. Here we have the trial the
hand had already done. So let's keep drawing now. Denied this a detail over here. That year. In some details in the
inside of the year. Now the neck by this character has a
scarf around the lack. We can always kept making, adding all the details. We think it is necessary. For example, here the ham, I didn't want the tails. When you make a drawing without ANSYS catch, you usually look, we're gonna have to add the
details in a lot of parts. And one part and how to
come back to another one. That's just fine. So
let's now draw the body. Chest. This part two, I'm going
to use this hand pose. Catch the shoulder here. And the arm. It is not a too much color. Character. Bow, but we have some
muscles over here, so he doesn't want to make
the details of muscles. Some more details here. It is the close. In this part of the clothes. There's final part of
the arm, not the bank. Let's keep adding details on
the shirt or the character. Even using cloth,
it is important to make evidently the
masters of the character. The amps. Just, just be careful to
draw a lot of masses. Get this character
we aren't drawing. Don't have a lot of muscles. Just want details here. On the scarf. Here guys, we can see our image
whose catch, okay.
61. Drawing Natsu Final Sketch: Guys, at this stage
of the drawing, I don't have much
to explain to you because basically it again
up maybe the final Aren't. We can highlight outline. We already have it and
they show is catch. The jar is Bayes is completed. So we just have to
align the contour. Of course, we're going to
add more details and we're going to erase the parts that
we think it is necessary. Basically, we're going to just highlight the entire
online of the colon. This point, we can up
the notation a lot on the size and the height and the proportions of the parts of the face and the body too. So I advise you to really pay attention
to how I'm doing it. See how I'm making each one of those strokes in trying to do it near home to try to practice. This is growing. We can start online in the hair, then can you highlight the face? And all the details
of the character actually doesn't have a role, it doesn't have an
order to follow. You can choose to
wear just tired. Where do you want to start? So if I need to say something or explain
something, I came back. Okay? But at this stage, we will just align the trawling. Advise you to really pay
attention and King eyes. As you can see,
there's nothing new. Is just the outline. Here. As I said before, you can use the raw
umber and erase the parts that you want to fix. We have a lot of bass
lines on the trawling. And we gonna how
to create arrays that landscape highlighting the online. At this stage we're going
to use a rubber lot. Well, I don't know. Don't worry. We have to the rubber. You can use it as many
times as you need. Here you can see there are
phases are already done, is almost completed actually. And it's getting
very nice actually. And that's why it's so important to make them issues catch, because when you make
an initial sketch, you can have just two online. When you are doing
the final art. Of course, it is possible to make a drawing
without any issues. Catch butter really,
really advise you guys to make an issue
sketch. Without it. We may draw an eye
bigger than the other and the nose too
small in the mouth, too big, for example,
we don't want this. Initial sketch helps us to
know the size of the height of each part of the
body. The character. Here we are just adding some
details around the eye. Let's keep
highlighting the hair. Don't forget to make the aim of each log of always
saying the beginning. This kinda take her by the
end, is always saying, this is valid for any kind of character and a
kind of a hair, hair. You like drawing. If you are using a password
variable, a brand. So it's important to have a really thin tip to
make all these details here on the hair. Well, I don't have
much to explain you how to see how I'm doing
in church to record this. As you can see, all the logs
is kind of the same process. In the beginning is thicker, the end is painter. As much more details
you add the bottom. Of course, it'll take longer. For sure. Deidre is
gonna be much better. So it is very nice to age
as much details you can. Now let's tar making the
outline of the body. Here we have a scarf. So let's add the
details of this car. Who wants a natural drawing? So pay attention to the curve. Strokes. It is almost like a rounded contour. Usually we make it
stronger and strokes on the external colon term. As you can see here. The inside the
strokes that kind of lighter than D,
the external ones. This is also valid
for these cough. Make stronger strokes on
the outside and Ladders, tropes or the insight. Here we have some
details of the cloth. In some details on the arm. Just small strokes. It's really nice to those, those laid out with strokes. Let's keep adding some
details over here too. That's a close-up detail. Well guys and said before, I don't have my tics
playing on this part. So we're basically
here, highlighted. The online is very simple. To make this. Add some shadows to use it. To make the final outline. I've already made
these details with a mechanical pencil
because it'll help us to make the final
are all these channels. You can use the pencil tool to make the shadows that
That's just fine. And more details over here. You can always use the rubber here guys, so we can see the
adjoins basically completed. I'm going to just add
some more details. I apologize. I know that this
is a base class. Is there any it was
really important for you to see all the details and all these trucks and
other parts of this row. And we saw that we actually we did it first
in an issues catch. Now we're just highlighting
a in aligning the drone. It is okay. Always erase the stroke that we
eat all moved in the more it is actually it
is really bad class. I apologize for that. Well, thank you so
much for watching. I really enjoyed that. Really hope this little
lesson will help you to become a battered sign that
if you have any questions, please contact me. Okay. Thank you, guys. I see you. Are. Next video lesson.
62. Adding Base Digital painting Colors to the Drawing: Hello guys, how's it going? So here we have our
drawing. We can color it. We're going to work with layers. I'm going to create
here a new layer. You can click here on new layer. And on our right side
you can see that we have another
layer to work with. So we're going to use some
tools to paint or draw one. Okay, let's see here
the outline layer. And I'm gonna select all of these parts that
I want to paint. I'm going to start
with the hair. And as you can see, I
selected part of that. I'm, that I'm gonna
call her cake. And if our online he's
not completely online. Well, he doesn't worry, guys. We have to make all the online. Okay. You can highlight
all the outline. And it will have again, length of the
pattern that we want to color and they
wanted to paint. And remember then to select more than one
part of Photoshop, it is very important
to click on the shifting on your dashboard. Okay? So you click and Shift and then can click with your models. Okay? And then I'm going to click
here on modifying and expand. I'm going to land with
Tupac's holes and click on out k into the different. As you can see, it is much better and you can
see the difference when you click on to pack sold on Expand. You can see that we have
an online which better, we don't, we don't have any
unimportant and unwind. There's no white on our outline. Okay. So the entire, entire hair will be colored
with the same color. We won't have any white part on this hair because we
click it on expenses. So it's very important to do
it on this layer over him. I'm gonna, I'm gonna put
a name on this later. Okay. I'm gonna, I'm gonna lead
here within the trace. You can put in the
name you want to tell a line or a stroke. Anyway, you can, can make, they can put their name
they you want. Okay. So we've finally finally select the part
that we will color. It is it is time to call her a trauma that's
highlighted here, the color that we want to paint. So here it is, the painting. Well, this bar over
here is not painting. But other than that, it's fine. We can just select again
this part over here and take the car again and
paint his bright here. And every time you select, you have to click here. We'll select and modify in hornets paint and
the width to Paxos. So it is very important
to do this every time you select a
part of a trauma. I usually use two pixels, but I think it is enough bomb. You can use three pegs. That's just fine. Okay? So we can see here little parts leaders
points with no color. We can call it this. I can use the zoom in just color the parts that
you see that is still white. You can use a brush or the
pencil on the software. Engines color it. Remembering that you have to, to finish with this
selection to start coloring. Okay? You can use Control D to
finish with this selection, but it's important to end with this selection does
turn color in neutron. This process guides to
color all the parts. They still aren't white. I'm going to use on every, every trawling and
on the entire drama. And actually, in that process, I'll click on Select, Modify, Expand two pixels per k. This will also do
the entire drawing. Every time he was tied to paint. We have to do this
process again. Then we can make
the adjustments. For example, here, I'm GHS ten, this part over here, this trace. Okay, so it is important to pay attention to all the
details we want. Beautiful food trying right? Well, as you can see, the hair is already done. It is a very nice hair twice good to another
part of the drawing. I'm gonna use this
tool right here. And I'm going to deal
with his kingdom, his face scan and see
that I'm selecting the parts of the face that I'm going to deal with
and I'm going to work. So every client here
ever pile this can, I'm going to select those
parts will be here too, and their arms,
the AB, the chest. So let's click on Select, Modify, Expand to Paxos. Okay? So the selection, it
is okay, it is done. The triangle is
painted, expanded. How we can check
if it is all okay. Okay guys. Then let's click on
the display here. Select the color of the
skin that you want. And you just have to
click on the drawing. As you can see, that you draw
the VI is with this color, but we don't want this
color is but that's okay. We just have to you
the rubber and just erase these parts
of the eye, okay? Just how to use the rubber. But right here we will have to use also this car, the skin. The same thing that
we did with the hair, I'm gonna do now where this can all the parents that
they still aren't white. We have to, to color selection. Anyway, it is important
to color these parts that aren't still white. Does part here. Let's make let's
close all the online. It is important to
close all the online. Okay. And then we can adjust the colors that I'm selecting this perimeter
rehearing again. So all the current
that will be with the same color with
this car for here. Select, Modify, Expand, okay, the same thing as click here on, on the layer of the colors. It's like the color that we want in Bailey can just click here. This is the same process the entire drum will be
with this process here, the same thing, the same thing
as just select and paint. It is a lag time again, Modify, Expand OK, into pigs, those guys, that layer of color. And select the
color that we want. And then we can paint. Paint. All these aren't here, okay, you can use the
brush. Of course. You can choose how
you want to paint. Again, we have some open
parts here on the tray, so it is important to
close this primes here. Kate, the robbery is just
amazing to just the traces. You don't have to
either rubber just to erase things.
You can interrupt. But of course, to
adjust the traces, I can't relate to their
Robin to do this job. Sometimes it is much easier to make the adjustment
with the rubber pants. So I'm selecting this car right here. Let's highlight this far. Okay, very nice. These parts here to Select, Modify, Expand. Okay. Here guys, we are just doing
the same thing, repeating the same process. This tool here to
color in this part. Okay, it is very
important to paint all the parts of the drawing. Okay? N Here it is. Very simple, very easy guys. These parts to k. And here is guys withdrawal
when we have here the basic, basic colors of a trauma. And I'm going to just adjust the saturation alignments
of the trauma. I'm going to make
the drying darker. I really believed that it
highlights the drawing. And then you can see you can see all the parts then
must be adjusted in the year to paint
this burden here. Now guys, let's click create another layer because we
want to paint the eye. And then it is important to create another
layer of the eye. Okay. As you can see, we're painting just,
just the I can. That's because we
are using a layer. If you don't use the
layer, well, it can, it can make, it can
make you make mistakes. And if you don't want
to make a mistake, so use the layers. You will be able to paint all the drawing other parts of the journey that you weren't going to use this color here that you're
seeing to the eyes. This almost like a gray. It now prime here on
behind the propel. It is a red papilla. And here it is, guys. On the next class, we continue with the shadows
and other layers. Let's go.
63. Digital painting Creating the Shadow Layers and the Masks: Hello guys, how's it going? So let's start this class
making a new layer. And we can create some shadows and some highlights on the hair. Last click here. Then we have a here, our layer. And we want to create
beautiful shadows that you want to color
the entire hair. You can put the name that
you want, the layer. Next, let's click
on the layer again. And then we can choose
the color of our channel. You can choose the
color that you want. I'm going to use pink fairy nice and see that the
hair is in turn selected. We want to create a layer of mask and see how I'm doing it. I'm clicking on this
icon right here. And this, these vaults right
sided is what we want. That's the mask layer
that I'm talking about. Now, let's do this later. We're going to deal
with the hair again. Now, let's deal with this can, let's call her the skin and
create channels on this camp. And again and do the
same thing. Okay? So let's select this, can click on this option
here, the option similar. And then we have here, all of this can select it. And here it is. The same thing that
we did before. This box here is what we want. We're doing it because we wanted to create
channels on the skin. Just a sec. Okay. Let's go, let's do it again. I unselect him this can
the similar option. Then let's create a new layer and then new layer and see that the entire drawing is selected, the entire journal. This can of course, and I click on the same
line option to do it. And now with the
Germans highlighted, we can just create a new
layer just right here. That's the option. Hit is the layer. You can put the
name that you want. I'm again, I'm very good. This is our scan. And how we can deal
with the tones of the EU, with the color. Let's select the
color of the shadow. And now we have to
paint this layer. And you can see here, you can see that all skin
is now kind of darker. And with this channel, we cannot create
to the mask layer. And we have to do this with
the layer of the skin. And as you can see, we have the icon,
the mask layer. Now let's do the same thing with all the other parts
of the trauma. And this curve here, for example, I click it
on the assembler option. I selected this car a
create, another layer. Then I can choose the
color of the shadow. I'm going to use gray. Then you can put the
name of the layer. You can name it. For example, scarf. About, of course, you can
choose the name of your layers. Actually guys, you can select more than one part to
create the shadow, okay? It is important that
you know about it. If for example, we
have these cards and also the eyes with the same hue, with the same color grade. Now you can already see, you can already see the
shadows over drama. Now, we have to create
again the mask layer. We will do this with all
the parts of the drawing. It is very important that
you understand that you have to create a
layer, the mask layer. If you have any questions, if you don't understand some
art, please contact me. It is very important that you understand all the parts
that I'm trying to tell you. Now let's create another layer. As you can see, we have the, this part of the
drawing selected. You can name the layer. Very good. Now let's select the
color that you want. Let's see, Use this
hue more darker. And as you can see, I'm doing it with
the entire drawing, all the parts of the
drawing, the hand scarf. This can then ask class, you can understand better
why it is so important to make the mask layer
and when we are dealing, dealing with shadows in China. Okay, so in the next class, we'll see more
about this content. Okay, thank you.
64. Digital painting Defining Light and Shadows Part 1: Hello guys, welcome
to this class. Now we're going to define some details of
shadow and shine. You saw that in the
previous class. We make a lot of mask layers, as you can see right here. So let's use them to make the shine in the shadows
of this room right here. Let's start with the hair. You can see that we
have mask layers to each part of the drawing. Of course, you can make some adjustments with
the trace, the drawing. And actually, I'm going to make some adjustments
right here in them. We'll deal with the hair, with the shadows and
the shaft of the hair. This brand that I'm doing here, He's just the online. Okay, it is a simple part. It does create a volume
effect to this car. And that's it. That's okay. Let's select the layer. But we don't want to just
select the regular layer. We want to select
the mask layer. And then we get our satellite to the black and white collar. We going to deal with the
white and with a blank. Here you can see the bike handy white on this part down here. The blank, we'll create
the shine when you, when you have the
black selected. Of course, it will
highlight the shine. It is important to
understand where are the part of the
brightness of the drug, what is the highest
point of the German? Okay? And now, of course we
will deal with the shine, so we'll use the black to the shine of the trauma
in any year. Can see. It is very simple actually guys. As you can see, the hue right
here kind of gets lighter. You know, that the chandelier
we're talking about. The shine, your
light in the part, some part of the hair. The Schein point of pores, it is not the entire hair, just some points then some parts that you know,
that is important. I'm using the mouse to do this. So it is very important
to be careful because we don't want to make a
trauma and right guys, use this zone to know exactly what are the
parts that you have to make. The query is you
can use the rubber to fix any part that you
feel that is necessary. It is up to you. You can also use the
wind, for example. Well, we are using
the blank, but, but you can use, we are
dealing with the shine. You can deal with the shadows to make some adjustments
to if you want. More shiny here. You can vary the size of the
brush that you're using. You can use a bigger brush. This brush is you can choose. I really advise you
to vary the color of the brush because we want to
make it as fast as possible. As you can see. It, isn't it? It's kind of a boring
part of the drawing. You just coloring
this parts here. So you can use the beggar brush. I'm basically, it's these guys. You just have to
outline the part that we want to create a shiny, they will just color it. And actually we can do this
and the entire drawing. It doesn't matter the color
that you will deal with. We'll do this and the entire
German and don't forget. The wine tool will highlight to the shadows and the black
will highlight the shot. See how nice the joint scanning. At this point, I don't have
much to tell you to play. So it is just, yes,
creativity shines. Okay? So you just have to place the shines and determinate
where you want to highlight. And then you can't
use the brush and highlight the part of the shine. And as you can see, all these shines are
on the same direction. Always on the same direction. It is important to do it. If I need to tell you again or explain something,
I came back. Okay. So let's keep doing it. No, I'm just selecting
the tray hair. And then I created a new layer. I'm doing this because
I want to create another shadow
with canola color. And that's what I'm gonna do. I'm gonna add a shadow right
on this part right here. See how I'm doing. It is the bottom
part of the hair. So I use a darker here. It's dark hair, this part pattern because
we'll get a dip. In fact, we want this. So we have this
shiny and we have also this darker hue over
here to create a tipsy fact. And the shadows, of course, the parts that you want
to appear more with, more volume you create
with shiny, you add shine. And see how nice the
trauma and the scanning. We have 33 different hues. So it is very, very
nice when you use three different hues
of the same color. It is a prothrombin. Animation Pro professionals use. This technique, is in three different hues of the
same color to create tip, shine and channels
on the drawing. No, I'm good. I start to deal with these kin. To that I'm adding some, some shine on this part here. That is basically the same
thing that we did on the hair. Again, I know doing this part
of the skin of the face. And as you can see, this
is the shine on the face. Forget of course does how actin, the color that you want, the color of this can. And of course, we
are dealing with the mask layer and all
with the regular layers. So you have to pay
attention to this. Now some details
here on the nose. Define the shine points,
the Chinese ports. And then we can just
color in this part here and see how nice
the face getting wet when you add
shadows and shine to the draw in Detroit and gets
much, much more beautiful. Of course, pay attention
to the size of the shy. And remember that you can
vary the size of the brush. You can use beggar at the beggar brush or
the smaller, worse. Well, when you're
dealing with details, is smaller brush, well, it's better to Dell. And as you can see, we
have here two different, two different hues
of the same color. So let's add a third, a hue we have now
just to use a let, let's add another here. You're going to
make the discount even matter, even
more beautiful. And selecting here. Now, I'm going to select
the color that I want. In here. I'm going to add the shadows. I'm going to end the
parts that I want with a, a bigger deep through fact. The jaw line here on the ear. It is very nice to add more
channels to the drawing. And then we can make the drawing
gets more, more natural. For example, this
part over here, it's tail is very important. It is a darker hue
is the Narcan. You, it is very important to make this
point because you went to, went to make a trauma
as natural as possible. And as you can see, we
have here our face almost done very built to face. The drama is getting very
natural and very nice. Or the next class we continue.
65. Digital painting Defining Light and Shadows ( Conclusion ): Well guys, now let's
finish on trauma. So basically we can then do the same thing that we did
on privileged classes. So I don't have much to
explain on this part here because you already
know how to add the shine, the shadows, and layers. So let's just continue doing it. And basically everything
that we're going to do here, you already know. As you can see, I'm
just keeping adding the shadows on some parts
of the shadow of the arm. Just like we did on
phase and only the hair. Remember that the
black is to make the shine and the black and
the white, the shadows. Okay, that's great here. A third layer, because we always went three different
hues of the same color. In lighter, a median,
and a darker. We did this on the
hair on the face. Enemy of doing this, of course, on the arm to to forget
to you the mask layers. A lot of professionals on the animating
and the street use this technique of three different
hues of the same color. If you want to make
animated drawings, you can do just like this. Of course, that's not the
only way of doing it. There are other techniques and although there's
ways of doing it, but that's a common
way of doing it. Now, very poplar actually
on this car is learning how to make amazing drawings with amazing callers,
with Humason techniques. I also use Paint Tool SAI to
make this kind of drawing, but this is Photoshop software. Some drawings, I like to use Photoshop and then use
the paint hillside. Actually the quality of the
drawing on both soft tries, it is the same. The techniques
kind of different, but the quality of the trial, one of the colors is basically the same way of doing it
is slightly different, but there's a lot of
things and both softwares. As you can see, I'm defining
the shine of this car. I define the outline of
the shine in that I can paint all the all the
inner part of the online. It is just like we did on all the other
parts of the drawing. That's why I will not explain over and over the same thing because you already
know how to do it. It is important
that on this page, you see how I'm doing
and try to do the same. It is very important
guys that you practice a lot and it's totally the
shadows and the shine. It is important to know where
the light is coming from. And then you can define point, the light, lights ports. That's what makes the whole
difference when you're doing a digital coloring
of any drawing. Here, a third layer hue. The shadow is always
to give a deep fact in the Shiny is always to
create volume to the trauma. We want volume in
view once and deep. Shadows in light is something that you really
have to understand. You will have to know where you have to
place the drawing. This will make all the
difference finished drawing. Here, I'm going to just add a Detail on the, I am
going to use the brush to make this detail here. All the eye. You will see that it is a very simple detail on
the eye, but very nice. As you can see, this is the detail of the pope pale into that and
use different, different hues of red. And I'm going to
create here a point. With white. It is this shine I, and it makes the eye
much more natural. And of course you have
to do on both eyes. Now let's finish the drawing of this part over here
on the character. Some more shine here. And even though the
drawing isn't all finish, you can see they are withdrawing
is getting very nice. A very beautiful drawing. I really believe that
it is very nice to make those kind of drawings. So perfect. So cool. And as you can see, it
is a simple process. It is not too hard to do these things.
This kind of trauma. It is not that hard. Paint him digital coloring. It is not that hard to do. And I'm sure that that
color and traumas will not be that
hard in the future. Because now you know
the techniques. Now I'm going to add
some final details. Remember guys to select
the color that you want. They can just click on the layer and add the
parts that you want. As you can see in here. Of course, I select the mask layer and on
the regular layer. Then you can choose the
color that you want. And then add the Shiloh here. With the black, the
Cheyenne is created. Okay? And the drug has got a very
natural for you to try. And with the layer, we can create a shadow on the shine and make the
journey and gets much beautiful as it dries basically
completed on this stage. Just a third, third hue
on this brand here. As you can see on
the entire drawing, I use it always three different hues of the same color on the
hair on the scan. Did it? Okay. And of course you can save
a drawing with PNG file. And I really hope guys, that you understood and they, you really know how to do it. Now, I really hope that
you can make your drawings in color than make very
beautiful to N cool drawings. Okay, so thank you very much. You guys keep studying, keep your practice and
it is very important to understand why you have to
put the shine, the shadows. And if you start a
hard, if you practice, aren't really sure that
you will understand and become an amazing
InDesign. Okay. Thank you very much and bye.
 Israel De Sousa