Transcripts
1. Welcome: Hi, I'm Sue. I'm a surface pattern designer and illustrator from the northwest of England. In this class, I'm going to show you four ways to digitize sketches and design ideas in Adobe Illustrator to make motifs. You will see that the choices made when digitizing have an impact on motif flexibility and style. I'll take you through the key tools in the software with lots of tips, ideas and examples. Then we'll create a set of vector motifs from a sketch which can be used to decorate a greeting card, journal cover, or in fact any surface you like. The class is geared towards people starting out with vector-based design who want to learn about Illustrator software and develop their vector style. It would also be interesting for illustrators and surface pattern designers who want to try new ways of creating their motifs. So you'll need Adobe Illustrator software, some very basic sketching equipments such as plain paper, pencil and pen, and a way to get your sketches into the computer, which could be a smartphone camera or scanner. I'm really excited to see what you come up with. So let's get started.
2. Two Types of Graphics: Hi everyone. In this lesson we will compare two types of graphics that exist in computers: rasters and vectors. Raster graphics are things like photography, paintings and sketches that have been digitized into the computer, for example, by scanning them in or taking a digital picture of them. Once in the computer, these images are made up of pixels in a grid. For each image there are a set number of pixels. This means that scaling up the size can be problematic because the image runs out of information to fill the area, and you may see pixelation, which is a fuzzy and boxy look. Zooming far in on raster images also shows this effect, as you can see in the magnifier here on this feather. Adobe Photoshop is designed for raster graphics. In contrast, vector graphics are made in the computer from points, lines, and shapes that are calculated mathematically with coordinates, angles, length measurements, and so on. Please don't be put off by the mention of maths. The software does all this in the background. Vectors have the huge advantage of being infinitely scalable while retaining quality. This Easter egg design could be scaled for printing on a massive billboard and the edges will still be crisp as shown in the magnifier. Adobe Illustrator is designed for vector graphics, and that's what we will be using in this class. As well as digitizing design ideas directly into Illustrator, we will see it is also possible to use rasters as a starting point and vectorize from there. I'd also like to mention that some art work can be a hybrid mix of vector and raster graphics. When you see this type of work it may be confusing as to how it was created. In this pond illustration example, I have scanned paintings and place them inside vector outlines by using clipping masks. This makes it possible to have beautifully marble paint areas inside the lily pads and fish, yet with crisp clean edges. But be aware that file sizes in Illustrator quickly become huge, so it may be necessary to switch to Photoshop. And with rasters added, the artwork no longer has the scalability benefits. To get those benefits use pure vectors. As you can see with Bob the cheeky seagull, it is possible to add depth by using shading, layering, and vectorized textures. I've also employed clipping masks in this design and we'll cover those later. Usually the file sizes are reasonable so long as textures and managed. And of course, pure vectors remain fully scalable. In the next lesson, we'll look at different methods of creating vectors, all of which I think I actually used here for the seagull and his chips.
3. Ways to Create Vectors: Hello again. In the last lesson, I mentioned that I use multiple vector techniques in one piece. This is because each method is good for certain elements or creating a certain look. Here I've summarized the methods on one page for comparison, just using a very simple leaf outline to demonstrate the concepts. Using geometrics such as circles, rectangles, polygons, and lines is possibly the simplest method. As well as drawing individual shapes, they can also be combined, overlapped and divided, reflected, rotated and more. The software does the maths and the look is quite computer-generated. This is great for elements with symmetry and for making perfect shapes. By using simple geometric shapes the file size is kept small. Perfect shapes can also be modified to look more organic, as I'll show you later. Method two, vector plotting, is the process of placing points with what is called the pen tool, and indicating the shape the line should be between the points, which the software then calculates. The curves created tend to be smooth and sinuous. I find it a very fast method to draw clean outlines. It does take some practice in the beginning, but once you get used to it, you'll likely use vector plotting a lot. This method is fairly light on resources keeping file sizes down, especially once you get the hang of plotting just enough points to get the detail you need. Method 3, the pencil and brushes in Illustrator, allow you to sketch onto the digital canvas directly with tools similar to traditional media. It is possible to use these tools with a mouse, but most people find that they have much greater degree of control by using a drawing tablet: More on tablets later. When drawing into the software, it interprets the shapes and renders them according to the settings of the tool, which can be adjusted for smoothness or accuracy. Increasing smoothness makes the drawing closer to vector plotting while increasing accuracy gives a more hand-drawn look and generally a larger file size. The hand-drawn look can be enhanced with a huge variety of brush options available. For the final leaf I used Image Trace. This is the only method where it is required to have a raster image such as a scanned sketch to start with. For the other three methods, you may wish to place a digitized sketch or one of your own photographs on the page as a guide, but Image Trace actually needs the raster image to trace around. With this method the artist's style, including imperfections and textures from the medium used, will be transferred. There are many settings available in Image Trace, but in this class we'll be focusing on tracing sketched artwork. Personally, I rarely create a whole design using Image Trace. It can be greedy on resources, especially for textured sketches. And I generally prefer my artwork to have smoother edges highlighted with some hand-drawn elements and textures inside. As I mentioned earlier, for the seagull and chips design I mixed the vectorization methods. I used geometrics as the background texture and for the crossword in the chip cone. Vector plotting created the actual chips and bird outline. I added digital pencil work with my drawing tablet for a few details such as the webbed feet. These small touches add interest and polish to a piece. Image Trace was used to create the feather textures from rubbings, plus the eye was inked by hand then vectorized. Mixing methods is really useful and I hope you will make the technique your own after this class.
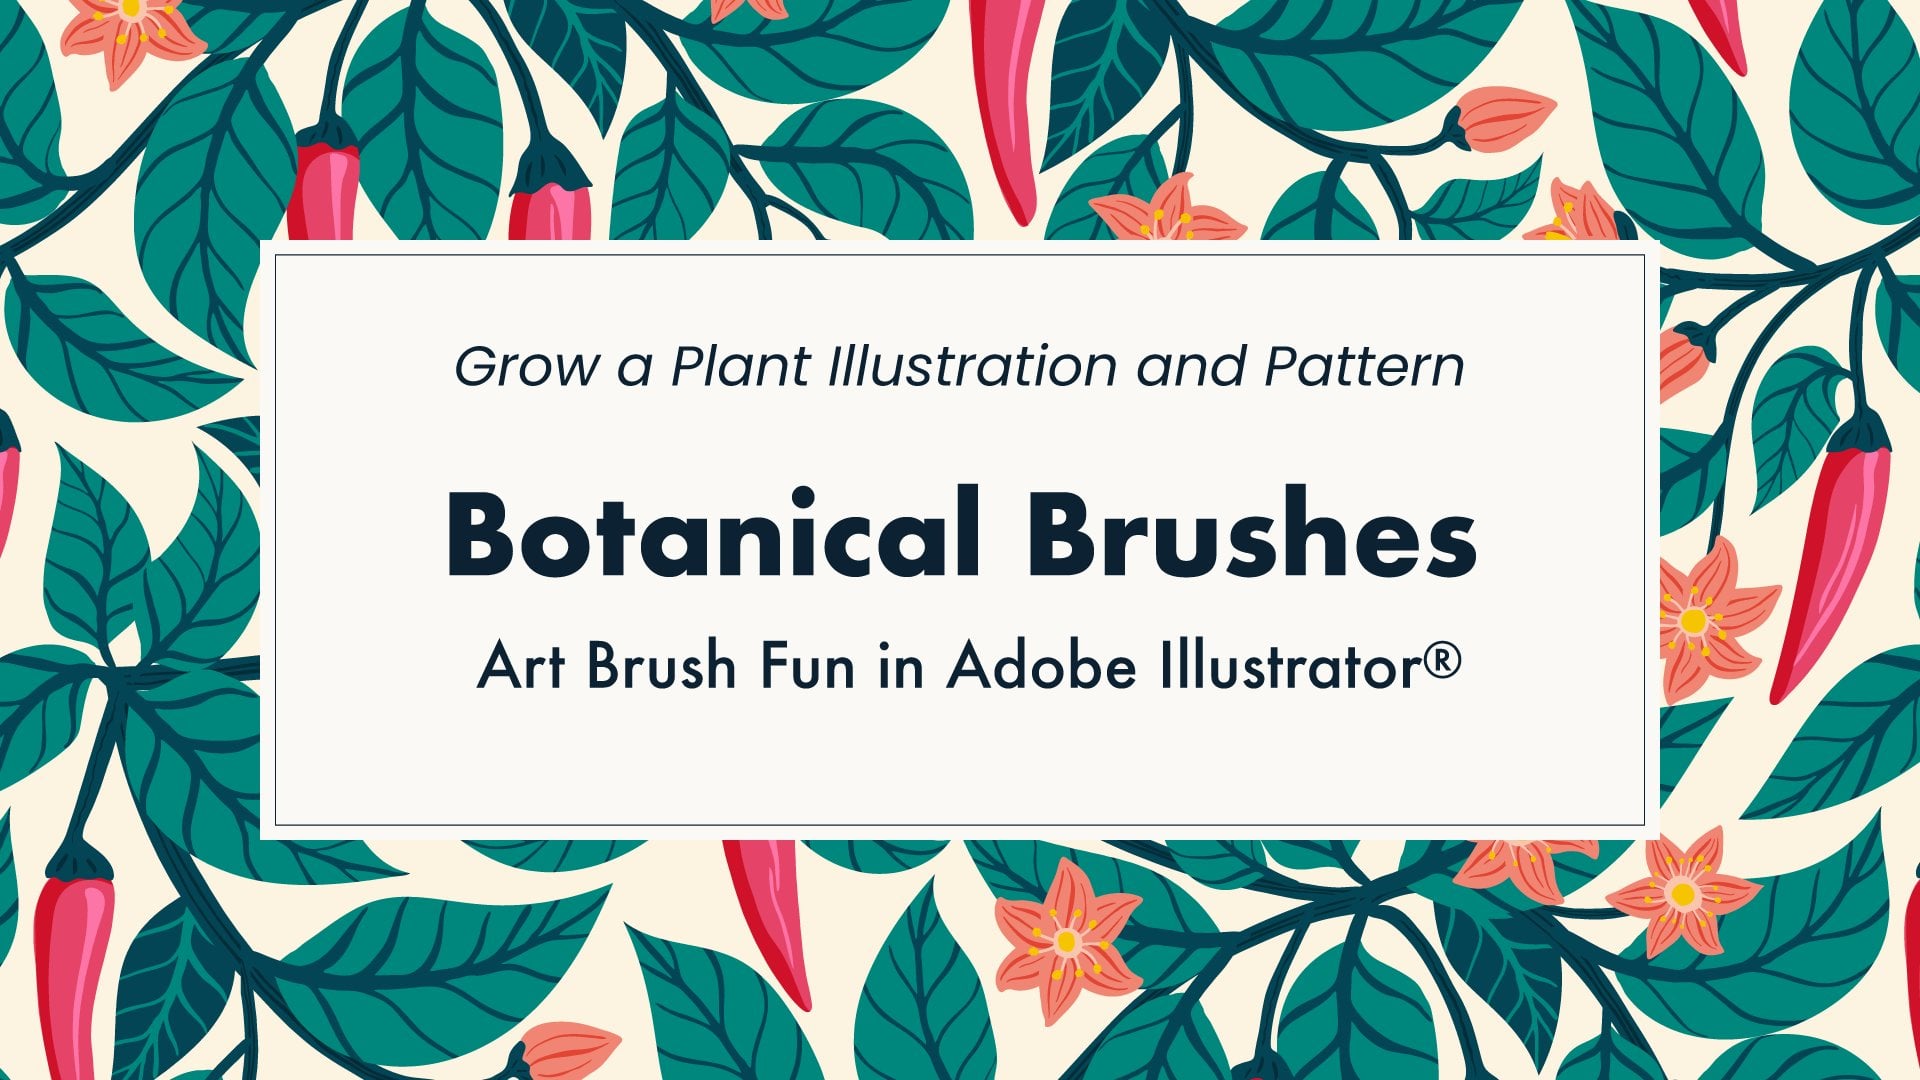
4. Motif Choice & Research: Welcome back. Now that we have an idea what we can do with Illustrator, let's choose something to create. When choosing your motifs subject, select a topic that is interesting to you. Think about places you enjoy and what you like to do in your spare time. Choose something that is not overly complex, but offers opportunity to try out the different vectorization methods. It might also be good to consider what you'll be using your motifs for and imagine them adorning a surface. I like nature and I'm enjoying the butterflies about the garden at the moment. Butterflies will be great to explore curvy shapes, patterns, and textures. I'm imagining them on a journal cover or a greeting card. You can already think about your own choice of motif subject. It could be butterflies to or something else. Sometimes I sway between ideas and therefore it takes longer to begin the project, so don't overthink it. You'll need to commit to a subject so you can get started. I therefore encourage you to pause the video, go to the project area and start your own project by typing in just one word or phrase describing the kind of motifs you'll be making. It'll help you focus to make that start, and if you really want to change it later on you can. To research motifs my first choice is to get out and about with a sketch book and camera. I also have quite a big archive of photos I've taken over the years that I dip into. But with animals that don't tend to stay still for long, like butterflies, it might be that you can't easily capture all the details or poses you want. For this project, I only managed to get a couple of photos that show details and poses. So I'll use references as well, which could be the Internet or books. I've had this beautifully illustrated book since I was a child, and it's a bit dog-eared now. This book has a comprehensive butterfly section. The talented illustrators are all listed here in the front. When I use these resources, I take only very rough notes and sketch form while looking at the material because I want to respect copyright and make the motifs my own. I'll speed this next part up a bit because I'm a fairly slow note-taker. Okay, so I've noted down some overall shapes I liked for the parts of butterflies, I noted some types of wing patterns that I'm particularly drawn to, plus some textual detail and some color ideas as a simple list.
5. Sketching & Scanning Considerations: Hello again. In this lesson, I'd like to share with you how materials and sketching formats impact on what happens later in Adobe Illustrator. So we'll be talking less about mechanics and more about sketching and scanning considerations. I've put the reference book away, but have the notes I made earlier on my desk. I'm ready to sketch two of my own varieties of butterfly for using in Illustrator. I'll start with pencil sketches on plain white printer paper with HB pencil. I just wanted to get the shapes right at this stage. So the first consideration is symmetry. Due to butterflies' wings being in pairs, I'm only going to need to draw one of the pair because I can copy and reflect it in the software. And actually I'm quite bad at getting the left and right similar! For antennae, I usually draw both of the pair because I think it adds a bit of personality to have them be slightly different. Make your own choices about how you work with symmetrical motifs, knowing that you can make copies and reflect parts in the software. Once I have some shapes I like in pencil I'll scan them so I can go back to that point in the process if I wish. I have a flatbed scanner, but it's also fine to use a smart phone to capture the image and send it to your computer by USB, email, or whatever method you prefer. Now cast your mind back to my four leaves example earlier. Remember that when using geometric shapes, vector plotting, or the pencil brush methods of creating vectors the sketch is just an optional extra to use as a guide. You can sketch free hand into the software if you wish, or use a different type of guides such as one of your own photographs. The software itself only needs us to provide a sketch as a starting point if we are using the Image Trace feature. For tracing sketched artwork with Illustrator, pencil doesn't work very well. We need to make the sketch high-contrast, ideally black and white. So the second consideration is materials. You can use any type of media - pens, ink, paint - but bear in mind that the results will be clearest when working in black and white. If I'm image tracing a sketch I don't usually include any color. I usually use a couple of different thicknesses of waterproof drawing pens, a brush pen with waterproof ink and a white gel pen to add highlights and make corrections. So if I'll be imaged tracing, I'll have a second stage of sketching after pencil. Sometimes I sketch freestyle in pen, but mostly I like to go over pencil sketches after I already scanned them in. When I want multiple versions, I get the lightbox out. In the case of the first butterfly, I want to show you three different versions, so I'll use the lightbox for that. There's nothing special about my inking these in terms of my technique. The black parts including imperfections and textures will be picked up by the trace. So I'm going to skip to the finished version so we can talk about the third consideration, connecting lines. A regular pen sketch would typically have lines from different parts of the object and an outline that touch and intersect. It's important to realize that image tracing these touching lines will produce a connected shape, which might be good for what you want to do, or it might hinder your styling of motif. Although we'll cover some options to disconnect sections in Illustrator, bear in mind that adds an extra step. If you find yourself doing a lot of disconnecting in Illustrator, you might consider making the parts physically separated on the page of your new sketches. This will make it easier to move and style parts independently. However, this is not a very natural way to sketch. In this case, you might use a pencil sketch below and a new sheet of paper above, moving the top page around for each section to get them separated. I like this deconstructing technique because you then have the option to make copies of the parts and build them into different motifs. For the butterflies, I can make an open one with four wings, or I could do a resting butterfly showing just two wings with the body tucked behind. With that in mind, I added some legs on a curly tongues to my sketch. Another way to disconnect the parts is not to ink in the outlines, but leave those in pencil. You'll see later that the pen traces nicely but the pencil lines won't be traced. So there'll be no connection of the main areas. But I'll need to create the pencil shapes separately with a different vectorization methods such as vector plotting. I liked this technique because it creates a motif style with smoother edges that don't necessarily have to be outlined. Since I normally do my sketches in pencil first anyway, this method is faster at the paper stage. Often it depends on the motif as to which sketching formats is best. You have plenty of choices, so try experimenting. For the second butterfly. I know that I want to use multiple methods to vectorize it. I want the swirly wing patterns and the face area as inky details. I'll use my brush pen to ink those in on top of the pencil sketch, and they will be image traced. For the remaining details, the sketch will just be a guide as we use the Illustrator geometric shapes, vector plotting, and the pencil / brush tools. So it's quick to get this one ready for scanning. Scanning the black drawings is a bit more critical than for the pencil ones. Quality and contrast of the image can have an impact on the tracing. If you are photographing your sketches, remember to take the photo in even natural light and get the image in focus. Most smartphones also have options to adjust contrast. You may want to increase it so the blacks are blacker and whites whiter, but be sure not to go too far to lose details. If scanning, I typically choose 300 dpi for sketches and keep the scanners default contrast settings. So to summarize, three considerations to bear in mind when sketching for Illustrator are symmetry, materials and connecting lines.
6. Illustrator Quick Tour: Hi everyone. This lesson is a quick tour of the Adobe Illustrator workspace. If you are already familiar with it, then you may like to skip on to the next lesson. I'll start with the File menu and choose New or use the shortcut command N on Mac or control N on Windows, I'm using the latest version of Illustrator. Depending on your version you may be offered preset file types. If so, start with the closest for your project and customize it. You can allocate a name. Now if you wish, choose units and dimensions. Bleed is just some extra surrounding your main dimensions, and a printer may ask for this if the artwork will go right to the edges. In advanced settings, there are two options for color mode I normally start with CMYK for print and convert to RGB if I'll be showing the art on a screen or if that format is requested. Let's create it. A white artwbord appears that is the size we asked for with an area around where we can put things before positioning them. There are so many goodies in Illustrator that you'll want to customize the workspace to have the things you use most immediately to hand. In the Window menu, there is a full set of panels for doing different jobs. Clicking one you already have in your workspace makes it fly out. It can be minimized or opened up with the icon anytime. Panels also have their own menus accessed with the little icon in the top right corner. If you choose a panel from the Window menu that is not already in your workspace it will appear. Panels can be docked, grouped, and undocked by dragging. The x closes the panel from the main workspace. It is also possible to group panels in columns that can be expanded and minimized as a whole. I keep my most used items in an open column and the remaining items minimized but ready for use. The Tools panel, which we'll look at more closely in a moment, can also be positioned to your liking. Once you have your workspace positioning set up, save it using Window, Workspace and name it. You can have multiple workspaces and switch between them. The window workspaces menu also allows you to reset a workspace to the state you save it in, making it easy to clean up your work area. Let's look at the tools panel. It can be shown as one or two columns. If a tool has a little arrow in the corner it indicates that there are more tools below. Click and hold to access them. Hovering over a tool provides info about the name of the tool and any shortcut key. For example, I can instantly access the Rectangle tool no matter where my mouse is by simply hitting M on the keyboard, then I can drag out to rectangle. Note also that near the bottom of the tools panel there is information about color. Both for fill (the inside part) and stroke (the outline part). The fill and stroke colors can be swapped over. The red diagonal icon sets the top one to none. This icon here allows you to revert to the previous selection. The Layers panel is really useful and I use it a lot. You can name layers to stay organized. Creating new layers for different elements of the artwork is easy and it has the benefit that you can switch the stacking order of the layers, hide and show layers independently, and lock layers to prevent them being edited until you unlock them again. There is also a quick select on the right of the layer row so that you can select all on one layer. And layers can be color-coded so you can see at a glance which layer selections belong to. By double-clicking on the layer box icon, you can get further options. Layers can also be deleted. Note that if you want to undo an action, you can use Edit Undo with shortcut Command Z on Mac or Control Z on Windows. This is definitely one shortcut to learn. Show costs related to the view are also very handy. Look at the View menu for zooming, guides and more. Command equals and Command hyphen on Mac, Control equals and Control hyphen on Windows are the easiest way to zoom in and out. Holding the space bar and dragging accesses the hand or Move tool, and it's the easiest way to move around the outboard. If at anytime the panels are in your way, you can hit Tab to hide and show them. For this course, I'll use less shortcuts than usual to make it easier for you to follow the process via menus and panels. But keyboard shortcuts will really speed up your work. So start to learn the ones for tools you use often. There is also a hady quick reference list from Adobe.com, and I'll put the link in the resources section for you. Remember to save your work often via the File, Save menu or use the shortcut Command S on the Mac Control S on Windows.
7. Colour Palettes: Welcome back. In this lesson, I'll show you how to set up colors in Illustrator to work with. Although I often change colors later and usually finalize them at the end of the design process, it can be helpful to have some to work with while developing the motifs. I keep my swatches and other color panels together over here, but you can also access them via the Window menu. The first thing to do is clean up the unwanted default colors in the Swatches panel. They can be sent to the trash icon individually or in groups, or if there are a lot you can use an Action. Actions make things faster. And although they are an advanced feature, the built-in presets are very easy to use. Find Actions in Window menu or with the play icon. Expand the default actions and scroll down to Delete Unused. Expanding this shows a list of every unused item that the action can delete, including brushes, swatches, and more. We just want unused swatches deleting, so select that and press Play. It does the action. Since black and white a currently active in tools, I'll need to remove those manually. It's a good idea to group colors together to be organized, and it also helps when using re-coloring tools. In the Swatches panel you can create a new color group here and name it. You can create a color swatch from scratch here. Set the cyan, magenta, yellow, and black levels with the slider. You can name it if you wish, but it isn't required. Process colors are the types that are mixed from cyan, magenta, yellow, and black, and it's the usual choice. Spot colors are pre-mixed, so choose this only if specifically asked. The global checkbox is useful. Checking this means if you decide to modify, the color will change automatically on all items in the file that have that color. The swatch appears here as you create it. Note the tiny white triangle in the corner of the swatch that indicates a global color. You could continue like this mixing manually. Another option is to pick from one of your own photos. Choose File, Place, and select a photo with a source of colors you have in mind. Remember I made a list of color ideas when I did my research notes. Once you have selected a photo, click Place and drag it out to the size you want. Now select the Eyedropper tool. Clicking will make whatever color is below the Eyedropper into the current color selection. You can drag it across from Tools or down from the top of the Swatches panel so it drops into your color group. If you want to check the color or edit it, you can double-click. You'll remember I deleted the black swatch earlier, and that's because I prefer almost black enriched with color like this swatch here. I'll select global and say OK. I'll do the same for an almost white, I'll get this creamy color and make it global. I'm also going to get a grey. For my pops of color, I'll get a mustard, green, and purple as well. Note there aren't any tiny white triangles on these three because I haven't yet made that global. I can actually make these global in one go. Hold the Shift key down while selecting to get multiple Swatches selected. Then use the Swatches panel menu to bring up swatch options. Check global and OK to apply that to all swatches selected. Right now I'm building color palettes intuitively. Another way to make color palettes is to use the built-in Color Guide, which encompasses color theory and color harmonies. With a swatch selected, you can go into the Color Guide. You can see tints and shades of color and other harmonies in this drop-down menu. When you find a scheme that you like, click the Add Color Group icon at the bottom and the set of colors will appear in the Swatches panel as a new group. There is also a wheel and sliders in the Color Guide to make adjustments. Turning the wheel and moving the first slider change the overall hue of the color and the scheme changes as a whole to keep it harmonious. The length of the wheel forks and the second slider change the saturation of the individual colors selected. The amount of black in the color can also be changed with the last slider. Changes are shown at the top here, and you can go through the color scheme to make adjustments. To save the new version of the scheme in the guide and to the Swatches panel click the Color Group icon here top right. Once you have all the colors you need to begin the project, save to the Swatches Library to make them accessible from any Illustrator document. To do that, use the menu top right of the swatches panel and choose Save Swatches Library to AI and use the default swatches location. Give your et of colors a name and click Save. To Open Swatch Libraries uses the Swatches panel menu again. This time scroll to Open Swatch Library, so more options appear. There is a list of already provide a swatch libraries for you to explore. And any that you have saved yourself will be found in the User-defined option. I'm going to open a set that I took some time earlier to create for this project. It appears in its own movable panel. I can click the groups to add them to the main Swatches panel for use. I'm going to tidy up by removing some of these example color groups that I don't want to use. And i'll save my file.
8. Image Tracing Sketches: Hello again. In this lesson we will take the first butterfly sketch I did earlier and make it into a vector with Illustrator's Image Trace. I have a new file created and I've brought in my swatch library as I showed you previously. To make it easier to see what's going on, I'm going to lay down a background using the rectangle tool by dragging over the artboard area. I'll give it a fill color so it's visible and remove the stroke color. I'll name the layer as background and lock it so I don't accidentally move this square. Let's have a new layer for the butterfly we will be creating as well. Now I'll bring in my first sketch with File, Place. Clicking on the artboard places it at the original size, but you can also drag it out to a desired size. With the sketch still selected, I will bring up the Image Trace panel with this icon. If you don't have the Image Trace panel out, remember you can find it in the Window menu. For those of you using early Illustrator versions, the Image Trace feature may be called Live Trace, which can be accessed via the Object menu instead. These preset settings make the tracing process very easy. We'll be focusing on sketches in this class, so I'll choose Sketched Artwork. In early versions of Illustrator, this exact description may not be available, but if you choose black and white, the settings will be close to this. You will see a preview when this box is checked. For a scan sketch of black pen on white paper, the default threshold would likely be just perfect, but you can tweak this up or down if you need your trace darker or lighter. Lookout for gaps in the black area where there should be a continuous line. That can happen when using very thin nib pens or drawing lightly. Make sure the threshold is high enough to capture everything you need. You may also choose to change the threshold for style reasons. For example, to achieve a more inky look. There's also this ignore white checkbox which can be handy, and means the white won't be traced. If that is turned off, you can see the white on the preview. For this one, I'll trace the white. Once you are happy with the preview, click Expand to commit the trace. The raster image changes to vector artwork. Initially all of this artwork is grouped together as one. To get inside and make changes we can use Object, Ungroup. I'm going to pick up the Select tool, which is this black arrow. And now I am able to select just the white surrounding part. The colored edging, in this case in red, shows us what we have selected. If I hit delete on my keyboard that selection is removed. The white fill area in the wings remain, but the fill of the lower body has been removed with the background. Let's zoom in to investigate. So there is a gap and this part isn't connected. I'll get in really close to fix this. When I select the black part, you might notice in the Tools panel on the left that it's a shape filled in black. This is important because it indicates that these areas that look like lines are actually not strokes but fill areas. For bridging gaps in filled areas, the Blob Brush tool is perfect, so we're going to use that. Blob Brush is a special type of brush that lays down shapes rather than just strokes like other paintbrushes. The exciting thing about the Blob Brush is it can take on the style of other shapes and fully unites with them to properly bridge gaps. The size of the brush is adjustable by using the square brackets on the keyboard to go larger or smaller. I'll paint the gap to bridge it. Now I'll zoom back out. I'm going to use Object, Compound Path, Release to make the hole in the middle of the lower body into a filled shape. I can select just that part now and fill it with white. Okay, let's stop and backup or moment. What are compound paths exactly? If I draw a couple of shapes with the polygon tool here and make them different colors using my swatches, I can show you placing the orange shape over the black one just has the result of layering them. But if I go to Object, Compound Path, Make, I can create a compound path from the two objects. The smaller top one has become a hole in the middle like a doughnut. It is all one shape. And you can see other objects below through the hole. I can release the compound path as I did with the butterfly body and get back to the shapes being separate. On releasing, the shape that was the hole takes on the color of the outer shape, so it appears invisible. But it can be moved and edited as an independent shape again. Image Trace typically creates objects with compound paths, so I hope that helps you understand them and how to work with them. Let's remove those now. I'm now going to change this pure black and white to my rich black and cream. To select all the black, just select one part that is black and then use Select, Same, Fill Color. I can now re-color that with my own swatch. I'll do the same for the white and color that cream. I'd actually like the body of the butterfly to be dark with lighter hairs. So I will use the lasso tool to go around the hairs in the lower body and select them all. To subtract or add an object to the selection, hold down the Shift key while clicking. I'll de-select the wing, add these hairs and subtract the body fill. The red selection indicator now shows that just the hairs are selected and a color indicator in tools on the left shows the all objects selected have a black fill. So that I don't have to lasso these in the future, I'm going to group them together using the shortcut Command G on Mac or Control G on Windows. I'll make those the cream color and the body rich black. I'll repeat that for the upper part as well. I'm going to add a bit of interests to the wings by changing the color in a few areas. To select multiple objects at one time, hold the Shift key down while clicking on them. We don't have a whole butterfly yet. I'm going to select all of this and copy it. The easy way to copy and move an object in one go is to hold down the Option key on Mac or Alt key on Windows while dragging it out. I'll group this original but keep the copy ungrouped. I'll zoom in a bit on the copy. Remember this is the connected version of my sketch. What I need to do is separate the wings from the body so I can use them for the other side. I'll use the Eraser tool. It is like the opposite to the Blob Brush and makes gaps in filled areas. I'll get in really close in erase in sections. Again, the size of the tool can be adjusted up and down with the square brackets keys. I'll lasso around the unwanted parts and hit the Delete key. I'll zoom out, select the new wings and group them. Go to Object, Transform, Reflect, and choose the Vertical option, then OK to mirror the wings. I can now move those into position. They need a little bit of rotation since the body isn't totally straight. Hovering just slightly away from the corner of an object brings up the rotate arrows icon and drag to rotate the object. You can also access rotation via the Object, Transform menu. And there is a tool for that in the Tools panel as well. I want the wings to be behind the body, so I'll use Arrange in the Objects menu and send them to the back of the stack of objects on this layer. The shortcut keys for arranging objects are very handy. Remember I left a shortcut keys link for you in the Resources section of the Project tab. I'll select the whole butterfly and group it. And I'll save the file.
9. Deconstructed Sketches: Welcome back. In this lesson, I'm going to vectorize the deconstructed sketch I did earlier so we can compare this with the connected sketch format. As before, I'll be using image tracing, reflecting, and arranging. But with the deconstructed version, I don't need to use the eraser to separate the parts and it is very quick to rearrange the butterfly into a completely different pose. Since I'll be using similar techniques to the last lesson, I'm going to speed this up, give you a break from my voice and treat you to some music. I have hidden the butterfly layer from the last lesson, and I'll create a new layer ready for our deconstructed version. I begin by bringing in my sketch and tracing it, followed by coloring and arranging the parts in two ways. Okay, there we go. I'll show all the layers so we can compare the two motifs from this lesson and the one from the last lesson. Looking at the timings before speeding up, I see I did the two deconstructed motifs in just slightly less time than the one motif that began life as a connected sketch. So I guess you could say that with deconstructing I got two for one.
10. Geometric Shapes & Effects: Hi everyone. In this lesson I'm going to show you a few tricks with geometric shapes and effects. I'll be making some simple graphic flowers for this butterfly to rest upon. This isn't my usual floral style. I'm creating these to show you a wide range of tools in one lesson. I'll hide the butterfly layers and make a new one for the geometric flowers. I've already used some geometric tools in previous lessons. In the Tools panel, the option used most recently will be on the top with the others below. I will select the polygon, which is symbolized by a hexagon, but can be used to create shapes with more or less than six sides. Click on the artboard to get the options. Of course, the fill and stroke colors can be changed. In this version of Illustrator, the shapes have widgets such as this little slider on the bounding box that allows the number of sides to be changed. This widget inside is for rounding the corners. And another way to create a polygon is to drag it out on the artboard. And it is possible to change the number of sides while dragging by using the up and down arrows on the keyboard. These don't look much like flowers yet, do they? But let's use the Effects menu, Distort & Transform and choose pPucker & Bloat. Turn preview on and try the slider. That looks more like a flower. Now, these shapes and effects are live, meaning that changes can still be made on the fly. So I can still change the number of sides. This other polygon has rounded corners, and that will be interesting when combining with the effects. The effects are also editable. Open the Appearance panel and you will see what is currently active on the selected shape. Click to edit it. To stop the effect being live, for example if you wanted to edit it with tools such as the eraser, choose Object, Expand Appearance. You will see the effect disappear from the Appearance panel as it becomes permanently applied as a shape. It is also possible to layer multiple effects on top of one another. Here is twist on top of bloat. I'm going to expand the appearance of this one as well so I can work on the edges. Let's zoom in. I'd like to fix these problem areas on the edges. So I'll use the Smooth tool which is kept under here with the pencil. Select the shape to smooth and run it over the edge. Notice the little magenta squares moving on the edge. They are anchor points and we'll discuss those in the next lesson. It's actually quite difficult to see the changes to the edges with the anchor point showing. So I'll use Command H on Mac, Control H on Windows to hide the edge markers. Then hit those same keys to show the edges again. Now i'm going to get the Ellipse tool from underneath the polygon. Holding Shift while dragging it out constrains the ellipse to a perfect circle. I'll change the color so we can see it. The circle is already smooth, but in this case, I'm going to use the Smooth tool to move around the anchor points fairly randomly to create a shape that is slightly more organic. It's a subtle way to finesse a computer-generated shape and make it fit in with hand-drawn artwork. Another choice could be the Roughen effect. There are several options to play with here. Another exciting way to work with geometric shapes is to combine them. I'll get three copies of this circle. Remember that dragging while holding Option on Mac or Alt on Windows will make a copy. I'll make a duplicate of the set because I wanted to show you two ways to work with these. So we can see what's going on. I'll swap the fill and stroke over. I'll select the first set of circles, then pick up the Shape Builder tool. As I hover the tool over the set of shapes, hashed areas indicate segments created by the overlaps. Clicking and dragging the tool over multiple segments causes them to be combined. Segments can also be removed by holding down the Option key on Mac or Alt key on Windows: a minus sign appears next to the arrow and when you click the hashed area is removed. We have created a couple of shapes that are much more exciting than circles. Let's select the second set of circles. Now, if you are running an early version of Illustrator, you may not have Shape Builder available. The Pathfinder panel has tools that can achieve the same as shape builder in a slightly different way. And there are some extra tools to, so it's worth exploring. I'll bring the panel out to make it easier to see. The bottom-left icon is used to divide shapes up. Shapes divided by Pathfinder are grouped together, so go to Object, Ungroup and the segments can now be moved independently. To combine segments, hold down shift while selecting the segments, then choose the Unite option top-left in Pathfinder. Segments can be removed by selecting and then using the Delete key. I'll just keep one moon to use in my flowers. It needs to be a bit smaller and I'll make a copy. I'm holding down the Shift key as well as Option key so that as I make a copy it is moved directly below the original. I'll hover at the corner to get the rotate option. Then as I drag to rotate I'll hold Shift again so that the object rotates in increments of 45 degrees and it is easy to achieve exactly a 180 degree rotation. Now select both and rotate them in unison. This time, I'll use the Object, Transform menu to get all the rotate options. You can see a preview of the rotation amount. I think I like 60 degrees. Because I wanted to keep my first two moons and get two new moons rotated, I'll choose the Copy button rather than the OK button. Another amazing shortcut is Command D on Mac or Control D on Windows, which repeats the last action. Now we have a flower center made from the moon. I'll group those who command G on Mac or Control G on Windows. Hovering on the corner allows me to scale the selection and I'll hold Shift while doing that to constrain the shape. Then I can put this on my flower. I'll group all the elements of each flower and position them. When I turn the resting butterfly layer back on it is behind the flower so I need to drag that layer above the flower layer in the Layers panel and finish the positioning. There we go. Some basic flowers as an example of geometric shapes and effects for creating vectors.
11. Graphics Tablets (as an optional tool): Hello again. In some of the lessons coming up, I'll be using a graphics tablet along with Illustrator's pencil and brushes. These tools do work with a mouse, so the tablet is not essential at all, but many people find that it offers much more control for drawing directly into the software. The mouse is replaced by an electronic stylist similar to an actual pencil. It is used on a special tablet surface that lets the software know exactly where the drawing is happening in relation to the screen. There are many on the market with different features and I haven't tried them all, but I can offer you a few pointers. Firstly, size. The footprint of the tablets is usually larger than the active area where drawing takes place. While the overall size may impact on portability, the active area is the main consideration for your drawing needs and style. There is a school of thought that the drawing area should be of a similar scale to the screen size, so that hand-eye coordination seems more natural. Also, if you're drawing style generally involves big sweeping curves covering the whole page, you probably won't want a tiny drawing area. But if you are just adding little details than small may be perfectly adequate and also has portability benefits. Secondly, pressure features. Many graphics tablets come with a stylus that offers pressure sensitivity. Tools like Illustrator brushes can be set up to accept pressure input, meaning they can make thicker marks when the stylus is pressed harder on the tablet. It's a feature that I personally feel is worth having. If you are going to make use of Illustrator brushes a lot then you will likely agree. But if those tools don't interest you then it might not be a feature that you need. You'll have to look at how you work and determine if this is something that you will use. Thirdly, workflow. Dedicated graphics tablets usually connect directly to the computer, either via cable or wirelessly, and allow inputs directly into software such as Adobe Illustrator. This generally fits in easily to the Illustrator workflow. The more general tablet devices with added stylus are most standalone offering sketching on the go, but without the benefits of providing drawing directly into Illustrator, at least without extra apps or transfer steps. So consider how the device will fit into your own way of working and make designing easier for you. If you are not sure that using a graphic tablet is for you, a small entry-level one could allow you to try the concept with little investment. Do be aware it usually takes a couple of projects before becoming comfortable with using a tablet, so I encourage you to give it some time. In this class you will see me using a Wacom Intuos Pro Medium graphics tablet for drawing. Note that you will see my tablet in the corner of the screen. This is to allow you to view the other action as well. But in reality I have my tablet right in front of my screen at the same angle so I can properly coordinate hand and eye. If you get a tablet, make sure to set up centrally for that reason.
12. Drawing Digitally & Clipping Masks: Welcome back. In this lesson I want to cover ways to handle the motif edges. My own work typically does not have an outline around the main shape of the motif. I use line inside the motif, but not usually at the very edges. I'll show you how to create motifs like that from scratch in a moment. But first, let me show you a way to remove the main outline from this butterfly wing. In the process, I'll be showing you how to create a clipping mask, a very useful tool indeed. But first I will need a shape to use as a mask area. I'll make a copy of the wing and paste it exactly in front of the original using Edit, Paste In Front, which is Command F on Mac or Control F on Windows. Now I'll bring out the Pathfinder panel. With the top copy still selected, I'll use the Unite option in Pathfinder to combine all the shapes within the wing. I am going to make that a bright color so we can see what's going on. This silhouette will be my wing shape, so I am going to take this opportunity to finesse it with the Smooth tool. I now want to slightly scale that down so that it covers only the inner part of the wing and not the black outline that I want to remove. It is important that the mask area be totally transparent, so I'll set both fill and stroke to none. Select both copies of the wing then go to Object, Clipping Mask, Make. The part outside of the transparent mask has disappeared. I'll scale the wing up a little to compensate for the loss around the edges. I'll do the lower wing as well so you can see the process again. This time I'll use the shortcut Command 7 on Mac or Control 7 on Windows to create the mask. And I'll send that wing to the back with Object, Arrange. So the wings on the left that no longer have the main outline are much more in keeping with my style. I'm going to make a copy of that wing that I'll use again in a moment. So often I don't ink in or trace my motif outlines. Remember the three formats of sketch I did and the mixed media sketch. Let's bring that third one in now. I'll duplicate it and lock the duplicate layer because it is helpful to keep a copy of the sketch as a guide for digital drawing. Now I'll select the unlocked sketch on top and Image Trace it. This time I'll ignore white because many of the inside shapes aren't closed anyway. You'll see that the pen traces nicely as before, but the pencil lines don't trace. Now I need to add those outer shapes. One option is to use a shape that has been created by image trace and finessed such that this lower wing shape we used a moment ago. If you already have the shape, color it and position it behind those enter details so you have a background. Then make a copy for the mask which needs to be totally transparent and brought right to the front to use as a clipping mask. Usually it's much faster and smoother to create the main shapes with the vector plotting pen tool or the digital pencil tool. I'll pause with butterfly for a moment to demonstrate how vector plotting works. Choose the Pen tool found here in the Tools panel. There are additional tools for modifying the plot here as well. The Pen tool allows us to place points that will be connected by line segments to make paths. In the simplest example, you can place a point here and another one here with a straight segment between. That is an open path with 2 endpoints. Holding down Command on Mac or Control on Windows and clicking away is a quick method of de-selecting the current path. Then when you release the key, the Pen tool is back and ready to use again. I could also make a closed path with several anchor points. Vector plotting is also great at doing curves. To make a curve don't release straight away when you create a point: drag to pull out these direction lines. The length and angle of the direction lines you create will determine the curve. The curves can easily be modified later. If you find that Illustrator Smart Guides get in your way when plotting, turn them off in the View menu. As you go along making curves, you may need to make an abrupt corner. To do this, click again on the point you just created to change it to a corner. This can be very helpful. To adjust positioning of any point, use the direct selection tool, which is the white arrow with shortcut key A. When a specific point is selected it will be solid. The point itself and any adjacent direction points can be moved. This additional tool under the Pen indicated with a plus sign adds an extra point along an existing path. And this tool removes anchor points. This tool is for remaking the length and angle of the direction lines. Drag on a corner to make it a curve. Click on a curve to make it into a corner. I'll plot the butterfly wing for you now. I find it helpful to have a stroke but no fill during plotting so I can see below as a guide. It takes some experience to learn where it is best to place points and how to get the angles you want. Don't worry too much because you can modify them later. In general, using just enough points will give me the smoothest looking curves. In general try to place your points on the extremes of the shape. Now I can fill the wing with cream color. I'll send that to the back behind the inner details, then make a copy that is transparent and bring it right to the front to create a clipping mask with the shortcut keys. So with a clipping mask applied, the extra outside the mask is just made invisible. It is still actually there. The clipping mask could be removed and positioning edited as well if needed. It is also possible to permanently commit the mask. Doing this reduces the file size and also allows tools such as live paint bucket to be used on the area. I want to use that now. Since I'm sure I don't want to change the mask again, I'm going to make it permanent using two steps. First Object, Expand, then the Pathfinder Crop option. So now the Live Paint Bucket will be available to me for the shapes. I'll click on the tool here and then the shapes I want to paint. Now I can get colors from the Swatches panel and drop them in. Now I'll make the upper wing a live paint group as well and paint that. Note the area where the color will paint is shown by a highlight. Let me also show you how live paint reacts to gaps. If the gap is very small, live paint treats the area as a closed shape, so you have more flexibility to color the area. You can always color the adjacent piece the same if you want the paint to run through the gap. Okay, we don't need that blue color so I'll undo with Command Z. Another way to create the outlines is to draw digitally with the Pencil tool found here. I'm going to turn on the sketch layer that I created earlier and I'll be using my graphics tablet for this. If you double-click on the Pencil tool, you'll get some options appear. The main one to be concerned with here is fidelity. Setting it up for more accuracy, keeps more of a hand-drawn look. I like the software to do a little smoothing, so I'll have that in the middle. We'll just keep these defaults for now because most are conveniences depending on how you like to work with the Pencil. Set the stylus down or click the mouse button and follow the sketch as a rough guide. If you find drawing awkward, it may be because you aren't at the correct zoom level for the area you want to draw, so try adjusting that if needed. Note that when I get close to the start again, a little circle appears at the pencil arrow indicating that shape will be closed if I release. I'll fill the shape so we can see it. I'll send that to the back so we can see the texture on top. I want to make some modifications to the shape, so I'll zoom in. On my tablet model I have a zoom wheel for that. You can use the pencil over the top of an existing path to make modifications. Just be sure to start on the path and finish on the path otherwise you'll get an additional line. If that happens, just undo the last action. And on my tablet I also have a button for that. This right side doesn't quite look the correct shape, so I'll take the fill off this shape so I can see my sketch below. Okay, that looks better. I'll grab the lower body details and color those. For the head area, I'll use the Ellipse tool to make an oval then I'll finesse it a bit with a Smooth tool to give it a more organic feel. I think I can turn off this sketch layer now, which will help you to see the anchor point handles. I can adjust those also to get the exact shape I'm looking for. I'll also group and style is area same as the lower body. I don't want these antennae to be transparent, so I'm going to release that compound path. I'll make them a light color then select just the outer edges and make those darker again. Let's zoom out and move this butterfly over so I can do Object, Transform, Reflect. I'll choose Vertical and make a copy, then drag the new wings over slightly and group the whole butterfly. So we have recreated a butterfly from a mixture of image trace details enclosed in clipping masks. And we saw different ways to create the main outlines for motifs, including vector plotting, digital pencil or starting with geometric shapes.
13. Brushes & Combining Techniques: Hello again. In this lesson, I'll show you the basics of Illustrator brushes, and I'll create a new butterfly that combines the techniques learned so far. In this new file, I've created my background layer that is locked, and a new layer for the motif. I'll use File, Place and select my sketch of the second butterfly. I want to have two copies of this, so I will duplicate the layer using the Layers panel menu. I'll call that 'sketch', drag it below the motif layer than lock and hide it. With the top unlocked copy selected, I'll do Image Trace. I'll choose Sketched Art from the presets with ignore white selected and preview the trace. The pencil marks disappear from the trace, but the inky details look good, so I'll expand that. I'll ungroup those, then regroup the markings for each wing. Now I'll turn the sketch copy back on to use as a guide for drawing digitally. I'll select the motif layer, then zoom in on a wing area. I'll start by vector plotting the outline of the wing. If you have fill turned on then your plot will begin to cover the sketch, so make sure that there is just stroke color but no fill as you draw. Remember that adjustments can easily be made to the shape. For the lower wing shape I'll show you with the pencil tool and the tablet. I came off the tablet for a moment by mistake, so I have a gap, but it is very easy to run another pencil line between to join them. I'll also finesse the shape a little by going over some small sections with the pencil. So making the wing shapes was very easy with the pen and pencil tools. Let's move on to using brushes now. Brushes are incredibly powerful and have their own panel. Find this icon or access the panel from the Window menu if it isn't open in the workspace. There are brushes provided, a more can be added too. I still have my lower wing edge selected, and you'll see that the first thing I can do with brushes is apply them to existing paths. This one is a calligraphic brush type. To remove a brush style from a path, select the remove brushstroke icon at the bottom of the Brushes panel. To paint fresh brush strokes, go to tools and select the Paintbrush or use shortcut key B. Then select a brush from the Brushes panel. Double-clicking on a brush brings up its settings which can be edited. The options will vary depending on the type of brush. This one is calligraphic as described at the very top. It has a name, then there is a picture that gives a visual of the settings below. In this case the angle, the roundness and size. Next to each setting there is a menu for selecting how the setting is applied. Since I'm using a pressure-sensitive stylus, I'm going to set the size to be determined by pressure. And I'll need to also say how much variation in size should be applied with pressure. I'm going to have this brush be 2 point size in total and allow it to vary by the full 2 points depending on the pressure I use. Okay, I'm ready to paint. I don't like to be too close if I'm doing long brush strokes so I'll zoom out, I'm just going to draw on the tablet as I would on paper, focusing on drawing lightly when I want a thin section and adding pressure for thicker parts of the stroke. I won't worry too much now about how the strokes connect because the brush strokes are editable. Having said that, sometimes I prefer to undo a brush stroke and remake it again. I can use the direct selection tool to move points if needed. I'm going to turn Smart Guides back on in the View menu because they'll tell me whether I'm at an intersect point. For the rest of the wing veins, I'll be doing the same thing, so I'll speed it up a little and play some music. The wing markings at the side are a bit like semi-circles. My version of Illustrator offers a pie widget on the Ellipse tool for making partial circles. The widget is the handle sticking out. Just drag the widget around to make the shape of the pie needed, in this case just less than half a pie. The shape can be finessed as well of course. I think I'll do the remaining ones with vector plotting though. Then I'll also make the body and head areas in the same way. Okay. So I have filled the main areas with a bit of color and straightened the motif up. Now I'll add color to the veins and markings. At this stage, you may prefer to make the brush strokes into filled areas so that you don't need to deal with stroke color as well as fill colors. Expanding the appearance of the brush strokes will turn them into filled shapes, but be aware it permanently changes them, and so they are no longer editable as brushes. If you are ready to commit brush strokes to shapes, select them and go to Object, Expand Appearance. Now I can reflect the wings to the other side. I'm not very happy with the color of this butterfly yet. I'll just choose something a bit less bright and work on it more later in the re-coloring lesson. But first, textures.
14. Creating & Adding Textures: Welcome back. Earlier, I created some example textures using a variety of media. I used different pens to make marks and scribbles. I found textured objects like dry leaves and lace to make rubbings from with a dark pencil. And I dipped objects like petals and fabric in paint for relief printing. After the paint dried, I scanned the sheet and placed it into Illustrator on a new layer. Now in Image Trace I'll choose Sketched Art and convert them to inky black shapes. Note that usually I create each texture on a different sheet or make a separate scan for each. This is because the settings needed to trace these textures will vary quite a lot. So finding one single threshold setting to suit multiple textures like these would be difficult. You'll see the problem here with some of the lighter textures not tracing. I can increase the threshold for those and that works, but some of the others go too dark. So remember to prepare your textures separately. I only need one of these for my project. These dashes bottom centre of the page made by rolling a cog in paint. This higher threshold looks good for the one I want, so I'll Expand it. I'll ungroup all of these and regroup just the texture I want, then move it to the side. For now, I can delete these other examples from this layer. The other textures I'll create are going to be from my own photos. It is quite amazing where textures can be found. This is just a quick snap of a slice of lemon in a drink. Although Image Trace has presets for photos, I won't be using them because I want the effect of converting the photo to just black and white shapes, so I'll keep my usual settings. I like the middle section, but I want to delete the outer areas, so ungroup and remove the unwanted shapes, regroup the texture and move it out of the way. The next texture is a close up of my actual gym shoe! The photo isn't very pretty at all, but I think the mesh material will make a great texture. I'll repeat the Image Trace as before. I can see when I move it that most of this shape is connected. I'll delete these stray bits here and keep the main shape. What I actually want is the mesh holes as my texture, so I'm going to release the compound path of this shape and remove the outer part that was traced to keep just the holes. Now I'll remove these stray parts around the edges that I don't want. Group the shapes and move the texture up here. For the last texture, I have a woolly rug. I'll start with the trace. This time the threshold needs to be increased. I'll ungroup that and delete the outer parts because I wanted to keep just the swirly part in the middle. And group those shapes. Let's zoom in for a closer look. Okay, I like those. The detail is great, but if we use textures the file size can get large. It helps to simplify the paths and reducing the number of points to just what is required to get the look we want. To do this select the textures, then go to Object, Path, Simplify. Check preview. You'll see the number of points before and after the simplification for the percentage precision you have on the slider. As you can see at 50% we have lost the essence of the textures somewhat. It's normally best to use this tool subtly. So 95 to 98% is usually about right for me to get the reduced file size benefits while still retaining the look of the texture. At 95%, we have reduced the number of anchors from 7.5 thousand to just over 2 thousand, and the texture still looks good to my eyes, so I'll say OK. So now I'm going to turn the butterfly layer back on and place these textures, making clipping masks to contain them in the body areas. I'll color them as I go. Since you've learnt swatches and clipping masks earlier, I'll speed this part up. The textures are now placed. With clipped textures like the ones in the body it is common to have a lot of excess outside of the visible area, and with the complexity of some textures this can make file sizes huge. So I'm going to expand the clipping masks and crop the access away just as I showed you earlier. I also want to explain about the coloring technique I use for textures. What you will see when I expand the crop is that the texture seems to vanish, but it is still there. I just set it earlier to the exact same color as the background shape. To get the texture to show up, I apply a special kind of transparency. Unfortunately, cropping the mask resets the transparency of the top object. I have the Transparency panel docked here and open. If it isn't open in your workspace, you can open it from the Window menu. In the Transparency panel you can set the blending mode and the opacity. Opacity alone won't work if you're using the same texture and background color. I want to use the same texture and background color because it makes re-coloring much easier and I liked the look. So I'm going to apply a blending mode as well. Example combinations are screen mode with 40% opacity for highlight textures like this, or multiply with 80% opacity for shadowy textures like on the lower wing. Here in the lower body, I noticed this gap in the texture that I wanted to fill a bit. It is best to do this before cropping away the excess texture. So I'll do that now. To edit the contents of the clipping mask double-click to enter isolation mode. In this mode, the non editable parts are grayed out and an extra info bar appears at the top of the canvas window indicating editing a subsection of the layer. Now I can see the whole of my texture beyond the edges of the mask. The texture itself is grouped, but if I double-click again then I'll go deeper into the structure of the layer, which is also indicated in the info bar as well. Now I can move individual texture elements around and edit them. Double-clicking outside of the area takes me out of isolation mode. Now I can expand and crop the mask. Then I'll set my transparency to screen mode 40% opacity. Let's zoom out and have a look. Okay, the textures are done. Next we'll look at re-coloring.
15. Re-Colouring Motifs: Hello again. After making motifs, it's common to want to alter the colors or make multiple versions with different colors. Earlier I showed you changing individual parts of the motif manually by using a live paint bucket tool or picking swatches. In this lesson, I'll show you Illustrator's re-coloring options for modifying multiple colors at once. I've saved my butterfly into a new file so I can play around with it and keep my original. I'm going to unlock the background and scale it down because I want that to be part of the re-coloring process. Let's have four copies. Remember holding Option on Mac or Alt on Windows while dragging makes a copy. Also holding down Shift will keep the copy neatly lined up. I'm going to import one of my own Swatch Libraries access from the Swatches panel menu. Remember saves swatches can be found in User-defined. I'll bring in this lively autumnal set of colors. The re-coloring tool uses color groups. Select the artwork to recolor, then select the group to use as the new palette. Now click the color wheel icon here. The re-color tool will swap the original colors to the new palette colors, and you'll see the changes in the artwork itself. If you like the color combination straight away, you need to commit it in order to keep it because currently there is no back button inside the recolor panel. That's why I make a few copies on the outboard and do a few rounds of re-coloring so I can keep multiple versions. Let's do another one and look at some options. To remove and add colors to the re-coloring group go to the Edit area. Use the remove tool on the wheel to take out a color. Use the add tool on the wheel to add in a color. Reset the color group by clicking on the existing groups listed here. After editing, return to the Assign area and continue re-coloring, It is possible to opt out of changing a certain color in the artwork. Just click the arrow to change it to a dash indicating that the original color will be kept. It's also possible to manually select a color, so double-clicking here brings up the colors and there's an option to pick from color swatches with this button. Again, once you get a combination that's pleasing, commit to it before continuing. In this case, I don't want to save the group with two blue swatches, so I'll say no. It's fun to just cycle around the combinations. I often find versions I like this way. This button randomly switches the colors. Again, if you find a version you like say ok and save it. Although the swatch colors themselves haven't changed the order has. If I choose to save the order, then the re-coloring we'll pick up at the point in the cycle again next time. But I want to keep my original order so I'll say no. It's also possible to tweak the palette's saturation and brightness. Use these sliders to alter a particular swatch in the recolor group. I like that blue, but there isn't much of it in the eyes, so let's try the next combination. The button next to that randomly alters saturation and brightness. Again, cycle around until finding a pleasing combination. In this case, I've created a whole new palette. I'd like to keep it, but I don't want to save the changes over my original, so I will cancel so I can first save this as a new color group. There we go. The Recolor Artwork tool as a lot of powerful features. As you can probably guess, is quite addictive too!
16. Project & Resources: Hi everyone. I couldn't resist doing a bit more re-coloring after the last lesson. The light background version is sweet and colorful, so that's the one I've used to create a greeting card to finish my project. For home printing, I recommend to create the documents so that front and back combined are smaller than the size of paper the printer takes. Simply print, trim and fold. For printing via a company ask for a template to get the size correct. Templates like this one typically are a little bit larger than the finished size, the extra being called "bleed". Often there is a guide layer in the file to show where cutting and folding will take place, and that layer is turned off before printing. I already placed my butterflies into this template. I made some duplicates and rotated them. To finish off, I added some vector plotted hearts and a line of text in a computer font called Brusher. I did continue some design elements over the fold onto the back, but that's totally optional. Printers usually want CMYK files, but ask to be sure. If you need to change the color profile it is easy to do so from the File menu. Printed colors are often different from screen colors. So getting a print sample is also a good idea. In terms of providing files, Export As in the File menu gives options for all the common formats. To share designs for your project and for social media, use Export For Screens. This will save files to RGB, the correct color profile for screen viewing, and you can also choose size as well. Here's how the front of my card looks in my project. Now it's time for you to make motifs. Follow the simple project steps I've listed in the Project tab to go from idea to your own unique vector design. I want you to use this project to find your unique vector style, so experiment with how you combine image tracing, digital drawing, vector plotting, and use of the geometric tools. I'm keen to see the development of your motifs and the finished designs, So please share each step in the Project tab as you go. Remember, the Adobe shortcut key resources can also be found on the right in the Project tab. Happy designing.
17. Thank you: Thank you so much for joining me in this class. I do hope you've enjoyed it and picked up some new ideas. Do reach out if you have any questions at all. As well as the community here you can also email me directly via hello@rocketandindigo.com. Remember that there's more than one way to create motifs in Adobe Illustrator. And combining different methods in your own way is part of developing your unique style. The class project is a great opportunity to experiment. Please do post your work in the project area so we can all take a look. When posting on social media, do remember to tag me @rocketandindigo so I can see all your wonderful designs. And you can also use #rocketskillshare. If you've enjoyed the class, please do leave a thumbs up and review. It does mean so much to teachers on Skillshare. Thanks again, and I'll see you next time.
 Sue Gibbins, Designer at Rocket & Indigo