Transcripts
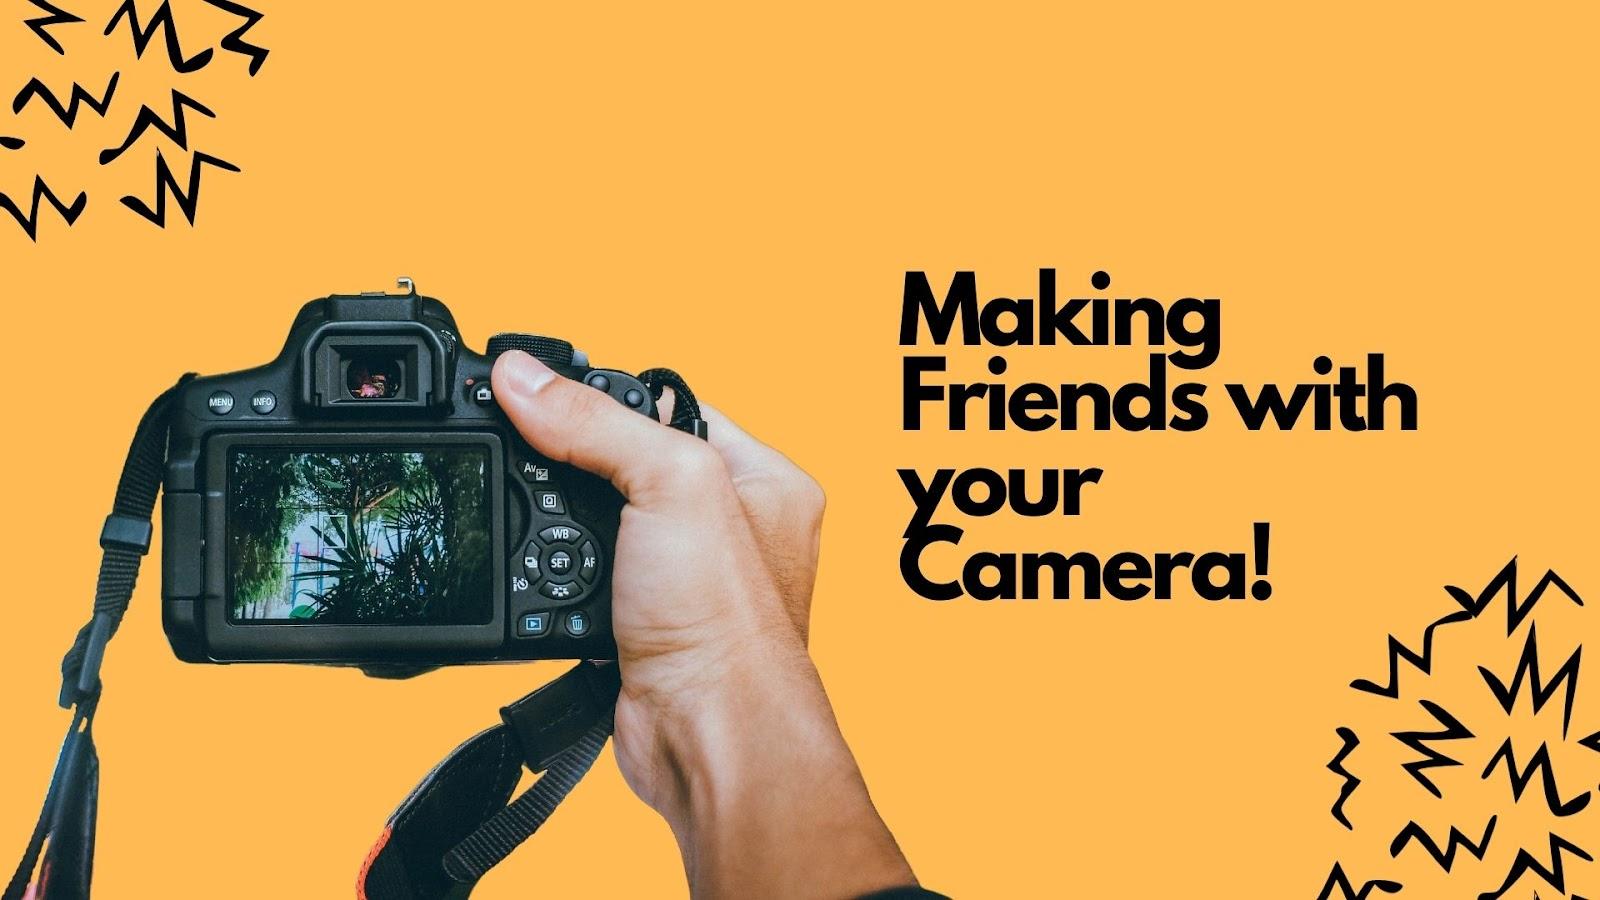
1. Introduction: A digital camera is one of the most powerful
creative tools out there. It is all about making
friends with your camera. And after you do
that, any camera that you will pick and you'll see you immediately feel this confidence in pating
them up and using them. You will also be
able to understand all the terms in photography as well as able to understand the basics of photo
editing as well. Hi. My name is Astra. I'm an Indian filmmaker, artist, and educator currently
based in Vancouver, Canada. I teach film media and photography courses at
college and university level. I've been able to take experiences working
in film, media, and education industries to learn both creatively
and technically about using a digital camera as an effective tool
in all its glory. In this class, I want us to make friends with
our digital cameras. We will learn to
set up our camera. Easy, learn all about its
various modes and terms, and most importantly, learn
how to shoot in manual mode. My job here is to teach
you the ideal balance between What I see is the three
holy g of camera setting, one ISO, second aperture and
third being shutter speed. The class is more about deals to find the camera and their modes. I found that with just
a little effort in learning the artistic and
technical language of a camera, You can be easily able to click and error
photos like a pro. The class will motivate
you to go out, use your camera to its pest and push away the stronger to use your iPhone or your
smartphone cameras or just to put your
DSLR in order mode. What we want in this class is through interesting
classic sizes. To create these billing blocks, finally have all your work in our digital
photography portfolio. All right, I'm excited to
see you in the next class. Let's make friends
with our camera.
2. Camera Setup: Setting up your camera.
Hello, everyone. In this class video. I want to discuss all the
basic camera stuff. We must get off
on the right foot before we head out to
shoot some great photos. First thing first, every
camera is different in its set up interface
physical buttons. I highly advise having your camera manuals at hand
or you can easily find setup instruction online
if you quickly search them with your specific camera
model and manufacturer. Okay. All right. We want
to go to our menus, find image quality
and change it to raw. This file type literally
means raw unprocessed data. We want to use this file type
when we shoot on cameras. To get the most information out of the photo
we are clicking. It is very helpful when we sit down to edit our photos as well. Next step would be to set up
grid display on our cameras. We want to refer
to our manuals or a quick online
search with a model. In our menu settings, we should be able to
get it up and running. I would advise to choose
the option three by three. It is the most standard
grid line settings used. Now, rotating your camera dials, you should be able to find
the icon that says M. Navigate to that. It means
that we want to shoot on manual mode rather
the auto mode, which is denoted by A. We should be able
to find the button for ISO on our cameras. You can use that to
change your ISO settings. We will talk about ISO as
we progress in our class. In your manual, please locate
which pattern or dial. You can see or you can use on your particular model to
change your aperture, which is the stop
set on your camera. Typically, using a basic
DSL and a kit lens, you will be able to see
that the range you move. You can move in
your camera 4-22. Again, each camera and
lens you're using will decide what's the lowest
stop number you can go to. And we will talk about it in
upcoming classes as well. Now, look at the
button or a dial similar to changing your
shutter speed settings. You will see them typically
going as high as even 2000 to as low as 30
with a quotation mark. Both these tells
time and seconds. So if you see your
shutter settings on your camera, say 100, it means one by 100 of a second or if you say CS two
with otation mark, it means it is 2 seconds, more in on this later. Now, if you want to
look at your lens, you should see a small
launch like a butter, which typically is set on AF. You may want to change it to MF. It is changing from camera
order focus to mammal focus. Now you have the ability
to change focus on the subject by rotating
smaller ring on your lens. If you have a zoom lens, you should be able to use
the bigger ring by rotating it like this to able to
change the focal lens. We will talk about it more soon. All right, a camera is set up. For shooting, you may
want to use a tripod. Make sure also to have a SD
card inserted in your camera, have your batteries charged. One step using the
tripod is to make sure that the bubble
level is at center. Different tripod
manufacturer may have different ways of you moving the centerpiece
of your trio to make sure to have
the manual at hand. But do make sure that a tripod
bubble level is at center to have the perfect
desired balance as you start shooting. All right. Let's navigate
to our next class video. A.
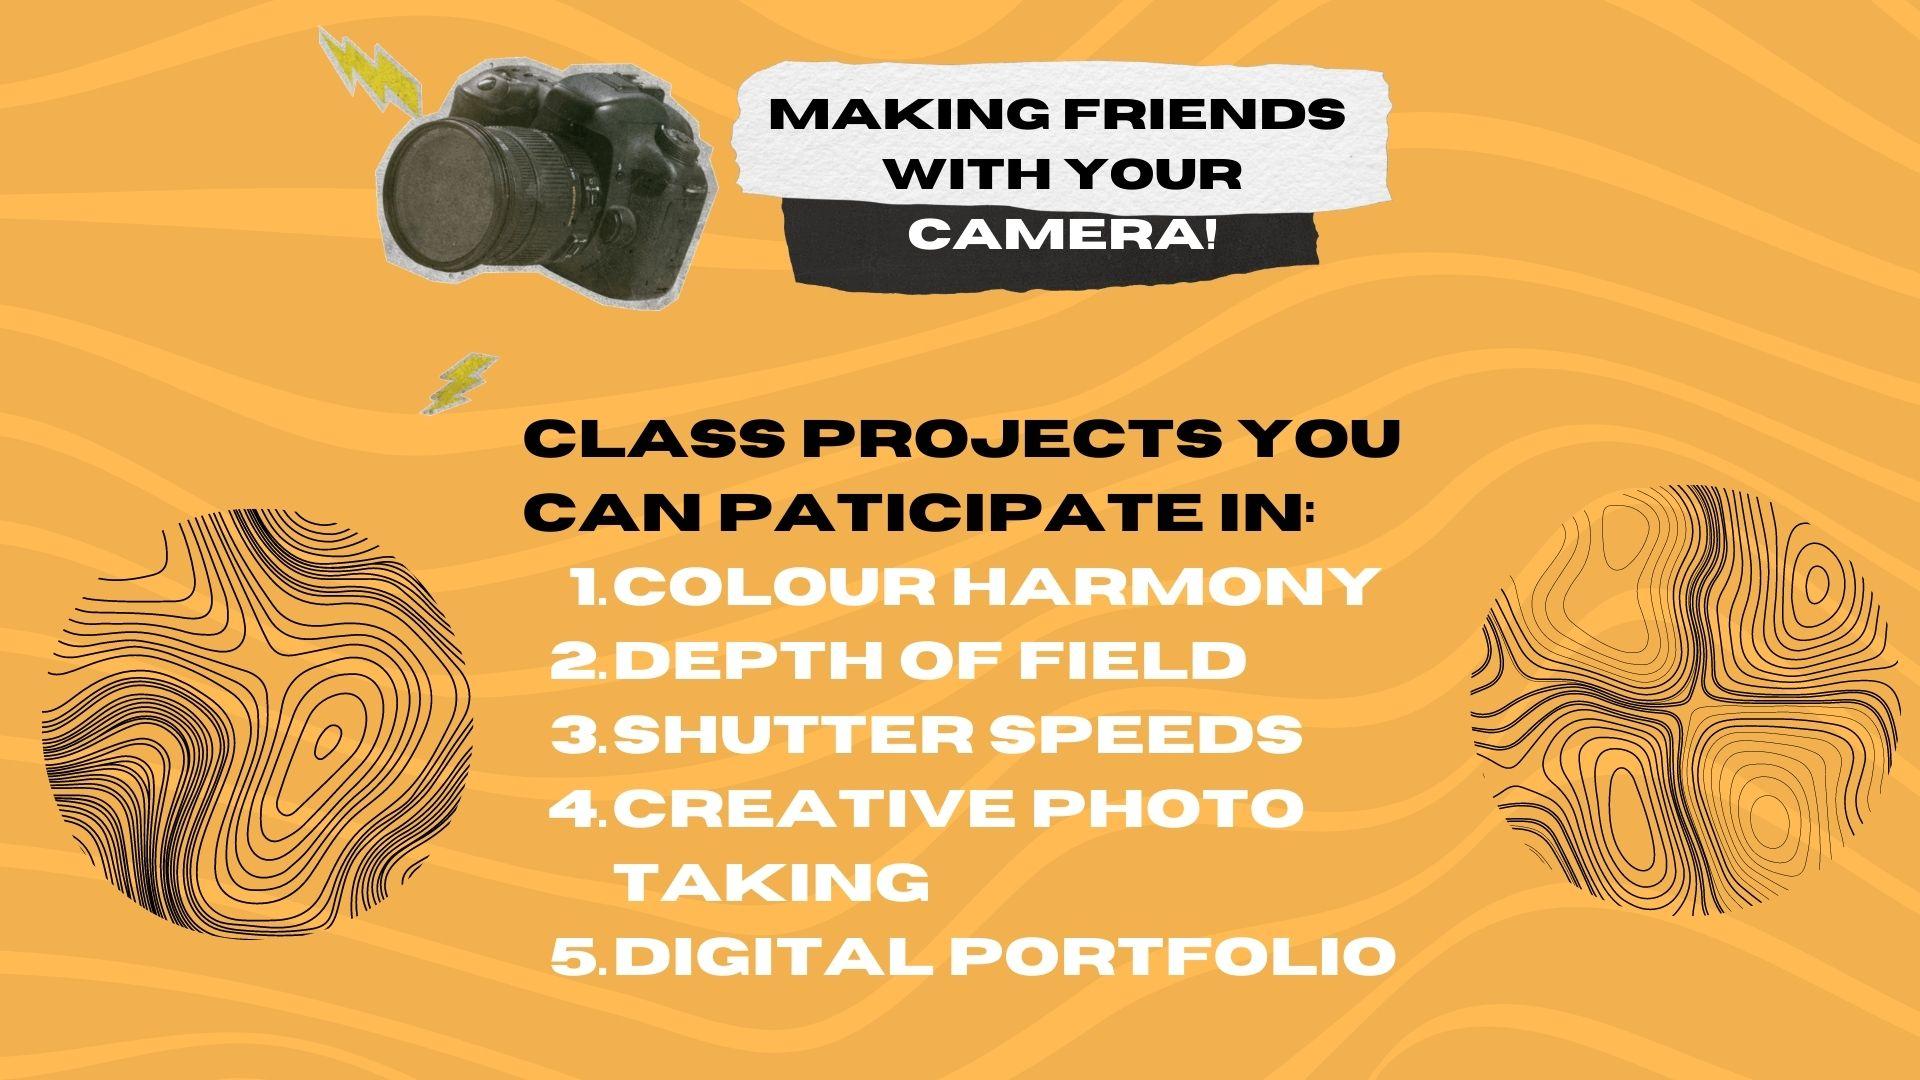
3. Projects: Hello, everyone. The class
project is a combination of four exercises aimed to make you friends
with your camera. Our aim is to create
a portfolio that can become an amazing
space for you to collect the photos you
take in the class or generally in your photographic
practice afterwards. The first exercise
is designed to make you both creatively
stimulated and learn how to use the camera to capture colors
around you generally. It is understanding of complementary colors
using a color wheel. It's like finding combinations
that you like the best, for example, red
and green orange and blue, such
complimentary colors. Second exercise is all about learning about depth of
feel in plain language. It is the sharpness of the
subject or the background. We would be using our
aperture settings on our cameras to achieve shallow depth of feel
usually used for portrait photography
and large depth of feels used for landscape. Third exercise would be playing around with our Shua speeds. It is all about learning
how to capture motion, whether using it to capture these beautiful emotional
images or still image of a fast moving object. Fourth exercise in our
class project would be working to create this
artistic and creative concept. It is producing photos
that speaks to your ideas, creativity philosophy by finding
inspiration motivations, applying all the technical
skills learned to produce highly creative
conceptualized photos of your choice. You're free to share
your exercises on the class project and
also learn how to include them all in your
photographic portfolio as we will be seeing
in our class videos. I'm excited to start
the class now. All right, can't wait to
meet you in our next class.
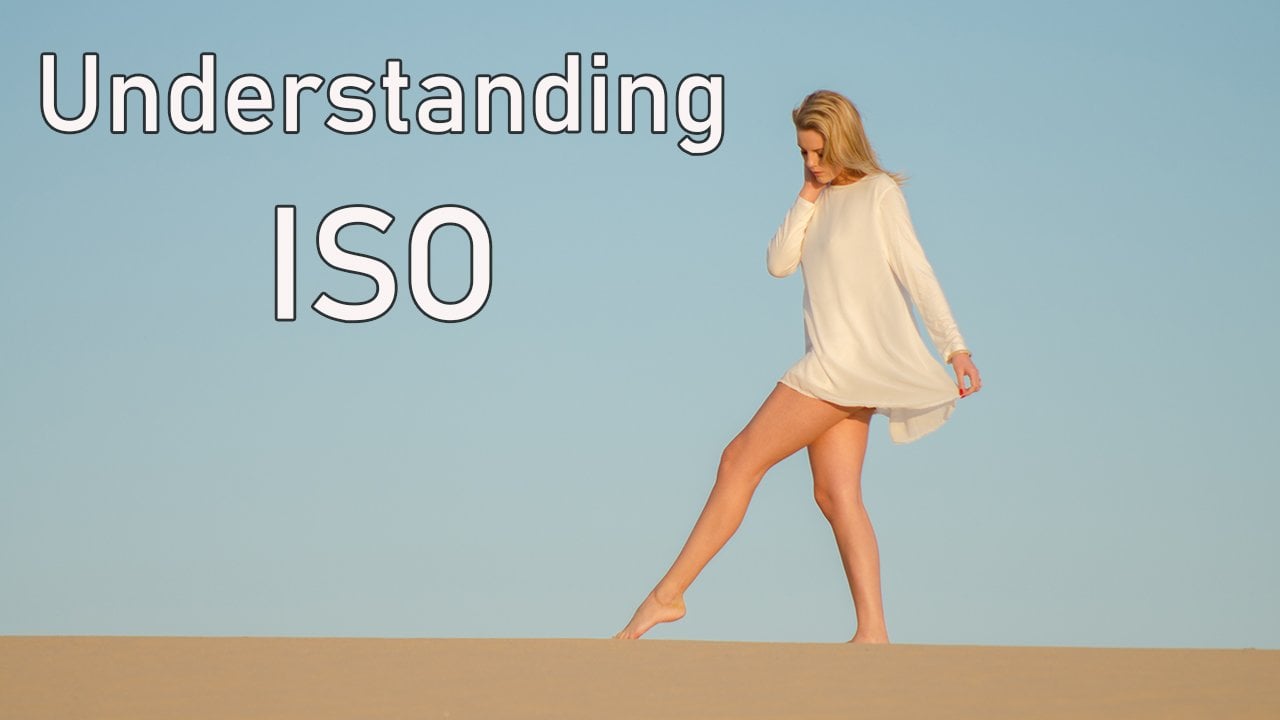
4. All About ISO: Okay. ISO is one of the crucial cornerstone
of the exposure triangle. ISO setting determines quality and brightness of an image. A smaller ISO
setting, let's say, between ISO 100400 guarantees high quality and sharp image. You won't really see any
noise or gray in the picture. A higher ISO settings anywhere
above 800 to let's say 32,000 means quality will deteriorate as you
increase the ISO number. There is a prominent
ISO buttons on most of the cameras for
you to play around with and change these
settings around. Generally, if it's daytime or just we have a lot
of lights window. It means that it
is quite safe to have our IS the lowest
possible setting. Let's say 100. We are only interested in
changing our stock settings and shutter setting after
after we have set our ISO. We have to make sure
that we have set our quality to its highest,
then we build from there. Then we move on to thinking
about depth of field and the motion of an
object. All right. Let's say we are shooting at low light conditions indoors
or let's say shooting at night under only
street lights or just getting some light
around us from shops, houses, restaurants,
cafes, and cars around us. After setting our top and
shutter speed settings to its best possible scenario, we check back with our ISO to see if it's still quite dark. Generally, then you
have to make sacrifice. Just sacrificing the quality of the photo in order
to get a photo, which is well
exposed and visible. That's why a lot of night
shots have grains and noise in them compared to if they're taken
during the day. So we have to sort
of navigate now 800-32 thousand ISO settings in the degree of light that
is available around us. Let's say we are in
a well busy street. Maybe ISO 800 with a
low approaches setting, and optimum shorter
speed setting, able to give us a
well exposed photo. But as we move away
to a darker alleyway, we have to then increase
ISO to now let's say 16,000 just to
barely see anything. You shouldn't move to a
low ser speed setting because then you will start capturing images that
are on Balan still, and we can see a
lot of motion blow. Okay. In following videos, we will definitely talk
about various scenarios. So it becomes really
abundantly clear for us how to best use our
exposure settings. Again, guys, All of this for the first time can
seem a little overwhelming. But again, as you go and break down each common
scenario that you as photographers beginning to explore their digital
SLAs will face. I'm pretty sure you will be
able to take away a lot from a following course videos
and also implement them practically so that any ideas
about exposure triangle, ISO, stop, aperto
depth of field, ser speed, motion blow, will sink deeper into practicable and tangible
ideas that you can access and really understand for yourself while you are
experimenting with your cameras. Okay.
5. Depth of Field: Okay. Depth of feel is the acceptable sharpness of the subject and object
in front of you. This is the most simple
and plain language I can think of to have
explained this to you. So it is in photography
and videography. It is often classified as shallow and large
depth of field. So we will break it down for you so you can
understand it properly. Okay. So as we
have learned that, to settings on a camera
controls the aperture. To put it simply, it is
always great to think in terms of this
inverse relationship. So if your stop number
on your camera is low, then it means a higher aperture. A higher aperto means
your lens and camera, allowing more space
or just a window that is open for the light to come in inside your camera
and process image. That is why a lower
stop number from 1.8 to let's say 5.6 on your camera
means a greater aperture. It means you're
allowing a lot of light to enter and make your
subject really pop out. Hint portrait photography with
the principal subject and focus utilizes a F stop
number that is low. So it means that we are creating a shallow depth of
field or you can say that the meaning that it is the acceptable sharpness is
limited to only a subject. That's why we may see in
a good portrait photo. It is all about the
subject being in clear sharpness and focus while you see a background blur. This is very cinematic look in filmmaking and it's a principle aesthetic in
portrait photography to have a background blur, shallow depth of field. Now, if you move
our extra settings on our camera to a high number, let's say somewhere
between nine to even as high to
all the way to 22. It means that we are
creating a lower virtue, a lower window, allowing less
light to enter a camera. It is often the
case that we care about creating a
large depth of field, meaning creating
sharpness and focus to a background rather than just
focusing on the subject. Okay. High top setting and a low apojo is mainly utilized when we are taking
landscape photos. So when we are interested in
capturing a lot of subjects, their relationship to the
background activities. Instead, in portrait
photography, just one or two
primary subjects. Thus, a high stop
setting is used to create a larger depth of field. All right, guys,
in my experiences, there is a sweet spot when we care about the sharpness
of the Celts subject, as well as the background. This is generally the case for a lot of street photography. Where we want to
possibly capture some elements of a subject as well as the near
background around them. Medium depth of field,
as I like to say, can be achieved by
using a F stop that goes from the range of
5.6 to eight to line. In my experiences, an
expensive lens would allow you to achieve a really
low stop number. But DS its with primary
lenses often can allow you to go on stop
as low as three to four. They are good and great
starting points to shoot with shallow
depth of fields and also try shooting
good landscape photos of a city of mountain ranges, of nature of hikes and trails
with a higher stop number. A low stop number means you're allowing
a lot of light in, a higher stop number means you're allowing a
little bit of light in. But again, it depends upon
if the subject is your hero, if the whole come passing
background is your hero. Again, after that, we move on to our other
exposure settings. Is insurers pees, all these three settings are interdependent of each other but depth of field is such an important concept for
us as photographer still d.
6. Shutter Speed: One of the crucial settings
on our DSLs shutter speeds. It is so amazing to
have the ability to actually maneuver
between our shutter speeds to either capture still images of a
fast moving object or just to capture these trails of motire
in a slow setting, which are known as motion blows. Show speed settings,
in my experiences on our cameras can be seen as
numbers like 30 or 60 or 100, or thousand, which
means it is either 30th of a second or 68th
of a second or so on. It is like blinking
our eyes and capturing a stemgHw fast to bling
is to your camera, is the show speed allowing
light to enter the camera. So if the camera is, let's say, allowed only one by 1000th of a second when your
camera reads 1,000, It means your camera
will just instantly capture precise
position of an object. One by 1,000 of a second. A high share of speed is used
to capture still images of high speed moving objects like a racing car or athletes running
during a football match. Now, using a very low she
speed where your camera may read something like
one or two or 30. The quotation mark
here means seconds. It means your camera
lens is open for one or two or even 30 seconds depending upon the
settings you choose. You will hear the sheer
sound in the camera only after let's say 2 seconds
have passed or 30 seconds. If we choose to do that, we use low shear speeds
to capture motion blurs. The beautiful traffic
shots that you often see are result of the low
sheer speed settings. Now, let's talk about
optimum shuto speeds. The shuto speeds,
which is comparable to a human eye and
real life motion. In my experiences, the shuto
speed settings of 30 or 50, which is one 38/second
or one 50th second are the best optimum setting to
capture daily scenarios. Daily scenarios are often not high speed moving objects
or capturing motion blows. It is like street photography or still portraits of friends or
family of flowers or trees. Anyways, I advise
everyone to not go below one 38th of a second and not above
100th of a second. The sweet spot is between 1308 of a second
21100 of a second. As soon as you go
below one by 38 of a second where your
camera may reach 2010, 15, five, and then one
with a quotation mark, it means you're going
near slow so speeds, and you will start seeing
as we talked about, appearance of motion blur, not ideal to capture still
photos of real life scenarios. Similarly, if you
start going above 100, that is maybe
128200 of a second, 500 of a second, you will start seeing
real dark images. You have to really
understand that a lower sho speed number means photos
appearing more pride because our camera
has more time to take in all the lights
and more darkers for a sho speed number
because it has really less time to get exposed to the subject
in front of us. All right. Thank you for
sticking with this class video. I'll see you in the next class.
7. Color Harmony: In this assignment, I
want you to have a look at the color wheel and
click two photos of two different pairings of color combinations readily
available around you. You are encouraged
to be creative and choose color
pairings that will work. Okay. All right. So complimentary colors are so ever present in our
lives, in our homes, in our wardrobes, architecture, art, spaces, and
the food we eat. The color wheel, as
you can see here, simply guides you into picking color combinations that can
work really well for you. If you're free to be creative, choose odd parings
of colors as well that you feel works
really well, right? It is all about your creativity. You know what?
Complimentary colors can also be black and white. If you think about it, you
can be bold and also be experimental with black and white photography,
if you may choose. Look at your camera
manual and see how to switch your picture
style to monochrome. Combining the technical ideas that we have covered
in our videos. I want you to express yourself. Choose two unique color pairings from the color wheel
that work for you. These are complimentary
colors and show us here on class project what you're
being able to convey. I also suggest highly
to take some time and edit your photos
on either light room, photoshop or free photo
editing software like Canva or Photo P. Please refer to the photo editing
made Easy video. Please make notes of your
exposure readings on your camera and of your
photos that you're clicking. That is your ISO, stop, and Sher speed settings. Now, make come up with a clever
title of the photos that you're clicking and also mention the camera and the lens
that you're using. And again, exposure
readings, right? Thank you and see you in
the next class cheers.
8. Lightroom Basics: Please open Lightroom classic
on your computers or Max. Please make sure you're
working on Lightroom classic, not light robe. There
is a difference. Ideally, for computers and desktops, classic is preferred. As you can see here, I want to import a photo from my ED card, which is connected
to my Mac mini here. I'm able to see all the photos
here in my ED card folder. So make sure to
click on and check all and just select the photo or photos
we want to work on. So all right, let's
click on port. Over here at the library, the primary information
that you see is the exposure settings
that you have used and the focal
length you used as well. So, it is a histogram, which gives us the spread of darker and brighter
areas of our photo. Leftmost area concerns with
darker shades while the rightmost with more whiter and brighter parts
of our photos. Let's head to develop. Here, the first tool you see
is a crop or a re size one. Simple enough, you can omit
the areas you may not like. Here, you can see the mask
button. Click on this. You can see that light room will give you a
bunch of options of creating a layer mask of subject or background
or even sky. So let me click on
subject mask layer. That tells me that
the layer has been identified by light
room. Perfect. Now you can see in this
first layer panel, there is a plus sign. Click on that, and
you should be able to now create a
background layer as well. The red area color shows
that light room has identified the
background layer too. You can click written
or just click and the mask layer
would be created. If you feel that you may
want to control of how you choose your background or the object layer,
very specifically. You can select the
brush tool here and a bunch of other
options and just select the areas that you want to select instead of light room automatically doing
that for you. Again, it would be
again this sort of red area that you would
be brushing or selecting. Perfect. Moving on, I'm
making some changes on how I see my photo should be. You can see how my
histogram is reacting. So any changes that you make is actually a direct response to the changes being seen
in the photos histogram. If I make changes specifically
using black or shadows, then the left part that concerns itself with black and darker parts would respond naturally. Similarly, if I interact with
the whites or highlights, it's a right part
of the histogram that would appear to change. Here you can see how you
can compare the changes in your photos by using
the compare feature in Lightroom classic quite easy. Make sure it reads y y. It is basically about
comparison of before and after, and you can change
the various ways you can preview it as well. In the second photo
that I am choosing, I am looking to edit in
an interesting fashion. I have this photo
with a slow shad of speed with a bit
of motion blow. I am making changes with my its, plaques, highlights and shadows, and also contrast to see how I can make this more inviting. It is relative of
how you want to make changes to a
specific photo. Now, here, as I can
see with temperature, you may remember in our
white balance course videos, when we use raw file format, opening files in light room, we can see the exact color
temperature in Kelvin. So if we increase the dial, more hues of orange
yellow and to the left, if we move our dial
more shes of blue. Basically moving this
dial temperature dial to the left means telling
the software that the color temperature
is pretty low, which is a lie in this case, because it was sort of
bright and sunny outdoors. That's why such blue color can be seen on a light room to bring the color
temperature up. Alright, you can see
our collective history of the work that we have done. If you're not
happy, you can also use to clear it out and
you can just begin afresh. And also, you can see
and track your journey. He said, there are a bunch of really cool filters
and scenarios that light room has for you. You can also make your photo as black and white from
here, as you can see. Now, I'm looking for something that has a lot of rainy effects. So I feel there are presets that might just work out for me. So after all our hard work, we want to export a
photo so we can share it out or even just
consider it for printing. All right, so to do that, go to file, export. You can see you can
choose the folder, create a folder as well,
to be more organized. Make sure to choose custom here so that you can name
your file as you want. Then select the file format. I would go for JPEG here. You can also choose different
file formats that you like. PSD and DNGs are usually prefer if you
want to work on them over photoshop after this
or open them with a similar photo editing
software. All right. Thank you, guys. Hope
this light room course basic tutorial has been helpful. See you in the next
course videos. Cheers.
9. Shutter Speed Project: Hello, everyone. In
this class exercise, we want to play with
our shear speeds. So, all right, guys, as a
refresher, if you need it, navigate back to my Sar
speed video. All right. So I want you guys to one. Produce a picture with motion blur that to a
mid range motion blur. A protip to use a slow
motion blur setting. It's ranging
anything from one by tenth of a second
to say 2 seconds. If you're looking to
get motion blur effect this still object around you, just move your camera. Just to move your camera, right? Now, the second problem here is to produce a picture
with motion work. Now, working with the
slowest speed possible. A pro tip here is to now move your so speed setting all
the way down to 30 seconds. Now, my advice is to
use a tripod here, then choose, I would say a nighttime or if inside,
tin the lights around. Making sure that your S of settings are at the
lowest and the s of speed and your top is really high to
balance your exposure. Now, the third prompt is produce a picture with really
high shuttle speed. Now, move your shuttle
speed dial all the way to a high
number like one by 1,000/second and try
to snap a picture of fast moving object
or maybe a running tab. Now, these two fun prompts, I also want to throw in here. Now, the first prompt here is, use your focus ring
to completely defocus and create amazing looking
bouquet shots of your choice. The second bonus prom is find a reflection or an
amazing perspective to click amazing photos
of your creative genius. Alright, guys, I'm
looking forward to seeing your wonderful photos in
the class project section. Please mention the
specific prompt you are responding to and also find time to edit your photos before uploading always a good
practice that I plan. I'm very helpful to the class. If you can also note down the exposure settings
of your photos. Again, S everyone we'll
see you in the next class.
10. White Balance: White balance is used to adjust colors to match the colors of the light source so that
white objects appear white. Subjects may lit by a number
of different light sources, including sunlight, in Candacent verbs and
fluorescent lighting. You can see on your camera
there should be a WB button, or you can see your camera
manuals to search online for your particular camera
model and how to navigate into changing
the white balance. There are presets built in your camera which are
auto incandescent, fluorescent, direct
sunlight, flowery, shade, and then in
some camera models. You can also see custom set, standing for Kelvin.
Okay. All right. As you can see here
in this image, how different white
balance settings respond to temperature outside. So if you're shooting outdoors, then you are telling
your camera that hey, it is warm outside. So when we change our white balance settings
from the WB button or the WB icon to
daylight or shade or manually put in at a
higher temperature. It means that we're
communicating the temperature that we
think our surrounding is. So increasing the temperature on our camera or even light
room or any photo editing software means adding amber or red or to cool the bluer tones. Now, for indoors, when the light temperature
is really low, it means that we are lowering our ties in camera or
light room settings. Incandescent or white fluorescent white
balance sing means we are telling our camera that we are add a lower temperature sex. Thus, camera will add more blues to balance
the reds and the ambos. So in real life,
when you see a fire, blue color means more warmth naturally in terms of
Kelvin or Celsius. But in simpler terms
in photography, it is more like that
blue means more cool and red as more warmer. By nature, blue skies means
more light available to us. But for our simple
understanding, if we are increasing our camera values of
Kelvin or Celsius, it means that we are putting in the temperature we think
outside should be. To break it down in
simple language. When it is nice and
sunny outside with clear blue skies,
we choose presets, which is daylight, telling
our camera the temperature out there is high in terms of
the light available to us. Please add more red
ambus and yellow. Now, with the shade setting, we are telling that
the temperature or the light available
is really high. So please add a lot of reds and ambers
to compensate that. But when it's overcast or
darker clouds out there, almost no sun, we tell
our camera that hey, it is bright outside, but there is a
little less light. So the cloudy white balance, the preset will add
a balance of blues, reds and ambers to give
it a fair balance. But when you are inside and you just have let's say verbs, LDs and indo lighting. You may choose incandescent
of fluorescent presets. This tells the camera that, hey, the light available to us or the light temperature
is pretty low. So to compensate the reds
and the ambers inside, it will add a lot of blues. To get the white
balance required. Try for yourself if you can use incandescent white
balance setting on a bright day outside. You will see your fort
turn out to be super blue. So similarly, if you
use shade preset inside your house
during late evenings, it will be uncharacteristically
amber or red. So it is so crucial
for us to make use of our white balance
settings properly. Generally, our white
balance settings on our camera is set to do, meaning our camera
is interpreting, whether you are
inside or outside, or it is cloudy or bright. So I want you to now
be in full control, always be in the habit of changing your white
balance setting, reading, in which
setting you are outside, is it cloudy or are
you inside right now? Thank you so much, everyone. Let's move on to our next class. Okay.
11. Exposure Settings Tips: Getting our exposure
settings right. In photography, when we
say exposure settings, it means ISO, F stop and Serped. These three settings are part
of the exposure triangle, and they are the cornerstone
of any camera out there. Once you get the hang
of the balance of these three settings responding
to real life scenarios, I am confident that you
can pick any camera in the world and just
be friends with it. So as I have mentioned
this before, different cameras of
different manufacturer would have different interface, different names, to
the same settings and some unique features. But the essence of exposure settings is the
same. All right, everyone. The best way to
learn the balance of exposure settings is to go
through real life scenarios. So let's have a quick look
at a bunch of photos in real life and try to talk about the settings that were
used clicking there. So in this photo,
here we can see a tennis ball captured
in middle of motion. It means a high shed of speed, we can see the quality is good and depth of
feel is shallow. So to get this result, we want to have a
high shed of speed, a low stop setting, and a low ISO value. Now, in this second
portrait photo, we clearly see it daylight. Our subject is in focus. There is background plow, good quality, still
motion to achieve this, navigate to a low stop
number, low ISO number, and then use your shutow
speed settings to set how bright or dark you
want your image to be. We want still portrait. So we don't really want to go below one by 30th of a second. In this photo, it is all about taking a
photo during night. It is tricky, everyone. We don't have a lot
of light in here. So we want to now operate
at a lower stock number, an ideal shutter speed number. Nothing below one by 32nd. We still want a still
image not motionar here. Now, we may have to use
a higher ISO number, so to get it bright
enough, visible image. So generally during night, A conditions with
not enough light. We have to sacrifice
a bit of quality. Now, this is a
landscape for everyone. We know that we need to work
on a large stock number, a large depth of feel 11-22. We want to use the ISN number 200-800 for a decent
quality and navigate cero speed to an idea
number of one by 30th a second to
get good exposure. Reading this image, we can
clearly see motion glow. This means guys that
Archer speed is quite low. I would say it is
about 30 seconds. Now to get this kind of result, we want to use a tripod
ideally for stability. Because it will
take your cameras 30 seconds without interruption
to get this exposure. It also means that your F stop settings would be quite high
and your ISO really low. A lower shutter speed setting
means a lot of exposure, meaning a lot of light
coming into your camera. This is a simple street
shot achieving this means using a mid
range stop 4-8, a low ISO for quality and a
ser speed ranging from one by 38 to 100 of a second
for a stable shot. Everyone, it is not easy to get the balance right
in the first time. Even though I've broken
these scenarios for you, it will be best for you to discover what I'm really
talking about for yourself. All these exposure settings on their extremes produce
extreme results. A balance is always
working on a lower ISO, F stop in low in range, shutter speed from
one by 30 to one by hundred for many photos
in real life scenarios. But to get interesting results to achieve very specific loads. You may want to just take
time and practice and go through class videos
lowly and surely. Also make sure to have your white balance settings
change accordingly. Thank you, everyone. Let's hop onto our next class video. Okay.
12. Depth of Field Project: Hello, everyone. I want us to now play with our
camera apertures. Change our stop settings and
click some amazing photos. I would advise everyone to refer to my aperture and depth
of field class video. Just as a refresher for
this particular exercise. Now, the first prompt is produce a picture with the
shallowest depth of field. As much as your
camera would allow. A quick tip, your top
setting would be the lowest that your camera
or your lens can allow. If you will notice that if you're using a zoom
lens and if you're changing your focal length or
just zooming it like this, the lowest top setting
you can use would change. So my advice would
be to not change your focal length and it as close to your
object or subject. Physically as much as
you can to achieve the lowest stop setting
in your camera lens. Now, second prompt is producing a picture with a mid range
shallow depth of field. For this, maneuver
your top settings anywhere between 5.6 to eight. Our goal here is to get both the subject and a little
bit of background as well. This is ideal for
street photography. Here we want to get
both the subject and the nearby background activities both in sharpness of focus. Now, the third prompt is
to produce a picture with a deep or a large depth of
field. All right, everyone. So let's play with a
larger stop settings. So here, anywhere 9-14 would do, aim is to get the details of the background more
and more clear. The fourth prompt here is
to produce a picture with the largest depth of field
that your camera can allow. We want to now navigate
to a highest est of settings to get the most details of a beautiful landscape. Dally, this setting,
as I mentioned, is for landscape photography, where our aim is to try to
capture a lot of details. So think of a mountain range or a city escape
from a b, right? So getting a lot of details in. All right, guys, all our
photos with FTOps are interdependent with each other with other two exposure
settings as well. That is ISO and Sopeed. So again, please feel free to upload these photos
and class project. Come up with clever
names and titles. Also do mention which
prompt you're responding to from that I've given one to four with
your exposure settings. As always, sit down on your
computer, on your light room, other photo editing
softwares to make your photo pop even more.
13. Compositional Strategies: Let's talk about
compositional strategies that you can use
while taking photos. I want to talk about
rule of thirds, one of the most useful and
time tested practices using your standard three
by three grid lines on your camera screen. Some characteristics
we can discuss here are nine equal quadrants, providing a helpful visual cue, compartmentalizing
subjects and objects. Helping in creating a flow between subject and
object as well, balance and
equilibrium, organizing light and shadows in
a more concise way. Other compositions
we can achieve using rule of thirds
are centered. It gives us two equal halves, gives us tunnel vision, effect, organize attention,
it is aesthetically pleasing. It is simpler in its organization
of all the elements, and like rule of thirds, it organizes flow of colors
and light this time. Other perspective weight
strategies that we can use such as shooting from
below or even above. So Below gives us
the idea of being small or maybe looking
at something more powerful to us while looking
from above is more about observing things which may look smaller than they might be, or it gives us specific idea of our relationship to it or them. Frame within a frame is a
very interesting strategy. It is basically a
frame in terms of, let's say, a window or a door
within our camera frame. So you can find natural frames
around nature with trees and various natural or man
made structures as well. Now, let's talk
about leading lines. The lead your vision,
the command focus gives you a sense of direction. Also, leading you in and out
of the subject and object. Then there are
advanced strategies in terms of using triangles
and diagonals to frame. These can be sort of
advanced leading lines, creating shapes from
a point of focus and organization of
various elements. You can also use negative space effectively to communicate
an interesting idea of mystery or intrigue or may give your eyes a
breathing room of sorts. There are other interesting
composition ideas in terms of the golden
triangle and golden ratio. They all for someone, starting out can be incorporated by simply
using as mentioned, our three by three grid
lines on a camera, you can think of them as
advanced form of rule of thirds. These composition strategies are highly effective once you have your exposure settings all set as you can follow the
previous course videos. Thank you and see you in
the next class video.
14. Creative Photo Project: Hi, everyone. I want us to
explore our unique creativity. In previous class exercise, we responded to various
problems relating to specific camera settings. This time, I want you to be a free flowing
creative person who is aware of the technical
abilities of the camera. It is now time for
you to hone down your artistic eye
and endeavors to click three amazing
photos of your choice. Now, these three photos will be the highlight of your
digital portfolio. Please refer to my making the digital photo portfolio as a refresher. All right, guys. What I want from you is to
find an artistic inspiration, let's say, a photographer, an artist or a concept that
really speaks highly to you. Choose the story that
you want to tell. Do you want to talk
about, let's say, your immediate surroundings or your travels or an abstract
concept or life in general, or the people as you
see it around you. Now, in your digital portfolio, I want you to take some time and write about the concepts
that you are working here. Come up with a unique title for the photos you are taking. If you like please, I would suggest mentioning
the exposure settings, the camera and the lenses
that you are using. You can also write
in the descriptions of your photos about your technical ideas or even as I mentioned, your
artistic inspiration. All right, guys, you are free to share the photos
directly here or the links to your first online
digital photo portfolios. I'm so eager to see
the wonderful work that the class can produce here. Okay. Thank you so much for following up with
all these exercises. I sincerely hope that these can serve as something useful in your journey of becoming
an amazing photographer. Cheers, everyone.
15. Digital Portfolio: I will show you basic
steps of curating both an online as well as an offline portfolio
for your reference. A digital portfolio is a very powerful way of
curating your work. You can find a space to create different sections of
your creative photos. It is also a very
interesting way to relay your vision out
there in the world. I would like to see you
try your hand in creating a simple and beautiful
photo portfolio. You can use services like ICs, which allows users to create free websites with tons of great photography
and creative templates. I also recommend for
offline portfolios as well, which can be shared as simply as PDFs or presentations by using free design softwares like v. It is a very easy and user
friendly software, which has a lot of design templates and
customization options.
16. Final Tips: Thank you for following up
with all the course videos. I sincerely hope that they
were of help can become the foundational basis for your photographic and
creative journey. In closing, I would
like to point out that all the projects I've
asked you guys to participate in will aid
you immensely to put together both the theory of photography and to a
tangible practical. Thus, a digital portfolio in today's digital age is crucial for others to see your work
curated in a concise manner. In addition, it is a
very effective way of motivating yourself and also communicating
your creative vision in a more professional manner. Lastly, there are a few tips for show that I want to discuss, which in my experiences, working with the
camera, I found useful. While setting your
exposure settings in manual mode on your camera, I aim to first set my ISO to
its lowest number possible. Then move on to my
Aposure setting, and then lastly,
my shut of speed. If I If still, I am not satisfied with
the exposure I am getting, I revisit my ISO. I only sacrifice my low ISO
settings when my pogo and surer speed setting doesn't give me ample of exposure
that I'm looking for. This is quite common during night time or low
light conditions. Second useful tip, multiple
shots of one frame. Maybe in different angles. I would rather
have 100 photos to choose from rather
going through ten. It is my personal experience
till now that out of 100 only ten would satisfy me. So take a lot of bad photos to find the gem you
are looking for. The last tip is to always check your focus multiple times. Sometimes it is too bright out there we are able
to accurately read a mind looking at the small camera screens
that we have in our cameras. If the focus on our subject
is sort of right or wrong. Always double and triple
check your focus. And when in doubt, if it's in focus or not, retake a photo and
do a focus check. A great photo can be down with an improper focus when you look at the photo at a
larger screen later. So thank you everyone for taking your time out and
following these course videos. I sincerely hope
that I'm able to help you become a
better photographer. It has been a pleasure
curating this course and best of love with making
friends with your camera.
 Anushray Singh, Filmmaker, Media Artist & Educator