Transcripts
1. Introduction: Hi, welcome to my studio. I'm a mixed media artist
and I've been painting and exhibiting for nearly
30 years. Recently. I've finished a 100 days
of collage project. It was huge, Just a bunch. And I learned a few
things along the way. I absolutely love colors, but I already knew that. But what I found
through the process was my favorite applications
for colors. So I'm going to share with you the best techniques
for creating collage. And number one of my absolute favorites
is using found papers. What I love about using
found papers is that, well, they found you can gather them from paper
packaging, recycling, the paper bags from
your shopping tickets, tags, cards, letters,
anything is possible. And most of these materials
will be found around your home and either have
a minimal cost all baby, they can be free. In this class, I'm going to show you how easy it is to create beautiful collage
using found papers from around your home. I'm going to give you a
list of 20 possibilities. And there might be someone that list that you haven't
thought of yet. You will learn how to
apply these papers, how to adhere them
to the substrate and which adhesive
is best to use. We will discuss the
elements of colors and how to achieve
the best results. This class is
suitable for anyone wanting to learn the
art of paper collage, especially good for beginners. Because I would
take you personally step-by-step through every
process of the application, right from the beginning
of choosing your papers to the end result of hanging that glorious
artwork on the wall. It's going to be so much fun. You're going to learn so much, not just about collage, but about yourself as well. There's minimal cost as
we're using recycled papers. And you can design this artwork exactly how you
would like it to be. At the end of the class, you will have gained
knowledge on how to create collage from a
variety of materials. And you will have gained
the confidence to create your own beautiful
original artwork. You will have learned
how to staff the colors, had a complete the design and had a finished
lack of professional, or we'd love to see what
you creates a don't forget to post your artwork
in the project section. I'm really excited to begin
this adventure with you as we delve into the glorious
world of mixed media collage. So let's gather materials
and let's make that.
2. What Can You Use?: I'm so glad you joined me
on this creative adventure. I absolutely love
colors because it's such an incredibly liberating
and versatile medium to use it with your artwork. The word collage comes from the French word meaning
to glue or to stick. So basically anything
that you can glue or stick onto the
substrate of backing, we can use vocalized. Collage began as a form of modern art in the
early 19th century, when Pablo Picasso
and George Brock started gluing items
onto the canvas. Picasso's still life with chair canning featured oil
cloth glued onto the canvas, and take even added
rope around the image. Brock, fruit dish and glass and cooperated pattern
wallpaper into his design. I absolutely love
using role-play. So these four runners
of this fabulous mono not has given us the
permission to use whatever we can
find to pour onto our beautiful whereas
in the form of collage. So a baby, what are you
worried about and you got nothing to lose
and nothing to fear. This class is going to
be a whole lot of fun. And I'm going to give you
20 possibilities to help jump-start you in finding possible items for
your collage artwork. You'll be able to find
fabulous material from around your house or simple items that you can pick up
at the dollar shop. I can't wait to get started. So have a look at the
next lesson where you have 20 ideas to get you going.
3. Finding Papers 20 Possibilities: So let's get started. Now, my very first
favorite way of making colors is
using found papers. Now you might think
that you don't have a lot of papers
in your home, but you're going to
be quite surprised at the beautiful items
that we're going to use to create with collage. First of all, you
have paper packaging. This comes wrapped around
all of the beautiful things that you buy and purchase online comes wrapped in
paper packaging. You get the brown paper. You can also get white paper. Paper packaging is fabulous
for using collage. So make sure you
keep it next time. It turns out also
the white tissue. The white tissue is
fabulous for your collage. You can use it just white or you can color it in so
many different ways. This is an absolutely
fabulous material to glue on it so easy. And did I mention free
resources of paper packaging? Now you can also use the brown paper bags that you get when you buying
something from the store. This was from my glorious
holiday last week. Yeah. I bought lots of things
from this store. And I'm going to use
this brown paper bag for the substrate or
the base of my collage. It's great to be
able to recycle. It's a free resource and
it's absolutely fabulous. So remember that when
you're out shopping to keep your paper bags because they
make fabulous colors paper. Now, the next thing
is wallpaper samples. I have found quite a few places, interior design places
particularly that have those big books
of wallpaper samples. And sometimes they
want to get rid of them cheap or even free. So when you see them
grab them because wool, fiber in the sample books
makes fabulous collage paper, especially if you've
picked it up. But even if you have
to pay something, the last wallpapers
sample book I got I paid for I can't
remember what it was. It wasn't very much
because the book had been damaged by water. So hello, I was winning. I've got a whole stack of sample papers that are
perfect for collage. Wrapping paper is also
fabulous for cars. You get a hollow in endless
amounts of beautiful colors. It's really cheap. This one's from one of
those dollar stores. And look how glorious, that is. Absolutely fabulous. Sometimes the wrapping
paper is a bit thin. It may backer with your glue, but don't let that
stress you because it's going to look fabulous in
the overall composition. So pick up a couple of
sheets of wrapping paper next time you're
at the cheap store and that will be fabulous. This is more paper that came
wrapped around something. I purchase, a stat
that is just glorious. And the papers are all different
qualities of thickness. And I think it's so enjoyable to use the different textures. On the lines of packaging. Don't forget to look at what
you pick up. Oh, purchase. That's in a box because
sometimes the boxes have really nice textures and colors and patterns on them. And when you cut the
pieces of the boxes apart, they made great shapes. Packaging is always
fabulous for colors. And what do you mean you
don't have champagne? Have a look at our fabulous,
this champagne box. Folds out. I mean, glorious
collage material. If you have to buy
that bottle of wine, that's just what you have to do. Because you want to use
the packaging for you. There's gotta be
research along the way. So have a look next time you're purchasing something
at the packaging and say whether or not
you're going to be able to use it for a
beautiful collage. Now, Soviets are one of my absolute favorite materials for collage because they're
beautiful and they're soft. Don't forget to peel off the
white tissue from the back. I love using Soviets. I pick them up everywhere
I go from kitchen shops, design, interior design shops. Sometimes you can even find glorious ones in
the cheap shops. If it's a two-ply, you'll have to peel off
one layer of tissue. If it's a three ply,
there'll be two layers. Just remember that you can
stick it on just like that. It just won't stick flat if you don't pull off
the backing tissue. Easy peasy, lemon squeezy. Now you can of course use colored tissue from
the cheap shots. Um, I picked up some black, I was pulling some stencils
on it. It looks stunning. So you can think about
different colors. They are so inexpensive in the dollar shops to pick
up some colored tissue. Of course, you can
use some book pages, especially old books
that you've got laying around that you're
not going to read it again, or you can pick them up
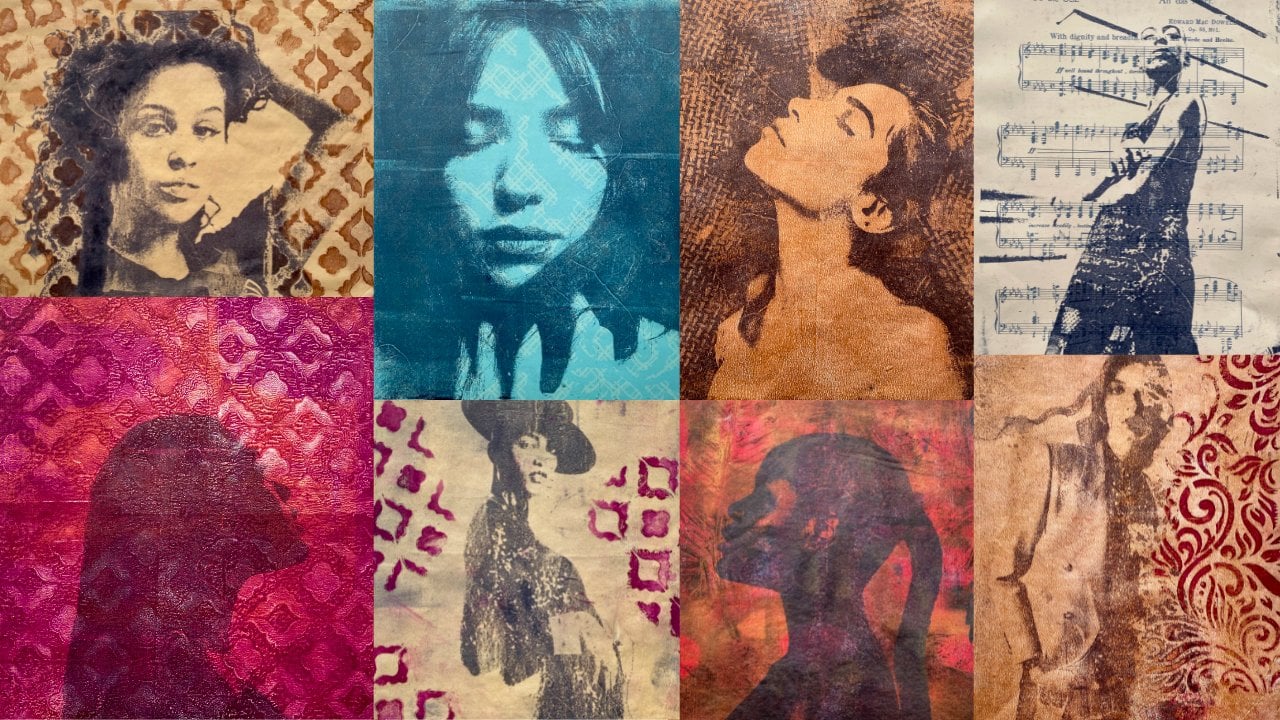
at the thrift store. Very easy peasy, lemon squeezy. And while you're at
the thrift store, make sure you pick up
some music notes as well because they make
fabulous collage paper. Absolutely love
using music notes. You can also color these
if you don't want them, the old creamy color, you can put a little watercolor
on them or some inks, or even acrylic paint that'll
work well to note paper, you want to use some notepaper. This is a lovely textured ones. If you've got some letters, they make fabulous
colored pants. He's saying what I mean, there's so many papers in
your home for you to use. Four colors, gift cards. They make fabulous
collage papers and even the envelopes
that come with them. They look glorious, their
artworks in themselves. And sometimes the envelope might just be the color
that you want to use. So you can cut that up and
split it down the side, and then you have
something for your client. Papers, paper baby. No matter how it comes, you can stick that onto your
substrate and an all works really well and gives you
such a variety of texture. Now there's tags
and these tickets that you get when you purchase
things that are attached. I mean, look how
cool these look. They'll make fabulous
elements of collage. So have a look next
time you're buying something as simple
as tea towels. See how fabulous the tags look. Then of course there's
tickets, the different things. I mean, the list is
absolutely endless. Now, of course you can use brushes that you pick
up along the way. This is a really nice one from an interior shot that's got some great images
and pictures in it. You can also use magazines that are lying
around your house. Of course, they make fabulous resources for
using in your collage, especially if you want
to add some images. The possibilities are endless. Oh, you can also use fabric. Fabric looks
fabulous in collage. You can easily glue that down. And then it just gives you another texture and
different elements along the lines of February, you could also use ribbons. You can use different
kinds of fabric. And even cheese
cloth looks great in collage and dressmaking pattern. Oh my gosh, this simple
and inexpensive material makes fabulous collage papers. And you can always
add watercolors or inks to the dressmaking patterns if you want it, a
different color. So resources that endless have a look around your
house and see what you can find and gather yourself a fabulous big pile
of found papers. And let's create a collage out of these glorious
textures and colors.
4. Getting Started: So where do you begin? You now have your big pile of found papers surrounding you. What are you going
to start with? Well, first of all,
you have to decide what we're going to use
for your substrate. So I'm going to use this paper bag because I
think that would be fun. The substrate is
what you're putting your colors onto to
create your artwork. It can be anything. You can use watercolor,
paper or canvas. Or you can use a
recycled element, which is what I'm using here. Then next you have to decide what glue you going to use
to glue your papers on. Now I personally like to use Mac medium with a
brush because I like painting it on with a brush
because I've done a lot of paintings in my life and
that feels so natural to me. You can also just
use a glue stick. I could use all of these
papers with a glue stick, no problem at all. Or you can use
PABA if you've got something more stiff and
you need a stronger glue. So first of all, decide what
you're going to put it on. Then you're going to
decide what you're going to use with it. You also need to arm yourself with a couple
of pairs of scissors. And you're good to go. All right, so I'm just going to cut the side of this bag and I'm going to
use this for my substrate. Step. I don't want the handle on it, so I'm going to peel
that piece off. You can always use the handle in your collage to add another
line or a texture to it. You can unravel it. It's quite interesting
how it looks. So just remember that
every time you're picking up paper or touching different packaging can use
for color has a question, can you stick it on something? And you too can become
as obsesses me. Right? So that's why substrate, that's what I'm going
to use to put my color. So what am I going to do first? A collage is about
multiple layers and creating beautiful combination of different textural elements. I think what I'd
like to do is tear the edges of this page because
it's all just a bit stiff. I'd like it to be a
little more organic. So I'm just going to give
the edges a little tear. So give them some more shapes. So they're not so
stiff and straight. Now that to me is a much more interesting
shape to work with. Now I have to decide which papers I want
to add to it next. The thing is with collage. If you don't like something, you can cover it up. So don't be afraid
to start or to try because you can change
it as you go along. The way something finishes won't necessarily be
the way it starts. You can change things
and rearrange things. You can cover things up. You can paint over them, you can add more paper to them. So don't be afraid
just to jump in, fearing that you might
not like your decisions. Because you can change
it as you go along. You can guess with some music paper because
that's really cool. And I just like it. I'm really not sure
exactly where I'm headed with it or what
I want to achieve yet, I just want to get started. I'm also really loving
this wallpaper. That's a really nice color. So I think I'm going to
add some of that as well. I'm going to have to cover up the great pattern
that's on my paper, but that's just the way it goes. So I think I'll put
that there and I'll put my music paper on top like that. So I'm going to
glue these pieces down and then just
keep adding to it. Knowing that if I don't like something and
I can change it. And the beauty of collage
is in the multiple layers. We're off to a great
start and don't forget, if you get a little sticky, you can just grab
some baby wipes on the side and clean
up along the way. I can't stand being sticky. Or sometimes I like to grab a damp cloth because I like
wiping my hands a lot by now. What can I say? That's
just how it is Rhino, so that's a great start. Now, what am I going to do next? I'm really liking this
beautiful survey it, I loved the colors and
the pattern of it. I think I want to
use some of that. So I think I'll add that next. I love using Soviets. That's so easy, they're so soft. Just don't forget to pull the
tissue paper off the back. You can always use this paper as well for collage another day. You can always add
paint to it or ink to color it if you
don't want it white. Now, I'm thinking
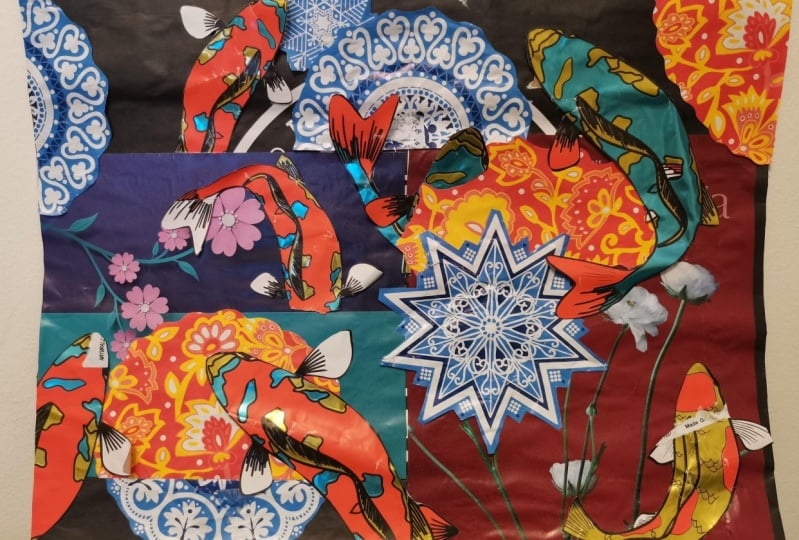
I might just cut around these beautiful flowers
and add some to this side. That could look good. My Soviets looking
fabulous on there. Now, don't get stressed out. If you tear holes in something or something
comes apart as you're blowing it on because you can always add more
elements to your class. What I love about using
Soviets is the see through the transparent quality of them because we take that
backing tissue offered. You can see right
through the design, I love the way my fabulous music nights are
coming through there. That looks really cool. I'm pretty happy
with how they look. I did tear a few spots here and there because I'm like, Yeah, a little rough because I
can always fix it lighter. If I'm not happy with something thinking I
might put a little bit of text on this side. Like that. Yes. Let's add a little bit
of book texts here. Like right here. Yeah. Like I said, don't
get stressed out. If you're worried about making a decision because you
can change it later. If you don't like it, you can put something
else over it. It'll be all right. The beauty of collage
is that it's fun. It's extremely affordable,
especially when you're using found papers are
recycled packaging. Hello, it's just fabulous. What about some of
these notepaper that could look good too? This is actually some beautiful
handmade Japanese paper. So I've bought it to
write some notes on, and it was just beautiful.
I didn't want to use it. I haven't done that. That just me. Well, now I'm using it, putting it in this color. I see at least I still get to see the
beauty of the paper, right? I know it's just fabulous. I haven't quite decided exactly how this
composition is going to go. This is what you
call an intuitive. It's a very spontaneous
application. You pick something up and you respond to the
element in your hand, and you decide if you'd go
in and put it down or not. You don't stress out about there on the track
if it's going to look good or bad because
you just make that decision when
you get there. It a whole lot of fun. It's a whole, Let's
lot less dress. So why don't you try
this application? It's just a matter of trusting yourself that you'll be
able to work it out. If you don't like it, you can change it. Some of this packaging
might look good. I'm liking that. I'm liking the pattern on it. What shape do I want? Probably not that stiff because everything
else is quite organic, so we're gonna have to
give it a bit of a tear along the edge so that
it looks more organic, but look how nice
that texture is. Yes, yes, I'm loving it. We just need to tear
off the hot edges. Then I think that's
going to look fabulous. Maybe I'll put it down here. Like that idea, Radha. Let's do that then. This pace of packaging
is a lot thicker. So I might use some
PVA to put it on just to make sure that
it sticks down properly. Now, this wasn't
even from my house. This was actually
a friend of mine. She was keeping some of
her packaging for me. How long you've got to
have friends like that. And that will keep
you there packaging. It was for something. I don't I can't even remember some kids thing I think anyway, I just loved the texture of it. She knew that I would say she kept it for me
and look at that. Now, it's in my
glorious collage. So you know, you gotta get your friends keeping
their packaging for you. Because it's
absolutely fabulous. Look how beautiful that looks. Yeah, that stuff
down beautifully. Now, don't worry if your
edges are starting to curl. That's because of
the moisture that I'm using in the matte medium. Because once it's all dry, you can flatten it
down with some books. Or I could glue this onto
a different substrate. I could glue this onto cardboard and that would
hold it down flat too. So don't worry about that kind of thing as
you're going along. You just have to think about, do you like where it's
headed or don't chew? Now, I'm liking it. I'm thinking maybe some of this packaging paper because
it's rather beautiful. Maybe I'll put some over here. Probably not too much because I liked that little collection
I've already got, but I'm definitely
need some of it. So I'm just going
to test them all. And then I have to decide
how much of it I want to, again, take off the hard
edge because we've gone with a theme that
looks pretty cool. There would have been
a put that there. What do you think?
What do you think? I think that'll be alright. We could put that right there. The color looks glorious, the flower themes matching.
5. Making Great Art: Fun part about doing
a collage like this is that it doesn't
have to be anything, making it for anything. It doesn't have to be framed or doesn't have
to be in an exhibition. And you just free to enjoy
the creative process. And that is really good for you. Loving nodes, colors, you know, almost want to put on some more. Just had to add a tiny bit more. Because I really like it. I'm really loving this piece of wallpaper that I've taught
out of my sample book. It's just fabulous design. It looks like it's been hand painted and the gray matches. So I'm thinking of
putting some of that probably in this area. I think I'll just cut out this piece and see
how I go and see if I like it. Right. Sorry. That's my beautiful paste from the wallpaper isn't a
glorious, I just love it. We'll pipe is fabulous
collage material because it's not strong
paper and it's payback. Payback. Now, where am I going to put it? That's the question. It's going to clearly hang
off because it's so big, but I just love it. I love the feel of it. I think that it has the same feel as the
beautiful red flowers. Am I going to put it this side? That's not a bad option? Or am I going to
put it this side? No matter which way
am I going to put it, I say and you can't stress about covering up things
if I put it there. So what I'm covering up my text, which I really liked, but I'm thinking that it looks
pretty cool on this side. And I really don't mind
it hanging off the edge. That's kinda cool. I could always put
some more text over there if I really wanted back. Or I could put it this
side and have it there. Which way is it going to go? No, not really liking it. I'm thinking this side. I think I'm leaning
towards this side. Right there. It hangs off the edge a little, which is kind of fun. It's working really well with these other colors and patterns. And I think that, okay, I'm gonna do it. I'm going to put it right there. Rhino. So the big decision
ended up on this side. Oh, where was I putting in? I think it was going off
the edge, wasn't it? Oh, man. I just glued on everything. Obviously. Got blue all over
the back of it. Well, we're off the edge. Yeah, that looks all right. I think that's okay. I'm liking it off the edge. It's a really nice piece
that wallpapers, fabulous. That looks great. What else have we
got in my pile? Then I desperately
have to have on this, right, It's looking good, but I think we need a focal
point blank here because this beautiful wallpaper pieces now dominating to the side. So we want something there. I'm thinking I really
like this gift card so I could use this. Yes. Yes. First of all, I'm going
to cut it off the back. Then I think, I think, I think I would really
like that to be a circle. So I'm going to cut a circle. We'll turn it over
because I don't want pen marks on the front. And I'm going to use
this fabulous little bow to make a circle. Yeah, Easy peasy, lemon
squeezy, sacred circle makers. And then we cut it out and
we'll say how fabulous that gift cards are fabulous for collage and
letters that you receive. They're so rare these days. You want to put them
in and out so high, it's like framing them. But they do make fabulous
textures for colors. Yeah, look at that. Look at that. That is just beautiful. I love it. What a fabulous
focal point, right? So that's going to
probably go, well, it needs to go in the middle of the two focal point, right? We could put it there. Now, isn't going to stand on its own or does it need
something else behind it? Is the question. So I'm thinking that maybe baby. It's getting a bit lost
with the busy background. So what about if I put some
black tissue behind it? That could work? Maybe. Baby, you have to try things. You can't be afraid to try. I'm just going to
move that up there. Then what I'm going to do is put a circle of my
beautiful black tissue. This is just a water pen
from the dollar store. And I'm going to tear the tissue by putting water
on it like this. It just makes it easier in more of the shape
that you want. Now, if you haven't got one of these from the dollar store, seriously, you need to get one. But you can also just use a normal watercolor brush or any brush really in
a little bit of water. Say Look at that. It tastes so easy you can
create easiest shaped with it. I just think it needs a bit
of something behind it. The beautiful image of the card, and I liked that. It's all really torn. That works for me, working for what
we're creating today. And I like that. Yeah. Dollar Store Don't I'm
saying you need one rider. So let's have a look and see
how this is going to look. Now, if I put the whole thing
on with the black tissue. Yeah. Yeah. I'm losing too much RNAi. Yeah. You tell me that. I just
need you to tell me that. That's too much pretty much it. Okay. Well, what about if
there's the phone? Wonder if I folded it in
half? Let's try that. We could put that there
and put it on like that. I think that's pretty cool. What do you think? Yeah, I think that's
better, right? That's better. Not
losing so much alike. The focal point was
still got the flowers. We can still see some
of the music night. This is looking fabulous, but now this is on top of it. And I think, yeah, I think folding it in half
will work. All right. Let's take that down. And I'm pretty happy with this. This is looking at Cave
had just found papers. We're looking. Okay. You know what I'd like to do? Maybe I should add some gold onto this white because
it's a little stack. Maybe I'll go hunt
up some gold ink and perhaps add some
gold onto there, so it's just not so white. Alright, let's do that thing. Now. I think this is looking
rather beautiful, but I still think that perhaps we might add a little bit of watercolor or some ink onto the paper there because
it's so stark white. Helen decided, I think I might wait until it dries
and then decide. But I'm really liking the
rest of the composition. I'm happy that I put the
black tissue under it because it just that contrast makes sure I look
in that direction. So you look there
first because of the stark contrast of
the black and white. Then your eye travels
around to look at all the other beautiful
textures and patterns. And I think it's
come together really well and I really want to
add anything else to it. Even though I have
another ton of papers. You need to look at what you've got at your place and see how many from that list of 20
you can actually hand up, I think could be
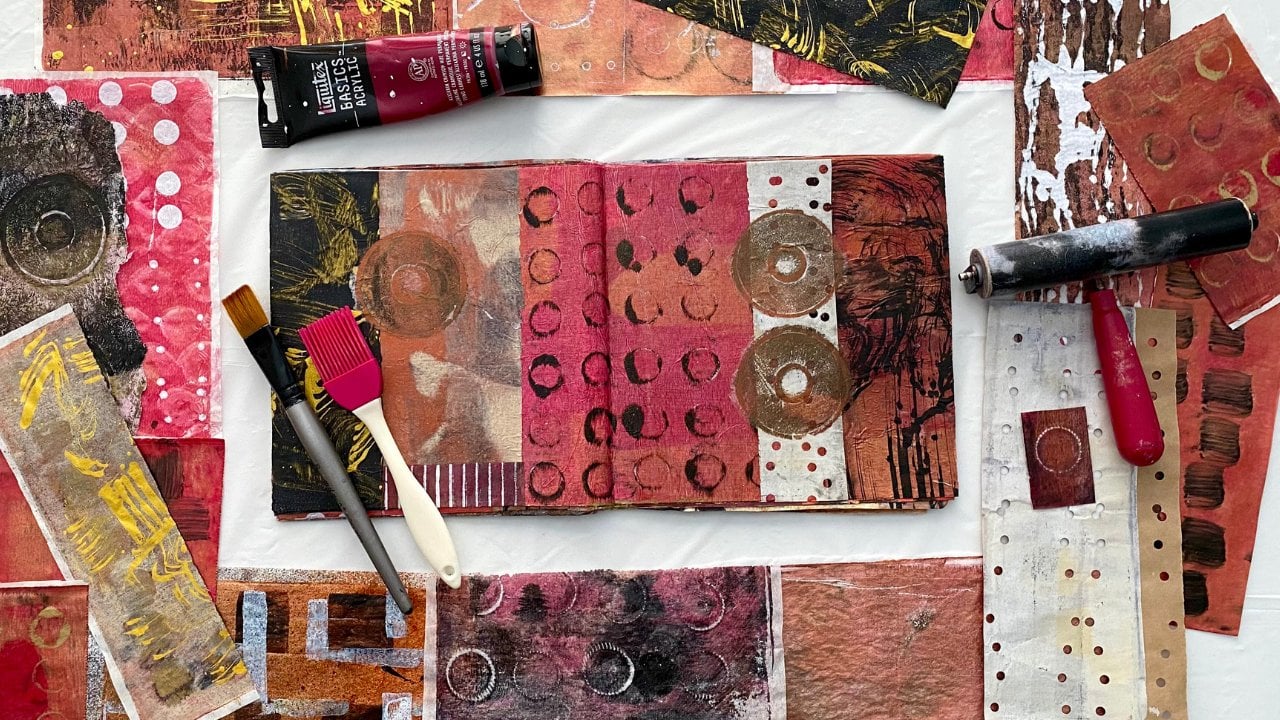
quite surprised. Well, it's not entirely dry, but I'm not a patient person. I've pulled out some and bleached titanium
Liquitex basics, basics range of paint, very affordable paint range. And I'm just going
to put a little bit on here and then wipe
it with a damp cloth because I just wanted to take the stark whiteness
of the piece of card. So we'll see how we go. I'm thinking this
is going to work. This is a glossy gift cards. So if wipes off nicely
and it just adding a little bit of
warmth and taking the stark whiteness
of the piper. And I think that's working. All right. You look on bit braver now. If you do a collage like
this on Found paper and you love it and you
want to hang it up. You can always then
glue the substrate onto Canvas and the input string on the back
and hang it on the wall. Or you could get a
frame inexpensively from your department store and then you can
put it in a frame. I think it's come
up rather nice. I absolutely love
using found papers. It's one of my most
favorite ways of doing collage because there's so much abundance free that you receive in packaging and also
the things that you buy. Recycling is fabulous. It's a lot of fun. Look at that. I think that looks way better. I'm very happy with that. And I think I might
now leave it alone. I just put enough of the
bleached titanium on it to make it more golden
and not so stark white. And I'm pretty happy with that. I think I'll let it dry and decide if I'm
going to leave it alone or if I'm going to
add anything else to it, of course, you can always keep
adding little bits to it. I just cut this 78
out of a magazine and I think the color will
work really well. And I just really liked it, so I'm sticking it right there. You can embellish your collage with all sorts of
little bits and pieces once you have all
formed in its composition. I'm pretty happy with that. Yes, I liked that 78. That looks really cool. Once you get started with
this kind of application, it's really hard to stop because there's so
much you could keep doing to it and
keep adding to it. I'm loving that 78. I'm going to leave it at that. I'm not adding any more to it. I think it's a
great little piece. To finish that off. I loved the textured
marks in this phase. I loved the music
and the flowers. I think the Black tissue worked out really
well underneath that focal point and it's
all looking really good. So I'm going to
let that dry now. And then I'll decide if
I might actually glue it onto some cardboard to
keep it nice and flat. And I think it's
pretty beautiful.
6. Finishing Like A Professional: Hi, so I'm really happy with
how my collage has dried. Considering hello, we're using recycled papers here
and found items. So I think we're doing good. This was a paper
bag from the store. I bought something.
So as a substrate, it's holding up rather well, considering what it is, I'm really happy with it. The composition looks great, the textures are fabulous. So now there's a few
things we can do. I can either leave it like this, which is perfectly fine. I could put it into my art
journal if I had a large one. I could also glue it onto
cardboard or mat board, put a hook on the back
and hang it on the wall. Or ultimately I could
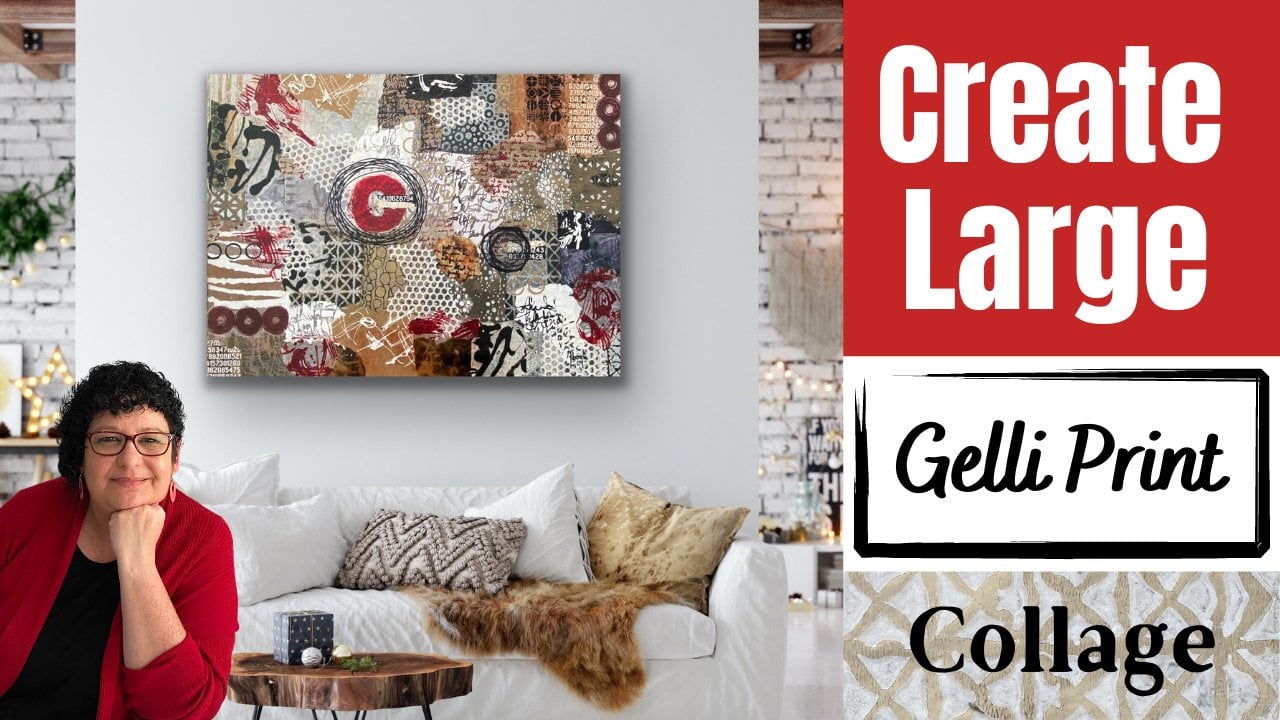
use a canvas and glue it onto Canvas and make it a beautiful finished artwork, which I think I'm going to do. Because I think the conversation and the look of the
collage makes me happy enough to what a
bother to take it to a completion and finish
it like a professional. Yeah. Right. So I bought
this canvas which is an 18 by 14 inch size, and I'm going to glue it
onto this canvas and finish it so that I can then type it in string and
hanging on the wall. That's what we're
going to do next. So what I wanna do
now is decide on what colors I want to put
under it and around the sides. What I love about putting
collages onto Canvas is that you can wrap
colors around the side, which can really add to
your design elements. It's looks absolutely fabulous when it's hanging on the wall to walk up to it and see the beautiful colors wrapped around the sides of the canvas. Now, I'm going to use probably met medium and I will
probably use the PVA glue because it sticks faster and stronger and it just
works better when I'm wanting to do something
that's a little thicker. Okay, so what I
like to do is use the colors that are in the collage to wrap
around the side. So I'm going to use both some of these fabulous wallpaper that I have for the top section
because look how good that's going to look
underneath and around the side. And I think on this
bottom section, I'm going to put some
of this wallpaper, the leftovers from
where I cut my piece, because I think that'll
look really cool too. Now, this is paper, so it glues on fairly easy. You can just wrap it
around the side like this. It is a little stiff. That's why I'll be
using the PVA glue, but it's going to
work really well. Also, if I wanted to, I could probably wrap
some of the music notes around the sign because it's in this piece here that
could look really good. It's really soft and easy
to use for the sides. Also, maybe some of the
packaging paper that's in there. I could even use some of
that for around the sides. So you want to pick
out colors and patterns that you
already have in your collage to wrap around
the sides on to use for the background because it keeps a consistency with your design. Well, that's gonna be good. I'm going to glue that down and then we'll
see where we're at. Okay, so you want to do the layers at the
bottom on first. So this side is going to go under the collage
that's on the top. So you want to put that
on first and you tap the corners like
you would fold a present and glue them down. I ended up going with the music notes that
side, like I thought. And this fabulous paper that is packaging on this side that these papers are so soft
and so easy to use. Glue them down on the top, rack them over the
side and just tap them under so it's
all nice and neat. And then the corners you just followed like you're
wrapping a present. Easy peasy, lemon squeezy. So now I'll put
the colors that go underneath the colors on Next. Now I'm using the PVA to glue the wallpaper on
because it's a little stiffer than the packaging and the note and the
music notes, right? So I have my background on, and it's looking rather good. I loved it using wallpaper is such a fabulous
texture to work with. It's paper, right? So it's easy and
it looks glorious. It glues down easy. I have the sides finished. I ended up using the paper
packaging. They are. And the glorious music
notes on that half. I also did the same for this side with the music
notes and the packaging. And I just think that those textures in
combination look fabulous. It's coming along very nicely. Now. I could have the red at the
top or the bottom really. It's just a matter of
deciding which way I want to put the
colors under my colors. If you're having trouble with
bubbles under your PayPal. You can, of course, turn your Canvas
over on your table and weight it with books on this side and then
wait for it to dry. If you're having problems
with the lifting or bubbling. See how I've taken the
paper right round the edge. I just liked things being nice and neat and
finished off, well, I know it's pedantic, but I am showing you how to
finish like a professional. And this is what I've done
for the last 30 years. So you can weight it
inside like this, put up books in here. I had done that when
things haven't stuck well. But this wallpaper has gone down very well and I'm not having
a problem with it sticking. So I won't need to do that. I just have to decide
do I want the red side up or do I want it
on the bottom half? So when looking at
my collage now, which way do you think
is going to be better? Originally? Always going to have
the red at the top. But I think that my
beautiful picture here from the wallpaper is getting lost in its own
pattern underneath. So I think that I'm going
to turn it around this way and have the gorgeous red at the bottom so that this
picture then stands out. And I'm really loving this edge. I didn't tear the
wallpaper very well. When I pulled it out
of the sample book, I was a bit rough and it's
got a very jagged edge, but I really don't mind it. I think it looks okay. I like that. You can then see the music notes
at the side there. And this paper is just
glorious pipe packaging. How long that came
wrapped around something. Free resources. They look fabulous. So I'm thinking I'm going
to put it on like this. I loving that jagged edge. I'm going to take the
point of this piece here right to that edge because
that sits well with me. And then I'm gonna glue
that down like that. I love that this is the same wallpaper as
this pace matching. Well, I love the red here that's working
well with my flowers. I think I'll just
go on and do that, stick that down, and then
we'll see how it all dries. Write a good dose of glue
on the back of my collage. And we're ready for
the final moments. Hi. I'm saying, whoops, better get it on the
canvas in the rides, but just beautiful. It's so satisfying when you put your final collage on top of all that
glorious background. And I like to use a damp
cloth to smooth it all out. Now, remember, it is recycled,
found paper packaging. So don't stress out if it gets crinkle or it's got creases or wrinkles because that's part of the texture of what the
medium is that you're using. I really don't mind
that if it's got a few torn bits
are crinkled bits because I think that just adds character and texture
to the collage, like this brown paper bag is not going to go down
completely perfect. It's going to have wrinkles. And I'm okay with that. Got a few wrinkles myself. Because it's a
recycled paper bag. So you gotta put
it in perspective. You haven't used high
grade watercolor paper. That is part of the beauty of the kind of
collage that it is. It has a lot of history and
textures and I'm loving it. I think it's going down well. I will let it dry before
we do anything else to it. And we can decide if we're going to put
anything else on it, like some kind of varnish
to seal the papers. Or if we're just going to
leave at natural write out, we'll let that dry. Now, I have talked about
varnishing this piece, but I've decided
I'm not going to, because the pipe
is quite roar in that they're natural
and they're recycled. And I don't think vanishing
will be good for them because it just changes the textural
quality of the pipa. Sometimes it works really
well and it looks great. And other times it takes away that beautiful papery
look of the paper. So I've decided that I'm
not going to vanish. I'm going to just
leave the pipe is wrong because I just
liked the look of them. But I do think that I
could add perhaps some of these beautiful feathers because this image has the
feathers there. I bought these from spotlight, which is like a
material craft shop. They came in a packet. Look how beautiful they
are, just loving it. So I'm thinking that it might finish it off
nicely because, you know why stop now? I could put them like
they're what do you think? Yeah. I think that'll be
great because it's all kind of the natural papers. I think just gluing the
feathers on their is a fantastic idea because it all really works well in the textural elements
of the composition. I'm doing it, I'm just doing it.
7. The Final Touches: I'm really liking
that little bunch. So I think I might
just go with that. I've got some PVA glue in
this little bottle here. And I think I might just
add them where they are because they look with me. I could play with it
another 100 times, but why mess with it? Looking good there. I'm just going to add a little dollop of the
PVA glue underwear. They are just looking beautiful. A color works well. I love feathers. Feathers to me are an
expression of freedom. And creativity is all
about freedom to me. Freedom of self,
freedom of expression, loving that, That's
just beautiful. I think I'll put tuck that
little one under there. I think that's a great way
to finish off collage. Yeah. They'll sit up like that, which is nice to have that three-dimensional
element in the colors. And it works well
with the theme. I could even put a bit
of washi tape across the ends there just to
make it a bit neater. Which I'm sorry, like that. Okay, I'm gonna do it. I mean, look how
beautiful these calories. If we make a little
bit of glamour, little bit of
bronze bling on it? Yes. What about we just put it just on the ends here where it's a little monkey like
that across there. That looks really
nice against the black, is quite stunning. What do you think? What do you think?
What do you think? I think that's working? I liked the way the feathers are kind of floating when
it's hanging on the wall. That'll look really nice. Yeah. I think that I've
finished it off nicely. Yeah. Okay. Well, now I'm going to let that dry before we can turn
it over and do the back. Stop poking it to
just count them. I'll stop poking it
and let that dry. Right? My collage has dried up nice. It's not entirely,
completely dry. It's dry. And look at my feathers. I'm a pretty, I think
they're so pretty. They look beautiful. I really liked the way the
hanging there on the canvas. The sides look fabulous. See how much better and
Nita it looks when you wrap the sides around with the
colors from your collage, It's all looking
fabulous Friday. So now we want to
type and string the beautiful collage so that
we can hang it on the wall. What you're going to
need for this section, some code or some string or something to tie
up with some tape. I get a framing type
from the Framers. I just buy up her
role in directions, Eigen things from
the hardware store, easy peasy screwdriver. Okay. You don't have to have
an electric screwdriver, but I'm too lazy and I don't want to have to do it myself. Scissors and a ruler and a pen, so you can get
your measurements. The same. Both sides. Really doesn't matter too much. What measurement and
you want to use. You just want to make sure
it's the same both sides now, you don't have to
type it like I do. This is just what I like to do because I like having the
backs nice and clean. I've been doing this
for a long time. So it is just
automatic for me to make the backs clean and tidy. Especially if you're wanting to exhibit or sell your artwork. It just makes it look more professional to have
the backs of finished. So I like to put on some framing tape to make sure it's all neat
and tidy on the back. Right. So I'm happy that it's nice
and neat and typed up. Like I said, it doesn't matter really what measurement you use. You just have to make sure that it's both
the same measurements. So I usually come down on
probably a little less than a third so that it hangs well on the wall
and put a little mark. Cut yourself some colon. And you're good to go. Now, these D rings I bought
from just the hardware store. Easy peasy, lemon squeezy. Put a D ring in, make sure you measure
a little bit, a bit extra so you
can tie it off. And then you just put
the other day ring on. A good solid nought. And what I like to do then
is tape off the ends. Because like I said, I'm pedantic when it comes to having it neat and
professional looking. So I like to tape
it off like this. Just so it makes the
code nice and neat. And it looks more finished. Roll it up like that.
And there you go. Hopefully you've got
your measurement grades. You're gonna be doing it again. Then it's just a
matter of squaring it onto the back of your canvas. Of course, you can just use a good old fashion screwdriver. I wanted to do that when I can use my little electric one. I give it a little
bit of a twist so that the cord is nice and tight. Make sure you put it the
same side of your mark. On this side, I've
put it under the Mac, so that's what I need to
put on this side as well. There you go. Just like that. It's beautiful and finished. And ready to hang on the wall. Doesn't that look good? Oh, ready to go? It's so incredibly satisfying when you finish a
project like this. And you can put
it up on the wall and have that incredible
feeling of accomplishment. Yes. I'm pretty happy with this
beautiful collage and I'm definitely going to
hang it up on the wall.
8. Thank you & Farewell: Thank you for joining
me in this art class. I truly hope you find that
you've gained new skills and that you've
gathered courage to keep developing
your own artwork. I would love to see
what you've created. So don't forget to post a peak
in the project section and show me what papers did
you gather along the way? Have you found
something that wasn't included in my 20 possibilities? I'd love to know about it. Make sure you include
your project. Have a look at my other
Skillshare classes because I know
that you'll really enjoy learning more techniques and I'd love to see you
again in the studio. You can also join me in my private Facebook group,
creative adventures making. It's a fabulous group
full of friendly people, beautiful artworks, and
great conversation. You are very welcome
to join us here. You can view my
paintings on my website, find out more of who I am and even download a free print and for lab.com all the best with
your creative adventures. And I hope to see
you again soon.
 Froyle Davies, Mixed Media Artist