Transcripts
1. Introduction: [MUSIC] Hi, Froyle here, welcome to my studio I'm
so glad you found me. I've been painting and
exhibiting for over 25 years. I've been through so
many different styles and tried all of the
mediums possible, I absolutely love
mixed media and collage because
possibilities are endless. I have personally
found that mileage under the brush is the
absolute best teacher. You have to create art
to make great art, that's just how it is. I'm glad you found my art
class because I can't wait to show you how fabulous
you are at creating art. My teaching style is along the lines of
creativity coaching. I want to empower you to create
the best art you can and allow a sense of freedom and liberty to really express
your mark making. I absolutely love mark
making on the gel plate; it's one of my most
favorite things to do on all the planet. What I love about gelli
printing is it so experimental, you never know what
you're going to get until you actually
pull the print. It's fast, it creates fantastic results with very
simple techniques and I love the way you're making beautiful and
exquisite mono prints that you can never
reproduce again. In this art class I'll be
showing you how to create many and numerous ways of mark making on
your gelli plate. They're a little unconventional, you won't find all of these
tools in the art shop; actually, you might find some of them in your
plumbing supplies. [LAUGHTER] Now you're
going to have to watch just so you can see
what I'm talking about. This class is going to be
fun, very experimental, and you're going to learn
some incredible tips and techniques for making fabulous
marks on your gel plate. We will be using everyday
items from around your house, so don't worry about needing special art
equipment; you don't. We're going to be incorporating
recycled materials. I love using recycled
materials because, baby those resources are free. [LAUGHTER] You have to love free resources and
if you're like me you get paper packaging that
just arrives at your house on an
almost daily basis. All those fabulous things
that you're buying online comes wrapped in a lot of paper packaging and I'm going
to showing you how to use that fabulous free
resource to make the most fantastic prints
on your gel plate. We will be making so
many fabulous prints. They're going to be
all over your table, all over your floor, and on
every available flat surface. Then we're going to put our favorite prints into an
art journal so that we have a concise glossary
or a reminder of the fabulous prints you made and how you actually made them. Because I don't
know if you're like me but a few months
down the track, you're going to forget exactly how you created those prints, so if we put together this
fabulous art journal it's going to be able to show
you exactly what you did, how you did it, and you're
going to remember so that this fabulous lesson will be ingrained part of your
art making practice. I'm telling you, this
is a fabulous idea, you're going to love this and
don't stress because it's not going to be an
expensive art journal that you have to
rush out and buy. We are going to use
recycled, baby. We're going to recycle a junk mail brochure into an absolutely
fabulous art journal. You're going to be
so surprised at the beautiful artworks you
make and then you're going to collect them into a
fabulous art journal that you'll be able to keep and look at and refer to and you'll continue
art practice. I know, it's fabulous
you're going to love this. This class is for anyone
wanting to explore the infinite world of gelli
printing and collage. The art class will be fun;
you may get a little messy, [LAUGHTER] very experimental,
perfect for beginners because I will show
you step-by-step exactly what to use
and how to use it. If you are more experienced
at gelli printing, then this class will give you extra inspiration and
help you to improve your printmaking
techniques, adding more tools to your
art making tool belt. I will be showing you
exactly what materials to use and how to use them. You don't have to
follow me exactly. You can use your own color
scheme but if you would like the same results
that I'm achieving, I have included a material
list in your resources. I'll be showing you
exactly the materials I use and how to use them but if
you don't want to use the color palette
that I'm choosing, you can create your own. At the end of the class
you will have had a fabulous time and you will be bursting with a
zillion new ideas of how to create marks
on your gel plate. You will have found
some of your best mark making tools, some
from places you may not have even thought of
yet and I know you're going to be so happy with the beautiful art
that you've created. You will also know how to use those prints and put them together in a beautiful collage. There's just something so
deeply satisfying about creating your own art from the core of who
you are as a person, the choices that you make, the colors that you choose, your individual marks that you make on the gel plate and the prints that you pull are so personal and beautiful
to who you are. We're going to celebrate that and we're going to
put it together in a beautiful collection
and you're going to be so deeply satisfied with the
artwork that you create. You can keep it for yourself. You don't even have
to show anybody, but if you do I know
you're going to impress those around you with how beautiful your project
comes together. I would love to see what
you create so don't forget to post a picture
in the project section, you can put a photo of
your favorite print, one of your favorite
mark making tools, or even your completed collage. That would be so fabulous,
I would so love to see it. If you find something
that makes a mark on the gel plate that I
haven't thought about. you need to share that. [LAUGHTER] Make sure you let me know what is
your favorite tool. As you're watching
these lessons, you're going to find out very quickly what my
favorite tool is, because I get a little obsessed
and use it over and over. I'm not going to
tell you what it is, but you're going to find out. I can't wait to show you my favorite ways of creating
marks on the gel plate, [MUSIC] so let's gather our
materials and let's make art.
2. Material List: [MUSIC] Let's talk about
the material list. Now, you need a gel plate, you definitely need a gel plate. You don't have to use the
brand that I'm using. This is the brand that I'm using and I've had
this gel plate for six years now and it has worked fine
for me. I love it. I love gelli printing, so passionate about it. But if you don't
have this brand, don't worry, you just use
whatever brand you have. Or if you're starting
completely new, there are a few
options on the market. This is the gel plate. It's a fabulous invention. I absolutely love it, because it is soft
and easy to print on. It pulls the prints incredibly
and let me tell you, it's a little addictive. I'm just [LAUGHTER]
going to say. Because you'll find out why pull one print when
you can pull 20? Yes, it's fabulous. I'm really hoping that you're
going to absolutely love this class and gain so
much inspiration from it. Now you will need a brayer. This is what you
put the paint on, you'll plate with and you
roll it with the brayer. You can also use it to roll on the paper to push firm on your plate when
taking your print. You can use two, I often do, but [NOISE]
you only really need one. Now of course you
need some paper. I'm going to be using
white tissue paper. I love using white tissue
because it pulls the paint off the plate at a level that
gets all of the detail up. I use recycled white tissue, the stuff that comes with
the numerous packages I buy online; that
works perfectly well. I've also used tissue from
the [inaudible] store and the art shop, and I really find it
all seems to pull the prints up just as evenly. It's up to you if you
want to use that. It is fabulous, let me say. Recycled tissue, you
need to keep it. Ordinary copy paper
off your printer, easy peasy, lemon squeezy. I also have some
Chinese rice paper that I bought off wish.com. In this session I am also using some Japanese calligraphy paper. This is what it looks like. You don't have to
have these papers. You can use whatever papers
you have at your place. But if you want to
use these papers, I bought the Japanese
calligraphy paper from Amazon and I bought the Chinese
rice paper off wish.com. You can source those
if you want to. All the details will also be in a material list in your
resources section of the class, so you can read it all
there or write it all down in case I'm talking too
fast or I have an accent. [LAUGHTER] Let's
talk about paint. I love using Liquitex basics. I get it here in
beautiful New Zealand. It's a five-minute walk
to Warehouse Stationery, so it's easy for me. I find it works really well. It's a standard price
across the board. It doesn't matter
what the pigment is so that makes it far
more affordable. I also use this Reeves brand
paint because I get it from same place and it is
also an affordable paint. These paints work
fabulous for gelli printing because you want to use inexpensive paints;
otherwise, you're going to stress about
how much it's going to cost you in your numerous
applications so don't stress. I think during this class, I will probably use
a little bit of pale gold and rich
gold in Atelier, only because I have
them in my studio. I have drawers full of paint
and I just pull them out. But you don't have to
have these brands. You don't even have to
use the same colors. You can use all your own colors and a color palette
that works for you. I'm going to use the metallic
tones like the golds, the copper, and the bronze, with some of the
beautiful warm tones of alizarin crimson,
my favorite, some unbleached titanium,
and also white, and black. This is the color palette that I'm choosing for this class. I will stick to these colors. I will mix them up. I will integrate them in different variations
of tints and tones, and this is just
going to work for me. However, if you'd
like to use blues and greens or purples or
any other color scheme, you go right ahead. [NOISE] Because
you want to create beautiful prints that you're happy with; that's the point. So if you've got a different
color scheme in mind, you go right ahead with that. Now I am using a couple of the more expensive
artist brands. I love the golden
iridescent bronze fine. It is my absolute favorite
color on the planet. It does so many things
that makes me happy. I have to have it in
my artist toolkit. This is the full body. I also have it in the fluid
and I'm using some of the white fluid and some of the black fluid Golden
paints as well. Because I'm doing
different mark making on the gel plate with
the different paints, the fluid is just a little
bit different to using the full body and
you'll find that because you're going
to be experimenting. I'm also going to be
using Liquitex inks. I have black and white
in Liquitex inks. I also going to to
pull it a little bit of gold mica ink. I bought this
recently on Amazon. It is glorious. It is so gold. It's like someone has
just liquefied gold bar. It's [LAUGHTER]
absolutely beautiful. Of course, again, you
don't have to have it, but it is glorious;
let me tell you. I'm also going to be using
a couple of the spray inks. This is the Dilutions
spray ink in white linen and black marble. I'll be using both
those spray inks. Now, spray inks for me here in New Zealand are
really expensive, and it's a drag; it's such a drag when
stuff's [NOISE] expensive. What I like to do is buy these affordable
little bottles from the [inaudible] store and
then I will fill them with the ink that I
have in my studio. These two bottles, I have
filled with this ink here. It's a transparent burnt sienna and a transparent raw umber. This is the colors that
are in these bottles. I've just put them
in here so I can spray them with a mist and an atomizer because the standard fancy paint
sprayings are really expensive. That's an idea for you if
you've got inks laying around, especially if they're
colors you haven't used for awhile and you
want to use them up. Find yourself some little
affordable bottles at the [inaudible] shop
and see how they go. Now sometimes if you
use gold pigments in the spray bottles they are
heavier at the bottom, you'll need to stir
them regularly to get them to come
through the atomizer. That's what I've found. This is not what it
says on the bottle. This is just a different
gold ink that I've put in this empty bottle [NOISE] and it works really well. I love it. You definitely want to experiment with
what you have. It is really good for you to
use up your art supplies. If you don't have
any art supplies, then start with basic
colors that you really love and enjoy
and get black and white. Always black and white is fabulous with the
other color schemes. Now, we're going to
use some brushes, some traditional brushes, some not so traditional brushes. You'll need some scissors
and some baby wipes; [NOISE] it will get messy, maybe a damp cloth. Now as we go along in the class we will be using other
different tools, but you will find them in
your household guaranteed. Don't stress about needing
specific art tools. If you have a couple
of brushes, fantastic. [NOISE] But if you don't, don't even worry
about it because we are doing expressive
mark making. Whatever ingenious idea you come up with that you can
find in your kitchen, your laundry, your garage, let me tell you, you're going to be hunting
all over your house to find some awesome tools that you can use to make marks
on your gel plate. Now this class is all
about experimenting. It's about having fun. It's about you pushing your creative boundaries
a little bit further. I really hope you have a lot of fun and you allow
yourself to experiment. You do need to be a
little courageous, but just a little
bit goes a long way. Dig out some of
your art supplies. If you need some that you
want to buy specifically, make sure you go for
inexpensive art supplies, because you really don't need the expensive ones
for this art class. [MUSIC] Let's get printing.
3. Let's Start With the Background: [MUSIC] I am so excited for
this new Skillshare class. I absolutely love mark
making on the gelli plate. It's one of my most
favorite things to do in all the world. [LAUGHTER] Seriously, I will come in here and I
especially at night time, and I will spend hours
just making marks, taking prints, and
creating backgrounds. It's absolutely fabulous
and very freeing. What I'm doing at the
moment is just putting the bronze on the gel plate and pulling a
background print. Because what we want
to do is start with some background colors so that we can add some
layers to the papers. You can use one color to
pull your backgrounds. You can use two colors
or three colors. You can completely
blend your colors so it's all a smooth tone, or you can leave abstract shapes in the
patterns on your gel print. It's really up to you. What we want to start
with first is to create a whole heap of backgrounds so we can then put
more layers on. Also, the benefit of starting with backgrounds
is that it's fun. It will warm you up, it will warm up the plate. It's the best way to start the process is by
creating backgrounds. I absolutely love it. It just gets all the
creative juices flowing. You'll have beautiful
papers to then work on when we want to create
different textures. Now you don't have to use the color palette
that I'm using. You can choose for yourself
what colors you want to use. But I've shown you
in the material list the range of colors
that I'll be using. They're very warm tones and lots of metallics because
I like things shiny, I like rich, gorgeous, warm tones with shiny metallics. Now I've created a
few backgrounds. What we're going to do is
systematically go through this process by adding more and more onto the application. Now we've started with
simple backgrounds. Print yourself off a few, plain colors, pattern backgrounds just so you've got some to choose from. Then we're going to
add different things into our process
as we move along. I'm so excited. This is going to
be a lot of fun. Highly experimental,
it will get messy, just so you know. [LAUGHTER] But what
we want to do is create a fabulous experience of making marks
on the gel plate, creating papers that
you can then use in your collages and
mixed media artworks. We're going to put the
papers to get up into a fabulous art
journal so that you can remember how you made
your marks and textures. Then when you want
to create some more, you'll be able to refer to it. [MUSIC] Like I said, you want to allow
yourself to experiment, and this one is the bronze, copper, and a little bit
of unbleached titanium. We've made some backgrounds. They're beautiful, they're
sitting in a pile to dry. Let's start experimenting. This is the black marble
Dylusions shimmer spray. I know; so fancy. I'm just going to spray that on to the paint
that I have there, give it a very slight general
roll over with the brayer. Then I'm putting on the
Japanese calligraphy paper. You want to try a few
different papers to see what kind of
response you get and what kind of marks that it makes because they do
make different marks. That is the paint on the gel plate with a beautiful
spray of the black marble. Now that has created just a little textural
element to the background, and I absolutely love it. We're going to
create a few more. Now these kinds of backgrounds where you're
putting the paint on and spraying or spritzing
with a little bit of spray inks is highly
experimental and so much fun. What it does is it creates a beautiful soft textural
mark in your background. It can make the most
amazing creations. Now, I'm just going to
spray that one on and leave it because it
looks pretty cool. I'm going to put it onto
these Chinese rice paper. That again was the copper, the bronze, and the
unbleached titanium with a spritz or a spray of the
Dylusions black marble. What I love is creating these pages as backgrounds
for in the collages. Especially if you then want
to put some little marks or symbols or writing or some
other element over the top. That is absolutely beautiful. Now, if you find that your print is not as
exciting as you'd hoped, you can always add the spray ink to it after you've pulled
it from the plate. See how that little bit
of texture there just gives it a bit more
intrigue and interest. Don't be afraid to try things. Put the paint on the plate, pull the print and spray, then, or spray it before
you pull the print. Have a little play
with some spray inks. I only have a very
small amount of these because in
beautiful New Zealand, these American brands
can be very expensive. But you know, sometimes
you really do just have to buy a few key elements
for your art toolkit. You just have to. [LAUGHTER] Now this
time I'm going to throw a little bit of the
pale gold in with alizarin crimson, and the copper. Yes, I know. I do really
like these metallic colors. Now my brayer still has paint on it from
the previous print. I really don't mind that because I like
the mix of colors. Sometimes these full
body paints are a little thick on the plate but that really doesn't bother
me either because what we're doing is mark making to
create collage papers. Let's not get too
stressed out about it. This time I've got white linen of the Dylusions spray inks. Let's spray that on. Give it a little
bit of a roll with the brayer and see
how that prints. Have a little experiment
with your background papers. Put your paint on the plate, spray on some inks, and take the print. You can also pull the print
and then spray the inks on. Look at that. I mean,
that's just beautiful. [MUSIC]
4. Using What's Right in Front of You: [MUSIC] You've got your acrylic
paint on the plate, you're playing with some
spray inks, all is beautiful. This is the alizarin crimson, the copper, and the bronze. I know, it's a fave. You spray your ink
on, that's glorious, but what about making some marks with the lid of
the spray bottle? What does that look like? This is just using the lid of the spray bottle on the plate. Now, that looks fabulous, but not entirely riveting. I've got some fluid paint here, just the Golden
brand on my palette. Oh my gosh, hello then. [LAUGHTER] Now we're
cooking with gas. [LAUGHTER] That's way better. We have got black fluid paint with the lid of the
spray ink on the plate. You see, you just have
to try different things. Not every idea will work
exactly how you want, but you just have to try again. Look at that. That's
just gorgeous. That's where I put the paint. That was with just the
lid without the paint. Now you can see which
one works better? Hello, the paint obviously
[LAUGHTER] has more impact. Now we know using the lid of the spray bottle on the plate
looks fabulous with paint. Of course, it doesn't
have to be black. It can be any color. We could go crazy with colors. As you can see, there's a buildup of
the ghost print there, but I'm going to leave it. I'm just going to add
some more of the bronze, the alizarin crimson,
and the copper. I'm just going to roll
right over those marks because it'll create
a beautiful buildup in the ghost print. Those marks will eventually
be pulled off on something, and it'll look
cool when it does. Let's do that again
because that was fun. What about if we use the
Golden bronze fine in a fluid with my trusty
lid of my spray bottle? Yes. Look at that. Seriously, I'm going to
go crazy with this one. [LAUGHTER] [MUSIC] Let's see what we got. Now that is just glorious. Look, it's got the bronze
circles that I just put, and it's got the little
ghost impression of the black circles
from the previous print. I just love it. I could do this all
day, but I won't. We will move on to
something else. [LAUGHTER] I'm using
the same colors again. The crimson, the
bronze, and the copper. I'm rolling straight over
the ghost print because it's going to build up another layer of texture
of that ghost print. I just had a thought, how much different does
the ink look to the paint? Really, that's what
you have to do. You have to think about how
would this look and how would that look and
experiment with ideas. This is the Liquitex
carbon black ink. I'm just going to put
some into this little, beautiful dish I have there. I'm going to use the ink
exactly the same way. Look at that. That has a bubble in it and
it creates a different mark. Of course, it's a lot
more fluid being the ink, and the circles
don't come out as perfect and precise
like the paint does. What you have to do is
decide how you like it best. Do you like it precise, or do you like it more
with dots and splashes? Then if you go like this
and add more splashes, that's pretty cool.
[LAUGHTER] Stop splashing. Let's go with that. Now, this, of course, is going to absorb more
because it's an ink, it's not the paint, so I might just let
that sit for a second. Look at that. You can see the
ink coming through on that. That's just fabulous. Have a try with the
spray ink's lid and some ink and see what beautiful marks you
can create with that. Let's see how that came out. Interesting. Now, for me personally, that's not as riveting as I
had expected. [MUSIC] No. That's where the paper didn't make contact because
I didn't push it down because I didn't
want to smudge it all, but it's interesting. I think personally, I like
the impact of the paint, but then I am a
high-impact person. You actually might like more subtlety of the marks and that would suit you better. Now, this ghost print's
going to be pretty cool because there is a lot
of paint on this plate. Let's see how this pulls up. Maybe if I had rubbed
the previous page, it would have connected better. We could always try that again. Let's pull up the ghost print
and see how fabulous that is. Look at that. That's got a beautiful shimmer from the bronze and the copper, and then it's got
numerous rows of circle shapes from all of
those prints we just did. Love it. I always personally
love the ghost print best. I just love the mystery of it and the marks that you
couldn't have made purposely. I just love the
experimentation of it. It's fabulous. Loving this. Same colors again. I thought I might
try the white ink. I promise I'll move on. [LAUGHTER] After
this, I promise. I've got the white Liquitex
ink in this little dish here. I'll have to find a new lid. [LAUGHTER] Here we go. Let's use that one. [MUSIC] Let's see what
the white ink does. I'll use the rice paper. Now, if I push it down, see how now I'm smudging it? But it will make better
contact with the paper. Oh, yeah, see? That's better. You do have to put a little
bit of pressure on the paper, even though the ink will smudge, if you want it to come
up better, which I do. That's good to
know. Look at that. That's going to make
a great ghost print, but we'll just add a little
bit more paint. Same colors. It's just really good to
use the same colors when you're experimenting
because then you're not worried
about if they're going to work or not and if the mark was made from
the color or the shape, so I just like it. Let's spray some black on there, let's get a bit moody. What if we use the
bottom of the bottle? Now I haven't put any
paint on with it. I'm just touching it onto the plate
with the bottom of the spray bottle I
sprayed it on first. I think that could
be rather cool. Let's look at that. Let's put it on the calligraphy paper. Got a nice crispy feel,
this calligraphy paper. Look at that spray ink
coming through the paper. You can see that, and
you can see the shapes that the bottom of
the bottle has made. These spray inks are a
good bang for your buck. [LAUGHTER] Come on,
you get the ink, you get the lid shape, and you get the
bottom of the bottle. You got great
printing tools here, just with a bottle of spray ink. That's pretty nice. I like that. It's got a nice subtlety
of the circle marks. That's okay. The black spray on these colors looks fabulous. It just creates
another moody texture. That's really beautiful.
That's working. You need these for sure. You need to use the lid
with paint and with ink. Then you can use the
bottom of it as well. These are fabulous
mark-making tools. The spray ink in
itself is glorious. Even if you'd just get black and white, I've only
got black and white, it is really worthwhile
getting those because you can just do
fabulous things with them. What else are we
going to play with? [MUSIC]
5. Making Unique Brush Marks: [MUSIC] What? We're already starting to get messy [LAUGHTER]
[inaudible]. Now the next thing
that I want to play with is the simple brush. I have this one which is a
mont mark 12 and a size 16. What can we do with these on our gel plate to make
some beautiful marks? I got my trusty alizarin, maybe I want some
rich gold this time, of course I do, and a little bit of bronze. I've got some abstract
marks still left up there, which I personally like. Now, if I was to put a mark on the plate
just using the brush, this is pretty much like
the lid without using pipe. It's okay. It's not bad. It'll create a mark for
sure and a texture, but not that subtle. Let's add some black to
it and look at that. [MUSIC] Let's
create those marks. That's fabulous. Now, what if I just wet the brush there and use the black
ink for the last row, how different will the black ink respond on the plate
with the brush? That's the question. Let's pull that and have a look. Let's see how that looks. Now you can see the ink is absorbing faster into the paper, and then there's the paint, and then there's just
the mark with the brush. Let's see how that looks. There's the marks on the
plate with the brush, there's the paint marks, and there's the ink mark. The ink's a little
more fuzzy, of course, and it absorbs more
into the paper, so it's actually
holding stronger. This pain has been sucked up into the background color and
that's really interesting. I thought that it would have
been stronger than the ink, but there you go. Let's play around
with this some more. Now, of course, it does all depend on how
much paint you're putting on your
plate as well as how the inks and paint
marks will respond, so don't get too
technical about it, just have some fun. I'm going to throw some of my trusty black marble
spray on their. You're only limited by
your imagination as to what marks you can put on this beautiful gel plate
and pull your print. I've just used the
rice paper again because it's pretty much the
first pile in front of me. [LAUGHTER] That's easy. There we are. There's the marks from brushing the
black paint on, I like the fuzzy edge of them. I think it's quite intriguing. I think we could play around
with this a bit more. If I use this brush
instead of this brush, it'll make a different
mark entirely. Look at that. Of
course it's fatter, it's more bristled, and those marks
are going to look entirely different to
the previous marks. [MUSIC] Look at that, that is just fun. I just love it. It's so endless what you can do with such simple application. Look how fabulous
that looks with just brushing it one
way and the other. You could cut that out and use it as an element
in a collage. Of course, you can always add combinations of these
simple techniques. So much fun. I'm just rolling out with bronze the girth paints that are still on
there with the marks because I love having those fight shadowy shapes in the backgrounds of my prints. Now I had a thought, why do we have to
use actual brushes? [LAUGHTER] Go into the kitchen and pinch your
mom's pastry brush. Now you don't want a brush, brush one like a normal brush because that's just
a normal brush, you want one like this, which I think is
silicon, feels like it. Anyway, go in and pinch
that out of the kitchen, and let's paint with that. Oh my gosh, I'm in love already. Look at that. Look at the marks that
this brush makes. Oh, I'm using the
black in there, the liquid techs black ink. Look at that. Oh, my gosh. Yes, you know, I'm going to go crazy. Flick it. Don't forget
to flick it [LAUGHTER]. Now, what would happen if we
spread the white on that? [NOISE] I don't know.
Let's have a look. Now I know you can get these pastry brushes from the dollar shop or
the cheap shop, because I've seen them. We've got here in New Zealand, the chip shop, is
called Cracker Jacks. Think I saw them at Cracker
Jacks. Look at that. Even that looks awesome. Look at that, look at
the marks that it makes. made I'll put a plain
color on it because perhaps the ink's getting too absorbed by the
metallic plate, although I have no go at that. This time I'm just using the unbleached titanium
to see whether or not the ink print
spit up when it's not so full of metallic
pigment on my plate. That's my theory. [LAUGHTER]
It's just a theory. Oh, my gosh, you
need one of these. Chip shop, dollar shop, one of those shops,
is got to have them. Seriously, look at these
marks you can make, and you can flick it, go that way, go that way. You can get some messy writing almost going on with
that script feel. That is just fabulous. I think I've found my
new favorite brush. I've got the Chinese rice paper. Look at that coming through. Oh, just so fun. Look at that. That is just beautiful. Yes, this is now my
new favorite brush. You have to go rush out now
and get yourself a silicon [LAUGHTER] pastry brush,
couple of a bucks, and experiment with the marks that you can make
with it because, oh, my gosh, the potentials are
endless, that is glorious. I wonder what the white ink
would look like on here. Oh, yeah, that's pretty nice. The white flicks itself
and the marks it makes, I absolutely love
this pastry brush. It really is quite endless what kind of marks
you can create with it, whether you want it completely
abstract or you want to look like some Asian script, it works really well. It's definitely worth
you getting one and trying it out because
it's a lot of fun. It creates beautiful marks which make fabulous backgrounds. There's the white. Look at that. That is just
beautiful and subtle. Oh, my gosh, maybe I should
pull out my gold ink. [LAUGHTER] One one
moment because [LAUGHTER] I'm just
going to go pull out my gold ink because oh, my God, I love these marks. I washed up my dish and my pastry brush and I put in some brilliant gold
ink, it's cold. I'm going to put a bit
of the black spray on there. Did you notice? I just put some black
spray on there. Look at that color,
that is just glorious. I love the abstract marks. [NOISE] Oh, in heaven. Oh my gosh, look, oops [LAUGHTER] that
flicks really well. It flicks really well
with this particular ink. I think this ink is a little bit thicker than the Liquitex ink. That's what I'm
thinking because it definitely is holding its
formal and flicking better. That's really interesting. My paper's got a little
over spray, that's okay. Now I'm using the
Chinese rice paper. This gold ink is definitely thicker than the Liquitex ink. Let's see what that does. Look at that, that
is just beautiful. Come on. You got to admit it. That is gorgeous. Let's see how it looks
on black because that gold ink is so dramatic. I know I'm dramatic but jeez, this stuff seems more dramatic. Look at that black.
Beautiful baby. I don't know if this will
work or not [NOISE] call the fine caller because I
haven't tried it before. Yes. [NOISE] Look at that. That's crazy. Oh, just love it. Chinese rice paper.
Now everything I'm using will be in
your material list. You can choose to source
the materials or not, it's totally up to you. But I'm thinking you might need a pastry brush and
some amazing gold ink. Just saying. I think the black was a bit too heavy,
that's not too bad. What about if we put it on now? Oh, yes, look. Never fear. You can always add
to the prints. That is fabulous. Oh, love it. Pull you print. If you print's not as
astounding as you'd hoped, then just flick a
bit more on it. What do you got to lose? [MUSIC] Nothing. That is glorious.
6. Experimenting with Recycled Materials: Your beautiful
backgrounds that we painted earlier
should now be all dry and we can put some mark-making on
these beautiful papers. What I absolutely loved to
use is paper packaging. I mean, it comes free, wrapped around all sorts of fabulous things that
I purchase online. You know, it's up for grabs. I mean look at this
corrugated card, it came wrapped
around something. I think it was art
supplies [LAUGHTER] that I bought the other day
and it's fabulous. Let's do something
with paper packaging because it's an
incredibly free resource. I'm using a titanium
white golden fluid on the gel plate to
have a little play with some mark-making
with paper packaging or recycled materials
because I love that. Now this fabulous
corrugated card makes great marks
on the gel plate. Look at that, that's awesome. I'm going to go
this way and there, absolutely loving those lines. I'll put that on one of my previously
painted backgrounds. I'm going to put that on
this bronze background. Look at those marks from
the corrugated card, I just love it. Now that's a bit
boring because I use straight white though
I do love the lines. What you could do [NOISE] is get a baby wipe and even wipe off some of the
paint before it dries, you can of course manipulate your prints
when they're straight off the plate You don't have to leave them exactly
as you see them. You can play with
them some more. Look at that fabulous. What happens if
you go like that? That's pretty cool too. You just need to allow
yourself to play, to experiment and to be
inquisitive enough to think, now what would
happen if I do this? Then you'll find you'll have the most amazing painted papers. Now that looks much better and what about if we
give it some spraying? [NOISE] Whooh, look at
that, that looks cool. Adding a little bit more
texture there, I like that. Now, what about we use
the fabulous bubble wrap. I love bubble wrap, I get so much of it. I might order a
few things online. That's perhaps why
I get so much. But if you'll notice when
your bubble wrap comes, they're all different sizes. This is quite small
and then there's this size which is bigger
and then there's hello, the mother load, [LAUGHTER] look at that size. Let's take a print of each
and see how they look. We'll put that one there. [NOISE] There you go, this is just so much fun look at that, that's pretty cool. We'll put that one there,
that looks fabulous. Then we might just print
that onto some white tissue so we can see how it prints. Now, white tissue is also a recycled paper
packaging product because I use the tissue that comes around all the beautiful
things that I purchase. It works really well
for jelly print, the prints are fine. It doesn't matter
that it's crinkled. Well, it doesn't
matter to me that it's crinkled, beautiful, loving it. It just makes other different
marks and textures. [NOISE] Keep your white
tissue that you get with your packaging and it comes up fabulous for using that on your gel plate and the
resources are free, I mean you can't get anymore
affordable than free. Now I've just put
some of the Alizarin on the plate with
a bit of Bronze. We're going to do
another print with the other size of
the bubble wrap. Now I can actually see Max still on there
from the bubble wrap. That's fabulous. Look at this. This is the mother-load
of bubble wrap. [LAUGHTER] That is all
fat. Look at that. I love it, just look at that,
that's fabulous. Let's put it on
some white tissue. This should pull up some
of that print as well as the other side's bubble
wrap that's underneath it. Look at the size
of that, I mean, that's just hilarious,
loving that stuff. Next time something arrives at your house that you have
ordered [NOISE] from online, make sure you have [NOISE] a little look at what the packaging is that
wrapped around it. If it's paper packaging, [NOISE] you definitely
need to keep it. I use the brown paper from
a roll-off sheets and they always get printed on and stenciled on and I use
them in my collage. White tissue is
your best friend. You definitely want to
keep the white tissue. You can use it on the gel pipe, you can use it to
paint and put ink on. Look at that, that's fun. The bubble wrap have a look
and see what size it is because all the
different sizes make different marks, love it. [NOISE] Look at those textures
that just looks fabulous. Now with the paper packaging, [NOISE] have you ever have something arrive at your
house wrapped in this? [NOISE] This is weird
paper packaging. Look at that,
that's pretty cool. That comes wrapped around different things
that you buy online. Let's have a look and see
what kind of mark that makes. Should we pull it apart? Should we just push it on? I mean really, you just
got to try these things. Paper packaging people you
need to have a look at it. Look at that. This time I
forgot the calligraphy paper. Let's see how good that prints. Look at that. Now, if you were to put that paper packaging
over a background color, that background color
will come through those marks so let's try that. It's always really good to try something first on white
paper [NOISE] because then you can see [NOISE] how it's going to
look [NOISE] and you can work out what's going
to be best to put it on top of [NOISE]. I've got the
alizarin, the copper, and the unbleached
titanium on my plate. I'm going to put that
fabulous packaging on there again
because that was fun. I think what I did
was as I pushed it, I separated it to create
that movement of spice. That's pretty cool, look at that almost looks like fabric. Now I'm going to put it over this dark background
and hopefully, this could look
really interesting. Now remember, we're
experimenting, we're trying ideas, we're just pushing the
limits of what marks we can put on our gel plate and
what prints they type, we're not trying to make perfect prints so allow
yourself to experiment. Try different ideas and
if they don't work, don't stress out because you can just add another
layer on top. Wow, look at that. Now that's really interesting, I liked that pattern. That's made some really
interesting marks and because I pushed it open as I put it on the
background colors coming through. That's pretty cool, you got to try that one. What other easy household item can we use for mark-making. [NOISE] How about the
trustee toilet roll? I mean, come on, you know, you want to [LAUGHTER]. Look at that beautiful color
trust your toilet roll. I'm telling you there's
an abundance of these things [LAUGHTER], they seem to be endless
so what can we do? Of course, we can go back to
what we were doing before and putting the circles on
the plate, that always works. Look at that just beautiful. Spray, a bit of moody black
on there, always looks good. Now this is standard copy paper. Of course, you can easily create beautiful circle shapes with
the glorious toilet roll. Now, see how fabulous that looks with a
little bit of the black spray. It just makes it moody and it gives it a bit more texture. That's pretty exciting. I like the way the paint
here is bled also, it just makes the marks a little bit more
different and there are bigger circle then the
lid of the ink bottle. [MUSIC] Now I've got the golden fluid white here. [MUSIC] There is the golden white fluid on top of the black ghost print and that's really interesting. The trustee toilet roll is absolutely fabulous
mark-making tool makes great circles and they're bigger than the other
lid of the spray bottle, you don't have to rush to the
shops to buy these tools. [MUSIC]
7. Part 2: Using Recycled Materials: [MUSIC] If you go and hunt
round your house and find some rubber bands we
can also turn our fabulous toilet roll into another mark making tool
using rubber bands. I mean, simplicity at its finest, here people;
I'm telling you. [LAUGHTER] You don't have to
spend a lot of money to find fabulous mark making
tools for your gel plate. I'm just putting the
rubber bands on like this, moving them around
so that they have got different
patterns and lines, maybe they crossover
in some areas. That could be interesting
too, like that. Let's see how this prints. Might be great, it might not. [LAUGHTER] But you've got to
at least give it a go, right? Maybe we'll put one more
there; maybe one more there. Let's see what this
does. Right-O. I've got black
fluid paint here on my roll off sheet and I'm just going to roll it in it and then roll it on my
plate, look at that. That's fantastic, I love it. Don't worry if it's smudgy, it's supposed to be smudgy
because you're making marks. I'm going to use
this background, which is predominantly the
bronze and the copper. Clearly it had some spray ink on it because you can
see it on the back of the paper and let's see what marks that
puts on the paper. That's just fun. That is. Look at that; that's
just fantastic. [LAUGHTER] Such a simple tool. It's a toilet roll with
some rubber bands. I know it's a little messy, but that'll be okay. You can always wash
your hands later. Now we've got all this
black paint on there. We could wait for it to dry and then put a color on it
and pull the print but, seeing as I am not
a patient person, I'm not so good for
waiting for things to dry. I'm just going to throw
some bronze paint on there and then I'm
going to pull the print. See how that looks; it looks almost like
an animal print, don't you think? Well, I'm thinking. Put on some white
tissue, pull that up, then I'll want to do
that toilet roll again, [LAUGHTER] because that's
fun, that just fun. You can pretty much
put rubber bands onto anything and do that. But I like the rolling
action of the toilet roll. There you go pull
the ghost print up. Look at that, definitely looks a little bit animal print
like, I'm thinking. There's still stuff
on the plate. I've grabbed my
other toilet roll that I've already played with and I put some white, roll over the top, and look at that. I really don't mind
the blobbiness of it, I think it makes cool marks. Now, of course you don't
have to use the toilet roll. You can use baking paper or you cling wrap runs out and you've got one of those tubes. But there's so many things
that we use that end up with some tube at the
end, cardboard tube. You can cut those
up and use those, and they also will be different sizes so that everything makes
a different mark. The amount of rubber
bands on your tube, the size of the tube
that you're using, the amount of paint
that you put on. Everything makes a
different mark and it's really worth
experimenting with. There we go, that's
on that background. This is what I'm
meaning, this tube. That was the end of the roll of something I used and I've put these ones on and that will take a different print than this one. You need to experiment
with different sizes, different amounts
of rubber bands, and it's just a lot of fun. I think I'm just going to put
copper right over the top. Maybe a little bit of the umber, just to change the
tone a little. That's what so fabulous
about the sprays. Then, how about I use this one, I roll it in both the
black and the white. [LAUGHTER] Will that even work? I don't know. What about if I put some more spray on it? We'll put some more spray on it, to see if we can get that
working because that's fun. Look at that. [LAUGHTER] That's fabulous, look at that black and white
at once, everything at once. There is a piece of rice
paper to put it on. That's just fun. Give this a try, have a look around your house, the ends of the roll of
something or your toilet roll. Find some rubber bands and experiment and see
what marks you can make and which ones
you like. There we go. Look at that, it's
got the black and the white and what I like
about rolling it, is that it creates this continual line and
the lines are quite free, and I like the
marks that it makes here with the blobby
bits of the paint. I just think that
looks really cool. What I love about
paper packaging, I get a lot of this brown paper. I don't know about you, but [LAUGHTER] I tend to order
a few things online, and it comes stuffed
full, big box, stuffed full with brown paper. Tiny little thing
like you go figure, I don't know what's
going on with that. Anyway, I have tons of it. I use it for my roll-off sheet, for gelli printing and
I use it to print on, I will use it for collage, I'll use it for everything. But what I like about it
is that you're going to freely create with paper
packaging and experiment, whereas you won't
with good paper, water color paper,
calligraphy paper, your expensive textured
papers, or rice papers; you won't experiment with them because you'll be
precious about it. If you grab yourself a few
bundles of the packaging, brown paper, when it
comes into your house, you're going to
be more likely to experiment and have fun
with your gel plate creating marks on this free
resource, free, hello. Can't get any cheaper than that. Now, I personally absolutely
love using stencils. I have quite a few
hundred of them. I get them from
everywhere and everybody. Love commercial stencils. But if you were to just cut some shapes out of this hello, free paper packaging,
it pretty much does the same thing, magic. I'm cutting squares this time because you might be
getting sick of circles. [LAUGHTER] Now, I've got
this piece here and I'm just pretty much randomly
cutting almost square shapes. They're not square,
but they're almost, shapes out of this piece
of paper packaging because then we're going
to use it for a stencil. We're going to paint on it, we are going to
paint all over it and the awesome thing is, you can keep the paper and
then use it in a collage once it's heavily laden with
beautiful colors of paint; there's no reason why
you can't do that. It's a win win. I'm cutting
some shapes out of this, some almost square, probably more rectangle shapes. I'm just folding
the paper that way and I'm just cutting
shapes out of it. I mean, it's pretty
basic, people. I know. My techniques are
incredibly technical, not; pretty basic, but the beauty is you're
going to experiment, you're going to allow
yourself to just have fun and really that's the goal. Beautiful square-ish
shapes out of the paper packaging and let's slap some paint on it and
see what we can create. There's my stencil. Look at that and look, I know that it's
not going to last. It doesn't have to. It's just fun for a few prints; there it is. That looks great. There's so many ways you can do that and you can
put it down first, roll the paint on, pull it off, take the print. You can now paint on first, put the stencil on
and take the print. There are just endless
ways to create beautiful marks with amazing stencil type shapes from
your paper packaging. Yes, I'm moody, very moody, start with black. Let's go black and
a bit of copper. We'll start with that. Now, of course it
is paper packaging, so your stencils
are not going to stand up to too much
paint application. But it's okay, it's only an experiment
to play with shapes, and to see what you can create. That's on the plate. There's my stencil shape. I'm going to use this
copper background. Keep pulling out your piles of backgrounds that you've
already printed. Look at that, that's just fun. Now you've got some gorgeous black rectangle shapes on there. Now of course, if that's
not too thrilling, it's a little stiff, of course I've got
to add sprays to it because that makes it
a little bit more fun. Oh, yes look at that one. That's those two again,
same spray bottles. That's just fun. I love that. We have this on the plate. If we pull off the stencil, if we pull it off a
little bit careful, we can probably use it again, maybe not; it's
coming off all right. Then we've got that
fabulous ghost print. Now, I'm going to put
that onto this background because that will just leave some black marks on it;
that could be really cool. You can use that piece again if you haven't saturated
it too much in paint. But if you have,
what does it matter? I got tons of that
paper packaging under the table in my studio and it
just continuously arrives. I don't why it's just
continuous; it's like endless. Let's take the ghost
print and look at that. That's just fun. That's got some
different shapes. You, of course, you can cut a whole heap
of different shapes out of that beautiful paper packaging and use that to create
marks on your gel plate. [MUSIC]
8. Making More Stencils: [MUSIC] Well, I thought I'd just cut
another one and try that again because
that was pretty fun. [NOISE] Even the ghost
print looked pretty cool. I'm going to put it
on this background. I like this background, is already had the spray on it, so these shapes and max
will look fabulous. There we go. Look at that. Look how fun that prints. Now, this time I put the gold ink into an
old spray bottle. That's pretty nice. I like that. Yay for gold ink. What would happen if I pulled
that just like that again. Get more of that
paint off the plate. That could be
really interesting. This is why you need a
heap of background so that you can just create more
shapes on your prints. Loving it. Look at that. That's just using a piece of brown paper packaging
with cut a few shapes. I mean, halo. That's gorgeous. [NOISE] What about if we cut some shapes an easier
way even using a hole punch. That'll be cool. I'm folding
the paper packaging, and then I'm punching some
holes with a hole punch, literally a basic hole punch. Then let's see what
that looks like. That pretty much
looks like one of those old school
computer readouts. [LAUGHTER] Back in the day. I'm going to punch
them to the end there. [NOISE] That is so cool. Now what can we do with that? [NOISE] Let's see if we can print through
those tiny little holes. This time, I'm going to put
some white on the plate. Now it's still got some paint there from
the ghost sprint. That's okay. Let's put some beautiful
fresh white. Look at that. On the plate we'll put down a fabulous hole punched
piece of paper like that. I'm using this dark background, so clearly you'll
see if it works, and see if anything's
going to come through these tiny little holes. [NOISE] Look at that. [LAUGHTER] That's just
fun that is. I like it. It's all just ways
of making marks on your gel plate for printing. You could use this
in collage now. That's fabulous and painted. You could actually use that and it would look really cool. I might just do that
again because that was fun. There we go. I've got another hole punched
paste on paper packaging. I'm going to put it
this way on there, and I'm going to push it
down with this background. [NOISE] Look at that. [LAUGHTER] That's
fun. I love it. That just makes me smile. That's fabulous. Now, I'm going to keep
these pieces of paper. This particular paper packaging
is a bit stronger than the first paper
packaging I was using, so that's able to be kept
now and used in collage, or you can use it again for
that beautiful dot stencil. I'm going to put this ghost
print on this background. [NOISE] Wow. Look how interesting that looks. I just love it. It's getting these
textural layers and it's just looking fabulous. I punched a few rows of holes on this piece with one
of these fun little things, and I reckon that would
make a really cool print. That way or that
way, doesn't matter. Let's go with some of
this unbleached titanium. [NOISE] We'll put some
of this on the plane, and see how this one prints. The holes are just a bit bigger. That is pretty fun. I'm going to put that
on the space here. I'm just going to put it
on a section on this side, and print some of those holes. That's pretty fun. [NOISE] You don't have to print
the whole page. You can just print
sections of your page. Look at that. That's awesome. Possibilities are endless. This one would then make
great paper in a collage. We have another beautiful print. [NOISE] Look at that. It all just keeps
adding onto your print to make multiple
textured layers. While I'm thinking about it, I'm just going to add some of that black scribble max with
the beautiful pastry brush, because I think it'll
look just awesome. Look at that. Then
what about if we spray just a little
bit of gold on it? Oh my gosh. Love it. Same with this one. Just look fabulous. That's fabulous. [NOISE] Gorgeous. That is some pretty
beautiful mark making that I would
definitely use in collage. What about this one? I've just pulled out of
my box and I made my box. This is my box of
mark making tools. Look at all my
[LAUGHTER] That's funny. The corrugated
card, some fabric, some sponges, lots of lids. I love lids. I just
throw things in this box when I find them that I think is going to make a
good mark like this thing. I don't even know what it is. It's the bottom of something, but it makes a cool
mark. I'll show you. All rubber bands and
bits and pieces and things that I think will make a good mark I
throw into here, and then when I'm
creating jelly prints and I want to find
something that's going to make a cool
texture or make a mark, I hunt through my box. I just pulled out. This is a makeup
sponge of course, and they work fabulous. I just thought I'd put
some different shapes on this particular print. That's the one I just
pulled with the round, punched a hole circles, and that's okay. Look at that. Just trying a different idea, something else, some
other way to make a mark. What about this weird thing? I didn't know what it was from. It was a bottom of
something clearly. But you've got to have a look. Look at that, in your house and around and all the things you have
and see what it is that you've got lying
about that could make a fabulous mark
on a jelly print, and you can either put it on the plate or you can put it directly on
the print like this. Yes, I still love lid of
my spray bottle best. But that's pretty cool. I don't know what
it is, but you can find bits and pieces like
that around your home, put them in a box
and pull them out when you want to
print something. If I do this a little
spritz with some gold. I put the gold ink in an old bottle and it's
working fabulous. Love it. Have a play, have an experiment. Make sure you put yourself together a box of
tricks like this. Rummage around your
house and find bits and pieces that are going to leave a fabulous texture or that
are going to make a mark for your gel printing and you
will absolutely love it. [MUSIC]
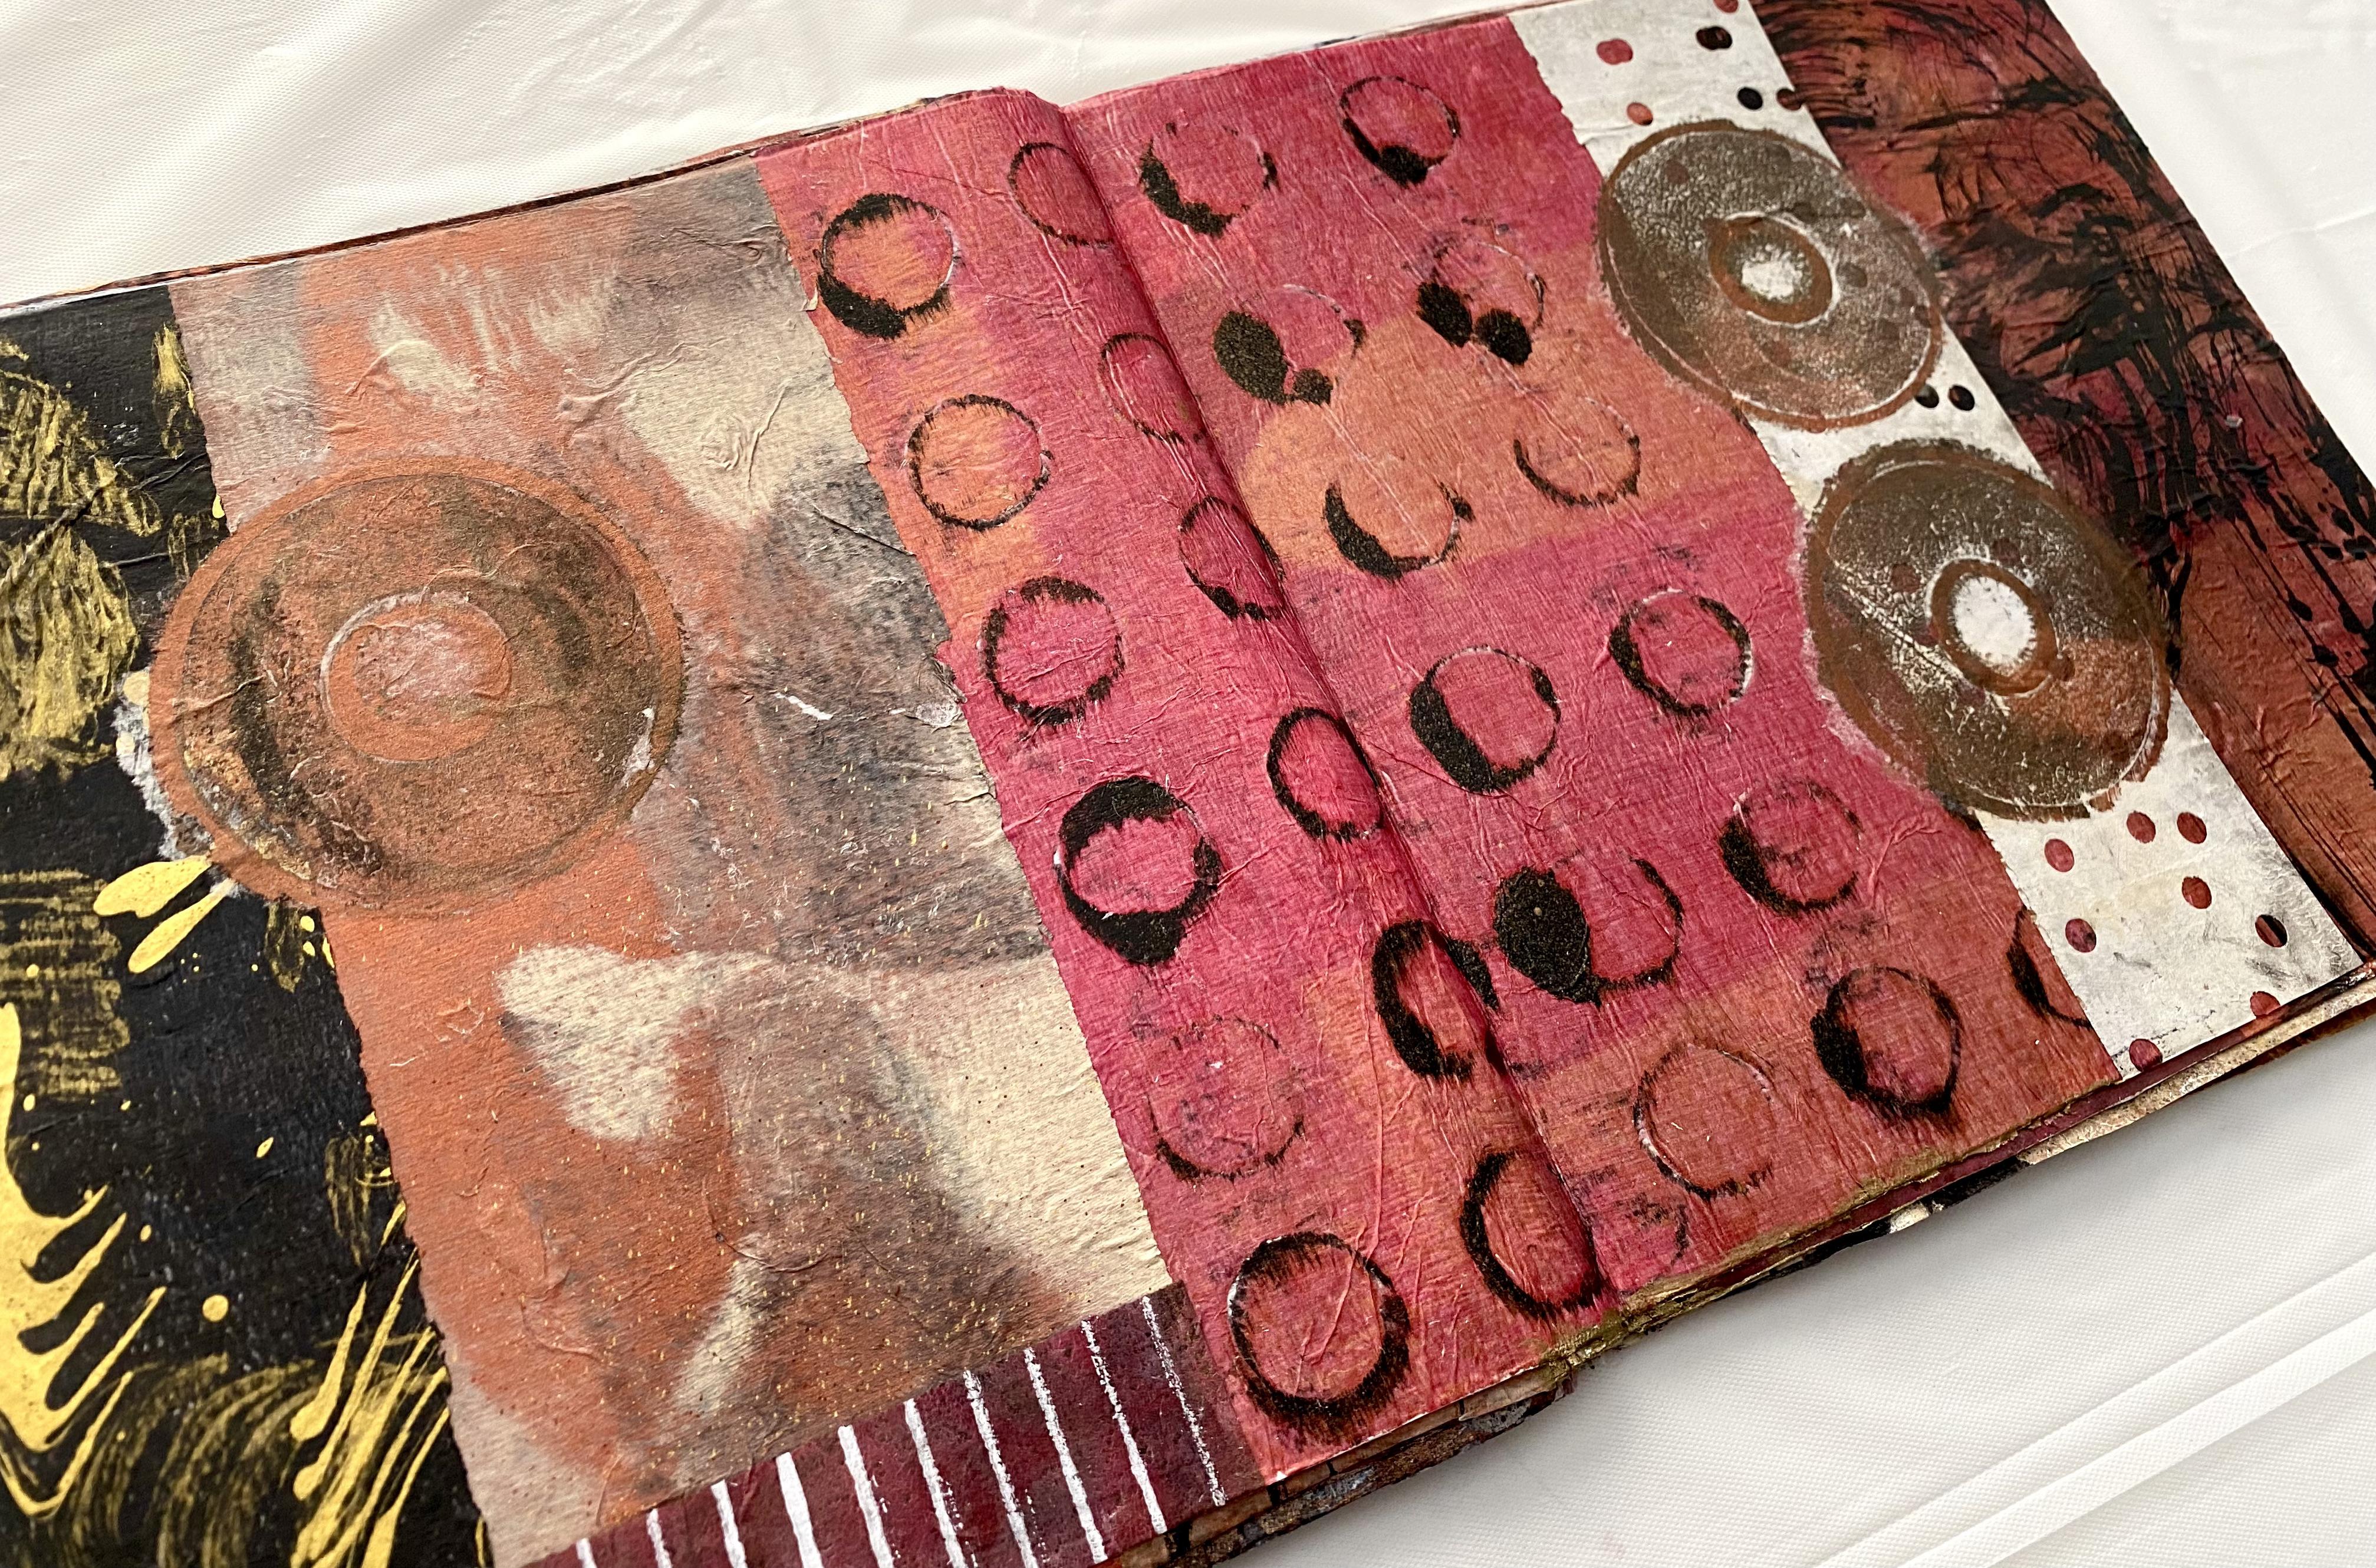
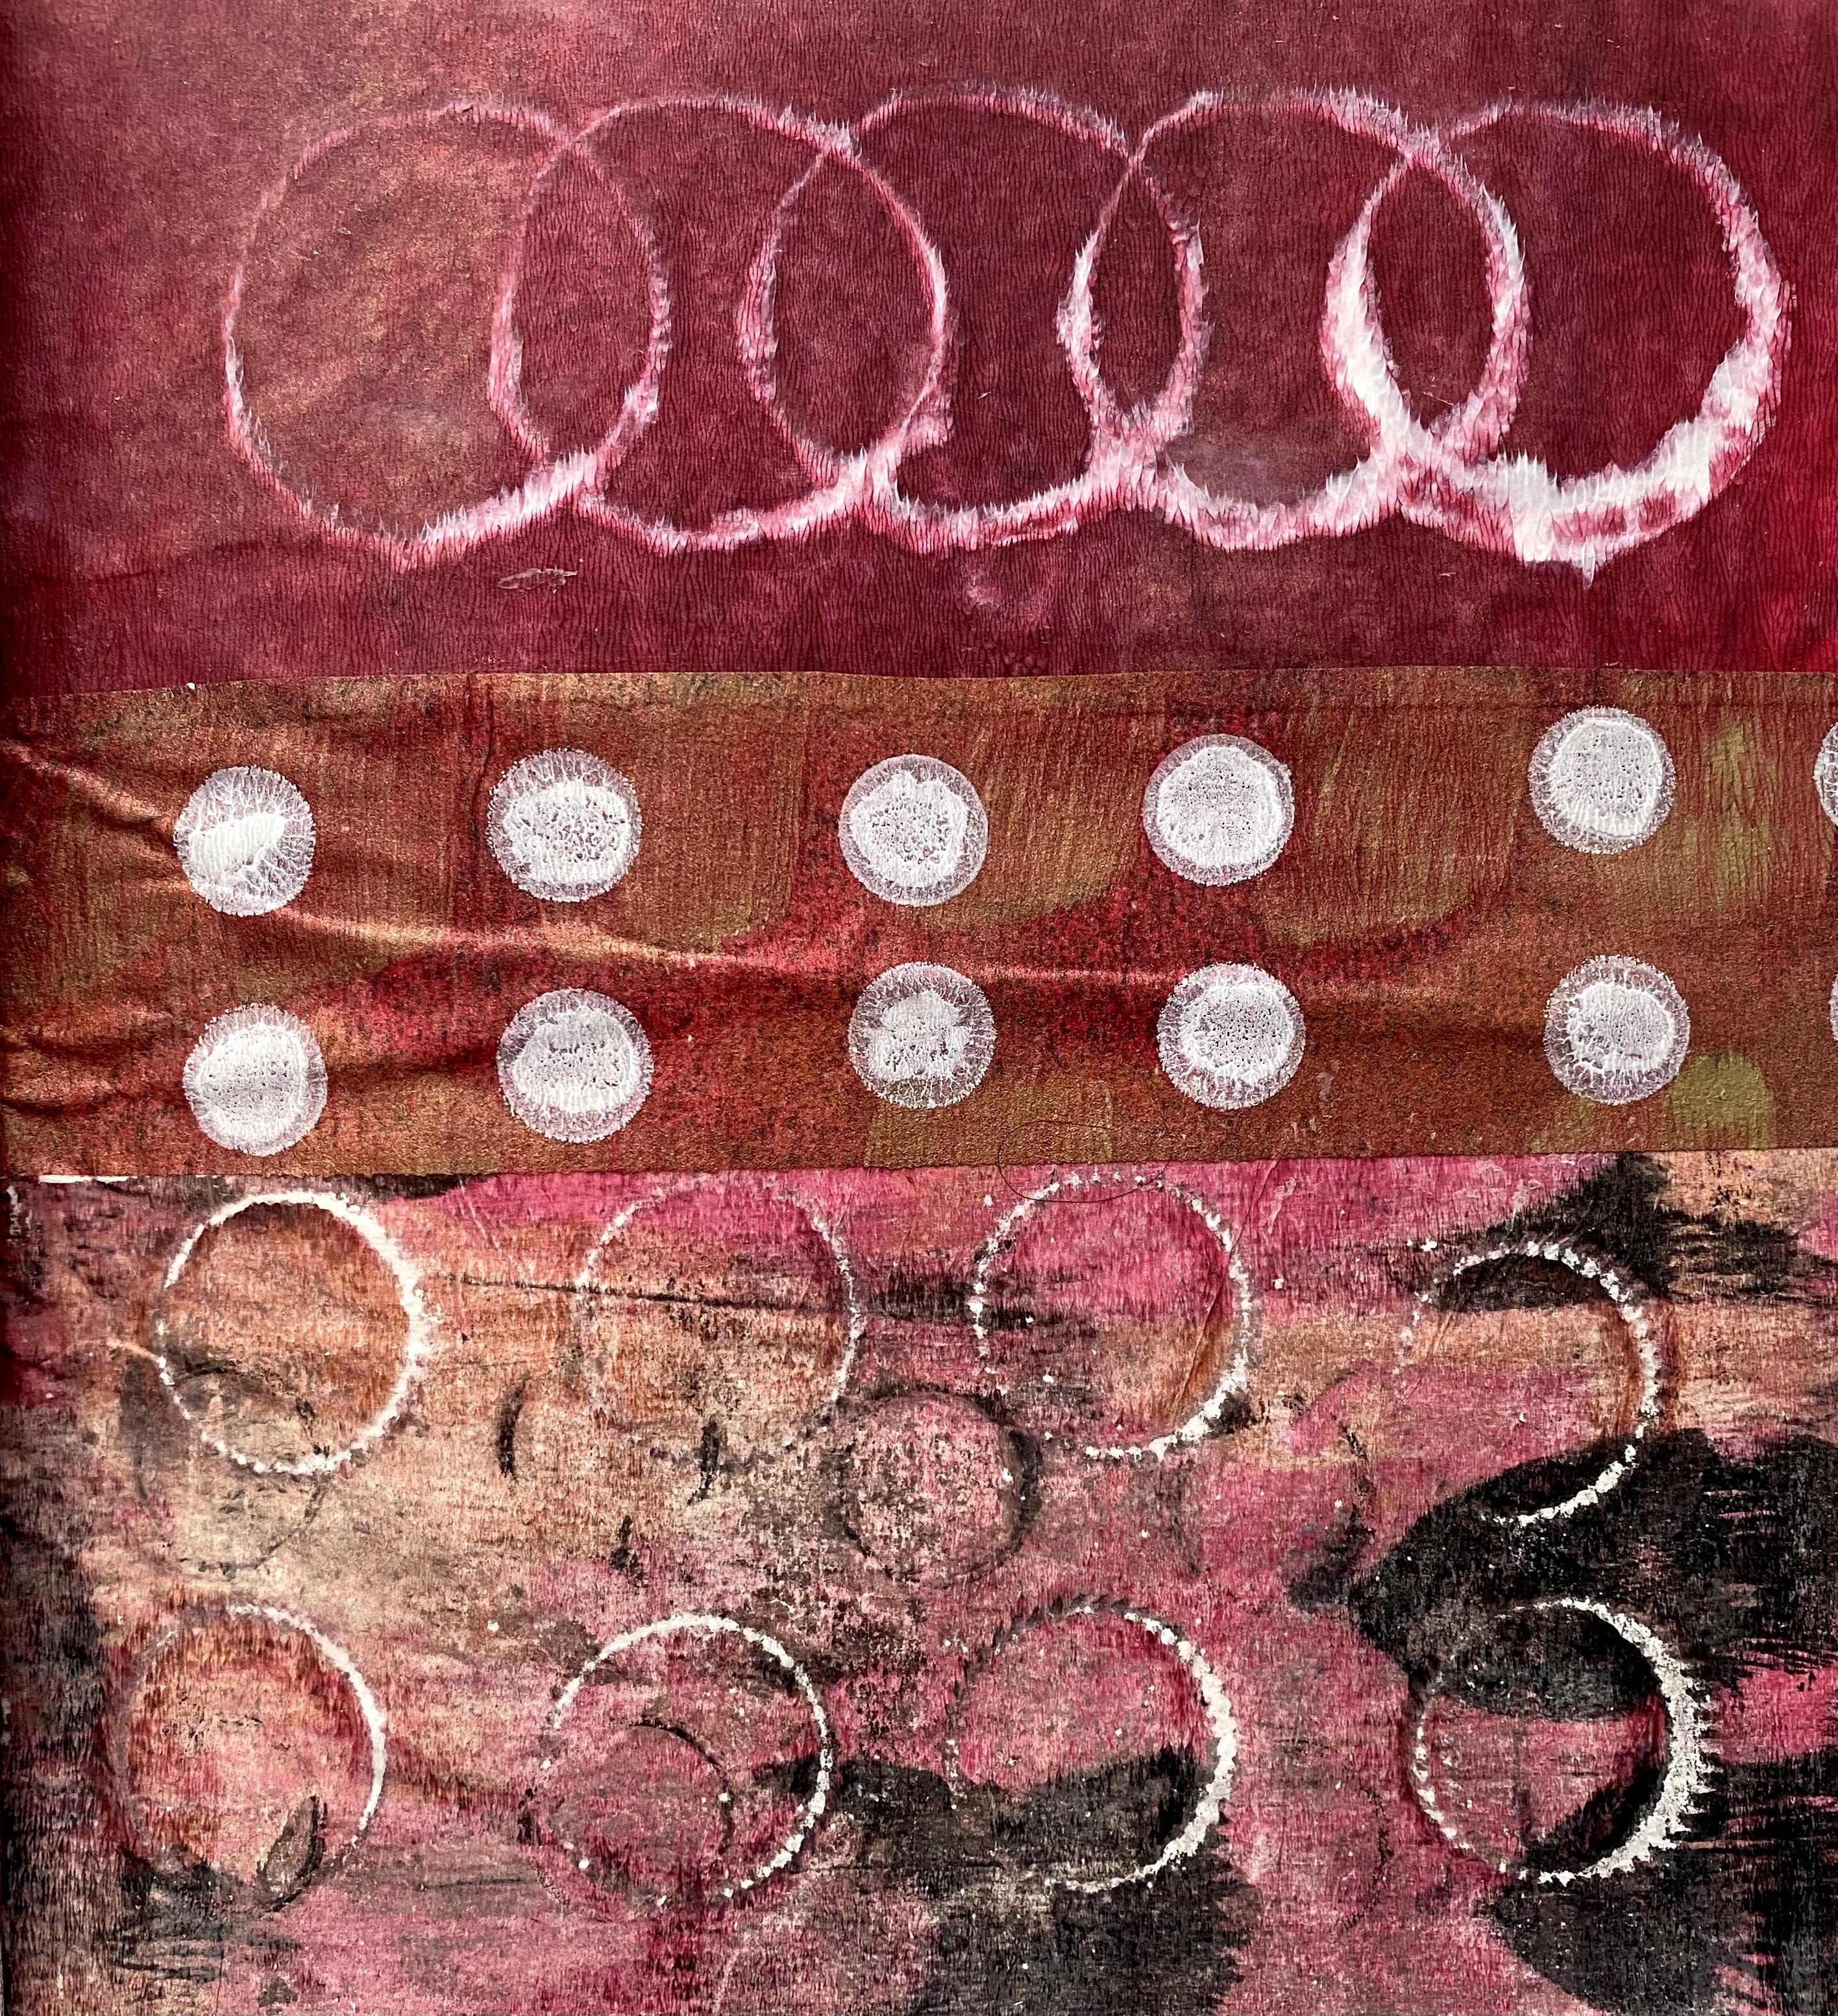
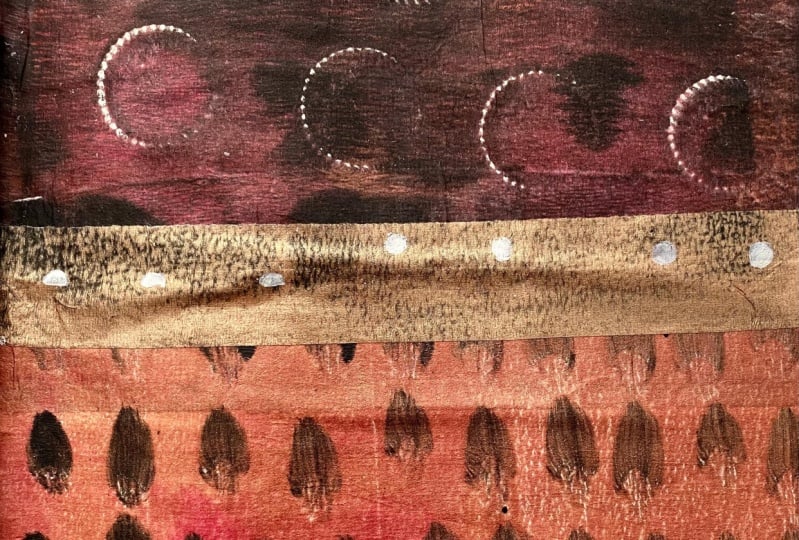
9. My Secret Circle Shape: I'm going to show you one of
my absolute favorite ways to create fabulous circle shapes with printing on your template. This is the magical little
circle template right here. Do you want to know
what my secret is? [LAUGHTER] They are
Fix-A-Loo seating washers. Yes, I am serious. We are using washers that
you put in the cistern of your toilet to create
shapes on the gel plate. I know, you just don't want to tell anybody
what you're using, and everything will be okay. That's what they are. You get them in the plumbing
section of your hardware, and seriously, you need these. You get a whole 10 in this pack. It's pretty cheap,
very inexpensive. They are made of thin rubber. They're fabulous. They last the test of time. Look at these ones. Clearly, they're being
printed on quite a few times. There's so much you can do with these fabulous magical
little circle shapes. I'm going to show you
a few different ideas. Now, what we're
going to do first is put some paint
on our gel plate. Yes, I'm using my beautiful
Alizarin crimson with a little bit of copper
because I like the bling. Yes, that's a bit too much paint that I've just squeezed out, but it's getting to
the bottom of the tube and it either doesn't come
out or it comes out too much. Not to worry. I paint on the plate and now, we put our fabulous
little circle shapes on. Doesn't really matter
where you put them. I'm going to line them up
like this because I like to then use them in my
collage in different ways. Now, I'm going to use ordinary copy paper
straight off the printer. As you can see, I'm going around the shapes
and in the middle of them because it becomes a mask
on this piece of paper, where you put the circle
shapes does not get the paint, and it will be left with
that shape on the print. If you can go around the shapes and in the
middle of the shapes, you're going to get a clearer print of the
fantastic little circles. That's going to be fabulous. There's my fabulous
circle shapes. Now, I'm going to put this
aside and I'm going to show you something else that we can do with this blank space later. Now, if we take off
these fabulous shapes and pull that ghost print, there's still quite a
lot of paint on there. That will pick up all of those beautiful round
little circles. Look at that, they
look fabulous. Absolutely love this
circle template. You just have to not
tell anyone what that's actually for and
then you won't be worried. Now, if we leave the rest of the pipe on
the plate like that, it's going to come through
in the next print I take, and I really like that. It has a fabulous look to it. Now, I might just deepen
this color a little because I want to use it
on this background here. We'll just deepen the color. That's got the Alizarin, the copper, and a
little bit of black. If we put our fabulous
circle shapes on. This time, when I
pull the print, I'm going to use one that I already have a
background color on. Then the fabulous
circle shapes will be the color that's
already on the paper. You do have to make sure
you go around them, pushing the paper against them so that you can
get a nice clear shape. Because they are
thin little rubbers, they hold up really
well with the paint. Let's see how that looks. See? Look at that. Absolutely fabulous. Now, if we go ahead and
take another print, and pull more of that
paint off from the plate, we'll just be left with the beautiful circle shapes
for the ghost print. They can make absolutely
fabulous elements in our collage. You can cut them
out and use them in collage and they
just look wonderful. This is the second
print and we're picking up the rest of the paint
that's on the plate. That's created that. But really, I just wanted to pick up
all that paint and we can do something else with
these once this is dry. Now, when we take
our shapes off, which are absolutely beautifully saturated in paint underneath, we will get a very
clear ghost impression of those circle shapes. Sometimes, this is actually
my favorite print. Look at that. Isn't that
absolutely fabulous? It becomes separate
little circles that you can then put onto another
layer in your collage. I'm loving it. I'm using a golden
iridescent bronze fine. I love this color, it's one of my absolute
favorite colors. [MUSIC] I'm going to put this one on this background because I
think it'll be fabulous. Some of these backgrounds
are actually prints that didn't come out
as great as I'd hoped. I put them in a pile and I just use them again then when I'm
printing something else. Don't get discouraged if you print the first
time, don't work. Just put them in a
pile ready to be used for a second or
even third layer, and then they make
incredible prints. You just have to allow
yourself to have fun, to play, and to experiment and
see what you can create. There we go. There's that beautiful colors
come through and it's got the bronze around them, and they look fabulous. [MUSIC] The ghost print is
still picking up some images of
previous printing, and that is so much fun. What I like to do
once I've pulled them off the plate, sometimes, I like to give them a bit of a spray with some spray ink, just to create more
texture on them. It's pretty fun. Look at
that, that's pretty cool. [LAUGHTER] Sometimes,
it's a bit of an oops, but sometimes, you'd create
the most amazing effects. I'm going to use this for the
background of the shapes. I think that could look
quite interesting. [MUSIC] Let's see how that looks. That's pretty fun. Depending on what background you start with, it will leave that in
the circle shapes. You can also see some
of the white alphabet, it was an alphabet stencil, and you can see them behind
that in the background. Plus it comes through
in the circle shapes. If you've got prints that you've taken that you're
not happy with, you like the colors but the design didn't
work for whatever, you could try this
idea because some of that previous print will come through in
the circle shapes, and it could look
absolutely fascinating. Let's face it, you
got nothing to lose. If you use prints
you're not happy with anyway and it doesn't
work, who cares? It doesn't matter, does it? Because you aren't
happy with it, anyway. But you might find incredible, amazing prints that you
wouldn't have tried otherwise. I'm hoping this ghost print
will pull up a few of those different circle
patterns that are now on the plate with my
trusty white tissue. That's good. Look at that. Don't you find that fascinating? I find that so fascinating. That's like a perfect outline
print. I just love it. [LAUGHTER] You can't reproduce these things in a
fit if you tired. You can't do it again
the second time. It's a monoprint, it's one print and I
absolutely love that. I could use that section there
in a collage, on a page. You see why I'm obsessed
with circles and they keep popping
up in my artwork? Because I do a session of
prints like this and make a whole heap and then
continuously using them. I just love it. [MUSIC]
10. More Circle Shape Ideas: We could get a little more dramatic and make the
prints a little darker. Yes, I do love me
a bit of drama. [LAUGHTER] Depending on
what background paper you're putting your circles on, there will be so incredibly
unique difference. It's quite amazing. Once you start experimenting, I'm telling you, you'll be as obsessed as I am,
truly you will. So I'm trying my circles on. I'm going to try this
very dramatic background. This has got a layer of stencil. It had a background color
and then a layer of stencil. It's very patterned. That pattern should be
now in a circle shape, which could look very cool. Don't stress out if it doesn't
or something doesn't work, just try another idea. Just keep moving, allow yourself to create because that's the beauty
of Jelly printing. Such an incredible freedom of creativity and
experimentation. Dramatic, love me some drama. Look at those
beautiful stunning. I would probably rip
them out and use them as elements in collage
like separate elements. I think that'd be really cool. We could even throw some silver spray across that and give it a
bit of a shimmer, that'd be really nice too, which I would do with
my bottle wasn't empty. [LAUGHTER] Now we've got all this drama of
the black on there. Let's see how that prints. What I love about using the white tissue is that you
can add it to your collage. You can add an element or layer on top because
it goes quite transparent so you can still
see different elements and different
techniques underneath. The beauty of collage
is multiple layers. This just gives you
a lovely pile of papers that you can use when
you're doing your collage. I just love having
that. Look at that. That is just fun. That is just fun. Look at that. That's the bronze with a bit of black liquitex mars black and the golden,
bronze iridescent. That's all those
two colors to make our beautiful circle
shapes. Love it. I know what I'm going
to do with this. What about we stamp some of the, yeah, let's do that. I'll get a bit of black. I really don't mind using
my job plane as a pallet. [MUSIC] I'm thinking that this could look
quite stunning in black on this space
we just pulled. Yes. How good does that look? That looks fabulous. I'm going to do a
few more of those. Cover my lovely print with
these black circle shapes. Then I'll have those to use. Look at that. Fabulous. I just love it. As you can see I'm not
too precious about it. I tend to get paint everywhere, I get into a bit of a
creative frenzy. I love that. I Love when it's not
perfectly printed. I love the patchy texture of it. I just think that looks
absolutely fabulous. This space will
probably get used in something. Look at that. Flipping beautiful,
they are fabulous. Now you know the
secret of how to make these fabulous circles
that you're gonna see in my art journal
and my collages. You're going to say, yeah, I know how she does it, but you're not going to want
to tell anyone [LAUGHTER]. Excellent watches for the
toilet system, now are you? No don't tell anybody
that [LAUGHTER]. I love this print that I just took just before, but it's a little dull. I'm thinking I'm going to
put my circles back on, because you can continuously
mess with these prints. Whoops, I could
go [LAUGHTER] and I'm going to spray some of
the dilutions [LAUGHTER]. Spray ink on it. I wonder if I sprayed a
heap it would hold tight. A good impression, I don't
know. I got nothing to lose. I wasn't that fast on
this print anyway. It was just an attempt for it. As you can see I have
just sprayed it with the dilution spray
because I wanted to see what it was
going to look like. Now if I pull them off, will it bleed in that shape. It's pretty cool, I like that. That's way more interesting. It might continue to bleed
into the circle shape. See as it dries,
it's going to move, but I'm okay with that because I don't need perfect circles. Yeah, that's cool.
That's a good idea. If your prints are
boring, put them down, put the circles back
on them and give them a spray. Nothing to lose. Maybe if you let them dry, they would stay in
their proper shapes. But I'm all about trying these
ideas and experimenting. I really don't mind. If they break their banks
and bleed over, that's okay. That looks pretty cool. This was the very
first print I took, it's nice and dry. Now this was just normal
standard copy paper, I put the paint down, I put the circle shapes on, and I took a print which creates this mask shape
from the circles. Well, I know that's boring, but what we can do, so I've got one of
these water brushes, and it's just got water inside, which is pretty
cool at Doll shop. Hello, really cheap
from the Doll shop. Now, I'm going to just put
some water on this shape. If you don't have
one of these water brushes, don't stress out. Just get a normal
watercolor paint brush and dip it in water. It's not rocket science. I've just got this fancy
paints one because it was a couple of bucks
at the Doll shop, which I might tend to
frequent quite often. [LAUGHTER]. Looking for amazing new things to create marks on the gel play. Now I've put some
water on that shape. Now I'm going to drop in
some ink into and it should. It won't always hold its form. I've noticed and I am always
a little heavy handed. I don't mind if they're not perfect circle shapes
and it's really fun. It's quite therapeutic
to watch the ink bleed. Like I said, it won't
hold its banks entirely, it will bleed out. But I don't mind when it
does because it creates really interesting
shape and texture. Then what I like to do
is put the paint on the circle shape and then use it as a stamp and stamp
over it as well, because that looks
just fabulous. Of course the more
water you put on, the more it will bleed, the more ink you put on, the more it will spread. If you put too much on, it'll run all over your paper, but that's all right anyway, don't worry about it. This is a no stress
way to create art. Just Beautiful.
When this is dry, I'm going to add a stamp of the bronze over the top and I'll show you it looks fabulous. I'll let that dry and then
we'll add a stamp to it. It's now dry enough [LAUGHTER]. Maybe not entirely, to add a stamp on. So I'm just going to put some paint onto one of these beautiful circle shapes and use it like a
stem to take a print. I don't mind if
it's not perfect, I'm quite happy for it to be textured and I always
love to see what we get. See, just beautiful. It's just another way of creating textures and
shapes to add in collage. Of course you can use any
colors that you fancy. I am just playing with these because that's what
I feel like today. Beautiful, love it. There is so many
possibilities using these fabulous circle shapes. It really is quite endless. You just need to try things, experiment and see
what you come up with. I liked the bronze here
on top of the black, I think that looks fabulous. I like that it's all kind
of patchy and textured. It's not perfect,
it's not absolute, and I'm loving that.
11. Adding Another Layer: [MUSIC] All right, have a look around at your
print all over the floor. [LAUGHTER] Oh, is that just me? I print myself into a frenzy and I leave a few stepping stones
to get out of my room, but other than that, they
are pretty much every way. Have a look at them now and see which ones could do
with another layer. I'm loving these ones, but they're a little boring, so I cut another shape out of my fabulous
paper packaging. This particular one is stronger than the other
one that I was using, so have a look at that. When you're packaging comes, there's different types of the brown paper that
comes in that packaging. You need all of it because it's fabulous and you can use
it for so many things. If you have to order a single paint to get
all of the packaging, then you just have to do it. [LAUGHTER] I'm going to put another layer on
some of my prints, this has got a bit of
gold spry lift on it, not to worry, I love gold spray. I'm going to use some of them. I also might put this on a couple of
them because I'm loving these circles and
I might spray them with ink and see how that looks. You want to just have
a little ply and put another layer on the prints that you think are
a little boring, all that could do with
just some more texture. I think I'll just put
some titanium white on the ply and use my fabulous brown
paper stencil and put some more shapes on a
couple of these prints. There we go. Look at that. That's pretty cool. Hello, there's a little bit of modern art right
there, I'm loving him. See how one extra layer can just give it so
much more interest. It has that push and pull now of the layers on top and behind, and that's working really
well, and so simple. Just grab another piece
of brown packaging, cut some different shapes,
take another print. Oh my gosh, it's endless
what you could do. I could even turn
it round perhaps. Let's try that and have
the lines going that way. There's an idea. Let's see what that looks like. It's just a matter of playing, experimenting, allowing
yourself to have fun, and trying different ideas. It's endless what
shapes you can cut out of the brown paper
packaging and how long. The resource is free. Let's say what this did. Look at that, it picked up the gold that was
already on the ply from previous printing and it's created a really interesting
pattern, liking that. This particular paper
packaging, like I said, is a lot stronger
than the other one. It peels off a lot easier, and I can probably use it again. It's also quite cool. Now, look at all the
paint that's on that. That's pretty nice. You could actually put
that into a collage, different sections of it, and that would look
really good too. There's a little bit of
ghost print on there, which will finally come through on one of
the print's sample, and that'll just give it some interesting
background texture. Now, I'm going to use my
fabulous hole punch circles. I might just put them
on one side here and put one side of this print on. Look at that, that
looks fabulous, it just adds far more
interest to the print. There must already on
there and I could use that section in a collage or
I could use that section. It just gives me more options and makes the print more usable. What will I put this onto? That's pretty cool. Think I'll use this background. This was the one that had
the corrugated card on it, I liked those lines. I'm just going to add all of that wet paint onto this print, give it another layer, give it some more interest. That's pretty cool. That printed out great. Now, this hole punch circle
one looks pretty cool. I wonder how it would stand
out with spraying it? We have to try these things. I'll just give it a
bit of black spray and see how well it works as a
stencil when you spray it. Look at that,
that's pretty cool. I think it's fun,
that's for show. [NOISE] Of course we're wrong not to add a
little bit of gold. [LAUGHTER] See [inaudible] tell my prints end up
so multi-layered. I love the overs-pray line here, I love the hole punch circles, that's gone a bit smudgy, but it doesn't matter. It's all texture and its own mark-making and it
will all look fabulous. Now, you can also use all of that spray paint
that's on there, you don't want to
waste anything. I put that on another piece of paper or put that over one of your prints and use up
all that beautiful paint. It can either start
another paper or it can be added to
one of your prints. Look at that, that looks
fabulous, I love that. Hello, prepare your packaging. Nothing gets wasted, everything can be recycled
and reused and turned into something else
to make fabulous art. That's a great
pattern, I like that. I like the way it's
got that look to it, it looks mysterious. I can definitely add some
more layers onto this paper. Now, this is my
transparent burnt sienna that I've put in this bottle. How easy is that? That is fabulous. Little bit of bling baby bling. Got to love me some
bling. Look at that. I have started now another
print that could just be used in separate
pieces into collage or else I could just create
something else on top of it. Fabulous background layers, that works really well. Now, it's the sign when
you're using all of the fabulous recycled
packaging options, like the corrugated card, you can use it to put
marks on the gel ply, of course, because we did
that already, which I love. Love these marks. You can also use that side that you've now put all of
that fabulous paint on and print it straight
on one of your prints, especially if it just
needs a little bit of something else or a second
layer or a highlight, you can use it as a
stamp onto your print. See, look how
fabulous that looks. Their circles came up so cool, I'm pretty keen
to do them again. I'm going to put that there. What about my tiny ones? I like these too.
Put those there. I'm going to put that on. This one had the mega
mother load of bubble wrap. I've never seen bubble
wrap so big as that piece. I don't know what I bought that needed to be wrapped so full-on, but it's fun to print with. I'm putting this other layer
now with white through my punch holes and just
see how that looks. Love it, I already know
I love it. Look at that. That is so fun. Have a look at your
prints and see if they need a little something. This was the brush marks. I love the brush marks, I'm playing with all
different directions of the brush marks, but I'm thinking maybe, oh baby, I love this. [LAUGHTER] Hello,
that's fabulous. I think I'll just
leave it right there. Thanks for coming. Hope that looks fabulous,
I just love it. A few splashes with
some white ink, and the dollar
store pastry brush, which is now my new
favorite mark-making tool. Look at that. Yes, I know. This one's not even dry yet, I just did this one. [LAUGHTER] Hello, look at that. I love it, I just love it. I love it, messy. Look at that, that's
a fabulous print now. I'm loving this one, but I'm not going
to flick it with the pastry brush, I promise. I've gone back to my makeup
sponge and I'm putting little square shapes in-between
the L-squared shapes. Now, it already had some of the makeup sponge shapes that were a little blobby
and a little dark, so let's go back in with
some beautiful white ones. If your workspace is
completely in a mess, you have over-sprayed
ink and pipe every way, then you are doing this class
right, Just be reassured. If your floor is
covered in prints and pipers and you have to tiptoe at to get
out of your room, that's okay too because just know that's where
I am right now. All right, I think that
the prints are fabulous. Go through all the ones that you've printed, have a look, if you don't like something, put it in a pile to
do another layer on, and the ones that you
love put in another pile because now we're going to
move on to the next section, and we're going to
put them together in collages in an art journal. You're going to love this. It's so easy, so much fun, and you'll be amazed at how beautiful your prints
are going to look. Layer out all your prints, go over a second layer or
third layer or even fourth on the ones that need a
little bit more texture or a brighter color
or a different shape, and then put your pile together
of all the ones you love that you're going to use in the collage to make
your art journal.
12. Preparing Your Art Journal: [MUSIC] Now you should have a
beautiful collection of your fabulous prints from
your expressive mark making. Do they cover all your floor? Are they all over your table? Do they sit on every
flat available surface? [LAUGHTER] Then that's fantastic because that's how it should be. What are we going to do now with all of these
beautiful prints? I'm so glad you asked. I'm thinking, wouldn't
it be great to put them into like a glossary
or a catalog or something where you can refer back to in a few months' time to remind you of the fabulous mark-making
tools that you used. You might have found
different color combinations that you like, or you might have discovered your new most favorite
tool, which I did. I am loving, love, love, loving the pastry brush, oh, my God, yes. Also loving this, punching the holes in
the paper packaging. I really love that
one and of course, I already had the lid of my spray bottle as a
personal favorite. I love the brush marks
of just a normal brush. But look at the bottom
of the ink bottle. That turned out
really amazing too. I'm thinking let's put a
little snippet of these prints together into an art journal so we can look back in a
few months' time and go, "Yeah, that's right. I loved how that did that. Let me do that again." Because I don't know about you, but I find it really
easy to forget down the track, things that right now
I absolutely love. We're going to put an
art journal together. Now, before you have a
little hissy fit and get all stressed out
because you either don't know what an art journal
is or you don't have one, we're going to do it
the recycled way. I love recycling. An art journal is just a book that you can put
your artwork in. You can even write on it as
a journal if you like to, hence the journal part. You could actually
write notes about what size marks you liked or what color schemes
worked well for you. It really is totally endless. Now if you already
have an art journal that you want to use, well done. No worries at all. You go right ahead and pull out your favorite art journal
that you already might have. But if you don't have
one, don't panic; I'm going to show you
one of my favorite ways to create this glossary where you can have something
to look back on to be reminded of how
fabulous your marks are. We are going to recycle
junk mail brochure. Yes, we are. Now, this is one that I picked
up from the hair dressers. Hello, free. That's why I love [LAUGHTER]
recycled; free resource. It's a lovely square shape. I like the square shape, and the paper is okay. It's not like real thick quality like my proper mixed
media art journal, but that's not what we need. The pages are not too bad, not too great, not too bad. It's in-between. You don't want to use a supermarket's brochure because those pages are way too thin. You want to find something
that you can use and recycle that has half decent
paper that you can use. Also something that
you like the shape of. I really like this square shape, but also I had this from the post office, you know,
prices on sending postage. That makes a really
good journal, recycled brochure because
the pages are quite thick. It's not bad, the long thin one. You could put it this way or
you could put it that way. You could fold up like this. Why I'd like to use
these brochures is because it's already
made into a booklet, easy peasy, lemon squeezy. We just stick our newly made beautiful print onto
each page and hello, we have an art journal
already. There you go. It's fantastic way
of making something easy and without any stress, which I'm totally into. Did I mention free resources? [LAUGHTER] This one
would work really well. It's quite thick. You can either have
it portrait or landscape size, really
doesn't matter. I also have an Art Trail
one of the same size. The pages on this one are
actually thinner and glossy, which is fine too. That's not a problem. You'll find these
all over the place. In fact, if you go to your information
center where you live, it'll have a lot of visitor
guides and booklets as well. Now if you get one like
this that's folded in half, just know that it's almost impossible to get that
fold out because I've done one [LAUGHTER] and I
didn't like it because I put the whole page on there
and it wouldn't unfold. Just know that if
you're going to get one that's this kind
that's already folded, it will stay folded,
which is okay, if you want to put like one piece per section
that could be cool too. That would work out all right. Just pay attention to the
brochure you're using as far as the size and the shape just to make sure
you like it really. I mean, this would
work perfectly fine. I would have to put the pieces in-between
here because I didn't like it when folded but
it's not bad thing to do. Art Trail magazines, fabulous. This is a great size. I'm liking that. That'd be like a half
sheet of our print. That would work really well too. Have a little look around, have a hunt round your house, see what you might have around. You can source your
hairdressing salon where you go to
get your hair cut. Fabulous. The post office, the Information Center, any Art Trails that you've been to and you've kept
the brochures of, they recycle really well. These are great
brochures to use. Don't use the
supermarket brochures or anything where the
papers are just too thin because it won't hold up under the weight of gluing
the prints into it. In this way, we get
to recycle something, we get to make ourselves
a fabulous art journal, keepsake of our wonderful
mark-making sessions, and it's a free resource; so, winner, winner;
chicken dinner. Let's see what you
can find and I know it's going to be fabulous. Once you have
decided what you're going to use for your
fabulous journal, I would suggest putting
gesso on the pages. gesso is just a medium
that we can use as like an undercoat or
that protects the pages, or that creates a better
surface for painting on. But I like to use it for this particular
project because it just makes the pages
white for a start. Also, it makes them a little firmer so that they're
not so thin and flimsy. Now you don't have
to do this because we are collaging
our pages anyway. [NOISE] We are sticking
our beautiful prints on your pages. Some of the other pages
might be transparent if you've used tissue, so you might want your
background to be white. It's completely up to you. You can put the gesso
on to make your pages a little stronger or don't put
it on if you don't want to. Now, remember again, a stick. Unfortunately, we do have to wait for the pages
to dry in-between. It shouldn't take too long. Just make sure you put
a really thin coat on, and if your gesso is too thick, you can always water it down. I'm using the Liquitex basics. It's pretty good. It's not too thick, and it's going on fine. I'm going to continue
and go through my art journal with the gesso. The gesso really doesn't
take very long to dry, especially if you're
just doing a thin coat. Being the impatient
person that I am, I just put a piece of baking
paper under the pages [NOISE] so they don't stick
while they're drying. Because I don't want
to have to wait. [LAUGHTER] Just don't stress yourself about getting it
perfect because this is just exercise for you to
put your beautiful print somewhere that you
can remember what you created and which
marks you like the best. It's your own personal glossary. You don't have to show anyone. It doesn't have
to be on display, so don't stress yourself into
having to make it perfect. That's why we're using a recycled brochure so you don't get too fussy
about it all. Look at that, beautiful. Remember, it only has
to be a thin coat, [NOISE] just so you can
strengthen your pages and you can not back the color of what's already
printed on there. My fabulous junk mail brochure, which is going to be a
beautiful art journal, has now been gessoed. Now, don't worry if
yours is crinkled, if your pages crinkle or if they sag or if they look a bit
sorry for themselves. Remember, it's a
junk mail brochure, so don't get too fussy
or stressy over it. You're going to be covering
all of the pages anyway. As you can see, the gesso is
not thick on these pages, and really that's what
you want because you don't want to saturate
your pages too much. Remember it's a
junk mail brochure. It will only handle a
certain amount of weight. Now I'm very happy with this. It's really cool. It doesn't worry me
that the pages are crinkled or if it tears
because it is what it is. You have to keep
it in perspective. You can put pages across the join here that will
strengthen the middle spine. There are different ways of
handling the application, so your junk mail brochure doesn't get too beat
up in the process, but try not to stress
over it too much. The whole exercise is
somewhere for you to put your beautiful prints that
you can refer to and say, "Oh, that's right. I liked that one. How did I make those marks or the color scheme
or the textures?" It's just a reminder for you of how you did the
beautiful mark making so that you can remember
a few months down the track and look back and go, "Yeah, that's right.
I liked that idea." Don't get too stressed
out about it. If it tears or if the pages sag, or if it's wrinkly, because it's just
another tool for your art tool belt that you can look at back and go, "Yes." That's going to
be a fabulous way to put all your prints
in like a glossary. [inaudible] Let's move forward. What are we going to do now? [MUSIC]
13. Collage Art Journal: [MUSIC] Now how are you going to decide which prints to put in
your art journal? We're going to call
it an art journal. I know it's a recycled
junk mail brochure, but we're calling it an art journal because that's
what it's going to be. How are you going to decide
what you're going to put in? Well, for me, I'm going to
choose my favorite prints. I'm going to make it
absolutely fabulous because I love to
make beautiful art. This is one of my favorites, I'm either going to use all of it to stick on the whole page, or tare a section of it and use some of it and then put something else on the page. Decisions. Are you going to choose by the brackets
of how you made them? This was a background paper. This was one using the
lid of the ink bottle. You could put them
into your art journal, clustered into the pages
of how you made them, or will you go with the colors and the
shapes and the textures? I'll probably use
the color, shapes, and textures to decide
which ones I want. At the moment, this one sits rather beautiful
next to this one. I'm liking that. I think that looks fabulous. I could possibly even throw in some of these
gorgeous marks of the brush, love the brush, onto the edge of that one, that would look cool, or some of this one with my fabulous favorite
pastry brush. I think what I'm going to do is definitely look at the colors, which ones sit next to
each other the best, and the prints that I like with the marks such as this one, I love this one. This was just the corrugated
cardboard paper packaging. Look how perfect those
lines printed like. I just love that. I'll be using probably
sections of pages like this. Because then I'm going to look at that down the track and go, oh, my gosh, I need
to do that again. That's the point of
what we're making here. We're making something
that you can look at down the track in a few
months time and go, oh, I'm going to do that again. That was a great print. I forgot about that
particular technique or that mark making
tool. Look at this one. This one is just the bottom
print of the ink bottle. Hello, who even
knew the bottom of the ink bottle would take
such a fabulous print? It looks like the
cycles of the moon. I'm looking at that guy, yeah, I got to do that again. That was cool. That's the purpose of this beautiful art
journal that we're putting together to remind you
how awesome the marks are, the colors that you like, and things to remember as when you are in your
art-making practice, you can go, oh, my gosh, that's right, I love that. It really doesn't
matter how you put it together just as long as
you're happy with it. That's why also why we're
recycling the brochure because don't get too stressed there and fussy about
it being perfect. It's not about being perfect. This is about you
just having a tool to be able to remember
the marks you made, the colors you did, and be able to continue
to create like that, and work these marks into
your normal arts practice. Now, I'm going to use matte gel medium because I
always use matte gel medium. I like the brush application, it works for me,
it makes me happy. You don't have to use this. The problem with matte gel
medium is it's very wet, so your pages will get very wet and because they are
very thin pages, you will need to let them
dry and they might tear. They might come apart in the seam because it is
a much wetter medium, just so you know. Also if your pages are wet
and you want to keep going, you can put the baking paper. Here's a piece of
baking paper that I used to put the
[inaudible] on the page. You can easily slip the baking paper
in-between your pages to keep them from sticking together if they are wet and you
want to keep working. You could also use PVA glue or you could
use a glue stick. Now the glue stick
is going to be the driest method
of application. It probably won't saturate your pages and make them
all wet and crinkly. Think about that if you
want to use the glue stick. It really doesn't matter, just as long as you're happy
with what you're working on. I'm going to start with these two pages and then
we'll say **** we go along. Oh, look at that color. See that's just the
background page. What you can do is put parts
of your prints on the page. You can also come back and add more shapes and marks from
your prints onto your page. Don't stress about if
you put something down, it has to stay like that, no, hello, it doesn't. You can come back
and add to it later. You can put more of your
prints onto each page. Remember, this is about
you and it's for you. You're the one that decides exactly how it's going to look. You cannot get this
wrong. Just so you know. [LAUGHTER] Have fun. Enjoy the beautiful
prints that you've made. I would so love to
see what you do. Just remember the
place where you start is not where you finish. Don't be afraid to start. Just put some prints onto your pages and if
you don't like them, you can change them
as you go along. You can add multiple
layers on them. You can add different
shapes and colors. You really got nothing to lose, especially if you're using
a recycled brochure, hello. Now I'm going over the edge with my papers and I will trim
that off once it's dried, it's just easier
that way because I'm not so brilliant at making sure I cut to the right length. [LAUGHTER] Just works for me. I am going to put, I print right over the fold here just to give it
a bit more strength. Remembering it is only
a recycled brochure, so it's not going to have
huge amounts of strength. Anything that you can do that increases that strength in your brochure is a
really good idea. I'm going to put some of the
ones that I really like, first of all, onto
the first page. I might come back later and add some more shapes on top
of them, I don't know. But you just got to get going. Get some of your beautiful
prints onto the page. Get moving along the side here, you're going to adhere them. Are you going to use PVA, going to use a glue
stick or matte medium, what are you going to
use to stick it on? Get a nice pile of your
favorite prints and just start. Just know that it will get beat up and bent out of
shape, your brochure. It will probably not look like it's neat little self
once you're finished. But that's okay. That's what we're after. Gives it all a [MUSIC]
little bit of character. It'll be fine. Look at that, what
a beautiful start. Keep going and fill up your beautiful art
journal/recycled brochure. Let's see how fabulous
you can make it. Now if you find
that your pages are too thin and they're not
handling the prints, you can go through your brochure at the beginning
and glue pages together. I have another one of
these hairdressing, beautiful brushes from
the salon [LAUGHTER] course I do because you've got to bring
them home when you go. I have glued these pages
together in the beginning, so that made them a lot
stiffer and a lot stronger. Remember that if you want to
do that with your brochure, if the pages ain't handling, your going the prints on, glue them, flew every
second page together. You'll have less pages to use, but they will be stronger. That's just another option. Keep going, keep adding
a beautiful print to your gorgeous brochure and
let's see it completed.
14. Part 2: Collage Art Journal: [MUSIC] Just
remember you can put four pages on them and
then come back and add little pieces and other
elements to it as well. You don't have to complete
all of your page at once, you can go through your brochure adding all the backgrounds in, and then come back and add some more little pieces
and some extra shapes, just to create it how
it suits you best. Remember there's no wrong way. [MUSIC] As your brochure does fill up with pages and become fatter, it will knock it
out of shape but you don't worry
about things like that because it's got all of your beautiful original artworks in it and that's
all that matters. You can also use
a credit card or a plastic card to
flatten your pages down, if you find that easier. Any hard part that I have
is waiting for it to dry. [LAUGHTER] [MUSIC] I was getting a little
out of sorts so I went and put my beautiful journal in
the Sun for half an hour, so it could dry out
a bit because it is a beautiful day here
in New Zealand, and then I gave the sides a little trim just so I
could see where I was at, see how the pages
we're drawing up, and I think it's
coming together okay. Look at this. This
is just beautiful. That's a bit of
bronze and copper on this background I'd
say and then this is the hilarious,
hello, toilet roll with rubber bands
rolled across the page. I mean you've just got
to love the simplicity. I trimmed off the edges and had a look and I
think we're cooking with gas, traveling along okay. Although if you find that
your brochure does have too many pages or if
the pages are too thin, you can glue them together
like I suggested. I actually was almost
tempted to do that, [LAUGHTER] because when I
trimmed them off and had a look, there's quite a few
more pages left to do, so I was thinking, shall I just glue them
together and it'll make them stronger and there'd be
less to have to complete. But no, I decided I love all my prints and I
would love to see them in this fabulous brochure so I decided just to
keep on keeping on. I trimmed the edge and
that really helped me to be able to
see them better, and now I'm back at it. This piece of paper is a
lot stiffer because it's just a regular copy paper. I think I want that up the
other way. Off we come. [LAUGHTER] The copy paper is a little stiffer
than the rice paper, so that's good for my pages because it makes them
a little stronger. But because I'm using
the matte medium, it also makes the pages
a lot more wet and soft and it can tend to also be a
little too soft in the join, but that's okay, I know that that's possible. I'm just going to take
it easy. Look at that. That's beautiful. I'm loving
this beautiful print. That was just one of my
backgrounds when I first started. I love leaving the abstract
marks on the gel plate. I think it's just
so interesting, that's just a
painting in itself. Just fabulous. I'm just loving having
this whole collection of prints together in one
place, so much fun. Look at that, just beautiful. [MUSIC] Now look at this piece. This piece is what
I used to print with on one of the
other designs. It's the paper packaging, brown paper, and I painted it, rolled over it, black and
it looks flipping amazing. Hello, so what you print with, with the brown paper packaging, you can actually
put in your collage because it looks fabulous. It looks so good. I love paper packaging. That looks fabulous. [MUSIC]
15. Finishing the Artwork: [MUSIC] How are you going with your
beautiful art journal? I have mine all stuck
in, and ready to go. Man, there's a lot of
pages in this brochure. [LAUGHTER] I almost was
tempted to glue some together, because I'm like, man this
is never going to end. But the beauty of it is, it uses up a lot of your prints, which you might
have quite a few. I have hundreds now, all over my floor, and everywhere, so it is a great project for using
up those fabulous prints. Also, it's some way concise to put them
so you can look at, and go, oh yes, I remember how I did that, and I want to do it again. I want to show you how I put these beautiful circle
shapes on here. You saw how I printed them with my secret circle shape template. [LAUGHTER] I've got
them on the front, and I've got one on the back. I just love it, I love them, they're fabulous. Element for collage, they work really well. If you've printed them onto
tissue, like with this one, just on white tissue, this one's got a multiple prints from the ghost prints,
it's fabulous. This one's got some beautiful
black, and bronze ones. If you've got any of these circle shapes
printed onto tissue, I want to show you how to
rip them out in an easy way, so that you can use
them as elements. This is my [inaudible]
fabulous water brush pen. Seriously, I got this from The Dolar Shop or Cheap
Shop, really cheap. Don't remember how much.
It's got water in it, and if you go around your beautiful circle
shape with the water, and then you tear it, it tears really easy, and it means that you
can pull out the shape of the print without
wrecking it, which is always fabulous
because trust me, it's really easy to destroy something that
you actually wanted. l might have done
it a few times. Look at that,
absolutely fabulous. Little bit of water and a
very cheap water brush pen, and there you go. I love it. It's so simple, it's so easy. Then that can now adhere onto
any of your journal pages, and it looks
absolutely fabulous. If I went round any of these, I could do it the same. If you wanted to leave it
in that cluster of shapes, you could do that too, which I have also done, and it looks
absolutely fabulous. It really is a quick, and easy way of being able to tear out the beautiful
circle shapes. You can get right up
close to the lines, and you can still have that
lovely organic torn edge, which I think looks
particularly good. [NOISE] It comes away really
easy from the background. Then you can put it into
your beautiful collages, and they look just fabulous, [NOISE] just like that. Easy peasy, lemon squeezy, that's a great way
of being able to tear up your fabulous
circle shapes. [NOISE] I'm really happy with how my fabulous art
journal has come up. That's my beautiful brush
marks with the pastry brush, and this is the brown
paper packaging that I put hole punch marks in, and printed with. I love it. Of course the lid of
my spray bottles, and my glorious circles. To me each page is
a fabulous way to display the mark making
that I really love. Now, my pages are
a little crinkled, and have lines in them because, hello, you have to remember
where you came from. This was a junk mail brush up from the hairdressing salon, so the papers are going to crinkle because they're
not great quality. But it is a fabulous, keeps a reminder art journal
to show me the marks, and the colors that I
particularly enjoyed. I love the brush making, I love the cost of
spray bottle includes, and this is just a
beautiful background that I started with. Here's some more of
the pastry brush. That's the rolling
of the toilet rolls, and this is more of brush marks, some splintering of ink, and this was where I punched out the hole in the brown
paper packaging, and it turned out fabulous
to glue into collage. More of those
beautiful lid marks. I pretty well love those. You'll be able to see which ones I'm obsessed
with the most. The pastry brush, the brushing, and also this was where I sprayed the piece of paper that I've punched
the holes out of. It's just absolutely glorious. That's the hole punch page of
the brown paper packaging. Who knew it would come
out as beautiful as that? More of my glorious lid. Yes, I know, it's
one of my favorites. [NOISE] There it is again. [LAUGHTER] This is
the corrugated card. I love that mark, and there's my circles, and I've shown you
how to tear them out, really easy to put them in. They look fabulous. Look at these, beautiful
background colors. I'm pretty happy with how
all these prints turned out, and I love that I
have them now in my glorious art
journal that was, hello, free resources. Yes, that's the
beauty of recycling. The junk mail brochure is free. That's the pastry brush, loving it, beautiful
background colors, and again, that hole punch
brown paper, corrugated card. Hello, that is a toilet roll, rolled with the rubber bands. We're talking basic. Not very much money to create
these glorious prints. l'm loving that. That's
the corrugated card. Again, you're seeing all of the same ways that I've
used the mark-making. That's the makeup sponge, and that's the brown
paper with a hole punch. Doesn't it look fabulous? Come on, it does,
I know it does. Circle shapes, and
then brush marks, the pastry brush, it goes on, and on with
glorious textures, and colors. [LAUGHTER] Absolutely love it. I had so much fun making this, and putting it together. Toilet roll marks, hole punch, lid of
the spray bottle, the pastry brush, and it's just beautiful, it's all worked
really, really well. That's the piece of brown paper that I punched
the holes out with. Used it, took prints from it, and then stuck it in my collage, and it's working really well. That was that real brown
paper packaging stuff. That's so bizarre.
You need to keep your eye out for your
paper packaging, check all your parcels when
they come because baby, it's a goldmine [LAUGHTER] of possibilities for
Gelli printing. More circles, fabulous
pastry brush, more of my beautiful rolls, with the rubber bands, and I'm loving it. That was the stencil that I cut out of the brown packaging, brush marks, hole punch, and that's the bottom
of the ink bottle. Come on now, pretty
simple tools. You can do this, I know you can, and I would so
love to see yours. I really hope you put something
in the project section, either your favorite prints
or your finished journal, or even some of your
mark making tools. Come on, you got to share
your secrets with me now. If you've found
something that's made fabulous marks for your
printing techniques, you need to share them. There is the corrugated card, the bottom of the ink
bottle, hole punch. That is toilet rolls. Hello, [LAUGHTER] come on, you can't get more
affordable printmaking tool than toilet rolls. Fabulous, I absolutely love it. That is the spray
leftover piece of the hole punch paper packaging, put it on a piece of paper, splashed on some ink
with the pastry brush, and doesn't it look so good. There's the roll there. It's absolutely fabulous. I'm so happy with how my glorious art
journal has come out, because now, I can look at this, and say, I remember when
I created this print, and that print, and
I really love it, and then you can
create some more. This is just the beginning of such endless possibilities for your mark making
experimentation. You can take what you've learned in this fabulous art class, and you can build on
them, and develop them. Everywhere you look now, you'll see possibilities for creating textures on
your Gelli plate, which is absolutely fabulous. I really hope that you've
enjoyed this class. I've really enjoyed making
this with you, and for you. I really would love to see
what you have created, what prints you've made, what particular items that you've enjoyed creating
the marks with. Make sure you post something
in the project section, and show me because
that would be so good, I would so I love that, and all the best with
your creative adventures. Find some more incredible
tools for mark making, experiment some more, use
some different color schemes, and just have [MUSIC]
fun because baby, it's all about
creating great art. [MUSIC].
16. Thank You & Farewell: [MUSIC] Thank you for joining
me on this adventure. I truly absolutely love
mark-making on the gel plate. Isn't it such glorious fun? [LAUGHTER] You're never
going to know what you are going to get until
you pull that print. I hope this class
has inspired you, empowered you on to create
great art giving you courage and shown you
that you can do this, you can make amazing art. You just need to trust yourself, to have courage and allow
yourself to experiment. You never quite know
what's going to come out. I truly hope you've
enjoyed this class, you've been inspired,
you've learned new skills, but you've had a
lot of fun because great art comes out
of great fun truly. It doesn't all have
to be serious. It can be about enjoying yourself and allowing
yourself to create freely in a place that's not restricted by
preconceived ideas. That's when your originality really comes to the forefront. Like Picasso said, every
child is born an artist, but it's how to remain an artist once you're an adult,
that's the problem. [LAUGHTER] I truly hope
you've enjoyed this class. I hope you enjoyed the
creative adventure of watching my process and that
you've worked along with me. I would love to see
what you've created, so don't forget to
post a picture in the project section showing me something that you
absolutely love, one of your favorite
prints or one of your fabulous tool making items, or even your completed collage, I would love to see it. If you found something that made an incredible mark
on your gel plate, don't forget to
share it [LAUGHTER]. I would love to know what things you have
found from around your house that creates fabulous
mark-making techniques. If you would like to know
more about who I am, you can find more
info on my website froyleart.com and don't forget to check out my other
skill share classes. You're going to know just how obsessed I am with
gelli printing, I absolutely love it. I also have some classes on acrylic painting and other
mix media techniques, and I would so love
for you to join me. You can also join me in my
private Facebook group, Creative Adventures Making Art, where we can chat and
you can show me some of your art works and you can see what crazy adventures
that we're having. It's a fabulous group, it's very friendly
and there's a lot of beautiful inspiration
amongst encouraging people. Recently I started a
regular weekly episode of Sunday in the
Studio on YouTube. If you'd like to see more
of my antics in the studio, have a look there and join me. The episodes air air a Sunday
morning New Zealand time. Once again, thank
you for joining me. I truly hope you've enjoyed this art class and
I hope to see you again in the studio in
one of my other classes. All the best with your
creative adventures. [MUSIC]
 Froyle Davies, Mixed Media Artist