Transcripts
1. Introduction: Hi Froyle here. Welcome to my studio. I'm so glad that you've chosen this course and I'm so happy that you're going to create with me in my space because I know you're going to really enjoy this art class. I've been painting and exhibiting for over 25 years. I've tried everything. I've gone through all the types of paints, all of the mediums, pastes and gels. I've learned so many techniques and I've tried my hand at every subject imaginable. I've experienced so many things through the years and I've learned so much. I failed that a lot of things too! But along the way, we learn even more. I've taught workshops on Developing Creativity for nearly 20 years and now I'm wanting to share my secret tips and techniques with you. I specialized in beginners or what I like to call 'Virgin Artists'. So this course is specifically designed for absolute beginners. If you've never put paint to paper before and you don't call yourself an artist, then this course is perfect for you. This course is a beginner's guide to collage painting. And I will take you step-by-step through each tip and technique. And then we will put it together in a finished collage painting. You're going to love this. It's going to be a lot of fun. There's gonna be a lot of things for you to learn, but also you can do this! This is absolutely easy for anybody to achieve. You don't have to have any prior knowledge or skills. I will tell you exactly what you need and how to use the materials. And you will come away with something that you're so excited and proud of. Also it will unleash your creative potential so that you can then go on to create more beautiful paintings, or even allow the courage that you learn from this workshop to permeate other areas of your life. Here are some of the techniques that you will learn in this art course. Finding affordable collage papers, Using book text and musical sheets for collage. Making collage paper from white tissue and paper packaging. Using images and choosing colors. Adding pearlescent paint for glamorous effects. And how to create an abstract expressionist style of paint application. You will learn how to find affordable collage papers, how to make your own collage papers and how to put it together in a completed design. You can do this. You can't fail. I'm going to show you step-by-step the techniques that you need to create this project. From this project, you can create many more. You will have everything that you need to complete this project. And I know that you're going to do a beautiful painting. So make sure you show me and let's make art!
2. What is An Art Journal?: What is an art journal? Quite simply, it's a book or a journal that you do art in. And it's really not that mysterious. It's definitely not difficult. This one has wonderful thick pages for mixed media, which I do a lot of collaging in. So you want to get yourself a really good art journal, good quality. It will cost you a little bit up front to buy that journal. But then, you have all of these pages you can use to put your art in. The beauty of an art journal is that it can stay private. You can keep it to yourself. You don't have to show anybody. It can be a contemplative space or even somewhere that is just for you, to create what you're thinking and feeling at that time. The benefits are, it's personal and you don't have to have it on display. Of course, you can show people what you're working on if you want to. It is a very affordable way of creating art. And if you get a good art journal with mixed media pages that are nice and thick and able to cope with paint and textures and collage. It should do you for quite a good amount of time. There are quite a few varieties of art journals on the market. So have a look at what you prefer. Just make sure your pages are nice and thick and able to cope with a mixed media expression because you want to put paints and inks and collage and all sorts of textural elements onto those pages. This is the art journal that I use. You can put images into your art journal. This is an image transfer. You just want to make sure you get the one with the nice thick mixed media pages so that it can handle all of the paint and stencils and writing that you might want to do in your collage paintings. An art journal really is a beautiful place to put all your thoughts and to set your goals and aspirations. And maybe this workshop might be a whole new creative practice for you. It really does handle quite a lot of mixed media paints. So it really is worth the effort of getting yourself a good art journal.
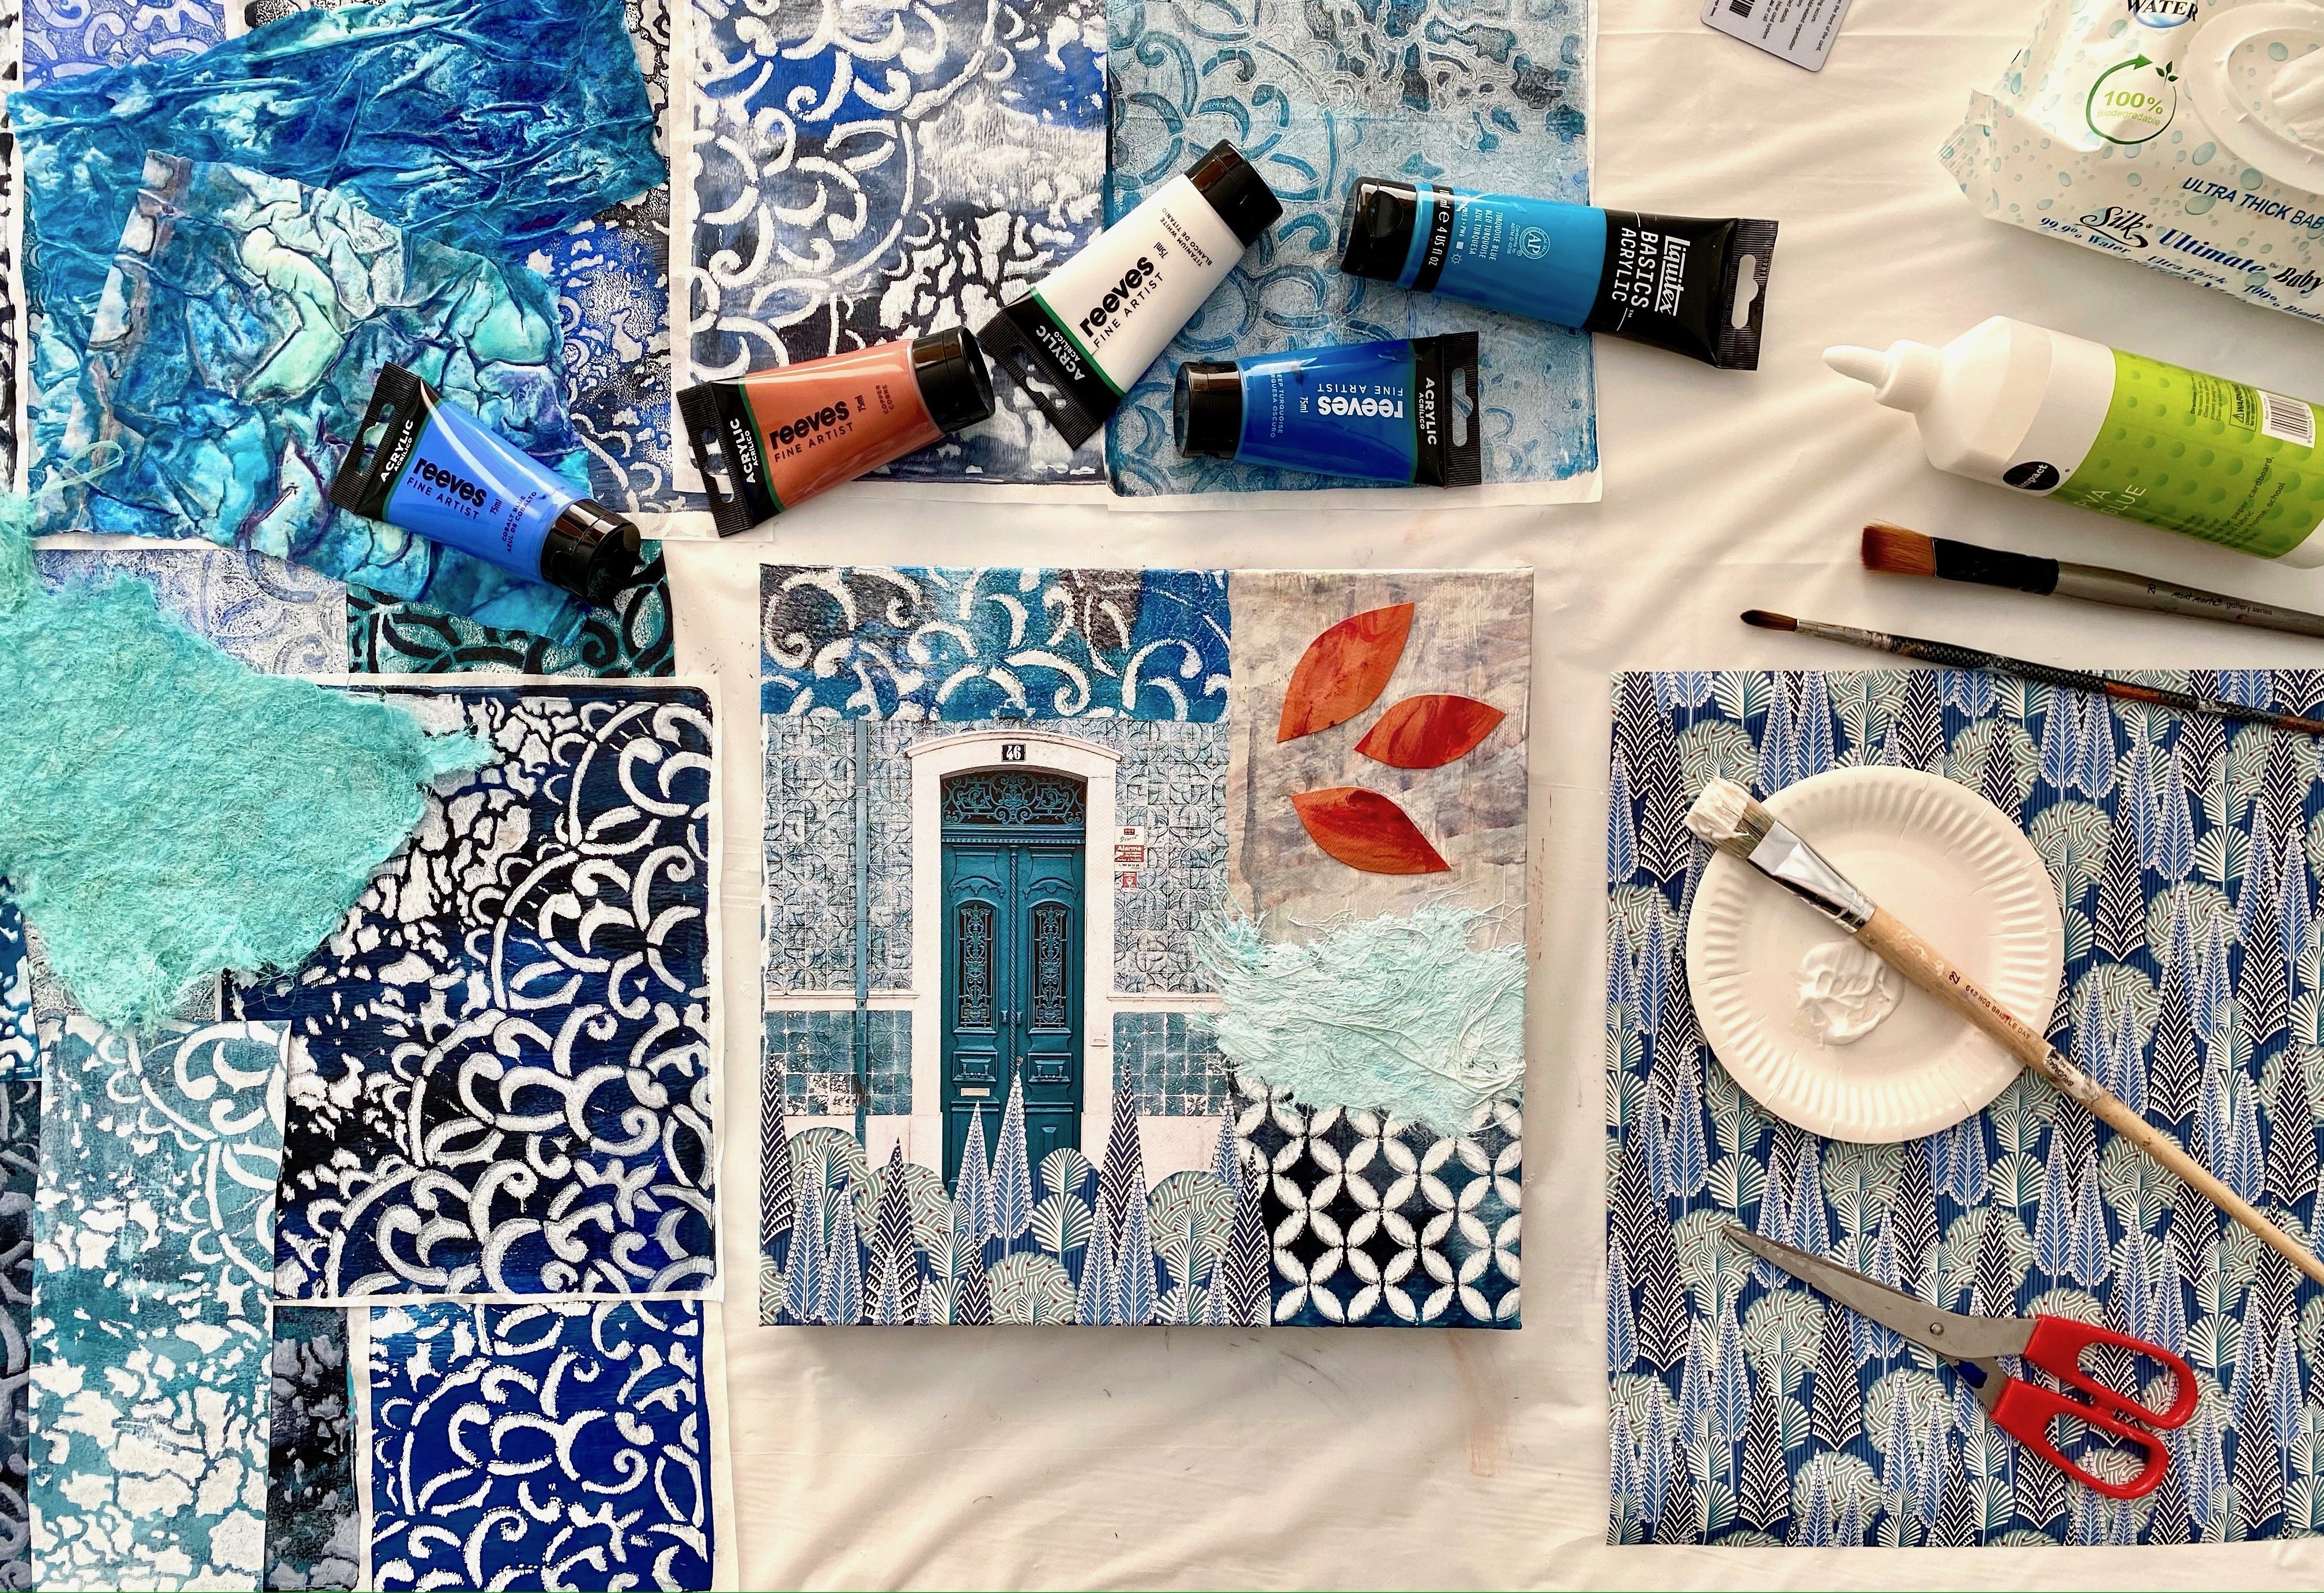
3. Choosing Your Image: I absolutely love collage because it's a versatile medium. There's so much you can do. Collage comes from a French word, coller, which means to stick or glue. So truly anything that you can stick on that canvas or in your art journal can make a beautiful collage painting large. Collage as an art form has been around for quite some time and became more popular when Picasso started putting images of magazines and newspapers into his paintings. The image that you choose is vital for your collage painting in establishing your focal point, helping to choose your colors and determining your composition. Now, I'm providing you with two images, which are paintings that I did quite a few years ago, just to help you with your project. Because we're going to discuss the colors that you would use and the composition in putting the whole design together. You can however use any image that you like. And the thing is with this workshop is that once you learn these techniques and gain a little courage, you can keep creating these paintings over and over with a different color schemes and different compositions. It's really quite exciting. The opportunity and the doors that open when you allow yourself to create in a mixed media application. Have a look at the notes on My Secrets For Making Exceptional Collage Papers. Because I lay out quite simply step-by-step all of these elements that we're talking about. And it will help you to create even more collage paintings, You can use images that you already have. You can find them in magazines or in birthday cards or in old pictures, even recycle your own paintings. They are fabulous for collage. And you can also source the Internet for images. Now, if you're going online to find your images, make sure you use royalty-free websites. That's really important. You don't want to have problems with copyright issues down the track. Unsplash is one that I use all the time, but there's Pixabay and quite a few, other royalty-free sites, where you can get free images that you can use in your artworks. Make sure you access these websites, also, Etsy sells images really cheap as digital collage. I have bought quite a few images from Etsy. This one here I used with an Etsy image that I downloaded. What I love about it is that it's very affordable, It's very quick. It's an instant download. And you know, you've got permission to use that image to create your artwork. If you're using my images for your project, then you want to think about what colors in that design do you really like? Because you can actually do collage so many different ways. You could take the images and paint five different paintings with the same inspiration because you could use different colors. You can make a different composition, so you don't have to follow exactly my project. It can be just inspiration for you, like a springboard, for you to bounce off into your own design. That's perfectly fine. Or you can step-by-step, I can show you exactly how I created this project and you can follow along. It depends on how you want to create this beautiful masterpiece.
4. Using Paper Packaging: As we order more and more things online shopping, I'm finding I have an abundance of paper packaging resources, which is absolutely fabulous for collage. So the things that I order are coming wrapped in brown paper, this works really well. You can paint on it, you can stencil it. You can collage over it. You can use it for a background. You can use it for testing ideas and paintings and trying out different applications, that works really well too. on brown paper. It's also endless, comes in reams. Cardboard. Corrugated cardboard is fabulous. It's got an absolutely gorgeous texture to it. It's got these lines. You can gesso this, paint this. You can also use this for printing techniques in a different course. It's endless what you can do with the paper packaging. I also have found that things I've bought have come wrapped in like a cheap craft paper. This is fabulous for painting on. So make sure you keep everything that comes into your house. That's paper packaging, because truly it makes fabulous collage paper. But my absolute all-time favorite paper packaging for collage paper is the white tissue. I absolutely love using white tissue that makes fabulous collage paper. And it's endless, it just keeps coming! So I'm going to show you my favorite way of using the white tissue, because it makes absolutely beautiful college paper. Recently, I had something arrive with this. How nice is this texture? It's paper of some sort, brown paper. It's got this crazy weird textured pattern on it. And it came wrapped around something that wasn't even that precious. I think I was more excited with the packaging. Anyway, this will make fabulous texture for collage. As you can easily stick this onto a canvas or your art journal, you can paint on it. You can also use it to take prints from, there are so many ways you can use paper packaging. So make sure you keep everything now that comes into your house. You're actually going to look at the world in a completely different way after this workshop. And you start to question, can I stick that on something? Can I paint over that? Paper packaging really is the best material for collage painting.
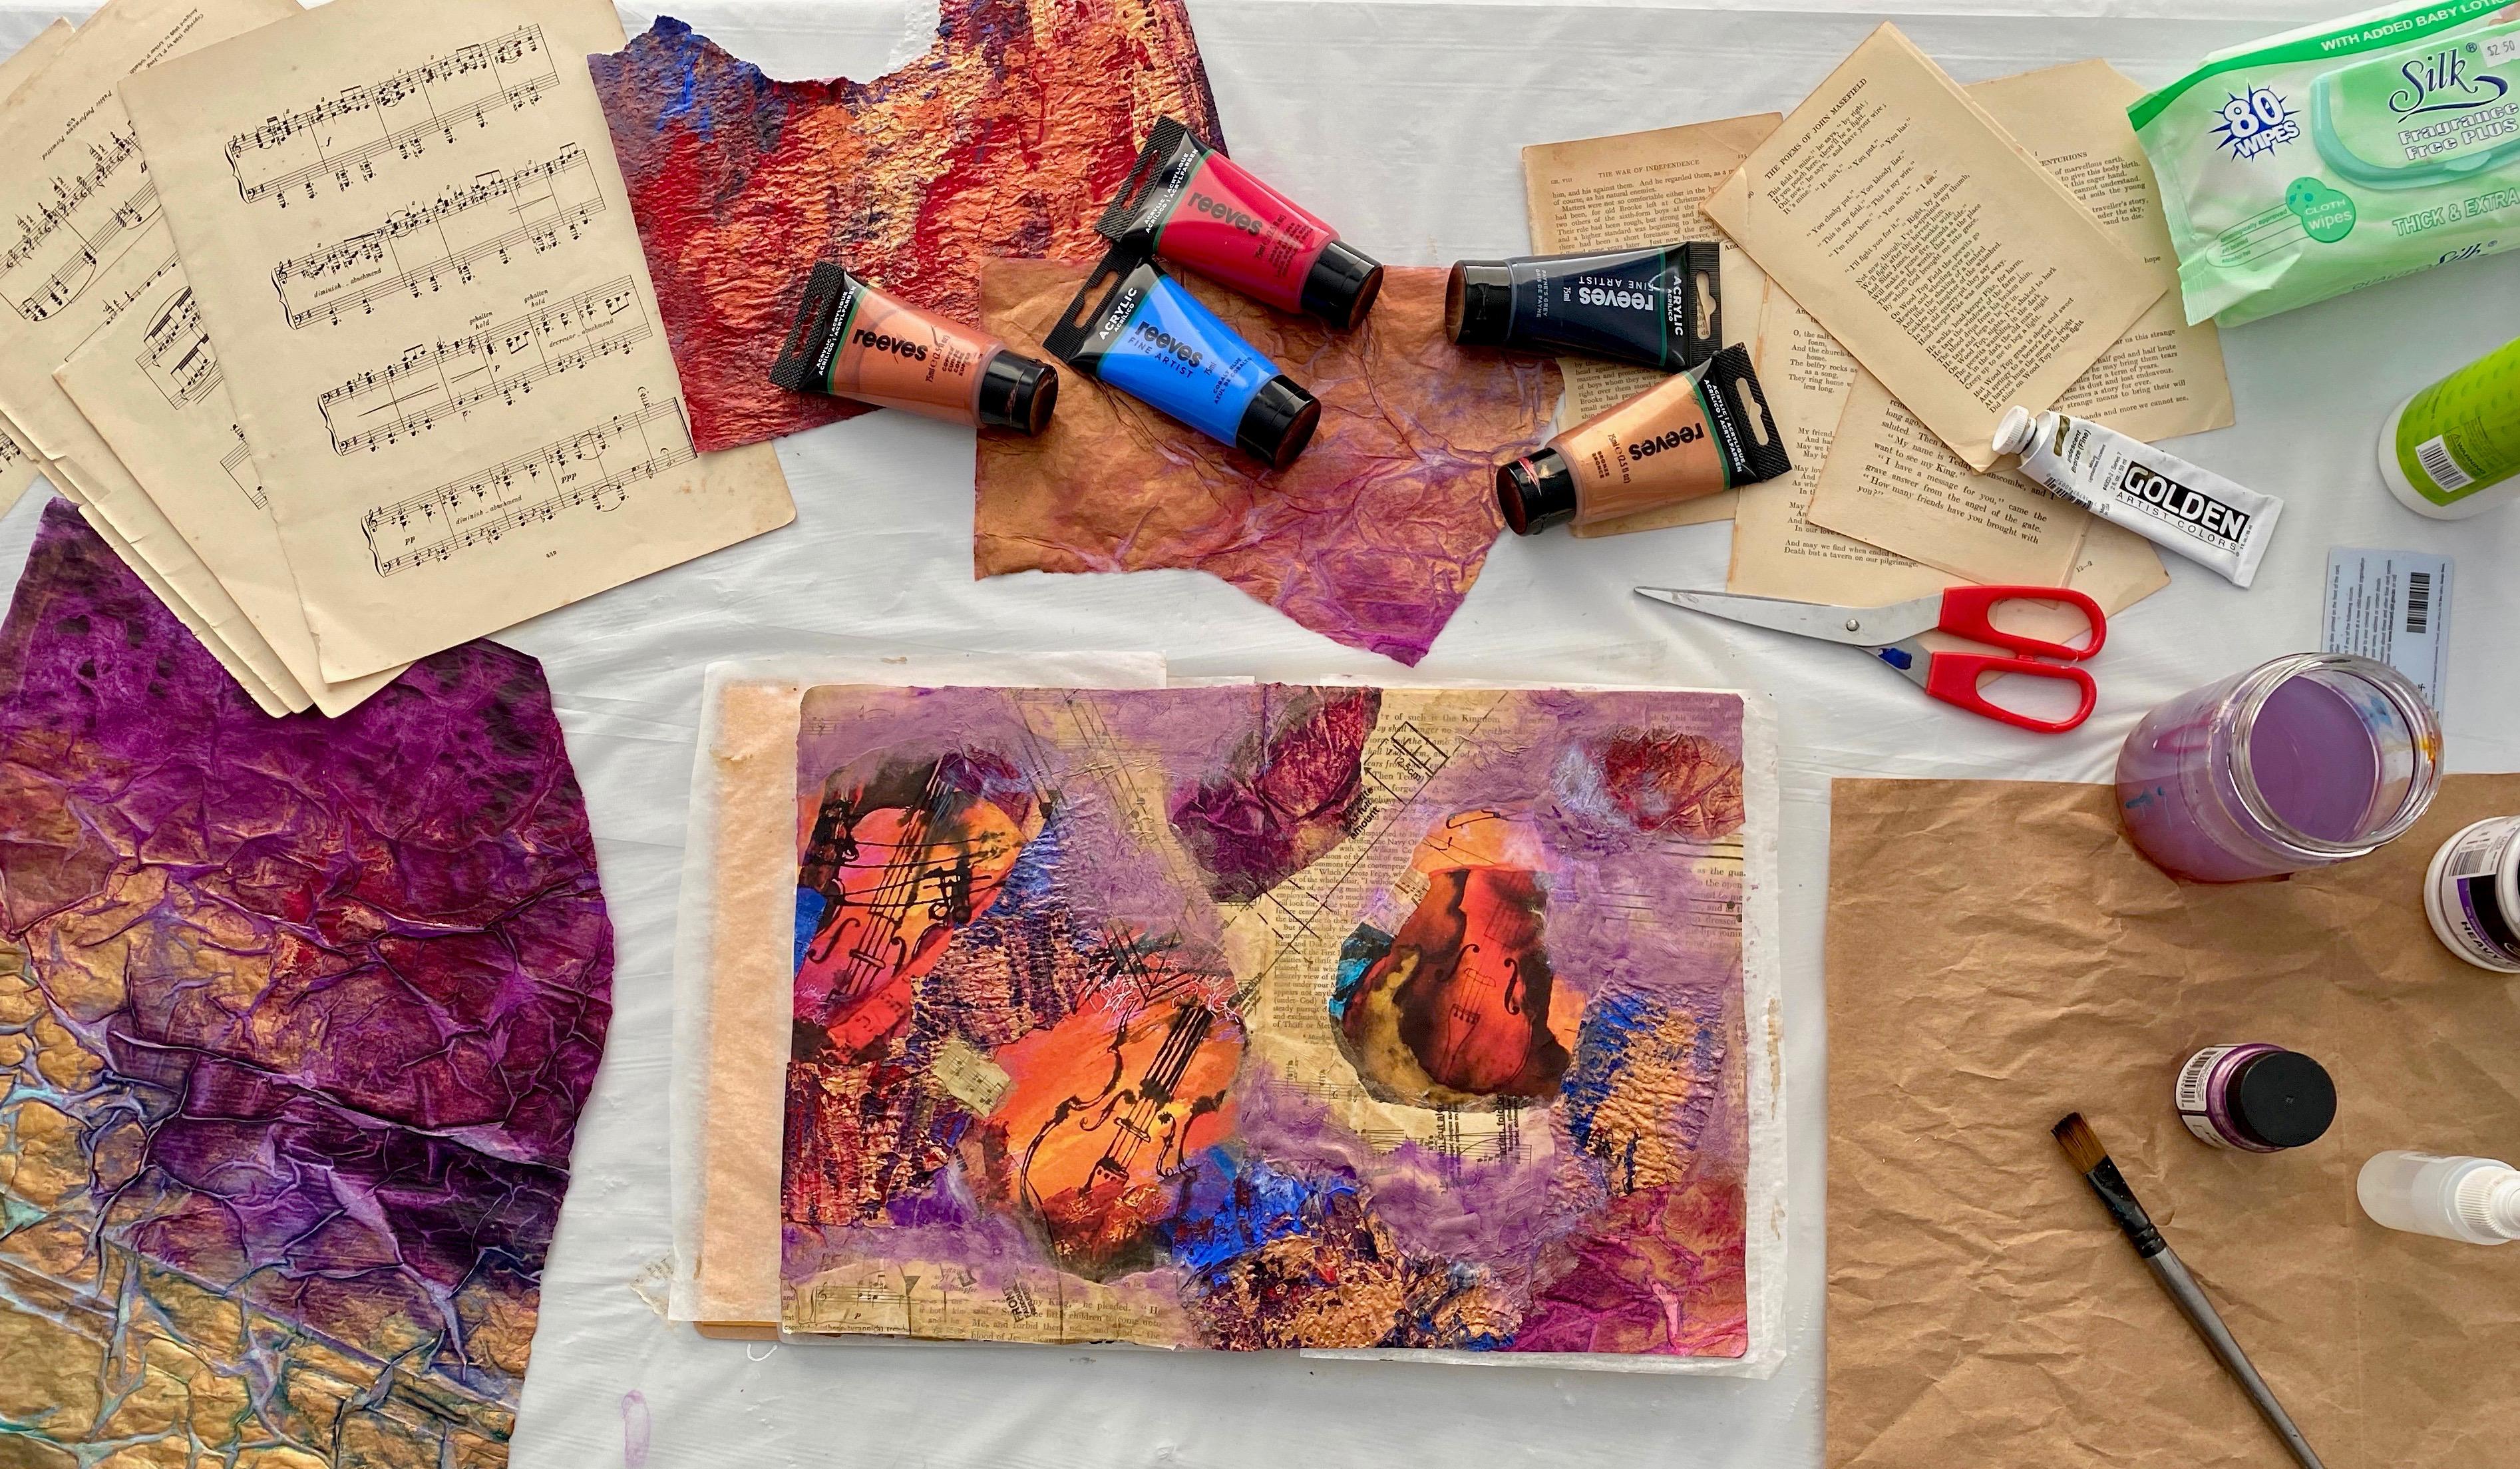
5. Creating Your Own Papers: So I want to show you my absolute favorite way of creating collage paper with white tissue. This particular piece of tissue is clearly a recycled piece because it's all crinkled. It was definitely packaging. But I loved the crinkles, I don't have a problem with that. You can buy brand new sheets of white tissue from the dollar shop. Pretty cheap and it will come straight and clean and fresh, which is fine too. I really don't mind the texture in this. You want to make sure you have it on a plastic tablecloth. That is really vital for this particular technique. Because we're going to spray it all with water and when it dries, it will not come off the table, if you haven't put plastic down first. Now here's our images. So you want to pick out some colors in the images that you're going to use. I personally absolutely love these Liquitex inks, they're strongly pigmented. They flow beautifully and they have got amazing colors. This one's a deep violet that will work gorgeous. I'm pretty sure we need some rich gold, iridescent bright gold, that's going to work really well. Bronze, bronze works really well with these tones here. And I'm going to put in some magenta. There's a few lighter pinky tones within the painting. So a little bit of magenta could go really well. See how nicely all those colors fit together with these particular images. So that's what you've got to look for when choosing your image and deciding on your colors. Basically, the whole process of this technique is to literally throw the inks on, and spry with water. I absolutely love this particular technique because it's so liberating. I just love throwing these inks on the tissue, it makes a beautiful texture. And there's no stress involved. Now, the more water you spray, the more it will spread. I am going to spray the whole piece of tissue, so that it spreads right to the edges. With this particular technique of spraying it like this, it will create organic shapes. And the water will find its way right to the edge. And it will create all these crevices, almost like a stained glass window. That's how I describe the look of it. It's my favorite way of creating the collage paper with the tissue. There are a couple of other things that I'm going to show you as well. But this one is my absolute favorite. You want to get the water right to the edge because then it will run out. If you spray too much water, don't stress out because it will dry, eventually. And if you don't spray enough. Your ink won't move basically, It'll just be stuck in blobs of round drops, so You do have to be quite liberal with your water. It will dry eventually. You can move it around a little bit, but remember, it's tissue. So you can't really give it too much grief because it will tear, I think you'll be surprised when you come back to it Just how much it has spread because it does find its flow. You can kind of mix the colors up a bit. You could try different things. This is a metallic ink, this one, so it'll look really pretty. There are all sorts of different inks on the market you can try. And then you just have to leave it to dry completely. Don't try and move it off the table until it's entirely dry. Otherwise, it will just all tear to bits. I love to use leftover bottles when I'm using this particular technique with the white tissues, It's feels incredibly satisfying to use up the last remnants of the Golden Fluid bottles, especially to make such beautiful colored tissue for my collage paintings. Now, you can also use watercolor. You can use watercolor paints on the white tissue. And you can, if you want to, you can brush it on. You don't have to spray it with the water and brushing it on like this, This will actually just create whatever shape it is your painting. So you're not limited to just one particular look. If you brush it on like this, it doesn't create as a fully textured stained-glass looking result and it can come up even softer by adding more water to your watercolors. So I'm just using some colors here that are going to work well for that particular project that we're doing. And I'm just going to cover the rest of this tissue with these watercolors. You just brush it on with watercolors. Pretty easy. There's definitely nothing difficult about this technique. Also, you can continue to do this particular technique with whatever color schemes and for whatever projects we're working on. All you need is a little bit of courage, a fair bit of space, And, away you go. Now any colors will work for this technique. I'm just using these ones that are going to match the particular images that we're working with. But of course, you can do this with any color scheme. And it doesn't have to be as intense as my colors are. I know I'm a little bit of an intense person, so my colors tend to be rather strong, but it will work just as beautiful with different tones and different shades of colors. If you go more carefully. Like I'm doing on this piece of paper, you'll have less crinkles and less textured lines. I personally absolutely love the texture of the lines. And the crinkled look like a stained glass window that's my favorite. But I just wanted to show you some more ways of doing this particular technique because truly, it really is endless. See how I'm getting kind of a more smoother line here. And this is watercolors, so it's going to dry a lot lighter. It'll be a lot softer in color. See look at me, I can do soft! I just want to show you that really, You can use any color scheme in any kind of tone or tint with this particular application. It really is just the best. Now this one will dry up a lot lighter, a lot softer in color. And you won't have as many lines in it as the other one where you just spray it and let it all flow. Options are endless. Right, now my beautiful collage paper is all nice and dry. See how easy it peels off the white plastic tablecloth. That's what you want. These are the inks, And this here is the bronze. The bronze came out really nice I think. And then see how brushing it with the watercolor brush. It's not as crinkled as the other papers. This is the paper that I dropped the paint on and just sprayed and left it. See how it goes. More organic stained-glass kind of a pattern. As the water creates its own textures. I love this. It's actually my favorite, but you can do other, other textures with it. So the watercolor paint on the tissue has now dried. See how much lighter this is and how much smoother it is, It's not so crinkled like the stained-glass kind of effects. And so it's really up to you what you want to create, how you want your beautiful collage papers to look. I personally love the intense colors and the way the water creates those textures and patterns. But you need to try a few different sheets of paper with different colors and different applications. This is the smooth over with just with the watercolor brush or drop the inks on and spray it, definitely give this technique a try because it's fun. If you're using recycled tissue, It's really cheap and it makes absolutely beautiful collage papers.
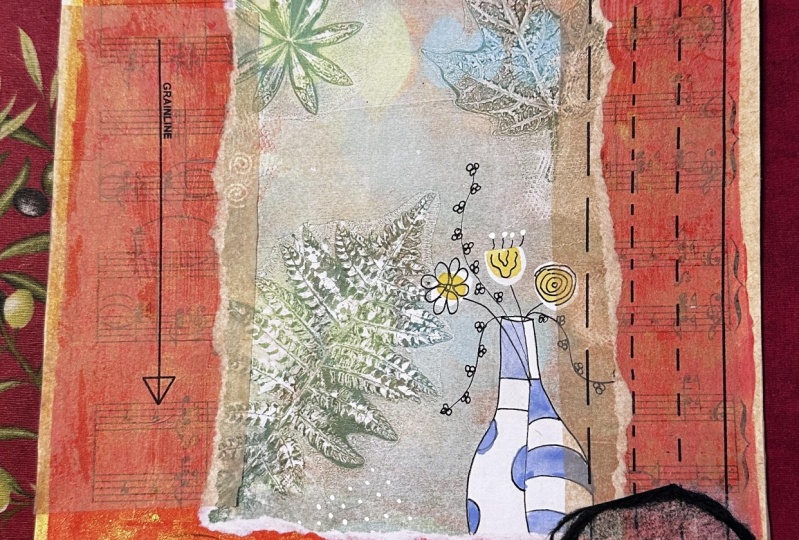
6. Gathering Collage Papers: We're going to look at the beautiful treasures from the Op Shop or thrift shop or second-hand shop, and the amazing collage materials that you can find there. Personally, I absolutely love the music books. You get so many really old music books like this. And they're very affordable. Look, they've even got someone else's notes in them! It doesn't matter to me what instrument it is or what language it's in. I just loved that they are quite, affordable they are in abundance to find. And they make great textured papers. They do fall to bits, but that's okay. So we're gonna use some of these today. Also from the Op Shop. Or Thrift Shop, you get old books, some of them are really old and discolored which is fabulous textures. The text looks fab, it doesn't even really matter what the book is about. Poems or fiction, or really it's irrelevant. It's actually just creating texture on your art work. So they are quite inexpensive. Old books at the Op shops as well. Also the other thing I love to get from the second-hand store, from the Ops shops is dressmaking paper. This is fabulous. It's almost as exciting to me as the white tissue. You can actually paint this as well, you know, like I showed you in the white tissue demonstration, you can do exactly the same thing with dressmaking patterns. Look how fabulous this is, What I like to use them for, is to put like on top of a painting if I want to do a separate section with like a more of a vintage tone, or if I want to knock back some of the colors, or if I actually just want to add this particular line through it and cause it's quite transparent being the dressmaking pattern. It looks really good. On top as a layer. Have a look at this one here. This one's got the dressmaking pattern across the image of the figure. And it looks really, really good. I really like that, and it costs like 20 cents for like a whole packet and you get all of this. There's an abundance of collage material at a thrift shop. Of course, we're going to use some packaging. You can use this. You can paint on it, you can stencil on it, you can write on it. You can leave it as brown paper or you can paint it. You can gesso the brown paper. And then add other colors on top, you can add that bronze to it. You can add, oh my gosh, it's endless. What you can do, you're limited by your imagination and how much you are willing to experiment. Now what I also want to add with this particular project, I want to encourage you to use your own paintings. So these are two parts of paintings that I did quite a few years ago. I'm going to use them in this art journal page. Print the out at the copy shop. Because you want to get a laser print. Unless you've got a laser printer, yeah for you, I don't have a laser printer. An inkjet will bleed. So you print it out at a copy shop. These are my paintings. If you've got artwork that you've previously loved and you've got really good images of them. Then you can use them in a collage to make something else. So I'm going to use these two images from my paintings in this particular spread. And I'm really encouraging you to do that with your previous artworks. Reuse them, they're fantastic for collage material. Also, I'm definitely using more of this because I'm totally in love with my colored tissue that we made, right? And also what I want to use this time is some of this. So this is paper towel, white paper towel that I was using that I had beside me as I painted the base coat of the canvas, I wiped with my palette knife onto the white paper towel. And then in the end, when I'm finished putting the layer of paint on my canvas, I put all the remainder or leftover paint onto that white paper towel. So now I'm going to use this as collage material in my journal page. And I'm telling you, paper towel is one of the most fantastic collage materials. It's soft, It's easy to glue on. It takes an abundance of paint. It even takes water, watercolors or inks. It takes it thick or thin. They're very absorbent, absolutely fantastic. One of my favorite collage materials is paper towel. You can also use the paper towel just as white paper towel in a design or composition or apainting that needs a certain area to soften. Or you want to add some shapes to it, like this one. This one needed that area softened, so I put the white paper towel into it and it came up really well. I'm really happy with how that page came up. So paper towel people, it's pretty inexpensive and it makes fabulous collage paper.
7. Finding More Ideas: You can use anything for collage. You can use magazines, newspapers, photos, old cards, momentos, ribbons, cardboard, really anything that you can glue or stick onto your canvas or into your art journal can make a beautiful collage painting. You really only limited by your imagination and how willing you are to experiment. Serviettes also make fabulous collage paper, especially those really nice ones you find in designer shops. Some of them come with beautiful patterns and textures on them and they can work perfectly in your collage painting. They do have a couple of layers on the serviette. So you will have to peel off the actual patterened top layer. You can use the other layers for collage as well because you can paint on them. You can add inks to them or you can use them just as white in your painting. In this painting here in my art journal, I used this beautiful serviette that I found. And I think it just adds a really nice touch to the overall composition. So if you don't have leftover paint that you've put onto paper towel. After you've been creating a painting, you can make them specifically for your collage. You are just going to want to use ordinary paper towel. Easy peasy. This one's got a beautiful texture on it. It's got this white circular pattern, which I really like, you can use plain, you can use textured, you can use really anything. So when doing this project, and these are the images that are going to be in the project. So if you've got something in mind, you might like to create some paper towel for collage paper, specifically in the colors that you are going to use. So these are my images that we're going to use for the project. Looking at this, I'm really liking the cobalt blue, definitely some bronze and some of this rose madder. Now these paints are very affordable from I got them from office, no stationery warehouse. Or office supplies you can get them from. Newsagents have very inexpensive student grade paints. These ones cost me $6 each. So, hello, totally affordable, totally accessible. I think you can order them online or you can go into your local store. Why I like using affordable student grade paints for my collage papers. Because you won't stress, you won't stress about how much they cost, or how much you put on, you'll just create freely. And really, that's the goal, is to get you creating freely with your creative expression without stressing about performance or productivity, because that's when you really access the parts of your heart that allow yourself to really create something beautiful. So these are the colors that I would choose if I was purposely going to create collage, papers to go with these images. You might like to choose different colors within these designs. It's really not a problem. Totally free to create from your own expression and your own choices. And I would love to see what you do. But if I was going to do this just for this particular project, Put some paint on the beautiful paper towel, And go from there. Now, I like using a palette knife when I paint because I like things chunky. I'm really not a delicate person nor a delicate painter. You don't have to be like this if you like yours. More delicate than you could use a brush and put it on really nice and careful. And really is completely up to your own style and your personality. And that's the thing that I'd really want to stress continuously, is you just need to create according to how it makes you happy. This makes me happy. Thick chunky paint like this. I'm not worried if it blends or becomes muddy because let's be serious people, This is paper towel, right? We're creating paper towel for our collage painting. It's not going to be something that has to be perfect. This is an incredible way to really chill out. Let yourself create freely, make a bit of a mess and see where you go. I love paper towel. When you see the demonstration in the project that we put together, you'll see it's very easy to use, very versatile. It comes up nice and thick and chunky when you've got this beautiful paint on it. And it's just a fabulous collage paper. Right, so that's how easy it is. Basically, if you don't have leftover paint that you've been wiping on a paper towel while you're creating a masterpiece, then just make some specifically on purpose for your project. Remember, when you're making your collage papers to always put everything on plastic tablecloth. Because when this dries you want to be able to peel it off easy. And being acrylic, everything will peel off the plastic. Easy peasy, no stress. Now, I will put these colors that I've used for this in your notes. No problem, you can do this. Absolutely copy this exactly. You can create your beautiful paper towel collage paper, and you can put it with the images that I give you to print out. This is so step-by-step, basic beginner, beautiful collage techniques. And I so hope to see what you create.
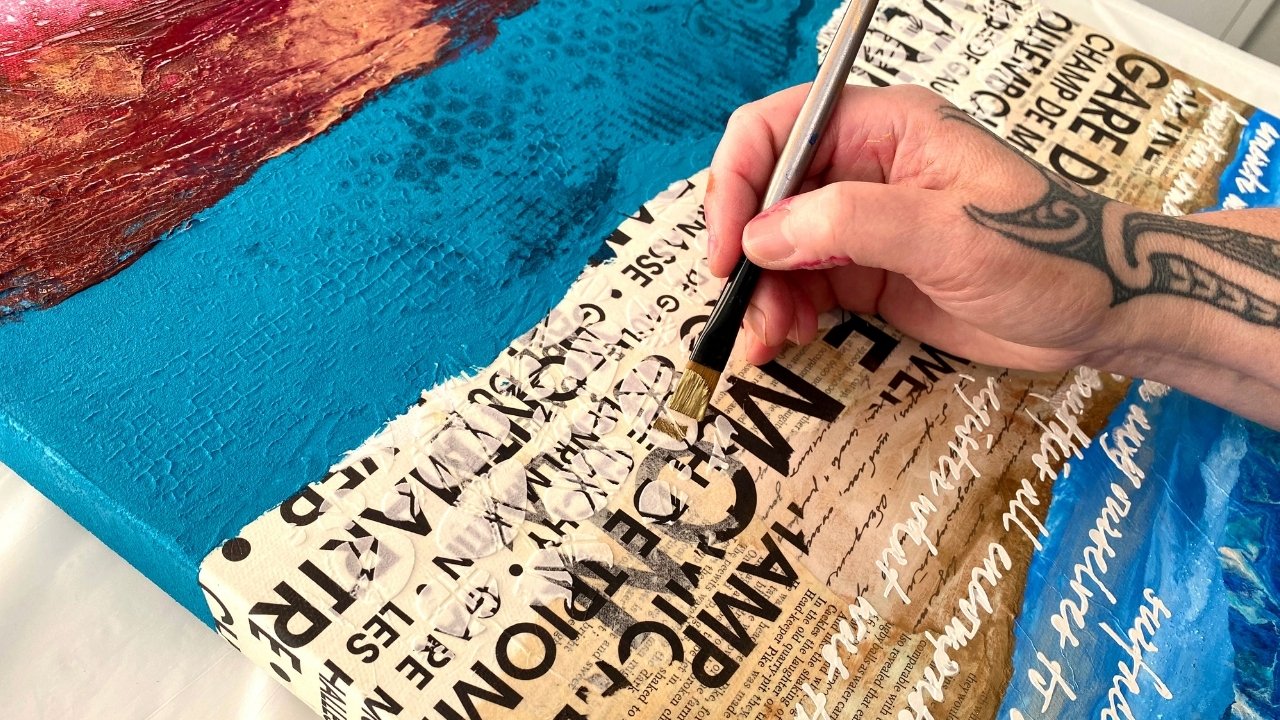
8. Part 1: Let's Begin: I like to put baking paper under my pages just to separate them or keep them clean. Sometimes you can JSON, the pages before you start net just seals everything. But I'm going to cover the whole thing in collage, so I'm not going to bother just sewing it. I'm just going to jump right in. We're going to use some matte gel. You can also use PVA glue if you want to. I'm just using matte gel in my app, my OT general here because I just liked. And I've got to stop by covering the whole thing in the musical notes and the book pages and Benno go from there. Right now, I'm pretty happy with that coverage. Next, I think I better decide where I want my images. Nighttime worry. If you have just covered your page on Canvas with beautiful texts and musical notes. And now you're going to cover it all up. Part of the beauty of a collage is the layers and layers and lions. And sometimes you just have to start by covering it all to decide what you wanna do next. That really is part of the creative process, is that continuing, developing, and journey of the art piece. In the end, you won't see all of the colors, materials that you put on your page or your Canvas. But it will help you to make the decisions to get to the place where you arrive. I hope that makes sense. I'm going to definitely use some of these images from my paintings. I'm liking this colors and I like the cello is like in the musical same. So I'm going to just decide where I want to put them. Like I said, if mad, I may or may not end up being Sane in the end. But right now it's going to help me to decide what I'm gonna do next. I think compositionally, it's always good to have odd numbers, especially with elements out, imagery or symbols. So like you want to have one or you want to have three. That just seems to be how it works in elements of design, how it works better. You don't have to stick to those suggestions, but a lot of design flies is to advocate for odd numbers in the elements. So I'm going to put straight on here three cellae in this way. That way. That will be in the right flow. Or we could go that way and be difficult. It really doesn't matter too much. We might go in that if you want to just squeeze out all of the air bubbles so that it's nice and flat. Although I really don't mind a bit of ticks jump. So they're stuck on nice, sticky, but nice. What am I going to do next is the question, well, I'm totally obsessed with my beautiful colored tissue that are made. Pretty sure I need to put some of them. And I think it would go well with these colors for souls. So I'm just going to reach some shapes from the colored tissue here and put some a bet on. I'm thinking that that matches actually really well. And that's sad to see my book texts disappear. But we've gotta keep moving forward. I love that line that this tissue paper creates with the inks and paints. A beautiful book text. A letter to the King. Nice. And I find that critical zone gets when gluing it on fill and a little crinkled myself. I think it creates really nice texture. Just want to get all the bubbles animate the trim, the edges. Once it's dry. So don't worry about that right now. And just thinking about the shape placement and the column, we want to get a nice flow of similar colorings around the Tigris and the shapes. That's all I'm thinking about at the moment is the shape and the color. And that I think I'd like to use some in this paper towel now because see how it's got the blue in here. I think we could add some of that from this texture. Probably want the bit in the middle, that would be wrong. So just rip it up. It's quite tough now because it's head of pretty thick layer height added to it. Almost leathery. I think I'm on the line to this bit here. Look at that bit. That's pretty nice. So I've got PVA glue on there now because this is a little bit tougher. We've don't want it to come off. Yeah, I'm liking that. I'm going to trim the age lighter once it's dry. Sorry, the paper towel is a lot thicker than the tissue, but it can get quite chunky. With the paint application, which is great texture, lines the shape. We can just change it. That age was a bit harsh. So I'm just wondering if that bit off. That's a detail is you can move it around really easily. The right columns material. And a full and boom, Did I mentioned. So this kind of application is like painting with paper. That's how I see it. Can always fix the edges lighter. Hoop stress too much about it. Thanks. You can fix anything and IGA, you don't like it. You can paint over it. You can always add more paper or texture. Or even paint is so many ways to fix something. So you want to just create with no fear and allow myself to enjoy the process. Because truly you can fix later what you're not quite happy with.
9. Part 2: Triple Cello: Now that I've got a fairly decent coverage and I've got some block placement of color and shape. I'm going to put a little bit more of the details back in. I'm going to add some more, both texts I think down here. Bring that back in again. Add a little detail back down here. Even under there. Okay. So I'm going to add some dressmaking pattern because it's fun. And I can not so exactly how great it obey or if it'll even work how I'm kind of thinking. But that's the recipient I can creativity. So you begin to work or it's not. I kinda like the idea of it. And I like the way it's so transparent. And I like the lines and the tanks and it just creates another whole layer. So you have transparent that goes. That's pretty fun. We'll see if I still like it wants to ride. Not sure exactly where I want to do with it, but I'm just going to put it on in some places and see you fine line. Could If I don't like it, I can rip it back off again and do some math. That's pretty easy to work with. Tears really easily. See how it's just gives him that deeper time. Hide that loops. It's a matter of getting it where you want it and taking it off way and you don't have mine that kind of pose the shapes when we're together with a deeper time creates that line. So that line I like that wind, like the composition of it connects the shape's gonna come down here and curling there. I do like the way it curves around them. It might come back a bit more colored when it dries. I like that shape there, so I'm probably going to change that. But I do like the way that line crosses it there. I like that. I even like the upside down Ronnie, like the way that's coming down like that. So yeah, that's kind of connecting that shape and then that's mirroring this shape like a map from swiping. What about up here? Let's draw a P sub theta. And so little sticky tenet around that. Yes. I can trim that off later. That's I can I can I think that's okay. Now it's created this vase section. Look at that. And if you've watched the Dubinsky code hidden, I remember what it meant, but it may someday. What about if we repeat that shape? Either they have an idea, you know, address making patent from the Op Shop or through shop is like 20 cents, maybe 50, half, half a buck, maybe a buck than an expensive one. Add another bad. Anyway, it's really cheap. And it's got a great look to it. I liked the way the dressmaking patent creates these lines. And it's so transparent underneath coming through and it just gives it a nice warm-up time difference, the time. All right. I'm not happy with that spot there really. So I'm going to find and not a pace of that paper towel. And this one will do. And I'm going to stick it there. That's offending me. How far to omega. Okay. Will that way too, I think there is good. That's quite chunky. Their pace. It's going to go on the side. And it's called hard to tell now because it's not, because it's so he gives is that that's quite chunky. That spoke heir of painting. Not to worry. You know, dry. Right? What else? Downtime like. Pretty happy with my students. Really. Think a lot as some bronze. Hello. We're pretty happy with how the bronzes dried out. It's a nice, got a nice time to it. Is fold that together nicely. See, it's still wet. Say how the dressmaking patent looks is pretty cool. But I think I made some of this color around places. I'm going to use some Lumia love Lumia. High-low violet gold is one of my absolute favorite colors. I get it from Warehouse stationary, but you can probably get it from an art supply or stationary shot if he wasn't as good as mine. So I'm just going to put it on like this. And then I'm going to spray it. Because the amazing part about the halo gold colors is that when you spray them, they release a pigment that looks absolutely incredible like Island and this is violet, violet side. It's going to look absolutely amazing.
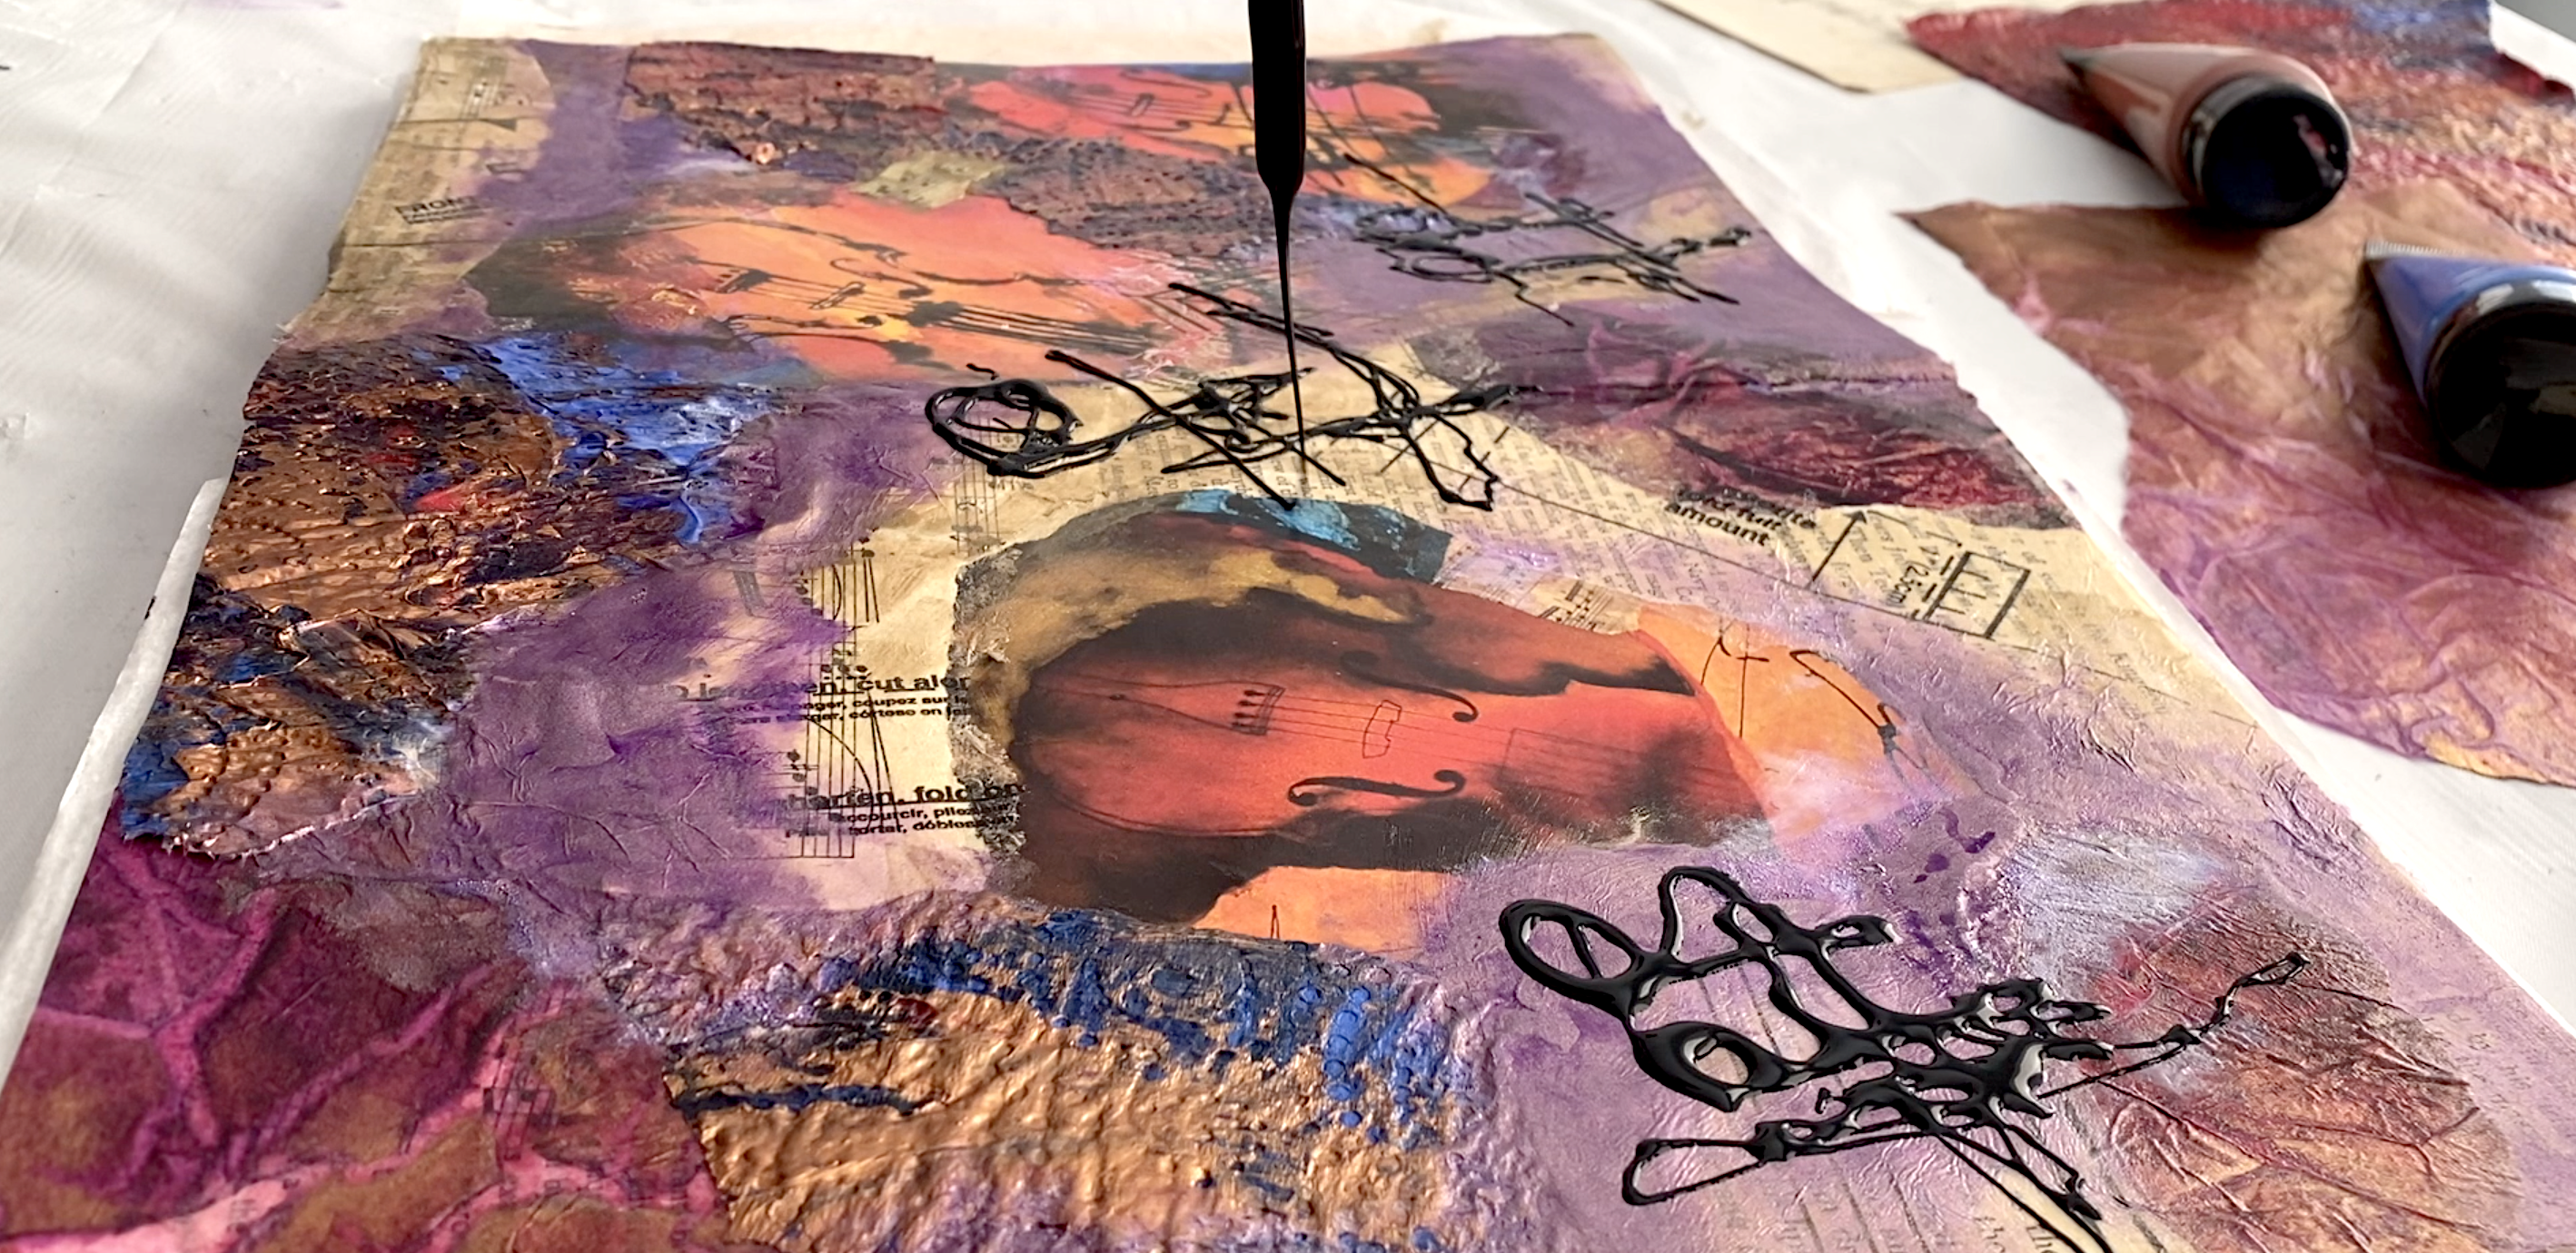
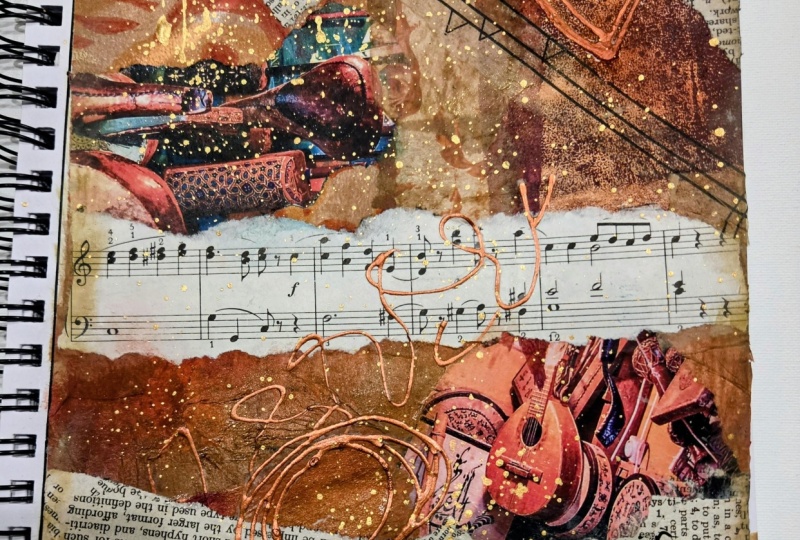
10. Part 3: Finishing Touches: They're not too expensive a product and they're well worth every single penny you pay for them. It's definitely one of my favorites. I think you should look into getting a selfsame of the Haida golf. It's looking good. I think the Lumiere, her logo has recruited altogether. I like the lines here in the composition of the dressmaking pattern. And I love the notes underneath that. Multiple layers is a little bit of texture you can still see. So it all really contribute. Each layer you do contributes to the next. And it's just a matter of keep working on your composition until you're really happy with all of the parts. The moment I'm feeling like it's looking pretty good. So I'm going to let it dry. And then I'm going to decide if it needs one final thing or if I should just leaving a lot and that's a thing. How do you know when to stop? It's a question I hear quite often. How do I know when to stop? There's a few ways. How do you know what a painting is finished? Number one, you can just choose to stop and say, Okay, it's finished. For me. I look at how does it make me feel? Do I feel like it's finished or is there something that still annoying me about a particular area of the composition? I think this is pretty close. I might play around with those notes and a little bit of that free form scribble, but I tote know before wanna do that? And do I want to do it in white? Would that be too much? Seeds, topics? But anyway, I'll let this dry and then I'll decide. So it just put the page to one side, dry a little bit before it. Continue with the next thing. Now I've got this pint neoplasia. It's a brand, similar brand to Lumia, but not as glamorous. Anyway, I want to create some like notes, some notation. And because I've got this fabulous packaging and beautiful brown Haifa that I go slow. I'm going to just have a little play with an idea. Now the thing is, when he using packaging, you're not going to stress about it, getting it wrong or stuffing and opera costing you money. So it really is a beautiful thing to have a feat of packaging on hand so that you can try things, you can experiment with them. And if it doesn't work, you not so stressed out. You haven't spent the money on good watercolor paper or canvases. This paint is quite thick, but it's very runny. So I'm like, what if because that's what the day, right? One if I did a bit of a Jackson Pollock and kind of played around with the idea of notes with this pain and the back of a brush. But this is a very abstract expressionists form of painting application. Now abstract expressionism is a term used for an art movement that developed in the late 1940s, early fifties in New York. And the honest square, more interested in expressing personal emotions rather than depicting a pictorial reality. Jackson Pollock was one of the styles of this particular art movement. He was the one who originally dripped the pint of the back of his brush rather than applying it with the brush. And he went on to create massive, huge scale paintings with drip, some splatters and movements of the pipe rather than creating pitches on the canvas. But this is pretty causes got some good movement to it. Now, when you're using something like brown paper, you're not going to stress about, um, oh God, it's not working. Bla, bla, bla because if you hate it, you're only going to throw it out. But I don't want to hate it. I think we could use it in collage for sure. It really is a heck of a lot of fun. I'm like in that it's got some good movement to it, don't you think? Yeah, like, you know, it's notation, right? I'm gonna, it's gonna do a bit more. And we'll see how it comes up when it dries if I want to use them. My page is going to have enough space. But anyway. Hi. So I had a bit of a play with the white on the brown PIPA practicing my scribbly notes. And I feel confident then to give it a go. So I used a black neon Jacaranda. It's the same brand as the Lumiere. I get it from stationary warehouse. You can get it online, you can get it from the art supply stores. It's 1499 in New Zealand. So we're on an island at the bottom of the planet, and that's what the currency is here in the US, it's probably way cheaper and I don't know where you are, but I think it's well worth every penny actually, because you still have much Lumiere I put on really wasn't very much. And it made such a beautiful difference in pulling all these colors and shapes together. And then of course, the black scribbly notes sign 1499, I think it's well worth it just a few specific professional grade artist pays that you can't live without. Because look how cool those scribbling notes are. I'm just lucky that the feel and the jazz going on. I'm pretty happy with this. I'm going to leave this to dry and see how it comes up tomorrow, but I'm pretty done. A trimmed up the edges. And I think adding the Lumiere really helped pull it all together. But you can see still clearly that's got the book text. And then it has also has the notes from our beautiful thrift store and then the dressmaking pattern, the treasures in a second shop I tell you. And then there is the paper towel that was painted with leftover paint. And my images from paintings I did years ago, printed out for a buck and a half from the copy center. So seriously affordable, seriously beautiful. And now you've seen all the techniques that I've used to create this. I really hope it inspires you to do your own love to see what you create. And I'd love to see your own images in the, the painting that you do. I think that a really beautiful, I will give you these images of my paintings. I'll add them into the notes of the project if you want to print them out and do something like this with the TTX and the musical notes and the dressmaking pattern. You really should go ahead and do that. This is, of course, my beautiful favorite white tissue that was painted with leftover paints. You need to make yourself some of those just the fun of it is so worth it. So I'd love to see what you do. And I hope you've enjoyed this creative expression in my art journal. Pretty short should be called tripled cello. And it's not very original, but I'm pretty happy with that. Okay.
11. Thank you & farewell: Thank you for joining me in the studio. I truly hope you enjoyed this project. I absolutely loved putting this course together for you. What I think I enjoyed the most about this particular project is the continuous application of layers. I love that with collaged, you just keep adding layers and keep putting more elements to your page or to your painting until you're satisfied with the results. I really enjoyed that. I loved the way we laid down the text, the musical notes, and then the dressmaking pattern. Oh my gosh, absolutely loved dressmaking patterns. And of course, the colors of glorious and the Lumiere. You've, you've got to have loved the Lumia. Now make sure you take advantage of the notes that I've put with this course because I've edit a photo does show you exactly the type and the brand and the name of the Lumiere, plus also the black paint that you do, the scribbly notes with. Did you like that little bit of abstract expressionism? And there's also an article in the notes that I've written about Jackson Pollock. Really fascinating. So make sure you have a little look at that because it really is worth your time and effort. I love to see what you've done and what you've created with this inspiration. So please post a project in the section and show me because I would really love to see what you've done. Now, if you've got any questions, make sure you shout them out in the discussion section or the questions area. Make sure you let me know if you've got a problem with some niggly, you're not sure about something, or you just want to ask about something to do with the project or the application or the paid or the text is all the papers or really anything and just put the discussion nail that question and I would definitely get back to you. You can also join me in my probe private Facebook group, creative adventures in the studio. And you can come into that group and you can show me your artwork. You can ask more questions. You can see what I'm working on my post in their daily, so you can see what's going on in my studio there. And also I've got beautiful paintings on my website. If you'd like to have a look at the other work that I do. And so we can continue this journey of creative and ventures. So thank you so much for joining me. It's been an absolute pleasure during this course with you. And I can't wait to see what you've created.
 Froyle Davies, Mixed Media Artist