Transcripts
1. Introduction: Steps for Betting Editing: Hi. I'm Nadine Sykora and I'm Kristen Sarah. We both in full-time content creators for nearly a decade and we're here to share our insider tips and tricks with you. So you too can earn a living traveling the world and creating content that inspires. In this course, we're going to teach you how to up your editing game will teach you basic tips and techniques. They'll help tell your overall story, as well as how to record a high-quality voiceover, which is really important. We're going to also take you behind the scenes and into a step-by-step real-time editing process by both the Dean and I on Final Cut and Premier. This course is perfect for those who already have very basic editing skills, but want to keep learning and take their editing to the next level. This is part 4 of a five-part travel blogging series we have on Skillshare. And you could do each course bit by bit, or you can do them all in one go. That's up to you. Everything that you learned in each course can be applied to any genre. But because NAD and, and I are experts and travel blogging, that is what we're focusing on. Mel, let's go.
2. General Tips for Editing Your Videos: Post-production is a process of video editing. It's about taking all of your clips, cutting out the ones you don't need, keeping the ones you love. Fine tuning your audio, adding in music, adding in voiceovers To help tell your story editing. This is where you take all the footage that you filmed and start piecing it together to tell your story. But to do that, you need an editing program. There are four main editing programs that we're going to be talking about. First, iMovie. If you have a Mac, you have iMovie on your computer, it's free to use and it's really easy to really get the grasp of editing, especially if you're just starting out and there are more advanced features to it as well, such as transitions and texts. So Mora, this is another really cheap, easy to use film editing software that works for both Mac and PC. It has all the things that you need to edit your video together without all of the more complicated features and you get from the advanced programs Final Cut Pro. This is the program I've been using for 15 plus years. I have not looked back since. And I really enjoy the program as I've gone to learn it, there is a lot you can do with the program. So when you're first starting out, it can seem a little bit intimidating, but don't worry, Take your time. Learn as you go look up YouTube tutorials on how to do different things within the program and you will be fine. This program is specific for Mac users, although you can download loaded for PC as well. And in the TV and film industry, this is one of, this is the program that they use this and Premier. Yes, Adobe Premiere. So this is editing program that I use. It is, again, a very advanced editing program, but the basics are there too. If you're starting out, however, it is a more price your program it is on a subscription plans, so you're paying per month. So it's there to give you room to grow at. Editing is something that you really want to advance in. It's a great way to hone your filmmaking techniques, but there is a lot to learn with Premiere. Now, Premiere is for both Mac and PC, although it is, it does work better on a PC and a Mac, there is no best program. It really just comes down to preference, but we have given you guys links to free trials for Adobe Premier and Final Cut Pro down below. So if you have already tried iMovie and you want to get into something more advanced, check out those links further down in the section, you'll see both Kristen and I do an entire editing, a walkthrough using both Adobe Premiere and final cut, where we show you our entire editing process and kinda show you how we use each of these programs respectively. So scroll down to watch through those. The story is what makes the video in the editing process is where you take all the clips that you filmed for the story and put it together. So that's why it's important to know ahead of time before you get into editing what your story is because it will drastically help you in the editing process. Filming for the edit. There are two ways of doing this. You could have a really structured shortlist of everything that you want to shoot when you're out and where you want to shoot it in order to tell your story. Or as you get more practice going out there and vlogging your travels, you could have be having a spontaneous day and still be able to prepare yourself of what you want to shoot in order to tell the story by pretty much like mentally edited, editing, by thinking of every shot you want as you see the DEI, progress. So basically it's about knowing what shots you want, where you want to shoot them in order to tell your story and making the video editing process so much easier when it comes down to sitting down in front of your computer, crafting your story. Filmmaking is storytelling. And as a travel vloggers, you're going to be going about crafting your story as you travel. Here are some key elements to crafting your story. Is your audience. Who do you want to target? What is your demographic wherever they frown, what kind of person are they? What do they like? These are things you're gonna wanna ask yourself. What are you teaching your viewers? What do you want them to take away from this video? Avoid showing the obvious. What is it that is going to make viewers stay on your video and watch it all the way through. What's gonna make you stand out from other people's videos. Keep the bad stuff. You're like What? Well, as we all know, the Internet loves drama. So if you keep the bad stuff, people are going to love it. Fact, characters and story should come first. A story is what people will stay for. There's beautiful shots. You can get montages, you can create beautiful locations to showcase, but it's the story and the characters within the video that's going to make people come back for more. Now that is a perfect world. But what happens if you are faced with the fact that you have 30 plus hours of footage from your past travels sitting in front of you. You didn't have a story at the time. What do you do with it? Well, a good place to start is to watch that 30 hours. I mean, I love reminiscing through my travels and it gives you an idea of what you found. And then taking that 30 hours and bringing it into sections, you can even break it into different folders. So you can do it as like different days route your travels, travel for a week, break the footage up into seven days. Or if you went to different cities, you can break the footage up that way. Different experiences, different styles of travel. It will really help you condense everything and you can actually, you're basically creating a little mini series. You don't have to turn all that 30 hours of footage just into one video pacing. This is how fast or how slow your story unfolds. Speaking up slow and fast if your video is two, so people are going to click off, they're not going to want to watch. And if it's too fast, you might get whiplash. And no one wants that either. Finding the right pace that keeps a viewer's attention is key to great storytelling. So how do you get the right pacing? Basically, you're going to want to go through your edit several times. You can even walk away for a couple hours or a day and come back and go through it again. And each time you're going to cut out clips that don't help tell your story or that you find you're losing your attention. You can get someone else to also come and watch your video 2, which is a really good idea because they have fresh eyes and. You can ask them like, when was their attention kind of veering off? What parts of the video didn't really add to the story. And this will help you get the right pace, length the video, when it comes the length, how long she your videos be? Well, when you're just starting out, I would aim for the two to five minute mark because you're still building your audience and new people are always going to be checking out your channel and you want them to stay so you want to keep their attention. And two to five minutes is like a good, a good length to do that and keep them there throughout the whole video so that they continue to click on more videos, more videos, and YouTube really likes that. As you continue to build your audience, you get better at video editing and storytelling. You can aim for longer videos named Dean and I. Our videos are usually around the 10 minute mark at this point. And YouTube also loves that because it keeps people on their page longer. You get longer. Watch time, which is really great for the algorithm and people coming back to watch your videos as well as they continue to learn who you are and they want more of you. They want longer videos. Now if you haven't really long video and you're having a hard time cutting it down. Again, get someone else to come and watch a video, tell you what really doesn't need to be there. But when you're going through it yourself, get rid of any of the bad camera work, anything that's shaky, that just does not look good, That's grainy overexposed, underexposed. Sometimes you do end up with a 20 minute video and you want to keep that 20 minute video. We suggest cutting it down into many videos. And you can even add at the end to be continued and it gets viewers excited to see the next, the next part of that series. Also ask yourself, can this video or the chemists clips even be shorter when you have a clip that you're working with it like ten seconds long. Do you need that full 10 seconds to prove your point and get across your point to an order to progress your story. Or if you have like a pan of a, like a landscape that's lasting like 15 seconds long. Do you need those for 15 seconds? You don't necessarily, you just have to establish where you are and move on. Be ruthless. Only the best make the cut. If you're not happy with the clips you're using. Jacket editing is the most time consuming part of the video making processes personally my favorite though, because you get to be really creative. And the more you do it, the better you get at it, and the more you learn and the more techniques you can apply to your story, photos, you can definitely use them in your video, but I'd recommend using photos that you've taken in their high-quality so they match your video. If you aren't using your own photos, you can use other people's, but you need their permission. You can use Creative Common photos or you can pay for them. Google has also added an option to filter out only the photos that are labeled for reuse. You just go to images and click on the top drop-down menu that says usage, right? Then choose the option that best suits what you need. So your video should contain a narrative arc, a beginning, a middle, and an end. You'll want to structure story so that it creates a clear narrative. If you can think of the bigger picture. Great, if not, to think of each may story and see how you can kind of piece them together to create the larger story, determining order. So how do you determine the order of all of these mini stories? Are all of these many sections chronologically, this is where you arrive at a destination, show the destination thrones and B-roll rather the next destination, show that destination. Throw in some B-roll, kind of mix it up here and there. But essentially you're going from a to B to C to D, and so on is chronologically this can be in the days that you filmed it or community activities that you did. It can be. In the places you visited, this is an option that I typically like to do and it is rearranging each of the many sections that I've filmed into whatever order I like, whatever order I feel, mix the videos, pace, feel best because sometimes you have sections that are a little bit more quieter or some things they're more action-packed, or sometimes they're funny or are somethings are just longer. And so I like to kind of break it up and see how the video flows best. So I'll put something funny at the beginning or something engaging to kind of grab my audience. I'll put them more in depth, thought out slower bits, maybe in the middle, then action-packed one closer to the end, and then ended on a nice note. You could do this with your videos as much as you like, as long as it still makes logical sense, meaning you're not jumping back and forth between countries with no explanation. You're not going from night to day to night with again, no explanation. You're not throwing the order so completely out of whack that the video seems like a mishmash or a jumble of scenes all put together by the narrative. This goes back to the storytelling aspect. So you're essentially just rearranging the clips to fit the narrative that you set out for yourself at the beginning of the storytelling process, at the beginning of your film making process for this video. But what if we're missing key elements to explain or show what's happening in this video. Well, that is where VoiceOver comes in, where we do get into a bit more in the next section. But VoiceOver is essentially a way to explain visuals, to progress the story, to fill in the gaps that is kinda missing in the footage that you filmed. Another way to tell your story is to create a script from your footage. So once you kind of have an idea of what clips you have filmed, you start writing scripts down to transition them together, to piece them together, to make them make sense. And you can record that as a voice over and that'll help you edit them together. Music, music is another way to add depth and feeling into your video. It can set the tone for an entire story sequence or transition. You can use the same visuals over a dramatic, upbeat, angry, or slow track. And each of those will make that scene feel something different, even when the visuals are literally all the same. So you don't want to use music as a crutch and have music playing through the entire video. It's aid to help you transition, but it's not a be all, end all, and it shouldn't overwhelm your video. I use music to add pasting to a video to help keep the audience engaged and focused. You'll also want to make sure you're using music that you have permission to use. This is very, very important because YouTube will strike your videos and you can get copyright claims on your videos if you are not using proper music. Below, we've included links to where you can find music to use for your videos. There are several royalty free sites, but you can use free of charge. And there are several paid music sites where you can buy individual music tracks or you can buy subscription plans to get that give you libraries of music that you can use sounds at a richness to video and complements the world you are creating. For example, you introduce a, we're heading over to one of the most famous coffee shops in London and you're going to be filming them making a coffee. You explain a little bit about the coffee shop in a voiceover or an on-location dialogue. And then you cut to the coffee brewing process. Then the video transitions into the coffee making process with only a background track, no dialogue. You see close-ups of the coffee beans being ground up, and this is an excellent time to add in some additional sounds. You can either film these on-location using a directional mic to pick up the sounds, or you can add them in afterwards using a sound library or film to somewhere else. What better way to end a day out in the snow then with a good cup of Jabba, the small sound clips all add up to create the environment that you're trying to show and really helps engage your audience and up your filmmaking skills.
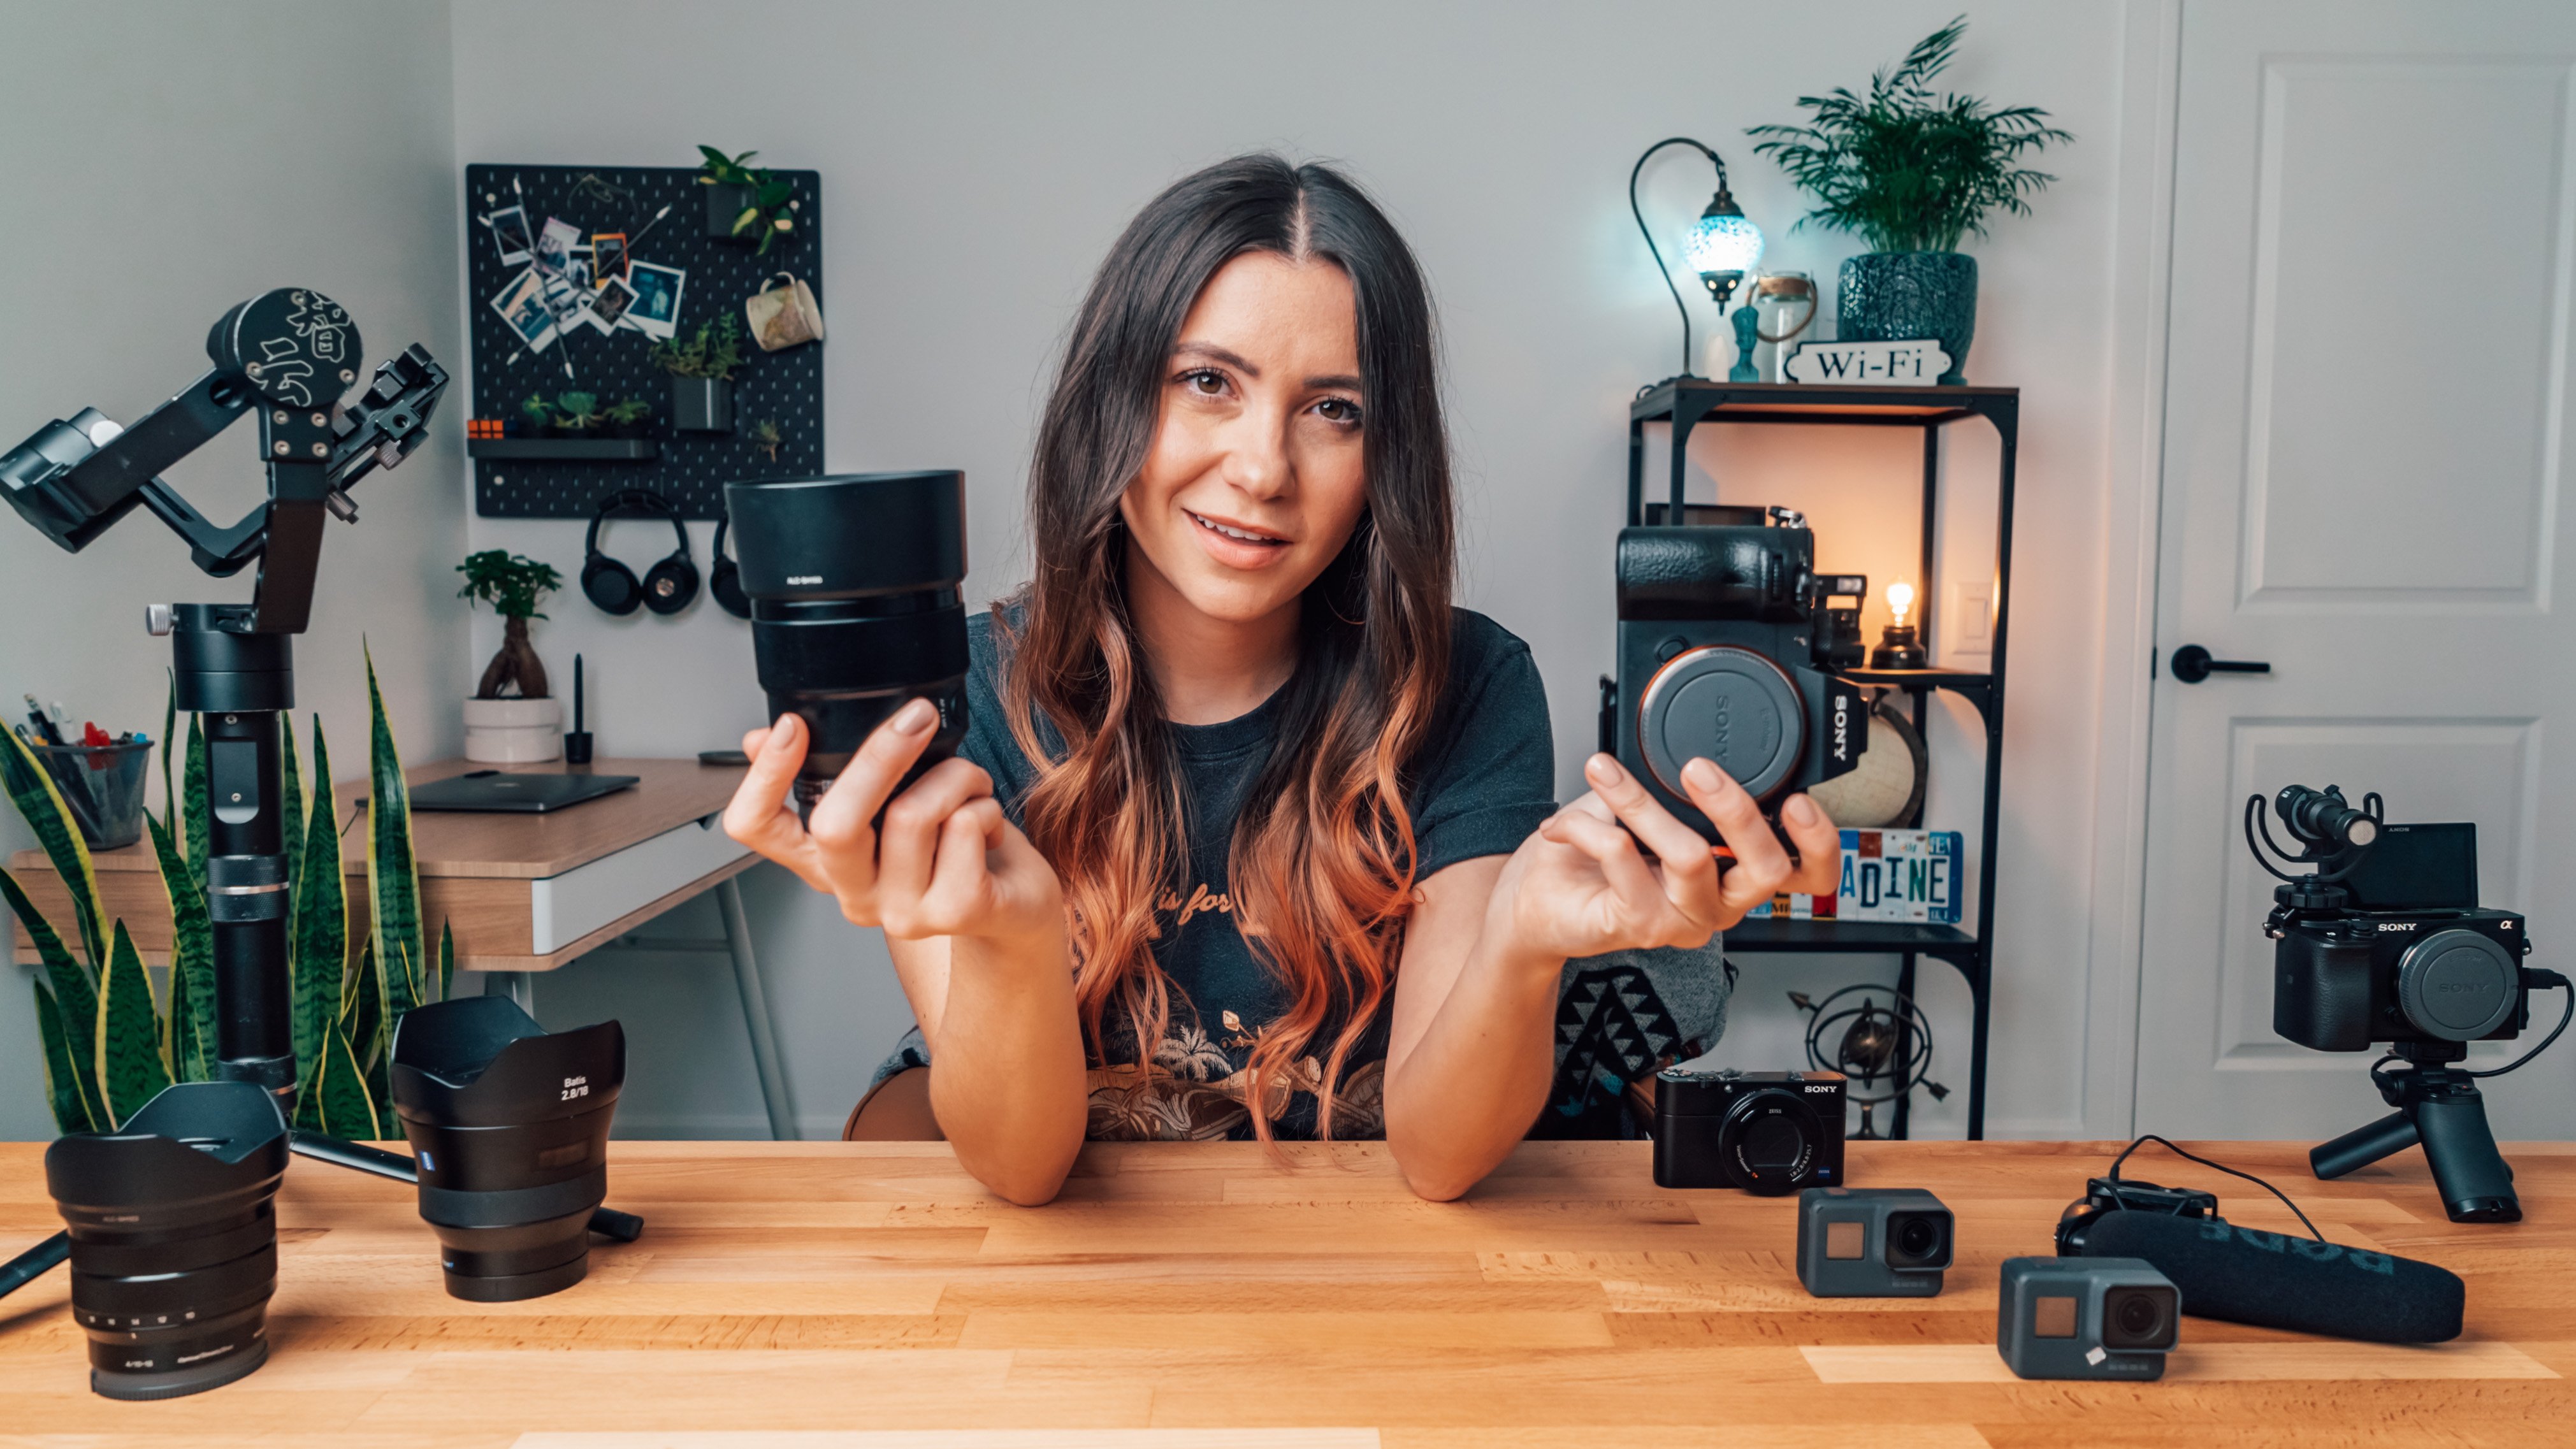
3. Recording Voice Overs: Voiceover is when someone speaks while the video is playing, though the person isn't directly in the scene, It's a great way to get information directly to your audience that may not otherwise get across. With exception of commentary, scripts are essential for voice-overs. Scripts allow you to have a clear idea of what you want to say. How long you want to talk before actually recording your script might change a bit once it's been matched with your video, but you could always cut out any parts that the audio doesn't fit with. Depending on the type of video you're shooting will determine the voice you'll want to use. There are several different types of voice-overs, but the most effective ones for travel videos are conversational and narrative. This is a more natural style VoiceOver, is if you're telling your friend a story over a couple of drinks without the slurry. The point is the sound natural but clear. This type of voice over is great for logs and personal stories where you want to connect with your audience on a more personal level. I have found that conversational voice over is our most effective on community building platforms such as YouTube. Your regular viewers want to build a more personal and relatable relationship with you. If you speak with them as a friend, you'll make them feel as if you're speaking directly to them. A voice-over narration is when you narrate the events in scenes that are being visually presented, no matter what style you choose, a great voice-over is always clear and concise. Each word needs to be easily heard and understood. So emotional, you need to get the emotion or idea of the line out only using the tone of your voice. Over emphasized. Your voice tends to lose some character in a recording. So over-emphasizing emotions in annunciation brings back the natural energy of your voice. Audio is such an important part of video production. It's better to have decent footage and excellent audio than white footage and horrible audio. While your cell phone or computer may have a built-in microphone, investing in an external microphone is always the best idea. You can choose any recording device from a pocket recorder to a microphone. You can plug right into your computer a windscreen, which prevents the air from your breath from reaching the microphone, is an incredible and essential tool that you can get very cheaply online. A great recording device that we use for voice-overs is the handy recorder, age foreign. It's well-priced and his battery operated and as a power input if you want to plug it in and built in stereo microphones. It also has two external mic inputs that can both take XLR and quarter-inch. The best place to record your voice over is in a soundproof environment. This doesn't mean you need to build a soundproof recording studio in your home. The easiest and most convenient way is to either record in a closet filled with clothes or under a large blanket. This should be fairly easy to find anywhere in the world and will make a huge difference in the quality of your voice over recordings. There are two ways of recording the pace of your voice-over. You record it at a pace that is comfortable, not too fast, but not to pseudo. You will then choose the footage for that voiceover afterwards and cut it to time properly. You have already edited the footage together and you need your voice-over to line up with your footage. The best way to do this is to play the video and record over as it plays. Make sure to hit play and record fs same time so it's properly lined up. This will help you match the speed of your voice with the duration of the eclipse you want to line up. Make sure your audio levels are set to a good volume that matches with the level of the voice that you're using. You can make a few tests recordings before your final recording to make sure everything is set right. And you want to be about eight to ten inches away from the mic and record your audio between negative six and negative 12 decibels to avoid distortion and peaking. If your mike has a hyper cardioid pattern, use it. This means that the sound is moving through the microphone and out the back, instead of echoing around inside. Too much of a voice-over in one video ruins the flow. Either mix up your voice over width, dialogue, visuals, and music to drive your story as well. Read the same line in different ways. Read the same line in different ways. This will give you flexibility when you are lining it up with your footage and help you give you the field that you want. Create pauses between each line. This will also give you more flexibility we're editing to help cut out unnecessary words. At the very least, play with the EQ and the volume of your voice, which allows you to subtly balance the tone of your voice. And you can do this using Final Cut Premier.
4. Premiere Pro CC: Behind the Edit : Welcome to my how to edit in Adobe Premiere Pro CC. So when you're walking you through how I ended my video. So first things first, let's open up our Adobe. I subscribed to Creative Cloud. That's the current version I house. Why have the latest most up-to-date version of Adobe Premiere? First thing is first is we hit New Project and we're going to title our project. So let's title it, edit, Premiere Pro Mini, Dean, and I put it in an external hard drive. This is my Cronus, which is one of my external hard drives. And then I hit OK and it's going to load that all up. Next thing I'm gonna do is on the left here I'm going to import my media. So I'm going to right-click import. And I am going to grab my small cam footage. Or actually let's grab big cam footage. And those are going to import those files. Ignore this error. You won't get that. It's because I import the raw files from my camera. So it gives me the XML's which are not compatible, but you won't get that. And then I'll import my small camera footage. There we go. Excellent. And now another trick that I think that I like to do is once I have my footage imported, I like to keep them in folders so I separate my big cam for my small cam and I usually have multiple multiple days than a list them by days. But what I like to do is I like to go into my small cam and change up all the colors. So right now as you can see, all the colors are the same. But I like to go to my small cam right-click and go down to label. And when you see a label, I like to do my small-cap cerulean. So now it's just a light blue, as you can see here. Whereas the big cameras like this lavender will pair, it looks like a periwinkle. It's lavender worth my small-cap footage all has a light blue label and I'll show you why that is handy in a sec. The next thing I like to do is I will go through here and I will organize all of these by frame rate. So most of my big flip cam footage I saw on 24 frames per second. But down here is a 120 frames per seconds. So these were all my slow motion filming. So I'm going to right-click and shift and hold down. So I select all my slow motion. I'm going to right-click and I'm going to modify and Interpret Footage. Okay? So now I'm going to click. Assume this frame rate and I'm going to put 23.976 frames per second. And click, Okay, There's a couple of different ways to change slow motion footage over, but I like to do the Interpret Footage. So now I put it into my clip and I watch it. And it is slow down and into slow motion. This will, obviously this clip is on a very good clip, but if I select another one, here we go. So you can see the slow motion. That is all slow motion. Already done. And there we go. So I'll close that backup. And now I'm going to start editing and selecting the footage that I want to use. Now there are two different ways to do this. Oh, I have 159 frames per second here. Oh, that was one slow-mo. So right-click. Modify, interpret footage. Assume frame rate of 23.976. So that's just the frame rate that I was using for the rest of the videos. So whatever the frame rate is of the rest of your normal footage, I just interpreted to that. So that was originally a 60 frames per second. Now it's a 24 frames per second. Now I've got that all sorted. How people typically edit. I'm a bit different. All bone when it comes to my editing style, I mean, each person's editing style is very, I mean, it works for them and you need to take time to find yourself. I'm just going to show you my wacky style of how I like to edit my footage, but this is what normal she wouldn't know what people do. So you'll click on your your piece of footage that you want to put into your time, your sequence, which will be down here, and you will watch it. So spacebar will play. You see a clip that you like Spacebar again and then you mark it in spacebar play. Oh, that looks good. Oh, wait, not so far. Mark it out. That's the clipping want to use in then drag, drop ran to the sequence here. Boom. Okay, so we have this footage here and I'll drag and drop it right into the timeline. Boom, it creates a sequence for me. Now I go into my project files and you see how it's called sees, zeros or one, that's the name of the clip. But let's rename that to Toronto since that's where we filmed it. So that is our new sequence. So when I close this up, I have big cancel h small cam footage and Toronto sequence, which is 23.976 frames per second sequence. Cool. All right, so now we can continue on with our clips. This what people do. Take the next clip. Oh, here's the note, clip number three. Open that up. Oh, what looks good. Mark in. It's a good clip. Mark out, drag, drop, insert, boom. And you can kind of go through all of your footage and insert all you'd like. Now, what I do because I'm a very visual person, is instead of that, I like to just drag the whole folder into my V1 and A1 timeline, like so. So I have it all in sequence. And I could see it all before me. Then I'll go through and I'll do that with my small cam, which I'll put over here. Oh, isn't that pretty? See now you can see the color difference and why I like to do with labels. So once you start mixing up the footage together, I'll have a good idea of where I want to put up with the small camps are what the big cannons are. I just like it because sequentially, normally my small CAM is a lot more talking footage, more vlogging footage, so I can visually see where that footages. Whereas my big cam, it tends to be a lot more B roll or visually stimulating footage, you could say. Okay folks. So now that that's all in the timeline, we are good to go. So let's just save that. Because saving our project is very, very, very important. Now, getting back to my wonky, wonky editing style, what I'll do then is I will play my footage in the time bar and I will use the Cut tool. Well, the razor tool, which is the C command. So razor or the C shortcut. There's a lot of shortcuts and Adobe Premier, it's worth it to take some time and learn them because it'll save you time when you're editing. But I use the razor tool. I see a clip that I like. Boom, see, keep playing. Oh, maybe one more back. Okay, boom. There. Spacebar cut here. And then I'll hit the V tool, which is the selection tool, and select that bit and just move it up on the timeline. That's all. Oh. So I will then go through all my footage like so. See, good clip, good bird. C, B, move up onto the timeline. Now we're getting into the talking parts. This is all Nope, nope, nope, nope. This is us just discussing all my big camera. Let's turn that up previous. Hey guys and welcome to a Kensington Market here in Toronto. This is what I'd like to thank the most multicultural places in the city even get food from all different kinds of cultures, logical shops. And it's what we here at places here. So I'll click Okay, now I'll see right about here. And cut me up. Let's see if we did a third take because I think we did another one. Alright, let's see if I can get here in Toronto, multiple places in the city. You can get shops. It's one of my favorite places. All right, that is a much better take. So cut that out and move that up. That I like that one better than this one. So I'm gonna move that one back down the timeline. Already know that I'm going to select this one or that one. And let's continue on. Now this piece here is a time-lapse that we did. So as you can see, as I speak through it, you can see a time-lapse goes. So now how we do a time-lapse is I right-click on the clip. I'll scroll down and I will go to speed and duration. And I usually go, I mean, the speed, it all depends. You can make it as slow or as fast as you want. Let's see what 500 percent is. Then click Okay. And see how that looks. Obviously, we still hear the audio now, but we won't hear the audio and the actual eclipse. So 500's a little slow. I'm going to make that faster. So let's go back to speed and duration. Let's go 1000 times, okay, and see it, That's a bit better. Now my computer is not the fastest machine in the entire world, so I keep it always on a fourth of the quality you can put at full quality. But I never really had a new full quality because it's too taxing on my computer, so I don't know and forth end unless I want to render this out, it's going to be a little bit not the best for for viewing. So it's gonna look a little jerky like that, but when it actually does get exported, it'll look fine. Okay, so that's pretty good. Time-lapse. Now let's just always just cut out the very beginnings of the time-lapse and then usually the very end because that's when it gets a little bit sketchier. How long I want the time-lapse, I still need to determine once I get down to editing with music and where I want to put it, et cetra. Sorry now I'm just gonna leave it kinda hear as it is. Alright, let's go through some more events. Let me write it out. Like that clip property. All right, That's a stationary still. Go back BB up. Like that clip to nice little clip there. And I'm just going to go through and pick out all the good clips and pick it all back cliffs. Well, so why don't I do that now where I go through and pick out all the good things that I like and move it on up to the second grass. Oh, here you go. There you can see the slow motion. It good fits right into the timeline there. So those are all my slow-motion clips, hence the really creepy audio. But I'll kinda go through there, see if there's any cool clips. And basically all I'm doing right now is I'm just cutting the crap for say, I'm just cutting out all of the garbage and picking out what I like from my video. This wasn't the best slow motion flag flap I've ever done. I've definitely done several slow motion flag flops before. That one, not the best one. So let's just grab a small little clip of it. I don't know how much I will use for where it will fit in, but let me just place that they're cool. And I will continue going through all this. We are done going through the raw footage. Alright, so basically I just cut up all the crap. And you can see I have all the good bits here of my big cam, all the good bits here of my small camera when I use. And then the beauty of this, v1, v2. So then I just select all the clips here so you can see it, but I make sure it's only the video clips. So none of these top good clips are selected. And then I just press Delete. And boom, all the crap is gone. And then I go Command a to select everything. And I move it all down onto timeline b1. So now I have all of that good stuff and I'm going to save. So the next thing I'm going to do is I am going to group all my footage into kind of sections that I can work with of where I visited. So all my travel videos kinda have sections of where of things that happen throughout the video. So starting with the beginning and going all the way to the end. And I'm going to group that with both my big camera footage and my small camera footage. And I would do this also to note, if I had a GoPro which you did it a GoPro don't know where that footage when we had another camera or a GoPro, I would also put that footage. I would do the same thing for that footage and then it has its own grouping for that. So let's do that. So if I just kinda move that up a bit more than I can see a little bit of what each footage is. So this is the beginning. So now that I've removed the old crappy footage, I have these big gaps in between. And what I basically do to kinda close up the gaps is selected and press the Delete button. And that just closes up the gaps between those. So those are the beginning. This is the beginning. So let's delete, move that together. And this is just general Kensington Market B-roll footage. So we have beginning and Kensington Market B-roll. So some of the gaps here, Kensington Market B-roll, Kensington Market B-roll, B-roll. B-roll. Because I need to go through and sort all of this where I want stuff to go. This is a cool guitar section. More cleansing to mark it, B-roll, this is just fun playing around. Continued to market. More slow motion, be wrong. B-roll. And these are all the food close ups. So these are all closer. Let's put those three together. And this part here is where we get to the Jackie's stand. So this was, I took several different clips of this. So I want to make its own kind of section. So let's move all of these. So this is the start of that. I'm going to close these all up until it ends square. And then that one is Kensington Market B roll. Let's move that back over here. And all the takeaway Jackie, I'm then going to select and I'm going to move up into a V2. These are more Kensington Market B roll, some more fruit, be wrong with those together. Going to cut. So this is just Command X. And I'm just going to move the trochlea key thing and I'm going to select V1. So if you brought a paste into a timeline like B1 and then I'm going to paste that footage there. So that's more B-roll. And then, Oh, that's some more footage from the fruits and the shops. And now we go to playground. So this part here is Kensington Market and B-roll exploring the market. This part here is takeaway AKI, and now we're into playground. So I'm going to make this a new section, kinda move all the playgrounds and the stuff together. That is Playground, playground and then that a shot. Okay. So those two clips where the CN Tower and night, I want those to continue. My ending clips are really liked these as ending clips. So I'm going to cut them out and I'm going to move them to the very end of my big cam footage right there. And I'm going to go back and keep working on the Kinsey to mark it here we have the cosmic treats stop. So this is cosmic treats, cosmic treats. So that's a food place. All of this is cosmic treats. So all those will go together. And then more cosmic treats, cosmic treats. And then here we have the extra 0. So because cosmic treats was down on B1, the extra part or outro extra, I'll put those together along with the CN tower. So that'll be up on the V2. So now you can see I have four distinct sections, the intro. So I could even move the intro into its own section. There we go, intro, boom. Even though the intro and the B-roll is kinda very similar, I'm going to interchange between those two. Intro Kensington Market B-roll than we have. Over here we have the taco yucky Stan here we have the playground, cosmic treats outro. Now because I have those distinct sections, I'm going to go through my small cam and put those in similar groupings. So this is B roll. Let's see exactly what foreign country. So this is kind of like Kensington Market, general be wrong. All this is general B-roll, so I'll just delete some of the spots, the spaces in between here. And now we moved on to general B-roll. Takeaway Jackie. So let's move her up into pieces. This is b2 is different playground. Alright, so playground will go stay down in V1. All this is playground. This is Playground. Playground. And right here is when it goes to cosmic traits. So I'm gonna move those up. Those are all cosmic treats. Cosmic treats. All of this is cosmic treats. And literally everything until the end is cosmic treats. Because there is no outro here. We did only on the big, oops, on the big K. Awesome. So all this is cosmic traits. Great. So now that we've had those in our groups, I'm going to save it and we're going to kind of give ourselves some space to work with here. I purposely didn't delete every single spot because these are going to be I'm going to be moving and shifting things as I kind of organize and edit each group. So let's just select everything and move it over, give ourselves lots of room. This was Kensington Market general and the intro, this part here was Kensington Market general in the intro. So that's what I'm going to select everything from that section one and bring it over here. It's actually one now we have taco yucky. So the W Pakistan and Pakistan from camera to now, I have the playground section. Let's just close that up. Pretty big gap here. So a MOOC, bring all that section in. Plus I'll bring all the small cameras section from the playground. And then I have the big camera from cosmic treats plus all the small camera from cosmic treats. And there you go. Excellent. So now I have my Sections to work with section one, section two, section three, and section four. Now, the next part I'm going to be going through after I've broken up and place everything kind of intersections with a different camera footage is I'm going to go through and place the voice, so the talking Bits. And I'm gonna just kinda determine where I want to do my music or where one do you like voice-overs? So alright, so let's start editing the intro. The beautiful sun. All right, I want to switch these clips around because I'd rather start with the kids used to mark it. And I will bring it into our intro. And I'll cut to hear. Excellent. Now I've got a whole bunch of overview footage, and this is where I'm gonna start bringing in some overview. So let's move those down so that we have the intro. Let's move some of the overview, overview. Overview. Those would be some good shots here and we'll kind of explore time-lapse. So these are kinda just likes B-roll filler bits. Street. This is some more slow-mo. So let's move all those bits here. Because I want some market shots. So those are all like kind of a close-up fruits and veggies and stuff. So I'm going to put all that together. Move all the B-roll. Then I've got this talking about food like are you hungry? You, I try. So there's a lot of different things that I've noticed here so far, a lot of variety. Let's see exactly what we've got. Some foreign country. Sorry, I haven't tried that jurist. It looks like we have a few options here either. I don't even know what. These are, just some general walking and you put the and the knees I want to move to right before the talk. Well, yeah. Alright. This needs a whole lot of work. Those there and move that there. And now I'm going to edit this little small talk, yucky part. All right. All right, so I kinda have my first couple of sections in a little bit of an order. And now I need some music because I edit a lot to my music until I had my music. I can't really do any of my fine tuning warm, I find editing. So I'm going to go into my Google Chrome. So youtube.com slash audio library is the place to go for free music. And now let's just listen to some things on here. What I like. So I approximately because I went through all that my rough footage. I know kind of what I'm looking for because I know the feel of the videos, so I'm just going to kind of listen to things and CFA, they sparked my interest. So a little bit slow. All right, let's try another one. Probably want something bright. Too much, too much. What about rock, funky? Great bargain, this is kinda cool. So a pretty use it. I just gotta include in the description. There you go. See. All you do is make sure you put on the description. That's kind of fun. That might be good for the playground part. So let's keep listening. Oh pop calm, sea about is a little bit too dramatic. See, climbing. That is far too nomadic. Alright, let's do some more funky because we're in a kind of a cool place to see what kind of funky stuff we have. Dance electronic. Let's try that one. All right, little too high pace. Let's do. This is kinda cool. All right, Let's download them. See what else we got those funds. That could be good for the beginning. Alright, so what else? We got a little too slow. And oh my gosh, this is fun. Okay, let's see this one. And I feel like this might be like a really cool song for the playground part. Alright. Okay, so now let's import our music. Boom, music, import all that. So I've put all those songs into this music folder. And there we go. That is all my songs that I just downloaded. And now we're going to kind of just put them in and see how they feel as we're going through our footage for the first bit. Okay, So how I organized my tracks, but audio tracks is like this. Zoom in a bit. So you have a1, a2, and a3. A1 is my main audio track. It's where my talking is going to be. A2. I like to make my music track. So for example, these beginning couple of clips, although there is audio attached to them, I'm not going to use the audio, so I'll just take it and I'll drag the audio for that down. So anything that I placed on this a2 track will be muted automatically. So for example, this is playing to now this is muted. Here. We have a talking. If I drag that down, see, it's all muted now, but obviously we don't want to have that muted. So I keep that on my A1, A2, A1 is my main audio, a2 is my music track A3. I like to have my voice-over track. So if I had any voice over additional bits and I want to add in, I keep my A3 for that and then I make an A4 which doesn't exist yet, but I'm going to my music track, so I'll just take any audio clip, doesn't really matter. And I'll drag it down below here. And now it'll automatically create and a4. A4 is going to be my music Hi track. And my A5, which I will create by dragging that down one more time. A5 is going to be my music low track. And what I mean by music, Hi music. Lo, I will show you in a sec. All right, so let's turn the volume down a bit and let's start. So this one is what sign did I pick? Let's start there beginning and go through the list. So I just put it in an order that was all my music tracks and we're going to dry them out and see how they sound. So obviously you can here now we can't hear ourselves. This is a very loud track. That's why I have my audio track number five, which is my low music track. So once I select my music, I would cut that and bring that down to Audio 58 in the audio track mixer up here at the top. In audio five. So let me just label these. Low music. Hi, music. Voice over. Mute, track and name audio. Okay, so there you have all my tracks. My A5 is my low music track. I will lower that down to about 18 or so. Usually it's between 15 to 18. I like to keep it around 18. It just depends on the track and how loud it is. So I will lower that whole track down a bit quiet. So I'm going to lower that. I wouldn't move that up a bit more. I'm actually going to boost up the A1 track because it's a bit low, but I'm willing to three. All right, so then obviously this critical backup to the high drag. But first off, before we get too crazy into that, I want to select my music. I liked this track, It's kinda cool. Let's see how it plays. In high okay, field. I'll kinda go through and I'll take the track and I'll take you through different parts of my clip. See. It's a little slow. I mean, I like the truck. It's a little bit slow and like maybe once a week with more fast-paced. So let's find our self something a little bit more fast pace. Let's see what find our way home is like, I'm not a writer. Alright, this is the really weird one. This is not a fun track. Let's see how it please later on with slow-mo, pretty epic, get all this stuff. And we would proceed run AIG, it's pretty epic. Okay, so that's a possibility, so that phi my home. Now let's listen to some others. Let's put it in Magnolia. Feel that one place. All right, It's all right. See what Otis McDonald click. That's kinda cool. All right, Let's see what else the host performs. Liking it, liking it. Alright, liking it. I would obviously low as it music here. Okay, really liking that track. It's fitting really nicely. I'm getting a good flow with the liking, how big it's going to make a good mix between everything. Let's see how the time-lapse goes. Little tricky. Can you handle a computer? My computer is not the fastest machine of a keeper. I liking it, liking it, liking it, liking it. Let's try some more phases. Let's see how that performs. Oh, really liking this now. Ooh, really liking spin in Scratch. Alright. Alright. I am not liking so many plans the troopers like there's kind of going through different parts of my video and seeing how different songs would fit. We begin. This area's not liking trooper. Okay. So I think I've got my interests on. I spend a lot of times like the music, I think music is very, very important in any kind of feel it. And once I have my piece and music and heavily determined on how I'm going to edit. The rest of my video. So once I have my piece of music selected, now I'm going to start on kind of editing to the music and how i, and the video is gonna kinda come together based on that piece until I'm done with that piece and unloads the next piece for the next section, let me stick. So now I have my sock. Let's start editing. All my audio is in my audio hi track. And I'm going to start moving it to Latino low track. And those are going to start fixing up all the audio as we go along and moving these bits into the mute track if I need to. And, and that's a cut down there since I going to be talking to what here. So I'm going to move these bits down to the an audio track, which right now my audio low is still at about 21 because it was a bit high. This trucks. And who that actually what's move that up a bit. And that's kind of my favorite places. 20, I think, will be a good. This audio is a bit low here. Now when it's just a single clip and it's not necessarily the whole track. I will right-click and I'll go Audio Gain. And let's gain up by about five decimals. Let's increase the volume for those particular tracks, again, from a lot of cool shops. And it's one of my favorite places. Some books will ask. Alright, In the city would get shot. It's one of my favorite places. All right. That's probably where I wanted to do my next transition. So let me just delete that since it was little a tumor. If I extend this audio clip here, it'll be the same part of the song. So all right, I like this beam pet. I'm going to move the beam bits out. I like the flag. I like the slow-motion clips, so let's do this. I'm moving those into the audio track or the bleach rep. Okay, let's, let's try this one. Actually, you know what? Here's the Canadian flag. Let's insert that clip there. No, it's not. They found that clip. Let's delete it. Alright, let's see where this one is here. All right. I don't like that claim for sure. This one gets a bit shaky and I'm going to cut that and then delete, will delete that. Sleep. Slow to shore nodes but different one. Alright, now, sticking with the first, whenever really like this. I think I'm just a couple of pizza. So let's move all of this just a wee bit to lift that. Jump ahead a bit in a sequence. Okay, No, move back. Row, the beat drops. All right, Let's click right on that be, I want it to go to this. Okay. Let's jump to, I get to the focus bit to pull that bit in. And we're going to end it right there. Alright, so okay. All right, That's a pretty cool bit. Don't know where it's going to start yet, but as you can see now I have this kind of like still bit. I need to put something in there. So let's find something to put in there. Maybe my beans bit won't work at the beginning. Now I have this fill because I really like a really like male jumped in beans, but now I really like the beans now. So now we've got to fill up this bit here right after the street. So let's put the fruit. Right here is a beat drops. So I'm gonna cut that bit there. And I'm going to put something else, Ratan there. Close-ups of the pomegranates. Perfect. All right. Since I'm not using any of this audio, I can just kinda overlay it here. It's not a big deal if I'm playing in between clips and I want to, and I don't know which way I want to cut each yet. I'll just play with the different layers and just, and just kinda know this 1 first. All right, We're getting there. We're getting there. Right on the cut, right on the brake. Kinda breaks there. So ooh, little too long. I need something else here. See what else we got? More fruit. Pumpkin. Oh, okay. Being grabbed. Like the bean grab. So let's put in the bean grab right here. Close to put the clothes in right here. Great. Really liking that. No one, even though I like these clips, they're not fin in the music. They get the cut. May be the case. We've got a time-lapse. Got some more fun of me walking in slow-mo let's figure that fits in there now, before we get to time-lapse, like that bit, Let's jump ahead to that bin. Okay, So delete that bit. I'm a little bit messy when it comes to arranging my timeline. I just kinda I give myself a lot of freedom to rearrange. See you. I feel and kind of go from there. Like that bit. I'm feeling like I want to break this up a bit and I want to put in a little bit of dialogue now. So I have this one talking clip. We're going to move that here. And then I actually want to bring in the takeaway yucky part where we are eating and looking at that. And then I'm going to go back at the montage because I'm feeling like it's a little too montage. Kinda want to break it up and add some something else. So let's see where we are. All right, so, so what we've got so far. All right, So I am from the beginning we have cross-walk wave. Then it goes into montage of just moving all that audio down here, any of this audio. Okay. So we move that down a lot of varieties and unless you are, let's see exactly what we are by some foreign countries routes that I haven't drive. Or thrilling adventures, Coursera. Okay, and I want to bring into the takeaway occupied. All right, so let's move this up. My name is Pam, but it's gotta start here. Alright, now I think maybe, Oops. Spring that clip over. Nope, not that clip. Maybe. Nope, don't like that one. That I want to bring right into the mix. A little too long. Okay. Let's see where I want to cut it. Okay, That's good. But now we have a different close-up on the top. Right. All right. I'm just going to shorten this bit. It's a little bit up. That's enough. Cut there. Maybe I'm going to cut your reaction shot that I have with me. I'm going to call it the audio, bring it down. In another clip of her. Very the same. Maybe I can move up and flip back there. Let's see how it fill. No other into a better deleting that clip. All right. Maybe this is the swipe is time-lapse. I try to figure out a good spot for Nope. Not a good spot yet. Still got to find a good spot for that timelapse. And cut that right there. Delete that. Right. Maybe I'll bring in the good tolerance, just see how he fits in here. I've got a couple more slow-mo shots and shelter, Kristen, and then I think I'm going to cut out too. And this bit here, see how the guitars comes in. The B2B bit off, but I'm just extending a clip here. Extending a clip there, I'm going to move that. We'll bring a wide shot of him in and then bring this kinda cool close-up, delete those bits. Alright, so we're going to start with kind of a close-up. Go to the bit wide and a high field, but all that, bring that in a bit. Let's see how we fill up this dough. Mayor may cut out this guitar, but completely because the shuttle audio is too much, I want to keep the same track throughout. And I don't really want to mess it up too much, but let me just see because there might be a lot I feel like there might be a lot of Milwaukee the beginning that I can cut down on. There's a lot of different fields here, so, okay, so I've got a solution. So I feel like there's too much, I mean, walking in this shot and it's a lot. So instead I'm going to remove this bit here, say like this bit. I think it just needs to go to a different section when it will be to the end here. And I'm going to move D Kristin montage that I really like to be more into the center bit. So let's cut it in and shoot. It feels right. I mean, her more jumping. All right. My Castro on the jump. I'm going to bring in catch you on the jump down here because I love her hair flip. Alright, too much, too much Joe to jump Cuddy there. So let me take this one back to more of the pre jump. Pre jump, kristen? Okay, let's see how this works now. Okay? If I can catch it, if I get time this right, I think right here we'll have a good drunk transition right there. So my clips that I wanted to put. Okay, One more. Right there. Two there. Alright, so we have now Christians base, we go beans. Yeah, I'm liking in that transition much more than just gonna bring down some of the tracks to clean that up so it makes it a little bit nicer. So you guys can see still a huge fan of this cut right here. Because it a break right here. See how there's a dip in the music. So when I see how there's a dip right here in the music, that's where the break should be. I do really try and listen to this little music breaks. Okay, Now you can see when I transition, how much smoother it, it it transitions. Yeah, I love that. That's much better. All right, let's Save. All right, good. Foo, we transition to the food part. Close-ups. Of all the food we have. My dad's. Very interesting. All right. Okay. I'm gonna make an executive decision. And unless there is a bit at the beginning where I could put him in, the guitarist in. No, guitarists gets cut. I'm not feeling it and not liking the break and the music. So I'm going to bring the music back in because I want to keep this track throughout this whole sequence. You can kind of play around with how you want to put different tracks in. But I kinda like to just stick with one track of I like a track. I want to stick with it. All right. So I have this time-lapse which I want to end on by still this little walkie montage though. So I'm going to add this little bit here that I edit it before. I'm just going to re-edit it to the music. All right, too long. Going to remove that first clip, delete, and move that one. There we go. I'm really bad with shortcuts, guys. I know there's a lot of other shortcuts and key is that you can be using to tighten these up. But I just have my system and it kinda works for me. When I bring this to the beat. Right here you see there's little lump is a beat, so I'm going to add that, cut it there. Cut that one there, right here, and then I'm going to move the time-lapse in. Okay. I don't quite know what I want to do the time-lapse yet, but I'm feeling very good about this section so far. It's about two minutes or so. And now I want to move on to the next part. Save, just going to clean up some of the bits that didn't use. And let's start editing the playground section. Now, I definitely want to have a different piece of music in the playground section. And I'm going to use a time-lapse or something to transition me to the next piece. But I want to start with the edit of this and we'll go from there. Great. So I had a couple songs I liked tracks, a variety of different things by brings everyone together right now. Okay, I'm, song is one of the song I was thinking of, but this one. Now there's a lot of talking in those bits. There's a lot of talking in this part. So while I really like the song, I feel like it might overpower the talking. I like lyrical songs if I don't have a lot to say and I just want to like how people listen to music to kind of create. Some sort of intrigue in that part of the video to keep people's attention. But if there's if there's a lot of talking and noise like natural noise that comes from the video itself. Then I kinda want more of a simple song. So I think I went to go with this one. Otis, isn't can Donald? All right, so let's start with the edit that. So I'm just going to move this bit up here. And we can start on the Edit. Alright, so this is a good little transition and bit here. So I'm probably going to move that bit. So I'm just going to put a little cut there. Oops. And I want to line this up so that my start and my clip with this bit. So I'm going to leave that little tail but of the music to transition to my previous clip. So now we will add it. And I really want this to be on the moving bit. So I'm going to start from there. Okay. I'm going to move it a little bit more so it starts completely unmoving. On this B. I'm just going to fare forward it a bit. And I'm going to cut there just to kind of speed up the panic, but want to speed up a panel, just cut it halfway and then just move it in just so you can get the full pan, but it doesn't take as long. Move a dog clip the clip, so Q. All right. I'm going to end there. That does not belong there, so I'm going to cut that and put it over here in the next section. That's where it shouldn't be in the food bit. But see if I have if I want them each dog. All right. I do want them watchdog, but I want to cut it a little bit. Okay. I'm gonna put it right on the bike transition. So let's move that up here. That's a beat on there. I'm going to cut there, delete that and delete that. And let's see what I have here. Sorry. Sorry. Now we're standing
5. Premiere Pro CC: FINAL Edit : In the system. I think I hear you saying about few, like are you hungry, you are addressing, right? There's a lot of different food that I've noticed here so far. A lot of variety. Let's see what, let's see exactly what varieties. There are some foreign country foods that I haven't tried. Ventures, Chris, I let go. Oh my gosh. This looks very interesting. So right now we're standing in the park in Kensington Market, and this area is really cool, especially in the summer. Iterated attracts a variety of different people, different cultures, different lux people are introduced, different things, but it brings everyone together and it's usually really busy in the summertime people are eating and just hanging out. We're going to go play in the park. Yes, we are. Because although it's busy, this average I am right now. We're the only Dow. So you do as an adult, you play in the park just like again. Okay. Well, violence five, always find the playground, always find a bigger. But now I'm really hungry. Let's do this time. So my hills, ooh, gosh, what do we end down? And Amanda, do you know what really hard part? The sign accounts cheesy. But this menu, it's privilege. And we think in, I'm thinking like whoa, and it looks pretty like a good choice. So we somehow upon a place called Pause Making trees and it's all being fans are buyers or in on ourselves. So say I want all my dad left and then there's a cheesecake that began that one does I failed? Now I really filling a kid and a candy shop literally went up later on in our country works out well. And they start going up. And I got the chocolate and peanut butter cheese cake because the person who works here says, that's what I get. So I listened to revive advice. I would give you walk today on my nose, got goosebumps, or you're going to cry. My wife actually chose all over my body. And you're like I wonder with your using instead of cheese, maybe tofu. And you're done. And you tap out. Caesar a rallies and v is, your eyes do not deceive, you lose. Laugh is like crooked. I'm like Really how am I supposed to know? What is on the clay when it's on the table, it looks like it's falling over. Yeah. Well, that was a very delicious, wonderful trip, is to Kansas, the market, and hope you enjoyed our little exploration and adventure today. Spine, I felt like little kids playing in the park. And again for like dessert is like the art. Desert playground go up. I'm working. I don't remember last time I was on a teeter totter, so that was good. If you enjoyed this video, please give it a thumbs up and let us know down below in the comments and subscribe to our channel. Yeah, we'll leave links to that and check those out. All right.
6. Final Cut Pro: Behind the Edit: Hello everyone and welcome to a editing session with Moi Kristin Sarah. I am going to be using Final Cut Pro to edit my video. This is what I have been using for years in 18, uses Premier Pro so you can go check out her video as well. She didn't editing session showing you how she edits on Premier. So let's go ahead and open up Final Cut. Nadine and I went to Kensington Market in Toronto, which is one of my favorite places I work. And we shot a video and we both took the footage and I'm editing my version. She edited her version. And yeah. So this is the process. This is what happens when I just traveled somewhere. I've filmed some awesome content and I'm ready to put together my story. So I open up Final Cut and I start to, you can either go to File and Import or this little down arrow here to import the footage. So I put it, I dragged it off my SD cards and I put it into a folder, and I actually divided up all the footage as well. But we're gonna go to main camera. And just all of these clips here. I went all the way to the bottom and click on that one good copy of all of them. And then I'm going to go over here to the right and go to Create new. I just turned down and import all awesome. So I'll let it do its thing. She's importing right now you can see these little actually that changed because I upgraded. But these little, I guess this little white square with a circle inside means it's importing. I'm gonna go ahead and also import the other footage from the other camera we shot on. A lot of clips importing. So my computer is like Stop it. Stop important blips of sled, do its thing, and just wait patiently. So all of this footage is now imported and we can start editing. So I'm gonna go to New Project here. Is I'm going to name it Toronto with OK. I can actually name this Toronto. They deem as well. This is the library it's called. So basically it's all the files, all the project files, the actual timeline. And if I were to look up, if I wanted to find this full project on my computer, I can just type in my finder, whatever Toronto with knee deep in, everything is in the library. So within the library is this event. And this is where all the clips are stored. So I can have different events within a library if I want to. So say, I was doing multiple projects in Toronto, different locations, then I can type in. Each event would be like this would be Kensington Market. I could do Chinatown. Et cetera, and just divide the footage that way. And then this here is the actual timeline, the project timeline. So this is what I'm going to be editing the video on. What I like to do is go through all my clips and get rid of the ones that I don't like aren't good and also clean up my other clips. So for example, this one here, I'm just kind of waiting shot. We don't need any of this. We want to clean that up a bit. I think we're just talking. Okay. I think it starts here, so I'm just going to clean that up and see if that worked. So by the way, I using the blade tool to do that, so I just hit B on my keyboard and that's a shortcut. And it cuts wherever I have the cursor. So just cut that right here. And then I'm going to hit P and it takes me back to this arrow cursor. And I'm going to click on the clip that I don't want are the part of the clip I don't want and hit Delete and then just see what that sounds like. Okay, so we're just Chen, we're not even really going for it at this point. I think we start right here. Oh, no, not quite. Your interop town. So it starts right here and if you want, you can zoom in on the clip. So again, a shortcut for that is zed of his magnifying glass. And then a use by Kiva keypad and just click as many times as I want and I can zoom in so I can get an cleaner slice with my blade. So let's start there. How am I making? So right here, cuts that. So that's a clean cut. So again, let's start from the beginning. I'm just going to go through these clips. See which ones I like, which ones I don't like. These two are the same. Though it seems a little too shaky for my liking. This one looks like that's actually not bad. I only needed a second of it, so I'm going to get rid of the first one and just chop it down to the points that I like. So let's see, probably starting there. So displace that using B blade cut and then back to P, click on the clip. I don't want to hit Delete. That's not bad. Oh. So when I'm on a clip and I want to go back or forward frame by frame. I can use the side arrows on my keyboard and the bottom right there's the up and down and left and right. So I can use my left and right arrows, I should say. And I can go back and forth frame by frame so I can get that clean cut. So I think. That's probably good. Those cut that and get rid of the part I don't like. That's okay. And also there is no audio on these clips. You can see here. So you can see the audio. Like on this clip, you can actually see the audio. We can even detach it by doing that, you just click on your clip, right-click on your mouse and you can go detach audio. So you can actually see this is the audio and this is the video. This one doesn't have any audio. We can even attach audio. So you'll see there's no audio. So I can just bring these down. Another way to bringing clips that don't have audio. I just kinda brought all these clips and together and some are mixed. There, I'll mix so some have audio and some don't. But if you're really bringing clip by clip, you can actually go here. And for example, this here does not have audio, so I don't need the audio and video track. All I need is the video track. So I just click this down arrow here and I go video only. Or I can also go up to, but just to show you video only. So I hit that. And now when I drag this into my timeline, it's actually only bringing in the video. You can do the same for audio. So if you only want to bring in the audio of a clip, you can change it over to Audio if you, although you just press L. Okay, so back to here. Let's clean this up a little bit more. One of the Kensington sign, I kinda just like scroll through quickly to my clips. I don't have to click the space bar and watch it slowly. I can I can tell if I like a shot just by scrolling through it quickly like this. Oh, there's a bird that goes to the shot that could be cool. So let's actually watch that. Too shaky for me. But I can tell this other clip here isn't as shaky in some parts, so I'm going to get rid of the first clip. Turning it here is probably pretty good. Yeah, that works. Only a few seconds. Here are the stuff. I don't need quotes. We've got those two clips. So basically I'm going to go through all of this footage, cut out the stuff that I don't want and keep the stuff I do on my halter is lots to cancer to mark your inter opt-out as one of the most multicultural places in the city. From all different cultures. Lots of shops. And it's one of my heroes places here. Okay, that was our first take. So I'm going to cut it there. I know we did this a couple of times. So again, I'm going to roll through you can tell are not actually doing the shot and maybe no, not yet. It's going through its going through fixing fixing the hair. Oh yeah, I got to fix the hair. Woo, woo. And here we go. Okay, so this is the second take. I can tell where it starts because the audio peaks a little bit. So I'm just going to cut that and get rid of. All of this. And because of the audio and the video or detach, I have to click again, click on the one clip shift or sorry Command. Click on the next clip. Hit Delete right here in Toronto shops. And it's one of my favorite places south. That was much better. So I'm going to keep that, get rid of the n because we don't need that. And get rid of the first take about because the second one's way better. This here is a time-lapse we took. So there are two different ways of taking a time-lapse. We chose two. We're using the A7 and I don't have a remote for the ASM and 18 is doesn't either. So we just kind of left the camera on a tripod pod rolling for a good five minutes. And we can create time-lapse that way. Other ways you can do it if you have a remote or the GoPro can do this, it takes a go, you can set it to take a photo memories like 2.5th or a second or two seconds wherever. How many, how often, however, often you want the camera to take a photo, you can set it that way, but you can't do that with the A7. So when A7, so we just filmed five-minute video. So I'm just scrolling through, looks good. This clip actually. And I don't want that. I'm going to have music in the background. I can already tell. I'm not going to want the audio. That's already on the video. I'm going to get rid of it. So I'm going to take that audio by dragging this little line thing, you know, you know, it, it's called Hopefully down to the bottom. So there's now no audio. A five-minute video. I'm going to shrink it down to probably only like five seconds max. So to do that, I click on the clip. And I go to this little guy here. Even know what it's called, what are you called? If you put your, okay. So if you put your cursor on any of these buttons and just like let it sit there for a second, it will tell you like what it is. So this one here, enhancement menu, read time, so that's what we want. So I click that and we're going to go to, we're going to speed it up. So I'm going too fast. Let's speed up eight times. Still going to be way too long then what I like, so what's cool now is I can take my arrow and drag the clip over until I get to how right there's a little bit at the beginning to those and it moved the tripod noobs. So I'm going to cut that off. And probably at the end too. Well, a color change a little bit. I don't like that, so I'm going to cut that off as well. Okay, so that's looking pretty cool actually. Let's speed it up again. Sometimes that disappears like because I cut that bar at the top that let me re-time disappeared, but that's okay. I can just go back to this button here. Go to fast. It's going eight times. And do it again. Let's see what that looks like. What it felt like a little bit more is going to be too fast. Get okay. I like that length. Let's leave it like that. Don't know what that is. Getting rid of it. That's a cool shot. Let's start there. That's good. When it comes to B-roll, I only use one shot for like a few seconds each. I don't like holding unless it's like an absolutely stunning shot. I don't really keep one shot specifically for more than five seconds. I do this because you lose your viewers attention if you don't constantly switch the clips, right? If you're just looking at this relay, I don't know exactly once you're gonna get bored. So I like to keep my story going visually. Okay, so bad. I like this flag. From there are two shots of it. But really blowing in the end. They're kinda like blowing a little bit more. But then you don't really see the Canadian flag. So I'm going to stick with this one. Chairman, a little bit here to there S. Bring down the audio. If I can remember correctly, this shot here, the shot at 60 frames per second, which is great. That means we can slow it down because we're going to export at 24 frames per second. So let's find out if that's how we actually shot it. So how you do that is you go over here. And this is the video where we can edit the video portion of this clip. This is the audio. We can do audio enhancements and bring down the volume, bring it up, et cetera. We can do that later though. We need to do that now. And if we go to Info, this is going to tell us more about our clip. And it's actually shot a 120 frames per second, which is even better. So let's see what that looks like. We'll get rid of the audio. And if I go over here again and I go to snow and 50 percent, Let's see what that looks like. A 50 percent. It's cool, but we can make it even cooler. Let's go to like 30. Let's go to 40. Actually. Looks cool. So I'm going to leave it at 40 percent. I like that. Might come back and change that. And let's start it around here when Nadine starts going around these little pulls that out. And then that's Q sleeve. She starts talking, So cut it there. Where I shop, we want to keep Wu I remember this shot. I did this one. I was like a pull focus. So I love shots like these are great. Purge telling the story and just creates dynamic, right? You don't want the same continuous shot over and over again. I love mixing it up when it comes to B-roll, tight shots, wide shots, and just getting creative. Don't be scared to play around a little bit with your shots. So using my right and left arrow and go back a couple of frames, probably started there. Oh, it again. Zoom in a little bit. Make it a little easier for myself to see. Okay, So the great therapists trim that a little bit. But it's really nice and we can cut it right as needing leaves frame. This is Q. And again, this was shot in a 120 P. So I'm going to slow that, write down, get rid of the audio track. So we'll need that. Slows down like 50 percent and play with it from there. That's cute thing and they slow down a little bit more. Let's try that. I think that looks good. Yeah, this one, I'm totally in frame, so I'll cut it just before I walk into the frame, getting, gonna get rid of the audio and just cut it soon as I leave frame for exact. I love these types of shots the best. So I am all about B-Roll whenever I'm filming anything because it really helps deliver this story and keep viewers tuned in. So I tried to get wide shots, close-ups, extreme close-ups. I play with the shots a little bit like I do still shots for that. I also kinda play with the camera to give it more dimension. It's more interesting, more variety you have to play with. So just a little bit of like almost like a pan, but not on using a tripod, just using my body kinda swaying back and forth. So I'm going to just clean that up. One of my other favorite tools, the shortcut for it is T on a Mac. So if you press that, it's called the trim tool. So you can actually go on top of a clip and drag the clip left or right. So this helps you also get a clean cut at the beginning of a clip. So for example, so why I'm doing this right now is let me just go back. The camera motion. Started a little bit earlier. And instead of pressing Control Alt Delete, it's going to use my trim tool and kind of try it a little bit to the right. So I have more to play with at the beginning. Okay? So now I can go frame by frame a little bit to the left. I think that looks good. Just showing up that beginning part again. And it turns out I actually like this. Like this one better. So let's zoom in even more. Okay, scale. So this is the same kind of motion is going to bring down the audio. So I don't need to take a look through because I did this a couple of times to see which one was the smoothest movement. First one I think was better. So in through there. Yep. I'm happy with that. So I'll trim that. I really liked this type of panning shot at the time, I guess. Oh, okay. We got closer. Apparently it was really into this panning shot at the time to really like that clip at also going to get rid of it. We already have a few. Too many. The same fiber shot. Yes. So this is a sign of a vendor of food vendor. When it comes to filming at restaurants are filming of restaurants or stores. I like to get a shot of the star sign just to show where we are without having to say it, right? So I'm just going to scroll through this as C. Okay, this is a little bit better. You can read it. I went more head on. So I think I'll trim the first part then. Let's get enough, long enough. Perfect. There's a delicious food. I really like this audio you can hear like the frying, no ice in. It really helps to tell your story to use sound clips here in there. Even if I'm doing a montage style video of where there isn't any talking. And I just put like a song, like a track underneath a bunch of beautiful clips. A lot of people who edit only focus on the video aspect, like the visual aspect. But audio and music is such a big thing. I spend like two to three hours looking or searching for the right track for a video before I even start editing. It's very, very important and can really change the feel, the mood of your video. So I also like to not just add like a music track, but I like to add sound bites because it You get that environment feel when you're watching the video, when they're soundbites. It really adds to your story. That's good. Foundation for that. That was a cool shot. So I think starting at their arrows. So you can hear Navy and I talking in the back of that so I can bring down the audio. I can always use the audio track from the portion of the video that I cut and just put it underneath, actually show you how to do that. So Control Delete and bring that audio backup. Just going to drag this clip above the timeline, and I'm going to detach by right-clicking on the clip, detach audio. And I'm going to use that trim tool and drag the audio a little bit, a little bit talking. So try it more. More. I think maybe just a tad. That works. Probably won't use this entire clip focused. Trim it right before we're talking here. Yeah. Can even drag this clip video part portion back down. All right. Yeah. I think getting rid of the audio on this. Okay. This person's shoulder was in the shot, so we'll start the clip there. Okay. And then it starts moving. There was also a little bit of a focus situation happening. So I'm going to try to start there lib, right after. I think that that's enough anyway. Perfect. Okay. So looks like I've got more shots were needing whoever was filming got more shots of the sign. So actually like that. And I like that. It zoomed in. So let's see what that looks like. Oh, it doesn't mean too much anymore. Let's see how long clip is. Starting there. Here to audio. Starts moving there. So it's not very long. I feel like we can use it. Don't really like this shot. He noticed the fact that it's far my eyes to concentrate on the shot so you can get rid of that. This might be cool for when we're not throwing R and R. All right, so I'll get rid of that. Some fruits I think I can already tell, I prefer to watch it anyway, prefer though, some thought from further away, less than done. More zoomed in. So okay. I'll just trim it there so I know where it stops, starts and ends. This one. You can see more. It just looks smoother too. So I will start just before I start to pan over. Atmosphere. That's cool. You're going to get rid of it or ask because I think in offspring down the audio, think this is an exercise. Maybe that will keep it, clean it up a bit there. Okay. So this is the next part of the video or at a park. Dark. But I like the dog vibe and we can always call it cracked. See if we can work with it a bit. Cut it at the end or the audio. So for the pomegranate, keep it for now. But a bit to make it look a little nicer. Actually left better. Looks like the yeah, the settings on the camera were adjusted. That's what's great about shooting in manual because you can play with your settings. I know so many people who are shooting in automatic, I would highly recommend learning how to shoot in manual. It will change your video making life. And don't be intimidated by it. Just just start from the beginning and take your time and play around with the camera bit. Moses. Yes. So you went to a restaurant out she has Crayola generally think. Okay, from the beginning where I start talking and reading this clip that out, she's so I clipped too close to me talking, so I cut myself off a bit. So again, I'm going to use the trim tool so t And just going to click on the clip and drag it a little bit to my right, just so I can see, let me zoom in a bit of magnifying glass. Again, shortcut is zed. After t, I can see the peak and the audio where I started to talk so the sign up. So now I can take the tea and drag it. So there you go. That should be good. I'm like, Wow, this looks pretty like a good choice. So it's very big in frontally. And Alex also called cosmic. Cosmic, and I'll click. Okay, That's way too long. Audio clip and was bored watching it. So if I'm going to use it, and it's gonna take a couple seconds of me talking in 18, talking in the background. So cheesy. So again, like Wow, this looks pretty like a good candidate to what I say here. Cosmic and I'll talk about cosmic treats. So, yeah, yeah, I'm digging, right? What do I like when I say I'm digging it? Let's go. Can I combine that with out cheesy? Many of us privilege and we think after that would make sense. So after needing says, When am I wonder, what are we thinking? I'm going to cut out this middle part. I say, yeah, I'm going to do right. That makes sense. Okay, so now we have cut out all that like chitchat in the middle, cheesy. And we think, Yeah, I'm digging up. Let's do it. Let's do it. We don't even need that repetitive. Let's do it. Let's do it. I'm just going to cut it there. And some people like jump cuts, I use them quite often actually, I think. Yeah, see how it went from one clip. Same scenario. And we think Yeah, to the next clip. So some people use jump cuts. I do not all the time, but I do like them when it's right, when I'm feeling it. And that's up to you entirely. This would be a jump cut. So it's the same setting. And been talking, we cut out all that middle part and we don't want to use, and it's jumping from this to this. So it looks like this. So you can either leave it like that if you want, or you can take another shot and place it over these two clips so you don't even notice. Now I have all this bureau of inside the store. And I like that shot. So I think this is shots all the sweets. Just going to scroll through quickly. At this point, I kinda I can feel it out like what shots I like just by scrolling through quickly, don't have to play the entire clip. I'm also going to get rid of the audio because I don't use it. I don't have to play through the entire clip. I can quickly see whether it clip is the right one or not. So this, this will do the cones. Feel like I might be able to use them. Maybe a short little clip, get rid of the parts are not going to use. So this shot here, well, you don't watch during the class. Okay, so this is NAD and I just talking, discussing this whole clip. We're not going to use because it was just asked, discussing, well, the camera was recording. And here we go. Okay. So I think we start maybe around here, so I'll get rid of all this. All right, Let's do that. Well, that was a very delicious, wonderful trip to cancer ticket market. I hope you enjoyed exploration and adventure today. As far as like little kids playing in the park and, and art, desert playground, I've got my marquee, want Amazon teeter-totter, so that's awesome. All right. So I think we did it twice, but I'll keep Israeli started. I'll keep this first take. I'm just cleaning it up a bit and see if we do it again. Yeah, We did. You enjoy watching more of your videos? Maybe that was it. Okay. Continuation. If you enjoyed this video, please give it a thumbs up and let us know down below in the comments. Yeah, only links in the description box. Blast, go check those out. So that is called the call to action. So you should always have a call to action. You're just going to clean up that clip. To always have a call to action on every video. Don't just expect people to know to subscribe to your channel. You want to tell them, tell them to comment, tell them to give your video a thumbs up and tell them to subscribe. It's a good practice to do at the end of your videos and also at the beginning. But you don't want to like be too pushy. It's kinda like a subtle Hey guys, if you like this video, give it a thumbs up, subscribe for more videos, right? You want to let people know how they're going to benefit, period, subscribing to you, you're going to bring them more content that they're enjoying by subscribing and they won't miss a video if they subscribe. And engagement 0 is always nice to getting, getting people to comment and then you can reply to them and then you get that conversation going. Alright, so here are the vlogging parts. So a lot of this is talking. So we're gonna have to run through the entire clip. And I also like the same thing, combining blocks down with more cinematics. There is a lot of different too long and like professionals like me like to incorporate. Yeah. I think that's needy and I have a a conversation not for the camera pose record. All right. So that was discussing before actually going into the sky, which is funny. Okay. This is where the real shot begins. Get rid of this. This is the beauty of editing a video close to the time that you shot it because you can remember what you were filming, what you said. I knew needy and I really like just talking back and forth so I can just get rid of that and you really have to like listen through our whole conversation. Okay, cut that little too close. So using the T tool, the trim tool is going to bring that clip over a bit. There is a lot of different food that I've noticed here so far, a lot of variety here. Let's see what, let's see exactly what you guys, some foreign countries routes and I haven't tried really good ventures. Cruiser, always, always go. Well, kristin, it looks like we have a few options here. I'm seeing hungry tie lot towards her. I don't even know. Like Honda and Millie, I don't even know. It's all good here. I'm telling you. Now I'd like you to use my what country you don't want to eat today. All right. Let's go. Okay. So that is a lot of talking. Definitely going to trim down a lot. But I'll leave it for now because I want to see our other vlogging parts. I want to see how much we actually talked, because this video is going to be no more than five minutes long. So we'll just see what we're dealing with. Walking shots. I think the way that they're to that blocking shots so is fun. Right? To win. This is Ni yeah, when she starts walking. And it was cool. We're walking shots. See which one's better. Right down the line. This is a different color. I think this is a little too blue. I'm going to get rid of that shot. I think this shot is too many twists and turns. It makes me a little dizzy. So I'm going to use this shot, just a small part of it. This is cool because so this is more shots of the lady cooking. So this is a lady cooking Japanese balls, and we've got some close-up shots already. So this is a further away shot. I like that we can combine it with the close-up, so I think that's good enough to keep the audio because the audio for the other shots of them and they the audio for this might be better. I don't know yet. We'll test that out later on. Day-long reaction. Very interesting, Very interesting. Very interesting. So that got a little blurry. Oh my gosh, I'm going to keep it for now. You might be able to work with it. Get rid of the other stuff. Let's try. It looks so good. Alex Soto, I guess I am such a fruit a hallway. And there's some interesting ones like 7% having a back button wipes. Cinema. That's us being goofy. You have these always fun. Stay true to you. Definitely do specially together. At this point this out because I saw that I was talking about just what a nerd and I love her. Coolest nerd. I know. I would think the exact same thing if I saw this on first of all, that sign. I'm baffling keeping that. It's adorable. Now we're standing in the park in Kensington Market and this what I saw, this I was like Okay. And just yeah, forgiven that. So right now we're standing in the park in Kensington Market. And this cake I see generally get the idea of going through the clips and cutting out the parts and I don't want and keeping the rest that I do. I'm just going to go through quickly now without talking. Unless something new comes across and I just finished cleaning is all. Now that I've gone through all of the clips and clean everything up and kept the clips that I want to use in this video, I'm going to bring in the music track that I'm going to have to set the mood and. Be consistent in the background to help pull the video all together. So I usually take time to look for music to make sure I pick the right music for the video that I'm editing. So I'm going to go to the Import button and I have this on my desktop. Oh, and I'm going to make sure that the clips are on B. So that sounds good. And it looks good. What I really love to do is overlap. I'm going to take the intro of media and I drag it to where the cursor is. And then I'm gonna go to the music track and click in the same spot where the cursor is. And then going to go over to the audio and hit this little key point. And then go over a couple of frames, just a couple to another keyframe. And then I'm going to bring down the audio track proudly to Liga see 17. So yeah, that sounds good. So it's a little loud. Bring you down. Why? So Navy, you and I are pretty quiet, so I'm going to jack up that audio. So what I did here is overlapping notes when I'm calling it. I don't know if that's actually the technical term. And I just really like the look and the feel of it. So we're still watching the same track. But all of a sudden, you can hear mine in the dean's voice under the track and then it goes into that actual shot. So let's watch it from the beginning. Targets here in Toronto. It's one of my template. So that's when we stop talking. So make sure you clicked on the music track to another keyframe. Go a couple of frames over using my right arrow. Do another keyframe and then Treg the audio back up to 0. There's a little too harsh, so I might take that first keyframe and drag it a little bit to the left. So it's like a longer transition. At the same time as this. As the music goes up, I'm gonna kill the audio on mine in the Dean's talking prior. Again, I'm going to make it a longer transition, so it sends me there. Okay, So now the beats get started again. You can see it there. So it goes on, beat, us exploring. So let's see what the shots are like. Keep it with the quick counseling I did at the beginning. And to be honest, I think I'm going to switch around. Let's do that. Let's go back. Not really set on this being the first shot. I think it's kind of ugly. But we'll see what we can do. Actually. I'm going to get it. I'll keep this clip. I'm going to drag it a little bit over here. Just shove it in there somewhere. And it might come back and use it. But I like the slow mo shot of needing. And then I'm going to, because this is so long, but I really liked the shot and the beat's really funky. So I'm actually going to do jump cuts. So I'm going to skip this and jump to like here, see what that looks like. Actually let's have more fun. Let's do lake. So the beak goes like boom, right? Thumb. It's maybe you can do to jump cuts. Let's zoom in a little bit. Markers can be fast. Okay? Ignore that cut because we had to, we were in exactly on beat. So local tray up a bit there. And then those quick right after. So we're going to do another one. Let's see what that looks like. Cool, but she looked at the camera there. So let's change that a little bit. So zoom in even more when these are trim tool and just drag it over a little bit. Okay, so now this shot is too close to the shot Scenario Manager is see what this looks like. They can zoom back out and might even bring over this even more. See what this looks like. Bring us even more. Make it even more of a jump. That C and its control alt delete that. I think I need to play it back a little further to get a feel and things like that. But let's bring in a little bit so we see kilos smile. Cook. I think we can bring in the last or the second. Yeah. That's good. Okay. Okay. Although I do like how she goes back around eventually, I think that's enough. Maybe we can use this stuff. So I think it would be fun to now bring in my slow-mo skipping and do the same jump cut. And see what that looks like. Sorry, Really, it's like just playing around and having fun. Having fun with the music. Again, I like to edit on beat. Some people don't care. I think it's more fun personally. Then I'm beat. It's also takes more time, it's more time consuming. But I really enjoy it so that it's going to happen again, that double beat. So I start skipping Cp Min. Any mistake or wherever you can just control alt, delete it. Okay. Oh, like that. There you go. So they can drink this tea again. And I think for the second one, I'm going to have it all the way around like just before I went to frame. See what this looks like. 0, negative screwed up, Control, Delete. There. I did. Okay, let's go back a bit. So, okay. First of all, I wanna get myself lake little bit more in the air, started up there. So this is where the jump happens. So we'll make one cut their Geng Chang it in again. I think that'll be nice. Adding this will work klutzy. And now I'm, might go back and then go through this later again and just perfect it. But I might go back with needing going around. Thinks she goes around twice. Let's eat. She does like a full play it. Let's try this again. You know, what I mean? Is it, so it's too much. So I got rid of that part. Let's move on. Maybe there's another talking clip now. It's actually, let's, let's show some shots of the beans and staff. Go through again, see what the vlogging parts were. Just talking about food. Ooh, that's a fun shot. Okay. So I'm gonna take this and drag it and drop it right after the show. Actually, I really like that shot with needing walking because it goes together. So I think we're ready for talking shot potentially. Okay. I got it. So let's bring this is Q2. So let's bring the little vlogging clip of me talking about fruit and the gene docking about the frequent sign. I'm going to drag it over here and put it before that walking shot. So again, it's just after this shot. First. There's Bureau of perfect. So let's take that bureau PUT area for this. If we did a jump start. That shot. Here's CC half the oranges. And the second one. That's better. I see kinda see all three fruits and you're like mid pen, which I think flows really nicely. 0, 0, 0, missing a shot, or is that pomegranate shot? Here it is. Let's take that too. And kind of like that or look kind of shaky cam but not too much. Now, usually I'd like to try to, again go to a talking clip when the beat goes down, but it might work. So I'm going to take me talking about the fruit. What do I say? Okay, that works because this fruit looks so good. So I'm going to do another overlap because those are fun. So then that means I'm going to bring down the audio. Put the cursor right when I start to talk, click on the track keyframe, bring it over another keyframe. And we had this at 26 minutes, pretty comfortable there. I was like you could hear it just enough. Okay. The thing with music in the background, when you have like a talking bit, you don't want to have, but you don't want it too quiet. Basically, you want to be able to hear the music when there's a pause between dialogue. And that fills in that void of blank space. And if you haven't music too loud, it's distracting when you're trying to listen to the person talk. And if you have it too low, then I mean, what's the point of having it at all? Let's try. It looks so good. That works. Cubed. I'm going to go right into native. So when the meeting starts, make the face, I'm going to bring the audio back. Yes, I am such a interesting ones like music actually might be. That's why it's got to get up to God. And so it was cool. Even. Yeah, Because I like her walking at a shop. Perfect. Let's get this guy playing now. So if we're going to do that, bring down the audio again. So another keyframe. This is going to be more of a gradual. I'm going to watch this from the beginning now to see if this vibe goes because it's really slow. I wanted to get a musician like playing something because it happens a lot in Kensington, but Sky clean, pretty slow music. Target here in Toronto. This is one of the most multicultural places in the city all over the world. What a cool shops. It's one of my different places, so that's why it looks so good, because it looks so delicious. I am such a through to Hollich. And there's some interesting lines like this. It's like you're saying, I'd have our seven. Bring it back. As cinema. What I saw, the sign gets up to God about it just being around you in care too much for these shots either. But I might I might use them. So let's just drag that over here. The C code that sensor. Okay, so he established the place. You want to see who is a little focus glitch in the area that see if that was too quick. So now I want to bring the music track dow
7. Final Cut Pro: FINAL Edit : Hello and welcome to Kensington Market here in Toronto. This is one of the most multicultural places in the city. You can get from all over the world a lot of cool shops. It's one of my favorite places. So let's go through and that's where it involves a long tube. You to solve this for. It looks so good cursive analytics, so delicious, I am such a fruit, a Hollich. And there's some interesting ones like here's this up. Whatever 7% I think in fact one once, you mean like cinema, what I saw this sign, I was like, Go kids up for God, got a good typically because visited song no, to deceive. I think he's lying about food like are you hungry? You want to try something. There's a lot of different sued that I've noticed here so far, a lot of variety. And let's see what, let's see exactly the Fridays. Maybe there's some foreign countries who said I haven't tried feeling adventurers cruiser always. Do. You feel, Oh my gosh. This looks very interesting. Yeah. Sorry. Now we're standing in the park in Kensington Market, and this area is really cool, especially in the summer. It attracts a variety of different people, different cultures, different lux people who are into just different things, but it brings everyone together and it's usually really busy in the summertime people are eating and just hanging out. We're going to go play in the park? Yes, we are. Because although it's busy this our time right now. So what you do as an adult, you play in the park just like I can't really call it out. Oh gosh, wow, not held myself up. And this is how you get from volume. Hello, Alice five, always fight on the playground. Always find a playground. But now I'm really hungry. Let's do this. Go time, but sorry, the camera sign accounts. Cheesy, what do we think in? Yeah, and dig in to Instagram. So we stumbled upon a place called Tasmania trees, and it's all the bands are buyers or anode ourselves can say, chocolate and peanut butter cheese cake, which is everything. In life. What am I on? And maybe even continuously, I just need to walk it. But I want to talk about like for you as a manager, are you going to try my students? And I don't want to see in our rally around, yeah. But tastefully as a regular people working in your app, it's not sticking in a row and a piece of work. So we're back around. Well, that was a very delicious, wonderful brief trip into Kenzie team market. I hope you enjoyed our little exploration and adventure today. There was fine. I felt like little kids playing in the park and I was like graffiti art, desert playground and go up working. You want I don't know. Remember loss. I was on a teeter-totter, so that was good. If you enjoyed this video, please give it a thumbs up and let us know down below in the comments and subscribe to our shadows. I will leave links to that in the description box below so you can go and check those out. All right.
 Kristen & Nadine, YouTubers | Videographers