Transcripts
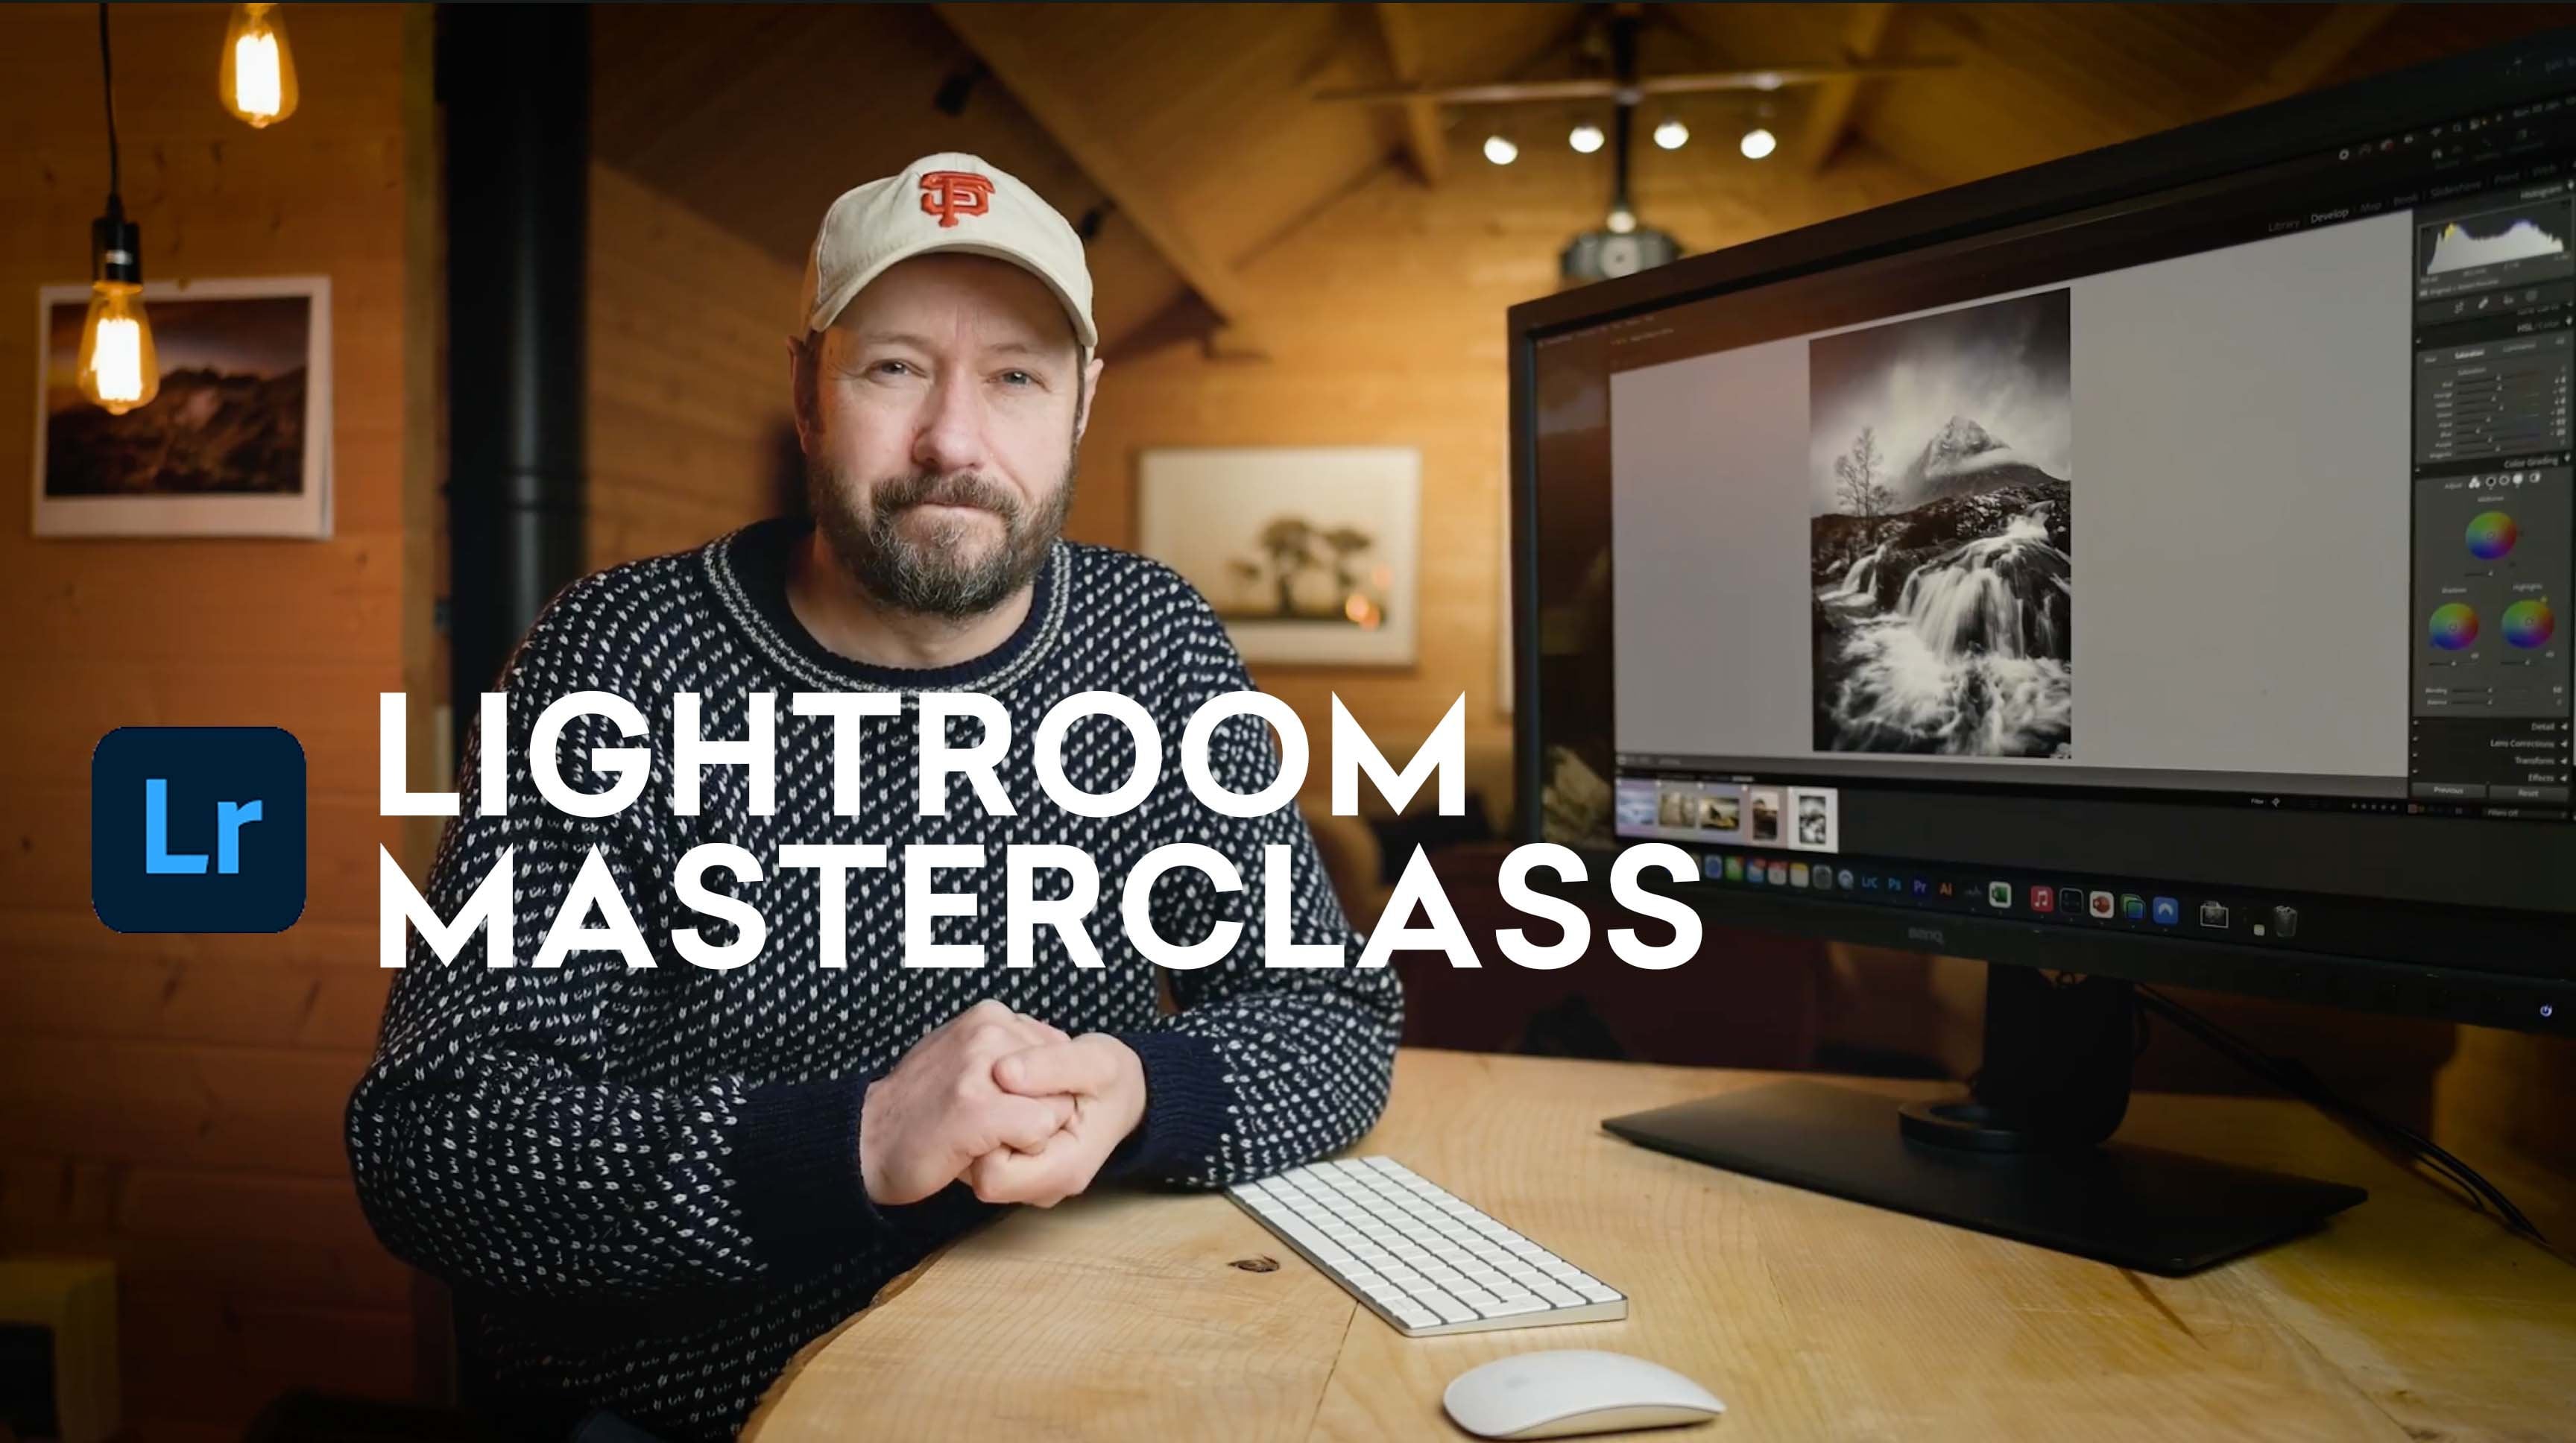
1. About the course: Hello and welcome. In this class I'll teach you
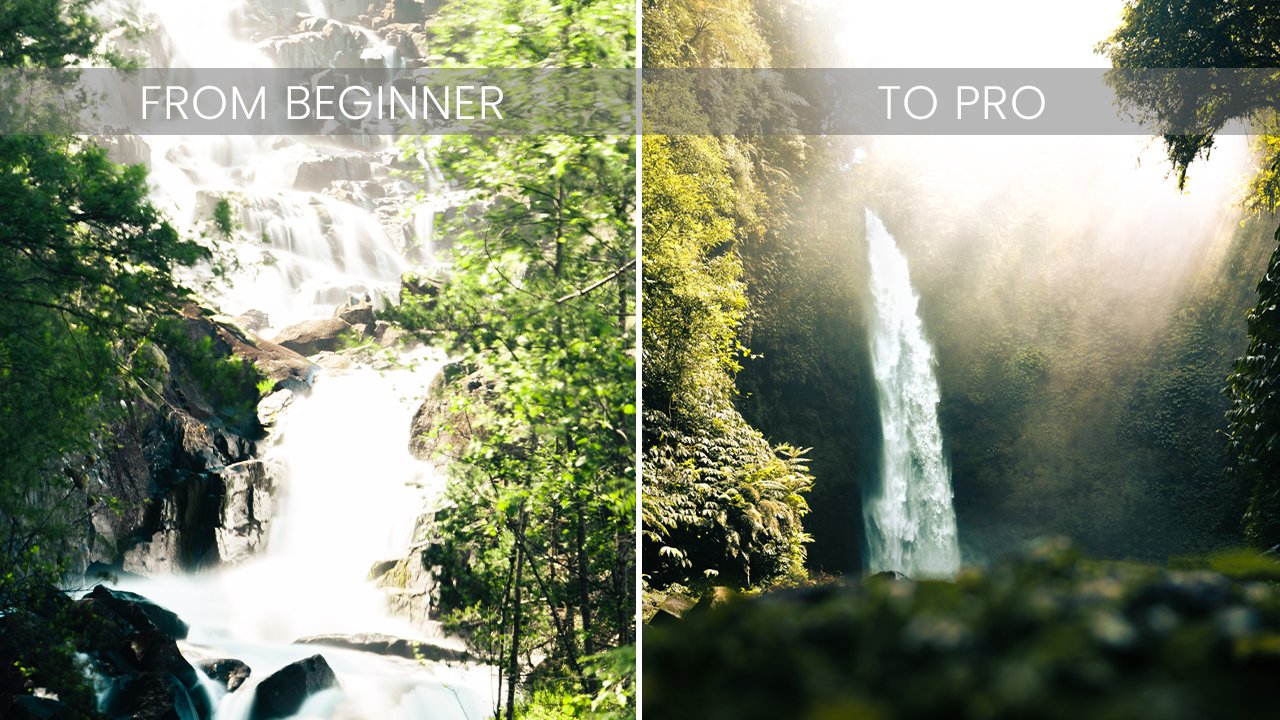
how to turn a photo from this into this and thereby
make your stop it stand out. My name is Alex and I'm a
visual traveled storyteller. I've been doing photography
professionally for more than four years and specialize in
nature photography, but I do all kinds mourners. Now, in this class, I'll teach you how to make use of the masking
tools in Lightroom. And why is that important? You might ask, well, to make your subjects stand out, it's very easy to
use masking tools and thereby create
some difference in your contrast from the background and the
foreground or your subject. And that way you can draw the attention
into your subject, which is super important for
the story you want to tell and the emotions you want
to emphasize on your photo, or just draw attention into a very beautiful
portrait you'd taken. Now this class is for all levels beginners
as well as people who already master Lightroom recently the launch
some new features that makes it really, really easy to mask and library. So what I wanted to teach you
here is how to use those, but also teach you how to
use the old techniques. It will go through the
old techniques first, then the new ones, and
then how to combine them. If one is not enough, then I'll go through a few
advanced masking techniques because there are
a lot of ways that you can now combine the masks. And I'll teach you that too. The only thing you
need is Lightroom and then you need to photos. Because for the
class assignment, I want you to edit two of your photos and you don't
have any good photos yet. Don't worry, you can take
two photos with your phone. Just make sure that
there's some kind of subject in it and then you
can make use of it too. It's really simple, it's
really easy and I'm super excited to share these techniques with
you because of thing, it's something that everyone should know if you
do photography. I'm excited to get started. I'll see you in
the first lesson.
2. The old way of masking: Alright, so let's jump
into Lightroom here for the first photo chosen
and the one that we will go through the first
three videos here will be a photo of myself
just to make sure that the infringement in thing, I'll just put a
really quick edit on it just to make
it look not a stall. So you can see the before
and after it was a little more desaturated and that's because there was a raw photo. Just shine it up a little bit, put some more contrast
until the colors. And now we're ready to make
me stand out from the photo. What we want to do is
use the old way today. When we opened the
masking tool over here, we have some different options. The new way is to select this object will go into
that in the next video. But what we want to do
in this first tutorial is to choose the brush tool. You can also hit K on your
keyboard as shown out here. What we want to do is we want to mask out from the photo
to make me stand out. And the way we do it is we have our brush over here so
we can control the size, we control the feathering, the flow, and the density. And we also have an option
to click on Auto Mask. And automatic helps you not go out of the different
lines stories. So that's a really neat tool. So if we just zoom in, I hit my, I hold down the Space key on my keyboard and
then click Submit. And what we wanna do is
we want to start masking. And I have everything on
full, 400% over here. So both the failure of
the flow and the density, and what we want to
do is just slowly brush around these
different areas. And you can see that we might
go a little bit outside, so I'm hitting my option key and thereby I can make
it a minus instead, remove a mask already. I'll just speed this up so you don't have to look at
me masking all of this. Then we will be
back in a second. All right, So now
we've masked me out and it's not
necessarily perfect. You can spend more time on this, but as I'll show you
in a little bit, if we use a new technique, there are some better
ways to do it. This is just to show you
how you did it the old way. So this was before
lightroom launch, these new features that use
computational intelligence, whatever to just
make this better and to make it easier
basically for you. But what we have up here now is our mask and we
have our brush here. Now, what I usually do to
make sure that we can make our subjects stand out is
I duplicate this mask. So now we have two selections. So you can see if we deselect, That's the mass and
beyond right now. And we have the same thing here. Now what I'd like to do to
make my subjects stand out is I hit the brush tool
and then I hit invert, which makes sure that it
selects everything else. But what you can see is
that when we do this, especially because we have
selected something ourselves, it isn't perfect anymore. What we want to do is we
want to go in and we want to hold down the option key while we then remove the small bits here that I'm
not supposed to be here. We want everything
bought me select it. This can take a little
bit of time to do, but it's not too bad. Usually it's hit it pretty good. So we'll just quickly remove all these areas haven't
been precise enough. As you can see. Our auto
mask helps us a little bit. So it tries to figure out
like the contrast areas and it helps us to not
go outside of the lines. So I think we are
pretty good here. It doesn't have to be completely perfect for this tutorial. You get the point. Now we have a selection
that is everything but me. And we have a
selection that is me. I usually do to make
my subjects stand out, is I first select the one
that is the background. Then I will usually go
down just a little bit. It doesn't have to be a
lot, just a little bit for the highlights and the shadows. It depends on the picture, but that's usually how I start out. Usually go a little bit
in the negative side of the clarity as well
just to make sure that nothing really pops as
much in the background. Sometimes you can do that
in the HSL sliders as well. But sometimes I like to decrease the saturation
just a little bit. Maybe that was a
little bit too much. We like these greens. Then you can see the
difference here. We've just made it a
little bit darker. And already here you
can see how we're now having me as subjects stand out way more than we had before. So here it's much
more than the limb. Whereas here you
can see that I'm standing out a lot more. Then I'll go in and I
choose myself as a mask. I usually pop up the clarity just a little bit to
make me stand out. Sometimes I'll go up
just a little bit. So basically doing the
opposite of what we did with the other layer, just to make me stand
out a little bit more. Sometimes you could add a
little bit of contrast as well. Why do you can see
here is the now we've brightened me
up a little bit. If we zoom in, you can
see that I'm a little bit more bright now and the
background has become darker. What we have is this the before, and now this is the after. You can see I stand out much more as a subject
than I did before. And this is our entire before, before I did any editing. And this is now the after. This is basically
how you did it the old way and this is
how I go about it. This is how I make it stand out. It's very easy and very simple. You just mask out
your main subject and then you duplicate
it and invert it. Now if you accidentally
duplicated, after all, forgotten duplicated, but then you made some changes. Then if you duplicate it, let's just disable this one
and then duplicate this one. We can see that now
if we invert it, will have the
settings on that we had with our original mask. If you double-click effect, that will reset that. And now of course we didn't make our changes as we did before. You can remove those and then you can do the same
effect basically. That's just to note that if you didn't duplicate it before
you make the edits, you can just double-click
Effect and then you're all set. Let's delete this one again. And then this is our baseline. Now, let's jump
into the next video where I'll show you how to use the new tool to do these things.
3. The new way of masking: Let's jump into how to use
the new way of masking them. I've just removed both my masks from the old way of doing it. And now we'll jump
into the new way and assert in the late 2021, Lightroom release
some new features for Lightroom in terms of masking and they basically
redesign the entire thing. So now we have our masking
tool and we will hit the select shopping tool
as we talked about before. When we hit that, it's
detecting the subject depending on your computer and wherever your
photos are located. If it's on a slow drive, it
might take a little bit, but it's now selected me. And yes, you can say it's
selected me quite perfectly. It's a little bit in here
that's not selected perfectly. Shouldn't select
those small areas, but that's not a
problem right now. We just have almost like a perfect selection
of me and just said, solve the following,
the previous video. It took me quite a
while to actually mask out myself and
this was an easy one. But this just did it
in a few seconds. So we'll do the same
thing as we did before. We'll duplicate this mask. What we'll do here is
again, we'll invert it. So now we have our inverted
mask and you can see how everything around me is just mask now and it's
even perfect already. So we don't have to remove
anything as we did before. You can actually
see if you hit oh, I was wrong about before. So it actually did select what's in-between my hands
here on my arm. So it's perfectly
selected everything. So o, the keyboard, the key O on your keyboard, select or deselect slideshows
and heights the red area. Just do the same quickly here. We'll put down the shadows, the highlights, and maybe
the clarity a little bit. You turn up the contrast. Then we'll jump into the
mask that acidic mean. We will turn off the shadows and highlights and the
clarity a little bit. Maybe also the contrast. And then we have a pretty
good selection here. Maybe it's a little
bit too bright, but that's not the point of this tutorial
That's reals just to show you how you can easily make your subjects
stand out like this. So if we remove the
things that we did to me, you can see that I
am law brighter now and the background has
become a lot darker. So without any of
these settings, and then with these settings, you can see how much more ice than maybe this is too much. You can do it way more subtle. This is just to show
you how to do it. Now, I talked a little bit about the selection
is not being perfect. And for this example, actually the selection
was pretty good. But I will, in the next video, I'll show you how to
combine the two when the selections are not
working perfectly. So I'll see you
in the next year.
4. Combining the old and the new: Alright, so now I've shown you the old way of doing masking, the new way of doing masking. And now I'll show you
how to combine it. But as you saw
before in the video, this photo was pretty easy for
the library and to select. So let's jump into
another fellow. I have this photo of a
monkey and you can see this a lot more going
on around the monkey, which will most likely make Lightroom have
a harder time of actually selecting this the
subject of this monkey. Let's see what happens when
we use the Select Subject. In this video, I
wanted to show you how you combine the two methods. So as you can see here, it has selected
most of the monkey and done a pretty good job. But it's also selected some
of the leaves up here, and it hasn't selected
the entirety of the tail. So what we can do with this
tool now is that as you see, we have the mask one up
here whose shall mask. And then we have
our subject one, which is a subject that we have selected or
disruptive to let we used. Now what we can do is
that we can choose add and we can select the brush. Now we have a new layer on
top of this object layer. And what we can do
is we consume in to the monkey's tail and then
we can mask that out. What we basically do is
that we mask out the tail. And now you can probably see, I chose a little bit
of to pick a brush. I should've made a little
bit smaller for it to be easier to actually select the
sale a little bit better. But what we have here now
is selection of the tail. So if I zoom out again, now we see that our mask here is the entire selection
of the monkey and the tail. But if we hover above
the snapping tool, you can see what the
subject tool has selected and what the
brush tool selected. So that's only the tail. And then now you can see that we have a little bit of the
leaf up here as well. And we also have a little
bit of the background underneath the monkey here
that we want to remove. The same way we can
use the subtract tool, subtract tool, sorry, the brush. And then we can zoom in again to make it a
little bit easier. And then we can just
remove this again. By doing this, we have now
removed the leaf up here. And let's assumed like scroll down a little bit and do the same thing
underneath the monkey. We can even do it here to make sure that that is not selected. You can also see how
the leaves that go in front here actually selected
some of the monkey. What I'm doing now is that I'm removing that and
then I can just select that again with the plus by holding down the option key as
I showed you before. Now an important thing is that
now we're removing stuff. Which means that if we hit hold down the Option key and
we want to add something, then we can only add something
that we have removed. So you can see that
if I try to buy now I'm trying to brush up
here and nothing happens. And a common mistake that
I've made sometimes is that then I can figure
out why it doesn't work. But that's because I'm on
the subtract tool and I can only add back something
that I've removed. So if we remove some
of this leaf here, I'll just make this a
little bit smaller. Then if we just go for us, then we have these
selected this much now. Now I can, if I hold
down the option key, now I can add back some of the monkey if we messed up a
little bit that we did. And I don't want
this to be perfect because it's just for the
sake of the tutorial. But now we have our
mask of our monkey. As you can see, this topic
tools detected these things, then the brush tool selected
with that reselect the tail, and now we de-select it those
parts with the brush tool, the Subtract brush tool. Now as we did before, before we jump into
editing anything, making any changes,
I want to hit the mask one and
duplicate the mask. Then we do the same
thing as we did before. So we use the subject
to do an inversion. You can already
see now that okay, Now we have everything
but the monkey, the leaf up here, and the tail. And that's because we've
actually deselected those in our brush tools. What we want to do
in our brush tool is we don't want to invert them, but we want to convert the ad brush that we
made to subtract, which means that we now subtract the tail instead of
adding the tail. And the same thing we want
to do with the brush too. We want to convert that into an ad tool instead
of subtract tool. Now we add in the
leaves that goes in front underneath the
monkey and the monkey. As you can see before, this is not perfect. Sometimes it's looks a little
bit better when we do it. But now this is a
subtract tool instead. What this tool does
is that it subtracts the Wherever we
brushes in this area. Now we have molar
subtract the tail again. It's not, I'm a perfectionist, so we just do this very
quickly and then we all good. I can even see that
the legs are a little bit off as well or
the feed of the monkey. But anyway, let's
just hold it to this. Now we do the same
thing as we did before. So we have our mask one
and then we can drag down the shadows and
maybe the highlights. Maybe we want to turn
down the clarity as well. You can see the photo also starts to look a
little bit better. Maybe it was a little
bit too bright before, even though I made a small Edit. And then we select our monkey. Now we can turn this
up a little bit. We can highlight it
a little bit more, maybe give it some clarity. And now already from that, you can see that if we remove this or everything blends a
little bit more together. But now if we add back, even just adding back, the monkey itself makes it
stand out a little bit more. But if we then show
how we show again, I'll mask to mask one copy. You can see how everything in the background
is way more dark. And that just makes the
monkey stand out a lot more than photo and brings our
attention into the monkey. So that's the end. This video on showing
you how to combine it. Next two videos, I'll show
you a couple of more examples of how you can make
this combination work. And just to make
sure that you have it in your mind and you figure out works and
you can also skip those. And then we can jump into the advanced masking,
which is the video. Next after that,
I'll show you how to combine this technique
or these techniques that I've shown you
now with some of the other tools and how you can then make that work even better or make some cool tricks
to make your food, your photo look even better and your subjects
stand out even more. So. I'll see you
in the next video.
5. Example with Food: All right, let me
walk you through another example of how
to use the masking tool. Just to make sure
that everything is not like living subjects as the person me of a
portrait or the monkey. That's also 11th topic. Now we have an example of food and you can do the
same thing basically. So this Select
Subject is not even though it's showing a person, it doesn't work on only persons like humans or animals
for that matter. It works on those
topics as well. Now I've chosen this photo because it's a little
bit more cluttered. So it will be difficult
for Lightroom to actually know what to select. When we hit the Select tool, you'll see that it
does a pretty good job of selecting these rotis
in the foreground, but it doesn't select the rice. They are the focus to be honest, but I would like those
to be selected as well. And also this ninth think make sure that everything
is and then it didn't select all of the
Rockies over here. So let's do the same
thing as we did before, and let's hit the brush tool. Now we don't necessarily have anything that we need
to remove this time. So we'll only use
the Add subject. And we will just quickly makes sure that the
selection here is good. Sometimes it doesn't select like the edges will be a
little less selected, which doesn't make a huge
difference. It's fine. But sometimes you can go over it with a brush
if you want to, just to make sure
that everything is perfectly selected
and highlighted. Then we will select the
rise here really quick. I'll just do some quick
selections to make sure that we are not spending
too much time on that. And let's just choose
this one as well. I'd like to zoom
in normally when I do this just to make sure that it's a little bit
easier to see what I'm actually working with. And if I'm hitting
the correct things, let's just each of
that witness as well. I think that looks pretty good. Sometimes I'll
select the plate as well depending on
what I'm doing. But for this example
is to select the food. Now we'll do the same thing. We'll duplicate the
layer and the mask, and we will invert the
selection of our subject. Now you can see
because we brushed over the Rockies as well to make sure it
was probably selected. The brush tool
shows that we have a lot of selecting
selection store. So we'll convert this one to a subtract and it's still
not completely perfect. So we will just very, very quickly remove some of
those parts that are not selected completely and think
this looks pretty good. I like that. That's fine. We'll do the same thing, will turn down the
shadows a little bit, maybe turn down the highlights, especially for this photo, I want to turn the highlights
down more and you can see up here the highlights
and very blown out. I actually want to want to
do is I'll turn the lights down a little bit more and then turn the
highlights down as well. And maybe I'll actually to
bring up the shadows just a little bit because we're turning down the
highlights so much. And the whites. Then now I think this looks a lot better
than it did before, and it's not too dark. And then we can select already. This makes it stand
out because we didn't apply the effect to this. If we just show what we've done, you can see that it
stands out a lot more. But what we can do as only we can maybe increase the
shadows a little bit, increase the highlights,
and give it some clarity. And now we've made this
stand out even more. From this way, everything
blends a little bit together. We now have this where it
turns out to be a lot more. It's not in focus, but a lot more clear what
we're showing in this photo. And the background even
looks a little bit better. Because if we show this, you
can see how blown out this. But that is now fixed. The reason I wanted
to do this is I did the base added and
that's from clicked on. You can see that the
Basic Editor did. I turn off the highlights, but that was because I wanted everything here
to be imbalanced, but that also meant that the
background was blown out. What I usually do is I will do my base edit as
I've done here. And then I will come to
the masking afterwards. And then I'll make sure that when I have everything
in balance, then I can start
making adjustments. This is the most important, important part of the picture. That's why I blow
at this blown out. But I knew that with
the masking here, I could do something like this. I could also apply just
another brush up here and then select all the
highlighted areas wanted to. Now we're just doing it very, very quickly as you can see. So it's by no means perfect. Just make sure that we have
this witness, this model. We could spend some
time on just making sure that everything was
good around the edges. We will not do that
for this tutorial. Then we can play
around even more with the highlights and maybe even make it look a
little bit better. Now here I think we have a much better picture
than we had before. And that's just showing how you can mask out that part as well, even just using the
first technique, the old technique that we
used in other way of doing it is that if we hide this one, we can create a new
mask and we can do it with the luminance range, which to selecting all
the very bright parts. As you can see, it's selected some of the other parts as well. But what we can come
over here and do then is that we can actually, by increasing this, makes sure that it's not
everything selected. If you see here now, we need to find the
balance because we want this to be selected. But we also want, we don't want this down here
to be selected. I'll show you in the
advanced masking how we can go about
that for analysis. Leave it here, hide this one
and show this one again. That is just an
example of how you can easily make these
mask work together and make your subjects
stand out without necessarily having to ruin the photo even if it's
not sharp perfectly. You can shoot the subject in focus and then you can
edit this afterwards. The next video, I'll show you an example of how you can edit
a silhouette sunset shot. So I'll see you in that one.
6. Example with Sunset + bonus tip: All right, For this example, I will, I'm saying this sense
of shot that I've shot. And it's just to
show you another way of working with Librarian
for these things. Because right now what we've
done with the other areas, we've brightened up the subject. We've made that
stand out that way. But some away you can
use it as well is to, for example, with this shot, we have assuming
you can see that they are not perfectly
in a silhouette, this woman and her child. In contrast to the sunset, which is what I was going fall. Very easy way to make these
two into a silhouette and stand out that way is
to use the masking. Now, if we use the
selection tool, you'll see that it did
basically nothing. If I hit O, you
can see that it's slightly masked out
something over here, but it didn't really
do a job at all. So that's not useful for us. So I'll just delete this mask again as we can
really use it for anything and then add
a brush tool instead. And as I showed you before
in the first video, we'll just do a masking. A tip here is that if you
use the automatic tool, then if be subtle
in your movements. So if I go about
and do like this, it will work right now, but sometimes they'll
just easily is more easy. Go out of the area of the kit. Whereas if I do
subtle movements, it'll have a heart
an easier time, sorry to make sure that
you actually selecting what you're supposed
to select and not going out of your way. So missed a little bit there. We want this to be smaller. I think this is pretty good. Then we just want
to mask this woman, select this and like that, I think that is pretty these. And for this example, now, we've now selected
this woman or child. I'll do the same thing
as they do always. I'll duplicate the mask. Now, actually, what I want to show you is I'll
delete this mask again. I'll show you another
technique to do this. If we use briefly I've
used the brush tool, then I can copy this one. So right now just command C. It'll be Control C on Windows. And now I have this
as my clip folder. Now I use a new mask. I can't really just
copy anything, but just for the matter
of showing you this, I'll just select
something up here. Now this is my brush, but if I use Command
V and controls, control V on Windows now, I can copy in my brush from before and I can actually
just delete the first one. So that's an easy
way to do that. And then I can invert that. Now, we're not
subtracting anything because this is our base
layer, we need to invert it. But as this is our manual subject selection,
that is how we do it. And as you can see, we didn't actually do
a perfect job here, or it didn't do a perfect job, at least when it did
the subtraction. So it was just
very, very quickly. Go in and edit that. And I think that
looks pretty good. So now what we can
do is that we can actually maybe highlight
this a little bit more. Maybe we want the
shadows to stand out a little bit
more, more contrast. Maybe we want this part to
be more, have more clarity. And then we can select
our mask and we can just drag down the shadows. Now if we zoom in and
see that this woman and her child is actually
completely in darkness. And we can even turn down
the blacks a little bit. And also if you want this
faded effect, you can do that. But for this example, I'll just turn it
down a little bit. And you can see
we've done now if we free, de-select this, now it was almost
uncivil it already, but you can see that we've made them into
complete silhouettes. That just makes them stand
out a little bit more and also heights them from
recognition of who they are. That's just a way
of showing you how to use the subject too as well. Use the masking. Of course, if the substitute doesn't work. Now one thing to mention as well is that if you want to
copy your settings, you can do that in Lightroom, but if you try to, let's go to another example. So let us go to
the monkey again, where we use the Subject tool. If you try to copy this, it will give you
an error triangle that tells you that this will
not be copied perfectly. And that is because
it cannot copy the topic tool as that is something that the
computer is doing. This topic tool is
something that it selects on the
basis of the photo. And that means that it
doesn't know how to do that. So let's make a virtual
copy of this one. Now, I made it a virtual copy of this one and I'll
just reset that. Now we don't have any
alias and this one, but we want to apply the
same minute as we did here, and we want to mask out the
subject that's the same way. It doesn't really make sense,
but just hold on here. We are copying the
masking as well. And I set the triangle, makes it so that just tells you that it
can't, it won't work. Setting. Now that I
am applying this, you can see that
there's triangle that just because the
subject isn't working, what you can do now is
it doesn't make sense for this. Of course. But if we just add
a subject here, we actually get the
selection and then you can drag it beneath,
delete the old one. And then we actually
have the same layer. So if you did remove something, all did some special
tricks or whatever, That's the way to
apply it again. And I love this example. We would probably delete these two brushes and
just have our selection. And we could do the
same thing up here, do the selection hidden bird, and then put it out here. And then probably delete
two brushes we have here. Now, we have from
our monkey edit, we actually have our
selections here as well. And I'll masking and it works. So I was just a small
extra tip and that. In the next video, I'll show
you how to combine some of the asks that you can do to make the subjects
stand out even more. I'll just see you
in the next video.
7. Advanced masking: Alright, in this video, I wanted to show you a few
advanced masking techniques that you can use together with the ones that
we've used today to make your subjects
stand out even more. And it's just some cool ways to combine these new
features that Live Room gave us in the reason to
update back in the late 2021. So let's jump into the
masking tool here. And we still have our
edit from before. So we still have
our masking here. We still have all our
different selections and different edits
that we've done. But what I want to
do now is I like to make sure that my foreground is a
little bit more dark. I like to make a gradient. We'll make a linear
gradient tool. And I'll just drag
it up from here, which I like to do and just make sure that it
covers a little bit more. And then I like to
drag down the shadows just to remove focus
from the foreground. Maybe hit down the
clarity as well. Now, if we don't want my
subject to be selected, what I can do now is instead of using the brush
tool to deselect it, if I hit O, you can see it
has selected some of it. It's subtle because
we've dragged this out. We could put it up even more just for the
matter of the example. And then I finally
hit over again. You can see that we've
actually darkened my arm and these parts as well. So what you can
do is you can hit Subtract and you can
hit the subject. Then what that will do
is they'll actually remove the selection of
me from that gradient. So what you can see
now is that we have, you're going to even see
the small preview up here. We have all the selected, but without me that makes sure that we've now darken
the background. We have an end, the foreground for that matter, but
we haven't done, is basically the same thing
as we've done up here, where we have inverted the subject and just selected
the entire background. But this allows us to
work together with the different tools
and then remove certain parts very easy
that we don't want. That way we can just have our linear gradient mask without interfering with us and still
have us stand out on me, stand out, the subjects stand
out as the way we want it. That's just one way
of combining the two. Now, another way that
I'd like to show you is let's jump into our
food photo once again. And if you solve that video, you also saw how we, let's hide this one again. This was our brush selection
that we did up here. Very ugly brush selection. Then I showed you another
technique that was our luminosity
luminance range. Sorry. What you can see here as we
talked about briefly in that is that it has selected
some other parts as well. We try to drag it out, make sure it didn't
select as much. But it couldn't be perfect
because if we go too far, now we don't have anything
selected down here. But now you can
see it's a little bit rough around the edges, which means that it
doesn't look as good. So we want to make sure that this up here
includes everything. But what you can do
then is subtract. And you can actually choose
the linear gradient. And then you can
just make a line up here that makes sure
that everything, this mask selects
everything underneath. But as we use it as
a subtraction tool, it has actually removed our
selection from down here. Now it's only selecting something without
luminosity range up here. And make sure that this is still only part
that is affected. And that is how we now
have the possibility of turning down our highlights even more and make it
look really good. The difference between
these two techniques are that this one is
a little bit more choppy and takes time
because we need to use the brush tool as we
did in the whole days. But this one, this new technique makes sure that we can
intersect and we can use these different
tools together to make sure that our selections are basically more
perfect and it's just way easier to work
together with these. There's different way
to use it as well. So let's jump into
our sunset shot here. Now, what do we do here
is that if we want to say use a gradient, linear gradient here,
and maybe we just wanted to have like
our sky selected. I know that there is
a sky selection tool, but that's not the purpose
of this right now. If we have a linear
gradient here, we can use in the
segment mask width, sorry, the second mask width. Then we could use a color range. What we have selected
now is we've said we want everything from above this line a little
bit below to be selected. But if we then use
the color range and we select the color
yellow from up here. You can see that now it's only
selected the yellow color, but it hasn't selected the
yellow color from the bottom. It's only selected the
yellow color up here. What do we can do is we
refine our selection. We can make more or less
of that yellow color. And that's just a way of
showing you how you can then Jews this exact color. You can do the same
width luminance. So let's delete the color
range again and then hit R intersect mask
wet, and hit aluminums. And then if we want to select
the darker parts into that, what do you can see now
as I'm this selected, you can see all the dark
parts actually selected. That's the selection that
our luminance range mate. But if I remove this
in C because it's intersected with our
linear gradient, it's only selecting
the top things that are in the shadow. So we can turn that down. We can make that much darker
to make it stand out even more without using more
than basically two clicks. What is it done? It has done basically is just to make a luminance range
and then it has inverted it. And then it's because it's on
top of the linear gradient, then that's how it works. That's just to show you how
you can combine some of these techniques and some of these tools to work
together with you very, very easily and very quickly. Whereas back in the days when
we didn't have these tools, we had to sit and mask
out everything with a brush tool, which
took forever. And it's one of the reasons
that I didn't do it. And not as much as
I do right now. It's just an easy way to make our subjects and
our photos pop and stand out way more than we had the
opportunities to do before. So that's it for
this video and I hope that it makes
sense for you. And that you got
something out of these advanced tools as well. Now, the next video we have a little bit
of a class project. I'll see you in that one.
8. Class project: Alright, thank you for
walking through the course. I hope you got something
out of it now, this class assignment
or class project, I want you to use two of your photos to do
the same thing. Use some of these
techniques using this mask. Then upload them to
the class project. And I want you to upload
both the raw image. So just make sure that you
export that all, include that. And then it doesn't have
to be the raw file. You can just export it as a JPEG before you start editing. Then show me the edit as well. You can even include a version where you've just done the base edit
if you want to do that. But one are basically he
wanted to see from you is how you go about the selection tools and how you make your subjects stand out. If you upload those, I will give you some feedback
on what I think. Now we went through
everything quite quickly in this tutorial because it didn't want it to
drag out too long. But make sure that you make these changes a little bit
more subtle than maybe I did. I saturate it a
little bit because of the emphasis on the
techniques and the tools. But what you really want to do with these tools or
these from my perspective and my fault is that you want to make it as subtle as possible so that it doesn't come out as it isn't the purpose like
it wasn't shot like that. But it's more a matter of
making it stand out just a little bit more and
draw our attention into the photo without
making it too obvious. So I'm really looking
forward to seeing what you do with these techniques and
how we make use of them. Welcome to include a node or
some texts on what you have done so that I can basically see what tools you've used and
what features went by wet. But I'm looking forward to see your project and give you
some feedback on that.
9. Thank you for learning with me!: Thank you very much for going through this
course with me, and I hope you got a
lot of value out of it. I was surprised by these masking tools myself
when I first found them. And be honest, I felt that was a little bit like cheating
in the beginning. But then as I got used to them and I saw the
value of them, I have used them on all
my photos ever since. Think it's just a
game-changing feature that they have launched and it helps us so much to make greater edits a lot faster. I'm just very excited to
share these with you. If you want to give
me any feedback, please leave a review. I'd love to hear what
two-fold about the calls and improvements for what I can make different than the future. I hope to do a lot more causes
and materials like this. And you're also welcome to
hang out with me on Instagram. My profile is at Alex. Yeah, I do daily updates
on my life in there. If my stories and you can
follow along how it is to be a digital nomad as I'll just jumped
into that lifestyle. Bring forward to hopefully
seeing you that as well. But otherwise, just happy that you watch the course and I hope, hope you learned
something so on. So the next time, take care.
 Alex Bjørstorp, Digital Nomad & Visual Storyteller