Transcripts
1. Introduction: You want to make your first repeating pattern in Procreate, but have no idea where to start? Maybe patterns feel complicated or you think you
need to be good at drawing before you can
create something that actually looks good. You don't. And in this class,
I will show you how to create your first repeating
pattern in Procreate, starting super simple and
building your skills as we go. Hi, I'm Maya Faber. I'm a surface pattern
designer and online teacher, and I have taught
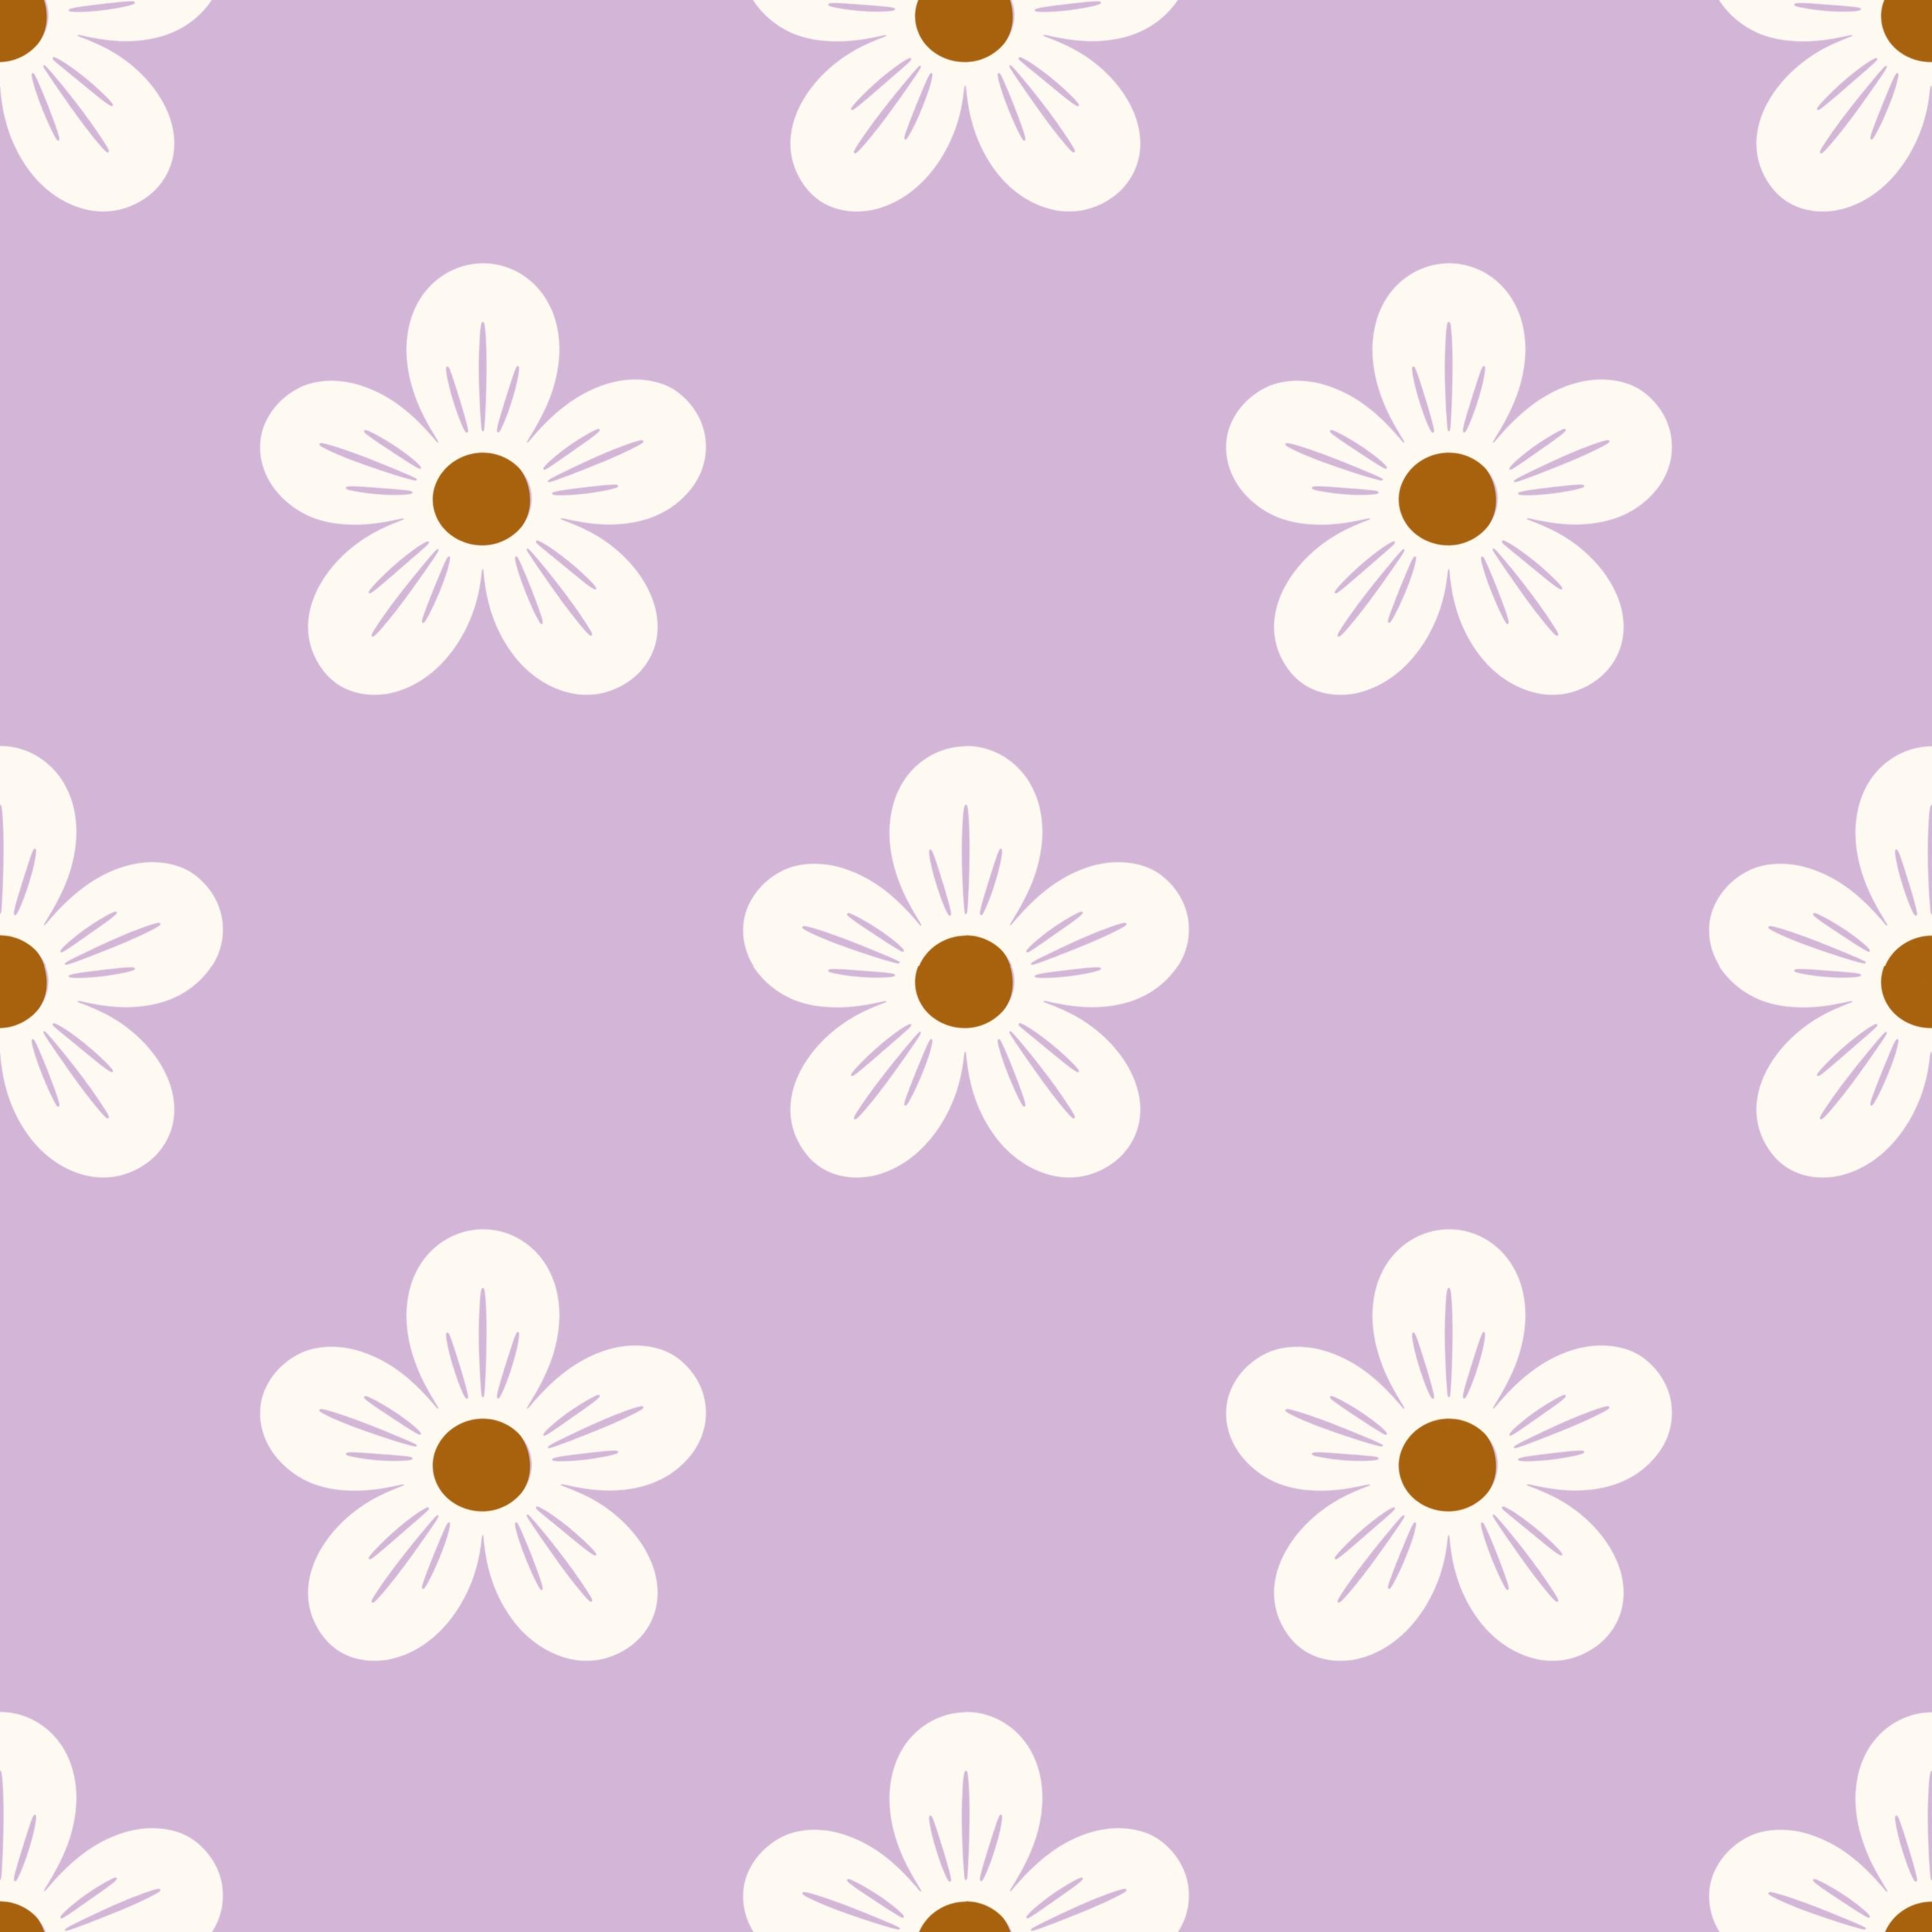
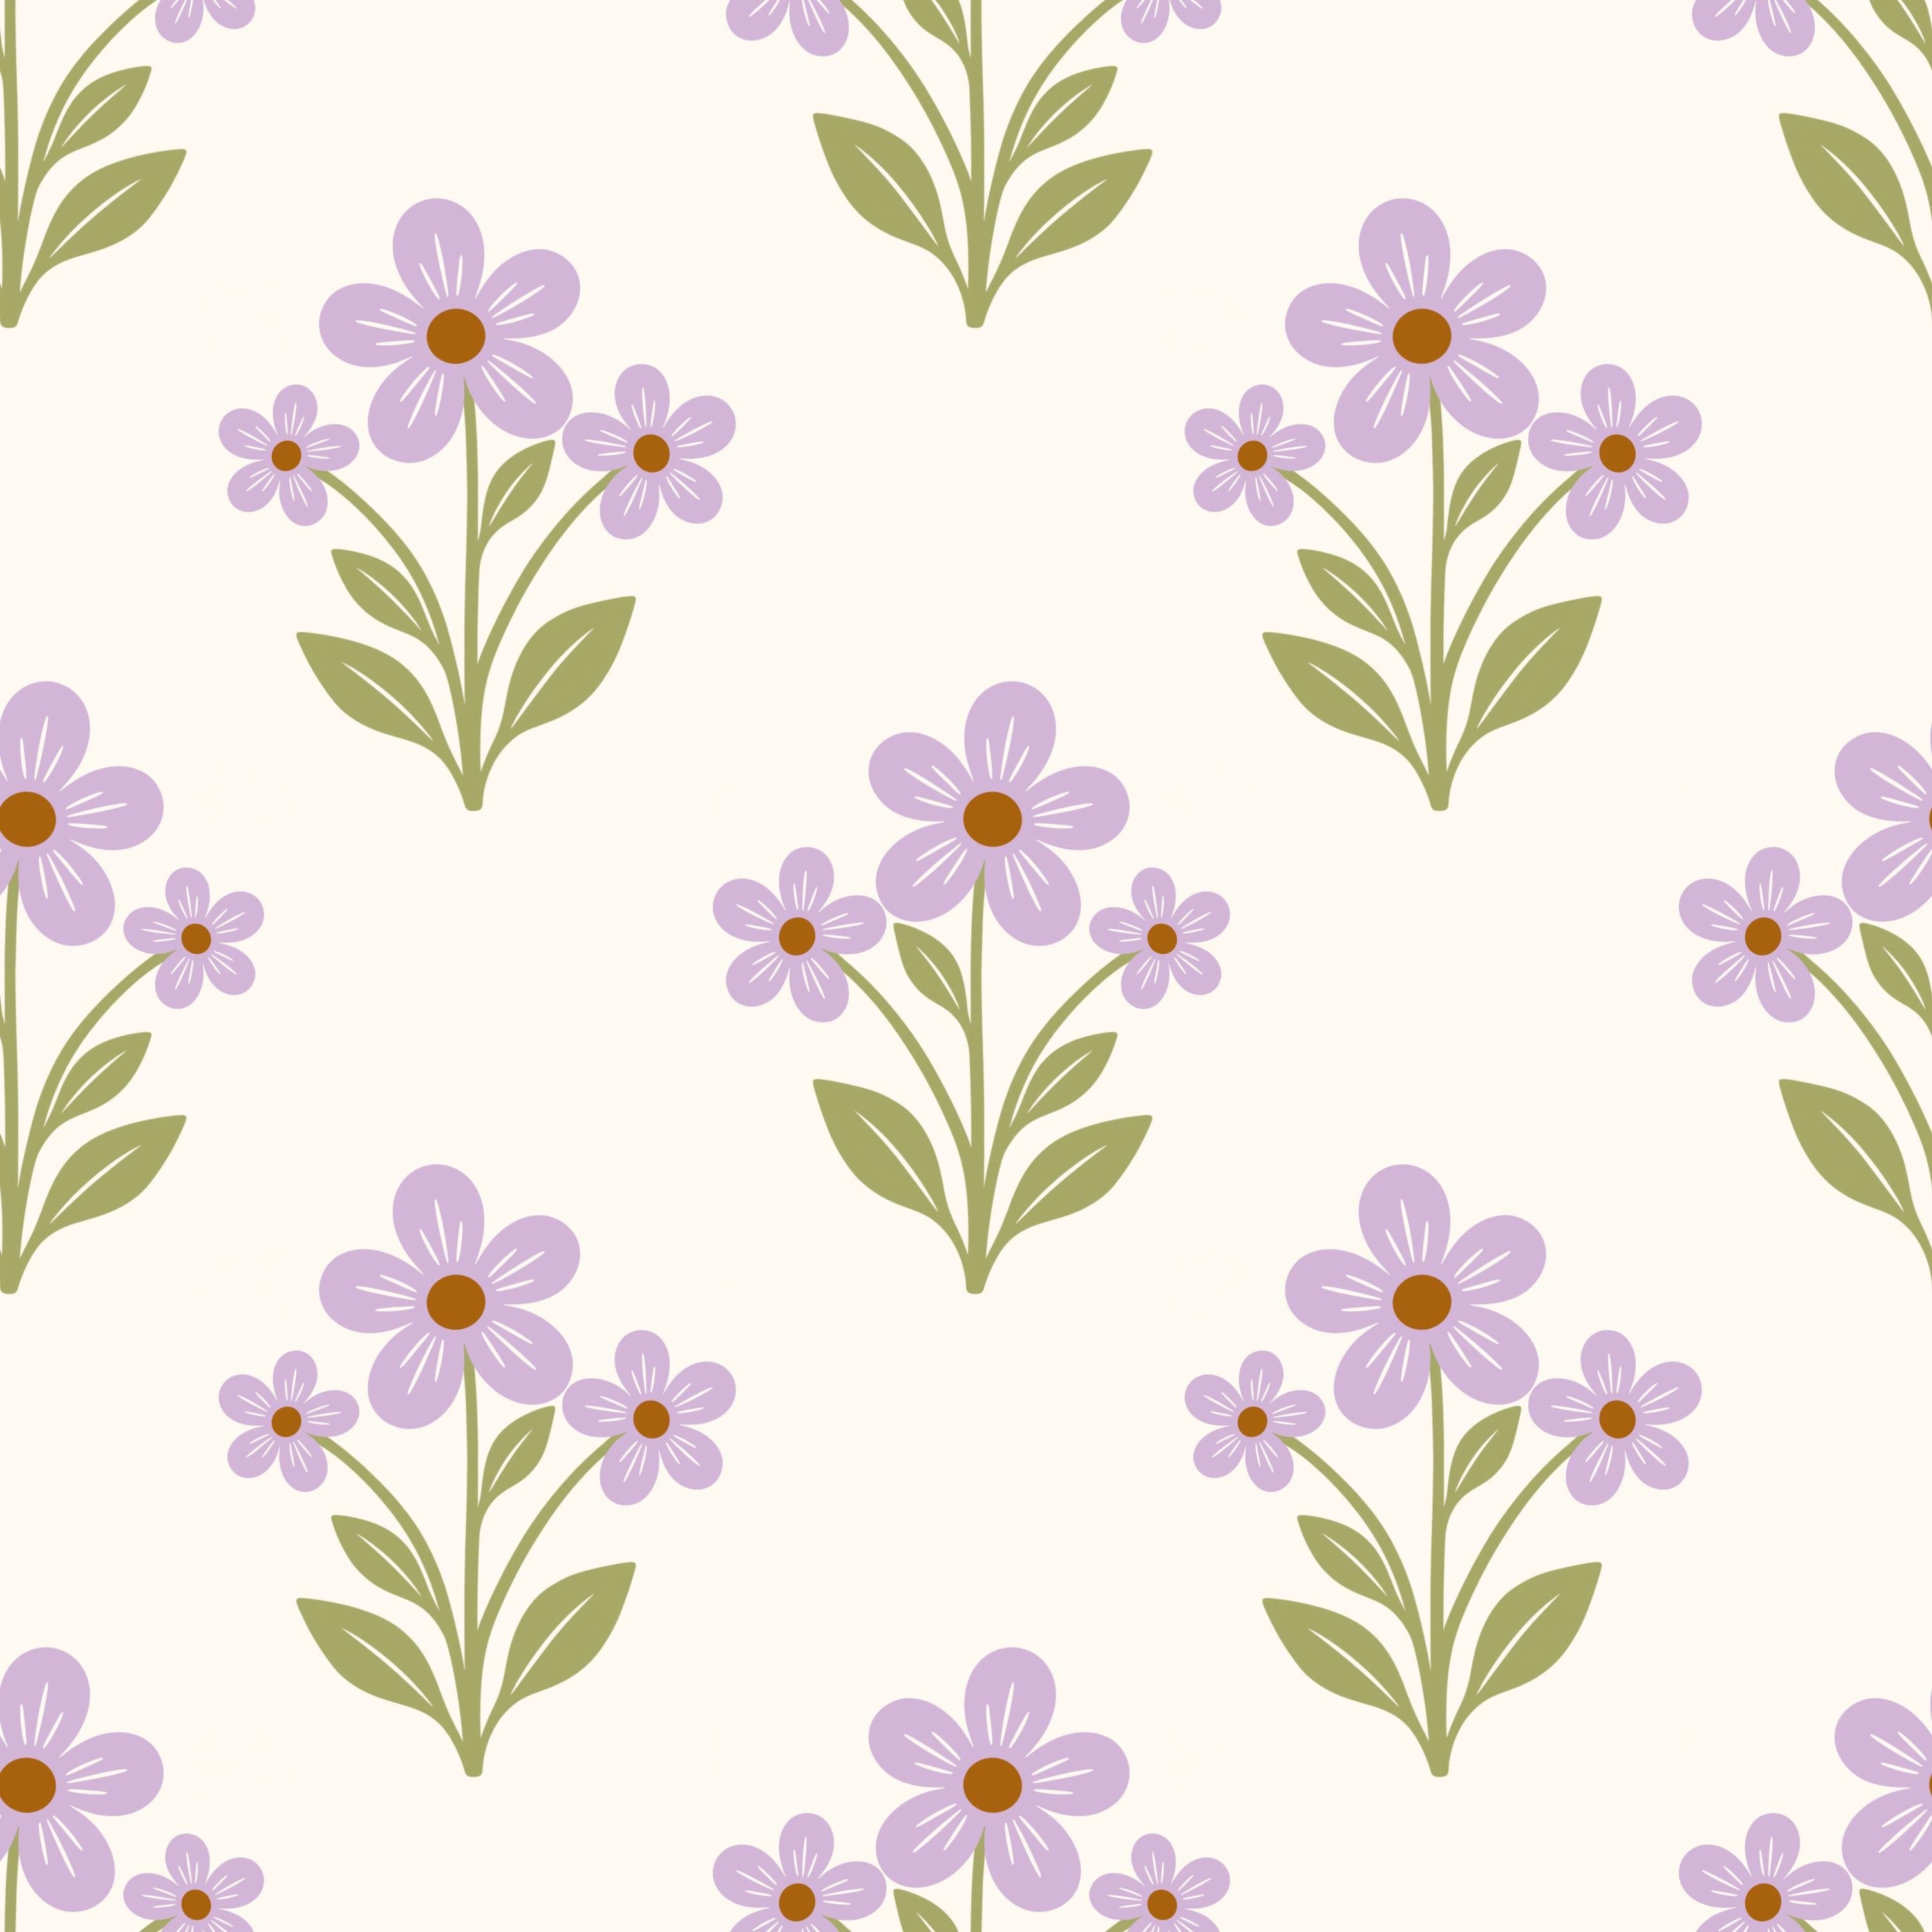
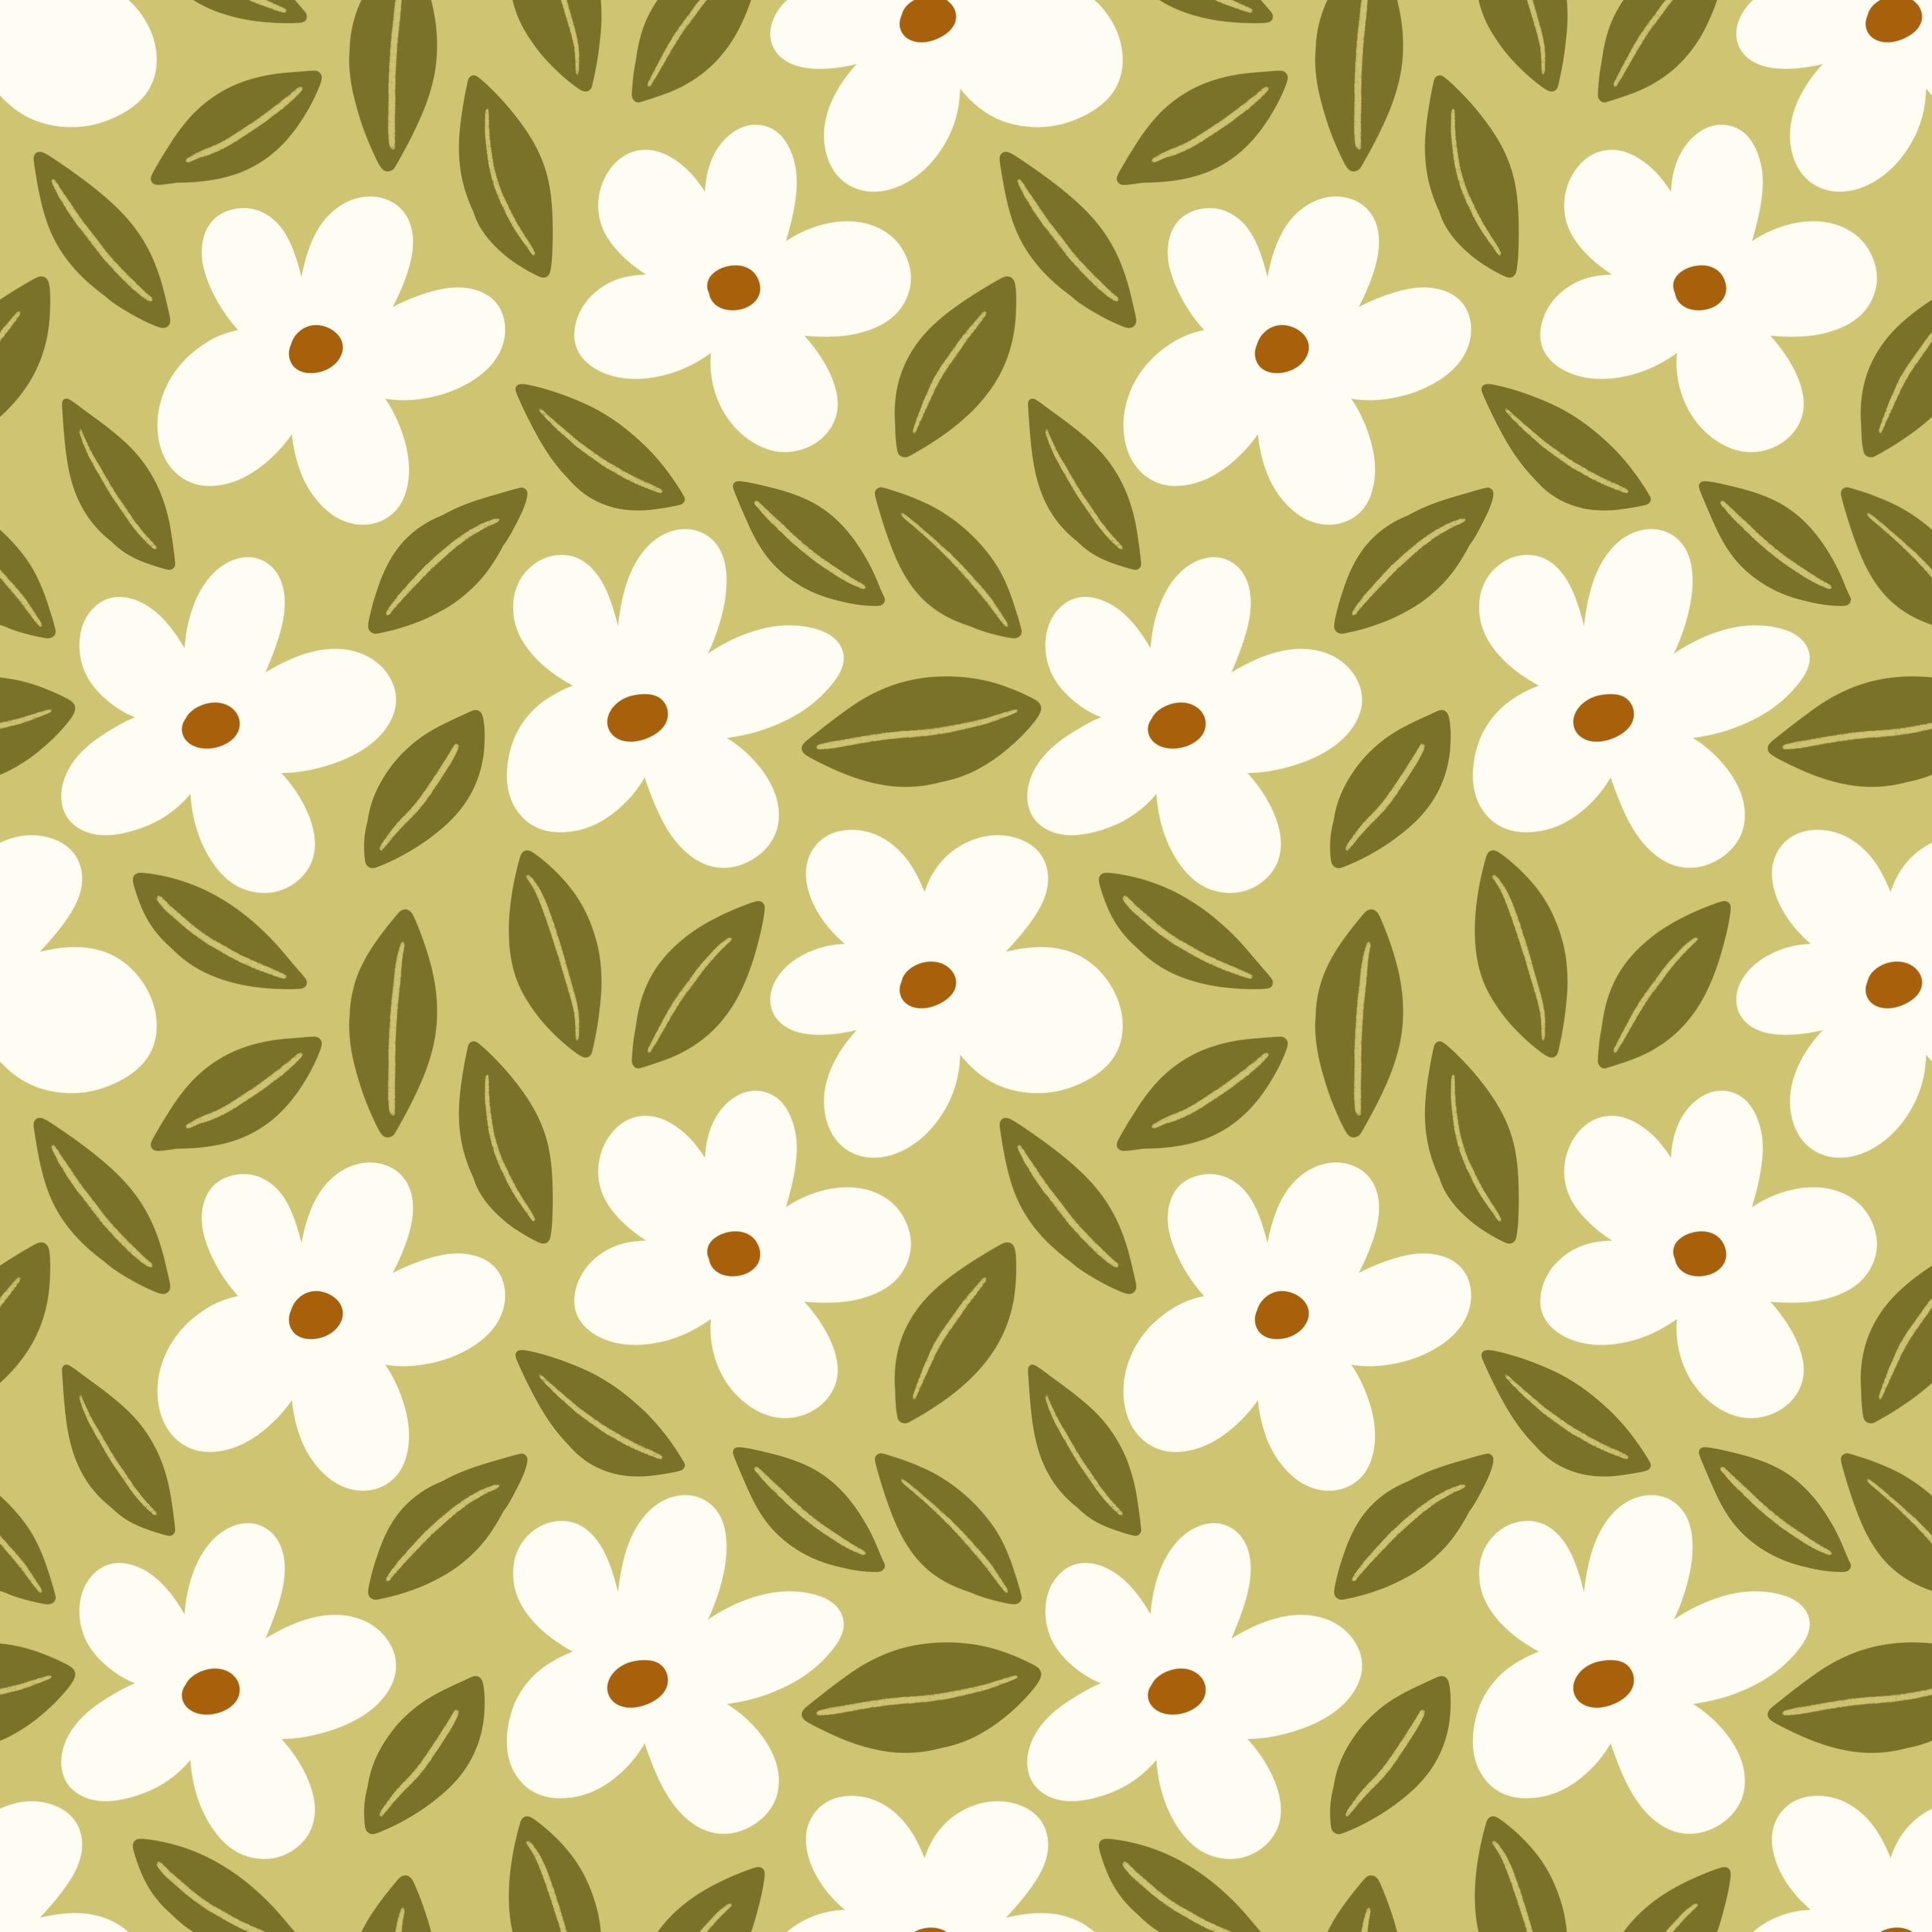
pattern design to more than 120,000 students worldwide. Together, we will create these three floral patterns using three different methods. We will start with a
really simple pattern using the stamp brushes
included in the class. That way, you can focus
completely on understanding how a repeating pattern works
without worrying about drawing. Then we will take it a
step further and create a more detailed
floral pattern while learning a second way to
build a seamless repeat. And finally, we will draw our own simple flowers
and leaves and create our third pattern using my favorite way to make
patterns Improcret. And if you don't want to draw your own motifs yet,
that's not a problem. I've included stamps that
you can use instead. You will also get a
procreate brush set, a ready made color palette, and a pattern template so that you have everything you
need to follow along. Along the way, you will learn the procreate tools you actually need for
creating patterns, how to recolor your patterns, test your repeats, and export
your finished designs. You don't need any
previous experience with patterns or procreate, and you don't need to
be good at drawing. By the end of this class, you will have created three repeating patterns in Procreate. And more importantly,
you will know how to start creating
more on your own. Patterns doesn't need
to be complicated. It can actually be really
simple and a lot of fun. So let's get started.
2. Downloads & Resources: Let me quickly show
you how to install the resources that is available to download
in this class. You have the pattern
perfect template, the first pattern color palette and the first pattern brush set. There are two ways to install. You can install them from
Inside Aprocreate or from your downloads
folder on your iPad. So if you want to
install the brush set, you simply just
tap the brush set and it installs
inside of procrt. If you want to install
the color palette, that works exactly the same. You just tap it and if you want to install the
pattern perfect template, you just tap that one, two, and all of these are
now inside apcrte. That is the pattern
perfect template, which I will show you in a
later lesson how to use. And if you have a look. Oops, in your brush set, you can see that I
have installed many of my first pattern brush sets over here and I have my first pattern
color palette over here. If you can't find your first
pattern color palette, it might end up at the very
end of your color palette. I have a bunch of
color palettes, so I needed to
scroll all the way down and it ended up here. You can tap and move
that one if you want to the most important
part is that you have your color palette in Procreate. If you want to install your brush set and
your color palette, inside of procreate, you can always tap your
little brush symbol. You can tap the little plus sign up there and
import from files. Here you can find your
first pattern brush set and that installed
number four of that set. Here you can tap the plus
in the color panel and tap new from file and then tap your first
pattern swatches. Scroll up there you can see that you have got your color palette inside
a procrt at the top. I would actually say
that it's easier to install your color palette
and you brush set from when you're insider procrt because
then your color palette will end up at the top
of your color panel, which can be handy. I have two here, that
really doesn't matter, but I can just delete my copies, tap the brush set and delete those because I only
need one of those. And I can delete one
of those as well. Now I have one color palette, oops, and one brush set. If you want to add the pattern perfect template
from inside of Procreate, you can tap Import and
you can tap your file. That is how you import a procreate file from
inside of procreate. Now you have all
of the downloads in Procreate and we're
ready to create our
3. What is a Repeating Pattern?: Before we jump into Procreate, I want to quickly explain
what a repeating pattern actually is and what we are going to
create in this class. A pattern is simply
a design where one or more elements are
repeated across a surface. The elements in a pattern
are often called motifs. A motif can be almost
anything, a flower, a leaf, a fruit, a shape, or something
completely abstract. In this class, we are going to work with simple floral motifs. But what makes a pattern
a repeating pattern? A repeating pattern is built from something
called a patentile. Pentile is the center of the design is where
you draw your motifs. In this case, it's a square. When we place copies of that square next to
each other to the left, right above and below, the design continues
without any visible breaks. That's what we mean when we say that a pattern is seamless. For that to work, anything
that crosses an edge of the pentile needs to continue in exactly the same place
on the opposite edge. If part of a flower crosses
the right edge of our tile, the rest of that flower
needs to continue from the left edge and the same thing happens between
the top and bottom edges. This little square
pentile is what we will actually be creating and
procreate throughout this class. There are several different ways that pentiles can repeat. In this class, we
are going to create something called a
full drop repeat. Full drop repeat is the most basic type of
repeating patterns. The patent tiles are simply
placed directly next to each other and directly above and below each
other like this. There are other types
of repeats too, where the tiles can be
offset from each other, but we won't need to get
into those in this class. Are going to focus completely
on full drop patterns. And throughout the class, I will show you three
different ways to create this type of repeating
pattern in Procreate. The methods will be different, but the basic idea
is always the same. We create one
square pattern tile where the opposite
edges match perfectly. And when we repeat that
tile in every direction, we get one continuous
seamless pattern. Now that you know what we are
actually going to create, let's open Procreate
and get started.
4. Getting To Know Procreate: Before we start making
our first pattern, I want to quickly
show you around Procreate and the tools that
we will use in this class. There are many features and
tools inside of Procreate and that is a whole class
of its own to dive deeper into each of these tools. In this lesson, I will show
you just the tools and features that you
need to be able to create your first
pattern in Procreate. If you have used
Procreate before, you probably know
most of this already, feel free to skip ahead
to the next lesson. The only thing that we will do in this lesson that you need for the next couple of lessons
is to create a new Canvas. If you know how to do that, you can just skip ahead. But if you're completely
new to Procreate, this will give you everything that you need to follow along. Let's start here in the gallery. This is the start screen that you get when you
open up Procreate. I have a bunch of things
here and that is just because I have created
a lot of artwork. Mine are single
files or canvases, as it's called in Procreate, and then I have
these stacked files. That is folders. Let me quickly just
show you how you can stack your files if you
want to do that later on. You can just tap two
files and tap stack, and that will create
this type of folder. That is just an explanation
of why my Procreate gallery looks like this while yours
may have single files. The first thing that
we're going to do is to create the canvas that we
will use for our patterns. We do that by tapping the plus symbol up in
the top right corner, and then you tap this little
folder symbol up here. I usually go for pixels. With my patterns and 3,000
pixels in width and in height. That's a good standard size. I keep my DPI, which is the resolution on 300 and maximum
layers only shows me how many layers
I can create in this procreate file when I
have these other settings. The next thing that
we will do is to tap color profile and I always go for RGB and the first SRGB
that you see up here, and then I will tap the
little check symbol to create my Canvas. Now we are inside of the Canvas. If you want to head
back to the gallery, you tap gallery, and then you can tap into your Canvas again. Now we have our square
canvas and this is the size that we will use
throughout this class. Let's have a quick look around the procreate
interface, the tools, and what we need to know to be able to create our first
pattern in Procreate. So up here, you find the main tools that we use
for creating our patterns. First, we have the
brush library. If you tap the brush icon, you will have a
brush library here. Yours might look different from mine because I have created a separate brush library
for teaching where I only have the brush sets that
I need for that class. But you will probably have a different library and
you can access that if you squeeze out and you will probably have
the Procrit library or the classic library. Which library you have
really doesn't matter. But mine is only showing this first pattern
brush set which is available to download
here in this class. When you have a brush selected, let's choose this monoline one, for example, you have two different sliders to
the left of your screen. The top one is your brush size, which you can drag up and down. To choose different
sizes of your brush. You can see that my
brush size settings have these little marks here
and that is because I have saved brush sizes
from that brush. If you want to do that,
you can drag up and tap the plus over there and then you have saved
that size for later. This little slider is the
opacity of your brush. In this class, we will
only use maximum opacity. The next thing that we
will have a look at is the color panel, which is this little round
symbol up here with a color. If you tap into that,
I have palettes selected down here and the
first pattern color palette, which you can download here in class and which is the
one that we will use. I will just tap
into one of those and you can see that
it's marked up here, which means you will also show that color palette in this classic and in
the disc, for example. If you choose another color palette and go back to Classic, you will have another
color palette down there. I will tap into first
pattern color palette. We will use these colors if you want to
change the colors, you tap into classic or
disc which one you prefer, I usually go for
classic and then you can experiment here
with different colors. You can just change the
colors just a little bit or change them completely. So the color palette is something that you
can experiment with or the color panel is
something that you can experiment with to
understand how it works. But for this class, we will use the premade color palette, which is called first
pattern color palette. Next, let's have
a look at layers. Tap the layers icon up here and you can see
that in this Canvas, we only have one layer. If you tap the
little check mark, you will show the layer and hide the visibility
of the layer. To create a new layer, we tap the plus symbol and then if you draw
something on that layer, let's use another
color, brown color, and I will just draw
something on that layer, and then I can uncheck the
visibility of the layer below, which means that I
only see that layer. You can also tap and drag to change the
position of the layers, which can come really in handy. And you can delete the layers by swiping to the right
and tapping delete. Let's tap the plus again to
add a new layer and up here, we can, for example, select both layers by
swiping to the right, tap the layers and tap group, which also can come in handy. Layers are basically
separate pieces of your artwork stacked
on top of each other. We will use layers a lot
when we create patterns, mostly because it's
the easiest way to separate your colors so that when you want
to recolor pattern, you can just recolor one layer and that will make your
colors crisp and your edges crisp and you won't
lose any resolution or things like that when
you recolor your motifs. Don't worry if all of
this feels new right now. We will use layers and all of the other tools that I show
you throughout the class, so you will get
plenty of practice. Another important tool
is the transform tool, which is the arrow up here. We will use this
when we need to move motifs and different parts of our pattern
around the canvas. With the transform tool, we can move all of the motifs and objects and everything we have
drawn on that layer. If you want to move it smoothly, you can just tap snapping
over here and turn off that and then you can move
it exactly as you want it. You can rotate your motifs, you can make them
smaller and larger. One note here is that as
procreate is a raster based app, you can't really upscale
your motifs too much, meaning that if you have
your motifs in this size, you can make them smaller, but you can't make them larger
without losing resolution. And another note is that
when we create patterns, we always have bicubic
set here because that is the best way to keep a good
resolution in your patterns. Make this setting now so we will keep it
throughout the class. The next tool that we will have a look at is
the selections tool. I will just tap
the arrow symbol, the transform tool, and
tap the selection tool. With the selection
tool, you can select different parts of your artwork. We will use this
later on in class, especially when we
create our third pattern with the selection method. But the selection tool is generally that you can select different parts
of your artwork. Let's say we choose
free hand over here, and you will tap and drag
around what you want to select, tap the little gray symbol, and then you can, for example, tap the transform tool
again and move that part. There is a lot you can do
with the selection tool, and I'll go through
exactly what you need to know about that
later on in class. So another tool that can come in handy is
the eraser tool. If you tap into the eraser tool, you can choose which brush
you want to erase with. I usually go for a
solid mon line brush like the Monoline One brush from the first
pattern brush set. Then I can choose the size of my eraser brush and I
need to choose a layer. Let's choose that layer. Then I can just erase
parts of that layer. That can be good to know. How you can erase
parts of your drawing. There's also a few basic
gestures that is useful to know. You can use two fingers to zoom in and out of your canvas. You can rotate your canvas in different directions
if you make a mistake, you can tap with two fingers to undo and if you want
to redo something, you can tap with three
fingers to redo. You can also use the undo symbol over here and the redo
symbol over there. For now, this is all that you need to
know to get started. Procreate has a lot of other features,
tools and settings, but you definitely
don't need to learn everything before you
start creating patterns. Throughout this
class, we will look closer at some of these
tools and settings as we need them and I will show you exactly what to
do step by step. Now that we have our
Canvas ready and you know your way around the
basic Procreate interface, let's create our
first repeating.
5. Method 1: Create Your First Pattern: Let's start with creating
our first pattern. If you watch the
previous lesson, you might have created
a Camas already. But let's just quickly do that one more time if you
haven't done it already. Tap the plus in the top
right corner and then tap the little folder symbol up here and type in 3,000 pixels, pixels down there
width and in height, and I will keep my DPI to 300. Then I will tap color profile and under RGB I tap
the first SRGB. And then I tap the chick
and I am in my new canvas. The very first thing that
we will do in this lesson is to tap the layers panel and
we have a layer over here. We will fill this layer,
I'll just clear that. We will fill this layer with the purple color from the
first pattern color palette. So I will tap the purple color, tap the layers panel, tap the layer and
tap fill layer. Now we have a background layer. If you want to
rename your layers, you can tap the layer, tap rename, and
type in background. I won't rename all of the layers in this class
because to be honest, I usually don't when
I create patterns, but I just wanted to show you how you can
name your layers. The next thing
that we will do is to tap the plus to
add a new layer, and here we will add our flour. Tap the color panel and
in the color palette, you have a cream white, choose that one, and then
I will tap the brush set and tap the flour stamp. This way, you don't
need to draw anything to understand how
a pattern works. We will just use the brush stamp and you can adjust the
size, as you can see. There's different sizes
depending on where you tap or where you adjust
that scrolling menu. If you also twist your canvas, you can add flowers in
different directions. However, I will undo
with two fingers because I have made it so that if you drag up your brush size to 100%, you will get the same
type of flower as me and the exact right size, and then I will just tap
one time on your canvas. It doesn't matter
where it ends up because now we will tap
the transform tool, the arrow symbol and
make sure that you have snapping and magnetics turned on down here in the
bottom left settings. Snapping and magnetics
should be turned on. Those are blue when
they are turned on, and then we will tap and drag
our flower to the center. How do we know when
it's in the center? We know because your guidelines will turn yellow in
both directions. As you can see now, we have
a guideline that's yellow in the horizontal
direction or almost we had and not in the vertical, but now as we pull
this in the center, you will get a yellow
guideline there. Now you know that
it's in the center. So then we can tap
the transform tool, and now we know that this
flower is in the center. The next thing that we want
to do is that we want to add a little round blob at
the center of the flower. I will tap the layers panel and we can rename
this layer to flower. In this first pattern, we will rename all
of the layers, but I probably won't when
we continue with the class, but now you know how to do it. Then I will tap the plus to add a new layer and I will tap and drag that layer
below the flower. Because that way, when I choose a color from the color panel, the brown color, and I
will choose a brush, the monoline one brush, I know that when I
draw with this brush, it will end up at the
bottom of the flower. If I would tap and
drag the flower below, it will end up above. We can just erase this by either undoing or you can tap the transform tool and just pull out that from the canvas because that means that it has
actually been deleted. Then I'll tap the
transform tool, and now we don't have
anything on that layer. That's a good thing to know
in procreate that if you move things out of the canvas,
they are deleted. But now let's head
into that layer again. Layer three. I will pull
that below the flower layer. I will tap the
brush monoline one, and now I just want to draw
around little blob here. As you can see, it
doesn't matter if I draw here unless I come up there because then you can see the brown from
beneath the flour. You can either just
draw in like this, or you can draw
around little blob. And then you can tap and
drag to fill the motif, the outline with the color. Now we have a flower with a
brown blob in the center. The next thing that
we want to do is to duplicate the flour because we will place
the exact same motif. This one, just a
copy of that one at the edges of the canvas to
create a repeating pattern. What we'll do first is to just swipe to the right on the flower layer
and let's call this, blob and the blob layer,
swipe to the right, tap the layers settings
up here and tap group. Now I will swipe the right on that group
and tap duplicate. That means that we have
duplicated this group. If I now tap the transform
tool and move the group, you can see that I'm
moving the full layers. You could also merge the layers. Let me show you how to do that. You can tap that flour
and tap merge down, or you can swipe them together. That way, you have made
it so that the brown and the white layers are on one layer that is
perfectly fine to do. However, what I always go for when I create
patterns is to separate the layers as much as possible because I
don't know if I want to change the colors later on and right now when we
have solid shapes, it will probably
be okay to change the colors even though we
have them on one layer. But when we start to use
textures and things like that, it will be much more difficult. I always have it
as a rule to keep my layers or my colors
on separate layers. I will just delete that
group where I used as an example and I will duplicate this group
with the flour. I will actually duplicate it
so that I have four copies. I was swipe to the right
and duplicate the group, swipe to the right,
duplicate the group. Now I have three copies
and duplicate the group. Now I have four copies
of that flower. This is the very easiest
way to create a pattern. It only works with a
few very simple motifs because I will show you
what we will do next. We will take one
of these groups, take the top one, for example, I will just zoom out
a bit so that I can see the edges of my
full canvas here. Then I will take the full group, tap the transform
tool and then again, make sure that you have bicubic
as a setting over here. We went through that
earlier in this class, but in the
interpolation setting, always have bicubic
when you create patterns to keep the best
resolution as possible. So what we will do is just to take this flower,
as you can see, we have some little
nodes here that mark the center or the edges and the center of the edges of your layers or of your
motifs on that layer. So what I would do
is to tap and drag. Again, I make sure that I
have snapping and magnetics turned on under the snapping
settings because this way, I will tap and drag up and
you can zoom in a little bit. As you can see, it snaps when it's
at the center, these blue little blobs. So this one that you pull
to the top right corner, you want it to snap exactly
at those blue nodes. If you don't you
make it like this, you won't get a
repeating pattern. Make sure that it snaps and that you have these
yellow guidelines. When you have snapped it, you tap the transform tool
and that way you have placed a fourth of that flower
to the top right corner. You will understand
why in a moment, but just keep creating with me and I will show you how
this becomes a pattern. Choose the next group with
a flower in the blob, tap the transform tool, tap and drag up to
the top left corner. You can zoom in if you need to and just make sure
that it snaps over there. On both that side and this side. This is a little bit
sensitive or a lot sensitive to if you happen to notch a pixel over
here or over there, then it won't match correctly. This is also why I don't
prefer this method and you will see later
on in this class, which method I prefer to
make patterns in Procreate, but this is the
simplest way to do it. I wanted to show you that first. When it's snapped, you tap the transform tool
and now you tap the next group and tap the transformed chub and you drag it to
the bottom left. When you see the
yellow guidelines, you tap the transformed
chub to place it, zooming out again,
tap the layers again, tap the last one of
the copies, the group, and then you pull
that to the bottom right corner and you can zoom in and you see that it had these yellow guidelines
and you snap it and tap the transform
tool to place it. As you can see now, we have placed the flower, a fourth of the flower
in each corner. That way we have made
that flower repeat. So what we can do now is
to just tap at the top of your layers panel and you can swipe down with three
fingers and tap copy all, or you can tap actions
panel and tap Copy Canvas, and then you tap either the
action panel and paste, or you can swipe
down and tap Paste. Both works. So now you
have that merged image, which is what you see on
your canvas on one layer. What we want to do now is to tap the transform tool
because now we want to see how this pattern repeats. You tap the transform tool, and now you zoom out so that you see all of the
edges of your canvas. You have snapping and magnetics turned on steel and
uniform selected, and then you tap in
the bottom right node, and you drag that one down until you see half of
the size of your Canvas, which is 1,500 pixels. If you think that this is
a little bit difficult, you can turn on
the drawing guide. You can tap the access
panel, Canvas drawing guide, Edit drawing guide, and pull up the grid size to maximum
and then tap the chick. Now you have divided your Canvas into a guideline that
is at the very center. Now we can tap that image again, tap the transform tool, zoom out so that you see the four corner
nodes and then you tap and drag until it
snaps can't be 15 oh one. It needs to be 1,500 exactly. Then you let go and tap
the transform tool. Then we will duplicate this layer by swiping
to the right, duplicate it, tap
the transform tool, and then we will tap and
drag until it snaps with the yellow guidelines over here and then place it
with the transform tool. Then you can merge these layers together by squeezing them together or tapping the top
layer and tap merge down. Now we can swipe to the right on that merged layer
and tap duplicate, tap the transform
tool and drag it down until it snaps and then tap the transform
tool to place it. Now we can merge these
layers together. You have a repeated
pattern tile over there. We can just turn off the drawing guide by tapping
the action panel Canvas, turn off the drawing guide. And here you can
see that you have created your first repeating
pattern in Procreate. This is a very
simple pattern with only one motif that we
pulled out to the edges. You can do this technique with a little bit more
advanced motifs, but it's hard to get the
snapping right at the edges, and I would recommend the other methods that I
will teach you later on in this class because those will make it more possible to make your patterns right
from the first time. So this is your
very first pattern. As you can see, I just want to show you now where
the patentile is. Let me just quickly outline
the pentile for you. We started by
creating a flower at the center and then a fourth of that flower on each center. The pentile is actually here then is just repeated
to the top to the bottom, and to the sides. That is the basic of a repeating pattern and also
how this pattern works. Now you have created your
first repeating pattern and we will move on
to the next method.
6. Method 2: Build Your Floral Motif: Let's get started
with method number two of creating a pattern. Before we start, I
just want to mention that method number one that we did in the
previous lesson. That is the very basic way of
creating a repeat pattern. You can't use that with all different types of
patterns and with a bunch of different motifs because it will get really hard to make
a pattern that way. However, I just wanted
to show you that because that is the easiest way to
create a pattern in Procreate. These two next methods, method number two and
method number three, they will give you exactly
the same result and you can create exactly the same type of pattern with
these two methods. Which one you use depends
on which one you prefer. I prefer method number three, and that is the method that doesn't leave room
for too many errors. So that is my preferred method. But method number
two works perfectly great for creating
patterns as well. It's just a matter of making a little bit more
room for making some more errors when
you create patterns. However, some prefer Method number two, and
then you can use that. So with that said, let's move on and create a pattern with
method number two. The first thing that we
will do is to tap the plus, and as you created the
3,000 pixels square, you can scroll down and you
have that at the very bottom. So we created that canvas
in the previous lesson, so we can just tap that, and we will create
a new canvas with exactly same settings as you
did in the previous lesson. So for this pattern, we will tap the layers panel, and on the first layer, we will use the
cream white color from the first pattern
color palette, and I can just tap the
layer and tap fill layer. So now we have a background
box with a cream white color. If you want to continue
to name your layers, you can definitely do that as we did in the
previous lesson. I will just move on with
creating the patterns without naming the layers
because to be honest, I usually don't name the
layers when I create. So we have our background, and now we want to
create our floral motif. So what I will do
is to tap the plus, and I want to use the medium green color here from these
three green colors. So I will tap that one. I will tap the first pattern brush set, and I will tap the stem stamp. So in this method, in this lesson that we
will create this pattern, we will use the stamps as well. However, you can definitely
draw your motifs as well. But we will use the
stamps in this method, and in the last method, we will draw our own motifs. So use the stem, and I have made
it so convenient. I have made 100% in brush
size is the perfect size so that you will
create the same size of your floral motif as me. Again, we stamp one time with
our stamp on the canvas. It really doesn't matter
where it ends up as long as it's not cut
off by the edge. When you have that on a layer, you tap the Transform tool, you make sure that you have snapping and
magnetics turned on. And then you just tap
and drag your motif until you have two yellow
lines, which is there. We have yellow line there
and yellow line there. Now we have that in the center. We might want to shift this a little bit further down when we have
placed our florals, our flowers on this stem
because then the center of the whole motif will be
a little bit switched. However, for now, we will use it like this and
then tap the Transform tool. Then I will tap the layers panel and I will tap the plaster
to add a new layer. Because again, as I
mentioned before, when we create
different parts of the motifs and especially
different colors, we want to separate
them in layers so that we easily can recolor
the pattern later on. So with a new layer,
I will choose the purple color and
the flower stamp. And now we can choose
the size of the stamp. This is a little bit too
small. Let's see here. I have 58 saved. I think that that works great. So I will just zoom
in a little bit and turn the canvas,
as you can see, if I turn the canvas that way, the flour will rotate
along with me. I will just tap two fingers undo and I can swim
in a little bit, and if I have the canvas
straight and place a flower, the flour will be
placed straight up, but I want it to
move a little bit to the right as the stem here moves a
little bit to the right, so it will just look
a little bit better. I'm just twisting my
canvas a little bit. And then when I
think that it has a good angle, I place it. Over there. Yeah,
that looks perfect. Then I have my first flower
and I can rotate back with two fingers and pulling the canvas in
different directions. I will try a different size. Let's try 37 in brush size on the flower and move it around a little bit until I find
a good angle for that. Maybe over there. I don't want these two flowers
to overlap for desmotif. You definitely can if you want
to, but I don't want that. And then I move on
to the third one and I rotate the canvas. We can save that if we want to. Save, oops, tap that, tap the plus, to save that size. And let's just put it
down a little bit. So we had 37. Let's do 33
and see, maybe a little bit. 29. So that's a smaller one. Yeah, I think that looks good. So now we have the three
flowers. Can we save that? Yeah. So we have three sizes
saved now 58, 37, and 29. If we want to save the sizes or reuse the sizes of the
floral stamp brush, we know that those
were those sizes. Okay. Moving on. Tap the layer that has the stem on
it and tap the plus. Now I want to add the center
parts of the flowers. So I will tap the color palette, tap the brown color, tap the brush set
and monoline one. And one thing that I want to mention is to make
sure in this pattern, you can, of course,
do as you want to, but that you have
100% in opacity. Otherwise, you will
get a brush that is different from
the other colors. All of the colors on this
pattern should be 100% opacity. Now I will just draw in my
little blobes here. Oops. What happened? I don't know. And I will just draw
the blob there. As you can see, I
don't mind if I go up here because
that won't show, but if I go up there,
that will show. So we'll just undo
that. And then here. And here I can see a little
thing that I don't like, and that is that this
green part is shown here. So if I zoom in, you can
see the green part there. So now the eraser tool
will come in handy. So I will tap the eraser tool, and I will use Monoline one with eraser tool and go
on the stem layer. So make sure you're
on the stem layer. And with the eraser tool, I can pull down the
brush size a little bit, and I will just erase this green that I can
see through here. So that was easy. And actually, I have a
little bit here too. Can you see that? I
will just erase that. Okay. So now this looks great. And the next thing that
we want to do is that we want to swipe to the right
on these three layers, tap the layers panel tap group. And now I want to tap the group, and I will just move it to the center because
now you can see, if you zoom out that the flower with the stems
aren't exactly in the center. So I can just tap the group, tap the Transform tool, and move my flower. It's snapped quite far down now. So now we have the
yellow guidelines, and we have it in the center, and I tap the Transform
tool. Okay, great. The next thing that
we want to do now is to repeat this
motif to the edges. But instead of duplicating
the group as we did before and trying to match
up the edges of the motif, we will now duplicate
all of the layers. So I already have the
flowers in a group, and I will swipe to the right on the background
layer as well because now we want the background box
to be able to repeat this. So I will tap the layers panel, tap group, and now I will
duplicate the whole group. So then I can duplicate
it a bunch of times. And this works exactly the
same as we did previously. So I will duplicate this so
that I have four copies. And actually, I will turn
off the visibility of this first group so that we clearly can
see what we are doing. And then how you
make this pattern is that you move the whole
group with a background box, tap the Transform tool, make sure you have snapping
and magnetics set in, and then you tap and drag until you reach
those yellow guidelines, and then you tap
the Transform tool. This one we moved up to
the top left corner. Now we're moving
the second group, tap the Transform tool, tap and drag to the top right corner and use the yellow guidelines to know that you're correct. And then you tap
the Transform tool, and then we tap the next group, tap the Transform tool, tap and drag to the
bottom left corner, tap the Transform tool again
to deselect and then tap the next group line and tap and drag to the
bottom left corner. So here's the thing with this method. This
is a great method. However, if you just happen to nudge this box a little bit, your pattern will end
up with white lines in it and won't be
repeated correctly. With white lines, I mean that part of the
background will be shown because the edges of the pattern aren't
repeated correctly. What we need to make
sure when we do this tap and drag click version, is that you place these parts
of the pattern correctly. If you are unsure, oops, I will do undo there. I would turn on
the drawing guide, edit drawing guide and tap
up the grid size to maximum. Is to say maximum, nothing else, and
then to degrade. Then I would tap the
group again and tap and drag and it snaps easier when you have the
drawing guide selected. So now we could create
another flower over here. However, as you want to do a really quick and easy pattern, I will make a copy of the original flower
and just flip it. But this is the basics of the pattern tile
that what we had inside is turned outside so that you can fill this
space with other motifs. You will learn
more about this in the next method of
creating patterns. So for each method, your skill level will grow. But what I will do now is
that I will just delete these layers with the four white squares which
are over here, and then I will tap. I will select those
to the right, and then I will tap
the layers panel up here and tap delete and delete. Now we have all
of those deleted. And if I turn on the
group at the bottom, you can see that we
still have our flour. So now we have a
repeating pattern with the flower at the center and
it's repeated at the edges. I actually is the
same type of motif, the same type of repeated
pattern as in Method one. However, how we reached
there is a little bit different because we moved
the actual background tile. By doing that, you can add
more motifs if you want to, and it will be easier to fit them in the edges
of the pattern. I hope that that made sense. Otherwise, you will learn
more in the next method, method number three, about this. What I want to do now, I will just turn off the drawing guide, and what I want to do now is
just to flip this flower. I will twist it so that it's
in the other direction. I will tap that group with
the flower in the center, tap the Transform tool, and here I'll just
tap flip horizontal. That means that I have
some flowers pointing that direction and some flowers pointing in this direction. So now we have our
finished pattern, and the next thing that we
will do is just to tap at the top here and swipe
down with three fingers, tap, copy all, swipe down
with three fingers, tap, paste, and then you can
swipe to the right. So this is another way of achieving the same result
as in the last lesson. I'm just doing four
copies of that, tapping the Transform tool, and then I can tap and drag
one of them to the top left. The next one, tap in the
bottom left corner node, and pull it up to the
top, right, sorry. Then the next one, tap in
the top right corner node, and rag it down until
you reach 1,500 pixels. You need to make sure that it
says exactly 1,500 pixels. Then you let go and tap. The Transform tool, and then the last one tap in the
top left corner and pull it down to 1,500
pixels and you have your yellow guidelines here
and tap the Transform tool. Then you can merge these
patterns together. So this is your
repeated pattern, and this is your pentile. Even though if you mess up with the moving of the squares, you still haven't messed up your pentile so
everything looks good here and we have created our second floral pattern
with method number two. Let's head back to the gallery, and it's time to create the last pattern in this class
with method number three.
7. Method 3: Create Your Pattern Template: Let's create the last pattern in this class with
method number three, which I call the
Selection Method, and it's my favorite way of
creating patterns Procreate. The first thing that
we will do is to create our own pattern
perfect template. I will just tap into this so
I will show you what it is, and you can see the
different numbers here. Shows, if you tap
the selection tool, save a load, it shows where
the different selections are. In this pattern
perfect template, you have a total of one, two, three, four,
five, six, seven, eight selections that are
saved in this procreate file, which means that you
can use this file, reuse it, duplicate the file before you start
creating a new pattern, and reuse it and you
know that you will always end up with a
perfect aligned pattern. However, I still
want to show you how to create these
selections yourself. I will show you firstly now before we create the pattern
in Method number three, how to create a canvas with
these four selections. We will only create
four selections. Follow along because
it can be good to know and understand how
you do this for yourself. But then later on,
if you want to use the Pattern perfect template and just skip the step of
creating your own selections, then that's perfectly fine. But I just want to show you
how you can do it yourself. This is the first step then before we start to
create actual pattern. Tap the plus and we still have our SRGB, 3,000 pixels square. This is a really simple thing to do to create
these selections. I'll just zoom out so that
I have my full canvas here, and then I will tap
into the color panel. I can tap and drag my
color panel out here. And tap the little
palette symbol there, and here I get my
premade color palette. You can create this selection
canvas with any colors, but I will just use these
as I have them here. The first thing
that I would do is to tap the layers panel, and here I have my first layer, so I will just tap
this layer and fill the layer with any
color you want to, but I'm using the purple. Then I will tap the plus, and I will use another color. Doesn't matter which
color you use, and you can even use the
purple for this as well. But I will create four
different squares with four different colors because it's easier to see
what you are doing. Then I will tap the
layer, tap fill layer, tap the plus, tap another
color, tap the layer, tap filler, tap the plus, tap another color,
and tap fill layer. We have four layers with
four different colors. Now I can tap the little cross symbol here to turn off the
visibility of the color panel. Now I will tap into the layers panel and zoom
out the bits so that I both have my layers panel
with the layers and my canvas here and I can see all of the edges of the canvas. Now I will tap the
Transform tool with one of these
layers selected. And here I will tap in
the top left corner node and make sure that I have this little chain symbol
tapped in so that it's blue, which means that I have the same size here as
there in this case, with this file, but it really means that you keep
the dimensions of the file. So I will tap in 1,500 pixels, and that is half of
the size of my canvas. And I have a perfect square
that is half of the size of my canvas that is aligned
to the top left corner. Then I will tap the
Transform tool to place it. Next, I will tap the next layer, tap the Transform tool, tap in the right cornon node, and I will type in 1,500, and then I will tap
the Transform tool. Then I will tap the next layer, tap in the bottom left cornonde, type in 1,500 and tap
the Transform tool. And the last layer, zoom out so that you can see the
bottom right corner node, tap in that one, 1,500. And here you have four
perfectly sized squares that is half of the
size of the canvas, and they are perfectly
aligned to the top left, top right, bottom left, and bottom right of your canvas. So there's nothing
in between here. There's no white in between, that's very important
that they need to be half exactly half of the size of the canvas and
perfectly aligned. The next thing that I will
do is tap the top layer, tap the layer, tap, select. As you can see, I have this layer selected
now and then I will tap Save a load and tap the
plus to save this selection. What that means, you will
understand later on. But for now, just
follow my lead and you will end up with a
really good template that you can reuse
over and over again. Next, I will tap the next layer, tap the layer, tap, select, tap, save and load. And tap the plus. That
is Selection two. Next, I will tap the next layer, tap select, tap Save and
load, and tap the plus. That is Selection three
and tap the next layer, tap select, save and load and tap the plus.
That is Selection four. Even though we will remove the visibility
of these layers now, when we tap the selection
tool, save a load. Selection four, I have this little corner of our
future pentle selected. Selection three, Selection
two and Selection one. If you don't see these
marks that I have, you can tap the actions panel and tap preferences here
Selection mask visibility. Maybe you have it to zero ops. But I want mine to be up. Let's just save it or open it up again
and you can choose. For me, it's easier to have it around 70% because then it's very easy for you to see on screen which selection
I have chosen. That is all that you need to do to use this Canvas as
a pattern template. The next thing that I will do is just to delete all
of these layers. I swipe to the right, tap the layers panel and tap delete. This is your ready
made pattern template. You can even write
pattern template here. That's exactly the same as this one, although in this one, you have more selections
that you can use both for full drop patterns like the ones that we
create in this class, but also they come in
really handy when we create more advanced patterns such as brick or half drop patterns.
8. Method 3: Draw the Sketch: Now we have our
pattern template, and now we just tap into that, and it's time to
create our pattern. So during this class, we have learned about how
a repeating pattern works. What you need to do to
repeat the pattern that the motifs need to be
matched in the edges. However, we have kept it really simple and used
the stamp brushes. But now we will create with the other brushes
and draw our motifs. But if you feel during this lesson that that
is too much for you, then you can still use
the stamp brushes. So in this pattern, I will draw a flower that
looks almost like this one, a little bit more wonky, and I will draw leaves that looks
almost like this one. So you can still use
the stamp brushes, if you want to, if you don't want to follow
along and draw with me. However, I do recommend
that you follow along with the
sketch at the start. And then if you want to
use the stamp brushes, you can stamp after that, or you can draw along with me. I also want to mention that
placement of the motifs in a pattern is really important for how your overall
pattern looks, so how the pattern is balanced and how it looks for your eyes. In this class, I've
already made this pattern, and I will show
you where to place the motifs so that
it looks good. I suggest that you follow
along and place your motifs. Almost at the same place or exactly at the same place
as I place my motifs. That way you will end up with
the same type of pattern. If you play some motifs
on different places, then you will see
that your pattern might look very imbalanced
or really, really good. You don't know that
before you tried it. But to learn this pattern, it's easiest to just follow my lead and create
the flowers and the leaves on the same places or almost the same
places as I do. Okay, so with that said,
we will start with sketch. So we haven't started
with the sketch before. I will go for classic and
just black as my color, and you don't need to sketch any of your patterns or
all of your patterns. It really depends on
how you like to work. For me, when I create
patterns that are a little bit more
maybe not complex, but that has more motifs
than one motif or that has a motif that is a little
bit more complex, then I like to sketch my motifs. So for this, I use the
perfect pencil from the first pattern brush
set and black as my color. And let's see, 44. That works pretty good. I will just roughly sketch
out this pattern. So we are going to create
these types of flowers. So that's pretty simple, and it feels like many people can draw
that type of flower. It doesn't matter if it looks
like this or like this, you know, you can draw
however you want. You can draw a flower like this. But I'm just keeping
it to a kind of simple floral shape so that
it's easy to follow along. I'm just going to undo those, and then I'm going
to draw the flowers, and also the leaves that I will draw are just these
types of leaves. And I also want to mention
that when we draw our sketch, I'm going to draw
pretty rough and quick, and then I will fix
the shapes later on. But also this pattern will look a little bit wonky, a
little bit hand drawn. That's kind of the idea
with the whole pattern. So let's move on
with the sketch. So I will draw a flower, and you can see I'm not super detail about that it
should supposed to be even. I don't mind that. I will just draw different
shapes of the flower. Although I think
that I have one, two, three, four, five petals, I think that I want
to have one, two, three, 45 petals on each flower. Let's draw a flower
over here four, five, one, two, three. That one didn't
turn out that good. This is the best part of using
a sketch that you can get the rough shape of the flower before you
draw the final motif. So I think that that looks good. They are kind of
similar in size, but they still are a little bit different
in size and also wonky. From here, what I do
is that I will just fill out this space with leaves
in different directions. I will just draw
a leaf like this and a leaf maybe like that. I'm trying to fill out the
space and not keep all of the leaves in the
same direction like this because then it
won't look that organic. I'm just trying to fill out the space and also
it's fine if there's a little bit more space here or air in between the motifs and a little bit less here.
I won't mind that. And I'm just twisting the
pattern around a bit, trying to make this
whole thing look nice. I also want to mention
that it's fine if your pattern doesn't turn out perfectly balanced
and things like that. We are just practicing using two pretty simple
motifs and how to fill a pattern and how to make your
pattern tile seamless. Then you can experiment
with over and over again different types of motifs and different types of flowers, anything
you want to draw. But this is just a first try on creating a pattern this way. Okay. So when we
have our sketch, I will tap the layers panel
and I will tap the plus sign, and I need to add a
background layer. So I will tap and drag and use this as my background layer. And you can choose any color. For now, I will just
do a white color, tap and drag to fill
that layer with white. You can see it now, but it's
actually filled with white. And then I will duplicate
or not duplicate. I will swipe to
the right on this, tap the layers panel
and tap group. And then I will tap the group, and now comes the flip part. Now I will tap the
Selection tool, save a load, Selection four. If you have the group
selected and you get I will show you
an error message. This is usually the most
common thing that happens here is that you tap the
selections tool and you get this error message. You currently have
a group selected, would you like to open layers? Even if you tap open layers
there, nothing happens. If you tap cancel,
nothing happens. What has happened then is that
you need to tap one layer, tap the selection tool, and you should have
color fill here, and I always have
free hand as well. If you tap off the color fill, so you don't have that selected, and then you make sure you
have free hand selected. When you tap the group again
and tap the selection tool, then you can get into the selections and
tap the selections. If it still doesn't
work for you, when you tap, let's see, I will show you again, so you don't need to
follow my lead here. I will just show you
the error message. If you tap here and you tap
group and Selection tool, and this happens, tap cancel, and if it doesn't work for you by unchecking the
color fill option, I would tap into the layers
and swipe to the right on both of the layers and
then tap the selection tool. That way, you can select your selections even though
you have the color fill. So I hope that makes sense, and that is the
most common issue that people have
with this method. So I will tap into one layer, tap the selection
tool, make sure I have color fill, not selected. Then I will tap into group, tap the selections tool, tap Save and load,
Selection four. And then I will tap
the Transform tool, and that has selected
that selection. I will flip vertical
and flip horizontal. Then I will tap the
Transform tool again, and I have flipped this
square inside and out. Then I will tap the group again, tap the Selection
tool, save and load, Selection three, tap
the Transform tool, flip vertical, and
flip horizontal. So that means that
I have flipped that little square
inside and out. Tap the Transform tool, and then I will make sure
I have the group selected, although you don't need to go into layers panel between each of these flips. I'm
just showing you. I will tap the selection
tool, save and load, Selection two, tap
the Transform tool, flip vertical, flip horizontal. It doesn't matter in which order you flip horizontal
and flip vertical, you just tap one time on flip vertical and one time
on flip horizontal. Then I will tap into the
Selection tool again, save and load Selection one. Tap the Transform tool,
and this time around, I can flip horizontal first
and then flip vertical, and then I will tap
the Transform tool. What has happened
now is that all of these four squares
has flipped inside and out so that you can fill this space with motifs and
make the repeat pattern. Because what was usually, let me show you the
edge of the pattern. This was the horizontal edge
that was here and here, and this was the vertical edge. This was the horizontal edge and this was the vertical edge. This was previously
here and here, and this was previously
here and here. As you can see
that what you draw here will actually end up there and there and actually there and there when we flip
the pattern around again. That is the magic of a seamless repeating
pattern that it repeats at the edges. Okay. I hope that makes sense. Now I will just tap the group and I will
tap the Transform tool. In this pattern, it
doesn't matter that much, but your pattern
has also rotated. What I will do is rotate
45 degrees four times, tap one time, two time, three times four time, and that will leave me in
the same direction as I drew this sketching. Then I will tap the
Transform tool, and now I'm ready to fill
out the space with more. Flowers and leaves. I will just choose black as my color and the
perfect pencil again, which size did I use 44. That doesn't matter that much because this is just
a rough sketch. Then I will I think I will make a flower somewhere
here in the center. Oops. Something like that, maybe not that big.
Oops. Maybe smaller. One, two, three, four, five. That feels good. And then I will add leaves to these places here. Let's see. Maybe this one
should be in this direction. I'm trying to make the leaves in different direction so that they won't so that the pattern
will look more balanced. Let me see what to do here. Maybe one leaf like this
and one leaf like that. Yeah, that would
probably look good. Then over there and over
there, I don't know. Maybe I want to flip
the pattern around again to see what I
can do over here. Then I can take the group
tap the Selection tool, tap save a load, and Selection four and tap
the Transform tool, and I will actually
just flip it vertical. That way, only the bottom
comes in and not the sides. Then I will tap Selection three, tap the Transform tool. Tap the group, tap
Selection three, tap the Transform tool
and only flip vertical. Then I need to do that with Selection one and two, as well. I will tap the selection tool, save a load, Selection
two, flip vertical, tap the Transform tool again to deselect and then tap the
selection tool to select, save a load Selection one, tap the Transform tool
and flip vertical. Now I have flipped it there, so I can just rotate
45 degrees four times and then tap
into the sketch layer, and here I can see
that I might want to just erase a little bit or move the leaves a
little bit to make them. Look good next to each other. There might be a good spot for that type of leave that
goes in that direction, and then maybe one that goes in this direction and one that
goes in this direction. But that turned out a
little bit empty there, maybe I can just do
a larger one there. Then I can see that if I just change this petal of the
flower a little bit, it fills out this space. I can just erase a little bit there and fill out that space. Okay, so I'm starting to
feel that this looks good, but it might look a little
bit empty here now, so I will flip it around again. So tap the group, tap
the Selection tool, and now we want
to flip the edges in sell tap saving load, Selection four, tap
the Transform tool, flip vertical, flip horizontal. Tap the Selection tool again to deselect and tap it again
to select Save and load, Selection three, tap
the Transform tool. Oops, flip vertical
and flip horizontal. Tap the selections
tool to deselect and tap it again to
select Save and load, Selection two, tap the
Transform tool, flip vertical, and flip horizontal, and tap the Selection two to deselect
and tap it again to select, Selection one in
the saving load, tap the Transform tool flip
vertical and flip horizontal. As I suspected, we have a little bit of
empty space there. I'll just fill that in. I can erase a little bit of this leaf and see
what I can do here. Maybe if I do one there, one there, and I might
want to redraw this. This is why we create the sketch because now it will be much easier to
draw our motifs. Now we made the sketch and it's time to draw the actual pattern.
9. Method 3: Make the Pattern: First thing that we would do to create this pattern to draw the actual motifs are to first, change the color of
the background layer. So I will tap and drag out my color panel and tap the
little palette symbol, and the background color can
be this light green color. So I can tap and drag to fill the background
with that layer. So that is our background layer. The sketch layer, we can just rename that to sketch because it can be hard to see in this little thumbnail
what it is. And then I will tap the N and drag down the opacity
so I can draw on top of my sketch layer without seeing the full
black white lines. So you can drag
down your opacity. I will keep it around 15%, so you can see it on
screen, you can put it down even further
if you want to. We have an extra layer up
here that we don't use, so I just delete that one. I don't know if you have that,
probably not, but I have. Then I will tap the plus above the sketch
layer so we can draw above that and I will use one
of the monoline brushes. You can choose if
you want to use the monoline one or the
monoline two brush. Let's use we can try the monoline one for the flowers and the monoline
two for the leaves. I will use the cream white. And arrange my canvas, and then I will
draw the flowers. Let's see what size this
have. That's probably good. I want to mention one thing now when we are drawing
our own flowers. If you draw like this and
you feel that it's too wonky or that is
too streamlined, that it follows your hand
too much or too little, you can always adjust
how that works. I would recommend to duplicate a brush before you
edit the brush. I will swipe to the
right and duplicate it and then I will tap into that one here under
stabilization, you have the streamline. This one is pretty streamlined, and then you have
the stabilization. You can try it out. I don't like to have too
much of that actually, and I like mine as it is. But you can try it out
and have less if you wanted more wonky or have more. It was set to
around 93, I think, because then it will give
you a more smoother lines. So that is just a way
to adjust your brushes. But I will delete that
one because I like the original one and I will tap
into the moonine brush, and I can just tap the Transform
tool here and move out this because I delete everything that I move out of the
edge of my canvas, and then I have an empty layer, and then I can draw my motifs. Okay, so let's start
with the flowers. I will draw all of the flowers that aren't cut
off by the edges. I won't draw these ones
that are on the edge or any other motifs
that are on the edge. I will only draw the
motifs that are inside of the edge of the canvas
that aren't cut off, which means this,
this and this flower. And then we will flip the pattern around
and draw the ones. Okay, so let's see. I will just draw like this. Also pretty rough. I don't want to have
perfect flowers. So I'm just kind of
following my sketch, but maybe making it a
little more smooth, also as the mononine
brush is a little smooth. So now we have three
outlined flowers. I can tap and drag in
the color to fill it. And if you tap and drag and you drag up and
down the threshold, you can't see that
much of that now. But if I drag up the
threshold to maximum. You will fill the whole canvas, and if you have a textured
brush and pull it down, you will get a
little edge around. That doesn't really matter. What matters now is
that you can have it around here, 80 or 70%, and then you can
tap continue fill, and fill in those
shapes as well. Or you can drag and drop
to fill in those shapes. So that is good. Now if you want to see your sketch above, you can tap and drag
that layer above so you can see the little dots
if you want to see them. Then you can tap the plus and I will use the monoline
again and the brown color, and I will just move in here
and draw those little dots. I'm drawing them. You can of course,
use a dot like this, but I want mine to be
a little bit wonky. So I'm just drawing them. Oops, I wanted it to be smaller. I like the wonkiness of this. Okay, good. Now I will just drag that one or actually drag the sketch below my
flowers like that, and then I will draw the leaves. I will tap the sketch layer or above the dots layer and tap
the plast add a new layer, and now we will draw the leaves. The leaves, I will draw with this monoline too because
it's a little bit tapered, so it will be easier to get those little pointy
shapes of the leaf. And I will use the darker
green color there and you can either have it
zoomed out if you want to and draw the leaves like
this or you can zoom in. It really depends on how you
like to draw and tap a fill. Make sure you have all of
the outline filled in. But I will have it a little
bit more zoomed out just because it's easier for me to show you how to
draw the leaves. And I'm just making sure when
you want to fill a shape, you want to make sure
that the edges match. If the edges doesn't match
and you try to fill it in, then you will fill
the whole canvas. You can redraw it if you
want to or just fill it in so that you have a solid line here, and then fill that in. So that is good to
know about procreate. I will only draw the
leaves that aren't cut off by the edge
of the canvas. Here, I changed that angle of the leaf just
because I felt that those two were the same angle. And here I will do a
little bit of cheat because I don't want to I
will just draw that here. I won't mind that it's a
little bit cut off there. I will just draw it on top of the edge there
or above the edge. You can't draw something
here because then it will be not
repeated on the top. So I will just make sure that it's not cut off by the edge. Okay, so now I've drawn all of the leaves that aren't
cut off by the edge. Now I'll tap and drag, continue filling, and just
fill in this by tapping. Okay. So the next step is to just add some
lines on the leaves. I will tap the plaster
add a new layer, and I will just use
the background color. You can tap and hold to use
the background color or choose the background color
in your color palette. I will use them on line two. And let's see. Here I had 9%, so I can save that for the
outer parts of the leaf. And let's just try 3%, and I can see if I like that. No, I think it's a
little too small. Maybe I can use 9%. Yeah, that looks good, I think. I think it's a little bit wonky now when I draw I
want a smoother line. I will actually go in and
duplicate that brush, tap into the new brush, and I will adjust the amount of streamline and actually a little bit of
stabilization, too. So I have, let's see, 85% in streamline and
28% in stabilization. And now I will try again and see if I get
a smoother line. Yeah. That brings me a
smoother line on the leaves. And then I'm just adding a line here at the center of
the leaves kind of quickly just to add a little bit more
interest to the pattern so that there's something more
happening in the pattern. Okay. So now we will
flip the pattern around. I will tap the new group. We need to make sure that all of our layers are
within the group. If we, for example,
have a layer, That, I'm just going to show you now, you
don't need to do this. Outside of the group,
let's say that the background layer is
outside of the group, then you won't be flipping
the pattern correctly. Then you need to
tap that layer and drag it in the
group and drop it. You can also adjust the placement of the
layers within the group, of course, as we did
previous in this lesson. So I will tap the group,
tap the selection tool, save and load Selection four, tap the Transform tool, flip vertical, flip horizontal. Then I will tap the Selection
tool again to deselect, tap it again to select
Selection three, tap the Transform tool, flip vertical, flip horizontal. Then I will tap the
Selection tool again to deselect and tap it again
to select Selection two, tap the Transform tool, flip vertical, and flip horizontal. Tap the selection tool to
deselect and tap it again, save and load Selection one, tap the Transform tool, flip vertical and
flip horizontal. Then I will tap the
Transform tool and rotate 45 degrees four times so that I get it in the same
direction as I draw it in. Then I will tap into the
white flowers layer, the monoline one brush, and my cream white, and
I will draw this flower. I zoom in a bit and just draw that one because that
isn't cut off by the edge, tap and drag to fill it. I would just move into my brown dots layer and just
draw a little dot here. I won't mind if
it's not perfect. Perfectly like the sketch. And then this flower is
cut off by the edge. So I will draw the leaves, so I will tap into
the leaves layer, the darker color, darker
green color, the moon line. We did the monoline too,
I think for the leaves. And draw the different
leaves here. And as I mentioned before, if you want to use the stamps, you can use the stamps. I can show you how
that would look. You would just use the leaf
stamp and you can twist it around and add the
stemps like that. But I will draw my leaves. For this lesson, And
here's a little leaf leaf. And maybe I should draw that one on that side
looks better, I think. Let's see how that works
with that one as well. Okay, tap and drag the
color to fill the leaves. Oops. Like that. Then we need to add
the little lines. So use them on line three and the background color and
just add some lines. Just being loose on the hand so that if I push too
much on the brush, put too much pressure, the line will go too thick. If I have too little pressure, the line will be too thin. I want the lines to be
the same thickness. Okay, so as I can see it now, I don't like these lines
actually, they were too thick. Let's try again. I think this is better. That's better. Except this line, I will raise
that and draw a new one. Now I need to flip the top and the bottom part of the pattern. I will tap into the full group, tap the selection tool, save a load, Selection four. Now I will tap the Transform
tool and I will only flip it vertical and then I will tap the Selection
tool to deselect, tap Save a load,
Selection three. Tap the Transform
tool, flip vertical, tap the selection tool again
to deselect, tap it again, save a load Selection two,
tap the Transform tool, flip vertical, and tap the selection tool again to deselect and tap it
again to select. Save a load Selection one, tap the Transform tool
and flip vertical. Then I can tap the
Transform tool and I actually like the way that the
flowers are seen here. I will keep it
like that and then tap the white flowers layer, the monoline brush flower
color, the cream white, and I will draw this last flour, tap and drag to feel the layer, tap the brown in
the colour palette, and just draw in a little dot ops in the
center of the flour. What's important to
me in this pattern is that it looks kind of balanced with the sizes so that the leaves are kind
of the same size, the flowers are kind
of the same size, the dots are kind
of the same size. That is the look that I'm
after for this pattern. Okay, so now I think we are
ready to try out the pattern. So what I will do is turn
off the sketch layer, and now I will try
out the pattern. So I will swipe down three
fingers, tap, copy all, swipe down with three fingers, tap paste, and I will tap and
drag this above the group. And then I can keep
the group or turn off the group if you feel that
that is a little bit annoying. And then I will swipe to the right and duplicate
this four times. And as you have seen in
the previous lessons, you can do this in
different ways. And now I will do it in this way where I take the
Transform tool on one layer. I will tap the top
left corner node, make sure I have
the chain symbol tapped in and type in 1,500. Then I will tap
the layers panel, tap the next layer, tap
the top right corner node, and type in 1,500. Tap the next layer, tap in the bottom
left corner node, and type in 1,500, and
then the next layer. As you can see, I would
just make an example here. If I drag and drop, it's possible that I get
a little bit of pixels there if it doesn't snap correctly or if I happen
to snap correctly, but then I still move my canvas. Oops, that didn't happen. But if I try to snap it, and then I accidentally move it. Well, not that
much, but then you get a pattern that's
not repeated correctly. So it's better or it's easier to make sure
that you don't make that mistake by tapping
the corner node in the bottom corner node
now and typing 1,500. That way you would have
the exact right dimensions and it will be placed
exactly right on the canvas. If we merge these
four layers together, this is your repeated pattern, and this is your parentile. So this is your
repeated pattern, and for me, this looks great. So now you have created all of the three different
patterns with three different methods
here I Procreate. And what we will do now is to
practice on how to recolor these patterns and also how to export them so that you can
use them however you want.
10. Recolor Your Patterns: Okay, so we have
created three patterns, and now I will show you how
to recolor the patterns. So let's have a look at
this pattern, for example, as we have that the recoloring works exactly the same with
all different patterns, so it doesn't matter
which one you use. However, I will tap into gallery first and I will select
my three patterns, and I will tap stack. So I have those in a stack, tap the little
chick symbol there, and then I can tap in throws. I will just duplicate the
pattern that I want to recolor because I don't want
to recolor my original, so I will tap that one
and tap duplicate. So now I have a copy here
and I can tap into that. The easiest and what I feel is the best way of recoloring
where you have total control of your colors is when you have created a
pattern that has separate layers exactly
as we have down here because then you can very easily recolor the
different layers. Usually, it doesn't
matter if you have a bunch of textures
and things like that, they will still be able
to recolor perfectly because you have kept the colors separate on different layers. That is my first tip. If you want to be able to
recolor your patterns, keep the different colors
on separate layers. How we recolor now is that let's say that we have other colors. Should we just use the same color palette maybe
and recolor. Let's do that. I will tap into the layers panel and tap
the background layer. Then I can tap the purple
layer or purple color, tap the layer and
tap fill layer. So that is a very simple way to change the background
color of your pattern. It's very easy because your background color
fills the whole camas. However, if you would
like to recolor, let's say that we want to
use a darker purple now. I go to Classic and
I just drag down my color here to this little
bit more darker purple, and I want to color the
layer with the leaves. I can't just tap the layer and tap the layer
because that will fill the whole layer
with a purple color. I would just undo
with two fingers. What I need to do is that
I can either tap and drag like this and recolor different motifs with
different colors. However, the whole
idea by keeping the different motifs that
have the same color on a separate layer is that it's
very easy to recolor them. By tapping the layer,
tap Alpha lock, you can see that you have
this little chick pattern, which means that
everything else is transparent except the motifs that you have drawn
on this layer. Then you can tap the
layer and tap the layer. So then only the
motifs that you have drawn on this layer
will be recolored. So I can tap and hold to
select the background color or tap the purple in
the color palette, tap the next layer
with little limes, tap alpha oc, and
tap fill layer. And now I have
recolored that as well. I can tap the white, although maybe I want the
white to be white the brown, I can tap phalok and I might want those to be
green, for example. I will tap the green
color and fill layer. Now I have recolored
the whole pattern. And if you want to save a color, let's say we have this new
purple color over here, in your color palette, you can just tap one of those little squares and
you have saved that color. You can tap and hole
and clear the swatch. Or you can tap and hold
and set current color. That is how you save a color. You can drag your colors
here in the color palette. And that way, you can save
all of the new colors. So that is how you recolor
a pattern this way. So now I want to show you how
to recolor in another way. So tap gallery, and let's
use should we use the same? Maybe we should use the same so that we can see
the difference. So I'll tap that pattern, tap duplicate, tap the chick, and tap the pattern template
or tap in the file. Now if we have it
flat and like this, you can tap here and you can tap hue saturation
and brightness. And here you can see
that you can very quickly recolor your pattern to a different Hue, for example, the pink was really nice
and then saturation, you can make it
more saturated or less or keep it at the middle, make it brighter
or make it darker. Although what I recommend
if you want to recolor patterns like this is to
mostly work with the hue. That way you will
get the same vibe in the pattern as your original, but just different colors. But as you can see, you can't control the colors as much here. You could also head in
to one of the layers, tap the hue and
saturation and just adjust the hue or
saturation of that layer. That is a little trick to
keep that more controlled, and you can tap into the
background layer oops, Hue saturation, and try out
different background colors. This is not my preferred
way of changing the color because I feel that
you have more control when you tap and drag
and choose the color. But that is one other way
of changing the colors. Okay, so that is
the basics of how to change the colors
of your patterns.
11. Test Your Pattern: We have already tried
out our patterns in Procreate by repeating them like this where we match the tiles together to
get a repeating pattern. If you want to try out how your pattern
repeats in a smaller scale. You can duplicate that one. I will just make four
copies and one original. And we are in one of the patterns now. It
doesn't matter which one. And you can tap the Transform
tool and you can tap in the bottom left corner node
or top left corner node, type in 1,500 when you have
the chain symbol tapped in, tap the next layer, tap in
the top right corner node, type in 1,500, and then
tap in the next layer, tap in the bottom left
corner node, type in 1,500. And in the next layer and tap in 1,500 in the
bottom right cordon. This is one way of trying out
how your pattern repeats. Another way, I will just
merge these together. You can swipe down with
your fingertap copy, swipe down with your
fingerstap paste, and now we have a
flattened image of our pattern tile there. What we can do now is to try out the pattern in the pattern
tester on my website. What we do then
is that we double tap Procreate so that you get Procreate as a
separate window like this. Then I tap and drag it
over here somewhere. We can make it smaller, and
then I tap up my menu here. I will tap Safari and pull this one adjust the size and
drag it beside this one. Then I can tap my layers
panel, tap and drag. The pentile in my repeat
pattern tester on my website. Then I can double tap Safari, here, if we scroll up, this is an online free tool. You can see how your pattern is repeated in small
scale, in large scale, and drag it up and down
to see that you have a seamless pattern with no white lines and you can see how the
pattern is balanced. That is a quick way of
trying out your pattern. You can try it out in procreate
and you can try it out in the repeat pattern
tester on my website.
12. Export Your Patterns: The next step is to export your patterns so
that you can use them however you
want to use them. Maybe you want to create
products from them. Maybe you want to print them on your printer at home or sell them online or
whatever you want to do, you can use these files. So you can export
the pattern tile, which is this one, and you can export your repeated patterns. Which is these ones. So to export these in this size, what you do is, let's
export the parentile first. This was exactly the
same with all files, so I will only show
you with this pattern. We have the parentle here. We'll tap the
actions panel share and you can export
your procreate file if you want to
save it for later. But if you want
to use this file, for printing or whatever, I would export it
as a JPEG or a PNG. I usually use JPEG. I will use that, export JPEG, and then you can save
it to your files or save it to your image folder. And if you want it to
save as the right name, you can tap here pattern
template and write your name. Let's say bold floral
pattern, for example. And then we can use
this as a diamond, floral, and this as simple floral or whatever
you want to name them. So I just tapped the name, wrote the name of the
pattern and tapped Enter. So now I have both
floral pattern, diamond floral and
simple floral. You can export it
from here as well. If you tap one of these, tap Share, and you
can export to JPEG. And save it to your files, let's tap into one
of those again, if you want to save
your repeated pattern, this one, or this one,
let's just use this one. You can just turn that one on, tap the actions panel, share JPEG, and either save to your camerao
or save to your files. So another thing to
mention is that if you want to use this pattern
on a different size, let's say that you want
to print this pattern on a print on demand product that demands you to have the
pattern in a certain size, then you can't just resize the canvas because that way you will lose resolution
of your file. So how you will do
that is that you will tap the plus size
tap new canvas. Let's say that we need
a completely new size. We want 5,000 pixels times 2,800 or
whatever, random size. And then tap. The
little chick symbol. Then we will tap
the actions panel, a insert a file. You can choose if
you want to insert the bold floral repeated
pattern or your pattern tile, I will import the
repeated pattern, and then I can
drag it over here. For example, you can also make
it smaller if you want to, but I think it looks good there. Then I will swipe to the
right to duplicate it, and then I will just pull it out there and tap the
Transform tool. Make sure that the tile
aligns next to each other. If you get the white line, let's see how we can do that. If you do I can't
get the white line, but let's say that
we just move it like this and we get a little
white line in between. Then that will not make your pattern repeat
correctly in this file. Be sure it's easier when
you have snapping and magnetics to place it
exactly next to each other. And here you have
your repeated pattern on a different size. Let's see. Now you can save
this size if you want to use that size
for something later on. Now you know how to
export your patterns so that you can use them
however you want.
13. What's Next?: Before we wrap up this class, take a moment to look at
what you just created. You started this class by learning what a repeating
pattern actually is, and now you created three finished floral
patterns in Procreate, using three different
pattern making methods. You learn how a patentile works, how to make the edges
repeat seamlessly, how to work with
brushes, stamps, layers, selections, and
the Transform tool, and how to recolor, test, and export your
finished patterns. Hopefully, you also seen that pattern design doesn't
have to be complicated. You can start really simple and build your skills as you go. If you want to keep creating, I have something extra for you. I put together a
free sample of my Painterly Florals pattern kit. It's a fun next step if you
want to practice creating more floral patterns
with ready made creative resources to
help you along the way. Inside the free sample, you will get a small
selection of resources from the full Painterly
Florals Pattern Kit that you can download
and use Inprocrate. You can grab it
completely free through the link that I've
shared in this class. If you enjoy the sample
and want to keep going, you can also check out the full Painterly Florals Pattern Kit, where you'll find
even more resources and inspiration to create
your own floral patterns. Most importantly,
keep practicing. Try these three pattern making methods again
with different motifs, colors, and ideas and see what you can come
up with on your own. The more patterns you make, the more natural the
process will start to feel. I would also love to
see what you create, make sure to share your
patterns if you can. And if you share
them on Instagram, feel free to tag me with Maja Faber so I
can see your work. Thank you so much for
joining me in this class. I hope that you had fun, learn something new, and feel excited to keep creating
patterns in Procreate.
 Maja Faber, Surface Pattern Designer