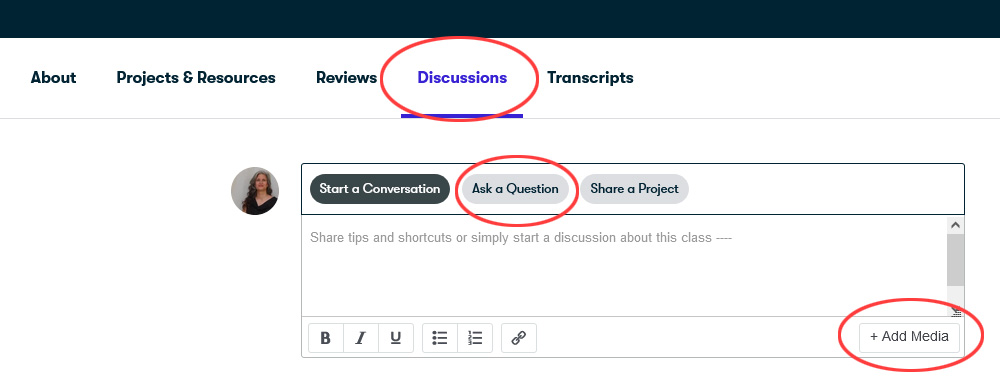
Transcripts
1. Intro: Did you know that you
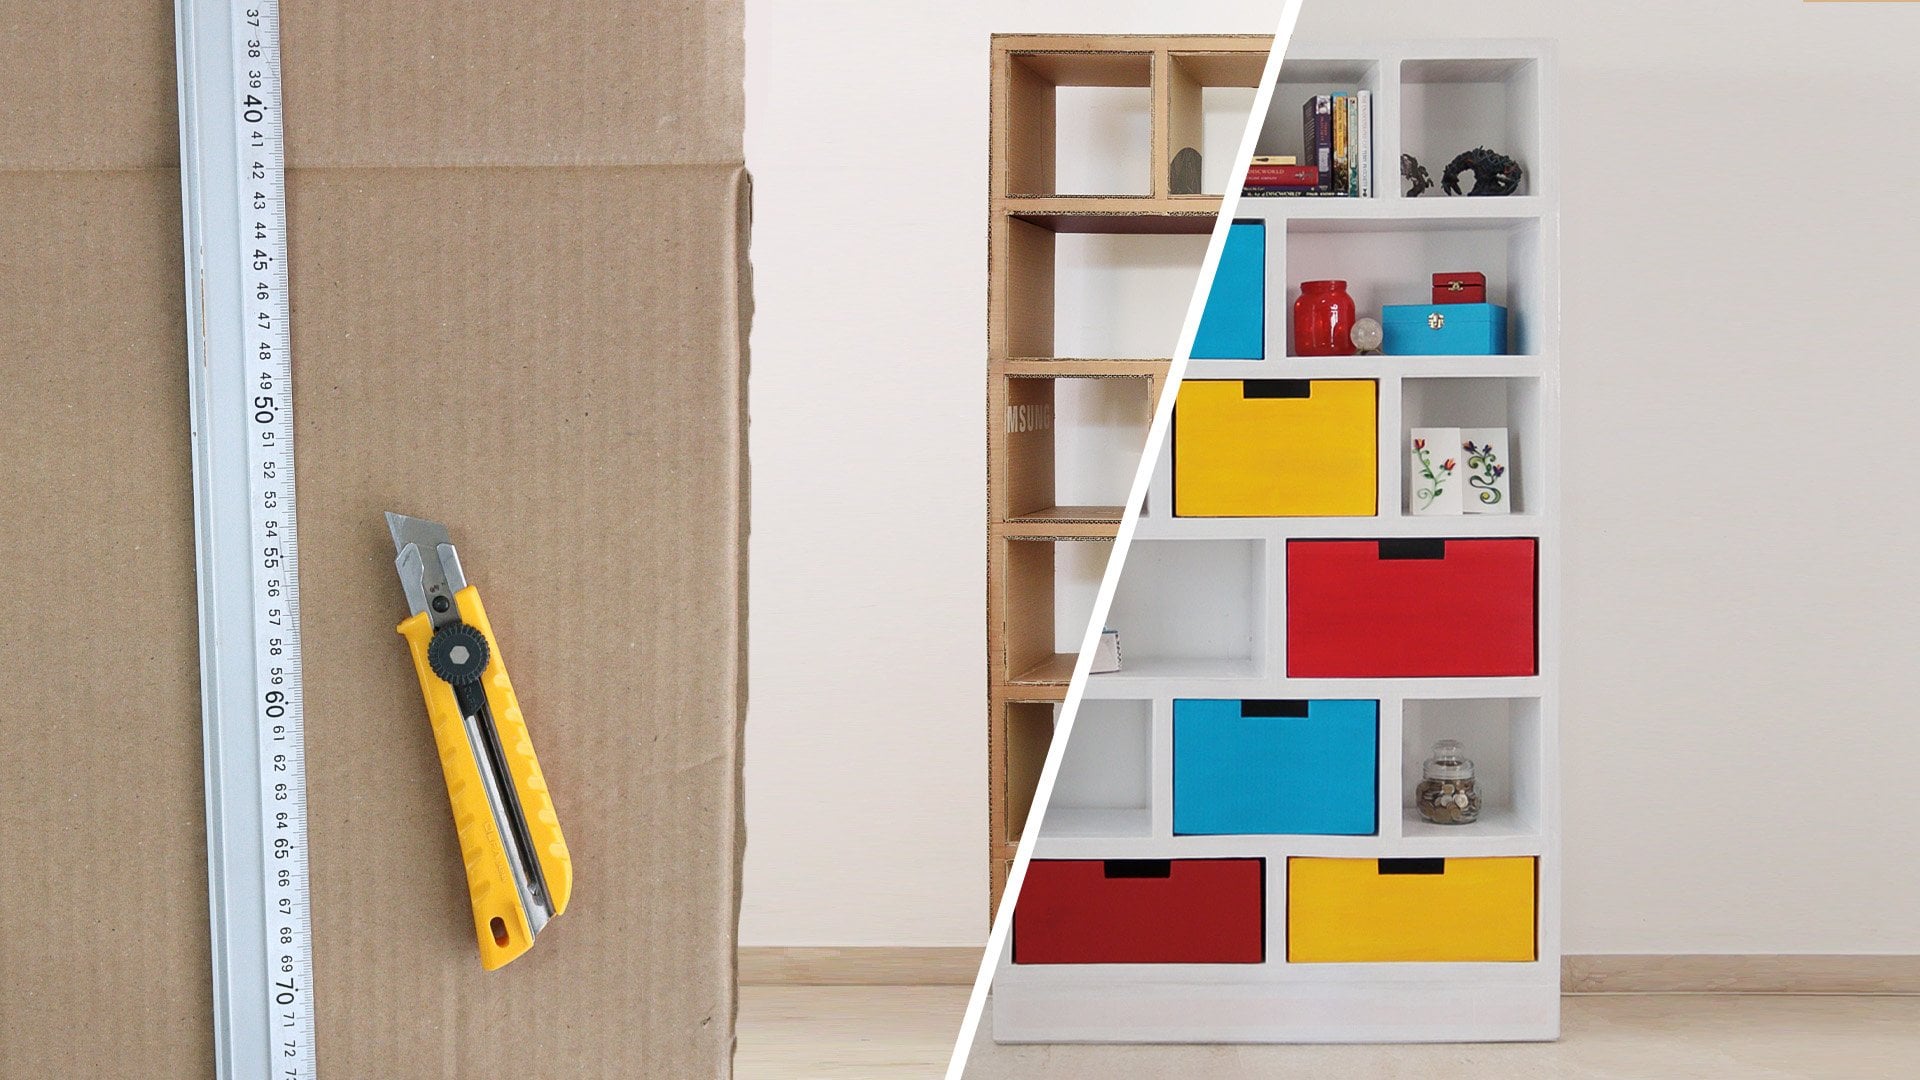
could make a piece of furniture with your own design? You can make it out of simple cardboard that you
find on the street. We're going to see
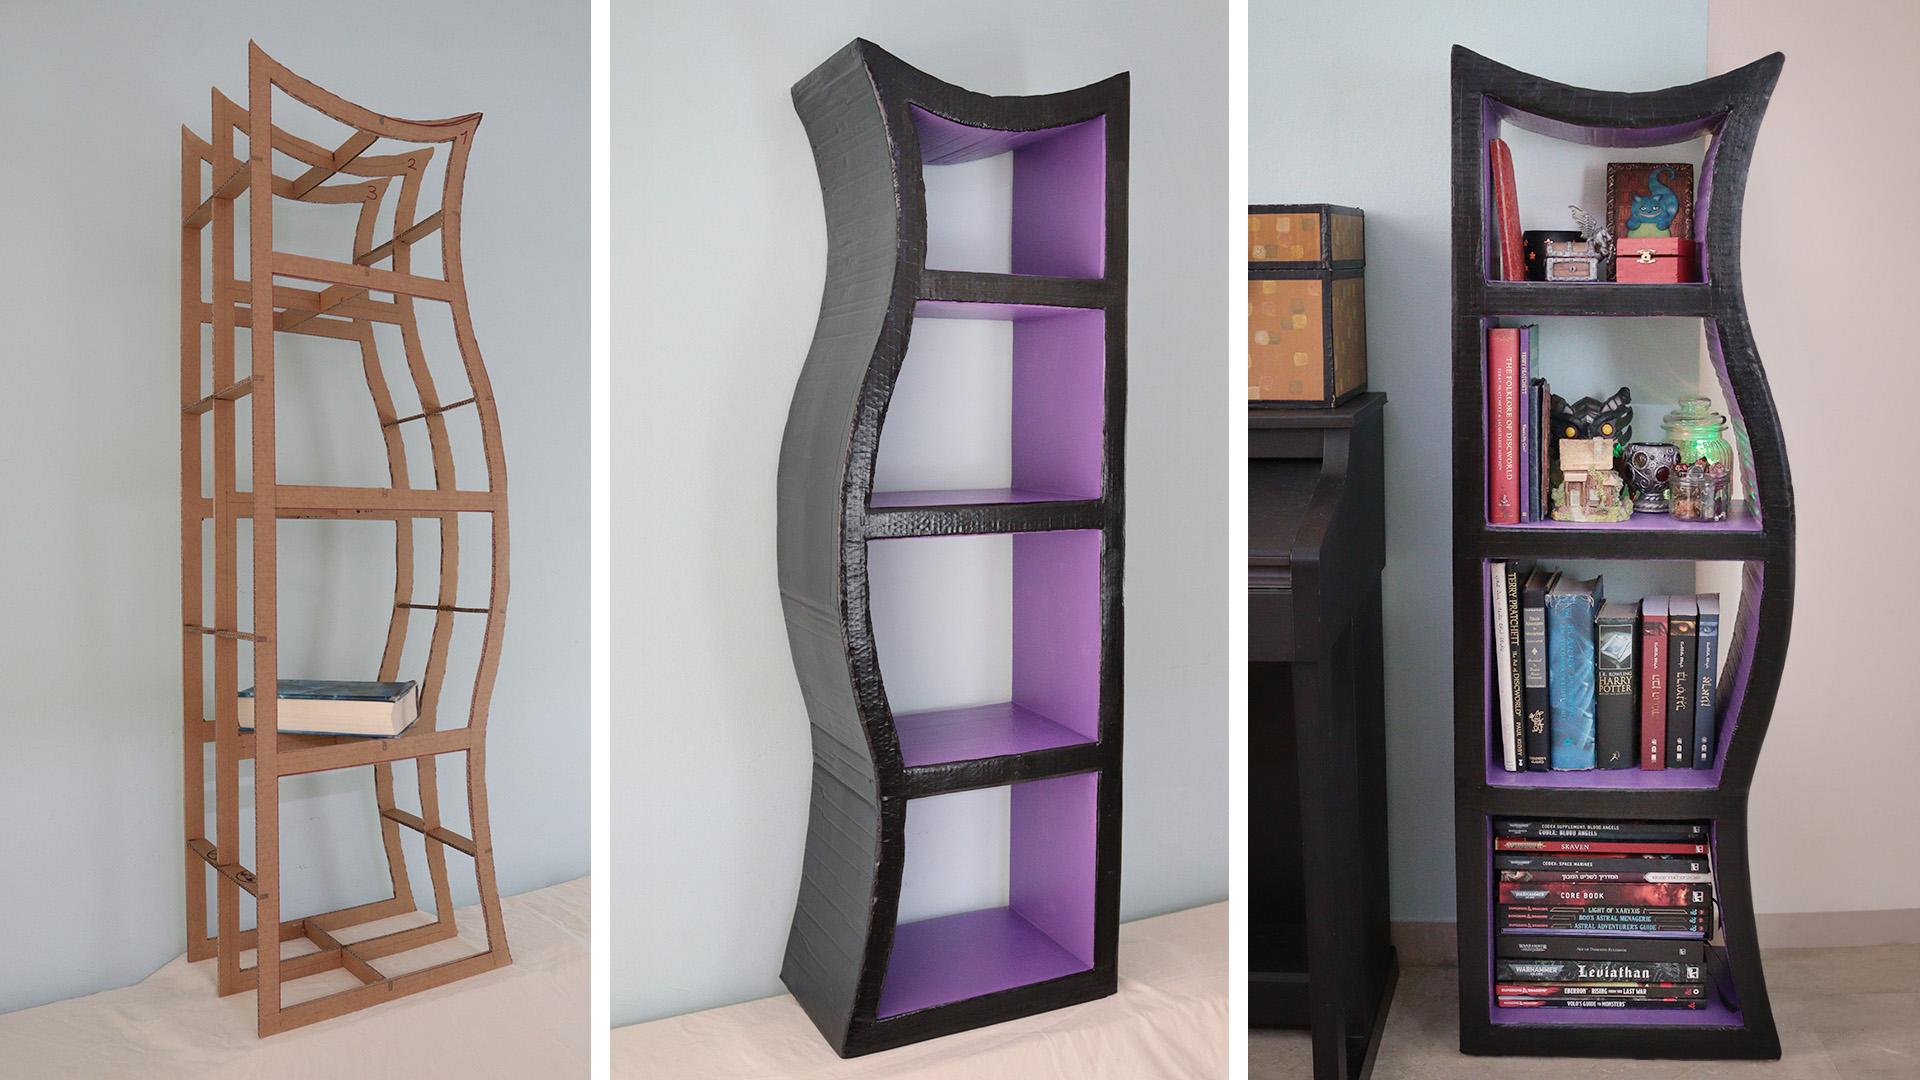
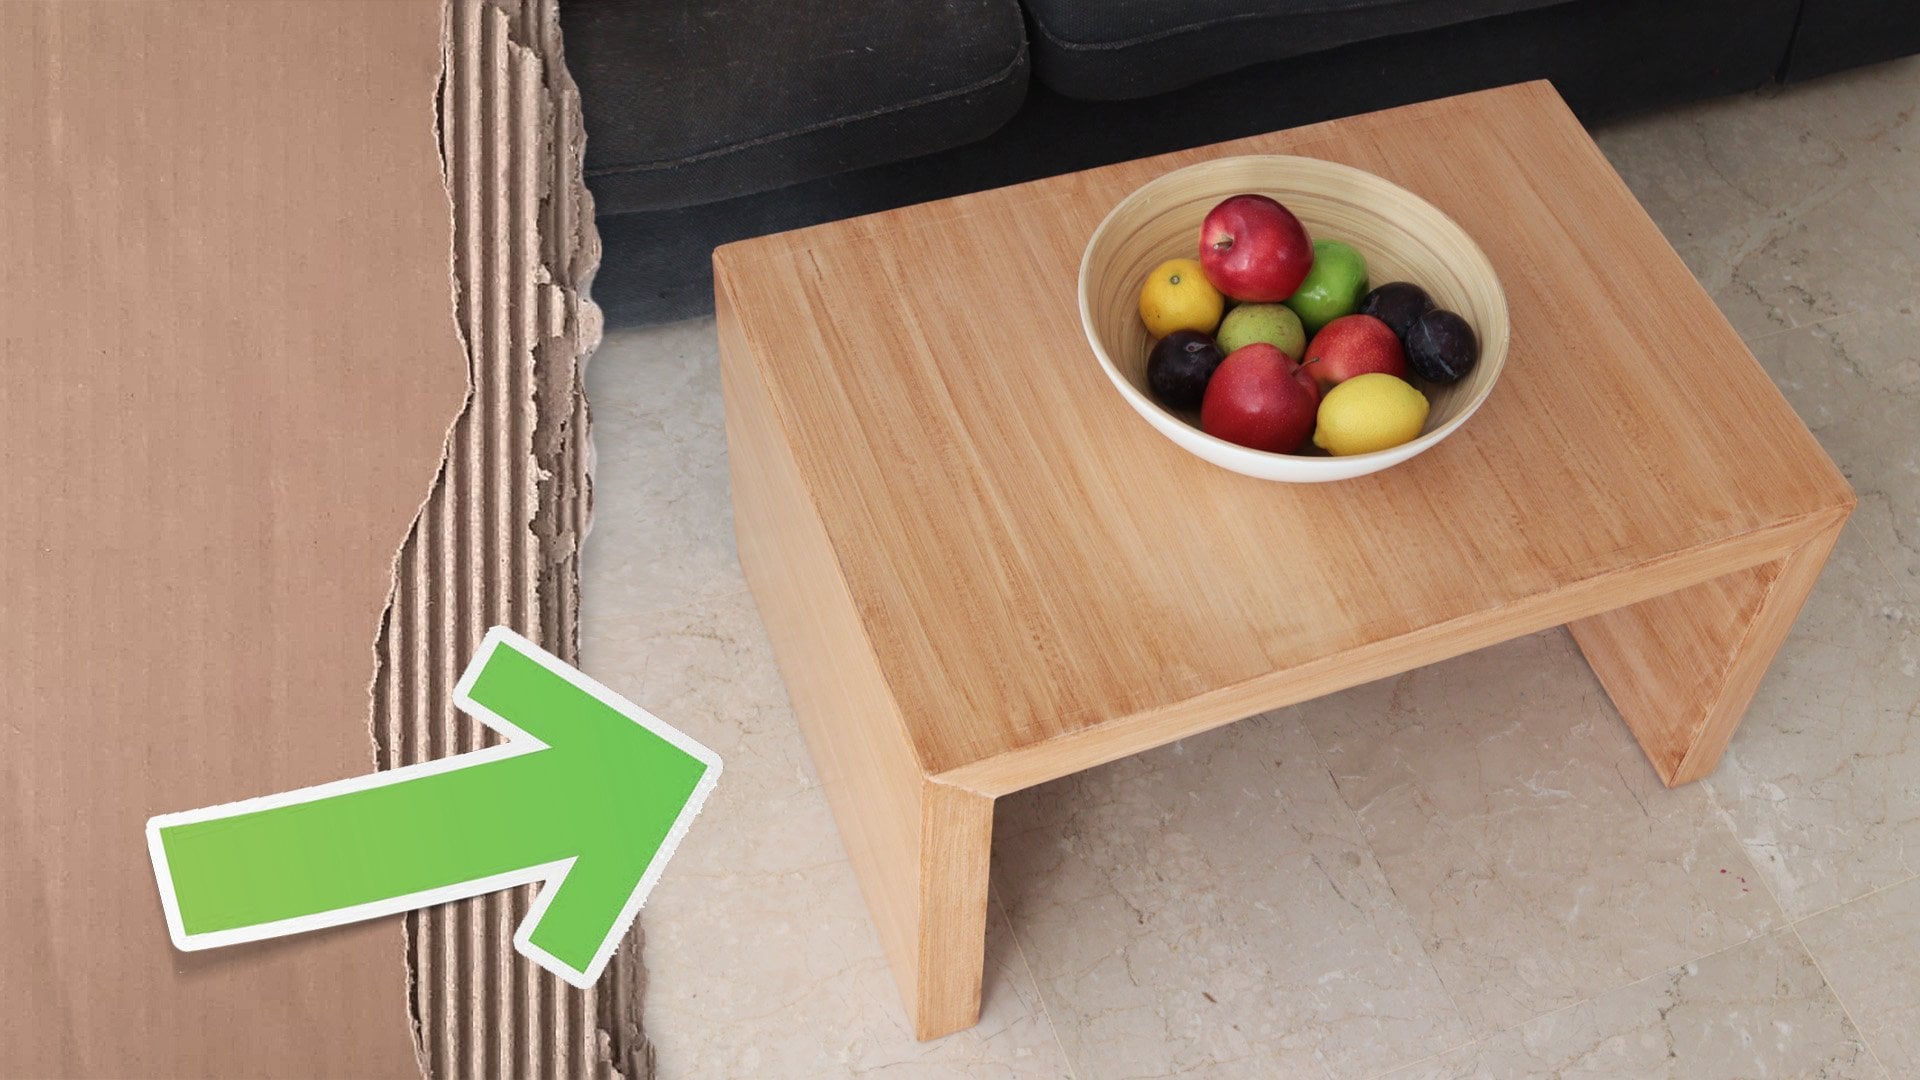
the magic of how to get from this... to that. It's much simpler to
make than it looks. You don't need a large workshop. I do all my furniture
here on this table. This is our dining table. In this class, we're going to learn how to cut the cardboard, how to connect the parts, how to add supports
so the furniture would be stable and could
carry heavy weight. How to make round parts, and how to give the
furniture a clean finish. Of course, we're going to paint the furniture with
colors that will give it style and also protect it from
water and humidity. Hi, I'm Naama. I'm
a graphic designer and I really like to make things out of reusable materials like cardboard or plastic, to make beautiful objects out of things that we
throw to the trash. This class is great for anyone who likes to
make unique stuff, for anyone who likes
to make things out of used materials and tries to be a little bit more ecological. Let's get started.
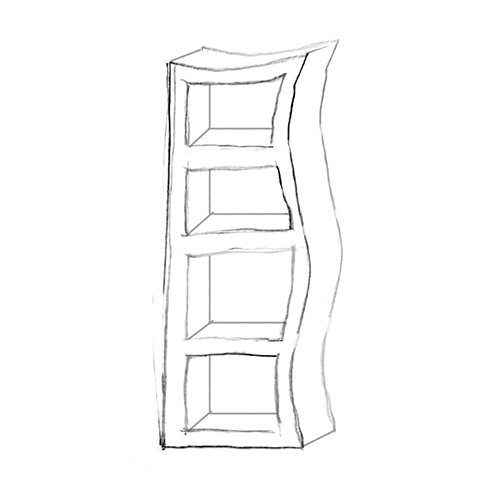
2. Class Project: The class project is to make a cardboard cabinet with
a non symmetrical shape. I know it may look daunting, but don't worry, it's
really a simple process. We will just do it
one step at a time. After you learn the method, you could make other
pieces of furniture. If you want to follow my design, you can find the sketch and the measurements in the
resources of this class. If you want to make
your own design, just draw the shape you
like on the cardboard. You have nothing to lose. If you don't like it, you
can erase it and start over. To get inspired, you can
search Pinterest. look for "cardboard cabinet" or
in French: "armoire en carton" there are a lot of
good ideas there. You can also look for
inspiration in furniture sites. For example, these
beautiful cabinets at Dust Furniture
inspired me to make mine. But if it looks too
much at this stage, just follow my design. Your cabinet will still be
unique because it is handmade. No two pieces are the same. Yours will get your style and touch. In the next video,
Tools and Materials.
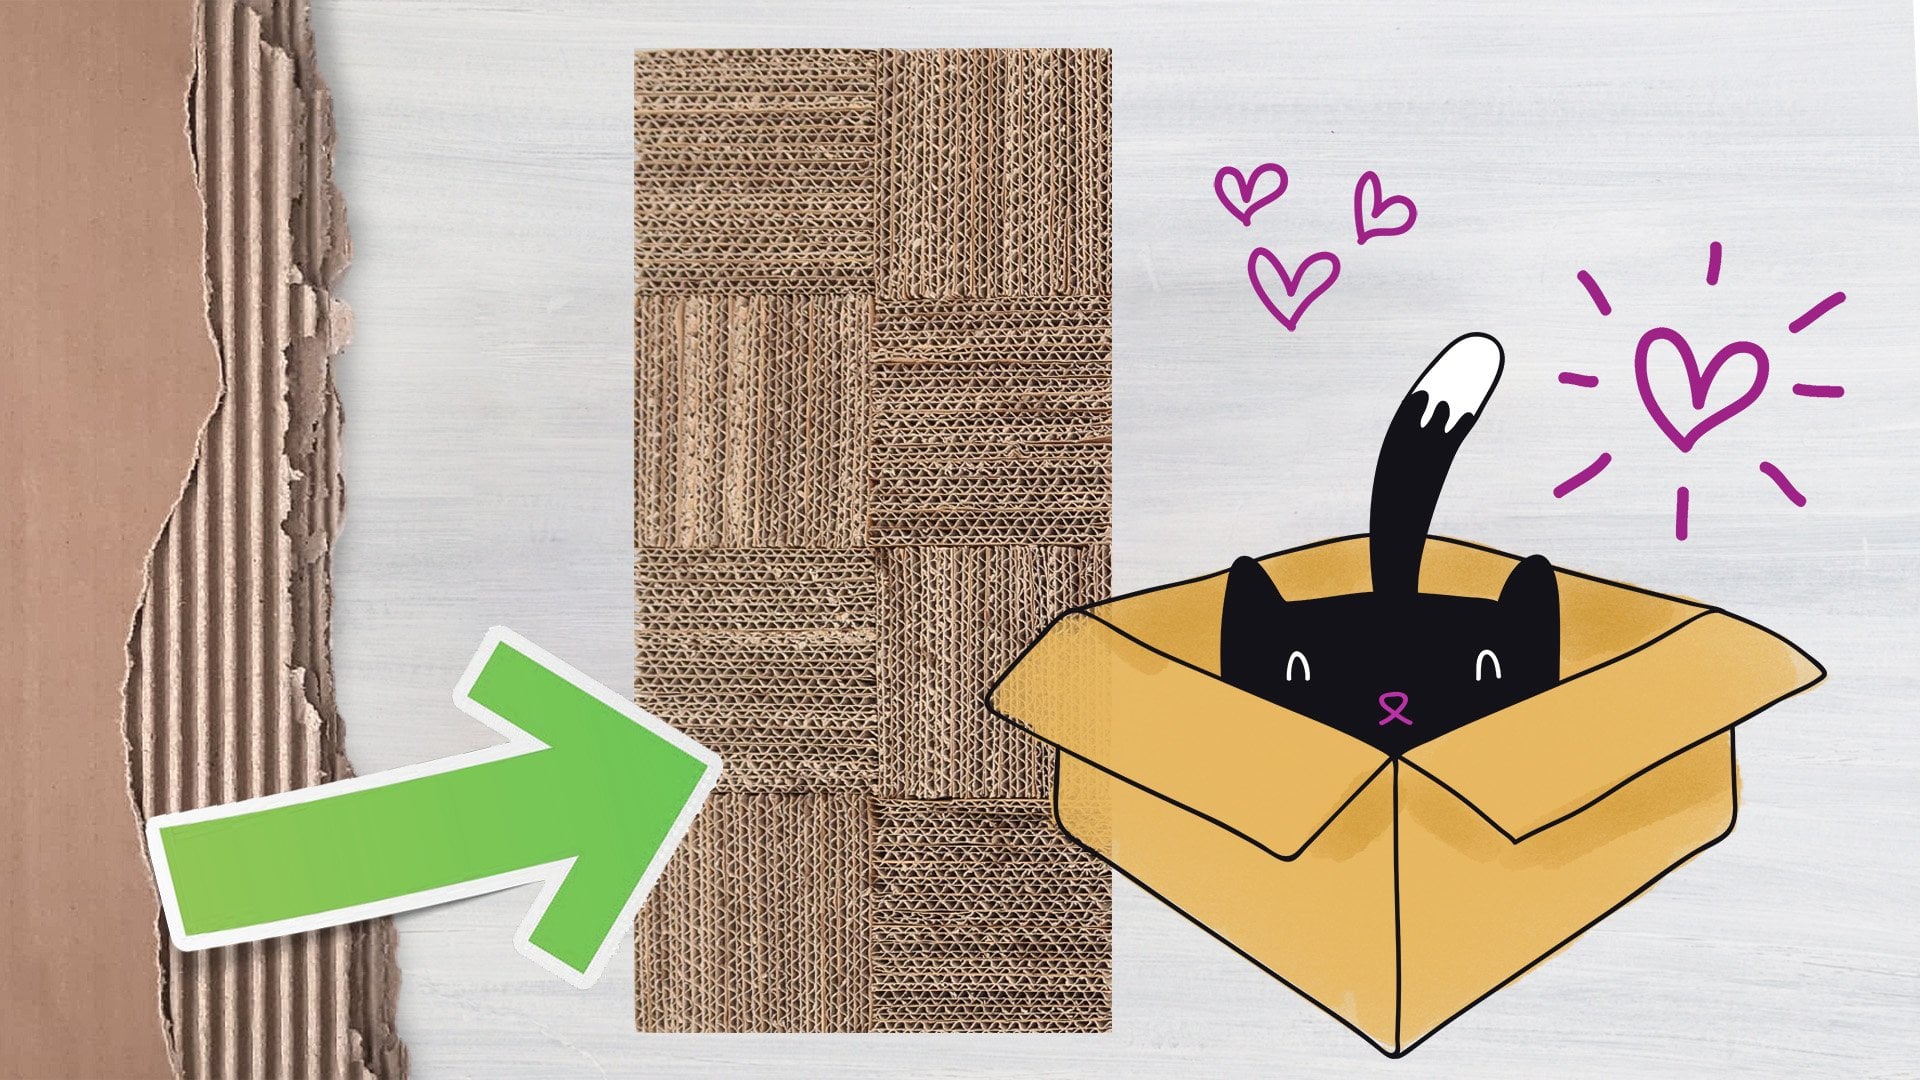
3. Tools: First, we need cardboard.
For making furniture we use double wall
corrugated cardboard, the kind that is
used in packages of large electronic utilities
like TV screens, air conditioning units,
washing machines, et cetera. For this project, we'll need
four large cardboard sheets. If you want to follow the
measurements of my cabinet, the width should be at
least 42 centimeters, and the height should be
about 130 centimeters. We'll also need some
more medium sized cardboard boxes or
cardboard sheets. We need a good cutting knife. There are all kinds of cutting
knives that you can use. I highly recommend using a broad one that
has a screw lock. While we work, the
blade gets blunt, we have to renew it, we can break the blade. Now we have a new
sharp blade again. We also need snap-off
blades and a plier. We need a ruler for making straight lines
and cutting them. You can use a short one like this, If this is what you have. I use this one that
is 1 meter long. We also need a cutting mat. It is self-healing. Cutting on it will
not damage it. The reasons we use
cutting mats are, 1- it protects the table -
our working surface. 2- it protects the blade. Because the cutting mat
is relatively soft, the blade can last longer if you don't want
to buy a cutting mat At this point, you
can simply use another cardboard underneath
to protect your table. The glue that we will use is a simple PVA glue
or school glue. We will also use a hot glue gun. Hot glue is not mandatory. It is possible to build
an entire piece of furniture just with PVA glue, but there are many cases where hot glue will save
us a lot of time. We also need right angle ruler, or L shaped ruler, or another object that
has a right angle. We need some sanding papers. The last thing we'll need is a water-activated paper tape. The glue gets activated
when it gets wet. This will save us a lot of time, but if you don't
want to buy this right now or you
can't find it now, you can simply use strips of
plain paper with PVA glue. We will need some acrylic
paints for this project. I use white, black and violet. That's it. Let's get to work.
4. Cutting the Main Panels: We begin with the general
plan. You can use mine. It's in the resources
of this class. I didn't use a ruler for that. Just a rough sketch of the
general shape. Or you can plan your own. For this project I don't have
measurements in advance. I go along with the size
of the cardboard that I have. To make the main
panels of the structure, We need three large cardboard sheets. According to the plan one side is straight
and one side is curvy. I like the unsymmetrical
shape of it. In this piece, I already
have a straight cut. The next step is to
cut this side too, I will have a right angle. To draw a right angle, I can use a ruler like that or another object
that has a right angle. Hold the ruler along the line, hold it firmly, and cut in a straight line
along the ruler. Cut slowly and
don't use a lot of force. That way you have more
control over the knife. Then a few more times
until you cut through. We have these two sides. In the other two sides, I will draw curved shapes. I will draw them free-hand. I start with the top and
I make a downward curve, just like that with
a large motion. Don't worry if the
line is not clean. Just repeat the
general shape with a pencil until you find
a line that you like. Go over that line with
a pen or a marker, so you will cut the right line. You can see that my line is not clean and pretty, but it's okay. On this side, I
draw a curved line. And I connect it to this
corner with another line. And one more to
connect it to the top. Look at the shape and
fix what you don't like. You can draw and erase with your pencil until you
find the shape you like. I will go over the lines with a marker so I can
see them better. Now that we have
the outer line, we will mark the inner shape. The wall should be
3 centimeters wide, measure 3 centimeters from
the outer line. And mark it, then connect the dots to
make a continuous line. The next step is to
mark the shelves. I want three shelves, so I divide the
space roughly into four parts and the
top one is smaller. The thickness of the shelves
is also three centimeters. Now that we have the shape, it's time to cut it.
For the curved line I'm using a serrated
knife like this one. Move the cutting mat so that
it will be a bit outside the table so it will protect
the table from the knife. Now you can use the
serrated knife like a saw. Keep it
close to the edge. For the straight lines use the craft knife
and the ruler. Don't throw these pieces away, you may need them later. For the front of the drawers, I will add an extra
lesson on how to make a drawer with a curved
walls to fit the cabinet. This one is finished.
I'll mark it number one. We need two more like this one. There is no need to repeat the whole process of measuring. We can use the first one as
a template for the others. Use masking tape to secure it in place and mark the shape, and then cut the shapes
as we did before. In the end, we should have three identical pieces
that look like that. Give them numbers:
#1 for the front one, #2 for the
one in the middle, and #3 for the back. For the next step, we will use the one marked number two,
the one in the middle. We need to cut in these places. To do that, we first
find the center because we know the walls
are 3 centimeters wide. We measure 1.5 centimeters
and make a line. Do it also on the curved
parts. We do it like that. The thickness of the notch is the thickness
of the cardboard. About half a centimeter. In this case, I use a piece
of cardboard to mark it. Make one in the center of every shelf and also on
the top and the bottom. Do the same for the outer frame and make several notches
along the frame, one in the middle
of every section. To make it easier, you
can make a template like this one and use
it to mark the notches. Cut them out carefully
with a craft knife. If it doesn't separate easily, flip the cardboard
and cut it out like that. I made a total of 13 notches. We need to mark the notches
on the other two panels. Take number two, the one
we did the notches in, put it on number one, and mark the places
of the notches. But don't cut them out, just mark them. And do that
again for panel number three. Those marks will help us later when we
assemble the pieces. At this point, we
have three panels. The middle has 13 notches. On the other two, there are
marks in the same places. In the next step, we will make the cross-sections
that connect them.
5. Cross Sections: To connect the three
panels that we made, we will make some
cross sections. If I want my cabinet to be
about 25 centimeters deep, the width of the cross-sections
should be 25 centimeters. You can use any cardboard
leftovers that you have. Just make sure that the
wave side is on top. The lines of the cardboard
are vertical, that gives the
furniture its strength. The width should
be 25 centimeters and the height is 3 centimeters. Because we have 13 notches, we need 13 cross-sections. They too need notches
so they can fit. Find the center. The center should be at 12.5 centimeters. And mark the half point, that is 1.5 centimeters, it should look like that. Mark that one as the original and use it as a template
for all the other 12. Now we have 13 cross-sections
ready for the next step.
6. Assembling the Frame: In this lesson, we are going to assemble all the
pieces that we have. We start with the middle
panel number two. Because it's tall, I prefer
to lay it on the side. The flat side, of course, begin by connecting the
cross section on the bottom, then go around and place all the others to secure them in place. When we move the frame, use some PVA glue, school glue, before letting it dry. Check that the
cross sections are in the middle and
not sticking out. If the frame wobbles
too much at this point, just put something to
support it while it dries. You can make this
step quicker if you use hot glue instead
of PVA glue. Now we're going to
attach the back panel. For that, we use the
marks that we made in the previous video to
help us align the panel. Put some glue on the mark and press the cross
section to it. I'm using hot glue because
I want it to dry fast. If you're using PVA glue, you need to secure the panel in place with masking
tape until it dries. That can take several hours. In this case, hot
glue is preferable. Be careful not to touch the
hot glue when it's running. Also protect you working
area with paper or plastic because there are going to be some glue drippings. Now for panel number one, the one in the front, in this one the markings
are on the front. Don't put glue on the mark. Instead, put the glue on the cross section and attach
it where the mark should be. Put some hot glue and hold it in place
for about a minute. Now we have our beautiful frame. It is thin and not stable yet. In the next video, we will make the inner walls and add some supports to make
it steady and strong.
7. Inner Walls: We start by making the
bottom of the shelves. Because the shelves
have different sizes, we have to measure each
shelf and cut accordingly. This one is 28.5 centimeters, the length is 26. Remember that we made the
cross sections 25 centimeters. After we add the thickness of the third panel and first panel, we now have 26 centimeters. About 26 centimeters. When you make the
length a bit longer, you can cut the remains later. You can use either hot glue or PVA glue because it's a flat
surface and I have time, I'm using PV glue. You can use a brush
to apply the glue, but I like to use a
piece of cardboard. That way I don't have to worry about ruining a good brush. Now, for the bottom of the top
shelf, that one is curved, so I take a piece of cardboard, it's a bit longer, and I break it along the lines. I usually cut a larger piece
and then cut the excess off. Now it can fit for
curved pieces, I prefer to use hot glue. In this case, I'm
going to mix the two. You can apply PVA
glue on most of the surface and leave two lines clean and
put hot glue on there. We have the benefit
of hot glue that dries fast and keep
the piece in place. And we have the benefit of the PVA glue that
is much stronger. When I touch curved pieces, I use a lot of masking
to hold it in place. In this picture, you
can see that I put some heavy books to hold the pieces in place
while the glue dries. But be careful not to put too much weight because the
structure is not stable yet. Now we'll make the top of the shelves, but
before we do that, we're going to add
supports that is very important to make the shelves
steady and not to bend. When you put heavy
things on them, like the cross sections, the supports should be
with the waves on the top. The lines are vertical and
the height is 3 centimeters. A great way to use
all the leftovers. The length is not
important at this point. Just cut strips
of 3 centimeters. It can be short or long. We're going to use them all. I place them diagonally, but you can place them
in any form you want. It doesn't really matter. I usually put them in a way that one side touches
a cross section. One side touches the frame. I put it in place and
mark with a pencil. We're to cut. You can use
either hot glue or PVA glue. Now we divide the quarters
into smaller spaces. I continue to divide them. There is a lot of
places to apply glue because there
are many supports. Instead, I'm going to apply glue on the piece that's
going to be the shelf, Spread the glue evenly,
including the edges. Do the same for
the other shelves. Now for the top shelf, because it's curved, we're going to do it a bit different. I can't put the support like that because I can't curve it. So what we're going
to do is to put them lengthwise and
not diagonally, so the top should look
something like that. I'm not going to put the top of the top shelf at this point. I usually prefer to
do the top one last, you will see that
in the next video. After we do the shelves, we do the inner walls. Even after you measure it, the piece could be a bit smaller or larger
than you expected. If it's larger,
trim the excess of, if it's too small,
make a new one. But it's okay if you have a little gap of one
or 2 millimeters now for the curved walls, start with a bigger piece. After you roll it, you now can see what length
it should be. I mark the top roughly
with a pencil. I will cut it more precisely. After I'll attach all the walls and the glue will
be completely dry, then I could cut the
excess more accurately. Now that we have the shelves
and the inner walls, the structure is very sturdy and now you can put heavy
things on the shelves. In the next lesson,
you're going to do the outer walls and also
the top and the bottom.
8. Outer Parts: In this lesson,
we're going to do the outer walls, the
right, the left, and also the top and the bottom Peel the masking tape carefully so not to
damage the cardboard, but if there is a little
tear, don't worry, the paper tape in
the next lesson or the paint will cover it. We use a larger
piece of cardboard. At this point, the side
is not perfect rectangle. It's hard to measure exactly. What we do is we
cut a larger piece, glue it in place, and
after it's completely dry, we cut off the axis, apply Pv glue, and spread it on the surface with
a piece of cardboard. On this piece, one side
of it is straight. I align the frame just to
the edge of it and I will cut the other side later when the glue will
be completely dry. While I wait for it to dry, I will now go over the curved side and I will cut all the pieces
that are sticking out. I can feel with my finger whether something
is sticking out. And cut the Xs with a knife. Also, use a ruler,
hold it on the side, and when you slip
it along the frame, you can sense where is
something that is sticking out and prevents the
ruler from sliding off. Now that it's dry, I
will cut the axis. Put the knife right next to
the edge and carefully cut along it in this position, We can't use a ruler. There is no place for it. Just do it slowly and carefully. I'm speeding up the video
here, so not to bore you, but remember to do it slowly before you add the curved wall. Add more supports in places
where it's a bigger gap. Now we'll make the curved
wall, it's a long piece. If you don't have a long
enough cardboard for that, you can attach two or three. Just make sure that where they connect the
line is straight. With curved shapes, it's really hard to make it in the
exact measurements. Cut a bigger piece,
glue it in place. And after it will dry, we can cut off the axis because it's a long piece, glue it in parts. Apply glue to a small space, and use hot glue for the
sides so it will dry quicker. Hold it in place for a minute, and then you can go over and apply glue for
the next area. And now when it's dry, we will cut the axis. And again do it slowly and
right next to the frame, we can trim off all the other
parts that are protruding. Now that we have
the outer walls, we can add the top
and the bottom. And we do it in the same
way as we did before, just use a larger piece
and trim it later. We already did the
bottom when we did the shelves in
the previous lesson, but I'm going to
do another layer. This one will also support the side walls that
we added this time. Now it's done, the
cabinet is complete. But before we paint, there are two more
steps we have to do. And that would be in
the next two lessons.
9. Smoothing: To give the furniture
a smooth finish, check out every connection
and all the edges, and find the places where
something is sticking out. Sometimes you can't see the
places where it's needed. So use your finger and
find the places where the connections between two
card bots are not even. I usually use the knife
for the big parts. For smaller parts I use sandpaper or other
sending device, there's going to be a
lot of cardboard dust. Don't throw it away, we can
use it in the next step. Sometimes there are gaps, especially where we attach curved cardboard because
it's not easy doing that. Exactly what we can do
is to fill the gaps. I do it by using
cardboard savings and cardboard dust and mix
it with a bit of glue. But you can also use toilet
paper or another thin paper. Cut it into little pieces and
mix it with water and glue. Insert the mixture into the gaps and smooth it with your finger
or some hard piece like a flat ice cream
spoon or a credit card. And after that, when
it's completely dry, we can send it to make
it even smoother.
10. Paper Tape: In this video, we
are going to use paper to cover all the
corners and connections. We do that for two reasons. One, it makes the
connection more secure. Two, it makes the corners smoother and the paint
will look better on that. We're going to use paper tape. It looks like that
one side is shiny. There is glue there that
activates when it's wet. That's why it's important
to keep it away from water so it doesn't
get wet accidentally. You can find that
in craft stores or where you find
packaging supplies. You can also buy that online. There is a link
in the resources. But if you can't find it or
just don't want to wait, you can use simple paper. Cut the paper into strips. Apply glue with a brush, all over the surface of
the paper from edge to edge. Then you can use it. Attach the bottom
half of the paper, Smooth it with your fingers to make sure there
are no wrinkles. If there are a lot of wrinkles, the paper is probably two thin. Then attach it to the
edge with your finger. Now, the top half, starting from the center and
smooth it as you go. I use paper tape
because it's quicker, it's strong, and the color blends well with the cardboard. After we cut the desired length, fold it in half to make a corner water on the shiny side. I like to use a sponge for that. Align the center of
the paper to the edge. Smooth the bottom half
from the center out, make sure there are
no gaps and wrinkles. Now, attach the corner. Then the top half, starting at the center while pulling
the paper a bit. If there is a wrinkle, lift
the paper and stick it again, or make a cut like that. And stick the pieces again. We're going to put paper tape on all the corners and
edges of the cabinet, on the outside and
the inside as well. When we cover an inside corner, we fold the paper outward. Then we don't start
on the bottom half, we start with the center,
with your finger, attach the center
of the paper to the corner and press it a
bit so there will be no gap. Then the bottom half
from inside out, starting from the center and the top half in curve places. Make sure to go along the curves and press the
paper into the valleys. Make cuts along the top path, and press the pieces
to place one by one, the curve parts are problematic, so do the flat corners first and leave the
curves to the last. By then, you will
be an expert on making smooth corners
with no wrinkles. Remember the two pieces
of the curved side. Now I can use paper
tape to cover the connection line and make a smooth connection
between the two pieces. This is how it looks
before and after. Now the piece is
ready for paint, and that will be
in the next video.
11. Paint: The cabinet is ready for use. If you prefer the natural
look of the cardboard, you can leave it as it is, but I recommend painting
it with acrylic paints. Acrylic paints are water based, but when the paint is
dry, it's waterproof. The paint protects
the furniture. Apply the paint in several
layers to get good coverage. After that, you can clean the
furniture with a wet cloth. Before you begin to paint, make some samples of the colors to see what
they look like on the cardboard Wait until they dry because acrylic
paints are lighter. When they are wet, the
colors that I use are black, and violet and white. For the best layer, the paint
out of the tube is thick, add some water to it. You can use any brush. If I want smooth coverage, I use soft brushes or a sponge. Acrylic paints are
a bit transparent. I like to use white
as my base layer. It gives uniform coverage to the cardboard and the colors
will look better on that. If you want the
cabinet to be white, paint 23 layers of white. Let the first layer dry completely before
applying the next one. You can paint the
whole cabinet with a uniform color or paint the shelves with
a different color. If you choose to paint
with two different colors, start with a lighter one. It would be easier later
to go over the line between them with the
darker color than with the light color paint
a bit outside of the line to make sure that there won't be a white gap
between the colors. Wait for it to dry and make a second layer
where it's needed. Of course, wait for
it to completely dry before moving on
to the second color. To make a nice clean line
where the colors connect, Use masking tape or washi tape. Test the masking tape
before you use it. If the glue is too strong, it might peel the paint later. Make sure to smooth the tape firmly so the paint
won't seep under it. Start with a small brush and
paint from the tape outward. That way you minimize the chance of the paint
getting under the tape. After you paint a bad Els, carefully paint all the rest. Don't forget to wear an ugly apron to protect your clothes. Maybe just mine is
ugly, I don't know. After the paint dries,
you can lift the tape. A very satisfying moment, if the tape was fastened, well, the line should be clean. If not, it's okay. You can fix it. Just go over the line with a small
brush and paint over it. Don't worry if the
color looks lighter, it will be the same
when it's dry. That's it. I usually apply
Vanish to protect the paint. In this case, because there is no delicate paint effect
like on this table, I decided not to use Vanish. The cabinet is ready.
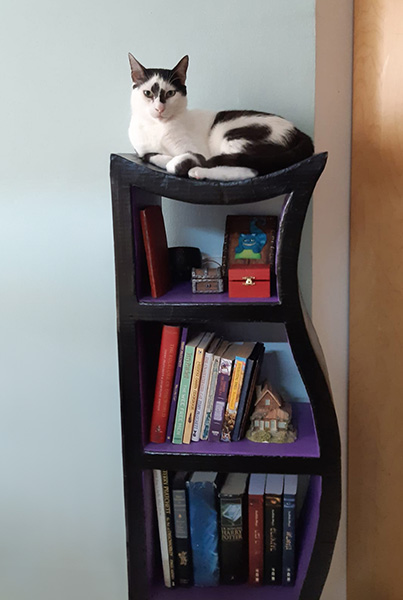
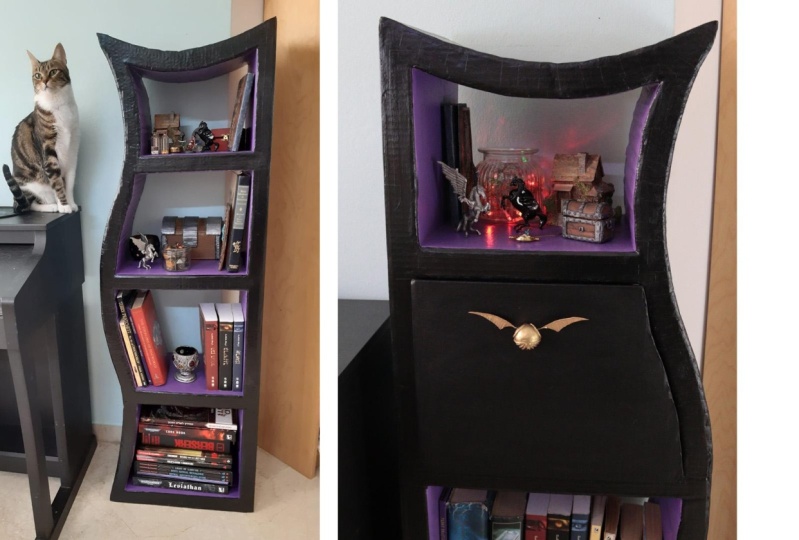
12. And it's done!: The cabinet is ready because it's made of
cardboard, it's very light. Put heavy objects like books on the bottom shelf that will keep the cabinet steady if
let's say a cat jumps on it. I never used that
color combination before and I love
how it turned out. I also love the non symmetrical
shapes and the curves. Now I want to see what
you and what colors you chose to share your
design in the gallery. Please leave a review so
others would know about this class and I will know
what to do better next time by
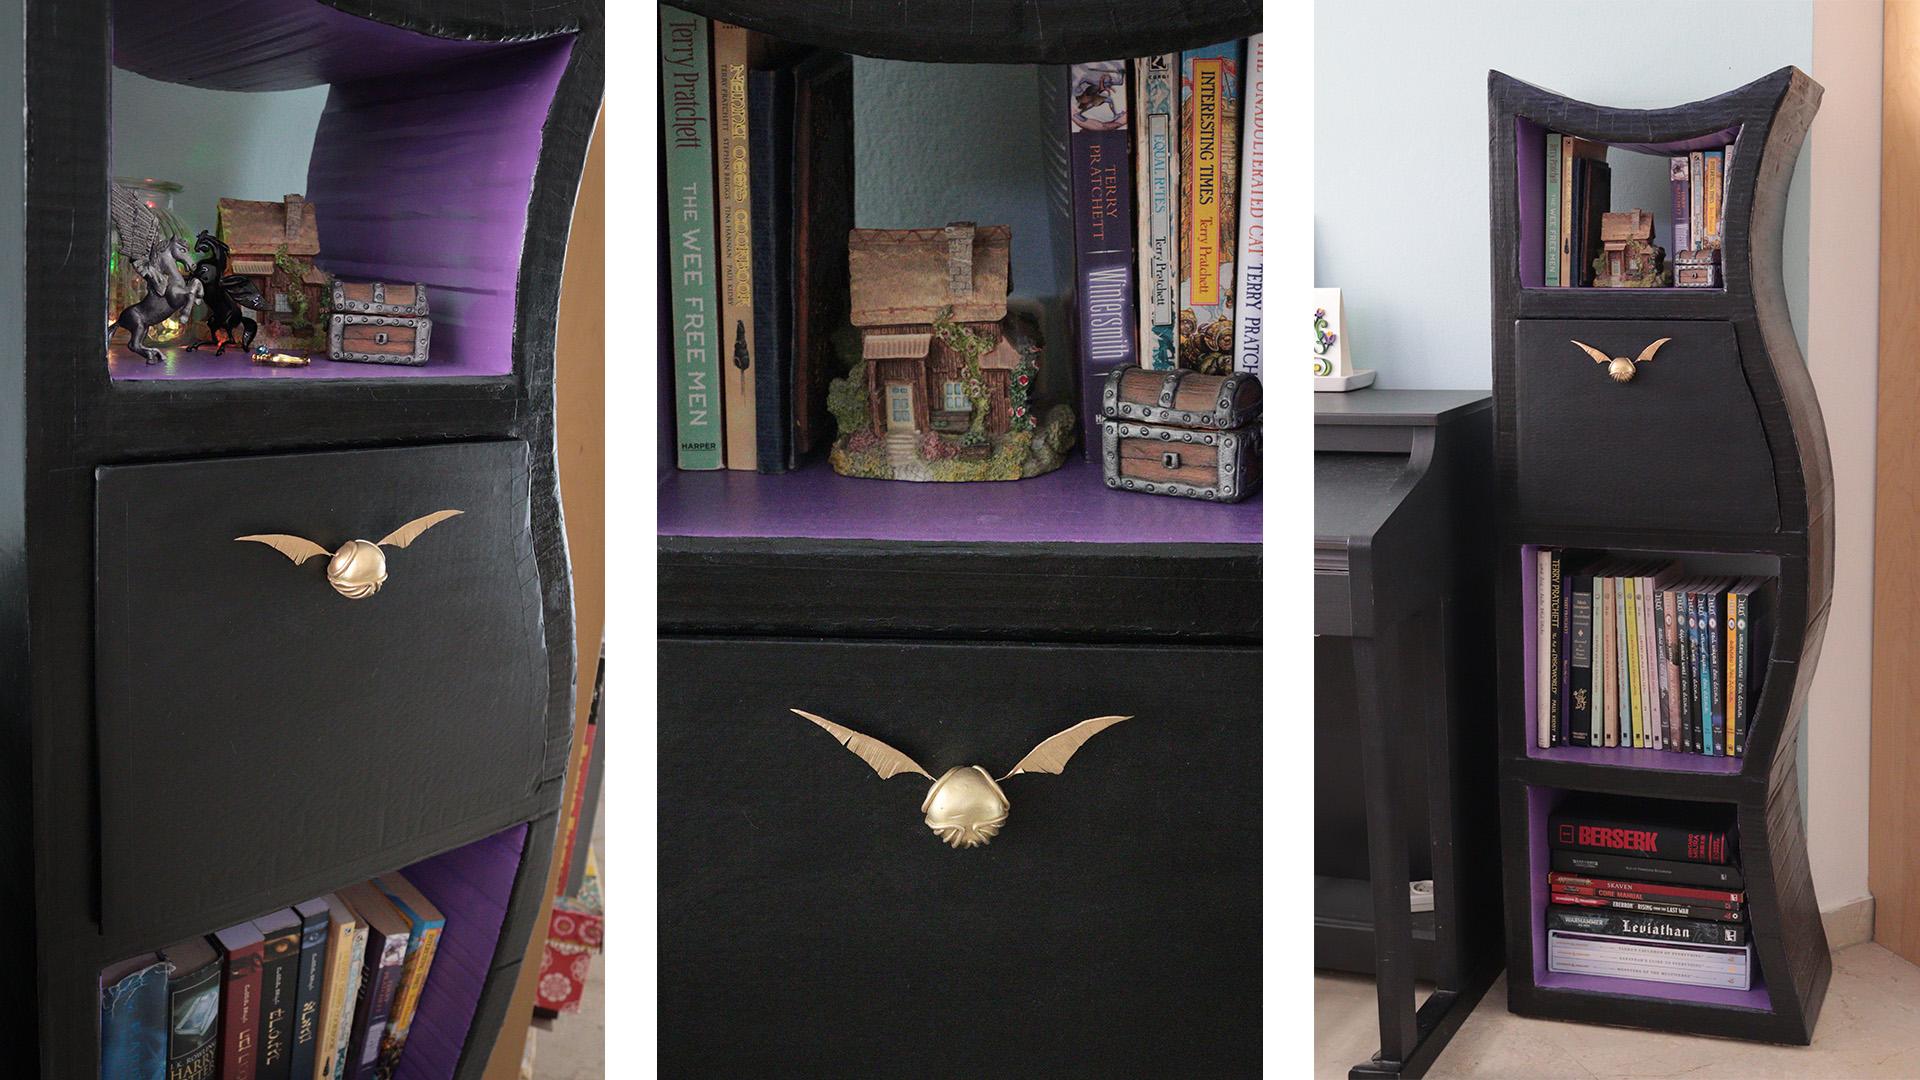
13. Curved drawer: I want to make a
drawer for this part. Usually, to make a
drawer is very simple. You can see how to make
simple drawer in the class: "How to make furniture
easily by yourself with cardboard" in lesson 22. But this time it's a bit
tricky because we want a drawer that will be straight on
one side and on the base, But on the other side,
it would be curved. This is an unregular shape, how do we make a drawer
with special shape? This is what we learn
in this lesson. I will start with the
back wall of the drawer. I want to know the shape. So I'm taking the
cabinet and I will put a cardboard underneath, and just draw the shape
with a pencil or pen. Now I have the shape. I
want to make the actual drawer a bit smaller, because I want it to get it
in and out easily. I want a gap of about
1.5 centimeter, so I'll mark 1.5 centimeters
from the straight side. I just mark this line
so I won't cut it, and I will leave a gap in
the height of 2 centimeters. This is the shape
that I will cut now. I will start with
the straight lines. And I won't be confused because
I marked what not to cut. That's not a very pretty
piece of cardboard, but I don't care much because it will be in the
backside of the drawer. You can cut the curved part
with a serrated knife, but because it's a short piece, I will use the utility knife. So this is the back
wall of the drawer. I will now make the
base of the drawer. I will measure the width here. And to know the depth, I will
measure the cabinet itself. I'm using the lines of the
cardboard to find the first line. After I have the first one, I'm using the grid
of the cutting mat to find the right
angle on the side. Cut slowly and carefully. I measure 25 centimeters, that is the depth of my cabinet. This is the base, this is the back wall that will
be connected here. Now we need to do
the other two sides. I'll measure how
much is left here. For me, it's 24.7. But there is a straight side and one side that
goes like that. We'll start with
the straight side. This is the back one
and the left one. I glue the three of them, and I'll use hot glue
so it will be quicker. You can also use PVA glue and hold the pieces in place with masking tape until the glue is dry. The right wall is
curved along this line. The final height
should be about 24.7. But because I'm going
to roll it a bit, I should cut a longer piece. I'm using the piece that I already cut to
measure the new one. The lines on the cardboard
should go this way of course, so it can bend. And now I can Glue. And then cut the leftover. We have the back wall, the base, one side that is straight, and one side is curved. Now we need the front
piece of the drawer. I have this piece that I kept when I made
the main panels. It's a bit bigger. To
put it exactly in place, I'll put it on the table, I'll put the drawer on top of it. Then I can see where it is exactly in the
middle, and that I have the same distance from right and left and
from the base. I mark it with a pencil so I can know where
to put the glue. The drawer goes in and out very easily because
we left a gap. Don't rely only on the glue. We have to make the connections stronger and we'll do that
again with the paper tape. And we are also going to make a little hole in the front
for the handle or knob. As always, before I'm
using the paper tape, I'm going over and find all the pieces that
are sticking out. And if you use hot glue, then they are probably residues of the glue that you should cut out. A reminder, when you work
with the paper tape, put the water container on one side and the roll
on the other side, so it won't get
wet by mistake, and keep a towel nearby to dry your hands
and the surface. Don't skip this part. It's very important to
use the paper tape on all the corners and all the connections of
the inside and out. That way, the drawer
will be strong and would not fall apart even if it
has heavy things in it. The inner curved corner
is a bit tricky. So it would be easier to use small pieces of the paper
and not a long one. Before we are going
to paint the drawer, we should make the little
hole for the handle. Because the cabinet has a strange shape and
not symmetrical, I'm not measuring to
find the middle point. I'm just eyeballing it. And here I'll make the hole. Start by puncturing a hole with a needle or some
other sharp object. And then stick a bigger piece in it like a
chopstick or a brush, and that's how you
make it larger. That is my method to make
a nice smooth hole. You can paint the drawer black like the outside of the
cabinet, or purple like the shelves, or
whatever color you choose. As usual, apply two coats of the paint to get a full
cover and get a deep black. After the two coats
are completely dry, you can connect the
handle or the knob. You can buy a knob or
make one yourself. I made a bonus lesson on how to make polymer
clay handles (next lesson).
14. Handles: In this video, I'm making knobs for the drawer
for the cabinet, and I'm making them
out of polymer clay. There are all kinds of
brands of polymer clay. In this case, I use the one from "Fimo" but that is not necessary. We also need a bolt and a nut, the size is M6, which is 6 millimeters
or a quarter of an inch. The first one will be in
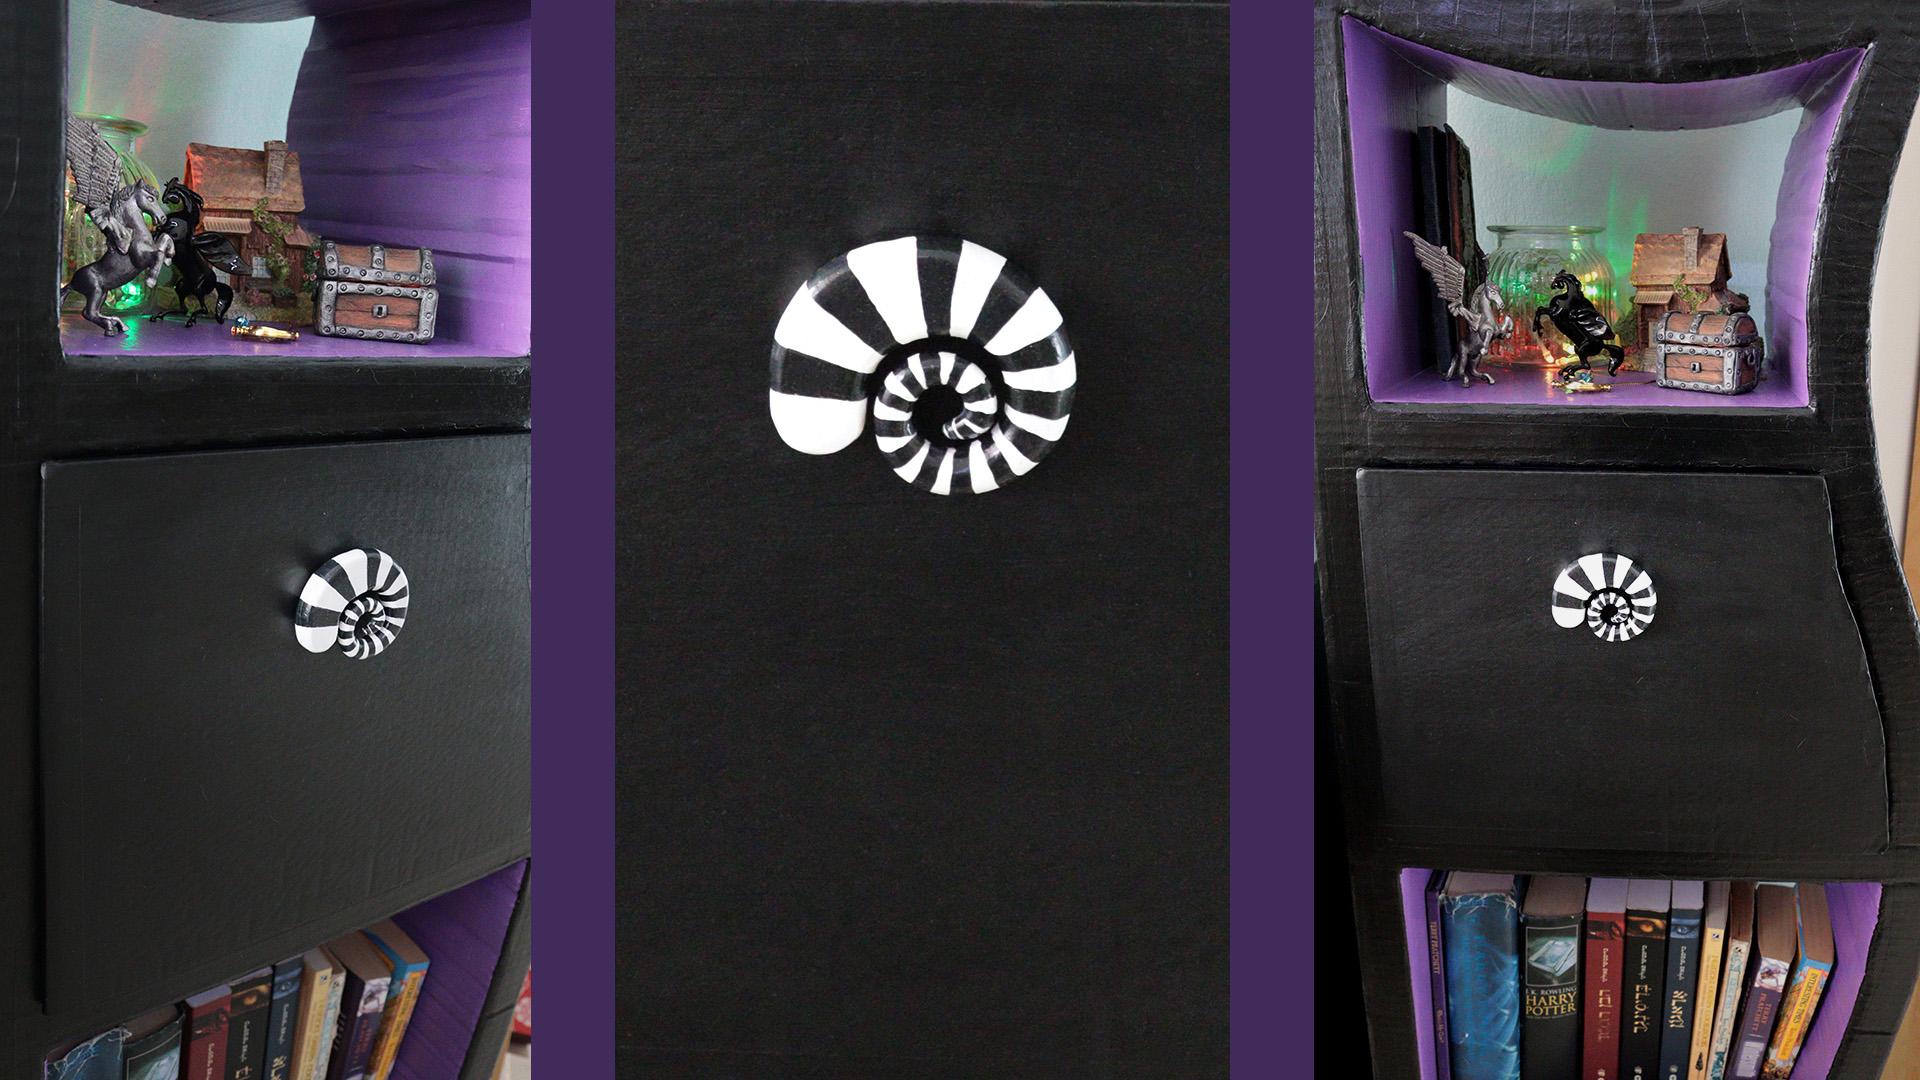
the style of Tim Burton. I start with a polymer clay with a light color because I
intend to paint it white. Start with a ball and then roll it on the side with a slight
pressure on one side, it gets a water-drop shape. Now, make it into a swirl. One side is much thicker, and here we'll insert
the bolt head. This is the thickness
of the carboard. So I check how much gap is
left after I inserted the bolt. This is the height
that should be in the knob. We'll make a small
depression for the bolt head. Now, it can go to the oven, look at the instructions on the polymer clay
package to see what is the temperature of the
oven and for how long. For me, it was 110 degrees
Celsius for half an hour. After it's baked, paint
it with acrylic paint. We need a few coats to
get even coverage. Before I proceed to
paint the black stripes, I mark them first with a pencil, and that will guide me to
make straight clean lines. paint the lines slowly
and with a thin brush. It may be easier to insert the knob into the
cardboard at this point, so you can have
something to hold. If there are little
accidents and you paint somewhere
you didn't mean to, you can fix it and
paint over it later. When the front is dry, you can paint the
sides and the back. It's not absolutely necessary
because no one will ever see this part, but
I'll know it's there. When the paint is
completely dry, you can apply varnish. In this case, I use
the same varnish that I use for all
the furniture. This one is ready, and
here it is on the cabinet. Start with a ball
of polymer clay. In this case, I use leftovers that I have and
the color is gray, but it can be any
color you like. After I made the ball, I sliced a little
piece from the side. It's easier if you use
a very sharp knife. Make a little hole
for the bolt head. Check if there's enough space
for the bolt and the nut. And now you can
decorate the ball. Make very thin snakes
from the clay. To mark the place
where to put them, you can use some circular
thing like a bottle cup. Then proceed to lay the
snakes in this design. Make small holes for the wings. Use a needle to do them. I used a bigger tool and the holes
were larger than they should be. Bake the clay.
Now we'll make the wings. Make a little sketch of the
wings, something like that. Prepare four pieces of
paper tape or plain paper. If you use a regular
paper and glue, then make sure the
paper is not too thin because the glue will
make it very wrinkly. If after you apply the glue, the paper has too many wrinkles, then choose thicker paper. Cut two pieces of metal wire
and bend them to the shape. Then wet the paper, put the wire on it, and close
on top with another piece. And then press them together so there will be no
gaps, and no bubbles. With your fingernail
or other tool, press the paper to the wire. Do the same for
the other wing and let them dry completely
for several hours. When the polymer clay is done, paint it gold with acrylic paint, and as always when the
first layer is dry, apply a second layer,
or maybe a third. And let that completely dry. Now get back to the wings. Carefully cut along the
top line of the wing, very close to the wire. To transfer the
sketch of the wing, scribble with a pencil on
the back side of the paper. Put it in place, and go over the line again with
a pencil or pen. Then cut the shape. Do this only after the paper
is completely dry. Don't try to do
it when it's wet. Make small cuts
for the feathers. And we paint the wings with
the same color as the ball. So everything is dry and
we can connect them. I just use plain glue for that. To support the wings
while they dry, put some pieces of cardboard. Paint the backside,
and paint the wire too. And it's done. And this is
how it looks on the cabinet. This knob I made in
the same method. I just made a simple
moon shap, decorated it with snakes of
clay and painted it silver. Make any shape you
like, decorate it, paint it, and you have your
own knob with your own style.
 Naama Yaffe Mendelboim, Graphic designer and artist