Transcripts
1. Intro video: Hi everyone. Welcome to this class. Here we will make this table. What is special about this table is that it's made of cardboard. Yes, that is cobbled. But although it's
just paper and glue, you can still use it
as a regular table. We will learn all the steps, how to make sturdy
furniture from cardboard, and how to paint it like that
so it can look like wood. If you have questions, post them in the discussion. And that's it.
Let's get to work.
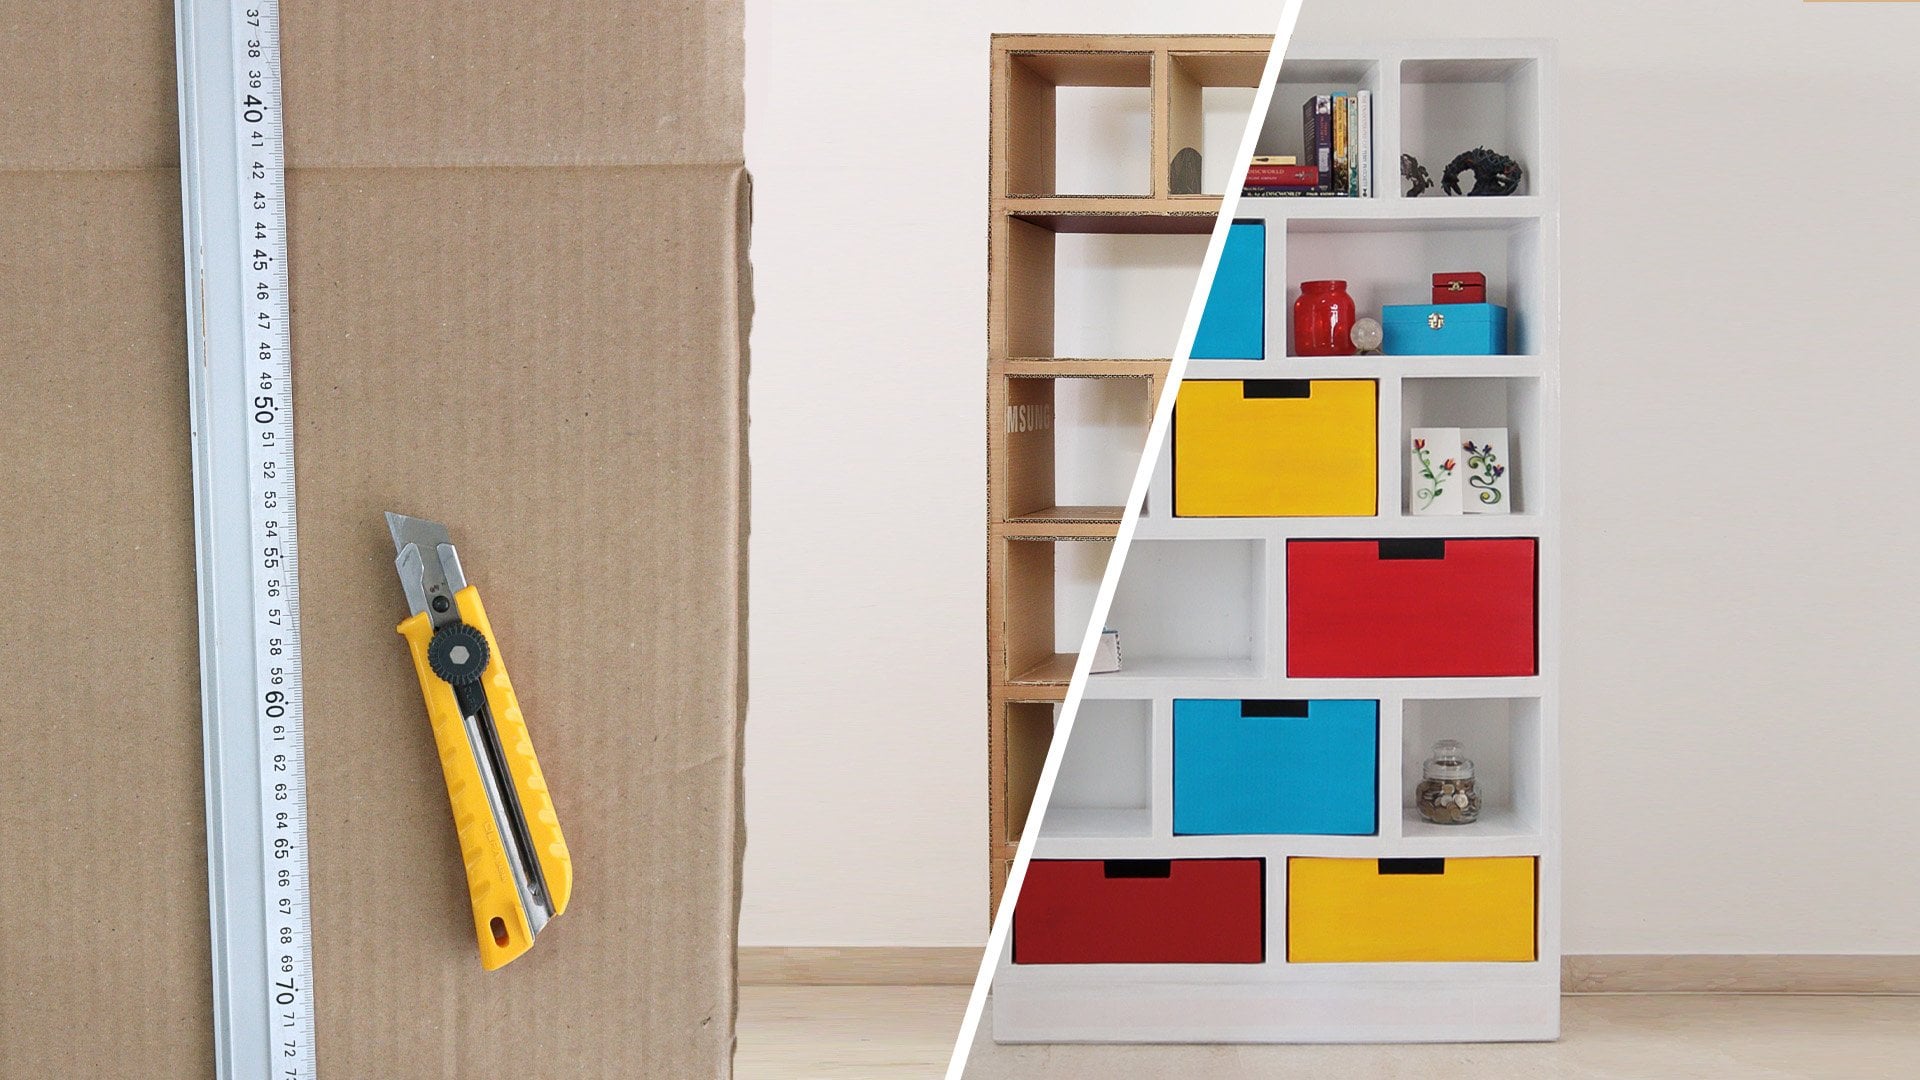
2. Tools: For making furniture, we use double wall, cow
gated cardboard. The current that is
used in packages or flowers or electronic
utilities like TV screens, air conditioning units,
washing machines, etc. We need the cutting knife, whole craft knife, a
knife with a lock. When the blade gets bland, we replace the blade like that. So we also need pliers and replacement blades.
We need a ruler. You can use a little
one like this, but it's much easier to use a long one and it's
not expensive. We use PVA glue or school glue and hot
glue and hot glue gun. You will also need an L-shape
roller or triangular ruler. Some ruler that has
a 90-degree angle. Sandpaper. Acrylic varnish
for wood furniture, damped paper tape, a sponge in some kind
of container for water, a cutting mat like this
one with the grid. You don't have to. You can just use some kind of cardboard to lay down
to protect the table. That I highly recommend
buying this because it's very useful and I use it
for a lot of projects. Acrylic paints and a brush. For the table, I will use white, dark titanium and burnt amber. And finally, Caesars. A pen or pencil
and masking tape.
3. Planning the table: I start by planning my table. I measure the place
that I wanted. The table will be, I think about what
I will use it for. This would be a coffee
table and should be roughly the same height
as the seat of my sofa. The length of the
table would be 78 cm, the height 37 cm, and the depth 50 cm. The measurements of this
table are in the projects and resources section that you can change the dimensions
to your needs. I recommend that the
length of the table will be no more
than 70 or 80 cm. In cases of very long tables, there should be some more
support in the middle. So I prefer to keep
it under 80 cm. I also included measurements
for a kid's table. That one is 50 by 50 and
the height is 50 cm. The first part that we need
will be the front panel. This is the front panel. This is the back banner. And there will be two
more in the middle to distribute the way that
will be on the table. So the beginning is very simple. I need to cut a piece of cardboard that is
these measurements. And I will need four of them. The next video, I
will cut the panels.
4. How to cut safely: Before we start to cut, we have to talk about
some safety rules. Even if you have experienced
with cutting knives, please pay attention to
this very important rules. Maintain a sharp knife so you don't have to
struggle with cutting. Sharp knife is
safer. When you cut. Stand. Don't sit down. You don't have enough
control on the blade. When you sit, the
cardboard is very thick. Don't try to cut it in one. Go. Stand in front of the
ruler along the line. When you start to cut, don't just start cutting because the knife may get out of
line and cut your finger. So the role of firmly feel
the ruler with the blade. When you feel it, just then start to cut. Don't use a lot of false. Again, feel the ruler
and start to cut. When we made this, we can put the ruler side, hold the cardboard firmly, the hand in a respect
and respectful distance. Respect the knife and
don't get too confident. Repeat these steps
every time you cut cardboard as if it's
your first time. Even if you are
very experienced. To find a straight line, we use the natural
lines of the cardboard. Sometimes it's very easy to see the lines in
cardboard like this. The lines are very obvious. But when we use
smooth cardboard, sometimes it's harder
to see the lines. If you don't see them. Hold the cargo hold
in all kinds of angles to the light
until you see the lines. Lock the first
point on the line. We lack the next point. And then we can base all our
lines on that first line.
5. Cutting the main parts: Now I will cut the main parts of the table to make
the first line. I use the natural lines
of the cardboard. Now I have one side that
is a clean straight line. From here, I measure 17 cm, and I cut my second line. I locked the knife,
the blade one to align the ruler to
the line that I marked. I put the knife in
contact with the ruler, certainly to the cardboard. And then I start to cut. If you didn't watch
the previous video about how to cut the cardboard, safety, please do so before you cut the cardboard yourself,
it's very important. Now I have two straight lines. To cut this side, I will need to
measure right angle. I can use a triangular ruler. We say 90 degrees corner of an L-shaped rulers over T ruler. If you don't have any
ruler of this kind, you can use other object
that has a 90 degrees angle. I always speak this video app, this point, but please do
not rush when you cut. Do it slowly and carefully. Now when we measure 37 cm, that is the height of the page. The thickness of the leg is
three-and-a-half centimeters. But they found out
that the width of the ruler is about that size. So to make things simpler, I will use the ruler
to measure the week. So now I have my first
panel. At this point. It doesn't look
like something that you can make a table out of. It looks so small and flimsy. But don't worry, you
will see the magic late. I need three more
panels like this one. I can use. The first one is
a stencil to mock the waste. If it had a complex shape, that would be the
perfect solution. But because it has a simple
shape with straight lines, I'll measure the rest is
a date, the first one. So we have full Panels. Choose the ones that will be in the front and on the back, depending on how smooth and
clean the cardboard is. Give them numbers to
avoid confusion later on. In the next video, we'll make the paths
that connect them.
6. Cross sections: First I will make a stencil
to help me mark the notches. For this, use, a
thick piece of paper. Its height should be the
height of this margin. The width doesn't
matter that much. I'll make it 6 cm. So we need a piece
like this one. Now I will find
half of the height, because the height is
three-and-a-half centimeters, the meet point is 1.75. And now I have to
cut a hole here. The thickness of the cardboard. I put it in the middle
and mock the thickener. And I will cut this part. So this is the
stencil that I need. Now I will check if it is
indeed in the right size. It goes in without pressure, but it's the right
size. It's not too big. I want to make notches, one in the middle and
two more on the sides. He doesn't have to be
exactly in the center. But for good measure, I prefer to be in the center. So I measured to find the
middle point, mark this line. And now I will take my stencil, place it so that
it's in the middle. So I can see the
line from below. And with the pencil or pen, I will mark the hole
and I will cut it out. So this is the first one. Now we will do another one here. This time we will do it
with a notch facing up. In 1 mol. Here. I will only make two
notches, not three. And also on the other side. Now I will do the same for
final number three as well. So I placed part two
on top of part three. Check that it is exactly straight and mark
all the notches. So 2.3 have these
notches parallel. And in part 1.4, which is the front part, in the back part, we
won't cut the notches, but we will mark them. I want to mark the
notches on part one, but on the backside. So I paint them together,
flip them over. And now I marked an
artist in part one. The notches are marked
on the backside. And adult Catlin. Also in part four, there will be marked
on the inside, which is default facing us now. So now I have these four
pieces. In part one. The notches are marked on the
inside too. And fast three. The notches up cutout in part for the notches are
marked in the inner part. Now we can go to the next day
cutting the cross-sections. The cross sections will
connect these four panels. The depth of the table
should be 50 cm. According to my plan. The cross sections will be between the front
and the back panels. And we have to take into
account the thickness of the cardboard itself
of these two panels. Therefore, the path
between them will not be 50 cm methylator lists, let's say 48 cm. So I need to cut such a strip whose height is 3.5 centimeter. Or in my case, the rulings
height and the width is 48 cm. We will need seven of these, three of them to enter here and fall more to
enter here and here. The most important thing is that the broad side will be
the side with the waves. I mock seven of these. The width is 48 cm. Because I have two panels
in the middle of the table. I will need two notches here. I want them to be
roughly equidistant. So Mark 15 cm from the side and 15 cm
from the other side. I will use the template again to lock the notches to
be the same size. And I will cut the notches as I did in the notches of the time. In the meantime, the
blade has worn out, and this is a good opportunity to show how I changed the blade. I turn it to unlock it
until the school comes out. You should take it out carefully so that the parts don't fall apart and weight will be clear
how to put it back again. I've pulled a new blade
Dean and scroll Bugzilla. We have seven of these and there are no chairs
should be parallel. The next video, we will connect the paths to create the frame or the base
of the furniture.
7. The main frame: In this video, I will assemble
the base of the table. I start with the
central parts 2.3. I put them up in set one of
the cross sections to connect them on the other side. Now I can leave it because
it can stand on its own. I pulled the cross-sections
on the sides. Here were the notches
at the bottom. I put a piece of masking
tape to hold it in place. Here's the front panel
and the backbone of a check that I haven't
forgotten any part. Or if there is something that
is too long or too short. This is the time to fix things before we
glue on the parts. If everything is okay, I can assemble
these parts again, but this time with PVA glue. Before I leave it to dry, a check that everything
is tracked in that the parts are in the
middle and don't stand out. After the glue has
dried sufficiently. It's time to glue the front
panel and the back panel. The notches I marked in these panels will help me
place them exactly in place. These are narrow paths, so I prefer to use hot glue
because it dries quickly. Because very important not to touch the hot glue
with your fingers. If there are drapes, do not clean them
with your hand. You can use a small piece of cardboard to clean
up the glue residue. The base of the table is ready. In the next video, we will add the inner parts
of the table.
8. Supports and outer parts: The frame is ready. If we put too much weight here, it may collapse because there is nothing to
hold it from below. Our next step is to
make these parts. They will be connected to each other and support each other. After that, there will
also be a part on top that will hold it and that will make the
whole thing stable. I always start with
the inner parts. If I do the auto
parts, I flip it over. I have these two
pieces, the leftovers. When I cut the pants, they are exactly the height
of these inner parts. I will stick them
here on the sides. After that, that will
measure the distance left here because it is an inner
part and will not be seen. I allowed myself
to use leftovers of two pieces of
cardboard that I have. But of course, one
large piece is better. So I will do this down
and wait for them to dry before I proceed to glue
the rest of the pieces. I use a combination of
PVA glue and hot glue because it is faster that you can't apply them
in the same place. So I will apply hot
glue here and there. And PVA glue everywhere else. Despite all the measurements that I tried to
make it accurate, it is not a perfect rectangle. I will glue a piece of cardboard
that is a little bigger. And after it dries, I will cut out the leftover. This is the best way to be
precise and get clean corners. Since this is a flat
and white part, I will use PVA glue. If I was in a hurry, I would use the
method of combining hot glue and PVA glue,
but I have time. Now, I will place
heavy flat objects on the books are perfect
for this purpose. I would like to dry
for a few hours. After they're completely dry, you can cut out all the
protruding and unnecessary paths, make a cut adjacent to the line. And as much as possible
in a straight line. Make the first cut slowly and patiently to get a straight cut. Before we glue these
pieces on the sides. And on the top, It's important
that we add supports. If we will put this part here, there is enough support with
all these cross-species. And it will be enough if we use the table only
four broad things. Because there are large
empty spaces here. If someone will lean
on the table here, if someone places something
small but very heavy, it may then to the table
in this weak spot. That's why we will
add more support. In this stage, I want to glue these two parts
with paper thing. I will do it on the
inside as well. So these are the pieces
that we will use. The height is the same as the height of
the cross sections. We will cut them to
length as needed. What is important is that the Abroad side is the
side with the waves. I take a piece like this one
and cut as much as I need. And I will stick it in
place with PVA glue. The shape doesn't matter. I prefer diagonals because
they take up more space. You can also make
triangles curbs. The main thing is to divide
the area into small spaces. So this part is dry. I did not add support on the sides because there will
be no heavy weight on them. But you can add support
there if you want to. In the next video, I
will add this path. And this path. Only after that, I
will add the top, which will be over everything, including this side panels.
9. Outer parts - part 2: I cut two pieces
that will be here. I caught them a little
bigger than they should be. I prefer the part
facing out to be the part with the waves
because it looks nicer. Because I want it to stick
fast and use hot glue. But because there's
a large area here, I also use PVA glue. Now quickly put it in place and I'll use its
weight to attach it better. Both parts are glued. It wasn't rolled out to
mark the cutting line. The cut along that line. Because of the new side panels, I will add more support
to connect them. Now the table top, this is the white piece, so I will use PVA glue. I use a little piece
of cardboard to spread the glue over
the entire surface. In the meantime, when it dries, I can glue those
parts of the legs. I will use PVA glue on the long lines and hot glue
on the two narrow lines. The table is almost ready. In the next video, we will
check that the table is level. We will fill holes
in Santa colonists.
10. Smoothing, leveling and filling: Before we continue,
we should check that all the connections are smooth
and there are no bumps. With my fingernail. I check well, they
are protruding parts and cut them
out carefully. And after that, use
sandpaper to smooth it. Use a spirit level to check
if the table is level. If it's not, put a long piece of cardboard
and then one of the legs to level the table and stick it
in place with glue. Another thing you should do
is to check if there are big holes or gaps and fill them. I use shavings of cardboard, but you can also use little
pieces of tissue paper. Mix them with some glue, and push it inside the hole. After it dries. Use
sandpaper to smoothie. In the next video, we will do one more
important step before painting the table.
11. Paper tape: The next step is
to use paper tape. There are two reasons. One is to add more strength
to the connections, and the second is that it
looks cleaner and smooth. We use gummed paper tape. It comes in different sizes. I use one that is 4.5
cm wide or 1.7 ". You can use plain paper
instead and apply PVA glue, but the results are nicer
with this paper tape. The paper is perfect
for cardboard. It has a similar color and
it's glue is very strong. The shiny side has an adhesive that gets activated when
you wet it with water. That's why it's important. So keep it away from water so it doesn't get wet accidentally. The stains here, a water spots. I recommend starting with the inner part to practice
using this paper. I mentioned how much I need. It's better to cut it
too long than two short. Keep it away from
the water container. To get a nice corner, I fold the paper in half
because it's an inside corner. I folded with the
glue on the outside, do it with dry hands. I use a wet sponge because it's easier to apply the
water that way. Make sure to apply the
water all over the paper. Now I touch the cornea of the paper to the corner
of the cardboard. Don't stick it yet laid down. Find the center and
from there outwards. If there is a crease, pick it up, strengthen
and grow it again. With my finger. I press the
paper well into the corner. After that I do the other
side in the same way. First from the center outwards. Here, it didn't stick. I probably didn't put water
here with it and ***** again. Occasionally wipe your
hands and the surface. This was an inner corner. Now I will show an outer corner. Sometimes it's difficult to
manage long pieces of paper. It can also be divided
into small parts. When the colonists
outside folded paper out in the corner along
the entire length. Then one side. At the same time a
stretch the paper lethal so that there are no wrinkles. And now the top part
from the center outward, now the other half on a corner like this. If I put paper tape
here and here, I will have an open spot here. So I'll cover that part first. I got the square and glue
it roughly in the center. Make a diagonal cut here. That way you can
have a neat corner. After I have done all the
inside parts in the side, I also arranged the
corners of the talk. The next step isn't necessary, but I like the clean look of it. I take the paper tape which is about the
width of the leg, or cut the length of the leg. I mark a diagonal
here in the corner. About 45 degrees angle. Cut it and paste it down. And also on the other leg. And the fact that between this is the before and after. The next step we will
paint the table.
12. Paint and Varnish: We paint cardboard
furniture with acrylic paints because it protects the furniture
for moisture. Before I paint and make
several samples of paint on pieces of cardboard
to see what combination. Unlike this table, I chose
dark titanium and burnt umber. For the best layer. I paint white. I prefer to use a light
color for the base. We need several layers because
acrylic paint is a little transparent and we also dilute it with water to make
it easier to apply. There is also printing
on the cardboard. Here. It's white,
but also black. So we need several layers of
paint to get a uniform look. As usual. I start
with the inside. You can use a brush or a
sponge painting with a sponge, it's smoother and
with no brush marks. To apply the second layer, wait until the
first layer dries. Otherwise the brush may
remove color we just painted. You should paint
two to three layers to cover everything
in an even layer. When the pen drives, you can move on to
the next column. I paint with dark titanium. Likelihood and defend the
strokes in one direction. When the color is dry. Decide if you want to stop
here or get to the next step. I want to get with texture. So I put a little
burnt sienna in a container and the little
water can dilute it. This is about the resulting
color that I want. For this texture. Use a brush, not a sponge. Paint,
some strikes. Why the color is still wet. Go over it again to
blend the color. Painting small sections so that the paint won't
dry before time. If the color is too
dark, headwater. Do it from end to end
in straight lines. This is the pattern I want. It's okay to have
paths that there's a little lighter or darker. It gives a more organic look. Here, I paint the
top of the table, but of course it's
better to start on the hidden parts of the table
to practice the technique. It's easier to make straight
lines when you paint back and forth, rather
than side-to-side. When you get to the corners, you can paint as usual
with straight lines. But I want to keep the
diagonal corner here. So I use washi tape. You can also use masking tape. The main thing is that
the tape comes out easily without pulling
the paint underneath. When you get to the tape, dot, push the brush
in this direction, but do it on the top towards the outside to get a
clean and sharp line. If the texture is too wet, clean the water from the
brush and blend the color. Now I do the other corner.
And the path between. I really like this technique. It gives a clean
and organic look. Another advantage
of painting texture is that it hides imperfections. If you paint a furniture
in layers of solid color, then you can leave the
furniture as it is. But when making textures, the top color layer
is very thin. And it may comes off when the furniture is
cleaned with a cloth. That's why I apply
varnish, mix it well. I start with the inner sides to avoid unpleasant surprises, such as if you find
out that the vanishes, the shade that you did not expect any would vanish will do. I prefer to walk on a water-based varnish to avoid the fumes of an
oil-based varnish. It can be applied with
a brush or a sponge. Pay attention to
drapes and wipe them. I prefer to use the
varnish that doesn't have a tint so that he does not change the
color of the furniture. This color looks milky, but when it dries,
it will be clear. Wait for the first layer
to dry completely. Before you apply the second one. Read the instructions
on the package to know how many hours you have
to wait between layers. After the varnish has
dried completely. You can clean the table
with a damp cloth. And if you put hot
dishes though, you should put a coaster to protect the furniture
from the heap.
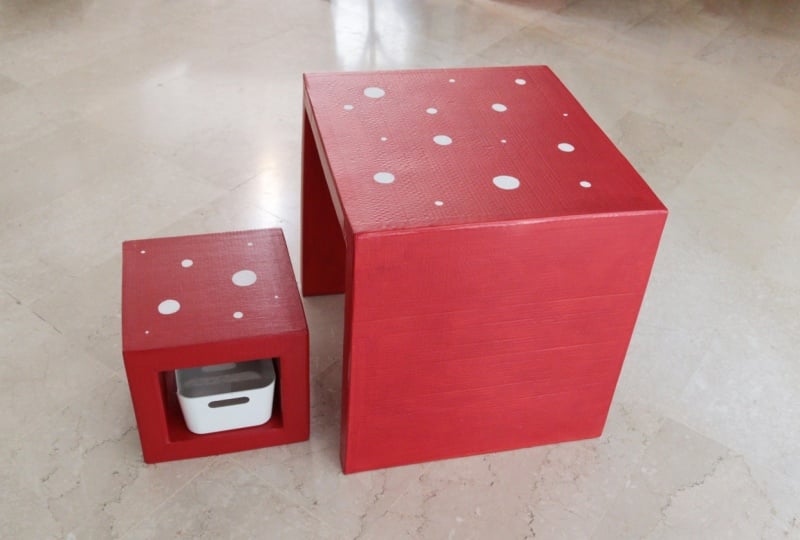
13. What next?: I also included the
measurements of this table. After I made this, I decided it needs
a little chair. I painted the dread and
added some white circles. So it's a Marshall said. Of course you can paint
it any way you like. He allows some ideas that I had. I'm interested to know
what are your ideas. So post them in the discussion. We come to the end
of the class and I will really like to
see what you made. So post a picture and tell
something about what you did. Upload it to the
project section. Just hit that green button. If you want to learn how to make other furniture
from cardboard, check out my full
class about it. If you want to stay
in touch and learn about new classes,
then follow me. And please leave a
rating and review. So others will know about this class and I will know
what to do better next time. So post your project, share it with us, and I will
see you in my next lesson. Bye.
 Naama Yaffe Mendelboim, Graphic designer and artist