Transcripts
1. Welcome to the class!: Hello. Welcome to this
homemade granola class. My name is Rita. I am a Portuguese pastry chef. I'm a cookbook author, and I'm a YouTuber, and
I love to make granolas. Granola is a very
popular breakfast food, but it can be very expensive. The good news is that when
you make granolas at home, they are much cheaper and
they are very easy to. Once you start making
your own granolas, chances are you will never buy granola from
the store again. And besides being much
cheaper and easy to make, the other big advantage of
making the granolas at home is that you can customize them and use the ingredients
that you prefer. What you will learn
in this class is to base granola recipe with
very few ingredients, and then you can use it
simple for a simpler granola, or you can use this base
granola to build other flavors. And as a bonus, in this class, I will also teach you
three granola flavors, so you can see what kind of granolas you can make and
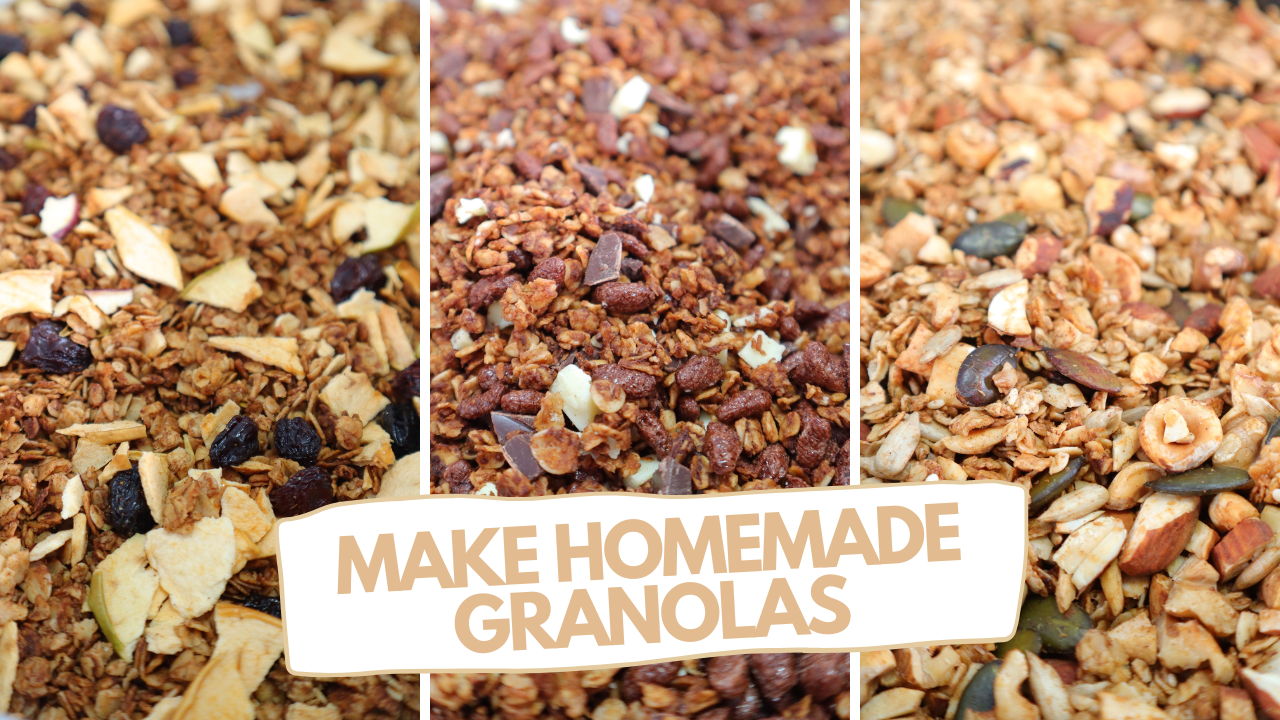
to get some inspiration. So the granolas we
are making today besides the base granola are
a double chocolate granola, an apple and cinnamon granola, and a granola made
with nuts and seeds. So there is a granola
for everyone. And now let's officially
start our class.
2. Granola base recipe: Oh start by making our
basic granola recipe. As I mentioned before, you can use this recipe to
make your granola as is, or you can use it to build
other granola flavors. Depending on the ingredients that you will use to
make your granolas, you can add them directly
to the base recipe and bake everything in the oven or some ingredients you
will add them after. I will give you more tips about this at the
end of the class. With these quantities,
you will make about a tray full of granola. And again, depending
on the ingredients that you choose to add
to your base recipe, you will make more or
less quantity of granola. But more or less, you will make a jar like this,
which is not bad. Obviously, you can
double or triple the recipe if you want to
make bigger quantities. I already told you that
making granolas at home, it's very easy, but I didn't tell you it's very fast as well. So you are going to need
about five to 10 minutes to mix the granola and then
20 minutes in the oven. So the whole process
start to finish. I won't take you more
than half an hour. It is very worth it. Now, let's check
the ingredients. We will need to make
our basic recipe, and then let's make it. We are going to
need rolled oats, coconut oil, or any other
oil that you prefer. Honey, or you can
also use maple syrup, shredded coconut, I'm using unsweetened and
the pinch of salt. Start by melting together
the coconut oil and the honey either in the
microwave or in a saucepan, mix it until
everything is liquid, and then add it into a
bowl with a rolled oats, the coconut, and
the pinch of salt. Mix everything so the mixture of coconut oil and honey can
coat evenly the rolled oats. The coconut, and believe
it or not, this is it. Our base granola is ready. You can now spread it
in a tray and bake it. But I am going to use it to
make other granola flavors. If you want to
bake it like this, follow the baking
instructions of the recipes that I am
going to show you next.
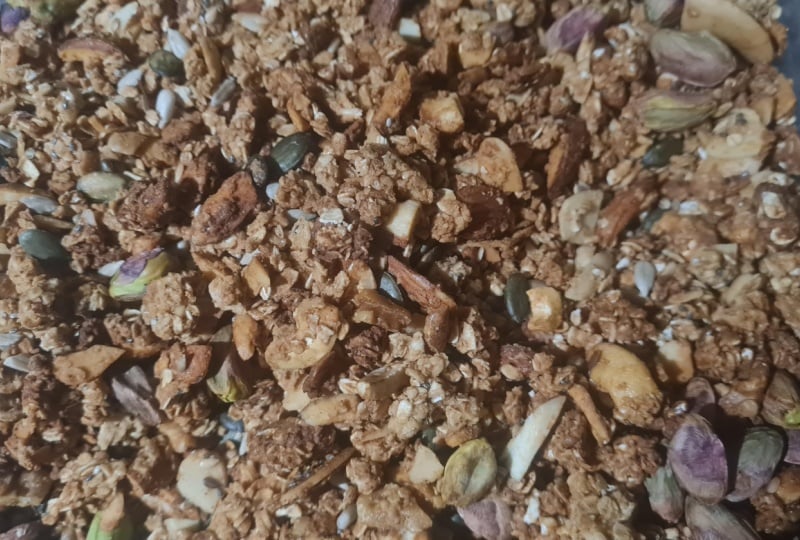
3. Nuts and seeds granola: A. Now that our base
recipe is ready, it's time to have some
fun with our granolas. I'm going to teach you now how to make one of my favorites. It's a nuts and seeds granola, full of textures and flavors, I am sure you're gonna love it. For this granola, we will need
a recipe of granola base, and then walnuts, azelnuts,
almonds, and cashew. You can also use
just one type of the nuts with the full quantity of these quantities that
I am using divided. And then pumpkin seeds, sunflower seeds, sesame seeds. The same goes for the
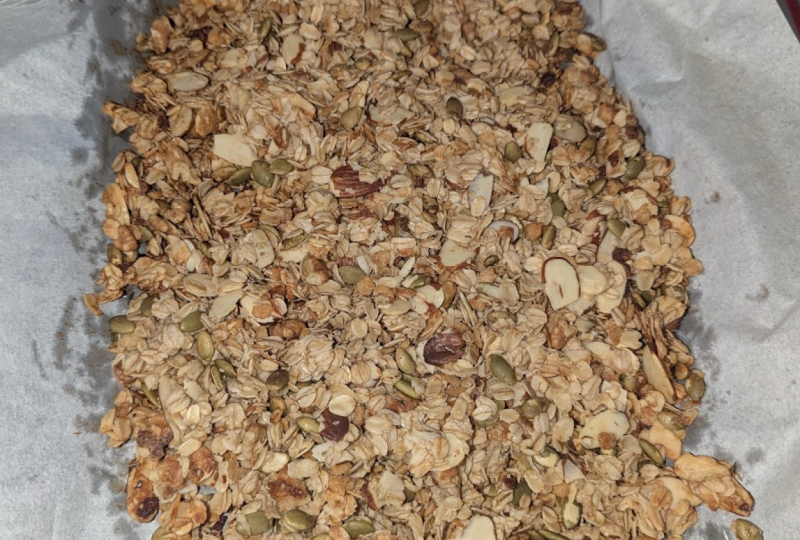
seeds and cinnamon. With the granola base ready, let's start by roughly
chopping the nuts. It's important to use raw nuts because if they
are already roasted, and if you take them to
the oven, they might burn. So you can use roasted nuts, but then add them at the end. So I'm chopping the cashews, the walnuts, the almonds,
and the hazelnuts. But actually, if you
prefer a chunkier granola, you can leave your nuts whole.
You don't need to chop. Now that I have
mine all chopped, I'm going to add them into the granola base with the
seeds and the cinnamon. And I'm going to mix
everything together so everything is
evenly distributed. Let's spread it now into a tray and take
it to the oven at 170 Celsius or 325 Fahrenheit
for about 20 minutes. But every seven to 8 minutes, take the tray out of the
oven and mix very well, so it bakes evenly. When everything is golden
brown, it's ready, give it a final stir
and let it cook completely before stirring. But
4. Apple and cinnamon granola: A. Next, we are going
to make an apple and cinnamon granola that almost
tastes like an apple pie. For this granola, we will
need the granola base, dried apple slices,
raisins, and cinnamon. Add the cinnamon into the
granola base, mix very well, and then spread
this mixture into a tray and take it
to the oven to bake at 325 Fahrenheit or 170
Celsius for about 20 minutes. But every seven to 8 minutes, take the tray out
of the oven and mix everything so
it bakes evenly. Everything is golden brown, take it out of the oven, let it cool and meanwhile, break the apple slices
into small pieces. You can do this using
a knife or scissors, but I prefer to do this by hand, and they should look like this. Once the granola
is no longer warm, you can add the pieces of dried apple and raisins
and mix very well. So later, every bite of granola
has apples and raisins, and now it's ready
to eat or to store.
5. Double chocolate crunchy granola: A. Lastly, I'm going to share a granola that is perfect
for the chocolate lovers, a double chocolate
crunchy granola. The ingredients for this granola are a recipe of granola base, cocoa powder, chocolate
rice crispies. If you don't find
chocolate ones, you can use just plain and
then dark and white chocolate. You can use a bar that you
are going to later chop into very small chunks or you can use small
chocolate chips. The granola based recipe ready, add the cocoa powder, mix very well and
spread this mixture into a tray and take
it to the oven at 170 Celsius or 325 Fahrenheit for about 20 minutes or until
everything is golden brown. Take the tray out of the oven every seven to 8 minutes to
mix everything together, allowing the granola
to bake evenly. Soon as the granola is ready
and comes out of the oven, it's not crispy or crunchy. It will crisp up once
it's cold, don't worry, leave it to cool and when
it's completely cold, you will see it's going
to be very crispy. At this point, chop
the chocolate into small chunks if you are
using a bar like me. I have decided to use
dark and white chocolate, but you can also
use milk chocolate. When your granola is cold, add the chopped chocolate and the rice crispies and
mix everything together. Now you have three options. You can eat it right
away. You can store. Actually, you can
package it and offer it because I think Ranolas
make also a great gift.
6. Tips for making granolas: A. Before finishing this class, I want to give you
some more tips for your granola success. One of them is how to store
correctly your granolas. They need to be in an
airtight container. A jar like this is perfect, and they can last
for up to a month if they are stored correctly, but I'm sure they
won't last as long. So I want to give you a few tips about the ingredients that you can use to add flavor and
texture to your granolas. And most of them you
can add directly to your base recipe
and bake in the oven, like spices or
nuts, for instance. But some others I prefer
to add at the end, and those are the ingredients
that shouldn't be baked. Like chocolate, for instance, it would melt and it would burn. And some ingredients may
get a little bit tough when baked like raisins or
cranberries, for instance. So I also add those at the end, and also like cereals, for instance, or some
other ingredients that I want to add that really
don't need to be baked. I also add them at the end. So have this in mind when creating your own
granola flavors.
7. Goodbye and class project: Aw. I hope you have
enjoyed this class and I hope you are feeling inspired to make your granolas at home. As for the class project, I invite you to make
obviously a granola. You can use either one
of the flavors that I shared with you or you
can create your own. And please don't
forget to upload the picture so we can
all see your creations. You can also check my
other classes here, and you can find me at La Dolce ita on Instagram
and on YouTube. I will see you in my next class
and happy granola baking. Bye.
 Rita Nascimento, Pastry chef, Youtuber, Cookbook author