Transcripts
1. Welcome- What are Portuguese Custard Tarts: Hello. My name is Rita. Welcome to this class. I am a Portuguese pastry chef. I also have a YouTube
channel dedicated to pastry, and I teach baking classes, and I also write books about it. Today, I'm happy
to share with you the most famous and
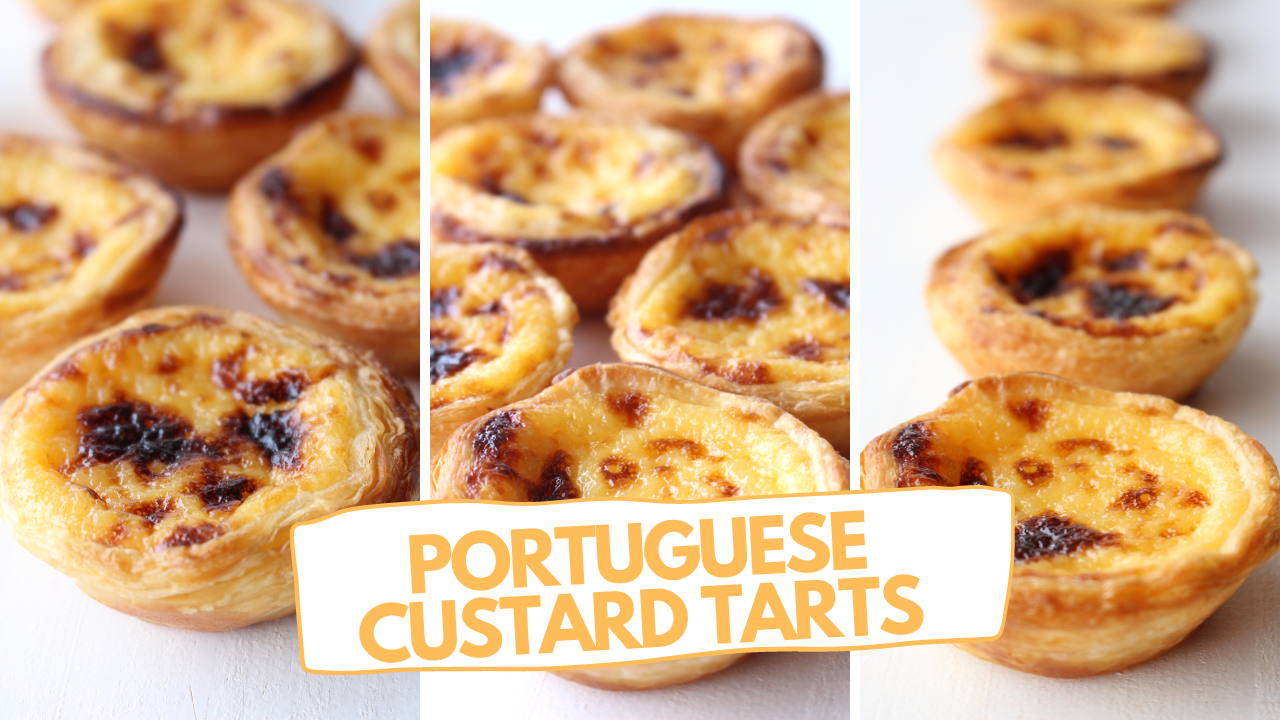
iconic Portuguese pastry, the Pastel D nata, or you might know it as
Portuguese Custard tart. If you have tasted them, you know what I
am talking about. If you haven't tasted them, it's pastry that consists on a very flaky puff
pastry on the outside, and a very rich and luscious
cream on the inside, lightly flavored with
lemon and cinnamon. They are absolutely fantastic. They are adored
here in Portugal. Portuguese people eat
them at any occasion. Some people like to eat
it for breakfast or a midmorning snack with
a shot of espresso. Sometimes it's served as a
dessert or an afternoon snack, and it's always
present at parties. Here in Portugal, it's not that common that we bake them at home because they are
very easily accessible. They are not expensive, and also because in bakeries, they are baked at a
much higher temperature than our ovens at
home can reach. Usually we buy them
at our local bakery. I am going to share with
you a very easy recipe that is adapted for
the domestic ovens. If you are not in
Portugal and if you want to eat these delicious pastries, keep watching the class.
2. Ingredients: Now, we are going to take a look at the ingredients
we are going to use. They are very simple. I'm going to teach you how to make the custard with
these ingredients. I'm also going to
teach you how to prepare the little molds
that we are going to use. For convenience, we are going to use store bought puff pastry. I'm going to leave the written recipe with all the measurements
in the class notes. Will need sugar, flour,
cornstarch, milk, lemon, cinnamon, egg yolks,
and puff pastry, and more on each
ingredient next. For the sugar, we will use a
normal refined white sugar. We will use yolks
from large eggs. Use an all purpose flour or a plain flour that you
can find in your country. We will use just the
peel of the lemon without the white part,
a cinnamon stick. As for the milk, we will use whole milk. Here, we can find these
pre rolled rectangles of puff pastry,
those are perfect. But you can use
whatever puff pastry you find in your country, you can use a piece
of puff pastry and then roll it
into a rectangle.
3. Making the custard: Let's start by
making the custard. Into a medium saucepan, we are going to sift the flour and the cornstarch
and then add the sugar. With a whisk, we will mix
everything very well, and then we will start
to add the milk. Add a little bit of the milk first to start
dissolving the sugar, the flour, and the cornstarch, and then add the rest
of the milk slowly. Let's add now the lemon peel. I like to use a vegetable
pillar for this, the pel should be very thin, and we are going to use
three pieces of the p, and we're going to add as
well the cinnamon stick. Now, we are going to take the saucepan to the
stove in low heat, and with the whisk,
we are going to mix continuously so it doesn't stick to the bottom of the pan. In about three to 5 minutes, the mixture will
start to thicken. When it starts to thicken, just be careful and
whisk more vigorously. As soon as it starts to boil, count about 30 to
40 seconds and then turn off heat and take the
saucepan out of the stove. This is how it should look like almost like a Bahamel sauce. It should be thick
creamy and shiny. Leave it to cool for about
15 minutes and meanwhile, add the yolks into a bowl. Break them up with a
fork or a spoon and once your milk cream
is not as hot, add a little bit to
the yolks and then add this yolk mixture into the
saucepan little by little, and always mixing
with the wheat. Till everything is
well incorporated, and that's basically
our custard ready. All we have to do now
is to strain it into a bowl so we can get
rid of the lemon peel, the cinnamon, and some lump
that the custard might have. It should look like this. It should be very shiny, light yellow, and very smooth. Now cover it with
cling film and take it to the fridge
for at least half an hour before using it.
4. What tins/molds to use: And now I'm going to
talk a little bit about the molds that
we're going to use, the tins, whatever you
want to call them. Here we have very specific
Portuguese custard tart tins. They are very, very similar
to the muffin tins like this, but they are slightly different. The difference is that they
have a smaller bottom. Here, it's narrower. And also, the sides
are much more open instead of more closed
like the puffin ones. These specific ones
for the custard tarts, since they are a
little bit more open, it's going to be better for the puff pastry to puff
here around the sides, but it's a very
small difference. If you don't have the ones, you can use this ones, or if you don't have
any of these kind, are going to probably
have one of these, you can still use them. It's going to be
a little bit more difficult to put the
puff pastry here, but it's still doable. Use whatever you have at home. You're going to have good
patage nata either way.
5. Preparing the tins with the puff pastry: This might be the trickiest
part of the whole recipe, so let's go over it slowly. Unroll your roll of puff
pastry or roll your piece of puff pastry and then sprinkle
it lightly with water. We don't want to get the
puff pastry all wet. This is just to help
the puff pastry to glue to itself when
we are rolling it. Roll it tightly and
try to glue as much as possible that last piece
into the rest of the roll. And roll it for a
couple of times more, so it's very tight. This roll should have
more or less the diameter of two fingers. That's about an inch
or 2-3 centimeters. The puff pastry should be cold. If it's hot where you live, you might want to
refrigerate it for about half an hour
before this next step. We are going to cut
pieces of the roll of the puff pastry with the diameter of more
or less one finger, and you should have these pieces of like a spiral of puff pastry. Place the pieces
of puff pastry at the bottom of each tin and
get a small bowl of water. Are going to slightly wet our thumbs so they don't
glue to the puff pastry, and we are going to use
them to stretch it. Start by pressing it down
so it creates a base, and then with one of your thumbs stretch the puff pastry
from the bottom all the way to the border of the tin and rotate the tin as you
do this movement. Can wet your tongue
whenever you feel the need, and you can correct the puff pastry until
it looks like this. It should be smooth
and it should be all the same size
around and have a little bit of a border that comes a little bit up from
the border of the tin. It should be thin all the way around especially at the bottom, but not as thin that it
becomes transparent. Now all we have to do is
do this to all the tins. These are the traditional
for the postage nata, the ones that have wider sides. It makes this process
a little bit easier. You can use them right away, or if you want to
use them later, or if it's too hot, you can put them in a tray, cover them with cling film
and store them in the fridge. These here are regular
muffin tins and I am also going to show them
the process is the same. But since they have a little
bit of a taller site, it's going to be a little
bit more challenging to take all the puff
pastry all the way. Just be careful adjust as you go and be a
little bit patient. Lastly, I'm going to show
you how to do the same thing in one of those muffin tins
that come glued in a set. You are going to start by flattening the little
piece of puff pastry. Then you're going to place it in the middle of your
tin, and slowly, you are going to
do the same thing, which is to stretch
from the bottom up, always wetting your to
whenever you feel the need. It's going to take
a little bit of more time in this kind of tins, but as you can see,
it also works.
6. Baking: Now that we have
both elements ready, the custard, and the tins
prepared with the puff pastry, we can either bake them right away or you can store them both in the fridge for
up to three days and they will be ready to
bake whenever you want. Speaking of baking, that's exactly what we are
going to do now, and the most important thing
is to preheat your oven. Oven needs to be very, very hot. Usually in bakeries, they
bake them at a very, very high temperature
around 400 Celsius, that's about 750 Fahrenheit. In our homes, our ovens
usually go up to 250 celsius. That's about 480 Fahrenheit. So that's the temperature
that we are going to use. Pre heat the oven for
about 15 to 20 minutes, so it has time to reach
that temperature. Meanwhile, we are going to
fill our tins and wait. When you're ready to bake, give your custard a little
stir and transfer it to a jug. It's going to be much easier
to fill your tins this way and fill your tins up to
three quarters of the way. Don't overfill them because the custard expands a
little bit in the oven, and it might overflow. In fact, you can use a
tray with parchment paper. So if this happens, it's going to make
clean up much easier. Now they are ready to take
into your hot hot oven, and don't overfill your tray, so there's enough
air circulation between the tins, and meanwhile, the first patch is baking, you can go ahead and fill the other tins with the
rest of the custard. Depending on the size of your teens with
these quantities, you will be able to make
12-16 custard tarts.
7. Tips for and after baking: It will take more or less 15
minutes for them to bake, but it will obviously
depend on your oven. We are looking for the puff
pastry on the sides to be very golden and with a
crisp and flaky look, and the custard in the center should have a few darker spots. Sometimes even some that
are black, almost burned. They are characteristic of
the Portuguese custard tarts. They add to the flavor. When you start noticing these spots and the puff
pastry appears to be cooked, take them out of
the oven carefully, and they will be very it's normal. Then as
they are cooling, they will go down. Leave them alone for at least 15 to 20 minutes
before trying to unmold them. When you are ready to do that, take a palette knife or a
knife and run it around the tin, and they should
come out easily. Sometimes what happens is that the custard will
overflow a little bit, and it will glue to the
upper part of the tin. Just go with a knife, cut
that, and you're good to go. So let me show you, as you
can see, it's very easy. Run the palette knife
around the custard tart, and they will come
right out of the tin. There's no need to grease the tins because
the puff pastry has enough fat and do this that 15 to 20 minutes after you
take them out of the oven, don't let them cool in the tins. Otherwise, that fat can get hard and they can
glue to the tins. Here it is a typical
pestil Natta with a shiny custard
with darker spots, and on the bottom, you can
see the rolled puff pastry. They are wonderful, served worm, not hot because they
can burn your tongue, but worm, they are fantastic. They are fantastic cold as well. And they are specially good
the day that they are baked. They are still good the day
after or two days after. But the experience of eating the puff pastry crispy
with a creamy custard, you can only achieve that on
the day that you bake them. The next day two days after, they are still going
to be very tasty, but the puff pastry will absorb the moisture of the custard
and it will be soft. In the next segment,
I will taste one, and I will show you how
do they look inside.
8. Let's taste them: There is nothing quite as a plate full of
worm petage nata. You can enjoy them simple
or sprinkled with cinnamon. Let's cut into one, and this is how they
should look inside. The puff pastry should
be crisp all around, and the custard in
the center should be shiny and very, very creamy. And when you bite into one, this is how it should sound.
9. Goodbye: And there you go.
This is how to make Portuguese custard charts
in a very easy way at home. I really hope you have
enjoyed this class. Obviously, the class project
is to bake a batch of this. If you do that, please upload the picture so I can see
how they turned out. If you like this class, check my other
classes here as well, and you can find me
on YouTube at dolera. See you on my next class.
 Rita Nascimento, Pastry chef, Youtuber, Cookbook author