Transcripts
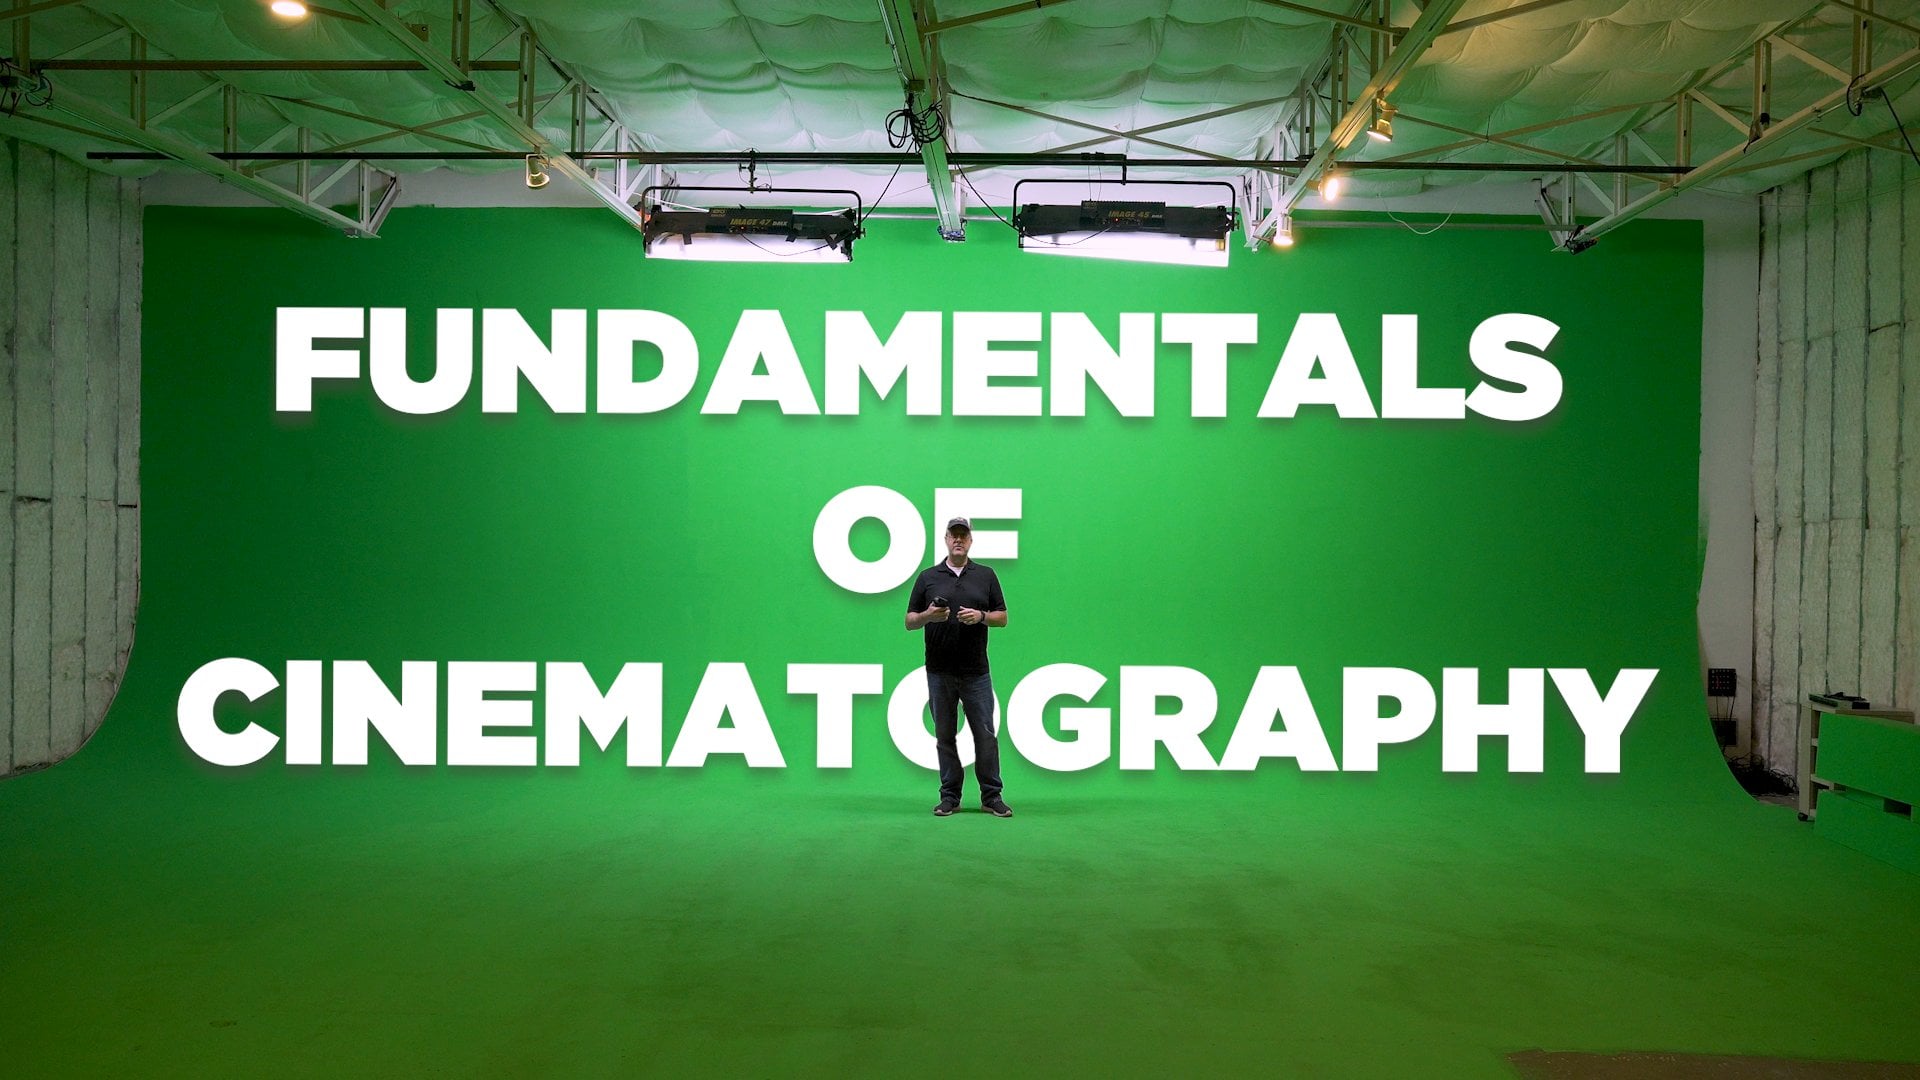
1. About The Course: This course is a
case study that I call the DIY short bone guide. And it will look at
how my iPhone shots short film pre-owned was made. The idea of being
for you to learn my process and then use it, make your own short film. This isn't just about the gear. This is a complete script to screen blueprint that I have
successfully used for years. And that's making short films, digital series, and also
in the feature films. Here though I'm
concentrating on producing low to no budget DIY shorts. And that all starts with taking an idea and turning
it into a script. Then how to take that script and turn it into an actual movie. And so that means figuring
out how to pay for it. How to cast actors
and book a crew, had to do preproduction, including a script breakdown, shot listing and storyboarding, also, how to schedule the shoot. Then we move on to production
and how I shot the film. And I show what gear
I used to make it. And finally, my
post-production workflow. How I edited the film and did calibrating sound
design and music. Also included are the
actual shooting script, storyboard, shot list, and
the schedule from pre-owned. That way you can
preview or download these to use as a reference when you're creating your own. Additionally, I include several
production forum templates and a PDF version of the
entire DIY short film guide. Again, for you to download
and use as a reference during the course or
refer to it later. So ultimately I'm providing this blueprint for
you to follow. And if you do, you'll
be on your way to successfully making your
own DIY short film. I guess, Blake Calhoun. If you've taken any
of my other courses, this one's going to be
a little bit different. On this one, I'm
going to do more of a one-on-one consultation, kind of feel less
hands-on with the gear, although I will be doing that
more just discussing and going over my short film
pre-owned and how I made that. It's a DIY short film. So how I use various
techniques and approaches to make that and then how you can do the same on your project. But before we get into it, we need to watch
this short film. And so that's in
the next section. So go check that
out and when you're done, I'll meet you back here.
2. Watch the Short Film "Preowned": Enjoy your next I will. Yeah, I just picked it up. You're gonna get it now. I mean, I I just couldn't
pass up this deal. Ms. almost too good to be
true. That's great, man. Yeah. Come on. Come on. Yeah, you got me. Okay. Super funny, but that's enough. Alright. We talking
about the car stuff. The messing with the seed, the cranking up, the
weird music really loud. Don't know what. It
just needs to stop. Well, somebody's
doing something. I want to know is it's not me. Why don't you have
them check it out? Okay. Okay. You're sure it's not you? I think it's malfunctioning
or something. I don't know. Maybe somebody's getting
it at night. I don't know. I just well, you lock it
right here that I lock it. Like super careful. You can select up to chew
custom driver settings. And then when you
get in the car, you push the button and it
automatically adjust to that? Yeah. I mean, yes, it's working. But I mean, what
about the stereo? I mean, that's weird, right? It's a used car. So sometimes they have
a mind of their own, but I'm sure it'll
work itself out. And if it doesn't, we have the
15 a money-back guarantee. Okay. Sound them out. You can select up to two
custom driver settings. That way when you
get in the car, you just push the button. It automatically goes
to that setting. Just make sure to
not accidentally hit it with your
legs when you get the car. Enjoy it. Thank you. I will. I'm talking about I'm talking about right. Well, now that you've
watched the movie, I hope you liked it. I did shoot that on an iPhone, an iPhone 13 Pro Max, and I use a variety of gear
which I'll go over later. And when you're making
a short though, that part doesn't really matter. I know that's
probably why you're here because I shot it on an iPhone and it's
a DIY project. But in reality, everything I'm going to
talk about in this course could be applied to a whole
lot of different cameras, any kind of camera,
truth be told. But in particular, I'm gonna
focus on affordable ways, DIY ways to make that happen.
3. Ideas & Scripting: Now again, I'm going to get into the actual gear and more of the techie stuff
later in the course. But this is actually training to teach you how to
make a short film, not only during production, but from the beginning. The idea, the
concept, the writing. Now, I can't tell you what
the right and nor should I. That should be your
own creative choice. And that's what makes filmmaking an art interesting
and subjective. You write what you
want to write. But a general rule that I go
by is write what you know. And you've probably
heard that if you've listened to any type of writing, podcast or taken any kind
of writing training. But writing what you know, can be a great way to start
and you don't have to. You could write space opera. You can write whatever you want. But if you write what
you know, that way, it becomes more personal and it typically is easier
to write something. Now, of course, in my
short film pre-owned, it's a supernatural story
about a car that kills people. So I didn't actually
know anything like that. But I have done a lot
commercial work in my past. And so it was also a little
bit of a story about how car dealers could
be maybe unethical. And so again, the story
doesn't have to be exactly something that's literal or something that
happened to you, or autobiographical or
anything like that. But it just is helpful for
you to know the topic. And the other point to that is especially on these
DIY kind of projects, is right around ideas or things that you have
or have access to. So in pre-owned, I
use my mom's car. I had access to my
mother's car that I thought would be
perfect as a used car. I had access to a
friend of mine, his house, the house, and that had a very
cool retro vibe and I just thought it fit
the story really well. And then had access to a
car lot because again, I used to do car commercials. And so I knew and agency guy who got me in contact
with a car lot. And so the point there is, doesn't matter what
your story is about. But right, with things you have access to and that
are ideally free. This, I got the idea from a famous book called
Rebel Without a crew, written by Robert Rodriguez
back in the early 990s. So if you're younger than 40, probably don't even
know that book exist. But back in the early
days of Indie film, Robert Rodriguez had
made El Mariachi, and he made it for like $7,000, famously shot at by himself and Mexico and 16
millimeter film. The book talks about how he took everything that he had access to and put
it into the film. He got production
value that way. Now, it's a little bit dated since he shot on 16 millimeter, which today most
people don't do. In a weird way. Phones today have become our Super eight or 16
millimeter cameras that we used to use. But the ideas still apply very
well to Indie filmmaking. It's a book I highly
recommend picking up. And as a matter of
fact, I'm going to mention several books
in this course, and I'll put them in the
additional resources section. So if you're
interested in those, and I do recommend them, be sure to pick those up. But on these low
budget DIY projects, It's great to have access to what you're wanting to shoot, whether that's maybe
a swimming pool at your parents house or at
your house, a farmhouse. If you're doing a
horror film, a car, maybe you're doing a movie
like I did about a car or a car race or if
you have a horse farm, whatever it is, anything you can get your hands on that will add production value to your short without adding a lot of
cost to your budget.
4. The Script: When you're writing the story, I would suggest
keeping it short. We're making a short film here. Sometimes you see these
shorts that are well done, but there are 40 min long. That's technically a short film, anything under 70
min as a short film. But if you're trying
to get this on YouTube or put it on
YouTube or trending, get it in a film festival, five-minutes or under is
really the sweet spot. 10 min tops, maybe 15 if you've really got a
good dramatic story. But I would keep it short. The shorter the better. I think five-minutes
is a sweet spot. So if you haven't
written a script, keep in mind that
typically speaking, one page of your script
equals 1 min of screen time. So a five-page script
would be five-minutes. Now that is not exact
because if you write an action sequence that is maybe just a paragraph
on your script, that could be 2 min and a movie, because it depends on
how you direct in, how you shoot it, and
then how you edit it. But generally speaking, movies like features and
stuff are 120 pages or so for 2 h or 90 pages
for a 90 minute movie. So when you're
writing your script, tried to keep it
under ten pages. Again, five works the best. And then one other
interesting thing, especially for shorter films, again, five-minutes or under, comedy tends to work the best. Now again, I'm not
telling you what the right, I'm just telling you, typically speaking, comedy works well and then horror
works well too. My short I just did. I mixed comedy
with supernatural. And those tend to
do pretty well, especially on the
Internet and YouTube. Festivals can be hit or miss. It really depends on
the type of Festival, but today, I almost don't
make my films for festivals. And matter of fact, I don't. I do enter occasionally the bigger festivals like Sundance or South by
Southwest, et cetera. Pre-owned though I actually
didn't enter any festivals. I made it for my
YouTube channel. I got it out. And I have really
been making those to share them on my channel and share
them with the world. You'll find that in the end, you'll get a lot more
people to see it online than you ever
would at a festival. Festivals can be great, especially if you're trying
to make a feature version or if you're trying to
network and meet people, or if you're just
trying to support your local arts community
in that respect, festivals can be great. But otherwise to me, there's just so many festivals now and they cost
a lot of money, a lot of more rip
off truth be told, I don't enter many festivals unless you know the organizers, unless you're invited or again, unless you're supporting
your local arts community. The idea that you're
gonna get in Sundance or South by Southwest
is really a lottery. Truth be told, they get five to 10,000 films submitted and
they pick a couple of hundred. So your odds are very low. Now I'm not trying
to discourage you. If you make a short you
want to enter it, do it. But in my experience, you have a lot better
chance of doing well on YouTube than you
do at a festival.
5. Scriptwriting Software: Now regarding actually
writing the screenplay, if you're making this
film for yourself, meaning you're gonna
do it yourself, not making it for yourself, that you're going to be the
only person that sees it. But making it by
yourself or with a close-knit group of
people you already know, then it doesn't really
matter what you write in. You could write it
in Microsoft Word, especially if you're on
a budget, you can write it in the notes app
on your iPhone. Doesn't really matter. However, if you want to take to the next step and do it in
a more professional manner. And especially if you're
going to submit the script to other people or share
it with actors, et cetera, then it's really best to work in a
screenwriting software. The industry standard is called Final Draft. That's what I use. It cost a few hundred
dollars, ethnic, maybe a little bit
less if you get it on sale and it is an investment. But it's super important to have the script not only
be written well, but also to be
formatted properly. Especially again,
if you're gonna be sharing it with other people, crew, actors, et cetera. The great thing about
final draft is it's not just for writing
screenplays. You can write other
kinds of projects, corporate video, et cetera. And so it can be a
multi-purpose purchase if you end up buying it and you don't
have to use final draft, it's just the
industry standard and they have an iPad app is great. I've used it for, I
don't know, 20 years, but there are other options
out there and I'll put those in the additional resources
at the end of this section.
6. Screenwriting Books: Now the last bit on writing is if you've never
written a screenplay, it's probably a good idea
to learn how to do that. And one of the best
books I've ever read was a book called screenplay
by Sid field. It's been around forever. I think it's probably
30 or 40 years old, although it's been
updated over the years. And it is great. It'll teach you how to
use various plot points, midpoints, et cetera, how to
structure your screenplay. Now, it's really
for feature films, but a lot of those concepts
do apply to short films. So I really do highly
recommend reading that book or pick up Robert Mickey's
book called Story. A great book on just well story. Another one would be
Blake Snyder's book called Save the Cat. Again, these are
really geared more towards feature film making, feature screenwriting, and that may be what you're
working towards. But the same principles
really apply when you're writing any kind of story
and creating characters, whether it's a short
film or a feature. So again, I definitely recommend checking out those books and I'll have links to those in the additional
resources section.
7. Paying for Your Short FIlm: Alright, so your script
is written at night trying to figure out how
you're gonna get it made. And what I mean
by that is money. Well, in these type of projects that really
money is not involved, that you're doing it DIY, you're doing it for no
money or very low money. However, it just
depends on the type of project you're
doing with pre-owned. I did it for a few
hundred dollars. Now, most of the
short-sided done, especially on my iPhone channel, have been zero budget or a couple of hundred
dollars budget projects. I've done other short films that had been up to maybe $3,000. The thing to keep in mind is, you're never really
going to make money back on a short film unless you have a
YouTube channel and you make some
ad revenue on them. And even that though, unless
you get millions of views, you're not going to make
a lot of money back. That's not the reason
you make a short film. Now, the reason you make a
short film is or experience, or it's a calling
card, or just for fun. For me, it's been
all three really. But mainly I do them because they're fun and a
creative exercise. Now get on YouTube. I do
make a little bit of money on my channel when I put
my short films out there. But mainly I do
them as camera test instead of doing a
boring camera test, register them for fun. If you aren't going to
finance a short film, you didn't need to
have a rich uncle or maybe you have a trust fund. I'm kidding, but not really. Because really no one's
going to invest in a short film,
typically speaking. Or you could use credit cards. Now I'm not encouraging
to go into debt, but that's one way to do it, or just save up some
money ultimately though. And these kinds of
films you want to get people to probably
work for free. Find some like-minded
people in your community, whether that's on social
media or whether it's at your school or
wherever you may be. Get them to work for free and maybe you'll work on
their project for free. That's what I have done a lot. Or in my world, I hire
people on paying jobs because I do corporate video on commercials and other film work. And so I'll get them
to do me a favor on a short film and then I
hire them on a bigger job. The other thing I do
is sometimes do with very low budget where ii
pay people like $100 a day. Now, it's not a lot, but it does help pay for gas and it gives them a little
bit of pocket change. You can also give gas money. I've done that before
and especially right now when I'm
making this video, gas is super expensive
around the world. Helping them out like that unit. It's a passion project
is a good idea. One really important thing too, is don't overwork your crew. Typical film shoot days or
12 h for doing a short film, you're paying people
little to no money. I don't do that. I tried to keep them
to maybe eight to 10 h or even do half days. Make it quick, shoot it
as quickly as possible. You want to do as
best as you can, but obviously you don't want
to take advantage of people. And one other thing
regarding money and your crew making a movie, regardless of whether
you're making a feature film or a short film, even if it's a no to
low budget project, you want to feed your crew, feed your crew well,
and not pizza. Spend money on good
food, good catering, good craft service, makes
sure that they are happy. A happy crew usually
means a happy movie. Doesn't mean it's going
to be a good movie. But you want your career to be happy because then you want
them to work with you again. And also again, you don't want
to take advantage of them. So good food usually
makes a happy set, which hopefully
makes a good movie.
8. Crowdfunding: This course is
really about making no budget or low budget films. But sometimes you might want to actually try to raise a little money
through crowdfunding. I've been involved
with a few campaigns, but what I wanted to show you is the biggest campaign I ever did was for a web series
called Morgan bill. But this one is a little bit bigger than what we've been
talking about in this short. This was for a series. I had some pretty
well-known people involved from the web, like Felicia Day and
a well-known author, Rachel came from a
well-known book series. However, there's some good
lessons that I learned from here that I
wanted to share. And so what I'm going
to do is show you the actual Kickstarter page and then play the video we made. If you're going to do a
Kickstarter or an Indiegogo, whichever site you go with, you do wanna make a video. Video is super-important. The campaigns with
videos are almost always more successful
than one without a video. Our goal was to raise $75,000. We were doing an hour-long show. It was actually five or so episodes broken into
ten-minute long episodes, give or take a few
minutes here and there. We ended up making our goal. We had 832 backers. We raised just under $82,000. And that may sound
like a lot of money and it is a lot of money, but it's not for
what we tried to do. We're trying to do a TV
quality show on the web. We end up getting some
pretty well-known actors in the TV world. Especially we got Amber Vinson from Buffy the Vampire Slayer. And we got Robert Ricardo, who you may not know his name, but you know his face. He was on Star Trek for years and has been in just
tons of movies, is a great character actor. And then we had some
excellent actors, local actors we
cast out of Dallas, but they came from
Los Angeles as well. But we did the normal
thing where you get rewards and we had
different reward levels. And the rewards went
from $5 up to $5,000. I think we even had
one-person donate $5,000. We had a lot of people donate
in the 100 to $500 range. Again, this was based on a book series and
so that did help. But even this was
really hard to do. That's kind of an overall point. Doing crowdfunding is not easy. It's a full-time job
while you're doing it. And so another tip I
would suggest though, is make your campaign fast. Do a 30-day campaign. Don't go longer than that. And what will end up happening is you'll get a lot of attention at the beginning and then you'll have a hole in the middle, even though you gotta be
emailing and tweeting and mom, Facebook, et cetera,
the whole time. And at the end you'll
do a big push, that urgency people
will actually, people will tend to contribute. It's a fine line
though, because you don't want to be
spamming people. You don't want to drive your
friends and family crazy. However, It's a great
way to get them to donate without having to ask
them in a weird way, like, Hey mom, when you pitch in
$500 in my short film instead, Hey Mom, we're doing a
crowdfunding campaign. Will you pitch in $500 in a way, it's easier that way
for them to feel like they're part of the project
more than just rewarding you. They're rewarding their
project, if that makes sense. And so now I'll play the
campaign video and you can decide whether this is something that you might
want to try or not. And again, you could use
Kickstarter Indiegogo. You use Indiegogo. You can do a campaign where you get the
money no matter what. It's called a flexible
campaign on Kickstarter, if you don't make your goal,
you don't get the money. If you're doing a short film, you might set that low. We want to make it $1,000 or $5,000 or whatever it may be. That way if you go over great, but that way you're guaranteed or you're somewhat
guaranteed to get the money. And so here's the video I made. I shot and edited it, and it stars Rachel K in
the book author. Hello, I'm Rachel Payne, the author of The Morgan
field vampires series. It says story about
a girl who moves to a small Texas town and discovers that it's owned and
operated by vampires. And once she's there,
she can't get out. I've been writing these
books since 2006. And whether I'm traveling
the world promoting the books or going to
conventions or Comic-Con. Or I'm just at the store
picking up a gallon of milk. I get the same questions. And the question is, when is Morgan Bell going to be made into a movie or a TV show? My stock answer is always been, we're trying hopefully soon. But in truth, I didn't know. We've had several traditional
development deals, but none of them are
quite worked out. Did I mentioned that
we have a huge fan following and we've sold
millions of copies worldwide. So we've tried it their way. Now we're going to do it
our way. With your help. We're not going to make a
movie or traditional TV show, but we are going to make a
web TV show like the guild. But with vampires. There have been many petitions worldwide wanting to see this
made into a show. Recently. Glass houses was voted the number one book among UK school kids ahead of even books from the Harry
Potter in Twilight series. And interestingly on that list were the only ones at the top who have not been
made into a movie or TV show. And we're
here to fix that. A few years back, I became
friends with Felicia Day, the wonderfully talented
creator and starve the guild. You know, the one
with no vampires. I think they need vampires. We talked about the possibility of my books becoming
a web series. And she introduced me to
filmmaker Blake Calhoun. Calhoun. Like is from texts, which is important
because I'm from Texas. Morgan villas said in Texas, and we're going to
film it in Texas. This shows have millions of online views and fans
around the world. And now he's onboard
to produce and direct our show in
front of the camera. We're very excited to have Amber Vinson
attached as anomaly, the founder of Morgan Bell. And this time she'll
be playing a vampire. Instead of slang vampires. Producing a TV quality
web series is expensive, and that's where the majority
of the money we raise will go to paying the cast and crew, studio space,
equipment, editing, visual effects, original
music, and so on. The remaining money will
go to cover the rewards, things like DVDs,
posters and more. This fall, our plan is to film six episodes which will
run about 10 min each. If we go over our
fundraising goal, will feel more episodes. And that brings us to you. We're doing this for you, for fans of the
book series and for fans of genre series
like Blake produces. But to do this, we
need your help. So please take a look
at the rewards below. Choose something you like, contribute and become
a Morgan. No record. What was that? Where's Rachel? Did a vampire just
kill them writer. So again, I would
suggest trying to make your movie for
little to no money. It's DIY. But if you want to do something
a little bit bigger, crowdfunding may
be a good option.
9. Booking Crew: I was just talking
about cast and crew and feeding them well
and keeping them happy. Well, how do you get
your cast and crew? Well, the way I do it is sort of like I
mentioned previously, I get them from other
jobs I've done. I asked him to come work on the short film because
I've worked with them on another project or on
a corporate video, etc. But if you don't have
those kind of connections, again, reach out to
people on social media. You want to try to get
the most experienced crew you can that is willing to work on your passion project because likely they
won't be much money. But you'd be surprised how
many people are out there. This is cast and crew
that are willing to work for no money to loan money
to build up their resume. Again, you don't want to
take advantage of people, but especially green new
people are willing to work. And oftentimes, especially
with YouTube today, there are a lot of really
talented people out there that I think are
chomping at the bit to work. So again, find some
like-minded crew to help you and the main
guys are going to need. Now, let me backup though. On my short films, on my YouTube channel. I've made almost all of them
with a two-person crew. Now I have a lot of experience and I can wear a lot of hats. But ultimately you need
a director or producer, a DP or cinematographer. It's kinda interchangeable
name there. Then you need someone
to run audio. And audio person would be ideal, but it's not always
available because of budget. So there's ways to get around
that using wireless mikes are putting a boom pole
up on a stand, et cetera. And then you might also want
to get a gaffer or a grip to help with lighting and just
moving things around onset. And depending on your project, you might need an art
director or a prop master, or maybe even a
costume designer. However, for most DIY work, I do these roles myself. But if you're doing
a period piece or something requiring
custom wardrobe, probably a good idea to consider finding these crew
members as well. Now again, you could
be the director, the DP, and the producer. I do that all the time. And you get someone to help with the lighting and the
audio on your shoot. For me, I've done
it with two people. Again, we have a
lot of experience and so that might
not work for you. But if you can find
those type of people, even a production assistant, someone just coming up could be handy in
those situations. Now I will say when you
regarding audio though, you don't want to
have your little 12-year-old sister
hold the boom pole. Audio is super important. So don't skimp there. It gets someone that
knows what they're doing. And sometimes it's better to pay that position
than other positions because it's so
important to have good audio on your movie
that I can't overstate it. That and good acting are really the two most
important things. Even more than the
cinematography in direction and script truth be told,
everything is important. The bad acting and
bad audio will kill your short film very quickly.
10. Casting Actors: I always say the
number one job of the director is
getting a good cast. That is by far the
most important thing. Whether you're doing a Hollywood
movie or an indie film. But an Indie film,
I think it may be even more important
because you're usually working with
less experienced people and bad acting will kill
your short films so quickly. How many times we'd been
to a festival or watched a YouTube video
where you're like, wow, this cinematography,
it looks good. I like the score, the color grading, the
editing is all great. But the acting is so wouldn't, and bad pulls you
out of the story. That's because
people are casting again their family
members or non actors. Now, you can use non actors. Shawn baker, the well-known indie film director,
has done that a lot, but not everyone is
good at directing non actors is a general rule. I would cast professional actors even if they're just
getting started. Actors in particular, always looking to work and
build up their resume. And so I don't think it's hard to find good actors really, no matter where you live. And that is the
case whether you're doing it non-union or union. Now, for these kind
of DIY short films, I've almost always
gone non-union. But I have done a
few short films where I spent maybe
1,000 or a couple of thousand dollars where I
went through sag because sag has micro budget
and low budget. And I think they have
a short film contract where you can get
actors to work for zero or even $100 a day depending on the project
and the contract. The main thing though is it
does increase paperwork. Again, I like supporting SAG actors and working
with SAG actors. Not always a reality, however, it can increase the
production value because you are more than likely to get better actors that are
part of the union, at least more experienced. And so you really
should consider a sag deal depending on
the scope of your project. If it's just you and
somebody is going out and shooting one weekend, maybe a skit, then no. But if you're doing a
more involved short film, even shooting on a phone, then considering making
it sag is not a bad idea. And I'll put links again in the additional resources to the different
contracts through sag and the newer ones that are for micro budget and
low budget stuff aren't that complicated. So you don't really have to hire a line producer to do that anymore on features and stuff that's a little
different story. But I'm short films
and low budget Indies. It's very doable today. And so the overall point here is don't skimp
on your actors, get the best actors you can. And you will thank me
for that and so will your audience when
they're actually watching your short film.
11. Shooting with a Two-Person Crew: After today were square. I mean, I'm forgiven. You guys, Blake Calhoun
here I directed this short film and
in-between setups. I would also run the
behind the scenes camera. This is handheld GoPro, so excuse the shaky cam. If you've watched any
of our tests videos, you would know that
we were going to shoot this by a fence. And right here you'll see
that fence in the background. But as it turns out, it
was really hot today. We shot this and the
cameras kept overheating. So solve this building
and I thought, well, let's shoot in the shade. That's what happens
on shoots you improvise and ended up
working out very well. All of our sound was
recorded double system, meaning it was recorded into the iPhone camera
as a reference, and then it was captured
into a zoom recorder. That was the actual audio we used and sync to the
picture and editing. We shot this short film on the moon dog labs
anamorphic adapter, and also a lot of it on the
native iPhone tele lens. In my opinion,
shooting telephoto on an iPhone just gives you that
extra feeling of a movie. It also can help you get
some shallow depth of field. And using the helium core rig, we couldn't mount any telephoto
lenses that we owned. And so we put in
D on the front of the helium core and just use the native tele lens
and the iPhone. And overall it worked out great. What are you doing? Are you seeing this? In this setup? We were in the direct sunlight
and it was really hot. We ended up using a giant silk to soften the light
on the actors. Most of this scene
from this angle was actually shot on the tele lens, like the previous scene, although I did use
the moon dog labs anamorphic lens some two, we actually had the phone
overheat on several instances, and I'll do a video about
that in the future. But it's something
to look out for if you're shooting
in direct sunlight. So I would recommend covering the camera when you're
outside like this, a courtesy flag,
that kind of thing. The reason we use
the icon monitor on the helium core rig was when you're shooting low
angle or high angle. It's hard to see
the screen outside, not to mention with the sun. I used a small rig adapter so the monitor would articulate up and down and the shade allowed me to see
the image outside. And that's the moon dog
labs anamorphic adapter and an ND filter. Again, we went back-and-forth
between shooting on that and the native
iPhone tele lens. You're all set. You
understand the deal, right? Yeah. Now, repeat
it back to me then. You realize how insulting
notice this is important. We've been doing
this for nine years. I don't want to be
Miranda anymore. After today. You don't have to. So you might have noticed this
scene was shot on a Canon, see two-hundred know,
this isn't a smart phone. This was a new camera, and so we wanted to test it out and use it as an experiment. This was the only scene
we use lights on to. Everything else was
available light, and this was very
minimal lighting. Use an awesome little
applets or light as a spot and then a practical
light on the wall. And that was really
it. Short films more or less our experiments for us to learn
different things about technology and to improve
our storytelling skills. How about I just
take the vector down myself. We work as a team. You know that plus
you lost your weapon. You don't have to be an acid. Just get the guy horizontally. Getting brag. Don't steer the conversation.
You'll get there. Once we hear you say, Miranda, the cavalry with bust through the door
and save the day. It's like last time. Action. Here we use the gimbal
is a steady cam. The helium core is
on a xy Ukraine. We use the crane
because of the weight. That's me again, shooting behind the scenes and running sound. Again, the nature of
a two-person crew. One thing we did a little
different here too, is we shot everything
on the tele lens. Normally you shoot
gimbal stuff or steady camps though
with a wider lens. I went with a tele lens for a little different look and
I think it worked out great.
12. Development & Pre-Pro Overview: Now we're on to development
and or pre-production. They can overlap depending on the size of your production. Development typically
covers the whole process of before you make the movie, The writing, the fundraising, the budgeting, the script
breakdown, et cetera. In this instance though, they overlap because in pre-production you
do a lot of that. And pre-production
on a movie can last anywhere from a couple of
days to a couple of months. Maybe longer could be a year
on a big Hollywood movie. But then development can be as short as a few
months up to years. Some people develop a movie
for ten years, 20 years. It doesn't matter.
They're continually trying to work to get one made. I know myself, I've
been trying to get this wrestling movie
made since 2007. It's a big feature about the
Von Erich wrestling family. I've been close multiple times, but it hasn't happened. It's a multi-million
dollar project and so it's hard to get that
kind of money together. It's a period piece, et cetera. So the point is I've
been developing that for a long time. Hadn't happened. But
once I get it to happen, I hope I do one day. I'll go right into
pre-production. Then pre-production also
involves the casting aspect and wardrobe and all those kind of things that make the
movie what the movie is. In other words, you have to get all of those
pieces of the puzzle together during
pre-production and then you go into production. But the number one
thing you have to do in pre-production, the pre-production aspect
is a script breakdown. And this again could fall under development because you need to break your script down
before you can do a budget. Now, for this kind of project, we're not really budgeting necessarily because
it's free or DIY. Although it's still
a good idea to have a general idea of what
you're going to spend, whether that's on food or
gear rental, et cetera. But budgeting is done
with breaking down your script and breaking on your script is done
through software. And that's one really
cool important thing about using final draft. Final draft will import that
script into other software. You can number your scenes and final draft and then import that into a piece of
software called e.g. shot list or shot list or is one I use and
I really like it. And it does just that.
It lists your shots. You can break down your shots
for each scene in a movie, and at the same time, you can create a schedule. Now, there are other ways to do scheduling that
are more involved. You could use Movie Magic, that's the industry standard, or you could use gorilla. And there's also
a studio binder. There's a lot of
options and as I've said several times
during this course, I will put links in the additional resources to check out other
kinds of software. And again, if you're
doing this super DIY, writing your script and
Microsoft Word or in notes. You don't really need
to do this and you don't need to do
a full breakdown. But you do need to do a
breakdown for your scheduling. At least get an idea
because unless you're shooting a movie in a
couple hours in real time, you need to know what
scenes you're shooting, what day and what actors have to be there and
what crew have to be there, and what gear has to be there. And you do that by
breaking the script down and creating a schedule. Again shot list or I
found to be really good. It has an iPad version and the
version for your computer. And I used it on my
short film pre-owned. And the other thing I did
in connection with that, as I used a great piece of
software called pre-built Pro. And what it does is allow you to very easily storyboard
your movie. Now, I use the storyboard
only my action scenes, okay? Now with previous Pro, I storyboard everything
because it's so easy, you can import your final draft into previous Pro,
as a matter of fact. And then it creates boards
for you in the beginning. And then you can
go in and modify them at different characters. The different ways they
look, et cetera, prompts. It's super easy and
it makes your movie that much easier to explain
to your cast and crew. You show them the boards
and then they're like, Oh, wide shot of the
house, I get it. Or hey, a dolly shot
of this or that. It makes it so much easier to communicate
using storyboards. And it also helps you get the
movie out of your head onto paper and eventually into the
camera and into the edit. So I highly recommend
storyboarding and shot listing for sure, you
don't have to do both. But I would recommend trying it. Shot listing almost Always I do. As a director, you're going through your day
with your schedule. You're scratching off the
shots, you've done storyboards. I don't always do them,
but I really liked them. Now, one other note
on storyboards. Now with all the
AI artwork options out there like mid Journey, et cetera, you could
technically do some quasi storyboards
with that. Enter your prompts, have
the AI doing for you, and then take those and show those to your crew and
your caste, et cetera. So there's a lot of great ways. Previous Pro is
probably better for being more customized and
getting exactly what you want. But if you're in a hurry and
there's also the type of storyboards where
you can actually hand draw them on an iPad. Or you could just print out
paper drama with your hands. A lot of different ways to get your ideas across to share
with your cast and crew. But that I'll start with
breaking down your script. And by the way, I'm kind of doing a general
overview of all this because I can't go into
super detail on each part. Like a full tutorial on
shot LR or previous PRO. Those are courses in
among themselves. And so I'm trying to give
you my process of what I do when I make a short
film or a feature film. And that way you can go out, approach it that way and then learn the fine
details on your own. But it's a great way
I've found to get my films made without
spending a ton of money.
13. Script Breakdown & Shot List: Alright, just wanted to do a
quick screen recording here of script breakdown
and then a shot list. This is final draft, as I've talked about
in the course. And this is the shooting script. And here I have the
pages numbered. Now again, you don't
have to use final draft. But in this situation it's
important because I'm going to import final
draft into shot lr. Now some of the other
screenwriting software you can convert those files, the final draft, and then some other programs
you can import those. It just depends. And so I'm not gonna go
into that minutia, but just understand that's why I'm using these two
things together. So breaking down the
script is different for a short film like this
compared to a feature. Obviously, feature
has a lot more to do on a short film like this. You don't have to
do a script break down, as I've mentioned, but it does help to at least create the schedule
and your shot list. The overall breakdown for this
project was pretty simple. And for me, when
I do a breakdown, I'm looking at the locations. I'm looking at how
many actors there are. I'm looking at the props, the wardrobe, that
kind of stuff. Some people will print the script out and then
go through it with a highlighter and highlight the different props, et cetera. Like in my script,
the car is a prompt. The camera, the surveillance
camera near the end as a prop, the
different wardrobe, if he was changing his
wardrobe every day, that would be noted
in the breakdown. And by the way, as a side note, that's one reason I had him work at a Best Buy type store. We never say it,
but he gets to wear the same wardrobe every day. A little sneaky thing to
do in a script like this. If you can keep the characters
in the same wardrobe, it's not only easier to shoot, but it helps you
with continuity. Now understand this breakdown
approach is a DIY method. If you're using a software
like movie magic, you would enter it
in the software. This is a screenshot
from that software. And so a lot of this would
be automated for you. However, again,
affordable DIY approach is you do it more in a manual mode and you could use a sheet like this one here. This is actually a download
I got from studio binder. So you would enter the
breakdown information per scene using a
sheet like this. And so you would still like
to go through and mark up the script and break
it down that way and then enter that information
on the sheet and then ultimately create your
schedule from that. So just to understand, there are ways to automate this process, but they will cost
you more money and you'll have to learn
additional software and for small DIY
short film projects, really not necessary. One thing about final draft
that I'll just quickly show is you can do reports. And so you have seen reports, location reports,
character reports, cast reports to you
can come in here and look at the cast, whether you have speaking
scenes non-speaking. And you can do a report. And of course in this story, I only have three characters, really two main ones, really one main one Arnie, but the car salespersons another one and then the new
customer at the end. And so this report breaks down already has 11 scenes
with dialogue, et cetera, et cetera. And so these kinds of
reports can really help. Again, when you're
breaking down the script. Another one would be
a location report. This can be helpful
because then you see how many different places
the scenes need to be shot. Which again, when you're
shooting your movie, you shoot your movie
typically out of order. Like all the scenes
of the car lot I shot at the same time. All the scenes at the house, I shot the same time. And again, you shoot
that out of order. But once you figure this
part out and again, you can make your own notes
and another Word document, but you can print the script and highlight it
however you want. Then you would take
your script into, I'm using shot list or again, there's lots of ways to do it. And you would import it. This is how it looks when
you first import it. Have all the scenes
broken down here. This movie has 17 scenes. And then it's nice too,
because you've got page counts here which comes in handy when you're trying
to figure out how long each thing is
going to take to shoot. And it also has the
cast broken down, which is nice because that way when you do your call sheet, that's another component
to this process. You know which cath
need to be there at what location and if this
was a more involved shoot, what casting to be
there each day. Now I shot this in
about 6 h and I would recommend the most of
these small DIY short films. You shoot them in a day. Almost all the short
films I've done on my iPhone channel have
been a one day shoot. So now I've got the
script imported. And from this, I will do
my shots, my shot list. And all you do is
you can double-click on the actual scene and
then you open this. Now, I added these already. This is work I've
done previously. And so to do that,
you come over here to this button and you would
click and enter a shot. I'm going to delete this one
because I don't need it. And so what I did is
I came in here and I knew my establishing shot. And by the way, I referred
to my storyboards to make these match
my storyboards. Again, you don't
have to do both. But in this project I did. If you had an establishing shot and then I've got a close up of the salesperson and then I
got a tight shot of the keys. And the nice thing is
in here, if you want, you can move these shots around. And then when you're on
set and you're shooting, you can slate each shot and
you can mark these numbers. You have one, A1, B1, C1, D. Eat scene can have as many
shots as you want in there. So here's seeing two. I've got five shots. Seeing three only had
one shot seen four. You get the idea? I went through and I
added all these shots. And then on the day
when I'm shooting, I go through and I mark
them off my shot list. But the nice thing
about shot list there is once you enter all these shots
and again there's 17 scenes I went through and
ended all this information. You come down here and
you have your shoot days. And again, only have one
shoot day with this project. And at the top here
it's going to tell you you have 83 shots, seven and three-eights pages. And it's estimated it can
take you 10 h to shoot. Now, fortunately,
it didn't take that long and you can go
in and adjust that. So here's the actual schedule. And you go through
this once you've done your shots and you put it in the order,
you want to shoot. As I mentioned, you shoot
things out of order. So here at the
beginning I've seen one that I did shoot first
because we're at the car lot. But then I go down, I
shoot seen ten here. And right here, you estimate the amount of time you
need to do each shot. So I estimated at
30 min of setup and then I did 15 min on this shot, 10 min here, five-minutes
there, 10 min here. Now, this will depend on the stories since we
weren't using lights, lighting setups
take a long time. Typically, these
went pretty quickly. And so my first setup took 40 min roughly that
was the plan anyway. And then I skip
down to seem ten, and then I skip down to 17. So again, just to understand, we're jumping around
in time in the movie because we're
shooting them all at the same time, one location. And then I had the
information in here, a short description
of what the shot is and then details of the lens. I think it would be. You don't have to
add that, but I did because I was switching the telephoto and
anamorphic back-and-forth. And so I knew when I needed to be on the telephoto versus
when I need to be on the wide. So again, this is one day
shooting with the schedule. And if you're wondering
about these colors, I did that because these different colors were
things that I wanted to shoot at the same time while I was set up in
one location, e.g. I. Have these front view from
hood and they're all blue. And so what I did
here is every shot of him through the windshield
when he's in the car. Even though these scenes
jump all over the place, I did those all at the same time because you
wouldn't want to shoot him coming out the door
and then move over and shooting at the car,
that kind of thing. And then the same
idea, whenever he was walking out of the house, I shot all those shots together. So this is how I approached
it with shot list there. And then from there what you can do is create a call sheet. So this is a sample call sheet that I include in the course, and this is basically
a template. Now for this particular job, I didn't create a call
sheet because again, it was just me,
one of the person and a couple of other actors. And I've worked with
these guys a lot. So depending on your project, you could do a call sheet. You would list the different
information that you need here and you would pull
this from the schedule. And now, if you're using
more advanced software like movie magic or one of the
other ones I've mentioned, you can do this
within that software. Here. I did it separately. I just use a template. It's a Microsoft Word
document and you enter it. And what you would typically
do is email this to the cast and crew the
day before each shoot, depending on how many
days you are shooting. In this case, I shot one day, so it would have been
a one day thing. Working in final draft, having the ability to do
the script breakdown, numbering your scenes,
figuring out your prompts, your locations, your wardrobe, and then bringing that into
shot list are to first create your shot
list, each of these, and then your actual
shooting schedule, and then ultimately
your call sheet. So simple tools
that are somewhat automated that can really help make your
project successful.
14. PreVis Pro Storyboarding Overview: If you've ever made
a narrative project, meaning a short film
or a feature film, or maybe even a commercial. You've probably
done storyboards. Storyboarding can be kind of
tedious and kinda tricky. And I've done it myself on various projects and
for the longest time, I would usually just get
something with my hand. And I would only
do action scenes. I wouldn't do every
scene in a movie. It was just too much work. And when you're doing
independent stuff, you don't really have
the budget to do that. But now using an iPad
or even an iPhone, there are a lot of great apps you can use to do storyboards, even if you can't draw. One we're gonna look at today
is called pre-built pro. Alright, so I've got my iPad Pro and I'm using previous Pro. This is the splash screen
when you open the program, what I'm going to
show you today are the main things I like
about using previous pro. The number one thing that
I like about this app is how easy it is to use. These are the storyboards I created for my short
film pre-owned. I'm just going to skim
through these real quick. If you've seen the short film, you should recognize
some of these shots. Enjoy your next. I will. And I actually went in and
storyboarded the entire movie. All 17 scenes in the short film are shown
here in the storyboards. But we'll come back to this. I just said previous, Pro
is super easy to use. And one thing that
makes it really easy to use is that if you
write and final draft, you can import your
script from final draft. And it will automatically create all your scenes and your
basic storyboards for you. So right here at the
bottom of the screen, it imported
successfully pre-owned shooting script 17
scenes, three characters. And then it has the
various seen headers and et cetera there. And so that is so incredible and makes this thing so
fast and easy to use. I almost can't tell you
how awesome that is. It just really speeds
up the process. And so once you do that, you come in here and set
up the project settings. I shot anamorphic. And then you can choose the
size cameras sensor I shot on a phone with you choose phone and it really crops
in more than I'd like. And so if you just
keep a normal camera, it's fine because
this is how you're envisioning the storyboards
in your head anyway, it's not exact to the millimeter of the lenses you're using. At least not the way I do
them. And you open it. And then what I just
showed you previously were the storyboards that
I had gone through and done detailed work on. But this is what happens when
you first open the program. And again, it's already done
a lot of the work for you. I can't stress how cool that is. When you hop into a panel, you have a 2D view. You're looking top-down here. You can slide it around. You get a 3D view. In the 3D view, you can also just come in, slide it around
anywhere you want. You can grab the camera with the camera
wherever you want. Up here in this preview window, you see what the
camera is doing. And then you have
various controls on the camera to Dolly, back-and-forth, to pan or tilt. You can swivel it and then you
can also boom up and down. And so in a weird
way, it's sort of like playing a video game here, but it's all touchscreen. You can come in and just move the camera wherever you want. Now once you're in here, you can actually do
some refinements within the actual frame. So you can set focus, you can do autofocus. You can see that a little
indicators went around her face and not the
background out of focus. And you can choose the
lens you're using here. Or you can go into
manual and then you can set the depth
of field yourself. The other thing is while
you're in this view, you can also slide the
camera around and re-frame, or you can zoom out and
see the characters. And what I'm doing here
affects the camera and the previous view in
the 3D and the 2D view. Now when you come back
out here, you can see the two characters and the
camera has moved back. You can duplicate a
frame if you want a copy of that frame and
just make a different angle. So now I can pull a camera
around over here, pan around, and I've got a side angle
that when I go back in here, I got this wide shot that
I have a side angle. So it's really fast. The duplicate frames keep
going within a scene. A scene typically
you're going to have like seeing one H1B, whatever different
shots within the scene. And then of course you can add any kind of prompts
you want in here. You can add objects, you can add characters. You've got another camera,
you can add prompts. You can have walls. They have a ton of
different prompts. Let's say we're going
to put a tree in here. There's the tree. And you can control the way
the tree is positioned, how the camera sees it. Put that behind them,
go back into 3D. So now you go back up in here, you can see this
tree behind them. Now I'm just doing
this as an example. Obviously this would be kind of weird to have a tree there. But I just wanted to
show how easy it is that prompts and then
with the characters, you can add it the way
the character looks. You can change the skin, the hair, the eyes, the different height, the different clothes
aspects, the colors. You can also go in and
change the different poses, which can be really important. Whether they're sitting, whether
they're moving, running. Let's say that guy is
running away from her. So as I'm going through this, I think you can see
how quickly and easily you can manipulate
what's in the shot. And it's all done in real time. And then you come back out here and you would go through
each scene from there. And so in the
beginning I said how easy this is the
storyboard and it is, and what it's done for me
is make it to where I will storyboard every scene now
instead of just action scenes. And I really liked
that on this project, I actually printed out all my storyboards to
take with me on location. I'm more old school
in that respect. I use them in combination
with my shot list. Of course, you could also just have your iPad or iPhone on location and scroll through
them in the app or on a PDF. I'm going to jump back
into my actual storyboards and just wanted to demonstrate the proper aspect one more
time, a little more detail. This car is obviously a prop, and so you're able
to pop a car in here and then move the camera around the car and
also a character. So my character is
in the car here. And I did all these storyboards
and probably a day. I mean, I thought about them for awhile as I was
writing the script. But then the actual
storyboarding process for this knocked it out
really quickly. In addition to the car, the house played a big role. And so there is, if you've seen the short film, this is sort of
like the beginning of the film where I did this big wide dolly in as he
had arrived when the car. And the great thing is, again, once you had those prompts, you can cut and paste them and use them repeatedly throughout
all the storyboards. This is a good example. So I did the tracking shots as it
came out of the house. He's walking out to the driveway that is looking at the car. It's all the same storyboard. I just reposition the camera
within the storyboard. Now he's looking up and
there's a surveillance camera. There is all very shots and there's a POV
of the surveillance camera looking down at him. And then this is a shot of
him looking at a phone. This is like a background plate. I didn't actually put the
phone prop in his hand. Here's the main storyboard. You can see all these shots
are done in the same setup. The cameras down here, now the cameras shooting
across the car, all I'm doing is moving
the camera around, changing the focal length
and re-framing the shots. And so it makes
it so easy within one scene to create
multiple shots. A sequence I've used quite a bit in the
marketing and the film. This is the salesperson and this is the main character
and it's his car. He bought a shot. This a little bit differently
as you always do. But this is her talking to
him and the actual film, instead of being so low, I raise the camera up and
shot across the door. She was down on the
ground looking at the seat in the beginning. Here's the side of the seat. You push the button and it
automatically adjust to that? Yeah. I mean, yes, it's working. But I mean, what
about the stereo? I mean, that's weird, right? So you can get some
really similar looks that what you're going to
actually do in the film. This is a nice sequence here. I have the camera
up above the car. He runs out and
then he runs into the yard and the arrow indicated here as the
camera dollies into him, I was on a gimbal. It looks back at the car. He looks into the car. You haven't seen the film. These are some spoilers here, so be sure to check that out
if you haven't seen it yet. Now he's looking at the car because he hears
something in the trunk. Now it goes back to the trunk. And this is him looking up into the trunk and
that's actually a photo I took in the actual location to help sell it here
for the storyboard. And speaking of photos, the other thing that
this app can do, and I didn't actually use it
on this particular project. It has an AR feature
that can really, really up your game
when you're doing location scouting and
previous for your movie. They sample shots are from
the guys at previous Pro. It really shows
how you can place your characters and
real-world locations, real-world
environments using AR. And this is something
I will definitely use on a future project. Prevents Pro is a
professional app and while it can be
great for hobbyists, It's really for you
guys that are more serious about making films, commercials, Digital
Series, et cetera. They have several different
ways you can pay for the app, including
student pricing. I would suggest
doing the lifetime, it's a onetime fee or
you can do annual. But the onetime fee is just like buying a piece
of software for your computer and
you can do use it or ever know subscription
or anything like that. And you get the
continuous updates. And speaking of a computer, if you have a newer Mac with
the Apple silicon chip, you can now use previous
pro on that too, which is pretty cool. This really does
make storyboarding easy and I really
recommend trying it out. Thanks again to pre-bid. It's Pro we're partnering
with me on this project. And thank you guys for watching.
15. Storyboard Animator Overview: So here's a short sequence
from the actual movie. And here is a storyboard
that I took into Premier Pro and
create an antibiotic. And antiemetic is
just an animation, the shots from the storyboard
editing them together. And in this case, I actually had the music picked beforehand. And so I was able to create
an antibiotic to the music. I will show you the
first minute or so of this just so you can get an idea of what I'm talking about. Now. Normally I don't
storyboard every shot. Normally what I'll
do is storyboard, action scenes or
complicated camera moves. So here I did it mainly because he was just
gonna be me shooting. And so I wanted to have
a good plan going in. Often on bigger projects, you would do this so
you can show your DP, your director of photography, what kind of shots you want
that is if you're directing. But really the main thing
I want to show here is how easy storyboards can be to make. I think people get
nervous when they hear storyboarding or think of really high-end
professional drawings. And while those are great, you definitely don't
need those at all. And really you could just do stick figures if you want it. But here I used an
app on my iPad. It's a free app called
storyboard and animator. There is a 399 in-app
purchase for the pro version. It gives you more panels to work with and that
kind of thing. So in this storyboard app, you're doing simple sketches. That's all you're doing.
It's not complicated. You're not using any 3D
objects or anything like that. I have other apps like that
and I rarely use them. So all you do is you use
your finger to draw. You can click through
each panel full screen. You can play them back
in the app in real time. You set up the duration of each panel there at
the bottom right. And you can quickly scroll through all the
panels at one time. You can also add information for each panel, which is nice. And then when you go into
that particular view, you can see it. And if you printed
this out as a PDF, that information would be there. So now I'll do a very quick demo on how easy it is
to do a sketch. You do not have to
be a good artist. You just need to know what
kind of shot you want. So here I am drawing the
close-up of somebody's face. If you mess up, I want to make corrections, just
use the eraser. So there you have
it that took me a couple of minutes and
it's a very simple sketch, but it would translate to
what I needed to shoot. And yet, I guess he does look a little bit like, Hey
man doesn't eat. What's cool too, is you can use different layers,
different colors. This app offers quite a bit and the key is it's
really easy to use. So once you're done, you
can print it out as a PDF. You can export a video, an antibiotic, or you
can send out images. There's a lot of
flexibility here. Using an app like this. There's really no excuse not to storyboard if you want to. So here's the short
film now synced up to the storyboard so you can see
how it all kind of aligned. Hello.
16. Location & Tech Scout: Now another important part of pre-production is
location scouting. Location scouting is
typically done through a location scout or
location manager. Here being DIY, you'll most
likely do this yourself. Ideally look for
locations that are free and try to keep it simple. And by the way, when
you write your script, you should really only have one or very few locations
involved on a low budget, no budget short film that's
especially important. And once you have your
locations chosen, you need to go back
and do a tech scout with the principal crew. Now if you're shooting at your parents house
or your backyard, you may not need
to location scout. But if you're going out
to any other locations in your city or another town, or even a studio, you need to go check
it out beforehand with your DP, your
gaffer, whoever, your audio person,
or if it's just you and another crew member, you gotta go check those
out in advance and you're looking for sound. You're looking to
make sure that you're not right next to
a railroad track. Or if you are, When did the trains come by? You don't want to
mess up your audio. You want to check if
you're shooting outside, where does the sun hit? When does it hit? If you're in a building, you want to find out where the power is or if
you're outside, whereas the power, are you
going to need a generator to run lights or are you going
to shoot with natural light? Or are you going to be
near a river that's making noise if you're inside like I've shot in kitchens before you
go in there, it looks great. Then you don't realize
that the refrigerators are running and it messes up your sound and you can unplug them. And so it's just a good idea to location scout and get a plan
before you actually shoot. No matter where you're shooting. Again, even if
that's in a studio, you want to go into
the studio and figure out where you're
going to hang your lights, where the sound
person's going to be, where wardrobe is going to
be, et cetera, et cetera. Now, depending on your project, you might not have
any of those worries. But location scouting
is a vital thing to do when you're preparing in
pre-production for your film.
17. Rehearsals: One other component to
pre-production would be rehearsal. And now this can overlap
with production. It really depends on again, how big of a shoot you're doing. I personally do not rehearse. I don't like rehearsals
unless I'm doing technical rehearsals with
blocking with actors. And often I'll do that on the day right before
we're going to shoot. Unless it's really complex, then you go out and
a location scout, as I just mentioned in
the previous section, with your DP, maybe it
was stumped coordinator, whoever figure out a plan of action, shown the storyboards. But as far as rehearsing with the actors, it's subjective. A lot of directors love it. A lot of actors love it. A lot of directors hate it.
A lot of actors hate it. For me. Most of the time. I get what the
actors beforehand. We know the character,
we know the script. We have conversations over the phone or sometimes in person depending on if they're in
town or how much time we have. But I just make sure they know what's going on in the
story and their character. And then when they're on set on, in the day or in the moment, That's why I like to look at it. It's fresh, it's not rehearsed. Now, a lot of actors
are great actors. It doesn't feel rehearsed, but less experience actors
can get a little bit robotic, almost like a stage
player theater show. That is a different way of
working in those scenarios. You have to rehearse because
you're doing an entire hour, 45-minute long P
set of one stretch. In movies, you know, you're doing
sometimes 10 s or 30 s and the whole story comes
together in the edit. Now, that's an
over-generalization. Sometimes you'll have
ten-minute long monologues with a slow dolly
into an actor's face, whatever it may be
in those situations, it might be a good
idea to rehearse, but for me as a general rule, I'm not big on rehearsals. And then when you're working
with low to no money, there's really not
time to do it anyway. And so I like to
work in the moment. But rehearsing is
something you should consider depending
on the project and depending on how
you like to work.
18. You're Ready To Shoot!: The day has come, it's
time to shoot your movie. Now, this can be an
extremely exciting day and a scary day. At the very same time, trust me, I've been there, especially when you're
just beginning. The thing is if you've done everything we've talked about so far in pre-production,
development, et cetera. You've got everything
planned out. You've got a blueprint. So you're ready to go.
Now you gotta do is execute that plan and
bring your story to life. The things I've learned
over the years, I think we're really help. Number one, be sure to
get plenty of sleep. Being more rested will
keep you sharp and be able to make quick decisions
on your feet. Because I promise you things
will not go as planned, even though you've got to plan. It won't go as planned. That's just the way this works. And what I would expect to happen is you'll lose a
location, it might rain. Someone will call in sick. You won't have your full crew there and maybe a cast member. You can always work
around this stuff, but just be prepared. Who knows? You may be at a location and someone starts
up their lawn mower or a lawn crew shows up and they're blowing
leaves everywhere. As a side note, what
I always tend to do, his bring some bribe
money with me, like $120 bill that
wave along crew does fire up and then you can go there and ask them politely to come back later maybe in an hour and you give
them some money. It's worked for me, doesn't always work, but
it's worth a try. Keep a notebook or a clipboard
with your version of the shooting script along with many shot list or
storyboards you have. You will reference
that throughout the entire shoot and
each day in particular, what I do is
actually scratch off the shots I've gotten
and be sure to put your name on it because what will happen inevitably
as you'll lose it, I always lose my shot
list and my clipboard. And so part of my struggle
is keeping up with it. But if your name is on it, people will find it and
bring it back to you. If it's a small crew, not as big of a deal on larger jobs though it's
good to keep it labeled, but be sure to bring
that with you because you will reference
it all day long. A few other ones
are show up early. Be sure not to eat junk
food during the shoot. Drink plenty of water. Always be open to suggestions from other cast
and crew members. Now, it's your vision, don't compromise and
don't have someone maybe give you suggestions
in front of the whole crew. Maybe they pull you aside, but you'd be surprised how often even someone who's
not directly involved, maybe a day player, a grip might have a good idea
on how to light a scene. Or an actor would
have a good idea on maybe what their character
needs to make a scene work, always be open to input because filmmaking is
very collaborative. And it will really make your job much easier and
make your movie better. In the end, if it's
a good suggestion, you can take credit for it. And above all else, have fun. I can't stress that enough. You're working for
little to no money. Everyone's working for
little to no money. And so the reason
you're there is because you're doing
something you love, you're passionate about it. And so you want to
have a good time. Again, I can't
stress that enough. So keep a positive attitude
even when times get tough because I assure you they will and enjoy the journey.
19. Production Gear Overview: Alright, now that, that
overview is out of the way, That's really the guide part, the short film guide. Now we're gonna
get into the gear. And gear can be subjective. And this part right here will really be specific
for my iPhone. Although some of the stuff
like lighting and Gimbels, etc, could crossover to
traditional cameras. The previous sections I went over could apply to
any kind of camera. The camera is not really
important for that. You're telling your story, figured out what your
story is going to be. But now we'll talk about
the gear we're going to use and what I used and how
maybe it'll work for you. Keep in mind that gear
changes all the time, especially phones,
technology changes. This is a general
overview of what I used during the
production of pre-owned, but don't get too bogged down on the exact models are
brands, et cetera. There are great options
out there and they will continue to be as phones change, gear changes and
technology advances. And so in this
overview, I talked about the principle gear here. But after that, I
have a couple of other sections that go into a little more detail on different
aspects like the cages, ND filter, Gimbels, et cetera. So what's this overview
and then check out the subsequent sections
for additional details. My original idea was to produce this short film to test out the ProRes video
codec that was added in the iPhone 13
Pro Series devices. As I was preparing for the film, I quickly learned that the new larger sensor and camera bump on the 13 pro affected the way third-party external lenses
worked on the phone. Many actually didn't work. So I shot some charts and determined through my
testing that the moment 58 millimeter telephoto
and the Beast grip 1.33 times anamorphic V2, the version to model. And that's important,
worked very well. And I'm talking about on the
iPhone standard wide lens. The lens is, I tested had soft edges and or
chromatic aberration. I loved the way the
B script lenses have this screw on Mount filter. They're very easy to use, robust and of course work
great with the beast cage. So in the end, I decided to use the two lenses from
different brands, but also there are
different types of lenses. The telephoto is a
traditional spherical lens, and the anamorphic
is well anamorphic. But on smartphones you
don't actually get the oblong vertical bokeh that traditional
anamorphic lenses have. I wasn't too worried
about them matching. I really just wanted the
best image I could capture. But this actually caused
additional problems. Shooting with a phone in wanting a cinematic look with the proper shutter
speed and motion blur, I have coerced needed to
use neutral density filters since each lens has its own mounting system
that made it kinda tricky. One is the moment
bayonet mount and the other is a universal
37 milimeter map. And I also only had one variable ND filter
that I wanted to use. The idea of constantly
changing lenses and moving the filter back-and-forth
was not an ideal situation. And I mentioned the
beast cage and that's what I wanted to
use because it is by far the most robust iPhone
filmmaking cage out there. And it has mounts
for both lenses. But to use them, you have to unscrew them out
and replace it each time. Again, not ideal. So what I ended up
doing was shooting with the two different
rigs using one phone. I use an iPhone Pro Max and the filmic pro app shooting
for k 24 frames per second, ProRes log on the beach. Cade's setup I use the B
script pro 1.33 x anamorphic V2 lens with the free well two to five stop
VND, missed filter. Shooting the car stuff. We're using a zoom recorder and a road in Tg microphone
and a big shotgun mic. The beast cage. And we've got an ND
filter on here with the beast script anamorphic. And then my second rig was the small rib-cage for
the iPhone Pro Max. On it, I use the moment
58 millimeter telephoto with the moment filter mount
that DIY gap, they break. And then I would add
the same free well, B and D filter to it. That way the only
accessory I was moving whenever I change
setups was the filter. The lenses stayed
put on each cage. But of course I did have to move the phone in and out
of the cage each time. So that's pretty easy, much easier than switching the lenses out in this
particular situation. In a perfect world, I
would have been great to have two different phones. And I actually do recommend
that for shoots like this, if you can make that happen. I shot most of the
movie on a tripod, but I did do a handful
of shots using a gimbal. And this gimbal was the
jeoneun crane in three. When shooting on the tripod, I use both lenses. But on the gimbal, I
only use the anamorphic. And I did have one
scene where I needed a polarizer filter because we
shot through a windshield. And so here I switched out
the main v and d I was using. And I put one on that had
a polarizer built-in. And all these shots, we're
done with the telephoto. You might be wondering how
I took traditional 16 by nine footage and married it with widescreen
anamorphic footage. Well, the first thing I did
was I used the guides and filmic pro to know where I would crop in and post-production. This is a really great feature that I actually use quite a bit. Then the second thing
was I edited and a widescreen 23921 timeline and re-frame the
telephoto shots.
20. Moment Lens DIY Gaff Tape Rig: So why do I have gaff
tape on the back of this? What otherwise is a normal
looking moment lens and a filter map. I posted this behind the scenes
picture on social media. I wanted the number one
things people ask is, hey, why do you have
tape all over that lens? I use this setup on
this small rib cage because it is a
bayonet mount ribs. That way I can add filters
to this moment tele lens. The moment filter mount is
a 62 millimeter and this is a step-up bring
on here, 62-77 mm. And that's because I used the 77 millimeter mount
V and deep builder. This one is from free well, and it also has missed
built-in. Why the tape? Well, maybe you're
starting to get an idea. This is becoming a
pretty heavy setup. You've got the lens itself, the filter mount,
the step-up ring, and then the actual filter. And here's where the
tape comes into play. If you've ever used the
moment filter them out. It is simply a rubber ring
that goes around the lens. And they make one for
each of their lenses. This one is for the anamorphic. This one is for the
one-hundredth millimeter. And then the one on here
is for the telephoto. Then the actual mount, this metal piece here slides over that and
then onto the lens. You can see it right in here. And note that I said it slides
and so it just slides on, doesn't click on it more or
less just fits over the end. Which if you're not doing
anything too dramatic to bouncy too involved is no problem for me when you're
moving around a lot. And then you're changing
filters constantly, you need some reinforcement. And that is where
the tape comes in. This is just plain
old gaff tape. And it works great. No, it doesn't look pretty, but who cares what it looks
like behind the scenes? It's all about what it
looks like on camera. This setup works very well.
21. Camera App: For pre-owned, I use
the filmic pro app. It doesn't really matter
what app you use as long as you use an app that
gives you manual control. And that is the key aspect. You want to be able
to set your shutter speed and your ISO, and then also adjust
your focus as needed. Although often I will
just run autofocus, but manual settings
including white balance, being able to set a preset
or a custom white balance. That is vitally important when you're doing
this kind of project. Now, you could use the
native camera app. The native camera
app actually has ProRes now a great codec. This is an iPhone 14 Pro Max. If you have a 13 or 14, you can shoot ProRes, not completely
necessary, but for hiring content for
higher-quality stuff. I like to shoot in
higher-quality codecs. And of course, you also have cinematic mode in
the native camera. Now for me, I really
like cinematic mode, especially in the 14, because you can now shoot 24
frames per second. And for k, However, for a narrative project, I would not shoot
in cinematic mode, just a word of warning. It's subjective, but that's
just my own personal taste. While the cut-out is really good and it's getting
better all the time. It is definitely not perfect. And so I would only shoot
cinematic mode for me anyway. Unlike B-roll or maybe
even a travel film, you might do it for a
shot here or there and your movie or on a music video. But anything more complicated where you're tracking something, the focus will not be perfect. Maybe one day it will,
but right now it's not. And so I would shoot
in regular video mode. You're going to use
the native camera app and what the larger sensors now, you actually can get some
shallow depth of field, especially when objects
are closer to the camera. But typically speaking, I
would use a third-party app, whether that's
filmic pro or one of the other ones that I've
covered on my YouTube channel. You probably know by now that filmic Pro is going through
a subscription model. I've been a big filmic
pro proponent for shoot since 2011 or
so. And I still am. But I know a lot of people don't want to subscribe to an app, a mobile app in particular. And so there are other options out there that you can look at, depending whether you're on
Android or iPhone four iPhone my top ones right now are
the cinema P3 camera app. B scam, movie pro, pro take, and probably the
moment app on Android. There's some differences
because these are mainly iOS. So I'll put links to these
apps and other apps for Android in the additional
resources section. But the main takeaway here, especially when you're
doing a narrative project that you want to use a manual app so you
can set your ISO and your shutter and of course your white balance and just have control over your image
instead of letting the phone automatically
do its thing. Manual apps are very important.
22. Gimbals: So in pre-owned, I use this gimbal and I
don't want to go into the specifics on the
brands of Gimbels that I use are the brands
of gear necessarily, because gear changes
all the time. This is more of a general
suggestion or idea on what gear you should use or what gear you might use
depending on your setup. What I like about these
kinds of Gimbels, this is what I would
call a hybrid gimbal, is they work with smartphones
and traditional cameras. Small traditional cameras, mirrorless cameras
are point and shoot, or even go pro, etc. This will hold a
couple of pounds, maybe up to four. And so it's more versatile
than say, This gimbal. This is a DJI ON for SC. So this came out actually
after the OM five. And at the time of this
video, there's now an OH M6. And that's kinda the
point I wanna make. Gear always changes
almost yearly. So don't really get bogged
down on the type of gear. Again, in the end, a gimbal is a
gimbal is a gimbal, and they all work pretty
much the same unless you're looking at different
cameras, sizes, and weights. That's where these type of Gimbels or you're
much better bet. So if you're doing a
short film and it's super DIY, super minimalistic. You're not putting
anything on the camera. Then this type of gimble
a smartphone only gimbal will be more than fine. But if you're putting anything
on the phone such as I did in pre-owned where
I use the cage, I use an ND filter, I use different
lenses, et cetera. Then you absolutely want to
use a more robust gimbal. Now with modern phones, the stabilization is
really, really good. So you may not need a gimbal
is what I'm trying to say. It just depends on your shoe, depends on the project. Lots of times for
travel style films are just YouTube videos. I bypass a gimbal and just
use the phone stabilization. However, if you're
shooting something, what I call more steady cam like meaning tracking shots,
following characters. Very traditional
movie style shots than a gimbal is still
necessary for a lot of reasons. You just have more
accuracy and you can be more precise
with your moves. And also, again, if you're putting
anything on the camera, then you would
definitely want to have a more robust set up. Also with these larger gambles, you can grip them with
two hands if necessary, which can be a big benefit. You could do that with
these smaller Gimbels, but that's not really necessary because the weight
is already so light. You normally do that
with a bigger gimbal, two-handed when you
have more weight. Now, if you want to learn
more about these Gimbels, I've done lots of videos
on my YouTube channel, review type videos that
will give you more details. Again, I'm not going
into that here. I'm really just going over
what I use for pre-owned and making suggestions for
what to use on your film. And again, I think
a hybrid gimbal, if you're doing
narrative type work, music videos, et cetera,
is the way to go. And this crane in three
or similar type Gimbels are ones you should look at.
23. Phone Cages: I mentioned using a cage
and the gimbal section. And these are the two
cages I used on pre-owned. In the overview I talked
about why I use two cages. That would be non-ideal. And in a perfect world, you would just use one cage. I had to do it because
I always switching lenses and they wouldn't work
a little bit convoluted, hopefully again
and your situation that wouldn't be necessary. But cages are really important when doing narrative type work. Not only to give
you more support and like I've got
this grip here. This is a beast handle. I've got a side group. This is a small
ribcage by the way. Then on this cage I've
got an ND filter mounted. And I'll talk about ND
filters in a minute. And then I've got a little
nato rail here on top. But I could put a monitor on. Now it didn't actually use the monitor shooting pre-owned. You could though,
depending on the scenario. This is the beast cage. I have an adapter
on here right now, but I can mount a filter
on here without lenses, which is nice because
you don't have to add external lenses by the way. I did, and I went over
that in the overview. And then if you
haven't watched it, be sure to check out the
moment telephoto where I do the gaff tape rig with the actual ND filter that
gives more explanation. But today, smartphone lenses
have gotten much better. However, one of the
main reasons I use them as I like using the main
camera in the most. And so if you put a
telephoto on the main, or you could even put
one on the telly, although some lenses now don't actually work well on the telly. The three-times tele,
the longer tail is on the latest generation. Iphones don't work
as well with lenses, but the mainlands is great. Not only the best lens, it also is better in low light, it has the best quality. And with the iPhone 14 Pro, you now have a two
times tele in that. And so you can push in with that and go to four times by
using external lens. Let me be clear though,
even though I use iPhones, you can use any kind
of phone you want. It's just what I am used
to and what I prefer. Shoot your film or
whatever you want. And again, doesn't
have to be a phone, it could be a mirrorless camera. This section obviously is
going over my phone setup. But the main thing
about a cage is again, attaching that kind
of accessory lens, but mainly ND filters and
also microphones if needed. If you're using a cage, you
want to use a larger type of gimbal or like with
this hand grip here, especially for
shooting handheld, you can just do it like this. You can hold it with these different handles
and not even use a gimbal completely depends
on the type of film you're making or the type
of project you're making. If it's a music video, whatever, the cages are a
great thing to use. And also, not only does that
make it easier to work with, especially in
larger productions, but it actually makes
your camera look more professional to some
people that matters too. It doesn't really matter to me. But it is cool to trick out your camera and make it feel like a more
traditional camera. But that's not the
real reason you do it. You do it because these accessories that you're
adding to it are necessary, especially when doing
narrative type work.
24. ND Filters: I'm pre-owned, I
use this ND filter. This is a variable ND filter. So you can adjust it. 2-5 stops. What an ND filter does on a smartphone is helps
control the shutter speed. Ideal motion blur is
what you're going after. So if you're shooting
24 frames per second, you want your shutter
speed to be 148. That follows the
180 degree rule. Now again, this isn't a tutorial about that kind of thing. But just know that ND
filters are important, especially when you're doing
narrative kind of work, shooting in bright,
light, bright sun. The other thing I did
on this shoot though, is this has missed
built into it. And so it gives a very
subtle highlight bloom and just softens the
image ever so slightly. Which is good because
smartphones have very sharp images and so it
makes it more cinematic. And quotes Miss filters
are super common. They're used all the time, sometimes heavily in light
news or even in some movies, especially when
you're talking about people's skin or their
use light just to bloom highlights and that gives
it more of a filmic look. You don't have to use a
misspelled word though. There's a lot of different
kinds of diffusion. Blackness filters that do different things like
lowering contrast. And then again, just softening the image ever so slightly, which for smartphone footage
I find to be very important. And so doesn't really
matter the brand per se. This one is from free. Well, this one's from moment. They both make very
quality products that are affordable and not
too crazy expensive. Again, a lot of
brands out there. I just wouldn't
skimp on an indie. I would personally spend
a little bit extra money and get a really
good quality in D, because you don't want
there to be any kind of weird color shifts
or vignetting. And the nicer indies, we'll always keep your
image looking great.
25. Lighting: So now we'll talk
about lighting, and this is a little LED light. But I'm pre-owned. I actually use natural light, meaning I shot outside. And so I didn't
really use any light except inside the car when
he's in the driveway. As the day got longer and
we started losing light, which you'll hear
that on a film set. Occasionally we're losing light. I did use an LED as a
kicker light on his face. That's it. Everything else was
available light. And so it really depends
on your project. But if you're doing
a DIY project, I would highly suggest
trying to use natural light, or sometimes called
available light. Although available light is the amount of light
in a location, like if window lights
coming in, etc. But natural light,
meaning the Sun, is a great way to go. But a couple of things
you need to keep in mind. Number one, you don't want to shoot in the
middle of the day. You'd want to shoot
in the morning like the first couple hours, There's a term
called golden hour. You don't want to just
do golden hour because that's just for a
short period of time. But if you shoot from just after sunrise to about mid-morning, depending on the time of year. And then if you shot in the later afternoon
and the evening, Those are great time
to shoot outside. Now if you shoot during the
middle of the day, you can, but you need to be in
shade or you need to have some sort of a silk or a cover, something to diffuse the light. Or like with pre-owned, we actually had cloud cover on the day of the shoot
which worked out great. Because not only did
it fit the story, it also gave us a
very nice soft light. So it's hard to plan around
cloudy days, but if you can, that's a good way to shoot if it fits because that
way you don't have hard lighting and
harsh shadows from the sun map you're
shooting inside. You can use Windows, and you can also use reflectors. Reflectors are a great
thing that I use all the time to bounce light
into people's faces. So you can use just a board like a whiteboard
to bounce light. You could use something that
has a shiny side to it, or you can use even a mirror. There are a lot of different
ways to go depending on your particular shot
or you're seeing. And of course, one thing
to note is you can also use available light, natural light, so to speak, shooting at night, not nights, a little bit tougher,
especially with a phone. But e.g. if you shot under streetlights or maybe
lights outside a store, you can pull that off with available light, natural light. And even inside you can use
practical lamps, et cetera. But shooting at
night, you may need to add some artificial light. But the easiest and
most affordable thing is just to pick up a reflector. You can get them on
Amazon for low-cost. They have multiple
different sides to them. And again, I'll put
a link to one of those in the
additional resources, including other type of lights. If you're doing a
more advanced shoot, we're doing a more
advanced shoe. You'd probably rent lights instead of going out
and buying lights. But again today with LED, affordable LEDs like
this and others, you can really get away
with minimal lighting. And in particular, when you
use the best light of all, and that's sunlight and
shoot with natural light.
26. Lenses: I'm pre-owned, I use two lenses. This is the moment telephoto, and this is an indie
mount that's on there. And I use the B script,
anamorphic version two. And so I mentioned in
the cage section two where you don't have
to use lenses today. Iphone cameras have some
pretty nice lenses. However, these are two
that it's hard to achieve, but the camera less
so the telephoto, you can get good
telephoto shots now. But the anamorphic,
you really can't, yeah, you can cheat it. You could just do a letterbox or a crop and post-production. But it really doesn't do
the same thing because the anamorphic has
several features. Of course, yes, it's widescreen. It also has distortion with some people like, some
people don't like. And then importantly
it has a lens flares. And so to get those type
of characteristics, you really need to shoot
with an anamorphic lens. And to do that is when
you would need to use a cage or a case
depending on the lens. Because some anamorphic lenses, like moment and other brands
will fit right onto a case. This one would require a cage. But when it comes
to using lenses, if you're gonna
do something that adds a little more character, like again, I use this telly to get more shallow
depth of field, but I'm sure it'll
work itself out. And if it doesn't, we have the 15th day
money-back guarantee. And then this again gives it a interesting
widescreen look. Or you might use a fisheye lens. That's when you need to
add lenses to your phone. Otherwise, oftentimes you
can get away with just using the built-in lenses depending on which
phone you have.
27. Audio: So now let's talk a
little bit about how I did audio on pre-owned. I shot with a boom mic. This is the road in T G4 plus. Now as I've said, don't
get bogged down on brands or exact models. What you would need is a shotgun mike similar to this to do what I
did on pre-owned. This is a very common way to do audio on a movie in
particular or commercial. Anything narrative.
This is a dead cat. And so this knocks down when you put that
over the mic itself. This plugs into a cable, then that cable goes into
an external recorder. Now this is a task cam recorder, not the actual one I
used on the movie. I used a zoom recorder, but they are virtually identical,
just a different brand. And so I don't have
the cable right now, but an XLR cable would
connect these two. And then that way you
can record the dialogue or Nat sound or
whatever you recording sound effects directly
into this system. It's a stand-alone system. And so if you're recording
dialogue in a scene with this, because of the nature
of smartphones, you can't plug in XLR mics. You would record the
audio into the phone. So here's a phone. All I would do with the phone
is typically what anyway, what I do is that only
put a mike on there. I just use the built-in mic because that's just
reference audio. And so then when you
get in post-production, you take this audio, they're really
nice, clean audio, and marry it with this audio. So you sync those in editing, and then you delete
the reference audio and you have the clean audio. That's called double
system sound. That's the way I do
pretty much everything when I'm recording on my phone. Again, what I'm talking about, more advanced stuff,
like a movie. If I'm doing a YouTube video
or just shooting B-roll, I will rig out a phone
with a microphone on it, and that works fine. And in particular,
if you're using a small shotgun mic that's
on the actual phone, this one would be too big. That works fine for
certain things, but you've got to be
really close to the phone within three or 4 ft to
really get good sound. So obviously that's
not going to work for a movie in this situation, we actually boomed it and because it was
a two-person crew, I had the microphone on a boom pole and then I
had that on a stand. And I just put it
over the actor. Unless they're moving,
then you've got to have someone
operate the boom. Now, the other way
you can do audio for a narrative is with
wireless mikes. Now wireless mikes
you can run into a phone so you don't have
to do double system. However, if you have more
than one person talking, it can get a little
tricky because then you don't want
them to overlap. You want to have discrete audio with rode my x and
a couple of others. You can do discrete
channels into your phone. But in my experience on
a narrative project, even if you're doing
wireless mikes, it's probably best to go
into an external recorder, a dedicated recorder,
so you don't have all that going
into your phone. Again, it just really
depends on the job. Because if you're
doing a YouTube video or you're doing a new story, that is probably the way to go self-contained into the foam. Again, if you're doing
something like a movie, it's best to have standalone audio that you didn't
sink in post-production. So hope that all makes sense. Again, don't get bogged down by the mike brand
because other great Mike brands out there like
Sanitizer, et cetera. And so just get the mic
that you can afford and it works best or you
can even rent it might depending on your project. But recording good sound,
getting clean audio. I can't stress enough
how important that is. And so don't skimp on your
audio, get good sound.
28. Post-Production Overview: Now we'll bring it
all together and talk about how I did post-production. Now, this is subjective as well, at least the way you do it, what software to use
I use Premiere Pro. You might use Final Cut Pro, you might use luma fusion. Davinci Resolve is
another good one. A lot of different
ways to go and then the end, it's just a tool, your story and how you tell your story is
the important part, not the software you use. And so this isn't going to be a full-on tutorial because
as I said earlier, these kind of things can be
of course all of their own. However, what we
will talk about, it's what I did for
pre-owned and how I took an iPhone
and made it look, I think a very cinematic
filmic look out of a phone. And if you didn't know better, you might not realize
it was shot on a phone. And ultimately, that's what
I'm always trying to do. No matter what camera I'm using. I'm trying to make
it look filmic. I'm trying to make it
not look like it's shot whatever camera I'm using. Unless I shot film, shot film before film
looks like film. The old joke is, if you want your movie to look like
film, shoot on film. Because every thing today
has its own kind of look. Red has its own look, area, has its own look. Iphone has its own look. Although with shooting
techniques and software, you can absolutely make it look much higher end
and much more filmic. And so that's what we're
going to talk about now. The first part of
post-production was actually handled during the production because of the integration of frame
IO and filmic pro. Each time I rolled a clip, a proxy file was recorded
and uploaded to the Cloud. Then that can preview
it or share it with my iPhone or iPad
or on a computer. And this was particularly great with this project because I shot ProRes and those
files are huge. So I was able to instantly see my footage in
my editing app. That would be Premiere Pro. And I can even start my
editor if I want to, before I even transfer
the files to my computer. I did the actual editing
in Adobe Premiere Pro, but of course this can be done in any editing app you prefer. The nice thing about
using Premiere Pro here was that it links to frame
io as I just mentioned. And so I can preview and
work with that footage directly again without even transferring it to my computer. Now in this case, because it
was only a one day shoot, I did go ahead and transfer those high res files and
use those to edit width. But if it would have been
a multi-day shoot or if I would've had
even more footage, I would have done an offline
edit using the proxy files. And then later all
you have to do is really linked to
the high-risk files. We recorded all the audio
to a zoom recorder. And so I had to sink that
in post-production with the video and the reference track I
recorded into the phone, which was just the camera Mike. With that done, I then proceeded
to the actual editing. I spent about six weeks or
so in post on this film. The first assembly edit, just putting the movie together was done in only
a couple of days. But of course, the
process of editing is re editing and revising. Onenote too is I actually
shot both for k 1.33 times anamorphic and traditional spherical 16 by nine footage. And so what I did was I edit in a 2k23 921 wide aspect ratio. Then I re-framed the 16 by
nine shots within that. So this process took me
about several weeks and simultaneously I was
doing rough sound design. For sound design,
I did record some original boldly on location
while I was shooting, e.g. when the key drops from the trunk near the
end of the movie. And then depending on the scene, I add another sound
effects I either recorded or that
are already owned, or I also use artless. I haven't artless
subscription where I get sound effects
along with music. Speaking of the
music from art list, I actually largely score this movie with music
from there as well. That's one of the great
things today is the quote, unquote, stock music
sites are really good. They don't sound
like stock music from the past, that's for sure. And of course there are
numerous services out there. This is not a sponsored video
by art list by any stretch, I just use art list, but music bed is
great. Sound Stripe. There are lots of
others out there. Really great way for indie filmmakers to get
much higher in sounds, music, and sound design
without breaking the bank. The hardest part
of that process is actually finding and
choosing the music. But once I got that pig, I didn't edit it in
and added that to the various sound design
and I locked picture. And that's very important. You want to picture lock before you move on to
these next phases. And of course,
picture lock means that the editing is done. You're not going to be moving
things around are shifting. At least that's the idea. Sometimes it doesn't stick, but that's what you
want to try to have done before you move on. The next phase for me was
doing the cleanup and sweetening of the
production dialogue. Then of course from there
going onto the sound mix, I did all this in Premier Pro, but also use audition, and I use several plugins, including one of my favorite. From isotope RX eight, which is really
great at cleaning up dialogue, removing
unwanted noise. Doing dialogue cleanup like
that can be really tedious, but these type of plugins
can really save the day. And there are other
ones including in Final Cut Pro et cetera. Everything I'm mentioning
here is just what I use. There are always options
out there depending on what editing app or what audio
editing apps you're using. But to really show what I did check out this before and after sample of some
really noisy audio recorded in the car lot. There was tons of
traffic driving by. But then I cleaned it up. I think it's malfunctioning
or something. I don't know. Maybe somebody's
getting it at night. I don't know. I just lock it right. Login. Super careful. I think it's about
functioning or something. I don't know. Maybe somebody's
getting it at night. I don't know. I just you lock it right here. Lock it like super careful. Another option of course, would be to do looping where
you go in and you replace the actor's dialogue with something new you
recorded in a studio. But that takes time and
money and lots of times it doesn't sound nearly as good as the original
production audio. And so in this case, for me, the plugins worked well. And just to be clear, I did this process
throughout the entire movie. Most scenes weren't this noisy, but I went through
and cleaned up all the dialogue and then did the sound mix. With
the sound mix. Now done, I moved on to color grading and visual
effects, the color grading, I also did directly within Premiere Pro using
Lumetri color, that's their color
correction tool. But then my LUT packs. In addition, I use
thumb convert nitrate. Again, these are
plug-ins that I use. There are other ones on the
market that you might prefer, but these worked well for me. Shooting ProRes log gives you a nice latitude in
post to be able to bend the footage
around when you're doing color correction
and using lots. And so it's a great way to get started with color
correction and grading. But of course you will
have to finesse it. And I did a lot of
that on this project. For this particular film, I wanted a desaturated
and cooler look, somewhat bluer tone. And as a side note, one thing I did that was kind of tedious, but it's also kinda
cool that you can do this is his shirt was blue and the color grading
I did in certain shots, it made the shirt look
black, almost very dark. And so I added a secondary
color correction. Basically, I use the
eyedropper and created a key around his shirt
that particular color, and I added saturation to
it and some luminance. So that's just something
else to consider when you're editing of how you can
manipulate the colors, not just from a stylized
grading point of view, but from a practical
point of view, depending of course on
what you're trying to do. And I mentioned film
convert as I wanted to do a film emulation
on this footage, and I chose one from Fuji. And I also add just a
little bit of grain. Again, this is an
optional thing, but I really liked doing this to really any footage,
any digital camera. But in particular to
mobile shot footage. For the most part, this footage
was pretty clean since I shot outside in a fairly
bright environment, but I did get video noise
sometimes in the shadows. I used a pretty heavy ND filter. And if you've ever
shot with a phone, you know that sometimes even
in brighter conditions, you can get video noise
using indie especially, or even just bringing the exposure down to a
level that you want. If the phone auto exposes, it'll usually
brighten the shadows and eliminate the noise. But in a movie often
you want to have a moodier look and it
will bring in noise. And so to fight that, I use neat video, It's a great plugin that
will de-noise your footage. Unfortunately, I didn't
have to use it a lot, but I did use it some. And in a couple of
shots in particular, it really made a big difference. And just like the other
plug-ins I've used, there are other types of plug-ins depending on
what app you're using. E.g. DaVinci Resolve
has its own built-in. Just depends on what
app you're using. The only caveat would be
if you're editing and luma fusion on an iPad or an iPhone, currently they don't have
any de-noising product, at least not one that I know. We have some really
noisy footage. You may have to bring it into
a traditional editing app. The last piece of the puzzle was some visual effects shots. Now one shot and this movie is an obvious visual effects
shot spoiler alert. It is when he looks
in the trunk and gets basically disintegrated
by a fireball. But before I talk
about that one, I want to show one that
is not so noticeable. And as a matter of fact,
these types of shots get done all the time in movies. On this wide shot here, I inadvertently captured
the mic and actually cliff, the guy who shot the project
with me holding the mic. And so I had to go in and erase him out in quotes
from the shot now, But what about a background
plate for this exact shot? It wouldn't have
been a big deal, but unfortunately I didn't. I had moved the camera
and so I had to combine a couple of
shots using Photoshop. And within Photoshop
I had to use content aware that
it'll fill in spaces. It copies the pixels
close to it and almost clones it and makes
it disappear in quotes. And then the trunk
shot, of course, we're Arnie, our hero, looks in and then catches
fire and his burned alive. That's shot was done
by Cliff Richard, who I mentioned earlier. And he used After
Effects to do that. And some particles from
trap code particular, along with fire elements from
the action VFX collection, some Spark elements
from video copilot, action and essentials, and smoke and some sound effects
from Envato Elements. I was really happy with
what he achieved here. One interesting thing too, I wanted to show, we
actually did two versions. Here's the one in
the final film. And then here is the alternate. I like them both, but I thought the first one was better in the end
because it happened faster. And I think it fit the story better and it was a little
more of a surprise. Then the last thing I did was create a master video
file for my archive, which was a 239 14k ProRes file. I upscale the movie from two
k for k within Premiere Pro. And then of course I
exported a file for YouTube. It too is for k,
but it was H.264. And on that one I did a
two-to-one aspect ratio. Currently, YouTube
does not allow you to do full widescreen 23921 and keep video elements
on the end of your videos. So that's why I didn't do that. But I used the widescreen
and other places like Vimeo or any future screenings
at a festival or whatever. Although I have not entered any, so I may never do that. So that's it. That's how I did post-production
on the short film.
29. Color Grading Demo: Yes, now there is
ProRes log and they are calling this new
version log V3 plus. And of course, yes, this is ten bit four to two pro
rata log on a phone. Filmic Pro has
supported logs since back in 2017 with log V0, V1, I have covered each
iteration from log V2 to the recent ten bit log V3, which uses a TBC. And that one is
really quite good. I still use it all the time. But now this latest
greatest version uses the even higher-quality
ProRes codecs. Remember to ProRes
is only available on the iPhone Pro and Pro Max model or on later devices if you're watching this
video in the future. For those that don't know, shooting log video
allows you to get the most dynamic range out of the sensor and into the footage. This allows you to have
the most latitude and flexibility for color
grading and post-production. Of course, remember
this is a phone with a small sensor and you're using computational
imaging here. So it's not the same
as shooting law with a traditional
camera, but nonetheless, the idea of shooting
ten bit for two to ProRes log on a phone
is still pretty mind-blowing and really can help you create some very
cinematic looks that we're really
unthinkable just a few years ago using phones. Alright, so I'm in Premier Pro doing a screen recording here, but of course this
will work in any app. Luma fusion, Final Cut Pro DaVinci Resolve
whenever you're using. Now here's a shot
from my short film, and it's shot on
a telephoto lens, the moment 58 mm. So I got some nice shallow
depth of field going here. It's also, of course,
shot ProRes log. Now this is not the final grade. This is a great I'm just working on but I applied a lot to it. A correction let which
corrects it more or less to what is called rec 709
because we're working in SDR, standard dynamic range,
and in Premiere Pro. And again, depending on
what app you're working on, this works in a very
similar fashion and resolve Final Cut Pro
luma fusion, et cetera. You can control the
light intensity here. And so I had chosen 87%. Every shot is going to be
a little bit different. And so the LED intensity will be different depending
on the shot. And that's a good thing
there. As a reminder, using lots is really
just a starting point. You almost never drag-and-drop
a lot and it's perfect. So keep that in mind when your
color grading, and again, what I'm doing here is I'm doing color correction and
grading simultaneously, which isn't always
what you would do. Often you would do a correction using a utility
ladder, a transform. Then you might do some
general correction and then you might do
some shot matching. And then you would do
your grade at the end. I'm kind of doing that, but I'm combining a few steps in this process after you
get the look you want. And that actually
looks pretty good. Then on top of that, I add film convert nitrate. Now again, this isn't
my final look in the short film on going
for more desaturated, a little bit of a blue or look. But you can really see the
difference that I did. That's more of a warm look. And then when I did nitrate, I added more blue into the highlights and really
an overall blue look. And then in this one I'm using Fujifilm emulsion and just
a little bit of grain. I don't like adding
a ton of grain, but adding some film grain, especially it's a phone footage, can really give it
an extra texture that makes it look
much more cinematic. To me, this shot looks really cool and does not look like
it was shot on a phone. And I'm talking
about this for years shooting filmic pro log and also just gives the image a more
flattering filmic look, less crunchy sharp images. And that equals typically speaking, more cinematic images. And so that's another
benefit to shooting log, is you get a quote
unquote softer image and speaking
of softness here, I also use the midst filter
and the mist is very light. I think it's maybe like one eighth or maybe a
quarter at most. It's not overdone. And so it really just softens the skin and I really
liked the way it looks. Alright, now one more shot. This is the log shot. This is another character
from the short film. And again, you've got
to be really careful, especially when it
comes to skin tone. If you look at his hand
right here at the bottom, that got borderline overexposed and same with the edge of
his nose and his forehead. Use zebras when you're
shooting or the histogram. What I've been doing
as a tip here, whenever the phone exposes, bring that down
just a little bit. It's better to underexposed
and overexpose. You can always denoise, but if you clip a shot, you can't do
anything about that. You really can't even
shooting log because the sensor just doesn't capture enough
information, enough data. However, it's pretty incredible. From this shot, here is the lot. You can see how much
the lot brings it down. And again, with this leg just like the previous one,
you can control it. I went ahead and did
100% on this one. You can do whatever you want, whatever is required
for the shot. Then I went in and did the specific color
correction I wanted to do. And just to repeat myself, I'm doing a transform, let a d log lot, and then I'm correcting
within that same effect. Some people might make that
separate Effects and Premier, I tend to do it in
the same effect. If I was in Resolve, I would do a different node. And so then that looks
pretty good just using the correction lot and doing some correction
to bring it back. And then of course,
as I've done in the previous shots,
I added nitrate. And then that really gives it
a much more cinematic look. So I'm adding a
little bit of grain. But then of course what
they do is they take the Gamma curve that you would have shooting that film
and they emulate it. So again, there is the
original ProRes log. There is the lot with some
correction done in that. And then here is the grade. And again in the short
film, I'm going for a more desaturated blue look.
30. FiLMIC Pro Frame.io Overview: You've probably heard
that Adobe acquired frame IO last year and it's now
part of Creative Cloud. That part was just announced recently, which is pretty great. And now you can add
filmic pro into that mix. If you don't know
what frame I0 is, It's a Cloud-based collaboration
platform for a client. Video approvals,
sharing footage, reviewing dailies
and a lot more now, including C2C, camera to cloud. And that's where filmic pro
comes in, which by the way, they've had C2C for higher-end productions
for a little while, but now integrating
that part with filmic pro is what's brand new. Now as you're shooting, you can automatically
upload proxy files to the cloud to frame IO
within filmic pro. And anyone on your
production team, including your editor,
view that footage. Not only can they
view that footage, they can download that footage. So that means that
anywhere in the world they can simultaneously be editing
while you're shooting. So to use this new feature, you do need to have the filmic
pro cinematographer kit. And you need to have
a frame IO account. And by the way, there are some hardware
limitations to using this. It works with the
iPhone 11 or later, and then on Android it works
with Android seven or later. And then it will depend on the device you're
actually using. Within frame IO
on their website, you need to set up
a new C2C folder, camera to Cloud folder. Once that's set up, you
come back and filmic pro, and there's a frame
IO icon here. Now you click that. Now I've already
gone through this, but you would on
this top line here, login to your frame IO account. And then that will actually
connect it to filmic pro. After it's connected, you
choose the proxy quality. I've tested all three. And for me, the best
quality that meets file size is the LQ ten ADP LQ. I tried 720 P, and I found that it was
a little bit too blocky, especially for checking focus, what I found to be pretty cool. So 720 p is a little bit too low quality
because of the compression. So I would choose ten ADP, LQ or HQ and LQ I
found to be the best. And the other thing
you need to do is choose your upload method. You can do automatic,
which would obviously automatically upload as
soon as the shot is taken. Or you can do prompt or
you can turn it off if you're not going to
be using this feature on a particular project, I have prompt on because
if I shoot a shot, that's a bust, I
don't upload it. But then of course if you
want to use it, you hit Okay. I'll record a quick
demo clip here. I'm shooting ProRes four to two. Soon as that's over, I get a
prompt upload to frame IO. Do you want to generate a proxy and add this clip to
your upload cube? Hit Yes. And so it Dan samples that clip that quickly and it uploads it in the background, right then as long as you are
connected to the Internet, you obviously have to have an internet
connection either via Wi-Fi or four or five G. They're all very quick.
I've discovered, regardless of which
way you're connected, you come into the library and then it instantly
signifies is that proxy has been
uploaded right here on this purple strip
in the bottom corner. And the original
file is there too. That way you have both
bile is the original and the proxy on the phone
and the filmic library. And then the proxy file
is up in the Cloud. Now that file is available
in the Cloud and the frame I a website which you can look
at it there on a computer, or you can check it out and the mobile app on an
iPhone or an iPad, it's also now available
directly within Premiere Pro or in luma fusion. Remember you can
connect either one of them with the
frame IO plug-in. If you use luma fusion, you can do an offline proxy
at it and then export and XML to finish that
in Final Cut Pro, DaVinci Resolve or
in Premiere Pro. So again, this means that an editor can start
working right away, or a client could
review the footage. Let's say they're
not on location or a member of your team, your production team
could do the same thing. What I've been doing
is using it in combination with shooting
ProRes on my 13th Pro Max, because those files are
huge, they're really big. And when you transfer those to a computer, it takes forever. You've gotta do
that at some point. But using this method
using frame IO, you can then see the files instantly on your
computer or on your iPad. And that way, you
know what's going on, you know what the footage looks like and you can start editing. So again, having them instantly
available to review or edit using the C2C
feature has been awesome. I recently shot a new short film and had a days where
the footage, alright, at my fingertips before I transferred anything
to the computer, not only was this a big help
to organize the footage, and also gave me peace
of mind that I got certain shots in focus
because with this, you can quickly see them on a
big screen on a computer or iPad versus just on the
small iPhone screen. So you may be asking,
Who is this for? And it's really for anyone in my opinion that wants to
collaborate, share footage, whether that's with team members on your production
or with clients, or even if you're doing solo stuff and you have
a lot of footage, you're dealing with light large ProRes files, as I mentioned, but I would think
right now it would be especially great for
mobile journalists. Shoot something in the
field and how the editor or producer back at the office
start working immediately. Or if you're doing
long-form projects like a movie or documentary, this is an ideal option, or if you do corporate video
and have clients involved this another great tool to use for those kind of projects. To me, this is a
natural fit using this type of technology,
meaning your phone. While it also works great
on high-end production, you have to have a
lot of additional expensive hardware
to make it work. Here, it's all built right in. Of course, shooting
on your phone is totally different than
shooting on area Alexa. But as phone video quality
continues to improve, I could definitely see where
this could be adopted by more and more professionals depending on the
type of project. You have to have an Adobe
Creative Cloud subscription or a paid frame IO account
for all this to work. And since a lot of people already subscribed
to Creative Cloud, this is gonna be a great
value add for using that. But if you don't use Adobe
frame I0 is affordable. I've been a subscriber
for several years, but since I also subscribe
to Creative Cloud, I'll now be able
to combine those which will ultimately
save me some money. So I think this is incredibly
cool tech and maybe one of those things you didn't know
you needed until you try it.
31. Director's Commentary: Now you know my
writing approach, my shooting approach,
how I edit. And now let's hop into the actual short
film one more time. I know you've
already watched it. Go watch it once again with
a director's commentary. And I'll point out a
few things within the actual short that I
did and hopefully enlighten you a
little bit on what I did and demystify the
process even more. So thank you for
taking this training. I hope you learned a lot
and it was beneficial. And now we'll roll a short
and I'll see you later. Alright, here we go. My
short film pre-owned. This is Susanna give, and this is Troy grant. That lens flare is not real. I did that as a visual
effect and post, I just thought I'd
add a little bit of character to the shot. Susanna has been in a
ton of my short films. Troy grant has been at a
bunch of my other projects. First iPhone short film. They shots of him
driving in the car. We're crazy noisy. I had to use neat video on. Those are whatever reason the ND filter I was using in here, combined with the outside, the low exposure went crazy. Now this shot where I
pull in the driveway, this was a one take
deal and I was on a gimbal and I was really happy with the way
that shock turned out. It looks like a dolly. And I don't think I did
really much stabilization at all in post-production. I really goes to
show what you can do with the gimbal
on an Indie film, especially that's why they can, Gimbels are still important
for this kind of stuff. Now this song here is one that I ended up picking
and post-production. Before I get there though,
the badge there on his shirt, Arnie, no one
really picked up on that and it's very much
just an Easter egg. But a movie I really like
is called Christine, and it's about a haunted
car more or less. And the main character,
his name was Arnie, played by Keith Gordon, who ended up becoming a very well-known TV and film director. So just a little
side note there. But Christine was definitely a inspiration for this short. But back to the song, the song I ended up picking and
post-production. And then it repeats throughout the short film and end up
being a little bit like a Groundhog Day
where Bill Murray wakes up every day and
the song is the same. That wasn't scripted,
he used the same song. I came up with that and editing. And that happens a lot by
the way, in filmmaking. You find things in the edit
that really helped the story. Line. The song here that plays is another one that's
a stock music song. That doesn't sound like
a stock music song. And I really think that
fits the dark comedy supernatural Bible there. And now the song repeats here. He's going out
looking at his car. He is proud of his car. That's my mom's car again. Troy is like six foot
three in real life. And so he actually had a tough time getting in
the car. My mom's like 55. There wasn't a lot
of acting there, although of course we did
move the seat back-and-forth. The song gag was another
one that I didn't plan on having the same song
play over and over again. I thought it would
be a different song, but then in the edit, the same song being repetitive was kind
of creepy and cool. Pretty much all the shots of him walking to the car were one or two takes on these small,
indeed DIY projects. That's really all
you get is one or two takes three Topps. You've got to move
on to make your day. This shot here almost looks like a split diopter because
everything's in focus, but I'm using that
wide anamorphic lens. He looks really small in the
frame. It's a cool shot. I think the messing
with the seed, the cranking up the women
here on the telephone. That's me actually
only on the line. That was all done
in editing because originally I didn't
have dialogue there, but I thought
it needed it. So I am the voice on the
other end of the phone. Check it out. Okay. Okay. You're sure it's not you? Now, this is a real car
law of a Kia dealership. And so I got this
through a connection of an ad agency and they let
me shoot there for free. We didn't show any Qia
logos or anything, but that's just one
thing you can try to do is use stuff from
your business life, your personal life to
get good locations, custom driver settings. The shot here of her doing
the seat was achieved because that wasn't actually an
automatic seat like that. We had our cover
up their control and push it and it worked. But another way to
cheat something, but you don't actually have the right setup in your
crop. It's weird, right? It's a used car. So I really like the shallow depth of field
I got there to using the moment telephoto on
the larger sensor or the iPhone 13 when shooting
with a phone in particular, that's a big giveaway because traditional cameras will usually have more shallow
depth of field. This tilt up here, when
I did my storyboard, I wanted a lens flare
there, but it was cloudy. So in post-production again, I added that lens flare. Then all of these shots of
the phone coming up with the right there with the
actual surveillance, that is something I
did in Photoshop. And then the actual interface
was tracked onto the phone. And after effects, the surveillance camera there, I actually just stuck on the
wall with a command strip. There's the interface again,
that was a visual effect. Originally in this sequence, he finds a sandwich
in the car and then cutting it because it felt like the story is getting too long. And it's just another one of the things you find in the edit. Routinely you end
up cutting things, the speedup, the story, especially I think
in the short film, not the ghost in the backseat or the aberration,
whatever, That's me. Again, when you're doing
indie film or DIY stuff, you're going to
have to do cameos. That's my Hitchcock moment here. Originally I was going to
have scored done for this, but I thought that the music I pulled from Art
List worked fine. It was creepy and I was able to edit it to where it hit
right on the right beads. One thing to that POV
shot inside the door, actually shot that
in my driveway at my house a couple of days later, I forgot to get it
during the shoe. Also, this shot of the bumper of the car That's actually
shot in my driveway. You can see the driveway is
a little different color, but when you edit
it all together and do the color correction, you really don't notice it. Originally, I wanted
more of these shots to be moving but we
ran out of time. But the ones that are moving
Suddenly there I do like especially that little push into him right there
looking at the trunk and then my mom's car trunk wouldn't pop up automatically. In my mind, I thought it would, but it's an older car and so it didn't but it ended
up working anyway. And right here where
he opens the trunk, I left the camera on autofocus. It actually looks like someone's racking the focus
from side of the car. So I thought it worked, but that was kind of a happy accident, which are great
filmmaking by the way, happy accidents
really are awesome. A lot of people who have
watched the short film when they see the shot
here of the burn feet, they say it reminds
him and Repo Man, I never even thought about that. That's again, one of
those happy accidents. You can select up to two. And then here at the end,
that shot of her hand, that's a repeat
shot from previous. We didn't shoot that
again and I didn't even notice her sleeves
wear long there, so it doesn't technically match. But again, movie magic, you
can get away with that. People don't notice that
kind of continuity error. Enjoy. Thank you. I will. Speaking of an error or continuity error, here's one more cameo from me and I didn't even notice
That's why we're shooting. But in post-production I did. I'm in the glasses there holding the gimbal, talking dishRouter. Do credits on your
short films and be sure to spell
everyone's name, right. That is something that
happens in every movie. Someone's name will
be spelled wrong. I got everybody's name
spelled right here, although I got the wrong car
lot name on their credit, the people that
worked on your film, everyone likes to see
their work acknowledged. But that's it. Thanks again for
taking the course. This is Blake Calhoun and
I will see you guys later.
 Blake Calhoun, Filmmaker