Transcripts
1. Make a Little Book of Birds Introduction: In this class, I show you my process of using
collage to make a handmade book that you can
fill with collaged birds. Hi, I'm Helen and I'm a lifelong artists and
maker from the UK. And I believe that
creativity isn't all about fancy materials and
the latest equipment. I believe that we can all
create with everyday, simple, easily found materials. My work has always stemmed from the love of materials
and processes, and collage and assemblage have always been my favorite
ways of working. Collage and assemblage of
always featured in my work. And I love using materials that other people perhaps wouldn't consider
unusual materials. So quite a lot of
my canvases have got unusual found
objects buried in them. I find that using
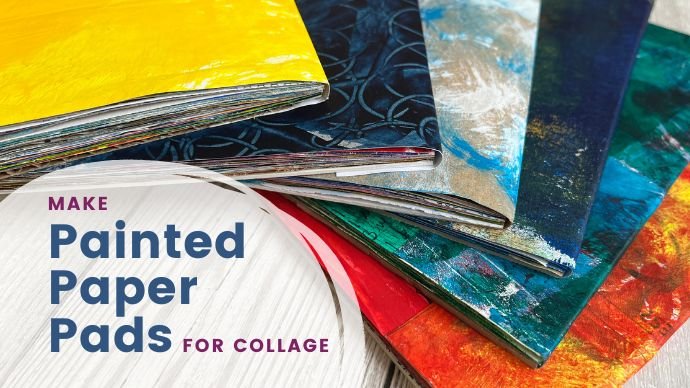
abstract painted papers and liberating way to work. When I'm painting the papers, I'm not worried about
the end result. I'm just having fun
putting paint on paper. I enjoyed the happenstance
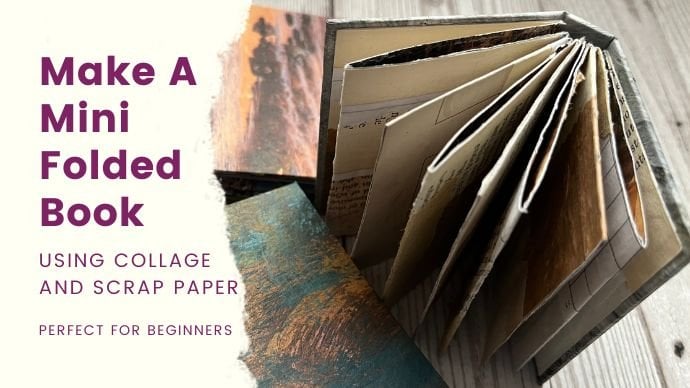
and the happy accidents. In this class, I'll show you my process of using
collage to make a single signature book bound with a three
hole pamphlet stitch, which I then fill with
collaged painted paper birds. I discuss the materials I use. I provide templates
to guide you and there's an information
pack for your reference. Let's get cutting and sticking.
2. Project Overview: In this class we'll be using easy bookbinding
techniques combined with collage to make a
little book of birds. I chose this project because
I love to reuse and recycle, and collage and assemblage
and bookbinding, favorite techniques of
mine for many years. This project uses
easily found materials. I talked you through the process step-by-step and offer
alternatives along the way. I'll walk you through
the process of making the book using a three
hole pamphlet stitch. And then we fill it
with collage to birds. I'd really love to see your
little books of birds. So please do share
them with us here. Just click Create,
Project button to upload your photos or videos of your finished little
books of birds. Let's start making our
little book of birds.
3. Materials: To make the little
book of birds, we're going to need a
collection of paper. The paper that I've used in
this book is actually from a cut down notebook that was that I had picked
up at a scrap store. But you could use
any paper at all. I like to save the paper
pages out of old notebooks. Notebook pages. Any paper you would like to use, you can use regular
printer paper. Should you wish to
cover the book? I've used painted paper. This is my favorite, which is painted newspaper. Newspaper, just paint
on some textured. That's for the
cover of the book. For the birds themselves. I decided for this
one I was going to do black and white goods. So I've got a collection
of black painted papers. That's what I've used tonight. Of course, we're going
to need glue for this. I use irregular Pritt
Stick, glue stick. And glue stick will do
also have some PVA glue. Using PVA, I like to push the brush to add some more
to keep your brush wet. And any glue will do my
favorites or stick and PVA. To the book. Together. I've got some bits
of finding the equipment. I have a book binders, all which is what I make the
holes in the spine with. This is a sharp,
pokey implement. You could use a needle, you could use a skewer, whatever you've got
to make a hole in the spine of your
book. I'm stitching. In this project, I use this
linen thread. Various other. Then in my collection. I've also used string
to bind to iBooks. You want to go down
the colored version. Regular embroidery
thread works very well. So the book, I have
collection of needles. I've got some big donors. Whatever works for you. Think needles would be the ones that you would
show up knitting with. That sort of thing
works very well. Thread on some
bookbinding equipment. To decorate the front
of my book. Name. My book. I used some rubber
alphabet stamps. These in the UK. I got
these from hobby craft. They came in little
living collections like this in a small box. For ease of use. I've put them into a little tray that I
made from balsa wood. And I've just got a couple
of alphabet sets here, and I've used that to
print the name of my book. This is just a little ink pad, probably again from
hobby craft, the range. And I've got black ink. But you could use
if you would like. These alphabet stamps
are available in lots of different craft
stores and shops. So for my book, I've used alphabet
stance and an ink pad. The cutting and sticky. We
also need a pair of scissors. I use a craft knife to cut. So I use a metal ruler, a cutting mat, and I've got
a retractable blade, knife. And finishing off the details on the birds, on collage birds, I use a white posca pen and I use a 0. I told you the wrong way
because I'm left-handed. I use a, my favorite
is 0.8 Uni pin pen, but this is a
permanent black line. Fine liner pen. Again, whatever
you have to have. All the equipment that we need.
4. Pages and Cover: So today I'm going to
make a little notebook and I'm using these pages
that are, as you can see, it's half half of a notebook
or part of a journal that I picked up from a scrap
store, local scrap store. But you of course can use any paper that you have to hand. So I'm just counting out the
pages that I want to use. This book has got brown pages
and they've got whitepages. Just tear the pages. And I'm just going to measure them and see
what's the biggest size that I can get to maximize
usage of these pages. I'm aiming for a square
book for this project. So I just need to
measure the length to work out how high
I want to make it. It's Paypal will give
me pages of around about four-and-a-half
inches square. So making sure that
they're nice and square. Trim them to regular sizes. So just being very careful
with your cutting knife and lining them up
and making them square on the cutting mat. Nice and square now, all even sizes individually
folding them in half to make the pages
for my notebook. Make sure that each of the
folds are nice and crisp. And that one's reject because
it had a little tear in it, but I get to use it later. So I've got white ones
and I've got brown ones. And I'm deciding
that the pages are gonna go alternate colors. So I'm just slotting them in. White brown, white
brown. I'm saying white. It's more of a creamy color. And that will form the
signature for my notebook. Those are the pages from
my notebook to the cover. So I'm using the rejected page, the one that was slightly torn. I've cut a piece of painted newspaper slightly
larger than that page. And I'm just putting some
glue on jm using PVA glue. Any glue will do. So very carefully. Paste the paper, stick
it on, smooth it down. I've put it between a couple of pieces of paper
just to try it. Flat a little bit.
Trim the corners off, and paste the flaps. Folding them over, leave it to dry. It dries flat again. And then finally cut a piece of paper to cover your flaps. So I'm just trimming it nice and square of a sticky
patch on that. So I've got a piece of paper
that fits on the back there. Again, paste the paper
carefully glue in place. And again, leave it under
something heavy to dry flat. So that's gonna be
the cover of my book.
5. Binding your Book: So here we have the cover. It's nice and dry and flat. And I'm just going
to fold it in half. Creasing lay along
the folded edge. You could choose a paper
folder if you wanted to, but I just find that
my hand is enough. The next stage is to
attach the signature, the folded pages skinned to
the cover of the notebook. And I'm gonna do this by sewing the signature
into the cover. I'm just collecting the I
need so I need a needle. This is in my little
handmade needle holder. Need to make sure
I put a needle. I've got a sharp implement
to make the holes, and I've got some
thread to stitch width, so I'll put brown thread
here to make the holes. I sometimes I measure, sometimes I don't,
It's up to you. But here I'm going to
measure where the holes are. I just want to have a bit of an idea of where
the center hold this. We're going to do the
three whole pamphlets. I need to find the center
hole and then we'll measure an even distance either side effects
central hole. So we've got three holes in the fold of the pamphlet,
of the notebook. With the book binders. I'm going to make
the three holes. Now, if you don't have an old, you can use any sharp, pokey thing that
you have to hand, a darling needle or a skewer. You could use a similar thing
from a woodworking toolbox. So there's woodworking, anything
that will make a sharp, sharp, that will make a whole. If you've got old
style set of campuses, the point on the compass is
sharp enough to do this. If you want to start
making notebooks regularly than a book binders, all is a very useful
tool to have. So I'm just measuring. So I'm just measuring 3 cm either side of the center hole. And that's where I'm going to do my number two and
number three whole resting the book and they all flat against
the cutting mat. I'm sliding, wiggling a hole in the spine by going
horizontally, not poking down. A little bit of recall, you do get the coming through
the fold of the notebook. Always remember to
protect the point of your all the signature. We need some thread. And for three whole signature, you need three times
the height of the book in measure three
times the height, and cut the length of
the thread accordingly. You need a needle. Thread, your needle. And I'm
going from the outside in. That will give my
threads on the outside. So find the center hall and parse your needle through the center hole into
the middle of the book. Keeping a tail on the outside. Back out through one of the holes all the way
over to the other end. Whoa. Going back into the book. And then back out
through the center hole. Now with this going back out
through the center hole is good idea to hold onto
that tail thread. You don't split the thread. Before I tie this signature, I want to make sure that
the thread is evenly distributed through
the, through the spine. The tails are of equal length. So I'm just having a bit
of a wriggle around, making sure that everything is nice and tight and lay flat. With this three whole signature. You have one big stitch on the outside and you
put the two tails, you want to make sure
that each tail is coming either side of
that one big stitch. And I tend to use a, I think it's called a reef not
so I tend to do a leftover right and underneath and a right over, left
and underneath. And dressed for
luck, I do a third, not going back to the leftover,
right and underneath. So I use 3 kt to secure
that signature in place. But you'll notice that now
we've got the pages sewn in. The pages do kind of stick out a little bit further than the than the cover of the book. So I'm just going to mark it in pencil where
the cover goes. And I'm going to trim
the pages so nicely. Folding the cover
of the book back and letting the TBA go over
the edge of my table here. I'm lining it up on
the on a cutting mat. It's just the pages
that I've got held between the cutting
mat and my ruler. And I'm just going to
trim those pages where I marked them to make sure that the edges of the pages
are all nice and straight. And that looks much better now. So the pages are within the cover of the book
and nice and straight. Is no, the pages we saw earlier. The other thing I'm going to
do right now is I'm going to add some decorative
knots to be tails. Now I quite like having the
tails of the thread dangling. So I am just for a
little bit of detail, I'm adding 3 kt on the strings. So 3 kt on each of
those two tails. You could use beads, you could make paper beads. You could do whatever you want. You could trim them.
You could make it put up a bow there. You can, you can decorate that how you want or you
can just leave it be just a little bit
of textual detail. I'm having 3 kt on each
one of my tails here. I'm just going to trim
them a little bit shorter, so it's not so much
a tail sharing. There we have it, our book with the pages all stitched in.
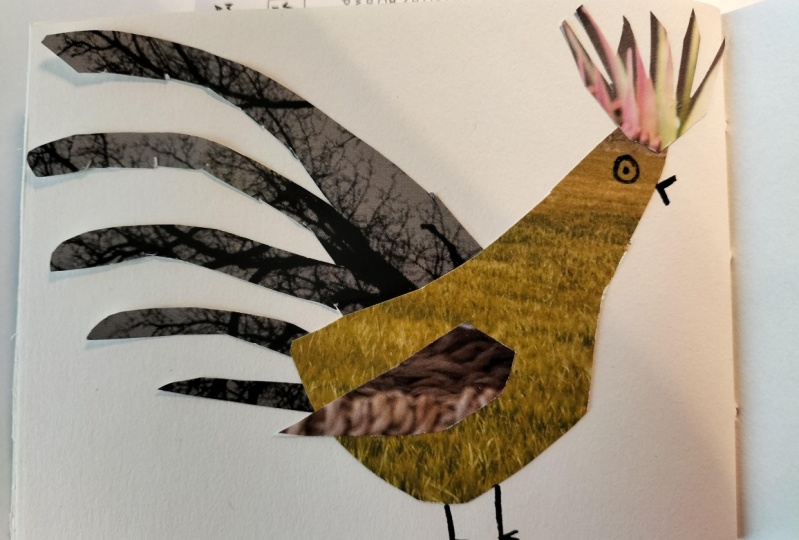
6. Making a Collaged Bird: For this project,
I wanted all of my chickens or birds
to be black and white. So I've got a
collection of papers which I've painted
with black paint. I'm using chickens that I've drawn in my sketch
book as inspiration. So to start off with, I'm just going to
quickly cut out pieces. The painted paper, roughly about the same size or a little bit
smaller than the page size. This is going to form
the body of my chicken. I tend not to draw my
trip and shape first. Cut shape. And that way the character of the birds develop and each one will be
slightly different. But you could use
the birds that I've provided in the
supplementary materials. You could use those as
templates or guides. Or you could draw
your birds onto the paper first before
you cut it out. So I'm just cutting
out the rough shape. And as you can see,
it does get adapted. And I do a little
bit more trimming. It develops. I just trim as I go adapting it until I'm happy
with the basic body shape. Now we're using painted papers. Each one of your birds is gonna be completely different anyway, because the marks on the paper are all going to be
slightly different. So that is my basic
bird body shape. So I'm not going
to have a look at making some tail feathers. I'm having a little
look, see whether I like different parts of
those different planes. Painted papers. Quite like lines. On this section here. I'm cutting out a, it's
going to be a sort of an elongated triangle shape
to make the tail feathers. And I get the rough
outline of the block, first of all, trimmed
to how I like it. Before then cutting into make
the feathers themselves. I just cut long
cut marks 20 over, putting in, trimming out that
little elongated triangle. Just to make some indication
of tail feathers. Just rounding off
that final one. I'm quite happy with that. So I'm just going
to have a look, see what it looked
like. Oh my God. Yeah, I'm pretty
pleased with that one. Using a cover from a
magazine as a glue mat. Some print stick glue. You can use any glue. Of course. I'm just going to do a slightly attach the tail feathers
onto the body of the bird. He's not gonna be attached
onto the page at this stage, but the tail is
attached to the bed. So the next thing I want to
do is I want to make a wing. And again, using as
sort of elongated, rounded triangle shape, I'm just going to cut
a bit of a wing shape. Actually for this bird, the wing does kind
of disappear into the texture of the
body of the bird. But you could, you could make
yours a little bit clearer and a little bit more obvious than when I've
decided to do here, but yeah, I'm, I'm quite
happy with the outcome. Is going to glue it into place. The next element
we're going to do. I'm just going to round this. Head off a little bit
more. I didn't quite like. A little bit pointy. The next element
I'd like to put on this bird is I want to put
some head feathers on. So I'm just going to cut out. Again. We're going
for that sort of rounded triangle fan
shape to start off with. I'm cutting a block shape. First of all, this is
little bit more fiddly, but I'm just going to nip, nip in and cut feather shapes into this
block of headphones. As you can see, it's just
coming together now. Just gently trimming
feather shapes. I think I'm reasonably
happy with that. Just rounding off the
edge a little bit more. And that will sit on
top of the bird's head. So those are all of
our basic elements. Now as you can see,
you can attach these, you can attach them at
different angles and that will give different
characters to your birds. Have fun with with how you, how you want your bird to look. I'm just going to attach that
to the back of the head. And so all of those elements are all
together in one piece. The body, the tail, the wings, and the
head feathers. Now that I can glue the
whole thing in place onto, to go onto the page. So you have to be very
careful with this. It's a little bit
delicate at this stage. Individual feathers
can easily break off. So just take your time
when you're gluing this. And if it does break off, then is any paper cut
another one or just stick that feather or whatever that's come
off back in place. Gently centering it on the
page, smoothing it down. You may find that,
as in this case, some of the ends of
the tail feathers hadn't quite gotten off glue. So just make sure all
your little edges and ends of all got enough glue and it's all holding down nicely in place. There's a bird on the page. Now, I need to add a little bit more detail to
make it look like a bird. So I've got a little
white posca pen here. So this is a permanent
acrylic marker pen and I'm just going to
make a little eye shape. I do the eyes first because then that gives it time to dry before I go back to
add the detail to the eye. So with the eye in place, I can now make a beak
with a fine liner, black Uni, pin pen. You can use any pen
that you'd like. Pencil, crayon, whatever,
whatever you've got to hand. I'm just making a beak and
then adding on some legs. I do my legs very simply. Just keep them fine and fill out the lines very gradually to give them a little
bit more substance. So I tend to do fill in a little bit
more around the ankle, feet just to give it a
little bit more substance. And then I'll do a little tiny waves triangle to indicate where the legs
are attached to the body. That's our bird.
The eye is now dry. The white of the eyes now dry. So I'm going to just
add with my black pen, I'm just going to add a pupil. And I'm just going to gently just define around the outside of the eye with the black pen. Let's my first chicken done.
7. Printing the Title: So we've made our
little book now and now we're going to title it. I have got some paper. You're going to use some
recycled round paper here. And I'm going to have
stamp the name of my book. This is the little
book of birds. And so I've got an ink pad here, and I've got some letters, stamps that I bought from
hobby craft in the UK here, but I'm sure you can
get these anywhere. Any craft or art store will have individual
letters, stamps. You can write your name on. You can title of your
book however you like. But I'm just writing these
words on here by individually stamping the letters
onto the brown paper. Now as you can see, I'm just putting the words on. I'm not arranging the words
on this brown piece of paper because my intention is to cut each of these
individual words out and glue them onto
the front of the book. So I'm just literally
putting the words on. I quiet like the quirkiness of the upside-down Z
formation of the letters. That doesn't worry me at all. If you want things a little bit neater and a little
bit more in line. And obviously you need
to take your time and make sure that there's
stamps if you're using them, are nicely lined up in level, but I quite like the
quirky quirkiness of the upside-down Z words. I'm just going to
cut out these words. Who's going to cut the strip and trim them pretty much
evenly as much as I can. And then the words get
trimmed a little bit more because they cut
into individual words. We have a little book of birds. We're ready to glue that
onto the front of the book. You can play around
with the arrangement of these words however
you would like. I'm just trying
Lee in the center, do I like that? Do I like it going
diagonally across? Or I could put them
one side or the other. Have a little play
with the arrangement. I'm favoring the center
the center line. But it's whatever
is pleasing to you, It's your book. Decision made. It's going in the center. So I'm going to actually
use the cutting mat here, the grid on the cutting mat, to just let me know where the
center is, the center line. Pretty much whether the bolder
line on the cutting mat is it's giving me guides
but without drawing it onto the cover of the book. So just with a
regular glue stick, but you can use
any glue you like. I'm just going to
put these words onto the front
cover of the book. Starting with the top word. I'm putting little on there
to make sure that these are pretty evenly spaced
on the cover. I'm now putting birds on. And then you can glue the other two words on pretty much evenly within
that center space. I just found that easier. It's easier way to do it for me. The final word, the off, just going in that space there. We have it. There's the title page, the cover of the
book. I finished. I'm going to keep
the end pages lung, the first and the
last page blank. The other pages,
I'm in the process of filling with different
sorts of birds, all using the black
painted paper. Little book of birds
ready to fill up.
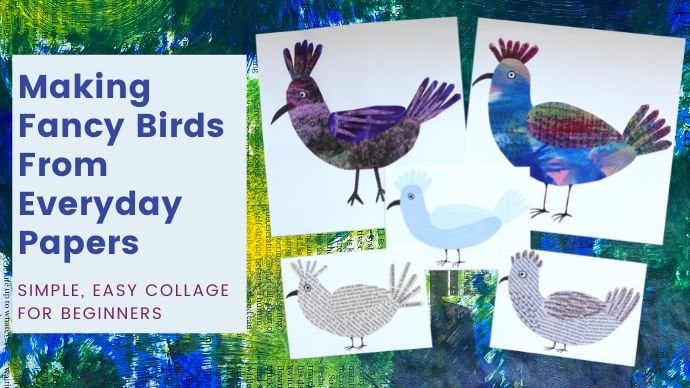
8. Final Flip Through: Here's the final version of
my little book of birds, filled with 16 birds made
with black painted paper. But I've also got here
another book to show you that I've filled
with colored birds. I hope you have fun making
your little book of birds.
9. Conclusion: How did you get on? I'd like to thank
you for coming on this creative journey with me and I hope you've had
fun along the way. We've reminded ourselves of the joys of cutting
and sticking. I'm looking forward to seeing all the photos of your makes. I'd love it if you
could follow me on Skillshare here and
leave a review. You can follow me on
Instagram where I share some of my creative projects. And if there's one thing I'd
like you to remember from today is that cutting
and sticking is fun.
 Helen H, UK based artist and maker