Transcripts
1. Make A Mini Word-Trail Book - Using Paper Scraps And Found Words: Hi, I'm Helen and I'm a UK
based artist and crafter. My favorite materials, recycled, repurposed and found materials. And I love working
with mixed media, collage and assemblage of
always featured in my work. And I love using materials that other people perhaps
wouldn't consider. My canvases have unusual
found objects buried in them. Today I'm going to be
making a mini folded word trail book using scrap
paper and found text. I believe that creativity
is in us all and we can all make wonderful things
with the resources we have. Let's get creative and make a mini folded word trial book.
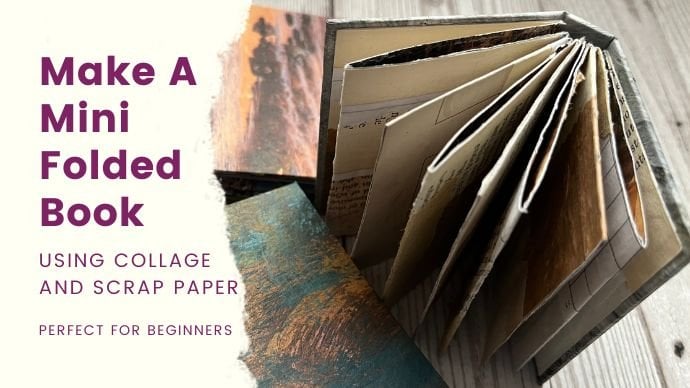
2. Project Description: In this class, I'll
show you how to make a mini folded word trail book. By following the example of this book that I
made previously, I take you step-by-step along the process of making
this mini book. So it's a little
folded book that they're held together with
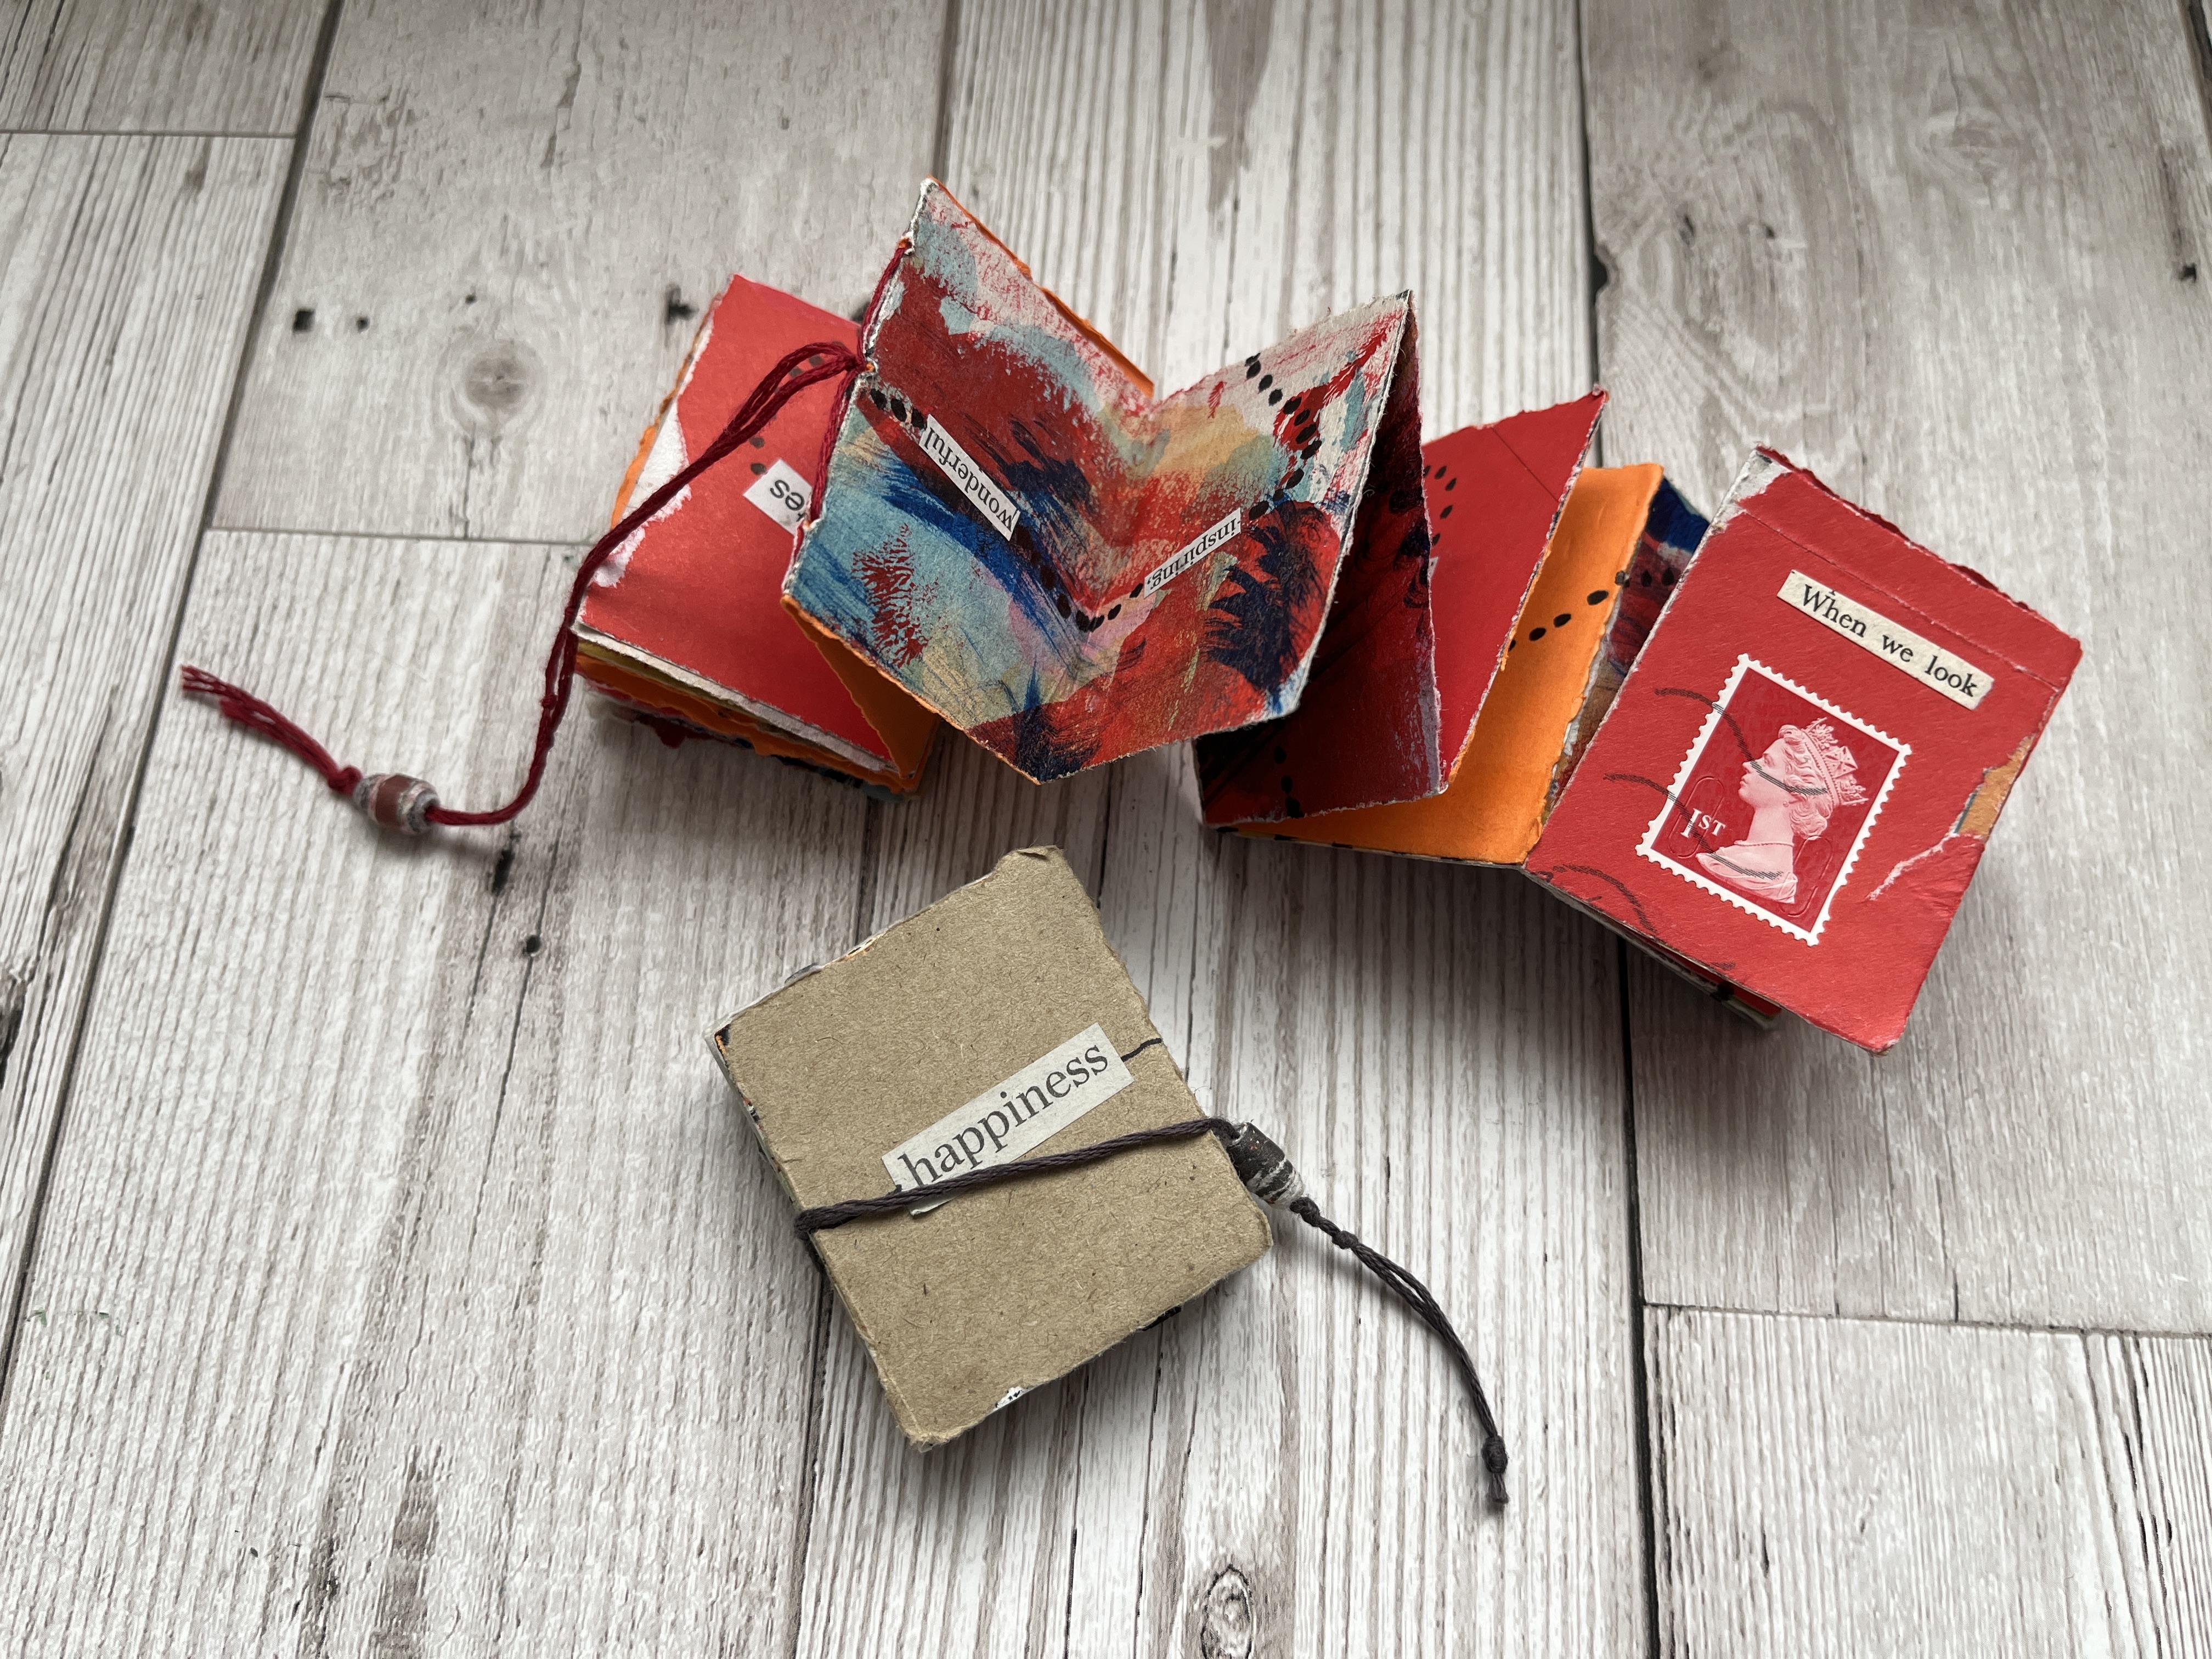
a bead paper bead closure. And the little book takes
us on a trail of words. It's a twisty tourney journey. So I've made a little trail to help follow where the
next words are coming. And it takes, this
little book takes you on a journey through the book, through the pages,
twisting and turning. And the words are found words from
newspapers and magazines. They're words that I've
collected together. They can make sense, they can make nonsense. It's your mini Workbook. He can say whatever
you want it to say. This is a little tactile book. But just it takes
you on a journey. Make your own journey of words through your
own little book. If you'd like to learn to
make simple folded mini book. You loved collage and
all things paper craft. And come along and
join me to make a mini folded word trial book.
3. Equipment and Materials: The equipment I've
used for this class includes scissors,
a paper folder, a craft knife that
I use with a ruler, metal ruler and a, and a craft mat, cutting mat. I have also used a scalpel, which I protect with an old
rubber here and old eraser. I've used glue
stick, Pritt Stick, blue pencil, sharpie pen. I've got a book binders, all. A cocktail stick, and
some donning needles. Materials I've used in this project or the
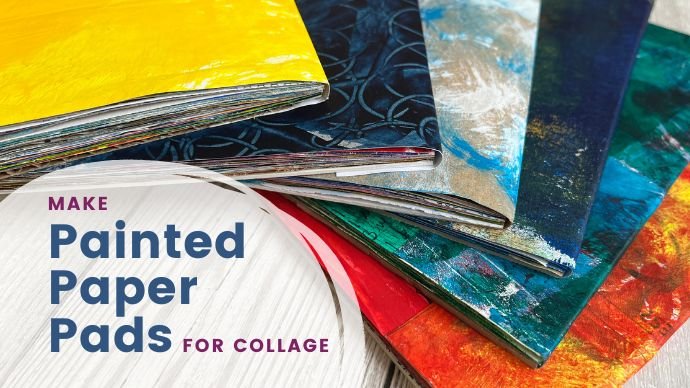
cover from a magazine. Painted paper, abstract painted paper that I've painted with. I tend to use acrylic
paints for these. I've also used colored envelope, paper, words from newspapers, magazines, junk mail,
anything like that. And embroidery thread.
4. A Quick Look At The Example Book: So I've unfolded my
little word trail book, and as you can see, it starts life as
one piece of paper. And it's a piece of paper
that's divided into 16. So that's what
we're going to do. We're going to cut a piece of
paper and then we'll start folding concertina ring
and making the pages.
5. Preparing The Base Paper - 1: So I'm starting off with one of my favorite materials and that's the cover
from a magazine. So again, I've gone for a non shiny cover and it's slightly thicker
than the actual magazine, but that's what
I'm going to use. Is this a square book? It's not quite square, but to make a square
book, you will need it. Need the original piece
of paper to be square. So this little book is
four by five. Okay? So we could make it
exactly the same. If you wanted to make a square, you could start off
with the square. It's very easy to work out how big your little mini
book is going to be. You see that is much
smaller than the original. Then the magazine cupboard, if you wanted to make
it this dimension. So if this is four, so that's going to be 16 by 20. So it's gonna be 16 cm by 20 cm. Now as you know, my cutting
mat is a metric ones. So each one of those
grids is 1 cm. So this way we're
going to do 16. So I'm just going to cut that piece to one side. And this other one
is going to be 20. Okay, so we've got our
piece of paper very easily. We're going to just
fold this into 16. So it's easy to do because we've only got the
thickness of the magazine. You use my paper folder. And for this one, I'm going to add all the
extra details on after I folded the paper. Three folds there, and then three again in the
other direction. So folding it in
half, first of all. Then fold the outside
to the middle. Okay, so that's our
folded piece of paper.
6. Preparing The Base Paper - 2: I've got my piece of paper
folded into 16 equal sections, and I'm now going to be cutting the page to then
be able to fold it up. We're going to cut
this one in a spiral. Cut. So to make it easy, I'm just going to
mark it out on, on here with the sharpie pen
so you can see where it is. But I'm going to be
cutting along this fold here to this crease here. And then cutting
along here to there, where it joins here. Now we're going to
be cutting along here to that point there, where that fold is there, along here, and into here. So now we'll create a piece, a strip of paper that is one page thick all the way along. And so there is only one page
thick all the way along. So that's how we're
going to cut. I'm going to cut along
this first line. First of all, we've already folded so we know
where we're going. If you haven't
marked like I have, then just mark where
your corner is. Make sure you can flap that open cut until
you reach the crease. That crease there. Okay, So that's your first cut. The second cut is along
the next two blocks. So make sure that you are
putting along the crease line. So I'm going to cut from
that fold to this one here. That should then join
that this 12 there. So again, make sure
you can crease line is nice and freely accessible. Okay. And that should have
hasn't quite caught there, but I'm just going
to nip that. Then. Last couple along
that crease there. Along the last crease there. Now, you can, if you wanted to, you could quite easily
just tear these. I have done little fold
in books like this with tare instead of cut edges. And it's a very lovely
quality to have. So that's what we've got. We've got a spiral which matches the spiral of
our original book. So we go along down like that. So we're now going to
start folding this up. And we're going to concertina it along backwards and forwards, backwards and forwards
all the way along. It will be obvious where you're folding
backwards and forwards. Just try and make sure
that it's staying into a nice square block. And then you can just
press to hold it. So that's our little book and
this is gonna be my front. I'm just going to mark
that with just a little f. This is going to be the back. Okay? So I'm gonna keep it
exactly the same as the other one. Opens up. Then we've got the
little fold like that opens up so the creases
on the bottom there. So that's how I'm going
to do this. Okay.
7. Preparing The Pages: Now comes the fun part. We're going to start
decorating the pages and making them a nice
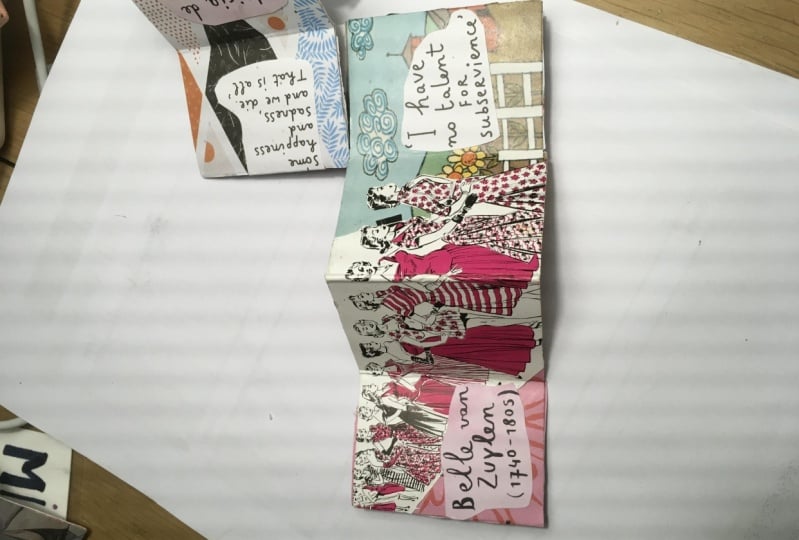
background for our words. The previous one, I have used neutral tones and
you probably know, I'm a bit of a fan
of neutral tones, but I thought I'd do something
different this time. This one was using, I've used envelope paper,
love envelope paper. But I've also used,
as you can see, this is from a magazine and there's still some
letters on there, but I'm using the, the just random strips
from magazines. That works very well. This one has been
collaged on top, so I've got some
strips going over it. Just to give a little
bit more detail. That's what I did for this one. For the one I'm
going to make today, I thought I would put
some color on this. So I have dug out of my stash. I've dug a lovely red envelope and the symbol LPs
red on both sides. Sometimes colored envelopes
are just colored on the, on the one side
and not the other. So I'm going to use that. And I thought this would
be a really lovely loud, a compliment to it. So this is just a
piece of very cheap. It's newsprint quality
paper that I bought in, out, in, out block. So it's a paper block of paper. And I have just randomly put some marks
on there, some colors. And I think that is going to
go quite nicely together. The nice thing
about this envelope is I don't want to use, obviously I've got my address
hiding underneath here. I don't want to
use that address. I don't want it to be
showing that addressed, but I do like the stamp on here and I do like
the the postmarked. So I think I'm going
to put the stamp on the front cover and make
that my front cover. And maybe put some of this
post-market as the back cover. So I'm going to just
tear the envelope open. So it's already very poorly torn there where I've opened it. And I'm just going
to sit just slice, slice it open so I can
use all of that paper. So I don't mind actually using the pieces that
are glued as well. So I'm now going to very
carefully fold and tear. They had dress off of
there. Don't mind. There's a little bit of
writing coming through. I don't mind that. That's
what I'm going to use there. I want you to do was to continue with this
Torn Edges on here. So although I've cut
the actual paper, I've cut it so there's
a straight edge. The paper I've glued
on top is torn. So I might have just a tricky
bit tearing that bit there, but we'll see, we'll see. So that's going to
be my front cover. And I'm just going to do that as one single piece of paper that most
of the others are going to be double-page spreads. But this first one I'm
going to put the stamp on. Let's make that the first page, the first piece of
paper that we stick on. I am going to have
a little bit of edge crease happening
here, but that's fine. I could turn it round
the other way and have the stamp sideways on or I could have it
sideways on that way. But I think I still
want to keep the stamp. I still want the Queen
up the right way. And so I'm just going
to glue it like that. Another glowing mat. And I'm going to
just put a piece of another gluing
that in-between, put some paint on there, and then just center the
piece of paper that I'm going to stick on and
then I'm going to tear. For this project, I'm going
to just use glue stick. But you can use any
glue that you're happy with and you're
comfortable using. Make sure that's on. Okay. So I'm happy with
that positioning. They're pressing firmly down. That's my first page, glued. But I don't want to obviously don't want all these trimmings. So I'm now just going
to get my ruler. I'm using my ruler upside down because it can get flatter, because this is a
cork covered ruler. You can get flatter against
that piece of paper. Okay. So that's the front and the back of our little book. Collect snips out of the way. I'm going to make the first page a continuation of the cover. So I'm gonna do
read again on here. But this time I'm
going to be doing it as a double spread. So I can use the piece
that's got my dress on it, but I'm obviously going
to use it upside down. So I'm going to put a
double-page spread on there. You could tear your paper
first of all, before you, before you start to glue. I might just do that. So that's going to go
on to that bit there. Okay, so now I've got my little clue map
underneath again. Glue your page. Ready for your piece of paper. Because you're
gluing extra paper on top of the magazine paper. This is going to
be reinforcing it. I quite like I've just jiggled
it along a little bit. I quite like the edges where you can see a little bit
of the underneath. I don't want to see
too much of it, but a little bit of the
underneath is fine. I'm just going to
tear along there. Again, that's going the other
direction to the grain. But I've got a, I've got
a I'm a rougher tether. So those are my first
two pages. Done.
8. The Pages - Side 1: We've got the cover and
front and back cover, and we've got the first
double-page spread. So I'm going to do the next one. Will preclude. Okay, so that's my first one. The next one is going to
be this one here is going to show you that it is
going to be the same. I've got my red one where
the brown one wasn't. I'm just going to do
the next one then. This is where gluing now
becomes a little bit more fun. So I'm going to do
those two pieces. This time. I'm going to be using
the painted paper. I'm going to paste off, which hopefully will
be about right. So I'm going to put
that onto there. My glue and mapped
out from underneath. Press it down and tear off and see if I can tear
this little bit here. Really leave much
room for me to tear. Something like this. You
can just sort of nipple along carefully. That works nicely
because then you get that rough tear. Start again. We've got the front cover, we've got the
double-page spread, and now we're going
to be colored one. So the next one we're going
to do is this one here. So that's going to be red. Doesn't matter which
way you use it. So during the next two, so I don't want to
do that one there, but if a little bit glue
goes on there, That's fine. Put that onto there. Now with an envelope, you may find that you do need to glue down the flaps as well. So if, say this piece here, I'm still folded on that one. But I could put a
bit of extra glue underneath there just
to hold that down. To stop all your
flats coming up. I'm going to tear
long strip first. This might be a bit more
tricky because we've got simple thicknesses of paper and therefore the grain will be going in a
different direction, possibly on each piece. That's fine. So that's our next
double-page spread. Your folding these backup, try and keep them as
square as possible. So you're basically working on one side of the
paper first of all, and then you're
working on the other. I've got to read, to palette to read. So these next two will
be the colored ones. And just keep working your
way around like that.
9. The Pages -Side 2: As you can see, I've completed one side and on the other side, I have got the front
and the back cover. Now, the envelope but I had this is all
I've got remaining. I don't think I've got enough
to go on this other side. So I'm going to use some of this orange paper because there's some
orange in here. And I think if I'm if
I'm careful and pick out the patches that have got a
bit more orange in there. I think that would look okay. So we are now going to
work on this other side. So I'm going to fold
this back up again. And I'll show folding. You may need to crease,
redo those creases. Get my loo maps back down again. And quickly do this. So does it matter which
way round we do these? I don't think it really matters. I think I'm going to
do a colored one. First of all, let's get those
other ones out the way. So I'm going to do a
colored one first of all, because we've got a
block of red there. Just put glue on
like we did before. That's not going
to be wide enough. So I am going to want to
have some orange next to it. So I've got orange
on this edge here. So let's just do, let's just go for that
bit straightaway, straight on that edge there. Just slide it over
a bit more here. Okay? Then we're going to
do the same process on this other side, doing double-page spreads with the painted paper and then
with this new orange paper. And this is my last
panel just going on now. I'm just going to put
that piece of paper onto that over just a slight bit. That's fine. And
then trim it off. So that's the piece I need. Shrimp. I'm going to just
trim down there. Okay. Move all of these
out of the way. So that was the first
slide that we did. And then this is
the second side. So fold it up. Concertina backwards
and forwards. You may find that as your, as you've glued, you're
going to need to recreate. But working this way. Each one of these
creases is reinforced. So we've got, we've got
a join of paper on here, but we've got one whole
piece of paper on this side. We've got one whole piece
of paper on this side. If we flip it over, That's where we've got a join. So each one of these
where the paper joins should have a whole piece
of paper on the other side. So that's my little book. It's piece of paper. I do need
to tear off a little bit, so I'm going to spend
some time just tearing down there and getting
rid of those small bits. That's going to have
to be on hand done. Just need to just play around
with this piece of paper. And I still up here, I'm just literally going to
nip it with my nails and trim trim down because
I want that rough edge. Fingers are still a bit
sticky from the blue. It should is tearing
quite nicely. If you do get a little bit too much coming off
on the other side, then that doesn't
matter too much. I'm not sure what I'm
going to bother doing. That is that gonna go? I don't think I'm going
to bother doing that. So that is my little book. If there's any pieces that
need a little bit reinforcing, I'm seeing a piece
tearing up here. I'm going to put some
extra glute on that. So any, any flips and flats that just need a
little bit more glue on. You can go around and do that. Then we'll start doing
our trail of words.
10. Looking At Words: So it's time to put
our words in our book. And as you can see on
the table top here, I have collected a whole
load words from there, mostly from newspapers, but I do have some from
magazines as well. So you can collect your
words from anywhere. It can be junk mail, it could be newspapers, it could be free magazines you pick up on the train
or the bus station. It can be magazines
from you buy. It can be the magazines
that come in with subscriptions and
and memberships. Anything, anything that's
got written words in it, text, then that's a
source for your words. What I do is I collect them up. I trimmed them
roughly so they're mostly going to be
probably about this size. But I may need to trim
them a little bit smaller. And i've I've just
laid them out on the table top here on a
flipped my cutting mat over. So it's got a plane surface
so it's easier to look at. So I find using my scalpel useful because just to help move things
along a little bit, if you've got some
tweezers that would help. I've just basically
categorized my words. I've got the larger
words on this side, going over to the
smaller words here. And I've got some strips
of words which collections of half sentences on this side. And some of these have come
from book pages as well. So what I'm going to
do now is I'm going to just collect
words that I like. So I've decided already
that words like this are gonna be difficult
to fit in my little book. Not impossible. I can put that on a
double-page spread. That's absolutely fine. So I wanted to make
a little trail of words going through the book. And that's what I'm
going to do here. So I'm gonna be using
mainly the smaller ones. There may be some slightly
bigger ones as well. I'm going to get going and put my favorite
words together. Just put them on a, on a blank
piece of paper like this. I'm not going to glue them on. I'm just going to lay
them out and then I can rearrange them to say what I think would be fun to say or what I
would like to say.
11. Trailing The Words: I've got my words on my
piece of paper here. And the next thing we need to do is we
need to glue them on. Now, my, I counted the words on this book here to give a bit of an idea as to how
many I'd gotten. This book contains 48 words. So I've got a round about
that number there, about 46. Some of them are going
to be chopping off. There's a couple that
need trimming down. They've got two words together. So I'm going to put that off to one side for a second
and go up there. So we need to decide how are we going
to do this now or do I just want to basket and put the words on as I
go through that, if you wanted to, you could work out. So I've, I've made a
little template here, a little MCIT to then show
you which way round these, these pages are going to go. And so you could draw
a little spiral around your page and then put your words on an
open piece of paper. I don't think I'm going to
draw my spiral first of all, because I am not sure about
the length of my words. So what I'm gonna do is
I'm going to put my words on the same sort of format. I'll open it out. It's been folded, it is
tricky to keep it open. That is the same format as the Mac hit that
I've just drawn. My page number one is the one
over here, page number 1.2. 1.2. So I could just lay the
words out like that. And I think I will, I'm going to be brave and start glowing. I'm going to keep
that handy so I can see which direction
I'm going to be going. So my first ones I want to
put on her on my front page. And I am working
along like this. I think I've got
about four lines of words and I've got the words. When we look, just going to
trim that down a little bit. There's some people
who like using smaller scissors when they're dealing with small
pieces of paper. But I actually managed very well with longer, longer
blades, scissors. I do have some smaller ones. I find I find them a little bit more
awkward to work with, but they work in certain
situations for cutting. Cutting words like this. Aim knows either chunking
great ikea scissors, they work very well for me. Keep my glue stick here and this is where you
starting to get, you're gonna get a bit gluey because I find it easier just to run the word on the glue
stick rather than put the, put the words down on the paper. So I'm just running some glue on there so your fingers
will get sticky. You can use gloves if you want, but perhaps have some baby
wipes or something nearby. Oh, just be prepared to
wash your hands a lot. So I'm gonna put that
straight on the top there. It's a little bit of skew, but I don't mind that my stamp, my coin is not in the
middle and neither is that. So I might just nudge it over just a
little bit more though. So that's my, my first words. Then I want to probably
put we become wealthier. Literally it is just putting
the words on and then I'm going to dodge a
trail afterwards. So as long as you're reading
them up the right way, I want them to be a little bit. Hegel typical day
so I can trial. You might find it
easier just to help with this process to have your have a pair of tweezers or a craft
knife or a scalpel nearby. Just to help put that down. If you're working with children, obviously you don't
want to be doing that. In that case, another useful
thing is a cocktail stick. So have a cocktail
stick just to help to put those down so you
sort of roll it down. Let's carry on with the
cocktail stick can be safe. So 3.4, that's number 1.2, 3.4 are gonna be
rotated the other way. So I need to make sure that
my words are this way up. So this one needs
trimming down a bit. In other words, I'm going to
use these little scissors. But because the blade
is not so long, I find you have to
do snip, snip, snip. Whereas if you're using a longer blades is that
you can do it in one go. So in other words, six is let me keys on its own. Have a whole page with this little tiny word and it
can be right in the middle. Fingers are getting
a bit sticky. I'm putting 0s on is
going to be tricky. And you continue on like this until you finished
the first side. I've finished my first side. And now this is the
last bit that I glued. Then need to flip it over
and continue on round. It's in the same way
that you did before. You're going to rotate it round. This page is going to
be standalone one. And remember the colors are indicating your
double-page spreads, so that will go that way. And then we rotate.
12. Make A Paper Bead: I'm ready to make my
fastenings for the book. I've chosen some darker
red embroidery thread. So that's what I'm going
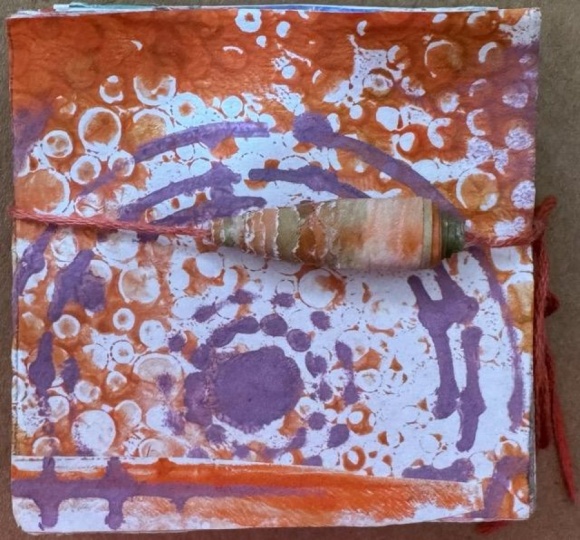
to make my tie with. So I'm going to make a paper
bead out of this paper here. Let's have a look, see
what that's going to do. Some glue on near the beginning. I'm rolling on a cocktail stick. You could use a skewer
if you wanted to. Whatever you're
rolling on will define how big the hole
is in your feed. That's not catching
at the moment. Okay, we're off. So just carefully roll
your obeyed your paper. Glue further along and
just keep rolling. And hopefully if you've got
a tapered piece of paper, this will make a
more rounded bead. Trial and error.
Whatever you do, it will be a unique bead. Nobody's ever going to make, make one just like that
because each strip of paper, whatever the paper will
be slightly different. Your beads will be
slightly different. So this is just a strip of
paper from the magazine. It is the height
of the magazine. And there we go. That's my bead. And I'm quite happy with that. It's a bit Rowley. It's
a Raleigh Raleigh bead. I'm going to leave that to dry.
13. Make The Closure: So I'm ready to
stitch my binding. It's not actually going
to bind anything, but it is going to
create the closure. So in my earlier one, I've got it Three, how hope
bound onto the center. So that's centerfold there. So that's what I'm going to do. You're going to find
the centerfold. And it's this one here. One there. And I'm going to do a very
simple three whole pamphlet stitch to bind it together. So I've got my thread. To calculate how much
thread you need to find using the three
whole pamphlet stitch, you need three times
the height of the book. So that's actually not
very much, it's 123. But I'm going to
take a whole lot more because I want
to make the closure. And at the moment I don't
really know how long I need, but I'm going to I think that will be plenty
to wrap around. So I'm gonna be very generous. You could, if you wanted to, you could leave it
still attached to you. Scan of thread. So you only use what
you need to use. But I'm just, I'm just going
to take mine cut mine off. I'm just going to put this
onto a regular downing needle. Now with embroidery thread, you do have to make sure
you've got all of the all of the little strands
in uncontained. And I do I have got I've got a I've got
a book binders all here, but you don't have to make your holes with an all you
can use your dining needle. And I'm just going to
make three holes along here so it doesn't really
matter where they are. But three holes, so one evenly, pretty much in the middle and
then a whole either side. I've got my cutting
mat underneath so I'm not damaging my table. Okay. My protecting cover on there. Now, we know that the inside is orange and the outside is that
join there. So that's fine. We want our ties to
be on the outside. So we're going to start
from the outside. So go in the center hole. How one of the other holes
doesn't matter which one. Back in through the hole. And then you're going to very carefully come through
the center hole. But this is where you need to hold your binding out the way so you're not catching the thread, splitting the thread as you, as you pull it through. So this is the
outside of the book. I don't need my needle anymore. I'm going to pop that
back in its container. So that's that. And
as you can see, I've got two different
lengths of thread here. So I'm going to just try and
pull them through evenly. And it will make things a little bit easier if they're
pretty much the same length. Okay? So this is where we're at. And as you can see, I've got threads coming through and
then I've got one big stitch. Now, we don't want the threads coming through on the same side. We want one thread
coming through on one side and one thread coming
through on the other side. And that is so we can tie
that center thread in place. So I've now, so as you can see, I've now put 11 strand, one side and one
strand the Alba. I'm, we're going underneath the bridge of that big stitch. And then I'm just
going to tie it. Just gonna do a
reef not leftover, right and right over,
left and underneath. Sometimes. I'll do one for luck, but I
don't think I need one here. That is now our tie. We are going to have one strand going one side and one strand
going the other side. We're going to
thread our bead on. So what I'm gonna
do to help secure the bead when it's in
its locking place. I'm just going to put a series of knots along the threads. You only need a
couple, two or three. That will help. Just to give the in fact, I'm only going to do to help
give the bead something to grip hold of when it's
in its closed state. So just a little tie just to give a little bit
of texture to that closure. Now going to thread
the bead through. And this is the tricky bit. Carefree. Find twisting helps. We want is both bits through, yet we're through good. So the bead is now in place. And I want to tie a big
hefty not at the end. So around two or three times. If you can, two or three notes, you're tying these
two threads together. Now, I should have done
this before I snipped it. Maybe one more. What is that going to be enough? I think that's gonna be enough. Okay. So that is our tie,
a tie binding. So it's just going
to loop over there and keep shot like that.
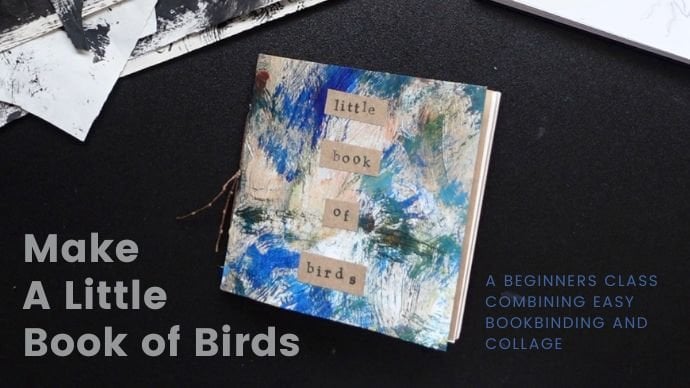
14. A Look At My Finished Book: So here's my little
finished book. I've pasted my words on. I've made my closure. I've attached my bead inside just with a
regular sharpie pen. I have joined the words together to make my little
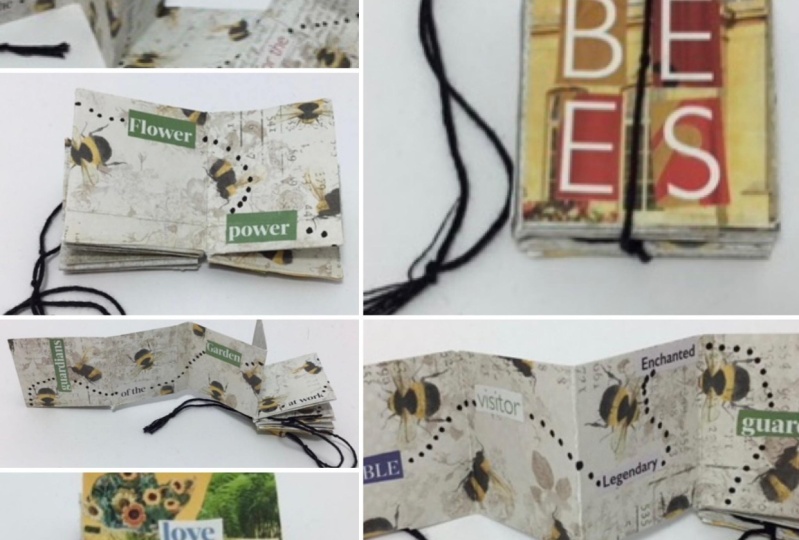
trail through the book. To help her I follow the trail of words and
where are we gonna go next? Through the pages? I've just dotted a little
trail with my sharpie pen. If I open it up, you'll see a bit
clearer what I mean. So when the words
have been pasted on, I have joined them up
with a trail of dots. You could do dashes, you could do a line in this one. I did just did a
very fine black line and trailed my word
through like that. But this one I decided
I would do dots. They don't show up so clearly on this part here,
but that's fine. You you maybe have to
hunt for them a bit more. But that's, that's what I
have done to help the reader, the viewer, the observer, the whoever is going to be
looking at your little book. It's just to help
that your eyes follow the trail of words
through the book. Let's put them side-by-side.
So there we are. Mini folded word trail books.
15. Conclusion: So how did you get on? I hope you enjoyed
making your mini folded word trout book and have rediscovered the
joys of cutting and sticking and making
things from scrap paper. I really love it
if you could share your project in the gallery
for us all to enjoy. And I look forward to making another project with
you again soon.
 Helen H, UK based artist and maker