Transcripts
1. Introduction: Hello and welcome to my
new Skillshare class. My name is I'm a
long-arm Coulter, a bag maker, and a
pattern designer. I saw almost every
day and every day, new scraps of
fabric are added to the baskets around
my sewing studio. I love coming up with ideas
on how to use and recycle these tiny fabric scraps
instead of throwing them away. In this class, I will
show you how to use your fabric scraps to make
a postcard or a gift card. I will show you the tools
to use and discuss. So in feet, we will talk about paper and which materials are
left, which are optional. I will share with you how
to find inspiration in nature and how to prepare
your card for quilting. We'll talk about quilting
and stitch options. And finally, we will
trim the car to size and finish the
edges, this exact stitch. And as a bonus, I'll share
with you my card collection. So thank you for joining me. And now let us start.
2. Tools and Materials : Let's talk about the tools and materials we will use to
make our fabric cards. First thing, fabric scraps. Every time I turn on my sewing machine to
work on a project, use crops are added
to this crab basket. These scraps are leftovers of foundation paper
piecing project. They are different in
size, color, and shape. This crops here
are mostly solid, but you can use prints, tribes, tone on tone
undertakes to the surface. We will arrange the fabric
on is cotton batting. I like the warm
company cotton batting because as you can see, it is very thin. This betting also has
scrim and this will keep the tiny pieces of
fabric from shifting easily. You want to rectangular piece
of batting that will be at least a half inch larger
than the finished card size. Embroidery stabilizer
is one of the materials that will make cool thing and
stitching the card easier. It will also help
your finished card stay flat without curving. There are many kinds of
embroidery stabilizers that I recommend for this project is the
cutaway stabilizer. For the paper side of the card, I recommend heavyweight
card stock paper. I use a pre-cut pack
that is six by 6 ". This way I only have to trim one side of the card to size. Pick the color that will
work with the fabric side of the card and trim
it to six by 4.5 ", which will be the size
of our finished card. Excusable web is a must. In making the card,
we will use it to fuse the paper side and the fabric side of
the card together. I am using a paperless
feasible web that is also known as
double-sided feasible web. Tool is optional,
but it does make stitching the court
easier. It's up to you. If you decide that you want to use tool in making your card, then pick a very light color, something that will
add shade or tint to the fabric but won't
hide the design. And finally, the
usual selling items, you're sewing machine,
pins, thread. You can stick with
one color of thread. I have used one thread many
times they're making cards, or you can use several
colors of thread. I'll also be using
a walking foot, a free motion quilting foot, to stitch the layers
of the fabric cord. And I'll use the walking foot again to finish the
edges of the card. We will also need
an ironing mass. In an iron. I'll use this folder way
cutting and pressing station. I can cut on one side and
iron on the opposite side. And with the cutting
mat, I will need a rotary cutter and a ruler. Now that we have what we need, let us find an inspiration
for the fabric card.
3. Insperation: Most of my fabric
cards are inspired by the landscape,
sunset or sunrise. You can also Google
landscape photos and find many beautiful images of
mountains, fields, and seaside. However, there are
laws for copyright, and I'm not very
familiar with that. So to stay on the safe side, make sure that photo you
choose is royalty-free. Copyright-free. You can also work
from imagination. However, for me, I find it easier to work from
an actual photo. When I worked from imagination, I find that I end up with
the same court every time. So the best thing
I find is taking photos of landscape
on my daily walk. For Sunrise, blue-sky photo, I go on a morning walk. And for the sunset colors, I take a walk in the afternoon. Whether it's mostly
sunny where I live, when it's cloudy, the photos
become more interesting. I think that's because the clouds add a bit
of drama to this car. And when translated
to fabric postcards, the postcard becomes more
interesting and eye-catching. For this class, I will use this photo to make the
quilted fabric postcard.
4. Making the Card: We will now work on the
fabric side of the card. First, I'll set the phone with a photo on-screen on a
stand in front of me. Second, I'll cut
the padding so it is half inch larger than the
finished card on all sides. The card will be six by 4.5. So I kept my batting to
be seven by 5.5 inch. The Canvas, also
known as the Batting, is ready to be
painted with fabric. So let's begin. My advice when working with landscape
was to always start from the background and
move to the foreground. Here in this photo,
the background is this guy. So we'll start there. I'm playing with
different values of blue and a bit of white, trying to imitate the sky and
the clouds and the photo. Makes sure that your
fabric pieces overlap. And use scissors to trim and shape your fabric
pieces as you like. Once the background is done, move to the middle ground. The middle ground in
this photo is trees, the sea, and there is a
boardwalk over there. So we'll add a brown, orange piece here, and
more water, the sand. And finally, in the
foreground, grass. You can tell by now that the
fabric card, once it's done, we'll look more like
abstract art than a real landscape scene.
And I really liked that. Now after we are done arranging the fabric
on the batting or carefully move the batting and to put it over
the stabilizer. Another reason for using embroidery stabilizer is to prevent the bank
from stretching. If that happens, the
fabric pieces will shift. Before adding the
fabric tool on. I'll give the landscape
a good press. It looks very nice
and neat. Now. Next step, move the fabric to the mat and
cover it with tool. I have a light shade of green and a light shade of pink tool. But I think the
green looks better. Lay the tool on top
of the landscape and make sure it covers
the whole thing. Start thinning and use
as many pins as needed. I think you did a good
job getting here. And we are ready for stitching. So let's move to
the sewing machine.
5. Stitching the Layers: Now it's time to switch the four layers of the fabric
side of the card together. The first option is cool thing with a free motion
quilting foot. This is a good option,
especially if you like adding visual texture
to the postcard. However, if you are
new to this technique, it is good to practice on a small cold sandwich before
working on the postcard. Second option is
using a walking foot. This foot is perfect,
especially when working with multiple
layers of fabric. With a walking foot, you can
do simple straight lines. You can also use the embroidery stitches that come with your sewing machine, which is what I'm planning
to do in this class. The walking foot now is
on. Now let us begin. I started with a
light blue thread and a straight
stitch for this guy. I am removing the
pins as I work. I'm also using the marking
on the walking foot to measure a quarter inch
between each line of stitching. So the distance between each
line is a quarter-inch. You prefer you can stitch
the lines closer to each other as it's done in
matchstick wilting. The stitch length is set
at 3 mm because it works better with the
multiple layers of fabric padding and stabilizer. The longer stitch length will accommodate the increased bulk. Now I'm done with this
chi and we'll move to the C. For the C, I've switched to dark
blue thread and change the stitch to number eight on my Bernini's sewing machine. I think the stitch will
give the illusion of waves moving from the
sea to the sound. Again, I'll change
thread and this time go back to a simple straight
stitch that is 3 mm long. For the grass. I fixed
it. Number four. I like green thread. I also made such number for longer so that I can get
the serpentine book. And now it's all quilted. And here is the results. Time to trim it to size.
6. Finishing the Edge: So the fabric side of
the postcard is done. It's time to get rid of the excess tool,
fabric, stabilizer, embedding, trim everything to the postcard size
which is six by 4.5. I am using the lines on the mat plus the lines on the
ruler and the edge of the ruler to make sure that
the edges of the card or straight and that the
corners are 90 degrees. Remember when sewing and cutting always measure twice. Cut once. Very good. Now let's join the fabric and paper
to make the card. This will be done in two stages. So here is the fabric
side of the card, and here is the card stock. Both are six by 4.5, which we will do
first, is attached the fabric to the card
with a feasible web. As you can see, diffusible
web is cut to the exact size of the fabric and the
card stock on the mat, I will first place
the fabric tool side down and stabilize her side up. Then I'll place
the usable on top, followed by the card stock with a hot iron on
the paper side. And everything will
be fused together. Fusing the two sides
together has to be done on the card stock side because the paper can stand
the heat of the iron, but the tool will melt. You also want to make sure that no feasible web is sticking out from the
sides of the card. Otherwise, it will melt and stick to the bottom
of your iron. Now let's cover the edges of the card with a zigzag stitch, which is the second stage. For finishing the
edges of the card, I recommend doing a
tight zigzag stitch. This stitch width is 5 mm and the stitch length is 0.5 mm. I also recommend doing this stitching with the fabric side down because the paper's
site can be slippery. Start stitching in the middle of one side when turning a corner. So all the way to the end and stop with a needle
down on the right side. Turn 90 degrees and continue. You do not need to worry
if the paper will tear. The paper is fused
to the fabric. So even if a small tear occurs, the paper will stay in place. When you reach the
starting point. Take a couple of stitches, backstitch, and finally
cut the threads.
7. Be Creative: If you would like
your greeting card or postcard to have texture, then follow the previous steps. But don't add to this. The moon and discard were
made from scrap fabric. And the C was made with fabric. Salvage is fuzzy edge
of the salvage is, is what gives the card
and interesting texture. This fuzzy edge also distinguishes
the sea from the sky. The stitching was done with
a free motion quilting foot. A card looks interesting. However, I found
that I prefer adding a tool fabric Because tool fabric Gibbs the card a
cleaner and neater look. This is the card stock
side of the card, and here is the
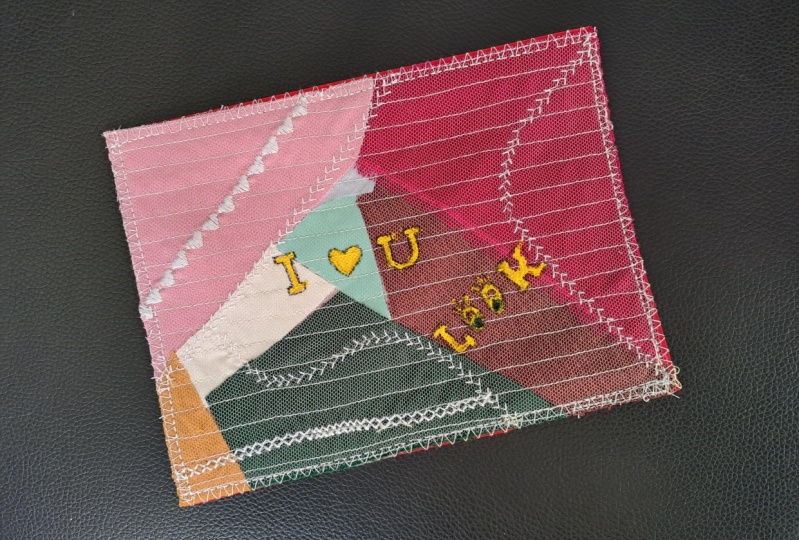
front of the court. Embellishing your card with applicant is a wonderful idea. Here all the layers of the fabric side of the card
have been stitched together. The tool, the fabric, the batting and stabilizer. This card was inspired by the two day trees that you see on the right
side of the photo. I found the perfect palm trees for this card and
must grab basket. Using scissors. I'll cut to palm trees to
be applicable on the cord. And here are the palm trees. Let's see how they
look on the card. This looks nice. I'll use glue, stick to glue the trees to the tool till they are
stitched in place. I've lowered the feed dogs
on my sewing machine and replace the walking foot with a free motion
quilting foot. Now, I'll stitch around
each palm tree twice. This is the front of the card after the trees have
been applicant in place, and here is the
back of the card. The next step would be
fusing the card stock to the fabric and framing the
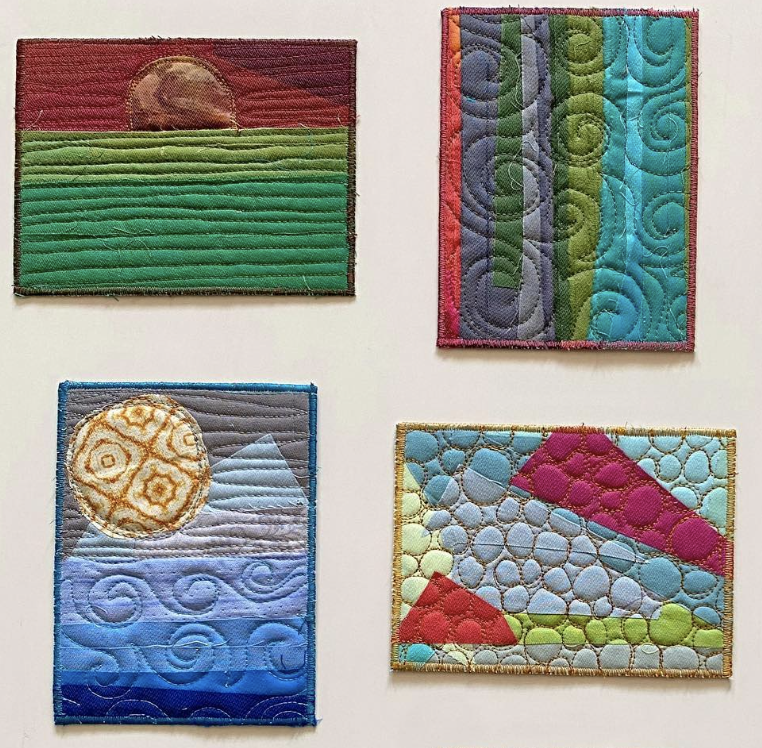
card with his exact stitch. Here we have the finished cards, the palm tree card,
the full moon card, and the boardwalk card.
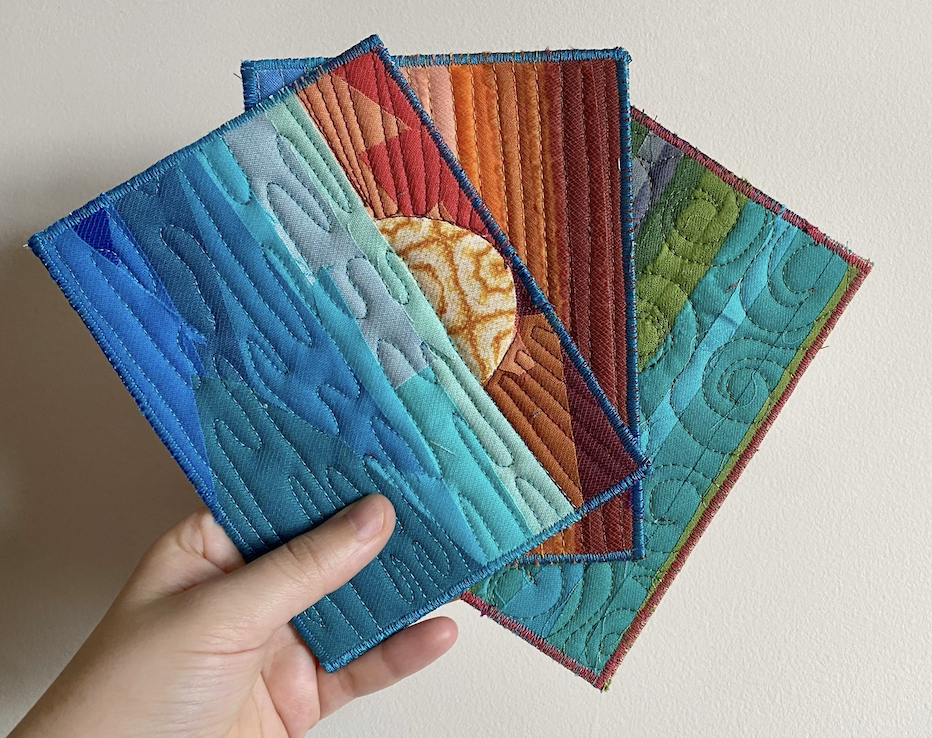
8. Card Collection: So here's the card that we've
worked on in this class. You can embellish the
paper side of the card was Thompson stickers write a few lines and
gifted to a friend. I've made many fabric
cards and given away many. Here are some of
the cards that I have ready for future occasions. And as you can see, I found the perfect cookie tend to keep my cards stored in. Here are my cloudy day cards. They were inspired
by cloudy days, which are really not that
common where I live. And here are my son cards
inspired by sunrise and sunset. These are my floral cards
or my Japanese cards. I teach this technique and
another Skillshare class. So make sure to check that out. And here are the
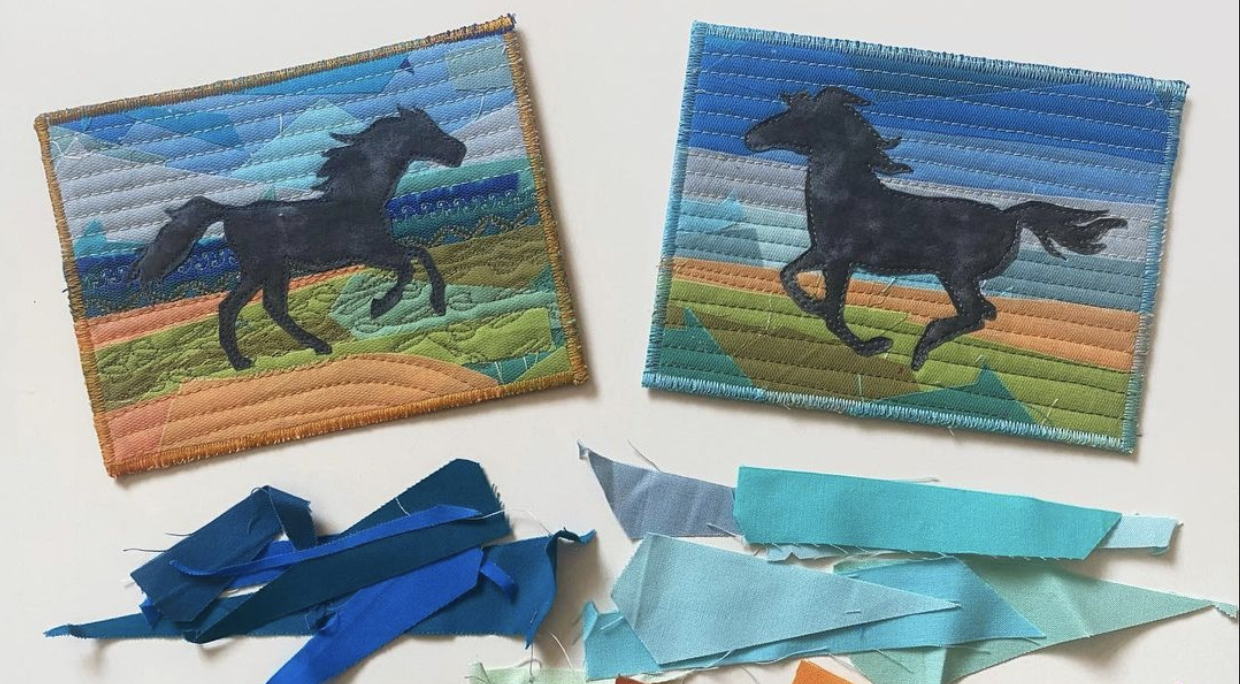
scrap fabric cards. I teach this technique the
same class as the Borel cards. No tool was used in making
any of these cards. And finally, the salvage cards. I teach this technique in a
different Skillshare class. So don't forget to
check that out. Thank you so much for
joining me in this class. I hope you check my other
classes on Skillshare. I cannot wait to see your beautiful fabric postcards
in the student gallery. Please don't forget to rate
and review this class. See you in a future class soon. For now, take care and
have a lovely day.
 Rawyah Sami, Quilter