Transcripts
1. Welcome To The Class: Hi, This is Anita
Srivastava from India. I'm a self-taught artist
and author. And alone. If you've taken my
previous classes, you must know that I love. And Madani is my most
favorite for guide farm, which is originated in India and loved all over the world. That's cities invite. I'm very, very
excited about this, another class of mine. Because in this
class I will teach you all about modality. Modality is NYC. Any other forecasts vary
greatly inspired by nature. So most of the motifs
and artworks are about birds and trees
and sold out for now. And it's very
whimsical and magical. So many creatures are
actually not very realistic. They are very, very
imaginably and magical. That's the beauty of this
folk art form and maneuver. Nice characteristic feature is the linework and the borders, the beak in this art form, no matter how difficult
or complex it seems, it's very simple and easy. Trust. With my
step-by-step guidance, you will definitely
find it. In this class. I will tell you about the
brief history of his art form. Then I'll take you to other
materials which are needed for this lab and just read the
materials are very simple. You can even choose your
own mediums and you can change the mediums and
there is no fuss about it. Also, I will take you through the process of the linework. The borders are bad. Jones and I will into how do we make different animals and boards and plants and
flowers in this form? It's going to be really,
really interesting. It's going to be really
exciting and not just this. I will also take you through the process of making
three gorgeous artwork, which are going to be
your class projects. So if all this sounds
interesting to you, meet me in the next lesson, where we will start the
beautiful journey of ads.
2. Madhubani Materials: Before we discuss
the materials we are going to use in this class, let me tell you originally what all people used to
make my Duany art. For the surface, it was
mainly done on the walls, especially the mud
coated walls of the village of Motwani
and be heard in India. So vaults and fabric were the
main surfaces for this ad. And they used to give
the background a code of a study made from cow
dung, mud, and water. For the colors they use, to use all organic
colors made from the sorbed flower petals or the powdered rock stone like
limestone or red stone. And many other things
like goal and Talmudic. And for the tools they
use to make brushes and depends using the feather
quill or bamboo sticks. But here we are not
going to do all of that. We're going to simplify it. And for the surface, we
are going to use people. So 200 GSM or more than that will be good
enough for drawing. Leaving need pencil,
fine liners, sketch pens, and for coloring. You can use anything
from brush pens, acrylic, gouache, or watercolor. And according to the
medium you choose, you will need water. Brushes, rough cloth. And to help us make
things easier for us, we will use rulers skill, compass, and for the
warm-up practice, we will be using
ordinary stretch book. Grab all your supplies, and meet me in the next lesson.
3. Practice Line Forms: Welcome back guys. Let's begin with some practice. And it will also help
your hand to become three with the work we're going to do
later in this class. For the practice, I am taking
this ordinary sketchbook. Either be using my microns, the fine liners,
you can use pencil. So I've got different colors of my songs and I've got black. You can obviously use fences if you're not
so confident about it. And I will also be using these brush pens or
coloring. Let's begin. First or fourth. For the practice. I suggest to you do
practice some lines. As you notice. He enrolls
a lot of line work. Fine line will entropies
and very elaborate. Before that you need your wrist and you need this movement. This practice is going
to help you warm up. First of all, you have to practice drawing straight lines. Straight lines, straight
lines, straight lines. Without using the escape. You can obviously use
the scale, all the tiny, but it's better if you practice drawing the line
without using a scale. Alright, so here's
horizontal straight line. Then I like you to practice
drawing vertical lines. If you notice what I'm seeing, I'm not moving my wrist to draw a line or a
horizontal or vertical. I am I am moving my
shoulder and my elbow. Right. I'm willing my handbag that I'm pushing stack to the
right or to the left. You see which direction
is comfortable to you. You want to draw
a line like this. For me, I'm more comfortable
like that. Let's do right. So whichever direction you are, comfortability sectors
and for vertical lines, see if you are comfortable. Dr. Bottom audio reconstitute
with water drops. Did you ever read your account? It just practice
hundreds and hundreds of horizontal and vertical
lines to make your hand. Once you've done this. This is exercise number one, and this is exercise number two. Once you've done this exercise, we'll be drawing draw
the curved lines. And again here also, I'm not moving just my wrist. I am taking my
hand there Pseudo. The movement from the elbow is taking place here like that. If you notice, my
wrist is not moving. My hand is moving from the
elbow and from the shoulder. Whatever happens, keep
your shoulders relaxed. If you build tension
in your shoulders, you will get tired very quickly. This is the coding because I
didn't have to do exercise. I want you to set
this zigzag lines. Try to keep the peaks at the same height and try to give the values also deep squats
like the same height. It's going in a straight
line and more or less similar to each other. Not exactly the same, but they are, there is
no much difference. Practice making this
exactly like this. Small, right? This is the full data save. Now, make sure you
here on this page so you can be there
for you at one-page. Fifth one is ready to be semi circles connected
Samy of goods. In this, my wrist is
moving like that. These you have to practice. Now. It's here. It's one-page
exercise 12345. You can take a screenshot
for your reference. And let's practice
the semi circles here. What do we have to do it? This is very important. All these line forms are very important when
you do one-to-many. In fact, these forms are
important in any doodle art. If you do, then downward
you do Mandela or any line. Line forms are really good
and important to practice. This exercise is not only
help you in Macedonia, It's really help you
in any kind of do. The fact is these, and I'll see you in
the next lesson.
4. Practice Double Lines: Welcome back. Now since we have factors, these lines, let us move
on to the next lesson. That is w. All right, so this is the
unique feature of modal eniac, as I do with you before
in the previous videos. Street line battle align during. Keep the distance as
minimum as possible. Distance between the two
lines and keep them, you need a stem to keep them as badly as possible, alright? And you have to do it freehand. I encourage you to practice
doing this free hand. Of course, if you
have so much trouble, you can use a skill. But my suggestion,
try doing it for. So this is the first
lesson for today. Try drawing lines, double lines. Students are doing these lines. On the right. You see the distance between
these two is very less. Number two, lines, w, w, w, w vertical. Mix more lines. You don't have to cover the entire page for
doctors do this, but venue practice this
you can easily draw. Another, can also see
this, this and this. It's an online. I drew it in three
parts, but that's okay. Practice. Vertical double lines. Lines what the governor, then again, you get the tray. You're going to
have to practice. This is a little tricky. You need to go
slow with this one because you have the
first Gov I drew. But for the second girl, I am managing the distance between the two at every point. And that's why I went slow. And it's okay to take your
time and Google slope. So this is the thing
you have to practice. Then. Fourth one is the zigzag
line, the triangles. And now this is
also a bit tricky. Here. We won't go
bad in the lines. We will just do this. This, this one model that you can also practice, the upside down zigzag lines. This is the fourth one. Now let's move on to the fifth. Practice. Now. The semicircle lines endergonic. Dave, semi soccer's here also. You need to go slow. Let's do upside down. This is the common
mistake that takes place. Then be working on
this kind of see that this semicircle became small and from here
everything went wrong. Let's do it correctly
one more time. If you notice, when
I'm doing the inner, the beaks, deeper or
higher, peaks at higher. This one, when I'm
doing the inner depths, deeper, you see this, it's going down, down, down. This is the fifth one. And for the sixth one, I am taking this
one step further. For this, what do
you have to practice is draw a horizontal line. Another what is underlying
these two lines? Vertical lines, right? Try to keep the distance between the two lines as
equal as possible. This factors these
vertical lines, so many of them close
to each other and then practice slanting lines, lines close to each other. This I and I do
draw down two up. You can draw it up to down
through practice this way. Opposite tree. Right? Practice this. These three V's of lanes, so many lanes close
to each other. Practice this. Next it, That's it for this lesson. Practice these six
exercises I have suggested, and when you are done
and comfortable. But these next lesson.
5. Border Patterns 1: Now, moving on to the
broader patterns, borders are very,
very important. I will be sharing some
basic broader patterns. I've already divided
my paper in the box. It was an columns. Here, as you see, I have made double
line and I've left some space and made another double line to this one is going
to be one border. And this one is
moving under border. And on the other side also in trying different
borders on right? So if you want, you can already watch the video and divide
your page like this. What if you wanted to
just go on along with me? You can just draw one border, the space for one border at the same day and
do the filling. B2b suits you. Let's move on. The very first,
Bordeaux is going to be factors. I told you. This one. This one, this is one
goiter itself, Right? The bud song. Birds today are pretty Sharpie. Just to draw some vertical
lines to each other. Angle on filling
this entire window. This is the most basic
border off my Danny. It's used in different paintings and they got buildings and smaller buildings
anywhere you can use this. You can decrease the thickness. You can make it half, right? That's totally up to you. This is one border stinking, be slanting lines that as you keep doing it, tried to keep the distance
between the lines. Seem try to give them as closer to each
other as possible. There you fill this up and
it becomes unmoored water. I am leaving this space for you because I'm going
to upload this cheap or in the resource and
you can fill it up on your own and that will
become your practice sheet. Alright, so I'm not
filling the entire border, I'm just showing the process and leaving this space
for you to fill in. Now the next Bordeaux is the opposite slanting lines. I find these lines
difficult to control. Mode comfortable in these
happens on the day. This is another border. Now. There's one more Bordeaux. Alright. Let's do the line. You have to take it further in. This sheet is going to be
in the resource like that. Then you meet
smallest one leaves, that leaves the other side. This can go on. Now that and in a final, this is also a very pretty
and beautiful border. When it's used the buildings. This is fine. Bordeaux. Let's move on to the other one. That zigzag lines this in the practice. Then you give it. The upper lid. You can leave it like that. What you can do. You can. For this, I'm using
the brush pens. You can also use
sketch pen or marker. What do you can even
use watercolors. You can give seen color to
all three, all the triangles. Or you can get a combination of two or three colors
once it's ready, really accepted in
many paintings type or they're very
vibrant and colorful. So don't hesitate
using the colors. This is another one. Now, what we can do is there
can be an oil in a divorce. This everybody, I'm telling you, you can alternate it in your own style because
it's not possibility to each and every border in one class or in
any glasses because, because it's your hot, the art comes from the heart. Every person will have a different approach
when it comes to listen to your heart. Experiment with the style and create your own raspberries, all the templates I'm giving. If you're here in our
next change, your burner. You can even Gallo this
alphabet and fitting lines. And this is also a very nice body issue and a
very nice, very widely used. I have left some space
for you to practice. Now, there's one more very interesting
thing with this Rydberg. Me, the zigzag line like that. And we give it. Instead of filling
it with colors. What we can do is we can fill this spot color of the lines. For this step, you can
use a sketch failures. Right? Now. Let's do you can fill this spot. Different colors. This also become a
very pretty broader. Now you, instead of the
vertical lines you can do is on onto lines in the lower one and slanting
lines on the upper part. You can do as many
variations as you like. Try, experiment, and create your own
version of these waters. Now let's move on to the next
one and let's do the same. Isa can treat lines like this. Now, the option is, you can fill this with color. Gullah. There is an
option you can just do. Whichever way you like, you can go about it. Me, Dr. underlines here. Whatever way you like,
you can do that. Now. Another design for them. Semi-solid. This time I'm doing
the double line. Black. Fill this. You can do it other colors. I like this design with black. You can use red, green, blue. Haven't used blue yet. You had only using.
Next we will use blue. This is neither
design you can do, leave the upper part
empty like that, or you can do this
in the depths. This is another Verdi, pretty broad and
very widely used. This one is mostly used
for the smallest pieces. For the smallest pieces, even this order is
used very widely, its variation of
this one of leap. And show you again here we will do the double line on top. You see, I'm trying to
keep it as close to one as possible and
I'm trying to keep it similar cases and again, it just became this fill
this up, sit together. These borders, these
two mainly used in who denounced the data element
of any that they use. Black. The black color. Again, you
can leave it like that. Here also you can choose to me. Now, let's move onto
the next lesson.
6. Border Patterns 2: Let's do yet another
simply border. So I'm making up a
leaf shape and I'm keeping distance
between the two leaves. Now, this one has
become a little closer so you can measure
the distance and meet equidistant
dots and then make this black disc upside down. Leaves. Wouldn't begin to it
divided divided on the leaves that do the ribs on one side
and the one side empty. This also becomes a
very nice border. You want, you can color
the leaves or you can just leave it up to you. Now, next me, the
semicircle gov hostilely, the border, and then
do the upside down. Once. Then what you have to do is join the ends like
that. With the gauze. You have these lavas, know, you can choose to
color them in the middle. You can do this one. Now, if you wanted to keep
it very, very simple, you can just choose to give, let me show that pencil. Just choose to give dots. Here. You can do this with black. What you can do is use this
with horizontal lines. This pod with vertical lines. You can do this. I really sure you're
dumb example of this on, so there are two ways you can follow this way
or you can call it that. For this one. What I'm going to do is I'm
going to me slanting curve. Then I moved to
join it like that. Now, make marks at a greater distance back
this, I'm not doing that, but meet them equi distinct
for that and measure it with this heel and MEEP
doors. Denied it. And what you can do
is you can color the background light on
what you can do is give this double negatives piece of beautiful Florida. And after this, you can also
make dots to fill the space. Now let's move on to this. Let's go slightly different. So practice this. Sleeping. Sleeping. Sleeping is try to make them equally
and tried to meet them. Because the next quarter
is going to be like that. Let's meet the sleeping
in the same order. Then. Remains bottom of the body. The lines med Skylar that WE DO. This is one-off, my favorite. This is another one. Lets me upside down, U double line. Here. Again. Let's fill this
with vertical lines. This is also a very
widely used border. You can also give goods. Here. Lets me see me. Next. Give them double lane. Meet another thing he said. Let's go over the inner one. You can use to be three
fellows in combination. For every water. I'm not using it. Just using single,
but you can use what? You fill in this spot with. Nine studies I made you
practice these vertical lines. Lines because these lines
are the sole of my dwelling. No matter what your painting, what you are drawing, these
lines have to be there. So this, if you want to
encounter the backdrop, what if we wanted
to just leave it? Now for the next one? This semicircle, the same domain leaf on a Friday
and they'd be having this meek equidistant
and scaring them. I know all of it. That's another one. Now. Let's move on to
the other one. For that. Give them the email. Let's make another global war. He'll give died or whatever. Then on that knee, these buttons inside here, you can choose to just
scanner or you can choose to keep it loose. This clade with low degree
lines give double-declining. Do these pages. Let's fill this out that for this one here. Let's meet small curve. Let's meet next
week of vigorous. Make more veterans. This a bit. Giving a double
line to this one. Then one bit better. You can fill the DI water, but these flavors
futures you can give Ds also gardner them outside. You can
fill the border. Many of these flowers. You can fill the board. These flowers up to you
to where you issue. The same problem. Finally,
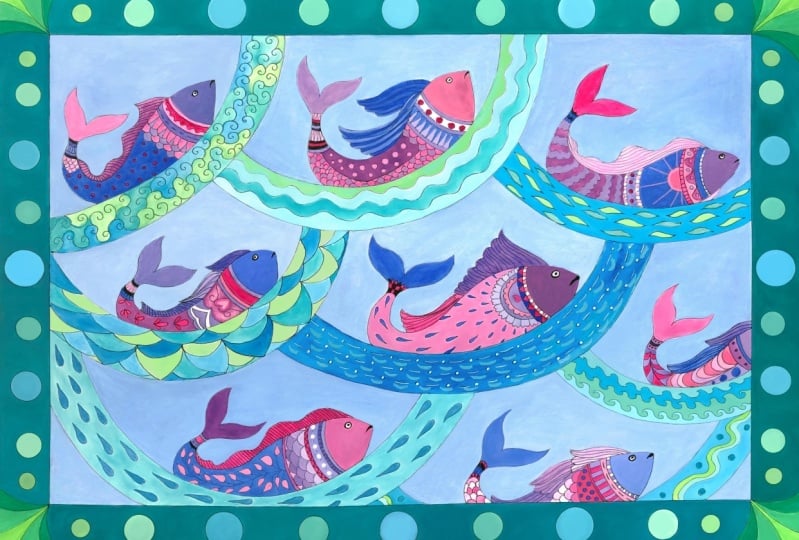
let's me very different. Let's meet these curves. What we're going to do is get it back. And do you have a fish? This fish. To weaken this. We will be learning to
draw fish separately. You can color them inside. You can either just draw, you can fill it out. You can do mesh. You can do this. So up to you on this,
or do you want this, or do you want this week
in New York? Bordeaux? I definitely haven't. Friendly borders
for your practice. Practice these and try to meet your own valuations
of these waters. I will meet you in
the next lesson.
7. Practicing Flowers: Welcome back. Now let's move on to learn how he made different types of
flowers and metal venue. Rather than a full God. There are so many imaginary
and whimsical flowers and forms of animals
that we draw and paint. There can be endless
number of flowers that we can make in modern style here I'm going to show
you a few of them. First of all, let's start
with the simplest one. And for that, we make
a circle like this. Gave it a double line. That we do small, small petals like this. Now if you want, you can
crosshatch the center part. Double-declining. Do the badges. This kind of Florida is widely
used when we make trees. On the branches of trees, we make these flowers. This is one. Secondly, meek, tiny circle. Hot. We go on making the heart sheep. Again. We give it a
double outline. Like so. We filled up outline. So many lines. You fill it with the linework. Alright, so this is
another type of Flavel. Very simple level is
also meet like that. This is the twig. Suppose these are the leaves and we just make us
a good inside it. We make another circle. We fill this spot with
small, small lines. This is also another way of depicting flowers in my style. Now, let's see another style. Here. This is like that. Then you decorate it. Whatever way you
like to decorate it. It depends on you how
you want to decorate it. This is the basic
shape of the flower. And after that, you can decorate it in whatever way you like to. Here's another Flavel. Know me. Leave via damage more. Beta's. This is a leaf sheep
complete leadership. And then we add a
dancing few petals. So it's simplistic. Lotus give it a double
outline. Like so. This is another one. It's kind of a lotus, but I will show you better and very pretty Lotus later on. Now. Another one. Now you can leave
this as a problem. This itself is a flower, you give it a double outline, and this becomes a flower. Now what I am going to
do is a different thing. Join these, fill this spot with
small like that. I dab the outline. You have. Another flower. If you want, you can give
stem-like structure on top. This is another very,
very folk style. Now let's move on
to another one. Here. Another extension
of this level. This is a very pretty flower. This is also very widely used in different Madu
bunny illustrations. This, and now what I will
do is I've in this same TO, I will make up longer petal. On both the sides. I will attach these
pointy petals that this spot also a double outline. He'll, since it's a big lava, Let's do one more thing. Alternatively, lines. Then you decorate it. Whatever we would
like to decorate it. Depends on you, how you
want to decorate it. This is the basic
shape of the flower. And after that, you
can decorate it in whatever way you like
to fill this Bartlett small dots and we can
fill this bug but the lines there, another global. We can also fill this
alternatively bit, small dots. Now, let's try and
make a marigold. For that. I'm making this
semicircle, semi oval. On top. I'm giving a semicircle. Crosshatching. I'm feeling it. These elongated rehab. Maddie Good. Comes to double outline
and they've eagle. Now. Let's see how we
can make the lotus. The lotus make a dot over here and straight below
that make another dog. This teardrop shape. Then make three pointy. On the, on one side. Three more pointy petals
on the other side. Now have to give double outline. These. I'm using sign up in here because this
piece is very small. If I use a bigger
ballpoint, it will. Space won't be there. Okay? Now from here, make
another teardrop. This would be a little smaller. I make another teardrop on one side and make another
one on the other side. If you want, you can make one mode shape petal
over here and over here. What I would like to do is I will guard like that
and I will attach it. Again. I've got a blank that I
would like to watch it back. We have lotus. So these are nine types of flowers be widely find in
Bodoni style paintings. Whereas there can be
many other styles of Madaba, any flowers. You can explore that and
as you drag this further. Now let's move on
to the next lesson.
8. Practicing Leaves: Now let's move on to the next. Believes. The mean. Simple leaves. Like that. Sometimes the leaves or even left blank only and we
fill color inside it. Another video of drawing leaf is the largest. Divide the center. But we also give ribs on one side and keep
the other side empty. Another way of drawing leaves
is there we completely fill it realistically like that. The Jews, the style
depending on how interrogate and how detailed our work is. So these are the smaller leaves. Then we have some grass blades. Depict grass blades like this. These are sometimes used as longer leaves
also where we attach flowers like these levels or these flowers to the
tip of the blade only. Sometimes they are
leaves of the plants, sometimes they are
depicted as grass. Now, another variation
of this kind of grass is we don't divide
it from the same, do we just make these lines? Another way of depicting
grass is like this. This is generally done. Show the ground when we make some animals or when we make human figure and we have to
show the ground below them, then we make grass like this. But sometimes even voter
is made like this. This is also grass. Sometimes even this is grass that you fill the entire ground on which the human or animal
characters are stood. Such button. And this is also
considered as grass. Again, like flowers, they can be endless number of ways we
can depict the leaves also. But these are the
few basic ones. And you can practice
these and master these. You can depict these
in any art form. So now let's quickly
paint the flowers also. Again, this sheet
is also going to be there in the resource, so you can have it,
you can practice. This is a very basic way
by which we can plow. Was that this, the moment I added the color, it all became difficult. Isn't it? That and let's have a combination of
orange and yellow over here. Let's do think I am painting very fast. That's why it's gray out. The boundaries. Do that. These Take your time. Don't let it go out of the box. I'm just trying to
do it really fast. That the video doesn't become
very lonely and boring. Guy like this. Here we have these beautiful
flowers for the leaves. I'm going to use just
one color quickly. All of them that light green. Here we can paint like this. Also, paint one part and
leave the other part empty. All the weekend. Paint. One more variation of the grass can be like this. He failed one part with the
lines and we leave a lot of Part D and fill it with color. So we can do that. Or as I told you, this formation is also used
as Bordeaux when we make, when we make fish. There, we color it red, blue, and North width. And when we color it green, then it's all right. There. We have our beautiful sheet. Practice these, and see
me in the next lesson.
9. Practicing Trees & Plants: So till now we have
practiced the line forms. We have got this double lining, we have practiced
border patterns. Then we have practiced
flowers and leaves are right. Now, let's move on to join
some trees and plants. So the first one in this, there'll be a simpler one. As we know, as I have
already told you that Madani revolves around the knee joint and the Tree
of Life concept. So there are a lot of trees
depicted in Madu, any BDS. So let's start with
a simpler one. We just make a trunk like that. Or you can give it initiate, decode branches, single
lane balance sheets. The fill them. We can fill it with
flavors or weekend, use a mixture of
flowers and leaves. Me up to, here I go
again, my swiftly bomb. I didn't have to use
the flush like that. Another big drawing
trees is, go for it. I take those stem
majors to move forward. Single line branches like that. And again, we fill
this up with leaves, whichever the empty leaves, leaves divided in just
two halves leaves. So many ribs. Ribs on the one side. Maybe habit. Another one is Nika
street double. This definite branches. Once he had this structure, we fill it up with leaves
and lovers like that. You can make the flowers
and bees on either side. And this is how he decreed
the stem of the tree, gave it a name. That you can fill it up
with flowers and leaves. And there you have another
real meetings are. Now in this style. We can go forward,
taken branches night that we can have a very
whimsical BSP tree got, Thank you again, Villanova, but leaves and flowers. And then God dealt with flowers. As I do live, flowers can be
different, different ways. So this is another tree. Sometimes be used, lead to
fill in the background. And this is also considered
as a blonde or a team. Then fill them up with flowers. We can also just have
these long needs and choose not to have any others smaller leaves
and just make flowers, may know smaller leaves,
just the pharmas. That this is also another
view of the tree. And there are many
other bees on, right? It all depends on how you
dig it forward. Here. This is what we have to
learn in this lesson. So dark this way, the trees in my style. And I will see you
in next lesson.
10. Practicing Fish: Welcome back. Let's
learn how to make a beautiful mother when he
is considered to be issues. So symbol or animals that have been widely used in business and ladies
and even in borders. So let's see how many
different guides, how we can see a couple of them. This one goes like that. That's the basic staples. We add. I'm going to go back. So basically this
shape, your way. That's one type of fish. One. Jellyfish. For this one as decoration. Yeah. Basically this is the shape. You can decorate it, your waist. Now, let's move on to another
very cute density fish. Ready some glutamate. Sometimes even decorate
the page. Size. Flowers or left side. Now, let's move on to another. Make mistakes like this. Just on the door
and do a bad job. Just because of one mistake. It is a blend. There's another one. All these fish. You can keep the outline. Do you think do this?
All the fishes, all the styles everywhere. So this is how we make beautiful
faces in my 20s death. Now let me show you
different types of fish paintings with examples. So it's a very good example of different types of fish
made in Modigliani sides. I will show you more examples. Here. As you see, the fish is used and you see
the longer same dire body. That's kind of the
waters to see me, or a complete painting
of fish in the morning. You see different
gestures, office. Here. This is another way
of using fish meal. This is my surface pattern
or a background or a border, which is going to be
the second project.
11. Practicing Birds: Welcome back. Now it's time to learn about
the buds in mud bunny style, how we draw them. As forgot. Mother bunny is very
much inspired by nature. And along with flowers
and trees and animals, birds are also very important
part of my job in painting. So let's see how we make some easy birds in
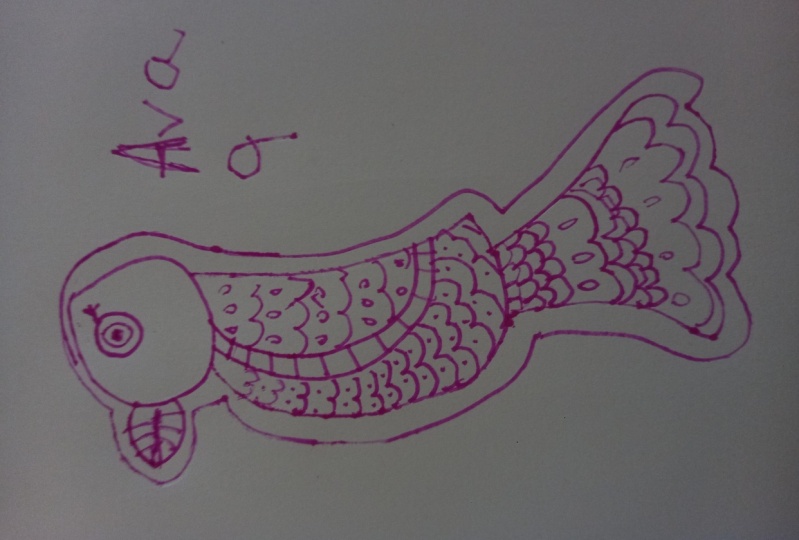
by the bunny style. Here we start with a small
circle for the head, and we make a pointy curved
bean shaped for the body. A small leaf-like beak. And a D. That's the
basic structure, basic body structure of a bird in my learning
style or in any style. And after this, we
just decorate it. It's similar to what we
practiced in model bony fishes. So we start with a
double-blind border and then we decorate. But fit line work. Now let's make one of the wings, since the bird is sideways, so only one wing will be neat. And finally, the decorative
patterns, the line work. There's no right way or wrong way of decorating a
motif and Bodoni style. Modigliani paintings can be as difficult as you make them, or as easy and simple
as you keep them. So it's totally up to you what you want to do with
your mother. Many paintings. Now you can leave
the double outline hazardous or you can fill
it with Catch Nice work. Now let's move on
to the second bird. And this one is my favorite. We start with two small circles. And these are not the heads. These are going to be
the big eyes of this. But I think you understood
what I'm making. Just keep watching
and follow along. Here comes a small pointy beak below the goggle like big eyes. The head and pointy ear like structure like so or
hold like structure. And it always shaped body. I got two small W shaped feet. At the bottom of the body. And now we make the wings. Like so. I want to make partly closed eyes for
my sleepy. I really love it. And I'm filling the eyelids
with the catch any lines. And there are the eyeballs. Now, let's decorate Mr. Ali. And again, it's up to you whether you want
to keep it very, very intricate and detailed, or you want to keep it simple and that it's ready. You have to just
fail the other wing also in the same way you
failed the first string. And here's a tweak
on ****** sitting. I am not giving double outline. So if you want, you can give it, but it's fine. Now, let's move on
to the other board. It's fun is going to be
dreamy and more whimsical. So we start with a
spiral like this. Make a triangle shaped beak. And he'll be me, a beautiful human-like I like. So now this board is captured
in the middle of movement. So here's the vein. One of them. I believe this board is
either going to fly away or just coming down and sitting. And the other wing like that. And here's the go
VDD, body, like so. And there comes
up and beautiful. The basic body shape is ready. Now we have to fill in the design and patterns
to decorate it. It is also gives some
headgear to this bird. And now the Declaration, which is entirely up to
you how you want to do it. I'm only giving you an idea of simply decorating
these creatures. Here I have divided
the body of the bird in different parts,
horizontal part, and I'm going to fill
crisscross lines and a row of dots
in these parts. Alternatively, like guns, dead. Now, I'm pretty much
happy with this, so let's stop here. And of course you can
do the double outline. That's completely up to you. Let's move on to the next board and see how we can make it. Showed I'm making another
boat who's flying. I'm not decorating this one. I'm leaving that part for
you and your imagination. Let's move on to another one. And this one is going to be
very exotic bird like that. We create the wings
of this board. And that's going to be the body. It's flying and it's going
to put you on something. The legs. And finally the head. It's like you can make
any bird or any animal in a folk style by just
capturing the overall shape of that animal or bird
in a flow whimsical way. And it becomes a folk style or whimsical style
bird or animal. Here, Let's see how we can make peacock in by
the bunny style. Though there are so many styles, we can make a
peacock or an hour. Depending on their posture, how they are facing
the audience, how they are sitting
or standing. So they can be sideways
or Fran, frontal, or even facing us via keeping the back towards us, like this one here,
peacock there. These are the basic ways we can paint the birds
and not many side. And as you see after
decorating and coloring them, they look so beautiful
and gorgeous. All the fauna and flora we
have practiced in this course can be used in your
future projects. Here's an example
of the peacock. It's a very famous by the bunny peacock motif,
world-famous motif. So use these motifs in your future projects
also and keep practicing. And I'll see you in the
next lesson where we will move on to the final projects.
12. Styles Of Madhubani: Welcome back. Before
we move forward, let's discuss the different
styles of Madani paintings. And for that, I will
take example of the speech which I have illustrated in three
different styles. So I have illustrated
the same motif of a fish in three different
styles of painting. First one is that
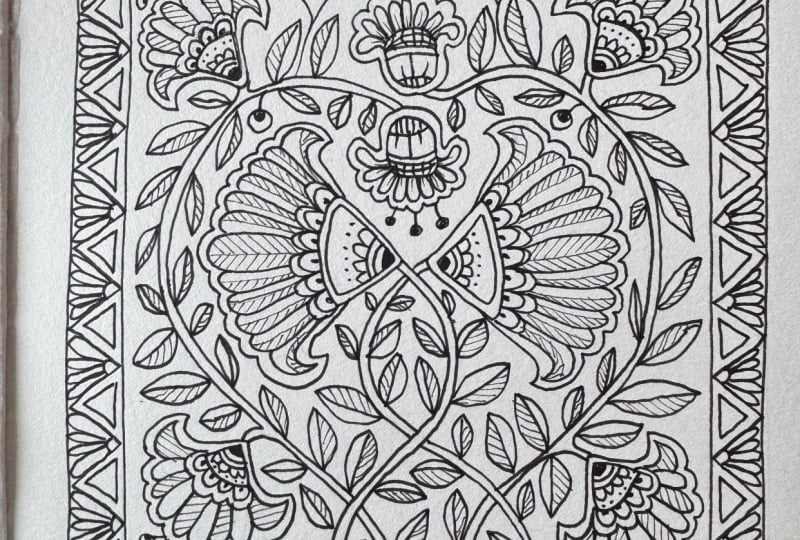
cartoony style. It's characterized by the
extensive use of fine lines. The fine line work is there in the background as well
as on the subject. We don't really leave any
space blank in catch the side. Whereas the Bernie style
is characterized by the use of vibrant colors,
solid color backgrounds, and we use colors in the
subject also be used the line work in
Bernie style as well because mother bunny is
all about It's linework, but not as much as we do
in the cartoony style. So we limit the line work to the borders and some patterns
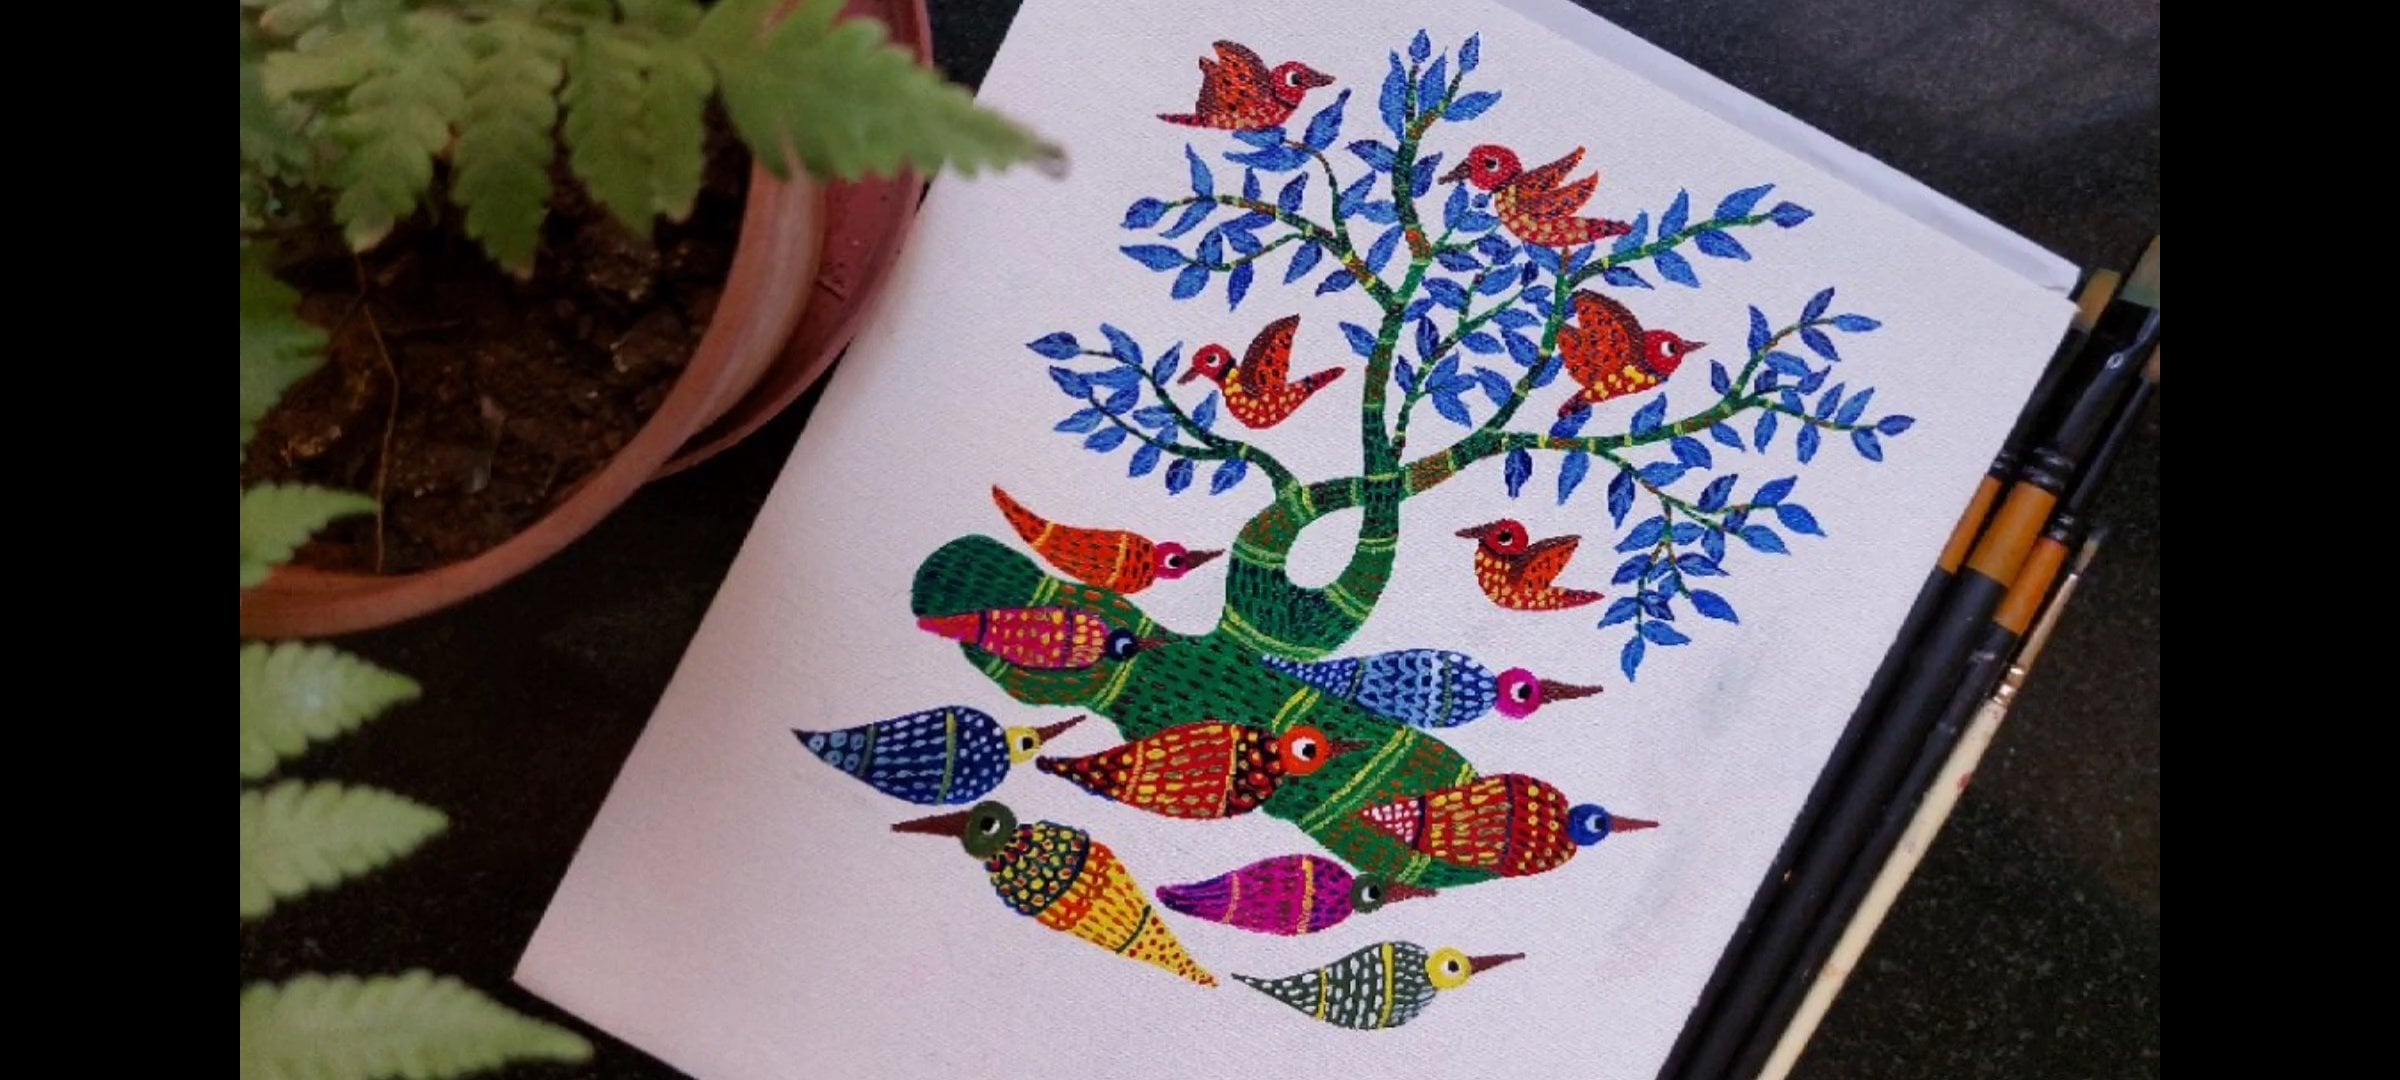
and the double outlines. Right? So this is bernie style. And the third one is the Golden. Our style. Go dinner. In Hindi means tattoo. This artwork is originated
from a data form, but it's not limited
to only tattoos. It's very widely used in different merchandisers,
walmart, etc. It's characterized by the
bold and take out lines. Instead of the double outline, we mainly use bold black
outlines for this. And it's also characterized by the use of five
primary colors. Three primary colors. The concentric circles and
rows of fauna and flora. The animals and flowers are used in rows and
concentric circles. These are the three main
styles of Modigliani painting, which we are going to
focus on in this class. Apart from these, there
are other styles also. We will talk about
them in this video, but we won't be practicing
them in this course. So the first one
is Coburn style, which is mainly used to decorate the walls of
the rooms of newlyweds. So it's full of the symbols of love and union and togetherness. The deities who are blessing the new couple does last
one is tantric style, and it's very, very religious
and spiritual at work. So it's full of the folklore, mythical stories
that they tease, the spiritual symbols, etc. All these styles are very worst, especially the koba style and tantric style are
very vast that they require whole class dedicated
to each word of them. Here, we will only be focusing on catching a bunny
and go denial styles. I will see you in
the next lesson where we will start practicing.
13. Katchni Project Sketch: Welcome back guys. This is the time for our
very first class project. We have practiced making
all the flowers and plants, and fishes and birds. And finally, we have arrived
the first-class project, which is going to be a
cartoony styles floral motif. So first of all, we will make
the basic pencil sketch. And for that, we need
an A4 size paper. Watercolor paper will be good. That a compass, a
pensive, rulers, eraser, fine liner markers, and some sketch pins. Black, red, and green
will be perfect. So grab your supplies and
let's start making it. For the paper. I will suggest you go for a
smooth finish paper. So whether it's a card stock
or a watercolor paper, paper should be thick but smooth because we
are going to be using fine liner markers
and sketch pens and it's easier to use them
on a smooth finish paper. So first, I will start
with the border. This, we have to first decide how much space we want to leave, a rounded or motif. It gives a nice framing
to the painting. So with the help
of a ruler skills, you just decide that
distance from the edge of the paper and go for a pencil and draw
a straight line. Like so. Repeat this step
on all four sides. And at any point, if you find the video too fast, was it and finish your steps and then unpause it
and move forward. Now, after drawing the empty
space around the motif, it's time to draw
the inner product. So for that, again, the thickness of the border. And there you see Bordeaux. And there's a glue on my window. Now I'm outlining this border
with fine liner marker. Recording a video in the
daytime in India is very, very difficult with a
lot of people come, a lot of vehicles and they
keep moving about roads the whole day and sometimes there's even some construction
work going on. So it's never ever
silent in the daytime. It's only the nighttime when I can find some peace and
quiet to record the videos. And I right now, I'm
recording in the day. So a lot of retakes. Where do you live? I would love to know
more about you. You've taken my class and
I'm really thankful to that. And I'd really love to connect with all the artists
in the world. It's great to connect with
people around the world. And with online sessions, this has become very easy nowadays to connect with other
adults around the world. So do let me know
in the discussion, where are you from? I would love to know that for here we have
made the border. And now at this point, I am taking my center for that. I am measuring the body of the border and
I did good center. And from here I'm just
making a circle with the help of my
compass like that. And add the center
of the circle, I will draw a cross like that. Small cross. The lines all
the way to the circumference. Just keep them small. And now we've got these
490 degree angles. We'll have to intersect
them to get smaller angles. Night that shell have to
place this hanky because my hands are sweating and now I zoomed in so you can see
it properly from here. I am going to set
this up like that, but with a curvy line, not intersect the circle,
sorry, intersect. Angles, right angles are 90 degree angles like
that with curvy lines, so no skill is required. And with another curvy line, I will just attach both the tips of
these curvy lines, slanting curvy lines like that. That I'll do that on the
other side also. Like so. Basically these
two ginkgo leaves, shaved structures are going
to be our two flowers. The main center of
attraction of this motif. So here I start decorating them. I request you to follow along. Let's now make the long
central petal like that. And following the curvature
of the outer circle, We'll move on making
the other petals. But as we move
towards the corners, the petals will be
becoming smaller. And the final battle, there'll be a little
pointy like that. So five petals on the
one side of the central. Same day if he will make five more petals on the other
side of the central bank. Now, let's repeat the same
process on the other level. Also. We have both our flowers. Now, let's make some
whimsical and you connect them with the leaves and make
a painting more magical. Like that. I think this one looks a
little out of proportion. Let's fix it. Again. That, yes,
this is good to go. Now, I am making
secondary stems, which will cover the rest
of the parts of the paper. Like that. There is no set principle
for doing this. I'm only following my instinct. If you want to change the layout of the stems
or secondary stamps, you can surely do that. If you're having problems
following alone. The final sketch will be
uploaded in the resource. You can get it from
there and copy it or transfer it to your canvas or a paper, whatever
you're using. They making stems cross one. Right on top. I'm trying to
make this figure of eight. Just to give the painting
a little more interests. Like so. You can obviously make the curves as per your liking and different
from what I am doing here. Now it's time to make
another set of flowers, just like the ones
we made earlier. But this time I am not
taking any measurements. I am not using the compass. I'm just going instinctively
and making similar flowers. The reason behind this is that
the center of attraction, the focal point of the painting is previously made flowers are, and rest of the flowers, even if they are Jews similar to look the same to the viewer. You have to just give an impression of the same
flowers and you don't have to be better
themselves, making them. And the viewer will perceive that these are the
same flowers only. Be completely different
or completely off. Well, but little bit of imperfection not
make any difference. And here I am making two more stems because I found
this area to be empty. And moreover, right now we're
just making pencil sketch. So we can draw the
flowers roughly, just to know the
place where we have to finally draw them with
a fine liner markers. That is another reason why we can just meet these numbers. Anyhow. Just following
the instinct. There, let me nuts travel. We are almost done. And this is the last
flower off the painting. It's almost like
the previous ones. It's fix it a little bit. As I said, you don't have to worry too much about
these numbers. They have to just be similar to the ones
here in the center. If you look at the total,
overall composition, you know that all the other
elements are directing the eyes of the
viewer to this point. So that's the focal
point of the painting. And this is the basic outline. I will see you in
the next lesson.
14. Katchni Project Detailing: Welcome back. I hope you've got your
pencil sketch ready. Now it's time to outline
the entire thing with the help of a fine liner
marker. So let's do that. The marker I'm using
here is number five. You can even use number eight. But since I will be using
black sketch pen also, so I don't want to keep
these lines a bit too thick. So five is just fine for me. Using different tip
sizes always create interest in a painting
or an artwork. That's exactly what
I'm aiming for. Right now. I'm only outlining the joint we have made together. There's no much of
technique in this, so that's why I'm
taking time lapses. If you want, you can pause the video and
complete this step. After I'm done outlining
with the fine liner market, I am removing all
the pencil marks. And now I am starting with the double
outline for the stems. And it's an easy step. The only point you have to
take care of while doing this is which stem is
overlapping, which one? Don't go crisscrossing
all the lines. Just make sure one stem is on top of each other
and you don't have to follow the same steps. Stem being up and the
same stem being download. Any stem can be any stains. Stem can be down. That's okay. But at the point where they
meet or intersect there, you have to take care
that you are not crisscrossing the
lines or four lines. Just take care of that
and you will be done. And here I am double
outlining the flowers now. Have practiced this before. So it's going to be
very easy and simple. I am repeating this step
and all the flowers night that Dan did this step. Now let us move on to making leaves on both
sides of this stems all the way from
down to the tip of the this whimsical gland. And my friendly
little crew is back again saying hello to you. There's a saying in Hindi, has taken a joke come, which I will attach. It means whatever you do with a cheerful mood and
light mood and happily. It's good. Always keep your mood cheerful and don't be
stressed about the results. Just trust the process and follow along,
go with the flow. And something good only
will come out of it. And in case you think that it's not what you expected or you're not happy
with the result. So relaxed. That's not the end of
the life my friend. You can always just
leave this one. The thing you're working
on and start a fresh. Take it as you're learning and move ahead with
a better plan. And there's no point in stressing over something
which is not in your control. What we can control
is the process. We can't control
the results because result is controlled
by many other factors, apart from you and me. So it's not worth to take all the stress about something which is
not in our control. Anded with all the chitchatting, We are now done with the
outlining and making the leaves. And here, at this point, I feel this area looks
a bit too empty. So I'm just adding some
fillers to this part. You can skip this
step if you want. And now let's fill in some
finer details for that, you can take a fine tip, like a final tip mock-up there. Now let's fill in
those catchy me, linework all along
the stems, like so. This line work can also
hide the imperfections. If you've accidentally
made the stems crisscross, this line work can
even hide that. So you can choose to do that or you can choose to keep your
stems just double outline. But I would suggest because
this is a Cassini project, so I suggest you do that. And here we are
decorating the flowers. Now it's time to
add some colors, so I will start with red. You can choose to use
colorful markers, fine liner markers only. But I'm using this catchment, which read, I will be filling in the flowers with the line work. And I'll be using
green for the leaves. Isn't that? So why
am I saying that? Now the first power is finished and see how beautiful
it looks already. In the same vein, we
are going to finish on the flowers like that. Here's another one,
moving on to the next. Dead. Now, the next one. You might feel
your wrist or hand tired by now because a lot
of line work has happened. So keep moving your wrist, rotating it like that to
relieve the stress and tension. Also, try not to smudge
the color because these color pens
are regular then only true for smudge proof. So let them dry and be careful you don't smudge
it with your hand. And then we move on
to the next flower. You can also slow the
video down if you want. That option is there. And if you feel really tired, you can just leave
the video here. I stop it and come back after some time and finished the
project. There's no hurry. So they're all the
flowers are done. Now, it's time for
the leaves fall. I'm outlining the leaves
with black sketchpad. Give them more definition. And there it's all
done and I don't be like adding any
other color to it. It's beautiful as it is. So let's move on to the
border and decorate it. I'm keeping the
border very simple. You can choose any border
from the ones we practiced. We've got the template. But I personally like
the simpler ones. Or you can come up
with your own idea for the border better. I would love to see that. And if you are going ahead with the one I am making,
follow along. The outline is ready. It's time to fill in
the fine line work. Now for these triangles, I'm going to alternate
the red and black colors. Repeat this step on the
entire bottom. Like so. And now the very final step, it's done, but I think some lines over here
need definition. That's what I'm doing
now. Sketchpad. I'll do the same with the border lines like that. And there we are done with
our very first class project. Now DKA break, relax, and come back in the
next lesson where we will make another
class project.
15. Bharni Project Sketching: Welcome back. It's time for
our second class project, which is this gorgeous painting. And this one is my most favorite
of all three paintings. So here are the supplies. The usual ones, paper, rulers gains, fine
liner, markers, pencil, eraser, and
what's added here. So instead of the sketch pens, I am now going to
use watercolors. So you can use the sketch
pins or brush markers, watercolor, brush pens,
anything you would like. But I will be using this basic watercolor
palette, bison alias. And if you're using watercolor, you can use any brand. We're just going to be
needing some primary colors, and of course, a jar
of water, clean water. Now let's begin with a border. So I'm mocking the outside area. And now the inner border step is just like the
previous project. Now I'm going to copy
this motif on my paper. And for that, I'm going to divide my people in
three equal parts. And once that's done, I will draw three
fishes in each part. And I'm going to speed up the drying process
because we have already practiced drawing a lot of fishes in by the bunny style. If you've missed that video, I request you to go back
and watch that video. It will be easier for you
to draw the fish then. And in case you want to slow down this video,
you can do that. That's the option available. So here I'm drawing
my very first fish, the basic fish three. You can choose any other fish from the templates we practiced. That's up to you. But I'm going
to keep it really simple. By now. You must have
understood that I really like simple motifs
and simple borders. That's my personal choice. But you're free to
choose any other fish from all those we have
practiced as per your choice. The first one is done, and similarly I'm going to
draw the two other fishes. Now, let's decorate them. Let's do the detailing. It's now time to outline
them with fine liner marker. Here's the double outline. This project is very
simple and very easy because we've practiced
all these steps in the practice lesson. And the fun part is that
despite being super easy, this one is the most beautiful. It's my absolute favorite. If you're following
along or planning to draw it afterwards. This is surely going
to be flammable at work for your home or
for your loved ones. So then we are done
with the outline. Now it's time to decorate
the border pattern. For that, I divided the
border area in equal parts. And with pencil, I am now drawing the border
pattern like so. We have practiced a lot of border patterns as well
in the practice lesson. If just in case you
miss that lesson, please check that out
and you can choose any other border pattern of your choice from
that template also. For your class project, you are most welcome to
change the border patterns, to change the number of fishes, to change the style of fishes. You can do anything you want in this Madou bunny
style painting. And I would love to see your
version of class projects. The border pattern is ready. Now I am doing the details. Here. I'm outlining
the required area with thicker marker. Sometimes I just
look for the words, the appropriate word in my
head and I just forget. And it happens usually when I'm drawing and talking
at the same time. So this is done. The border pattern is
ready on one part. Similarly, we'll make it
on all four sides there. And now it's time to
decorate the fishes. So I'm keeping the design very simple and basic because
we are going to be using vibrant colors
and I don't want to fill the visuals with very
busy and complicated design. I want the colors to stand out. And that's why I'm
keeping it really simple. Good. And the sketches ready? I'll see you in the next lesson where we will start coloring it.
16. Bharni Project Painting: Welcome back. So
we are ready with the outline of this
beautiful painting. And now it's time to color it. For that. As discussed earlier, I'm using my watercolors. You can use whatever
medium you choose to use. And here I start with
the background first. So it's very simple. Technique, just like filling the color in a coloring book. My brush here is neither
too wet nor too dry. Just write Kansas and z. And with that, I'm just
filling out the background. So I'm painting around
the fish motifs. And since it's a
watercolor paper, to ignore drying very quickly. So as you see here,
I'm choosing small, small parts of the
painting to color. And I'm finishing
that particular part before moving on to the other. But that way I am avoiding
anytime soon T background. But just in case
there are patches in the background that will
also be taken as fixture. So I'm not worried about
the badges if they format, but addressee and I'm
trying to avoid them. I hope you got my point. And then the background is ready and I let it be for a
couple of moments to dry. And then I started
coloring the fishes. So here I took one color
at a time approach. I started with yellow
and decided to finish on the parts where we, where I wanted yellow
in all the faces. Here. I tried to kind of
create a pattern. And for that, I colored all the teal fend off all
the fishes in yellow. Once the deals were colored, I decided to paint the
fence also yellow. I really like this
bright yellow. It's one of my favorite colors. Do I have many favorite color? But this bright yellow is
definitely one of them. So Debbie go on the mean fins of the fishes
are colored in yellow now. Okay, Now it's time
to change the color. So I'm taking red and
with a smaller brush, I'm going inside the fish. I'm painting the Feast of the first fish
with red. Like so. And since the top and
bottom fishes are similar, I'm painting the bottom
page piece in red as well, but that choice is
completely yours. If you want to change the color, you can totally do that. Now, I'm adding the
same red stripes all over the fence.
These two fishes. I also feel that the face
of this fish is very thin. So I'm going in with
another code of red, this bright red. And that's nice. Now I'm in green, in my clean brush
and going in to paint all the skills like that. And follow the same
pattern on the other fish. Also. As you see, I have used green for
alternate rules of skills. Now I'm going in
with ultramarine blue on the remaining
rules of scapes. And I'll be following the same steps on the
other facial muscles. Now, I will use this sap green, which is kind of
an olive green in this scenario, color effect. And I'll color this the
other half of the page, all these colors I'm using
directly from the SEC. And I'm not mixing the colors my way to the edges directly
from the palette. Now same goes to the
other fish over here. I liked the intensity of
the color in this one. So I'll go with another quote on the first fish. Like that. Nice and vibrant. Now adding some ultramarine
blue here and there. And finally, it's time to
paint the fish in the center. And for her, I am mixing
the bright green. So I'm just adding
a little bit of yellow in the Green Knight that to vary the color a little bit from the rest of the pages because I've
used cleaning them all. So now let's use
French ultramarine. And now some cilia read. It's kind of vermilion color. If you're not using familiar. Of course, you must not be
using fluid, meaning color. And our same old green. Now, let's give some
red lips to this one. And so we're done
with the painting. Join me in the next
lesson where we will do the final detailing, right? So I'll see you in
the next lesson.
17. Bharni Project Detailing: Welcome back. Now, this is the final step
to our second class project. Here, I'm going to detail these fishes with
fine liner marker. And as you see, I'm mostly filling
the double outline with fine line work like that. So it's super easy and simple. Nothing complicated. I'm going all over
it and filling the entire novel outlined
with the fine line work. Similarly, I'll decorate
the other fishes also. But for this one, I will be filling in some
slanting lines like that. Just to create some variation. I will fill some slanting
lines in the films, also. Some fluid Coby
lines on the teal. I decided to make them feel good on the body of this page. But as you see, the black fine liner marker
is not standing out enough. So I will use white. Rule is when you
may get sand out. That we're done with the fishes. Now it's time to
fill in the backdrop because it feels a
bit too flat to me. I'm just going with
some wavy lines. It's my number eight fine liner. Like that. I filled in
the end diabetic jaw. And that's the final
step of this painting. Now, I'm just outlining the border with my
black sketch pen. Just to reclaim the
outline right back. They're nice and bold. And that's the final look
of this gorgeous painting. Isn't it beautiful. So that's the end of the
second class project. Now join me in the next lesson where we will move on to
the third class projects.
18. Project Godna Sketching: So let's begin the project by sketching the
motif on the papers. So first of all,
as usually we will start with the border secure. I'm drawing the border. By now. You know the, the pattern I follow for making all my paintings
in my dominant style. So I hope it's easier for you, for you now to follow along. I have marked the bottoms. Now in the center, I want to make a circle. So first of all, I have to
mark the center of this page, which is very easy. Like I have to take the point where the two central line
intersect each other. And that's our center of
this rectangular page. And from there I will draw one circle and then some
concentric circles, as we discussed,
GoldenEye style is all about concentric
circles and rows. So here, make sure
you don't move the center of the
circle. Keep the center. Same for all the circles. And if you are not
able to follow along, I will link the final drawing, the sketch in the resources. So you can find this from there. Here as you see, I'm
making the double line in, outlining the inner rose, but it's not going to
be the double lines. I'm going to fill in
with black color. So it looks like a
thick and bold outline instead of a double line. So that's why I made it. And this is pretty much
the outline of the design. Now, I'm going to divide
these rows in three parts. So roughly not exactly
the equal three parts, but roughly three parts. Because all the folk art forms are very organic and natural. So they are full of flowers. They're not very perfect, as you know, the, the digital illustration
or something, they are handmade, so the feeling of handmade
is always there. Now. I will start filling
in the motifs. So I sat with the animal. Can you guess what
animal is this? I'm going to to make an
elephant in my bunny style. And which is made very simply. So you can follow
along like that. And that's it,
That's the elephant. So I'm going to draw, do elephants in each row. And so for elephants total
for two rows like that. There. Now in the mid part of this row, I will be making
the tree of life. So the Tree of Life I'm
making here is full of fishes instead of leaves
or branches. Hello fishes. That's a symbolic
model, bunny motif. Symbolic representation
of the tree of life. It's a tree of life
which is full of fishes. So nature wisely is the tree of life in form of
fauna as well as Florida. It's nature wisely and the
oneness of everything, animals and the trees. Oneness of them in nature. That's what it represents. They're very easily and simply. We've made this tree of life. Once we're done with
the entire sketching, we will just outline it with the fine liner
mockup. You know that step. Now one of the rows
is ready and we need the exact same illustration
in the other row. Also. We will copy that in
the time-lapse for now, let's make the border. And here I'm making
a very simple border of leaves or petals
arranged forming. These are A's, you
can say like that. And I thought it was
being a little too wonky. So I just thought of
making the marks for the placeholder of
each petal or leaf. And now I will do
the same design for the border that I did before. So at any point, if
you think it's not. Coming out as you want it, you can just use, like you can take
use of the ruler and compass and
everything and try to make it as perfect
as you want it. But never let the process
too overwhelming and tiring. Just keep it simple and
fun so you can enjoy it. On right here. You see me struggling
with the the border. And you can follow along that. It became very easy now to
make all the leafy patterns. Once we've drawn the lines
for the placeholder. Like this only I will make
the borders on the rest of the three sites that I will of course take
a time-lapse for that. You can pause the video
and finish making the borders on all four sides. Let's start working
on the central motif. And for the central motif, I have decided to make a bird. The chairs are inspired
by the peacock. So it's not a realistic peacock, but it looks partly like a peacock and partly
like a duck or a swan. So it's a whimsical
and fictional, but which is supposed
to look pretty. I really love this part
of any folk art form, be it might've money or gold or any other Russian folk
art or Mexican folk art. The creatures and
even the flowers are very whimsical and magical. It's almost like
illustrating a kid's book. And I really liked that
part of the full guides. So here we are done
making the bird. Now, I have moved on to the outer border of the
concentric circles. There I am making this
simple three petal flower. The trick here is to divide
the circle in four parts and make one flower each at 1, and then you fill
in the quarters. I hope that made sense. So with that, you
avoid the chances of some flowers being squash or some flowers being oversized. It's mostly the same size. All the flowers mostly
are the same size if you practice like that. And then we have completed
the main elements. Now, it's time for
a magic. There. I have completed
the entire artwork. Now it's time to ink it. So I'll see you in
the next lesson. Meet me with your inked artwork.
19. Project Godna Coloring: Welcome back. In the previous
lesson, we sketch this motif and as you see, I have outlined it with
quinine, a marker. And now I'm removing
the graphite marks. And for this one, I'm going to use the brush
markers, watercolor. Brush markers. You
can use watercolor. Also. You can use a critical source of whatever medium you
like, you can use that. But watercolor brush pens are very easy to use and I just wanted to use
them for this project. So here I start one color at a time and I go on
filling in the colors. It's a very simple and
very easy process. So I don't have to tell
anything about the technique. I have to just go on filling the colors and you
can do the same. So here we go. You don't have to use same
color palette as mine. You can use your own colors, but I just thought this
will look really nice. So I choose this color palette. Then I'm now going
to use some yellow. Red, and yellow look
really good together. Now, let me tell you something more about the history
of this style. This particular style
of modal bunny was started by the great
artist channel dv. And she did it fit the help of bamboo pens and lamp black. That's why the thick
bold black outlines. You can look for her work
online and if you do so, you'll find how
organic and simple the artworks are and how much ease she has
used in her work. And that's the beauty
of this style. You will also find some very
intricate and busy and, and very full goodness style
paintings full of good work. But mostly it's very organic
and easy and simple. That's the beauty of
any forgot, isn't it? There's the center part
of the motif is done. I am leaving the background
of the bird blank. I will color it in the
end and you'll know why. Moving ahead with other
parts of the motif. While filling in colors, you need to understand that
you don't have to go on coloring each and
everything right away. Go slow. Keep most of
the areas uncolored and blank and see how it looks and gradually
fill in the color. If you color each
and everything, it might not look that great. Because leaving some white is what makes the
picture beautiful. Always leave some whites, at least in the beginning. Because later if you want, you can still color it up. But if you've already
colored it in the beginning, then you can't remove
the colors from the parts you don't like. So that's how simple
this process is. Just fill in the
colors as if you're coloring coloring
book, and that's it. There's no much
expertise required. Let's just be with the music and enjoy the meditative process
of coloring this motif. Now I will color the three of the life on the other
side in the same V. And here comes the
star attraction of this motif, this blue color. And I'm coloring the
border with this dead. Now, I'm taking the
time-lapse and finishing it, but you're free to
pause the video and finish your motif
with the same color. I am coloring outer backdrop
of the central motif. There. We are done with this. And now it's time for the real game changer
color and that is black. You will see when I add
black to the painting, how dramatically and magically
it changes everything. I will start with the tiny parts and then move on to
the bigger areas. Make sure the
background has dried completely though this
dries very quickly, but still just make
sure that it has dried before painting so close
to the previous area. So you avoid mixing the
colors and making it ugly. And here, I colored the main background
off the boat. Black. If you're not
comfortable going in these tiny areas
with a brush pen, you can do it with the
fine liner markers also, all you have to do is just
color that area black, no matter how you do it. So whatever you're
comfortable with, you can use that to me. And that's how the drama begins. Let's finish up the
borders with black. You see how the design is
standing out like that. And there in the end, I will paint the
eyes of the animals. Now you can leave it like this. But I went ahead and
colored backdrop of the rows of motif on both sides because I
was not liking it. The white background
was not good to me. So I went ahead and
painted it later. I'll show you how tiny dots for eyes of the
fishes in the tree of life. Again, you can do this
with the fine tip marker. And we're done. But as you see, it doesn't look that great. So I went ahead and
painted the backdrop of the tree and the elephants
with yellow and red. And I also made some patterns on the fishes and added a tree branch on top
of the elephant. And this is the final
look of the painting. Hope you enjoyed this video. I'll see you in the next one.
20. Your Turn Now!: Congratulations, You made it
to the end of this lesson. I hope you liked
this class and I hope you enjoyed it
as much as I did. If you followed along with me and made those
beautiful artworks, I encourage you to
share your at work in the project gallery
for all of us to see. And if you haven't
given it a try yet, please give it a try and
share it with the community. If you want to share your
work on social media, tag me, I go by the name, just woke up to add, I would love to share it. If you liked this class, please consider leaving
a constructive review. It will help others
to find the glass and also follow me here to be notified about my
future classes. I really enjoyed
making this glass and I hope you
enjoyed it as well. I will see you in my
next one until then. Happy creating.
 Manishaa Shriivastava, Artist, Art Educator, Author