Transcripts
1. Low Poly Art Intro: Hi. My name is Aaron. I'm a freelance graphic artist, and I teach it a pair
of junior colleges. So today, I want to show
you a project that I've been doing in my class
for a few years now, and it's called a Low
Poly Illustration. So what we're going to
do is take a photograph, and we're going to
basically trace that photo using this
low poly technique. And what do I mean by low poly? Low Poly art means
an image is created out of a low number of polygons. Usually, you would hear this term when
working with three D, but here we will use it to make a two D illustration
in Adobe Illustrator. For this project, we'll be
working with triangles, although a polygon
can mean more. This is sort of a nice exercise to get you used to
using the Pin tool. We won't be creating
Bezier curves, which is what the Pin tool
is typically known for. I'll save the Bezier
curves for another class, but this will ease
you into using the Pin tool and
learning how to use anchor points and
work without being overwhelmed by trying to learn how to use
the Bezier curves. And I will show you how
to use the photograph as a template layer and
why that is so useful. I hope you will come
along for the journey, and I will see you in class.
2. The Project: The project for this class is to create a low poly illustration. I hope that you will
take the time to upload your finished work
and share with everyone else. Now,
how do you do this? Once this is completed, you will need to go
to the project area, and I'll show you
how to do that in another video once we have
completed the illustration.
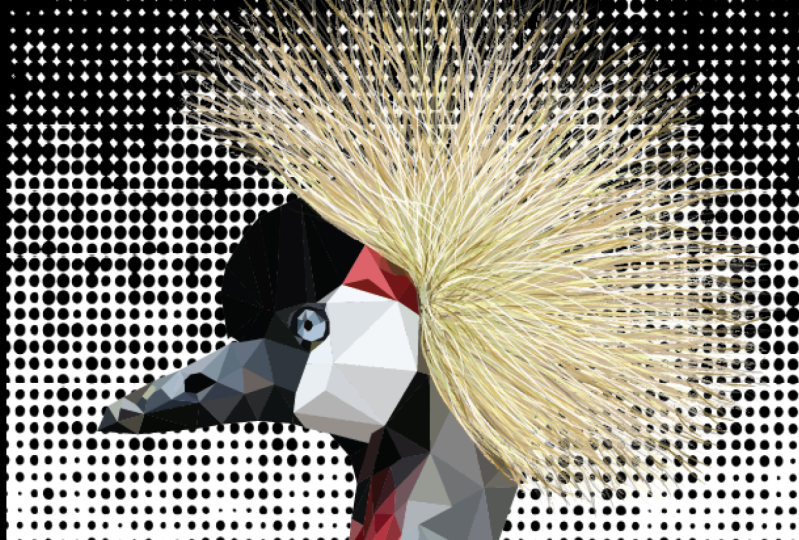
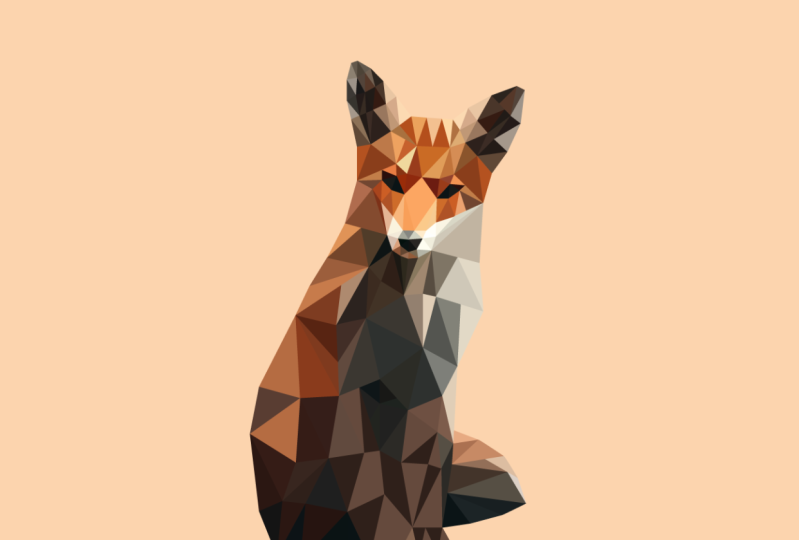
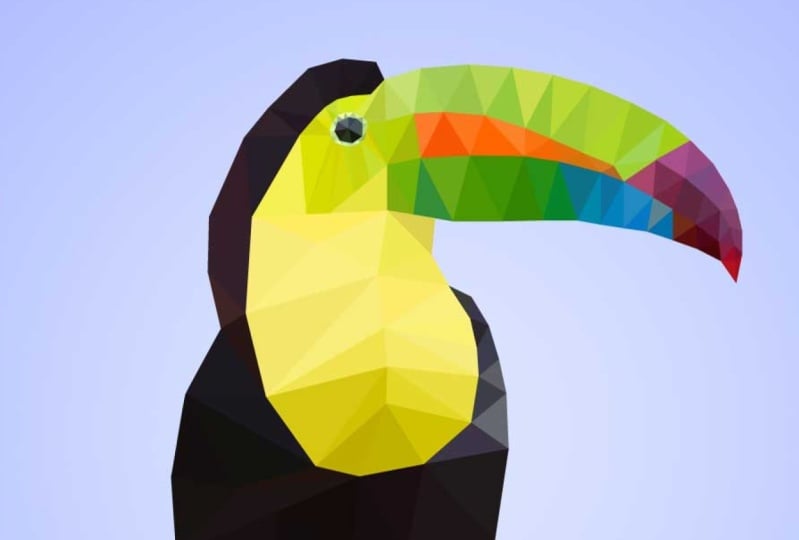
3. Selecting an Image: And here we are on Pexels, where you can telegraphs. And you can use them in
your artwork as you like. They have a few rules here. You can see under the license,
but for the most part, you can use them as you like, whether it's personal
work or commercial work. Alright, so I'm going
to search animals, okay? And let's see what we get. And I'm going to pick
something that looks nice, and we're going to make
a low poly illustration. I like this little dog here, but I want to use something
a bit more colorful. I like the little bunny
rabbit with the sunglasses. I think this two can
might work nicely, because it has lots
of color here. So if I move my cursor
over the photograph, I can click Download and boom. And it will download. I'm just waiting for it. And now I'm just going to hit Save. You can either keep the
name that we have here, or I'm just going to
call this two can. Alright, so now I'm going to
come down here to my dock, and I am going to open up
Adobe Illustrator 2024. I'm going to choose
this blue button here off to the left
called New File. And then I'm going
to choose print, and I'm going to choose letter. And the image that I've chosen is vertical or
portrait orientation. So I can leave it right
here with a default. And all the rest
of these settings, I'm going to leave here, and I'm going to choose Create.
4. Selecting Essentials Classic Workspace: Okay, so the first thing, Oh, first thing I want to do is my workspace is set up a
little different here. So the first thing
I'm going to do is come to Window right here, and I'm going to
choose workspace. And I'm going to choose
Essentials Classic, okay? And now I'm going
to go back up there and choose Window, workspace. And then I'm going to choose
reset Essentials Classic. Okay, so you saw
some things change. And the reason I'm
doing this is so that we're on the same page. So you have the
same tool set up, so if I bring out something new, you'll be able to do
that along with me. Alright, so here we go.
So the first thing I want to do is bring
in that photograph.
5. Placing Your Photo: Now what I want to do is
bring in that photograph. So I'm going to go file place. If I can find it,
place right here. Okay. And here's the two can. And if I select that
image, I can hit place. Now, you see if it's
set up like this. If I just click and release, it's going to come in full size. Don't click and release. Just watch what I do, and you'll see what
I'm talking about. So I'm just going to
click and release, and you see it's gigantic. Okay? And then you
have to scale it down. This is our letter
size document. You see that little thin line going around here.
That's the document. If I printed this out right now, all you would see is this I. So I'm going to delete
that. Alright, now I'm going to do this again. I'm going to go file place. And this time, I'm
going to choose it, and I'm going to click and drag. So I'm going to come
up here in the corner, click hold, and you can see if I move the
cursor, I move well, you can't see it, but you can see the cursor
moving around, you know, in a big circle. And you can see the
images being constrained. And I'm going to lock it here, but you can drop it down
here at the bottom. But you can see
it's not going all the way across the
Canvas. But that's okay. We can either crop the Canvas
in or use our imagination. And extend the image. So I'm going to release
right here, okay? My finger is still pressing
on the mouse button, and I will release. All right. Now, I
want to center this. And since I have the essentials
classic open right now, you can see I have
this bar here. If you have essentials open,
you won't see this bar. And what I'm doing right now, you can just eyeball
this and center this. But what I'm going
to do since it's here is I'm going to
click right there, and you'll see it'll
center this on the canvas. And then I can do that
vertical center as well. It just nudged it
just a little bit. Okay? Alright. And again, if you
don't see that, that's because I am on
the essentials classic, not the Essentials Work space.
6. Creating a Template Layer: Now, what I want to do is change this image into a
template layer. And the reason I want to change this into a
template layer is because say I have a I'm just going to
make a rectangle here. If I go to view here and
I choose outline mode, You can see the outline of this, but you cannot see
the photograph. But if we make this a template, then I will still be able to see the photograph even when
I'm in outline mode. Now I'm going to go to
view and choose preview, and I get the photo back. And again, I can use key
commands to go back and forth from outline into
preview mode right here, okay? Command Y. I'm on a MC. So if you're on a PC, you can choose Control Y. All
right, so here we go. Command Y. Command Y, and it just goes back and forth. Now I'm going to change this
layer into a template layer. And you can just
watch right now. I'm going to redo it
a little bit slower, but I just want to show you very quickly how I'm
going to do that. So I'm just going
to click on this. Command X. I'm going to make a new layer that's not
going to be a template. Go. And again, I'm
going to go over this very slowly afterwards. I just want you to
see what happens. So I'm going to
double click on this. I'm going to make
this a template, and I'm going to hit okay. It grays it out, but I'll
talk about that later. But now you can see this
is a template layer, and it's also locked
down, so I can't move it. I can unlock it,
but it's locked. You can see right here
in my layers panel. Now, what I'm going
to do here is if I go command wide
like we did before, again, that's up here
under view Outline. Now, the image here, you can see the square
turned into outlines, but the photograph,
I can still see it. So that means I can work with just lines and see
the illustration. That's why that's
important. All right. So now I'm going to hit a few
undoes and take this back, and I'm going to walk you
through this step by step. All right, so I have my
image here of my two can. And I'm going to double
click on this layer and label this to can. Okay. And now I'm going to double click right
here in the blue area. Don't double click on
the text because it will set it up so you
can edit the text. So I'm going to double click here in this empty area here, and I will get this layer
options panel. Okay? And right here, you
can see I can click right here and it will
change it to a template. But one thing it
does automatically, as you can see it, this is checked where it dims
the image to 50%. That just makes it easier
for you to see things. I'm going to change this to 70% so that I have a
bit more, you know. It doesn't look to washed out. But the advantage of this is when you have your
lines on here, you can still see the
lines. All right. Now we need a drawing layer. So here we are in
my layers panel. Again, if you don't see
it, it's right here. It's that little stack, and I can tear this off here. Actually, I'm going to
click here and tear that off and just let it float. And I'm going to click
here on the Chevrons just to close that
up. So here we go. So now we have our
layers panel with the two can layer
and as a template. And you can see
the template layer looks a little different here. That little icon tells me this
is a template. All right. So now I'm going
to click here on a plus symbol to create
a new blank layer. You can see that has an e, and that has a template. So this layer, I'm going to
double click on the Words, and I'm going to call this draw. And then when I'm done, I hit the inter key
on my keyboard. And now we're ready to draw.
7. Snapping Points: First we need to do is
select the pin tool. So I'm going to come over
here to my tool bar, and you can see they're stacked. I'm going to hit that
little button right there, the Chevron and straighten these out so that it is
a single column. And that makes it just
a little easier to see, and that is the pin tool. If I click and hold, you
can see that there are several different options embedded here with the Pin tool. There's the Pin tool, and then here is the Add
Anchor Point tool. Here is the Anchor Point tool, and here is the Delete
Anchor Point tool. And I'll show you how
to use those later. But first thing I want
to do is just go over some basic pin tool,
how to use it. I'm just going to turn off this template layer by
clicking right here, and we're going to do a little practice drawing right here. So I'm going to
zoom in. I'm going to click here is the
magnifying tool, and I can drag right to zoom
in and left to zoom out. Ever find yourself getting
lost so you can't find it just hit command zero or
control zero on a PC, and it will fill the
screen with your object, and that's in case
you kind of get lost. All right. So What I want to show you,
here's the pin tool. And don't confuse this
with the curvature tool. The curvature tool is very
similar to the Pin tool, but it is different, okay? And we're not going to be
using the curvature tool. We're going to use the pin tool. And now, I want to
make a triangle. So I'm on the pin tool, and I'm just going to click. I'm going to make sure to hold my mouse stationary,
and I'm going to click. Then I'm going to move
to the next stop. I'm going to click. And then
I'll move to the next place. Click. And then
when I move back, notice, you see my cursor. Watch the cursor closely. When it comes in closely, you can see it shows me that little circle next to
the Pin tool icon. And that's just telling me that it's going to
close the shape. And this is what we're going
to be looking for with every triangle or every polygon that we make in
this illustration. So I'm going to click,
and it'll close. Okay? And If I want to zoom in, I'm going to go to the magnifying tool and I'm
going to zoom all the way in, just drag right, and you
can see it's closed. Okay? And if I go to view, I can go to outline mode. You can see it's closed. Vew, and I'm going to go
back to preview mode. And I'm going to zoom back out, and again, it's easier for me. I'm just going to hit command
zero and zoom back out. And then I'll Zoom back in. I'm using key commands to
zoom in and out to use the, you know, to get the
magnifying glass. You're welcome to click
here and zoom in, or you can see here, the
quick key is a Z as in Z. Just hit the Z key, and it will take you to the
magnifying tool. But then you have
to hit the P key to go back to the Pen tool. So this is one way of working. Z. I mean, yeah, Z. Now I'm on the Zoom tool, and I want to get back
to the Pen tool, P, and it takes me back
to the Pen tool. Okay, Z, P. But the way I work is, I'm going to select
the pen tool, P. And when I want to
go to the Zoom tool, I hold the space bar down that gives me the hand tool, okay? And then I add the command key, and I get the magnifying glass. And that may be on a PC, it may be Spacebar and control, and you get the
magnifying glass. Some plus, I can
add the option key, and I get the minus, but
that's not necessary, because if I click hold
click and drag to the right, it zooms in and
click to drag left, it zooms you know, it zooms out. So that's one easy
way to do that. So if you see me doing this, that's what I'm doing. But feel free to come
over here if you're not comfortable using
those quick keys. Feel free to use these. But I highly recommend getting
used to those quick keys. Alright, so I'm going to make another triangle.
And here we go. I'm going to go
click, click, click, and then we look for
that little circle to tell me it's going
to close, click. If you don't see that,
you'll see a little gap, and that's just going to make for a bit of a
sloppy illustration. And you can see when
it doesn't close, it doesn't let go. Okay? So be aware of that. So if you close it, you
can cheat a little. I can click and close it. But you can see there's
a little dent in there. That's easy to fix. Remember these tools over here, the pin tool, and
nested with this. You see the Ad anchor
point Delete Anchor Point. I can just use
Delete Anchor Point, move my cursor over and, and I think I missed it.
Let me try that again. Please use the
Delete Anchor Point tool on an anchor point. Okay. I think it's
just the sensitivity, it's not close enough. There we go. I just have to be careful to make sure and get it. All right. So I'm going to
put it back on the pin tool. All right, so that
is what we're doing. And when we are working
with these triangles, we're going to be building
up the illustration. One thing that happens, and this is one thing
that may throw you off is say I make
a triangle here, and I want to make another
triangle to go like this. Okay? Now, I want to show you a little problem
that's going to happen. Watch this. Don't do anything. Watch. If I'm on the Pin tool, and I can click
right here and add another these three more
three points. There we go. Done. But what's going to
happen is when you're drawing, you're going to go
click, click, click, and then you're
going to close it, and your next reaction will likely be to make
another triangle, and you're going to
start in the same spot. But notice my cursor. You see it's giving me that little minus symbol next to my pen
tool minus, right? So what that's going to do is
if while this is selected, it's going to take away
that anchor point. So you can see it says minus, and when I click on
it, it goes away. Okay, so be careful of that. So again, watch what happens. Click, click, click. Click, and then I'll go and same thing will
happen down here. I go to click on it again, and it takes away the
point. All right. So a way around this is to
I've made the three points. Now I can hold my command key, and my cursor will change
either to the black or the white arrow depending
on which one I use last. So I'm holding the command key, control on a PC, I click, and it de selects it. Now I can click on top of that point and continue
making my triangles. Okay. Whoops, I
missed at that time. You see it didn't
line up quite right. So I'm going to hit undo
Command Z or Control Z on a PC. Wait for that circle and boom. Okay. Alright. Now, I'm
going to zoom out a little. I'm going to delete that.
Let me do this again. And another problem
you may have. So check your snapping. And you may have snap to pixel, snap to point, snap to glyph,
and all these things here. If you have some
of these checked, you may want to go
in and uncheck them, because what will happen is say, I have this selected, and I come over here, and I go to click. You see how I was on top of it, but it selected it there. So let me try that again. I'm going to click right here. You see my cursor is right
there on the point and boom. But the point is up there. Now I'm gonna try it down here. Boom. It's going in
the wrong spot, okay? And it's lining up here, but that's because it's
snapping to the grid. And if the grid is on, like, if I do this one first, it's going to it'll be fine. But if I'm trying to line
this up in a picture, this may be a problem. So what I would recommend doing is going in
here and turning off, make sure all the s all
the snapping is off. But one thing that I do find useful is this thing
called Smart Guides. If yours are that's command U, sometimes it gets turned
accidentally turn it on by hitting the key
command by accident, but we're going to turn
this on, SmartGuide. And now if I click the
Smart guide, you'll see, I get these extra
little controls that helps me to line things up. So this way, I close that. Now if I want to go here, I'll go click out here, and then I'll click, and now it's snapping to
that anchor point. So this is helping me to make this snap to
the anchor point. But just be aware that
that is what is happening. And you can turn
those off if you feel more comfortable
without them. Alright? So I'm going
to delete those again. I'm going to click, click. So now you can see, if I
want the Smart guides off, command you, and now
they're are off. And if you want them on, again, command you on a MAC
Control on a PC. All right. So Alright, so now
I want to show you if I want to click back
on this again, again, as I said, I can hold the
command key or Control key, click away, and then I
can click on this again. Okay. Another way I can do
this is hold the shift key, and I can click on it. But you see when I
hold the shift key, it's snapping, so I
need to release that, and then I can continue. Okay? So you can see
this is still selected. I'm going to hold the shift key. I can click right on that point, and it doesn't take it away, and then I can close that. Now, I'm not going to
hold the shift key this time and you'll see
it removes the point. So I'm just going to go command Z or Control Z, and
it brings it back. Now I'm going to
hold the shift key, and I can click on that
point, and it's snapping. All right. So there we go. Now, there's a couple
one more thing I want to show you is
if I zoom in here, you see how you have these
little jagged points. If I command Y, you can see
they line up perfectly. Okay? Again, command Y is view outline, and
that's what I'm doing. Command Y, Control Y on a PC. And I'm just checking these out, but you see these
pointy part bits aren't lining up right. And I'm going to show you
how to turn those off. So I'm going to
select all of these. Well, actually,
first, I'm holding the space bar to get the
hand tool or the Zoom tool. You can get there by typing H. Or but you can
see right here. There we go. That's a mess. Command Y. Everything
is lined up perfectly. So what I'm going to do
is go to my white arrow, and I'm going to click
here and drag across. And that's just selecting
these points here. Okay? Well, it's selecting
these three triangles, these three polygons. Okay? So I have
this one, this one, and this one because I
selected that point, so it selected everything
connected to these. And I'm going to zoom back in. Now, I want to get rid of this, so you can see, here's
my properties panel. If you've gone up here and used your window gone workspace, and if you're using the
Essentials Classic workspace, and you haven't closed anything, you should see the
properties panel. You might see the library, but just click right here
to Properties panel, and that'll bring it
right back up here. The properties panel
is super important. Without the properties I
mean, the properties panel, actually, it's a bit
redundant of what is up here. This is the Options bar. And I remember I recommended that you use
the Essentials Classic. The Essentials work space does
not have the options bar. They remove that because now the properties panel
is the most important. I'm a bit old school. I've been using this a while and the properties panel
has always been there. So I like to keep the
properties panel. If you're working on a
smaller computer screen, you might feel more comfortable getting
rid of that, you know, to save that extra space since you have everything here
in the properties panel. But anyway, sorry for
the tangent there. But I've selected again. I'm going to go to
the white arrow. I'm going to click
and drag across. I've selected these points. And again, I just
want to get rid of that big those ugly
jagged points. So over here in the
properties panel, you can see where
it says stroke. So here in the properties panel, you see where it says stroke. If I click right here, it opens this panel up, and this is the line weight. I can increase the line
weight to reduce it. And here is the
cap, the end caps. And here are the corners, okay? And right here, we
have the corner caps, and for some reason, they just point in the wrong direction. And it looks weird. I can put a bevel right here,
but right here, this is what we
want the round cap or the round corner caps, k? And that fixes that. Okay? So you can see, remember, I didn't do that. I didn't select these over here. So I need to just go in
here and select them. So I'm just going
to hit command A to select all or control a stroke and put those
corner round caps on, and you can see it
solve that problem. And I almost forgot. There's
one last thing that you need to be wary of is again, the pin tool is made
to make Bezier curves. So if I click and drag, I can make these nice
beautiful curves. That's not what we're going
to get into in this class. I as I said before, I'm going to save that
for another class, but you can see you can make
these really nice curves. But there's so much to it, I thought it's a good
idea to introduce it with this simple exercise here is if you're making
these triangles, don't go too fast. You might see me
once I get into it, I'm just clicking away, but I'm hesitating ever so slightly just to make
each of these points. So if I go click, click, click and click, I'm
waiting between each point. If I go, sometimes I might do that where I will accidentally drag, I'll
accidentally drag. And then I'll click and now, you can see it's not
quite a perfect triangle. It doesn't look so
obvious right here. It kind of looks okay. But when I select it, you know, I can see these anchor points have these little
handles on them. And I don't want that. Either you can delete the
triangle and redo it, Or you can come over
here to the Pin tool and click hold and choose the
Anchor Point tool, okay? That's this little upside
down V looking thing. And if you click
on it and release, it will convert that to an anchor point to
an anchor point. So you don't have to
go back and redo it. But if it's more
comfortable for you, just hit that delete key
and click, click, click. Click and then just slow down. If you go too fast, that's when, when you may hit
those accidentally, hit those Bezier curves. And if you really want
to learn how to use the Bezier curves right now,
at the end of this class, I'm going to show you a
game online where you can practice creating
Bezier curves. But for now, we're
just sticking to the straight lines
and corner points. So I think that's everything
we need to get started, so let's get drawing.
8. Creating Polygons: And so I'm going to delete
this mess right here, and I'm going to turn
on my template layer. Alright, so you can really
just start wherever you like. And one of the things that I think is a good thing to
do is on the detail areas, we will make smaller
triangles on the, you know, more broad areas. We can make them
larger. Background, you can either leave a solid color or if you are ambitious
and want to go in and add the triangles there
or the polygons there, you're welcome to
do that as well. So I'm going to start out here. Well, I'm going to start here. And again, this is
sort of a thing that you're gonna
have to do by feel. There is no right way or
a wrong way to do this. Okay, so I'm going to start
out here with the pin tool. I'm going to click on
it. I'm going to make sure that so I'm going
to start out with the pin tool right here
and I'm going to make sure my the I'm going
to start out with the pin tool here and
I'm going to make sure that the smart guides are on. You can see they're
checked here on mine. And again, make sure
the snapping is off. If something feels
off that might be the reason is you
may have snapping on. And the smart guides, you can turn off and
on, depending on whether or not they're
serving you correctly. But once you put a point down
when you click on it again, you know, it go. But once you put a point down, if you go to make
another point on top, it should snap to that
point. Alright. Here we go. So I'm just going to start
out in this area right here, and I'm just going to
make a click, click. Click click. And you can see,
I just closed it. I'm on the Pen tool, and
remember, do not drag, do not do that, you know, by accident
while you're going. Once you start going quickly, that may happen, but again, you can always go back and change that by using
the, you know, change it back to a corner point by using an anchor point tool or deleting the triangle or
polygon and redoing it. Okay? So here we go. I'm here, I'm I have
my first triangle, but here is my properties panel. I'm going to go over
here, and you can see the stroke is at one point. I'm going to knock
that down to 0.2, I'm going the wrong direction. I'm going to knock
that down to 0.25. Okay? And now it's like that. And then I'm going to leave it filled with white because
if I fill it with none, when I go back, I'll have to select the line to select it, whereas with the fill. Can just click in the middle
if I need to reselect it. All right, so we have
the first one down. Now, I'm going to zoom in again. Again, I'm using the
magnifying tool. If I want to start right
again on here, if I click, right there, remember, I'm going to get
that minus symbol, and it's going to make the
point disappear. Okay? So I want to hold the shift
key, and then I can click, and then I can
click on this one, and uh oh, I need to
release the shift key. Okay, so whoops. So now you can still see that you can see this
is still selected. So when I come back to
go on there, remember, if I click on this with the pin tool again while
it's still selected, it will remove that
point because you can see I'm hitting command
Z to undo that. You can see it's automatically
giving me that hang on, I'm off of the pin tool,
that subtract symbol. So it's telling me that it's going to remove
the anchor point. So I do that again,
I'm going to hit undo. If I hold the shift
key and I click, now it doesn't take
away that point. I can do that here.
But the problem on that second one And then I can release the shift key and click here, and I'm good. And then I'm just going to put that triangle wherever I like. I could do a nice
zigzaggi thing here, but then I'm going
to have a pattern. If you want that
pattern, that's fine, but I'm going to try
to mix things up and not necessarily have a
clean pattern. All right. So again, I'm about to
click on this point, so I need to hold the shift key so it doesn't remove the point. I'm right on top of it, and now I can click click, and then I can close it. Now, another way around this instead of holding
the shift key, but this is extra step, so I don't recommend
doing it this way, is to hold the option key. Hey, sorry, is to
hold the command key. And then I'll either go to the black arrow or
the white arrow, whichever I used last. And I can click on
the background, and now I can continue. You know, so it's
de selected now. So now I can continue, and you can see that it
doesn't remove those points. Another way to avoid
even any key commands here is instead of selecting this live triangle is
to come over here. I can click there since
it's not selected, and I can click and begin. Okay. And keep an
eye out to make sure you have corner points
and not curve points here. So I can come here. Again,
over you to this one. Click, click. Click. And I probably want
a little too far. I want to keep that
in the orange. So I'm going to hold
the command key, and I get the white arrow. And I can click one time
on that anchor point, and I can readjust it, okay? So now I can come here. I'm going to click on these. I'm still on the pin tool, and I can click
click click click. Okay. And then after that, you just sort of
get into a groove. And those are that's the
most important part. Click. Click. That's it. So I'm going to just start here. And again, I'm going
to start over here. So I'm just going to start here since that's not selected. Boom. Click. Click. Now, I'm going to go to change my
view to go to outline mode, and I go to view, Outline, or Command or Control. And you can see all of
these points are lining up. So make sure you check to see if your points are
lining up properly. Uh, something's off right here. Think what happened here
because the point seem to be lining up is one of
these has a curve to it. So I'm going to go
to my white arrow, and I'm going to click on this. See, you see there's a
little curve right here. I mean, that little
handle sticking out. So I'm going to go to my
Pin tool, click Hold, and choose the
anchor point tool, and I can click on that, and it will flip it
into a corner point. You see that fix that up. This isn't really, you don't
need to be this particular, but it's good to know because
when you actually start using the pin tool as
it's meant to be used, fully with the Bezier curves, this kind of thing is
really important to know. So I'm going to zoom out
a little and continue. And pretty much that's all that I need to
tell you from here, and you can just keep going. And mark the point in the video where I am
at now because well, But you may just need to come back to the
beginning and watch this again if you start
running into any problems. And you can see I'm just clicking and working
my way around. But rather than hold
the key commands, I start out in a empty spot. All right. Now, although
I need to zoom in here, these didn't line
up quite right. I kind of missed it. So I'm going to show you another way that you can realign these. I can grab the white arrow, click on that and move these. I'm going to undo it, though. One, drop it into place,
it'll snap into place. And that one, click,
snap it into place. Now, I'm going to hit
undo a couple of times. Now, another way And this is
sort of like a little bonus. You don't really
need this for this, but it's very good to know is this is the Lasso
tool right here. If you've used the
photoshop and you use the Lasso tool, this
behaves differently. What this is doing is
selecting these anchor points. So I'm going to click on that. And I'm just going
to draw a circle around this area here to
select these anchor points. So there we go. Now you can see it's selected all
of these anchor points. Now there's the easiest way
to do this is right here in my Options bar is I can align
these horizontal center, and then align horizontal. And you can see
they all lined up. There is a menu item here that
I can go if I can find it, Object, Path average, and this will line everything
up just the same way. I'll show you that. So here, I'm going to use the Lasso tool, select everything, and then
I'll go Object, Path average. And then it gives me this. And basically, it's telling me the same thing that's
horizontal and vertical, which is the same as this, and then I just hit both. Okay. So that's the long way to do it. But I just figured I'd
throw that in there. So, again, detail areas
have smaller triangles. Try to make sure
everything lines up, and I'll see you after
I get all of this done. All right. So let
me just zoom in and Keep going. P for Pen Tool. And like, here is a situation where both of
these points are selected, and I want to go in
here and select. Because if I make a triangle
here, it gets confusing, it doesn't look like I you know, it looks like this is
filled with something. I'm going to hit command Y. So, you know, say I did this. In the outline mode, it looks like there's
a triangle here, but if I go command y,
you can see it's not. So in this situation, I hit undo a few times. I would hold the shift key, click on that anchor point
and then fill this in. Okay? And now you can see
command y, it's filled in. All right, so I'll see
you on the other side of all of these
little triangles. All right. So here, I'm going
to just want to show you that you can add
points to the middle. Like, it's a lot easier if you just go point to point to point. But if you find yourself
in a pinch where you really want to
add one into a line, you just maybe go ahead
and click like that, but then you want to o
in and double check it. Command. Okay. Yeah,
so that looks okay. But you can do it,
but just double check the important thing is that you do not have any
gaps in the illustration.
9. Using Eyedropper to Sample Colors: Okay, so, now you're here, and it's time to
color this thing. And what we're going to
do is sample the colors. So we're going to use
the eye dropper tool. So I'm gonna zoom in here so
I can see what's going on. And this is where making this a template layer
comes into play. So if I hit command y, again, or go up here to view, outline, and you can
see if you're on a PC, it should be Control Y, and you can toggle
back and forth between outline mode
and preview mode. And that's preview mode, where you see the
full illustration and this is outline mode, where you just see the lines and how everything
is constructed. Alright? So I'm going to work
with this in outline mode. So I'm going to hit command Y. There we go. Now I'm going to
go to my black arrow tool, and I'm going to click on
one of these triangles. I'm going to zoom in again. And now I want to
sample this color. So I'm going to hit the eye
key to get the eye dropper. So right here, you
can see if I click, there's the key command, and that's the eye dropper. And now, what I'm going to do
here is sample that color. Okay? And what I did here is when I sampled
it, it filled it. But the problem is, if you
see if I go command Y, This is filled with white. So if I click on here, I can't sample what's beneath
it until I go Command Y, and then I can
sample this color. And pay attention to
where you are choosing. I don't want to click here because that's a
little too gray. I'm just going to try to pick a nice midtone unless I
want a nice highlight, but I'm going to
click right here in the middle and
sample that color. So it has changed. So if I hit Command Y, you can see it gave
me that color. Okay. And now, another
way that you can see what's happening is by
using the navigator panel. But before I do that, I'm
going to my layers panel. I'm going to drag
this over here, and you can see it turns blue
and I can redock it here, so we're safe and
secure right there. Now I'm going to go to window and open up my navigator panel. If I can there we go. All right, so this is
the navigator panel. And I don't use this very often, but this is one of those situations where
it comes in handy. So I'm going to click here. And in the corner, you can see I get that
little diagonal arrow, and I can click enlarge this. Okay? And you see it expands it. And however, if I
have a large screen, I can make this a
bit bigger, ok? So let's see if I can
move in on the sides. I believe it just,
Okay, this works. I wasn't sure if I was going to be able to crop the edges off. Now, basically, what this is
called the Navigator panel, because you can see
here is the box, which is showing me the view. And then here I can zoom in by clicking on that
little mountain, and I can zoom out by clicking. Well, I can zoom
in by clicking on the big mountain and zoom out by clicking on the
little mountain. And you can see, again, here is my preview. So I'm going to zoom in by
clicking on the big mountain. And if I want to move around, I can just click
here and move this wherever I want in my panel. And if I want to move around or to navigate within
the workspace, I can just click and drag this to wherever I
want on the drawing. But the nice thing that we can see right here is
if I go, command, if I If I go on the outline
mode by clicking command Y, you can still see
what's happening. So now I can go to my black arrow or the white
arrow, it doesn't matter. And I can click on
these little triangles, and then I hit y to get the eye dropper
tool, and I can sample. And you can see it
appears up there. Now, Now, instead of coming up here to
click on the Black arrow, you can click the V tool, so I can go V to get
the black arrow. I can click on this triangle, and then I can hit
I and I can sample. Okay? I'll go V as in Victor, click on the triangle
that I want, it I and sample. Now, I'm going to change
things up a little bit here because this is the
way I typically work. What I can do is click
on the black arrow, and then I can click on
the eye dropper, okay? So now it's on the
Eye dropper tool, but if I hold the command
key or control on a PC, it goes to the black arrow. So now I can just click here. Release the command key sample. Click, Hold the command key. Click here, release,
and then sample. Hold the command key, click on the triangle,
release, and sample. Okay, now, there's
a couple of times, there may be some problems
where say this triangle is hidden behind all
of these triangles, and no matter what side
you go to click on, you can't get that triangle. That's when you go command Y, and then you can select it here and then go command Y again, and then I can sample. O command Y. Hold the command key to get
the black arrow, click. And then go command
y again and sample. Now, if your colors are not, you see here,
they're full black, where this is my template. Actually, I'm going to
go in the template real quick to make this a
little more obvious. And I'm going to double click. And the default is for that the image to
be dimmed to 50%. You can uncheck that, and you'll get 100% color, and you can sample that way. But I have found in the past
or maybe an older version. I'm not exactly sure
why it would do that, but it samples the
tinted version. So if you're having trouble
with that tinted version, just double click
on the eye dropper, where it's not sampling, and make sure that
your appearance panel, right here, you see appearance
is unchecked, okay? And then you'll hit okay. If that is checked,
you can also just hold the shift key and
it'll do the same thing, but then you have
to remember to hold the shift key every
time you sample. But again, double click on the eye dropper tool and just make sure
appearance is unchecked, and it should behave
the same way M does. If you're still having
trouble with that, you can always
duplicate this image, and I'll do that real quick. I'm going to copy that, then
I'm going to lock it back. I'm going to click
on the drawing layer and paste this on
that top layer. Then I'm going to
scale this down. You can see it's really large, so I'm going to click
right here in the corner. I'm going to hold the shift
key to keep it constrained, and I can put it up right there. And that way, I can
sample from here, but I usually don't do that. But if you're more
comfortable sampling from there or working
with it like this, so I can just click there, hit the eye and sample
colors like that. This might be a quicker
way for you to work. And you don't have to
keep on checking those. And make sure that you
keep a lot of variation in the triangles with the color. You don't want them to
all be the same thing, because then they can
get a little boring. And sometimes when
you're doing this, you can even sample
from another triangle. I can select that, sample that, click
here, and sample that.
10. Sampling Colors Continued: [No Speech]
11. Adding a Colored Background: Now I need background, so I'm going to click
on this rectangle tool. I'm going to hit
command y again. Well, actually, I
don't need that. I'm just going to
draw a box here. And line it up behind the
bird for the background, I should have expanded the log, but I didn't, so I'm just going to go ahead at this
point and just crop it to make this fit. I'm going to send this
to the background. I'm going to go object arrange, send it back, and that'll
send it behind the bird. I'm going to go turn back
on my template layer, hit command Y, and
I'm going to sample. I mean, if you want to add more detail and go in here
with more triangles, You, you know, that's fine, but I'm going to take
the lazy way out, and I'm just going to sample the background and see
what this looks like. So that's going to
be my background, a nice solid background. And I need to crop this
image to the right size, you know, so that this
fits the document. And again, you can
extend the drawing, but again, I'm going to
take the easy way out. So I'm going to
come down here to my artboard tool down here in the bottom of my layers
pan. I'm going to click. And then I'm going to click on that anchor point right
here and drag that over so that it
matches my my drawing, and then I'm going
to come over to the other side and
do the same thing. And there we go. Okay? Now I'm going
to click away, and I'm just going
to check the edges. It's better if you are unsure
if this is lined up right, it's better to go
just a smidgon over, just a little bit over just
so that you can, you know, if you go to print it, it
will go it will print as far out as you can you
know, as it will go. You want to make sure you don't
want to have a thin line. Although most home printers do not go to the
edge of the paper, I still like to do
this just in case. And if you print it, you
can always trim it down. Okay, so now the final
step is, well, actually, I'm looking at this,
and I'm seeing this background color and
what I have going on here. It needs a little more contrast. So take a look at the
areas that look like they don't quite fit
or don't read right, and you can go in
and fix them up. So I'm going to come
in here and see if I can lighten this up. Actually, I can
just sample from. I'm going to hit eye to get the eye dropper
sample from there. Click on this one.
Maybe this darker, a little bit lighter color here. And maybe this one, I'll
go a little bit lighter. And one more. Not sure about that. Actually, not enough contrast. Let me go Command Y, sample color here, see if
that makes a difference. Maybe a little lighter, and maybe go over to
this other triangle. Get in there. Okay,
I think I like that. So I'm going to click in this gray area of the background just to deselect everything. And we're good to go. So I'm happy with
that. Again, if you're zooming around and
say you zoomed out too much, just hit command zero or
control zero on your PC, and that will fit this to screen, and I'm happy with this. So now we have one
last step to go.
12. Saving the File as a JPG and PNG: That is to save to
export this out, because right now, I'm
going to get file save. And you can see, I've already
saved it and named it, but this is a.ai file. This is an Illustrator file. If I go to upload this to the project area,
it will not work. So what I need to do is
save this as a JPEG. So I'm going to go file
export, export as. And right here, it says P&G. Well, actually, I can save
this as a PNG or a JPEG. Either one of these is fine. I'm going to go with JPEG since I already said I was
going to go with JPEG. I'm going to check U artboard, because if I export this as a JPEG and I don't
check this artboard, this little bit extra area
out here will show up. And you can see there's a little green outside of
this branch here, and this will make sure
that doesn't happen. Only this box, what's in
the art board will export. So that's one way exporting
as a JPEG, and that CMYK. That is the best way
to export for print. And I can adjust the quality. And the reason I would
adjust the quality is just depending on the size. Right here, this one says
the resolution is 150 Hmm. 150 is a good size if you're going to upload
it to the project area. But if you want to print
this out for yourself, I would save it as a high resolution image
at 300 PPI, and then hit. But I'm going to
leave this at 150 since I'm uploading this
to the project area. And I'm going to hit
okay. Did I hit it okay? Let's hit it again. All right. And just so you can see
the difference if I save export it as a
PNG, what will happen. And again, the P&G is
better for digital. So technically, if you're uploading this to
the project area, a PNG would be better. So it's set for PNG. Pay attention to where
it's going to export. Okay, so we're going
to export this. Make sure you check
the Ue artboard again. If you don't, it's
not a big deal. You can either go with it or you can re export it and
check the artboard, and I'm going to hit Export. I've already done this, so
it's telling me to replace it. You can choose, do you want
this for uploading online? I'm going to go
with 150 you know, the medium resolution, if I
was going to print this out, I would go with 300. And I'm going to leave
it at 150 and hit. Okay. And it will save it out.
13. How to Upload Your Project: Once you've completed
your project, I hope that you will
share your work with others and upload it
to the project area. And here I'm going to show
you exactly how to do that. So you can see here
I'm on the class, and down here, we have tabs
where I can, you know, there's reviews,
discussions, et cetera, and we want to be on this
project and resources area. And in order to submit the
project, it's quite simple. You know, once you say I'm going to click here on reviews, and then I'm going to click
on Project and Resources. Is that simple? And then I'll come over
here where it says, My Project, I'm going to
click Submit Project. Now, you'll give it a title. I'm going to call this two Can and I'm going to
put my description. This is the inch Instructor. Now, in order to upload it, I'm going to click upload, but you'll notice here,
it says cover image. And I'm going to
upload this twice. So I'm going to hit upload here. And I'm going to
navigate to the piece. And I have saved a P&G NA JPEG and PNG
is best for digital. So I'm going to click Open. And you can see it's uploading. The problem that I have
with this cover image is you can see if I
zoom in and zoom out. That's the best I can do. If it's a horizontal image, you can't show the whole piece, but I'm going to hit submit. But then I need to upload it again if I want to
show the whole piece. Sometimes you'll
have an image that fits the same dimensions
as the cover image. But if not, it's better
to upload it again. So I'm going to
click Image and put that right there, P&G and open. And now you'll see the
full image is uploaded. There is a limit. I believe
there's a two megabyte limit. If you create an image
and it's too large, you can always re
export it and where it has the area where you
can adjust the quality. But as I recommended in the previous video
where I showed you how to export the image, a medium resolution
is probably best. And it's that simple. If you want to put any
comments in the description or ask me a question about something or point
something out to me, feel free to put that
in the description. And I'll try to respond
to everyone when they when you post
your work here. And that's pretty much it. So I just need to
scroll back up to the top and hit that
published button, and we are good to go.
14. Thank you!: Thank you so much for
taking the class. I hope you enjoyed it, and I hope you learned
something new. I look forward to seeing
you in the next class.
 Aaron Porter, Illustrator