Transcripts
1. Intro: Krita Digital Painting: Welcome to digital
painting and Krita. Or are we going to use the
free open-source software to create a still-life. Hi, my name is Aaron. I'm a graphic artist and a digital art instructor
at a junior college. I have a master's degree
in traditional painting, but over the years,
I've developed an interest in digital painting. So even though I take advantage of the benefits
working digitally, I also rely heavily on what
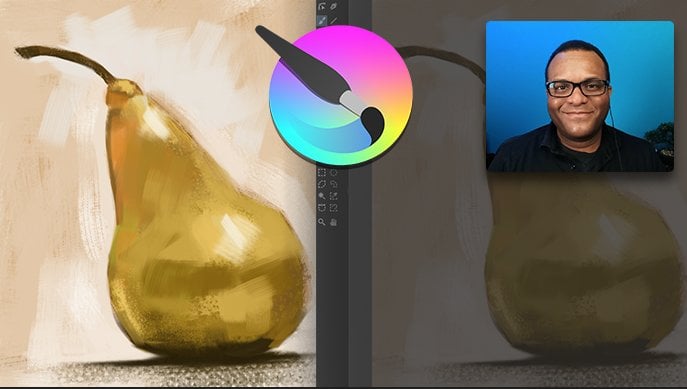
I learned as an oil painter. This course is based on
a simple still-life. The course will cover
everything you need to know to make this particular
digital painting. But if you want to
learn other techniques, make sure to check out my
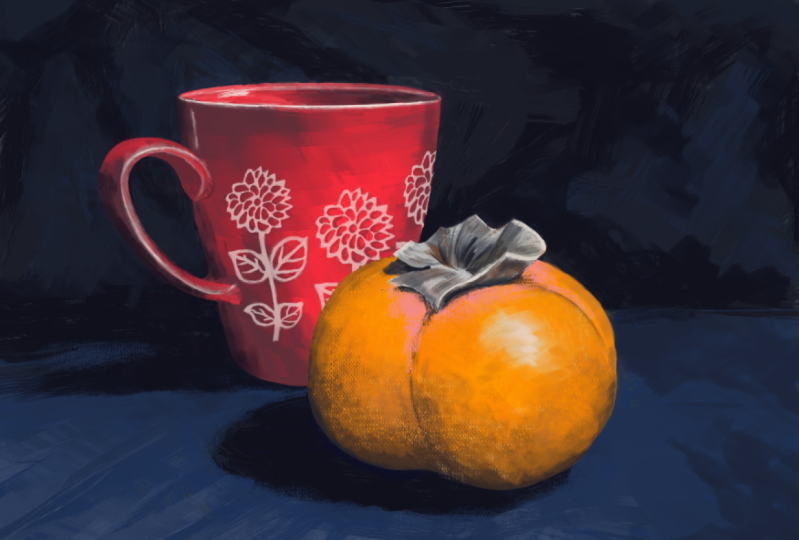
other two previous videos. This is the piece that
we'll be working on. It's an Alabama style, which simply means
it's done all at once. This is something I
hope you do quickly. Once you complete that project, I hope you upload it and share
with others in the course. I look forward to showing
you some new techniques. So pop on over to the next
video and let's get started.
2. How Videos are Organized: Here I just wanted
to talk about how the course is constructed. Basically, this is me
doing a digital painting from start to finish and explaining my process
as we go along. But I've broken it up
into a number of pieces. I mean, the entire
time is about an hour-and-a-half
and that's roughly about the amount of time that
I spent doing this piece. And there are some bits
that are sped up at high-speed when I
don't really say anything that I thought
was very important. But for the most part, what I did is I started each new segment when I
said something important. So if you want to just
watch the beginning part, part of the video of
each of these lessons. You can maybe watch
the first minute or two and then skip on to the next if you're having
trouble watching, watching me go through
this entire long process. So you can or you can
watch the whole thing. It just depends on how you want to consume the information. Another thought is you can watch the beginning
and then put it on. Maybe put it on in the
background as you create, as you work on your own drawing. Or you can play it at a
higher speed if it's just, if there's just too
much information. But again, the main point is the important information is at the beginning
of each segment, so you do not have to
watch the entire video. These titles will be different because I haven't
edited these yet. But you can. So you can see repositioning the sketch, blocking in color, making corrections,
carving shapes, rotating the canvas, and
different things like that. So hopefully this
will make this more enjoyable for a number of different people depending on how you like that information. And I hope that you enjoy the course and I look forward
to seeing your projects.
3. The Course Project: So the project is basically to follow along with
what I'm doing with the demonstrations and create your own digital painting using the reference
material that I have here. And once you've completed
your digital painting, upload it to the project area, and I'll explain how to upload the file in a separate video.
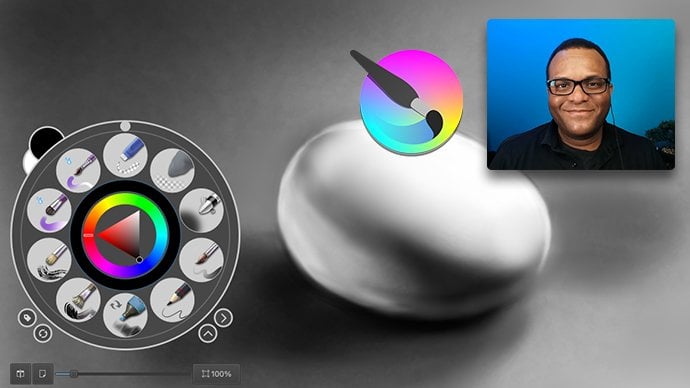
4. Creating Custom Color Pallet: Hi. In this section I want to
show you how to use pallets. Sometimes when you're painting. Often the pop-up palette, choosing the color picker in the hue slider
and all that stuff. It can get to be a little
tedious because you can't get the same
colors all the time. Sometimes you know,
you, you lose some of that harmony
that you get. Like when you're painting on a regular palette with paint, you use the same colors, you mix them and change them. But there's still a bit
of harmony that comes about in your painting because you're using
those same colors. And I want to show you one
way that I like to do that. While using critter years ago, I used to use prisma
colors all the time, and I grew accustomed
to using that palette and it affected my style. So what I'm going to show
you here is how to find a color palette that
you like and use that. Hopefully I won't get myself in any trouble using the
PRISMA color palette, but you can use any color
palette that you like. If there's a set of
markers that you've grown accustomed to and
there's certain colors that you like or you paint. You can either scan them in or find those on the Internet. But anyway, here we go. Let's see what we have here. Alright, so I'm open up Krita
and I'm in version 5.1, 0.1, what I wanna do here is I'm going to
start a new file. And I'm just gonna go with the default is because it
really doesn't matter. So I'm just going to hit Create. From here. I've already gone on the
internet and I've searched, and I've found this
Prismacolor colored chart. So again, you can go to the internet search like I
used to use Rembrandt colors, say there's colors,
Rembrandt, painting, paint. And let's see what
kind of color chart we can find their color chart. Here we go. So say if there was a, a color chart that you liked, you know, different
kinds of paints, you could just use
something like this or, you know, search, search wherever you like,
whatever color palette or again, create your own. I mean, you can
hear, just sample directly from these paints here. Okay? Alright, so I'm
going to close this down and I like the Prismacolor. So what I'm gonna do, I'm
going to open up credit again, and I'm just going to drag this in and I'm going to insert
this as a new layer. Okay? Alright, so in order to
create this palette, you see here actually this is the Prismacolor palette
that I've already created. So I'm going to
click right here. Well actually if you don't see this, I'm going to close that. Alright, so I'm gonna
come up here to the top and I'm going
to choose settings, and I'm going to choose Dockers. And again, if you
don't see the Dockers, just make sure you
check, showed Dockers. And I'm going to come down
here and choose palette. And that pops open. Alright, so I'm going to tear this off of here, this darker. And I'm going to just
expand this a little bit. I'm going to move my cursor
right here in the bottom. It's a little finicky, but, but when you get
that double-headed diagonal arrow, you good. And I can expand that. There are other palettes
that are in here. Actually, one of my favorites is right here. I'm going
to click right here. You see where it
says Prismacolor because this is one that
I've already created. I'm going to click right here. And you can see their
different palettes. And the one I like is
this one right here. It says swatch CMYK or
actually swatch RGB. And if you click on that, either of those I
just like because they're sort of
circular palette. But there's, again, lots
of different things here. This is a nice one. And swatches. You can see here actually kinda feels like
an oil painting. I think I might like this one. It has lots of
blacks in here too, and it goes out to the
warm and cool whites. Alright, so if I want
to make my own palette, which is quite simple, I come down here again
it to get to this, once I have the palette open, I click right here on the little swatches and
I click right here. And it may say something
different because before mine say prismacolor. If you just click on that
little color chip right there. And it opens this up. And then down here, you can choose the
little plus symbol, and I click on that. And I'm going to call
this PRISMA color. Prisma color too. I'm going to hit Okay, Say palate and the
current document. And I'm just gonna hit OK
without saving that there. Alright, so I've zoomed in here and I'm gonna go over
here to my toolbar, and I'm going to
choose the eyedropper. And I'm going to click on that. And then right here I'm going to sample the first
color here, cream. I'm just going to click there. And then when I come over
here, I'm just going to click. So I want to name these colors. It's a bit tedious to name it, but since I'm trying to match it up with these colors here, I want to remember the names. I mean, when I was drawing with prismacolor
pencils all the time, I definitely didn't remember
the, the Pantone color. I always went by the name. So from here, I'm just
going to select the, make sure the color is selected, That's the first color. And then down below
here where it says prismacolor to my palette set, I'm going to click on this
little pencil icon here. And from here I can
name the color, and I'm going to click on
that and type this in here, and this is called cream. One problem that I had is
the first time I did this, I went through the whole
set with by doing this, by clicking and dragging
over, dragging over the name. I'll show you what I did. So make sure you don't do this because you'll
just waste your time. Alright, so eggshell, I'm
going to sample that. And then I'm gonna come over
here to the second spot. Click and do not do this, rename it and think you've saved it because you
move on to the next, you think you saved it, but
you see when you come back, it still says color too. So make sure you
come to the pencil. And I'm going to rename
that color swatch name. And I'm going to call that
egg Shell and hit okay, Alright, so I'm gonna do one more and then I'm
just going to speed this up because I'm
sure you don't want to watch me go
through all of these. And that's pretty much it. You can probably skip to
the next video if you like. One thing I want
to mention about this is when you add the colors, is if you click here, it's going to add that
new color in each slot. And if I hit undo, oops, as you can see, it doesn't undo it. Edit, Redo, add layer. So what you need to do is
click here on the little trash can to get rid of those. And here you can see
I'm on this old slot, but I'm going to sample
the color anyway. Well, I'm going to
click here yellow, orange so I can remember
where was that? I'm not going to go
to the new slot. I'm just going to see a yellow. Orange was the last one. I'm going to sample
the color sample. And then I can click here, okay? And then I can name it. So it's like this. It's kinda tedious,
tedious little jazz mine. It tedious little procedure
you have to go through. So I'm going to sample
the color and you can see what it's doing
is jumping up here. What it appears to
be doing is jumping to the color closest, closest to what I
have just sampled. So I'm just going to
get yellow ocher. I'm going to sample it
and then click here. And then I can rename that. And that's it. And that's it. I'll see you in a bit. So that is how you
can create palettes. You can either create
something completely original, creating your own colors, or you can find something
that already exists and use the techniques
that I showed you here to bring
that into Krita. Or you can use my favorite
technique which is to find the palate them
already comfortable with that exists somewhere else, and then create
or add to that on the fly as I work when
I create my own colors. Anyway, I hope this was
a helpful technique for you and I'll see
you in the next video.
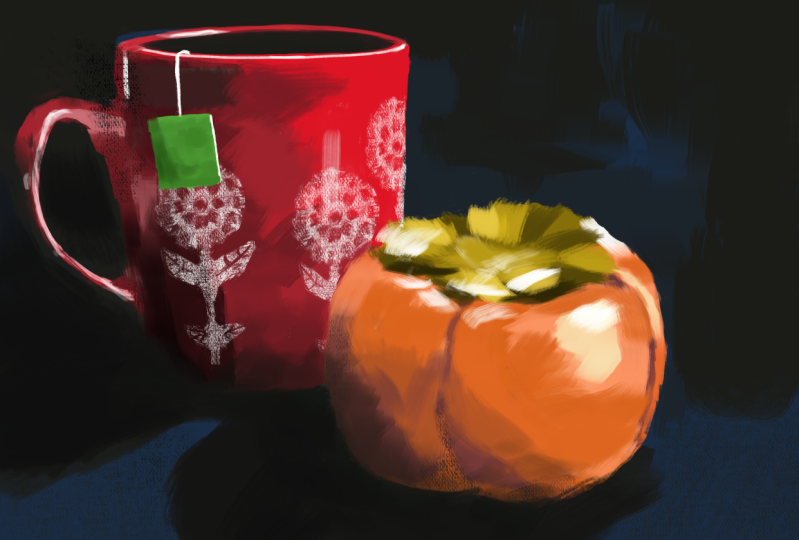
5. Installing Brush Bundles: So for this digital
painting, I am, I actually broke
out my camera and put up a light and took a
few pictures of my own. I kept this still life, very simple, but this
time there's two objects. Actually, if you want to count the spoon and some of them, there are actually
three objects. There's a teabag
here and I left that in there because I really
liked the contrast, so that green up
against the orange. So here I am going to
choose one of these. But you can feel free to
use a different one of these images if you decide that you just want to do
something a little different. So you can still follow along. I think I'm gonna go
with this one here because I like this one. But this one has the, has the little green
of the teabag. And I doubt that I paint
those flowers in on the cup, the design of the cup. I'm sure, I'm pretty
sure I'm going to simplify that quite a bit. So I guess that's it. So from here, let me open it up. Open with always open this
up in the preview mode. And I'm going to open up Krita. So I'm going to go up to here
to Image, Resize Canvas. And I'm just going
to flop these. Well, there's 8.27 and I'm just gonna go
eight-and-a-half by 118. No, that's the width. I'll make that 11. And make this 8.5. That's an American letter
size document, not 5.58, 0.5. But you can do just rotate the A4 size if you prefer that. And when you happy with that, I'm just going to hit, Okay? Alright, so from here, actually that kind
of fits this image, but you can extend
it however you like. It's a little cramped
here at the bottom. I'm probably going to
extend that a bit. Alright, so I just uploaded
these new brushes. So I have these here. There's a folder
called speed paint, but I also put these in here in this folder called
sushi brushes. If you watched my last video
where I went in and I made, and I installed these
brushes right here. Here's another one
that you should install because I want to
work with these brushes here. Alright? And I'm going
to bring them in and then I'm going
to install them. So make sure you
install this one. Credit for. If you want to follow
along exactly, you don't have to follow along with exactly
the same brushes, but it'll, it'll be nice to try some of these out and
see what, see what you like. So critical for. And it says extra credit
for extras free brushes. And I'm going to click on that. And you can see
here is a list of all the brushes and he has a little demo of what
how you can use them. I'm just going to cruise
through here because you can see I have this
one in this group. Um, so, yeah, so there's this
palette knife looking thing. There is actually, that looks
interesting right there. And this canvas
one, I like a lot. I really like this, it. And I'm going to bring you can see I've already
brought that in. And then we have, this is a very this
palette knife, although I don't think
that's from within here. That might be one
of the defaults. You know what? I'm just going
to make a separate video. So here I'm just
going to show you exactly where I found
each of these brushes. So well. These first 41, while
not the first four, these four here, 1234. These are the speed
painting brushes that I showed you how to download. Now, I just need to
find this eraser. I believe this, this and this. These three are also in the from David reservoir
but in a different, a different set, a
different bundles. So I'm going to
hover my cursor and you can see, there we go. Alright, so I'm just
gonna go back to my sushi brushes or speed
painting there these. And if I hover my cursor here, you see if I move my
cursor disappears, but if I leave my cursor alone, you see the name at the top
and at the very bottom, you can see it says this is in a bundle speed painting
is under brushes, be painting for credit five. Alright? And you can do that
with each of these brushes. So by doing that, I can go to the squishy brushes and I can do the same
thing. There we go. So you can see this one
is in, it says Dryad. Hang on. It's
divide bundle 2021. And this is I believe
is the same thing. Extra credit for extra bundle, okay, this is a different one. Alright, so this is
credit for extra bundles. Okay, Let's see
where this one go. Okay, I just loaded that one. Alright, this one, and you can see it says credit for default. So this is my, I thought this was one
of the default brushes, so critical for default
resource bundle. And this should probably
be the same as that credit for default resource bundle. So that's how you can locate all of these brushes in there. Basically, I believe Hang on. I missed this one. This one's in credit for
default resources bundles. So they are in the three, there are the, therein, the speed painting
and their defaults. And then there's that critique for bundled by David
where Ofwat's. So that's where you can find all of the brushes
if you want to use the same ones
that I am using.
6. Creating Your Document: If you don't have credit
installed on your computer, just do a quick search
of Krita on Google. Ita, and you can download it, install this
software from there. It will not work on a, at least as far as I know, create a will not work on a
Chromebook or a drawing pad. You'll need a regular
laptop computer, either Mackintosh PC or Mac, Macintosh, Windows
or a Linux computer. So here I'm just going to
click on this alias of the application to
open it up here. We're in version 5.1, 0.1. There is a new version out now, but it's a minor version, a minor update that, so I haven't bothered
to update it yet. Alright, so we're going
to open this file up. And I am going to click right here where
it says New File. I'm going to hit New. And you can see the have
documents sizes here, pre-made document sizes
that you can choose. But I'm gonna go with custom. If you don't want to
bother with the customer, I would just go with an A4. But what I'm gonna do
again, I'm in the US, so I use a the American
letter size document. So I'm going to change this 2 " and I'm going to
make this horizontal. And you can actually, mine was I think it's saved
this from the last version. It's eight-and-a-half by 11. I don t think yours
would say that, but if you want to work on the exact same size document
that I'm working on. This is it, but you can change the document size as
you, as you like. So the important part though, is to have a document
roughly this size and the resolution
at 300 pixels per inch. If by some chance your computer
is slow or struggling, you can lower this to 200, see how that goes. Or maybe even lower it to 150. You can lower it more but I wouldn't but I definitely
would not go below 72. Okay. That's as low as I would go, but these are the settings
that I'm going to be using. But again, you don't have to
use these exact settings. Alright, and now that
I'm ready to go, I'm just going to click Create. And you can see when
this new document I have a background layer and
I have a paint layer. Just make sure you, when you
begin painting that you are on the paint layer and
you are good to go. Well, that is not exactly true. We are not good to go. You want to save your file, so I'm going to go File, Save As, or just hit save. Since it hasn't been saved yet, it's going to force
me to give it a name and then
just give it a name and make sure you pay attention to where the
file will be saved. You can click and choose a spot. But critic does have an autosave and it will
save these extra documents. So you want to keep
an eye out for those. If you don't want them to
clutter up your clutter up your computer with
all these extra file. So I tend to try to save
regularly and I will go back and toss those extra backup saves when
I have the chance. But anyway, give
it a name that you can remember and
that you'd like. Then just hit the save button. So for this little demo, I'm just going to
call this painting and hit the save button. And it will save it as a K. Our angle on it
should be in here. Oh, wrong file. I put it here. Alright, so it's inhibited
some other things. There it is, painting, critter. And this is not the final file, is saved within
credit and it will not open up within
all the files. So when you're done with it, we're going to save it
as either a JPEG or PNG. But for now, we want that working file as a
credit file, and that's it.
7. Start Painting: We have our image. And again, whichever
one you choose, if you want to download
the reference images, click on Projects and Resources, and you can download
them right here. And the very first one
is the one that I used. So you choose to use, I'm going to make
this really small. Here we go. Alright, so what
I'm gonna do here, so you can see how I
work with the keyboard. So right now, Oh, I think I lost my
drawing tablet. Yeah, you got to
turn it back on. Connected. Alright, now I'm going
to hold the space bar and I can move that n. Not sure what's happening
right here with this. I'm just going to paint
that white click on that layer because I find
that rather distracting. So, alright, I'm on
the top layer and the first thing I need
to do is to build, to sketch these things in. So none of these are really
great sketching brushes, but anything will do so
I'm gonna go with this. I'm also using those
colors that I used, that I create it from
the Prismacolor pencils. You can use whatever you like. You don't have to use these. And actually to start out, I'm going to do a base
layer and hang on. Yes, So I'm gonna
do a base layer. I'm going to start out with a just something because the
background is very dark. So I'm going to start out
with a very dark background, maybe a gray, grayish blue. And then I will start
to draw on top of that. Alright, so here we go. I'm going to use this one, this brush right here, which is the come
on, show it to me. Flat paint, brush creamy, although it's gonna be
doing a little blending, but I really don't
care about that. The blending, I'm going
to hold the Shift key and just stretch out that brush. I'm not going to tell you every time I'm using a key commands, but I do want you to
see how I'm doing that. So I'm going to start. Yeah, that looks good. You can see this is
kind of moving my there's a quite a bit of a lag here using such a big brush. But it'll get everything
in there eventually. Alright, now I'm going to
hit this with this canvas. Again, make that a
little larger using the little canvas brush, you can see that nice texture you're getting with
this canvas brush. Now I'm going to make
a new layer here. Alright, so we have this one
thing I'm going to do here. I'm going to right-click. And this is the brushes that
I've been using previously. And you can see I have some
of these brushes here, but I still want to use these, but I want to get
to that pencil. What is, what are
these cold here? I'm just going to
grab a pencil here. Whatever brushes you have, I'm sure if you
use the standard, you should have the base. Let me see. Basic. No, we don't want that tag. I'll just go with paint. And then I can use one of
these thin brushes to draw. Alright, so I made
a new layer here, and this is where
I'm going to sketch. And this time I'm going to
sketch with a light color. Okay? So I am just going to just sketch it out and
get them on a new layer. So I don't have to worry about messing up everything below it. I'm not real concerned about
being very, very precise. I just want to knock this
in here and get this done fairly quickly.
It's more enjoyable. There are times when I
want to be very precise. There are times when I
want to be very precise, but this isn't one of them. I just want to get this in here, but I'm still going to
take a little bit of time. So what I'm doing,
I'm just comparing the constantly looking at
the shape and the size. And you can see how here in
that fruit that intersects, and this is a persimmon and it just sort of intersects
that bottom corner. So that's what I'm
using for my relation. And I'm just going to go
ahead and do that shape. Alright, then I'm going
to shoot straight across here and then try to get
that nice and round. Again. I'm not going to be real. I'm not really concerned
too much about I'm getting that
precision right. But I'm still trying
to try my best, but I'm not going to
kill myself over. So I'm just checking a
relationship and I can see that shape that's forming if
I ran a line across here. So if I ran a line across
here to get that shape, it should be connecting
about right here. So that should be the shape. Then I'll just sort of
not that shape in there. And I'm just gonna do a general, the general shape of
that piece up top. And if there are any
button this out there, you probably can tell me what
would that thing has got. Alright, so now I'm looking
at the different shapes. Hang on. I got a weird I clicked
on that. There we go. I'm just trying to check the shapes of each
of these things. But again, like I said,
I'm not going to drive myself crazy because
I want to enjoy this. There are times when I will
want to be more precise.
8. Repositioning Sketch: Alright, so I can see
that I have gotten, this is too far off center. So I'm gonna go here
to the move tool. The arrow hits that
guy right there. So I'm going to click here
and you can see I can reposition it and put
that in position. Now, I'm just going
to take the eraser here and click here. Well actually I need to
go back to my brushes. Can hit B, and then there we go. And there we go. I can
just scale that up. And again, if you're
more comfortable using the pop-up palette for
the size are coming up here. That's perfectly fine. I just find using some of the key commands
of just a bit faster. And once you get used to it, it becomes quite intuitive. And once it becomes
second nature, you really move quickly. You don't think much about it. Okay, that looks good to me. Alright, so that's my sketch.
9. Blocking in Color: So now I'm going to make
another new blank layer. And here I'm just going to
start dumping in the color, but I think I'm going
to start out with this black and chunking. Dig in some of those
those dark values. Actually, I'm painting
with my paintbrush. I'm like, why is this being
so weird? Here we go. Okay, So I'm kinda switch. Actually there are other
brushes that are ready to use. Let's go with this
one. I'm going to again just hold the Shift key, knock that to hit that. So it comes up and I'm after. I'm trying to get some
of these strokes in here because I want it to have a bit of a painterly look and I'm
going to go back and paint over that because I wanted to
have a little bit of life. I'm not being very
precise right here. And let's see, I'm going to
start mixing some colors. So I want to knock
in some darks, but I also want some, some color in here. So there we go, that nice
dark blue, little too dark. So there we go, That looks good. I just overlap them
and then I can sample the color until I get
something that I like. I actually got lucky. It might be easier if
you wanted to click on this little blending stump. You can smudge it a little bit. It'll be a lot easier
to mix those colors, that, that's a lot easier. And then I can go back to that palette knife and I
can sample where I want. But right now, I'm
still interested in and keeping a lot of
brushstrokes going here. I don't want to don't want
to get too smooth just yet. So I'm just going to
knock that in there. Again, this is all
on a separate layer. But if at anytime you feel like, oh, I really like what
I have going on here. You can always loops. You can always go back and choose a new layer,
make a new layer. So it'll be easier to hang on. You can always make
a new layer on top. I'm just going to, normally, I'm still happy with this. I'm gonna make a new layer here just to show you what
I'm talking about. So yeah, that's all. And just go back-and-forth. And one thing that I like
to do is to zoom out. So I can see the zoom-out or
flip it so I can hold the, the, the amount of Mac I'm holding the command key and the Spacebar and I
can just drag out. And I kinda like that. Alright, another thing I can do, I can right-click to bring
up the pop-up palette. And then I can use
the flip tool, but flip the canvas, but then it's just easier. Hit the M key. Although by flipping
it just now.
10. Making Corrections: You probably hang on. You probably already saw this, but I couldn't see it. Is my cup here. Looks a bit wonky. I, when I flip it, I can see it's, it's wonky, it's
not symmetrical. So here, from here, I can fix that. Actually, what I'm
going to do is see if I can use one of these
nice thin brushes. And if this is the base, That's where the base would be. See if I can fix it. I mean, I say I want it to look nice and relaxed
and all that. But I still want it to look. I still want it to look real. I don't want it to be so relaxed that nothing looks right. I think it might be
time to switch brushes. I'm going to go to
this one and this one. And actually it'll work a lot
better when it's smaller. You can see it. If I draw a Hang on, I'm going to sample the black
and paintings of the blue. And you can see what it does. It just sorted. It trails off, but watch it. It almost blends
a little bit too. I find it a little hard to
control just a little bit, but I do like this. I like the way it adds
a nice soft touch. We go. And you'll notice I'm
not covering up all of my all of these brushstrokes
I can kinda leaving, leaving some showing through. I'm sampling the blue by
holding the Command key. I get the eyedropper. Again, if you're on a PC, that's probably the Control key. So a lot of these key commands
and things I'm doing, I am now I'm going to switch
over to this other brush because I want that
brushy feel to it. I'm holding the Shift key
and you notice I'm reducing, enlarging the size very quickly, just sort of on the fly. And then sample, I just hold the command
key to sample it. Bring that back. And you see I'm kind of trying to keep
those strokes and I have to build that
handle at some point. Alright, so here,
I'm happy with this. I'm going to make a new layer. And I'm going to come
up here and I need to add that orange. I'm just going to knock
it in there real quick. I want a little too far here, but I'm not real
concern that I went too far over because all I
have to do is hold that, hit the E key, bang, and there's my eraser. You can either come
up here and turn that on and then I can just
trim that off of there. And it's all C or
pop-up palette. Same thing. Alright. Okay, I go back to B and hit the
heat and get off of that. Okay, I still on E. And what I'm gonna do here is I'm going to hit a
little red in the back, although that red
is not quite right. So I'm going to start mixing
these up a little bit. Actually, I'm going to go to
that smudge, brush, smudge. See if I can smudge out a new color and then I'll go
back to this other brush. Now I can sample it. Looks good and need
a darker color here. And if it's not blending this, these pencils, they are very
much like a pastel look. So if you want a softer edge, it's a lot easier to
control two legged at sea. But I don't know, I just like
the very brushy strokes but whatever whatever
floats your boat as they say whatever you like, I'm just going to swing
across and try to get this all in one stroke. Here we go. And then I can hit E and
try to take it out. Again. This is working like
this because I'm on a separate layer. I'm going to sample that in
this color I know is off. I'm going to sample it, bringing some of that end. And again, this is
supposed to just be a quick little quick
painting here. Again, I'm trying to keep
this nice and relaxed. We go. Another thing to keep in mind is pay attention to
those darks and lights. Actually, I haven't been
checking it, so zoom out. Get a good look at it. Alright, flip it.
That's the M key. I can still see the cup is still a bit off, but
we'll keep going. All right, zoom in. Actually, let's try this. Oh, I like this brush
here. It's that one. And I know this
color is overkill. I know it is not the
same the same as what this the cup actually is. But I like the color. I guess this is what you
would call artistic license. Now I need to darken
this up and I kinda feel like I got some
things going on here. So I'm going to make a
new layer in case I, so I don't have to mess it up. I'm going to try to
get that white rim in there rather than
go hit the white. I'm just going to see if
I can sample from within the painting on this sketch, but it's not coming
out wide. Here we go. Bang, bang. There we go. Alright. And see if I
don't hit it right, Just hit that Z, Command Z or Control
Z to get rid of it. Hit the E, c. This is one of those
things that I like. If I am just going
to erase this, I could come in here with a very sharp pencil
or brush and draw E. And draw that line. Actually. That worked out pretty
good. I kinda like that.
11. Carving Shapes: Alright. Alright. So I guess
I'll leave it. But what I usually do is say, I want to draw this part here. What I normally do
is I'm just going to knock in that shape actually,
I don't want that brush. Let's try it with this. Here we go. I'm going to
knock in that handle. Again. I'm not worried about
it being 100% precise. What I'm more concerned
about is that it looks real, at least with this. There might be times when
it is more important. But here, again, as I said, I'm just having a good time. So I'm going to sample, makes sure that
shape hit the E key. And then I'm just,
just chipping away rather than trying to
draw it all at once. I'm just sort of chipping away at it with the eraser to try to go back and forth
if I take too much Alf and I'm just trying to
keep that brushy next to it. I think that looks good.
Again, if I go too far, just hit the E key
and Chairman away. Alright, so now I'm going
to sample, and again, remember I am on
a separate layer. So I don't have to worry
about going too far. So if I, oops, mess up, I'm not touching
those layers below.
12. Rotating Canvas: So I think I like that. Alright, so here I'm
having some trouble getting my hand into
the right angle. So I think I'm on
this drawing tablet. Actually. Let's see, rotate. Hang on. There we go. So I can rotate the
canvas like this here. Or I can use the pop-up palette and I
can rotate the canvas here. No, not here. Here. So I can rotate it so I can
get that angle right there. Now I forgot what I was
trying to do. Hang on. Maybe click rate
to bring it back. Alright, It'll come to
me what I was trying. I was trying to do
this angle right here. So if I rotate it that way, I can space bar to get that up. Now I can not quite right. Whoops. Now I can get that angle here, but I'm going to sample
some of the dark. Actually, this wasn't what
I was planning on doing. What I was planning on
doing was less rotation. And I wanted to come
across here so I get those strokes going
across in that direction. Like that. See, I just loved the
brushstrokes that this makes, but it's not always the
easiest to control. Don't always know
what I'm gonna get. You see, I'm sampling and
read and pushing it back. Maybe I'll sample the dark and bring it out and
then bring it back. But I'm always after those
brushstrokes right-click, just click there,
bring that back. Again. The shape of
this cup is off, but I'm not going to
worry about getting it. Perfect. Although I
keep saying that, but I keep tinkering with it. Alright, so here I'm
going to come across with that black because
I want that black line. And what I'm gonna do, hit that eraser and then
I can trim it back. Actually, I'm going
to sample the blue to see if I can
get that. There we go. Sample black and blue
and bring that back. I can see my shadow is
not quite right here, so I'm going to enlarge that.
13. Soft Brush Instead of Blender Brush: I can see that this
shadow is nice soft, it's nicer, create
nice crisp edge here, but it goes very soft. So I'm going to
switch to this group of pencils brushes here. And you can see it has
a nice soft, soft look. So I can blend this,
feel free to blend, but I tend to avoid
the blend just because not just my preference. Um, I just prefer using the
brushes rather than blending. I'm going to sample this. I'm gonna go back
to this brush here. Now, I need to be precise here. Well, actually no, I don't. I'm going to make a new layer. That way. I might need to start
consolidating these layers soon. Nci, sometimes I move over, get to some funky position to get that angle
rather than tilting. But you can always go and hit that tilt by using
the canvas rotation. Actually, let's just try that. I'm going to hang on. Let me switch. Here we go. I'm just going to rotate. This is just a lot, a lot easier than going to the pop-up
palette. There we go. Actually, I don't like that. Put that back e. Now. There we go. Okay. So I'm going to pop
up palate boom. And it's just easier to
put it back that way. Okay, so I can see
this is coming along. I have some red in here. I'm going to sample. We get that shape. I'm seeing there's a
highlight right here. I'm going to sample from when
the net within that color, just because that's
a little too light. And see what happens. There we go.
14. Freehand Selection Tool: Sometimes if you want to
get a very precise shape, we can use this selection
tool right here, the free hand selection tool. And if I click on that, I can very precisely draw
this area here, this shape. It's easier than
controlling a brush. Then I can go back to my brush. And then I'm going to
sample in here and I can just swipe
across here and you can see I stay within
that shape and the controls that now
I'm going to get out of this by going select, de-select. I'll do that again a little
bit just so you can see it. I'm going to make another shape. Let me see my brush. I'm going to sample here. Yeah, so if you
didn't catch that, I'll do it again. I'm just waiting for
another moment to get that. Alright, so here we go. This freehand selection tool, I just clicked right here. It looks like a bean and
I want that red shape. So let me try that again. I'm gonna go select. De-select are
already de-selected. So here we go. There's the shape. There we go. And now I can add a
nice dark red go to B for my brush and
just paint it in. I'm actually I don't
want to scrub it in because it's going to
have a really hard edge. Let me see if I can
brush it, cross it. See it's sampling
the colors beneath and given me a mix that
I don't really want. Alright, let's see
what that looks like. Select, de-select.
That looks okay. I need to get the
shape right here. So I'm just gonna, I'm having trouble
carving that out. So I'm going to go back to B. Sample. There we go. That looks good. And
then select, de-select. That looks pretty good. I tend to leave the
highlights to last, but I'm going to close to last, but I'm going to
go ahead and knock that highlight in there. Right now. Bang, and then I'll
hit E for the eraser. Take that out, take
out the half of that. Alright. The shape of this is
not looking good. Like I keep saying I'm
not worrying about it, but this shapes when the
shapes aren't, right? That's not good. Okay. Let me start going
on this Persimmon. Just going to block and actually I should probably
make a new layer. And some of these old
layers, actually, I don't need to
keep them separate. So I'm going to right-click and I'm going to flatten image. Oh, that's not what I wanted
to do. I hit Command Z. I want to right-click and
I want to merge down. Merge with the layer below. I'm gonna, it's gonna be
a little more tedious. Merge with the layer below, marriage with the layer below. And I think that looks good, merge with layer below, but I don't want to
flatten everything. What is the, oh,
that's my sketch. Alright, so now I'm
gonna make a new layer. And now I'm going to
start blocking in, finished blocking this N. It's going to do it quickly. And I'm not going to
worry about the shape too much because I can
always come back with the black and control
that shape that way. And now I'm going to bring
in some of these orange. To do, do I have to tell myself, remind myself I'm on a new separate layer so I don't really need
to be careful. Sometimes I'll come
in here and I'll trim off more than I need. Say, it's wonderful. Alright, I'm gonna
go with this brush. Let's just see
what happens here. We can get a little bit
of a softer edge here, because this one, it's, you can see how it is. It's like the other
brush but not is the strokes
aren't as defined. Which is kinda nice. Sometimes. It's nice to mix
them, mix them up. Although here I
want a nice hard, hard edge loops, ammonia eraser. Take that off. I'm going to rotate
the canvas because I'm having trouble
getting that angle. E. Okay? Always go back here
because it's easier to just click there then to
wobble it back in place. Alright, so I'm gonna go
with a darker orange. Now that doesn't look dark. Maybe hit a little brown in
ASC if I can mix some colors here. Gotta go darker. Actually, I'm gonna
make a new layer. New layer. There we go. See if I can make some color. Actually I'm going to go
actually this smudgy, smudgy palette knife. Let's see what we get here. This is one that I used
to use all the time. Let me just bring
in some colors. See how I chose this
dark color here. When I bring it in,
it just blends it. I can press really
hard and it comes in. But if I go lightly, it just smashes everything. The only thing I don't
like so much as it doesn't have a it doesn't have
many brushstrokes to it. It's just a flat color. So I like to always go back and switch things
up a little just to add more that start
to lighten this up. And sometimes, rather than keep going and sampling colors here, I'll just click open a pop-up
palette and move that over. Just choose a lighter color. Sometimes it's just,
it's just easier. And it'll just go with the flow. And everybody finds their
own way and works in just a little bit different,
different way. Actually, I want some
dark for that area here, so I'm going to pick that, that's maybe a bit overkill
on that purple color. And E. Okay, I'm not
grooving on that. Let's go here.
Whoops. E for eraser. We go. This brush right here, which is called the wet
knife, is very nice. It's sort of a nice blend. It blends, but it also
leaves a nice brushstroke. I still sometimes have
trouble controlling it, at least controlling
it the way I want. I'm constantly sampling it. I don't know if you're
watching my thumb here. Whenever I do that,
I'm just sampling the colors so I don't keep going back to
my color palette. I just sample from the, from the painting here. Alright, let's see. Hit the E and take
away some things here. Okay, I'm going to sample
some red and trim that back. Although you see how
muddy this looks now, I have all these nice
brush strokes and now suddenly it just looks. This brush makes things look a little muddy and soft. Here. I think soft looks good. So I don't want that edge there, so I gotta, gotta bring some
of that back. There we go. So I just want a nice
sharp edge right here. Okay. And I'm not
a fan of this one. It just has too much
going on for me. I think. Here we go. See, when I
want those softer edges, I just choose a different brush. This brush has a nice soft edge. There we go. But I just tried to mix them up. Okay, I want a more
intense orange. Let's just go here
rather than search.
15. Warping Image to Make Correction: And I need to be
hit that button. Boy. Heck up is so DB. Alright? Alright, here's another trick. Alright, You see how,
why wobbly that is? It's funny that again, I just don't see it until
you hit that, you flip it. But again, I'm sure you
all have seen it from the beginning going
That looks terrible. So I'm gonna go to this
selection tool here, the bean. Alright, and I'm going to
move this, oh, actually, I do need to merge these
in order to do this. So I'm gonna go select, de-select and merge down. One more, merge
with layer below. Alright, so now I'm
gonna go to this one. I'm going to make a
selection around this guy. Alright? I don't know if I've
showed you this trick in the previous two videos. So from here, I want to try
to straighten this out. Actually I'm going
to hit M again because until I flip it, I just don't see that that
cup is that off? Whoops. What just happened
here is my hand hit the rotate and I
need to fix that. Alright, I'm just going to
right-click Pop-up palette. But I'm in here now so
it doesn't want to work. Here we go. Alright, so now
what I'm gonna do here is I'm going to
use the warp tool. I mean, I mean it's
going to right-click here and choose Transform. And I am going to choose
to transform tool. And you can see I can
stretch it this way, but what I'm gonna
do here again, on top of this is
right-click and hit warp. And I get this thing here. Now from here, I can go in
here and fix this wonky cup. This is one of the great
things about digital painting. Just can't do in the real world. There we go. So one of those things that if I couldn't do that warp thing, I would be going
back-and-forth, struggling, trying to get it because
you push it a little further and a little
further in the real-world. And it just, it just takes
a while before it clicks. You just push, push and
it just doesn't get it. Alright? Okay, so now I'm going
to de-select this. So I'll select, de-select. And now you can see I have these bits where I
have to patch it up. I'm going to hit the M
key to flip it back. Kinda don't like this. Okay, so I can see
that's not lining up. So we'll just go ahead and
use that selection connect. It's just easier. Now I'm
gonna come in here with the brush tool and
sample to get the black, reduce the brush size. And notice I'm using
the Shift key. And then I can just come
in here. There we go. But do you see that line
connected nicely? There we go. And now I can go
select, de-select. And now since we
have that hard edge, you see here the edge is soft. And you see this is an,
its shadow is just kind of a soft edge. So I'm just going to, actually, I'm going to make
a new blank layer because I may blow this. So there we go. I can sample, sample that and just soften
that edge of it. Didn't come in here exactly
the way that I wanted. But let's see. Now I can hit the E key to get the eraser and I
can trim back on that. I'm going to resample. And then E for my eraser and I can soften that
just a little bit. Now, hit E, C, I'm just going back and forth. I get it. I'm just
going to add a little black in here, sample. Hope I didn't lose the shape
of my cup. Here we go. Alright. Now I'm going to hit the mg
is still a little bit off, but we don't want
to be here all day. We'd go. Again. I've put the edge there and then
I just trimmed back. I just generally, I find that to be a lot more pleasant
than drawing a hard line. Although I drew a
hard line here. And it did work too far, can always hit Undo, but I usually just redraw. And I know this
isn't exactly right. It's not exactly the
same as what's here. It's more of an ellipse, but I'm going to stick with it since I've already started and I kinda like
the way it looks, so we'll stick with it. I'm just sculpting it. Actually. Sometimes harder. Straight lines tend to
look a little better than trying to get it
perfectly round. Perfectly, perfectly.
There we go. Alright, so we got all this. I'm going to go to
a new, actually this doesn't seem to be
a lot going on here. So I'm not going to worry about
making a new blank layer. I think I can sample this here. Maybe I'll sample here. Add a highlight and a highlight. I'm gonna go ahead
and make a new color or sample a new color. And then I'm just
going to trim back. Yeah, I kinda like
those going on now. Actually, this brush here
is a little easier to use. Alright, so let's add
some of that. Same no. Oh, I'm on my eraser. There we go. Alright, so now I need to start defining some things here. On this, I'm going to sample a sample that green right-click. And then just bring
that down there. Rather than go and try
to find some color. And what you wanna do here, at least what I'm gonna
do is try to find these dark spots and just
knocked the dark spots. And I'm not looking
for a lot of detail. I'm just knocking in
those dark spots. Okay. Let's just see what
this looks like. I'm just gonna put
in the dark spots and then I'm going to zoom out. And that almost,
almost gets there. It because let's see, it's a little lighter here. I'm just going to sample
right-click and then drag it to a lighter. Let's see. Is that light enough?
Yeah, that looks good. And I know mine is
a little green, but that's brown eyes. I just don't want to
make this too brown. It's just we're
going to do this. I'd rather have an make my, make this look a little bit fresher than it actually does. Because, why not? Alright, I am using some
smaller brush strokes here. But I'm trying to add a
little bit of detail. And maybe at some
reference strokes here. And I'm holding the
Shift key if you notice and making it smaller, I'm just brushing it. But again, you can always
size or use the size up here. Alright, I think
that looks good. Now I'm going to
add in a, actually, I want to add something darker. I'm just going to
sample the black. Here we go. Now I'm gonna go
back to the orange. Get this shape is a
little highlight there. Bring that back. And again, I'm here. I think I kinda like
that nice hard edge. Again, these straight lines doesn't need to be
perfectly curved. There's something about having those straight
brushstrokes. I don't know. They just makes it
look painterly to me. You see, I'm just sampling. I'm going into red
back-and-forth if I want a hard edge, okay, this is where it moved
when I use that warp. So there's a little
space there to fix. Okay, I think that's
all my tricks. So from here, I think I am just going to paint the rest of this out while at high-speed
and stop talking so much. I think I showed you
all my tricks here. F a few more up my sleeve, but I don't want to throw
them all out there at once. Here we go. Alright,
new blank layer. And one thing that I really like I'm going to hit
undo is you see how that little miniature
thing is there, the little miniature painting. It almost looks
real to me there. So when I zoom out, you can see, just start checking your shadows and the contrast is
super-important. Although I can see here, I need to add some more darks
in here and I need to add, yeah, it just needs
more contrast. I think the shape
cup isn't perfect, but it doesn't look, doesn't look wonky anymore. So I'm good with that. I'm gonna go to a
new blank layer. Here. I'm gonna go to this
little canvas brush. And I'm just going to start
knocking in some canvas, but I'm going to try to knock
it in a little bit darker. Actually, I don't like
that. Um, and again, I'm on a new blank layer. So whatever I do here,
doesn't really matter. I'm going to right-click. This doesn't have the
tilt sensitivity. So I can come in here and
change the angle of this. My pop-up palette, not
groove in on that. There we go. Then I can eraser, maybe add some blue here.
16. Squint to Simplify Values: Something I haven't
mentioned squint a lot. See now I'm starting to see it. Squint. Squint. I'm not seeing it. When you squint. That's
another way to see. As opposed to reducing the size, it helps you see the to
get that contrast right. So squint. Make sure you save regularly. I can't believe I
haven't saved yet. Okay. I think I'm going to quit
here and I will check this out in the morning. I forgot the tea bag. I mean, the TEA the teabag tag. Anyway, I'll get that
in the next session.
17. Fresh Eyes: A Second Sitting: Typically I tried to do
these in one sitting and I could say
that I'm finished. But I think I want to
push this just a little bit further and actually I
want to fix a few things. This cup is still looking
just a little off. Here. It has less of a oval. Here it has I have this. It's more of an oval and
there's a little v point here. It's almost like a square shape. Here. It's not matching up, down at the bottom. I'm not so concerned about this. I mean, I can see that angle now that maybe I'll try to fix it. I'm going to try to fix it. I'm going to merge these layers. Right-click, see what I can fix. And I'm right clicking
on the pen tip here. Okay, So here we go. I'm going to use the, go back to the free-hand selection tool. Let's see if we can fix this. Go back, take a
little bit more care. We go Command T or
Control T on a PC. And then I'm going to going to right-click and I have a right-click
button here. Or I could just grab my mouse
and right-click and I get the, the, the warp. But since I have the button, but this is only if you don't have the button on the mouse. So again, right-click. And I get the warp tool, and I'll click there.
That didn't go. Try that again. Warp. Strange. Let me 0 command T. There we go. Okay, My computer is running
a little bit slow here today and I'm trying
to get rid of that. That little pointy bit in there. Alright, problem I'm
having here is it's not it's pushing down
too far in the middle. It's not giving me
exactly what I want, but you know what, I'm going to hit Undo. I am going to hit the Enter
key and hit Command Z. Now I'm going to go
Command T again. Oops, I don't want that command T. Computers rented a bit slow. I think I have to do
many windows open. Alright, now let's
try this again. I'm on the transform tool. Hang on. There we go. I'm just going to
scrunch this down. There we go. That looks a lot better. It's fitting that
shape a lot better. Actually, I'm not going
to come from the bottom, I'm just going to
come from the top. And it actually kinda softened out that little V that I
had in there. There we go. That looks good. Okay, So select, de-select. Yeah, I like that better. And it actually matches
up with what's going on down here that I'm
going to darken this area here, B for brush. I'm going to hold the
command key so I can get my eye dropper and sample
that, that black area. And I'm just going to shave
in there a little bit. Actually, I'm doing this. I'm going to hit Undo. I'm going to do this on a new layer. Why take a chance messing
things up when I don't have to. We go, I'm on the wrong brush.
This is the one I want. It thought it looked
a little off. See this one sort
of blending so that black behaves a
little differently. There we go. Actually, I want to smoosh this
up a little bit, so I'm going to use
my wet knife here. See how that goes. There we go. So it's kinda, kinda
getting a lost edge here where it's just sort of
receding into the distance. Alright, that looks good to me. I'm gonna go back to this one. We go try to get that, sharpen that edge
up a little bit. And the shape of this
isn't quite right. Because you can see
this comes along. Okay, so you can see here, we got some problems going. So I'm going to just
hit that with this red. And then I'm just going
to shave it till, hit E and shave this till I can get that shape bright. Oops. Thought I was on the eraser. There we go. That looks better. I'm going
to turn this off and on. Yeah. It looks a lot better. Okay. The shape of this
is still a little off. I'm going to right-click
merge with layer below. Go back to my selection tool, Command T, right-click
warp or Control T again. And let's see if we
can get that shape. Okay, let me try this again. Hit the Enter key, let's try select, de-select. And to do that again, this time, I'm going to be a
bit more selective. Go Command T, right-click Warp. Now let's see. I'm not happy with that. Yeah, that's kinda
kind of working. Yeah. I think that looks better. Then kind of stretching
it back into place so I don't
have to patch that. I got a little bump
going on here, but I'm, I'm good with that. Alright, so select, de-select. Actually. What does
that shift command a. Alright, so remember the key commands when you start
using something a lot. It's always a good idea
to try to remember those key commands can save
you a lot, a lot of time. I can't always remember them
because I'm switching often switching back and forth
between different software. But if you find, even if you just try to remember it for a day, it can make.
18. Adding Highlights: I'm sampling the
white here because I want to highlight there. I'm going to hit
undo a few times. I want to be on a new layer. That way I can kinda
hit that in there, actually going to rotate. I'm going to hit that in there. Hit E, and then I can sorta
shape that highlight. I'm going to right-click, get my pop-up palette, bring that back, just click in the background
and get rid of that. Let's see if I can. Whoops,
I'm still only eraser. Actually. I'm going
to fade that out a little bit by just kinda brushing over that
with the eraser. Actually, yeah, that was e. Now I'm going to
shrink the brush down holding the Shift key. And I really want that
highlight to pop. Let me make sure I got
something nice and bright. Maybe a little bigger. Shape it. Yeah, I like that. Maybe it's a little too
bright there, but Alright. What else? We got a little
reflection, got lips, a little refresher
flexion going on here. E shape it because it's
a little too thick. But again, I'm trying
to avoid lines, maybe make that pop
a little bit more. I think I said I wasn't
going to go for the plant, the flower, but I think
I'm gonna go for it. A little white here. That the, when I say the plant,
what am I talking about? I'm talking about
the little design, the flower, flower design here. Oops, hit the wrong key. Okay. What else? Make that a little bigger. Maybe blended a little. I'm using this wet
palette knife. Oh, that's not doing any
doing what I want it to do. Okay. I'm on the eraser. Just kinda smudge it
out a little bit. Erase here, I'm
going to press hard. Okay, Let me just
look at everything hit M to flip my canvas. I'm seeing the shape of
this is still a little off. It's seems to be going down
a little too much and, uh, yeah, I see that up
here. I'll fix that. I'm going to sample that. I'm going to stick
with this one, but you see the size, it's a little bit smaller. Actually, I'm going to
make it bigger because this edge is a little
bit harder than I want. I want that. I don't want it to be so hard. So what I'm going
to do is this one. Let's see. Yeah, that
looks a lot nicer. Having a bit of a soft edge, I'm going to sample the red, come back, keep missing it. But I can just keep going
back-and-forth either side. I'll get it. Not that time. If you are watching this and you feel
like I'm getting too heavy and that is the
detail. But let me know. I'll try to keep some
or maybe mix them up. Do some that have a
little bit more detail and some that are a bit quicker, a little bit easier. Okay? Alright, I like that. It's starting to hit
me where I don't see so many things that are off.
19. Flower Design on the Cup: And say I'm done with this, hit Command S to save it Control S on a PC.
Now let's see. Oh, I forgot to little
teabag thing here. Alright, so I'm going
to merge this down, right-click merge
with layer below. I'm going to add a new layer. And now I'm going
to add that teabag. And actually I'm going
to do the flowers first. And what I'm gonna do here, I'm gonna do it with, let's try it with this Canvas. Canvas color. There we go. And I'm just going
to smudge it all in. And then what I'm gonna
do afterwards is, excuse me, is erase
what I don't want. Alright, so hopefully
this will work. I'm gonna go to this brush. Make sure I'm on the eraser. And let's see. I'm just gonna do the
general shape here. Actually this is looking
a little smokey. I don't want this one.
Let's try the canvas again. Is that going to E?
Now, don't like it. Let's try this one. Okay, there we go. Maybe not. I want something that
has a nice hard edge. E. There we go. I'm just going to
knock these in quick. I don't want to spend
a lot of time on this. Whoops. Now, okay, I made a mistake, but let me hit Command Z, see if I can get there we go. We got one flower here. Sorry, one leaf
here. One leaf here. Come down to that
stem, narrow that out. Leave here. Can just
knock it in there. I'm not going to get too
picky, scrub it out. And now what I'm gonna do, I'm going to cheat a little. Go back to that selection tool. We go make that shape. Oh, I'm on the wrong
deal of thought. It wasn't working. There we go. Alright. We go. I'm just going to hit
Delete. There we go. Easy, easy. Alright, same thing,
get that shape. I'm just going to hit delete. Don't want to go too far. Alright, much better. The leet. Okay, I see a little crack
here I need to fix from when I worked at Command
D to de-select, Select, de-select, I'm going
to go Shift command a bool. Alright? Okay, so now the fun part, actually not there yet. Let's get this shape. Is a leaf here. Delete, come down here, delete. Let's see if we can get
this shape stemmed down. And I'm just going to try to get all that stuff that's left. Delete. Oops. And get that. Oops. Okay, I see there's a little bit of white
peeking in there, but I'm not going
to worry about it. Alright, delete. There we go. Okay, Now what now
we got to fix these. I am going to come in here
with this hard brush. And I hang on, I'm not on my brush. And I'm gonna hit command
desk just to save it. Actually what I'm gonna do
is I'm going to duplicate this layer, duplicate
layer mask. I'm going to turn it off just
in case I wreck this up. So I'm on the wrong layer. And then I'm just
going to come in here because I'm
not exactly sure how I want to do these,
these leaves actually. I'm going to right-click, go to my pop-up palette and pick one of these brushes here
that's precious sensitive. And let's just see, I like that one. You don't need to go with
the exact brush that I have. I'm just trying
to find something that comes to a point because you see the shape of
these and I'm erasing. Alright, I think I don't
like what's going on here. Nope, nope, nope, nope. I don't care. I'm just
gonna go back to this one. Which one was I
used them before? That guy. I'm not going to worry
about it being I'm just going to not even eyeball
it I'd hit to this, have a sense of what
I'm looking at. King, king. And these are the petals. I'm not grooving on these because there's
no point to them. And I can keep that
edge in there. What I think I might do just
because I don't really want this to stand out
and I don't want to spend like all
day working on this. If I want the
detail, that's fine. See the other problem
I could have. If I put too much detail
into this flower is, then everything else
needs more detail. It needs to be is lightened, fluid as everything else. Or I'm gonna make even
more work for myself. Alright, it boom, boom. There we go. Alright. Now let me zoom out and
see what this looks like. It's standing out a little bit. Alright, I'm going to duplicate
this again, to duplicate. Alright, turn that off. And again, this is, I'll
delete those after I just want to save them
in case I screw up. Because what I'm gonna
do is I'm going to take my canvas and put it on
eraser and zip across. And actually just so I can take it down a bit so it
doesn't stand out as much.
20. Cheating: Duplicating the Flower Design: Alright, You know
what I'm gonna do? I'm gonna cheat even more. Yeah. I'm going to take this. Come across that select, I know these flowers
are different here, but we are not going
to draw those. I'm going to copy that. Edit copy actually because
I don't think I've done I don't think I've
done edit copy yet. Sorry, I'm looking
in the wrong spot. I don't think I've done
Edit Copy here yet. So what I'm gonna do is take a little time to
show you how to do that. So I'm going to go edit. I usually just go Command
C or Control C on a PC edit, copy. And I need to de-select that. And we have already gone over
that and then edit, paste. There we go. It pasted
it in the same spot. So I need to go to my move tool. Now, there we go,
double-headed arrow, Alright, so I'm gonna
move it over here. I'm gonna make it
a little bigger. Command T or control T. C.
No one will be the wiser. Hit the Enter key and
I'm going to go edit, paste or Command V, control V. Move that over Command T or control T. I'm going to squish it
because this is on the side of the cup. Hit the Enter key. Now I'm going to go back to my, I was going to use
the selection. Was going to go with the
selection tool right here. Just trim it. Let's see what happens. That looks good. Now, I'm
going to use the brush. Put it on an eraser. I actually want that one. Eraser. Whoops, wrong tool B. B and de-select. Okay, I had to think about that. Reduce my brush size, make sure I hit the
right key and that way I can control
what's happening there. And I'm going to scribble out
here because it looked like when I copied and pasted it, I picked up a little bit
of something else there. Here we go here and
just paint that, oh, it's on a separate layer. I'm going to merge,
merge this down, merge with layer below, and merge with the layer below. So because whenever I copied, whenever I copied and pasted
each of these things, they always makes it a new
layer. Alright, here we go. Knock that out. I don't like it. Alright, so see, I
should have left them on a separate layer would have been easy to move this up and down, but now these are all
on the same layer. So what I'm going
to need to do is select one of these flowers. I'm going to make this
one bigger because I'm seeing it's looking
a little small. If you look here, coming all the way across here. Yeah, significantly smaller and the leaves are a little higher. So I'm going to re-select that. I'm going to go to my move tool.
21. Skewing Object: And I'm going to go Command
T. And I'm going to, whoops, oh, that was kinda cool. I hit the diagonal by accident, but I kinda like that. Let's see. There we go. So if I move the arrow
here, I can skew it. Here we go. I actually
do kinda like that. Make it a little bigger. I
need to get myself some tea. My voice is so rough, I still got the morning voice. That's what happens when
I stay up too late. Hit the Enter key, select
diesel and select de-select. I'm just going to
hit Command Shift a. And if you're on a PC, just check to see
right here select. You can see what it says. Which is probably going to
be Control Shift a. Alright, anyway, I'm going to
zoom out, check it out. Yeah, those flowers kind
of blend in nicely. Alright, so now
what I'm gonna do, I want to add the teabag. I'm definitely going
to go into new layer. I don't need these extra extra
layers that I made here, so I'm going to delete those. Those would just backup in
case I screwed something up, I can always get
back to it quickly. I'm not sure what that is. I think there's nothing I don't think there's
anything there, but I'm going to
merge down just in case merge with the layer below. Whoops. What's going on here? Alright, I think I hit the wrong one. Cut layer. Cut layer. Alright. Okay, so now I need to add the
teabag, new layer. Boom. I'm just
going to make this. I'm going to grab my, one of my favorite brushes
here right there, that is called the flat
paintbrush, creamy. Grab a nice lime green on
the brush and brush tool. There we go. I'm going
to hold the Shift key, scale this up and
just try to get this all in a couple of
quick movements. Maybe come up here to my
advanced color selector, grab a little darker, I'm going to move that darker. Keep the vibrance
and see if I can. There we go. Now I'm
gonna do it with this brush because this is
going to soften that up a bit. Oh, I don't like what
it's doing here. Actually, I'm going
to overdo this. We go, sorry for
the sound effects. If I weren't recording, they'd probably be a
lot more sound effects. Alright, I'm gonna go
back here because it has a nice hard edge. Hit E for eraser.
Come across that. Go across here, boole. And again, I'm doing
the sound effects. All right, now, not happy, not happy. Take my time.
22. Adjusting Layer Opacity and Wrapping Up: I think it's time to call it. Alright, that's one thing. When you're painting. When is it done? It's really hard to say. You know, sometimes
you'll say a, it's done now and
then other times, you know, you'll come back
to it and then you realize, no, it's not really done. So you'll continue
working on it. So let's try this eraser. See we get going on here. And don't forget, I'm, I'm only working on
this layer here. So this is the new
who, much better, much, much better with that
extra bit of contrast. Darken that up. I'm going to zoom out. Maybe a little too heavy handed. So I'm going to click
on this layer here. So it's a little too heavy. I'm just going to
drop the opacity and see how that goes.
Now let's try it. It looks better.
Actually, I'm going to zoom out a little more. Off on maybe a smidgen
heavier. Zoom back in. M4 to flip the canvas. Again, that's on the pop-up
palette right there. Something feels a
little bit off. Like the tilt of the
cup isn't quite right. I'm going to work
on it right here. And then I'm going
to call it for real, as they say for reals. Alright. Sample. Make it small. Like the age, actually kinda
like going over top of that. All right, just add that. Okay, alright, I'm done. I'm going to zoom out, flip it. And that's it. Alright, so we'd done here, I hope you found
this enjoyable and I look forward to seeing what
you post in the project area. And remember, I posted
more than one photograph. So if you want to do something just a little bit
different, I mean, you can use the techniques here and do something
completely different. Setup your own completely
different still-life. But if you want to use the
photos that I have here, there's some, a little
bit more variety. Feel free to use those as well. And hopefully you'll find
these techniques useful.
23. How to Upload Your Course Project: An important part
of this course is to do a course projects. So I'm hoping you all
will participate. So I'm going to open
mine up here and you might want to refer
back to this later. So here I've opened mine up. I'm going to upload mine to the project area in order
to show you how to do that. So you might want to
refer back to this at the end of the course after you've completed your project. So the first thing I'm
gonna do is save this as a JPEG or PNG right now
it's a credit file, and I don't think that we'll be able to be read
once you upload it. One. Another way you
can do this is to simply just take a
screenshot of the image. So I'm gonna go File Save As. And right here you can
see it has dot k IRA, which means this
is a credit file. And I'm going to click right
here and move down to JPEG. And you can either
do JPEG or PNG. Either one is fine. So I'm going to
release right here and pay attention to
where you're loading. Where are you saving the file? And pay attention to where
you're saving the file. I'm going to load mine into
this folder called stage. And I'm just going to hit Save. And it's going to ask
you about the quality. If yours is lower, I just crank it up to
100% and hit, okay? Alright, so I'm
going to close this out and I'm gonna go
back into Skillshare. So here we are on the course. And just make sure you, down here it says about
reviews discussion, and you wanna be on the
project and reviews. And notice here at
the bottom you have about reviews,
discussions, et cetera. And you want to be on the
project and resources. Okay? So from here, you can
actually, since I'm here, I'm going to show you this
is where you can download the example images that you'll be using to create your piece. The very first one is the
same image that I use. You can use any
of these that you like or create your
own still-life. But if you want to use the exact same
photograph that I used, you can use this very first one. Alright, so in order
to upload that piece, we just need to click on this green button
here, Create, Project. And from here, you
want to select upload image and navigate to the folder where
you have the file. I'm already there and I'm just going to click on this
button right here that says persimmon painting
dot JPEG and click Open. It seems like a lot
of the images that have been uploaded
in previous courses. Part of the image
is cropped out. I don't know if this, I
think this is a change, so make sure that you
slide it all the way to the left to add
the entire image. Or if you really
want to crop it out, you can crop out what you want. But I'm just going to
slide it all the way to the left and hit that
green Submit button. And then for the project title, I'm going to have, I'm just going to call
this course exam bull. And for the project description, I'm going to type course in inch door example
and a Smiley face. Alright, and from
here I just hit the green Publish button
and I'm good to go. And of course, when you upload your project under
project description, just leave any comments
you want to leave. Anything you would
like to say to me about the piece before
when you're uploading it. And that's it. And I really look forward
to seeing what you create.
24. Bonus: Quick Keys: Hi. This video I'm doing this
video because Mel requested a video on using the
shortcuts within Krita. So here we go. So
the first thing I'm going to do is show
you some navigation tools. These are very basic, and you
probably already know them. If I hold, let me switch
cameras here, here we go. All right. So
here's my keyboard. I may have to slide
this back and forth a little bit
as I'm working, but most of the everything is set up on this
side. All right. So when I'm working
to navigate around, I will hold just
hold the space bar, okay? You hold it. I don't know if you saw
my let me move this. You see my cursor. When
I hold the space bar, it shifts to a little hand.
And then it disappears. I don't know why it
doesn't stay there, but it is on the hand tool, and then I can click hold
and move this around. Okay, another is to
zoom in and zoom out. I have a mouse right here, and I can just scroll in and scroll out if
I'm using a mouse. But if I'm using
a drawing tablet, I'll be using a stylus. And this stylus
does not have a um, doesn't have a wheel on it. And this is actually
what I use most when I'm painting more than I
would be using a mouse, but I'm going to
be using the mouse for this demonstration here. But the other way is
to hold the space bar, then add the command key, okay? And you can see if I
hold them together. You see, I get that
little magnifying glass, it just sort of disappears, but you can see it
gives you that signal. And if I drag upward, I zoom in, I drag downward, I zoom
out up in down, out. Okay? Now, if I
add the Ault key, and you'll see on my keyboard
right here, it says Option. This is a Matt keyboard. But there's that symbol
that stands for Alt. It used to be in the old days, I don't know if it was that old, but I had an old keyboard, and it used to say
Alt and option. And sometimes in my videos, you may hear me referring
to the Alt option because I used a wired keyboard for a
long time up until recently, I finally decided to switch
to the wireless keyboard. And that's when I realized this is a little bit different. So that's the ult key
on my Mac keyboard. So if I click, hold
the space bar, the command key,
and the option key, I'll do that again altogether. You see, I get sort of this
rectangular magnifying glass, and if I drag upward, it goes in increments. And then when I drag downward,
it goes incrementally. It's a little easier
to control than the other one that just kind of zooms in, zooms
out like that. Okay? So That is how
you can use that. And you see I'm just holding the space bar and
repositioning this. Okay. Now, if I
want the move tool, that is this tool right here. Also, I would like to say
something about these here. You'll notice right, if I move my cursor over any
of these tools, if they have a key
command assigned to it, you'll see it off
to the right there. So the move tool is T. So I can just hit
T on my keyboard, and you say I have
the move tool, and then I can click and
move what I have here. Okay? Now, I want to undo this, and I'm sure
everyone knows this. I can go Command Z, and that will be
control Z on a PC. So command Z, and that you know, it doesn't undo, okay? So I'm going to click
in the background just to deselect that. Now, I want to go
to my brush tool. Again, you can see if I
hover my cursor over it. You can see it has the B
in parentheses at the end, telling me that that is the key command
for my brush tool. So if I just hit
B on my keyboard, B, we have the brush. Now, there's two
different ways that I can enlarge or reduce the
size of my brush here, is if I use the bracket
keys on my keyboard, you can see, there's
the left and right, the right bracket will
make my brush larger, and the left bracket
will make it smaller. That's pretty easy to remember, and easy to control. Now if I want to make it larger, I can quicker, I can
just hold the button, and it will scale up faster, and the same with
the left bracket to make it smaller.
Hold the button down. Now, there's another way, and this is the way that
I tend to use it. If I hold the shift key, I can drag to the
right and it makes it larger and I drag to the
left, it makes it smaller. I'm just holding the shift
key, actually, let's see. And this is what I'm
doing here with my mouse, which has been offscreen. Drag right, drag left. Drag right, drag left. Now, if I want to
erase something, I can just hit E on my keyboard. You'll see up here in
this bar right here. Right there, you'll see
there that's the eraser. I can click on that,
and I go to the eraser. It keeps the brush the same, and then I can click
to take it out. Now, if I hit the E Key, it turns it on, and I
can go to the eraser. I'll just watch the eraser tool, and I hit E, and
it turns it off. If I'm using the pop up
palette, I will right click. Here's the keyboard shortcut. I'll just right cli Now, just make sure I'm on the
brush tool when I do this. When I right click, the
pop up palette pops up. And again, you can see you have access to all these
controls here. And I will right click
to make it go away. Now, if I'm using
the pop up palette, if I hit the tab key, you know, it clears
up more space. So say if I'm using
a small monitor? If I use the tab key, it clears away a
lot of this stuff. And that way, when
I right click, I have a lot more space to draw. Okay? So if I zoom in, you know, I have a lot
more space to work. And again, tab key. And this is an important
one to know just because it's so easy to accidentally hit
that button and go, Oh, my gosh, I just
cleared away everything. Well, how do I get
it back, tab key? One thing to remember, most of the time when I'm talking
about these things, on a MC, it's going
to be command and on a PC, is
going to be control. So sometimes I'll say command
control, meaning either or. I say if I'm going to go to
my move tool here, actually, I'm going to go T.
And if I select this, if I want to rotate
this or transform this, So if I want to transform this, I hit command T
control T on a PC. And then from here,
I can rotate this by moving my cursor
out to the side, I can make it larger, distort it, grab
from the corner, and enlarge it, make it smaller, I can hold the shift key
so it doesn't distort it, so it constrains
the proportions, and to get out of this,
I'm just going to hit the escape key to get out of
it without accepting that. And then I'm going
to click away. Okay, so I'm going to go
back to the brush tool. I'm going to hit B.
And if I'm painting, Oh, make sure I'm on the
paint layer. All right. And if I'm painting, you can see if I want to paint
a straight line, I can hold the letter V
as in vector, hold it, and when I paint, you can
see there's the line, and I release it, we'll
fill in with paint. I'll just click, drag, and it will fill
that in with paint. Okay? Now, I'm going to hit command Z to get rid
of these things. Again, control Z on a PC. Okay, now, if I want
to select everything, I can go Command A or Control A, and you see the dotted lines, the marching ants around here. Now if I want to
deselect everything, I can hold the shift command
A in that D selects. So again, if I use this free hand s the
free selection tool, I can make a selection. If I hit T, I get to
go to the Move tool, and I can move that, and to deselect that, I can hit command Shift A, and it will deselect it. I'm going to hit
command Z to undo that. Now, now, if I want to
just select something, I get that rectangular
the rectangle tool, I can go command R, and you can see I can
draw out this box here. And if I want to add to it, I hold the shift key, and it will make
another like first, you can see I can draw box, and it will replace that
box, that selection. Now, if I hold the shift key, I get a little plus
symbol next to my cursor, and now I can draw that, and it will add to
that selection. Now, if I hold the ult
key, I get a minus. Now it's going to subtract
from that selection. Okay? Now, if I want to
get rid of all of that, just drag across everything,
and there it goes. Often when drawing, I'll
want to flip the Canvas. You can see if I let me
go to the B brush tool. If I right click, there's this thing right here where
I can flip the Canvas, and that's just sort of to
give you an idea of what is, you know, what your drawing
looks like, so I can hit M. I just tap the M key,
and it flips it. It just sort of breaks that the way your mind is
seeing what you're drawing. Cause often if you're
working on a drawing, you don't see that
something is off because your mind makes
adjustments to it. And have you ever walked up and looked at someone's
drawing and you go, Whoa, that I is
really out of whack, and you pointed out to them
and they're surprised. And that often that happens to, you know, the person you know. That's because, you know, if they flip the canvas
like this, you know, that's a good way to break that adjustment that
your mind is seeing. And it just makes things
a little easier to see. So, again, the key
to flip flip that. And here's another tool. You notice up here here the foreground color and
the background color. If I hit x, you can see I can just tap that
and it flips those. And let me see. If I hover
my cursor over that, it doesn't say x here, but you can just tap that
and it'll flip. All right. So now I'm going to
show you the settings. And that is where there's a couple of things
that I want to add. Like, one is, I want
to rotate my brush. One of the things
that I actually nel, thank you so much for requesting this because by me doing this, I actually learned that they'd added this
into the system. Up until the last time I went through these kind of
things, it wasn't there. So often I will have a brush,
and it doesn't rotate. You know, the brush tip. It won't let me make this
brush a little larger. And I'll either have
to come up here and then I'll click
here and I'll rotate, and then I'll come back up
here and rotate that back. Or I'll Oh, actually, and I believe I put this here. You can click here, and
you can change this, okay? So you can choose whether you want to change the
opacity, the flow, or the size, and I
chose rotation, Okay? So yours may not be there. I almost forgot about that. All right. But the way
I used to do this, too, is I'd right click, and you can see here's
the angle here, but look how tiny that is. It's really difficult to Oh, click on that and
make that rotation. But I can make the
brush rotation go clockwise by tapping the y key, and by adding the shift key, I can make it go
counterclockwise. But that is not on by default. I have added this in myself, and I'm going to show
you how to do that. So if we go up here
to where it says, RTA preferences, and
if you're on a PC, this might be under settings, but I'm going to go here
preferences under a MAC, and you'll look for
something right like this. There's General and
right below General, you'll see keyboard shortcuts. And I'm going to
open this up all the way so we can see
this a little easier. These are all the different
things you can change, and I'm looking for something that says painting, right here. I'm going to toggle that open, and there's a ton of things. And as you can see, most
of these tools do not have key commands
or shortcut keys. But you can add
them as you like. If there's something
that you're not using, you can take it away from something or if it's
getting in your way, or you can add to things
that you use a lot. These keyboard
shortcuts, you need to pay attention to
the way you work. If there's something
that you use a lot. It's a good idea to make
it a keyboard shortcut. It can really save you time. Okay, so, as you
can see right here, I'm going to go find I'm
just going to look for a Y. It's a lot easier here. So this says none. And it says rotate
brush tip, clockwise. And here's another that says rotate brush tip,
clockwise, precise. Okay? So I put a Y, and I'm going to do
the precise one, okay? And I'm going to click on it, and you see it opens up. So I'm going to try Alt Y. I'm going to click
none and see input, and I'm going to choose
Alt Y for the precise, and it accepted it. But often you'll
get something that tells you if it is already taken that keyboard shortcut
is in use by something else. You can't override it,
but be careful with that. You know, you want to make sure because sometimes it
could cause a conflict. But this was clear, so I'm happy with this,
and I'm going to hit. All right. And now, if I go to brush y, clockwise, shift, counterclockwise, and
this is going to be precise, so it's just going to go
a little bit shorter. And you can see it's
moving clockwise, but in a smaller increment. Okay? I'm never going
to remember this. I have to remember
to remove this. All right, so there's
one more that I wanted to show you
that you can add, and that's the opacity
on your brush. So you can see here is my brush. Let me make that larger.
Use the bracket key. Okay? And let me try
this, W. That'll work. Now, I'm going to reduce
the opacity of this. And I believe I used I And you can see my
opacity up here going down, I, I, and if I go O,
it will go back up. Okay? And I'm pretty sure the defaults for that are
none. So let me check this. I'm going to go preferences, and let's see if I can
find that opacity. I'm just going to
look for the I and the O here. It's a lot easier. All right. I, I see the O
and I decrease opacity. All right. So I'm going
to click on that. And you can see, it's, Okay, the default is I. Oh, k, sorry. I thought that I created those. So the default is I. And so that's okay, and there's the O increase
is the default is O. So we're good there. You can use I to
decrease the opacity and watch the opacity up
here, the opacity bar. I tap that and it goes
in 10% increments, and when I paint, Hang on. And I tape O, and it increases. Okay? So if you can see as I tap to increase that
opacity, it becomes darker. Okay? Now, tap O, I mean, I, I reduce
that opacity. And I'm sure with
a different brush, this would be a
bit more obvious. Now I'm going to undo
command Z on each of these. Oh, okay, so the one that I
wanted to show you was how to program the Freehand
selection tool right here. Okay? So if I move
my cursor over this, you can see there's
nothing. All right. So I'm going to go
back to preferences. And let's see. W is select? Select down here. Okay, I'm having
a little trouble finding this Freehand
selection tool, so I just want to show you this. If I can't, I want
to find a tool here in the preferences. I'm going to move
my cursor over it, hold, and you can see it says
Freehand Selection tool. Now I'm going to go back up
here to the preferences. Click. And there's a
search bar right here, and I'm just going
to type in Freehand. And there you go. You can see
free hand selection tool. And I can and there's
nothing assigned to it, no shortcut assigned to it. So I'm going
to click on that. The thing is, I actually want to know where
this is located. It says tools. Okay. It's under tools. I'm
going to hit clothes. Now let's see if I can find it. I'm just curious. SVG
tool. Okay, tools. But again, you can always find that in tool
shortcuts. Here we go. But you can always find it again with the search once
you have the name. So tool shortcuts,
and There it is. Freehand selection, and there's
nothing assigned to it. Okay, so I have nothing
assigned to this. So I'm going to make this this Freehand Selection
tool, a W. Okay? So I'm going to click,
Toggle this open, and you can see,
default is none, and custom is none. I'm going to click right
here and I'm going to t W, hopefully, nothing else
is assigned to it. And it accepted it,
so I'm going to hit. All right. Now, when
I'm going to go to my move tool.
Okay, here we go. Let me space bar,
move that over. Now I'm going to tap the W K, and you can see there's the
Freehand selection tool. Okay? Now, if I want
to add to this, I can hold the the shift key, and you see I get the
little plus symbol, so I can add to it. If I want to subtract, I'm
going to release that, and I'm going to hold the
option key, and I get a minus. So even if I'm not very
precise with this, I can go back in here
and subtract and edit that down till I get it
just right if I go too far, now I'll go back
to the shift key, and I can add if I
take too much off. It's very versatile. And another thing that
I can do with this, I'm going to command shift
A to deselect everything. If I start with
this tool, again, that I'm going to go to B, and I've assigned this as a W, so I tap W. Okay, so if I click and start dragging and I want to
make this a straight line, I'm going to hold
the command key. And you can see if
I keep drawing, it still remains free hand, but if I let go of it, it gives me a straight line. So I took my finger
off the mouse button. Okay. And now I
can click release, click release, click release. Click Here, and now I'm going
to release the command key, and you can see it closes up. I'm going to do that
again. So Shift command A to D
select everything. Okay, so I'm going to
go around this leaf. I'm going to click,
drag, go around. And when I get to here, I'm
going to add the command key. Now I'm going to release
the mouse button, and you can see it
goes to a line, and I can click,
click, click, click. Then I release the command
key and it will close up. All right? So this
is quite useful. And I believe that
that's everything. Let me check my notes. Ah. And there's one more thing, las, so I see here my notes.
I have one last thing. If I hold the shift key and tap the backspace button,
that's on a PC, actually, it will fill whatever selection I have
with the foreground color. On a mac here, it's
the delete key. Okay? I mean, you
have two on mine, I have this extended keyboard, so I have the delete
here and delete here. This is backspace. And this is actually delete, but this is the equivalent
of the backspace. And I'll just tap that
button right there. So again, backspace while
holding the shift key, and it will fill with
the foreground color. And you'll see up here, that
is the foreground color. Okay? So if I switch those,
I'm going to toggle that. I'm going to hit X, and you see the foreground color in the
background color switched. Now, if I hold the
shift key and I tap the backspace button
or delete on a mac, it will fill it with what is
now the foreground color. Alright, now, I'm in the I'm going to I haven't
completed this yet, but this is something called a stream deck here because I'm completely
switching directions here. And this is called
a stream deck. They come in different sizes. I have one. There's
a medium size one, which is about $150. This is a large, the
Excel, which is 250, and they actually have
a six button version that is about $80. And what I do with this is because I'm often
using different software, and it's hard for me to remember the key commands for all these, if I'm constantly switching
between different programs. So you can see here, I have different programs key commands set here.
And here's Krita. And if I click on that
button right here, this has all the
different key commands. I don't have icons for these, which are, you
know, aren't great. But hopefully, you can
see what's happening. There's one that says flip. You can see if I
tap the flip key, see it's flipping the Canvas. And let's see what else
we got Pop up palette. No, pop up. I'm not
on the brush tool. That's why I didn't get the
pop up palette. Okay, brush. Hang on. Let me
click to get away. Okay, so here we go. The brush. Now I'm going to tap pop up. Okay. And there's
the eye dropper. Oh, that's one I didn't hit. Okay, we got to go backtrack
a little bit. Alright. I'm going to come back to here. And I'm going to go to shift command A to D select.
I'm on the brush. And say if I'm
brushing something, Okay, let me crank
that opacity back up. I'll just do it right here. Because some of these key
commands that I'm telling you, I don't use all the time. Because I don't usually use this opacity thing right
here all the time. There are certain
ones that I use a lot and others, I don't. But say I want
this and I want to sample a color. This
is one I use a lot. I'll just hold the I'll hold the command key or control on a PC while
I'm on the brush tool, and you can see I
get an eye well, when it first goes, it shows me the eye dropper,
but then it changes. But I can click there,
and now you can see that's the color I've sampled,
and then I can paint. I can click here,
sample and paint. And that's really important. I can't always
just hit the P key as it says right
here and go there, but I almost never
well, I never do that. I just when I'm using the brush, I'll hold the the command key, and then I can sample
and then paint. And then, you know, when I do that, again,
I hold the command key. I get the eye dropper sample, I release, it goes right back, and it's that easy. Okay, so I think
that's everything. Let me know if you have
any more questions, and I will get back
to you when I can. And and I apologize for
this one taking so long. I actually contemplated doing
a whole course on this, like, I wanted to
do one, include all the information
about the stream deck. But I decided to just too
much time had passed, and let me just go
ahead and get this out. And hopefully all
of this is helpful. And yeah, let me
know what you think. Alright. Take care. Bye.
25. Wrapping Up: So thank you very much
for taking this class. I hope that you are able to create something that
you are happy with, or at the very least, I hope you enjoyed the experience
of creating the piece. If there's something
that you think needs to be changed or you'd like to see implemented
in my next class, please let me know if you have any suggestions for the next
class, please let me know. So until next time, take care.
 Aaron Porter, Illustrator