Transcripts
1. Krita Quick Start Introduction: Hi, my name is Erin. I'm a graphic artists and a digital art instructor
to Junior College. Today I want to share with you
some of my knowledge about the free open-source
software called Krita. This is a short course
that will be a part of a larger series about
digital painting and Krita. This first part, as
I said, Quick Start. And what do I mean
by a QuickStart? My goal is to get you
up and running in the software in the
quickest time possible. And hopefully that's less than an hour or maybe
even 20 minutes. I often do digital
painting in Photoshop, but for someone new
to digital painting, something like
Photoshop can be a bit overwhelming with all of the windows and menus and
buttons and checkmarks. For me at least That's why
I think credit is special. It was created for
digital painting. And they, they have this tool
called the pop-up palette. And it is super intuitive and it puts everything that you
need at your fingertips. The learning curve is very insignificant compared
to other software. So in this quick course, I'm going to bypass all
of that unnecessary, those unnecessary tools and things that eventually
you'll get to know. But for now, I just
want to get you up in painting quickly. I want you to experience
what it is like to do digital painting and
in an enjoyable way. So that being said,
let's get started.
2. Download the Free Software: So the first thing we're
gonna do here is go to Crito, because I just want to
show you where you can find some good resources here. So I'm just going to
type it into Google and I'm going to click
on that first item here. And it takes me here. This is where we downloaded
Krita in right up here. What you can see
where it says Learn. You can click there and
find lots of videos and things and the critter manual. So right here you can
see the user manual. But what I want to
show you right here is the reference manual. And the reference
manual is right here. So I'm going to
click right there, and then we're gonna
come down here. I'm looking for something called the pop-up palette right here. So I'm just going
to click on that. This shows you everything
that you will find in the pop-up palette and
what you can expect. Alright, so that being said, let's jump right into it. So I'm gonna come down
here and open up Krita. And where you can see
we're opening version 5.6. And let me just make sure
that fills the screen. And I'm going to create
a new file right here. And from here, I'm going
to choose an A4 and make it horizontal or
landscape because that's, I'm doing this digitally. I mean, I'm in the US
and I normally would choose a letter size. You can see right here it says predefined and I'm
going to click here. And again, normally if
I'm going to print this out and I wanted to fit
the size of the paper. I'm going to go with US letter, but I'm just gonna go with A4, which is just a
little bit longer. It's somewhere
between, I believe, letter size and legal size. And make sure I'm going
to make sure that this is on a horizontal orientation
or landscape orientation, as they say these days. Old school that was
vertical and horizontal. And I'm going to choose Create. Okay, great. Now we've got the document open. Now I'm going to show
you the pop-up palette, and I'm going to show
you the pop-up palette and two videos. The first part is going to
show you the bare essentials, all you really need to know
to draw within critter. And then in the
second part of that, I'm going to show you
the all the other tools that are within the
pop-up palette.
3. Pop-up Palette: Essentials: Okay, so here is the first part. Makes sure that you are on the Brush tool
because you can see here's the tools
and here's a well, here's the toolbar up top. And there are more tools here
in this panel right here, and you can tear that off. Then I can put that right back. If you want to get into more details about
how these panels, these doctors, as
they're called work. I'm going to create
some videos later on, but for now, I'm just going to focus on the pop-up palette. But I do want to say
if you make a mistake, if you accidentally tear, tear one of these things
off here, let me grab that. You tear it off and
you mess it up. You don't know what to do. You can get that back by coming up here
where it says window. You click right here. And
then you can see workspace. And then right now I am on the default workspace and I'm just going to click Default. Once again. You may not have all
these panels while you won't have all of these because some of
these are custom, custom setups here a desktops
for me, but you want it, you should have the default and I'm just going
to click Default, and it'll go just like mine. So again, if yours
doesn't look like mine, you can choose Window,
workspace, default. And it will look just like this. So now we're gonna get into it. Alright, so if you look
over here at the tools, if I click on this right here, this is one that I sometimes
use, that I often use. And this is the Move tool. And if I right-click,
there's nothing happening. So make sure to get the pop-up palette that
you are on the Brush Tool. And the thing is
when you're drawing or painting or
digitally painting, you will be on the Brush tool, so it's quite natural. So make sure you choose that. And just right-click. Wherever I right-click, I'll right-click again
and make it go away. That's where it will pop up. So if you somehow end up
with it up in the corner, you don't like it there. Just right-click
again and then put your cursor where you want it
to appear and right-click. Alright? Okay, so actually let
me close that up. This is what it should look
like when you open it up, you'll notice that there
are these tools here. There's some paint brushes, There's a marker pencils, there's an airbrush
and some erasers here. You can explore those, play around with them and
see what you like. But to start out, this is a great set of tools
you don't really need. Need anything more. Again, I'm, I'm a person that loves to experiment
with new brushes and find them on the internet and play around with them and look for
that perfect brush. But these will get
everything you need done. You don't need more than this. Okay, So these are my brushes. And again, I can add more. I'll get into that
in another one. I'm going to keep
this super basic. Alright, so right here, let me close that up there. Maybe your pop-up
palette looks like this. There's these two little tabs here where you can toggle
these things open. I'm going to save
these for later. Okay, So we're just gonna
focus on this area right here. So these are your
brushes and I believe there's tin right
here, 12345678910. And you can change that into
preferences to add more. But this is the
default, it's ten. And if you want, so if we want to
paint, I'm going to choose this airbrush right here. I'm using a mouse
right now because, but I highly recommend that
you use a drawing tablet. I have a drawing
tablet right here, and I have the pen
to go with it. And I highly recommend
you use that. But for this first video here, I'm not going to use that. I'm going to save
it for later on. Alright, so here we are. So again, I'm using a mouse. So if you want to
work with the mouse, you're welcome to do it if
you're using a trackpad, I believe this will work, but I don't use a trackpad, so I won't be able to
help you with that. Often if there's key
commands are things, I will tell you whether
or not the difference between Mac or PC,
but a trackpad. I just don't feel comfortable
using one of those. But if you're comfortable using one to track pad
is perfectly fine. And again, working with a mouse that's
perfectly fine as well, but you'll get a
lot more control and a lot more intuitive control by using a drawing tablet. You can, you can get
those as cheapest, twenty-five dollars on Amazon and the tabulates them using, I believe retails for
about it for $375, but I bought my refurbished. So I didn't have
to pay that much. But you can get lots
of different kinds. They've run the whole gamut. I have another tablet
that I use for awhile and it costs
me about a $100. And that was a XP pen brand. And Helion is another good one and they're getting
better and better. Alright, I'm wasting time. I'm not showing you
about the pop-up valid. Alright, so from here, right, you make sure you're
on the brush tool right-click to get
the pop-up palette. We have our brushes. I'm just going to click on some of these different brushes and you see I'll click on
it and the palate closes. So when I click to
choose my brush, it chooses that brush. Okay, I'm going to right-click, choose a different brush, and you can see it behaves
a little differently. Right-click, grab this
marker, and we get that. Okay, so I'm going to choose any eraser here and say
this erasers kinda small. I want to use a larger, make a larger brush. I'm going to right-click. And I want to scale this up
right here in the tools bar, you can see opacity and you
can see size right here. I can scale that up right here, but I'm gonna do it within
the pop-up palette. So right here, there's these
two little marks right here. I can toggle that open. And right here you can see it
says the size is 60 pixels. And I'm just going
to scale that over. You can see if I move
my cursor over here, you can see the size. I can scale it up a little
and just kinda move it over so I can see the
mic. Check the size. That looks good to me. So I'll click to close
the pop-up palette and then I click again
to begin erasing. Okay? And from here I'm
going to right-click. You'll see here, there's another
thing that says opacity. Actually I'm going to click
and I'm going to hit undo. I just hit Command Z, undo. Other place to find that
would be edit undo. And you can see Command Z on
a PC that will be Control Z. Alright, so that's
how I undo that. And the thing is
when I'm erasing, I'm on the eraser tool. And you can see it says
right here, eraser soft. The opacity is at a 100%. So if I click and then click
again, it erases everything. So I'm going to right-click
and I'm going to drop that opacity to 50 per cent
or somewhere around there. Okay, Now I'm going to click, and now I'm going to
click and you see it's not erasing everything. So I have the control
of that opacity. I'm going to drop it even more. And you can see I can just keep erasing after right-click and just goes at a much slower rate. If you are using a
drawing tablet, you can, that will be controlled by the amount of pressure
that you're using. But that is one of the
great advantages of this, of using a tablet and a pen. So, but I'm going to crank
that backup to a 100. And again, as I said, I can use this opacity and this
is the brush size. So I can do that either within the pop-up
palette or peer. And you ask, why is
it so redundant? Why do you have those
same things right there? And that is because say, I'm going to click right here, toggle that opened down
here at the bottom. And you see that little
piece of paper right there, that little paper icon. If I click on that, it gets rid of all
of those tools. If you're working on a
smaller computer screen, now you have a lot more
real estate to work with. So that's when using this interface only will
really come into play. Okay, So I'm going to
right-click and I'm going to toggle that back on
just so you can see that that's how you
get these tools back. But I'm going to leave them
off for the rest of this, for this rest of this session, I'm going to toggle that on. And there we go. Okay, since we're in
this, when you here, you can see it says 100 and this is just a
zoom in and zoom out. It's a little hard
to see because I don't really have
anything on my, on my screen here. So let me add something
like a little Smiley face. Alright, and I'm going to
right-click and I can zoom in and zoom out by just dragging
right and dragging left. Okay, that's simple. And I'm going to click away. And actually I'm
gonna go back to the eraser and I'm
going to erase it. There are other ways to
clear everything off, but again, we're sticking
with the pop-up palette. Get you drawing in
a nice natural way. Okay, so I will
get into the flow and the opacity in
the next video, but you can control
those from here. I can also control the
angle of my brush. So say if I'm working with this, say this brush here. And you see, it's, let
me make this larger. I'm going to right-click
increase the size of that. And so you can see this is
the shape of this brush. If I right-click, I
can change the angle. So I can reduce the angle and you can see
that angle is changing. And when would you need this? So say I'm drawing and I want it to be fattest
at this angle, or I want a thinner line, I can just change the angle. And that way I'm going
to go back to my eraser, crank that brush
size all the way up so I can wipe away
all these things. Again, this is pretty
much like drawing and painting in a normal way. Okay, If I want to put that, so I'm going back to this brush and if I want
to put that angle BAC I can adjust it here. I can click here and adjust it by using that little
circular thing there. Or I can click this little
area here and I can flip it. And right here at the bottom it says reset angle and click, and it goes back to normal, straight up and straight across. Okay, so now I want to show
you how to change the colors. Alright, so right
here you can see this is the color wheel. And inside of this is
this little triangle. It allows you to adjust the hue, which is color or pure color. And we have the
darkness and lightness. Okay, so that's the value. And I changed the color. So right now you can
see it's on blue. But if I come out
here and paint, you can still see it's black. So I'm going to right-click. And what I need to do within
this triangle is move this little dot into
the color area. And now you see it. That little color chip right
here is showing up as blue. So now I can paint blue. I'm going to right-click. I'm going to change that
color value right here. I'm just going to
rotate it over. Now we're in this pink area. And I can click and then
paint with that color. Alright, I'm going
to right-click and something that may happen, and it happens to. If you're not
familiar with this, you see how I move that
cursor into the black area. And when you come in here, you might click on
that and drag it over. Okay, so I'm going
to paint with green. And then I start painting
and it's still black. You just have to
remember that in order for the color to show up, you have to move out of this
either black or white area. You have to move it up into the area where it
shows the color. In here, you can see
you can make it darker. And over here I can make it lighter and anywhere in-between. Alright, so now
it's all the way up in that brightest green area, and now I can paint with green. So I'm going to
right-click again. Something else that
I want to show you. I don't know if you
noticed when we started, I believe this area was black and now it's filling up
with different colors. And this is your, this is this is
your color history. And by, I can come
back to a color that I used previously
by selecting here. So say I want that
blue that I used. I will just click there. Boom, I'll right-click. And I want that
green that I used. I'll click here. And it remembers, I believe, 12 colors, up to 12 colors. Okay, So that is
how we can do that. Alright, so we got a
couple more things here. This is important. This here
is to rotate your canvas. And the reason I'm showing you this here
is because you might accidentally rotate the canvas over which that and
click on it and go. Now I can't
straighten my canvas. All this is is a way
to tilt your Canvas. I don't know if you know
how, when you're drawing, when say you have a
piece of paper and you drawing and you can't get that angle just right
without hurting yourself. You'll tilt the paper and
then you can get that angle. And that's what this is four. So I can rotate my canvas
and maybe hit the strokes. You see, now it's rotated that stroke without
actually having to go in and change the angle of
this brush because of the angle of my Canvas. Alright, so to get it back, I can just click on that
dot and rotate it back. Or I can just click on the dot right there and
it goes right back. Okay, so what else
do we have here? Okay, so we have
this thing here. Will flip my canvas. You can see, and this
doesn't actually flip it. Say if you printed it, it's
going to print normal. But what this is is a way for and An artists to
see their work, to step back and see, and see how it looks like. I do a lot of portraits. And when I would paint
in the real-world, I, I'd keep a mirror by my easel, and I will turn around
and look through the mirror to see
what it looks like. The reason to do that is
it gives you a fresh look. Have you ever worked on a painting or
something or drawing? And you thought it
looked beautiful. And then the next morning
you came back and you notice that i is a little off, you know, that they're not
lined up or something. Your brain tricks you to seeing everything
lined up perfectly. And this is a way to trick your brain into
seeing things fresh. So you just kind
of flip it and go. Okay, I can see the
mistakes a little better. And if you don't
overdo it, it works. Most of the time. Sometimes you'll
walk up to a friend and you'll see their
drawing and you go, that looks a little off. And you think to yourself, why can't they see it as just
the way the brain works? And I'm sure it will happen
to you at some point. Okay, so that's all this is, is just the flip it to
give you a fresh look. And then you flip it right
back and continue working. Alright, so I think
that is everything that you need to get started
with, the pop-up palette. There's a few more things here, but I'll get into those
details in the next video. But if you ready to go, you can get started
just as we are now. Alright, good luck.
4. Pop-up Palette: More Control: Okay, so here we are back for the second part of
the pop-up palette and wipe everything out. I want to show you
the difference between the opacity
and the flow. So I'm going to click
on this marker. This marker brush is actually
one of my favorites. And let me reduce
the size of that. So it's something a
bit more manageable. Another thing that you
can do, if you are, if you're in the key
commands which I highly recommend
getting used to is you can make change
your brush size sizes by using key commands. I'm like here, I'm using the
bracket keys on my keyboard. The left bracket makes it smaller and the right
bracket makes it larger. On my keyboard, it's
just to the right of the letter P, as in Paul. Those bracket keys. And I can show you
those right here. Maybe I showed you those. Might still have
a wired keyboard. Alright, so that's another
way that you can do that. The nice thing about using the key commands here
is you can actually see the size weights, scaling. Alright, so I'm going to
right-click and we're on this on this marker tool
or this marker brush. And I'm going to add
some color here. I'm going to move over
into the blue area and maybe change it up
just a little chunk. Okay, so I'm gonna click and
you can see right here the, the opacity is 100%
and the flow is at a 100% and I'm using a mouse so I don't have that pressure
control within the brush, so I'm just going to
click and click and draw. And that's flow, a 100%
opacity at a 100%, I'm going to right-click
and I'm going to drop the opacity to about 15%. It doesn't matter. You don't have to go
exactly 15% to try this. And I'm going to click and, and start painting here. You can see it hit
that 15% mark in it, just debts as far as it went. Okay? So now I'm going to right-click and I'm
going to go crank that backup to 100% O 11 and I'm going to drop the
flow down to around 10%. Alright, so now I'm
going to click, Okay if to click to close the pop-up L and
we're going to click, and I'm going to start painting. That's my 10%. And if I keep painting,
it's building up. Actually let me reduce that
up a bit more because that let me undo Command Zero
and try that again. I'm going to drop
that flow even lower. Okay, we're at two. Alright, so here we go. You see how it's
coming in that way? And then I'm going
to go back up. My finger is still on the button and it's just building up. And if I do this long enough, it's going to build
up to a 100%. Okay? So if I keep
going, there we go. And you can see here
now we're getting some, we haven't a little
bit of fun here. You can see how
it's building up. So I can build, adding that way, building
up with that flow. That's about, that's
about the flow means the amount of paint
coming out of your brush. Again, if I do
that with opacity, it will only build up so much. So let's see if I build
a 2% and it's building. And it's building. And the reason it's building is because I'm releasing the mouse. So it's, it's overlapping
that opacity. But if I only, if I just hold my finger
down on the mouse button, it's going to max out. Unlike the flow, the flow
without the clicking, repeated clicking, it
will continue to build. Okay, so that's the
difference between the two. Okay, so now I'm gonna go
back to the opacity here. Let's see if I drop the opacity
way down out paint here. And you can see there it is. If I release and I crossover, it's going to overlap. But it's only building
up in that one-click to that 2% or whatever
I was I chose. They behave a little
bit differently. You'll have to play
around with it to get a better feel of
what is happening. So I'm going to
click on my brush. Erase everything right here. These are the color chips. This is the foreground color
and the background color. I'm going to bring
back the tabs. There we go, the Dockers. And you can see here I have the foreground color and
the background color and the Dockers open in the
toolbar open you can see there is the
foreground color and the background color. When I'm here, I can switch
these back and forth, but that's basically all
they're good for in the, in the tools bar, in
the pop-up palette. Up here, I can swap them
by clicking right here. And I can go back to
the default right here, which is the black foreground,
the white background. And I can click and you see now my colors are
black and white. And another way to do that
is by tapping the D key, I get the default D as in dog. And if I want to flop those colors like I do with
that little icon here, I can hit the X key
and it flip-flops. Alright? Okay, so I'm going to hit X and we back to black and white. Alright, let me make sure
I'm on my, on a nice brush. Alright, so here I want to show you this little tag thing here. If you click on that, you basically the way you organize your brushes
as you create tags. And you can see that the tab tags come with a
set of default yours, yours will look different from mine because I've added a few, but right here I'm on my
favorites and I can change to different sets by
choosing different tags. And you can create your own. But again, I'm going to save
that for another video. But for now, just
explore these and enjoy playing around with
the different brushes here. Right here, you'll see it
says clear the color history. And you can wipe out that
colored history here. And you can see it goes to gray. And I do believe
that is everything. There's a couple of more
things like here you can see if I click on this
watercolor brush loops, is it has different, some different settings,
dulling smudge. And again, I'll save
that for another video, but play around
with those for now. But front with what
you have here, you should be able
to get in here and start drawing and
painting within Krita. So in the next video, I'm gonna do a quick
demonstration of how I work using the pop-up palette when I draw
and paint within Christa.
5. Drawing with a Mouse: In this video, I
want to show you how to paint with a mouse. I mean, you can also use these same techniques
using a track pad as well, but I would highly
recommend that you get a drawing tablet. Alright, so here we go, is, I'm on my brush, the brush tool here. I've selected that. And when I paint, so I'm going to make a circle, I'm going to make
my brush larger. I'm going to right-click to
open up the pop-up palette, increase the size of my brush, and that should do it. So I'm going to
paint with black. You can see my color chip
here is black actually, right-click you see it's
down here in the black area. So we're good. And then when I go to paint, you see it's just a 100% black. If I was using a drawing tablet and I'm going to pop that
open for just 1 second, just to show you how that will work is it's pressure
sensitive so I can press hard and you see it's getting it's black and
then if I go lightly, it becomes much lighter. You also see that depending
on how I'm tilting my brush, and this doesn't work
with all of the brushes. It's only certain brushes
rotate like this, but I'm just rotating my
hand on this brush so I can make different
changes like that, but that's not what
this is about. Let me put that aside. And going back to this, I'm going to erase everything. I'm just going to just
to make things easy, I'm just going to trash
that layer and create a new one by clicking on that
little plus sign right here. And let me show you that again. Here's the trash can. Click on the trash can to delete that layer was drawing on an a plus sign and now I
have a fresh dry area. So you can see my again, my color is black and the
opacity is on is one. It says 1.01, I'm going
to call that a 100%. So is that a 100%
and flows at a 100%. So when those are at a 100%, they just paint like that. I'm going to hit Undo. I'm on a Mac, so I'm going to go Command Z a couple of times, Control Z on a PC. Now what I wanna
do here is either reduce the opacity
or reduce the flow. I'm going to reduce the flow
and I'm going to put that all the way down to
like, that's like 2%. That might be too
much. Let's see, because that actually is
working out pretty well. So you can see, if I want to paint a circle, I can come in here
and make it a sphere. I can paint like that. I'm going to right-click
and go to my eraser. And I'm going to increase the size rather than go
back in the pop-up palette. I'm just going to go up there. And I can make that
circle just like that. I want to show you another
little trick here. I'm going to right-click to
go on the pop-up palette. I'm gonna go back to
this marker brush again. You can use any brush
you want for this, but that's one of my favorites. Rather than choosing
an eraser here, if you click up here
in this toolbar here, that little eraser icon, it will change whatever
brush you're using into a, into a and eraser. So you'll get the same texture and the same look and
feel as the brush. So now I've painted in
there and this is at 2%. And you can see I can
add this shape in here, although this isn't
going so well for me, because I'm used to using
this brush with a rotation. And it's not, it's not
working so well here. So I'm going to put
that back to regular. I'm going to right-click and
I'm going to choose this. A nice, nice air
brush right here, because this nice, smooth and round and I'm gonna
do this again. I am going to make
sure I'm painting with black and I'm going
to paint with black. That's too heavy.
So I'm going to just hit Command Z or Control Z. I'm going to right-click reduce
the opacity or the flow. In most cases it doesn't really matter if you reduce the
opacity or the flow, but I preferred to reduce the flow and this
time I put it on 1%. And let's see what happens here. Okay, that's way too low. Let me crank that open. Let's try 5%. And as you can see,
depending on the brush it, it seems to make a
bit of a difference. Okay, So we have this area here and this
is going to be a sphere. And I want to clean
up those edges. So I'm going to click on
that eraser right there. And I'm just gonna make
sort of a highlight here. And there we go. We have sort of a smear, a smear of a sphere. So it's not perfect. I, this is one of those times. I'm going to go in,
go back to them. I'm going to
right-click, go back to my marker and just
clean these off. And this time I'm going to put the eraser on, but the flow, I'm going to kick it
up to 100% and just kinda trim off those edges. It's not pretty, whoops. That was just the lack of
control with the mouse. Let me go back to this other
eraser. Let me try this. Okay, see this one
is shaped like this. If I increase the size, you can see it's that
same sort of shape, but I'm gonna go back
to the kneaded eraser. It has a round shape. I'm going to kick that the
opacity and flows at a 100%. And I'm just going to go for it. There are other ways
that I can do this, but I'm avoiding them right now. I want a sharper edge, so I'm going to reduce
the size of my brush. If you remember earlier,
I said you can, rather than going here
in the pop-up palette, I can just use the left bracket
key to reduce the size. You see, when I reduce
the size of that brush, I get a, it's a lot
less soft edge. And again, I'm going
to get into how to change that later. But for now, that's the
main thing I want you to. The main takeaway is this is a quick and easy way
and I'll show you other ways to do
this sort of thing. For one thing, there's a
ton of other erasers and brushes out there that
will do this same thing, but I'm keeping everything
limited to the bare minimum. But you can see it's
kind of a wobbly circle. But there we go. We have a sphere. I'll get into more on how to create a nicer sphere
in later videos. But right now, I'm
just going to keep this as simple as possible. And I also want this to be as naturalistic
as possible because there's new tools like selections and things
like I can make this a perfect
circle by using a, using the circle tool. But I want to keep this
just like with drawing with pencil and paper to keep
it as simple as possible. Okay? That is basically it. So if we're drawing
with the, with a mouse, I have to be very aware of the, you know, the opacity
and the flow. Again, you can use opacity. I'll go ahead and drop, crank the flow up and
drop the opacity. And let's see. You can see it's it's
still on the eraser. Okay. So I'm erasing. I was trying to dark in it. And you can see it's
building up nicely. And it just depends on what you, what you prefer to use when
it comes to opacity and flow. And I've explained
the major difference between the two in
a previous video. Okay, so there we go. We have a nice little sphere and that is using the brush pallet. I mean using a mouse and you could do this
with a trackpad. But again, the main
thing you need to know is right here
we have opacity. You can adjust your
opacity up here. You can adjust the
size up here as well, but I'm going to right-click
go into the pop-up palette, and depending on
the tool you have, but here, I'm on this airbrush. You can see I can
adjust the size, the opacity, and the flow. And if I have a brush that has more of that angle like
this marker brush, I can adjust the
angle right here. I can type it in, I
can click up and down, but you can see I can
change the angle here, but using a brush, it's connected to the tablet. And actually that's
one of those things that it also depends
on the tablet. So if you do get a tablet, make sure that your tablet
will allow that angled. Using angles when
you use the brush. And I will talk about
that in another video, but for now, that's
it for this video.
6. Drawing with a Tablet: In this video, I'm
going to show you how to use a drawing tablet. And in case you don't
know how to use one. Just going to talk about
that a little bit. But in this video I won't
be showing my face. I'll be showing the
drawing tablets so you can see what this tablet
is actually with a, what I'm doing with the pin. And again, as I said, this is
one where I will draw here. But the, but I'll be
drawing on the tablet. But the, I'll see what's
going on on my screen. So you can see here, I'm just moving the paint around and you can see
it's moving around. My computer screen. Right here. There's
a button here. You can change these up and reprogram them to do
different things. But right here, this
is my right-click. So if I hold my, my pin close to the drawing
tablet and I hit that button, it will right-click and
bring me my pop-up palette. So this is how I'm working. So right-click, bring up the pop-up palette,
hit it again. That's how I'm working. I can work very quickly. So the first thing I wanna
do is get rid of this, this what I've done before, so I'm just going to
erase all of this here. And I'm going to
show you how I draw. So I want this. I usually use this marker. And the reason I liked
this is because you can see it rotates with the, the movement of the pin. So and it's also
pressure sensitive. So if I press lightly, I get a light shade. And if I began to
gradually press harder, you can see it begins to
draw much, much more dense. And that's me sort of scrubbing and you can change the settings. So actually, the problem I'm having is I
change my settings. I'm going to right-click
and you can see the flow is at 0.2%. I don't usually
keep the flow that low when I'm using the pen. And here we go. Let's
try this again. If I press drag among the
eraser, let me change that. I'm going to press drag. And you can see I can start
pressing heavier and I get, and it goes to black. Alright, so I'm gonna hit Undo. So now this is more
like what I am used to. Okay, So that looks pretty good. Now I'm gonna go to your eraser and I can just trim that down. This isn't gonna, I'm not
gonna make this perfect. And there are ways
that you can use other tools to make
a perfect circle. But I'm going to save
that for another lesson. And that definitely won't
be in the QuickStart. So we have that and I'm just
going to lighten this up. And you notice just
because I like the shape of this and
it adds these lines, I'm constantly moving my hand around to get different,
a different look. So I just find this
a little bit more interesting than just
having a simple circle. And if I want, I took a
little too much out of that. I just switched right back
to the brush by going up to the toolbar and
unchecking that eraser. And I can add a
little more there. Okay, So this one, That's my first circle now
I'm gonna do another one and use the airbrush like
I did in the other tool. I'm going to right-click
and increase the size. And let's see what we gotta do. Turn off eraser. And you can see I can just
scrub like I'm drawing. If I get a little too
far from the mic, I apologize because
this camera is right in front of my face
and I'm trying to, I'm trying to see over it. Alright, so I'm going to
reduce the size of this, so I get a harder edge on that. And I'm going to
kick the flow up significantly and then I'm
going to reduce the size. That size looks good, okay. And you can see now I have that. I'm off with the eraser. And I can kind of shape this
a lot better and get a nice, a nice hard edge on this. I'm not gonna go
too far with this. But you can see the point
how I can shape that. Again. Sorry about the volume changing
because I'm moving around my mic is as well
trying to to see this. We go. Okay, so
you can see how we can go around and we
have a nice fear. I'm going to increase
the size of that. And I can brush lightly. And this is just the
way I work where I often will build up a lot of color and then take
away using the eraser. I don't normally work
like this in real-world, but sometimes I do. There is a technique
where you use charcoal and you'll draw in, you erase things using
a kneaded eraser. Okay, so that's one way I'm going to get rid
of all of these. I'm just going to delete
that whole layer, make a new one. And the other way put
this off of eraser. I can just build, build this up. I'm going to make my size of
that brush a little larger. And you can see, I
can build it up. That way. Whoops, too small. We go hit the eraser, come around the edge and
tighten that shape up. I went a little too
far with the darkness. So I'm still going
to come in here and lighten that up to
add that highlight. Okay? Alright, so those are
just some different ways. I just wanted to show
you how you could use the a drawing tablet
to its advantage, much more so than using a mouse. And I have an ergonomic mouse. That's why it looks a
little strange here, but yeah, that's the difference. Alright, I hope
this was helpful.
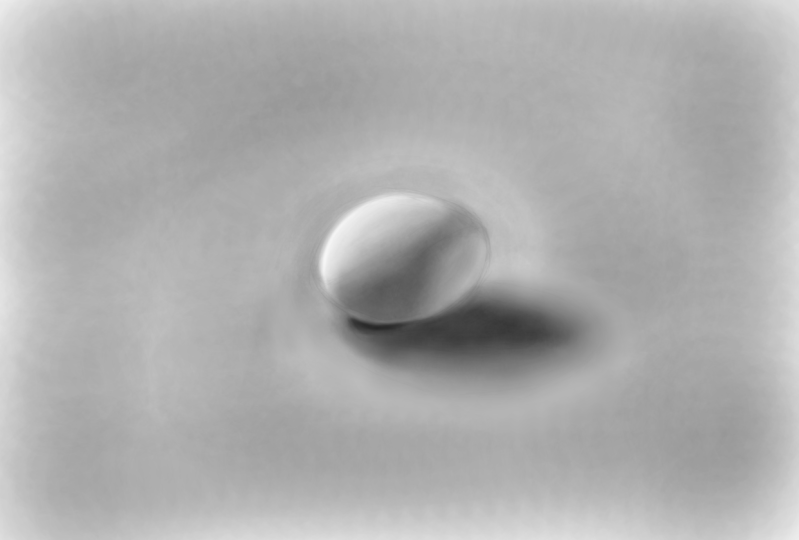
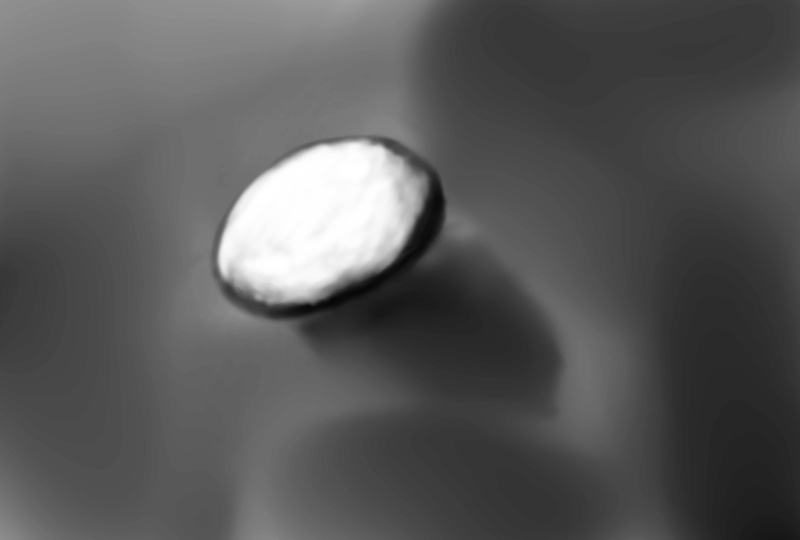
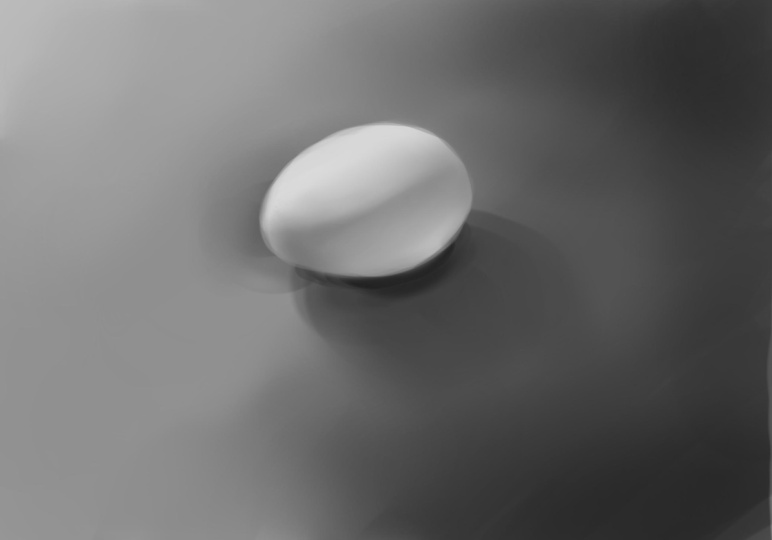
7. The Project: Painting and Egg in Grayscale: Alright, so with this, this is actually going to
be the project for the, for this quick course here. And it's a very simple thing. I'll have more
projects as I develop more courses that go
in tandem with this. So what I have here is this image that I found
on Pexels of an egg. This photo was
originally posted in color and I converted
it to black and white. The reason I've converted
it to black and white is because I want you to
draw in black and white. And by drawing in black
and white or gray scale, that just takes out
all of those extra, extra thought processes
that we have to go through to create color. So we're just going to
keep this very simple. Alright, so I have my
image here and I'll shorten the window that I'm using here to display Christa. And this is open as a PDF, and it's just in the
background on my computer. And you can also
print this out and just tape it up if you
have a very small screen. Alright, so I'm going
to right-click and I want to get this back to
default so I can get black. I'm just going to hit D as
in dog on my computer to, on my keyboard to get the
foreground color is black. And I'm going to
start this out with a using this pencil
icon right here. And again, I'm still
on the, My Favorites. If I look right here
with these tags, I'm still here on the, My Favorites, which
should be the default. And I'll get into this in later videos on an
another later course. But for now, you just know
that that's there and feel free to go through these and try out some different brushes. But you will likely not have the same thing that I have because I have installed extra, extra brushes and
things like that. Alright, so I'm going to
start off with the pencil. Make sure that you are
on your first layer. And just make sure you haven't toggled off
of the paint layer. So you write here we have this background layer
and the paint layer. And I'm just going to
start drawing this egg. And all I'm really interested
in is this EKG right here. And you can see
there's a shadow being cast across dislike a little
bit of darkness here, but then there's
some lightness here. And that's probably because
it's being reflected up from the surface
that is, this is on. So we have this bit
of a dark line here. So we got the highlight, the light coming here. That's the main
direction of the light from upper left to lower right. And it's casting a shadow here, but there's also a bit
more light actually, I said I thought
that was reflected, but you can see there's
a secondary shadow here. There's also a secondary light coming from the upper right, going to the lower left. So that's where we
get this shadow here. But you will also notice, see here that I was talking
about reflection. You can see there's a little
bit of reflection off of this darker part
of the table here. And on this side, it's not I'm not exactly sure because we're not all the way around to the side, but it looks like there might be just a little
bit of reflection. They are. But often if you
sit something on a table and it's a bright
table, kind of light. You will see that it is
lighter on the underside. So be aware of that. Okay. So I'm just going to
go ahead and get started. And you can see the
shape of my egg. It's not, it's not going good. So I just have to
refine that actually. Let's see. If I start at the
front end, go across. It looks like it's
more like that. And this is probably too big. I'm going to start over. I'm going to just delete that
layer and make new layer. And try this again. And the egg, the axis, it looks like it's
going that way. And I'm just gonna make
this smaller because the shadows are going to be a very important part of this. Don't spend a lot of time
making this perfect. All I really want you
to get from this is paying attention to the
lights and the shadows. And you can see,
I can see there's that light coming across there. And also I'm using, remember I'm using a stylus, so this is pressure sensitive. And I think that looks good. I'm just going to draw out
the area for these shadows. Actually, I'm gonna get rid of that line because it's kinda heavy and the line will probably show through in the final, in the final piece
a bit of the lines. And so those are going to be an artistic part
of this drawing. So just make sure those
look the way you want. Alright? I think that looks good. Again, I'm not going
for perfection. So if you're doing this, I'd love to see you posted
in the project area. And it does not
need to be perfect. You just need to. Good. I just want to see that
you've got the basics and share and see what, see what others have done. If you decide to get
creative with it. That is perfectly fine as well. Like using a different brush. If you use a different
brush than that I'm using, you will get a different look. But for now, just to
keep things simple and I think I'm good here, just to keep things simple. I am going to use the airbrush and I
think this looks good. I'm going to increase the
size of that and I'm just sort of brushing
over these lines. And the only reason
I'm doing that is so that there'll be very light and I don't
have to worry about removing them later if I
don't like the way they look. And I think that's good. I
like the way that it looks. There are other
ways to deal with this that we will get
to in the future. But right now, I'm trying to
keep everything super-duper, simple and very basic. Alright, so now I'm
on the air brush. I've chosen the air brush
size is a little bit large. Remember, you can
use the bracket keys to reduce or enlarge the size. And another trick that I'm going to throw
in here, in this, the reason I'm throwing
this in here now is because It's
something that I'll probably do without thinking
because this is usually the way I size up or
increase the size, reduced the size of my brush
is by holding the Shift key, I can drag to the right or
directs the left to the right, enlarges the size, drag
to the left reduces, and that's just
holding the Shift key. Alright, so now I'm
going to start drawing, but this is a bit heavy, even though I have that
pressure sensitivity on this, it's still a little bit heavy. My hand is not that sensitive. I can't draw that lightly. And if you have a
drawing tablet or the drawing tablet
pen that you're using might be more or less sensitive. So keep that in mind, but I'm going to drop the
flow down to about 50%. And that's roughly 50%. That's still a
little heavy for me. I'm going to drop it maybe down that twenty-five percent
somewhere around there. I know I put 23%, but I'm not being
real particular. Alright, so I'm just going to
increase the size of this. Actually what I'm
gonna do is let me undo Command Z to get
rid of those marks. And I'm just going to paint
across this entire area. And I'm just looking
at the drawing. And if I do something, I don't want to just scribble in the whole thing in all
all in one motion. Because if I make
a mistake and I decide I want to undo it, I'll have to end up
erasing everything. So I'm just trying to add it in there a little bit at a time. And you can see that since
I made this brush so large, that it's starting to
add this weird texture, but I kinda don't
mind that texture, but just be aware of that. Okay, Now I've got it
in there and I'm going to start looking
at can see it's a little darker in
the upper right. Maybe I'll make that
brush a little larger. Okay, I've maxed out the
size here you can see. But I'm just going to, I'm
going to zoom out a little. Ok. And there we go. Actually, it's probably
a good idea to zoom out getting this base,
base color in. And I think what I'm gonna do
the way I'm going to handle this is to draw in the shadows. And then I'm going to come
back and erased the area. Erased the area for the egg. Again, this doesn't
need to be perfect. Just want you really
to get a feel for the, for the drawing here and Krita, That's all this is mainly about, but hopefully you can get a little drawing practice
in there as well. Alright, see I went a
little too dark here. So I'm just going
to right-click, go to that kneaded eraser
which is a bit soft. Crank the size of that out. Oh, that's a bit heavy. I'm going to right-click
and I'm going to drop the flow of that eraser to just remember when you
drop the flow of something, you just remember that it's going to remember
that and you're going to have to come
back and fix that. Okay. I think this is good
enough for now. So now I'm going to, oops, I'm going to start
adding the shadow here. I'm going to right-click, go back to my airbrush. And I'm going to
reduce the size again, I'm just using the Shift key
and dragging to the left. I'm going to start
building this up. And I'm looking at the drawing. Again, this isn't perfect, but I'm not all about the
perfection right now. The imperfections or what makes a painting more interesting
than a photograph? Well, I shouldn't say that. That's not, that's what makes a painting different
from a photograph. And in some cases, it can make it more
interesting, but not always. Sometimes a good photograph
is all you need. Alright, so I've kinda
darken this a bit more than the original
photograph. But that's okay. I think we're going to
go back and smudge this out a little bit and use
the smudge tool right here. You can see here it's a
little darker right here. So I'm going to reduce
the size of that brush. And again, I'm overlapping. I'm not going to worry about about overlapping
that egg too much. I'm just touching
these places here. And now I'm going to increase
the size of that brush. Try to touch on this area here. I think that looks,
that looks good. Okay, so now I want to
come across this area. You can see there's this
dark here on the underside, but then there's
also a dark area here in It's a bit light here. And the brightest part of this
egg is on the upper left. So I'm just going to
come across here. And here. I'm a little concerned
about not going too far over the the background. Reduce the size. Thing is once you reduce
the size you have to, you know, you get more strokes. So you can see that I'm
just sort of going along with the direction
of the strokes. You may have to try these a few times before
you get the feel for it. This is actually my third egg here that I've been working on. Because I tried one with the fabric in the
background and it just, it just became too complicated. So I really wanted
to simplify it. Now, again, I'm using my eraser. Again, I'm just
right-clicking the pop, pop open that pop-up palette. You can see I'm getting a
little too streaky here, so I'm just enlarging
that brush. The thing is, I'm
using a tablet. So you see when I'm drawing, the moment I press
that pin down, it shows me a smaller brush because it's pressure sensitive. Okay. I think that looks pretty good. And come across this side. Now here I want to
get a little more precise and see I enlarge it when I don't
want so much precision. Reduce the size. When I went that precision. There are a number of
tricks that I am dying to show you right now
that you can use. That are nice, nice things to have when
you're working digitally. But I do want you to see
just how simple this can be, how close to drawing
on pencil and paper, just how close they can be. Alright, so now I'm getting
to the point where I want to go around here
and lighten this up. So I need to define
that edge a bit. The way to define it,
I'm going to make a really sharp image
here, sharp edge. I'm going to zoom in. And then I can add this and I'm just
going to add some strokes. And that looks pretty good. Maybe come around here. I think I overdid it here a bit, a one in a little heavy. But we'll fix that with the
blending the blending stump. Okay. I overdid it there. Okay, I think that looks good. Maybe add a little
bit more darkness here and we're good to go. Okay, so I'm just
going to zoom out. And you often want to zoom way out to get a
good look so you can see, okay, that looks good. The egg looks a little wobbly, but it's still
looks like an egg. I still have those shapes. So I'm happy with that. So
I'm going to keep going. I'm going to zoom back in. And now we're gonna get a
little technical right here I'm gonna kinda do now is
to smooth this out. I wanted to show you how
to get to a smudge tool. So what I'm gonna
do here, actually, I'm just going to
come right over here. And you can see there's
different tags here. Alright? And you can make a
new tag, ul tag, but what I wanna do
is search this in. Remember we should be
in the default window. So you have this if you
want to get back here, remember just go
Window Workspace, choose default in there. But right here in this window, right here at the very bottom, you'll see this thing
that says Search. And if you don't see it, just make sure your your palate, your workspace is
completely shown. Make sure it's not cut
off at the bottom. I'm just going to
end right here. I'm just going to type in blend. And you'll see we
get a number of blending tools right here. What I want right
here is this one, it looks like a Q tip. This one, the smudge tool that this is actually
called a blending stump, this little drawing that something you'd
use in real life. But you can see right here, this one is just a
little bit softer. If you look at the image here and I'm going to
click on that Q tip. And that is an actual technique
that you would use while, while drawing with charcoal, is to use a Q-tip
to smudge things. So I'm going to increase
the size of that. And you can see, I can run it across these areas but be very
careful, don't overdo it. But also remember that you can, you can undo it. Alright, so I'm going
to right-click here. And you can see the blender
blur is right here. It's not showing up
here in the menu, but you can still see
that it is right here. And I can drop the smudge rate. I can adjust that if
it's smearing too much. And I think I'm
just going to drop the opacity to about 50% just to make it a little less active. And C, Now I'm going
to, let me see. I'm going to zoom in here. And I'm going to hold
the space bar to get that hand tool so I
can move, whoops. So I can move this,
reposition this, and you can see my
brushes that size, I'm going to reduce the size. And you can see I can smudge
on these these lines. If I overdid it a bit. I also want to try to keep this a nice sharp edge because that what do you call
it, the sharp edge. There's going to draw
it, draw your attention. You don't want to have
everything all soft and fuzzy. Because if everything
is soft and fuzzy, there's no point of interests. You can see here. I'm blurring over
these areas here. Although I don't want to get rid of all of this texture in here. I'm just trying to get rid of these lines or reduce
them actually, because I think a little
bit of texture in here, does it make this a little
bit more interesting? Because if I smooth
everything out and in, if you do it, that's
perfectly fine. It's up to your taste, but if you do it by
accident, That's okay. This is a learning process. You are not going
to get all of this done the way you
want the first time, the first time you do it. And like I said, this is my third, this is my third egg, trying to find just
the right exercise. To do this. I thought about using an Apple, which would be infinitely
more interesting I think. But then you run
into the problem of the texture on the apple. So the different color, color variations on an Apple. So that's why I
settled on the egg. Just makes things
a lot more simple. And just go on and
through, touch these up. I'm just hitting the lines. And again, if you
smudge everything, it might start to
look a little dead. And again, that's okay. But if you do that, you
realize that you're doing it, you can always undo it. Or you can hit this
with the brush again. And that's what I'm gonna do. I'm going to zoom out here
and see what this looks like. That looks pretty good. It looks like it looks like chalk and I'm going to go
over that edge because it's looking a bit It's
looking a bit too soft for me. Actually, I want to increase
the size of that brush, touch these up, especially
these areas in the back. I want to keep a little texture, but yeah, see how it's
starting to look. A little limb I'm going to undo. And you can, you
should be able to see what I'm talking about. Here we go. You see how
that extra texture just, it just keeps it looking a
little more interesting. So I want to remove some of these things and blend
some of the things, but not to overdo it. Now, I'm happy overdid
it a little bit. I'm happy with this, but I need to sharpen this lineup again. So I'm gonna go back
to my airbrush. I'm going to zoom in and
then sharpen those edges up. And I think I'm
gonna be done here. So I'm going to reduce the size so I can get a nice sharp edge. Maybe not that much. There we go. And I'm going to show you
another little trick here, rather than adjusting
the color here. What I'm going to do, I'm going to sample
this color here. If I hold the Command key on a Mac or Control key on a PC, I can sample the color. So when I hold the command key on it again, Control on a PC, I get to, I get that eyedropper and you can see I can sample
that gray color. And now that's going
to come in here. And I can just add that,
sharpen that lineup. Because I just feel like
if I do this with black, it's going to come in
a little too heavy. And I'm not going
to like like that. So you can see I'm just
going back-and-forth on the outside edge, on the inside edge. And I'm just constantly
re sampling. And I should be able to get
that lined up just right. And again, I'm adding
the black on the edge. There we go. So this looks a little
better now I think I'm going to zoom out
and take a, take a look. Again. I'm just going back and forth
to get that right edge. We go around here. And if I want this to be
a little bit more sharp, I can reduce the size of that brush and I get
a much sharper edge. Here we go. I'm gonna
go to the outside, sharpen it out there. And it may be tempting to
draw a line around your egg, but try to resist that. Because you notice in
the photograph there are no lines around this egg here, but you can add a little bit. It's fine for your
artistic interpretation, but don't go overboard. I mean, I guess unless that's the style that
you're looking for, this is you're drawing that
you're doing and it's up to you what you want to
do with it. Okay? I think I'm done here.
I'm going to zoom out. And there we go. That is my final piece. And one thing I didn't do if
you wanted to take a look, this little thing, this little icon right here
that flips the canvas. And actually I think I drew
this on a flip canvas. So it just gives you a fresh
look at what you are seeing. But anyway, this is
the finished piece. And make sure you post
your finished project in the project area.
8. Quick Start Wrapping it up: Thank you so much for
taking the course. We're here at the end. And I hope that I
provided you with enough information
where you are able to dive into critter and get up
and running very quickly. I do plan on creating
more of these courses. So let me know what you liked
about this course or didn't like and what you'd like to
see more of in the future. I will be creating more of these and I'll focus more on some of the techniques that
I use and how to use the software a bit more and good luck with
your digital painting. I look forward to
seeing what you post in the project area. And I also look
forward to seeing you in the next
course that I create. Bye for now.
 Aaron Porter, Illustrator