Transcripts
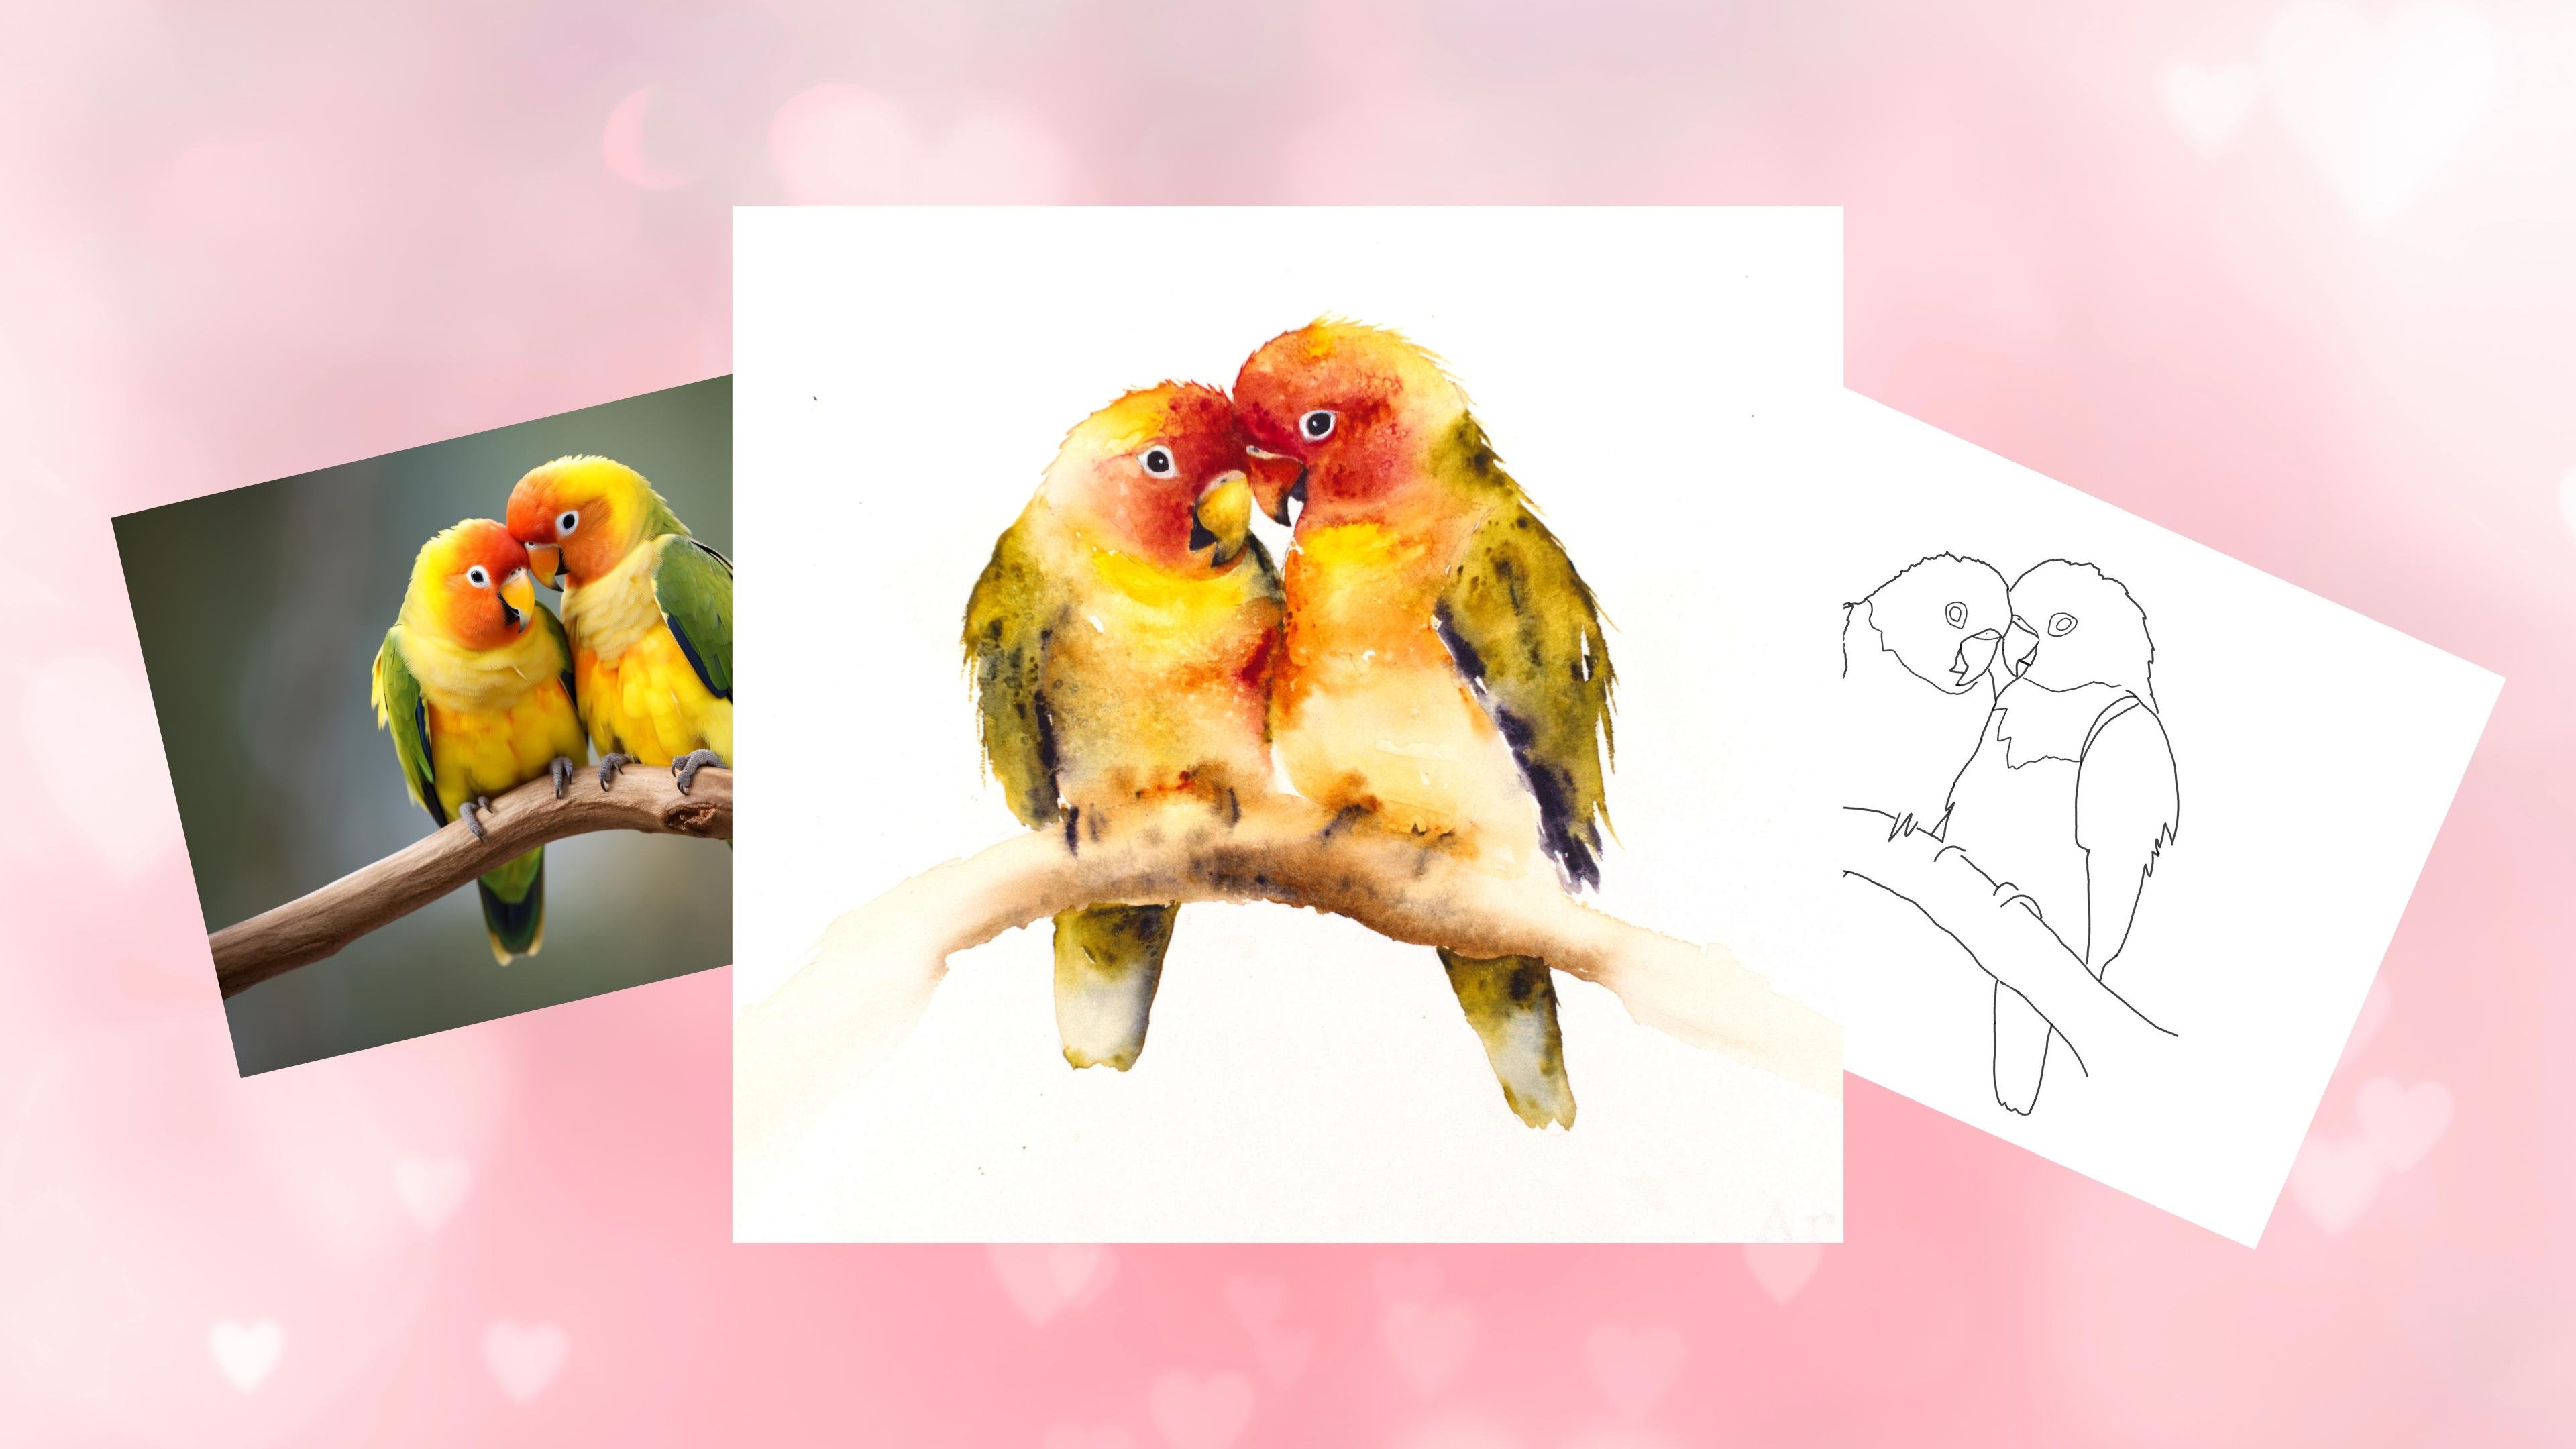
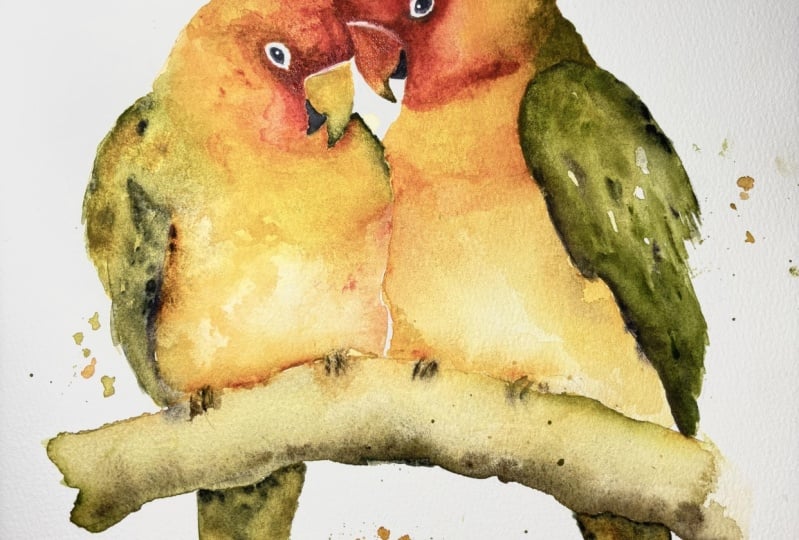
1. Introduction: Hello, and welcome to this
intermediate watercolor class. Today, we're going
to be painting these wonderfully cheerful
lovebirds together. Where the colors
don't entice you, the wonderful simple techniques I'm going to show you will. We'll be painting wet
or wet and placing that paint straight out of the tube and allowing
that magic to happen. I'm Jane Davis. I live, paint, teach, and walk my lovely spaniels in the beautiful South Downs
National Park in England. Over the last 20 years, I've taught myself the free flow technique that
you see today. Not having been to art school, finding my own way has been
fun and sometimes daunting, but has allowed me to
develop my own style. This has led me to teach others either on a
one to one basis or as part of a group in a wonderful studio in the
heart of the South Downs. I also run a successful
art business where two days are never the same from the thrill
of exhibiting to painting pet and
wildlife commissions in my own home studio. In all my classes, you will follow
along in real time, where I can guide you
to keeping your work loose and fresh
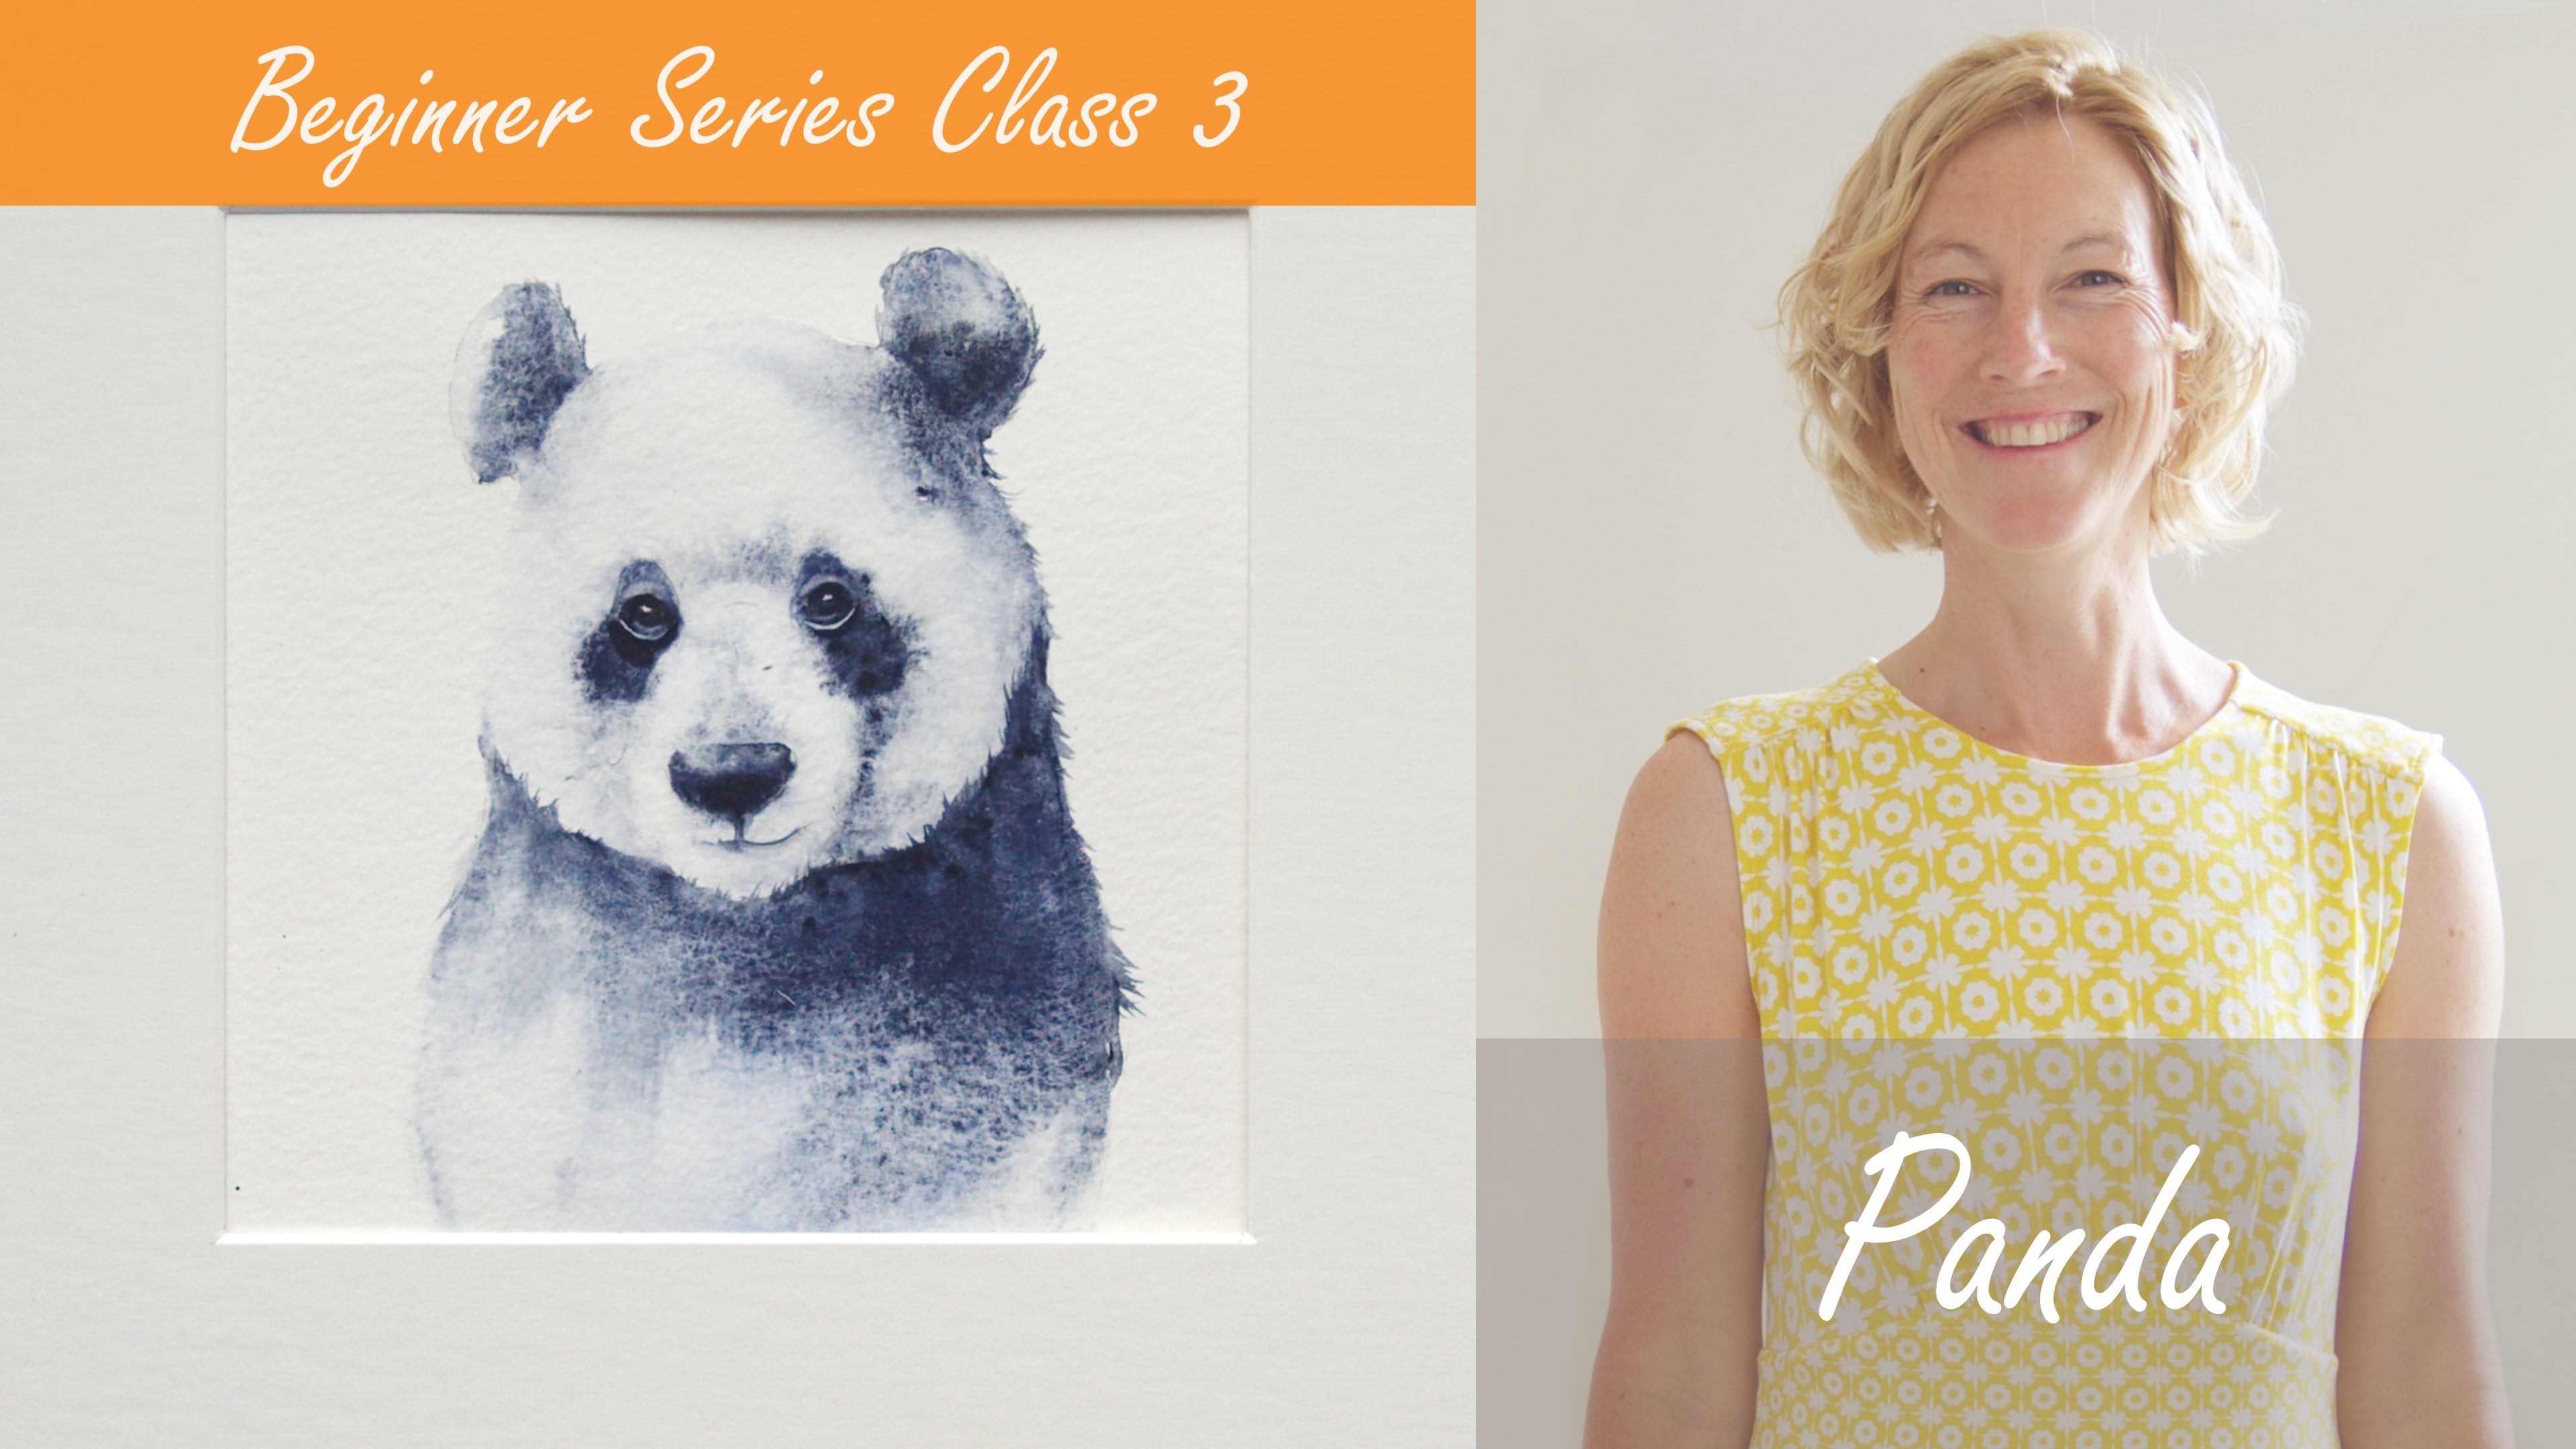
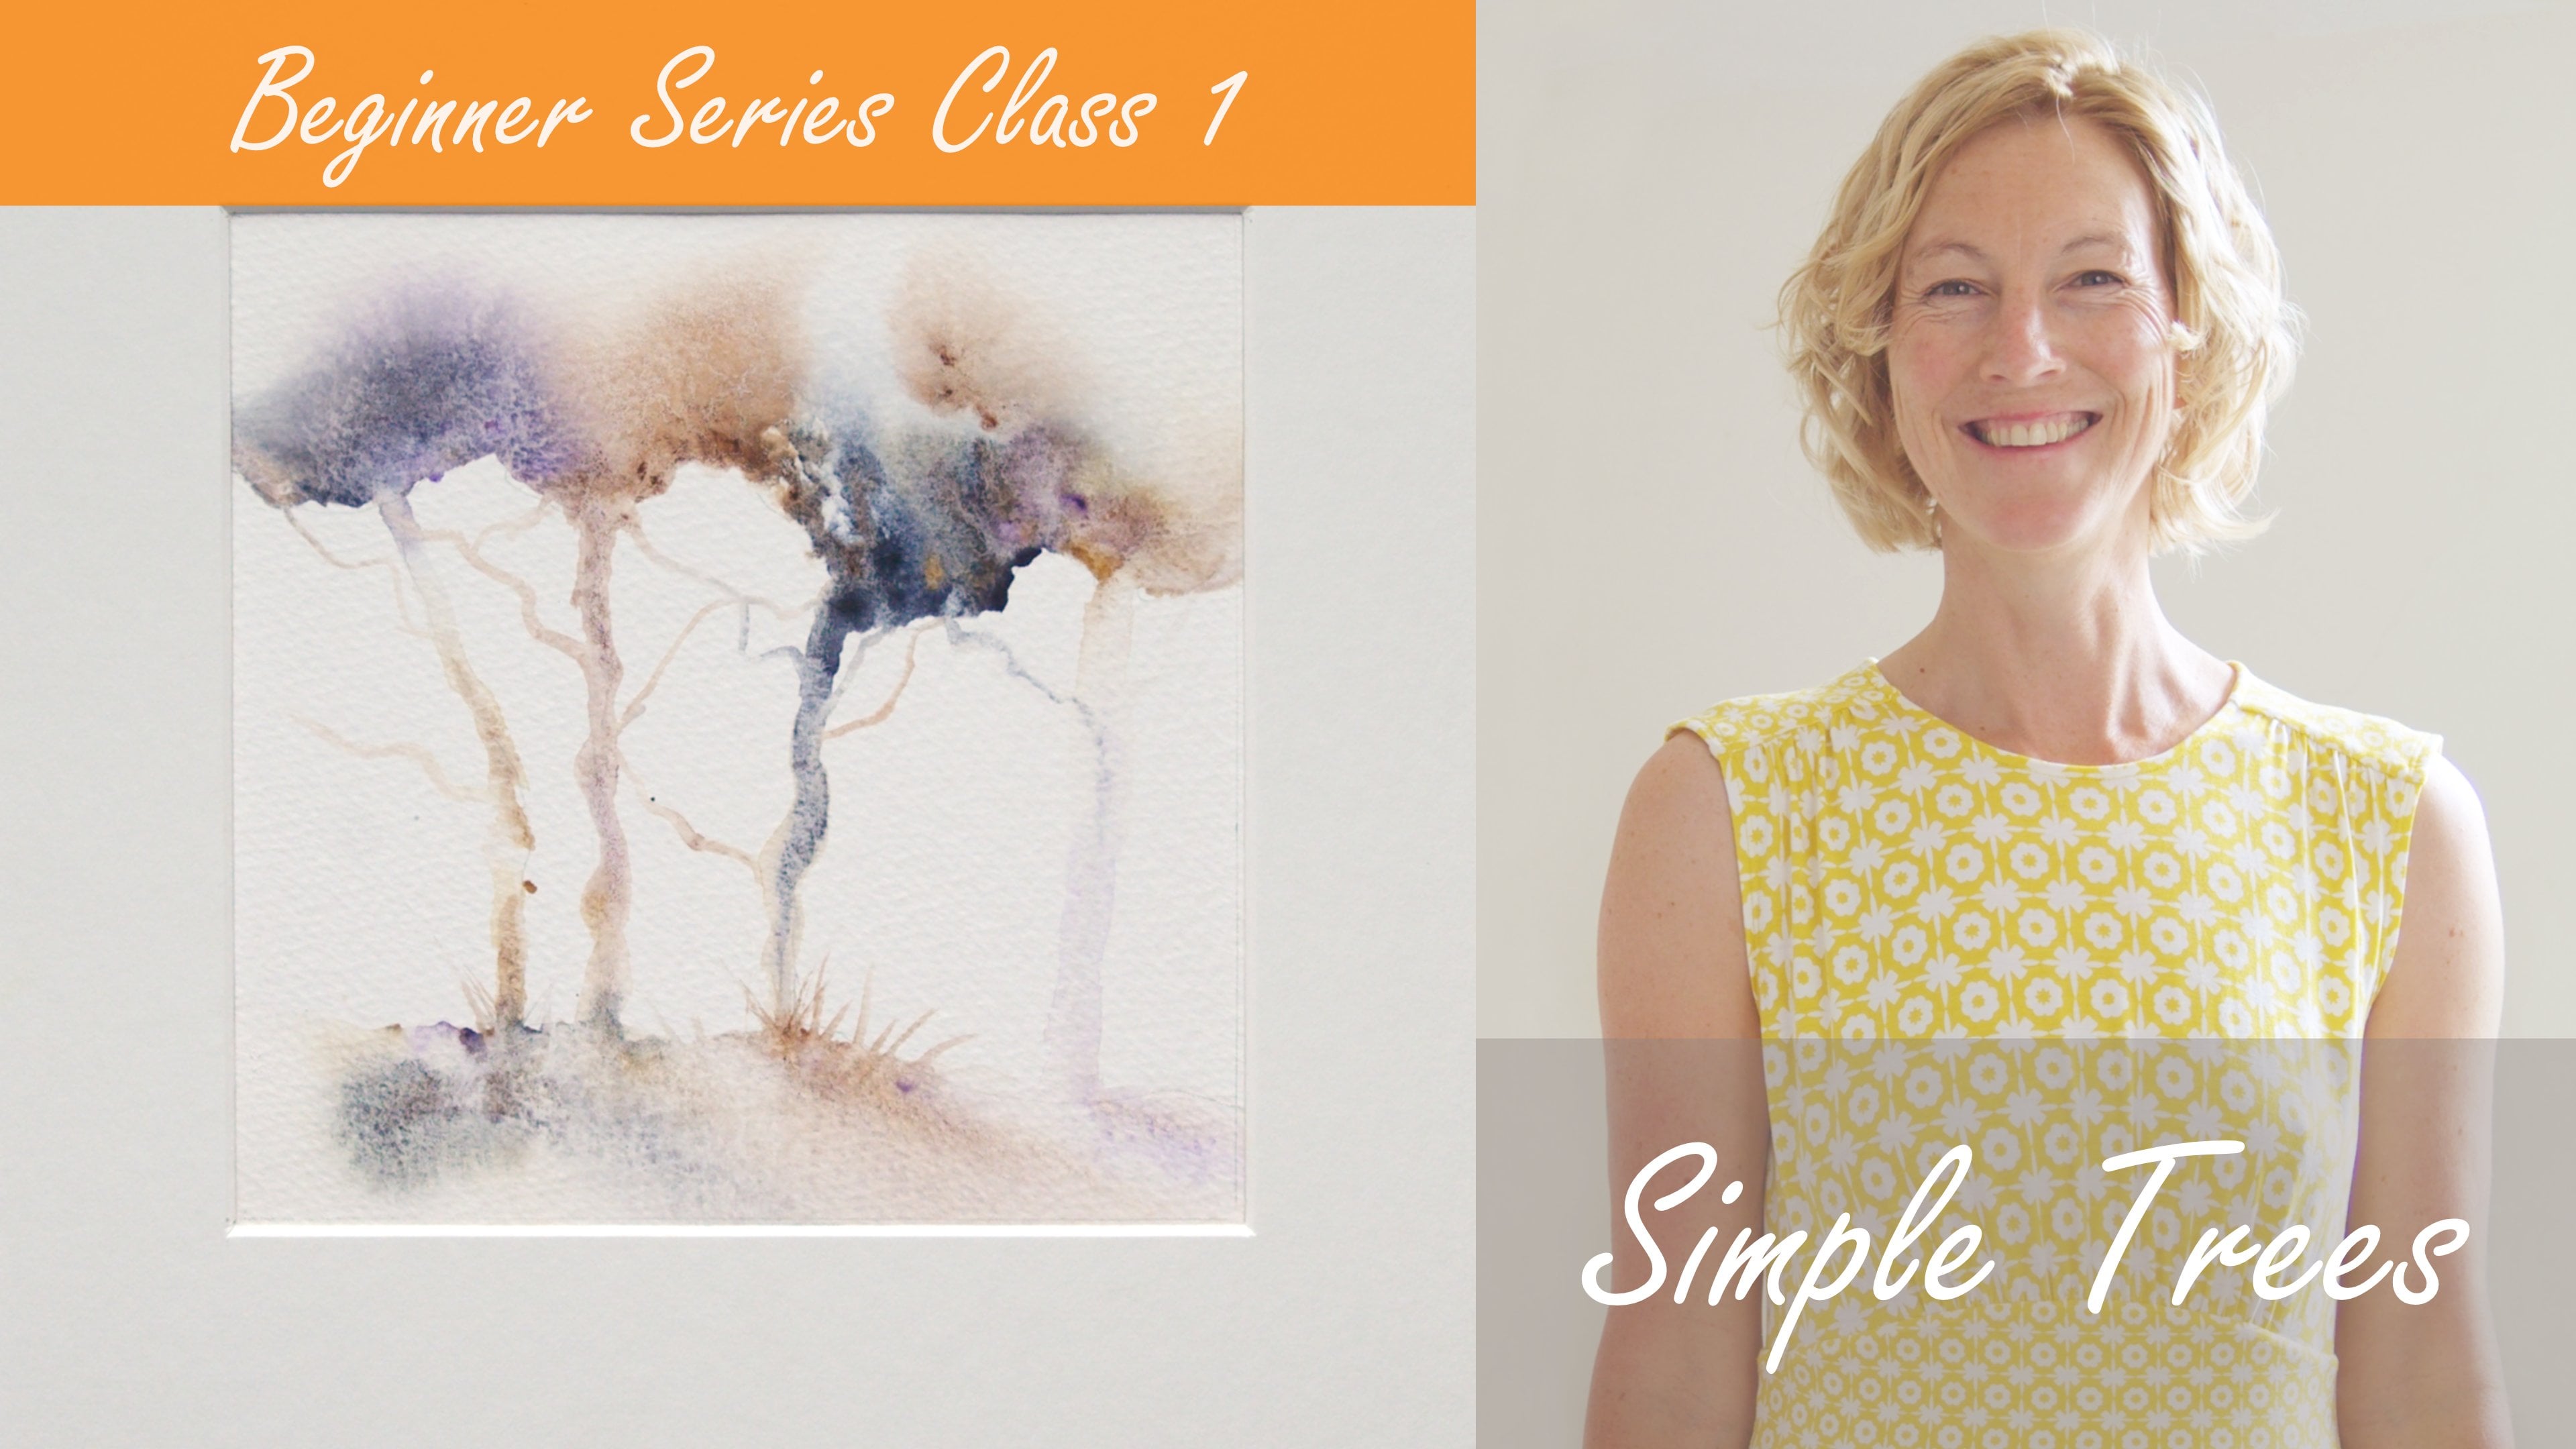
without overfussing. If you're just starting out, my three beginner classes
will guide you with your first masterpiece
painted in only 15 minutes. Then you'll find dozens of
my master classes available, covering a wide range
of beautiful subjects. In each one, I share the techniques I use in
my own professional work. We'll have a lot
of fun together, and you'll gain the
understanding and confidence to
incorporate everything you learn into your own work. You'll be amazed at how
easy watercolor can be. As ever, I provided you with
a wonderful reference photo, along with that downloadable template for you to print out. The template will give you a stress free drawing so you
can just enjoy the painting. I'll be showing you how to achieve that wonderful
light and looseness, adding two layers in places to give you
some lovely depth. I also want to show
you how to simply control where and when that
wonderful plate flows to. We'll also be looking at how
to get the timing right and the joys of using plenty of water and allowing
that magic to happen. Also, I'll be showing
you how to add those all important
finishing touches that bring these fabulous
pair of lovebirds to life. If you'd like to learn
more about me or my work, then please pop
over to my website at Jan Davis watercolors.co.uk. This can be found
on my profile page, along with the links to my
Instagram and Facebook pages. I'm very active on
my social media, where I love to share my art, especially on stories
with many ideas, works in progress, and
tales of studio life. I really hope you will share all your paintings on the
projects and resources pages. I love seeing your masterpieces. And don't forget
I'm here to help if you get stuck or
have any questions. I want you to experience that
buzz of painting in this liberating wet and wet loose
style. So come and join me.
2. Materials: So let me run through all the
materials you're going to need to paint a beautiful
pair of lovebirds. Aren't they just adorable? Okay, let me run through
my paints first. So I'll explain a
little bit in a minute. But I have got rich gold green, which is a really lovely, vibrant, acety yellow, which
is yellow green, sorry. I've got undersea green. If I'm totally honest, I didn't really use it a lot. I love the way it behaves and sort of granulation
it gives me, but I've only got hints of it, so I could have
easily not used that. I've got Aussie red gold. I like the way that behaves. It's just a nice color. And I have amethyst genuine. It's lovely purple up there. It's got a slight she, not that particularly shows on here. I've got Prilne red, and I have Hsien yellow medium, trying to read that
little nittle chubes. Again, they're just
nice vibrant colors. So if you haven't got
this exact selection, just pick have a
good old rummage, find those sort of
vibrant colors and a nice strong, good green. And almost an indigo would probably work quite
well instead of the amethyst, just any sort of dark dark, sort of purply bluey color. So the paper I'm
using is archers, and it's only 90 pound, but it's been stretched onto
a perfect paper stretcher, which I put a link in the
projects and resources pages. They are a fabulous thing
to be able to stretch your paper wonderfully flat,
highly recommend them. I've got my pot of water,
got a little bit of salt. I've got my very
trusty tiny rubber. I've got my little heart, which just gives my
board a little tilt. Obviously, you don't
need a wooden heart. Anything that's bad in
each hi is perfect. And then I've got my little bit of kitchen roll or paper towel, and I have just two brushes. I've got a number ten
and a number two, a big and a small doesn't have to be anything more
precise than that. And I have a little pencil. Also got a hair
dryer off camera, which is handy
just to finish off drawing section so you
can sort of carry on, but by no means essential. And don't forget there's that lovely reference photo in the projects and
resources pages, along with that
downloadable template, a useful guide. So use it. And all these can be found in the projects and
resources pages. So they're all there for
you to refer back to. So you don't need to
sort memorize them. Um yes, I think that's it. So let's go and sketch
these gorgeous pear out.
3. Sketching Out: So let me give you a few little helping hints on the best way to
sketch these two out. Firstly, I would say, use that template that's in the
project and resources pages, especially as it's two subjects and just getting them
in the right position. And I think this is an
AI generated image, it's quite cutesy, isn't it? But, you know, there's a slight tiltor It's gonna
be a male and a female. I'm sorry. But he looks like he's sort of
pushing in a little bit. So all those little lines
are quite important. So free drawing is trickier. Obviously, you can do them. But if you're not 100%
confident, use that template. And the other little
aspect I found was really important is getting
this eye shape. Obviously, there's the eye, and then there's a white rim
that runs around the eye, so I'm going to call that
the white eye makeup. But, yes, getting
the shape right, it's quite suggestive of their character and
how they're looking. Same applies to the little
black eye, as well. So really take your
time with that before you start the painting. As ever, try to keep your pencil marks on the
outside nice and light. I always make mine a little
heavier so you can see, but don't go too heavy, ideally, we want to be able
to rub these out afterwards. The feet just pop them in just so roughly you
can see where they are. I'm not going to
put too much detail in you probably know I'm
not a great one for feet. Um, Again, it's just
getting the shape right. Just take your time, make
sure the drawings right. And actually, when you
look at it, it looks nice. It looks pleasing
before you start. There's one important well,
vaguely important line. We're just going to wet this
section at different stages. So this little line
running across him is worth putting in just
to guide you a little bit. Other than that, yeah. Make it right. And I know I repeat myself a few of these classes if
you follow me regularly, but if you're new to this, sketch him out or sketch
them out, shall I say? Just walk away five, 10 minutes. Come back and have
another little look, 'cause sometimes you go, Oh, I didn't get that quite right.
I've missed this line out. And actually, as I'm
standing here staring at it, I haven't got that line
in there of her wings, so that just goes to show. It's always worth
just stepping away, coming back and just checking you've got everything right and taking your time. Then when you come to painting, you can go, It's right. I know I've taken the time, and you can just
enjoy the painting.
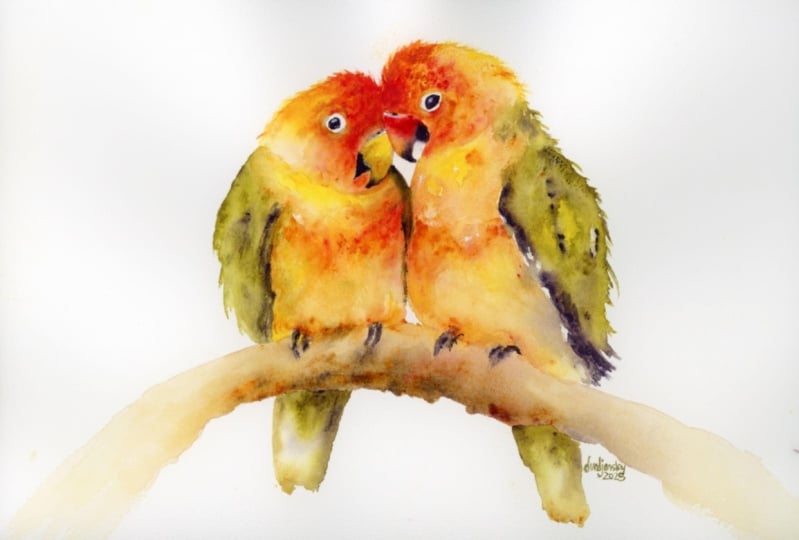
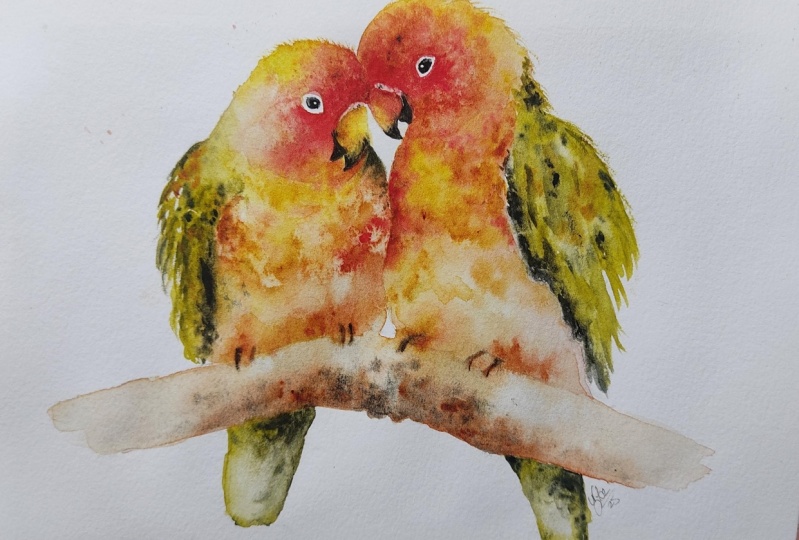
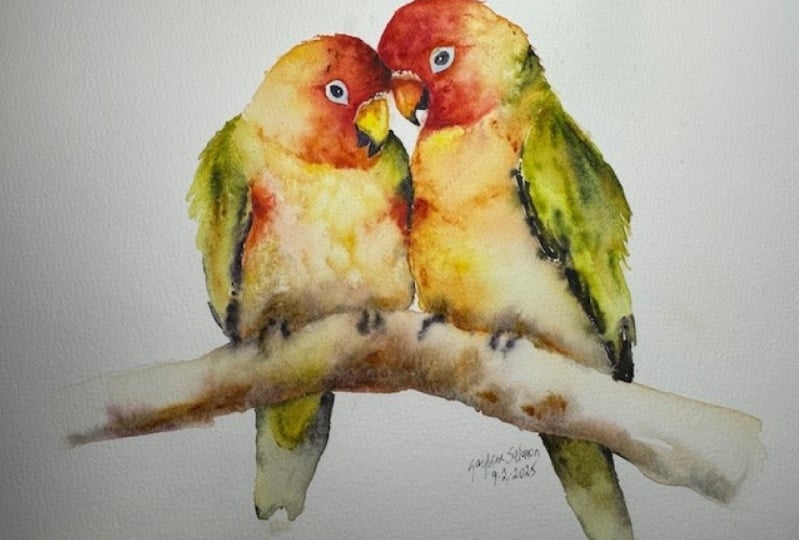
4. Head and First Body: Okay, so let's get painting. I'm just going to
remove my pencil and a little rubber.
I don't need that. And one little tip I
was going to show you, as I've got some very new paint, especially for this
class, a couple of people have said, Oh, when I open the tubes, I quite often get a sort of spurt of paint and waste some. I found, hopefully, this is
not going to backfire me, this being quite useful. So give it a little
tap, only a small one, and then squeeze with
your thumb and finger, just the very bottom there
just give it a little squidge. Only a light bit of pressure. So when you open the
top, you can see this. And then just keep a little
bit of a pressure on there. Sometimes that helps
to suck any painting that comes up down. Then you don't waste any. Right. Okay. Let's let's
do some fainting. So I've got my number ten brush, and go to give that
a nice wet it down. And then I'm going to
wet down both heads. So we're going to go I won't
put any color on here. I know in the past, I've put some color just to guide you, but it's going to be a bit hard. I haven't got a
light enough color, and I don't want to I don't want to get this
wrong from the word go. So we're going to wet this his head down going
around the eye makeup. So we're just going round. So we're not going into
that white at all, right against it,
missing the beak out. And then we're going down
to this sort of headline. Hopefully you can
see that line there. Just make sure it's
all nice and wet, and we're doing exactly
the same with her, joining up, so there's no dry patch between
the two of them. And again, we're doing exactly the same down to that line. Around the white eye makeup. Go careful because if you get colour into that white area, then it's gonna be
quite hard to get out. And you've hopefully
taken a while to get that nice shape right. Again, missing the beak out. I'm missing that white a little white area
above the beak, so I go carefully
around that as well. So it's nice and clean
underneath a little bit. Okay. And if you're taking your time, sometimes these little bits start to dry on the other side, it just tap a little bit
more water. You want plenty. You want it really
lovely and saturated. You don't want
puddles, but almost. Because if you don't
have enough water, the paint just won't move. Duck your head up
and down, make sure it's you haven't got
any little dry patches. And we're going to pick up
they're red to start with, and let's have red,
gold, and yellow. We used to used to working
with slightly bigger subes. They've just got
little ones here, as I don't use these
colors awful amount. Okay, so we're gonna let's
go with the red to start with a nice amount on my brush. I'm just going to
tap. Both sides. Keep tapping the coloring. We're just going to try
and work to the front. A nice bit of red
in there. I want that ice and strong, that red. Start adding a little
bit of yellow. It's got a little
bit too much there. We're going to do
two layers over her, but only one over him. So make sure you've got
enough color over him. Caffey around there. I have a little bit of that.
Ozzie red gold, as well. Color. I don't obviously
red and yellow make orange, but I like how
OssiRdGold behaves. It's a nice color. So I have included that. I nearly didn't, but I
like the way it behaves. A bit more, you know, being
a bit sticky to move today. It's it came very gently. Just keep tapping. Nice color in there. I'm not going to worry
too much with her. I probably would leave
that. That's nice. I've got a nice a nice
amount of light there, so when I rewet her, I can
put that yellow in there. But I'm just going
to concentrate on him for the time being. The idea of giving
her an extra layer. I just I almost to me, looks like she's sort of a little bit snuggled got a
little bit more shadow. So by giving her
a another layer, we can create a
little bit more depth there.'s going to
squint your eyes, see where that darker
is darker area is. Okay, that's moving
along quite nicely now. So I want to do. I'm going to just pop
those down for a second. I don't need the
red for a minute. I'm just going to hold
on to these two colors. I'm gonna wet.
Underneath the bib. Leaving a tiny little
dry line, we can work. I've just joined that
up. Hope you can see that it's starting
to flow around now. Just left the tiny
little white line. You see where that's
not going in, and we're gonna run down
into this bib area. I'm gonna pop a
little bit of yellow. Quite strong along that top, and then we're gonna join it up. Hopefully that makes sense. And then just carry on. We're gonna wet the
rest of that body. That will then draw
this color down. Right down to the sort of chest down to the chest down
to the very bottom here. Lovely. And then we pop up a
little bit of Aussie on this side here to get a little You can see where
the orange is, can't you? So we're just gonna tap a
little bit of that color. In for the minute you have
something that's nice, you may have already created it. So to go gentle, let it flow. I just put a little bit
of strength down here just to give it a little idea
of sort of the shadowing. I know it's not that obvious. Again, 'cause we're dealing
with an AI generated image, it's not real life, so
it's a bit trickier. Now, before this dries up here, I want to get some salt in here, and we get a little
bit carried away, be doing that wing and forget. So I'm going to pop a
little bit of salt. Just. It just gives a little
bit of texture. I like a little bit of salt. Again, if you haven't got salt, you don't want to you
don't have to add. Okay. And then we're
going to do the wing. We got the two
greens. Again, I'm gonna touch the very top there and allow some of
that color to run in. I'm gonna leave the
tiniest little white line. And then we're gonna start
with a rich gold green. Oh lovely starting
with a ne tube. About Love rich
gold green. Lovely. And undersea green. I don't often get to play these colors, 'cause they're not
really very animally, are they? Um, right. Just a little bit
of unsea green, and I'm just gonna
brush it on its side. I'm just gonna create
something on it just rundown. Say, the minute you get something
that looks interesting, we're not doing any
feather marking, so we're just off to
texture interest. That underseed green
is always quite yummy. It gives something quite nice. Do a few flicks out of
here to give that feather. Detailing. Also, actually, there's a little bit of
green up here as well. Pop that in before we lose that. There's a few little
flixes off there. And actually, while
we're doing the flicks and before it dries, I just quickly go back
and do the head flicks. Go careful and go
a little way in. Don't go right to the end you can then make some
very long flicks. Even go a little
bit to the front. Flicks are always best done when it's the pat nice and wet. Wise, they get a bit sticky and they look like they're
sort of stuck on then. Okay, fairly quickly. Before we let that
sort of dries, I'm gonna pick up this amethyst. It's a lovely color
this amethys. We'll just go really boldly because it's all starting
to dry a little bit, we're just going to place
some of that color there right up against the
wet two wet sections, wet section and the
wing and the body. You can see on the reference
photo where that amethys is. Just allow it to blend. If it blends and bleeds into
the body, beautiful. If it gets a little
bit rushy on you, you can always just haven't. It's just blending quite nicely, but you can always
just suck it in and let it pull it back in again. And always the minute you get something you
like, leave it. That is looking
quite nice to me. If I fiddle more, I'm going
to lose that lovely sense of lightness. Just a quick note. We're going to wet
this little section here on him in a minute. So if you feel you haven't got enough op down there,
don't worry too much. But we're only going to do
the one layer up here on him. So I can go back in with my red and just give
a little bit more strength. I may This is still wet, still damp, so I can go in. Just give it a little more
strength if I want to. There's that body all
bit Ozzie red gold, as well, because it's
such a lovely color. She breaks it up. And make sure you've got
that lovely neat. Swap brushes again around that
white that white marking. Really, because I say, you've probably taking
the time to get that lovely and the
shape really right, so make sure that's
nice and neat. Anything under here.
It's nice and neat. Always drop some little
droplets of water if you haven't got You know, theresn't enough
of interest there, droplets of water
are quite good, so it's just a little brush and just dropping water in there. And that often creates some
sort of blooms and interest. So yes, I think I need to
leave him and let him dry. We obviously going
to work on her next, but I would ideally
leave that to dry 'cause it's always too
easy to smudge things. Yes. Be patient and
allowed to dry.
5. Second Body and Branch: So once your birds
are lovely and dry, we're going to do her very
much the same technique. But we're just going to once
we come down to the body. We're going to wet
the bow and then work up around him just
to give you an idea. Quite a long little lesson here. So make sure you've got plenty
of time and don't rush it. There's no rush. Just
take your time and enjoy. Relax. Right. We are going to very
gently wet down her head. Now go ever so
gentle because we're now working on the second layer, you don't want to rustle up
what you've probably created. So nice and gentle, just allow your brush to fall. And again, just go carefully around what you did
before, really. The little top section.
Game careful around that eye or that eye makeup. Make sure it's organize and white and it's
hard to see, isn't it? Um on the second layer. So just stuck your
head up and down, I'm trying to do here and not disappear off
the microphone. Lovely. And we're just
going to strengthen her. I quite like this sense of light that's on
the back of her, so I'm just going to probably
work a little weight, you know, more
towards the front. So I've got my red, and I'm going to keep hold
Ossie red gold, as well. So a little bit of both. Just to give her a
little bit more depth, really. And we can add. Let's do the minutest bit
of amethyst, just a tiny, tiny bit of just give us a little bit more strength
strength that red and orange. Not a lot, but just gives
a little bit more umph. It's of my word of say, umph. Yeah, take your brush
away, have a little look. I might just work
to my little brush. It feels a little
bare controlled. And we need to do those flicks. Well, let's do those
before we forget. That's nice when wet
up here as well. Again, just go carefully round. You don't have to go
all the way around. You do some. Wow, that pate nice and wet. Again, just work a little
way in and come out. Lovely. I think once
we wet this body, a lot of the colors
gonna run round. So let's see how that goes. So again, wet to the top, the neck, miss the wing out. Just leave that tiny little
white line just for a minute. Then come right up
against his chest area. Run down down to that
bow then back fill. So all this body
is nice and wet. And then we can
where's that yellow? We can add that
yellow just like we did with him right
at the very top. Nice amount to strength. And then we're going
to join them up. Just by doing that,
'cause we put a nice thick amount of painting in here and
then joined it up. Because it's quite thick, it doesn't then
move up too much, but it gives us a
little bit of softness. Okay, then I could do the same. A little bit of orange here. She's got a little bit more of an obvious bib
there, hasn't she? Let's just tap that in. A little mixture of the
red and the orange. Actually, there's
a touch of green. Let's use. That undersea green. Do y'all see? Well,
that's nice and wet, and I know that
it'll blend nicely. Let's just pop that in. This the part of
the wing, isn't it? The other flip side. Come down a little
bit, long his chest. Missed a little bit out here. Always just to take a
second, have a little look. It's always so useful just take your brush away
and have a little look. I thought I had a little
bit more Ozzie there, I think. But it'll
wear red on top. They're such lovely colours
to work with, aren't they? They're just so cheerful. I'm filming this,
we're in January at the moment, with
the end of January. And it's just, it's
just cheerful to use. Alright, a little
bit more yellow because we're gonna wet
this bow down in a minute. I want to I want there
to be some color. That's got green on my brush. Yeah, that looks fine, Let's clinging on
to too many here. Let's pop that green
down for a minute. Right. We are now going
to wet this bow down. All way around. Along just for the moment, up against his feet or
his bottom of his chest. Let's make sure we
get who bow in. And you'll see some of that obviously that body
color from her, is going to be running
into that bow. Which is just what you want. Alright, we're just
gonna put a little bit of strength, let's
have the amethyst. Let's put the yellow down. So I've got probably
put the red down, so I've got Aussie red gold and the amethyst at the moment. Oh, I'm going to use two colors. I'm going to plunk Plank. Pop that along the bottom of the bow and just allow
that to work up. You can put a bit
of red in there. If you want, a
little bit of red. A little bit grits up to you,
really. It doesn't matter. We got to straight a line. I can. This bow end, just pull some of that
out a little bit. I will encourage
some of that paint to sort of move around. You can go right off
the page if you want, cause in theory,
you would mount it, so you won't see this end bit
where you've scrubbed away. And again, it's
always the minute you get something you
like, just leave it. And we need to work
sort of quickish 'cause we need to get a little bit of shadow in underneath. He where she's
sitting on that bow, so let's pop that in. So that's a bit of Ozzie y gold a little bit of the amethyst. Keeping an eye on that
reference photo over the time. I've lost a little bit of this. Little chest area have nice where the colors
are drawn down, it's drawing it
all the way down. Just tapping. Having a
little look, looking nice. We'll do the wing in a minute, but we need just to get these feet in so to be
able to disguise the feet, if the papers nice and wet, we can just put the feet in and they'll just blend nicely. So I'm now going to wet
his chest area up to the up to the middle section where we pencil that in
roughly that section. Again, go very gentle. All we're doing, we're just
wetting this area down. One, we can put a little bit more strength in here
if we wanted to. And two, we can get those
feet in with it without them looking too, painted on stuck. And now it gives us a
little church choice a chance to just strengthen
any bits on him. And it's quite nice if they
sort of blend together, 'cause they love birds. Yeah. They're a bit
orange down there. Okie doke before that dries, and my good idea of
putting feet on wet paper, let's put those in little brush, a bit of amethyst, little
bit of Ozie red gold. We're just going to go heavy probably on the sie red gold. Oh, sorry, the amethyst
and the Osi red gold. It's just a little lined. I'm not If you love
doing feet and you're really comfortable
doing feet, then obviously, let it dry and you can pop your feet on and put all
that lovey detail in, but I'm not going to. So by doing this,
we can pop them in. You can see there's obviously something there because
it's going to look a bit odd if there's no claws
in there at all or feet. But we can keep them
nice and soft this way. I'll put a little bit
of shadow up there, just we've got that idea there. Sort underneath him. Okay.
Yeah. That looks alright. But obviously, we can
pop a little bit of salt around her if we
haven't left it too late. You may have left it a
little bit too late. I'll a little bit there. So a still bit damp. You don't have to put salt
in, it's entirely up to you. Obviously, if you're
one of the birds, if he's got very salty already, you maybe don't want
to do or vice versa. Obviously, you can put salt in the bowel as well,
but I'm not going to. It can get a little too
salty if you're not careful. Right, let's do the wing. So we're just going
to wet the top there. If you had a little bit damp still, that's absolutely fine. Again, we've got that
sort of soft blend, but be careful to leave. Hopefully, you can see
this on the camera. Try to keep a little white line between the bow and the wing. It's just you don't really want the wing color running
into the bowel. A little bit of lighter. She's a bit lighter, isn't she? So let's have the rich gold
green, a bit of the yellow. Again doing those
flicks as we go down. Let's put a bit of
a undersea green. I didn't really need to
have the undersea green, as well, but I love the color. Yeah. Let's put that there. You can see some of that
squidging out, can't you? But if I suck the
bottom of the tube, just like we did, you can
see that's disappeared. Ah, right hanging onto
my rich gold green. Right, let's get a little
amethys in there as well. Quite nice and strong
because I can see some of this color has started to run
into the body quite a lot. So if I put a nice strong
amount of amethyth there, I'm almost sort of
damming it in some ways. Then come right down
to the bowel end. So where the bowel meets. Just go really deadly
up to the its edge. It might be dry enough. Yeah, I think that's
almost dry enough now. And take your bush away.
Have a little look. You can always give
it a little tilt. We haven't done any
tilting, have we? So let me let me just
give it a little tilt. What with? Do here. We can pop up maybe
a little bit of water in there,
see how that runs. Wing run down. All just
playing around, really. There's such gorgeous
colors you can kind of have a play around. Yeah, I leave that on a
little bit of a tilt, allow that to run down and, you know, sort of create
something quite soft and nice. But be careful. If you ever put
anything on a tilt, you get up little bubbles of
water sitting on the bottom. Lovely. I'm just
going to watch that. As that dries, I'm just
gonna make sure it doesn't sort of run
too much into here. So I just very gently
sort of push that back. I could add a little
bit more amthyst if I wanted to just
sort of dam that up. Be quite bold. It's sort of monitoring
it as it dries. And obviously, you can pop, I couldn't say a hoover.
That would be really weird. You can put a hair dryer
over that as it here. As it nearly dries, you can
put a hair dryer over it. But be careful about putting it there too soon because
you can sort of blow pigment around and lose some of that lovely sort of flowiness.
6. Tails: So how yours dried? Uh, yeah, I like mine. I think she's I think
they both look very cute. Okay, let's put those tails on, so I'm just gonna lay my board flat now. Put that to one side. I probably don't need anything that's gonna give me a tilt, so you can probably put
that away for a minute. Now, let's start, depending on where you're
left or right handed, I'm going to start on
her first just so I can hopefully avoid putting
my hand through any of it. I'm just going to
pick up. I've got my rich gold green and
my undersea green. I'm gonna start off the rich gold green, the lighter color. Good going to bizarre,
paint that in. It's like that. Then with
the rich gold green. So the undersea green. Come along top there, and we're just going to
run all the way down, leaving a little tiny white line around the rich gold green,
something like that. And then pop some more
undersea green in Even pop to have a little bit of that amethyst just to give it
a little bit more punch in that edge. Don't What down. Genie Bush. And then
we're just going to join that lineup to
join the line from the rich gold green top. And the existing where we
put the undersea green. I hope that makes sense. You've just joined
that white lineup. We can pop a little bit. Again, keep your eye on
that referred photo, a little bit of the
rich gold green, maybe on the left hand side, give him a little bit of colour. You don't have to
go all way along, don't have to fill it in. I think that's
what's quite nice. Trying to keep it
lovely and loos. So that's given me a
nice sense of light there without putting
too much paint in there, a little bit more. Rich gold green. Yeah, perfect. I'm not to say, I
want to keep these wonderfully loose and light. Tied any marks up, right, and move on to
him really similar way. So starting off with
a rich gold green. I'm gonna paint that in. And your brush. I'm gonna put the
undersea green, maybe a little bit of the
amethyst at the same time. Join it up just a little
bit and then leave that white line. I like that. Clean your brush and then wipe the rest of the
tail feather down. I know it's quite
intricate, isn't it? I'm not going to get
too involved with all that intricate tail
feather in markings. I've got an unfortunate
blob of water there, which I don't want to join
up. You see that there? I'm going to maybe make it
out a little bit shorter. A little more
undersea green there. A little bit of Emocis. A going to join them up? You couldn't you know, in theory, you could
not join them up, but I think I will cause there's no obvious white
banding, is there? And then we're just gonna
gently join them up. You can always add a little
bit more of the rich gold green bit to one side there. Just get something so,
you know, it's pleasing, but it's left lovely and light, so I try not to add
too much paint. Sometimes sometimes
you feel like you've been cheated because you haven't done
enough painting. You want to do more because
that's happened too quickly. But that will give us
a nice sense of light. So be strong and put your
paint down and let that be.
7. Eyes and Beaks: Right. Well, once those
tails are nice and dry, we can get on with the
eyes and the beak. But I'm just gonna get
rid of some of the salt, but make sure you
are nice and dry. It feels a bit crunchy under
my fist when I'm painting, so I scared we did that. A bit stuck there. Is that
what you got left with? I think I put mine
on it a little bit too late overheard, didn't I? But given me a little bit
of texture, hasn't it? It's all about catching it
at the right time of salt, and if you don't get much,
you'll result with it. By doing it on little scraps of paper. I know it's
a little boring. And just adding the salt as
the paper begins to dry, you'll get that sweet spot. Right, let's start
with him first, and we're just going to pop that little eye
on really simple. So we're just going to pick up the amethyst and paint it in. It's nothing more complicated
than that, really. So just go careful. Just, you know, stay within that nice lines that
you've created. That's why sketching it
out was really important. But yeah, if you can't see it for any reason or it's not
quite the right shape, just take your time with a little pencil
and get it right. I'm going to use my
standard excuse of being a little way
away from my painting, so I'm gonna put it down to
where I think it looks right, and I may tide you
once I'm off camera, but I think that looks
about right, doesn't it? Maybe a little bit bigger. Perhaps a bit bigger.
So this would be a lovely time to be
sitting down and having getting
really close to it. I think I slight the
wrong shape, actually. It comes up a bit, doesn't it? I'll be telling you to be really careful on getting
that eye shape right. Yeah, that looks that
looks about right. If for any reason, when you
come on to the next lesson, something looks a
little bit different. It's just I've been able
to get a little bit closer and alter something,
especially like the eyes. So it's sometimes a bit hard to get close the way the
camera hangs over my desk. Okay, sorry. Onto her.
Exactly the same. Just literally paint it in I almost looks like a little
sesame seed or something. I can't quite plate
what it looks like, but it's definitely wider at the back and thins down
to the front, doesn't it? Oh, it's a test for my eyes. Yes, I think that
looks about right. So I will get a little closer
to it once off camera, but I won't do any
more than that, but that's a general
general idea. We will put some
little catch lights in there, once that's dried. So onto the beak, so let's be methodical.
Let's do him first. So wet the little beak down. Make sure there's that
lovely white area just above the beak
and there's probably a very posh name for that is there but I
don't know it, I'm afraid. So just wet wet down your beak, leaving a little
white area above. Then I put a little
bit of ossi red gold. Okay, just pop out of the top. Kind of allow it to move around. I'll help if it's not moving. It's come up a bit, doesn't it? I can't quite see my
pip mark in here. Must have a little bit
of yellow in there. Oh, a little bit of yellow. Go all the way down to the tip. And then we're gonna pull it
back to the amethysk again. Right on the tip and allow that to just
to gently blend up. Now we're going to zoo. We're just going to actually, we'll do her little beak next, and then we go back to the
darker little section there, just allow this to
dry first, though. So we don't let that
blend too much. Make sure you got the
shape right before you before you leave.
That was more for me. Let it go up right
up against her. Little front there, doesn't it? Face? Yes, that's it. Lovely. Right. Same with her. Wet that drop of water. Wet her beak down.
Clutching onto that. And then we're going to
she's almost all yellow, isn't she? Yes, yellow. So let's tap that yellow in. We put a little Ossiod. Gold. Just so that far side
little sense of shadow. Again, Make sure you leave that little white area above
the beak and come way down. This is definitely a
nice time to be sitting. As I say, I stand most
of the time to paint, and I would sit if I could, because this is a
nice time to get really lovely and close
to this painting. So yeah, take your time with
this. There's no hurry. If you like your
little bits of detail, this is the lovely time
to really sit down and get nice and crisp. Because the rest of these
birds have been really loose. So to get that crispness
in the beak and the eyes is important
because if not, the whole thing looks
a little bit raggedy. So if you really need to take your time with
the eye and the beaks. There's a little
bit of amethyst at the bottom, same
we did with him. Let's spread up a little bit. Top there. Again, I'm going to let that dry before
I add the darker color. So let's pop that
down for a minute. I'm just going to pop
up a little bit more yellow down now. I've
lost some of the yellow. It's a bit amethyy So
yours might be fine. So always as we work
through these classes, we all start to differ, don't we where we're at. You have to be a guide
to your own piece and work with what
you need to do. So if I'm fiddling and
you're like, I'm done, then put your bush down, and wait for me to catch up. I'm gonna I want to
make chock at that. Yeah, that looks alright. Okay, let's stop fiddling
with that a little bit. I think that's dry now. So all I'm going to do simply
again with the amethyst is to paint that little
darker area in. I should have looked up. What these little bits are called 'cause they will
have a name, aren't they? I said, probably the back
of their beak isn't it, but I'm intrigued to know what that white area
at the top's called. Yeah, you just need to get something that's pleasing,
get the shape right. And while you got
your amethysk in, you can put little
I think they look like breath holes on that white, so Yeah, that looks alright. I can see my beak could do with it coming
up a little bit. But that's just me, so I won't fiddle too much
'cause that's a little thing I need to probably
do off camera. Right. T's probably
still a little bit wet, actually, so I'm just gonna
hang fire for a minute. I probably a little hair dry over there and
just make sure that her beak is nice and dry
before I add that darker area. Hoke Dokey, right. I'm just gonna pop that little darker pot on her, as well. So, making sure I get that shape right comes in a little
bit, dear, doesn't it? Almost looks like she's
smiling, doesn't it? Is to say, I guess it is, like I said, AIA
generated image. It's they've probably tweaked
it somewhat, haven't they? And then you've got
those little dark patches little
nostrils, aren't they? I I rightly remember. Lovely. Yeah, I think they
are almost done. So the only thing we need to
do is little catch lights. I know they're not She's got
one right at the very back, hasn't she on that picture, but let's do I'm just gonna do mydard standard little places. So usually top and to the front. His one for him? And
a little one for her. Yeah, they make all
the difference, don't they? They are amazing.
8. Finishing Off: Right. The only other
thing really to do is to take any color out. But what is quite
nice is to get rid of the pencil marks
actually before we start. So I'm going to just rub out
some of these pencil marks. I won't do too much because it wobbles on my desk
around somewhat. So you get the idea. So go very gently
round your piece. Be careful around the beak, so they might still be a bit damp. But yeah, go round your piece. D take those pencil marks out, and then you can kind of assess if you need
any light taking out. Mine isn't too bad. I've managed to keep
this ice and light here. I suppose I could take
a little bit out of here just on this chest area. Again, that can be done with a blobby a bit of kitchen roll. You can put your brush a
bit of pencil rubbing out. You can put your
brush onto one side and just take a little bit out. You can see on her just where
her feathers sort of lie. Give you a little
sense of light there. That was quite nice. Again,
you can do the same with him. She asked a few. Be careful. You don't date too
much out because these colors do lift out
ever so beautifully, but you can find you then take lots of color out and
it looks a little odd. So go careful. Just do a little bit
up here. Very gently. And you can squige
with a finger 'cause sometimes that
doesn't lift as much. It just softens it
a little bit more. I'm not going to start
doing wing markings. You can you can start doing
I'll show you what I mean, but I like the sense of
looseness and light, but you can you know, I've got probably a little
bit of paint on my brush right along the bristles, and you can add them by placing your brush
right along the side. That will give you
a sort of sense of some light and
feather markings. But I personally find as I start doing these
little tee things, I lose that lovely sense of sort of flow and
where we've been quite bold and allowed the
colour sort of bleed and blend into one another. And that can quickly be lost if you start doing lots
of little details. It's a personal choice. It's just, you know, how I like to see things. If you like things more detail, then obviously this
is sort of a base, and you can then go on
to do more details, but it's not really my thing. The only other thing
I thought I might do is with a little little
brush and my red, they have some quite
nice lines off there just off that
corner of that eye. So she just a little bit. And again, obviously
that's quite a hard line, so you can just go underneath
and just soften it. And even soften it again
with a little finger, so it just gives a
real soft impression. Again, you can. If
this white area has gone a little raggedy, again, just tidy that up. I will go back and just have a little tidy 'cause I
can see little things that need a bit of a bit of tinkering where I can
get a little bit closer. But that is generally your
little lovebirds finished. What another thing. Again,
light can be taken out on something else of the beaks, as well, 'cause sometimes
that's quite nice, as well. So again, exactly
the same thing, brushing some of that away. Even just brush and then lift and just sort of
squeeze a little bit of that paint out on your
finger on the kitchen roll, where you can care
for your fingers. It's a really delicate
area there, isn't it? You don't want to squidge
it onto the white paper. You could do
splatters. I probably won't do spatters today. I think there's enough
going on, especially if you've got quie
a lot of salt. There's nice, lots of
texture going there. So I think adding splatters
just adds a little bit more almost too much. Again, there's another
option you could do. You could do love hearts
on here. It's love birds. And I'm filming this just
before Valentine's Day, so you could carry on and do the background
and do love heart. Yes, like I say, but I shall
finish my little pair here. So, yes, I hope you enjoyed this lovely class,
really loving, simple. We've just allowed lots of colours to blend and
bleed into one another. And those colors are just yummy, aren't they? And cheerful. So do share these on the projects and
resources pages, please. And if you've got any questions, pop those in the
discussion section on each class is a discussion area where you can ask
many questions. Or equally, when you
pop your projects up, you can ask me some questions if something didn't
quite make sense, or you want some
advice on your piece. And if you do get
the opportunity to give me a review, it's
hugely appreciated. I love. Well, it's nice
to get some reviews. And yes, I feel I'm about to ramble
on if I'm not careful. So thank you very
much for joining me, and I hope you enjoy
painting these pair.
9. Final Thoughts: I hope you enjoyed
this class and found these pair a joyful
subject to create. Did you enjoy using those
brilliant, vibrant colors? What a joy it is to
allow it all to flow. What a fabulous experience. Did you find it helpful
sectioning those areas off, giving you a little time, and allowing the paint
to slightly dry, which stops it from
moving too much. I hope you nailed the eyes. It's incredible the
amount of character you can achieve with the
smallest of brushstrokes. As I always say, it's
worth stepping away, coming back and looking
at your painting with a fresh pair of eyes and
tweak, if necessary. So we look forward to seeing
you in the next class.
 Jane Davies, Professional Artist and Teacher