Transcripts
1. Introduction: Hi, I'm Nadine. Thanks for joining me for the lesson today. We're going to be
doing another one of those really fast exercises
that aim to loosen you up. So not much thought required, very little in the
actual painting. It's a really simple painting. But we're going to do
it with pencil and ink, which I think is a little bit more frame because once you've got
the ink lines on, you don't have to think
too much about the paint. So what we're going
to do is go through the reference photo
and the sketch with the ink over the top of it, and then we're going to go really quickly
through the painting. It's just a few steps. So a lot of wet and wet, a lot of just throwing
the paint on. And I've set it to intermediate, not because it's difficult but because I want you
to keep speed. So if you're a beginner, but you're happy about
going quickly, then by all means, give it a go. But it is a really fast paint. We'll go through step by step, even though there
aren't many steps, and then hopefully by the end, you're happy with
what you've got. So let's get started.
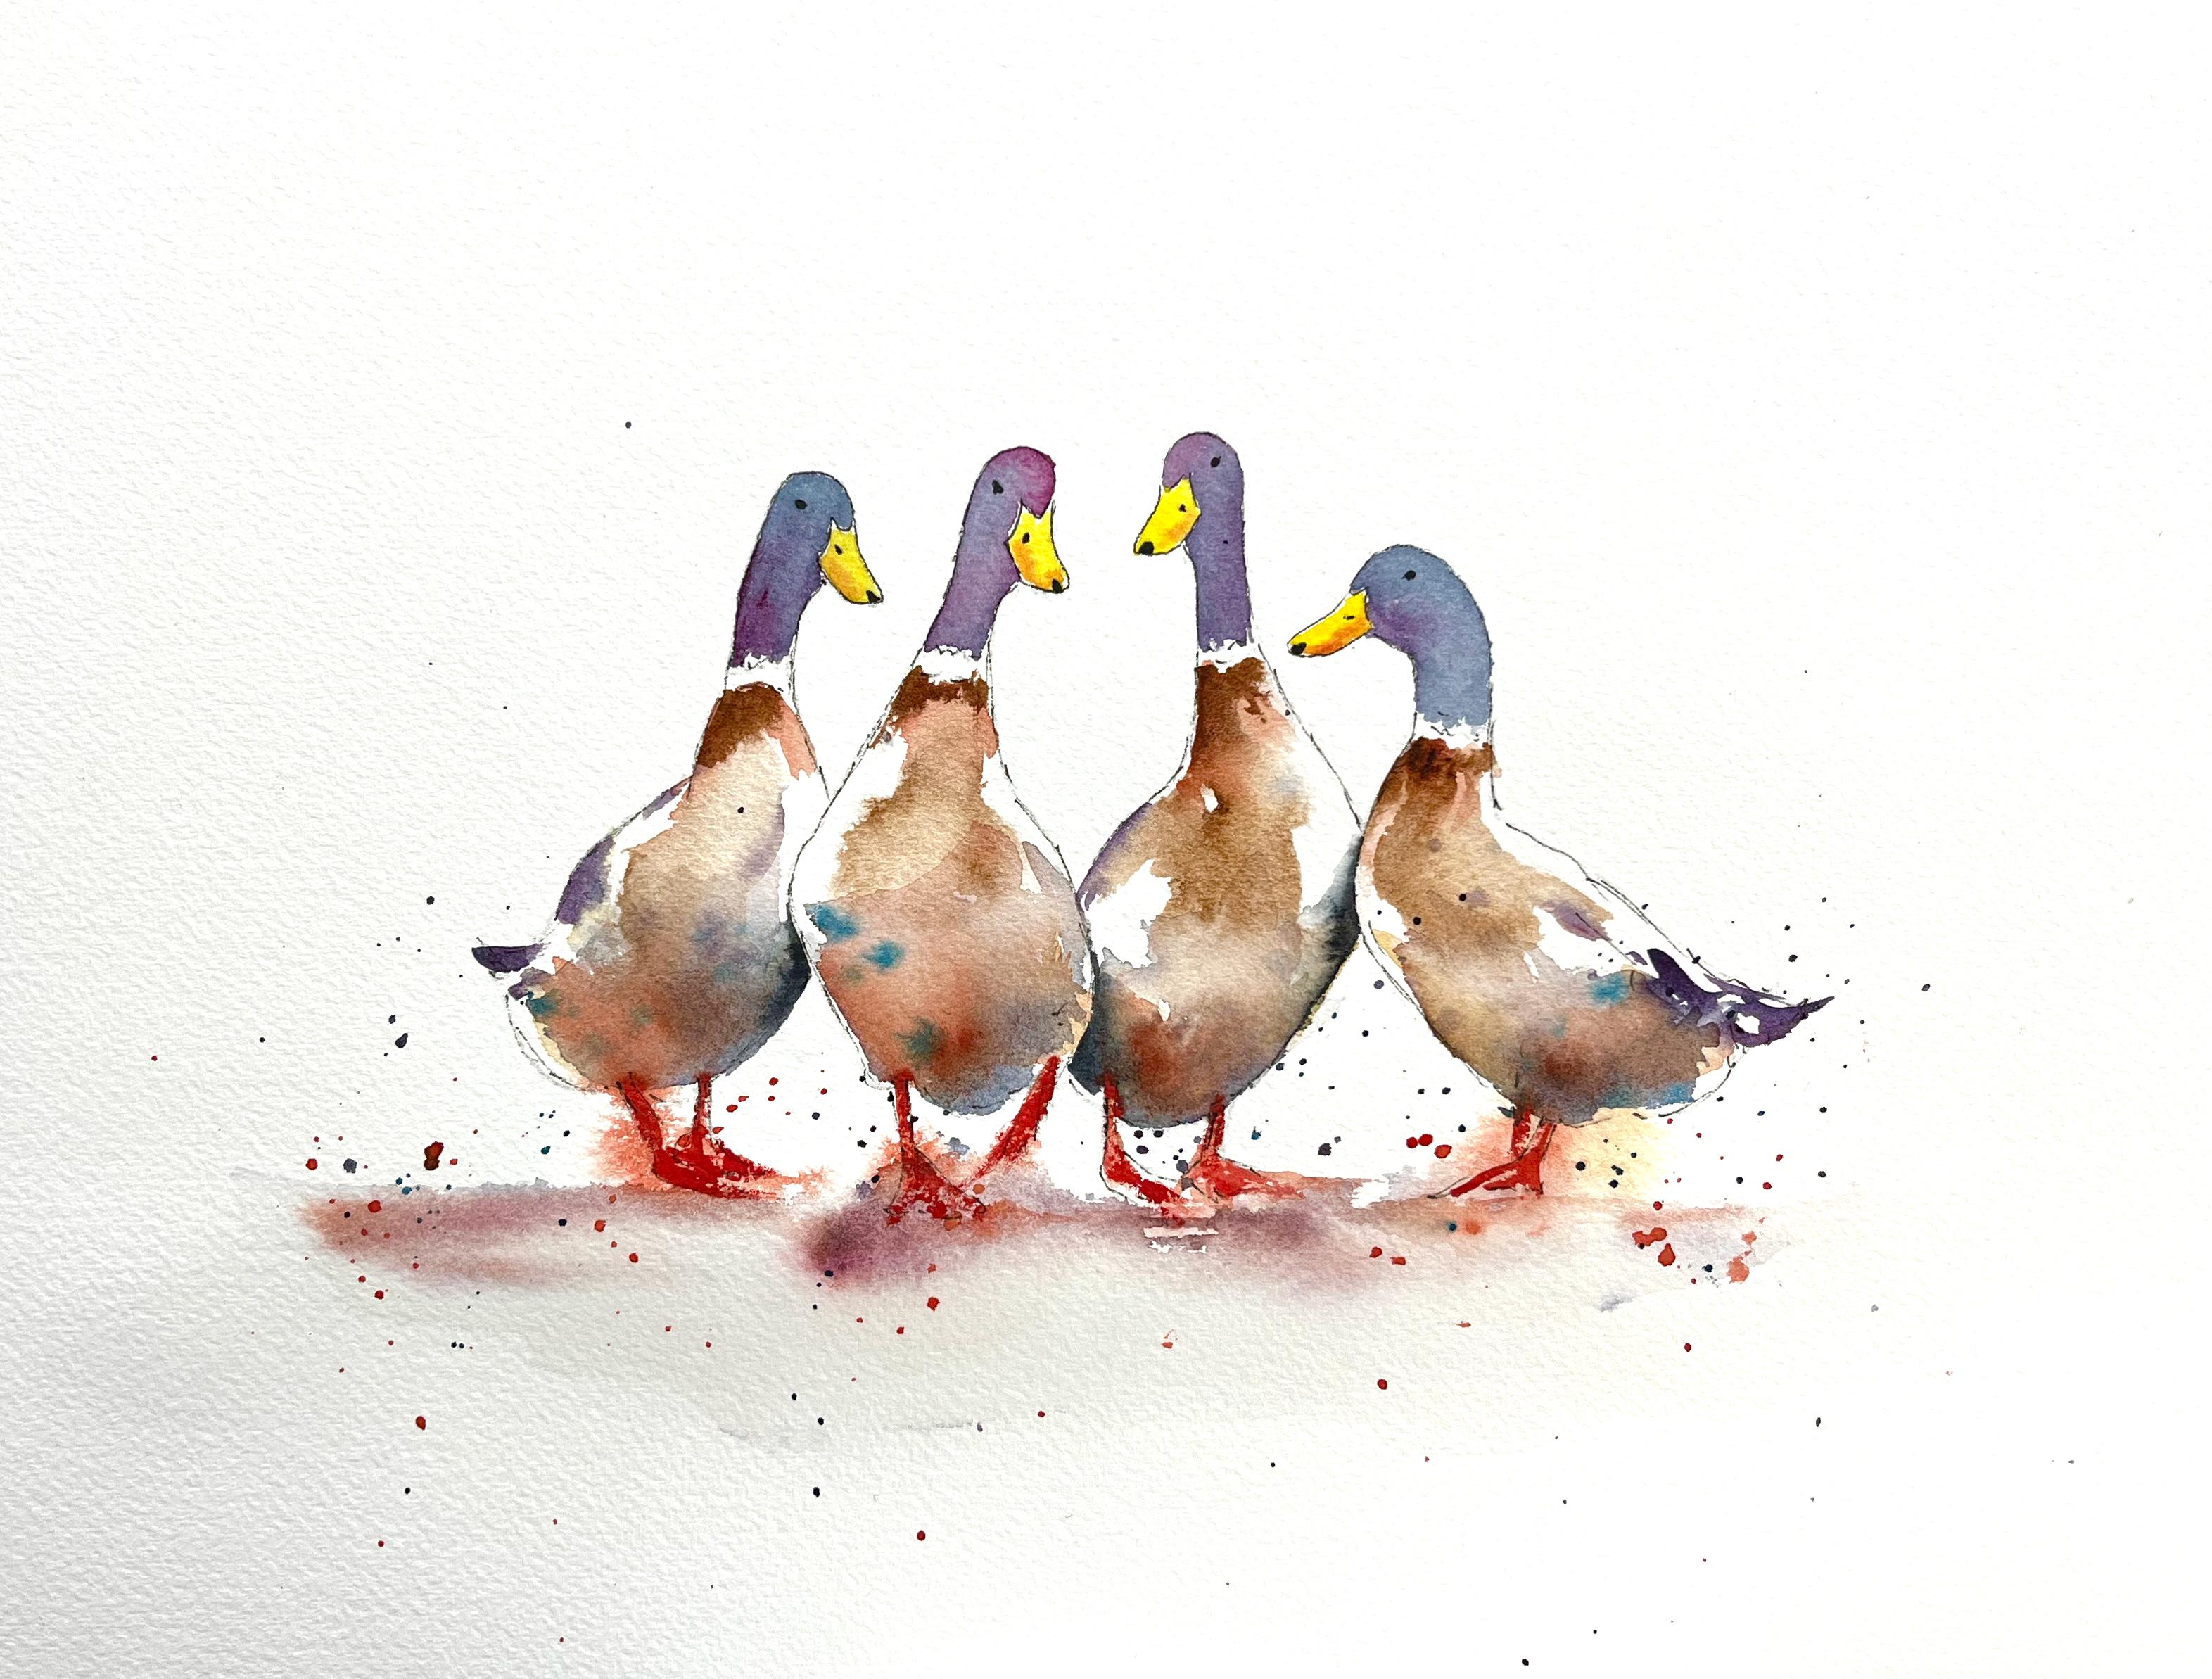
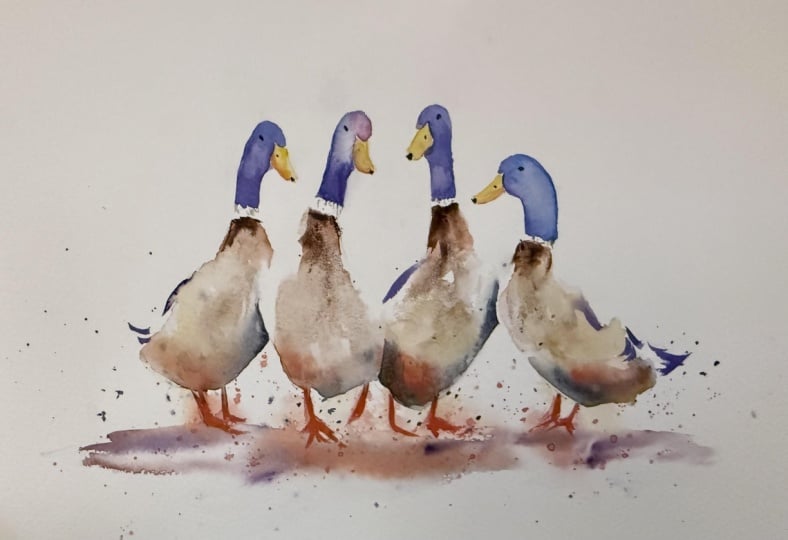
2. Materials : Okay, so we'll start off with materials for the class today. This is a reference photo.
This is actually mine. So what I've done is taken
four different photos, taken the duck out of them,
and pasted them together. It took a while to
fiddle around to decide what composition I
wanted, and really, it was getting these
two to face in to bracket the four ducks
together was what I was after. So you can download
this directly from the materials section. I'm painting on 300 gram
Arches coal press paper. I'm painting flat on a board, but I'm not taping it down. Got a regular HB pencil and an erasa I've got a bunch
of different paints today, but you don't have
to use all these. You can really use whatever
you want for this one. It really doesn't
matter. I've got for the purple and green
in the heads here, I'm using some quin violet
and some poturquoise. From Daniel Smith. The bodies, I've got some transparent brown and some cadbd scarlet
hue from Daniel Smith, and I've got a Windsor on Yeroka You could use raw
sienna for that. And the yellow that
I'm using for the beak is Daniel Smith
hunts yellow medium. I'm using a fine liner. This one is a 0.1 fine liner. It doesn't really
matter what you use. I just need you to
make sure that it's waterproof so that it doesn't disappear on you everywhere. I've got a spray bottle. I've also got three
brushes for this one, a tiny little synthetic
for getting into the beaks and I'll use those on the feet and
some of these shadows. Then the bulk of the bird, I've got two bigger brushes and the details of these are
on the materials section. Other than that, you'll
need your palette, a jar of water and preferably some cleaner tissues than this. We'll get on to the sketch ink.
3. Pencil and Ink Sketch: Okay. So here's my sketch, which you're not really going to be able to see at the moment. I've just used a HB pencil. And actually, for
this one today, I've just traced it because I spent ages putting the
composition together. These are just a couple of different two different
ducks in here, different photos of
the same two ducks. There have been ages doing that is I don't feel like drawing. I feel like painting, I
don't feel like drawing. So it's perfectly acceptable to use a last box, use
some tracing paper. Whatever makes you happy, it doesn't really
doesn't matter. So what I'm going to do now and then you will be able
to see the sketch, I'm going to take
let's see it's a 0.1. Doesn't really matter. 0.1 0.3, whatever fine line you've
got hanging around. All that matters is
that it's waterproof. I'm just going to pop some lines in here to make it easy
for me when I go to paint. So just roughly
getting the sketch in, and I'm not being super careful. I'm just getting some lines in so that when I
put the paint on, I can see where I'm going. The only place I will be careful is around the face and the beak. So this in here, I want to get the shapes. Right. Now, I've popped a
little bit of the eye, a little bit of that
black on the beak end, but I'll restate that later. So that bit's the only place
you're allowed to be fussy. The rest of it,
keep your strokes, nice and broken, nice and loose. And particularly
down these feet, some of them aren't
that easy to see. Don't worry about that too much. We'll sort that out
with the paint. Okay. That's all I'm going
to do for the sketching. I'll pop this as a
photo up his nostril so that if you're not
tracing or drawing from the reference that
I've popped up for you, but you can use a
template as well. Now we're ready to
start painting.
4. First Wash: All right. So this is going
to be really, really fast. What I'm going to do initially is wet down with some
water through the body, just whacking a little
bit of water on. Leaving white? No painting everything
in. Now, I'm not painting any water into these little white
stripes on the neck. I'm going to throw
a little bit of water just into the heads, not all the way the edges
just to get me started. I'm also just going to spray. Just down the bottom,
a little bit of water. I hold it up, you can sort of
see there where I've gone. All right. Then I'm going
to grab my big brush. I'm going to grab some of my transparent brown
and drop that in. Water milky to creamy, I guess. I'm not going to
worry about filling in all the up to the lines, all that, chucking
some paint on. I'm going to grab
some yellow ochre, throw that through the bottom. Really rough, checking it on, not caring if some
of that bleeds out. Then I'm going to grab.
I've got some, what is it? It's cadmium red scarlet hue. I'm going to throw
a little bit of that on the top of
the neck there. And maybe a little
bit down low as well. Just working my brush through. Then I'm going to switch to a slightly smaller
brush for this guy. I'm going to pick
up a little bit of quinacridone violet and
a little bit of turquoise, and I'm going to
throw in these sort of a couple of these tail bits. So just throwing a little
bit of paint around. Doesn't have to make
a lot of sense. Then I'm going to look
at these feet and I'm picking up now back to
that scarlet color. I'm going to drop a little bit of paint so the legs first. Then I'm going to drag my brush through it's just going to bleed
and that's fine. Then I'm going to switch to my little brush and I'm
going to pick up again, I've not put my hand in the
mix that's on the page. I'm going to put in the faces. I've got some purple there. Now I can paint straight through that eye because
the pen is in there. I'm not using the same color as the actual photo because I prefer the ducks
come in all sorts of colors and I prefer
the purple and pho mix. Keep going. The page it doesn't
matter if the page is drying off if you're not
getting much movement up here. I'm not really
bothered about that. Trying to get a mix
of the purple and the green turquoise with
the where I was going for. So I'm being relatively
tidy up here. I'm just really
looking for that to be mixing on the page. You can do the dts. No,
actually, I wouldn't. I want you to do them all at the same time because
it stops you fussing. Okay. So I'm just
whacking those in. Now, before that fries, I'm going to take a
bit of that purple and a bit of that turquoise, and I'm just going to flick. Just to stop me. This
is just to stop it being perfect and, you
know, overthinking. Get a flick, and then
before that dries fully, I'm going to treat my brush, and I'm gonna throw a
bit of water underneath. Take a bit of the turquoise
blue and the turquoise, the pho, and a little bit of
that orange and just chuck a little bit
into the ground. Then I'm going to come out
of that, let that dry. Then we'll come back in and add another layer of wet and wet. But come out of that for
ten and let that dry.
5. Beaks, Feet and Darks: Alright. Now my little splotches aren't quite dry,
but I'm dry enough. So I'm going to pop yellow the beacon I'm taking
my little brush. Get some milky, cad
yellow. What have I got? It's hunts a yellow
medium, actually. And my brush has got
a bit of green in it, but that's okay. I don't care. Then I'm going to actually
take a bit of that red, and I'm just going to
pop a bit into each of those beaks on the side just while
it's all a bit damp. Just so I've got a
bit of variation. So just a touch in
there. All right. Now what I want to do I want to strengthen
a little bit of the dark around under
the tummies here. So for that, I think I'm going
to try. Let's have a look. I'm going to try a bit of palo, a bit of my queen violet, and a bit of my transparent
brown to mix a dark. You see what that looks
like on a bit of paper. I'm going to wet the page. And my brush wasn't
very clean then. I'm gonna wet the page here
on the bottom of the tummies. And then I'm just going to
throw a bit of that dark in. I might take that bit. I came a little bit
too far over there. Bush my brush, soften
off that edge. I don't want too
much of a hard edge. Yeah, but still
being pretty messy, and it's not dark enough,
so I'm gonna make it feel. I didn't really
quite make enough. I need to replenish my wells. I'm being lazy. So just
throw a bit more of that in. I might throw a bit of the
red in as well for funzies. Wash my brush then and
dragging that around. If you start to think,
where should I go next, then you're fussing and
you need to get out. While that's still wet, I say get out and
then I go back in. I'm just softening those edges. I'm going to take my small
brush and I'm going to restate with my red scarlet, whatever it is, thick paint. I've got water down the
bottom here of each of these. I'm just going to
restate a couple of those red the feet,
let it bleed. I can bleed. That's
not a problem. So it's quite a dry brush. I just chucking a little
bit more of the feet in. Then I want to draw attention. I quite like that little white strip with my little brush, I'm just going to
throw in a bit of water under that collar. I think I might use
I'll use the brown. I have a look what
brown looks like. I'm just throwing a bit of paint up on that really roughly, just so that I've got. A bit more where
that collar starts. Just dragging that around. My spots have disappeared. I don't think I've
got enough splutter. Again, before that starts, I'm going to pick up milky. If it's not milky,
it won't splutter. I don't really now want
to splatter up there, so I'm just going
to take a piece of paper and let it splutter down. Whoa. Maybe some of
the orange as well. The red, rather. It just
stops you being uptight. All right. Now, again, I have to let that dry
before we come in, and we're just going to pull out a couple of little darks, a couple of little highlights maybe as well, and then
we'll be just about. Come out of that
and let that dry.
6. Finishing with a few Details: Alright, so I'm not quite
my splatters aren't dry, so I'm going to have
to be careful not to get my hand in things. But we're just
going to finish off with a couple of
darks with paint, and then a couple of more
lines with the black pen. So initially, I want to push, you know, see who's in
front, see who's behind. So this bird is behind. So I'm going to take some
indigo with my small brush. I'm going on to dry paper, been careful where
I put my hand. And I'm just going to pop
a bit of a dark in there. I'm going to wash my brush. I'm going to soften that. Edge. And as I'm softening, if that is too, that I can just grab a bit more pigment now
that I've kind of wet the page and
drop that back in. And that should push that
duck a little bit behind. And on this side, I can
do a similar thing. I'm going to chisel
out that shape. Wash my brush and just
soften that edge. I'm going to do the same here to show that this
duck is in front. I want to dry paper,
paint a little bit in, wash my brush and
soften the edge. I started really messy
and rough and then here, I can be a little more careful. These two ducks should feel a little bit forward,
those two going back. Then I'm going to take
my pen and I'm going to color in the little
bits on the beak, which I could have done
when I did the sketch. Sometimes I do these with paint. But I've done this quite small. I find these spaces because
my vision is pretty rubbish. I find these small little shapes difficult if I'm using paint. So for something like this
where I've already got ink in, it's quite nice to be
able to just use the pen. Yeah. I think that's
all I'm going to do. I don't really want
to do much else. You could put more darks in here and spend some
time shaking the face, but I don't really I don't
think I really want to. I quite like the
clean wash in there. I reckon probably probably done. I'm going to go and eat
some cheese, I think. I put my brush down. I
7. A Final Word: Alright, so I'm
nice and dry now, and I haven't fiddled
with it anymore, so I'm hoping that
what you've done with this one is that
you've gone quickly. I want you to embrace
that Got to go, got to go, got to keep moving. And to not let yourself fuss and get
caught up on the fact that, you know, I've got lots
of bits of white paper. I've got lots of messy
lines I haven't kept exactly to my pencil lines, and it absolutely
doesn't matter. So keep it really messy,
keep it really loos. Focus on a couple of fine
details to finish it off, and hopefully you're happy
with what you've done. So upload a photo of this one to the Skillshare site for me under the project section
so I can have a look and thanks
for joining me.
 Nadine Dudek, Professional Watercolour Artist