Transcripts
1. Welcome to Class!: [MUSIC] Hi and welcome to class. Today, we're going to learn
how to paint soft, delicate, loose style watercolor floral compositions, and bouquets. My name is Priya from Petals by Priya watercolor
designs and I'm a watercolor artist and online art teacher based
in Honolulu, Hawaii. Loose florals and leaves were the very first things
I learned how to paint when I started my
watercolor journey in 2018. It's truly what made me fall
in love with the medium. Over the years, my floral style has grown and evolved
from what looked like blobs of paint in
the beginning to my now signature style of soft, loose petals, roses, and
delicate compositions. In this class, we'll
go over the wet on wet watercolor technique
that I use for creating soft petals
and color bleeds. Then we'll walk
through the process of feeding both the flowers and the leaves individually so you can get the hang
of each component. We'll finish with not one
but two class projects. The first will be a delicate
composition and the second will be a sweet and
simple floral bouquet. By the end of this class, you will not only
have the skills and techniques to be able to create beautiful blooms
in your future paintings. You will also have two
works of art to frame, hang up in your studio or use as inspiration as you continue on in your watercolor journey. This class is suitable
for beginner and intermediate
watercolor artist and anyone who appreciates floral
and botanical art like do. I've broken up the class into bite-size lessons with
step-by-step instructions. I'll be painting everything in real-time so you can
follow along easily. Finally, one of my favorite
parts of being an artist is the amazing supportive
community of other artists and
creatives on social media. You can find me on
Instagram @petals.by.priya, where I share all
of my paintings, process videos, tutorials, and
behind-the-scenes content. I'd love to connect
with you there. If you want to learn more, I also offer free
artist resources like my watercolor supply
guide and color mixing guides on my website, which
is petalsbypriya.com. Now, if you're ready
to start painting some florals, let's get to it. I'll see you in
the first lesson. [MUSIC]
2. About the Projects: I briefly mentioned
our two-class projects during the introductory lesson. The first will be a delicate
floral composition, and the second a sweet
and simple bouquet. Well, you could follow
my every move and color choice to reproduce
these exact pieces. My main goal of these projects is to give you the skills and confidence to create your
own individual compositions. I'll show you how to paint
the loose style florals, add in the leaves and buds, and share tips on creating well-balanced floral pieces but I really want you to
add in your own style, choose colors that
stand out to you, and create a painting
you're proud of that feels like an extension of
you as an artist. Finally, I really
encourage you to upload one or both of
your final projects to the project section here
on Skillshare so you can receive feedback and
praise from fellow students, comment on other's works of art, and it's also a
great way to make connections and establish
friendships with other artists. I already have uploaded
my own projects to start things off and I hope to
see yours there soon. You can do this by navigating to the Projects & Resources
tab using your laptop, click on the green
button that says "Create Project" and upload your photos, a title, and a brief description or comment if you're up to it. I also encourage you to share your final works of
art to Instagram. I know firsthand how scary
and intimidating it can feel to put yourself
out there on social media but I promise, the artist community, especially on Instagram,
is just the best. Please also remember to tag
me @petals.by.priya so I can like and comment
on your artwork and share it to my
audience as well.
3. Watercolor Supplies: Let's talk supplies. Here are the supplies
you'll need for this class. For watercolor paper, I'll
be using Legion Stonehenge, 100 percent cotton paper. We'll be using the wet on wet watercolor technique
in this class, which is much easier to do with high-quality 100
percent cotton paper. But if you don't have
that, it's totally fine. Student grade paper will still be great for
practicing and building in your muscle memory with each stroke of
your paintbrush. For brushes, I'll be using a wide variety of round brushes. We're going to be painting
big fluffy flower petals so I recommend using at least
a size 8 or 10 for those. But you can use smaller
brushes when we add in the details and the
smaller leaf stems. For the paints, I'll
share the colors we'll be using at the beginning
of each lesson, but I want you to know
you can really use any colors that you have at home and that you
like to work with. Just pick a couple of
different colors for the flowers and a few shades
of green for the foliage, and you'll be good to go. This class is more about
learning the technique and the process for creating
extra soft floral blooms. I want you to focus on that
part of it and not get too caught up in choosing the
perfect color mixtures. That part can always come later. The other supplies we'll
need to include a jar, a bowl of clean water, your mixing palette,
and a paper towel for dabbing excess water
from your brush. Once you have gathered
up all your supplies, I'll see you in the
next video to start practicing the wet on wet
watercolor technique.
4. Wet on Wet Watercolor Technique: We are going to be using the wet-on-wet
watercolor technique throughout this class. In this lesson, I want to go over the basics of
the technique and walk you through some
practice exercises to help with water control, which is a huge part of
mastering this process. First and foremost, what
does wet-on-wet even mean? It's exactly as it sounds. It's when we paint on top of a layer of paint
that is already wet. We're putting wet paint
on top of more wet paint, and that results in these nice organic blooms and
gives our florals the soft, delicate look that we're
trying to achieve. A couple of things to know
before we start practicing. Number 1, the base layer should always be lighter than
your additional layers. We build up color
from light to dark. Your first layer
should be almost transparent and all
you need to do to get that lighter value of
color is either rinse off some of the pigment
from your brush before you start painting, or simply dilute the color by adding more water to
your mixing palette. Number 2, you want to have the right amount of water
in your first layer, which is something we're
going to practice next. If you have too little of water, you won't be able to get the
color bleeds and blooms. But if you have too much water, your paint will end up pooling and it will leave harsh lines when it dries instead of a soft blend that
we're looking for. Okay, let's practice by
painting a simple circle. I painted an example
here just so you can see what our practice
exercise will look like. You can see I have
my first layer here that's nice
and light and then it gradually darkens
into this dark orange. First, take a light
value of color. It doesn't matter what
color you are using, we're just experimenting here, so choose any color, get a light value [NOISE], and just paint a simple circle. Again, you want
to make sure that your first layer
is nice and even. You don't want any
pooling of water, but you want to
make sure you have enough so that when you put
down your second layer, you'll get some nice
organic blooms. Just make sure it's
nice and even. That's looking pretty good. Then load up your brush with a darker value of
that same color. I'm just loading up my brush
here with a darker orange. Then just start tapping in some color along one
side of the circle. See how that color is
blooming and bleeding. That's exactly what
I want to see. If you want to make it
even more dramatic, you can go back in with
the third layer with an even darker value
of the orange and tap it in and make
a darker contrast between the first
and third layer. Let's do one more
practice before we start painting our florals. This time I'm going
to paint a square. Again, I'm taking a light
value of this orange , painting a square. Then making sure that this first layer has an even
spread of water across it. That's looking pretty good. Now while it's still wet, again, I'm taking a darker
value of the orange, loading up my brush
and tapping it in. Just for demonstration purposes, I'm going to show you what
it looks like if I do a little bit too
much of a contrast between these and then I'll show you how
to feather it out. I'm going in with a really
dark value of orange. Now you can see there's a really big difference between this first layer of
yellow and this third. I'm going to show you
how to blend that out. In order to make
this a softer blend, just rinse off your brush
so it's completely clean, dab off excess water. Then you can just gently
feather it out with your brush. I'm just feathering
out where it dried. Making the blend a bit softer. You can repeat this
process as many times as you like to get the
desired blending effect. That's the nice part
about watercolor, is you can always reactivate
it with a little water. Now you can see
that that blend is looking a lot softer
and there isn't a huge contrast between
the first and third layer. Feel free to keep
practicing these exercises. I know it can be
frustrating at first, but once you get the
hang of water control, it gets easier and easier. I also find that these
simple exercises are great for daily warm-ups
before you start painting. I personally have tons of
sheets of paper filled with random shapes from practicing
these soft bleeds. It's a simple practice, but it's really a
game changer for improving your loose
watercolor technique.
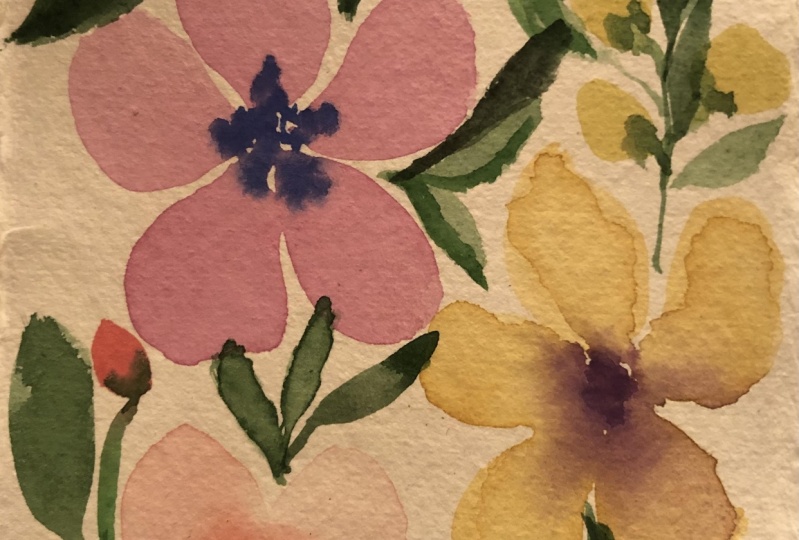
5. Painting Loose Watercolor Flowers: Now it comes the fun part. We're going to practice
painting a couple of individual flowers so that we can get the hang of
the process before we start piecing together
the composition. Let's get started with
painting flowers. Again, you can choose any
colors you like to work with since we're just practicing
this dark plum color. Now to start, I'm using a
smaller round brush size 4 and I'm just loading
up my brush with a really dark pigment
of that purple. [NOISE] We're going to be painting a very dark
center of the flower, and then using just clear
water to brush out the petals. Once it's loaded up just start tapping in some small dots on the paper for the
center of the flower. I'm Just going to
do a few more dots here before I brush
up the petals. That is looking good. Now once you have your
[NOISE] center done, take a bigger round brush. I'm going to be
using this size 7. Just get the brush wet. Don't add any color, but make sure it's pretty
loaded up with water. Once it is take the very tip of your brush and
drag out some of that pigment from the center, and then just lay your
brush down a few times. I'm just rounding it out here to create a nice soft petal. We have to work fast because we don't want that
center part to dry, otherwise we won't be able to use any of the color from it. Again, I'm wetting
my big brush using the tip to just drag out
some color from the center, and I'm laying my brush down. We are doing very
loose blooms today, so don't worry about creating
a perfect petal shape. Just lay it down and be
loose with your strokes. Just let your brush
dance on the paper. My brush is nice and wet. I'm dragging some
color from the center, and I'm laying my brush down. You can see wet-on-wet just
like what we practiced. That pigment is just flowing into the petal all on its own. There's my fourth petal, and I'm going to
do one more here. I'm just going to
paint the petal here, and then drag in some color. Now while it's still wet
I'm going to go back into my really dark
pigment of purple, and I'm going to make
that center even darker. Your petals should still be wet, so some of that darker value will start absorbing
into the petal as well and you just let
the color do its thing. Now, the method that we
just did with starting with a very dark center
and then using just water to drag
out each petal. Now this time I'm going to
do it the opposite way, and I'm going to use
different colors. This first flower we used all the same color,
just different values. This time I'm going to be
using this yellowy orange for the petals and I'm dropping in some of that
dark plum for the center, and that makes it
look very dramatic. This time I'm going to start
with the petals first. When you're doing this method, you do really light petals and then a dark interior,
a dark center. You always want to start lightest and then out in darker, so I'm going to start
with the petals and then tap in
the darker center. I'm just laying down
some petals here with that light yellowy orange. Make sure you're using plenty
of water in your brush. Don't worry too much about getting the perfect petal shape. Let's lay down some petals here and then we can
always go back in at the end and clean it up a bit. I'm just putting
down five petals. I'm making sure each
one of these petals has plenty of moisture
so that when I tap in the dark plum center, I'll get some nice
bleeding and blooming. Once those five
petals are laid down, I'm loading up my brush
with a really dark plum. Again, if you're not using these exact colors
just make sure your petals are light and the
center is some dark color, and then just tap it in here in the center
and you can see those really beautiful
bloom starting to happen. You'll just absolutely love this style, it's so relaxing. One thing you do have to keep
in mind is you have up to let go of control in this style. You can absolutely keep control of your water amount and
the colors you're using, but you can't control
each and every bloom. That's actually what I like
best about this style. I'm just continuing
to tap these in, and I'm going to go
in one more time with an even darker value just to really make
that center nice, and bold, and dark. Another thing to note
when you're practicing these flowers is that white
space is very crucial. When you're doing this
loose of the style of florals with this much water, it can be really easy for it to just turn into a complete blob. We don't want that, we still
want some separation of the petals and the inside
of the flower as well. Make sure when you
put your petals down, you leave some white
space in between and you don't completely fill in
the center of the flower. If you do that, that's
when it turns into a blob. Keep that in mind as
you keep practicing.
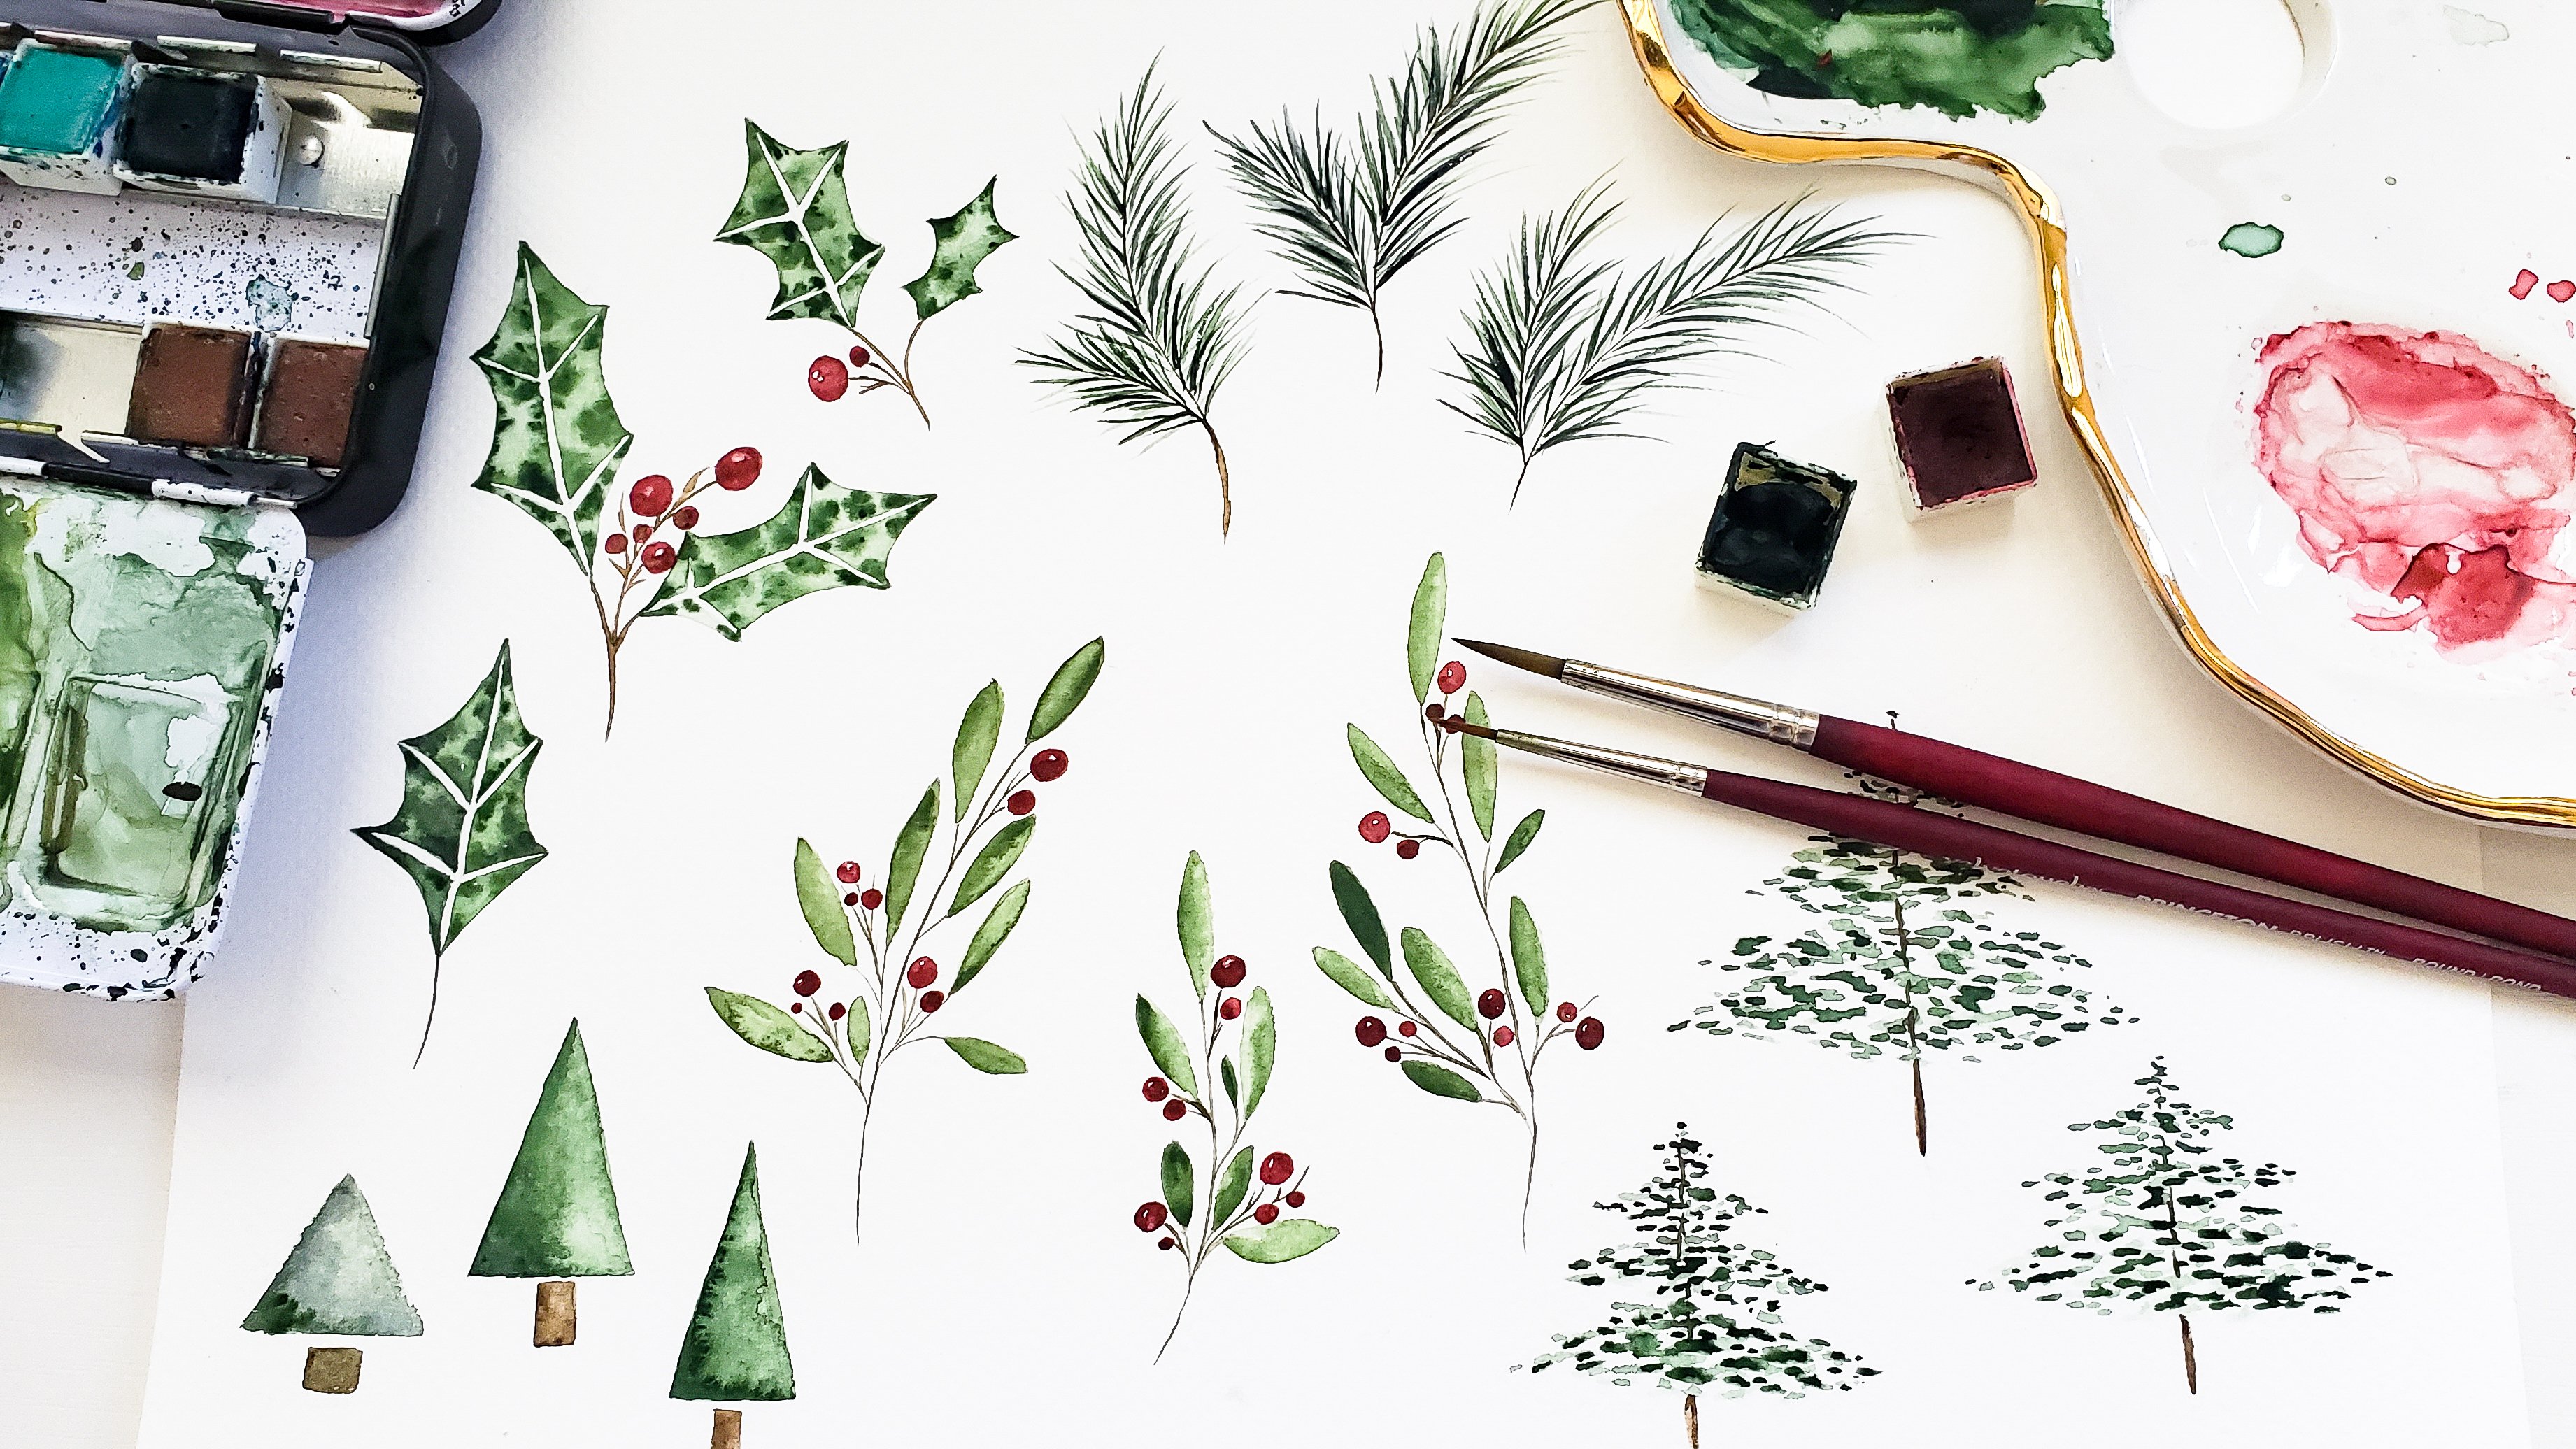
6. Painting Watercolor Leaves: One more quick lesson before
we start on the projects. I want to practice painting a few different styles
of leaves that we'll be using in both the floral
composition and the bouquet. The first style of
leaf that will be practicing is just
your basic leaf shape. I'm using a mixture of
sap green and Payne's gray in loading up my brush. Now I'm going to just
drag at the tip of my brush onto the paper, and then add a lot of pressure, and then lift back up and do the same thing
right next to it. There is your basic leaf. Again, it's light pressure, heavy pressure, and light. Light pressure, heavy
pressure, and light. Once you have your
first layer down, if you wanted to add some blooms to this type of leaf as well, then grab a darker
pigment of green, and tap it in there
at the bottom. You can see the color
blooming there just like it was with the flowers. Again, we're using the
same wet-on-wet technique that we practice at the
beginning of the class. The second type of leaf
we're going to practice is a more rounded almost
olive branch-type leaf. For that, instead of lifting back up at the end to
create a pointy tip, I'm just going to have a
soft round right there. Then go back and connect
it up at the top. It's the same technique as
the one we just practiced, but it has a rounded tip instead of the very
sharp pointy tip. Again tip of your brush, lay it down, and then just put a little bit of curve
there up at the tip. Again, if you want
to add a soft blue, grab a darker value, and just tap it in. The other type of leaf
that I always use in floral compositions is a
flowy, drapey style leaf. I'm going to practice
as if I'm just painting a leaf coming off of this flower that we practiced. To make it drapey, I'm just using the
very tip of my brush, pulling it out of it, laying the brush down, and lifting back up. I'm going to do one
connect it off here too. You just wiggle your brush as you go down to give
it some organic edges. It's not a perfectly smooth edge like these first two
that we practice, it has a little bit of wiggle
which I actually like. Again, tip your brush, lay it down, and make a nice
point at the end. Finally, the last style that
we're going to practice is just a simple baby leaf stem. I like to usually add
these towards the end of my compositions and I
make them a lot darker, and smaller, and just use
them as a filler leaf. I'm using a smaller brush. This is a size 4. I'm just going to
use the very tip, draw a little bit of a stem, and then push down to create
a leaf here up at the top, and do that same thing, and just work my way down. Use the tip, drug little stem, and then push down to
create your petal. Just work your way down. There's obviously
a lot more ways that you can paint
leaves as well. Those are just a few of
the types that we'll be using in the projects today. Now that we've practiced both the leaves and
flowers individually, it's time to get started
with our compositions.
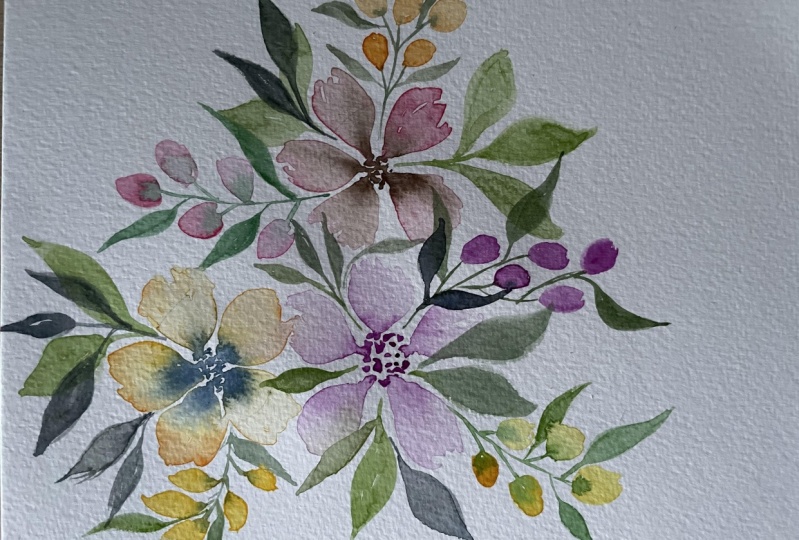
7. Watercolor Floral Composition Tips: Our very first project will be a delicate floral composition. As I mentioned, I'm
going to give you tips for creating a dynamic, well-balanced piece so you can create a composition
of your own. Let's start by going over the important components
of floral arrangement. These aren't necessarily
in order of importance, but they're all key
things to keep in mind. I'm going to be showing
you examples of my old and new artwork to help visualize each
of these points. Number 1 is having
a focal point. You want to draw the
viewer's eyes to the main element of your piece, which is usually
the larger florals. Then naturally the
filler florals, buds and leaves will
come second in view. That leads nicely into
number 2, which is contrast. Now you can have
contrast in color, size of your elements, you can have contrasting
angles or points of view that your florals
are painted from, etc. The main point is just to vary
all of these components so that your composition doesn't
look flat and stagnant. Number 3 is making sure your
piece is well balanced. This doesn't mean having a perfectly
symmetrical painting. You just want to make sure
you're painting isn't lopsided with all the heavy
large elements on one side. You want to make sure
those bigger pieces are balanced by smaller
fillers and leaves, and also make sure that your color choices
are balanced as well. Number 4 encompasses a
few different things that all tie in to the movement
of your composition. One thing to keep in mind is
you want the viewers eyes to move with your
piece along the paper. You don't want them to
just look directly at the center of the
painting and move on. One way you can do this
is to try to compose your painting in an
S-shape or zigzag shape, starting at one of the top corners and moving
down to the bottom corners. Like you can see I subtly did
in this composition here. You also want to keep white
space in mind as you paint. Sometimes it can be very easy to overdo it
and feel like you need to fill in every little gap or white space with leaves. But white space can
actually be very powerful. For example, this is
a very old painting I did a few years back, and I jammed in all of these
leaves in every open space, so there's no room to breathe. Every element is right
there in the center. In this case, it would
have benefited me to leave some of that space
open and maybe add some draping
leaves or flower buds to give this piece a
little bit more movement. Finally, number 5, you want to keep your
larger focal elements in odd numbers or groups of three instead of
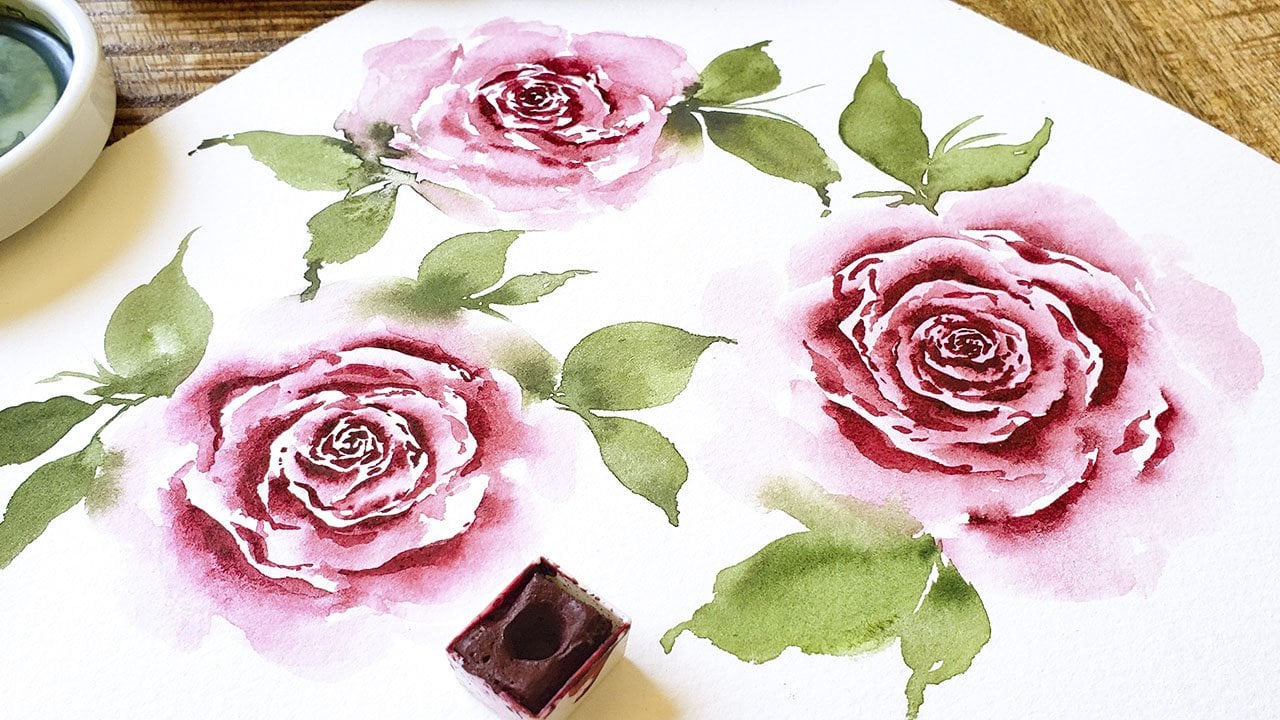
pairing them together. Take a look at another old
painting of mine that just has two big roses and some
greenery around it. It feels unbalanced and a little uncomfortable to
look at because it's just too big blobs
right next to each other and your eyes don't
have anywhere to go next. This painting would have
benefited from adding in one more larger flower
element and then some smaller buds and leaves
to help balance it out. These tips will be
very helpful as we move into our class
projects in the next video.
8. Project 1: Watercolor Floral Composition: Using what we've just
learned about composition, let's get started with
Project number 1. Here we go, we have our
blank sheet of paper, and I know it can feel a little intimidating
and scary when you have just a blank sheet of paper staring at
you and you're not entirely sure what your
painting is going to look like. But I just want to remind you, we're just doing this for fun. We're learning a new style, we're being loose and
free with our painting, so try not to put too much pressure on
yourself as we get going. I'm going to start by just very lightly outlining where I want my main floral elements to
be and do three big flowers, and I'm just going
to lightly sketch out where I want that to be. I'm just circling,
I'm not outlining flowers or doing any
detailed planning. I'm just loosely circling out where
I want this to be. I'm going to get started
with my very first flower. This is the one on the top left. Again, you don't have to
follow my exact composition. Just feel free to put
them where you like, use your own colors. I'm going to put some
petals down on the paper. Again, I'm doing this
method where I start with really light-colored
petals and then I go back in and drop in
a really dark center. I used to be really particular about how my petals
looked and I tried to make each petal look the
exact same and look uniform. But over the years,
I've actually liked experimenting with
messier petals like this, especially in this loose style and I think it just
looks beautiful. Don't worry about making
the perfect petal shape. The petals are nice and wet. My brush is loaded up
with the dark plum, and I'm just going to start
tapping in the center. It's looking really
nice already. I think it's a little bit too much of a
contrast for me from this really light blush to
the really dark center. I'm going to add a little
bit of darker pink onto the petals. Again, these petals are still nice and wet from
the first layer, so I'm not having any
trouble just dropping in a little bit of darker
pink around each of those. Now I'm just going
to do one final drop of that dark plum, just make the very
center nice and bold. The next flower I'm going to
do is this orange-yellow. I'm going to do the
same process as above. Starting with the petal, I want these petals to have a little bit more
definition than this pink one. I'm just taking my time. Remember what I said
in the floral lesson, the whitespace is really
an important element here, otherwise, you can end
up with just a big blob. That was one of the
troubles that I had when I first started
watercolor painting, because I wasn't very
good at water control, and so I'd get very
frustrated because all my colors would just
bleed into each other, which is what we're
learning in this class, but it's more controlled, and so that whitespace
in-between each petal, it's really important. Now, I'm going in
with a dark brown, and you can see those
colors start to bleed. For my third flower, I'm going to use the technique
that we learned first, which is starting with a
really dark center and then using only water to
brush out each of the petals. I'm using all the different
things we learned earlier in the class
to help build out this composition.
There is my center. Now I'm just loading up
my brush with water, no color, and using the tip and then
brushing up the petal. If you're working on your
petals and you're not getting enough color in there, just reach into the
center and drag in some of that color
into your petal. One more petal to go. That's looking good. Now that I have my
three flowers done, I'm going to start
adding in the greenery. I'm going to first start
by just adding in a couple of leaves off of
each of the flowers, and then I'll see how the
composition is looking. I'll see where there's areas of whitespace and then
I'll start adding in a little more of the
flowing greenery and some flower buds as well. As I'm adding in these leaves, you can see that my petals
are still a bit wet, so the green is bleeding
into the yellow petal, which is completely fine. We're doing a loose
style so that's to be expected and that just adds more interest to
your composition. Same thing happened here, get some nice bleeds
going on there. I'm just adding in these
leaves where it feels right. Same thing here when you're
painting your leaves. I want you to keep
that same mentality as when you were
doing your petals. You are not overthinking it. You don't have to have
the perfect leaf shape. You just dropping
down some color, and keeping that brush nice
and loose in your hand. I think that's good for
my first layer of leaves. Now I'm going to plan out with my pencil where I want
some flower buds to go. I think I'm going to have
one coming out of here. Again, I'm just
lightly penciling this in so I can see
how it will look. I'll hop on there. Probably have one
coming out of here, and one coming down. I'm going to start with
this little stem up here, and I'm just going to start placing some small
little delicate buds. Just a little oval shape. I'm just going to place
a few of them coming down the stem that
I penciled in. Just a little teardrop shape. I want to start putting in the brainstem while
that is still wet, so I get some nice bleeds. I'm loading up my brush
with the green and I'm going a little bit of a
darker value on the screen. I already have my
light first layer. Now I want to go darker
as I add more greenery. I'm using a size four here because it's just a
thin little stem. As I worked my way up, you can see it just
starts to bleed into each of those little buds. That means stem is done. I'm just going to add in a few small leaves coming off of it. Don't be scared to overlap elements that you've
already done. As I said before, we always want to work from light to dark. This green leaf is a lot darker than this
light yellow petal. It's completely fine
if it goes over. I'm going to do
the same process. But since this is a
pink flower here, I'm actually going to
put some yellow buds to help balance it out. I'm just going to
do a couple here. You can see I had too
much water there. You can see some pooling. If you have that happen, just rinse your brush, dab it on the paper towel, and then use that. She still got some of
that excess water. You're just using your brush
as a mop if that happens, and soaking up excess water. I think I'm going to do a
couple more coming up this way. Now it's time to add
in the [inaudible]. Again, loading up some
green on my brush. I'm just using the very tip
of the brush when I add in this part because I don't
want it to be too thick. You can see those
nice blooms forming, and adding in just a couple leaves coming off of the stem. That's looking pretty good. Something else I like
to do while I'm working on compositions like this is to stop every once
in a while and just take a look at
it from far away. I can see here that I'm starting to bunch up a little
towards the top left, which is something I always
tend to do for some reason. That just means I need
to focus a little more down here at the bottom and make sure I'm adding
plenty of buds and flowing greenery down here. Otherwise it's going
to feel off balanced. Again, just adding some
yellow buds coming down here. Now adding in the green stem. The more water that
you have in your buds, the more blooming
there's going to be. You can see that one's
almost completely green now because I had a lot
of water in that one. Again, you don't have to
follow exactly what I'm doing. Just look at your
composition and see what else it needs. It can be easy sometimes, so just get locked into your
painting and you don't even take a look at it until
you're completely done. But I always like to access as I go to see what's lacking, to see if there are
areas that have too much white space or that
are getting too crowded. I've been doing a lot
of light colored buds, so this time I'm going to
do some dark purple buds. I'm just going to do a few. Now going in with my dark green, putting the stem in place. Since these buds
are a lot darker, you won't be able to
notice the bleeds as much. I'm just adding in
some draping leaves. When you're working on your
leaves, don't overthink it, just lay your brush down, wiggle it around and
see what happens. Again, this is really
important to know. As I said, I always
work from light to dark when you're adding
my layers of watercolor. That's why this base layer, these big leaves,
were lighter green. Now I'm going on top
with a darker green. You can still see the
contrast between them. That just gives your composition some more depth because you can see that these leaves are on top of the
ones behind it. Just going to add in
a couple more here. Let's take another look. I just noticed there's a
lot of white space here, so I'll do one more little
thing of flower buds. Then I'll go in and put some finishing touches of
some more flowing greenery, and then we'll be done. I've just flipped this
composition upside down because I'm working
on the bottom buds. I'm just going to add
in a few more of those. These buds didn't have
a ton of water in them. You can see a little
bit of blooming there, but not too much. Here's the stem. I'm just going to add
a few more leaves. I'm doing one last assessment
before I finish off, and I'm noticing a few things. First, there's a little
bit too much white space for my liking here. I'm going to add probably
just a couple of small leaves coming out
of the yellow flower. Then also I just need a little bit more movement and it's looking a little
bit too centered. I'm going to add probably
some stems coming out of here and then coming
down the bottom too, so I can give it that nice
zigzag flowing movement. I encourage you to just step back and
take a look at yours, see what areas need some more, or if anything needs
to be balanced out. Another thing you can
look at is your colors. If you have too much
dark on one side, you can add a few dark
buds on this side, or if it's too
light, vice versa. Just take a look,
assess what you think needs to be done, and
then we'll finish up. As I said, there's a little
bit too much white space here for my liking. I'm just going to go in and
add a couple of wispy leaves. Again, white space is important, so I'm not going to fill in this whole thing with leaves, but I am just going to add
a few wispy little leaves. This is for here, and just lightly
adding those in. Might add a couple of
curving in here too. That part looks good. Then the other two
things I mentioned was just adding a
little more movement. I'm probably going
to add a little bit of a second layer of leaves here and maybe a couple
coming down here as well. You can see I'm just adding very loose style leaves in here. Just letting my brush
do all the work. I added a little more Payne's
gray to my green mixture, so it's really dark
and moody now. I always like to finish up
with some really dark pieces just to give it a
little more drama, make the leaves a
little more bold. I'll also add a couple of
coming out of this one too. Stepping back one last time, I think everything looks good. Let's review some of those composition tips
that we went over. First of all, it's a odd number of your main plural elements, so we have three. We also added in some
different sized flowers. We have buds, we have leaves, we filled in some of the white spaces with
some filler leaves. You can also see some movement. Those were some of the
last steps that I did. That's usually my last step, is to see where it's lacking, and then add into movement with these types of
leaves and greenery. That's it. I hope you're
happy with yours. If you're not, don't worry. Every time you paint,
it's great practice. This isn't one of my all-time
favorite compositions, but it was great practice. I had fun doing it. That's the whole goal for today. Once you're happy with
your composition, let's move on to the next
lesson where we'll be painting the sweet and
simple floral bouquet.
9. Project 2: Watercolor Floral Bouquet: Our second project is a simple floral bouquet like this one that I painted
earlier, as an example. We'll be using all the same techniques we've covered so fa, r but instead of a
flat composition, the flowers and leaves will be arranged in an upright bouquet. All of the same tips for compositions will
still apply here. You want it to be balanced, include contrasting elements, and still group the larger
flowers and odd numbers. The biggest difference will
just be here at the bottom, where we'll add all the
stems to the pieces bunch together like a real
life bouquet would have. Once again, I'm just
lightly going to circle where I want my main
three flowers to be. I'm going to be using the same
colors that I used in the last composition
just because they're already all mixed
up and ready to go. My first flower is
going to be light pink. Using this same pastel,
peachy pink color. Then I think the
center is going to be that same dark plum. I really like that combination. I'm going to start again just putting those petals
down on the page, making sure I'm using lots
of water in each stroke. I'm just going to be adding
this last fifth petal here. I just like to add a little
bit more moisture here in the center before I start
tapping in the darker color, just in case any of those
have started to dry. Now I can start
tapping in the color. That's looking great.
My second flower is actually also going to
be that peachy pink. But I'm going to try doing a yellow orange center
instead of something dark. Because the center is
going to be yellowy orange this time and
not the dark purple, I'm just going to make sure
that these petals are a bit lighter so that the light yellow orange
center can still stand out. Now I'm grabbing that orangey
yellow for the center. I'm going to tap it in. I really like how that looks. It looks a bit softer and
more gentle than this one. This one has a nice
bold contrast, but I also like this one too. For my third flower, I'm actually going to use that
same yellow for the petals and then probably do a darker
brown again for the center. Just to vary this flower
a bit from the others, I'm going to make these
bottom two petals just a bit smaller. Actually for now I'm
going to just use the same light peachy
pink for the center, then I'll probably go back
in with another coat, add something a bit darker. That's giving it a nice, almost like a cream
circle gradient. That's really pretty. I do like my centers
to be a bit more bold. This is nice, but I'll probably go back
in once it's dried up a bit and just tap in a
little bit of a darker color. I'm just going to tap in just a little bit
of a dark center here. Don't want to go
too crazy with it. For both of these, just something a
bit more dramatic. That's looking great. Now that the flowers are done, I'm going to start adding in
the base layer of leaves. Same as last time, I'm going to start with a lighter green, and then as I add more
buds and filler leaves, I'm going to get
darker and darker. Starting with a light wash. Just going to add a few leaves coming off of these flowers. For the most part, all of these leaves
will be angled upwards, and will have probably a
couple of draping down. For the most part
they'll be coming up. Remember you can also use the wet on wet technique
for the leaves. You can tap in some darker
values if you want. Now all the base layer
of leaves are done. I'm going to just
plan out where I want the bud stems to be. They're going to look similar to the buds that we did
in the last composition. I'm going to have it
overlapping this petal here. We have a couple coming
out of here as well. Now I'm going to start
painting those buds, will finish up with
a few extra leaves and greenery stems. Then the very last
step will be adding all the stems coming down at
the bottom of the bouquet. For the buds, I typically
start on the left side and then work my way to the right just because I'm right handed, so I don't want to have to
set my hand in any wet paint. This first one is going to
come out of this yellow flower and have buds coming to
the left and to the right. Again, there's a
little too much water here, it's pooling. I'm just going to soak some of that excess water
up with my brush. We're just going to
follow that same process as we did in the last one. Those are the buds and
I'm getting a dark green. I'm just doing a little stem. You'll notice a lot
of this process will look very similar to
what we just did, and that's all great practice. Each time you paint
a composition, I feel like you've
learned something new. You learn about
your preferences, what looks good, what doesn't. It's good to practice. One thing that I tend
to do is go a little overboard with the
leaves and the buds. I always end up liking
it when I just have a few buds and a couple
of leaves coming out, but I usually tend to
go a little overboard. That's something that I've
learned when I'm painting, so just try to keep it simple. That's looking good.
I'm just going to add a couple of more buds here and a few coming out of here. I think I'll call it good. I'm just going to do two little
ones coming out of this. I'm going to do one
more little stem of buds and then we can do
the finishing leaves and add in the stems. I'm still going to be
adding a few more leaf stems coming up at the top and sides but
before I do that, I want to just start
planning out where the stems are going to come. You definitely want to have
enough stems coming him that would be realistic for
how many elements you have. We have the three main
flowers and then we have lots of leaves and buds. I'm just going to start
penciling those in. For example, you want
to be able to show that there's some
depth to your bouquet. This flower is more
towards the back. I'm going to show
that stem coming through behind that petal
and then coming down. Just start penciling that in and then we'll add the
finishing touches, which will just
be the last layer of leaves and then these
stems coming down. For the finishing
touches of the leaves, I'm using a really dark mixture, just like I said
on the last one, I always like to add
with the darkest. I'm just going to do
some wispy leaf stems. I just do intuitive painting
here so I'm not trying to plan out too much where everything's going or how
many I'm going to put. I just assess my painting
and see where it's lacking and that's
where I usually add these last little stems. One other thing I really
want to mention is to not give up on
your compositions. I can't tell you how
many times I've started a floral composition and halfway through or not
even halfway through, I start hating it and I want to throw the
piece of paper away or rip it up and start
fresh but then I ended up adding more
fillers and leaves, adding some more
details on top of the flowers and I
end up loving it, so don't give up. They always look
a little weird in the beginning because
they're not finished, but just keep pushing through, and even in the end if you
don't end up liking it, it's still a good practice. Try not to tear
up your paper and throw it away if you're
getting frustrated. If you don't want to
put full leaf stems, you can also just do
these little wispy lines and I'm just using the very
tip of my brush for that. Again, it just adds a little bit of texture to the painting. I think that looks
good. It looks like a pretty full bouquet. Make us do a couple of
last dark lines here. Maybe add a leaf or two. But again, it can be easy to go overboard and overdo
it at the last second. I think I'm just going
to call it good there. Now we can start adding in the actual stems
of all the pieces. One thing to keep in
mind when we start doing this part is we want to vary the shade or the
value of the greens coming down because we want
to show some depth to there, that there's some stems in
the back and some upfront. You can see in my other example, I have some lighter stems
and then darker stems. That's exactly what
we're going to do here. Starting with a lighter
value of green, I'm using size 4. I'm just going to start
dragging down some stems. You can also vary the thickness. You can have some
thicker stems for the bigger pieces,
some thinner stems. Again, you want to show
those stems coming through the whole bouquet. Now I've loaded up
a darker value. I'm going to start gently
going over that first layer. Ones you see these darker
stems coming through, that's what really
gives your piece depth. The very last step just to add a few dark big leaves coming
off of the bunch here. I think I'm going
to call it there. I'm pretty happy
with how this looks. It's pretty similar to the
composition we just painted earlier lots of the same floral, so lots of the same
colors and buds but just gives it a bit of
the different perspective when it's shaped into a bouquet, it almost looks
like you can just grab it right off the page. In the next and last video, I'll share some
final thoughts and wrap up the class.
See you there.
10. Final Thoughts: You made it to the
end of the class. Thank you so much for
joining me as we learned to paint these delicate
loose style florals. I hope you had fun and learned
some new techniques that you can now apply to your
own watercolor practice. To recap, we learned how
to master the wet-on-wet watercolor technique to create blooms and soft-colored leaves, we then practice the individual floral and leave elements, and learned the
key components of a well-balanced
arrangement before finishing the class
with our two projects; the floral composition
and the bouquet. If there's one thing I hope you take away
from this class, it's just to be loose with
your strokes and just enjoy the process and the
magic that is watercolor. As a reminder, don't
forget to share your project and be
sure to tag me on Instagram at petals by
priya so I can like and comment on your
work and share it to my stories as well. Additionally, if you
have any questions, I am always reachable
of Instagram DMs, or by email, which I'll
leave a link to below. You can also find more
artists' resources like my free watercolor supply
guide and watercolor leaves, color mixing guide on my website, which is
petalsbypriya.com. If you enjoyed this class, please take a moment to
leave a quick review. I read each and
every review that you guys leave and
the feedback really helps me identify
areas of improvement and gives me tons of
ideas for future classes. I also encourage
you to check out some of my other
classes as well. I'd love to see you there. Thanks again for
joining me today and happy painting
from me to you. [MUSIC]
 Petals by Priya Watercolor, Watercolor Artist & Teacher