Transcripts
1. Introduction: What's up, guys? My name is Dennis. Welcome to the skilled share course on how to edit amazing instagram photos in light room with the help of light room presets. So in this course, you're going to learn how to use the presets that you already perhaps spot or found online . You're going to learn how to make your own presets to really show your own style and make the little adjustments that you want to make. And last but not least, we're going to go over some strategies to take care of the visual part of growing an INSTAGRAM account. There's lots of strategies to make grow, but the visual part is where already stops for most people. So gonna make your instagram feed look amazing. So what can you expect from this course? Basically, we're going to learn step by step from the beginning to the finish, how to easily add it. Amazing photos with software light room, especially with lighter presets, to put them on instagram To put the month unspool, ash be hands to print them and put them on the wall. Whatever you want to do with the photos later, we're going to go step by step every single step from picture to finish edit, and yeah, I'm gonna take your eyes a lot
2. A Quick Note About Lightroom: I want to be very clear about one thing, because this course years about editing with of self or of light room okay, especially with the use of presets, let's room is a great way to have a very consistent look every single time and make it easy and have all the adjustments that you really need to dig very deep. Okay, so that's number one if you do not have light room yet, there's a pretrial seven days that Adobe offers you guys. I put the link down in the description You don't need to put any credit card. And for something like that, you can really just downloaded. Try it out for seven days for free. If you if you notice you're gonna like it. If you love it, then you can purchase it or, like heaven, have a subscription for. I think I think it's about 10 or $11 a month and, you know, start editing with that. If not nothing happened
3. Find Your Look: So let's get started. Step number one. It's very important. Step number one is fined or choose your look. Choose your style. How do you want your pictures to look? How do you want your style to be perceived? Whether you want to be a professional photographer, you just wanna have a nice instagram feed. Or in general, you want to develop your own style. You need to choose and decide for some direction to go first, and you need to be consistent about it, you know. So it's very typical mistake. Is this jumping between the styles? You know, one picture might be a little like faded, the saturated moody look. The next picture might be like summary orange and teal look. And then there's another one with complete, blown out neon colors because they saw Blade Runner. You know you don't want to do that. There's ways to to, you know, to express different styles and ideas. But it shouldn't be one in the same instrument feet or one in the same portfolio, because one thing is very important. You have to remember that Think about yourself when you open an instrument feed you're looking at, You're looking at pictures, and usually you get like a feeling for the look of the profile right here. Like there's famous people that are very famous for their cell of pictures. You know, you can think about a Brent waffle or you can think about Peter MacKinnon, or you can think about There's this one guy that I recently found His name is visuals of Julius. It's I think, he's from Finland and very young guy, extremely talented editor in terms of pictures and used a lot of photo shop more than light room even I think. But the point here is that people get recognized for their styles, and it's not so much if the style is perfect or if the stylist exactly what I like. It's more like it's a style, you know, like you need to give people that chance to agree or disagree with your style. And the only way to do that is to stick with style. So Step number one is choose a style. So the question might be how do I develop style, right? Like it's not easy to just come up with my style right? What is my style? How am I supposed to know my style. So there's a bunch of ways you can inspire yourself to have a nice starting point for style because you have to remember, this is not the be all end all. You're not supposed to find your style now and stick with it forever. We just need a starting point, right?
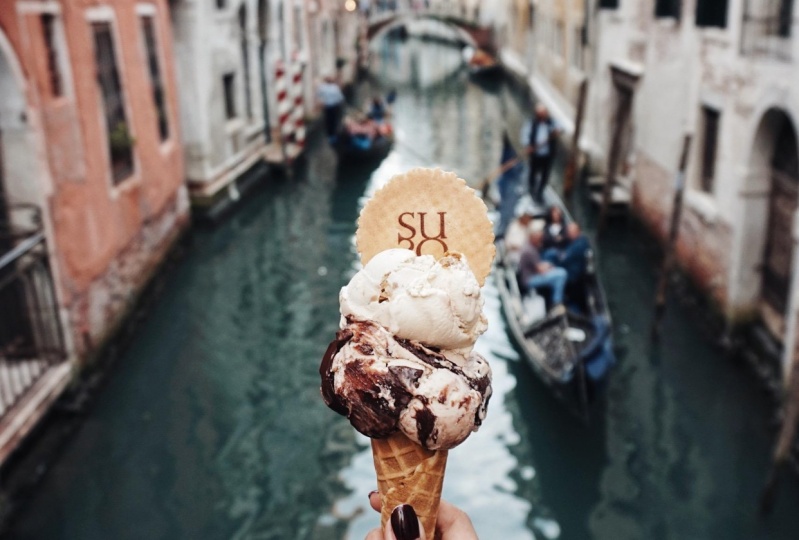
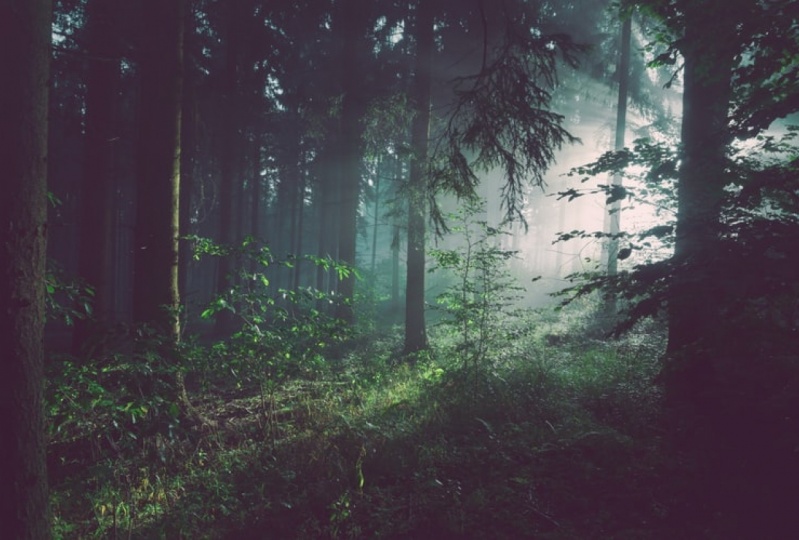
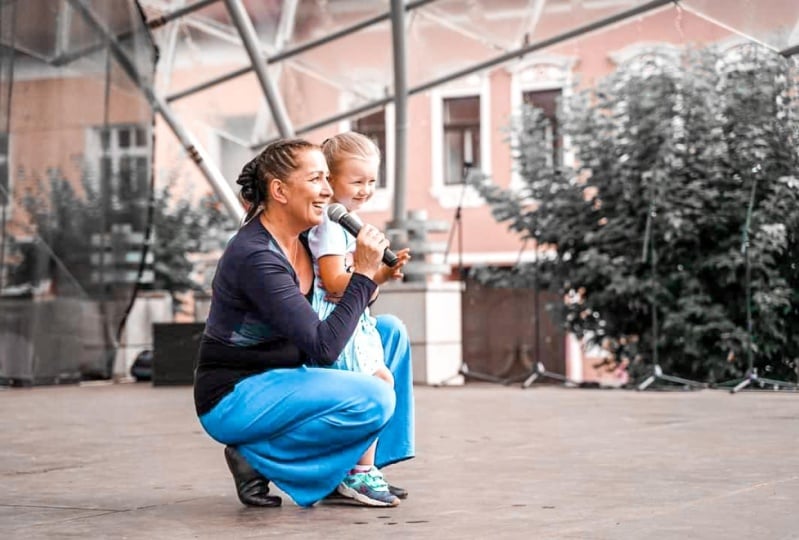
4. Develop Your Own Style: So now let's talk about quick and easy ways of how you can inspire yourself to find your own style. So Number one should be the most obvious because you probably already follow on Instagram people with styles that you like. You know, maybe you have your favorite photographer. Maybe you have your favorite videographer youtuber. I don't know who that uploads pictures in a style that you like. Look at those pictures. Think about how did they do that? Perhaps there really self presets that you could use to take a look at them and think about what? What did the person do in this picture to make it look the way it looks and also think about things like not only the editing off the picture but also the content of the picture . So what is it that you see? It always landscape picture. So is it also, or is it more urban, city, city and architecture that you see, or do you maybe see a lot of humans and portrait's and stuff, or do you see animal pictures? Do you see a lot of coffee? You steal of beer? There's a bunch of teams like you can literally choose what you want A picture. If you want to start photographing water bottles, you can start photo photographing water bottles. I really mean that the more important thing is not necessarily what style or what content you choose is that you stay consistent with the content so people can get an idea of what you're all about. Okay, So number one was instagram. What is another good inspiration Project description? I put some links of websites where you can find great great pictures. My two favorite examples are unspool Eshed dot com. It's a great place for amazing stock photos, and they're all free so you can download them. You can do with them whatever you want and really take a look at. How did the people edit it? And you can later try to recreate one of those looks and the other examples pixels dot com is pretty much the same. Just maybe a little different style of pictures. You can find everything there and search for different categories and everything, and with this, you should come up with a good amount of inspiration to really find an idea of what could my look, what is my look right
5. The Assignment: my task for you is to find three. Okay, Not more than three photos with different editing styles online anywhere. Instagram, unspool, ash whatever Doesn't matter off editing styles that you like. What is this style that you like three different ones and then look at them and think about and write down for each and one of them. Five points and five bullet points. Just make make your mind up and think about what did those people do to create this look that they, you know, is a very de saturated Perhaps is there like a fade filming? Look in there. Did they especially focus on some different colors? Maybe orange or red or blue? Whatever you think about what they created and what is also what is the content of the pictures? So what is the theme and what is the style of the photographs? Do that for three pictures and then move onto the next one
6. You Can´t Decide For A Style?: you can go and take a look in my instrument right now. I just made a fresh account because actually, that's a very good example, actually, because I wanted to try a new style that I haven't tried before, and I didn't want to mess up any of my other accounts. So what I did was I made a new account, and it's all about my travel photography, my old travel pictures from the last two years and also in the upcoming troubles. I'm going to use the same account where I just had a completely new style if I forgot everything I ever did. And I have this very orangey and for other colors, very de saturated look off very bright pictures, and I just literally saw a picture on. I think it was unspool Ash and tried to recreate something like this, made some tweaks so that it's now It's like my style. It's not copied from someone else. It doesn't look like the other picture just was the starting point for me to create something new and make the adjustments and make it really look like I want to look like I wanted to look like right and that's that's it. That's precisely the example of what I did. And then for every single picture that I chose to upload on that channel, I made slight adjustments to make it work for that picture. It's not always the exact same preset, but you can make it work and I'm gonna show you how so, let's move on to the next one.
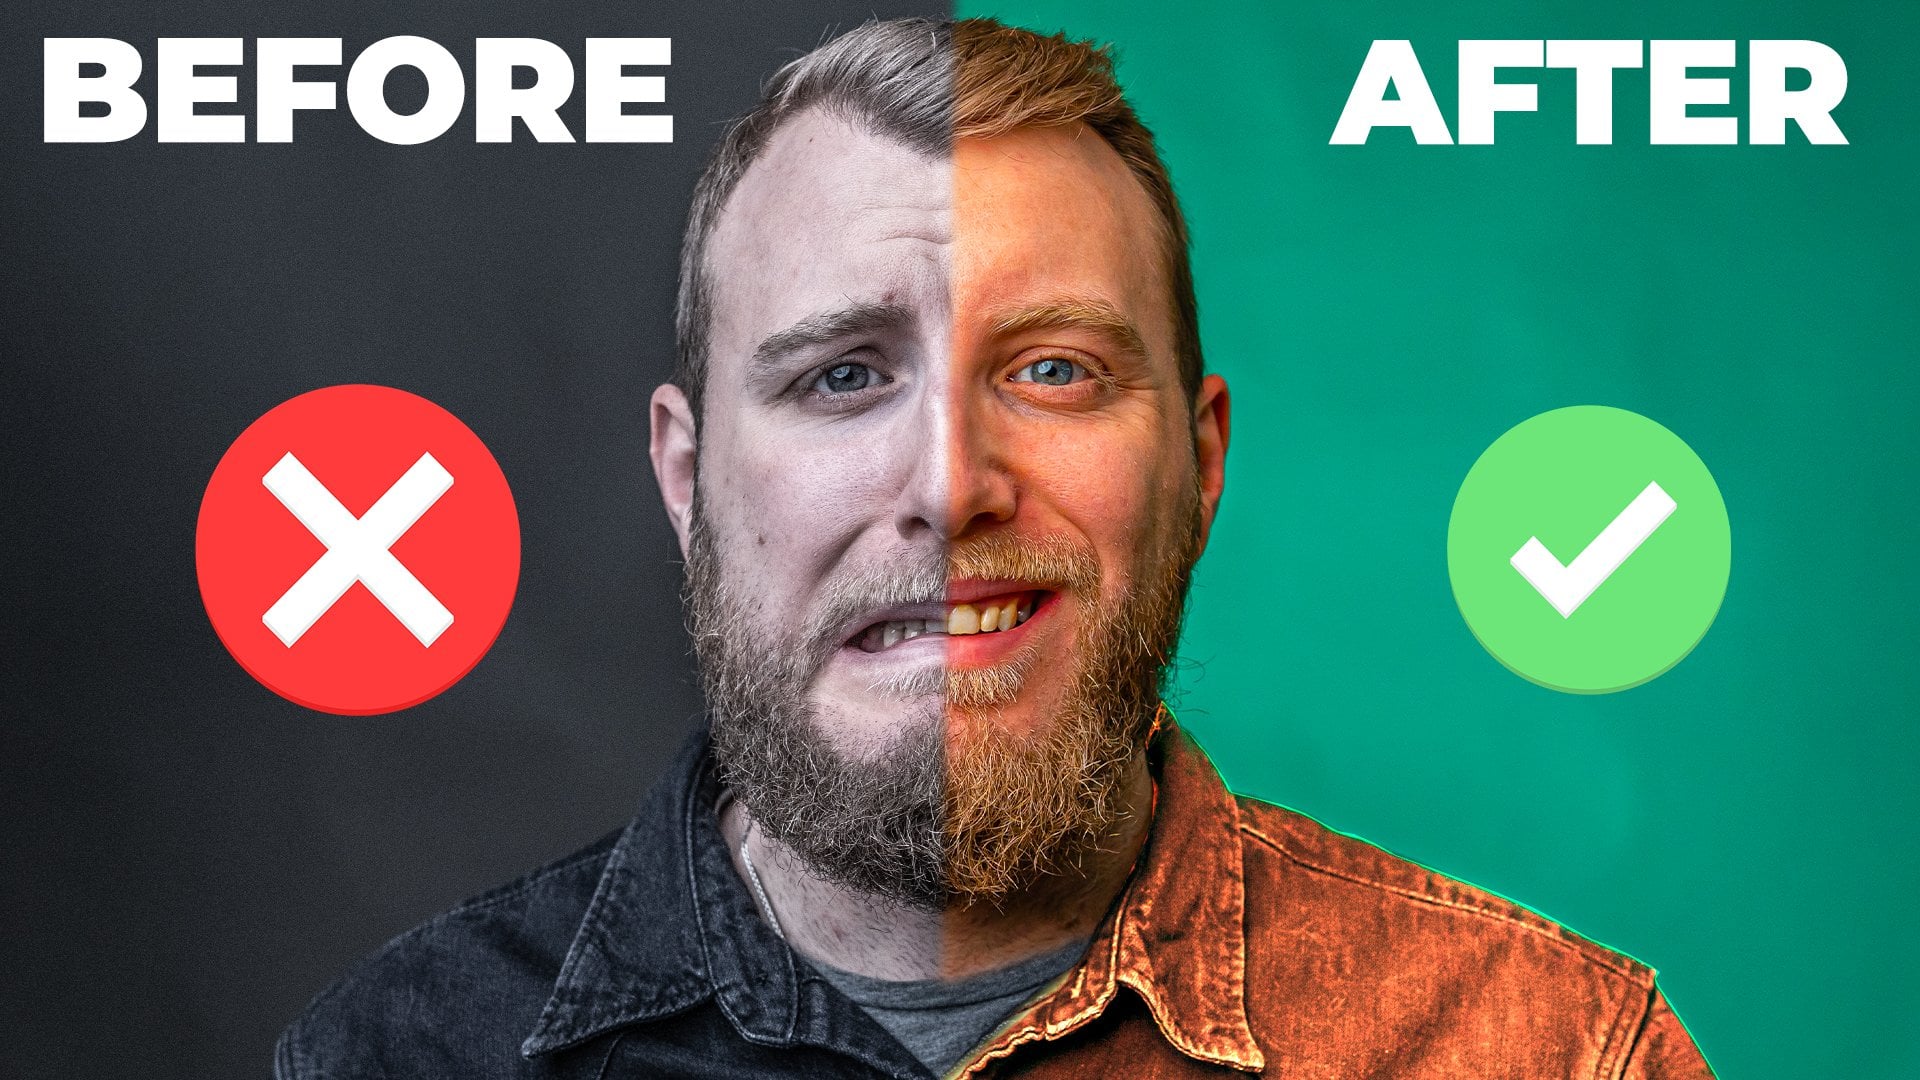
7. A Lightroom Overview: Alright, guys. So now we're inside a flight room and I'm going to quickly show you some of my presets. But more importantly, I'm going to show you how to make your own preset and save it super easily. So in the future, you won't have to redo your whole image again every single time to keep a consistent look and, you know, make your instrument just really look good and consistent over time. So it's really, really easy. So we're in the in the developed tap instead of light room right now. And basically, after you imported your pictures and you go here on the left side, If you have already some, you're going to see your presets. So in this case, I'm just gonna thistle raw picture here. Now it's a Rod's to Jay Peak, actually, but this is an unedited picture here, and I'm just gonna go ahead and go ahead and apply this preset here, Guanajuato to which is actually one that I made intentionally just for this picture. If I remember correctly, because what you see is the city off Guanajuato, Mexico. And I really love this image, by the way, As you can see, the picture looks totally different compared to the where is it here compared to the before and after? It's a very I like this. Look a lot. This is how my instagram looks like right now. It's like very de saturated look except for the Reds and the oranges are really much like this, Um, but that's not the important point here, because you can do your own preset to the to the style to achieve the style that you really like. So the point here is that now that we applied those changes, let's just make a new preset from it. So let's imagine, I did all those changes here inside of the off. All those. Just make sure that you can make, which is in a lot, And I would really just recommend to play around a lot, go through them and really, you know, take the time to find adjustments that you like to create the image you want
8. How To Save A Lightroom Preset: Let's go ahead and save the current image of the current adjustments because that's really what you're doing. You can say all the adjustments that you just made into preset. It's almost like a template. So next time you go here, you can just apply the template and the priest it to the picture that you're working at working on at the time. So you go on the left side, you go ahead to presets, hit the plus button right here and say, Create preset. So right now as it ask you first for name, I'm going to call this. Let's call it's give share, test preset. Okay? And then there's a bunch of settings and options that you can hit or not hit, depending on how much off information you want to put into the preset. So there's a few things I would start with check all. And then there's a few things that you want to keep out of the priesthood, and I'm going to tell you why. So, first of all the white balance, this is important to keep out, because essentially every single picture you take will have different white balance settings. You know, like because most likely the situation is not gonna be the same of the lighting is gonna be different. The color of the lighting, the temperature and all that stuff. It's gonna be different for every picture. So you will not want to burn it into the preset because this is something to adjust for every single picture, even if use the preset. So as you know, as you notice now that it's not as easy as an instrument filtered to, just put it on the picture and you're good. You will have to make some little adjustments every single time just to make sure the effect of the priest that comes out regionalized. So first of all, white balance, we're going to keep that out. Second thing is exposure for the same reason because different pictures are going to be exposed in a different way. And you just want to take care of that. So it doesn't, you know, manipulate your preset in that sense. So what's with then? We have graduated and radio filters with that basically just means is that within light room you have the possibility, and this is actually here, and here you have the possibility to change just certain parts of the picture and depending away useless filters. This is a very picture specific change. So you also don't want to keep this into the preset that you're going to use for all the filters. Same thing goes for lens correction because you might just use different lenses. When you take the picture for the transform changes because, you know, things like the image ratio or something like this, it's gonna be very specifically for every single picture again. But but that the pop process vision and that looks good. So that's all the information we want to put into the scarcer preset. Here. Let's create that. We go on the left side there. We have it skills, shirt test. I'm gonna hit. Add to favorites. So it's always at the top and there we go. So now let's just try out if it works and we're gonna head reset. So reset puts your picture back into the raw version before you have any edits in there. Okay, so now we're just gonna sketcher test. And now it looks a little dark. And that's exactly correct. Because, as you remember, we did not save the exposure So that's what we're gonna just now and then we go. So it worked perfectly. Now, this is exactly how you create your own light from preset, and that's all pretty easy. You can save as many presets as you want and every single time. Now that you are going to edit a new picture that you want to put a new instagram, you have your look already saved. You can just supply the presets, make some little minor adjustments like exposure and maybe white balance and stuff like that and you go to go.
9. Perfect Export Settings For Instagram: So now I just want to share one last little tip for you to make really sure you have the best quality photo on instagram that you could have, because I don't know if you noticed, but sometimes when you when you export really high quality pictures, they don't look as good an instagram, and that's because it's Graham compresses your pictures. It's basically, you know, putting the quality a little bit down, so it's not too much later to hand for Instagram in, and there's an easy way off making sure that doesn't happen. So, first of all, you have the image ratios that Instagram accepts right? For example, if you wanna have a picture like this, you could, of course, keeping in this ratio, which is totally fine. But you can also changes to this interim style 1 to 1, for example, or let's let's go. Even better, Let's go 4 to 5. This is gonna be the ratio that keeps the most space off phone display when you post a picture on instagram. So this is basically if if the picture allows, this is a good ratio to go to and then you go file export and here in export, you can make some settings to make sure that the quality doesn't get lower. And I really have them safe here. So you want export is a J pack quality at around like 73. Actually heard that another YouTube video And it worked well for me. So I just keep it at 73 and then you want to go to resize to fit 11 81,080 to 1350 pixels. Okay, so this is not just the ratio, its exact pixels. So it's not some higher amount of those numbers with the same ratio. It's exactly this pixel ratio with just the perfect one for instagram. And then you're gonna hit sharp for screen and you're gonna go ahead and export in this way your your photos gonna look as crisp and as beautiful as it looks right now instead of light room. And that's just a little tip I wanted to insert to make sure you guys get the most of the images. So thank you so much for being here in lighting with me. Let's go on to the next video
10. Congratulations!: All right, That's it. That's awesome. My congratulations. You have your first own preset and light room. Go ahead, give it a name. So you can recognize that every time you use it and you're gonna be happy about it. This is your first own baby. Okay, so now that's great, Because this preset, you're going to be able to use over and over again, and you're gonna need it to create this consistent look which we're going to look into in the next section. But now, really. Just be happy. Try and try it out on some different photos and see how it works. This is your first on preset. See you guys in the next section.
11. Consistency Is King!: All right, welcome to step number three. And this whole thing And this one is called consistency, okay? And this one, that is very, very important, but also difficult for a lot of people. And then remember that it was difficult for myself to just keep consistent and have the discipline. It's very much discipline that you need to do not go away from the look that you want because very often what happens is you get excited about one look recreated. Use it for a couple of pictures and then you start seeing maybe some flaws. You don't like it as much as he loved it in the beginning, and you want to change your feet is gonna be all over the place if you don't have the consistency to keep the same look over and over again. It doesn't need to be the exact same preset every time with the same settings. Obviously, you need to just a little, but it also just bring out the picture a little more. But you want to stay with the same style of picture, the same style of editing. You know, that needs to be some consistency in the look and a swell in the content of the picture. So what I mean by content is that if your feed if you for example, in your in your bio in your description in your profile you don't want to call yourself a portrait photographer. Okay? And then start posting pictures of landscapes because that makes no sense. And the the thing is, you might have been just coming back from your awesome vacation with amazing landscape photos that you edited in a completely different style than your profile. Your portray it's and you want to post them so badly. Don't do it. You know, there is one great thing that you can do if you really want to post different sorts of pictures at the same time, and then it's just making you account. You know, you can have different styles at the same time. Just put, just don't put them in the same account problem himself so you can have a travel photo profile. You can have a profile where you share all your you know, perhaps private family pictures, whatever and you can have a profile for You know, you're different passion that you have like you can take all kinds of pictures and all kinds of styles. Just don't mix them up with in one place and talking about Instagram. It's the profile could be also your portfolio. Like if you are decorating your walls. Don't put massively different pictures next to each other. It just doesn't look good.
12. How Often Do You Post?: So now that you chose your style, how do you want the picture to look like? And you chose the subject. What are you going to actually photograph Landscape, You know, street for 30. Whatever. Now it's all about Where do you put those photos and what do you do with them? Right. You have a great photo edited perfectly. It looks exactly like you wanted to look. And now how do you actually use it on Instagram to have the maximum amount off, you know, impact over time. So, like in a lot of cases, also like, for example, different platforms like YouTube or something. It's very important to be consistent because there's a bunch of people going onto those platforms because it's cool right now to be using light room and have cool cameras and all that, but and they upload a bunch of pictures and nothing is gonna happen at first. And so they stop it. So don't do that. Okay? Consistency and also patients is very, very important. You know, there's a bunch off courses online, and I actually have another skill show course in the process right now. It's gonna could be coming soon, so keep your eyes open about you know how to post on Instagram in order to have some growth and some engagement and some something's happening. Like, how can you actually grow a channel from zero to a certain you know, to a certain number? And one big part of this that I want to focus in this course is that is the topic of consistency. So I recommend that you go from that you post something between once or four times up to four times a day. Okay, so I know four times might sound like a lot, but remember this instagram similar to Facebook is already applied from working with an algorithm. That means if you have 100 followers and you post a picture, not all of those 100 followers are going to see this picture. It's more likely that probably I don't actually know. The numbers were now probably it's gonna change when you watch this video already or whatever, but you can look it up, but it's probably a fraction off the actual subscribers or followers that see the video or the picture that you uploaded, right? So that means that even if you upload four times a day, the chance that someone is seeing four pictures in the row of you. And because that's the fear, right, the fear would be, Oh, my God, they're going to be flooded with the pictures and they're gonna be annoyed and they unfollowed That's not gonna happen because most people don't even see. Probably even two of the four pictures, because they are so scattered in different different algorithms. And it's probably not even gonna happen because Instagram just doesn't show everything to everybody. And the good thing is, if some posts actually exceeds in engagement and in performance, then you want other people to see it, too, because it's very engaging, right? And then instagram, actually, exactly it does that and, you know, shows the post to more people.
13. Quality, Consistency And Patience: so again, 1 to 4 posts a day. It's fine. The only question just becomes How much can you actually handle? Because I personally I post once a day Right now. That's a good flow for myself right now. I'm not traveling exactly. So I have a bunch of pictures that I can use from my from a hard drive. But I don't want to completely overflow it. And, you know, four times it's just for me personally too much because I also want to take care of the quality. And right now, I'm just know traveling. I'm working like here is a freelancer. So I don't have the time to make so many pictures every day, you know? But between one and four is a good number to start. And if you have so many photos, you know, maybe you're traveling right now and you're really like, out there and shooting and all day long and like editing. Go put the photos out there. You know, just make sure they're great. Make sure that you don't go down and quality for for the pictures that you post just to hit the number of four or five or six a day, and that's it. And you have to stay consistent. So you don't want to post five pictures a day for one week. And then for the upcoming weeks you just posed to a you know, two per week or something like this. So again, consistency, consistency, consistency. And that, combined with some patients and some effort in your skill and trying to make better photos and interesting captions and all that together, that's the magic sauce. That's the secret sauce, you know, again, like I'm going to make another course about engagement and how you can, you know, make it faster. But the basic is the basic answer is always quality plus consistency, plus patients. And that's it. That's what everybody does, you know. That's how you grow. That's how we grow, something
14. Closing Thoughts: So that's that. I want to end this little course with a big thank you. Thank you for, you know, investing the time. I hope it was valuable for you. Hope you learned something. I hope you are happy with your first own light from preset that you created. Go ahead and make a bunch of more police. Show them with me. You know, go to Instagram. My instruments called bag bonding adds bag bonding going to link it down in the description below. Show me your pictures. I'm really excited to give you some feedback. I'm excited to see what you did on share with the community and just get feedback and get going. It's a really fun game to be, you know, inside of this photographer world and share content and talk to people and it's me. And it's all about the community and the connection that you make very exciting. The next classes, the next project. The next course is I'm going to make here. I hope to see you in the next one to it would be amazing if you could give me a little review. Give me some feedback. How do you like it? What didn't you, like, wasn't too long with short all that stuff? Give me some pizza. I hope to see you guys next one by
 John D., Freelance Videographer and Creator