Transcripts
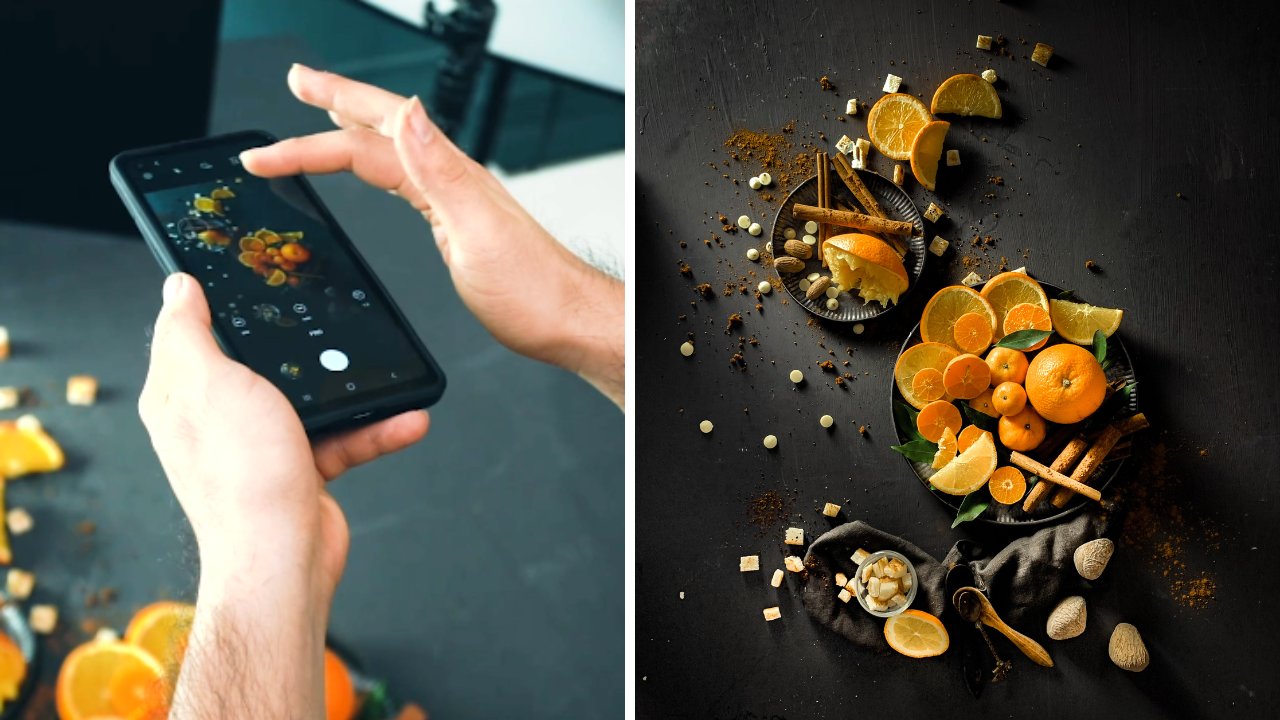
1. Introduction: As someone who adores both
food and photography, I enjoy the process
of transforming a simple meal into a
visual masterpiece. I love playing with lighting, experimenting with
different plates, and incorporating objects
around me to make my food truly shine fellow food lovers and
inspiring photographers. I am Asi Zane, a photographer based
in Brooklyn, New York. I shoot people still alive
and most importantly food. You might have seen
my recent work and the five elements cookbook. Today I want to take
you on a journey through the intricacy of
lifestyle food photography. We're dive into
six lessons here. We will start with
the fundamentals, exploring the basic
lighting characters to help you understand how to use
lighting in your own space. Then we will learn
about food styling, discussing how to arrange the plates and choose
the background. Discovering how to
frame your shots, and exploring
different angles that can tell a compelling
story through the lens. Post processing is
an essential step. I will share of some of my
favorite lightroom adjustments to help enhance
your food photos. Remember, there's
no strict rules. Play around, mess it up, and most importantly,
learn from the process. This class is designed for beginners who are
eager to dive into the food photography without the need for
professional equipment. Your project is simple. Create some food photos on your own using what you already
have in your space. Let's embark on this
visual journey together. I can't wait to see the unique stories you will
capture. Let's get started.
2. Orientation: Welcome to the class I thought through to your
joining this journey with me for this class. It will be ideal to have
a professional camera, but all the tips and
tricks I'm giving you can be applied to mobile
phone shooting as well. I'm using my icon
72 as a tool here. The lens I'll be
using are the 24, 70 millimeter and 100
millimeter micro lens. The 2,470 gives me
a wide range of focal length which allows me
to be flexible on the spot. The hundred millimeter
creates a nice compression which makes the whole image
looks clean and neat. But honestly, you can use any focal lens as long
as it fits your purpose. You will need a subject for this class assignment
for practice. Whether it's a cup of coffee, a plate of salad, or bowl of soup,
they will all be great starting point for you to practice your food photography. For this class project, you will try to identify
the lighting situation in your environment
and strategically use it to image making process. After you decided
the lighting angle in the shooting directions, you will then
stylize your food to your taste so it makes
images more interesting. Here I'm going to give
you a handbook which includes all the talking points I'll be discussing
in this class. These images and
the diagrams will help you understand lighting
and the composition. Make sure to share you
before and after photos so other students can understand
your editing process. Hopefully, you will benefit from this course. I
will see you soon.
3. Quality of Light: Welcome to my class about
lifestyle food photography. I understand the fact
that not many people have access to professional
lighting equipment. And sometimes you
just want to make the whole set simple and easy. That's where the natural
light comes into play. It changes during the day, which gives you a lot of different lighting
situations for image making. Let's begin with
the fundamental, the quality of the light. There are two major ones, soft lights and heart lights. There is an easy way to
identify the two kinds, which is looking at the shadows. Soft lighting results in
gentle, diffuse shadows. They lack distinct edges, creating a more even
and subtle appearance. Lighting produces heart shadows. They have a clearly
defined solid edge, accentuating the food texture. In what situation can you find soft light and heart light? When it's sunny outside and the sky doesn't have
a lot of clouds, you can get heart lights because the sun is directly casting
lights on your subject. When it's cloudy or
even raining outside, you will get a soft light
because the lighting from the sun is
diffused by the cloud. The next point I'm going to talk about is the
direction of the light. The direction of the
light can change the mood of the
photo completely. When the source of the light is hitting the subjects
from the front, the shadow falls
behind the subject. They're hidden from the lens. You don't see many depths
and shapes from here. The front side of the subject appears to be very
smooth and appealing. When the lighting is hitting
the subject from the side, you will see more
depths and definition. In addition to the two
previous situation, there is also back lift photos, which is not very common
in food photography. When the lighting source is hitting the subjects
from the back, the shadows automatically
falls in the front, which creates a dramatic and
moody feeling to the image. The distance between
the subjects and the lighting source also
creates a difference. When the subject is further away from
the lighting source, we will get even longer
shadows in the image. There will be more shapes, more texture, and more
depths to play with. As we can see, the direction
of the light really plays an important role in
our image making process. The shadows and contrast
of the image is what our human mind used to perceive shapes and depths
in the three D world. Hence, the choice of
lighting is essential for us to set up the
overall mode of an image. For this class, I want you to pay attention to
the lighting around you and try to identify whether it is soft
light or hard light. And how you can use to
your image making process. This practice will help you in the long run because the
environment is always changing. But our ability to identify
soft light, hard light, and direction of the light will help you in any situations. Next, we will take into real practice to find a
lighting in your own space.
4. Lighting in Your Own Space: In this lesson, we will
focus on finding lightings in your own space and how
we're going to use it. When we take photos, the most
common natural light source is the sunlight from the window. This is where I usually take my lifestyle
through photography. When it's sunny outside,
we will get hard light. And when it's cloudy outside, we'll get soft light. This is what we already know
from the previous lesson. But I also want to give you some tips on how to
modify the lightings. Some of us may have
curtains and blinds. They're great
lighting modifiers. When you can use
them creatively, say that you want to
use soft lighting, but it's sunny outside. You can use your curtain
as a diffuser to diffuse the strong direct
lighting and make it soft if you want to create
a shadow area in image. You can also use a
blackout curtains to completely block some
sun light from the window. The same methods also
apply to blinds. Blinds can create some interesting shapes
on your subject. Use it to advantage, can give your photos
an extra pop. In addition to lighting
in your own space, I also wanted to introduce
reflectors to you. This might be a
little bit advanced, but it's very easy
to understand. Reflector is something we use to reflect lighting to
a subject or scene. It doesn't create lights, but rather it helps
you redirect lights. A white reflector will give
you a soft, natural glow. A silver reflector will reflect brighter
than the white one. A golden reflector offers
similar brightness, but it has a warmer tone to it. If you don't have a reflector
nearby, don't worry. You can use any white
surface as a reflector. A piece of white paper or cardboard can do the exactly
same thing to your image. Now that we cover the
basic lighting knowledge, let's move on to the composition
and the shooting angles.
5. Shooting Angle: In this lesson, we
are going to dive into food styling
and composition. It can be confusing at first, where you couldn't find the
right angle for your food. First of all, I would like
to make an assessment on the appearance of the food before I even start shooting, Here are some categories
that will help you to understand why I chose different angles
for different food. The first one is flat lay. This cover a majority of food photography
when you lay out the food and props in the flat surface and take a
photo from the top down view, flat lay photo considering a plate of salad or giant pizza, the best way to photograph
them is from the top down. From there you can see
the shape of the food, the ingredients, and the
styling of the food. It is also very festivals when you have multiple
plates in the frame. The second one is side angle. This angle works with
food has a height. By that I mean when
sometimes food piles up, it will be beneficial for us to show the side of the plating. For example, when you're
shooting a Sunday, you wanted to capture
all the ice cream layers as well as the chocolate
chips and the cookies. Another perfect example would be a pile of pancakes or burger. These are the two basic
angle of shooting food. I consider all other angles
a violation of these two. Once you have chosen
your subject, you will choose an angle
that works the best for it. Sometimes both angle works, but sometimes one angle works
better than the other one.
6. Background and Styling: Food styling is a
really important part of food photography, since the scenario
is to shoot at your own space with the
subjects you already have. We're going to discuss
what can be used as background props to elevate
your food photography. The easiest answer for a
background is your desk, your kitchen counter,
or your dining table. Usually the background already have a lot of color and texture. They can be the perfect
backdrop for a food photo. Well, this can be a
little bit basic for you. What I usually use is a
piece of colored paper. Usually a neutral tone paper can work with any dish you have. If you want images to
look a little bit moody, you can choose a
darker tone paper. Some paper with
textures also helps. Another great things to use is any fabric you have
in your own space, whether it's a table cloth, a scarf, or even bedsheets. They can be great
backgrounds as they create a warming
feeling to your image. When it comes to props, putting multiple layers in your image always
helps for flat lays, considering using
different sizes of plates to create a
visual interest. Also, the use of chopsticks,
silver utensils, a cup of water, or even drinks can add
layers to your image. From the side angle views, you can see the set
as three layers, foreground, subjects
and background. You can always
adding something in your foreground or background
to create depths in image. Now that we have talked
about the lighting, the shooting angles
compositions, as well as food styling, let's put everything together
into the real practice.
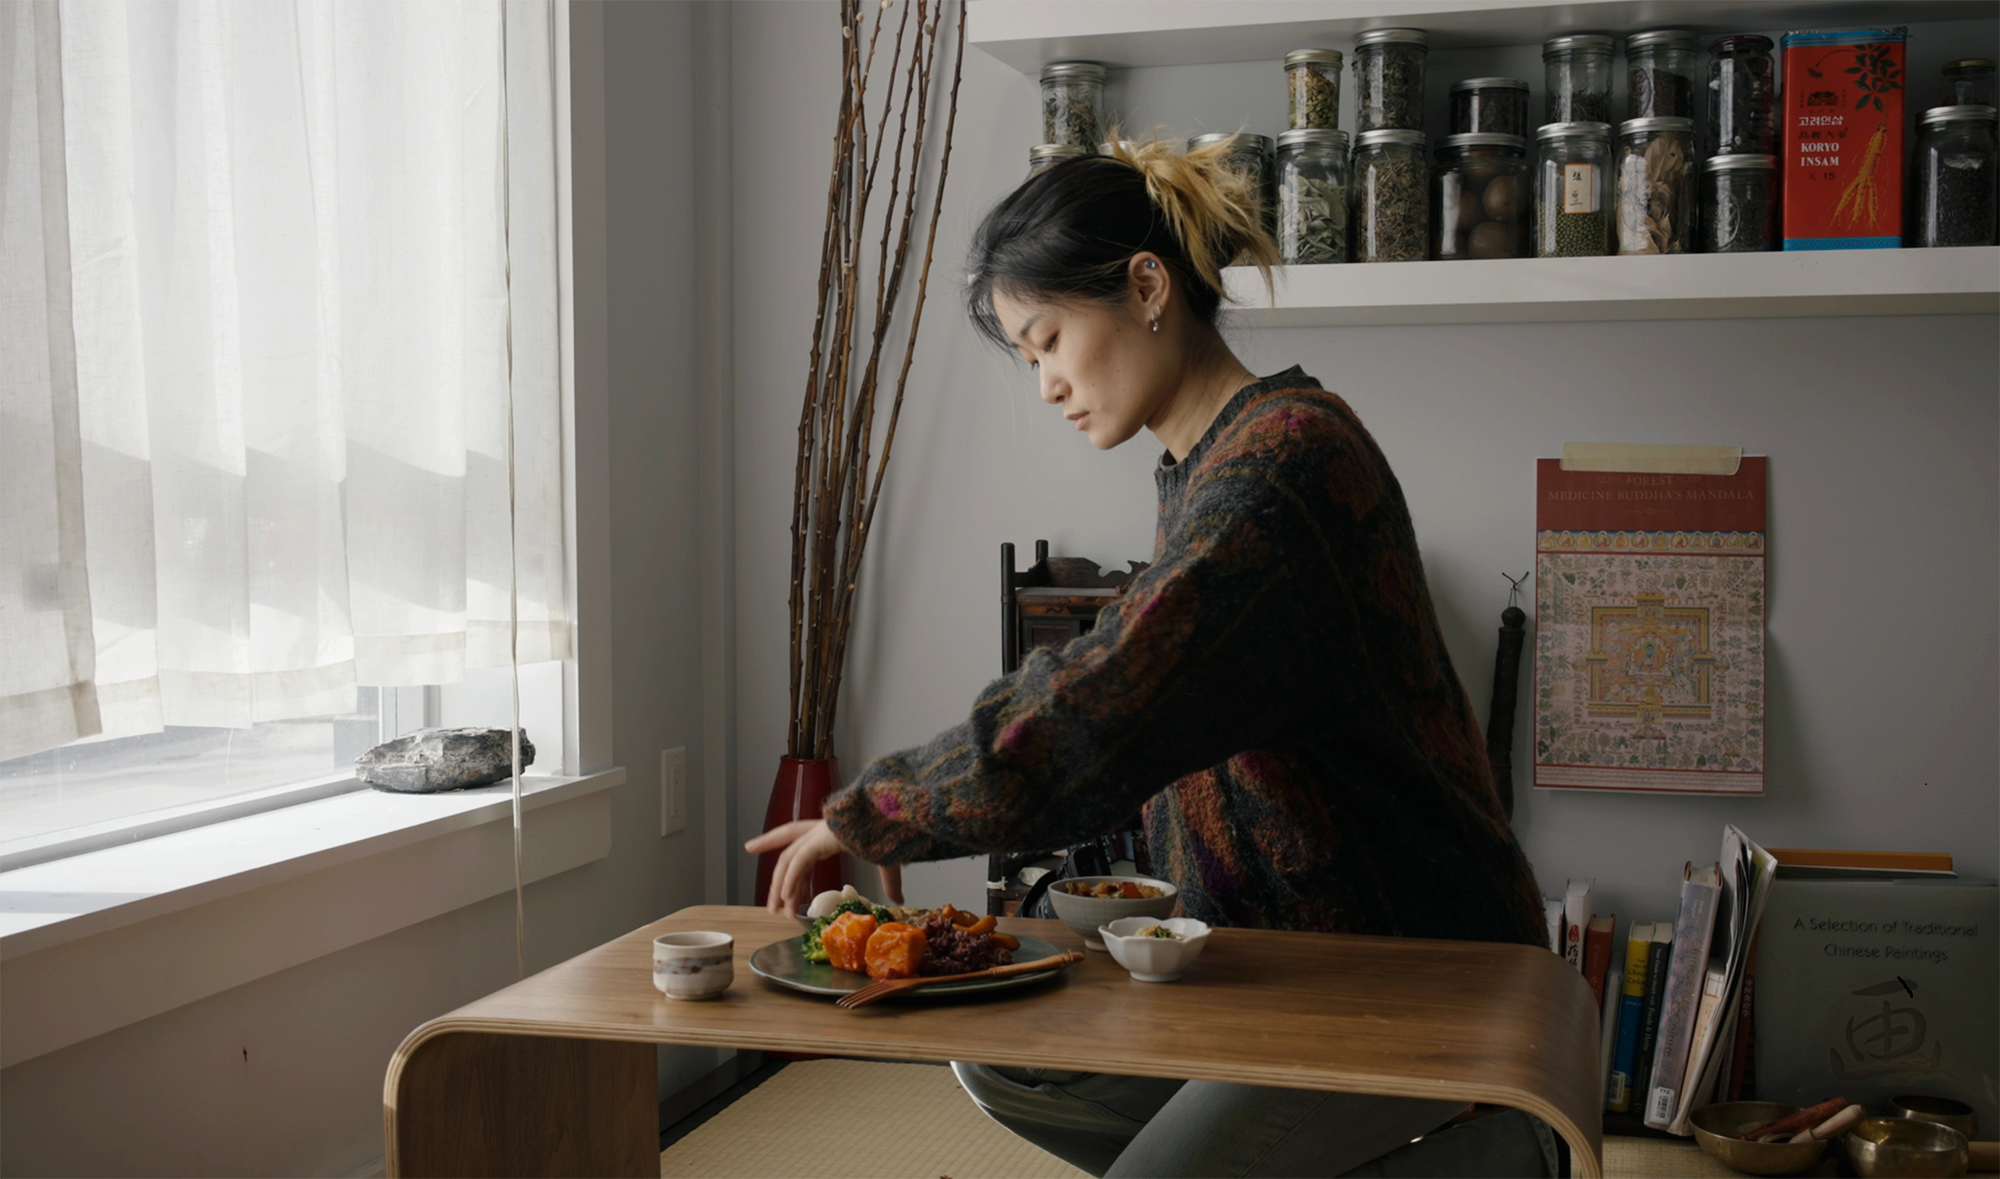
7. Shooting: In this lesson, we will
explore food photography and some techniques to
make your dishes look even more
delicious on camera. Let's dive right in, check out this example of how I
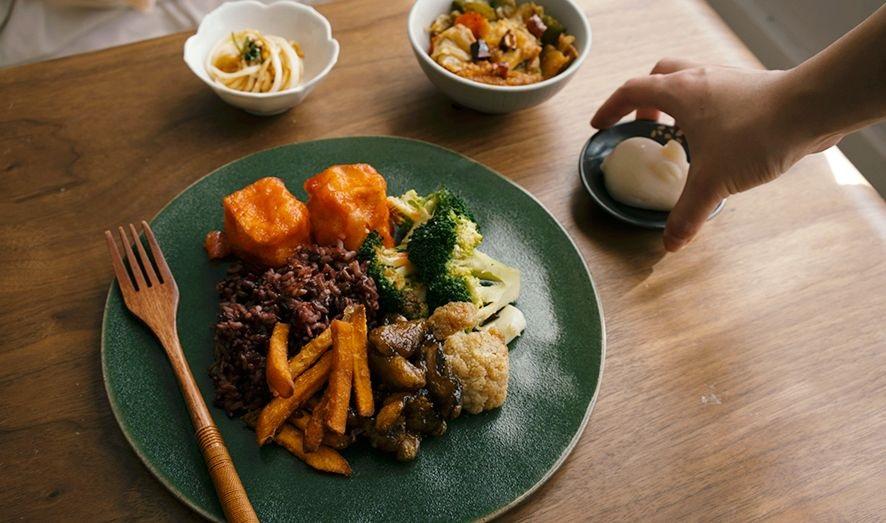
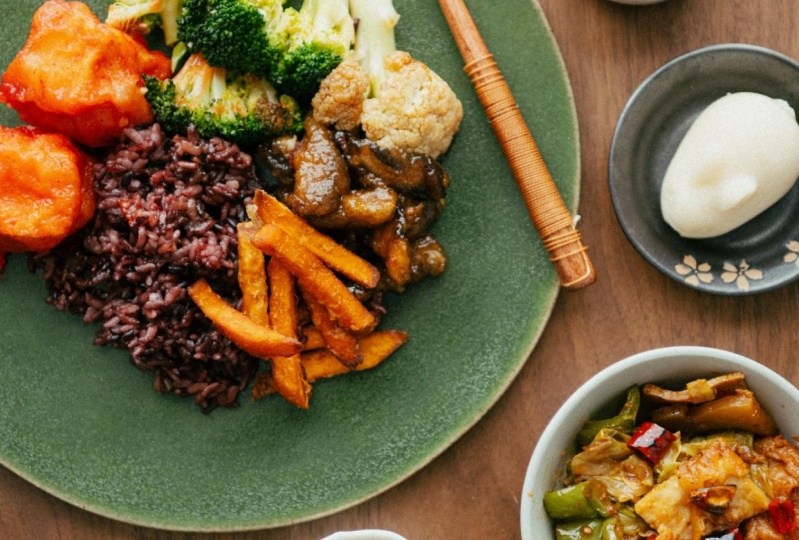
shoot these plates of food. I went for a wooden table as the background and used a dark
green plate for the food. Keeping it simple, I placed all the ingredients right
in the center of the plate. The vibrant food color really pops against the
darker backdrop. For lighting purposes, I position the table
and the plate not too far from a window to
soften the sunlight. I use the curtain as a diffuser. My camera angle is from the side with the lighting
coming in from the right. I also tried different positions
to capture virus angles, including a top down view, which creates a flat lay photo. Now let's talk about styling. I used a simple
neutral tone bad sheet to add texture to the frame. Tucking it under the play
gives a more dynamic look. Most of the shots were
taken from the top, creating a balanced and
interesting background with the fabric and a table. As the lighting changed, I felt that the shadow on the field was a
little bit too dark. I introduced a light wooden box as a reflector to
bounce some light. Remember, experimenting
with props is key to finding what
works best for your set up. In some situations, you may have the light coming from
behind the subject, which can leave the front
side in the shadow. In such cases, using a book as a reflector can help bounce
some light onto the subject. Now, as you add more plates to the scene
to fill the frame, you will need to do a
little bit more styling. Try placing the smaller
items in different parts of the frame to see what
complements the main plates. The best experiment with virus shooting angles to convey the mood you
want to capture. There's no one size
fits all approach. It's all about what you want
to emphasize in your image. Food photography is all
about creativity and finding the right balance of elements to make your dishes
look irresistible. Play around with lighting
backgrounds, props, and angles to create stunning food photos that leaves your audience
hungry for more.
8. Editing: When it comes to wrapping
up a photo session, I like to sort through all the shots to
pick the best ones. After going through
all the takes, I narrow down the selection, weeding out similar shots
to keep the strongest ones. For the final line up editing
is where the magic happens. I start by cropping the images, favoring a four by five ratio
that's not only aesthetic pleasing but also perfect for social media post without
further adjustments. Adjusting exposure is key. I tweak a little bit brightening the shadows
for more detail, and dialing down the
highlights for subtle nuances. I tend to add a touch of warmth to make the
food more inviting. Adding texture and
lifting shadows helps bring out those
intricate details, like the vibrant color
of the purple rice. Then I dive into playing with the curves to balance
the tonal range. Fine tuning from the darkest
to the brightest areas. Sometimes I aim for
a vintage vibe. This is where I use
the color curves, infusing a hints of sim by manipulating the dark side
of the red curve and adding some yellow by tweaking
the dark side of the blue curve for the
overall tone curve. I still try to bring down
the highlights and adding some details in the
mid tone as usual, bringing up the color temperature
for the perfect feel. The goal of these addits is
to make those full colors pop and create a welcoming
and warm atmosphere. Occasionally, I use light rooms, gradient mask to tweak
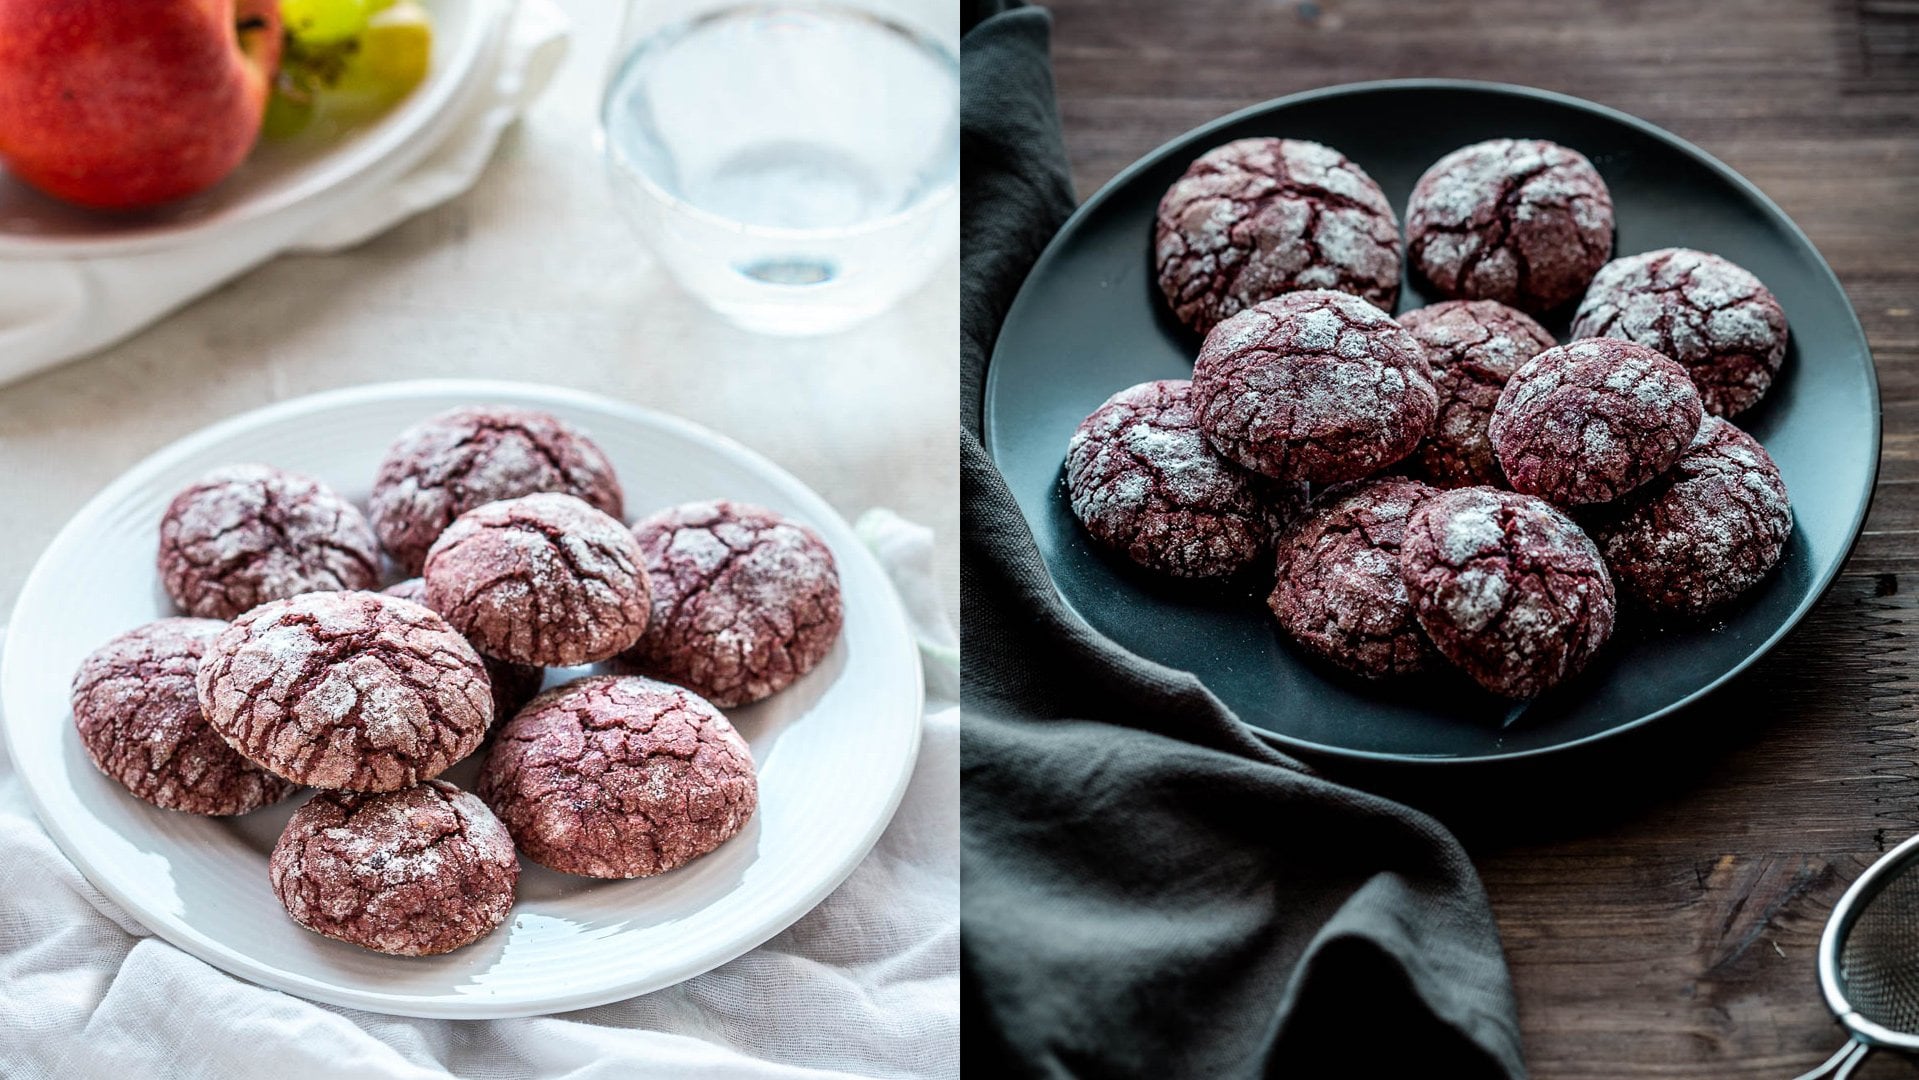
specific parts of the image, adding the final touch. What is fascinating here
is how different angles and composition can totally
transform the same set. It is a reminder for us
to always experiment, move around, and explore
new perspective. You might stumble upon something
even more captivating. Remember the art isn't just
in the set up and shooting, it is in the editing too. That's where your vision
truly comes to life.
9. Conclusion: Congratulations, you've
made it through this class. We have learned
about identifying different kinds of lighting
and the quality of the light. How to find a light
in your own space and use modifiers to adjust it. How to use background and
props to stylize your food. And how to add photos in light room to
enhance your photos. I want you to always
remember trying something new when you're
photographing your subject. Try a new plate.
Try a new angle. Put the plates in
different directions and maybe choosing a different prop and a different
color background. Challenge yourself when
it comes to photography. A little challenge goes a long way and make sure to
have fun with it. Thank you so much
for following along. I hope you've learned a lot and start to create
your own pictures. Make sure to share the photos in the project section
of this class. It will be great to see
your photos and get inspirations from the
others. Take care.
 Cassie Zhang, Photographer