Transcripts
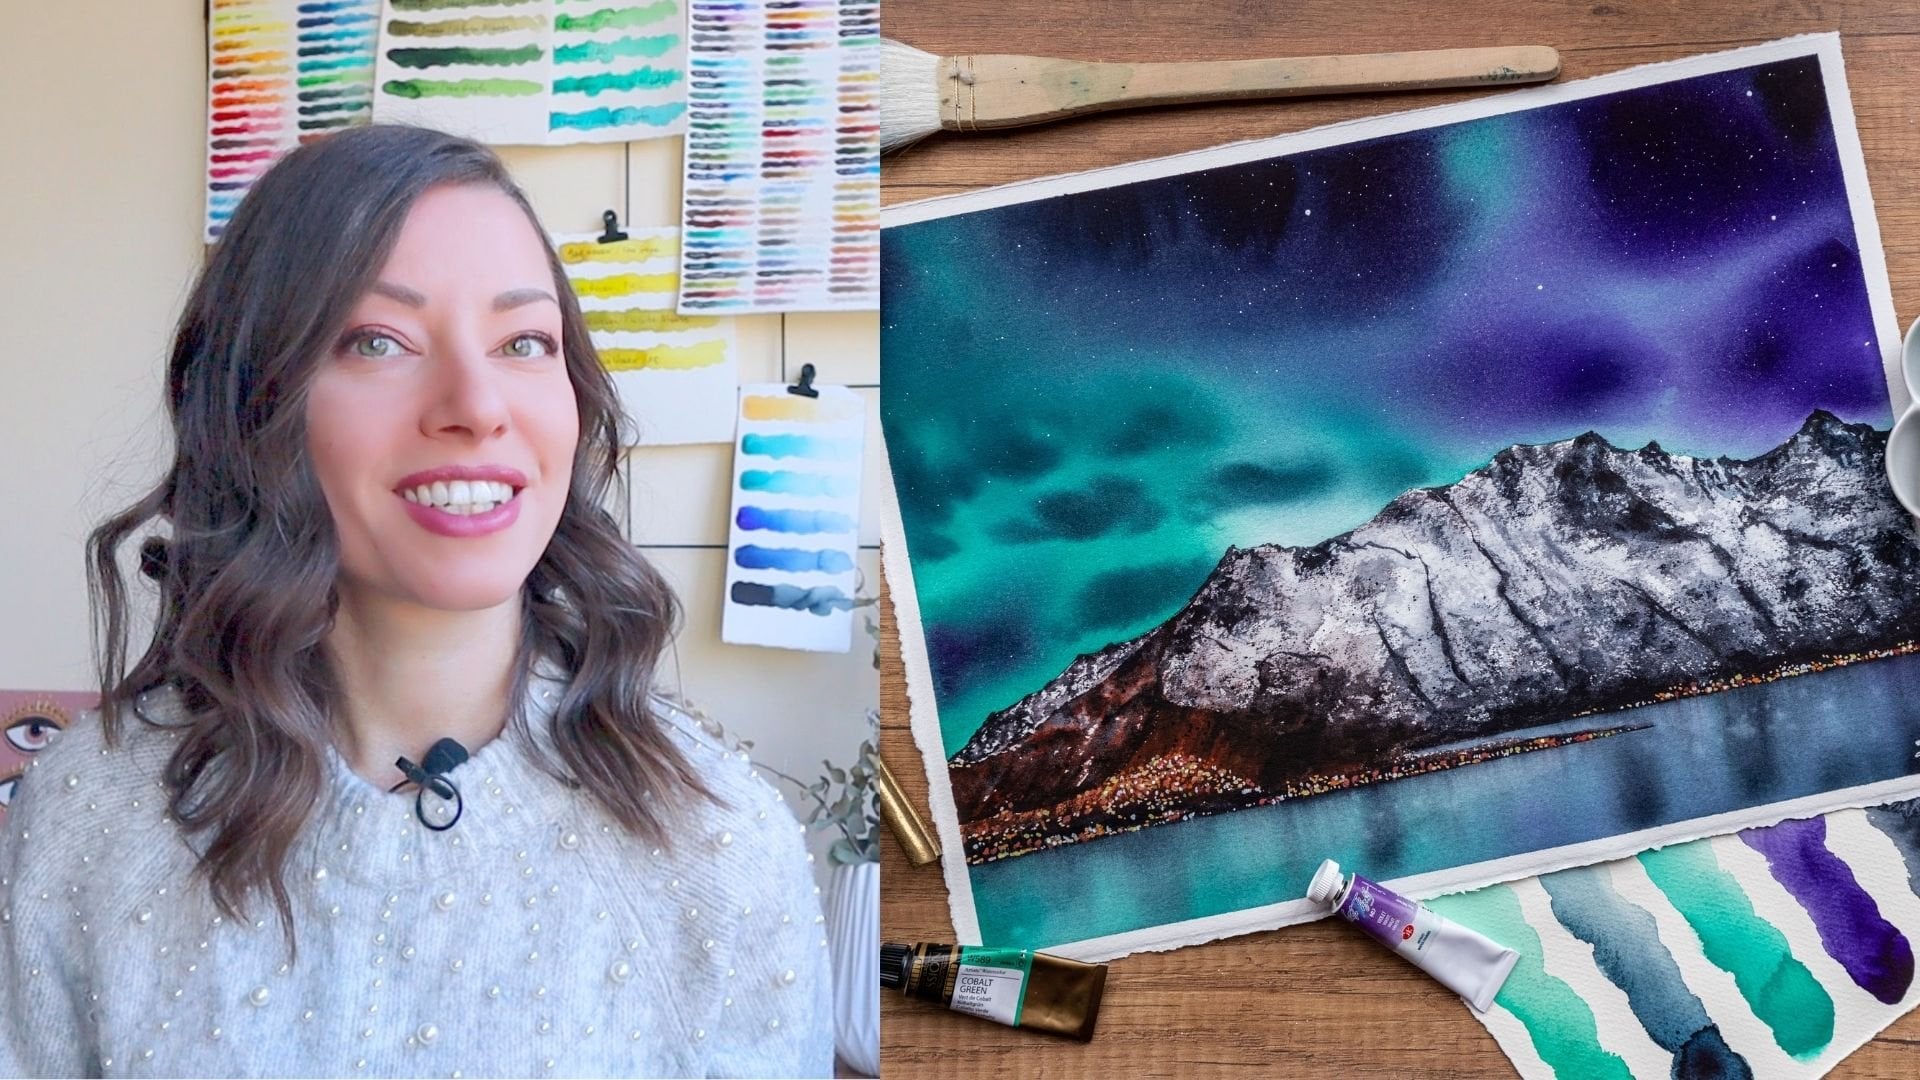
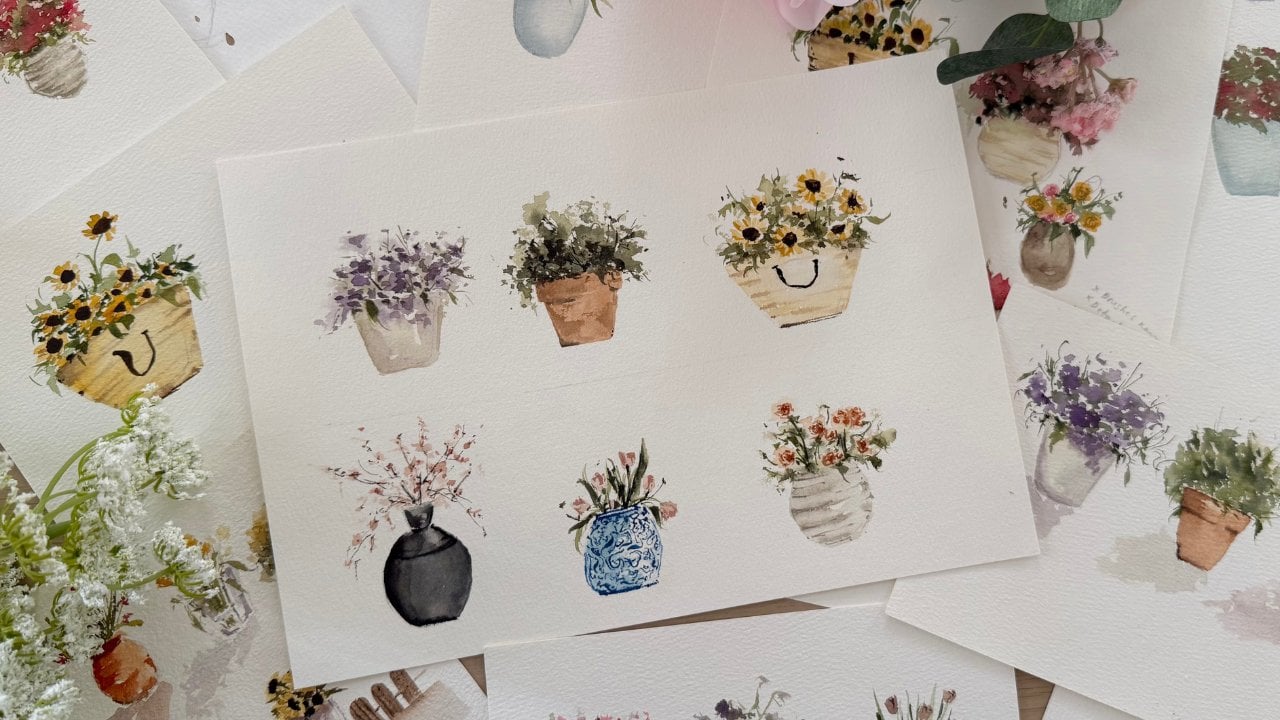
1. Intro: Hello, I'm Keithy, a watercolor
artist based in India, I'm back with a watercolor
class on polenoid. These cute little
polenoids are so fun and relaxing to paint and these are perfect
for daily practice. One polenoid hardly
takes ten to 15 minutes. Along with the materials
used in this class, I will also show you the colors and techniques used
for each project. I hope you will like it. Let's dive into it.
2. Materials : Let's start with the art
supplies we need for this class. First of all, watercolor paper. I will be using this one. This is from csim. This is 300 GSM, 100% cotton. It is cold press. I will be cutting this paper
into half in Aix size. Then we have the paints next. I will use some of the
paints from Shinhan, this stro, and some watercolor
pants from white knights. Then I have this
watercolor palette in which I will mix the paints. You can use any palette
you have with you. Moving on to brushes, I have this Princeton
Neptune travel brush. I will be using size number
four and size number eight. Then I have this number two synthetic brush from Neva Pate. Then for the details, I will use this
smaller size brush, a masking tape to paste
the paper on board, water, rough cloth
or any tissue. Then I have this
white, a pencil. I will suggest you to use
a light pencil such as three H. These are all
the supplies we need.
3. Taping the Paper: Let's talk about the paper size. This is an acid size
paper from Kansm. It is a 300 GSM paper, so it will remain
wet for longer time. What I will do is I will
just tape down the paper, and somewhere here, I will put one more tape so
we will get a square. Let's tape the paper. Let's measle the polyarci. It's ten centimeter wide, and I'm digging 11
centimeter as len. I pasted the tape
on a cloth first, so it will lose some of its sticky residue and it will prevent the
tearing of paper.
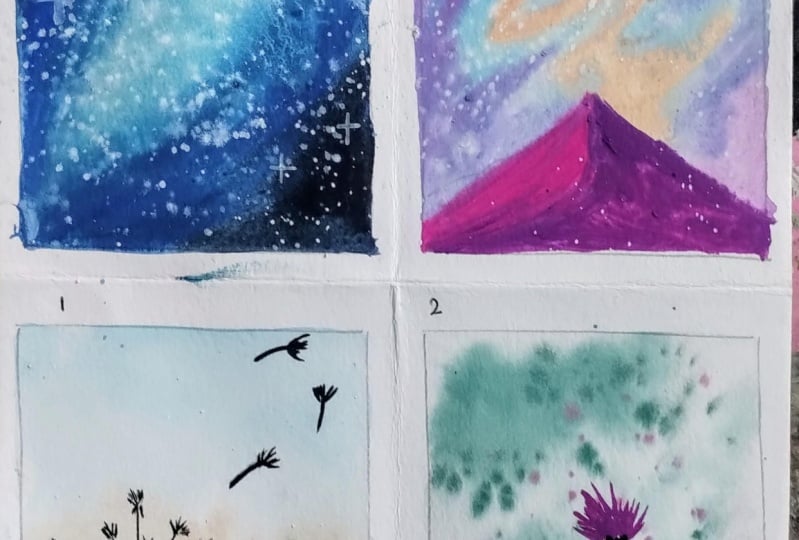
4. Day 1 - Colour Palette and Techniques : Welcome. Here's
the first project. As you can see, I have
used five colors for this. Let's talk about
the color palette. The first color is cobalt blue. This is from Shinhan. The pigment is PB 28. The second shade we
have is erleum blue. This is from white knights. The third shade I'm using is burned Sieno from Shinhan again. The fourth shade is screen from Busto And the last color
I have here is black. Now, let's switch the shades. Here, I'm writing the details so you know about the
brands and the pigments. Et's have a look
at the techniques. First, the blurry background. So apply clean water on paper. Apply diluted blue. Before that twice, I will apply second
color, the burn Siena. Then apply sap green. Then using a damp brush and
blending all these colors Now for the dandelion, take thick black pin
and paint the stem. It is thin and pointed at top, and as we move downwards,
it gets thicker. Now for the upper part, what I will do is
just I will paint a thin line and then some small lines in
a semicircle like shape. I'm showing you a
simpler version of this with the help of a pen. First, it is
something like this. And then thin lines
inside the outline. This is the structure I'm
trying to tell you about. Let's move on to the project.
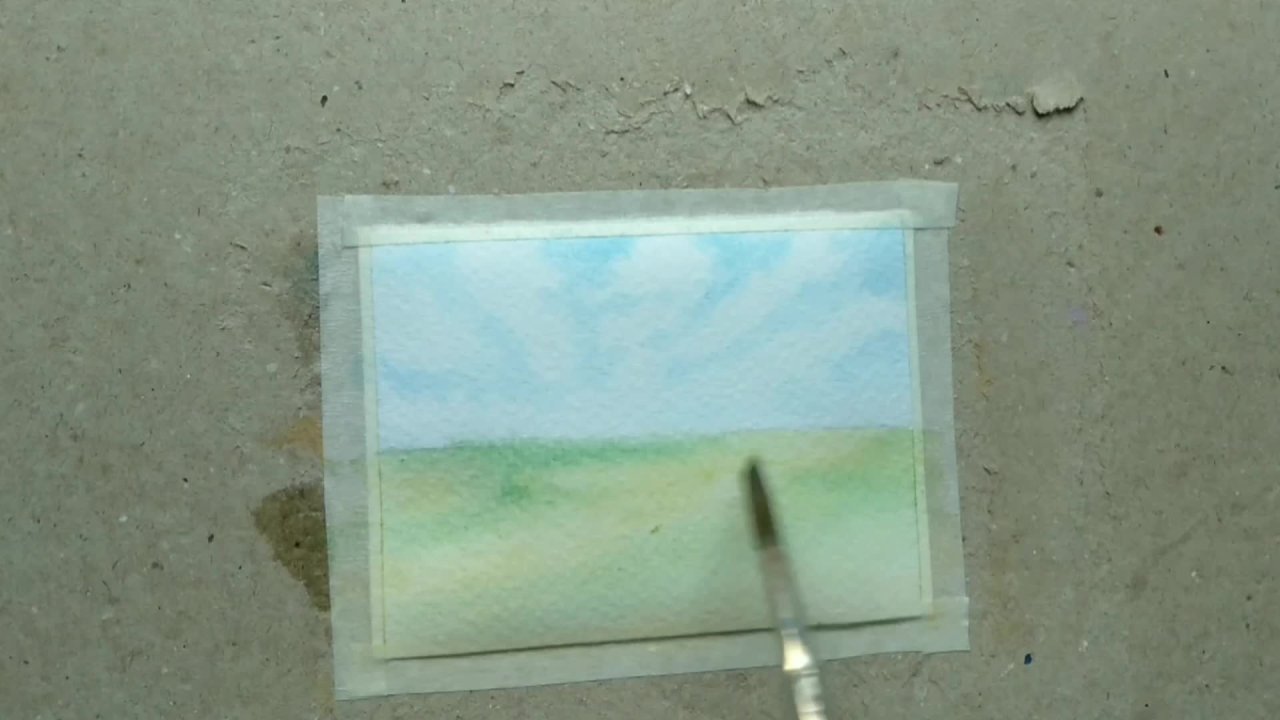
5. Day 1: Welcome to Devon. I will start with the sketch. Draw a thin line for stem. Apply clean water on the paper, apply a good amount of water, so it will remain
wet while we work. I have applied enough water now. I will start by applying
diluted cobalt blue on top. I want a blurry background
so I will work quickly. Now, with the help
of a dam brush, I will plant the pain. I will move my brush
all the way down here. Then I'm applying
diluted erleum blue just below the cobalt blue. Now I'm applying diluted
scream at the lower part. I'm lifting some of the green
paint to make it lighter. Then apply diluted burnt sienna where we have left
the white space. And then blend it with the
green using a damp brush. I'm applying some more
green to make it darker. Now I will wait for it to dry. The paper is dry now. I will use size number
four brush and I'm picking black pigment with very less water for the solute. Now I'm starting with the stem. With the help of
the smaller fish, I will paint the upper part of the tendelon as we learned
in the technique section. Paint some more flowers
in the smaller size. I'm darkening the seed
of the dandelion. I think that's enough. I'm painting some more petals like they are just
flowing in air. I think four or five
petals will be enough. These are in nda direction. Now, I will remove the tape. Remove this tape very slowly with light hand to
avoid tearing of paper. We have a very nice
and crisp line and the paper is also safe. This is your first project.
6. Day 2 - Colour Palette and Techniques : Welcome to Day two. Let's talk about
the colors used. Today, I will use these three
colors from white knight. The first shade is green. This is a dark green
kind of shade. You can see how it
looks when diluted. The second shade I'm
using is paints gray. Then the next one is
quinacridone violet. Let's get to the details. The green shade, its
pigment is PG eight. Then the next one
is paints gray. The last one Quinetldon violet, its pigment is PV 55. Moving on to the techniques, the first one is
this blurry pgroun. First, apply clean water. Then take green paint and
drop it on wet paper. When it dries, it will
blend on its own. For these background flowers, I will take the paint and
while the paper is still wet, I will paint the
flowers like shape. Now, for the foreground flowers, I will take the same shade
in more consistency with very less water and
paint the petals. You see this and now
paint more petals. Before the twice, I
will quickly take some paints gray and
drop it in the center. At last, take green paint and paint the lower
part of the flower. The stem is a very thin line. For the birds, I will use
the same green shade. Now, let's paint the cornflas
7. Day 2: Welcome today, too. Let's start with the sketch. I just want a rough idea
where I want my flask. Keep the length of
the flour different. Now using this
number eight dish, I'm applying the water. We have to work fast if we want achieve nice
wet on wet effect, apply three or four
layers of water. Remove any excess
water on paper. I'm applying some green paint. I'm just dropping
this paint here. Now I'm removing the extra pane. So more green. And then I'm spreading some
green on lower area. Using quinacidon violet, I will quickly paint the
flowers for background. Note that the paper should be wet during the entire process. Now I'm splattering some
green paint on my wet paper. Do the same with violet also. The paper is dry now completely. Now I will use wet
on dry metal for the foreground flow using the same violet
taint small petals. And then drop some paints gray. Also, I will feed some birds. Now paint the stems. Paint the lower part
of the flowers using green. Repeat the same. Now I will paint grass like
stops using sat train. Remove the tape carefully. This is our second polygond.
8. Day 3 - Colour Palette and Techniques : Welcome. Here is our
project for day three. You can see this
beautiful blue galaxy. Let's talk about the colors. Here I have used four
colors and white case. Let me tell you the shades. The first one is erleum blue. The next color I
have is ultramarine. Moving on to the next, here I have Cobalblue the
last one is Pains gray. Let's have a look
at the swatches. For the splatters, I
have used whitequh. Now the details.
For the first one, the cerulum blue, the
pigment is PB 35. Y Then we have ultramarine with
the pigment PB 29. Then cobalt blue is PV 28. For the techniques,
first, apply clean water. Then pick the lightest shade
and apply on wet paper. Then quickly pick another color and apply besides the first one. And then using a Dems
blend all these together. I have picked up
white quash now, and I'm going to drop
it on wet paper. When this white paint dries, it will give us
this kind of look. That's all. See you
in the next lesson.
9. Day 3: Welcome to day three.
Let's apply water. Apply some more coats of water so the people will remain
wet while we work. Now, using this
number four brush and applying sum blue in the
middle part of the paper, this is the base layer. Apply another layer on it. Next, I'm using ultramarine and I'm applying this
around erleum blue. Then here I'm
applying Cobalt Blue. At last, apply pin screen. Repeat the same
process on other side. Cabal blue here. Then paints gray. The base layer is complete now. I will apply the
second layer now, blend the paints with each
other before the paint dries. Now I have taken some
diluted white quash on my brush and I will drop
it randomly in the center. And then splatter some more guh. So the paper is dry and I'm splattering some
more white paint. Now, with the help
of a small brush, I'm picking some sash paint, and I will paint
these small stars. And remove the tape carefully. And here is our final result.
10. Day 4 - Colour Palette and Techniques : Welcome. Here, this is
the project for day four. This is a mountain with
beautiful shades of pink and a galaxy sky. Talking about colors,
I have Golden Deep, Medal Lake red, ultramarine
and permanent violet. Rose Medal Lake and whitecsh. And I'm creating this
color by mixing golden deep and Mada Lake red
and some white cash. Now, for the mountain, paint a mountain structure. Apply second layer to
make it a little darker. We will use dry on dry and
wet on dry in this project. Taking the wet violet, paint the half side of the mountain where
we want the shadow. This is it. Mm.
 Kirti Nama