Transcripts
1. Intro: Lettering more than a couple of words can be a challenge. Lettering long quotes and phrases can be downright daunting. Not to worry with few tips and tricks, you can do this and I'm here to help. Hi, my name is Gia Graham and I'm a freelance designer, illustrator, and hand lettering artist. In this class we will cover the key components of good composition, how to plan your layout, and how to choose the best lettering style to create a compelling piece. Once we've worked our way through these principles, the project for this class will be to letter a quote consisting of five words or more. This class is ideal for anyone who struggles with lettering composition. I will be working digitally using the Procreate App, but these concepts will easily carry over to analog work as well. Let's get started.
2. The Key Components: Before we dive into the step-by-step drawing, let's first talk about the key components of good composition and go over a few of the terms we'll be using throughout the class. Now the terms layout and composition are essentially interchangeable and you'll be hearing me use both terms throughout the class. Composition means putting together and in this context, it refers to the placement of visual elements arranged using conscious thought. This refers to the way elements are laid out on the page, which is why the term layout is often used. The key components to a good layout are hierarchy, legibility, structure, and balance. In the next four lessons, I'll break each of these down and explain how they work.
3. Hierarchy: Hierarchy is the arrangement of visual information to imply importance. This influences the order in which the human eye perceives the elements in a design. Essentially, hierarchy is all about deciding what's most important in the artwork you're creating and figuring out which elements you want to grab the most attention. Let's look at a couple examples. In this piece, the gist of the quote is acknowledging a super dope gift. So these are the words that hold the most important, super dope and gift. I decided to hierarchize these words in two ways. First by size, making them the largest words in the piece, and then also by color. As you can see, the white creates more contrast against the orange background, which helps the words to stand out. Now this quote by Rumi is quite long, 25 words to be exact. It was important to use hierarchy to highlight the essence of the quote, which is your task love is to seek and find yourself. In this case, I created hierarchy with size by making the most important words larger and also by style. The smaller words are all simple sans serif and monoline styles, while the important words are in boulder or slightly more decorative styles. I do want to point out that there won't always be hierarchy in every lettering piece you create. Here, for example, I made the lettering all the same style, mostly the same color and most of the words are even the same size. But it still works. That's mainly because it's a fairly short phrase with only five words. Hierarchy becomes very helpful when lettering longer quotes and phrases because it helps to visually break up the information, thereby making it easier to consume.
4. Legibility: The simplest definition of legibility, is the quality of being clear enough to read. The most common issues I've seen regarding legibility are, when reading direction is not considered, and when an overly complicated style is used. As I'm sure you know, English speakers and most languages using the Roman alphabet, read from left to right, and from top to bottom. There are many ways to play around with the layout of words within these parameters. As you can see here, this piece reads, vision is the art of seeing the invisible. With this layout, we read vision first, then the eye moves down and reads, is the, from top to bottom, then continues left to right to read, art of, left to right again, to read, seeing. Then finally reads, the invisible, from top to bottom. On the other hand, when words are placed out of this sequence, the text becomes difficult to read. Here is the same quote laid out differently, and at first glance, the layout looks fine, however, when the eye moves across the work in a natural sequence, you'll read, vision art, from left to right, then the eye wants to move from top to bottom, reading, is the of the. Then left to right you'd read, seeing, then finally, invisible. Obviously, this makes no sense. The reader would need to do a little visual gymnastics to read this layout and sequence, which is not ideal. Always remember to consider reading direction. Lastly, remember that a piece can quickly become hard to read if there's too much going on. Simplifying helps. For example, if you're using several different lettering styles in your layout, perhaps limit the color palette to help the piece feel more cohesive. On the flip side, if you want to use lots of color, try limiting the number of different styles you use, so the layout doesn't get too busy. Or if you want to use a very decorative lettering style with lots of flourishes, perhaps limit it to just one or two words, and balance it out with a simpler style. Lettering a long quote can be complicated enough as it is, so in order to keep things legible, try to simplify.
5. Structure: The definition of structure is the arrangement of and relations between the parts or elements of something complex. With reference to layouts, structure is the way the visual elements of a piece are organized and positioned in relation to one another. Think about structure as the building blocks for your layout or the framework for your piece. Just like a house needs a solid framework, a good layout needs to be built on a solid structure. Let's go back to that Rumi quote I shared before. With a quote this long, it is absolutely essential to build a solid framework to pull the piece together. Here's the final artwork, and here's the framework I used to build the piece. Now, here are some of the building blocks you can use when creating the structure for your own layout, horizontal, vertical, triangle, slant, wave, and arch. We will put some of these to use later in the class.
6. Balance: In design balance is the principle of arranging elements so that they are evenly distributed. When a piece is not balanced, it's difficult for the eye to flow across the artwork. If elements are too heavy on one side versus another, the viewer's eye can get stuck in those spots and it just doesn't feel quite right. Let's look at this example of an unbalanced layout and talk through why it doesn't work. The first thing that stands out to me are these areas here, which are basically just dead space. Dead space creates holes in your layout, which stops the eye from flowing around the art. Then hear the word art is too large compared to the other words, making it a bit overpowering. One could argue that the larger word creates hierarchy, but this is so much larger than the other words. It just becomes disproportionate and distracting. Another thing that stands out to me are these two words which are not aligned and they just seem to be floating. Finally, these two words are creating a little tension because they're too close to each other. Here's the same quote with a more balanced layout. Art is still the largest word, but it's not so much larger than the other words that it feels totally out of proportion. Also having the word outline rather than filled helps to keep it from overpowering the composition. The drop shadow style on vision is repeated on the word seeing. Along with creating hierarchy, this repetition also helps to create balance. Here these simple lines fill potential areas of dead space. This avoids visual holes in the layout. We will keep all these things in mind as we work through our project for the class.
7. The Five Steps: Now that we reviewed the key components to good layout, let's put these principles into practice. Here are the five steps I usually take to create a layout from start to finish. Step one is planning. Step two is the brain dump. Step three is a skeleton sketch. Step four is framework building, and step five is letterform building. Let's dive into each of those next.
8. Planning: Planning should always be the first step when creating a composition. Like with most situations, things will go more smoothly if you start with a plan. As you know, our project for this class is to letter a quote. You can choose from one of the quotes I provided for you in the resources section or you can choose a quote on your own as long as it has a minimum of five words. Let's first write the quote out to determine what should stand out the most or in other words, let's decide on hierarchy. Here's the quote I've chosen. It's by George Lucas, the creator of Star Wars. I've written it out and I've thought about the meaning behind it. This quote is all about the importance of imagination and the fact that it's the catalyst for all endeavors. Before you can do something, you first have to imagine it. I think the most important words here are do it and imagine it. These are the words I'm choosing to hierarchize. When these words stand out, it's easy for your brain to automatically fill in the blanks to get the gist of the sentiment. To do it is to imagine it. If I were to hierarchize different words, it could change the way the message reads at first glance. For example, if I made you can't and imagine, the most important words. As you can see here, this would not be the first impression we want to give because it relays a different message from the quote, and it even gives a negative impression at first glance. Now that we've identified the most important words in the quote, we can now think about the different ways to create hierarchy in the piece. We can establish hierarchy with size. Larger words will stand out more and therefore read as more important. We can also use color. Using a bolder color will make words stand out more, or you can use style. Lettering the important words in a different style can help them to stand out. I think I want these words to be the largest in my layout so I'm going to use size to create hierarchy. I will probably post this to Instagram so I think I'll letter it in a square format. I have my quote, I know which words I want to hierarchize, I have an idea of how I might create that hierarchy, and I've even decided on the dimensions of the piece. I have a plan in place, and I can move on to the next step of the process. Keep in mind that all of these things can be adjusted as you start building your layout, but thinking through these choices upfront will help you get started with more confidence.
9. Brain Dump: Now that we have a plan in place, the next step is to do a brain dump, which is all about quickly getting all of your ideas down on paper. The best way to do a brain dump is to create quick thumbnail sketches. I know my layout will be square, so I've drawn four squares. I also like to keep my quote nearby for quick reference, and to make sure I don't forget any of the words. Now, I'm just going to start loosely sketching any ideas that come to mind. If you're not sure where to begin, start with your most important words, sketch those first, and then build around them. The point of this exercise is idea generation, so keep it fast and loose. Your sketches should be messy. If you focus on making them look too pretty, you're not allowing your brain the space to roam freely and come up with new ideas. Once you get started, you might realize that the ideas keep coming. If that's the case, don't stop at just fourth thumbnail, keep going until you get all your ideas out of your head, and down on paper. Once you've completed this exercise, reveal all of your thumbnail sketches, and decide which one you want to move forward with. I've decided to explore this one. Now I'm going to move on to the next step of the process.
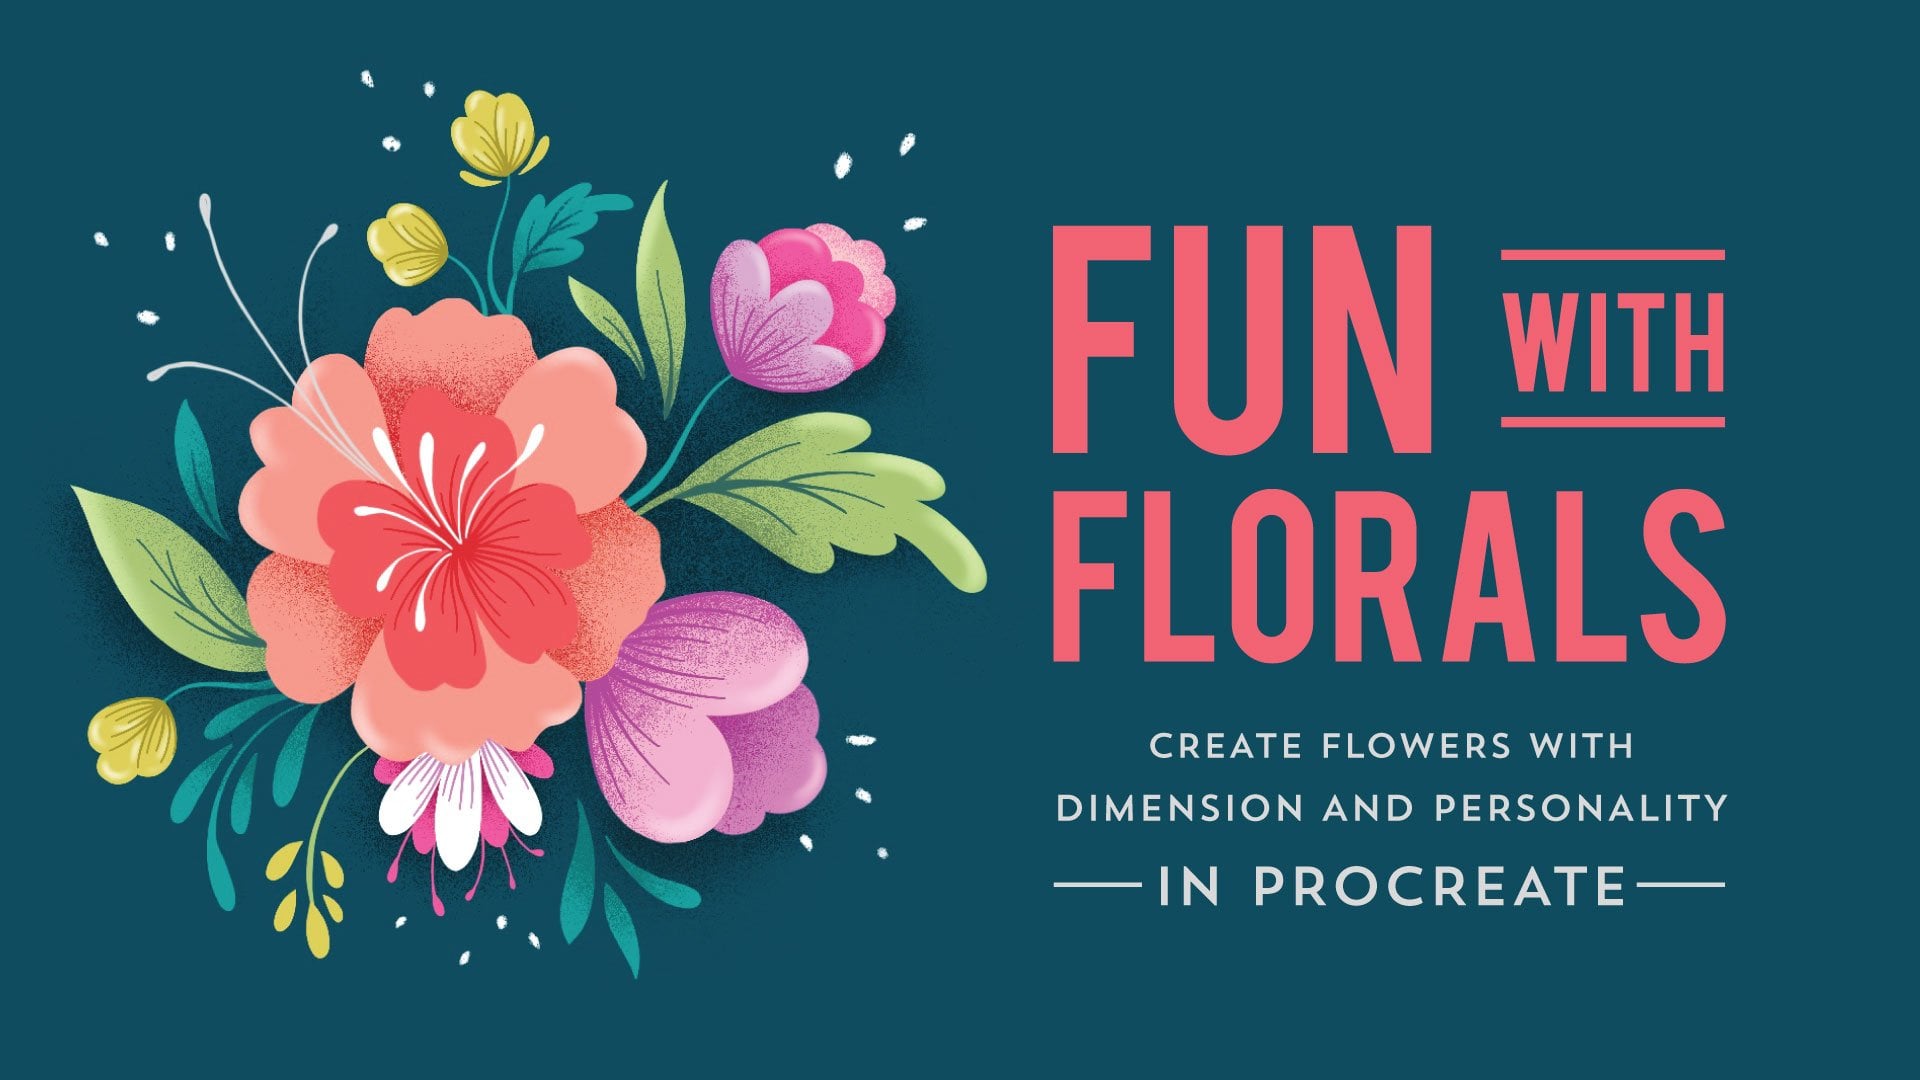
10. Skeleton Sketch: If you took my Fun with Florals class, you've already heard me talk about skeleton sketches. This stage of the process will be a more refined version of the thumbnail, but it will still be a very basic sketch. As the name suggests, skeleton sketching is all about putting the bare bones elements in place. We're still not thinking about detail yet. This is just about figuring out shapes, sizes, and placement. So all my letter forms will be very rudimentary during this process. Okay. So I've opened up a square Canvas and I'm going to turn on my drawing guide. The first thing I like to do is to determine the center point, which is right here. That just helps me with aligning everything and making sure things stay centered. Now I have my thumbnail and view for easy reference. During the planning phase, I decided I would use size to create hierarchy. So I'm going to draw two of my largest words first to set the proportions for the piece. So do it to where are my two largest words. So let's get those down. So I'll just make sure that's centered and then I'll start to build everything else around it. Now in my thumbnail, I drew unless and can in lowercase, but I actually think it will work better if uppercase. So I'm just going to sketch that in. Now I do like the idea of having these two words on a slant, but as you can see, one word is much shorter than the other. So I'll need to make sure it looks balanced. A couple of simple lines might help create that visual balance that I need. Actually, I'm going to have those lines repeat up here as well. Now the trick with ImagineIT will be to get all those letters to fit. So I really need to focus on the spacing here. Usually when I have a case like this where I'm trying to get things to fit in a very specific amount of space, a lot of the times I will draw the first and last letters, and then figure out the placement of all the other letters in the space that I have left. Now as you can see, this is super tight and it won't quite work. So what I need to do is reduce the height of ImagineIT so that I'll have more space with wise to work. If I make that a little bit shorter, then I'm going to draw in my first and last letter again. Let's see if I can make this work. Okay. That helped. Of course, I can't forget to include the attribution as long as you know where the quote came from, always give credit in your piece. So since I'm using these lines at the top, repeating them here, I'm going to use lines at the bottom as well, and just repeat that motif that's going to help balance things out. Okay. I'm going to just make sure that everything is centered, the spacing works top to bottom, side to side. So there is my skeleton and I'm now ready for the next step.
11. Framework Building: Now that I have a general idea of where things will go, it's time to finalize a structure and build a solid framework. I do this by drawing guides. As you saw in the last lesson, I always turn my Canvas guides on first, because they help me position the artwork on the page, but I also need another set of guides to make sure that my lettering height remains consistent across each word and across each line. These are the framework guides. To create the framework guides, I'm going to first add a new layer. I'm going to label that layer guides so that I don't accidentally draw on it. Now I'm going to choose a color that's going to stand out from the Canvas guides. I typically choose a bright pink. I usually use the technical pen to draw my guides with a brush size at about 10 percent. Now I'm just going to go through and draw my guides for each word and each group of words. Then procreate. When you draw a line and hold it and then just tap the screen, it will snap to a perfectly straight line. You can also just look at your Canvas guides to confirm that your lines are straight. Just remember if you start out with wonky guides, your whole piece will be wonky. So always make sure that your lines are straight. One thing to remember when building your framework is that you want to repeat sizes whenever possible. When lettering a quote where there will be several lines, repeating sizes can help create a thread of consistency. I'm going to duplicate this guide and use the same Cap Height for Imagine it. I'm going to drag this down so that my two hire raised lines will have the same Cap Height. By the way, the line that the letters sit on is called a baseline, and this line is called the Cap Height because it determines the height of the capital letters. If I were drawing a style that had both uppercase and lowercase letters, I would draw my baseline where the letters sit, I would draw my cap height to determine the height of the capital letters, then I would also draw a line here, which would be my x-height. That determines the height of all the lowercase letters. So back to the piece we're working on, I'm going to draw my guides for this word. Here I want to make sure that this is centered in the space so that there's the same amount of room above and below. For the slanted words, I'm going to draw one line first and get the angle just how I want it. Then what I'll do is I will duplicate this to make sure that the cap height follows the same angle. If I free handed, it's likely to be slightly off. I'll select that three-finger swipe, copy, paste. There we go. Then for the sake of consistency, I will duplicate this and copy it over here. So these are both on exactly the same angle. Now I'll just go through and finish up the remaining words. My framework is all set up. Now I can move on to building the letter forms.
12. Letterform Building: I have my structure in place and I'm happy with it. Now I'm going to start building out these letter forms and decide on what styles I want to use. This is where we add the meat to the bones of that skeleton sketch. One question I've been getting a lot lately is, how do you decide on what lettering styles to use? Let's start there. It's really helpful to start building a resource library of lettering styles so you'll have something to refer to, to help you get your wheels turning when you're starting on a new piece. One way to do this is through books. Here are a few books I absolutely love and turn to often. Junk Type is an amazing collection of vintage typography. It's a great source of inspiration and one of my personal favorites. Scripts is another collection of vintage fines, but this one focuses on script lettering and how it was used on signage, advertising, and more. The Golden Secrets of Lettering is a must-have book if you're learning hand lettering and Chapter 5 is dedicated to lettering styles. In Progress is also filled with incredible styles, sketches and thumbnails, lots of inspiration here. I will include this list of books along with the links to where you can find them in the resources section. Another great source of inspiration is Pinterest. When using Pinterest, my advice would be to do a very targeted search to find inspiration. For example, I have a vintage lettering and design board where I save images of only vintage product packaging. Vintage labels are overflowing with lettering inspiration. The same goes for travel posters and vintage signs. This is a very targeted search and there's lots of inspiration here. I also have a board with modern lettering and font inspiration as well. Again, I will link to all of these in the resources section if you'd like to check them out for yourself. Now this is super important. When searching for inspiration on Pinterest, especially when you're looking at current work, be aware of crossing that line from inspiration to imitation. The point of inspiration is to jump-start your own ideas. For example, you might like the way someone drew an L and decide to incorporate a similar flourish in your piece, that's okay. What's not okay, is mimicking someone's entire layout structure, style, or aesthetic. Now that you've done a bit of research and you found some inspiration, if you're still stuck on which lettering style to choose for your piece, first think of these two factors to help jump-start some ideas. Purpose. What is the purpose of the quote you're lettering? Is it meant to be motivational? For example with this piece, here I used a bold but friendly style which felt like it fit the motivational phrase. In this case, the phrase is more reflective so I used a serif style which feels more serious but the gentle curves and ligatures give a sense of connection and warmth. Here, this piece is just about fun and frolicking in the sun so I used a playful stylized lettering. The other thing to consider is content. What does the piece say? Are there any words in the quote that lend themselves to a particular style? For example, a word like "Light" could be done in a monoline style that visually feels light. On the other hand, a word like "Heavy" could be lettered in a chunky slab-serif because visually, that style feels heavy. Speaking of chunky slab-serifs, I've decided to use that style for these two words on my piece because "DO IT" feels a little like a friendly command so I want it to be bold. "IMAGINE IT" feels lighter, kind of like daydreaming so I'll use a more whimsical style here and it also needs to be a condensed or narrow style since there are a lot of letters to fit in a limited space. For the other words, I'm going to keep things simple by using an understated sans-serif. Now I'm just going to get down to building out each of these letter forms and finishing this piece. Here's my final sketch. As you can see, I've added a few embellishments and we're going to talk about that in the next lesson.
13. Embellishment: I've linked to my sketch, added color, and here's the final piece. Since do it is so large and I used a very bold style, I decided to make the lettering white and added an inline detail to quiet the impact of it. Otherwise it would have been too dominating. I repeated the drop shadow on imagine it, but flipped the colors because the narrow lettering needs the bold color to help it stand out here. Since all the other words are smaller and in a simpler style, I chose a dark color to give them more presence so they don't get too lost in the layout. The other decision I made was to embellish the third line of text with a few leafy details.The main reason for this decision was because it's just part of my personal style. My lettering tends to be more illustration heavy with lots of flowers and foliage. But there was a practical reason as well. In this layout, the leaves are filling the dead space created by the slanted words. They're also creating flow in the piece, keeping the eye moving from top to bottom and back around again, using illustration to embellish your lettering can really help to enhance a layout if it's done well. The key is to use the embellishments wisely. Use them to fill holes and dead space in the Layout. Create interaction with the illustrations in words to make the layout more interesting. Or as we've discussed, you can use embellishments to create movement in your piece. Just remember to use them sparingly and with intention. Of course, there are occasions when the illustration can be integral to the layout and just as important as the lettering, but that requires a slightly different approach. I will create another class specifically about how to create an illustrated hand lettering piece so I can show you how I worked through that process.
14. Final Thoughts: As you're working through your project, take it slowly and tackle one phase at a time. It's rare that a layout will come together perfectly all at once. Composition is like a puzzle. It takes a little thinking, a little effort, and a lot of patience to get all the pieces in the right place. There may be some frustration along the way, but when it all comes together, it's satisfying. You're welcome to post each of your steps in the project gallery if you'd like feedback along the way and definitely share your final piece. I can't wait to see what you create.
 Gia Graham, Illustrator & Lettering Artist