Transcripts
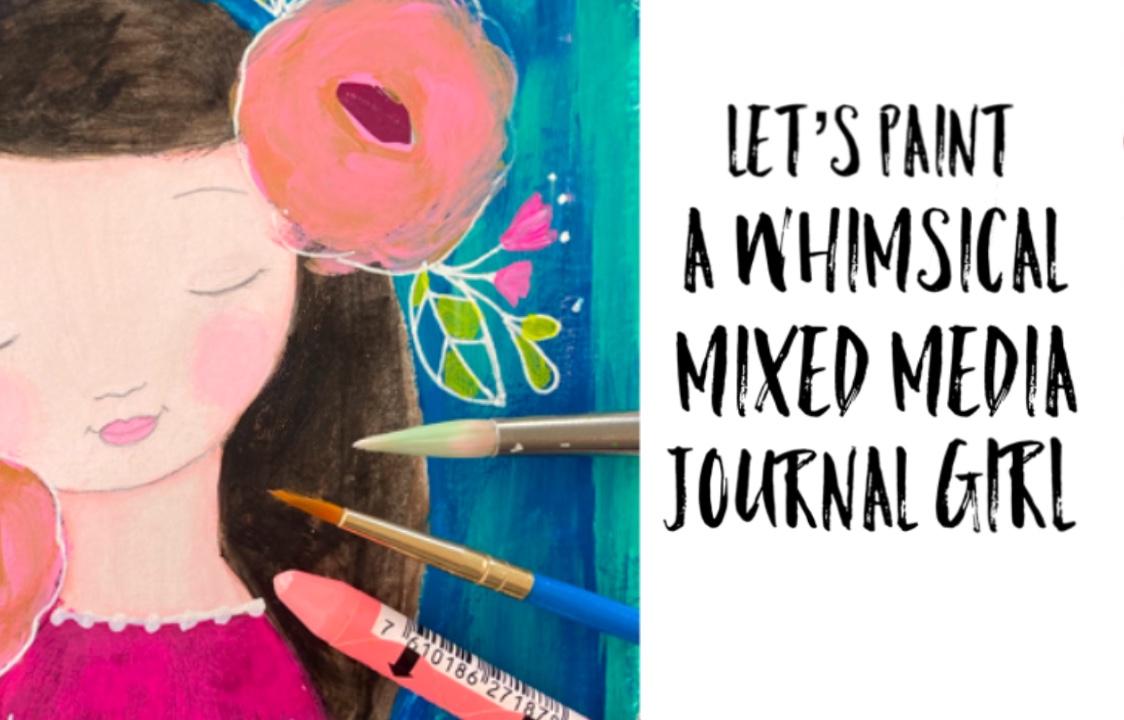
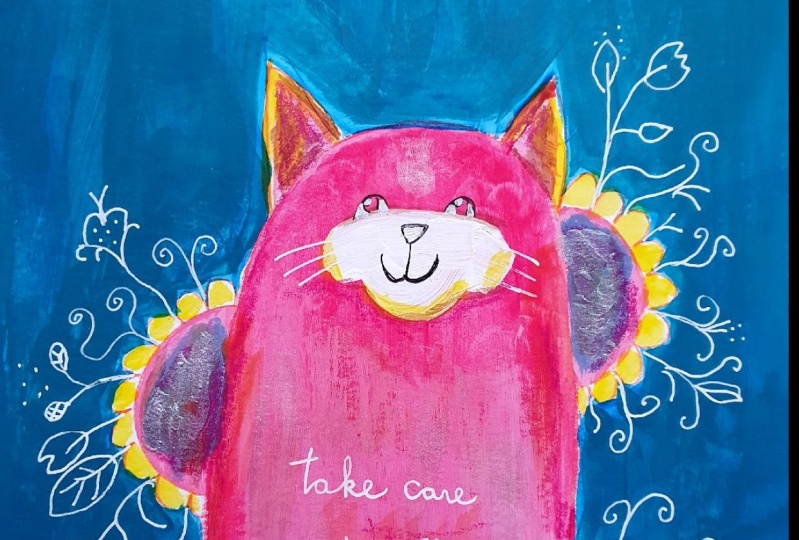
1. Class Intro: Do you love seeing all the whimsical mixed
media girls online? And would you love to
paint when for yourself? Hi, I'm Michelle. Founder of Michelle
per kit studio. I create colorful and
whimsical inspirational art. I'm an illustrator,
floral painter, and mixed media artists. One of the things I love
creating the most are the colorful and whimsical
girls in my art journals. I call them my Jesus
girls because they represent the love
of God in all of us. And they've been my most
popular paintings yet. In this class you'll
be inspired by color, creativity and inspiration to create one of your own whimsical
girls in your journal. I created this class so we
could all paint them together. I'll show you my
favorite mixed media in layering technique. We'll do some doodling in a
little bit of hand lettering. This class is perfect for
beginners and also for more advanced painters
who would like a more playful approach to
mixed media in acrylics. And I'll also show you my
favorite ways to paint faces. It's gonna be so much fun. So let's get started.
2. Supply List: The first thing on our
supply list is our journal. I love this Strathmore
mixed media paper or use it all the time. It's great for a
wet and dry media. The size I'll be
using as 8.5 by 5.5. The colors I'll be using
for her face are late. Portrait pink by Liquitex
and light pink by Blake. And I'll have all these
listed below for you. The other Pink's I'll
be using bright pink, deep violet, and
a bubblegum pink. For the background. I'll be using indigo blue
and a bright aqua green. Again, all listed below. I'll be using a
little bit of gold, but that's totally optional
if you don't want to use gold or you don't have any yellow will work great too. We'll also need a
black and a brown. And then for a little
bit of sparkle, I'm going to paint her crown with a
little bit of glitter. I'm also going to
use a lime green. So if you have
something similar to that and there'll be
graded something light. And then also some
white acrylic paint. I use just white gesso for my white because
it's nice and thin. They use it for everything. For brushes, I'll be using
three flat brushes, a 2812. But if you don't have flat
brushes, no worries at all, just a larger brush for painting the background would
really be helpful. I'm also going to be
using some round brushes. This one is a four, and I've had this
since art school. It's still going 112 smaller
round brushes, a 31. And you'll also need a pencil to transfer
your drawing onto your journal page and for
some drawing adjustments. Nothing expensive. Also, you'll need
a white gel pen. I use the signal gel
pens by uni-ball, they're my favorite job
parents. Then this is optional. You might need a couple of
binder clips to hold down the sides of your
journal if it gets a little warped from the
painting background. I'm also going to be
using a neo color to water-soluble wax pencil in
salmon pink for her face. And you can use a
watercolor pencil if you have that they
work the same way. Then it will be
transferring the drawing of our whimsical girl
onto the journal page with graphite paper immediately PDF to download to transfer it. I'll be using speed
ball graphite paper. I got it at the art supply
store close by to me. And it comes in two sheets
of size nine by 12. And I'll be using my
pencil to transfer that. You'll also need some paper
towels and a container of water and we're ready to
transfer our whimsical girls. So I'll see you in
the next lesson.
3. Image Transfer: Okay, So I've got your
PDF here on the left. You're welcome to use this. You can download it. It's down below there
for you to use. And before you transfer
it onto the page, you just want to make sure
that you have it centered on your journal page all the way around and that you have
pretty much the same spacing, an even amount of spacing, especially on the left
and the right sides because we'll be adding some floral elements
on both sides. I also wanted to mention too, that you can also transfer
your image using a light table or even just holding
up your page to a sunny window will work too. All right, We're ready to
transfer our drawing of our whimsical girl using
the graphite paper. And that goes under
your drawing with the darker side face
down on your journal. But before you
start transferring, you'll want to make
sure your images centered in the middle of your journal page because we'll be adding some floral elements. You'll need some space
on either side of her. I'm using a pencil
to transfer it, but a pen will work just fine. With this graphite paper is really dark when it transferred, so I don't have to
press down all that hard when I'm transferring
it with my pencil. And then I keep checking
under the paper now and again to make sure I'm pressing hard enough and to
see where I am, it looks good so far. I love this graphite paper. I use it a lot to
transfer illustrations. It's really easy and
it's a fast way to transfer a drawing and it's also erasable, which is great. I'm going to let the
music play until I finish the transfer and then
I'll meet you at the end. I finished transferring. I went a little bit
lighter when I was transferring her face
in a couple more areas. So I'm gonna go over her features again so
they're dark enough. We'll be painting
directly on her face over her features
in the next lesson. So I just want to make
sure they're dark enough to see through
through the paint. When we do that. Next, we'll be
painting her face. I'm so excited, so I will
see you in the next lesson.
4. Face Painting: The first thing we want to
do is mix up per face color. I'm using white,
black, pink, light, and light portrait pink
from liquid techs, but any pink and
peach will be great. I usually go a little
bit darker on my faces, but since the background in her hair will be so
dark on this painting, I wanted her face
to stand out so I'm making her skin
color fairly light. But if you want a darker, you can just add less white. And if you wanted a lot darker, you can always add a little
bit of brown to it as well. And you just want to fill in
all of her face and neck. I'm painting right over
her features because we'll be giving them more definition later
with our pencil. And if you get some inner
ear or in the flowers, no worries about that
because we will be painting over them with
much darker colors later. I'm just giving it one coat, but you're welcome to do too, but just make sure the
first layer is super dry. First. I'm going to let that
dry and we'll add some really fun details her face and make her
look super pretty. Next, I'll be using my neo color to water-soluble wax pencil. And like I mentioned earlier, you can always use a
watercolor pencil. They're both water-soluble. And I'm going to go all around
the edges of her face to give it some shadow and to give it the look of
being more rounded. I'm just lightly going
around her face. I'm not pressing down
very hard at all. I just want a bit of shadow
around the sides of her face, but not on her chin because we want the shadow under her chin, not on top of her chin. And I'm adding more more
on her neck because there's also more shadow there. That looks good. Now I'm gonna take my small round brush
and wet it a little bit and go over the neo color to smooth
it out and soften it up. I'm just moving my brush
over the neo color. This to soften it up. And moving my brush
side-to-side. Going to add in a little bit more water dries
up pretty quickly. I think that looks really good. The color and the neo color
twos are activated by water. So when you add water to them, they become just like
watercolor and they work exactly like watercolor pencils. They do take a bit of practice, but they're really fun. And if you don't have these, you can always use a colored
pencil for this section, so don't worry about that. I'm just trying to soften up the community on a little bit more shadow
on the right side. Feel like it needs a
little bit more shadow. I'm going to soften that up. Just a tad bit more.
I think we got it. Looks great. Now I'm gonna completely rinse
off my brush and dry it. And I want to add
some white onto her eyelids just to
define them a little bit. Straightway paint, give them
a little bit more dimension. A little bit of white onto
the tip of her nose as well. Now for for cheeks, I'll be using my
large round brush, We're lucky brush
from art school. I'm using the same colors
I used to paint her face, but I'll be making it
a little bit darker. Usually test it on
her face burst. Before I paint her cheeks
a little bit darker, I'm going to add some
more white to that. Looks great. Perfect. So when I'm painting the cheeks, I move my brush in a circular motion until we
get to the size that I want. Here's a little trick. I won't do it to mine, but you could just roll
your finger over it lightly to lighten it up if it's too dark and if
the paint's too heavy. That really helps a lot. Now for her lips, I'm just going to use
the pink as it is. The perfect lip color for her. I think. Perfect. Since I have a little
extra pink on my brush, I'm gonna add some white
to go over eyelids with. I'm also going to add some cheer her face and neck
just to soften up the color even more so it blends more with her face color. Yeah, that looks a lot
softer, more natural. Now let's add some details and redefine our
features a little bit. Taking my pencil and
I just want to go over her eyebrows first. Then her eyelashes. I usually add a few eyelashes, maybe three or four
at the corner of her eyes just to make her
look a little extra pretty. Then I'm going to go
back over her nose. Got a little bit hidden in
the same with her mouth. Just want to go over all
those lines in pencil. They stand out a
little bit more. A little bit more definition. Also going to go over
her chin a little bit. Her neck. Next we'll
be painting her here. So I will see you
in the next lesson.
5. Hair Painting : For the hair, I'm using
my size eight flat brush. I'm wetting my
brush a little and starting with the brown layer, and then the black will
go on top of that. For this layer, you don't want
the paint to be completely opaque or to water down
something that's in-between. More red dry brush
painting for her hair. Because here has
a lot of texture. And so that's what we're trying
to achieve on this layer. And it's okay if you paint over the flowers
or the background a little on this layer
because we'll be painting over them with
darker colors later. So don't worry about that. I'm trying to add a little
bit more paint next to her face on the
sides of her neck because that's where there would be more shadows in her hair, would be a little bit
more darker there. I'm just kind of
smashing the paint around to give it a
little more texture. And if it gets too
dry, wet your brush. Acrylic paint does
dry very quickly. Painting with these flat
brushes, they're so versatile. You can get a lot of coverage. You need a sharp edge
when you need it. Looking good. It looks
like there's a lot of texture going on there,
just what we wanted. Just keep filling in
this area and try to get as much of a crisp line as
you can along her beings. You can also do this with
a round brush as well, but flat brushes definitely
make your life a lot easier. Now I'm going to switch
to my small round brush when I finish working
on her banks. Then I'm going to fill
in the smaller areas of her hair next with this brush. And again, don't worry about
painting over the flowers. We'll be painting those
a darker red later on. This is looking great. By now this layer is fairly dry, so I'm going to just go ahead and start right in on
painting the black layer. Now, I'm adding this layer of black on top of
the brown layer. If it's not totally
dry and mixes in with the brown a
little bit, that's fine. I'm applying the black the
same way I did with the brown. I'm using my small flat brush with the same pink consistency, more dry than wet with this
layer of paint as well. Again, a little bit darker on the sides of
her face and neck. Exactly the way we did it. On the brown layer.
And even though it's still a layer of
black over the brown, you'll still be able to see
the brown underneath it. And that is why I
love layering paint. I've never been a
big mixer really. I do occasionally. Then like I did on
the previous layer. When I'm finished with the flat brush filling
in all the hair, I will grab my small
round brush to paint the two smaller areas
to the left of her face. I'm going to put on some music for the rest of the painting. And in our next lesson we'll
be painting the background. So I'll see you there.
6. Background : For the background,
I'll be using bright aqua green in the
indigo blue color, deep sea. And what I'm doing is just randomly laying down the colors, sometimes mixing them together
and sometimes separately. But I will mostly
be adding more of the indigo underneath and then more of the aqua on top of that. And we'll be adding some
leaves and flowers with paint, inner gel pens on top
of the background. So I'm not super concerned about making this layer
totally perfect. So I want you to
just have fun with this layer and add as
much color as you like. And if you're not using these specific colors and you're using your
own color palette. You just want to make sure that your background is
dark enough so that the white gel pen
work that you'll be adding on top of it
will show up clearly. I'll be using my
size 12 flat brush for most of the background. And then I'll switch to
my smaller flat brush to paint in-between her crown
and around the flowers. You want to paint the background under her little body as well, in all around the sides and
above the top of her head. I'm just going to
leave a little bit of white around the edges
of the background, probably about a
quarter of an inch. Because we'll be painting in a looser border in
aqua in a later video. Just to finish it off. It's looking like I'm using mostly the indigo blue
for the background. So after I finished
painting the background, I'm just going to
add a few strokes of the bright aqua green on top just to give it a little bit more
color and let that bright aqua green show through. Now I'm going to wet the
music play to the end. I will see you in
our next lesson.
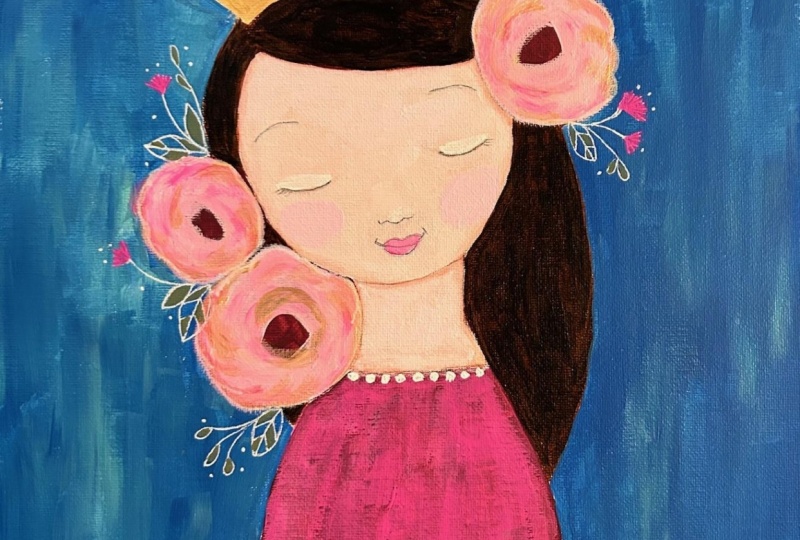
8. Final Layer Of Roses And Top: In this lesson, we'll be
painting a layer of white on the roses and adding a layer
of bright pink over her top. I'm using my small
flat brush again to add the white layer
over the pink roses. And I don't want to
paint the middle of the flower is just
around the sides just to give the flowers
a bit more depth. And I'm not laying the paint on heavily just enough to cover it and to let that nice dark
magenta to show through. Looks so pretty. I'm cleaning off my brush
completely and drying it. I'm going to paint her top while the roses are drying
with the bright pink. I'm also using my
flat brush just like a painted the bottom layer. This pink looks so pretty
or without dark magenta. Just fill that incompletely. While that's drying, I'm
going to add another layer of pink to the roses and it's
time for some bubblegum pink. My favorite color,
love bubblegum pink. All right, So we've
got tickled pink. Ready to go. I'm painting another layer of the Roses
with my small flat brush, just as I did before. You can see how pretty they
look with all the layers. They have lots of depth. Still not painting
a heavy layer. Some of the white in the dark, magenta still show through. Next we're going to paint the final layer of
the Roses with gold. So don't put your pink away
yet because we're going to add a little bit
of pink as well. Now with the gold, I'm going to paint
over the pink. And this will give it sort
of a rose gold look really pretty. With this layer. I'm going to start shaping
the outside of the Roses. Going to start adding some
brushstrokes that will give the circle's a bit more
of a floral petal look. Mixing in a little bit of
the pink with the gold. Looks really pretty. And so I'm alternating with
the pink and the gold. And if you feel more comfortable practicing this step first
in your sketch book, then go ahead and do that. I know it's a little bit
tricky for beginners. Again, adding some
more rounded edges to the outside of the
circles just to give them more of
a floral shape. I'm using the corner of
my flat brush to put some small curves into the
outside of the flower. By adding the curves
they'll really start to take on the appearance of roses. I'm going to let this
layer completely dry. And then in the next
lesson we'll add some gel pen
embellishments and really have some fun with that.
I'll see you there.
9. Gel Pen Floral Embellishments : All right, so now
we're really going to have some fine and add some gel pen floral elements. And the first thing is
to draw some leaves. I'm using my signal uni-ball
white gel pen and just want to add some simple
shape leaves to start. When I add gel pen elements,
they're always intuitive. What I do is just add my favorite floral doodles wherever I think they
need to be an old, think too much it just have fun and that's what I
want you to do too. If you have your own style of drawing florals and doodles, and I definitely encourage
you to go ahead and draw your own elements where you can just follow along with mine. The next element
I'll be adding or some cute little flowers
and they couldn't be more fun and
more easy to dry. They almost look like
little paint brushes. What I do is I just add a stem in a little
brush at the end. I tried to vary the sizes to
add a little more interests. You can make them larger
and add more if you like. But I feel like
for this lesson's more but that's
totally up to you. Usually tuck those
in-between the leaves. I want to add some more
decorative leaves. They're just a stem
and then a loop. You can make the loop
a little longer or a little wider if you want
to, it's up to you. And you can add as many of
these leaves as you want to. Like I did with the
little flowers, I'm tucking these more
decorative leaves in-between the flowers
and the leaves. Just where I see that there is the big enough
space for them. Now I think I'm going to
add a bit more detail to the leaves with some
line work just to add a little bit more
interest in more detail. So what I do is I
just add a line down the middle and then I just add two diagonal lines on
either side. It's super simple. It gives it a lot more detail. For a little enchanted,
magical look, I add little white dots above the flowers and randomly
around the florals. If I see a space that's still
needs a little something, but there's not enough room
for another flower or a leaf. I'll just add a daughter to. And it helps visually
to fill that space. I just can't resist adding a few little ones on the
point of or crowned. So I think she's going to
need a little necklace. So let's say I had a bit
of white to her color. I'm just going to
add a line right across the top of her blouse. And we're gonna make it
into a pearl necklace. So we're just going to
add dots evenly spaced all the way across.
How cute is that. Lastly, I wanted to loosely outline the flowers so they have a bit more definition and
more of a finished look. Here, you just tracing that
space outside of the flower. Super easy. Look so cute. In the next lesson, we'll paint the leaves and the flowers. So I will see you there.
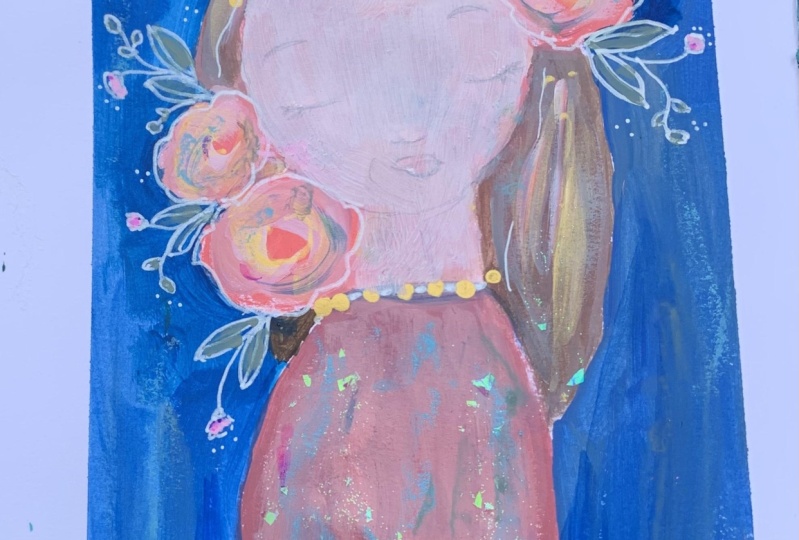
10. Painting Leaves And Flowers: In this lesson,
we'll be painting the gel pen flowers and leaves. So I've got my bright
pink and lime green for painting them in
later in this lesson, we'll be adding some glitter
to her crown as well. I'll start with the
lime green painting. The little loop leaves here just to give them
some extra color. And then we're going to paint
the small leaves as well. Then for these leaves, I'm just going to paint
every other space in them so we can
still see some of the background colors
showing through. And also so they're
not so overworked. But if you want to paint them different colors that I'm using, definitely feel free to do so. Now I'm going to
clean off my brush and dry it and take some of the bright pink and paint, some of the little gel pen, paintbrush flowers going right over the white to
add more color. And also it brings out
the color of her dress a bit more super cute. Next, I'm going to
grab my glitter and paint a little
bit on her crown. I've got my gold
glitter effect glitter. And I'm loading up my brush. Then I'm just moving
it around until it's evenly spread
out on her crown. I'll add a little
bit more. That's it.
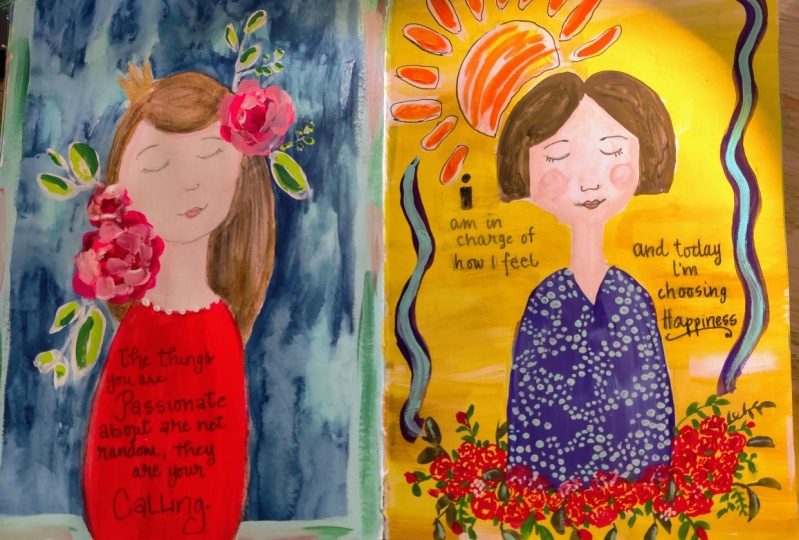
11. Hand Lettered Quote: Now we're ready to add the
quote with our gel pen. But before you write your quote, you can lightly pencil it
in on top of this area. I did very lightly
just as a guide, so I know which words
go on each line, but I won't trace
over it exactly. But you can if you
need to and if you don't have a lot of experience
with hand lettering, it's great to, to trace
over the lettering as is. The good thing is if you need
to erase your pencil lines, it's really easy to erase
over the acrylic paint. For my lettering, I'm just using my normal printing style, which is a combination
of capital letters, small letters,
writing and printing. I don't know how it
even came about, but a few years ago I took brush lettering classes and different hand
lettering classes. And I was terrible at it. So this style of printing
came about from that. But it's me and now I love it. The quote I'm using here
is by Christine Caine. It says the things you are passionate about are not random, they are, you're calling in. I just have always
loved this quote and I was so happy to
use it for this class. I wanted to mention
that you can go back and erase
your pencil lines, but don't do that until
your gel pen writing is completely dry because
you don't want anything to happen
to your lettering. Next, we'll be painting
a border which will finish off our
painting nicely. So I will see you
in the next lesson.
12. Painting The Border: The last part of
our painting will be to paint a border around the edges just to
give it a little bit more of a cleaner
finished look. I've added a couple of my
binder clips to the edges of my journal because
the page got a little bit warped from
all the painting, from painting the
background layer. And that'll hold it
in place nicely. I'm just going to
add a small border all the way around
the four sides. Just to finish up the edges, I'm using bright aqua green. And you want to wet
your brush a little bit first before you get started. I'm using my smaller
flat brush again. You don't have to use
aqua green if you have another paint color in mind and then
definitely go for it. It's your journal page. So I want you to use
colors your love. In any other color
from your palette would be beautiful to the pinks, would look great,
or even lime green. It's totally up to you. Our class is coming to a
close and I just wanted to remind you to upload your project to the
project gallery below. And I'll be giving
you the specifics of your project in
the next video. I'll let the music Take
Me Out until then. But I wanted to thank you so
much for taking my class. I really enjoyed being your teacher and I cannot
wait to see your projects. I'll see you soon.
13. Project Description : For your project description, I want you to create
a mixed media girl using at least one of
my layering techniques. It can be on the roses
or her top or her hair, or you can just paint
it exactly as I do. It's your choice. For the image. I made an image outline that
you can download and print. It's below, it's a PDF and then you can transfer it
into your journal page. But if you'd like to draw
it freehand onto your page, that's just fine too. I'd also like you to use a
quote of your choice as well. Welcome to use the
same colors I use, but feel free to use
your own color palette. But mostly I really
want you to have fun and get as
creative as you want. And if at anytime during your project or
watching this class, please don't hesitate to post a question and let me
know how I can help. When you're done, you can upload your projects to the
project gallery below. I cannot wait to see
your finished projects.
14. Thank You: You made it. Thank you so much
for taking my class. After uploading your project
to the gallery here below, you can also add them
to your Instagram and tag me at Michelle
underscore per cat. If you enjoyed this class, please leave a review. I'd really appreciate it. Thank you again for
taking my class. I'll see you again soon.
 Michelle Perkett, Teacher, mixed media artist