Transcripts
1. Moving Painting Illusion: Hey, creative people.
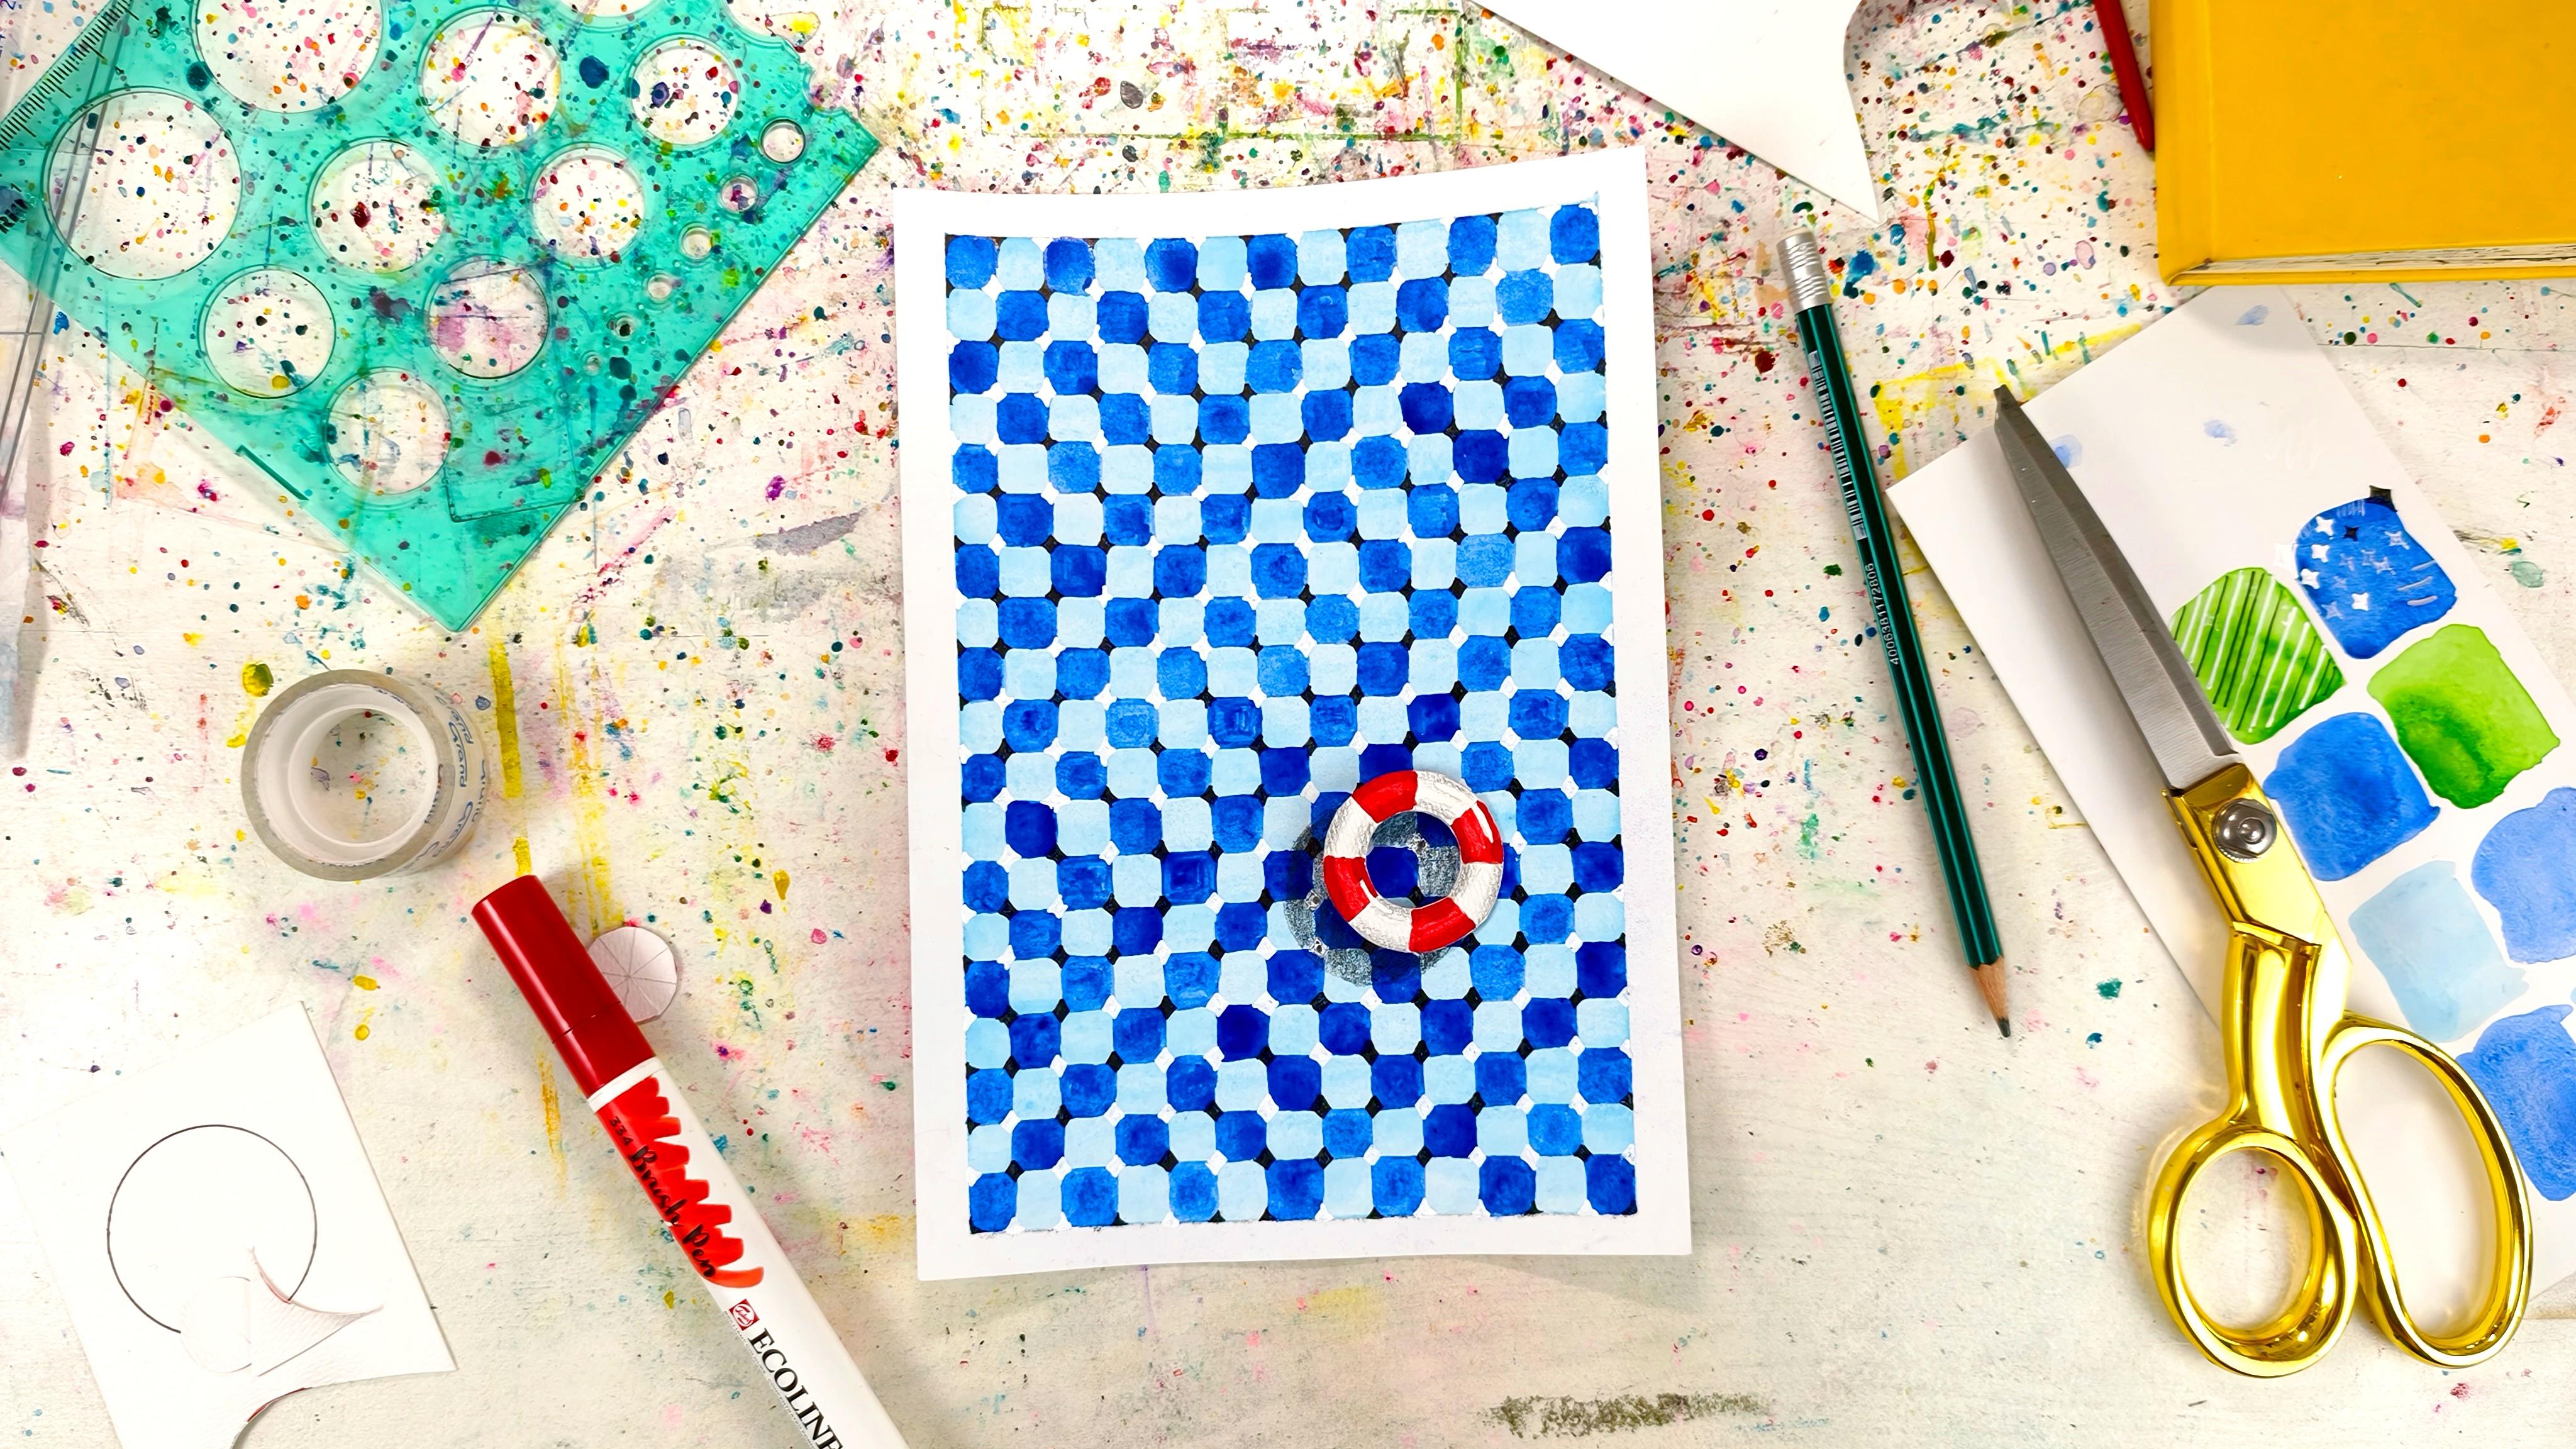
Have you been seeing this art
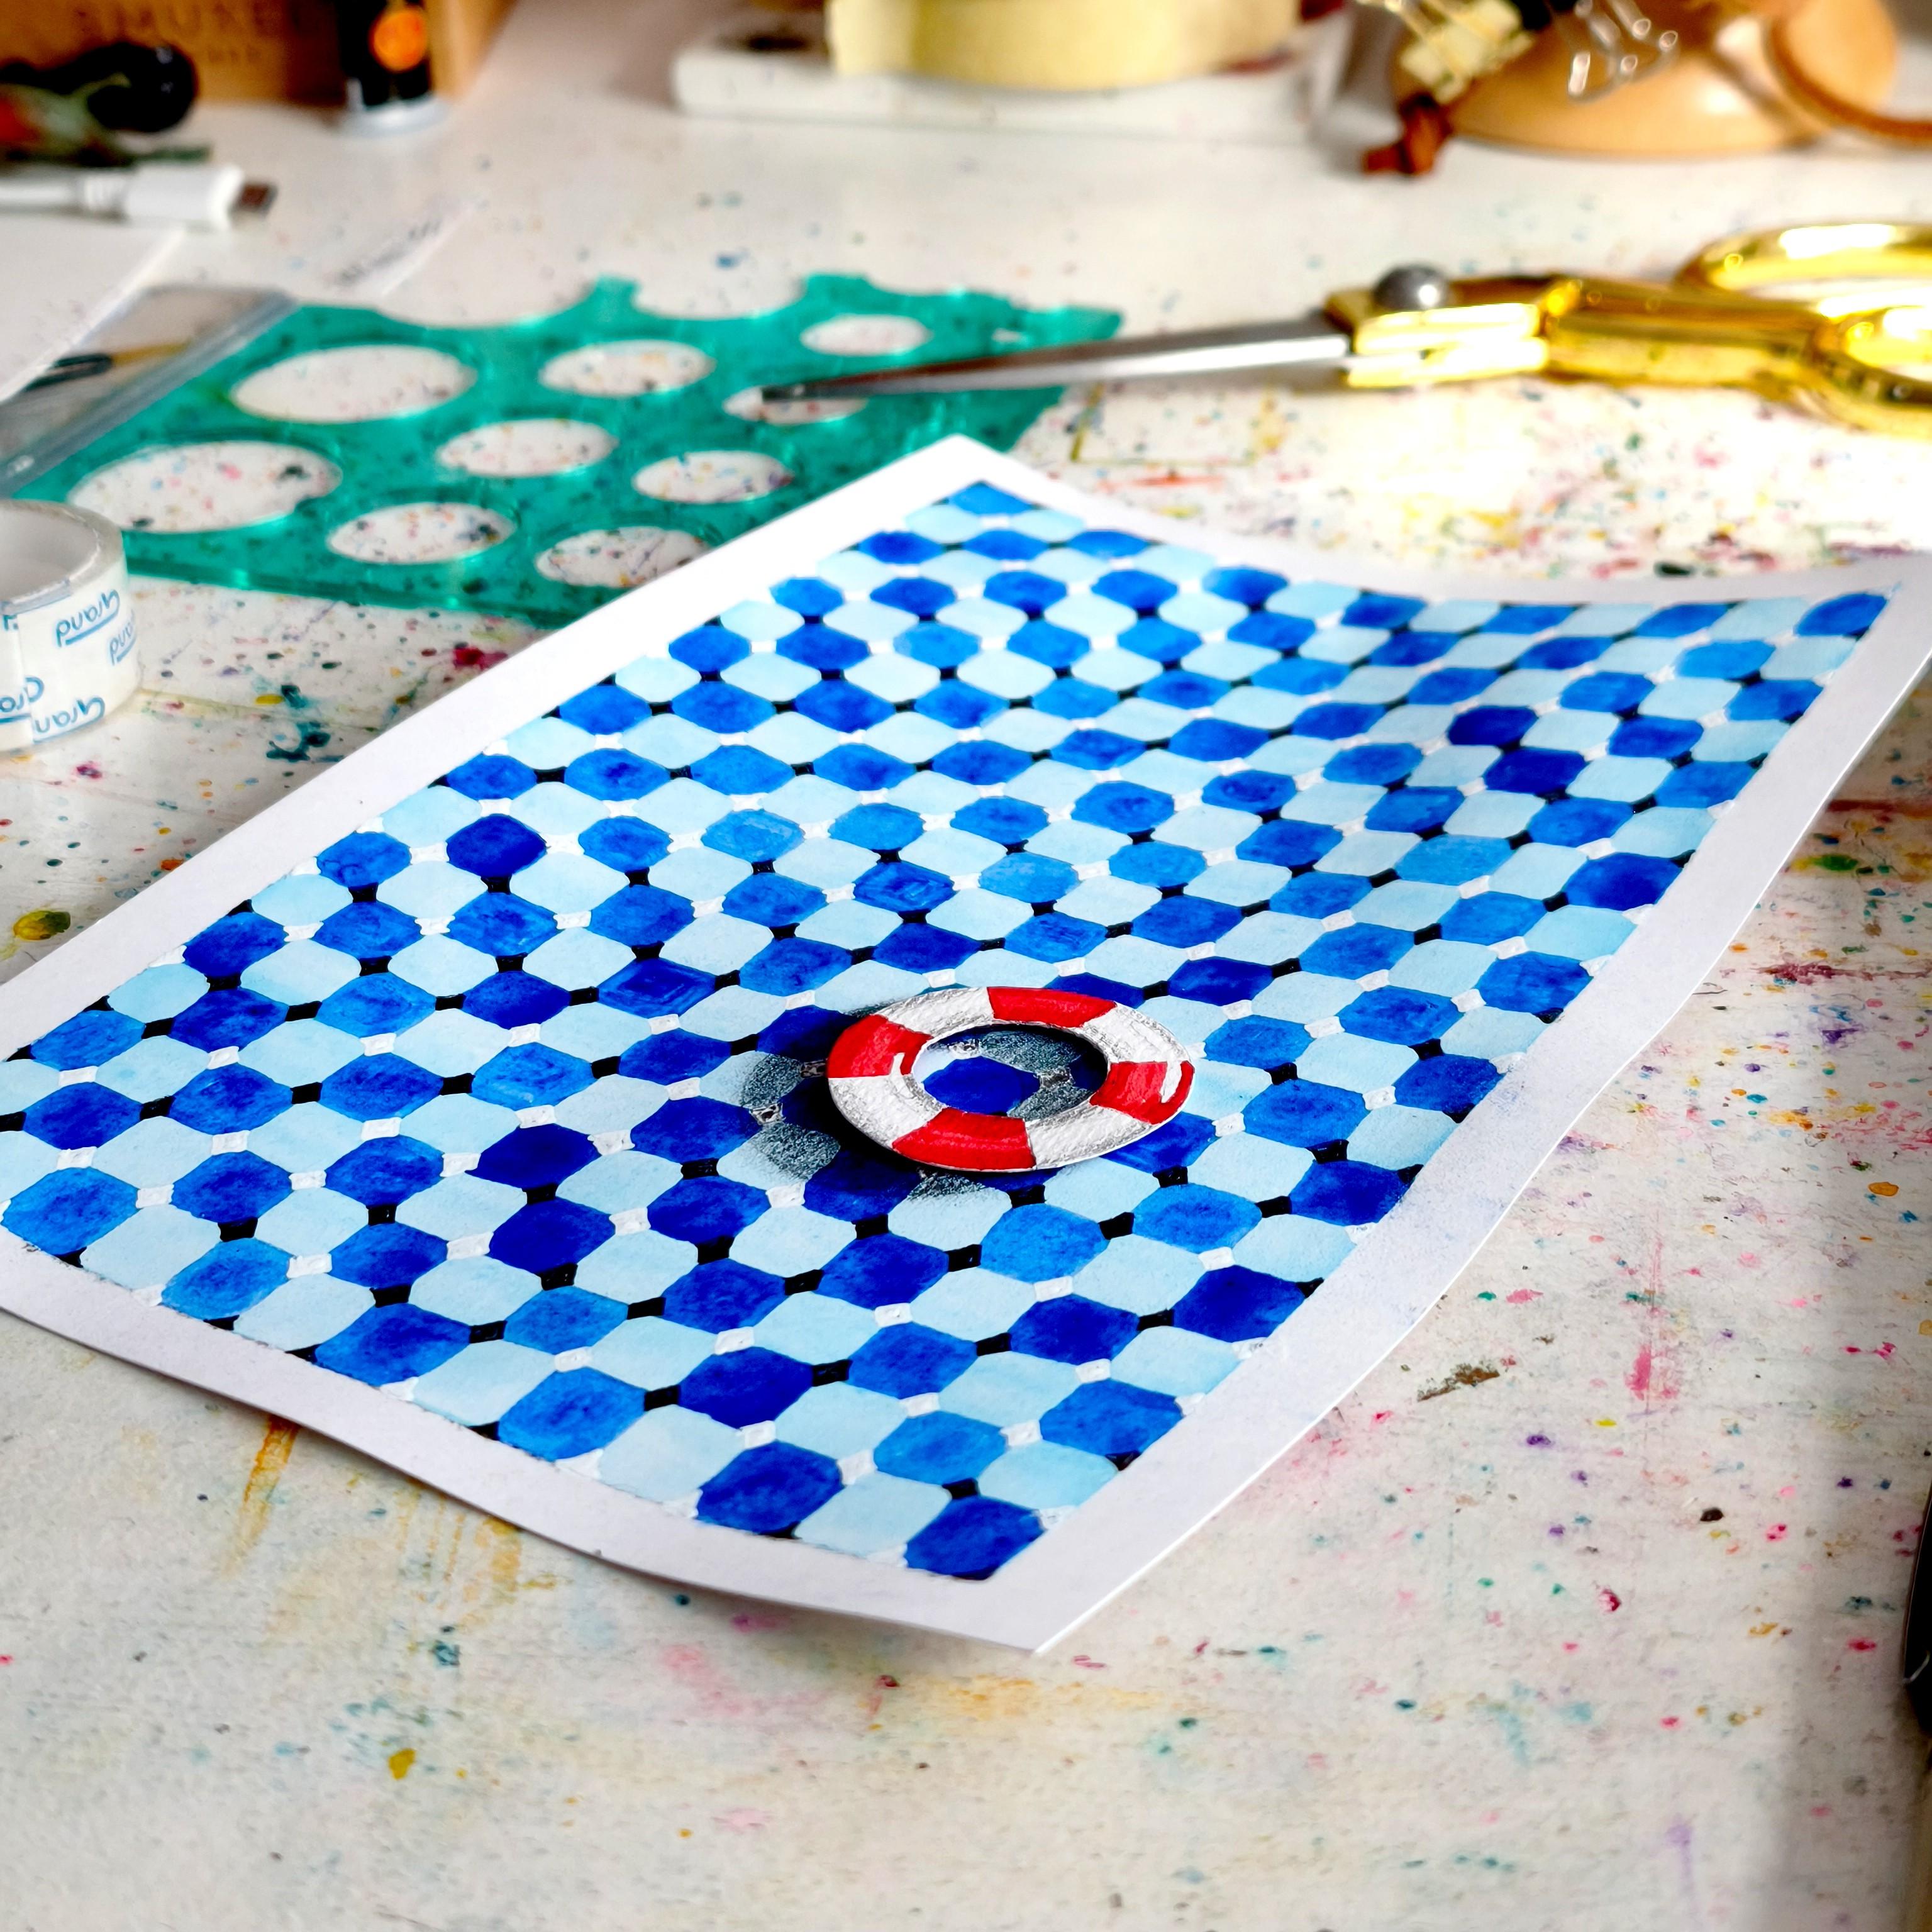
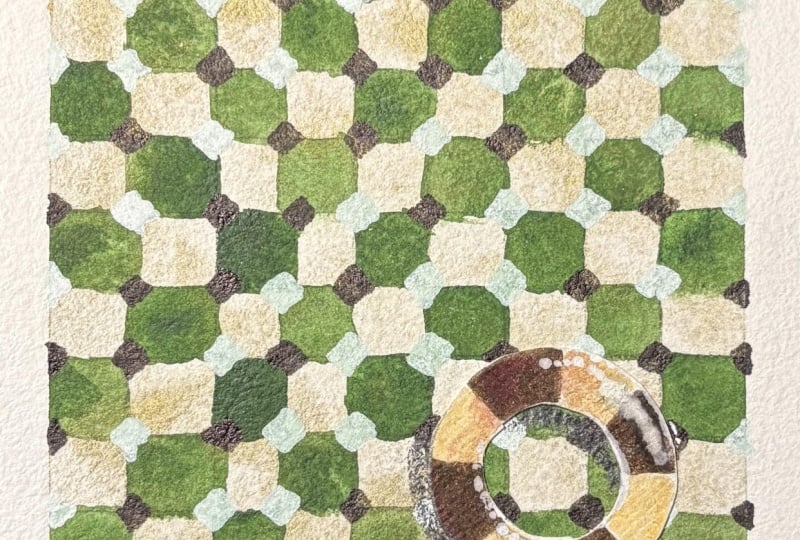
trend everywhere? Even if you weren't a look. It looks wavy, doesn't it? Yet there is not a single
curve line in this painting. This grit is
completely straight. It's an optical illusion. If you are wondering
how that's done, you are in luck because
today we are going to do this painting from
beginning to the end. Hi. My name is Fatih. I'm a watercolor artist and online teacher from
Warsaw Poland. Today, we are going to look into this painting and
this optical illusion. We're going to see how it takes, what makes it work. We're going to learn how to pick the right colors for this. What pattern actually
gives this baby feeling, and we will finish it off
with something cute, Lexi. For this painting, I'm
going to use watercolors, but you are free to use
whatever medium you like. I can almost hear you are
saying you can't wait, so let's go to the class project with you. See you in the class.
2. Class Project: H. Your class project is this. You're going to make
this painting with me. You can choose your own colors. You can choose your own
object to float on the water, or you can do exactly
the same as I blue with classic red
and white swimming. Instead of the swimming,
you can put a beach ball. You can put a rubber
duck, that's up to you. That's not really the main
focus of this painting, but something to look at, something for your
eyes to rest on helps. And but we're going
to focus mainly on the grid and how to make
this optical illusion base. It's like waving wavy
water, isn't it? For this, you're gonna need watercolors or any other
medium you would like, and ruler tapes for the
edges to mask them, and pencil to draw your
grid, and a brush. Anything else? Check. Water.
And I think that's it. If there's anything else,
I will let you know. You'll find out in a
moment in the class. So if you're ready,
see you in the class.
3. Choosing Colors and Painting the First Layer with Watercolors: Hello, everyone. Welcome
to my new class where we will be making
optical illusion. The most of the examples I
saw we're using acrylic, and I'm going to attempt
this with water colors, and I think it will be easier because instead of painting
all the squares one by one, I'm going to put the light
colors at the bottom, and then just put the
darker one on top. And I think this way, I will be fiddling with
squares only once. And you can use the same. I need a brush. Okay. Now, the first thing we need to decide is the colors. The colors are quite important
in this optical illusion because later on those
black and white stars in the junctions of the squares, it kind of connects the squares. Like, in a way, you would see tiles in a pool under
the waves of the water, that would be banded, yes, that gives that
illusion, basically. But for that to
work, their tones, their values should
be different. One of them should be darker. One of them should be lighter
sometimes when we put two colors next to each
other and say, Oh, look, this is
because of the hue, we might think, for
example, I don't know. Like this hin and
sub green deep, that they appear very
distinctive from each other. But as values, they
might not be so sip. The way to see that is to
make it black and white. When you take a photo of
the colors you're going to use and turn it into black and white with
any photo editing app. And at the end, that
black and white. If you don't see a big difference between the two colors in
black and white, it means their values
are close to each other. And this will affect the final illusion we are trying to create. So
let's have a look. I think I want to I want
to have this bluish. I have a spare paper
to test some colors. This one is I still
can't find my switch. Can you believe that? I actually
even tidied up my desk. This is Horizon Blue. And ultramarine. I want it to be a bit bluish because it
kind of makes sense. My first example
was more greenish. And some water in here. I think it's time to
refresh some of my paints. Okay, I'm thinking that this
could be the base color. And this ultramarine could be the dark tone I need. I think like the seats. Let's imagine them
in a grid like this. Of course, this project, it won't be wet on wet. Even though it's a pool
and water illusion, it's not going to be wet on wet, so that we are able
to create this grid. The goal of this to make
a really rigid grid, but it appears wavy. So we are not trying
to make anything. We're not trying to make
colors flow into each other. That's the illusions
job this time. I think like this,
it would work. Very well. And when
you pick your colors, you can test it that
if they gonna work, you can take a photo of it. Probably in here in Edits, I will show you an example. And then you can take a photo, turn it into black and white, and see if they are
still distinguishable. So let's try another one
here to show for example, let's keep the ultramarine. Let's say ultramarine
will be a color. But um that's something
like this sub green light. Yes. Imagine that we're going
to do it with this one. It could be tiles in a
pool, blue and green. Sure, why not? And I'm trying to make them even. Okay. So because we
have color vision, we are able to distinguish
these two easily where we see green and blue very
separately, ultramarine. But haven't tried.
I hope this works. If we just look at the values, they have actually
very close values. And we can test this
pie, like I said, take a photo and turn it
into black and white. And if they still
distinguishable from each other, those are good for this illusion for this project, let's say. But you can see
that even though we can distinguish them
easily with color, you can see in here a this ultramarine is much
darker than horizon blue. And when we apply those
black and white dots, the white ones will connect more with the horizon blue
to horizon blue, and the black ones will connect more ultramarine to
ultramarine and that will create this optical
illusion for our eyes. So I think we can go with this. And to do that, I will just make a
grid or do I have to? Maybe I will just
go ahead and paint. And once it's dry, I
will put the grid. Yeah, because this ultramarine,
it just came to my mind. It's opaque, and it will
cover what's underneath, then we will be
fiddling, trying to see where the lines are. Okay, I'm putting
the subcreen light away for now
ultramarine as well, adding more water to Horizon
blue, which is running low. And putting this one
aside for some change, I have space on my desk
because I tied it up. Such a nice feeling.
And I'm using this bristol paper,
250 milligram. It's good for many things
and also it's very smooth. It's paper. Unlike
watercolor paper. So it's good for
markers and sort stuff, but I tried other projects with watercolor, and
I like how it works. So and I have it,
so I'm using it. Okay, so now our job to
put the color ultra, not ultramarine, horizon blue on this paper, and that's it. Yeah. I'm thinking if I want to make a border
for this project, I need to keep the
paper in place. Just I didn't think
about this and I might run out of tape. Let's see how it goes. Let's hope for the best. There's always the risk that
paint might I finished. Might go under and
spoil the painting. But everything is fixable.
We're fixing the edit. And just by I'm trying to make parallel and
similar border. Okay, I was enough
for this edge, but there's something
of the edge. I just turned around. I think this is like that. And for this bottom part, I'm just gonna use sp, and that should be enough. Okay, so this taping down will help holding the
papers together. And it's also 250
milligram paper. I have high hopes
for less pending. But if you watch
my class before, I'm not bothered by I'm not
bothered by that so much. If it paints, it pens as
part of the painting. Later, we can straighten it out and there are ways
to work around that. So I will try to do this
as even as possible. But I'm not going to do
a perfect job because it's watercolors and
they see through medium, even though this one is
opaque, what's that? There's something nasty
on my painting my paint. And I'm hoping this will
maybe even help the illusion. Because underneath this,
there will be this color, yes, but it's a little
bit, as you can see, not like pure block of blue. And I'm going to embrace that. H. Yeah, that fun. A
few final touches. And I'm just going to let it be. I like how wavy. I'm just trying
to make the parts there looks like to white, adding a bit more color. And because there will
be the darker colour ultramarine grid on
the minor details, we won't be seeing
that our eyes won't pick that washing off my brush, and it's time to
let this Cool down. Okay. So that's it for now, and I will see after
this one is dry. Now I will go and start a fire to make some sausages
for dinner. See soon.
4. Painting the Grid part 1: Okay, I'm back. The fire was set and sausages
were cooked and eaten. And now we can go
back to our grid. I was actually just
looking because, as you saw, I didn't
calculate anything. I didn't check it
with the ruler. So now I'm left
with 19.2 and 12.8. And somehow I need to cut out one square centimeters,
1 centimeter square. Grit. And make it
nicely symmetrical. What is the best way to do this? Because if I leave the last one, it will just look weird. I could try to bring
it kind of find 80. So I have extra 3
millimeters over here. But if I hit them
in the corners, that might work, actually. So like 1.5
millimeters from here, one half millimeter from there. And yeah, I think I
will go with that. And then the rest is just
so I'm basically centering. Yeah, so I'm marking everyone
centimeter like this. And now we're going
to do the same here. But if you say 19.2,
so we will height. It's extra 2 millimeters,
1 millimeter. This row will be less
and one millimeters. This row will be less. So I'm like, no, I have
2 millimeters extra. So I will height them. So it will be 1 millimeter
more over there. So it will come
down 1 millimeter like this and I will mark so it means the first
row and last row will be 1.1 millimeter. I think that will
I did well enough. This is tough because
I can't quite see. I'm trying not to
cover the camera, so I can't go right above the ruler with my head
to not cover the camera. Okay, so I have to do the
same on the other side, so they will be nice and even. 19.2 I slide down 1 milliliter. Millimeter. Marking
every centimeter. I have to do this on
the top, as well. Okay, for that I
will make it a bit easier here for myself and
bring it closer to me. 12 point almost eight. So it's like I did by hand. So I didn't actually
know how many millimeters I was going in, but somehow I managed
to make them parallel. So it's no zero. 12.8. We have, I think
it should be like this. You can, of course,
measure first, decide where your grid is
going to be in the center of your page and go
ahead like that, so you don't have to do this. I'm doing these mistakes
so you don't have to okay. Take. Like I usually do
like this, my things, dive in head first, and then try to figure
things out on the way. Now I'm making my grid. I think this wash
turned out very well. It actually looks like a
very nice sky that I should remember how I did it for future projects involving a sky. But actually, this is the
best way to make even wash, but it would be better
if it's inclined, so they are slow you keep applying the same
amount of paint, and then they just
go down together. Mine was flat, I managed
to get these parts that are sometimes uneven,
and that was the goal. That a bit whiter here, a bit bluer there, a
bit more blue there. I hope you are also
driving your grid with me simultaneously alongside me
or are you just watching? I always prefer that you
also do while I do things. You also also just open and watch for
inspiration. I get that. But I think even if you
don't manage to catch up to my speed or don't manage to finish the project
at the same time as me, you can always go back and continue from where
you need, right? There's a better chance that you finish that project
later rather than watch this and let's do
later approach. We are almost there. Are you also curious how it's
going to turn out? I really am. And after drawing, I think I will make
this grid a little bit less visible with my eraser that probably disappear once I
put ultra marina. But yeah, I think this is
good enough grid, guys. Let's remove the paper. Actually didn't have
a look at that. If anything went
sideways, it's okay. There's a bit of a leakage
there, but nothing major. It's good that I used this tape. I think it was at the end
of its life that it's barely holding onto
the paper. Okay. Our grid. Not fully, that we still need
one more layer, but now I'm going to
this is the good thing about this kdable erasers, you can do this, and you can see your pencil lines are disappearing, but
they are still there. Yes, now we have a
barely visible grid. We can start with ultramarine. Let's bring ultramarine here. We are done with horizon blue. Go away. I made myself bo wet. And let's add some water with our eye dropper to ultramarine.
Then let's get to work. I'm thinking if I should use this brush or something
touch smaller. For this, I will use this
number eight instead of 12. If that doesn't work, I have this number three
here. Let's see. They are quite small,
this 1 centimeter square. But to be able to
see the effect, that this is not
the biggest papers like A five size,
half of an A four. So to be able to
actually see the effect, there needs to be some
good amount of squares. Okay, I will start. How
is it going to look? Is it an even number? One, two, three, four, five, six, seven, eight, nine, ten, 11, 12, 13. Actually, it's good. It will start with Tarc
and finish with now here, one, two, three, four, five, six, seven,
eight, nine, ten, 11, 12, 13, 14, 15, 16. Okay. That's again,
I didn't plan this, and it turned out that it
will be corners will be dark. Okay? I will do the
squares as well as I can. I don't want to fiddle
with masking tape again. Okay, I might change
my impression. I'm not very happy with
the tip of this one. I think over time, it got a bit lost its shape. Yeah, I started
getting ahold of it, but it got better. Let's try this even smaller
brush number three. Yes, this is more accurate for his job and I can just throw the edges first and like a head or something
like that in the tip. Okay, first edges. The second draw. The second one I did badly, but nothing is perfect. Okay. Grid is starting to form. And I like it with There's
a bit of inconsistency with the it's still
ultramarine these boxes, but it's a bit some of them are at the one are a bit lighter. I think that will overall make a good impact. This
will take some time. It was like when I was
doing this before, I was using acrylic pens, and pens are much more accurate for this
kind of job, I can say. And also now thinking back, thinking back, as I'm doing this with
watercolor and brush, I'm thinking, I can also do the first layer with
watercolors and second layer, again, with brush, that
would also be fine. The fourth row. We
have only about 19. I'm not too worried
about the corners. Sometimes they are not meeting. I'm not trying to make them meet because I don't want
to break the lines so much. And we're going to
put those black and white stars in those corners, then they will come
together anyway. And here, I'm a bit struggling. I made the grid disappear
a bit too much. So when you are doing yours, don't be too, don't worry too much about
the grid being visible. That actually helps a lot. And also, it hides. Once you put down
your darker color, that hides the pencil
marks, anyway. I should have gone for.
Two by 2 centimeters. Yes, now I can definitely say that leave your
grid alone a bit. It became quite difficult
for me at this point. I'm kind of doing by eye. Okay, we're almost
halfway there. This is I have to say. Again, I'm not saying I
have ADHD. I don't know. I don't know that. I
haven't been to a doctor. But I usually, when I'm
doing these kind of things, distract myself with
something to listen or watch. But since I'm doing a
recording, I can't do that. And probably most
of you know that I usually watch Seinfeld, but recently we decide to cancel Netflix because too many
streaming services, and we are trying to we have some shows we like on Apple TV, and we don't have time to watch everything all at once
anyway, so we canceled it. But this also means that
I don't have Seinfeld. In the meantime, we've been watching this show called Silo. And if you haven't watched it, I totally recommend
it very good show. Maybe if you're old enough, you might know this show
called Lost it's a bit from the point that making you
keep asking questions, it's that kind of show. But I have a bone to pick with Apple and some other streamers, they also started doing that. The whole reason we moved to streaming back in the day
and left the TV behind. The option to
Binge. When Netflix came out, it was all about that. You could sit down and Binge your show. You
didn't have to wait. That was the thing they sold us. And now, what are they doing? They're saying every Wednesday, every Tuesday, show is
coming. What's that about? We came here because
we wanted to Binge. We didn't want to wait for the Analog linear TV to
turn around one weekend. We could watch our show,
like I used to watch Dawson's Creek or LMC Bill
when I was in university. I would rush home from class when I was in university
to watch LMC Bill, I think it on Tuesday night. So the next day, I could
discuss with my friends. Good show. Quite
a crazy one, too, that I feel like
another show like Ellie Mac Bell didn't
happen after that. I like the TV show. I know. Can I call the genre? Like,
as a media to consume? My favorite thing is, I guess
finding a good TV show with five seasons so I can just sit down and watch that
I don't usually watch, like, nonstop, but it's kind of comforting knowing when you have time to sit down, you know what you
are going to watch. That's something you are excited about that you don't
have to search, you don't have to
find where it is, like, you think that
you're already excited, and there are episodes available
and you just keep going. If you want to watch one
more episode, you can. If you don't want to Okay. What other shows
I've been enjoying, since we can't watch something, maybe we can talk about it. Ted Lasso is fun.
I like Ted Lasso. And some people are complaining about the new season. Why
did they bring it back? It was already good. I already closed that
book in my mind, but in my opinion, why not? The crew you like so much that even if it's not as
good as the previous one, seeing them a little bit more. Doesn't hurt, at least for me. One of our time favorite
shows back then, there was a show
called White Color. That was a very exciting
show that it was about very smart
and charming Well, maybe this there's
also a movie with Tom Hanks and Leonardo
DiCaprio, something like that. And finally, that person, the FBI catches up to him, but they make him a consultant. So it was about this
charming, very smart guy, and he was joining FBI, but in the meantime, he
was still doing his thing. But even though
he's the let's say, bad guy because he's
the thief, yes, that you were actually
connecting with him so much and you were
ending up rooting for him. White collar was a good one. Long time, we watched
Grey's Anatomy, of course, who didn't I feel like I don't mind
watching a soap opera, but at some point, it lost me. I think it started when they
made this musical episode. And then there was the pandemia, and we tried to watch
during the pandemia, but we felt like we
were already everywhere seeing the pandemia on the news on the
newspaper, wherever. On the top, turning
on a TV show you like and watching pandemia again.
Also became too much. So we kind of left it
there and never went back. And before that or
around that time, also, we were watching suits. That was also a while ago. That was among the shows that go for so many seasons,
that was a good one. And actually started
talking about TV shows because while
doing this in my mind, I was thinking the
first episode of, I completely lost the grid here. I'm really doing B high or maybe while I'm doing
this with my hand, I am actually making
them even more, but I'm raising them even more. I try to put a paper under
my I was thinking about this first scene between I need to remember
the character's name. Ross was the main character. And the other main character was this best
closer in the city. What was his name? He had
a very charismatic man. Yeah, I was thinking
for some reason, while doing this. That scene. Okay. Grid is really forming up. It's not perfect, but
it's good enough. It will do the job, and
that's how it looks.
5. Painting the Grid part 2: Sorry for my squeaky chair, but bending over the paper
like this for a tedious job, you can imagine my back
is doing the same sounds. Yeah. Imagine that this
is my back at the moment. There is the line.
Another squared and how many squares
I'm doing? I wonder. I think one, two,
three, four, five, six, seven, and six, 13. And I'm repeating
that nine times. So 100 and 1,724 boxes,
I think. Really? Yeah, I guess. It seemed like not a huge number
once I calculate it. The reason I wanted to
calculate it was, like, this feels like lots of boxes, lots of tiny boxes to paint. Yeah, do you have
any good TV shows? You can recommend me some. I'm always open to suggestions. And speaking of watching
things on Apple TV, that there was a show called Dark Matter and I just opened
it to see what it is about, and I watched the first
two episodes back to back. It seems like a
really good show. Giving too much away, I like shows that involves parallel worlds
and other dimensions. And this is that kind of a show. So I haven't watched
the whole thing yet. I don't know if it will come
to a disappointing end, but at the moment, I would
recommend. What other shows? We watch so many over
years that of course, it's difficult to
remember all of them. But when we think with my wife, like what shows like really left a mark that among
the things I said, also, like, on the top of the
things I already mentioned, like suits and Grasnt also
always remember Orphan Black. That was also a good show. That was also a bit of
science fiction that a person was finding
out that she was a clone and there
are many clones. One actress was playing
all those characters. It was I can't remember. Name, I was going to
say Tatiana Aslana. Wow, I can't believe
I remember that. This is my brain
in a nutshell that I'm forgetting very
important things, but some obscure name
of an actress is there. Okay. What I was hoping
is also happening that it's a bit the ultramarine
patches I'm adding right now. They're also, like, as
the watercolors nature, they are a bit varying
in value and saturation. Some of them are much lighter, some of them are a bit darker, and I think it only
helps to be done by Hal PA seven I don't even know if I will
keep this part long. Maybe I will just speed it up so you guys can focus
on the I don't know, technique and how this
is being done than me painting tiny squares and
blubbering about TV shows. The edit will show.
That's not my problem. That's next week Crops problem. Okay, my biggest advice for you guys is to make
your grid more visible. Don't worry too much about it. It will disappear once you put two contrasting colors
on top of each other, but it's really difficult in some places not
seeing the line. And, of course, any
moment I'm waiting, I will lose focus and
put it in the wrong box. Let's see when pen. After this, the fun
part will come that we will put those
black and white stars. They call them dots, but I
call them stars. They don't. No one paints them like dots.
You will understand why. And in the corners of the
boxes and then suddenly, hopefully, our beloved crit will become wavy like it's
sitting underwater. Always fascinated by optical
illusions that actually even seeing how it works doesn't help your brain to understand
that you can see, actually I don't want to
call the word primitive, but I guess that's the best word to describe
primitive brain we have. That is, you know, it was evolved on
outdoors and savannah, and it kind of is
looking for patterns, and if something resembles it, just labels it as Okay, this is wave, it
must be underwater. So even though you
know how it works, it still is getting tricked by it. That's fascinating to me. Or that's what's fascinating
about the optical illusion. I think I need to
get some water here. It's getting a bit
tick, this paint. Come on. We're almost there. I need to be done by 7:30 because that's the
end of my work time. And so I can peacefully
leave this too dry, and when I come back,
it will be ready to go. I can tell that I'm
getting impatient. My books are starting to look a bit careless. Come
on. We're almost there. But doing this kind of projects like taking on this
kind of project and committing to it is
such a good workout for your hand that repetitively trying to do the same movement, same straight line,
holding a brush. It's a really good workout, and later, you definitely
see the benefit. Now I'm thinking which
one was more fiddly, putting more tapes or this. Somehow, I'm always running
late or running out of time. How does it happen? I don't know, but I'm constantly on the day cycling
home from the city, like, I'm always like I have
to be there in 20 minutes, which takes 30
minutes to get there. Okay, last four rows. Something funny is happening. I will share with
you guys maybe and ask if this is happening
to you as well. When I'm doing this kind of thing and not watching
anything, like, my mind is idle, like, I'm busy with this, but
my mind is not too busy, not as busy as my hand. In those moments, my
brain always goes back to the streets that I grew up as a child. Does
that make sense? Like, I'm doing this
and in front of my some streets from
my old neighborhood. It used to be my old
school corridors a lot that I would just, like, basically sit in front
of my eyes walk through it. Imagine I'm doing this, but my mind is walking
in that street or in the corridors
or looking inside the classrooms of
my primary school. Does that happen to
you, or is it just me? No one answers, so I
guess it's just me. Jack? You? Yeah, I know. You grew up in a forest
but in the woods alone, but the wolves raised you. Come on, we are almost there. Also, because this is such a slowdown process that it kind of hypes
up what's coming next. Like, at this point, I can't wait to finish
this and it's dry, so I can try the
optical illusion part. But for you, of course, it's
not a problem because you can just put me on
two times speed, and I'm talking like no, no, no. And you can also entirely skip to the end
then see that part as well. Maybe I should have given
you this idea. Watch, guys. Watch me slow away minute by
minute. Every minute counts. For example, you need to go to the kitchen to get a glass
of water. Don't stop me. Let me run in the background. Let me be the background
in your house, the background noise
in your house. And when you come back, you will just jump back a few minutes, and this way, you watch
some parts of my class tub. That's only good for me. That's what a sportive
student should do. Do not pause me for anything. Like, you are going to sleep. Just leave me running
in the background. When you come back
in the morning, you will go back where you left. I would appreciate
it. Thank you, or you need to go to the kitchen to make
dinner. Don't pause. Take me with you,
thinking that I'm in a laptop or tablet. I actually don't know how
you guys are watching me. How many of you are watching
from phone or tablet? I heard that some people have the option to
watch on their TV, even, but I guess that's
not for all classes. So selected classes, maybe. Some Cishare actually streaming
up would be a good idea. Just like you open I opened
my Netflix on my Playstation. You could just turn it on and watch Watch me on
the big screen. It's the last row guys. Come on. Almost done. Hanging. And for making something like a glass like it's a video productions. These kind of edits are a bit too slow, especially nowadays, we expect lots of action, lots of cuts, keep the
attention, and I get that. But in the meantime,
this is how it is, like, unless you are doing a
Jackson Pollock painting and just keep throwing
on the wall and making slashes that art is something that you
need to slow down for. And I don't think
that's a bad thing. That's something we
should all embrace and do on a regular basis. Agree? Again, no answer. Jack, you'd rather have fast
paced time laps, everything. Yeah. Yeah, that kind of
sounds like you, Jack. No surprise there.
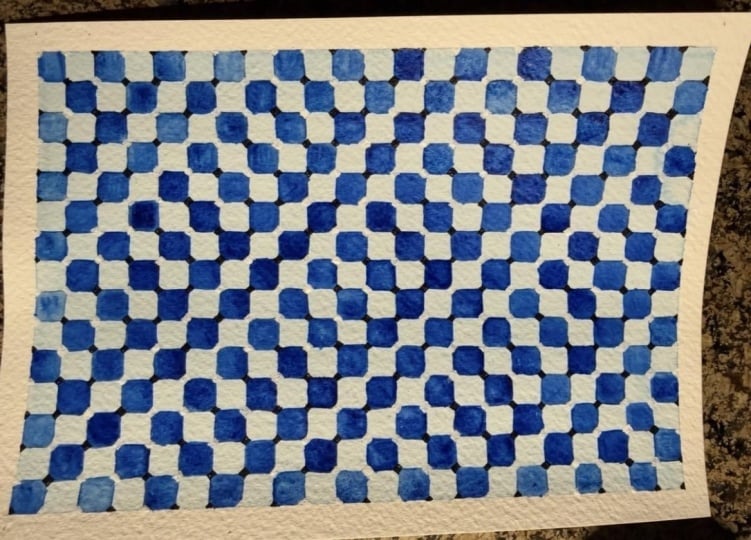
Okay. And like that, our grid is done. I think it looks cool, that when you look closely, individual boxes
might not be perfect, but as a whole, it works. And now I'm gonna let this dry, and then we will do the fun
part, and that will be it. Maybe we'll add
something on top of it. Let's see. Like
something floating. So I will see you later.
6. The Secret to the Optical Illusion: Mm. Hello. Welcome
back, and good morning. Yes, it's now the next day. It's 840 in the morning, and it was my morning to lay
in bed and drink coffee, and I did that, and I go a bit unsy and I had to
get up and do something. So I came here to finish what we started day on the
Saturday morning. I'm still in my pyjamas. So now, what's
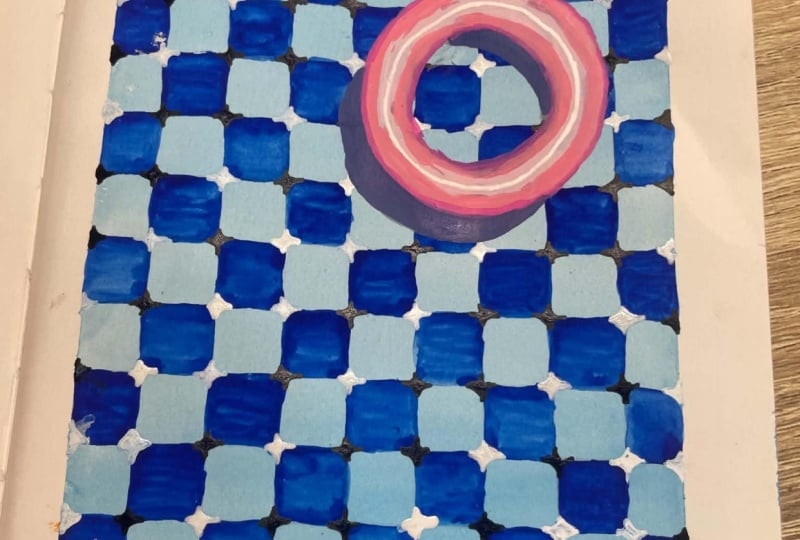
left is the let me show you an example
from my sketchbook. They put these black and
white stars, let's say. So this is supposed to the
white ones supposed to make it look like it's connecting
the lighter ones, and the black ones supposed to connect the darker squares, and then this will give the
illusion of being underwater. We don't need this now.
I will put it away. Okay, now, just go over there. Does not stay okay. I have two pens. One is Japan, white alpen and the other one
is my usual Faber castle. B arts pen, fine ener will do. So the trick with this, let's go back to our paper. We tested colors on yesterday. So basically, we need to add
the lines with this pattern. Let's go on this one. Two. One. One, To One. One. Then basically the same
repeats again this time again. Two is black, two, one. One, two, one. One. So this is the pattern. Of course, we're
not going to draw lines. We're going to put dots. And what I mean by that, it means when I'm putting the dots that we are
thinking diagonally from these corners that
we are going to get dots in these
lines, diagonal lines. We are thinking. These
lines I'm drawing here are those maybe with the
ruler I can show better. So we're doing first this corner. This is
the first corner. Yes, second line here, third line, fourth
line, fifth line. Do you know what I
mean? Sixth line, seventh line, eighth
line, ninth and go. So it was like black, black, white, White, white,
black, white. Black, black, white, black, white, white. Black, white. We will just follow
this pattern of 21, one, 211 always black and
white, black and white. But we are just doing
this diagonal like this. So that's what we
are going to do. I will start with black. The corner, I will, of course, try to do without going out. So the first black is here. And putting mine, like, I've seen other artists to, like, they call it dot, but no one makes it like a dot. They have, like,
star shaped corners. And if you watch
my neurographic, watch my abstract watercolor escape class in there that I do neurographic lines
connecting lines and leaving no sharp corners, that's what I'm basically
doing with mine. So we put two lines black. Now we'll switch to white. It's a good way
to remember this. Maybe we should do that. Okay, it's a good idea. What we need to do
is these lines. I also the pattern we'll show here as well,
one, two, one, one. So we can just do that here, 21. And then we'll just follow those lines once we create
it, it will be easier. Two, one, one, two, I don't want to make
a mistake. Two, one. White. Now again, two black, one white, one black,
now, two white, two, one, one, two black, one, white, one black, two white, one black, one white. Now, two black. This is the confusing part
of this process, I guess, two black, one white, one black. And the thing is this because we are doing
this diagonally, it continues here as well. So I think two black, one white, one black. Now it's going to be
we're going to do this side and we will continue
the pattern this way. And once we are done
with this site, we can just keep filling
whatever is in the corner. We will just keep
doing the diagonally. So you need to
follow this pattern from left side and the
bottom or thinking this way, as you can see there
on the same line. When we turn our paper
side ways like this, when we look at it diagonally. So two black, one
white, one black. Now it's time for two white. Yes, two, one, two, two white, one black. One white. Now, two black, one white, one black. Now, two, one, one. Now it's time for two whites, one black, one white. One. So then we don't have
place for two blacks. We'll just put this one. But this way, we
put the beginnings of all the diagonal lines
that need to go through. So now we can just focus
on if there is black here, diagonally, I'm putting black. If there is white here,
I'm putting white. So now there is
black in the corner. I'm making my little star
shape and feeling inside. As you can see, because we also need to do this at the end. I didn't matter that
much how the corners were meeting because we will
cover it. It's time for. Have a look at
diagonally, whites here. We'll keep ding whites. So diagonally, this
line we are following. So our next one is also white. Also, this way you
are on one pen. For a longer amount of time, it's better than keep switching. That way you do to 11. This way, you can just focus
on doing the whole line. Now it's a black line. I like the precision
I have with this pen. I wish I had a similar
white gel pen, but a good gel pen that
actually covers very well. It's difficult to find. And doing that, I haven't
been able to find, actually, one that does a good
job as a fine liner. That it feels a bit at times. What am I doing is this working? But just trust the process and keep going because
it is working, but my pen is not working. Some reason. What's happening? And now it's white
because white. Next time, it's black.
Maybe actually, I will switch to zero
point I have a good 0.5. This is what? This pand I
was looking for this one. Were you? It's called fdNipHart. Go Black Yes, this is doing a better job.
And another black. Of the pen difference and doing the black ones
are much easier. J pen, I have to be more
careful because it has a very thick and it's difficult to
put delicate lines with them. Yeah, I can see that the pattern already started emerging, it looks a bit probably that
when it comes together, you will see it will
get more and more. Okay, and the next line next
horizontal line is white. I'm putting the white stars. You really don't have to worry too much about how they look. It's the end result comes as a total of the holting when you look at
the whole thing, that it's not about every single square
or these connections. I guess you could say this
also has an emergent property. It works as a whole, like a single element of this painting doesn't
have this effect, but as a whole, it looks like
it's bending under water. Next one is black, because it's black and it's
going horizontally black. Last time I was talking
about the TV shows, and another one came to my mind, but I would recommend, and I think probably
is one of the if not the best TV show out there is you guessed
it Breaking Bad. I actually watched it
quite a long time ago, and now I'm thinking,
it's been long enough. I think I forgot
the plot enough. I could start watching again. Probably it would
be like, new to me. Other than the
general ending and the minor details definitely go so if you haven't watched it, I would definitely recommend. And again, if there are other shows, you
can recommend me. I think for a long time,
we also watched this show. How was it called? It was another criminal
police FBI kind of show. Come on, how was it called?
Person of Interest? No, that's another good
show, underrated show. Probably later on, I will remember what this
show is called and in the I will put right now here.
And that was a good show. Got a bit repetitive,
I think, at the end, and we had to stop watching, but while it lasted,
it was a good one. I definitely recommend you
also make the lines first, and then you don't have
to think about it, then it becomes much more
enjoyable the process. This jatan I bought
from a cheap shop. I don't know if you are on in the club with me.
Stay creative club. Actually, I made this example, then I made a blog post about and this was
also a practice for the acrylic pens I
bought from this cheap shop, and I bought this
from the same shop. I have to say, it is much better than the
ones I bought from a proper art shop that it
is very jelly the gel pen, as the gel pen go, that it
employs a lot of it's on ink, but the material to paint, and it really covers what's underneath.
It's a very good job. Okay, and we finish
the white like that. I mean, it's two rows. Now, some black.
Next one is black. How does it look? For example, when I look at it directly
by myself, I don't see it, but when I look through
the screen of my phone, I can see the effect
is already appearing. I guess it could be
a good practice. Instead of doing this,
like white and black, it could be an option to make exactly the same colors,
connecting them this way. It would also, I think, or paint a thing exactly
this way and maybe even randomize it
a bit to really give this underwater feel. We are, I think,
almost halfway there. This black is down and
next one is white. Really need to be careful a bit. It is easy to mix these up. Like, starting from
the wrong corner and everything would
be ruined a bit. But I'm guessing, if
you randomize this, it might still look okay. Because the white
covers so well, I'm going with the white
much faster than black. Now two rows of black. So in here, what's
left one, two, three, four, Yeah, so we are
almost at half point. This is by the way now in
the evening around 8:00, 28. When I was doing the first
part, it was the morning, and I want to use my
morning in bed by doing part of it and
continuing recording class. But this is how
our Saturdays are after that it was
time for exercise, and it was like, until now, this is the first time I'm able to find for myself, basically. Saturdays are pool day. I take my son to
the swimming lesson and I also swim and until then tidying up and making breakfast and can kitchen,
those kind of things. And then we played a bit. And then it was time to go pool, and then by the
time we came back, he swam, I swam. When we came back,
it was already 4:00. Then it's time for dinner. Then I worked in
the garden a bit. It's now here
September October 3. So winter is coming. Before putting everything away, it's time to oil the
garden furniture. So I've been doing
that recently a lot. Lots of time, a very
time consuming job, but it needs to be done. So finally, after coming home, because it starts getting
dark and I couldn't see where I'm standing
on the furniture. Came in and cleaned the kitchen, and finally after that, I'm here doing some art. This pan also is not doing
very well at the moment. I don't know why. Underneath
is just watercolor. I'm thinking maybe this
horizon blue is opaque and it's getting into
the scraping scraping. See that it's not
now it's better. That maybe these fine particles inside that they are
getting in the nip. I'm not sure. Is the theory. Yeah. After doing
on the scrap paper, it feels a bit better
maybe every now and then I should just clean
the nip like that. Okay, we've completed two rows two diagonal rows of black, and now back to white. I kind of with the span, like I was saying, it's
not very fine, very thin. I settle down kind of a diamond shape I'm
doing like this, and I think this
is working well. It is a bit too thick to
make this star shape. Yeah, I think this works pretty
well, the diamond shape. Now the row is quickly
done, now black. Of course, with one
pen, you could just go weight and then
switch to black, click. But my worry is that what if I after going over with my hand, if I would smatch
something if it's not fully dried by then. Probably, when I finish here
and I'm going to go there, I'm going to go
fresh drawn corners. So that's why, let's clean
the nip a bit and continue. Yeah, I think my theory
makes sense that after cleaning with few lines on the fresh paper,
it works much better. Somehow, the paint
underneath affects the pen. Now really thinking
that how would it look instead of this
black and white, if I just use the clothes
like this ultramarine, use a navy pen and use a very light blue pen
and see what happens. Maybe I will test it later. And these kind of tests, I always share what I'm working on behind the scenes in
stay creative clout. So if over there, you can also be notified
before everyone else. Now we're going to
do white twice. I just thought that I took
a break from this painting, which is essentially
looks like a pool that tiles underwater and
to go to the pool. I studied the pool and
came back basically. October here, but we've
been so lucky with weather lately it was
a T shirt weather, and that's not often in
Warsaw, especially in October. Probably very soon it will get all dark and
gloomy and bleak, so we are trying to enjoy
this lucky unusual weather as much as we can and try not to think about
the global warming. One thing about global warming, if it is really happening, I think four years ago brought a fig tree like a little branch, and I planted it in our garden. The funny thing is,
it's still live. However, whatever is
above the ground, let those parts die
over the winter. It just doesn't survive the cold and freezing
temperatures, even though I cover it. And then every year, I think, okay, this was it. It's dead because
everything starts looming and starts getting green and the victory, nothing. And just when I'm about to
give up from the ground, it starts giving new
leaves and new branches, and just starts growing. And I'm like, Okay, again, it's happening maybe this year. But by now, I learned that every year it comes
back from the death, only to die again, and it gives fruit but it
never gets enough to eat. They just stay like
this size fix. And so maybe one day, if this global warming
thing really happens and the temperature in here turns into closer to how
it is in Turkey, at least I will have one good thing to
look for fresh fix. Of course, for that to happen in order for
that to happen, probably Turkey
will be unlivable if the temperatures shift like that in the same direction. But fresh fix, yes, probably you hear in the
background every now and then. Chatter. My son has a
play date downstairs, and he has a friend over, but I'm guessing it's not really bothering you guys because
they are speaking Polish, so it's just gibberish
for you anyway. At least most of you.
I can't imagine any of you speaks Polish really
unless you are Polish. Please let me know if any of you speak
Polish. I'm curious. I recently got my certificate for B one in Polish.
I took an exam. This was the level I needed to get in order to apply
for citizenship, and now actually passed. I thought that I won, but I did thanks to my teachers hard work. Shout out to Olivia from here. Okay, and you're almost there. One, two, three, four, five, six lines left, and there is getting
shorter and shorter, yes. Of course, the thing
to think about that now we achieve the
underwater effect, and I can see it's already
when I look at it, it's a bit bending
in front of my eyes. I really like it. Okay, switch to Black. If you want to put
something on top of it, like I did in here. Where is it? That in my mind, the
beach ball made sense, since this is a pool. Funny. I never had to clean my tan like that because of
working over watercolors, maybe it's about this
type, this fut nip. Okay, now it's time for
white again, twice. Almost now black
and the last one. And like that, our
effect is complete. This is how we do the water
effect on the two color grid. Especially when I look
through the screen, I can see it's
working very well. And from the distance when
you stand away from it. And also, I noticed this the moment you set
your eye somewhere, the effect stops working. But if you like, especially when you are
looking from place to place, all of a sudden, you gaze over this and you are like, Whoa, what's
happening there? And it's working right now. I'm like, rocking back and forth and looking
at the painting. And when I look at the center, I see effect mostly
happening around it. Really cool. I hope you learned. And as I guessed, I want to do this
with watercolor so that it wouldn't be the
same color everywhere. There's variations, and I think that works for this
kind of project, that it only helps the effect. Towards the end, I
switched to this, like I said, diamond shape. I think it worked better
with the pens I have. I like this more. I think I would recommend you doing like this,
the whole thing. So this is the two to
one, black and white. The pattern gives you this
kind of warping effect. I hope you enjoyed I'm
going to stop the video and think if I want to add
something on top of it. This will make the class
longer, but let's see.
7. Final Touches - Let's Add a Swim Ring: Mm. Okay, I decided that I
will make a little swim ring. I don't know how is it called? Is this the name?
I will for that, putting my painting
aside for a moment. And I used to pick
a circle I have, and the small circle
I have in the middle should give me good
enough ratio for this. You know what I mean?
This circular thing. People who doesn't
know how to swim can put around
their waist and so they don't sink, yes. Yeah. And to the I will go
with the usual shape. The middle will be
cut out anyway. So for that, I'm doing
290 degree ones and then another one right in the middle and that one
that one another 90 degrees. So I'm dividing
into eight parts. And this part, I will cut out on the outside
as well, of course. And here I will leave this white as the shine. And if the light is
coming from here, it would be here on the
inside and it would be here on the outside and bigger. Okay. And it will be like
red, white, red, white, red, white, red, white,
and a bit of shading. And hopefully it will give us a nice I'm going to use
this brush pen for this. This is not the main
focus of the class, so I'm doing this quickly
without much care, okay? I think by now, you can you
have an idea what I'm doing. Yes. So because it has a curve shape that it will
be darker in these parts. So I'm adding another layer of this vibrant red. Okay. And of course, the white parts
also have for that, I'm just going to
use the pencil. You see the shape is appearing? I think by now you
know what I'm making. And you can always plant those with your finger. And like that, I think we have a pretty good looking Swimmering. I did had to look for the
how it's called in English. Yeah, in English. I'm just like one thing
drew my attention that I want to get rid of this
line here on the shiny, because this is basically
under the sun it's shining. You wouldn't see
the line probably. Okay, anything like this. We have it now. I
just need to cut it. And with that, now I'm going
to put a bit of one thing. We know that this
ring is this size. And now let's decide together
where this is going to be. Look how much fun
this looks already. Let's say it's gonna be here. It means it will have like shadow somewhere like this, yes. Okay, I will mark
this with this first. I'm marking where the
shadow is going to be now. Okay, so this is the shadow, and then I'm going to
put it over like this. And I don't know if the
shadow is going to be here, the sun should be
hitting from here, so the highlights on the swim
ring should face him here. So in the meantime,
let's put this side. I decided to go with the
because it looks really nice on the on the ring itself, I decided I will just
go with the pencil. And if it doesn't
work, I don't know. Well, I'll see that I can
always paint over it. But part of me likes
that it's pencil. Okay, and I will put
a bit of a tape. I just took a piece of tape, twist it over itself,
so it's double sided. Nothing fancy. Now as you can
see, you can see the cut, and I have all the parts run above that maybe it
should be closer like this. A bit up. I think like this, it
looks pretty cool. That's this swim ring is
floating over the water. I think this adds a bit of
an interest to the painting, like something for
eyes to look at, which is good because
then the rest seems like it's bending. Yeah. So this was
it for this story. I hope you enjoyed
it idly. Enjoy this. Um optical illusion and creating it and
seeing it for myself. Have it works, and hope
to see your creations. I will see you as usual on
the conclusion with you. Bye.
8. Conclusion - It was fun! : H. Thank you for joining me
and Jack for this class. I hope you enjoyed the process, and I hope you made
your own paintings too. For me, this was an experiment. I saw something interesting and I wanted to see how
it works for myself. I guess my advice
to you would be, it's good to try something new and test it for yourself
if you don't like it. And also doing and
putting your hands on it, lets you see how things work, and that's always useful and helpful information
for your art journey. So I hope when you see something
like this in the future, you will jump in and
try it for yourself. If you would like some
guidance, always let me know. Tell me, can you make
a tutorial on this, and I would be happy
to help you out. So I hope you
enjoyed this class, and I will see you
on the next one. And as I always say, until
next time, stay creative. I will see you. Where will see? Where will I see them, Jack? Next. What's our schedule like? I will see No, I will see you here, wherever
you are watching me from. I will see you on Instagram, on Skillshare on
Stay Creative Cloud. Wherever you find me,
I'll see you there. What's that? What
does that mean? Really? I don't know.
Jack, what was my line? I'm looking for, again, I'm looking forward to
seeing your paintings, and I'm looking forward
to seeing your paintings. Please, if there is a
place to leave a review, share your paintings with me. And let's try it. Please leave a review. Don't forget to follow me wherever you find
the follow button. And even more
important than that, don't forget to leave a review. Reviews are very
important for me. And after you left your review, Go ahead and share
your paintings because that's the
favorite part of my job. I'm looking forward
to seeing your paintings wherever
it's possible. If you can't find the place,
just send me an email. Like anything works. Just show them to me. Check, anything else, follow me. We me, share your
paintings with me. And as always, until next
time, stay creative. Bye.
 Fatih (fab) Mistacoglu, watercolor storyteller