Let's Make a Luminary Box
 LaVonne, Artist, Illustrator
Watch this class and thousands more
Watch this class and thousands more
Lessons in This Class
-
-
1.
Let's Make a Luminary Box - Introduction
0:39
-
2.
Materials Needed
0:49
-
3.
Luminary Front Panel
4:02
-
4.
Inside Back Panel
2:17
-
5.
Side Panels
1:20
-
6.
Top Panel
0:35
-
7.
Assembly
1:33
-
8.
Inserts
1:10
-
9.
Assignment
0:45
-
-
- --
- Beginner level
- Intermediate level
- Advanced level
- All levels
Community Generated
The level is determined by a majority opinion of students who have reviewed this class. The teacher's recommendation is shown until at least 5 student responses are collected.
7
Students
1
Project
About This Class
Welcome to Let’s Make a Luminary Box!
Have you ever wanted to bring a warm, glowing touch of creativity into your home? In this class, we’ll create beautiful handmade luminary boxes—artful, light-filled creations that transform any space into something magical.
Using simple materials and your own imagination, you’ll learn step by step how to design, decorate, and assemble your very own luminary box from start to finish. Whether you’re a beginner or a seasoned artist, this project is approachable, fun, and deeply rewarding.
✨ In this class you’ll learn:
- How to design and assemble your luminary box
- Decorating techniques to personalize your design
- How to assemble your box so it’s sturdy and luminous
- Creative ways to display and use your luminary boxes in your home
By the end, you’ll have a glowing piece of handmade art that reflects your unique style and spirit. These boxes also make wonderful gifts, altar accents, or cozy home décor.
So, gather your supplies, get ready to explore your creativity, and let’s make a luminary box together!
Meet Your Teacher

Hello, I'm LaVonne. I have been drawing since I was very young. I love creating things - drawing, painting, sculpting - as long as I am creating something, I feel content.
I have worked as a Graphic Designer as well as an Art Director at an advertising agency. I look forward to sharing my knowledge on Skillshare!
Some of my favorite mediums to work with are ink pen, colored pencils, pastel pencils and Procreate app on my iPad.
See full profileHands-on Class Project
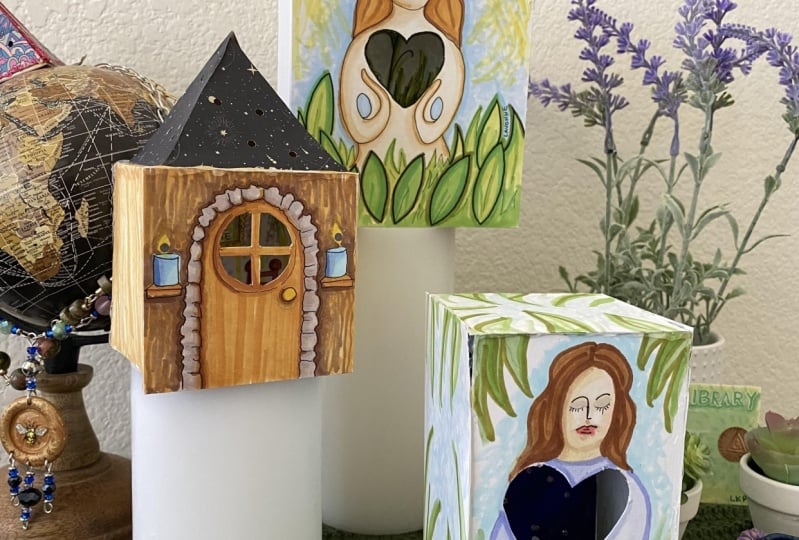
Project: Create Your Own Luminary Box
In this project, you’ll design and build a handmade luminary box that glows beautifully when placed over a battery operated candle or LED light. (Do NOT use candles that have actual flames for this project!) The boxes you see in the photo are examples—but your box will be uniquely your own!
This is a creative, hands-on project that combines art, design, and a little bit of construction. You’ll start with flat pieces of paper, sketch and decorate your design, and assemble it into a glowing 3D box. Once finished, your luminary will bring a warm, artistic touch to your home—or make a wonderful gift.
Materials Needed
-
Pencil (with eraser) – for sketching your design
-
Paper – card stock or Bristol board works best for sturdiness
-
Ruler – to measure and create clean edges
-
Glue or tape – for assembling your box
-
Scissors – for cutting out the main box walls
-
Utility knife – for detail cuts or windows
-
Markers, colored pencils, or paint – to bring your design to life
-
Optional embellishments – glitter glue, rhinestones, or anything that adds a magical finishing touch
Your finished luminary will be a personal piece of glowing art—something that reflects your creativity and imagination.
Class Ratings
Why Join Skillshare?
Take award-winning Skillshare Original Classes
Each class has short lessons, hands-on projects
Your membership supports Skillshare teachers
Learn From Anywhere
Take classes on the go with the Skillshare app. Stream or download to watch on the plane, the subway, or wherever you learn best.