Transcripts
1. 1. Introduction to the Course: Hey, there. First off, welcome to the show.
Welcome to the course. If you know me,
then you know this is how I always start my videos, and right about now, I'd
be jumping right into it. However, this is a
bit different because you're about to go through
an entire course with me, Shannon, an Adobe
certified associate. We can go more in depth.
You can take quizzes. You can chat with me and
message me directly, and you can chat with others in the Q&A that are
enrolled in the course. You will also be
able to practice your skills along the way, as I give you all
downloadable project files that I use in this course. Be sure to do that first.
If you don't know me, Then, hey, I'm Shannon. I've been practicing video, digital media and making short films since I was
back in high school. Okay. I know I'm not that old, but you get the point. And I say practicing
because like you, I'm always learning something new and new and
creative techniques and ideas with video are popping up literally every day,
especially today with all that's out there.
I'm going to teach you the basics to get started in Adobe Premiere Pro,
if you're a beginner. Let's say you're starting
a YouTube channel, or you work in digital
marketing and want to spice up your content
with some video stuff. Or maybe you're just
here because you want to edit videos of your cat. Whatever you're here for, I'm giving you a big thank you for your support and choosing me to help you grow your
skills along the way. So, let's get started.
2. 2. Linear vs. Non-Linear Editing: Before we jump right
into the software, it's important to start off with some background of the
art of editing itself. Today, we can produce video content in
pretty much seconds. Just look at TikTok
for an example. It's a free app with a built in video editor right
on your phone. The same applies to any
video editing platform today like Adobe Premiere,
Final Cut, Avid. Which are forms of non
linear editing software. It takes digital files. You splice them, you cut them, you move them all around the timeline because
it's non linear. You can add effects, and
if you make a mistake, we can just simply undo it. We don't have to
worry about cutting the wrong piece of an
actual film strip. So non linear editing
is non destructive, but we still call it and it's right as an art form,
filmmaking or filming. So you guessed it, linear editing is
for physical film. Let's take a brief look back at the transition from linear
to non linear editing. The first cuts were made in
the 1900s on editing tables. We've all heard of silent films. Well, not really heard, I guess, they're silent. So what a film
actually is is just multiple photos being
taken and running through at various speeds,
which creates motion. So really, film is photography
in its most simple form, which is why cinematography
is so important to capture and bring feeling
to a story through motion. Film was physically cut. If you've ever heard the saying on the cutting room floor, it's because film was spliced, taped together, and the pieces
that didn't make it into the film were actually left
on the cutting room floor. Computers for editing were
introduced in the 1970s, which required disk drives the size of washing
machines. It's crazy. So because of this,
it was very hard for the average everyday person or indie filmmaker to
actually have this luxury. It wasn't until the late
80s that software like Avid and Adobe Premiere
was created to edit video. From the late 2000s to now, digital cameras and
digital editing is what dominates the
industry and is ultimately why so many
beginners can enter this profession or even
just learn it as a hobby, like we are right now. However, it's interesting
how we are always trying to go for that
cinematic film look, and that is how
technology transformed the way we edit and we
will continue to edit.
3. 3. Managing Project Files: Media management is essential, and it is a critical first
step in the editing process. I'll show you how I organize my files and what my file
management workflow looks like so that I always have access
to all of my files in one place that is organized
while ingesting and logging. This also allows premier to find your files for your
project very easily. Let me show you what happens
if you do not organize, manage, and name your
assets properly. For example, I have my
videos mixed in with pictures in my downloads folder that are named with crazy
number and letter strings. Then I have my project folder with some of the other
pictures in the music. So my premiere project
is on my desktop. Let's say, before I open
my premiere project, I move a few of these
files to another folder. When I open my project, I get the dreaded
media offline slide. This means that Premier
does not know where your files are stored
because you moved them. You can try to
locate these files, but imagine if you
have hundreds in all different places and you're working on a
really big project, you don't want to be
doing this every time. This just makes for a
horrible editing experience, and it's just not best practice. Now, let's start over
with a clean slate. I always keep my files stored on my solid state drive
or a hard drive on my computer when I'm
working on a project. I like to store them on
an external hard drive because if I travel or I like to edit on site while I'm taking a break from production, I like to do this,
so they're all on my hard drive, and I
know where they are. But for optimal delivery
and rendering and premiere, it's always always recommended that you use a
solid state drive. So let's create a new folder for this project we'll be working
on throughout this course, which is the forever
Energy vitamin advertisement 22nd
spot for a commercial. My premiere project and files will live inside
of this folder, so I can access
everything in one place. Let's create a few other
folders to separate our assets based off
of their file types. We'll have a footage folder
to place all of our videos. If we have multiple
camera angles, I'd label them such as camera A, camera B, camera C. I will also name my footage getting
as specific as possible. So maybe we have this
footage of trees. I'm going to name
this wide shot trees instead of whatever
this number string is. So I get very specific. I actually name my shots
for what they are. So I have an easier
time finding them in premiere later.
Same with images. We'll make an images
folder to hold any JPEGs or pangs,
like the logo. If we really wanted
to get crazy, if we had logos that were
animated and after effects, if we had multiple
versions of them, we can create a separate
folder called logos. That's just if we had a
ton of different ones. Trust me, my folders
get pretty crazy, and I have to stay as
organized as possible, especially with large,
large projects. Next, we will create
a voiceover tracks folder along with a
music tracks folder. So being specific will help
for a smoother time editing. If you just put everything
into an audio folder, I've learned that for
smaller projects, yeah, get away with it. But for much larger projects, it's better to be as
specific as possible. Now, all of our project files are nicely organized
and named properly. We can save a lot of time
this way instead of rummaging around and experiencing
the dreaded media offline. For the final task
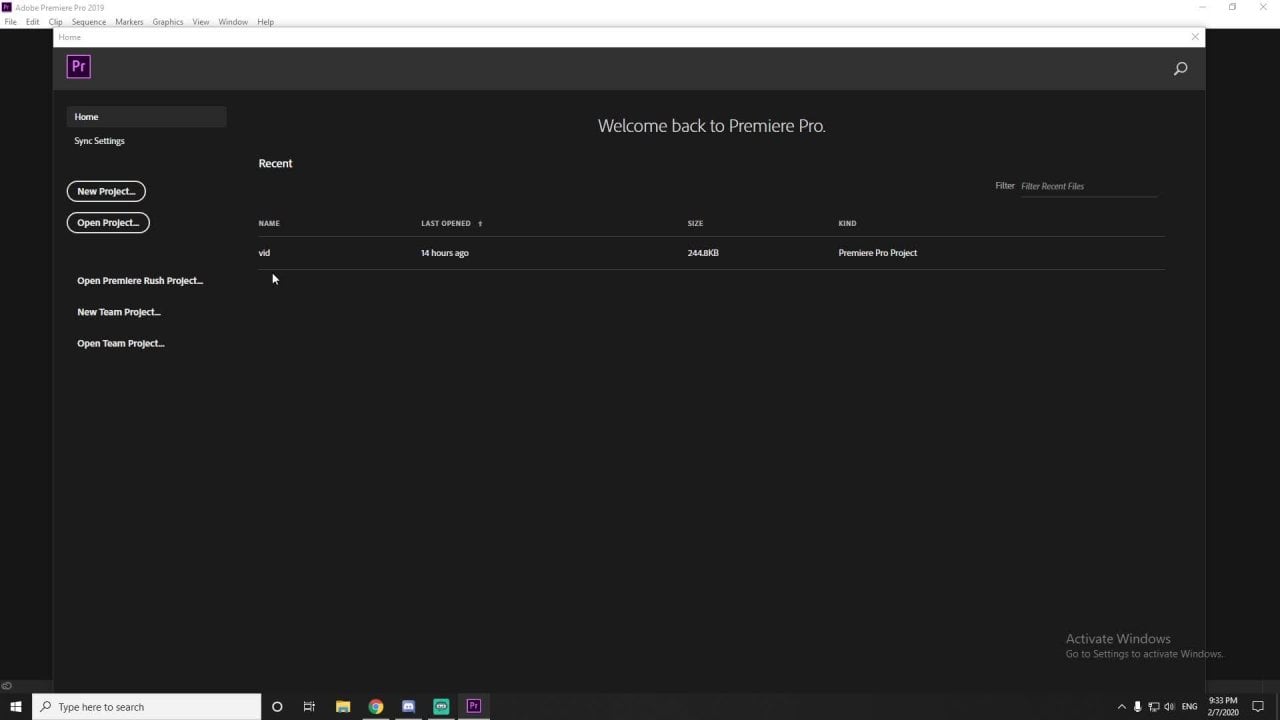
of this module, let's create our premiere
pro project that will live within this main project
folder. Open Premiere Pro. Name this project Vitamin
commercial project, vitamin advertisement, sample
project, whatever you like. Browse for the file location, which our video
commercial folder is in. And once we save and
close our project, we will know exactly where to find it within our main folder, along with all of our assets. So everything is coupled
nicely together. Okay.
4. 4. Importing: Now that we've organized
all of our files, we can import our
media into Premiere. There are multiple ways of importing media in the software. And it's really your personal preference with what
you like to do. So this is what I
love about editing is that in Premiere or probably
final cuts or Avid. I haven't had much
experience with those as I do with premiere. But there are multiple
ways of doing things. So you're going to find your own personal editing
style, which I love. That's what makes editing so great is because you
can make it your own. So I'm going to show you a lot of the methods that are
used for importing, there's methods for exporting, which I'll get into
later in the course, but these are the methods
that you can use, and I'll show you the one
that I prefer to use. There is the dragon drop method. So we just drag and drop our folders into
the project panel, and this turns our
folders into bins. So instead of folders, premier calls them bins. That's just important to know
the terminology of that. So you don't get confused. Another way is to double
click on the project panel, and it brings up your file
explorer or your finder, if you have a MAC to
select the files. So you can multi select by highlighting everything
and clicking in ports, and it brings them in for you. I like to use a variation
of both of these methods, so I use the dragon drop
sometimes if I have my file expler already
up on my second screen. And I also like to double
click on the project panel. So you can also use your
keyboard shortcuts. So Control or Command on a Mac brings up
your file explore. It's really quick. So say
you open up premiere, Control I, you can
already start importing. You can use what I like to call the old fashioned way
of going up to file, going down to import, and selecting your media. So it's essentially a three step process
instead of just hitting control eye or
double clicking on the project panel. It's
a little bit longer. But if you prefer
to use that method, please go ahead and do so whatever you are
comfortable with. You can also use what's called the media browser to browse your entire
computer for files. But we don't have to
do this often because we've already organized all of our files into one nice folder, and we separated them out. They're all right
there. So we really I don't find myself using this as much as maybe some other people, but there is a way to do that. So there are a ton
of ways to import, play around, see what feels right for you
and your workflow. I think if you're using
premiere a lot more, you're going to see it
comes organically to you, what you prefer to use. I like the dragon drop a lot. I also use my
keyboard shortcuts. But whatever method you use, your files are now
organized within Premiere, within bins, and you can start accessing and piecing
together your footage.
5. 5. Interface: Next, let's take a look at the entire Adobe
Premiere interface, what each panel means and a
brief overview of the tools. We'll get into using
the tools more in depth while we are
editing our project. Since we now imported our footage and assets
to the project monitor, if we click on a clip, it will pop up in our source monitor. The source monitor is your
raw unedited footage. It's good to use as
a reference and to mark and trim the parts of
your clip that you'd like. Once you drag and drop your selected file
over to the timeline, It shows up in the
program monitor. The program monitor shows the edited footage that's put
together in the timeline, along with any effects, titles, and transitions
that you've added. Next to the timeline, are the editing tools such
as ripple delete, rolling edit, rate stretch? We're getting into
the weeds here. I don't want to go too far yet, or I don't want to get
into any advanced tools, but we'll be using
some of those. In essence, the timeline and the program monitor
are connected. All of these panels can
be moved and shifted around to create your own
customized workspace. We will leave them as the
default editing workspace for the purposes of
this 101 course. The timeline is where a
lot of the magic happens. It is separated out into video
tracks and audio tracks. If I place just an audio
clip inside of the timeline, it would only show as an audio track because no
video is associated with it. The first clip I place inside of the timeline creates a
sequence from that clip. You can see this sequence
is named working. I can rename this
sequence if I wanted, especially if I'm working on a 30 minute documentary video and have three to ten sequences. I'm working inside
of my main sequence. We'll cover more about
sequences later. I can scrub through
my timeline with the CTI or the current
time indicator, which shows what the audience will see in the program monitor. I can add effects to any clip in the timeline by going
to my effects panel. Maybe I'll type in
black and white, for example, and shift those settings into the
effects control panel. The effects panel is where
you find the effects, and the effects
control panel is where you Tara control the effect. In the same way, we
can apply transitions. A transition happens either
at the beginning or at the end or at both ends
of a clip, like a fade. So let's search for a dissolve. Cross dissolve and transitions, apply it to the beginning of
this clip and to the end. And now my clip has
a dissolve on it. It's fun to play around with
these look through the menus and see all the kinds of effects and transitions
you can use. Premier is also a great tool for simple titles
and motion graphics. I would say that Adobe
After effects is better for more advanced
intricate motion graphics. Like a logo that has
multiple layers to it. So but to add titles and shapes
is very easy in premiere. So let's place our
current time indicator where we want a title to appear. And we will select
our type tool. In our effect control
panel, again, we can change the font, the size, the color,
the motion, everything. We can even animate this title
with certain effects and transitions. That's
a lot to remember. I know, but the best way to learn how to edit is
to dive right in and actually use the tools
and see them in action and really work
that muscle memory because the more you do this, the easier and
faster it becomes. So you could read tons and tons of
literature on how to edit. But you're really not
going to understand the process until you get right in there. So
don't be afraid. You might be slow at
first, but I promise you, it becomes easier, it becomes faster with a lot
of practice. Okay.
6. 6. Building & Trimming: So here we get into the actual build and
edit of the project, you can follow along
as I'll be explaining the tools as I go
or you can play around and experiment
with the footage or do something a bit more
advanced if you feel like it. Okay. So I have all of my
folders that we imported. I have a list view here. It's just easier for me. But if you wanted to change
this to a card view, You just go right down here
and select the card view. It brings up folders and bins. A sequences you have,
any text nested. I have some nested
sequences here, which I'll be going over, but I like to use the list view. I actually like to vary between the list view and the card view. So I'll be using the list view. So let's take a look. I have a working
sequence right here. I also have my
finished 22nd spot of the advertisement here. So this is essentially
what we will be creating in this course. This is it right here. I wish I could just, you know, copy and paste everything right here so that you
know it's totally done. But we will actually build maybe I'll go with a little bit something
different than this. If you've watched
the promo video or the download file
with this in it, this is what we
will be creating. You work hard to be healthy. You work hard for your body. Now, there's a vitamin that
will work hard for you. Maybe not for your dog, but your dog does love treats. And so do you. Forever energy, the vitamin that keeps
you going. All right. So it's simple enough. It's a really great way
to start off editing. It's an easier build. There's not too much going on. You could see we have
our music track, our voice over track
here on A one, our footage here on V one, and any adjustment layers that we have such as
color correction. We also have our
green screen Dago. That's my favorite. I try to
make it fun for you guys. All right. So I have a
working sequence here. And I use sequences a
lot and you should use sequences a lot if you're
doing a larger video project. To make a new sequence
really really easy. Just go up to file new sequence. The default is usually based off of what your previous
sequence is on, I'm AVHD ten eight P
because that's my footage, my frame rate is 30
frames per second. And you see you can
name your sequence, so I can name I
have a working one. Let's name this sample. Okay. And you see it comes right up next to my other
sequences here. It's also in my project panel over here so I could
actually just x this out. Okay. But we won't be
working from that. If you wanted to, you can make a separate sequence
for yourself. So I'm going to be working
from my working sequence. I know that I like to start
out with my audio tracks. So I'm going to place
in my music track. Audio Track two because I like my voiceover organized
in audio track one. So I'm just going
to drag and drop, place my voiceover
track right here, and we see that we have
our audio together. So let's just give that a play. Okay, you can see that
our audio is not mixed. The music track is totally
overpowering the voiceover. It's almost clipping at
negative 3 decibels. It's almost to zero a gover
clipping right now, I guess. So when your audio volume Let's just put our audio
volume at 6 decibels. Wow. You're going to get
that crazy clipping. You're in the red right here.
We never want to do that. It's always rule of
thumb for audio to be in between negative six and
negative 12 decibels. This is your sweet
spot right here. So I'm going to put
that back down to zero. You know, maybe I'll
actually tone it down a bit negative five. I want. Now, Okay. Good thing to do. I want to
build from the voiceover. So if I want to shut
off my music track, all I have to do is come over here and select the mute button. You work hard to be healthy. Boom, it just mutes the track. I can focus on the voiceover and matching that voice
over to the footage. All right. So let's go to our Footage. And I know I want to start with the jogger hands
on ground medium shot. If I double click this,
it's going to show up in my source monitor. Within my source monitor, I can select where I
want this clip cut. I work this way.
This is my style. Some people just like to place the whole clip right here
and trim it this way. So I like to actually trim my clips right within the source monitor and drag
them over to the timeline. So What I want to start with is, I see her shoe here, if I drag the time
indicator over in the source monitor and her
hands start right about there. I want a lead time here. This is where the arts of
editing comes in. You want. We don't want to
start with her hands here and then go all the way because it's like, we're
waiting for something. We really want the start of the action and the
end of the action. I can start my clip
and I can mark it in right here with these brackets and
say I want it to end, I can mark it out
with the mark out. And when I go and drag
this over to my timeline, this is already clipped for me. You work hard to be healthy. Okay. So that's
where you work hard. So I want the saying
you work hard. You work hard. Okay. So I want that to end where the
next clip is going to begin. To be healthy. So to be healthy is going
to be a next clip. So this is how my style is I use the footage with the voice
over to create a story. So I mean, you can. You don't necessarily
want it to be. So and then, say we had
another clip in here. I'll show you this
one. You work hard. I mean, you can, but it's it's really
the feel of the video. So let's just say
I had her running. I have the jogging. You heard to be healthy. So I have to be hard. And then I have to be healthy. Over here. You work hard
to be healthy. Okay. So say she's running from there. So I like to split
up my clips based on the voice over
in the messaging. Okay. So I'm going to zoom in to zoom in or
Zoom out on your timeline, you could hit the plus
sign or the minus sign, so that zooms in, zooms out. I'm just going to zoom in
a bit here and I'm going to trim this audio right
to where it starts. Okay. So when I trim in and out, I'm just hovering over
the clip I want and I see this red arrow,
I could trim in. I wanted to trim off
the p in the beginning. And if I right click, in this empty space, it'll say ripple delete. I use this a lot. So if I ripple delete
it, it brings it, it matches it up to the
beginning of the timeline or the next clip in the
sequence if it was a video. Okay. So we have a two here. I'm just going to trim
this a little bit. And this is just how I work. I'm very, very
specific and an arms to that some editors
build everything, so some editors would put all
their footage within here. And just keep going and
edit right from here. I like to be I mean, maybe it is a slower
version of editing, but I prefer it. I like to build as I go. So I like to start. I like to do my end, so I'm
going to do my beginning. I'm going to do my end, and then I kind of fill in in between what the stuff I want, my hands on ground is
going to be the beginning. You work hard to be. Okay. You work hard and
the two ends right here. You work hard to be healthy. So we're going to go
with the next clip. And the next clip that I do
have is her jogging away. So if I click on Jogger
running wide shot, I will see the jogger
running towards me, but I actually want
her running away. So we have a little
lead time in here with our shots and our production,
and she's running. Maybe I want her running a little bit away
from the camera. So maybe I want her to start
right here with her arm out. I'm going to mark that in.
I'm going to play that. Okay. And that's enough time
to show that she's running, and I just drag it right into my timeline and my sequence. So let's see how that plays out. You work hard to be healthy. Perfect. You work
hard to be healthy. And before the voice over
starts, another you work hard. You work hard for your body. So you work hard for your
body is where I'm going to start a different clip. So
you see where this is going. You work hard to be
healthy. Yoga pose. And I'm going to see where
I want since this is a little bit longer lead
time I'm going to do. Maybe I'm going to
reverse this clip because she starts off here
and she ends the pose. I could actually reverse this
to make it look like this. I think that's what
I'm going to do. I'm going to take it
from here, I'm going to mark it in and I'm going to take it from when she's not
posing the whole way. I'm going to drag and
drop this So we can reverse this clip
because I don't like how she starts up here
and I want to start out here. So all we do is right
click on this clip, and we select speed
and duration, which is really, really cool. So I can actually speed
up clips so I can make this 2000 and it'll totally
speed up this clip. So you could actually
do Slomo is how you do Slom the keyboard shortcut for speed and duration is
control, Command R and a MAC. It brings up the clip
speed duration box. With this, I'm going to
keep the speed the same. And I'm going to reverse
the speed and hit. So here we have her. You work hard for your body. Starting now that pose Love it. You could also use
the ripple edit tool. So when I click these
two double arrows for the ripple edit tool, it brings up the slash
sign with the two arrows. So I can actually trim this in, and we see that she's right
within the action here. I want to right there. I let go, and it does it
ripple deletes for me. If I didn't use the
ripple edit tool, Okay. Let me go back. Okay. So if I didn't use
the ripple edit tool, I just use my selection tool,
and I just went like this. It doesn't ripple for me. It doesn't close off the gap. Okay. So there's a little bit
of a gap in our voiceover. So what I want to
do is I actually want to cut this gap out. So what I'm going to do is hover over where I
want it to begin, and I'm going to hit Control K. Control K splits your clips. I use this keyboard
shortcut probably the most because it's super fast instead of right
clicking and hitting cut. So that's what we could do here, and then I'm going to
use my ripple edit tool to close that gap in and see
it close it right in for me. Let's hear that Body now. Okay. I kind of close
off a little too soon. We'll. Now. You work
hard for your body now. Like that. See, it's all about
just trial and error. Now. Body now. I like that. We're just going to use
that ripple edit tool. Slide this over, slide this up. It goes back. As you can see, the ripple edit tool is very, very helpful because
I don't have to close any gaps manually for me. There's a vitamin. Okay.
I want more of that. I want to extend that Now, there's a vitamin
that will work hard. And then at for, I
want the clips to end, and that's where
I'm going to begin my titling and motion graphics, which I will get into
in the titling section. So that's where my
f is going to go? Maybe not for your dog. The dogs going to also
go over this footage. Your dog does love
treats, and so do you. And so motion graphic is
also going to go over this. So this is what we have
at this part here. For you. Maybe not for your dog, but your dog does love
treats. And so do you. So you can see that.
So that is the end, which is where I
want the logo to go. So we'll do our end next. If we go into our images folder, You'll see I have the
forever Energy logo. So I'll put that up here. And it's on a black background because it's a PNG,
it's transparent. But I want this to have
a white background with sort of a nice
gradient ramp on it, just like the one that's here. It's modern, it's
subtle, it's clean. So I'm just going to
trim that to the end. Maybe the music will
kind of go over there. So what's really
cool about premier you can layer everything. I do need a color mat
underneath this logo. To make a color mat
is really simple. All you go to is new item. It's this little
looking page icon here, and you just go to color mat. We'll also be using
adjustment layers. You can also make a new
sequence from here. But I just want to
choose color mat and it'll be the same
size as my footage. I want this to be white. So you can choose any color you want, which is really nice. I'll just name this white And I'll just drag
that over just like any other type of footage. But I will scale this logo down. It's not centered
and it's too big. I don't like it. So we're
going to use our safe margins. Safe margins, I will also talk about in the title and
motion graphics module. Safe margins is amazing. It allows you to center
your footage and it allows you to not
have your footage be cut off from the screen. So if I go ahead and click on
this safe margins box here, it brings up safe margins. If you don't have
this in your toolbar, just go to this plus sign in your program monitor right here, and you'll see all
the different options for the tool bar and your program monitor hit
safe margins and hit. And when that brings up
the safe margins box, you'll see these lines here. I'm going to come up here to
my effect controls panel, and I'll go over the difference between effects and
effects controls. And I could scale any
image, any video, any type of asset,
I can scale it up, I could scale it down, really
cool things like that. I'm going to put it at maybe
that's a little too big. I want a little bit more subtle. Maybe like 70. That's nice. And then I'm going to center it. So our position are x and y
coordinates of the screen. So I'm moving my y coordinates because your x is
left and right. Premiere brings in a
lot of math into this. So if you didn't like
math in high school, I didn't like math
in high school, but working in premiere
and after effects really really helped me
understand a coordinate plane, especially if you're working
in three D with the Z plane, So you have your x and
your y coordinates, and I'm just going to center this right in the middle here. Turn off my safe margins. That looks nice. So what I mentioned
was animation, and you could animate
anything in premiere. You can animate titles,
images, video, anything. A really, really simple
animation I could do for this logo is scale. So I could start off at 70. And if I hit this little
clock timer icon. It makes a keyframe. A key frame is a start position to
a finished position. If I want to head and move
my current time indicator, and I made the second
key frame 100. It got bigger, but you will see the key frames the
create that animation. There animation points. Energy. The vitamin
that keeps you going. You can play around with this
forever, forever, energy, you'll need some Forever can it by moving them
closer together. Energy. Vi. It makes it faster by moving them further apart, it's ation. Keeps you going. So if I ended up keeping
that keeps you going. Amin that keeps you going. Boom. So I don't want
any animation here, so I'm just going to highlight all these keyframes
and delete them. You can also key
from the position. You can rotate it, so I
can move this all around. It gets pretty freaking crazy. That is how you move
this back to zero. That is how you would
animate anything in premier we'll get a little bit more into that with the
motion graphics segment. Okay. The last thing that I do want to do is fix the
music track a little bit. I'm going to open up a
new tool in premiere. Just go to Window. And
hit essential sound. And this brings
the most popular, most used easy tools from
audition to premiere, and it's so amazing. It's so helpful. I love it. I use
it all the time. So we can mark our track, so I can mark this as dialogue, which I'm going to,
Mark these as dialogue. Should I do that
first. Sorry, guys. But mark your tracks, and we'll mark our
music track as music. And with that, we can apply
a ducking against it. So what ducking is is when
someone is talking in a video, doing a voice over, the
background music gets lower, so that we're able to
hear the person speaking. And when they're not speaking, the music kind goes higher. We used to have to
do this keyframe by key frame, like
I just mentioned, so you know, animating the volume level that
got so annoying. So now there's an
automatic ducking feature that's really cool
that we will use. So I'm going to
unmute our audio, our music track audio. It's really loud. I'm
going to bring down the clip volume level to about. I don't I like rounded numbers. Hard for your body.
Now, there's a vital. Negative 20 times about
right. It's a loud track. Okay. So what we can do with this background music is
actually have it to be balanced. So we can balance it
against the dialogue. We want to click on Ducking We're ducking
against the dialogue. So the duck amount. Let me just change
it to negative five negative 18 was
like, Wait do crazy. So let's generate key frames. Chris for you. Maybe not for your dog. So that was way more subtle.
It wasn't like, Whoa. It wasn't super loud,
so hard to be healthy. You work hard for your body. Now, there's a vitamin that
will work hard for you. Maybe not for your dog, but your dog does love trees. And so do you forever energy, the vitamin that keeps
you going. Okay. I really like that.
I really like how the audio of the music
track gets a little bit louder as the voice over
ends. I like that a lot. We have our base built. This is considered
a good first draft. Once we have our dog here
and our motion graphics, I would consider this a good
first draft to show someone. I think we are set to
go for the next steps.
7. 7. Applying Effects & Transitions: All right. Now we can
apply some effects and transitions to spice this video up a bit, not make it so blah. This is where the art
form of editing comes in. We've been doing the art of
editing this whole time, trying to feel where the
music goes to the voice over, to match the clips up with it. It's really about
the feel and it's about playing it
over and over again, seeing what feels right,
trying different things. Yeah, it is definitely
an art form. So this is an important
part of editing, and I keep saying everything is an important part of
editing because it is. I mean, if you have
a crappy audio, it's not going to
be well received, if you have crappy footage, it's not going to
be well received. So everything pretty
much ties together, and especially effects and transitions because it helps tell the story and
bring it all together. I could really really mess up the mood and the feel
of the video story, such as the color correction, the color grading, certain
effects that are applied. For example, this project
is light and fun, a bit fast paced, so we want the effects and transitions
to enhance those feelings. The color comes
into it, the speed, the fades, the choice
to have no fades. Take Twilight for an example. Sorry to those who
like Twilight watching But the color grading in that movie just
screams blue filter. There's blue filter everywhere. We need this to look cold, and we need this to look sad. So we just stick on a
blue blinding filter. And when I first saw
this movie, I'm like, Why is every scene blue? Why are the outside scenes
blue during the day? Why are the inside scenes,
like, really desaturated? And it conveys that
feeling to me. It conveys cold and kind of desolate and desperate and sad. Kind of like how
Bella is the whole. The home movie, but this
isn't a film critique. I think they overdid it because
it's kind of like whoa, it's screaming.
We get the point. So in this video, you know, we could still keep the
light, fun, airy feeling. See how some of these
clips are dark. We could probably brighten them. We can increase the greens
and the blues and the sky and the grass and the
trees to keep it, you know, really, really
light and bright. Now to effects and transitions. So I might do something
differently here. I might not keep it
the same as this. We do have one transition here. Forever energy. Of a wipe. Okay. So there's a difference between transitions and effects. A effect, if I open my
effects panel here, an effect will go over
the whole clip. Now that. When a transition is applied, it can only be applied to
the beginning and the end, and I'll show you. So an effect. Let's go to video effects, and we'll just do a
distort just to be fun, and we'll do a mirror
on this jog clip. Reflection. We'll
move this around. I don't know. We'll just do
something goofy like that. You can see it's applied
to the whole thing, and it makes it so
weird, just delete that. If we did a transition, so if we opened up
our video transitions and we did a dissolve, let's choose cross dissolve. We can only put it on the beginning and the
end of these clips. We'll do it at the beginning. You work hard. So it fades in.
That's not too bad. But it can only go on the
beginning and the end. So if we did like a What's
a page peel Something fun. You could play
around with these. It transitions these
clips together. So you see it's on
the end of this clip, the beginning of this
clip. So if we do that. You work hard? It peels the page.
So transitions are in between clips at the
beginnings and the ends, and effects are on top
of the entire clip. To be Ooh. I like that. I never even used that before. See, you find things
that you don't even use. To be health. And I want
that to happen a little bit longer to be healthy. Cool. I like that. Let's see it on
the rest of these. To be healthy. You work
hard for your body. Now, that's cool. Okay. When these transitions are
starting, you can move them. So I can move it more towards the end of this clip or more towards the beginning
of this clip. To be healthy. You work
hard for your body. Now. That's kind of cool. Hard to be healthy. You work hard for to be healthy. You work hard for your body. Now, there's a
vitamin that cool. So I'm going to keep these
These cool whips in here. Am that will work hard for you. And we'll just do the same to be that will work hard
for you. Cool. Maybe Not for your dog, but your
dog does love treats. And so do you. Forever energy. Okay. And we could just
keep it like that. So we have these cool
whip transitions here. Hard to be healthy. It works. It's
hard for your bop. I like it. It's cool. I don't have it on the original, but again, see how things
could be different. It could bring a different
vibe to something. But I do want a
transition on my logo. So I just don't want it
to pop up like this. I want it to wipe how
it is in the original. Energy. It's a really
changes the opacity. It does a nice wipe. It's really sleek. So I'm
going to go and you could search for your effects and
transitions if you wanted to, I always do because I
know the names of them. So as you use this more, you'll remember the
names of them so you could search just
a little bit faster. So I'm going to go to wipe. And it's just wipe.
Forever energy. Okay, cool. Forever energy. So I like how forever
energy, the wipe ends. Ever energy. And it
comes full circle. But see how this is kind
really abrasive in your face. Ever energy. I want this to kind of fade
in with the wipe. So what we can do is some key framing an opacity
transition on here. So opacity pretty much
changes the transparency. I think if it like a ghost, so at zero, you're nothing
at 100, you're everything. I guess that was
motivating, I don't know. But we're going to change
the opacity of this. Right at the end of this wipe transition,
I want it to be 100. I'm going to hit
this stopwatch here, at the beginning of the wipe, I want it to be zero. I go all the way down to zero, I could hit zero on my keyboard, hit Enter, and you see it
creates these keyframes for me. With these keyframes, I could actually
highlight all of them and right click and
I could choose Biz. A biser makes it a
little bit smoother. It doesn't just have a
beginning and an end, and this is a little bit more
advanced and after effects, you can actually see a graph of how this motion is happening. Ever energy. Yeah, that works. Forever energy. I'm going to actually
have this come in a little bit faster here. Forever energy. Forever energy. So something with effects
that's cool is we can apply it to each
clip separately. We could do a different effect. Or we can apply it to all them. So color correction
is a type of effect that we can apply to individual clips or that
we can apply to all them. So instead of
copying and pasting all these effects to all
of these individual clips, we can use what's called
an adjustment layer. And adjustment
layers are amazing. I use them all the time, so I don't have to edit single clips, and how we do that is Again, this new item little page icon
here in our project panel, we can select adjustment
layer and we just hit and it brings up an
adjustment layer right here. I can rename this.
If I click, rename. Then we just hit
Color Correction. I already have a color
correction layer for my main advertisement here, but I'll just name this
as color correction one. So that we know which
one we're using. With an adjustment layer. We can put it over
all of these clips. We can put it over
some of these clips. We can put it over the
first clip. We can move it. If we had multiple pieces of
footage on multiple tracks, we could do adjustment layers for those certain clips
on those certain tracks. What I like to use for color correction is
luminary scopes. So we can go to window, and select lumetri scopes. So this brings up and I also
want to bring up try color. So this brings up the
coloring of the clip here. So we see that we have a lot
of brightness down here and that matches with
where the water is reflecting the sunlight. So it's very helpful
if you have, you know, like this one, we could tell it's super dark. This one's pretty even, and
it has a lot of greens in it. So it's very helpful to tell you what your color
adjustment needs to be. I will show you how to do
some basic color correction. Okay. This is a little big for me. You can expand these, move them around.
I do that often. We'll go with our
first one here, which is the hands
on the ground, and we could see we have Um, a lot of brightness
within this area. I definitely want to
increase the exposure. So I'm just going
to go to curves, and I'm going to increase
that brightness. So basic correction, we see
our white balance here. We could change the
temperature, the tint, the exposure, that's really
that's super over exposed. Let's go about here.
Let's check out this one. We need we'll do some shadows. You could get really
granular with this. That's why movies have a colors for the
whole entire movie, they just color the whole
entire movie because if I wanted to be Twilight, I just changed the
temperature to blue the color correction over the aerial trees
because this is pretty much color
graded right now. See how I could just
move this around and everything could be color graded here. Um,
but you get this. You can play around
with ltrc color. It's really powerful. It
has a lot of stuff in it. Like I said, you could mess
up your clips totally. But it's okay because this is non linear editing.
It's non destructive. You can do that, and
you could always undo it and play around. So the next thing in
the last thing of this module that we need
to do is key out our dog. So our dog is going to be
part of our commercial. And so let's get the
footage up here. So I'll show you how to
key key out the dog. So the dog, obviously, wasn't just filmed on the trees. It was filmed in the studio, and this was used
using Pexels footage. So we have our doggo I'm just
going to trim him up here. I think he's pretty cute. So where does the
dog audio start? Maybe not. Maybe
not for your dog. So he starts about here. Maybe not for your dog, but your dog does love
trees. And so do you. Okay. And the so is going to be our motion graphic as
well. So we have our dog. Yeah. He's for your
dog covering up the trees. That's fine. I mean, we could have
had it like that, but I think we want it to
be funny and consistent, we want him floating over our nice green trees for our
forever energy commercial. So we're going to color him out. So this is super awesome if
you're using a green screen. Just make sure your
lighting is good. It's bright because It doesn't work well if
you're not well let. Make sure you know you
have good studio lighting to do the green screen effect. All it is we're going to go into our effects panel here and
we're going to type in key, and we're going to get a lot
of different color keys. We're going to get
an Alpha adjust all these track
mats and mat keys. But the one you want
to use is color key. We're going to drag our color
key over onto our footage. I'm going to open up our
effects controls panel. You see we see our
color key effect. What we can do is we can
grab this eye dropper tool, and we could pick the
sample the green on here. Now that the green is sampled, we can play with the
color tolerance, the edge thin, and the feather. So the color tolerance, if we went and we
kept increasing this, just hover over the color tolerance number
and drag your cursor. Over to the right. Maybe yeah, 40 40 kind of separates him
from the background. So you see we separated
the background. Maybe we'll do a five on the edge thin and we'll
do a one feather, just to make it
the dog on there. We just need to
change his scale. So like I said, we can change the scale of any asset in there. And then we want to make that
maybe we'll make him an 80. Yeah, he's good, we'll
center him up a little bit. Boom. Okay. So let's
check this out. Maybe not for your dog. But
your dog does love treats. And so do you. All right. So that was so easy, guys. You just hit the
color key effect, place it on your footage. Play with the color tolerance.
We did our effects. We got our dog in
there by color keying. We color graded our footage
using lumetri scopes. So I think with that, we
are ready to move on with our motion graphics on
our aerial footage.
8. 8. Titles & Motion Graphics: All right, so we are ready for titling and motion graphics, and it is used so much more
It's used so much today, especially a lot of those
motion graphics videos for lyric videos, a lot in advertising. You know, motion graphics
are super super popular, more popular than they were
before in previous years. So they're used for more than just names directed
by produced by. They're more than just
credits, so they can really, really convey a message and pack a punch and be impactful. We're saying in this finished
version, it's for you. It's for you, it
works hard for you. We're keeping the U
messaging in there. A lot of marketing
come into editing. If you're taking this
course and you work in marketing and you want to
gain some more video skills. This is exactly
where it's going to benefit you, and so do you. Keeping that U language
in there because this is an advertisement.
We're going to do that. I'll probably make mine a little bit different than what's here. All we have is white
text, it's bolded, and it comes in at
the time where I say you for you. So
I really like that. It could be different.
It could fly in. It could fade in. It could do
whatever you wanted to do. It could have any effect and
transition applied to it, just like footage,
just like an image. Anything in here could have effects and transitions applied. So the only limit is
your imagination, not being corny,
but really, it is. Alright. So let's get
started with titling. So what you want to
do is you can use the type tool and you could
Press that type tool, click on your footage and it
brings up a graphic layer. You could do it that way,
or what you could do is go to graphics, new layer. Text. You could even
have vertical text. Or I could actually put
a rectangle in there, like an ellipse. I
can make shapes. I can animate some
shapes in there. We could do something
like that. Maybe I'll show you guys that as well. So I'm going to start
off with the word four. All right, so we
need to edit this. So we're going to go over
to our effect controls. And we see this text layer here. Again, we could shut off layers. It's pretty cool. I
don't like this text. So this is where you
could change the font. I want Future I
like Future a lot. I want it heavy. I want
this to be bigger. I want this to be centered. I want this to be bigger, so
we can use our scale here or we can actually type
in a number. We want 500. That's a little too big.
Maybe we want like 300. Yeah, that's fine. Bring
up our safe margins again. So in the previous module, I talked about safe margins. You're definitely going to
want to use this for text. So bring up the safe margins because we definitely
want to center it. All right. And if we click on this text and our
selection tool, we can actually
move this around. So we can actually really
line this up here. And I want this like that. Okay. So we have it like this. And we're just going to
bring this down because the four four hard for you. Maybe not for your dog. Okay. Now, if I bring this up,
it makes a new track. If I drag this up, I get new video tracks, which is a helpful helpful tip. Oh, my gosh, I'm so tired. It's so late right now. You guys, I'm doing
this for you. For you. All right.
Name more coffee. All we could actually
do is we can duplicate this layer
so we can hit V. And it could be like. We
actually have to move this down. If we move that
down. Look at that. We have two text layers, and they could come in
at different times. So if we move that
to the U part for you for me right there. It's a vitamin that
will work for you. Cool. We don't want
four four. We want it. Go on the second,
grab our text tool, double click, change it to. Cool. Vitamin that will
work hard for you. Okay. Maybe we want a background behind the four. We can do that. If we go into our
text effects panel here, we could do a stroke, so we could have
maybe I don't know, pick blue or something,
just to show you guys. So we could have a
stroke on our text. We could have a
background on our text, so it could be as transparent
as you want it to be, and it could be as wide
as you want it to be. Let's try that.
Let's You know what? I'm going to change my
mind. I'm going to do a white background.
I'm going to fill. I'm going to fill it with
the color of the trees. How that one. Then we'll do our
background check of White. Then I think I had
it 16 or something? What was that one? 27. Oh boy. 27. And then we'll
maybe move this one up, move this one down a bit. Okay. Maybe not for your dog. But your dog does love
treats. And so do you. Okay. So I have for you. Maybe I want it to fly in. So I can actually make
transitions on these text layers. So if I go to effect and I do like a wipe because we
had, you know what? I'll do a push. I'll do a push. We'll push this one in, and we'll push the in. Let's just see how that looks. Hard for you. Cool.
I want to go faster. Hard for you. Hard for you. Cool, because it comes in with the whip the whip transition
that we used on the trees. Hard for you. Cool. I like that. S, you could apply
effects transitions to text layers. Hard for you. Maybe not for your dog, but your dog does live. If I wanted to clean up my
working sequence a little bit, I could do something
called sting. Nesting works really well. Say I had a bunch of text layers up here, which
I will for this one. For this, and so to you. I want to nest so we can highlight or select
all of the text, anything you want in this
nested sequence, right click. Select nest. You can
name the sequence. So it's essentially just
creating a new sequence. So we're going to have
this one is going to be called for green text. Boom, it collapses those
layers, merges them together. But what you can do,
this looks really clean. If you're showing
this to someone, this looks really, really nice. If you double click on it, it brings it up as a
separate sequence, so you can edit
everything by itself. It's not as messy as it
would be in a main sequence. It really helps
if you have a lot of text layers and a lot of shapes and a lot of animation
going on. All right. So I went ahead and made NN title sequence just
like the for you. The for you and the so
do you match each other. Remember, consistency,
it's really nice. And so do you. Okay. So if we go into
the and so you sequence, we can see all the
separate text layers coming in at various times. Am I working, what do
we have on the for you? We have the push push? Yeah. We have the push. I'm going to copy
that transition. Again, we could copy
and paste transition, so we could just paste
control V, control V, control V, control V.
So we can do and so do. When we go back to our main
working sequence, we can see. And do you. That those changes in the DU sequence
are reflected. So that's why nesting sequences and working in sequences within a main your main timeline
sequence helps a lot. So instead of editing this whole nice
clean sequence here, that's my main that
I'm going to export, I can just go ahead and
make nested sequences or other multiple sequences to work within and edit those. All right. I think that is the end for the
basic motion graphics entitling So this just goes to show that graphics can
take as long as you want. I mean, I made these in
about ten, 15 minutes. But again, that's why graphic
designers are hired at your company to make
something a little bit more intricate,
something on brand. Their careers just in being a motion graphics artist
because of its importance.
9. 9. Rendering: Well, I think we have
a finished product almost a great habit to get into and a
good method to use, if you have a ton of footage
and it's skipping or its stuttering is to
render the sequence. Rendering processes, all of
the effects, the transitions, and the content, so
you can play it back without experiencing that
lag or that stuttering. If we look at this yellow line, and we may have some red lines where the effects and
transitions are placed. It is not fully rendered. We need to see a green line. So go to sequence in
the main tool bar of premiere and click
Render Into out. It may take some time depending on how large
the sequence is, but this one should
only take a minute. And now that our sequence
is lit up green, we can play this video all the way through
without exporting. This is such a good
practice because let's say I caught a few
editing mistakes in this. I can fix them without
taking the time to export, since exporting
longer video projects can take up to an hour or so, like a feature
film or even more. I think the longest
export I had was about 2 hours because of
all the effects on it. But I am sure some
can even take longer. So we don't want to waste that time and we don't
want to do that. We want to catch our
mistakes in sequences before we export them and
use our time wisely because, like I say, in this
business, time is money, which is why working in separate sequences
is so important. Rendering them out
is so important before you do a full on export.
10. 10. Exporting: We did it. We're at the end. We love what we've created, and now it's time to export. Exporting with the correct
settings is crucial. We just don't want
to export any type of video file or any
type of audio file. Like importing, exporting can be done a couple
of different ways. We can select file,
export media. That's the old fashioned way. The quicker way is we use
our keyboard shortcut, control M, or
Command M on a Mac. Now, there are two ways
that we can do this. The basic way is to choose our export settings right from this dialogue box
and click Export. Or I think the best way is to utilize Adobe
Media Encoder, and I have a free tutorial
on this on YouTube. I highly recommend Adobe Media Encoder
for larger projects, creating proxies, and some of the more advanced stuff I
won't get into right now. But it provides you with more exporting information
than this dialogue box, and I will show
you the two ways. So let's export this simple way using this dialogue box first. We will select our format. Now, this can be different depending on what you
want to accomplish. I can export this whole
project as JPEGs. That's crazy. But it's
useful in some cases. I can export a quick time file, but they're very, very large. They're high quality,
but they're very, very large, and it
takes up a lot of room. I can export H 264 or HEVCs, which are h265 files.
Let's be basic. Maybe I just want this
video on YouTube. So I will choose h264. Now, getting into the presets. By default, it sets to match
source, high bit rate. So this file will be larger
than a low bit rate, but it matches the source
sequence settings. What's cool about premiere
is that they have the best presets for the
platform you're using. So let's scroll down and use Tube ten eight P full HD
because my footage is ten ADP. It exports a relatively
smaller file size than say an AVI or
a quick time file, which are just huge. So this all depends on where
you want your video to go. That's very important. If I was showing this
as a short film, I'd want the highest quality
possible that it can be. So don't be surprised if you're exporting multiple
versions of your video. One that's a higher quality and maybe one that's
more compressed to be viewed quickly as a draft or something or just
four for the web. That's very, very important. What's also important
is your output name. It is the name of your file
and where it is located. Remember back to media
management when I said, it's crucial to keep all of
your files in the same place. Well, let's name this forever
energy vitamin commercial, and we'll store it in our project folder so that
everything is together. All of these other settings can be more advanced
for specific exports, so we'll just leave them,
and we will click Export. The video will export, and it takes time depending on
how fast your computer is, your footage, maybe it's in four K. Maybe you have ton
of effects in keyframe, so it can all depend. All right. Now, let's
use adobe media encoder, and you'll see why I
prefer exporting this way. Let's hit our keyboard shortcut Control M or Command M on a Mac. We'll ignore those settings
in the dialogue box, and we're going to click on Q. This will open up the
Adobe media encoder of the Adobe Creative Suite. Now, you're going to
see a bunch of stuff, and there's going to
be a lot of presets, but let's just focus on our video sequence that
we chose to queue. We can even queue up
multiple sequences with multiple different
export settings, which is awesome,
and we can continue working on another project in premiere while this is running. So you see very, very handy for advanced editing or editing multiple projects. So let's say our
settings are in H 264. We want to make
this a Tube preset, a ten eight P, and we
choose our output, which should be our
project folder. We see a status that says ready, so let's go ahead and push
that green go button. Now, In Adobe Media encoder, we can view the
entire export process and how long it's taking. You can see it gives us
way more information than that simple export dialogue
which we previously used. It's just so much more powerful
and so much more helpful, especially for larger projects, or if you want to export multiple versions of this
advertisement, let's say. And our video project
is now complete and available to share with
others, however we choose.
11. 11. Outro - Thank You: Congratulations. You completed
video editing basics that you need to know
in Adobe Premiere Pro. I really hope you enjoy
learning along with me. And most importantly,
you had fun doing it. Now, you're able to get out there and make some
kick *** videos. If you liked this course,
please let me know, as your feedback helps me create better and more engaging
video tutorials for exactly what you need. Don't forget to print or save your certificate as
it is an achievement. Be sure to brag to everyone. And if you haven't yet subscribed
to my YouTube channel, so you'll be notified
when I release new tutorials. Keep creating.
 Shann0n, Digital Storyteller