Transcripts
1. Introduction: Hello. My name is Menakhi. I'm an artist and
an illustrator. I love to draw and paint. I work on acrylics, watercolor, and pen drawings. I welcome you all to my class. Penguins are very cute birds, and everyone loves to
paint cute things, right? So, today we are going to paint these really cute,
flightless birds. I have designed this
class for beginners, so I will be teaching you to paint these birds step by step. We will start by choosing
the color palette. Then we will paint dt penguins step by step in a loose tile. Trust me, I'm going to make this very easy for
you to follow. Then we will try painting these
birds in different poses. After that, we will
want to draw and paint really cute and
adorable baby penguins. The objective of this
class is to make one confident enough to start his or her own creative journey. So if you think this
class is for you, let's meet in the next lesson.
2. Requirements: Et's take a look on the
requirements for the glass. You will need two
glasses of water, one for cleaning your brush, and one for painting. You'll also need a
ceramic palette. Mine has ten wells, but it is quite on
the expensive side. If you are a beginner, I
would suggest to you to use a ceramic plate
instead of a palette. It also works equally good. Then you will need two
watercolor brushes of different sizes
with a good point. As for me, the brand
is not important. I'm using Windsor and
Newton and Basto, but it is completely up to you. You can use any brand. You will also need some clean
tissues to wipe your brush. You will need a pencil and
an eraser for drawing. Then, talking about
the watercolor papers, I'm using menorah
watercolor paper. It is 100% cotton and 300 GSM. It is thick enough to
hold multiple washes. Again, the brand
is not important. Just make sure whatever
brand you use, it is 100% cotton
and 300 GSM or plus. Then of course, you
need watercolor paints. You can use either the cakes or the tubes as well.
It is up to you. As for me, I'm using machine
going watercolor paints. They are highly pigmented, and I love using them for
my watercolor projects. So that's all about
the supplies. Grab your supplies,
and let's get started to paint
the cute penguins.
3. Parts of a Penguin: Let's observe a penguin first. So a penguin has an oval head. It has a long beak, which is called as a bill. It has a huge oval shaped body, which is white colour on the front and black
on the other side. They have two large wings, which are called as flippers
that are used for swimming. Then they have two
feet with claws. So these are the parts of the penguin coming to the shape. The body of the penguin
is a big oval in shape, and the two flippers are
curved with a small oval head. So keeping all this in mind, let's start to paint
a penguin. And
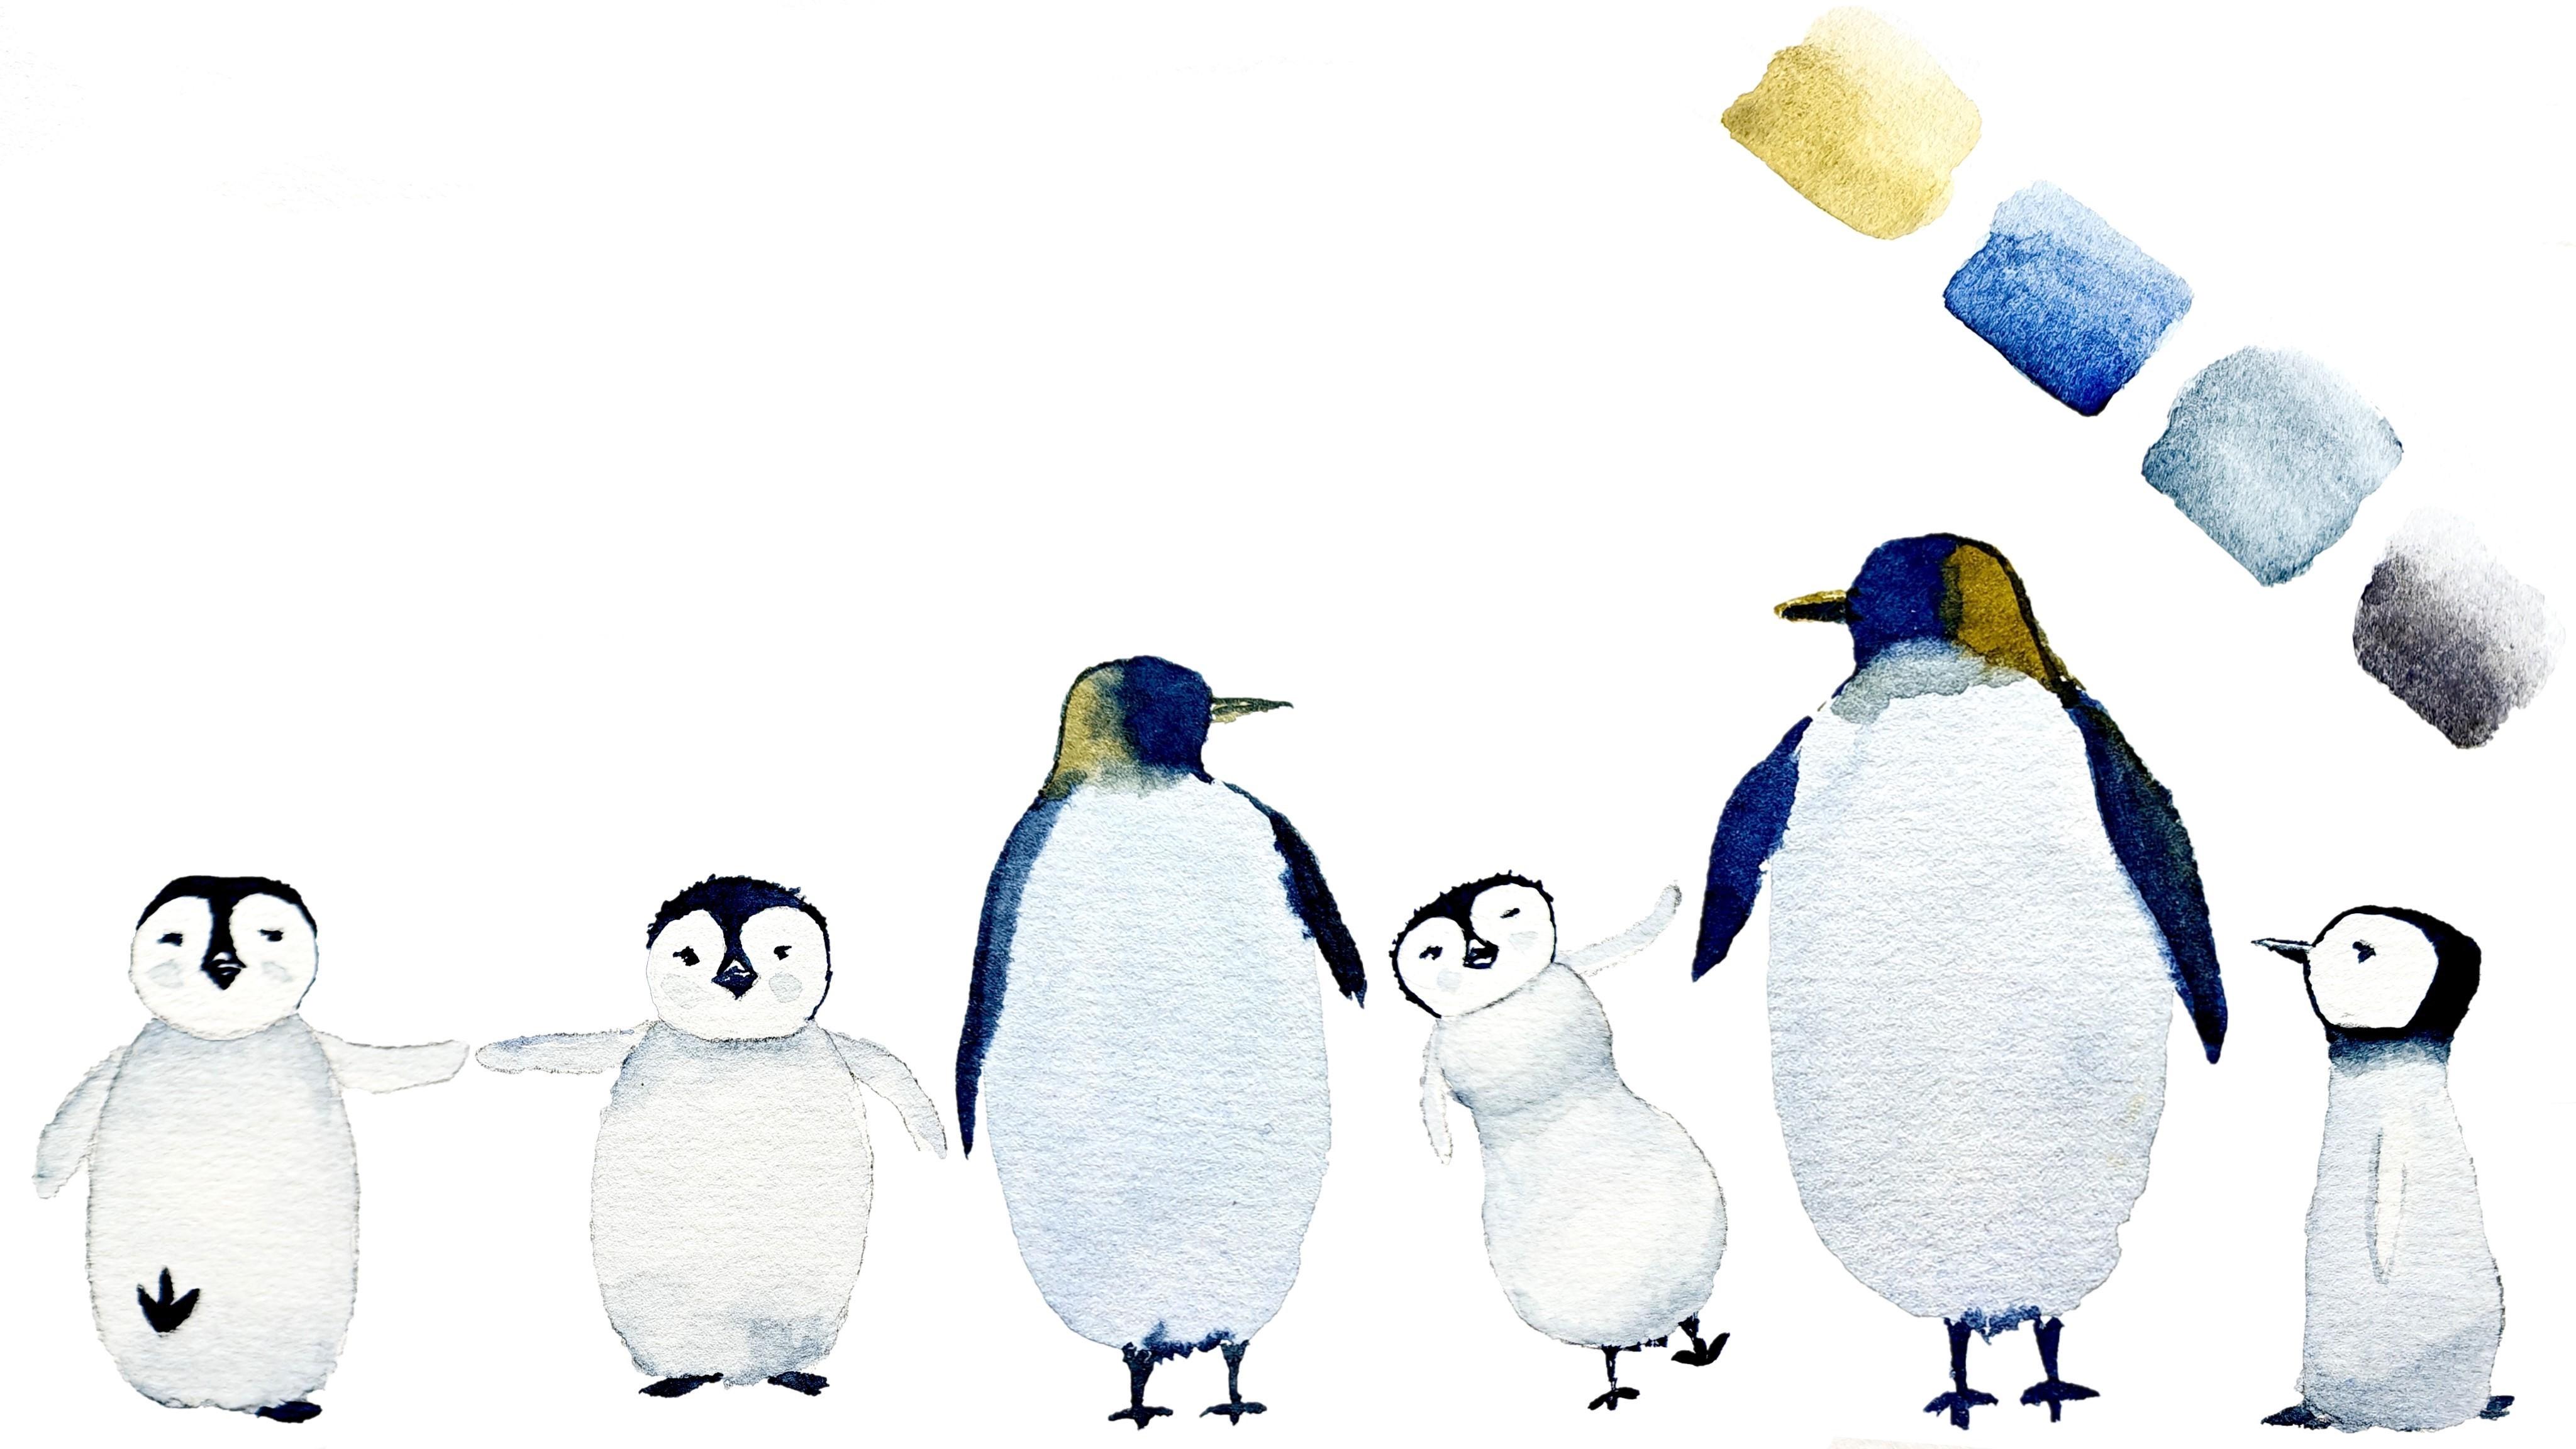
4. Color Palette: In this lesson, let's choose the colors that we'll be
using to paint the penguins. As I said before,
the penguins body is white on the front and
black on the other side. So I'm going to try ivory black to paint the
other side of the body. Here we go. I personally find ivory black
to be very flat. So I don't prefer painting plain black
color for the penguins. So I'm going to
try another color. Indigo is my personal favorite for all my watercolor projects. So I'm trying indigo now. It is better Even though I like Indigo, I still want to add
a little bit of Altramarin blue with
this indigo color. The new color looks
really amazing. I'm really satisfied with it. It is my choice, but it is entirely up to you. You can choose your own colours and you can select
your own palette. For the neck, we are going
to use a shade of yellow. I'll be using
permanent yellow deep, along with a touch of the
previous color we created using indigo and ultra
mellow and blue. So these are the colors you'll
be using for this project. So keep your palette ready, and let's paint in
the next lisson.
5. Let's Paint an Adult Penguin: Without waiting any further, let's paint a penguin. I'm using a very
diluted shade of ultramarine blue and indigo to paint the body
of the penguin. I'm using a medium sized
drum rush with a nice point. It is important not to use
too much water for painting. Let me show you what will happen if you use
too much water. Because I use too much
water for this penguin, I got this undesired
cauliflower effect. So it is important not to use too much water nor
too little water. Just a right amount
would be fine. In case if you used
some excess water, you can use a tissue paper to suck the excess water
out from the painting. Now I'm going to
paint the flippers of the penguin using a
small round brush. I'm using a saturated color of ultramarine blue with indigo. One wing is going to
be large and one is going to be small because
it is on the other side, so it is not completely visible. Also, I give a touch of the darker shade to the
bottom of the oval. Now comes the trichiap to
paint the head of the penguin. First, I draw the outline of the oval shape using the darker shade of indigo
and ultramarine blue, and I paint half of the oval
with this darker shade, and I slowly make the
neck of the penguin. I'm going to use a yellow shade to paint the other
side of the neck. I'm using my smaller brush again to paint the
other side of the neck, and I'm slowly
diffusing the color so that it is mixed and we
get a beautiful blend. I'm using yellow
color for the beak. I'm making a small beak. For the feet, I'm going
to use the darker shade. You can also use
yellow for this. The legs are going to be
a little bit white on the top and point downwards. Then I make the cross. Likewise, I paint the
other feet as well. So this is how we
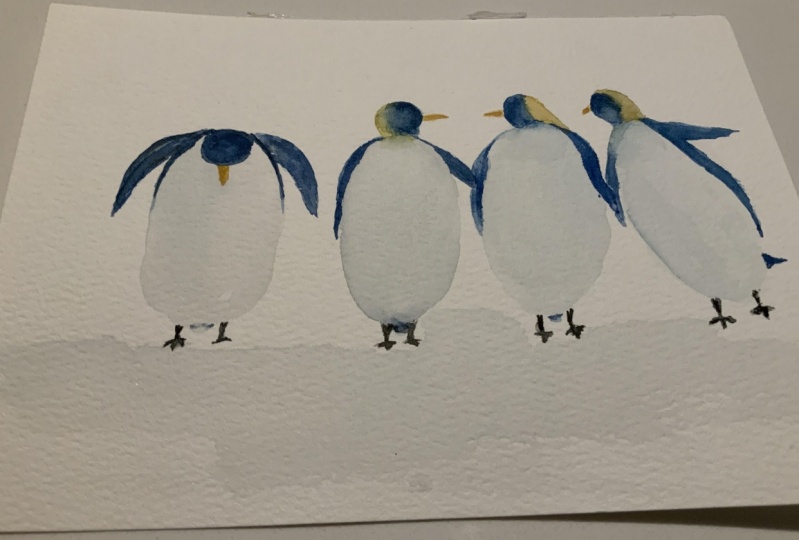
paint a penguin. The process is very simple. Now let's try painting
another penguin which is facing towards the
previously drawn penguin. I start by painting the
body with a mild wash. Switching on to
my smaller brush, I'm using a darker shade
to paint the flippers. The flippers on the other
side is going to be small, and the one which is towards
is going to be large. Then I paint the
head of the penguin using the darker shade of
indigo and ultramarine blue. As we did in the
previous penguin, one side is going to be indigo, and the other part of the neck is going to be in yellow color. I'm just painting
the other side of the neck because it is
gonna be a darker shade. And I wash my brush, take my permanent yellow deep, and I'm painting the
other side of the neck. Slowly, the colors
blend with each other. Then I paint the tail of
the penguin using indigo. And then I paint the
feet of the penguin. I'm making the claws, which is nothing but
painting three small lines. I'm giving a mild shading of the neck for a realistic look. And finally, I paint the beak of the penguin
using yellow color. I also draw a line using
indigo and blue on the beak. So this is how you
basically paint a penguin. In a common lesson,
let's try painting penguins in different
positions and different poses.
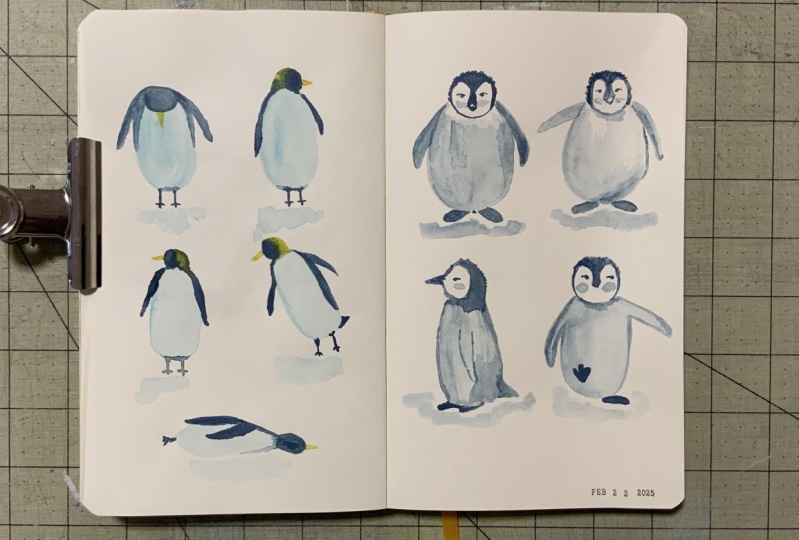
6. Painting Penguins in Different Poses: Now let's paint penguins
in different positions. I'm going to paint a penguin as if it is looking something down. For this, I start by
painting the whole shape. I'm giving a nice wash with
the right amount of water. Since it is facing
down somewhat on the back side of the penguin
is going to be visible. So I'm going to paint a
darker shade on the top. So I'm going to make a curve
on the top of the oval. This is the backside
of the penguin. As I said before, the front of the penguin is white colour, the backside is a darker shade. Since the penguin is
facing downwards, a part of it is visible. Then I paint the flippers
on either side of the oval. Likewise, I'm painting
the other flipper also. We're going to paint the head on top of the body since
it is facing down, but my body is still wet, so it is very important
to wait until the body is completely dry so that we don't get any undesired effects. Once the body is dry, I'm using a pencil to draw the oval shape on
top of the body, which is facing downwards, and I make a small beak. I'm using the darker sheet and my smaller brush to paint
the head of the penguin, which is facing downwards. Then I paint the beak, as well. Finally, I make the
feet of the penguin. Let's now paint a penguin which is facing
towards one side. I make an oval for this again. But then this oval is
somewhat in a slanting shape. Since the penguin is facing
towards one direction, the backside of the
penguin is quite visible. So I'm using a darker shade to paint the backside
of the penguin. Then I paint the
flippers on either side. After that, I'm going to paint
the head of the penguin. As always, I'm painting one side of the head with a darker shade, and I'm going to use yellow colour for the
other side of the neck. I Slowly, you can blend the colors
for a realistic look. Then I make two small
feet on the bottom of the penguin and I finish it by painting
the tail and the beak. Okay. Now I'm going to make a penguin as if it
is lying down on the floor. This is quite very simple
than the previous penguins. I'm making a small
pointed oval shape. Then I paint the back of the penguin using
a darker shade. Can you see the colors slowly
blend with each other? Then I make a small oval shaped
head which is lying down. Then I use the darker shead again to paint the
tail and the flippers. The feet of the penguin is
not visible in this position, so I'm not going
to paint the feet. And I finish it off by
painting the beak. That's all. Penguins look very cute. Now, you can just
leave it as it is, or you can do some
shadows as I'm doing now. It is completely up to you. You can do the shadows
or you can just omit it. It is important to use a very light color
for the shadows. You can keep on painting more poses using the techniques we learned in this lesson, or you can paint along
with me really cute, small, adorable baby penguins with me in the next lessons.
7. Painting Baby Penguins: The baby penguins are small, fluffy and green color, unlike the adult penguins, which are white and black. We will be using the
same colour palette we used for painting
the adult penguins, but with different saturations. Let's first learn to
draw a baby penguin. I'm using a drawing
paper and a pencil. I start by drawing the head. Then I draw the body
of the penguin, which is in an oval shape, and it has a flat bottom. Then I make two small feet with flippers on either
side of the body. Coming to the head, I
start by drawing the beak, which is in a diamond shape since it is facing towards us. Then I make two
small curves from the beak which goes to the
other part of the head. After that, I make two
small eyes with cheeks. Similarly, you can try drawing another baby penguin with
different hand position. I mean, different
flipper positions. You can first practice
this drawing on a drawing paper and then draw
it on a watercolor paper. As I said before, I'm going to use the same colour palette, but with different saturation. I'm going to use the same mix of ultramarine blue with indigo with a really light shade
for the body of the penguin. So I start by painting
with a lighter color. I'm just completely filling the body with this
slighter shade. The lower part of
the body is going to be a little bit in
a darker shade. So I'm going to add
some more pigment to my previously juiced paint. Also below the neck, I'm going to use
a darker shade to indicate shadows
and for contrast. I'm making the
colours to blend with each other for a
smooth gradient. And I'm using a
smaller brush with the same shade to paint the
flippers of the penguin. Similarly, I'm painting
the other flipper also. The top side of the flipper has a little bit colour
than the lower side. I use a clean dry brush to lift off some pigment
from the flippers. For the head of the penguin, I'm going to use a darker shade. I start by painting
the darker shade. I paint the curve which
goes down to the beak. Then I paint the outline of
the beak with the same color, and I'm leaving some part
white as it is for contrast, and I'm painting the other
side of the head as well. Once you're satisfied, let's move on to paint the
feet of the penguin. I'm making some small hair like structures on top of the
head for a realistic look. Then finally, I make the
eyes and the cheeks, using the tip of the brush. Slowly, I'm painting the eyes, and then using a
very diluted color, I'm painting the cheeks. Unfortunately, I
made this cheek a little bit darker than
I expected it to be. Following the same method, you can paint another penguin with different hand position.
8. Painting Baby Penguins in Different Poses: Let's try to draw penguins
in different poses. For this one, I'm
going to draw as if the penguin is
walking forward. I start with the
head and the body. A big oval for the body. I'm going to make one flipper which is up and one flipper, which is down to show that
it is walking forward. I make a diamond shape for the beak and two curves on
either side for the head. I make two eyes and the chin. Coming to the feet,
one leg is down, and one more is moving forward, so it is on top. Now, let's try to draw a penguin which is
standing on the side.
9. Painting a Dancing Penguin: Let's draw a dancing penguin. I first make the
body of the penguin. The lower body is going to be slightly bigger than
the upper body. I make a small oval
shape for the head, and I made two flippers. One is facing down and
the other upwards. This is because the
penguin is dancing. Then I draw two legs. Then you can draw the
face of the penguin two curves on the head
and a small beak, which is in a diamond shape. Then two little eyes Since it is dancing, I thought it would be better if the other leg is lifted up. So I just changed it. You can transfer this drawing
to a watercolor paper, and let's paint this
dancing penguin. Using a very lighter shade, I'm painting the
body of the penguin. And now I'm using a
slightly darker tone to pin near the waist. Yes. I want to make the upper part of the body somewhat lighter. So I'm using my clean dry brush
to lift off some pigment. Moving on to the lower body, I'm using a very lighter shade to paint the center
of the lower body. And as I move up, I slowly increase
the saturation. Now we can try to blend the
colors for a smooth gradient. Then I use a slightly
darker sheet to paint the bottom of the body. Now, what I'm going to
do is I'm just going to blend all the sheets so that
we get a smooth gradient. You can lift off the colours wherever you feel to lighten it. Then I paint the wings
using the same tone. Following the same steps like we did in the
previous lessons, I'm painting the
head of the penguin. Coming to the feet,
I first paint the leg which is lifted
off from the ground. So I paint three small
lines which are facing upwards and three small
lines on the other side. So that's how we paint the leg of the
penguin, small tail. And drawing small
hairs on the head of the penguin for a
realistic look. Here we go. Our
penguins are ready. They are so cute. I love them. In the next lesson, let's discuss about the class project.
10. Class Project: We have now come to the
final part of the class. I hope you enjoyed my class. I would like to thank
you for taking my class. It really means a lot to me. Please spare a
couple of minutes to share your feedback on my class. It helps me create better
classes in the future. Then coming to your
class project, using the techniques we
discussed in the class, you can try painting
penguins in different poses. You can try painting
both the adult and the baby penguins, as well. You can use Internet
for reference photos. There are thousands of photos
available in the Internet. Also, you can choose
your own palette and try giving some variations. Your painting may
not look perfect, but no one starts being perfect. Perfection comes in practice. So I encourage you to paint and post them on the class
project section below. I would love to see your
beautiful penguins. So that's all. Thank
you so much for taking my class and don't forget
to post your projects. Bye bye. Have a nice day.
 Meenakshi Muthuraman, Artist and Illustrator